EDIFIER IF500 Manual de usuario
- Categoría
- Altavoces de acoplamiento
- Tipo
- Manual de usuario

1
English
2
English
3
English
4
English
5
English
6
English
7
English
8
English
11
Français
12
Français
13
Français
14
Français
15
Français
16
Français
17
Français
18
Français
31
Deutsch
32
Deutsch
33
Deutsch
34
Deutsch
35
Deutsch
36
Deutsch
37
Deutsch
38
Deutsch
21
Español
22
Español
23
Español
24
Español
25
Español
26
Español
27
Español
28
Español
English
Français
Español
Deutsch
iF500 iPod Docking Speaker System
User’s Manual
Please carefully read this manual before operating the system
www.edifier.com
Edifier International Limited
Made in China
NOTICE:
For the need of technical improvement and system upgrade,
information contained herein may be subject to change
from time to time without prior notice
Copyright 2008
All Rights Reserved.
Manual Edition 1.0 , Sep. 2008
Printed in China
Illustrations and functional depict Illustrations and functional depict
Making connections
Guidance for using remote controller
Guidance for using remote controller
Listening to the FM radio
Important safety instruction
Unpack the box
Products of Edifier will be customized for different applications. Pictures and illustrations shown on this manual may be
slightly different from actual product. If any difference is found, the actual product prevails.
IB-200-M0300P-00
Thank you for purchasing this Edifier product. For generations, Edifier tries to provide powered speaker products to satisfy the need of
our end customers, even the most demanding ones. This product can add to your home entertainment, personal computer, and mini home
theater great sound performance. Please read this manual carefully to obtain the best of this system.
The lightning flash with arrowhead inside the triangle,
is intended to alert the user to the presence of
un-insulated dangerous voltage within the product's
enclosure that may be of a sufficient magnitude to
constitute a risk of electric shock to persons.
To prevent the risk of electric shock, do not
remove cover (or back). No user-serviceable
Parts inside. Refer servicing to qualified
Service personnel only.
The exclamation point inside the triangle is intended
to alert the user to the presence of important
operating and maintenance (servicing) instructions
in the literature accompanying the product.
SAFETY INSTRUCTIONS
Please read all the instructions herein. Please retain this manual safely for future reference.
Please heed all safety warnings. Please install in accordance with the manufacturer's instructions.
Please adjust the volume control to a comfortable level to avoid damaging your hearing and the system.
• Do not expose this apparatus to rain or moisture.
• Do not use the speakers near water, and do not immerse them in any liquid or pour any liquid on them.
• Do not defeat the safety purpose of the polarized plug. A polarized plug has two blades with one wider than the other.
• For added protection during lightning storms, unplug the speakers from the electrical outlet and turn off the computer.
• Unplug this apparatus when unused for long periods of time.
• Place the speakers away from all heat sources, such as heaters, stoves, and direct sunlight.
• Do not block the openings in the speaker cabinets. Never push objects into speaker vents or slots. Prevent risk of fire or electric
shock hazards, and provide sufficient space around the speakers for proper ventilation.
• Place the speakers in a stable location so that it will not fall causing damage to the speakers or bodily harm.
• Unplug the speakers from the computer and from the electrical outlet before cleaning them with a damp cloth.
• Servicing is required when the apparatus has been damaged in any way, such as the power-supply cord or plug is damaged,
liquid has been spilled or objects have fallen into the apparatus, the apparatus has been exposed to rain or moisture, does not
operate normally, or has been dropped. Refer all servicing to qualified service personnel only.
• Use the plug or the coupler inlet to disconnect with mains.
9
English
10
English
19
Français
20
Français
39
Deutsch
40
Deutsch
29
Español
30
Español
Specification & E.I.D.C. Instruction
Troubleshooting
Not all speakers function:
Please first check if the speaker wires are connected securely; then check if the Line-in connectors are reversed;
check also if the audio source is at fault.
One satellite speaker does not function when playing CD from computer:
This kind of phenomena is prone to happen on new computer systems that one satellite does not function when playing
CD, but system works fine when playing WAV formatted files.
This is mainly due to the fault connection of CD-ROM and sound card, that one channel of signal is shorted to the ground.
Please refer to the manual of CD-ROM and sound card to adjust the wire connection.
System does not work at all:
1. Please check if power is connected, and if the wall outlet is switched on.
2. Please check if the amplifier is still in STBY mode
3. Please check if the master volume is turned to minimum
4. Please check if the audio input cable is connected correctly
5. Please check if there is signal from audio source
Noise coming from speakers:
Amplifier circuitry of this product generates little noise, while the background noise of some VCD/DVD player or computer
sound card are too high.
Please keep the system in active mode and remove the audio source, if no sound can be heard at 1 meter away from
the system, then there is no problem with this product.
Magnetic interference:
This system is complete magnetically shielded, and can be placed near TV or monitor.
But since magnet of the subwoofer driver is large, some magnetism leakage is inevitable when the system is too
close to the monitor, and it is recommended to keep a 1 meter distance between the speaker system and monitor
or TV set.
Poor FM reception:
In certain circumstance, the reception of locked station is poor due to the weak FM signal and strong environmental
interference. Try to move the system to another place to get better signal reception.
If you have any further questions or concerns regarding Edifier Products
Please visit our website at: www.edifier.com, or email Edifier Support for further assistance
at: [email protected], If you prefer, you may contact us by phone, Toll Free: 1-877-EDIFIER (334-3437).
Power output: Satellite: RMS 2 x 10W (THD + N =10%, f0= 1KHz)
Subwoofer: RMS 32W (THD + N =10%, f0= 80Hz)
Signal to noise ratio: ≥85 dBA
Distortion:
≤0.5%
Input sensitivity:
AUX: Satellites: 150 mV ± 50 mV
Subwoofer: 100 mV ± 50 mV
iPod: Satellites: 150 mV ± 50 mV
Subwoofer: 100 mV ± 50 mV
Input type: AUX, iPod, FM
Adjustment: Master volume control on both the remote control & the control panel,
separate bass/treble adjustment on the remote control
Bass unit: 5.75 inch, magnetically shielded, 6Ω
Mid-range: 2.75 inch, magnetically shielded, 5Ω
Treble unit: 2.5 inch, magnetically shielded, 6Ω
Dimension:
376mm×390mm×240mm
Net Weight: Approx 4.7 kg
Gross Weight: Approx 6.1 kg
Input selection button
Dock adapter for iPod
Digital display – display FM frequency, preset groups, master volume, bass/treble
trimmer value and etc.
Box content
• iF500
• Power adapter
• Remote controller
• 12 pcs dock adapter for iPod
• 2.5mm to 3.5mm connecting cable
• 3.5mm to RCA connecting cable
• 3.5mm to 2.5mm adapter cable
• User's manual
1. Connect the speaker system to the A.C. wall outlet with the included power adapter.
2. Dock your iPod with correct dock adapter, or connect to a secondary source using the included 2.5mm to
3.5mm adapter cable.
3. While iPod is docked, its menu navigation is accessible either by operating the touch sensible pad (screen)
on iPod itself or by operating the remote controller. Refer to guidance for using remote controller.
Switch to FM tuner and select the preset group:
Press “INPUT” button on the control panel or the “FM” key on remote controller to turn on the FM tuner, the system will switch
to the last FM station selected. Preset group index and channel frequency will be shown on the display panel.
Press the “FM” button on the remote controller when the tuner is on (in FM input), the system will switch between the 3
preset groups.
Tuning the radio
To find a channel with a stronger signal, or tune to the target channel, you can:
1. Press and hold “ ” on the remote controller to seek to a higher frequency,
or “ ” to a lower frequency, until getting one channel locked down.
2. Press the “ ” or “ ” on the control panel to skip between preset groups
3. Press “ / ” to manually tune to a lower/higher frequency step by step, the step frequency is 0.1MHz.
Store a favorite channel to the preset group
1. Press and hold the number keys (1 to 6) on the remote controller to store the current channel to the
current preset group. Totally 18 channels can be set to 3 preset groups, with different index “1.x”, “2.x”
and “3.x” shown on display.
2. Press the “MENU” button when tuner is on, after “Auto” is shown on the display, press “SELECT” button
to start “auto search”. The first 18 channels locked down will be stored to the preset groups from FM1 to FM3.
When operating the remote controller, point the remote controller to the IR window on the base
of iF500 as shown in the picture, the optimum operational distance is within 7 meters.
When a remote command is sent, power indicator on the remote controller will blink.
Refer to guidance for using remote controller.
iF500 Remote controller
2.5mm to 3.5mm connecting cable
3.5mm to 2.5mm adapter cable
3.5mm to RCA connecting cable
Dock adapter for iPod
User's manualPower adapter
Note: Refer to the markings under each dock adapter for use.
Volume up button
Volume down button
Power switch
Input indicators
Fast forward
Input Press to… Press and hold to…
FM Skip between preset groups Seek into higher frequency until lock down one channel
iPod Skip to next tracks Fast forward in current track
AUX Do nothing Do nothing
Fast rewind
Input Press to… Press and hold to…
FM Skip between preset groups Seek into lower frequency until lock down one channel
iPod Skip to next tracks Fast rewind in current track
AUX Do nothing Do nothing
To A.C.
(AUX) Line in
7. Navigation pad:
Menu:
Input
Press to… Press and hold to…
FM One press to switch on the “Auto Search”; one more press to entry the
region selection; one more press to return to normal mode. Do nothing
iPod Equals to one press on the “Menu” key on iPod (classic menu structure only)
Do nothing
AUX
Do nothing Do nothing
“ ”:
Input Press to… Press and hold to…
FM
Switch between preset groups Seek into lower frequency until lock
down one channel
iPod Skip to previous track Fast rewind in current track
AUX
Do nothing Do nothing
“ ”:
Input Press to… Press and hold to…
FM Switch between preset groups Seek into higher frequency until lock
down one channel
iPod Skip to next track Fast forward in current track
AUX
Do nothing Do nothing
“Select”:
Input Press to… Press and hold to…
FM Function with “Menu” to complete “auto search” and “region selection” Do nothing
iPod Play the current track Do nothing
AUX
Do nothing Do nothing
“ ”:
Input Press to… Press and hold to…
FM Do nothing Do nothing
iPod Play the current track Do nothing
AUX
Do nothing Do nothing
8. Treble+/-: +/-7 treble adjustment
9. Bass+/-: +/-10 bass adjustment
10:Vol+/Vol-: 50-step master volume adjustment
Preset index: “3” for
“preset group 3”,
and “1” for the first channel
Current frequency
Especificaciones
Resolución de problemas
No todos los altavoces funcionan:
Primero compruebe que los cables del altavoz están conectados con seguridad; entonces compruebe si los conectores
de entrada de línea están invertidos; compruebe también si la fuente de radio falla.
Uno de los altavoces satélite no funciona cuando se reproduce un CD desde el ordenador:
Esta clase de fenómenos son propensos a producirse en los sistemas nuevos de ordenadores, en que un satélite no funciona
cuando se reproduce un CD, pero el sistema funciona bien cuando se reproducen ficheros en formato WAV. Esto se produce
principalmente por la falta de conexión entre el CD-ROM y la tarjeta de sonido, en que uno de los canales de señal está
cortocircuitado a tierra. Refiérase al manual del CD-Rom y de la tarjeta de sonido para ajustar la conexión del cable.
El sistema no funciona en absoluto:
1. Compruebe que esta conectado a la red, y que el interruptor está encendido.
2. Compruebe que el amplificador está todavía en modo STBY
3. Compruebe si la rueda de volumen esta girada al mínimo.
4. Compruebe si el cable de entrada de audio está conectado correctamente.
5. Compruebe si hay señal desde la fuente de audio.
Los altavoces producen ruido:
El circuito del amplificador de este producto genera un poco de ruido, mientras que el ruido de fondo de algunos
reproductores de VCD/DVD o tarjetas de sonido es demasiado alto. Mantenga el sistema en modo activo y elimine
la fuente de audio. Si no se puede oír ningún sonido a 1 metro de distancia del sistema, entonces el problema no
proviene de esté producto.
Interferencia magnética:
Este sistema esta completamente protegido magnéticamente, y se puede colocar cerca de la TV o de un monitor. Pero
ya que el imán del controlador de subwoofer es grande, algún escape de magnetismo es inevitable cuando el sistema
está demasiado cerca del monitor y es recomendable mantener 1 metro de distancia entre el sistema de altavoces
y el monitor o TV.
Recepción de FM de baja calidad:
En determinadas circunstancias, la recepción de una estación programada puede ser de mala calidad debido a que la
señal FM es demasiado débil o a las fuertes interferencias ambientales. Para obtener una mejor recepción de la señal,
pruebe a cambiar de ubicación el sistema de audio o a sacar y girar la antena de recepción.
Si tiene más preguntas o preocupaciones respecto a los productos Edifier
Visite nuestra pagina web: www.edifier.com, o envíe un mensaje electrónico a Asistencia Edifier para mayor
asistencia: [email protected]. Si lo prefiere puede contactar con nosotros por teléfono gratuito: 1-877-EDIFIER (334-3437).
Salida de potencia: Satélite: RMS 2 x 10W (THD + N =10%, f0= 1KHz)
Altavoz: RMS 32W (THD + N =10%, f0= 80Hz)
Relación señal/ruido: ≥85 dBA
Distorsión:
≤0.5%
Sensibilidad: AUX: Canal satélite: 150 mV ± 50 mV
Canal altavoz: 100 mV ± 50 mV
iPod: Canal satélite: 150 mV ± 50 mV
Canal altavoz: 100 mV ± 50 mV
Tipo de entrada: AUX, iPod, FM
Ajuste:
Control de volumen, ajuste separado graves/agudos tanto en el
mando a distancia como en el panel de control
Unidad de graves:
5.75 pulgadas, protegido magnéticamente, 6Ω
Unidad medios:
2.75 pulgadas, protegido magnéticamente, 5Ω
Unidad agudo:
2.5 pulgadas, protegido magnéticamente, 6Ω
Dimensiones:
376 x 390 x 240mm (An x Al x F)
Peso neto:
Aprox. 4.7 kg
Peso bruto: Aprox. 6.1 kg
Spezifikationen
Störungserkenung
Nicht alle Lautsprecher funktionieren:
Überprüfen Sie, ob die Lautsprecherkabel korrekt angeschlossen sind. Überprüfen Sie, ob der Line-in Anschluss vertauscht
ist. Überprüfen Sie, ob die Audioquelle in Ordnung ist.
Ein Satellitenlautsprecher funktioniert bei CD Wiedergabe vom Computer nicht:
Dieses Problem tritt häufig bei neuen Computersystemen auf (kein Problem bei Wiedergabe von WAV Dateien).
Hauptsächlich auf Anschlussfehler von CD-ROM Laufwerk und Sound Card zurückzuführen, ein Soundkanal ist gegen Masse
kurzgeschlossen. Lesen Sie Einzelheiten bitte in der Bedienungsanleitung von CD-ROM Laufwerk und Sound Card nach und
korrigieren die Verkabelung.
System funktioniert nicht:
1. Überprüfen Sie, ob der Netzanschluss korrekt ist und die Steckdose funktioniert.
2. Überprüfen Sie, ob sich der Verstärker noch im STAND-BY Modus befindet.
3. Überprüfen Sie, ob die Master Lautstärke auf Minimum eingestellt ist.
4. Überprüfen Sie, ob die Audiokabel korrekt angeschlossen sind.
5. Überprüfen Sie, ob Sie Signale von der Audioquelle haben.
Nebengeräusche der Lautsprecher:
Der Verstärker dieses Geräts erzeugt nur geringste Nebengeräusche, die Hintergrundgeräusche einiger VCD/DVD Player oder
Computer Sound Cards sind hingegen hoch. Lassen Sie das System eingeschaltet und trennen die Audioquelle ab.
Ist in 1 m Abstand kein Geräusch zu hören, ist mit dem System alles in Ordnung.
Magnetische Störungen:
Das System ist magnetisch vollständig abgeschirmt und kann direkt neben einem Fernseher oder Monitor aufgestellt werden.
Der Subwoofer hat jedoch einen recht großen Magneten im Treiber und das Austreten von Magnetwellen ist unvermeidlich,
wenn das System zu nahe an einem Monitor betrieben wird. Wir empfehlen einen Mindestabstand von 1 m zwischen
Lautsprechersystem und Fernseher oder Monitor.
Schlechter UKW-Empfang:
Unter bestimmten Umständen ist der Empfang eines eingestellten Radiosenders wegen eines schwachen UKW-Signals oder
starker Störungen in der Umgebung schlecht. Stellen Sie das System an einem anderen Ort auf oder drehen die Antenne für
einen besseren Empfang.
Besuchen Sie unsere Website unter www.edifier.com oder schreiben uns bei technischen
Fragen eine Mail an [email protected].
Ausgangsleistung: Satellitenlautsprecher: RMS 2 x 10W (THD + N =10%, f0= 1KHz)
Subwoofer: RMS 32W (THD + N =10%, f0= 80Hz)
Rauschabstand: ≥85 dBA
Rauschen: ≤0.5%
Eingangsempfindlichkeit: AUX: Satellitenkanal: 150 mV ± 50 mV
Subwooferkanal: 100 mV ± 50 mV
iPod: Satellitenkanal: 150 mV ± 50 mV
Subwooferkanal: 100 mV ± 50 mV
Eingangsbuchse: AUX, iPod, FM
Einstellungen:
Haupt-Lautstärke, separate Tiefen- und Höheneinstellung
auf Fernbedienung und Bedienfeld
Tieftöner: 5.75 inch, magnetisch abgeschirmt, 6Ω
Mitteltöner: 2.75 inch, magnetisch abgeschirmt, 5Ω
Hochtöner: 2.5 inch, magnetisch abgeschirmt, 6Ω
Abmessungen:
376mm×390mm×240mm (B x H x T)
Nettogewicht: Ca. 4.7 kg
Bruttogewicht: Ca. 6.1 kg
Caractéristiques techniques
Guide de dépannage
Tous les haut-parleurs ne fonctionnent pas:
Veuillez d’abord vérifier si les câbles du haut-parleur sont connectés de manière sécurisée puis vérifiez si les connecteurs
d’entrée (Line-in ) sont inversés, vérifiez aussi s’il y a un défaut de la source audio.
Un haut-parleur satellite ne fonctionne pas lorsqu’il lit un CD sur l’ordinateur:
Ce type de phénomène est susceptible de se produire sur de nouveaux systèmes d’ordinateur : un satellite ne fonctionne
pas lors de la lecture d’un CD mais le système fonctionne bien lors de la lecture de fichiers formatés en WAV.
Cela est principalement dû à un défaut de connexion du CD-ROM et de la carte son : un canal de signal est relié à la masse.
Veuillez vous référer au manuel du CD-ROM et de la carte son pour régler la connexion du câble.
Le système ne fonctionne pas du tout:
1. Veuillez vérifier si le courant est branché et si la prise murale est allumée.
2. Veuillez vérifier sur l’amplificateur est toujours en mode STBY.
3. Veuillez vérifier sur le volume master est sur minimum
4. Veuillez vérifier si le câble d’entrée audio est bien connecté
5. Veuillez vérifier s’il y a un signal de la source audio
Il y a du bruit dans les haut-parleurs:
L’équipement de l’amplificateur de ce produit génère peu de bruit alors que le bruit de fond de certains lecteurs
VCD/DVD ou la carte son de l’ordinateur sont trop élévés.
Veuillez laisser le système en mode actif et retirer la source audio.
Si aucun son n’est entendu à 1 mètre du système, alors il n’y a aucun problème avec le produit.
Interférence magnétique:
Ce système est entièrement protégé magnétiquement et peut être placé près d’une TV ou d’un moniteur.
Mais puisque l’aimant du caisson de basses est trop gros, une fuite de magnétisme est inévitable lorsque l’appareil
est trop près du moniteur et il est recommandé de garder 1 mètre de distance entre le système haut-parleur et le
moniteur ou le poste de TV.
Mauvaise réception FM
Dans certains cas, la réception de la station bloquée est mauvaise en raison d’un signal FM faible et de fortes
interférences ambiantes. Veuillez alors déplacer le système et étirez l’antenne pour obtenir une meilleure réception du signal.
Si vous avez d’autres questions ou préoccupations concernant les Produits Edifier
Veuillez consulter notre site Internet : www.edifier.com, ou envoyez un courriel à Edifier Support pour davantage
d’aide: [email protected], Si vous préférez, vous pouvez nous contacter par téléphone,
Numéro Gratuit: 1-877-EDIFIER (334-3437).
Puissance de sortie : Satellite : RMS 2 x 10W (THD + N =10%, f0= 1KHz)
Caisson de basse : RMS 32W (THD + N =10%, f0= 80Hz)
Rapport signal-bruit : ≥85 dBA
Distorsion :
≤0.5%
Sensibilité d’entrée :
AUX: Canal satellite : 150 mV ± 50 mV
Canal basse : 100 mV ± 50 mV
iPod: Canal satellite : 150 mV ± 50 mV
Canal basse : 100 mV ± 50 mV
Type d’entrée : AUX, iPod, FM
Réglages :
Contrôle de volume général et réglages séparés des basses et
des aigus à la fois à partir de la télécommande et du panneau de contrôle
Unité de basses :
5.75 pouces, blindée magnétiquement, 6Ω
Unité intermédiaire :
2.75 pouces, blindée magnétiquement, 5Ω
Unité aigus :
2.5 pouces, blindée magnétiquement, 6Ω
Dimensions : 376mm x 390mm x 240mm (W x H x D)
Poids net : Environ 4.7 kg
Poids complet :
Environ 6.1 kg
Display panel
Ilustraciones y dibujo funcional Ilustraciones y dibujo funcional
Botón de selección de entrada
Adaptador de base para el iPod
Pantalla digital–muestra la frecuencia de FM, los grupos predeterminados,
el control de volumen, modulador de valores de graves/agudos y etc.
Botón para subir volumen
Botón para bajar volumen
Interruptor
Indicadores de entrada
Avance rápido
Entrada Pulse para…
Pulse y mantenga pulsado para…
FM
Saltar por los grupos predeterminados Buscar frecuencia mayor hasta fijar un canal
iPod
Saltar a la siguiente pista Avanzar rápido por la pista en curso
AUX Nada Nada
Retroceso rápido
Entrada Pulse para…
Pulse y mantenga pulsado para…
FM
Saltar por los grupos predeterminados Buscar frecuencia menor hasta fijar un canal
iPod
Saltar a la pista anterior Retroceder rápido por la pista en curso
AUX
Nada Nada
Panel de pantalla
Abbildungen und Funktionsdarstellung Abbildungen und Funktionsdarstellung
Eingangswahlschalter
Docking-Adapter für iPod
Digitales Display–Anzeige von UKW-Frequenz, Voreinstellungsgruppen,
Hauptlautstärke, Bass-/Höhen-Einstellung, usw.
Taste Lautstärke erhöhen
Taste Lautstärke verringern
Netzschalter
Eingangsanzeigen
Schneller Vorlauf
Eingang Drücken…
Gedrückt halten…
UKW
Voreinstellungsgruppe wechseln Suchlauf zu höheren Frequenzen, bis ein Kanal gefunden wird.
iPod
Zum nächsten Track springen Schnelle Suche vorwärts im aktuellen Track
AUX
Keine Funktion Keine Funktion
Schneller Rücklauf
Eingabe Drücken…
Gedrückt halten…
UKW
Voreinstellungsgruppe wechseln Suchlauf zu niedrigeren Frequenzen, bis ein Kanal gefunden wird.
iPod
Zum vorherigen Track springen Schnelle Suche rückwärts im aktuellen Track
AUX
Keine Funktion Keine Funktion
Display
Illustrations et description des fonctions Illustrations et description des fonctions
Bouton de sélection de la source
Adaptateur pour iPod
Afficheur numérique – affiche la fréquence FM, les groupes de stations mémorisées,
le volume principal, les valeurs de réglage des basses et des aigus…
Bouton d’augmentation du volume
Bouton de réduction du volume
Interrupteur d’alimentation
Indicateurs de source
Avance rapide
Source Appuyez pour…
Appuyez et maintenez pour…
FM
Passer au groupe de stations Parcourir la plage de fréquences vers
mémorisées suivant le haut jusqu’à capter une station
iPod
Passer à la piste suivante Avancer rapidement dans la piste actuelle
AUX
Pas d’effet Pas d’effet
Retour rapide
Source Appuyez pour …
Appuyez et maintenez pour…
FM
Passer au groupe de stations Parcourir la plage de fréquences vers le
mémorisées précédent
bas jusqu’à capter une station
iPod
Passerà la piste précédente Reculer rapidement dans la piste actuelle
AUX
Pas d’effet Pas d’effet
Écran d’affichage
1. " " – Power on/off
Press this button to set the system on / off. The system can recall the volume last adjusted; turn off the main
power when unused for a long period of time.
2. " " -- Mute
A single press shall mute the system, leaving the corresponding mode indicator blinking, until another press
to revoke the system.
3. Presets – figure “1” to “6”
When FM tuner is on:
Press to skip to a stored radio station.
Press and hold to store the current channel into the current preset group, figure on the display panel will show
the preset group index.
4. Input selection buttons:
FM: press this key when playing from iPod or AUX, the system will turn to FM;
press this key when FM is on, will turn the system from FM preset group 1(FM1) to preset group 2(FM2), then
preset group 3(FM3), and back to preset group 1.
Preset index will be shown on the display panel
iPod: plays from your iPod.
Aux: plays from an auxiliary audio sources, such as an MP3/CD/PC soundcard.
Connect the audio sources to the system using the included 3.5mm to 2.5mm adapter cable.
5. “ ”
Input Press to…
Press and hold to…
FM Tune to lower frequency by one step (0.1MHz) Tune to lower frequency continuously,
with 0.1MHz every step
iPod Move the highlight band of iPod menu down for one step Move the highlight band of iPod menu
down continuously
AUX Do nothing Do nothing
6.“ ”
Input Press to… Press and hold to…
FM Tune to higher frequency by one step (0.1MHz) Tune to higher frequency continuously,
with 0.1MHz every step
iPod Move the highlight band of iPod menu up for one step Move the highlight band of iPod menu
up continuously
AUX Do nothing
Do nothing
Desembale la caja
Contenido de la caja
• iF500
• Adaptador de corriente
• Mando a distancia
• 12 piezas del adaptador de base para el iPod
• Cable de conexión de 2.5mm-3.5mm
• Cable de conexión de 3.5mm-RCA
• Cable del adaptador 3.5mm-2.5mm
• Manual de usuario
iF500 Mando a distancia
Cable de conexión de 2.5mm-3.5mm
Cable del adaptador 3.5mm-2.5mm
Cable de conexión de 3.5mm-RCA
Adaptador de base para el iPod
Manual de usuarioAdaptador de corriente
Nota: Consulte los símbolos debajo de cada adaptador de base para su uso.
Auspacken der Verpackungsbox
Verpackungsinhalt
• iF500
• Netz-Adapter
• Fernbedienung
• 12 Stück Docking-Adapter für iPod
• Verbindungskabel 2,5mm auf 3,5mm
• Verbindungskabel 3,5mm auf RCA
• Adapterkabel 2,5mm auf 3,5mm
• Bedienungsanleitung
iF500 Fernbedienung
Verbindungskabel 2,5mm auf 3,5mm
Adapterkabel 2,5mm auf 3,5mm
Verbindungskabel 3,5mm auf RCA
Docking-Adapter für iPod
BedienungsanleitungNetz-Adapter
Hinweis: Siehe Markierungen zur Bedienung unter jedem Docking-Adapter.
Note: When the system is set to standby, and “OFF” is shown on the display
panel, press "Mute" on the remote control to set the system back to default settings.
Escuchar la radio FM
Cambie al sintonizador FM y seleccione el grupo predeterminado:
Pulse el botón “ENTRADA” en el panel de control o el botón “FM” en el mando a distancia para conectar el sintonizador de FM,
el sistema cambiará a la última emisora FM seleccionada. El índice del grupo predeterminado y la frecuencia de canal se
mostrarán en la pantalla.
Pulse el botón “FM” en el mando a distancia cuando el sintonizador está encendido (en entrada FM), el sistema pasará por
los 3 grupos predeterminados.
Sintonización de la radio
Para encontrar un canal con una señal fuerte, o sintonizar un canal determinado:
1. Pulse y mantenga pulsado “ ” en el mando a distancia para buscar una frecuencia superior, o “ ” para una
frecuencia inferior, hasta fijar un canal.
2. Pulse “ ” o “ ” en el panel de control para saltar por los grupos predeterminados.
3. Pulse “ / ” para sintonizar manualmente a una frecuencia inferior/superior paso a paso, la frecuencia de
paso es de 0,1MHz.
Guardar un canal favorito a un grupo predeterminado
1. Pulse y mantenga pulsadas las teclas de los números (1 - 6) en el mando a distancia para guardar el canal en curso
al grupo predeterminado actual. Se pueden predeterminar un total de 18 canales en los 3 grupos predeterminados,
con diferentes números “1.x”, “2.x” y “3.x” mostrados en pantalla.
2. Pulse el botón del “MENÚ” cuando esté encendido el sintonizador, después de que aparezca “AUTO” en la pantalla,
pulse el botón “SELECT” para comenzar “búsqueda automática”. Los 18 primeros canales fijados se guardarán en
los grupos predeterminados de FM1 a FM3.
7. Panel de navegación:
Menu:
Entrada Pulse para…
Pulse y mantenga pulsado para…
FM
Una pulsación para pasar a “Búsqueda automática”; una pulsación más para entrar Nada
en la selección de región; una pulsación más para volver al modo normal.
iPod
Igual a una pulsación en el botón del “Menú” en Ipod (solo estructura de menú clásico) Nada
AUX
Nada Nada
“ ”:
Entrada Pulse para…
Pulse y mantenga pulsado para …
FM
Cambiar entre los grupos predeterminados Buscar una frecuencia inferior hasta
fijar un canal
iPod Saltar a la pista anterior
Rebobinar rápido la pista en curso
AUX
Nada Nada
“ ”:
Entrada Pulse para…
Pulse y mantenga pulsad para…
FM
Cambiar entre los grupos predeterminados Buscar una frecuencia superior hasta
fijar un canal
iPod Saltar a la siguiente pista Avanzar rápido la pista en curso
AUX
Nada Nada
“Select”:
Entrada Pulse para…
Pulse y mantenga pulsado para…
FM
Funcionar con “Menú” para finalizar "búsqueda automática” y “selección región” Nada
iPod Reproducir la pista en curso
Nada
AUX
Nada Nada
“ ”:
Entrada Pulse para…
Pulse y mantenga pulsado para…
FM
Nada Nada
iPod
Reproducir la pista en curso Nada
AUX
Nada Nada
8. Agudos +/-: Ajuste de agudos +/-7
9. Graves+/-: Ajuste de graves +/-10
10. Vol+/Vol-: Ajuste del control de volumen en 50 pasos
Pulse el número “3” para el
“grupo predeterminado 3”,
y “1”para el primer canal
Frecuencia actual
Nota: cuando el sistema se coloca en espera, y aparece “DESCONECTADO”
en la pantalla, pulse “ Silenciado ” en el mando a distancia para que el sistema
vuelva a los ajustes predeterminados.
Écouter la radio FM
Passez en réception FM et sélectionnez un groupe de stations mémorisées:
Poussez sur le bouton « INPUT » du panneau de contrôle ou sur la touche “FM”de la télécommande pour passer sur le
récepteur radio FM. Le système passe sur la dernière station radio sélectionnée. Le numéro du groupe de stations
mémorisées et la fréquence de la station sont affichés à l’écran.
Poussez sur le bouton “FM” de la télécommande lorsque le récepteur est allumé (sur la source FM) pour que le système
passe d’un des 3 groupes de stations au suivant.
Régler la radio :
Pour trouver une fréquence avec un signal plus fort, ou pour régler sur la fréquence voulue, vous pouvez :
1. Poussez et maintenir enfoncée la touche “ ” sur la télécommande pour rechercher une fréquence plus haut dans
la plage, ou sur “ ” pour une fréquence plus basse, jusqu’à capter une station.
2. Poussez sur les boutons “ ” ou “ ” sur le panneau de contrôle pour passer d'un groupe de stations à un autre.
3. Poussez sur les touches “ / ” pour régler manuellement la fréquence pas par pas, les intervalles étant de 0.1 MHz.
Mémoriser une station dans un groupe de stations :
1. Poussez et maintenez enfoncée la touche avec le numéro voulu (de 1 à 6) sur la télécommande pour mémoriser la
station actuelle dans le groupe de stations actuel. Au total, 18 stations peuvent être mémorisées en 3 groupes avec
les numéros “1.x”, “2.x” et “3.x” affichés à l’écran.
2. Poussez sur le bouton “MENU” lorsque la radio est allumée. Une fois que “AUTO” s’affiche à l’écran, poussez sur le
bouton “SELECT” pour lancer la recherche automatique. Les 18 premières stations captées seront mémorisées dans
les groupes de stations FM1 à FM3.
7. Clavier de navigation :
Menu :
Source
Appuyez pour… Appuyez et maintenez pour…
FM
Une pression pour passer en « recherche automatique » ; une seconde pression Pas d’effet
pour la sélection régionale ; une nouvelle pression pour revenir en mode normal.
iPod Équivalent à une pression sur la touche « Menu » de l’iPod (uniquement avec Pas d’effet
une structure de menu classique)
AUX
Pas d’effet Pas d’effet
“ ”:
Source
Appuyez pour… Appuyez et maintenez pour…
FM
Passer d’un groupe de stations mémorisées à l’autre Parcourir la plage de fréquences vers
le bas jusqu’à capter une station
iPod Passer à la piste précédente Reculer rapidement dans la piste actuelle
AUX
Pas d’effet Pas d’effet
“ ”:
Source
Appuyez pour… Appuyez et maintenez pour…
FM
Passer d’un groupe de stations mémorisées à l’autre Parcourir la plage de fréquences vers le
haut jusqu’à capter une station
iPod Passer à la piste suivante Avancer rapidement dans la piste actuelle
AUX
Pas d’effet Pas d’effet
“Select”:
Source
Appuyez pour… Appuyez et maintenez pour…
FM
Fonctionne en combinaison avec la touche « Menu » pour terminer la Pas d’effet
recherche automatique et la sélection régionale
iPod
Jouer le morceau actuel Pas d’effet
AUX
Pas d’effet Pas d’effet
“ ”:
Source
Appuyez pour… Appuyez et maintenez pour…
FM
Pas d’effet Pas d’effet
iPod
Jouer le morceau actuel Pas d’effet
AUX
Pas d’effet Pas d’effet
8. Treble+/-: réglage des aigus de +7 à -7
9. Bass+/-: réglage des basses de +10 à -10
10. Vol+/Vol-: réglage du volume principal sur 50 niveaux
Station mémorisée : “3”
pour le groupe de stations
et “1” pour la station
Fréquence actuelle
Remarque : Lorsque le système est en veille et que l’écran affiche “OFF ”,
poussez sur la touche “Muet ” de la télécommande pour remettre le
système dans son état par défaut.
Conexión
Guía de uso del mando a distancia
Guía de uso del mando a distancia
UKW-Radiowiedergabe
Wechseln Sie zum UKW-Tuner und wählen die Voreinstellungsgruppe:
Drücken Sie “EINGANG” auf dem Bedienfeld oder “UKW” auf der Fernbedienung zum Einschalten des UKW-Tuners. Das System
wechselt zum zuletzt ausgewählten UKW-Sender. Die Nummer der Voreinstellungsgruppe und die Frequenz des Kanals werden
auf dem Display angezeigt.
Drücken Sie “UKW” bei eingeschaltetem Tuner (UKW-Eingang) auf der Fernbedienung. Das System wechselt zwischen den
drei Voreinstellungsgruppen.
Einstellen des Radios
Um einen Kanal mit einem stärkeren Signal zu suchen oder einen gewünschten Kanal einzustellen, können Sie:
1. Halten Sie “ ” oder “ ” auf der Fernbedienung gedrückt, für einen Suchlauf zu höheren oder niedrigeren
Frequenzen, bis ein Kanal gefunden wird.
2. Drücken Sie “ ” oder “ ” auf dem Bedienfeld, um zwischen den Voreinstellungsgruppen zu wechseln.
3. Stellen Sie mit “ / ” manuell eine niedrigere oder höhere Frequenz schrittweise ein. Die Frequenz pro
Schritt beträgt 0,1 MHz.
Speichern eines Lieblingskanals in einer Voreinstellungsgruppe:
1. Halten Sie eine Zifferntaste (1 bis 6) auf der Fernbedienung gedrückt, um den aktuellen Kanal in der aktuellen
Voreinstellungsgruppe zu speichern. Maximal 18 Kanäle können in 3 Voreinstellungsgruppen gespeichert werden.
Die unterschiedlichen Nummern “1.x”, “2.x” und “3.x” werden auf dem Display angezeigt.
2. Drücken Sie “MENU” bei eingeschaltetem Tuner. Nachdem “AUTO” auf dem Display angezeigt wird, starten Sie mit
“AUSWÄHLEN” den “automatischen Suchlauf ”. Die ersten 18 gefundenen Kanäle werden in den Voreinstellungsgruppen
FM1 bis FM3 gespeichert.
7.Navigationstabelle:
Menü:
Eingang Drücken…
Gedrückt halten…
UKW
Mit einem Tastendruck den “Automatischen Suchlauf” einschalten. Keine Funktion
Mit einem weiteren Tastendruck das Land
eingeben.
Mit dem dritten Tastendruck kehren Sie zum normalen Modus zurück.
iPod
Identisch mit einem Tastendruck auf die “Menü”-Taste auf dem iPod Keine Funktion
(nur klassische Menüstruktur)
AUX
Keine Funktion Keine Funktion
“ ”:
Eingang Drücken…
Gedrückt halten…
UKW
Umschalten zwischen den Voreinstellungsgruppen Suchlauf zu den niedrigeren Frequenzen,
bis ein Sender gefunden wird
iPod Zum vorherigen Track springen Einen Kanal zurück, Schneller Rücklauf im aktuellen Track
AUX Keine Funktion
Keine Funktion
“ ”:
Eingang
Drücken… Gedrückt halten…
UKW Umschalten zwischen den Voreinstellungsgruppen
Suchlauf zu den höheren Frequenzen, bis ein Sender gefunden wird
iPod Zum nächsten Track springen
Einen Kanal weiter Schneller Vorlauf im aktuellen Track
AUX
Keine Funktion Keine Funktion
“Select”:
Eingang Drücken… Gedrückt halten…
UKW
Funktionsauswahl mit “Menü” zum Beenden des Keine Funktion
“Automatischen Suchlaufs” und der “Länderauswahl”
iPod Aktuellen Track wiedergeben.
Keine Funktion
AUX
Keine Funktion Keine Funktion
“ ”:
Eingang Drücken…
Gedrückt halten…
UKW
Keine Funktion Keine Funktion
iPod
Aktuellen Track wiedergeben Keine Funktion
AUX
Keine Funktion Keine Funktion
8. Höhen+/-: Einstellung der Höhen im Bereich +/-7
9. Tiefen+/-: Einstellung der Bässe im Bereich +/-10
10. Lautstärke+/Lautstärke-: Einstellung der Haupt-Lautstärke in 50 Schritten
Nummer drücken: “3” für
“ Voreinstellungsgruppe 3”
und “1“ für den ersten Kanal
Aktuelle Frequenz
Hinweis: Drücken Sie zum Aufrufen der Werkseinstellungen”„Mute“
auf der Fernbedienung, wenn das System in Standby geschaltet und
“AUS“ auf dem Display angezeigt wird.
1. Conecte el altavoz a la toma de corriente CA con el adaptador de corriente facilitado.
2. Acople el iPod con el adaptador de acople correcto, o conecte a una fuente secundaria usando el cable adaptador
de 2,5mm-3,5mm /2,5mm para el conector RCA incluidos.
3. Cuando el iPod está acoplado, el menú de navegación es accesible bien mediante la alfombrilla táctil (pantalla)
en el mismo iPod o utilizando el mando a distancia. Consulte la guía de uso del mando a distancia.
Al utilizar el mando a distancia, apunte el mando a distancia a la ventana de IR en la base del
iF500 como se muestra en la imagen, la distancia de funcionamiento óptima es de menos de
7 metros. Cuando se envía una orden mediante el mando a distancia, el indicador de encendido
del mando a distancia parpadeará.
Consulte la guía de uso del mando a distancia
A CA
Entrada (AUX)
1. " " – Encendido/en espera
Pulse este botón para encender/poner en espera el sistema. El sistema puede recuperar el último ajuste de
volumen; desconecte de la corriente cuando no se utilice durante un prolongado período de tiempo.
2. " " -- Silenciado
Una simple pulsación silenciará el sistema, dejando el correspondiente indicador de modo parpadeando,
hasta que se vuelva a pulsar para anular el sistema.
3. Predeterminados – del “1” al “6”
Cuando se enciende el sintonizador de FM:
Pulse para saltar a una emisora de radio almacenada.
Pulse y mantenga pulsado para guardar el canal en curso en el grupo predeterminado actual, la cifra de la
pantalla mostrará el índice del grupo predeterminado.
4. Selectores de entrada:
FM: pulse este botón cuando reproduzca el iPod o AUX, el sistema cambiará a FM; pulse este botón cuando FM
esté encendida, cambiará el sistema del grupo de FM predeterminado 1 (FM1) al grupo predeterminado 2 (FM2),
luego al grupo predeterminado 3 (FM3), y vuelta al grupo predeterminado 1. El índice predeterminado se
mostrará en la pantalla.
iPod: reproduce desde el iPod.
Aux: reproduce de fuentes de audio auxiliares, como MP3/CD/tarjeta de sonido de PC.
Conecte las fuentes de audio al sistema usando el adaptador de 3,5mm - 2,5mm.
5. “ ”
Entrada
Pulse para… Pulse y mantenga pulsado para…
FM
Sintonizar una frecuencia inferior con un Sintonizar una frecuencia inferior de manera
paso (0,1MHz)
seguida, con 0,1MHz en cada paso
iPod
Desplazar la banda de realce del menú del Desplazar la banda de realce del menú del
iPod un paso hacia abajo
iPod hacia abajo de manera seguida
AUX Nada Nada
6.“ ”
Entrada
Pulse para… Pulse y mantenga pulsado para…
FM
Sintonizar una frecuencia superior con un Sintonizar una frecuencia superior de
paso (0,1MHz) manera seguida, con 0,1MHz en cada paso
iPod
Desplazar la banda de realce del menú del Desplazar la banda de realce del menú
iPod un paso hacia arriba del iPod hacia arriba sin interrupción
AUX Nada
Nada
Verbindungen herstellen
Hilfe zur Verwendung von der Fernbedienung
Hilfe zur Verwendung von der Fernbedienung
1. Schließen Sie das Lautsprechersystem mit dem mitgelieferten Netz-Adapter an eine Steckdose an.
2. Stecken Sie Ihren iPod in den richtige Docking-Adapter oder schließen Sie ihn mit einem der mitgelieferten
Adapterkabel 2,5mm auf 3,5mm oder 2,5mm auf RCA als eine zweite Audioquelle an.
3. Wenn der iPod angedockt ist, kann auf seine Menünavigation entweder mittels Bedienung des Touch-Pads
(Bildschirm) auf dem iPod selbst oder mit der Fernbedienung zugegriffen werden. Siehe Hilfe zur Verwendung
von der Fernbedienung.
Richten Sie die Fernbedienung auf das IR-Fenster im Gerätefuß des iF500 aus, wie in der
Abbildung dargestellt. Der optimale Arbeitsbereich liegt innerhalb von 7 Metern. Wenn mit
der Fernbedienung ein Befehl gesendet wird, blinkt die Betriebsanzeige auf der Fernbedienung.
Verwendung von der Fernbedienung
Zur Steckdose
(AUX) Line-In
1. " " – Ein/Standby
Einschalten/Standby des Systems. Das System verwendet die zuletzt eingestellte Lautstärke. Ziehen Sie bei
längerer Nichtnutzung den Netzstecker des Netz-Adapters.
2. " " -- Stummschaltung
Schalten Sie mit einem einfachen Tastendruck das System stumm. Die entsprechende Anzeige blinkt, bis ein
weiterer Tastendruck die Stummschaltung aufhebt.
3. Voreinstellungen – Abbildungen “1” al “6”
Wenn der UKW-Tuner eingeschaltet ist:
Taste drücken, um eine gespeicherte Radiostation aufzurufen.
Taste gedrückt halten, um den aktuellen Kanal in der aktuellen Voreinstellungsgruppe zu speichern.
Die Darstellung auf dem Display zeigt die Nummer der Voreinstellungsgruppe.
4. Eingangs-Auswahltasten:
“UKW”: Drücken Sie diese Taste für die Wiedergabe vom iPod oder von AUX. Das System wechselt zu “FM”.
Bei eingeschaltetem UKW-Modus wechselt das System mit einem Tastendruck von UKW-Voreinstellungsgruppe
1 (FM1) zu Gruppe 2 (FM2), dann zu Gruppe 3 (FM3) wieder zurück zu Gruppe 1. Die Nummer der
Voreinstellungsgruppe wird auf dem Display angezeigt.
iPod: Wiedergabe von Ihrem iPod.
AUX: Wiedergabe von zusätzlichen Audioquellen, wie z.B. einem MP3-/CD-Player oder einer PC-Soundkarte.
Schließen Sie die Audioquellen mit dem mitgelieferten 3,5mm auf 2,5mm Adapterkabel an das System an.
5. “ ”
Eingang Drücken… Gedrückt halten…
UKW
Die Frequenz um einen Schritt (0,1 MHz) Die Frequenz fortgesetzt verringern
verringern
(in 0,1 MHz Schritten)
iPod
Den Markierungsbalken des iPod-Menüs einen Den Markierungsbalken des iPod-Menüs
Schritt nach unten bewegen fortgesetzt nach unten bewegen
AUX Keine Funktion Keine Funktion
6.“ ”
Eingang Drücken… Gedrückt halten…
UKW
Die Frequenz um einen Schritt Die Frequenz fortgesetzt erhöhen
(0,1 MHz) erhöhen. (in 0,1 MHz Schritten)
iPod
Den Markierungsbalken des iPod-Menüs einen Den Markierungsbalken des iPod-Menüs
Schritt nach oben bewegen
fortgesetzt nach oben bewegen.
AUX Keine Funktion
Keine Funktion
Établir les connexions
Utilisation de la télécommande
Utilisation de la télécommande
1. Connectez le système de haut-parleur à une prise d’alimentation via l’adaptateur d’alimentation fourni.
2. Placez votre iPod avec le socle adéquat, ou bien connectez-vous à une source externe en utilisant un des
câbles d’adaptation (2.5 mm vers 3.5 mm ou 2.5 mm vers RCA) fournis.
3. Lorsque votre iPod est déposé sur son socle, son menu de navigation est accessible soit en utilisant son
propre écran tactile, soit en utilisant la télécommande. Reportez-vous à la partie “Utilisation de la télécommande”.
Lorsque vous utilisez la télécommande, dirigez-la vers la fenêtre de réception IR à la base de
l’iF500 comme indiqué sur la figure, la distance de fonctionnement optimale se situe en-dessous
des 7 mètres. Lorsqu’une commande est envoyée, l’indicateur de mise sous tension de la
télécommande clignote.
Reportez-vous à la partie “Utilisation de la télécommande”
Vers le réseau
Entrée de ligne (AUX)
1. “ ”– Mise en route / mise en veille
Poussez sur ce bouton pour allumer le système ou le mettre en veille. Le système se souvient du dernier réglage
de volume ; coupez l’alimentation si l’appareil doit rester inutilisé pendant une longue période.
2. “ ” – Muet
Une simple pression coupe le son du système, l’indicateur de mode correspondant clignote jusqu’à ce que la touche
soit poussée une nouvelle fois pour rétablir le son.
3. Mémoires – chiffres “1” to “6”
Lorsque le récepteur FM est allumé :
Poussez le bouton pour passer sur la station radio mémorisée.
Poussez et maintenez le bouton enfoncé pour mémoriser la station écoutée dans le groupe de stations mémorisées
actuel. Le premier chiffre sur l’écran indique le numéro du groupe choisi.
4. Boutons de sélection de la source :
FM : poussez sur ce bouton, lors de l’écoute de l'iPod ou de l’entrée AUX, pour passer à la radio FM. Poussez ce
bouton, lorsque la radio est allumée, pour passer du groupe de stations mémorisées 1 (FM1) au groupe 2 (FM2)
puis au groupe 3 (FM3) et revenir au 1. Le numéro du groupe est affiché à l'écran.
iPod : poussez sur ce bouton pour écouter l’iPod.
AUX : poussez sur ce bouton pour écouter une source externe telle qu’un lecteur MP3, un lecteur CD ou une carte
son d’ordinateur. Connectez la source audio au système en utilisant un des câbles d’adaptation inclus.
5. “ ”
Source Appuyez pour …
Appuyez et maintenez pour…
FM
Diminuer la fréquence d’une unité (0.1 MHz) Régler rapidement une fréquence
inférieure, par intervalles de 0.1 MHz
iPod
Sélectionner l’entrée suivante dans le menu de l’iPod Avancer rapidement parmi les entrées
dans le menu de l’iPod
AUX Pas d’effet
Pas d’effet
6.“ ”
Source Appuyez pour …
Appuyez et maintenez pour…
FM Augmenter la fréquence d’ une unité (0.1 MHz)
Régler rapidement une fréquence
supérieure, par intervalles de 0.1 MHz
iPod
Sélectionner l’entrée précédente dans le menu de l’iPod Reculer rapidement parmi les entrées
dans le menu de l’iPod
AUX Pas d’effet
Pas d’effet
Consignes de securite importantes
Déballer la boîte
Contenu de la boîte
• iF500
• Adaptateur d’alimentation
• Télécommande
• 12 socles d’adaptations pour iPod
• Câble de connexion 2.5 mm vers 3.5 mm
• Câble d’connexion 3.5mm vers RCA
• Câble d’adaptation 3.5 mm vers 2.5 mm
• Manuel utilisateur
iF500 Télécommande
Câble de connexion 2.5 mm vers 3.5 mm
Câble d’adaptation 3.5 mm vers 2.5 mm
Câble d’connexion 3.5mm vers RCA
Socles d’adaptations pour iPod
Manuel utilisateurAdaptateur d’alimentation
Remarque : reportez-vous au marquage qui se trouve sous chaque adaptateur pour son utilisation.
Merci d’avoir acheté le produit Edifier . Depuis des générations, Edifier essaie de fournir des haut-parleurs puissants afin de satisfaire le
besoin de nos clients finaux même les plus exigeants. Ce produit peut ajouter à votre divertissement de maison, à votre ordinateur et à
un mini home cinéma une grande performance de son. Veuillez lire soigneusement ce manuel afin d’obtenir le meilleur de votre appareil.
Le symbole d’éclair avec une flèche à l’intérieur
d’un triangle équilatéral informe l’utilisateur de
la présence d’une tension non isolée et
dangereuse dans l’enceinte de l’appareil. Cette
dernière peut être de magnitude suffisante pour
constituer un risque d’électrocution.
Afin de prévenir les risque de chocs électriques,
ne pas retirer le couvercle (ou l’arrière). Aucun
élément n’est réparable par l’utilisateur.
Veuillez contacter un personnel qualifié pour
les réparations.
Le point d’exclamation à l’intérieur d’un triangle
équilatéral informe l’utilisateur de la présence,
dans ce manuel qui accompagne l’appareil,
d’instructions de maintenance (réparation) et
d’instructions de fonctionnement importantes.
Risque d’électrocution
ne pas ouvrir
Ne pas exposer l’appareil à la pluie ou à l’humidité.
Ne pas utiliser les haut-parleurs à proximité d’eau, ne pas les immerger dans un liquide ou renverser un liquide dessus.
Protégez le cordon d’alimentation afin qu’on ne marche pas dessus, qu’il ne soit pas pincé et plus particulièrement la prise,
les prises de courant et leurs points de sortie de l’appareil.
Pour davantage de protection pendant les orages, débranchez les haut-parleurs de la prise de courant électrique et éteignez l’ordinateur.
Débranchez l’appareil lorsqu’il ne sert pas pendant des périodes prolongées.
Placez les haut-parleurs loin de sources de chaleur telles que des radiateurs, des fours et la lumière du soleil.
Ne pas obstruer les ouvertures des coffrets des haut-parleurs. Ne jamais insérer d’objets dans les orifices ou les logements.
Prévenez les risque d’incendie et de dangers de choc électrique et laissez suffisamment d’espace autour des haut-parleurs afin d’assurer
une bonne ventilation.
Placez les haut-parleurs dans un endroit stable afin qu’il ne tombe pas. Cela pourrait les endommager ou entraîner des blessures corporelles.
Débranchez les haut-parleurs de l’ordinateur et de la prise de courant électrique avant de les nettoyer à l’aide d’un chiffon humide.
La réparation est nécessaire si l’appareil a été endommagé de quelque manière que ce soit telle qu’un cordon d’alimentation ou une prise
endommagé(e), un liquide renversé ou des objets qui sont tombés dans l’appareil, l’appareil a été exposé à la pluie, ne fonctionne pas
normalement ou est tombé. Veuillez contacter un personnel qualifié pour les réparations.
Utilisez la prise ou le raccord d’entrée pour débrancher de l’alimentation principale.
CONSIGNES DE SECURITE
Veuillez lire les consignes ici présentes. Veuillez conserver ces instructions pour toute référence ultérieure.
Veuillez prendre garde à tous les avertissements. Veuillez installer l’appareil en respect des instructions du fabricant.
Veuillez régler le contrôle du volume à un niveau confortable afin d’éviter d’endommager votre audition ainsi que l’appareil.
Instrucciones importantes de seguridad
Wichtige Sicherheitshinweise
Gracias por comprar este producto Edifier.Desde hace varias generaciones, Edifier proporciona parlantes potentes para satisfacer
las necesidades de nuestros consumidores finales, incluso de los más exigentes. Usted puede utilizar éste producto con su sístema de
entretenimiento doméstico, computadora ó cine casero, así dándole unas grandes prestaciones de sonido. Lea con cuidado este manual
para obtener lo mejor de este sistema.
El destello dentro del triangulo advierte al usuario
de la presencia de un voltaje peligroso no aislado
dentro de la carcasa del producto que puede ser
de suficiente magnitud como para constituir un
riesgo de descarga eléctrica para las personas.
Para evitar el riesgo de descarga eléctrica no
retire la cubierta (ni la tapa posterior). En el
interior no hay componentes cuyo mantenimiento
pueda realizar el usuario. Hágalos revisar sólo
por personal cualificado.
La exclamación dentro del triangulo pretende
alertar al usuario de la presencia de instrucciones
de funcionamiento y mantenimiento (revisión)
importantes en la documentación que acompaña
al producto.
INSTRUCCIONES DE SEGURIDAD
Lea todas las instrucciones. Guarde este manual para futuras referencias.
Tenga en cuenta todos los avisos de seguridad. Instálelo de acuerdo con las instrucciones del fabricante.
Ajuste el control de volumen a un nivel confortable para evitar daño en su oído y en el sistema.
No exponga este aparato a la lluvia o a la humedad.
No use los parlantes cerca del agua y no los sumerja en ningún líquido ni vierta ningún líquido sobre ellos.
Proteja el cable eléctrico de las pisadas o pellizcos, particularmente en las tomas, receptáculos adecuados y en el punto de salida del aparato.
Para mayor protección durante las tormentas eléctricas, desenchufe los parlantes del enchufe y apague el ordenador.
Desenchufe el aparato cuando no lo use durante largos periodos de tiempo.
Coloque los parlantes lejos de todas las fuentes de calor, como calentadores o estufas, así como de la luz directa del sol.
No bloquee las aberturas de la caja de los parlantes. Nunca incruste objetos dentro de las rejillas de ventilación ni en las ranuras.
Evite el riesgo de fuego o de descargas eléctricas, y deje suficiente espacio alrededor de los parlantes para una ventilación adecuada.
Coloque los altavoces en una ubicación estable para que no se caigan causando daño a los parlantes o daños personales.
Desenchufe los parlantes del ordenador y del enchufe antes de limpiarlos con un paño húmedo.
Se requieren revisiones cuando el aparato se dañe de cualquier forma, como daños en el cable de alimentación o en la toma, se derrame
líquido o si se han caído objetos sobre el aparato, el aparato se ha expuesto a la lluvia o a la humedad, o bien no opera normalmente
o se ha caído.
Refiera toda revisión sólo a personal cualificado.
Use el enchufe o toma para desconectarlos de la alimentación eléctrica.
Vielen Dank, dass Sie sich für ein Produkt von Edifier entschieden haben. Seit Generationen liefern wir bei Edifier aktiv Lautsprecher-
Systeme zur vollen Zufriedenheit unserer Kunden - selbst an solche mit höchsten Anforderungen. Dieses Produkt kann an Ihre
unterhaltungselektronischen Endgeräte, an Computer oder an Ihr Heimkino System angeschlossen werden und liefert einen
hervorragenden Sound. Bitte lesen Sie die Bedienungsanleitung vor Inbetriebnahme, um die volle Leistung des Systems nutzen zu können.
Der Blitz im gleichseitigen Dreieck weist auf
gefährliche Hochspannung im Gerät hin,
die zu Stromschlag führen kann.
Zur Vermeidung von Stromschlag Gerätegehäuse
nicht öffnen. Es befinden sich keine vom
Verbraucher wartbaren Teile im Innern des Geräts.
Reparatur und Wartung nur durch Fachpersonal.
Das Ausrufungszeichen im gleichseitigen Dreieck
weist auf wichtige Bedienungs- und
Wartungsanleitungen hin.
SICHERHEITSHINWEISE
Vor Betrieb des Geräts sollten Sie alle Sicherheits- und Bedienungsanleitungen lesen.
Die Sicherheits- und Bedienungsanleitungen sollten für späteren Gebrauch aufbewahrt werden.
Die Warnungen auf dem Gerät und in der Bedienungsanleitung sollten beachtet werden.
Bitte beachten Sie die Installationsanweisungen des Herstellers.
Stellen Sie die Lautstärke so ein, dass Sie keine Hörschäden davontragen.
Gerät nicht Regen oder Feuchtigkeit aussetzen.
Dieses Gerät nicht in der Nähe von Wasser betreiben, nicht in Wasser oder sonstige Flüssigkeiten eintauchen oder darauf verschütten.
Netzkabel sollten so verlegt werden, dass möglichst nicht darauf getreten wird und dass sie nicht eingeklemmt werden, mit besonderer
Beachtung der Kabel an Steckern, Verlängerungskabeln und dem Austritt des Kabels aus dem Gerät.
Während eines Gewitters ziehen Sie bitte den Netzstecker und schalten das angeschlossene Audiogerät aus.
Bei längerer Nichtbenutzung ziehen Sie bitte den Netzstecker.
Die Lautsprecher sollten fern von Wärmequellen wie Radiatoren, Heizkörpern, Öfen und anderen wärmeerzeugenden Geräten
(einschließlich Verstärkern) aufgestellt werden, direkte Sonneneinstrahlung vermeiden.
Schlitze und Öffnungen im Gehäuse dienen der Belüftung. Sie sind für zuverlässigen Betrieb der Lautsprecher und Schutz vor Überhitzung
erforderlich und dürfen nicht blockiert oder abgedeckt werden. Das Gerät sollte nur dann in Einbauinstallierung wie in einem Bücherschrank
oder einem Regal verwendet werden, wenn angemessene Belüftung vorgesehen ist bzw. die Anweisungen des Herstellers befolgt worden sind.
Stellen Sie die Lautsprecher sicher auf, damit sie nicht herunterfallen.
Vor dem Reinigen ziehen Sie bitte den Netzstecker und das Anschlusskabel zum Audiogerät. Die Reinigung kann mit einem leicht feuchten
Tuch erfolgen.
Eine Wartung wird notwendig, wenn das Gerät beschädigt wurde, Netzkabel oder -stecker beschädigt sind, Flüssigkeit oder Fremdkörper
eingedrungen sind, das Gerät Regen oder Feuchtigkeit ausgesetzt war, nicht wie gewöhnlich funktioniert oder fallen gelassen wurde.
Reparatur nur durch autorisierten Kundendienst.
Zum vollständigen Abtrennen vom Stromnetz bitte Netzstecker ziehen.
E.I.D.C. Instruction
As an advanced audio control technology of Edifier, E.I.D.C. (Electrical Intelligent Distortion Control) has been patented
by China, USA and many other countries.
The in-system microcontroller collects and calculates the distortion of the power amplifier. When the distortion is reaching
a critical amount, the system automatically adjusts and balances the power increment thus to avoid distorted sound
output and achieve a better compatibility to different output levels of different audio sources.
E.I.D.C. guarantees you the lowest distortion and the most authentic audio playback, protects you from hearing harms
and apparatus damages.
Advantages of E.I.D.C:
1. Compatible to various types of audio sources
2. Protects the apparatus and speakers units connected to the system
3. Protects your hearing
Transcripción de documentos
NOTICE: For the need of technical improvement and system upgrade, information contained herein may be subject to change from time to time without prior notice Copyright 2008 All Rights Reserved. Manual Edition 1.0 , Sep. 2008 Printed in China English Français www.edifier.com Edifier International Limited Made in China Español iF500 iPod Docking Speaker System Deutsch User’s Manual Products of Edifier will be customized for different applications. Pictures and illustrations shown on this manual may be slightly different from actual product. If any difference is found, the actual product prevails. Please carefully read this manual before operating the system IB-200-M0300P-00 Unpack the box Important safety instruction Thank you for purchasing this Edifier product. For generations, Edifier tries to provide powered speaker products to satisfy the need of our end customers, even the most demanding ones. This product can add to your home entertainment, personal computer, and mini home theater great sound performance. Please read this manual carefully to obtain the best of this system. M Box content E m m m • iF500 m D E m m m V m G m m • Power adapter The lightning flash with arrowhead inside the triangle, is intended to alert the user to the presence of un-insulated dangerous voltage within the product's enclosure that may be of a sufficient magnitude to constitute a risk of electric shock to persons. To prevent the risk of electric shock, do not remove cover (or back). No user-serviceable Parts inside. Refer servicing to qualified Service personnel only. The exclamation point inside the triangle is intended to alert the user to the presence of important operating and maintenance (servicing) instructions in the literature accompanying the product. m SAFETY INSTRUCTIONS Please read all the instructions herein. Please retain this manual safely for future reference. Please heed all safety warnings. Please install in accordance with the manufacturer's instructions. Please adjust the volume control to a comfortable level to avoid damaging your hearing and the system. • • • • • • • • • • • Do not expose this apparatus to rain or moisture. Do not use the speakers near water, and do not immerse them in any liquid or pour any liquid on them. Do not defeat the safety purpose of the polarized plug. A polarized plug has two blades with one wider than the other. For added protection during lightning storms, unplug the speakers from the electrical outlet and turn off the computer. Unplug this apparatus when unused for long periods of time. Place the speakers away from all heat sources, such as heaters, stoves, and direct sunlight. Do not block the openings in the speaker cabinets. Never push objects into speaker vents or slots. Prevent risk of fire or electric shock hazards, and provide sufficient space around the speakers for proper ventilation. Place the speakers in a stable location so that it will not fall causing damage to the speakers or bodily harm. Unplug the speakers from the computer and from the electrical outlet before cleaning them with a damp cloth. Servicing is required when the apparatus has been damaged in any way, such as the power-supply cord or plug is damaged, liquid has been spilled or objects have fallen into the apparatus, the apparatus has been exposed to rain or moisture, does not operate normally, or has been dropped. Refer all servicing to qualified service personnel only. Use the plug or the coupler inlet to disconnect with mains. m m m m • 3.5mm to RCA connecting cable • 3.5mm to 2.5mm adapter cable CONS GNES DE SECUR TE V V V m 3.5mm to RCA connecting cable • User's manual m 2.5mm to 3.5mm connecting cable N N P 3.5mm to 2.5mm adapter cable User's manual 1 2 English English Illustrations and functional depict m • 3 5mm • 3 5 mm m R A 2 5 mm m mm m m Press and hold to… Seek into higher frequency until lock down one channel Fast forward in current track Do nothing Fast rewind Input Press to… FM Skip between preset groups iPod Skip to next tracks AUX Do nothing Press and hold to… Seek into lower frequency until lock down one channel Fast rewind in current track Do nothing m R m 11 12 Français Français 4 Avance rapide Source Appuyez pour… FM Passer au groupe de stations mémorisées suivant iPod Passer à la piste suivante AUX Pas d’effet Appuyez et maintenez pour… Parcourir la plage de fréquences vers le haut jusqu’à capter une station Avancer rapidement dans la piste actuelle Pas d’effet Retour rapide Source Appuyez pour … FM Passer au groupe de stations mémorisées précédent iPod Passerà la piste précédente AUX Pas d’effet Appuyez et maintenez pour… Parcourir la plage de fréquences vers le bas jusqu’à capter une station Reculer rapidement dans la piste actuelle Pas d’effet es connex ons mm M m E iPod AUX “Select”: Input FM iPod AUX “ ”: Input FM iPod AUX Skip to next track Do nothing Press and hold to… Seek into higher frequency until lock down one channel Fast forward in current track Do nothing Press to… Function with “Menu” to complete “auto search” and “region selection” Play the current track Do nothing Press and hold to… Do nothing Do nothing Do nothing Press to… Do nothing Play the current track Do nothing Press and hold to… Do nothing Do nothing Do nothing Press to… Switch between preset groups Note: When the system is set to standby, and “OFF” is shown on the display panel, press "Mute" on the remote control to set the system back to default settings. Preset index: “3” for “preset group 3”, and “1” for the first channel 9 English E D E m w m m m M R U m MH m … m 1. Conecte el altavoz a la toma de corriente CA con el adaptador de corriente facilitado. m 2. Acople el iPod con el adaptador de acople correcto, o conecte a una fuente secundaria usando el cable adaptador de 2,5mm-3,5mm /2,5mm para el conector RCA incluidos. m m MH … 3. Cuando el iPod está acoplado, el menú de navegación es accesible bien mediante la alfombrilla táctil (pantalla) en el mismo iPod o utilizando el mando a distancia. Consulte la guía de uso del mando a distancia. MH mm m m m Appuyez pour… Passer d’un groupe de stations mémorisées à l’autre Appuyez et maintenez pour… Pas d’effet Pas d’effet Appuyez et maintenez pour… Pas d’effet Pas d’effet Pas d’effet Appuyez et maintenez pour… Pas d’effet Pas d’effet Pas d’effet Remarque : Lorsque le système est en veille et que l’écran affiche “OFF ”, poussez sur la touche “Muet ” de la télécommande pour remettre le système dans son état par défaut. Station mémorisée : “3” pour le groupe de stations et “1” pour la station Fréquence actuelle iPod AUX “Select”: Entrada FM iPod AUX “ ”: Entrada FM iPod AUX Régler la radio : Pour trouver une fréquence avec un signal plus fort, ou pour régler sur la fréquence voulue, vous pouvez : 1. Poussez et maintenir enfoncée la touche “ ” sur la télécommande pour rechercher une fréquence plus haut dans la plage, ou sur “ ” pour une fréquence plus basse, jusqu’à capter une station. 2. Poussez sur les boutons “ ” ou “ ” sur le panneau de contrôle pour passer d'un groupe de stations à un autre. 3. Poussez sur les touches “ / ” pour régler manuellement la fréquence pas par pas, les intervalles étant de 0.1 MHz. Mémoriser une station dans un groupe de stations : 1. Poussez et maintenez enfoncée la touche avec le numéro voulu (de 1 à 6) sur la télécommande pour mémoriser la station actuelle dans le groupe de stations actuel. Au total, 18 stations peuvent être mémorisées en 3 groupes avec les numéros “1.x”, “2.x” et “3.x” affichés à l’écran. 2. Poussez sur le bouton “MENU” lorsque la radio est allumée. Une fois que “AUTO” s’affiche à l’écran, poussez sur le bouton “SELECT” pour lancer la recherche automatique. Les 18 premières stations captées seront mémorisées dans les groupes de stations FM1 à FM3. Rapport signal-bruit : ≥85 dBA Distorsion : ≤0.5% Sensibilité d’entrée : AUX: Canal satellite : 150 mV ± 50 mV Canal basse : 100 mV ± 50 mV iPod: Canal satellite : 150 mV ± 50 mV Canal basse : 100 mV ± 50 mV Type d’entrée : AUX, iPod, FM Réglages : Contrôle de volume général et réglages séparés des basses et Unité de basses : 5.75 pouces, blindée magnétiquement, 6Ω Unité intermédiaire : 2.75 pouces, blindée magnétiquement, 5Ω des aigus à la fois à partir de la télécommande et du panneau de contrôle Unité aigus : 2.5 pouces, blindée magnétiquement, 6Ω Dimensions : 376mm x 390mm x 240mm (W x H x D) Poids net : Environ 4.7 kg Poids complet : Environ 6.1 kg 18 10 English 19 Français G m K m w N w w D R m Docking-Adapter für iPod w m m w w Pulse para… Cambiar entre los grupos predeterminados Pulse y mantenga pulsado para… Nada Nada Nada Saltar a la siguiente pista Nada Pulse para… Funcionar con “Menú” para finalizar "búsqueda automática” y “selección región” Reproducir la pista en curso Nada Pulse y mantenga pulsado para… Nada Nada Nada Pulse para… Nada Reproducir la pista en curso Nada Pulse y mantenga pulsado para… Nada Nada Nada Nota: cuando el sistema se coloca en espera, y aparece “DESCONECTADO” en la pantalla, pulse “ Silenciado ” en el mando a distancia para que el sistema vuelva a los ajustes predeterminados. Abbildungen und Funktionsdarstellung Docking-Adapter für iPod Relación señal/ruido: ≥85 dBA Distorsión: ≤0.5% Sensibilidad: AUX: Canal satélite: 150 mV ± 50 mV Canal altavoz: 100 mV ± 50 mV iPod: Canal satélite: 150 mV ± 50 mV Canal altavoz: 100 mV ± 50 mV Il y a du bruit dans les haut-parleurs: L’équipement de l’amplificateur de ce produit génère peu de bruit alors que le bruit de fond de certains lecteurs VCD/DVD ou la carte son de l’ordinateur sont trop élévés. Veuillez laisser le système en mode actif et retirer la source audio. Si aucun son n’est entendu à 1 mètre du système, alors il n’y a aucun problème avec le produit. Tipo de entrada: AUX, iPod, FM Ajuste: Control de volumen, ajuste separado graves/agudos tanto en el Unidad de graves: 5.75 pulgadas, protegido magnéticamente, 6Ω Unidad medios: 2.75 pulgadas, protegido magnéticamente, 5Ω mando a distancia como en el panel de control Interférence magnétique: Ce système est entièrement protégé magnétiquement et peut être placé près d’une TV ou d’un moniteur. Mais puisque l’aimant du caisson de basses est trop gros, une fuite de magnétisme est inévitable lorsque l’appareil est trop près du moniteur et il est recommandé de garder 1 mètre de distance entre le système haut-parleur et le moniteur ou le poste de TV. Mauvaise réception FM: Dans certains cas, la réception de la station bloquée est mauvaise en raison d’un signal FM faible et de fortes interférences ambiantes. Veuillez alors déplacer le système et étirez l’antenne pour obtenir une meilleure réception du signal. 33 Unidad agudo: 2.5 pulgadas, protegido magnéticamente, 6Ω Dimensiones: 376 x 390 x 240mm (An x Al x F) Peso neto: Aprox. 4.7 kg Peso bruto: Aprox. 6.1 kg 20 29 Español Deutsch Verbindungen herstellen Hilfe zur Verwendung von der Fernbedienung Al utilizar el mando a distancia, apunte el mando a distancia a la ventana de IR en la base del iF500 como se muestra en la imagen, la distancia de funcionamiento óptima es de menos de 7 metros. Cuando se envía una orden mediante el mando a distancia, el indicador de encendido del mando a distancia parpadeará. Consulte la guía de uso del mando a distancia Richten Sie die Fernbedienung auf das IR-Fenster im Gerätefuß des iF500 aus, wie in der Abbildung dargestellt. Der optimale Arbeitsbereich liegt innerhalb von 7 Metern. Wenn mit der Fernbedienung ein Befehl gesendet wird, blinkt die Betriebsanzeige auf der Fernbedienung. Verwendung von der Fernbedienung 1. " " – Encendido/en espera Pulse este botón para encender/poner en espera el sistema. El sistema puede recuperar el último ajuste de volumen; desconecte de la corriente cuando no se utilice durante un prolongado período de tiempo. 2. " " -- Silenciado Una simple pulsación silenciará el sistema, dejando el correspondiente indicador de modo parpadeando, hasta que se vuelva a pulsar para anular el sistema. 3. Predeterminados – del “1” al “6” Cuando se enciende el sintonizador de FM: Pulse para saltar a una emisora de radio almacenada. Pulse y mantenga pulsado para guardar el canal en curso en el grupo predeterminado actual, la cifra de la pantalla mostrará el índice del grupo predeterminado. 4. Selectores de entrada: FM: pulse este botón cuando reproduzca el iPod o AUX, el sistema cambiará a FM; pulse este botón cuando FM esté encendida, cambiará el sistema del grupo de FM predeterminado 1 (FM1) al grupo predeterminado 2 (FM2), luego al grupo predeterminado 3 (FM3), y vuelta al grupo predeterminado 1. El índice predeterminado se mostrará en la pantalla. iPod: reproduce desde el iPod. Aux: reproduce de fuentes de audio auxiliares, como MP3/CD/tarjeta de sonido de PC. Conecte las fuentes de audio al sistema usando el adaptador de 3,5mm - 2,5mm. 5. “ ” Pulse y mantenga pulsado para… Entrada Pulse para… Sintonizar una frecuencia inferior con un Sintonizar una frecuencia inferior de manera FM seguida, con 0,1MHz en cada paso paso (0,1MHz) Desplazar la banda de realce del menú del Desplazar la banda de realce del menú del iPod iPod hacia abajo de manera seguida iPod un paso hacia abajo AUX Nada Nada 6.“ ” Pulse y mantenga pulsado para… Entrada Pulse para… Sintonizar una frecuencia superior con un Sintonizar una frecuencia superior de FM paso (0,1MHz) manera seguida, con 0,1MHz en cada paso Desplazar la banda de realce del menú del Desplazar la banda de realce del menú iPod iPod un paso hacia arriba del iPod hacia arriba sin interrupción Nada AUX Nada 1. " " – Ein/Standby Einschalten/Standby des Systems. Das System verwendet die zuletzt eingestellte Lautstärke. Ziehen Sie bei längerer Nichtnutzung den Netzstecker des Netz-Adapters. 2. " " -- Stummschaltung Schalten Sie mit ei m m mm mm – W W m m m N mm Zur Steckdose (AUX) Line-In W M Sintonización de la radio: Para encontrar un canal con una señal fuerte, o sintonizar un canal determinado: 1. Pulse y mantenga pulsado “ ” en el mando a distancia para buscar una frecuencia superior, o “ ” para una frecuencia inferior, hasta fijar un canal. 2. Pulse “ ” o “ ” en el panel de control para saltar por los grupos predeterminados. 3. Pulse “ / ” para sintonizar manualmente a una frecuencia inferior/superior paso a paso, la frecuencia de paso es de 0,1MHz. M mM … 1. Schließen Sie das Lautsprechersystem mit dem mitgelieferten Netz-Adapter an eine Steckdose an. W mm mm m mm MH M M … 3. Wenn der iPod angedockt ist, kann auf seine Menünavigation entweder mittels Bedienung des Touch-Pads (Bildschirm) auf dem iPod selbst oder mit der Fernbedienung zugegriffen werden. Siehe Hilfe zur Verwendung von der Fernbedienung. … m W MH M MH M M M 36 35 Deutsch Deutsch 7.Navigationstabelle: Menü: Eingang Drücken… UKW Mit einem Tastendruck den “Automatischen Suchlauf” einschalten. Mit einem weiteren Tastendruck das Land eingeben. Mit dem dritten Tastendruck kehren Sie zum normalen Modus zurück. iPod Identisch mit einem Tastendruck auf die “Menü”-Taste auf dem iPod (nur klassische Menüstruktur) AUX Keine Funktion “ ”: Eingang Drücken… UKW Umschalten zwischen den Voreinstellungsgruppen UKW-Radiowiedergabe Gedrückt halten… Keine Funktion Keine Funktion Wechseln Sie zum UKW-Tuner und wählen die Voreinstellungsgruppe: Drücken Sie “EINGANG” auf dem Bedienfeld oder “UKW” auf der Fernbedienung zum Einschalten des UKW-Tuners. Das System wechselt zum zuletzt ausgewählten UKW-Sender. Die Nummer der Voreinstellungsgruppe und die Frequenz des Kanals werden auf dem Display angezeigt. Drücken Sie “UKW” bei eingeschaltetem Tuner (UKW-Eingang) auf der Fernbedienung. Das System wechselt zwischen den drei Voreinstellungsgruppen. Keine Funktion Zum vorherigen Track springen Keine Funktion Gedrückt halten… Suchlauf zu den niedrigeren Frequenzen, bis ein Sender gefunden wird Einen Kanal zurück, Schneller Rücklauf im aktuellen Track Keine Funktion Drücken… Umschalten zwischen den Voreinstellungsgruppen Zum nächsten Track springen Keine Funktion Gedrückt halten… Suchlauf zu den höheren Frequenzen, bis ein Sender gefunden wird Einen Kanal weiter, Schneller Vorlauf im aktuellen Track Keine Funktion Drücken… Funktionsauswahl mit “Menü” zum Beenden des “Automatischen Suchlaufs” und der “Länderauswahl” Aktuellen Track wiedergeben. Keine Funktion Gedrückt halten… Keine Funktion Drücken… Keine Funktion Aktuellen Track wiedergeben Keine Funktion Gedrückt halten… Keine Funktion Keine Funktion Keine Funktion Keine Funktion Keine Funktion Nummer drücken: “3” für “ Voreinstellungsgruppe 3” und “1“ für den ersten Kanal Aktuelle Frequenz Einstellen des Radios: Um einen Kanal mit einem stärkeren Signal zu suchen oder einen gewünschten Kanal einzustellen, können Sie: 1. Halten Sie “ ” oder “ ” auf der Fernbedienung gedrückt, für einen Suchlauf zu höheren oder niedrigeren Frequenzen, bis ein Kanal gefunden wird. 2. Drücken Sie “ ” oder “ ” auf dem Bedienfeld, um zwischen den Voreinstellungsgruppen zu wechseln. 3. Stellen Sie mit “ / ” manuell eine niedrigere oder höhere Frequenz schrittweise ein. Die Frequenz pro Schritt beträgt 0,1 MHz. Speichern eines Lieblingskanals in einer Voreinstellungsgruppe: 1. Halten Sie eine Zifferntaste (1 bis 6) auf der Fernbedienung gedrückt, um den aktuellen Kanal in der aktuellen Voreinstellungsgruppe zu speichern. Maximal 18 Kanäle können in 3 Voreinstellungsgruppen gespeichert werden. Die unterschiedlichen Nummern “1.x”, “2.x” und “3.x” werden auf dem Display angezeigt. 2. Drücken Sie “MENU” bei eingeschaltetem Tuner. Nachdem “AUTO” auf dem Display angezeigt wird, starten Sie mit “AUSWÄHLEN” den “automatischen Suchlauf ”. Die ersten 18 gefundenen Kanäle werden in den Voreinstellungsgruppen FM1 bis FM3 gespeichert. 38 37 Deutsch Deutsch No todos los altavoces funcionan: Primero compruebe que los cables del altavoz están conectados con seguridad; entonces compruebe si los conectores de entrada de línea están invertidos; compruebe también si la fuente de radio falla. Ausgangsleistung: Uno de los altavoces satélite no funciona cuando se reproduce un CD desde el ordenador: Esta clase de fenómenos son propensos a producirse en los sistemas nuevos de ordenadores, en que un satélite no funciona cuando se reproduce un CD, pero el sistema funciona bien cuando se reproducen ficheros en formato WAV. Esto se produce principalmente por la falta de conexión entre el CD-ROM y la tarjeta de sonido, en que uno de los canales de señal está cortocircuitado a tierra. Refiérase al manual del CD-Rom y de la tarjeta de sonido para ajustar la conexión del cable. Störungserkenung Satellitenlautsprecher: RMS 2 x 10W (THD + N =10%, f0= 1KHz) Subwoofer: RMS 32W (THD + N =10%, f0= 80Hz) El sistema no funciona en absoluto: 1. Compruebe que esta conectado a la red, y que el interruptor está encendido. 2. Compruebe que el amplificador está todavía en modo STBY 3. Compruebe si la rueda de volumen esta girada al mínimo. 4. Compruebe si el cable de entrada de audio está conectado correctamente. 5. Compruebe si hay señal desde la fuente de audio. Rauschabstand: ≥85 dBA Rauschen: ≤0.5% Eingangsempfindlichkeit: AUX: Satellitenkanal: 150 mV ± 50 mV Subwooferkanal: 100 mV ± 50 mV iPod: Satellitenkanal: 150 mV ± 50 mV Subwooferkanal: 100 mV ± 50 mV Los altavoces producen ruido: El circuito del amplificador de este producto genera un poco de ruido, mientras que el ruido de fondo de algunos reproductores de VCD/DVD o tarjetas de sonido es demasiado alto. Mantenga el sistema en modo activo y elimine la fuente de audio. Si no se puede oír ningún sonido a 1 metro de distancia del sistema, entonces el problema no proviene de esté producto. Eingangsbuchse: AUX, iPod, FM Einstellungen: Haupt-Lautstärke, separate Tiefen- und Höheneinstellung Tieftöner: 5.75 inch, magnetisch abgeschirmt, 6Ω Mitteltöner: 2.75 inch, magnetisch abgeschirmt, 5Ω auf Fernbedienung und Bedienfeld Interferencia magnética: Este sistema esta completamente protegido magnéticamente, y se puede colocar cerca de la TV o de un monitor. Pero ya que el imán del controlador de subwoofer es grande, algún escape de magnetismo es inevitable cuando el sistema está demasiado cerca del monitor y es recomendable mantener 1 metro de distancia entre el sistema de altavoces y el monitor o TV. Recepción de FM de baja calidad: En determinadas circunstancias, la recepción de una estación programada puede ser de mala calidad debido a que la señal FM es demasiado débil o a las fuertes interferencias ambientales. Para obtener una mejor recepción de la señal, pruebe a cambiar de ubicación el sistema de audio o a sacar y girar la antena de recepción. 30 M 2. Stecken Sie Ihren iPod in den richtige Docking-Adapter oder schließen Sie ihn mit einem der mitgelieferten Adapterkabel 2,5mm auf 3,5mm oder 2,5mm auf RCA als eine zweite Audioquelle an. Spezifikationen Español m … MH M 8. Höhen+/-: Einstellung der Höhen im Bereich +/-7 Hinweis: Drücken Sie zum Aufrufen der Werkseinstellungen”„Mute“ 9. Tiefen+/-: Einstellung der Bässe im Bereich +/-10 auf der Fernbedienung, wenn das System in Standby geschaltet und 10. Lautstärke+/Lautstärke-: Einstellung der Haupt-Lautstärke in 50 Schritten “AUS“ auf dem Display angezeigt wird. 28 M m m iPod AUX “ ”: Eingang UKW iPod AUX Guardar un canal favorito a un grupo predeterminado: 1. Pulse y mantenga pulsadas las teclas de los números (1 - 6) en el mando a distancia para guardar el canal en curso al grupo predeterminado actual. Se pueden predeterminar un total de 18 canales en los 3 grupos predeterminados, con diferentes números “1.x”, “2.x” y “3.x” mostrados en pantalla. 2. Pulse el botón del “MENÚ” cuando esté encendido el sintonizador, después de que aparezca “AUTO” en la pantalla, pulse el botón “SELECT” para comenzar “búsqueda automática”. Los 18 primeros canales fijados se guardarán en los grupos predeterminados de FM1 a FM3. m W N mm m m W W iPod AUX “ ”: Eingang UKW iPod AUX “Select”: Eingang UKW Frecuencia actual m mm WM M Hilfe zur Verwendung von der Fernbedienung Cambie al sintonizador FM y seleccione el grupo predeterminado: Pulse el botón “ENTRADA” en el panel de control o el botón “FM” en el mando a distancia para conectar el sintonizador de FM, el sistema cambiará a la última emisora FM seleccionada. El índice del grupo predeterminado y la frecuencia de canal se mostrarán en la pantalla. Pulse el botón “FM” en el mando a distancia cuando el sintonizador está encendido (en entrada FM), el sistema pasará por los 3 grupos predeterminados. Pulse el número “3” para el “grupo predeterminado 3”, y “1”para el primer canal W m Hochtöner: 2.5 inch, magnetisch abgeschirmt, 6Ω Abmessungen: 376mm×390mm×240mm (B x H x T) Nettogewicht: Ca. 4.7 kg Bruttogewicht: Ca. 6.1 kg Nicht alle Lautsprecher funktionieren: Überprüfen Sie, ob die Lautsprecherkabel korrekt angeschlossen sind. Überprüfen Sie, ob der Line-in Anschluss vertauscht ist. Überprüfen Sie, ob die Audioquelle in Ordnung ist. Ein Satellitenlautsprecher funktioniert bei CD Wiedergabe vom Computer nicht: Dieses Problem tritt häufig bei neuen Computersystemen auf (kein Problem bei Wiedergabe von WAV Dateien). Hauptsächlich auf Anschlussfehler von CD-ROM Laufwerk und Sound Card zurückzuführen, ein Soundkanal ist gegen Masse kurzgeschlossen. Lesen Sie Einzelheiten bitte in der Bedienungsanleitung von CD-ROM Laufwerk und Sound Card nach und korrigieren die Verkabelung. System funktioniert nicht: 1. Überprüfen Sie, ob der Netzanschluss korrekt ist und die Steckdose funktioniert. 2. Überprüfen Sie, ob sich der Verstärker noch im STAND-BY Modus befindet. 3. Überprüfen Sie, ob die Master Lautstärke auf Minimum eingestellt ist. 4. Überprüfen Sie, ob die Audiokabel korrekt angeschlossen sind. 5. Überprüfen Sie, ob Sie Signale von der Audioquelle haben. Nebengeräusche der Lautsprecher: Der Verstärker dieses Geräts erzeugt nur geringste Nebengeräusche, die Hintergrundgeräusche einiger VCD/DVD Player oder Computer Sound Cards sind hingegen hoch. Lassen Sie das System eingeschaltet und trennen die Audioquelle ab. Ist in 1 m Abstand kein Geräusch zu hören, ist mit dem System alles in Ordnung. Magnetische Störungen: Das System ist magnetisch vollständig abgeschirmt und kann direkt neben einem Fernseher oder Monitor aufgestellt werden. Der Subwoofer hat jedoch einen recht großen Magneten im Treiber und das Austreten von Magnetwellen ist unvermeidlich, wenn das System zu nahe an einem Monitor betrieben wird. Wir empfehlen einen Mindestabstand von 1 m zwischen Lautsprechersystem und Fernseher oder Monitor. Schlechter UKW-Empfang: Unter bestimmten Umständen ist der Empfang eines eingestellten Radiosenders wegen eines schwachen UKW-Signals oder starker Störungen in der Umgebung schlecht. Stellen Sie das System an einem anderen Ort auf oder drehen die Antenne für einen besseren Empfang. Besuchen Sie unsere Website unter www.edifier.com oder schreiben uns bei technischen Fragen eine Mail an [email protected]. Si tiene más preguntas o preocupaciones respecto a los productos Edifier Visite nuestra pagina web: www.edifier.com, o envíe un mensaje electrónico a Asistencia Edifier para mayor asistencia: [email protected]. Si lo prefiere puede contactar con nosotros por teléfono gratuito: 1-877-EDIFIER (334-3437). Français 34 Deutsch Resolución de problemas Satélite: RMS 2 x 10W (THD + N =10%, f0= 1KHz) Eingangswahlschalter Taste Lautstärke verringern Español Altavoz: RMS 32W (THD + N =10%, f0= 80Hz) Le système ne fonctionne pas du tout: 1. Veuillez vérifier si le courant est branché et si la prise murale est allumée. 2. Veuillez vérifier sur l’amplificateur est toujours en mode STBY. 3. Veuillez vérifier sur le volume master est sur minimum 4. Veuillez vérifier si le câble d’entrée audio est bien connecté 5. Veuillez vérifier s’il y a un signal de la source audio 32 Deutsch Digitales Display–Anzeige von UKW-Frequenz, Voreinstellungsgruppen, Hauptlautstärke, Bass-/Höhen-Einstellung, usw. Pulse y mantenga pulsado para … Buscar una frecuencia inferior hasta fijar un canal Rebobinar rápido la pista en curso Nada Pulse y mantenga pulsad para… Buscar una frecuencia superior hasta fijar un canal Avanzar rápido la pista en curso Nada Salida de potencia: Bedienungsanleitung Hinweis: Siehe Markierungen zur Bedienung unter jedem Docking-Adapter. Deutsch Display Especificaciones Un haut-parleur satellite ne fonctionne pas lorsqu’il lit un CD sur l’ordinateur: Ce type de phénomène est susceptible de se produire sur de nouveaux systèmes d’ordinateur : un satellite ne fonctionne pas lors de la lecture d’un CD mais le système fonctionne bien lors de la lecture de fichiers formatés en WAV. Cela est principalement dû à un défaut de connexion du CD-ROM et de la carte son : un canal de signal est relié à la masse. Veuillez vous référer au manuel du CD-ROM et de la carte son pour régler la connexion du câble. Netz-Adapter iF500 Gedrückt halten… Suchlauf zu niedrigeren Frequenzen, bis ein Kanal gefunden wird. Schnelle Suche rückwärts im aktuellen Track Keine Funktion Español Tous les haut-parleurs ne fonctionnent pas: Veuillez d’abord vérifier si les câbles du haut-parleur sont connectés de manière sécurisée puis vérifiez si les connecteurs d’entrée (Line-in ) sont inversés, vérifiez aussi s’il y a un défaut de la source audio. Fernbedienung N 31 Escuchar la radio FM 27 Si vous avez d’autres questions ou préoccupations concernant les Produits Edifier Veuillez consulter notre site Internet : www.edifier.com, ou envoyez un courriel à Edifier Support pour davantage d’aide: [email protected], Si vous préférez, vous pouvez nous contacter par téléphone, Numéro Gratuit: 1-877-EDIFIER (334-3437). m Saltar a la pista anterior Nada 8. Agudos +/-: Ajuste de agudos +/-7 9. Graves+/-: Ajuste de graves +/-10 10. Vol+/Vol-: Ajuste del control de volumen en 50 pasos Guide de dépannage Satellite : RMS 2 x 10W (THD + N =10%, f0= 1KHz) m w Schneller Rücklauf Eingabe Drücken… UKW Voreinstellungsgruppe wechseln iPod Zum vorherigen Track springen AUX Keine Funktion 26 iPod AUX “ ”: Entrada FM Français Caisson de basse : RMS 32W (THD + N =10%, f0= 80Hz) If you have any further questions or concerns regarding Edifier Products Please visit our website at: www.edifier.com, or email Edifier Support for further assistance at: [email protected], If you prefer, you may contact us by phone, Toll Free: 1-877-EDIFIER (334-3437). w R w Ü mB w H Pulse y mantenga pulsado para… Buscar frecuencia menor hasta fijar un canal Retroceder rápido por la pista en curso Nada Español 7. Panel de navegación: Menu: Entrada Pulse para… FM Una pulsación para pasar a “Búsqueda automática”; una pulsación más para entrar en la selección de región; una pulsación más para volver al modo normal. iPod Igual a una pulsación en el botón del “Menú” en Ipod (solo estructura de menú clásico) AUX Nada “ ”: Entrada Pulse para… FM Cambiar entre los grupos predeterminados Appuyez et maintenez pour… Parcourir la plage de fréquences vers le bas jusqu’à capter une station Reculer rapidement dans la piste actuelle Pas d’effet Caractéristiques techniques Poor FM reception: In certain circumstance, the reception of locked station is poor due to the weak FM signal and strong environmental interference. Try to move the system to another place to get better signal reception. G B B G Retroceso rápido Entrada Pulse para… FM Saltar por los grupos predeterminados iPod Saltar a la pista anterior AUX Nada Guía de uso del mando a distancia Passez en réception FM et sélectionnez un groupe de stations mémorisées: Poussez sur le bouton « INPUT » du panneau de contrôle ou sur la touche “FM”de la télécommande pour passer sur le récepteur radio FM. Le système passe sur la dernière station radio sélectionnée. Le numéro du groupe de stations mémorisées et la fréquence de la station sont affichés à l’écran. Poussez sur le bouton “FM” de la télécommande lorsque le récepteur est allumé (sur la source FM) pour que le système passe d’un des 3 groupes de stations au suivant. Français Noise coming from speakers: Amplifier circuitry of this product generates little noise, while the background noise of some VCD/DVD player or computer sound card are too high. Please keep the system in active mode and remove the audio source, if no sound can be heard at 1 meter away from the system, then there is no problem with this product. w m D G w m Gedrückt halten… Suchlauf zu höheren Frequenzen, bis ein Kanal gefunden wird. Schnelle Suche vorwärts im aktuellen Track Keine Funktion Español Pas d’effet Appuyez et maintenez pour… Parcourir la plage de fréquences vers le haut jusqu’à capter une station Avancer rapidement dans la piste actuelle Pas d’effet Appuyez pour… Fonctionne en combinaison avec la touche « Menu » pour terminer la recherche automatique et la sélection régionale Jouer le morceau actuel Pas d’effet Puissance de sortie : w m w Ö m Adapterkabel 2,5mm auf 3,5mm Schneller Vorlauf Eingang Drücken… UKW Voreinstellungsgruppe wechseln iPod Zum nächsten Track springen AUX Keine Funktion 25 Écouter la radio FM 17 System does not work at all: 1. Please check if power is connected, and if the wall outlet is switched on. 2. Please check if the amplifier is still in STBY mode 3. Please check if the master volume is turned to minimum 4. Please check if the audio input cable is connected correctly 5. Please check if there is signal from audio source m m m Français Passer à la piste suivante Pas d’effet Magnetic interference: This system is complete magnetically shielded, and can be placed near TV or monitor. But since magnet of the subwoofer driver is large, some magnetism leakage is inevitable when the system is too close to the monitor, and it is recommended to keep a 1 meter distance between the speaker system and monitor or TV set. m m E D m 16 One satellite speaker does not function when playing CD from computer: This kind of phenomena is prone to happen on new computer systems that one satellite does not function when playing CD, but system works fine when playing WAV formatted files. This is mainly due to the fault connection of CD-ROM and sound card, that one channel of signal is shorted to the ground. Please refer to the manual of CD-ROM and sound card to adjust the wire connection. W M Français Not all speakers function: Please first check if the speaker wires are connected securely; then check if the Line-in connectors are reversed; check also if the audio source is at fault. D M 15 Troubleshooting w m m w E D A 1 m 2 P 3 P E M m m MH m iPod AUX “ ”: Source Appuyez pour… FM Pas d’effet iPod Jouer le morceau actuel AUX Pas d’effet 8. Treble+/-: réglage des aigus de +7 à -7 9. Bass+/-: réglage des basses de +10 à -10 10. Vol+/Vol-: réglage du volume principal sur 50 niveaux 8 E D C n uc on A U A m mm m Entrada (AUX) m m R A 7. Clavier de navigation : Menu : Source Appuyez pour… FM Une pression pour passer en « recherche automatique » ; une seconde pression pour la sélection régionale ; une nouvelle pression pour revenir en mode normal. iPod Équivalent à une pression sur la touche « Menu » de l’iPod (uniquement avec une structure de menu classique) AUX Pas d’effet “ ”: Source Appuyez pour… FM Passer d’un groupe de stations mémorisées à l’autre English Bass unit: Mid-range: Treble unit: Dimension: Net Weight: Gross Weight: m m m m m U sa on de a é écommande 7 Satellite: RMS 2 x 10W (THD + N =10%, f0= 1KHz) Subwoofer: RMS 32W (THD + N =10%, f0= 80Hz) ≥85 dBA ≤0.5% AUX: Satellites: 150 mV ± 50 mV Subwoofer: 100 mV ± 50 mV iPod: Satellites: 150 mV ± 50 mV Subwoofer: 100 mV ± 50 mV AUX, iPod, FM Master volume control on both the remote control & the control panel, separate bass/treble adjustment on the remote control 5.75 inch, magnetically shielded, 6Ω 2.75 inch, magnetically shielded, 5Ω 2.5 inch, magnetically shielded, 6Ω 376mm×390mm×240mm Approx 4.7 kg Approx 6.1 kg m m M w N m Guía de uso del mando a distancia m Store a favorite channel to the preset group: 1. Press and hold the number keys (1 to 6) on the remote controller to store the current channel to the current preset group. Totally 18 channels can be set to 3 preset groups, with different index “1.x”, “2.x” and “3.x” shown on display. 2. Press the “MENU” button when tuner is on, after “Auto” is shown on the display, press “SELECT” button to start “auto search”. The first 18 channels locked down will be stored to the preset groups from FM1 to FM3. Specification & E.I.D.C. Instruction 2 5 mm mm iPod AUX “Select”: Source FM w B H mG Pulse y mantenga pulsado para… Buscar frecuencia mayor hasta fijar un canal Avanzar rápido por la pista en curso Nada Español A CA … Tuning the radio: To find a channel with a stronger signal, or tune to the target channel, you can: 1. Press and hold “ ” on the remote controller to seek to a higher frequency, or “ ” to a lower frequency, until getting one channel locked down. 2. Press the “ ” or “ ” on the control panel to skip between preset groups 3. Press “ / ” to manually tune to a lower/higher frequency step by step, the step frequency is 0.1MHz. w N w R K m Avance rápido Entrada Pulse para… FM Saltar por los grupos predeterminados iPod Saltar a la siguiente pista AUX Nada Conexión m P Passer à la piste précédente Pas d’effet mG m mm w Abbildungen und Funktionsdarstellung 24 m iPod AUX “ ”: Source FM 22 W m w w Eingangsanzeigen Español m m Current frequency English m … Press and hold to… Seek into lower frequency until lock down one channel Fast rewind in current track Do nothing W Manual de usuario 23 m Switch to FM tuner and select the preset group: Press “INPUT” button on the control panel or the “FM” key on remote controller to turn on the FM tuner, the system will switch to the last FM station selected. Preset group index and channel frequency will be shown on the display panel. Press the “FM” button on the remote controller when the tuner is on (in FM input), the system will switch between the 3 preset groups. V Verbindungskabel 2,5mm auf 3,5mm W N Verbindungskabel 3,5mm auf RCA • Bedienungsanleitung m V Botón de selección de entrada M m • Adapterkabel 2,5mm auf 3,5mm H Taste Lautstärke erhöhen – M Listening to the FM radio Guidance for using remote controller m m m • Verbindungskabel 3,5mm auf RCA w Netzschalter m M m w w Adaptador de base para el iPod mm m m AU G B mR Ilustraciones y dibujo funcional m M 6 Input type: Adjustment: m –M P Adaptador de corriente Español m m 3 iF500 Nota: Consulte los símbolos debajo de cada adaptador de base para su uso. m U V 3 5 mm Mando a distancia R m R m m 2 5 mm V Español U sa on de a é écommande –M English English Skip to previous track Do nothing m m Botón para bajar volumen 14 2 P Ö m 21 Bouton de sélection de la source mm 5 iPod AUX “ ”: Input FM m • Verbindungskabel 2,5mm auf 3,5mm B W w Botón para subir volumen R Do nothing Do nothing Do nothing m • 12 Stück Docking-Adapter für iPod Pantalla digital–muestra la frecuencia de FM, los grupos predeterminados, el control de volumen, modulador de valores de graves/agudos y etc. Français 1 K Gw N m Panel de pantalla 500 mm 7m mm 1. " " – Power on/off Press this button to set the system on / off. The system can recall the volume last adjusted; turn off the main power when unused for a long period of time. 2. " " -- Mute A single press shall mute the system, leaving the corresponding mode indicator blinking, until another press to revoke the system. 3. Presets – figure “1” to “6” When FM tuner is on: Press to skip to a stored radio station. Press and hold to store the current channel into the current preset group, figure on the display panel will show the preset group index. 4. Input selection buttons: FM: press this key when playing from iPod or AUX, the system will turn to FM; press this key when FM is on, will turn the system from FM preset group 1(FM1) to preset group 2(FM2), then preset group 3(FM3), and back to preset group 1. Preset index will be shown on the display panel iPod: plays from your iPod. Aux: plays from an auxiliary audio sources, such as an MP3/CD/PC soundcard. Connect the audio sources to the system using the included 3.5mm to 2.5mm adapter cable. 5. “ ” Press and hold to… Input Press to… FM Tune to lower frequency by one step (0.1MHz) Tune to lower frequency continuously, with 0.1MHz every step iPod Move the highlight band of iPod menu down for one step Move the highlight band of iPod menu down continuously AUX Do nothing Do nothing 6.“ ” Input Press to… Press and hold to… FM Tune to higher frequency by one step (0.1MHz) Tune to higher frequency continuously, with 0.1MHz every step iPod Move the highlight band of iPod menu up for one step Move the highlight band of iPod menu up continuously Do nothing AUX Do nothing N Interruptor When operating the remote controller, point the remote controller to the IR window on the base of iF500 as shown in the picture, the optimum operational distance is within 7 meters. When a remote command is sent, power indicator on the remote controller will blink. Refer to guidance for using remote controller. Signal to noise ratio: Distortion: Input sensitivity: m R G mR m • Fernbedienung W Indicadores de entrada Français É ab G D N B W B D m m • Netz-Adapter H Cable del adaptador 3.5mm-2.5mm Ilustraciones y dibujo funcional 13 Guidance for using remote controller Verpackungsinhalt m m m Adaptador de base para el iPod Adaptateur pour iPod Bouton de réduction du volume m E P m Cable de conexión de 2.5mm-3.5mm Afficheur numérique – affiche la fréquence FM, les groupes de stations mémorisées, le volume principal, les valeurs de réglage des basses et des aigus… English Cable de conexión de 3.5mm-RCA N Illustrations et description des fonctions w D w m m S CHERHE TSH NWE SE V B G D B D W mG B w • Cable de conexión de 3.5mm-RCA • Manual de usuario M m Écran d’affichage English Press and hold to… m m R U Illustrations et description des fonctions 3 7. Navigation pad: Menu: Input Press to… FM One press to switch on the “Auto Search”; one more press to entry the region selection; one more press to return to normal mode. iPod Equals to one press on the “Menu” key on iPod (classic menu structure only) AUX Do nothing “ ”: Input Press to… FM Switch between preset groups m m mm A m m W m m m Input selection button 3. While iPod is docked, its menu navigation is accessible either by operating the touch sensible pad (screen) on iPod itself or by operating the remote controller. Refer to guidance for using remote controller. m m Bouton d’augmentation du volume 2. Dock your iPod with correct dock adapter, or connect to a secondary source using the included 2.5mm to 3.5mm adapter cable. • Cable de conexión de 2.5mm-3.5mm m m m V Volume up button 1. Connect the speaker system to the A.C. wall outlet with the included power adapter. m m D m m m H m m Interrupteur d’alimentation (AUX) Line in G N E m G m H m m m m B E • iF500 • Cable del adaptador 3.5mm-2.5mm m m Digital display – display FM frequency, preset groups, master volume, bass/treble trimmer value and etc. Power output: mm mm Dock adapter for iPod To A.C. m m m N N P P D E B • 12 piezas del adaptador de base para el iPod Indicateurs de source Fast forward Input Press to… FM Skip between preset groups iPod Skip to next tracks AUX Do nothing Making connections m H m Power switch 8. Treble+/-: +/-7 treble adjustment 9. Bass+/-: +/-10 bass adjustment 10:Vol+/Vol-: 50-step master volume adjustment A mm mm Input indicators Volume down button m m NSTRUCC ONES DE SEGUR DAD mm K • Adaptador de corriente m m N Illustrations and functional depict Display panel m 3 5 mm mm m U Note: Refer to the markings under each dock adapter for use. 2 5 mm P • iF500 m m m m m P mm m mm m m U D m • Mando a distancia • M mm Power adapter V Contenido de la caja m Auspacken der Verpackungsbox W ch ge S che he sh nwe se mm P D iF500 E mm • V V m P D P N P Dock adapter for iPod m D Desembale la caja m m • 12 m • 2.5mm to 3.5mm connecting cable Remote controller m m m • E m m 500 • A m m • 12 pcs dock adapter for iPod m m • • Remote controller ns ucc ones mpo an es de segu dad Déba e a bo e Cons gnes de secu e mpo an es 39 Deutsch 40 Deutsch-
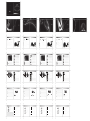 1
1

EDIFIER IF500 Manual de usuario
- Categoría
- Altavoces de acoplamiento
- Tipo
- Manual de usuario
en otros idiomas
- français: EDIFIER IF500 Manuel utilisateur
- English: EDIFIER IF500 User manual
- Deutsch: EDIFIER IF500 Benutzerhandbuch
Artículos relacionados
-
EDIFIER IF500 El manual del propietario
-
EDIFIER E3350 El manual del propietario
-
EDIFIER C2XD Manual de usuario
-
EDIFIER Esiena iF360BT Manual de usuario
-
EDIFIER SPK-EF-MP300P.B.R2 Ficha de datos
-
EDIFIER Tick Tock Dock Manual de usuario
-
EDIFIER E20 Manual de usuario
-
EDIFIER S330D El manual del propietario
-
-
EDIFIER S730 Manual de usuario