Profusion Heat HFU15-E Guía del usuario
- Categoría
- Calentadores espaciales
- Tipo
- Guía del usuario

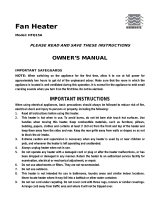
Digital Fan Heater
Stop
Please read and understand this manual before any assembly
or use of this product.
Before beginning assembly of product, make sure all parts
are present.
Customer Service: 1-888-538-0082 / [email protected]
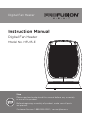
Instruction Manual
Digital Fan Heater
Model No. HFU15-E

Digital Fan Heater
2
Table of Contents
Technical Data
Model Number : HFU15-E
Control Style
:
:
Digital control without remote
Rated 120 V AC 60 Hz 1500 W
Power Consumption : 1500 W
2
3
5
7
7
7
Technical Data
Important Safety Instructions
Operation
Safety Features
Cleaning and Maintenance
Storage

3
Digital Fan Heater
Important Safety Instructions
When switching on the appliance for the first time, allow it to run at full power for about two hours to get
rid of the unpleasant smell. Make sure that the room in which the appliance is located is well ventilated
during this operation. It is normal for the appliance to emit small cracking sounds when you turn it on if for
the first time.
1. Read all instructions before using this heater.
2. This heater is hot when in use. To avoid burns, do not let bare skin touch hot surfaces. Use handles (if
provided) when moving the unit. Keep flammable materials such as furniture, pillows, bedding, papers,
clothes and curtains at least 3 feet (0.9 m) from the front and top of the heater and away from the
sides and rear. Keep the rear grille away from walls or drapes to prevent blocking the air intake.
3. Extreme caution and supervision are necessary when any heater is used near children or invalids and
whenever the heater is left operating and unattended.
4. Always unplug heater when not in use.
5. Do not operate any heater with a damaged cord or plug or after the heater malfunctions, has been
dropped or damaged in any manner. Discard heater, or return it to an authorized service facility for
examination, electrical or mechanical adjustment or repair.
6. Do not use outdoors.
7. This heater is not intended for use in bathrooms, laundry areas, and similar indoor locations. Never
locate heater where it may fall into a bathtub or other water container.
8. Do not run the cord under carpeting. Do not cover cord with throw rugs, runners or the like. Do not
be tripped over.
9. To disconnect the heater, turn controls to OFF, then unplug the power cord from the outlet.
10. Connect to properly polarized outlets only.
11. Do not insert or allow foreign objects to enter any ventilation or exhaust opening as this may cause
electric shock, fire or damage to the heater.
12. To prevent a possible fire, do not block air intakes or exhaust in any manner. Do not use on soft
surfaces, like a bed, where openings may become blocked.
13. A heater has hot or arcing or sparking parts inside. Do not use it in areas where gasoline, paint or
flammable liquids are used or stored.
14. Use this heater only as described in this manual. Any other use not recommended by the manufacturer
may cause a fire, electric shock, personal injury or property damage.
15. To prevent overload and blown fuses, be sure that no other appliance is plugged into the same outlet,
or into another outlet wired into the same circuit.
PLEASE READ ALL INSTRUCTIONS BEFORE USING THIS HEATER.
WARNING! When using electrical appliances, basic precautions should always be followed to reduce risk
of fire, electric shock and injury to persons or property, including the following:

4
Digital Fan Heater
SAVE THESE INSTRUCTIONS
CAUTION:
TO PREVENT ELECTRIC SHOCK, MATCH WIDE BLADE OF PLUG TO WIDE SLOT
AND FULLY INSERT.
16. It is normal for the heater’s plug and cord to feel warm to the touch. A plug or cord that becomes
very hot to the touch or becomes distorted in shape may be a result of a worn electrical outlet. Worn
outlets should be replaced prior to further use of the heater. Plugging heater into a worn
outlet/receptacle may result in overheating of the power cord or fire.
17. Ensure the heater is on a stable, secure surface to eliminate the potential of tipping it over.
18. Always plug heaters directly into a wall outlet/receptacle. Never use with an extension cord or
relocatable power tap (outlet/power strip).
19. Be sure that the plug is fully inserted into the appropriate outlet. Remember that receptacles may
deteriorate due to aging and continuous use. Check periodically for signs of overheating or
deformations evidenced by the plug. If such overheating occurs, do not use the outlet and CALL your
electrician.
20. Check that neither the appliance nor the power cable has been damaged in any way during
transportation.
21. Make sure that no pieces of polystyrene or other packaging material have been left between elements
of the appliance. It may be necessary to pass over the appliance with a vacuum cleaner prior to initial
use.
DANGER: High temperatures may be generated under certain abnormal conditions. Do not partially or
fully cover or obstruct the front of this heater.
22. This appliance is not intended for use by persons (including children) with reduced physical, sensory or
mental capabilities, or lack of experience and knowledge, unless they have been given supervision or
instruction concerning use of the appliance by a person responsible for their safety. Children should be
supervised to ensure that they do not play with the appliance.
PET OWNERS WARNING: The health of some small pets including birds are extremely
sensitive to the fumes produced during the first-time use of many appliances. These fumes
are not harmful to humans but we recommended that you do not use your heater around
birds and small pets during its initial use until the manufacturing corrosion (anti-corrosion)

5
Digital Fan Heater
Operation
LED Screen:
Control Panel:
Plug the heater into a functional 120 V AC, 60 Hz outlet; make sure that the plug is fully inserted in the
outlet. Once plugged in, your heater is on standby mode. The LED screen displays the current room
temperature. The heater can be controlled through the control panel.
1. Turning unit ON/OFF
a. Press the POWER button ( ) once to turn on the heater at the HIGH output setting; LED screen
displays . At this setting, the heater output is 1500 W.
for 30 seconds to dissipate residual heat.
2.Selecting he ating power
Press the MODE button ( ) to select mode:High Fan Low . Every press of the button selects a
High: 1500 W (High setting is selected upon startup)
Low: 900 W (Low setting)
Fan: 15 W (FAN output only)
3. Oscillation
a. Press the oscillation button ( ). The heater will begin oscillating for better heat dispersion.
Press the timer button ( ) to set the timer between 0 and 12 hours, in 1-hour increments.
it work continuously.
NOTE: While the timer is set, the LED display will show the set time. When the timer is not set,
the LED display shows the room temperature.
( )

6
Digital Fan Heater
5. Temperature setting
When the heater is working at the “low” or “high” setting, you can set the temperature by pressing
the TEMP button( ).
After pressing the TEMP button ( ), the LED screen will show and the default temperature (75°F),
or the last set value, will be displayed. To change the setting, keep pressing the TEMP button ( ) ;
the temperature will increase in 1°F (1°C) increments, between 41°F (5°C) and 90°F (32°C). The
temperature will set and stop flashing within 5 seconds once you finish pressing the button.
the room temperature is higher than the set value, heater will not turn on; if the room temperature is
lower than the set value, the heater will operate until the set value has been reached.
6. Temperature display (°F / °C)
To switch temperature setting from °F to °C, press the Timer button ( ) and TEMP button ( )
at the same time for two seconds.
7. Excessive heat alarm
If the room temperature exceeds 122°F (50°C), the heater’s alarm will start buzzing until the heater is
heater can be turned on again.
NOTE: Once a temperature has been set, the heater will remain in auto mode to maintain this
a safety feature.
A

7
Digital Fan Heater
Safety features
that may cause high temperatures. Wait five to ten minutes for the unit to cool down. Then plug it back in,
and resume its normal operation.
Tip-over switch: Your heater is equipped with a “tip-over switch” that is designed to automatically shut the
automatically come on again. This is a safety feature to avoid risks of fire.
Storage
1. Clean the heater as described in “Cleaning/Maintenance” section.
2. Wipe all parts to dry.
3. Pack the heater and the power cord in the original carton and store it in a cool, dry place.
Cleaning and Maintenance
Cleaning:
a. Interior dust can often be removed by using a vacuum cleaner with a crevice tool attachment.
b. Do not spray cleaning liquids or other chemicals directly on the unit.
of the unit. Don’t allow any water to drip into the heater or in the switches. Make sure the heater is
completely dry before turning it on again.
CAUTION: DO NOT ALLOW WATER TO RUN INSIDE THE HEATER AS THIS COULD CREATE A
FIRE OR ELECTRIC SHOCK HAZARD.
WARNING: THIS HEATER CONTAINS NO USER-SERVICEABLE PARTS. ANY SERVICING OR
REPAIRS SHOULD BE PERFORMED BY AN AUTHORIZED TECHNICIAN.

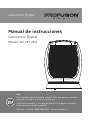
Caloventor Digital
Caloventor Digital
Modelo No. HFU15-E
Alto
Lea y comprenda el presente manual antes de realizar cualquier
tarea de armado o uso de este producto.
Antes de comenzar el armado del producto, asegúrese de que
todas las piezas estén presentes.
Servicio al cliente:1-888-538-0082 / [email protected]
Manual de instrucciones

Caloventor Digital
2
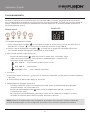
Tabla de contenidos
Datos técnicos
Número de modelo : HFU15-E
Estilo de control
:
:
Control digital sin mando a distancia
Valor nominal 120 V AC 60 Hz 1500 W
Consumo de energía : 1500 W
2
3
5
7
7
7
Datos técnicos
Instrucciones de seguridad importantes
Funcionamiento
Funciones de seguridad
Limpieza y mantenimiento
Almacenamiento

3
Caloventor Digital
Instrucciones de seguridad importantes
Cuando encienda el aparato por primera vez, déjelo funcionar a plena potencia durante unas dos horas
para eliminar el olor desagradable. Asegúrese de que la habitación en la que se encuentra el aparato esté
bien ventilada durante esta operación. Es normal que el aparato emita pequeños chasquidos cuando se
enciende por primera vez.
1. Lea todas las instrucciones antes de utilizar este calefactor.
2. Este calefactor está caliente cuando se lo utiliza. Para evitar quemaduras, no deje que la piel desnuda
toque las superficies calientes. Utilice las manijas (si se suministran) cuando mueva la unidad.
Mantenga los materiales inflamables como muebles, almohadas, ropa de cama, papeles, ropa y
cortinas a una distancia mínima de 0.9 m (3 pies) de la parte delantera y superior del calefactor y
manténgalos alejados de los costados y de la parte trasera. Mantenga la rejilla trasera alejada de
paredes o cortinas para evitar el bloqueo de la entrada de aire.
3. Es necesario extremar la precaución y la supervisión cuando se usa cualquier calefactor cerca de niños
o personas con discapacidad y cuando se deja el calefactor en funcionamiento y desatendido.
4. Desenchufe siempre el calefactor cuando no lo utilice.
5. No utilice ningún calefactor con un cable o enchufe dañado o después de que el calefactor funcione
incorrectamente o se haya caído o averiado de alguna manera. Deseche el calefactor o devuélvalo a
un centro de servicio autorizado para su revisión, ajuste o reparación eléctrica o mecánica.
6. No lo utilice al aire libre.
7. Este calefactor no está diseñado para ser utilizado en baños, áreas de lavandería y ubicaciones
interiores semejantes. Nunca coloque el calefactor en un lugar donde pueda caer dentro de una
bañera u otro recipiente de agua.
8. No extienda el cable por debajo de la alfombra. No cubra el cable con alfombras, tapetes o similares.
No coloque el cable debajo de muebles o electrodomésticos. Disponga el cable lejos de las áreas de
paso y colóquelo en un lugar donde no se pueda tropezar con él.
9. Para desconectar el calefactor, gire los controles a la posición APAGADO, luego desenchufe el cable
de alimentación del tomacorriente.
10. Conéctelo sólo a tomacorrientes con la polarización adecuada.
11. No inserte ni permita que entren objetos extraños en ninguna abertura de ventilación o de escape, ya
que podrían provocar una descarga eléctrica o un incendio, o dañar el calefactor.
12. Para evitar un posible incendio, no bloquee las entradas y salidas de aire de ninguna manera. No lo
utilice en superficies flexibles, como por ejemplo una cama, donde las aberturas puedan bloquearse.
13. Un calefactor contiene piezas calientes, o con arcos o chispas en su interior. No lo utilice en áreas
donde se usa o almacena combustible, pintura o líquidos inflamables.
14. Utilice este calefactor únicamente como se describe en este manual. Cualquier otro uso no
recomendado por el fabricante puede causar un incendio, una descarga eléctrica, lesiones a las
personas o daños a la propiedad.
LEA TODAS LAS INSTRUCCIONES ANTES DE UTILIZAR ESTE CALEFACTOR.
ADVERTENCIA: Cuando se utilizan aparatos eléctricos, siempre se deben seguir las precauciones básicas
para reducir el riesgo de incendio, descarga eléctrica y lesiones personales, entre las que se incluyen las
siguientes:

4
Caloventor Digital
CONSERVE ESTAS INSTRUCCIONES.
PRECAUCIÓN: PARA EVITAR UNA DESCARGA ELÉCTRICA, HAGA COINCIDIR LA CLAVIJA
ANCHA DELENCHUFE CON LA RANURA ANCHA E INSÉRTELA A FONDO.
15. Para evitar sobrecargas y fusibles fundidos, asegúrese de que ningún otro aparato esté enchufado en
el mismo tomacorriente o en otro tomacorriente conectado en el mismo circuito.
16. Es normal que el enchufe y el cable del calefactor estén calientes al tacto. Un enchufe o cable que
está muy caliente al tacto o se deforma puede ser el resultado de un tomacorriente desgastado. Los
tomacorrientes desgastados deberán reemplazarse antes de utilizar el calefactor. Si enchufa el
calefactor en un receptáculo o tomacorriente desgastado, el cable de alimentación se puede
sobrecalentar o provocar un incendio.
17. Asegúrese de que el calefactor se encuentre sobre una superficie estable y segura para eliminar la
posibilidad de un vuelco.
18. Conecte siempre los calefactores directamente a un tomacorriente/receptáculo de pared. Nunca
utilice el calefactor con un cable de extensión o tomacorriente reubicable (regleta multicontactos o
zapatilla).
19. Asegúrese de que el enchufe esté completamente insertado en el tomacorrientes apropiado. No
olvide que los receptáculos también se deterioran debido al envejecimiento y al uso continuo.
Compruebe periódicamente si hay signos de sobrecalentamiento o deformaciones manifestadas por
el enchufe. Si se produce tal sobrecalentamiento, no utilice el receptáculo y LLAME a su electricista.
20. Verifique que ni el aparato ni el cable de alimentación hayan sufrido daños durante el transporte.
21. Asegúrese de que no haya quedado ninguna pieza de poliestireno u otro material de embalaje entre
los elementos del aparato. Es posible que sea necesario pasar la aspiradora sobre el aparato antes del
primer uso.
PELIGRO: Pueden generarse temperaturas altas en ciertas condiciones anormales. No cubra parcial o
totalmente ni obstruya la parte delantera de este calefactor.
22. Este aparato no está destinado a ser utilizado por personas (incluidos los niños) con discapacidades
físicas, sensoriales o mentales, o con falta de experiencia y conocimientos, a menos que hayan sido
supervisados o instruidos en el uso del aparato por una persona responsable de su seguridad. Los
niños deben ser supervisados para asegurarse de que no jueguen con el aparato.
ADVERTENCIA A LOS DUEÑOS DE MASCOTAS: Algunos animales domésticos pequeños,
incluidos los pájaros, son extremadamente sensibles a los humos producidos durante el primer
uso de la mayoría de los aparatos. Estos humos no son perjudiciales para los seres humanos,
pero le recomendamos que no utilice su calefactor cerca de aves y mascotas pequeñas
durante su uso inicial hasta que se quemen los recubrimientos anticorrosivos de fabricación.

5
Caloventor Digital
Funcionamiento
Pantalla LED:
Panel de control:
Enchufe el calefactor en un tomacorrientes funcional de 120V CA, 60 Hz; asegúrese de que el enchufe
esté completamente insertado en el tomacorrientes. Una vez conectado, su calefactor está en el modo de
espera. La pantalla LED muestra la temperatura actual del ambiente. El calefactor puede controlarse a
través del panel de control.
1. Encendido/apagado de la unidad
a. Pulse el botón de encendido ( ) una vez para encender el calefactor en el ajuste de salida alto; La
pantalla LED muestra ( ). En este ajuste, la salida del calefactor es de 1500 W.
b. Vuelva a pulsar el botón de encendido ( ); el calefactor se apagará. El ventilador continuará.
funcionando durante 30 segundos para disipar el calor residual.
2. Selección de la potencia de calefacción
Presione el botón Modo ( ) para seleccionar el modo: AltoVentiladorBajo
Cada vez que pulse el botón, seleccionará un modo diferente. La pantalla LED
mostrará el modo seleccionado.
Alto: 1500 W (El ajuste alto se selecciona al iniciar)
Bajo: 900 W (Ajuste bajo)
Ventilador: 15 W (Solo salida de ventilador)
3. Oscilación
a. Presione el botón oscilación ( ) una vez. El calefactor comenzará a oscilar para una mejor dispersión
del calor.
b. Vuelva a pulsar el botón para apagar la oscilación.
4. Temporizador de apagado automático
Cuando el calefactor está en funcionamiento, puede ajustar el temporizador para apagarlo
automáticamente a una hora específica.
Presione el botón temporizador( ) para ajustar el temporizador entre 0 y 12 horas, en
incrementos de 1 hora.
Para cancelar el ajuste de tiempo, seleccione la hora 0 H. El calefactor se apagará. Vuelva a
encender el calefactor para hacerlo funcionar de manera continua.
NOTA: Mientras el temporizador esté configurado, la pantalla LED mostrará el tiempo establecido.
Cuando eltemporizador no esté configurado, la pantalla LED mostrará la temperatura ambiente.

6
Caloventor Digital
5. Ajuste de temperatura
Cuando el calefactor está funcionando en el ajuste "bajo" o "alto", puede ajustar la temperatura
presionando el botón TEMP ( ).
Luego de presionar el botón TEMP ( ), la pantalla LED mostrará y se mostrará la temperatura
predeterminada 75°F (24°C), o el último valor establecido. Para cambiar la configuración, siga
pulsando el botón TEMP ( ) ; la temperatura aumentará en incrementos de 1°F (1°C), entre 41°F (5°C)
y
90°F (32°C). La temperatura se establecerá y dejará de parpadear dentro de 5 segundos una vez
que deje de pulsar el botón.
Una vez que la temperatura se haya establecido, el calefactor se encenderá y se apagará para
mantener esta temperatura. Si la temperatura ambiente es mayor al valor establecido, el calefactor
no se encenderá; si la temperatura ambiente es menor al valor establecido, el calefactor funcionará
hasta alcanzar el valor establecido.
6. Pantalla de temperatura (°F / °C)
Para cambiar el ajuste de temperatura de °F a °C, pulse los botones temporizador ( ) y TEMP ( ) al
mismo tiempo durante dos segundos.
7. Alarma de exceso de calor
Si la temperatura ambiente excede los 122°F (50°C), la alarma de exceso de calor comenzará a emitir un
zumbido hasta que el calefactor se apague y se desenchufe. En ese caso, apague el calefactor y
desenchúfelode inmediato, luego deje que el calefactor se enfríe y que la temperatura ambiente baje. Una
vez que la temperatura ambiente vuelve a los niveles normales, el calefactor puede volver a encenderse.
A
NOTA: Una vez que la temperatura se haya establecido, el calefactor permanecerá en modo automático
para mantener esta temperatura. Para volver al modo high (alto) / low (bajo) / fan (ventilador), apague
y desenchufe el calefactor, y luego vuelva a encenderlo. Es normal que el ventilador funcione durante
30 segundos luego de que el calefactor se ha apagado, esta es una función de seguridad.

7
Caloventor Digital
Funciones de seguridad
Protección contra sobrecalentamiento: Este calefactor incluye una función de protección contra sobreca-
lentamiento que apaga la unidad cuando las piezas del calefactor se sobrecalientan. Si esto ocurre, apague
el calefactor, desenchúfelo, y retire cualquier objeto en el calefactor o en sus alrededores que pueda causar
altas temperaturas. Espere de cinco a diez minutos para que la unidad se enfríe. Luego vuelva a conec-
tarla y reanude la operación normal.
Interruptor de vuelco: Su calefactor está equipado con un "interruptor de vuelco", que está diseñado para
apagar automáticamente el calefactor si se inclina hacia adelante o hacia atrás. Cuando el calefactor
regrese a la posición vertical normal, se volverá a encender automáticamente. Esta es una característica de
seguridad para evitar riesgo de incendios.
Almacenamiento
1. Limpie el calefactor como se describe en la sección "Limpieza y mantenimiento".
2. Seque todas las piezas.
3. Guarde el calefactor y el cable de alimentación en la caja original y consérvela en un lugar fresco y
seco.
Limpieza y mantenimiento
Antes de realizar cualquier tipo de actividad de limpieza o mantenimiento, asegúrese de que el calefactor
esté apagado y desenchufado de la fuente de alimentación. Deje que el calefactor se enfríe por completo
antes de comenzar a limpiarlo.
Limpieza:
a. El polvo interior con frecuencia puede ser removido usando una aspiradora con un accesorio especial
para hendiduras.
b. No aplique líquidos de limpieza en aerosol ni otros productos químicos en la unidad
c. Para limpiar la carcasa, utilice un paño limpio, suave y ligeramente húmedo para eliminar suavemente la
suciedad de la superficie de la unidad. No permita que entre agua en el calefactor o los interruptores.
Asegúrese de que el calefactor esté completamente seco antes de volverlo a encender.
PRECAUCIÓN: NO PERMITA QUE EL AGUA PENETRE EN ELCALEFACTOR, YA QUE PODRÍA
PROVOCAR UN INCENDIO O UNA DESCARGA ELÉCTRICA.
ADVERTENCIA: ESTE CALEFACTOR CONTIENE PIEZAS QUE EL USUARIO NO PUEDE REPARAR.
TODO SERVICIO O REPARACIÓN DEBE SER REALIZADO POR UN TÉCNICO AUTORIZADO.
-
 1
1
-
 2
2
-
 3
3
-
 4
4
-
 5
5
-
 6
6
-
 7
7
-
 8
8
-
 9
9
-
 10
10
-
 11
11
-
 12
12
-
 13
13
-
 14
14


Profusion Heat HFU15-E Guía del usuario
- Categoría
- Calentadores espaciales
- Tipo
- Guía del usuario
en otros idiomas
- English: Profusion Heat HFU15-E User guide
Artículos relacionados

Otros documentos
-
Sunbeam SEH402-UM Manual de usuario
-
-
 Warmwave HFQ15A Instrucciones de operación
-
Comfort Glow CDE4800 El manual del propietario
-
-
 RedCore R-4 Manual de usuario
-
Holmes HCH8305 Manual de usuario
-
Honeywell HZ445R Manual de usuario
-
-
EAS ELECTRIC EHF201 Manual de usuario

