MERH865RAQ15

Maytag MERH865RAQ15 Manual de usuario

  • ¡Hola! Soy un chatbot de IA específicamente entrenado para ayudarte con el Maytag MERH865RAQ15 Manual de usuario. He revisado el documento y puedo ayudarte a encontrar la información que necesitas o explicarla de manera clara y sencilla. ¡Pregunta lo que necesites!
MA A{3
Precision Touch Control 800
Electric Smoothtop
Table of nts
Important Safety
Instructions ............................... 1-3
Care & Cleaning ...................... 4-6
Self-Clean Oven
Cleaning Procedures
Maintenance ................................. 7
Oven Window
Oven Light
Troubleshooting ........................... 8
Surface Cooking .................... 9-11
Surface Controls
Smoothtop Surface
Oven Cooking ....................... 12-18
Baking
Cook & Hold
Delay Cook & Hold
Keep Warm
Broiling
Sabbath Mode
Oven Racks
_ arranty & Service .................... 19
Guide d utilisation et
d'entretien ................................... 20
Guia de use y cuidado .............. 42
Form No. A/01/08 Part No. 8113P687-60 (_',2006 All rights reserved. Litho U.S.A.
replace any part of your appliance unless it is specifically
recommended in this guide. All other servicing should be
referred to a qualified servicer.
Always disconnect power to appliance before servicing.
ImportantSafety
Warning and Important Safety Instructions appearing in
this guide are not meant to cover all possible conditions
and situations that may occur. Common sense, caution,
and care must be exercised when installing, maintaining,
or operating the appliance.
Always contact the manufacturer about problems or
conditions you do not understand.
Recognize Safety Symbols, Words, Labels
To check if device is properly installed, look underneath
range with a flashlight to make sure one of the rear
leveling legs is properly engaged in the bracket slot. The
anti-tip device secures the rear leveling leg to the floor
when properly engaged. You should check this any time
the range has been moved.
To Prevent Fire or Smoke Dam=
age
Be sure all packing materials are removed from the
appliance before operating it.
Keep area around appliance clear and free from
combustible materials. Flammable materials should not be
stored in an oven.
Many plastics are vulnerable to heat. Keep plastics away
from parts of the appliance that may become warm or hot.
To prevent grease fires, do not let cooking grease or other
flammable materials accumulate in or near the appliance.
Read and follow all instructions before using this
appliance to prevent the potential risk of fire, electric
shock, personal injury or damage to the appliance as a
result of improper usage of the appliance. Use appliance
only for its intended purpose as described in this guide.
To ensure proper and safe operation: Appliance must
be properly installed and grounded by a qualified
technician. Do not attempt to adjust, repair, service, or
in Case of Fire
Use dry chemical or foam-type extinguisher or baking
soda to smother fire or flame. Never use water on a
grease fire.
1. Turn off appliance to avoid spreading the flame.
2. NEVER pick up or move a flaming pan.
3. Smother fire or flame by closing the oven door.
Turn off appliance and ventilating hood to avoid
spreading the flame. Extinguish flame then turn on
hood to remove smoke and odor.
Child Safety
NEVER leave children alone or unsupervised near the
appliance when it is in use or is still hot. Children should
neverbe allowed to sit or stand on any part of the
appliance as they could be injured or burned.
Children must be taught that the appliance and utensils in
it can be hot. Let hot utensils cool in a safe place, out of
reach of small children. Children should be taught that an
appliance is not a toy. Children should not be allowed to
play with controls or other parts of the appliance.
About Your Appliance
To prevent potential hazard to the user and damage to the
appliance, do not use appliance as a space heater to heat
or warm a room. Also, do not use the oven as a storage
area for food or cooking utensils.
Do not obstruct the flow of air by blocking the oven vent.
DO NOT TOUCH HEATING ELEMENTS OR INTERIOR
SURFACES OF OVEN. Heating elements may be hot even
though they are dark in color. Interior surfaces of any
oven become hot enough to cause burns. During and
after use, do not touch, or let clothing or other flammable
materials contact heating elements or interior surfaces of
oven until they have had sufficient time to cool. Other
surfaces of the appliance may become hot enough to
cause burns - among these surfaces are: oven vent
opening and surface near this opening, oven door,
window of oven door.
Do not touch a hot oven light bulb with a damp cloth as
the bulb could break. Should the bulb break, disconnect
power to the appliance before removing bulb to avoid
electrical shock.
NEVER use aluminum foil to cover an oven rack or oven
bottom. Misuse could result in risk of electric shock, fire,
or damage to the appliance. Use foil only as directed in
this guide.
Cooking Safety
NEVER heat an unopened food container in the oven.
Pressure build up may cause container to burst resulting
in serious personal injury or damage to the appliance.
Use dry, sturdy potholders. Damp potholders may cause
burns from steam. Dish towels or other substitutes should
never be used as potholders because they can trail across
hot elements and ignite or get caught on appliance parts.
Wear proper apparel. Loose fitting or long hanging-
sleeved apparel should not be worn while cooking.
Clothing may ignite and cause burns if garment comes in
contact with heating elements.
Always place oven racks in the desired positions while
oven is cool. Slide oven rack out to add or remove food,
using dry, sturdy potholders. Always avoid reaching into
the oven to add or remove food. If a rack must be moved
while hot, use a dry potholder. Do not let potholder
contact hot element in oven.
Use racks only in the oven in which they were shipped/
purchased.
Use care when opening the oven door. Let hot air or steam
escape before removing or replacing food.
PREPARED FOOD WARNING: Follow food
manufacturer's instructions. If a plastic frozen food
container and/or its cover distorts, warps, or is otherwise
damaged during cooking, immediately discard the food
and its container. The food could be contaminated.
Do not allow aluminum foil or meat probe to contact
heating element.
Alwaysturn off all controls when cooking is completed.
Utensil Safety
Follow the manufacturer's directions when using oven
cooking bags.
This appliance has been tested for safe performance
using conventional cookware. Do not use any devices or
accessories that are not specifically recommended in this
guide. Do not use add-on oven convection systems. The
use of devices or accessories that are not expressly
recommended in this guide can create serious safety
hazards, result in performance problems, and reduce the
life of the components of the appliance.
If pan is smaller than element, a portion of the element
will be exposed to direct contact and could ignite clothing
or potholder.
Only certain types of glass, glass/ceramic, ceramic,
earthenware, or other glazed utensils are suitable for
cooktop or oven service without breaking due to the
sudden change in temperature. Follow utensil
manufacturer's instructions when using glass.
cent.
Turn pan handle toward center of cooktop, not out into
the room or over another surface element. This reduces
the risk of burns, ignition of flammable materials, or
spillage if pan is accidently bumped or reached by small
children.
Cooktop
NEVER leave surface units unattended especially when
using high heat. An unattended boilover could cause
smoking and a greasy spillover can cause a fire.
This appliance is equipped with different sized surface
elements. Select pans with flat bottoms large enough to
cover element. Fitting pan size to element will improve
cooking efficiency.
GLASS-CERAMIC SURFACE: NEVER cook on broken
cooktop. If cooktop should break, cleaning solutions and
spillovers may penetrate the broken cooktop and create a
risk of electric shock. Contact a qualified technician
immediately.
Deep Fat Fryers
Use extreme caution when moving the grease pan or
disposing of hot grease. Allow grease to cool before
attempting to move pan.
Ventilating Hoods
Clean range hood and filters frequently to prevent grease
or other flammable materials from accumulating on hood
or filter and to avoid grease fires.
When flaming foods under the hood, turn the fan on.
Cleaning Safety
Clean cooktop with caution. Turn off all controls and wait
for appliance parts to cool before touching or cleaning.
Use care to avoid steam burns if a wet sponge or cloth is
used to wipe spills on a hot surface. Some cleaners can
produce noxious fumes if applied to a hot surface.
Clean only parts listed in this guide.
Self-Clean Oven
Do not clean door gasket. The door gasket is essential for
a good seal. Care should be taken not to rub, damage, or
move the gasket.
Do not use oven cleaners or oven liners of any kind in or
around any part of the self-clean oven.
Important Safety Notice
and Warning
The California Safe Drinking Water and Toxic Enforcement
Act of 1986 (Proposition 65) requires the Governor of
California to publish a list of substances known to the
State of California to cause cancer or reproductive harm,
and requires businesses to warn customers of potential
exposures to such substances.
Users of this appliance are hereby warned that when the
oven is engaged in the self-clean cycle, there may be
some low-level exposure to some of the listed substances,
including carbon monoxide. Exposure to these substances
can be minimized by properly venting the oven to the
outdoors by opening the windows and/or door in the room
where the appliance is located during the self-clean cycle.
IMPORTANT NOTICE REGARDING PET BIRDS:
Never keep pet birds in the kitchen or in rooms where the
fumes from the kitchen could reach. Birds have a very
sensitive respiratory system. Fumes released during an
oven self-cleaning cycle may be harmful or fatal to birds.
Fumes released due to overheated cooking oil, fat,
margarine and overheated non-stick cookware may be
equally harmful.
Save These Instructions for Future Reference
Cleantn
Self-Clean Oven
To set Self=Clean:
Note: Oven temperature must be below 400° Fto program
a clean cycle.
The self-clean cycle uses above-normal cooking temperatures
to automatically clean the oven interior.
The oven should be cleaned regularly by wiping up spillovers
to prevent excessive smoke and flare-ups. Do not allow a
heavy build-up of soil to accumulate in the oven.
During the cleaning process, the kitchen should be well
ventilated to get rid of normal odors associated with cleaning.
Before Self=Cleaning
1. Turn off the oven light before cleaning. The light may burn
out during the clean cycle.
2. Remove all pans and oven racks from the oven. The oven
racks will discolor and may not slide easily after a self-
clean cycle if they are not removed.
3. C.ean oven frame, doorframe, area _,,,-,,__ J,_,_,__'_
outside of gasket, and around the ", -
opening in the door gasket with a
nonabrasive cleaner such as Bon _:_X:_X_3___'_
Ami* or detergent and water. The
self-cleaning process does not
clean these areas. They should be
cleaned to prevent soil from baking on during the clean
cycle. (The gasket is the seal around the oven door and
window.)
4. To prevent damage, do not clean or rub the gasket around
the oven door. The gasket is designed to seal in heat
during the clean cycle.
5. Wipe up excess grease or spillovers from the oven bottom.
This prevents excessive smoking, flare-ups or flaming
during the clean cycle.
6. Wipe up sugary and acidic spillovers such as sweet
potatoes, tomato, or milk-based sauces. Porcelain enamel
is acid-resistant, not acid-proof. The porcelain finish may
discolor if acidic spills are not wiped up before a self-clean
cycle.
To Delay a Self=Clean Cycle:
1. Press the Delay 1 pad.
DELAY flashes.
1. Close the oven door.
2. Press the Clean pad /
CLEAN flashes.
SETflashes in the display. U
3. Press the Autoset O pad. Autose[
MEd (Medium Soil, 3 hours) isdisplayed.
4. Press the Autoset Opad to scroll through the
self-cleaning settings.
HVy (Heavy Soil, 4 hours)
MEd (Medium soil, 3 hours)
LITE( Light Soil, 2 hours)
Choosing the soil level of the oven automatically programs
the self-cleaning time.
5. After four seconds, the oven will start cleaning.
If the door is not closed, beeps will sound and "door" will
display. If the door is not closed within 30 seconds, the
self-cleaning operation will be canceled and the display
will return to the time of day.
CLEAN will appear in the display.
LOCK will flash in the display. Once the door locks, the
word will remain steady.
The cleaning time will start counting down in the display.
1
Delay
00:00 will flash in the display.
Enter the amount of time you want to delay the cycle using
2,
3.
the appropriate number pads.
Press the Clean pad.
SETflashes in the display.
Press the Autoset 0 pad.
LITE (Light soil level) is displayed.
0
,_,uloset
cont.
Brand names for cleaning products are registered trademarks of the respective manufacturers.
4
5. Press the Autaset O pad to scroll through the t'_
self-cleaning settings.
U
,,\utose[
HVy (Heavy Soil, 4 hours}
MEd (Medium Soil, 3 hours}
LITE (Light Soil, 2 hours}
Choosing the soil level of the oven automatically programs
the self-cleaning time.
6. After four seconds, CLEAN and DELAYwill light and LOCK
will flash in the display. When the oven door latches,
LOCKwill stop flashing and light continuously to show that
the oven is set for a delayed clean operation. The delay
time will display.
Notes:
If the oven door is left open, "door" will flash in the
display and a signal will beep until the door is closed
and the Clean pad is pressed again.
If more than five seconds elapse between pressing the
Clean pad and the Autoset 0 pad, the program will
automatically return to the previous display.
The oven door will be damaged if the oven door is
forced to open when LOCK is still displayed.
Cleaning Procedures
During the Self=Clean Cycle
When LOCK shows in the display, the door cannot be opened.
To prevent damage to the door, do not force the door open
when LOCK is displayed.
Smoke and Smells
You may see some smoke and smell an odor the first few
times the oven is cleaned. This is normal and will lessen in
time.
Smoke may also occur if the oven is heavily soiled or if a pan
was left in the oven.
Sounds
As the oven heats, you may hear sounds of metal parts
expanding and contracting. This is normal and will not
damage the oven.
After Self=Cleaning
About one hour after the end of the self-clean cycle, LOCK
will turn off. The door can then be opened.
Some soil may leave a light gray, powdery ash. Remove
itwith a damp cloth. If soil remains after wiping, that means
the clean cycle was not long enough. The soil will be
removed during the next clean cycle.
if oven racks were left in the oven and do not slide
smoothly after a clean cycle, wipe racks and rack supports
with a small amount of vegetable oil to make them easier to
mave.
Fine lines may appear in the porcelain because it went
through heating and cooling. This is normal and will not
affect performance.
A white discoloration may appear after cleaning if acidic
or sugary foods were not wiped up before the self=clean
cycle. TMs discoloration is normal and will not affect
performance.
Backguard and Cooktop - Porcelain Enamel
Porcelain enamel is glass fused on metal and may crack or
chip with misuse. It is acid-resistant, not acid-proof. All
spillovers, especially acidic or sugary spillovers, should be
wiped up immediately with a dry cloth.
When cool, wash with soapy water, rinse and dry.
Never wipe off a warm or hot surface with a damp cloth.
This may cause cracking or chipping.
Never use oven cleaners, abrasive or caustic cleaning
agents on exterior finish of range.
Clock and Control Pad Area
To activate "Control Lock" for cleaning, see page 13.
Wipe with a damp cloth and dry. Do not use abrasive
cleaning agents as they may scratch the surface.
Glasscleaners may be used if sprayed on a cloth first.
DO NOT spray directly on centre/pad and display area.
Control Knobs
Remove knobs in tile OFFposition by pulling forward.
Wash, rinse and dry. Do not use abrasive cleaning agents
as they may scratch the finish.
Turn on each element to be sure the knobs have been
correctly replaced.
Cooktop - Glass=Ceramic
Never use oven cleanem, chlorine bleach, ammonia or
glass eleanora with ammonia. Note: Call an authorized
servicer if the glass-ceramic top should crack, break or
if metal or aluminum foil should melt on the cooktop.
° Allow the cooktop to cool before cleaning.
° General - Clean cooktop after each use, or when needed,
with a damp paper towel and Cooktop Cleaning
Creme* (Part No. 20000001}**. Then, buff with a clean, dry
cloth.
* Brand names are registered trademarks of the respective manufacturers.
** To order call 1-877-232-6771 USAand 1-800-688-8408 Canada.
5
Note: Permanent stains will develop if soil is allowed to cook
on byrepeatedly using the cooktop when soiled.
Heavy Soils or Metal Marks - Dampen a "scratchless" or
"never scratch" scrubber sponge. Apply Cooktop Cleaning
Creme* (Part No. 20000001)** and scrub to remove as much
soil as possible. Apply a thin layer of the creme over the soil,
cover with a damp paper towel and let stand 30 to 45
minutes (2-3 hours for very heavy soil). Keep moist by
covering the paper towel with plastic wrap. Scrub again,
then buff with a clean, dry cloth.
Note: Only use a CLEAN,DAMP "scratchless"pad that is
safe for non-stick cookware. Thepattern and glass
will be damaged if the pad is not damp, if the pad is soiled, or
ff another type of pad is used.
° Burned-On or Crusty Soils - Scrub with a
"scratchless" or "never scratch" scouring pad
and Cooktop Cleaning Creme*.
Note: Hold a razor blade scraper at 30°
angle and scrape any remaining soil.
Then, clean as described above. Do
not use the razor blade for daily cleaning as it may wear the
pattern on the glass.
° Melted Sugar or Plastic - Immediately turn element to
LOW and scrape sugar or plastic from hot surface to a cool
area. Then turn element OFF and allow to cool. Clean
residue with razor blade scraper and Cooktop Cleaning
Creme*.
Oven Window and Door - Glass
Avoid using excessive amounts of water which may seep
under or behind glass, causing staining.
Wash with soap and water. Rinse with clear water and dry.
Glass cleaner can be used if sprayed on a cloth first.
° Do not use abrasive materials such as scouring pads, steel
wool or powdered cleaners as they will scratch glass.
Oven Interior
° Follow instructionson pages 4-5 to set a self-clean cycle.
Oven Racks
Clean with soapy water.
Remove stubborn soil with cleansing powder or soap-filled
scouring pad. Rinse and dry.
° Racks will permanently discolor and may not slide smoothly
if left in the oven during a self-clean operation. If this
occurs, wipe the rack edge and rack support with a small
amount of vegetable oil to restore ease of movement, then
wipe off excess oil.
Stainless Steel (select models)
° DO NOT USEANY CLEANING PRODUCT CONTAINING
CHLORINE BLEACH.
° DO NOT USEABRASIVE OR ORANGE CLEANERS.
° ALWAYS WIPE WITH THE GRAIN WHEN CLEANING.
° Daily Cleaning/Light Soil -- Wipe with one of the
following - soapy water, white vinegar/water solution,
Formula 409 Glass and Surface Cleaner* or a similar glass
cleaner - using a sponge or soft cloth. Rinse and dry. To
polish and help prevent fingerprints, follow with Stainless
Steel Magic Spray* (Part No. 20000008)**.
Moderate/Heavy Soil -- Wipe with one of the following -
Bon Ami*, Smart Cleanser*, or Soft Scrub* - using a damp
sponge or soft cloth. Rinse and dry. Stubborn soils may be
removed with a damp multi-purpose Scotch-Bdte* pad; rub
evenly with the grain. Rinse and dry. To restore luster and
remove streaks, follow with Stainless Steel Magic Spray*.
Discoloration -- Using a damp sponge or soft cloth, wipe
with Cameo Stainless Steel Cleaner*. Rinse immediately and
dry. To remove streaks and restore luster, follow with
Stainless Steel Magic Spray*.
Storage Drawer, Boor Handle, Side Panels =
Painted Enamel
° When cool, wash with warm soapy water, rinse and dry.
Never wipe a warm or hot surface with a damp cloth as this
may damage the surface and may cause a steam burn.
For stubborn soil, use mildly abrasive cleaning agents such
as baking soda paste or Bon Ami.* Do not use abrasive,
caustic or harsh cleaning agents such as steel wool pads or
oven cleaners. These products will scratch or permanently
damage the surface.
Note: Use a dnJ towel or cloth to wipe up spills,
especially acidic or sugary spills. Surface may discolor
or dull if soil is not immediately removed. This is
especially important for white surfaces.
* Brand names are registered trademarks of the respective manufacturers.
** To order call 1-877-232-6771 USAand 1-800-688-8408 Canada.
6
Oven Door
Leveling Legs
Note: The oven door on a new range may feel "spongy"
when it isc osed. This is normal and will decrease with use.
Oven Window
To protect the oven door window:
1. Do not use abrasive cleaning agents such as steel wool
scouring pads or powdered cleansers as they may scratch
the glass.
2. Do not hit the glass with pots, pans, furniture, toys, or
other objects.
3. Do not close the oven door until the oven racks are in
place.
Scratching, hitting, jarring or stressing the glass may weaken
itsstructure causing an increasedrisk of breakage at a later
date.
Oven Light
To replace oven light bulb:
1. When oven iscool, hold bulb cover BuL_oovER
in place, then slidewire retainer
off cover. Note: Bulb cover
will fall if not held in place
while removing wire retainer.
2. Removebulb cover and light J w,RE
bulb. _'_
3. Replace with a 40-watt appliance bulb.
4. Replace bulb cover and secure with wire retainer.
5. Reconnect power to range. Reset clock.
Storage Drawer
7
The storage drawer can be removed to allow you to clean
under the range.
To remove:
1. Empty drawer and pull out to the first stop position.
2. Lift up the front of the drawer.
3. Pull out to the second stop position.
4. Grasp sides and lift drawer up and out.
To replace:
1. Fit the ends of the drawer glides into the rails in the range.
2. Lift up the front of the drawer and gently push in to the
first stop position.
3. Lift drawer up again and push until drawer is closed.
Convenience Outlet
(Canadian models only)
The convenience outlet is located on the lower left side of the
backguard. Be sure appliance cords do not rest on or near the
surface element. If the surface element
is turned on, the cord and outlet will be
damaged.
The convenience outlet circuit breaker
may trip if the small appliance plugged
into it exceeds 10 amps. To reset the
circuit breaker, press the switch located
on the lower edge of the backguard.
if ¸
CIRCUIT BREAKER
Iroubleshoolln9
For most concerns, try these first.
Check if oven controls have been properly set.
Check to be sure plug issecurely inserted into receptacle.
° Check or re-set circuit breaker. Check or replace fuse.
° Check power supply.
Part or ail of appliance does not work.
Check if surface and/or oven controls have been properly set.
See pages 9 & 12.
Check if oven door is unlocked after self-clean cycle. See
page 5.
Check if oven isset for a delayed cook or clean program. See
pages 15 & 5.
Check if Control Lock is activated. See page 13.
Check if control isin Sabbath Mode. See page 17.
Clock, indicator words, and/or lights operate but oven
does not heat.
Oven may be set for a Cook & Hold or Delayfunction.
The Control Lock may have been set. See page 13.
Baking results are not as expected or differ from
previous oven.
Make sure the oven vent has not been blocked. See page 18
for location.
Check to make sure range is level.
Temperatures often vary between a new oven and an old one.
As ovens age, the oven temperature often "drifts" and may
become hotter or cooler. See page 17 for instructions on
adjusting the oven temperature. Note: It is not
recommended to adjust the temperature if only one or
two recipes are in question.
Food is not broiling properly or smokes excessively.
Check oven rack positions. Food may be too close to element.
Broil element was not preheated.
Aluminum foil was incorrectly used. Never line the broiler
insert with foil.
Oven door was closed during broiling. Leave the door open
to the first stop position (about 4 inches:).
Trim excessfat from meat before broiling.
° A soiled broiler pan was used.
Voltage in house may be low.
Oven will not self=clean.
Check to make sure the cycle is not set for adelayed start.
See page 5.
Check if door is closed.
Check if control is in Sabbath Mode. See page 17.
Oven may be over 400° F.Oven temperature must be below
400° Fto program a clean cycle.
Oven did not clean properly.
Longer cleaning time may be needed.
Excessivespillovers, especially sugary and/or acidic foods,
were not removed prior to the self-clean cycle.
Oven door will not unlock after self=clean cycle.
Oven interior is still hot. Allow about one hour for the oven to
cool after the completion of a self-clean cycle. The door can
be opened when the LOCK indicator word is not displayed.
The control and door may be locked. See page 13.
8
Smoothtop surface shows wear.
Tiny scratches or abrasions.
- Make sure cooktop and pan bottom are clean. Do not
slide glass or metal pans across top. Make sure pan
bottom is not rough. Use the recommended cleaning
agents. See page 11.
° Metal marks.
- Do not slide metal pans across top. When cool, clean with
Cooktop Cleaning Creme. See page 11.
° Brown streaks and specks.
- Removespills promptly. Never wipe with a soiled cloth or
sponge. Make sure cooktop and pan bottom are clean.
° Areas with a metallic sheen.
- Mineral deposits from water and food. Use recommended
cleaning agents. See page 11.
Pitting or flaking.
- Removesugary boilovers promptly. See page 11.
Moisture collects on oven window or steam comes
from oven vent.
° This is normal when cooking foods high in moisture.
° Excessivemoisture was used when cleaning the window.
There is a strong odor or light smoke when oven is
turned on.
This is normal for a new range and will disappear after a few
uses. Initiating a clean cycle will "burn off" the odors
more quickly.
Turning on aventilation fan will help remove the smoke
and/or odor.
Excessivefood soils on the oven bottom. Use a
self-clean cycle.
Fault Codes
° BAKEor LOCK may flash rapidly in the display to alert you if
there is an error or a problem. If BAKE or LOCKappear in
the display, press CANCEL pad. If BAKE or LOCK continue
to flash, disconnect power to the appliance. Wait a few
minutes, and then reconnect power. If the flashing still
continues, disconnect power to the appliance and call an
authorized servicer.
If the oven is heavily soiled, excessive fiareups may result in
a fault code during cleaning. Pressthe CANCEL pad and
allow the oven to cool completely, wipe out excess soil, then
reset the clean cycle. If the fault code reappears, contact an
authorized servicer.
Noises may be heard.
The oven makes several low level noises. You may hear the
oven relays as they go on and off. This is normal.
As the oven heats and cools, you may hear sounds of metal
parts expanding and contracting. This is normal and will not
damage your appliance.
There are no beeps and no display.
Oven may be in Sabbath Mode. Seepage 17.
SAb flashing and then displayed continuously.
° Oven is in Sabbath Mode. To cancel, pressand hold the
Clock pad for five seconds.
¢00ktn l
Surface Controls
Use to turn on the surface elements. An infinite choice of
heat settings is available from Low to High. The knobs can
be set on or between any of the settings.
Setting the Controls
1. Place pan on surface element.
2. Push in and turn the knob in either direction to
the desired heat setting. O O
The control panel is marked to identify Front oOo
which element the knob controls. For
example, the graphic at right indicates left front element.
3. There is an element indicator light on the control panel.
When any surface control knob isturned on, the light will
turn on. The light will turn off when all the surface
elements are turned off.
When a control is turned on, a glow can be seen through
the smoothtop surface. The element will cycle on and off
to maintain the preset heat setting, even on High.
4. After cooking, turn knob to OFF. Remove pan.
Suggested Heat Settings
The size and type of cookware, type and amount of food
being heated, and wattage of individualelements will
determine where to set the knob for cooking operations.
Some elements have a predetermined simmer and melt
setting that will require only minor adjustment up or down
depending on the food being prepared. The other elements
have settings printed around the knobs that are also unique
to those elements. Adjust the heat settings to the numbers
that give the desired cooking results. For information on
cookware and other factors affecting heat settings, refer to
Cookware Recommendations on page 11.The following
descriptions will aid in choosing the settings that will give
optimum results.
Hold or Warm: Food maintains a temperature above 140° F
without continuing to cook. Food is initially hot and then heat
isreduced. Never use a hold or warm setting to reheat cold
food.
Simmer: Foodforms bubbles that barely break the
surface. Foods are between 185° Fand 200° F.A simmer
setting can also be used to steam or poach foods or continue
cooking covered foods.
Slow Boil: Food forms bubbles at a moderate pace. A slow
boil setting can also be used for most frying and for
maintaining the cooking of large amounts of liquids.
Boil: Liquid forms bubbles at a rapid pace. A fast boil setting
can also be used to brown meat, stir fry, saut& and heat oil
for frying before turning to a lower setting. The highest 3 or 4
settings on the knob are used for these cooking
operations. The highest setting is always used to bring water
to a boil. Some elements offer an even higher speed for
boiling liquids.
9
Srnoothtop Surface
Notes:
Cooktop may emit light smoke and odor the first few
times the cooktop is used. This is normal.
Smoothtop cooktops retain heat for a period of time
after the element is turned off. Turn the elements off
a few minutes before food is completely cooked and use
the retained heat to complete cooking. When the hot
surface light turns off, the cooking area will be cool
enough to touch. Because of the way they retain heat, the
smoothtop elements will not respond to changes in
settings as quickly as coil elements.
In the event of a potential boilover, remove the pan from
the cooking surface.
Never attempt to lift the cooktop.
The smoothtop surface may appear discolored when it is
hot. This is normal and will disappear when the surface
cools.
Cooking Areas
The cooking areas on your range are identified by permanent
circles on the smoothtop surface. For most efficient cooking,
fit the pan size to the element size.
Pans should not extend more than 1/2to 1-inch beyond
the cooking area.
When a control isturned on, a glow car/be seen through the
smoothtop surface. The element will cycle on and off to
maintain the preset heat setting, even on High.
For more informationon cookware, refer to Cookware
Recommendations on page 11.
FLEX `CHOICETM WARMING CENTER
ELEMENT
6"ELEMENT
2. When done, turn the control to OFF and remove food. The
Hot Surface indicator light will go off when the Warming
Center surface has cooled.
Notes:
° Never warm food for longer than one hour (eggs for 30
minutes), as food quality may deteriorate.
Do not heat cold food on the Warming Center.
Heat settings will vary depending on type and amount
of food. Always hold food at proper food temperatures.
USDA recommends food temperatures between
140°-170° F.
Suggested Settings
Nlin =2
2=5
5 = Max
Breads/Pastries Gravies
Casseroles Eggs
Dinner Platewith Food Sauces
Soups (Cream) Stews
Vegetables Meats
Fried Foods Hot Beverages
Soups (Liquid)
Notes-"
Use only cookware and dishes recommended as safe for
oven and cooktop use.
Always use oven mitts when removing food from the
Warming Center as cookware and plates will be hot.
All foods should be covered with a lid or aluminum foil to
maintain food quality.
When warming pastries and breads the cover should have
an opening to allow moisture to escape.
Do not use plastic wrap to cover foods. Plastic may melt
on to the surface and be very difficult to clean.
Hot Surface Light
Tile Hot Surface indicatorlight islocated on tile control panel.
The light will be illuminated when any cooking area is hot. It
will remain on, even after the control is turned off, until the
area has cooled.
Warming Center
Use the Warming Center to keep hot cooked
foods warm, such as vegetables, gravies
and oven-safe dinner plates.
OFF
Setting the Control: MFn
1. Pushinand turn the knob.Warming
temperatures are approximate and 2
are indicatedon the control asMin, 2- ................
8 and Max. However, the control can be ........................s
set to any position between Min and Max.
Fle×=Choice TM Element oFF
(select models) Mr. Ht£h
2
The Flex-ChoiceTM element is fully a
functioning element that provides an
ultra low Melt heat setting for melting
chocolate and butter. It is located in the .......
left rear position. Medium..............
The Melt setting is located between 2 and OFF.
Heat settings outside of this area function as a normal
element, with 2 (Low) to High settings.
Note: When using the normal settings for preparing foods,
it may take a few minutes for the cooking area to cool to
the Warm heat setting.
10
Tips to Protect the
Smoothtop Surface
Cleaning (see pages 5-6 for more information)
Before first use, clean the cooktop.
Clean your cooktop daily or after each use. This will keep
your cooktop looking good and can prevent damage.
If a spillover occurs while cooking, immediatelyclean the
spill from the cooking area while it is hot to prevent a tough
cleaning chore later. Using extreme care, wipe spill with a
clean, dry towel.
Do not allow spills to remain on the cooking area or the
cooktop trim for a long period of time.
Never use abrasive cleansing powders or scouring pads
which will scratch the cooktop.
Never use chlorine bleach, ammonia or other cleansers not
specifically recommended for use on glass-ceramic.
To Prevent Marks & Scratches
Do not use glass pans. They may scratch the surface.
° Never place a trivet or wok ring between the surface and
pan. These itemscan mark or etch the top.
Do not slide aluminum pans across a hot surface. The pans
may leavemarks which need to be removed promptly. (See
Cleaning, pages 5-6.)
Make sure the surface and the pan bottom are clean before
turning on to prevent scratches.
To prevent scratching or damage to the glass-ceramic top,
do not leave sugar, salt or fats on the cooking area. Wipe
the cooktop surface with a clean cloth or paper towel
before using.
Never slide heavy metal pans across the surface since
these may scratch.
To Prevent Stains
Never use a soiled dish cloth or sponge to clean the
cooktop surface. A film will remain which may cause stains
on the cooking surface after the area is heated.
Continuously cooking on a soiled surface may/will result in
a permanent stain.
To Prevent Other Damage
Do not allow plastic, sugar or foods with high sugar
content to melt onto the hot cooktop. Should this happen,
clean immediately. (See Cleaning, pages 5-6.)
Never let a pan boil dry as this will damage the surface and
pan.
° Never use cooktop as a work surface or cutting board.
° Never cook food directly on the surface.
Do not use a small pan on a large element. Not only does
this waste energy, but it can also result in spillovers burning
onto the cooking area which requires extra cleaning.
° Do not use non-fiat specialty items that are oversized or
uneven such as round bottom woks, rippled bottom and/or
oversized canners and griddles.
° Do not use foil or foil-type containers. Foil may melt onto
the glass. If metal melts on the cooktop, do not use. Call an
authorized servicer.
Cookware Recommendations
Using the right cookware can prevent many problems, such
as food taking longer to cook or achieving inconsistent
results. Proper pans will reduce cooking times, use less
energy, and cook food more evenly.
Flat Pan Tests
See if your pans are flat.
The Ruler Test:
1. Placea ruler across the bottom of the pan.
2. Hold it up to the light.
3. Little or no light should be visible under the ruler.
The Bubble Test:
1. Put 1 inchof water in the pan. Placeon cooktop and turn
control to High.
2. Watch the formation of the bubbles as the water heats.
Uniform bubbles mean good performance, and uneven
bubbles indicatehot spots and uneven cooking.
Flat,smooth-bottom Panswith grooved or warped bottoms.
3ans. Panswith uneven bottoms do not cook
efficiently and sometimes may not
boil liquid.
Heavy-gauge pans. Very thin-gauge metal or glass pans.
Pansthat are the Panssmaller or larger than the
same size asthe element by 1inch.
element.
Secure handles. Cookware with loose or broken handles.
Heavy handles that tilt the pan.
Tight-fitting lids. Loose-fitting lids.
Flat bottom woks. Woks with a ring-stand bottom.
11
Canning and Oversize
Cookware
All canners and large pots must have flat bottoms and
must be made from heavy-gauge materials. This is critical
on smoothtop surfaces. The base must not be more than
1 inch larger than the element.
When canners and pots do not meet these standards, cooking
times may be longer, and cooktops may be damaged.
Some canners are designed with smaller bases for use on
smoothtop surfaces.
When canning, use the High heat setting only until the
water comes to a boil or pressure is reached in the canner.
Reduce to the lowest heat setting that maintains the boil or
pressure. If the heat is not turned down, the cooktop may be
damaged.
Control Panel
A B C D E
/ \
Clean
Broil
1 2
Delay
Thecontrol panel isdesigned for easein programming. Thedisplaywindow on the control showstime of day,timer and oven functions.
Control panel shown includes Convect and other model specific features. [Styling may vary depending on model.]
Bake
Broil
Clean
Delay
Number Pads
Autoset
Keep Warm
Convect
Cook & Hold
Favorite
Timer
Clock
Oven Light
CANCEL
Use for baking and roasting.
Use for broiling and top browning.
Use to set self-clean cycle.
Programs the oven to start baking at
a later time.
Use to set time and temperature.
Use to quickly set temperatures.
Useto keep cooked food warm in oven.
Use for convection baking and
roasting.
Bakes for a preset time, then holds
food warm for 1 hour.
Use to set and save a specific Cook &
Hold procedure.
Sets Timer.
Use to set time of day clock.
Use to turn the oven light on or off.
Cancels all operations except Timer
and Clock.
Using the Touchpads
Pressthe desired pad.
Pressthe number pads to enter time or temperature.
Pressthe Autoset 0 pad to enter temperature.
A beep will sound when any pad is touched.
A double beep will sound if a programming error occurs.
Note: Four seconds after pressing the number pads or
the Autoset 0 pad, the time or temperature will automati-
cally be entered. If more than 30 seconds elapse between
touching a function pad and the number pads or the
Autoset 0 pad, the function will be canceled and the
display will return to the previous display.
Clock
The clock can be set to display time in a 12-hour or 24-hour
format. The clock is set at the factory for the 12-hour format.
To change the clock to
24-hour format:
1. Press and hold the CANCEL and
Favorite pads for three seconds.
12 Hr flashes in the display.
2. Press the Autoset O pad to select 24
Hr; press again to select 12 Hr. N
L)
3. Set the time of day following the directions
Autoset
in the Toset the Clock section.
To set the Clock:
1. Press the Clock pad.
The time of day flashes in the display.
2. Press the appropriate number pads to set the time of day.
° Colon flashes in the display.
3. Press the Clock pad again or wait four seconds.
The colon will remain on.
When electrical power issupplied or after a power
interruption,the last clock time before power was interrupted
will flash, coat.
12
To recall the time of day when another time function is
showing, press the Clock pad.
Clock time cannot be changed when the oven has been
programmed for Delay Cook or Delay Clean or Cook & Hold.
To cancel the Clock display:
If you do not want the time of day to display:
Press and hold the CANCEL and Clock
pads for three seconds. The time of day
will disappear from the display.
When the clock display is canceled, press
the Clock pad to briefly display the time
of day.
When the clock display is canceled, after 15 minutes, the oven
control will go into Standby Mode to saveenergy. Thedisplaywill
be blank and the oven light will not operate. To "wake up" the
control from Standby Mode, pressany touchpad. A double beep
will sound.
To restore the Clock display:
Press and hold the CANCEL and Clock pads for three
seconds. The time of day will reappear in the display.
Timer
The timer can be set from one minute (0:01) up to 99 hours
and 59 minutes (99:59).
The timer can be used independentlyof any other oven
activity. It can also be set while another oven function is
operating.
The timer does not control the oven. It only controls a beeper.
To set the Timer:
1. Pressthe Timer pad.
0:00 and TIMER flash in the display.
2. Pressthe appropriate number pads until the correct time
appears in the display.
° The colon and TIMER will continue to flash.
3. PressTimer pad again or wait four seconds.
The colon stops flashing and the time begins counting
down.
° The last minute of the timer countdown will be displayed
in seconds.
4. At the end of the set time, one long beep will sound and
"End" will be displayed.
5. Press the Timer pad to clear the display.
To cancel the Timer:
1. Press and hold the Timer pad for three
seconds.
OR
(-_
2. Press the Timer pad and press '0' using the U
number pads. Au[oset
Locking the Control
and Oven Door
The touchpad and oven door can be locked for safety,
cleaning, or to prevent unwanted use. The touchpads will not
function when locked.
If the oven iscurrently in use, the touchpads and door cannot
be locked.
The current time of day will remain in the display when the
touchpads and door are locked.
To lock:
Press and hold the CANCEL and Cook & --('r'&ktr'_l_
Hold pads for three seconds. (Press
CANCEL pad first.)
OFFappears in the display.
° LOCKflashes while the door
is locking.
To unlock:
Press and hold tile CANCEL and Cook & Hold pads for three
seconds. (Press CANCEL pad first.) OFFdisappears from the
display.
Note: The touchpads and oven door cannot be locked if the
oven temperature is 400° For above.
Fault Codes
BAKE or LOCKmay flash rapidly in tile display to alert you if
there is an error or a problem. If BAKE or LOCKflash in the
display, press CANCEL pad. If BAKE or LOCK continue to flash,
disconnect power to the appliance. Wait a few minutes, and
then reconnect power. If the flashing still continues, disconnect
power to the appliance and call an authorized servicer.
Baking
To set Bake:
1. Pressthe Bake pad.
° BAKE will flash.
000 will flash in the display.
2. Select the oven temperature. Pressthe U
Autoset 0 pad for 350° For the appropriate Autoset
number pads.
° Eachadditional press of the Autoset 0 pad will increase
the temperature by 25°.
The oven temperature can be set from 170°to 550°.
3. Press Bake pad again or wait four seconds.
BAKE will stop flashing and light in the display.
100° or the actual oven temperature if over 100° Fwill
display. It will rise in increments until the preset
13 temperature is reached.
4. Allowtheoventopreheatfor8-15minutes.
Whenthesetoventemperatureisreached,onelong
beepwillsound.
Thesettemperaturewilldisplay.
Torecallsettemperatureduringpreheat,pressthe
Bakepad.
5. Placefoodintheoven.
8. Checkcookingprogressattheminimumcookingtime.
Cooklongerifneeded.
7. Whencookingisfinished,pressCANCELpad.
8. Removefoodfromtheoven.
Notes:
Tochange the oventemperature during cooking, press Bake
pad, then press the Autoset Opad or appropriate number
pads until the desired temperature is displayed.
Tochange the oventemperature during preheat, press the
Bake pad twice, then press the Autoset O pad or
appropriate number pads until the desired temperature
is displayed.
If you forget to turn off the oven, it will automatically turn
off at the end of 12 hours. If you wish to deactivate this
feature, see page 17.
Baking Differences Between Your Old
and New Oven
It is normal to notice some baking time differences between a
new oven and an old one. See Adjusting the Oven Temperature
on page 17.
Baking and Roasting
with Convection
When using convection, enter your normal baking
temperature. The control will automatically reduce the set
oven temperature by 25°.The entered temperature will be
displayed.
To set Convect Bake:
1. Press the Convect pad.
° BAKE and the fan iconwill flash.
000 will flash in the display.
2. Select the oven temperature. Press the
Autoset 0 pad for 350° For the appropriate
number pads.
° Each additional press of the Autoset 0 pad will increase
the temperature by 25 degrees. The oven temperature
can be set from 170° to 550°.
3. Press Convect pad again or wait four seconds.
BAKEwill stop flashing.
100° or the actual oven temperature if over 100° Fwill
display. It will rise in 5° increments until the preset
temperature is reached.
Convect
0
Autoset
14
° The fan icon will start to rotate.
@
4. Allow the oven to preheat for 8-15 minutes.
° When the set oven temperature is reached, one long
beep will sound.
° The set temperature will display.
To recall the set temperature during preheat, press the
Convect pad.
5. Placefood in the oven.
6. Check cooking progress at the minimum cooking time.
Cook longer if needed.
7. When cooking isfinished, press CANCEL pad. (CANCEL)
8. Removefood from the oven.
Cook & Hold
When using the Cook & Hold option, the oven begins to heat
immediatelyafter the control has been set. Then, the oven
cooks for a specified length of time. When that time has
elapsed, the oven will keep the food warm for up to an hour
then automatically turn off.
To set Cook & Hold:
1. Pressthe Cook & Hold pad.
HOLD will flash to indicate that you are in
Cook & Hold programming.
° 00:00will flash in the display.
2. Select the amount of time you want to cook by using the
number pads.
HOLD continues to flash.
The time will light in the display.
° Time can be set from ten minutes (00:10}
to 11 hours, 59 minutes (11:59}.
3. While HOLD is still flashing, press Bake or Bake
Convect pad and select the oven temperature. ..............................................................
Pressthe Autoset O pad for 350° For the
appropriate number pads. U
The desired function word will flash. Autosct
° The oven temperature can be set from
170° Fto 550° F.
4. Pressthe desired function pad again ORwait foursec-
onds.
The desired function word will remain lit.
° The cooking time will show in the display.
° The actual oven temperature will be displayed
during preheat.
The set temperature will display when the oven is
preheated.
cont.
When the cooking time has elapsed:
Four beeps will sound.
HOLD and WARM will light.
170°will display.
° Time of day will display.
After one hour in HOLD WARM:
Tile oven turns off automatically.
° HOLD and WARM go off.
° Remove food from oven.
To cancel Cook & Hold at any time:
Press the CANCEL pad. Remove food from oven.
Delay Cook & Hold
Notes:
Do not use Delayed Cook & Hold for itemsthat require a
preheated oven, such as cakes, cookies, and breads.
° Do not use Delayed Cook & Hold if oven isalready hot.
Keep Warm
Forsafely keeping hot foods warm in the oven or for warming
breads and plates.
To set Keep Warm:
1. Press the Keep Warm pad.
WARM flashes.
000 flashes in the display.
I"%
2. Select the Keep Warm temperature by pressing the U
Autoset 0 pad or the appropriate number pads. Autoset
° 170° will light when the Autoset 0 pad is pressed.
Each press of the Autoset 0 pad will increase the
temperature by 5°.
The Keep Warm temperature can be set from 145° to 190°.
WARM and the temperature will be displayed while the
function isactive.
When using Delay, the oven begins to cook later in the day. Set
the amount of time that you want to delay before the oven turns
on and how long you want to cook. The oven begins to heat at
the selected time and cooks for the specified length of time.
Delay time can be set from 10 minutes (00:10} to 11 hours,
59 minutes (11:59}.
To set a Delayed Cook & Hold cycle:
1. Press the Delay 1 pad. 1
/
DELAY flashes in the display.
Delay
00:00flashes in the display.
2. Using the appropriate number pads, enter the amount of
time you want to delaythe start of the Cook & Hold cycle.
3. Press the Cook & Hold pad.
HOLD and DELAY flash in the display.
° 00:00flashes in the display.
4. Enter the amount of time you want to cook using the
number pads.
5. Press Bake or Convect pad.
6. Set the oven temperature desired by
pressing the Autaset 0 pad or the
appropriate number pads.
° 350°will light when Autoset 0 pad is
pressed.
U
Autoset
After four seconds, the entered delay time
will appear in the display.
HOLD turns off.
BAKE and DELAY remain lit to remind you that a delayed
Cook & Hold cycle has been programmed.
To cancel Keep Warm:
1. Press the CANCEL pad.
2. Remove food from the oven.
Notes:
Foroptimal food quality, oven cooked foods should be
kept warm for no longer than 1 to 2 hours.
To keep foods from drying, cover loosely with foil or a lid.
° To warm dinner roils:
- cover rolls loosely with foil and place in oven.
- press Keep Warm and Autaset 0 pads.
- warm for 15-20 minutes.
° To warm plates:
- place 2 stacks of up to four plates each in the oven.
- press Keep Warm and Autoset Opads.
- warm for five minutes, turn off the oven and leave
plates in the oven for 15 minutes more.
- use only oven-safe plates, check with the
manufacturer.
- do not set warm dishes on a cold surface as rapid
temperature changes could cause crazing or
breakage.
15
Broiling
To set Broih
1. Press the Broil pad.
BROIL flashes.
SET flashes. A
U
2. Press the Autoset 0 pad once to set HI broil or
Autosct
twice to set LO broil.
HI or LO will be displayed.
Select HI broil (550° F)for normal broiling. Select
LO broil (450° E/for low-temperature broiling of longer
cooking foods such as poultry.
3. After four seconds, the oven will start.
BROILwill remain lit.
HI or LO will remain lit.
4. Foroptimum browning, preheat broil element for 3-4
minutes before adding food.
5. Place food in the oven. Leaveoven door open about four
inches (the first stopS].
6. Turn meat once about halfway through cooking.
Broiling Chart
Beef
7. When food iscooked, press the CANCEL pad.
Remove food and broiler pan from the oven.
The time of day will reappear in the display.
Notes:
° For best results, use a pan designed for broiling.
Expect broil times to increase and browning to be slightly
lighter if appliance is installed on a 208-volt circuit.
HI is used for most broiling. Use LO broil when broiling
longer cooking foods. The lower temperature allows food
to cook to well done without excessive browning.
° To change oven temperature during broiling, press the
Broil pad and then the Autoset 0 pad to switch between
LO and HI broil.
Broil times may be longer when the lower broiling
temperature isselected.
Most foods should be turned halfway through broiling
time.
Changing Ternp °F/°C
1. The factory default setting for temperature is Fahrenheit.
2. Tochange the setting, press and hold the CANCEL and Bake
pads at the same time for three seconds.
3. A single beep will sound and the current setting will be
displayed (°F or °C). (If no change is made, the range will
return to the existing setting after 30 seconds.)
4. To change the setting, press the Autoset Opad. Press again
to return to existing setting. Wait fiveseconds and the setting
will be complete.
Steak, 1" thick,
Medium
Well
Well
6
6
6or7
8 minutes
10 minutes
9 minutes
7 - 12 minutes
8 - 14 minutes
6 - 9 minutes
Hamburgers, 3/4" thick,
Pork
Bacon 6 6 - 10 minutes 0/o turningS]
Chops, 1" 6 10- 11 minutes 12- 14 minutes
Ham Slice 6 5 minutes 3 - 7 minutes
Poultry LO Broil LO Broil
Breast Halves 4 15 minutes 15 - 25 minutes
Seafood
Fish Steaks, buttered, 1"thick
Lobster Tails, 3-4 oz. each
10 - 15 minutes
7 - 10 minutes
Note: This chart is a suggested guide. The times may vary with the food being cooked.
[no turning}
(no turning}
16
Automatic Shut-Off/
Sabbath Mode
The oven will automatically turn off after 12 hours if you
accidentally leave it on. This safety feature can be turned off.
To cancel the 12-hour shut=off and run the
oven continuously for 72 hours:
1. Press and hold the Clock pad for five
seconds.
SAb will be displayed and flash for five seconds.
SAb will then be displayed continuously until turned
off or until the 72-hour time limit isreached.
° BAKEwill also be displayed ifa bake cycle is in use
while the oven is in Sabbath Mode.
BAKEis the only function that operates during the
Sabbath Mode. Aft other functions (Timer,Keep Warm,
Clea& etc.) are locked out during the Sabbath Mode.
A Cook & Hold can be programmed during the Sabbath
Mode, however a Delay Cook & Hold is not allowed.
To cancel the Sabbath Mode:
1. Press the Clock pad for five seconds.
° SAb will flash for five seconds.
° The time of day will return to the display.
OR
2. After 72 hours, the Sabbath Mode will end.
SAb will flash for five seconds.
The time of day will return to the display.
Notes:
Sabbath Mode can be turned on at any time with or
without the oven on.
Sabbath Mode cannot be turned on if the touchpads are
locked out or when the door is locked.
° Most prompts and messages and all beeps are
deactivated when Sabbath Mode is active.
If the oven is baking when Sabbath Mode is set, BAKE
will go out when bake is canceled. There will be no
audible beeps.
The oven light will not automatically come on when the
oven door is opened while the oven is in Sabbath Mode.
If the oven light is desired while in Sabbath Mode, it
must be turned on before the Sabbath Mode is started.
° When the Sabbath Mode is started, the temperature
display will immediately show the set temperature, rather
than the actual oven cavity temperature. No preheat
beep will sound.
° The self-clean cycle and automatic door lock do not
operate during the Sabbath Mode.
Pressing CANCEL pad will cancel a Bake cycle, however
the control will stay in the Sabbath Mode.
° If power fails, the oven will power up in Sabbath Mode
with 72 hours remaining and no cycle active.
Adjusting the Oven Temperature
Oven temperatures are carefully tested for accuracy at the
factory. It is normal to notice some baking or browning
differences between a new oven and an old one. As ovens
get older, the oven temperature can shift.
You may adjust the oven temperature if you think the oven is
not baking or browning correctly. To decide how much to
change the temperature, set the temperature 25° higher or
lower than your recipe recommends, then bake. The results of
the "test" should give you an idea of how much to adjust the
ternperature.
f
To adjust the oven temperature: Bake
1. Pressthe Bake pad. ........
2. Enter 550° by pressing the appropriate number pads.
3. Pressand hold the Bake pad for several seconds or until
appears in the display.
If the oven temperature was previously adjusted, the change
will be displayed. Forexample, if the oven
temperature was reduced by 15° the display will show "-15°''.
4. Pressthe Autoset 0 pad to adjust the temperature.
Eachtime the Autoset 0 pad is pressed, the temperature
changes by 5°. The oven temperature can be increasedor
decreased by 5° to 35°.
Pressing the Autoset 0 pad will first cycle through increasing
the oven temperature (5, 10.... 35). Continuing to press the
Autoset 0 pad will then cycle through decreasing the oven
temperature (-35,-30 .... -5).
5. The time of day will automatically reappear in the display.
You do not need to readjust the oven temperature ifthere isa
power failure or interruption. Temperature adjustment applies to
Bake, Convect Bake and Convect Roastonly. Broiling and
cleaning temperatures cannot be adjusted.
Favorite
The Favorite pad allows you to save the time and temperature
from Cook & Hold function.
To set a Favorite cycle, a Cook & Hold function must be either
active or just programmed.
To set a new Favorite cycle or to save a
currently running Cook & Hold as a Favorite:
1. Program a Cook & Hold cycle as described in the Cook &
Hold section on page 14.
2. Pressand hold the Favorite pad for three
seconds.
° The newly set or currently running Cook & Hold cycle
will be saved.
° A beep will sound to indicate that the control has
accepted the Favorite setting.
To start a cycle programmed into Favorite:
1. Pressthe Favorite pad.
° Time and temperature for the set Cook & Hold cycle will
be displayed. (If no Cook & Hold cycle has been
programmed, "nonE" isdisplayed.)
17
2. Press Rake or Convect pad.
The Favorite cycle will begin immediately.
The selected cycle word will light in the display.
° The cooking time will light in the display.
When the cooking time has elapsed:
° The selected cycle word will turn off.
HOLD and WARM will light.
170°will display.
To cancel a Favorite cycle in progress:
1. Press the CANCEL pad.
° The stored Favorite cycle will not be affected.
2. Remove food from the oven.
Oven Fan
A convection fan isused to circulate hot air in the oven when
the convection feature is selected.
I Note: The convection fan will automatically stop when the
oven door is opened.
i
Oven Vent
When the oven is in use the area near the vent may become
hot enough to cause burns. Never block the vent opening.
The oven vent is located below the backguard vent
shield on your range.
OVENVENT Do not place plastics
near the vent opening
as heat from the vent
could distort or melt the
plastic.
Oven Light
The oven light automatically comes on when
the door is opened. When the door is closed,
press the Oven Light pad to turn the oven light on and off.
A beep will sound every time the Oven Light pad is pressed.
Oven Bottom
Protect oven bottom against spillovers, especially acidic or
sugary spills, as they may discolor the porcelain enamel. Use
the correct pan size to avoid spillovers and boilovers. Do not
place utensils or aluminum foil directly on the oven
bottom.
Oven Racks
The oven has two racks. All racks are designed with a
lock-stop edge.
To remove:
1. Pull rack straight out until it stops at
the lock-stop position.
2. Lift up on the front of the rack and
pull out.
To replace:
1. Place rack on tile rack supports in tile oven
2. Tilt the front end up slightly. Slide rack back until itclears
the lock-stop position.
3. Lower front and slide back intothe oven.
Never cover an entire rack with aluminum foil or place
foil on the oven bottom. Raking results will be affected
and damage may occur to the oven bottom.
Rack Positions
RACK 7 (highest
position): Fortoasting
bread or broiling thin,
non-fatty foods.
RACK 6: Used for
most broiling.
RACK 5: For multiple
rack baking.
RACK 4: Used for
J,,_J I L L_b_-H-7
5
3
2
Convection baking
on two racks
most baked goods on a cookie sheet or jelly roll pan, fruit
pies, or frozen convenience foods. Also use for broiling
chicken pieces.
RACK 3: For casseroles, baking loaves of bread, bundt cakes
or custard pies.
RACK 2: Used for roasting small cuts of meat, frozen pies,
dessert souffles or angel food cake. Also use for multiple
rack baking.
RACK 1: Used for roasting large cuts of meat and poultry.
Oven Bottom: Place oven rack on
raised sides of oven bottom. Use for
additional space when cooking large
oven meals.
MULTIPLE RACK COOKING: Use
rack positions 2 and 5 or 3 and 6.
Note: When Convect baking on two racks, check foods at
Ithe minimum suggested time to avoid over-browning or
over-cooking.
Baking Layer Cakes on Two Racks
Forbest results when baking cakes
on two racks, use racks 2 and 4 for
regular baking and racks 2 and 5
for convection baking.
Place the cakes on the rack as
shown.
18
MAYTAG ®MAJOR APPLIANCE WARRANTY
LIMITED WARRANTY
For one year from the date of purchase, when this major appliance is operated and maintained according to instructions attached to or
furnished with the product, Maytag brand of Whirlpool Corporation or Whirlpool Canada LP (hereafter "Maytag") will pay for factory
specified parts and repair labor to correct defects in materials or workmanship. Service must be provided by a Maytag designated
service company. This limited warranty is valid only in the United States or Canada and applies only when the major appliance is used
in the country in which it was purchased. Outside the 50 United States and Canada, this limited warranty does not apply. Proof of
original purchase date is required to obtain service under this limited warranty.
ITEMS EXCLUDED FROM WARRANTY
This limited warranty does not cover:
1. Service calls to correct the installation of your major appliance, to instruct you on how to use your major appliance, to replace or
repair house fuses, or to correct house wiring or plumbing.
2. Service calls to repair or replace appliance light bulbs, air filters or water filters. Consumable parts are excluded from warranty
coverage.
3. Repairs when your major appliance is used for other than normal, single-family household use or when it is used in a manner that is
contrary to published user or operator instructions and/or installation instructions.
4. Damage resulting from accident, alteration, misuse, abuse, fire, flood, acts of God, improper installation, installation not in
accordance with electrical or plumbing codes, or use of consumables or cleaning products not approved by Maytag.
5. Cosmetic damage, including scratches, dents, chips or other damage to the finish of your major appliance, unless such damage
results from defects in materials or workmanship and is reported to Maytag within 30 days from the date of purchase.
6. Any food loss due to refrigerator or freezer product failures.
7. Costs associated with the removal from your home of your major appliance for repairs. This major appliance is designed to be
repaired in the home and only in-home service is covered by this warranty.
8. Repairs to parts or systems resulting from unauthorized modifications made to the appliance.
9. Expenses for travel and transportation for product service if your major appliance is located in a remote area where service by an
authorized Maytag servicer is not available.
10. The removal and reinstallation of your major appliance if it is installed in an inaccessible location or is not installed in accordance
with published installation instructions.
11. Major appliances with original model/serial numbers that have been removed, altered or cannot be easily determined. This warranty
is void if the factory applied serial number has been altered or removed from your major appliance.
The cost of repair or replacement under these excluded circumstances shall be borne by the customer.
DISCLAIMER OF IMPLIED WARRANTIES; LIMITATION OF REMEDIES
CUSTOMER'S SOLE AND EXCLUSIVE REMEDY UNDER THIS LIMITED WARRANTY SHALL BE PRODUCT REPAIR AS PROVIDED
HEREIN. IMPLIED WARRANTIES, INCLUDING WARRANTIES OF MERCHANTABILITY OR FITNESS FOR A PARTICULAR PURPOSE,
ARE LIMITED TO ONE YEAR OR THE SHORTEST PERIOD ALLOWED BY LAW. MAYTAG SHALL NOT BE LIABLE FOR INCIDENTAL
OR CONSEQUENTIAL DAMAGES. SOME STATES AND PROVINCES DO NOT ALLOW THE EXCLUSION OR LIMITATION OF
INCIDENTAL OR CONSEQUENTIAL DAMAGES, OR LIMITATIONS ON THE DURATION OF IMPLIED WARRANTIES OF
MERCHANTABILITY OR FITNESS, SO THESE EXCLUSIONS OR LIMITATIONS MAY NOT APPLY TO YOU. THIS WARRANTY GIVES
YOU SPECIFIC LEGAL RIGHTS, AND YOU MAY ALSO HAVE OTHER RIGHTS WHICH VARY FROM STATE TO STATE OR PROVINCE
TO PROVINCE.
If outside the 50 United States and Canada, contact your authorized Maytag dealer to determine if another warranty applies.
If you need service, first see the "Troubleshooting" section of the Use & Care Guide. After checking "Troubleshooting," you may find
additional help by checking the "Assistance or Service" section or by calling Maytag. In the U.S.A., call 1-800-688-9900. In Canada, call
1-800-807-6777.
9/07
ML &G
Cuisinibre _lectrique & touches de
precision 800 - dessus lisse
/sin/
instructions de s6curit6
importantes ................................ 21-24
Nettoyage ................................... 24-26
Four autonettoyant
Methodes de nettoyage
Entretien ............................................. 27
Hublot et lampe du four
Recherche des pannes ...................28
r O_iSSOn SUr [a surface ............. 29-32
Boutons de commande
Surface _ dessus lisse
Cuisson duns le four ................ 32-39
Cuisson courante
Cuisson et maintien
Cuisson et maintien diff6r6s
Maintien au chaud
Cuisson au gril
Arr6te automatique/Mode sabbat
Grilles du four
Garantie et service aprbs=vente ... 41
Guia de uso y cuidado .....................42
Lire routes los instructions avant d'utiliser cot appareil;
observer toutes losinstructions pour eliminer losrisques
d'incendie, choc electfique, dommages materiels et corporels
que pourrait susciter une utilisation incorrectede rappareil.
Utiliser rappareil uniquement pour los fonctions prevues,
decrites darts ce guide.
Pour une utilisation adequate et en s_curit_ il faut que
rappareil soit convenablement installe par un technicien
qualifi& et relic _ la terre. Ne pas regler, reparer ni remplacer
un composant, _ moins que cola ne soit specifiquement
recommande darts ce guide. Toute autre reparation doit etre
effectuee par un technicien qualifi&
Toujoursdebrancher rappareil avantd'y faire de rentretien.
instructionsde
securlteimporlentes
Les instructions de securite importantes et les paragraphes
_{avertissement _>de ce guide ne sont pas destines _ couvfir
toutes los conditions et situations qui pourraient se presenter.
II faut faire preuve de bon sons,de prudence et de soin Iors de
rinstallation, de rentretien ou du fonctionnement de rappareil.
Toujours prendre contact avec le fabficant darts le cas de
problemes ou de conditions qui ne seraient pas comprises.
Reconnaitre los etiquettes, paragraphes et
symboles sur la securit_
Utiliser une lampe torche pour determiner si la bride
antibasculement est convenablement installeesous la
cuisiniere: L'un des pieds arriere de reglage de raplomb doit
etre convenablement engage dans la fente de la bride.
Lorsque la cuisiniere est convenablement calee, la bride
antibasculement immobilisele pied arriere contre le sol.
Verifier la parfaite immobilisationde lacuisiniere par la bride
apres chaque deplacement de la cuisiniere.
Pour viter un incendie ou des
dommages par la fumee
S'assurer que tous los materiaux de conditionnement sont
retires de rappareil avant de le mettre en marche.
Garder los materiaux combustibles bien eioignes de rappareil.
Ne pas ranger de materiaux inflammables dans un four.
De nombreux types de plastique sont affectes par la chaleur.
Garder los plastiques eioignes des pieces de rappareil pouvant
devenir chaudes.
Pour empecher qu'un feu de graisse nese declare, eviter
toute accumulation de graisse ou autres matieres
inflammables darts rappareil ou au voisinage.
21
En cas d'incendie
Utiliser du bicarbonate de soude ou un extincteur _ poudre
chimique ou _ mousse pour etouffer les fiammes. Ne jamais
utiliser d'eau pour eteindre de la graisse enfiammee.
1. Interrompre I'alimentation electrique de I'appareil pour
minimiser la propagation des fiammes.
2. NE JAMAIS saisir ou d@lacer un ustensile de cuisine
enfiamm&
3. Fermer la porte du four pour etouffer les fiammes.
Arreter la hotte pour eviter la propagation des flammes.
Eteindre les fiammes, puis mettre la hotte en marche pour
evacuer la fumee et les odeurs.
S curit6 pour les enfants
NE JAMAIS TOUCHERLES ELEMENTSCHAUFFANTS NI LES
PAROIS INTERIEURESDU FOUR. Leselements chauffants
peuvent etre brQlants meme s'ils nesont plus rouges. Les
surfaces interieures du four peuvent atteindre une
temperature suffisamment elevee pour infiiger des brQlures.
Pendant et apres usage, ne pus toucher les elements
chauffants ni les parois interieures du four et eviter leur
contact avec des vetements ou autres materiaux inflammables
avant qu'ils n'aient eu le temps de refroidir suffisamment.
D'autres surfaces peuvent egalement atteindre une
temperature suffisamment elevee pour brQler :le ouverture
d'event et le surface avoisinante, ainsi que le porte et le hublot
de four.
Ne pus toucher I'ampoule du four brQlante avec un chiffon
humide car elle pourrait se briser. Si tel est le cas,debrancher
I'appareil avantde retirer I'ampoule pour eviter une decharge
electrique.
NE JANIAIS garnir la sole du four ou une grille du four avec
de la feuille d'aluminium. Ceci pourrait susciter un risque de
decharge electrique ou d'incendie, ou une deterioration de
I'appareil. Utiliser de la feuille d'aluminium uniquement seion
les instructions de ce guide.
NE JAMAIS laisser des enfants seuls ou sans supervision
Iorsque I'appareil est en service ou encore chaud. Ne jamais
laisser un enfant s'asseoir ou se tenir sur une partie
queiconque de I'appareil. IIpourrait se blesser ou se brQler.
II est important d'enseigner aux enfants que rappareil et les
ustensiles places dedans peuvent etre chauds. Laisser refroidir
les ustensiles en un lieu sQr,hors d'atteinte des enfants. II est
important d'enseigner aux enfants qu'un appareil menager
n'est pas unjouet, et qu'ils ne doivent toucher aucune
commande ou autre composant de I'appareil.
Familiarisation avec I'appareil
Ne pus utiliser cet appareil pour chauffer ou pour garder
chaude une piece, sinon des dommages _ I'appareil pourraient
s'ensuivre et cela pourrait etre dangereux pour rutilisateur.
Aussi, ne pus utiliser le four pour ranger des aliments ou des
ustensiles de cuisine.
Ne pus bloquer ou obstruer I'event du four.
Caisson et s curit
NE JAMAIS faire chauffer un recipient non ouvert dans le
four. L'accumulation de press[on dans le recipient pourrait
provoquer son eclatement et de graves dommages materiels
ou corporels.
Utiliser des maniques robustes et seches. Des maniques
humides peuvent provoquer la formation de vapeur brQlante.
Ne jamais utiliser un torchon _ vaisselle ou autre article
textile _ la place de maniques; un tel article pourrait trainer sur
un element et s'enfiammer, ou accrocher un ustensile ou un
composant de I'appareil.
Porter un vetement appropri& Eviter de porter des vetements
amples ou _ Ionguesmanches pendant rutilisation de
I'appareil.IIspeuvent prendre feu si levetement entre en
contact avec un element de cuisson brQlant.
Placer toujours les grilles _ la position appropriee dans le four
Iorsque le four est froid. Fairecoulisser la grille vers I'exterieur
avant d'ajouter ou enlever un plat; utiliser pour cela une
manique robuste et seche. Eviter d'introduire la main darts le
four pour y placer ou retirer un plat. S'il est necessaire de
d@lacer une grille Iorsqu'elle est chaude, utiliser une manique
seche. Ne pas toucher un element chaud avec une manique.
Ne pas utiliser les grilles que darts le four darts lequel elles
ont ete achetees/expediees.
Ouvrir toujours la porte du four tres prudemment. Laisser Fair
chaud ou la vapeur s'echapper avant de retirer ou d'introduire
un plat.
suite
22
AVERTISSEMENT - METS PREPARI_S: Respecter les
instructions du fabricant. Sile contenant ou lecouvercle en
piastique d'un mets surgele se ddorme ou est endommage
durant la cuisson, jeter immediatement le recipient et son
contenu. Lesaliments pourraient ¢tre contamines.
Ne pas permettre lecontact de papier d'aluminium ou de la
sonde _ viande avec leselements chauffants.
Toujourseteindre toutes les commandes une fois la cuisson
terminee.
Ustensiles et s curit
Appliquer los instructions du fabricant [ors de remp[oi d'un
sachet pour cuisson au four.
La securite de fonctionnement de cet appareil a ete testee
raide d'ustensiles de cuisine traditionnels. Ne pas utiliser un
ustensile ou accessoire qui n'est pas specifiquement
recommande darts ce guide. Ne pas utiliser de systeme de
convection additionnel. L'utilisation d'un dispositif ou
accessoire qui n'est pas expressement recommande dartsce
guide peut degrader [asecurite de rapparei[ ou sa
performance, ou reduire [a [ongevite des composants.
Si un ustensile est plus petit que relement utilis& une partie de
relement chauffant est exposee et peut provoquer
rinfiammation d'un vetement ou des maniques.
Seuls certains materiaux en verre, vitroceramique, ceramique,
gres, ou certains ustensiles vitrifies/emaifles peuvent etre
utilises sur [a table de cuisson ou dans le four sans risque de
bris sous reffet du choc thermique. Observer losinstructions du
fabricant [ors de rutilisation d'un ustensile en verre.
Friteuses
Exercer une prudence extreme Iors du depiacement du
recipient de graisse ou [ors de relimination de graisse chaude.
Laisser [a graisse refroidir avantde deplacer rustensile.
Hottes d'extraction
Nettoyer frequemment lesfiitres et la hotte de la cuisiniere
pour empecher la graisse ou d'autres produits inflammables
de s'accumuler sur les filtres ou la hotte en provoquant des
feux de graisse.
Pour flamber des aliments sous [a hotte, mettre [e ventiiateur
en marche.
Nettoyage et s curit
Nettoyer prudemment la table de cuisson. Arreter toutes les
commandes et attendre le refroidissement de tousles
composants avantde les toucher ou d'entreprendre le
nettoyage. Travailler prudemment pour eviter des brOlures par
la vapeur en cas d'utilisation d'un chiffon ou d'une eponge
hum[de lots de I'elimination d'un produit renverse sur une
surface chaude. Certains produits de nettoyage peuvent
generer des vapeurs nocives Iorsqu'on les applique sur une
surface chaude.
Nettoyer uniquement lespieces mentionnees darts ce guide.
Four autonettoyant
Or[enter la poignee de chaque ustensile vers [e centre de [a
table de cuisson et non vers rexterieur ou vers un autre
element; ceci reduira le risque de brOiure, inflammation de
matiere inflammable ou renversement (un jeune enfant pourrait
saisir et renverser un ustensiie dont [e manche est oriente vers
rexterieuO.
Table de cuisson
NE JAMAIS laisserun element de surface aliume sans surveil-
lance,particulierement avec chauffage eleve. Le debordement
du contenu de rustensile pourrait provoquer la generation de
fumee abondante et rinfiammation de la graisse.
Cet appareil comporte des elements chauffants de differentes
tailles. Utiliser toujours un ustensile _ fond plat, de taille
suffisante pour qu'il puisse recouvrir completement relement.
Pour opt[miser refficacit& choisir un ustensile de meme taille
que relement.
SURFACE ENVITROCeRAMIQUE : NE JAMAIS utiliser une
table de cuisson cassee ou felee :les solutions de nettoyage et
renversements pourraient penetrer darts [atable de cuisson en
entrainant un risque de decharge electrique. Prendre
immediatement contact avec un technicien qualifi&
Ne pas nettoyer le joint de porte; le joint joue un rOle essentiel
quant _ retancheit& Ne pas frotter, endommager ou deplacer
le joint.
Ne pas utiliser de produits de nettoyage pour four ou enduits
de four, darts le four autonettoyant ou sur les zones voisines.
Avertissement et avis
important pour la s curit6
La Ioicaiifornienne _ Safe Drinking Water and Toxic
Enforcement Act )>de 1986(proposition 65)stipule [a
publication par [e gouverneur de [a Californie d'une [iste de
substances que retat de Californie considere comme
cancerigenes ou dangereuses pour le systeme reproducteur,
et impose aux entreprises commerciales robligation de
signaler _ leurs clients los risques d'exposition _ de teiles
substances.
23
Nous informons les utilisateurs de cet appareil que Iors d'une
operation d'autonettoyage, ils peuvent etre exposes _ une
faible concentration de certaines substances figurant darts la
liste mentionnee ci-dessus, dont le monoxyde de carbone.
Pour minimiser [exposition, veiller _ ce que la piece o0 se
trouve le four soit convenablement aeree durant une operation
d'autonettoyage par I'ouverture d'une fenetre ou d'une porte.
AViS IMPORTANT - OlSEAUX FAMlUERS : Lesoiseaux ont
un systeme respiratoire tres sensible. Ne pas garder un oiseau
familier darts la cuisine ou dans une piece ou il pourrait etre
expose aux fumees. Lesfumees emises durant une operation
d'autonettoyage peuvent etre dangereuses ou mortelles pour
un oiseau, de meme que les fumees emises Iors du chauffage
excessif de graisse, huile, margarine, et du chauffage excessif
darts un ustensile 8 revetement antiadhesif.
Conserver ces instructions pour consultation ult6rieure
Four autonettoyant
4,
5,
6,
d'autonettoyage ne nettoie pas ces zones. Elles doivent 6tre
nettoyees pour emp6cher la salet6 de s'incruster pendant le cycle
de nettoyage. [Le joint assure 1'6tanchdit6 autour de la porte et
du hublot du four.)
Pour emp6cher tout dommage, ne pas nettoyer ni frotter le joint
qui setrouve autour de la porte du four. Ce joint est congu pour
@iter les pertes de chaleur pendant le cycle d'autonettoyage.
Eliminer les r6sidus de graisse ou de produits renvers6s sur la
sole avant le nettoyage. Ceci emp6che la formation de flammes
ou de fum6e durant le nettoyage.
Essuyer les r6sidus sucres et acides, comme les patates douces,
la tomate ou les sauces _ basede lait. La porcelaine vitrifi6e
poss_de une certaine r_sistance aux compos6s acides, mais qui
n'est pas limit6e. Elle peut se d_colorer si les r_sidus acides ou
sucr6s ne sont pas enlev6s avant de commencer I'autonettoyage.
Lecycled'autonettoyageutilisedestempdraturessup@ieuresa la
normalepourassurerle nettoyageautomatiquede la totalit6du four.
Lefour dolt6tre nettoydr6guli_rement.Les6claboussuresdoivent
6treessuy6espour dviterune productionexcessivedefum6eou
I'apparitionde flammes.Ne laissezpasde rdsiduss'accumulerdarts
lefour.
Durantle processusd'autonettoyage,il convientde bien a@erla
cuisinepour _liminerlesodeursnormalementdmisesdurantle
nettoyage.
Programmation de I'autonettoyage :
[ Remarqae : Latemp6raturedu four dolt 6tresitu6eendessous
de205° C[400°F] pour programmerun cycled'autonettoyage.
1
2,
3,
Avant I'autonettoyage
1. Eteindrela lampedu four avantle nettoyage.Ellerisqueraitsinon,
de griller. 4.
2. Enlevertousles platset lesgrillesdu four. Lesgrilles risquentde
sed6coloreretde ne plusglisseraussibien apr_sun cycle
d'autonettoyagesion ne lesenl6vepas.
3. Nettoyerle cadredu four, le cadrede la
porte,la zonea I'ext@ieurdujoint et ",,.
autourde I'ouverturedanslejoint dela
porte,_ I'aided'un produit de
nettoyagenonabrasifcommeBon
Ami* oud'eauadditionnc!ede
d6tergent.Leprocessus
*Lesnomsde marquedesproduits de nettoyagesont desmarquesd@osdesdesdiffc!rentsfabricants.
Fermerla portedu four.
Appuyersur la toucheClean (Nettoyage). Clean
Lemot CLEANclignote. .....................................................
Lemot SET[Valider)clignote a I'afficheur.
r_
Appuyersur la toucheAutoset 0 (Programmation U
automatique). Autosd
° MEd [Moyen)(Salet6moyenne,3 heures)estaffich6.
Appuyersur la toucheAutoset 0 pourvoir driller lesdiff@ents
rc!glagesde I'autonettoyage:
HVy[rr_s sale)(Salet6@aisse,4 heures)
MEd [Moyen)(Salet6moyenne,3 heures)
LifE (L%eO (Saletc!Ic!g_re,2 heures)
Lechoixdu niveaudesalet_dufour programme
automa-tiquementla dur6edu cycled'autonettoyage.
suite
24
5. Apr_squatresecondes,le fourcommencele nettoyage.
Si la porten'estpasferm6e,des bipsretentissentet lemot
{{door >>_orte) parait_ I'afficheur.Si la porten'estpas
fermc!edansles30 secondes,I'op_rationd'autonettoyageest
annulc!eet I'afficheurrevient_I'heuredujour.
Lemot CLEAN(Nettoyage)parait_ I'afficheur.
Lemot LOCK(Verrouillageclignotea I'afficheur.Unefois la
porteverrouill6e,le mot restestable.
Ladurc!ede nettoyagecommencele d_comptea I'afficheur.
D6marrage diff6r_ d'un cycle d'autonettoyage :
1. Appuyersurla toucheDelay 1 (Diffc!rc!). 1
/
Lemot DELAYclignote.
Delay
OO:OOclignote_I'affichage.
2. Entrerla dur6ed'attented6sir6epour le d6marrageducycle
[aide destouchesnum6riquesappropri6es
3. Appuyersurla toucheClean.
Lemot SETclignotea I'afficheur.
4. Appuyersurla toucheAutoset 0 (Programmation
automatique). 0
Lemot LifE (salet616g_re)estaffich_. Autoset
5. Appuyersurla toucheAutoset e pourvoirdriller losdiff6rents
r6glagesde I'autonettoyage:
HVy0-r_ssale) (Saletc!6paisse,4heures)
MEd(Moyen)(Saletcgmoyenne,3heures)
LifE (Lc!ge0[Salet6I%_re,2heures)
Lechoixdu niveaudesalet6dufour programmeautoma-
tiquementla dur6edu cycled'autonettoyage.
6. Apr_squatresecondes,losmotsCLEANet DELAYs'allumeront
et le mot LOCKclignoteraaI'afficheur.Lorsquela portedu four
severrouille,le motLOCKs'arr6tede clignoteret resteallumc!en
continu pour indiquer que lefour est programm_pour une
op6rationde nettoyagediff6rc!.Led_lai d'attenteseraaffich6.
Apr s le cycle d'autonettoyage
Environuneheureapr_slafin du cycle,le mot LOCKs'c!teint.Ace
moment,la portepeut 6treouverte.
La saiet_ poutavoir laiss_ un r_sidugris poudreux.L'enlever
avecun lingo humide.S'il restedelasalet_,colaindiqueque le cycle
de nettoyagen'apas6t6assezlong.Cettesalet6restantesera
enlevc!eau prochaincycled'autonettoyage.
Silos grilles ont _t_ laiss_es_ rint_rieur du four pendant
le cycled'autonettoyageet qu'e[iesgiissentmal sur leurs
supports,losenduire,ainsique lossupports,d'une finecouche
d'huilev6gc!tale.
De fines [ignes peuventapparaitre dans [aporceiaine parce
qu'eiie a subi chaieur et refroidissement.Ceciest normalet
n'affecterapasla performance.
Line d_coioration blanche poutapparaitre apr_s [enettoyage
sidesailments acidesou sucresn'ont pas_t_ eniev_s avant
que ne commencei'autonettoyage.Lati!!colorationest normale
et n'affecterapasla performancedufour.
Remarques:
si laportedu four n'estpasferm_e,lemot_door >>clignote
I'afficheuret le four _metdesbipsjusqu'_ ceque la portesoit
ferm6eet queI'onappuiea nouveausurClean.
S'il s'_!couleplusde cinqsecondesentrele momento0 I'on
appuiesur Cleanet celuio0 I'on appuiesurla touche
AutosetO,I'afficheurretourneautomatiquementaI'affichage
pr_!cSdent.
, Laportedu four setrouveraendommag6esi I'onforceson
ouverturealorsque le motLOCKestencoreaffich_.
Ni thodes de nettoyage
Pendant le cycle d'autonettoyage
Lorsquele mot LOCKparaita I'afficheur,laportene peut_tre
ouverte.Pour_viterd'endommagerla porte,ne pasforcer la porte
pour I'ouvrirIorsqueLOCKest affich_!.
Fum_e et odeurs
La premierelois o0 lefour est nettoy_!,il peuty avoirproduction
d'odeuret defum_!e.Ceciest normalet disparaitra_ I'usage.
Sile four esttr_s saleou si la I_chefritea _!t_!laiss6edansle four, il
poutyavoirproduction defum_!e.
Bruits
Pendantquele four chauffe,il peutseproduiredesbruits de m_tal
en dilatationou en contraction.Ceciestnormalet n'indiquepasque
le fours'abfme.
Dosseretet table decuisson- _mail vitrili_
L'emailvitrifi_estduverreli_au metalparfusion.IIpeutsefissurerou
s'_cailleren casde mauvaiseutilisation.IIest r_sistantauxacides,mais
pastotalementinattaquableparlosacides.Touslosproduitsrenvers_s,
enparticulieracidesousucres,doiventetreessuy_simm(_diatement
avecun lingosec.
Unefoisrefroidi,laveravecdeI'eausavonneuse,rincerets_cher.
Nejamais essuyerunesurfacetilde ouchaudeavecun lingo
humide.Cecipourraitlafissurerou I'ecailler.
, Nejamaisutiliserdenettoyantspourfour,d'agentsdenettoyage
caustiquesouabrasifssurlefini ext_rieurde lacuisini_re.
* Losnomsde marquesontdesmarquesd_pos_gesdesdiff6rentsfabricants.
** Pourcommanderdirectement,composerle 1-877-232-6771E.-U.ou 1-800-688-8/408Canada.
25
Zone dela consoledecommande/horloge
, PourutiliserlafonctionVerrouillagedescommandespourle
nettoyage,voirpage33.
Essuyeravecun lingohumide,puisfairesecher.Ne pasutiliserun
agentdenettoyageabrasifsusceptiblederayerlasurface.
, Onpoututiliserunproduitdenettoyageduverre,pulverised'abord
surun chiffon.NEPASprojeterleproduit directementsurlos
touches de commando ou sur I'afficheur.
Boutons de commando
Placercbaquebouton_ lapositiondeOFF(Arret),et retirercbaque
boutonen letirant.
Lover,rinceretfairesecher.Nepas utiliserunagentdenettoyage
abrasifsusceptiblederayerlafinition.
Fairefonctionnerbri_vementchaqueelementpourverifierquele
boutona etecorrectementreinstalle.
Tabledecuissonenvitrec_ramique
Nejamais uti/iser deproduits de nettoyafle du four,jave//isant,
ammoniaque ou produitsdenettoyage du verrecontenant de
I'ammoniaque.Remarque :Prendrecontact avec un r_parateur
agr_ sila surfaceen vitroc_ramique se fendille, se casseou si de
I'aluminiumou dum_tal fondsur lasurface.
, Laisserlatabledecuissonrefroidiravantdela nettoyer.
G_n_ralit_s- Nettoyerlatablede cuissonapr_schaqueemploiou
aubesoin,avecdu papieressuie-touthumidifieetla cremede
nettoyagepourtabledecuisson*(piecen° 20000001)**.Puis,essuyer
avecun lingosecetpropre.
Remarque : Desmalquespermanentesvontseproduiresilasalet4
restesurlasurfacedecuissonetestcuitedefagonr4p4t4e.
Salet__paisse ou marquesm_talliques- Humidifierune6ponge
recurer<<nerayantpas_.Appliquerdelacr_medenettoyagepour
tabledecuisson*(piecen° 20000001}**etfrotterpourrotiferautant
desaletequepossible.Appliquerunemincecouchedecremesurla
salete,recouvriravecdu papieressuie-touthumidifieetlaisser
pendant30_ 45minutes(2ou3 heurespourlasaletetr_s
importante}.Garderhumideen recouvrantI'essuie-toutd'une
pelliculeplastique.Rotter_ nouveau,puisessuyeravecun lingo
propreetsec.
Remarque : N'utiliserqu'untampon_ recurer_nerayantpas_,
PROPREETHUMIDE,sansdangerpourlosustensi/esde cuisine
rev4tementantiadhesif.Leverreet/emotifserontendommag4ssi/e
tamponn'estpashumide,s'i/estscull/4ousiunautretype
de tamponestuti/ise.
Salet_s cuites ou dess_chdes =Frotteravecun tampona
recurer_nerayantpas_et unecremedenettoyagepou
tabledecuisson*.
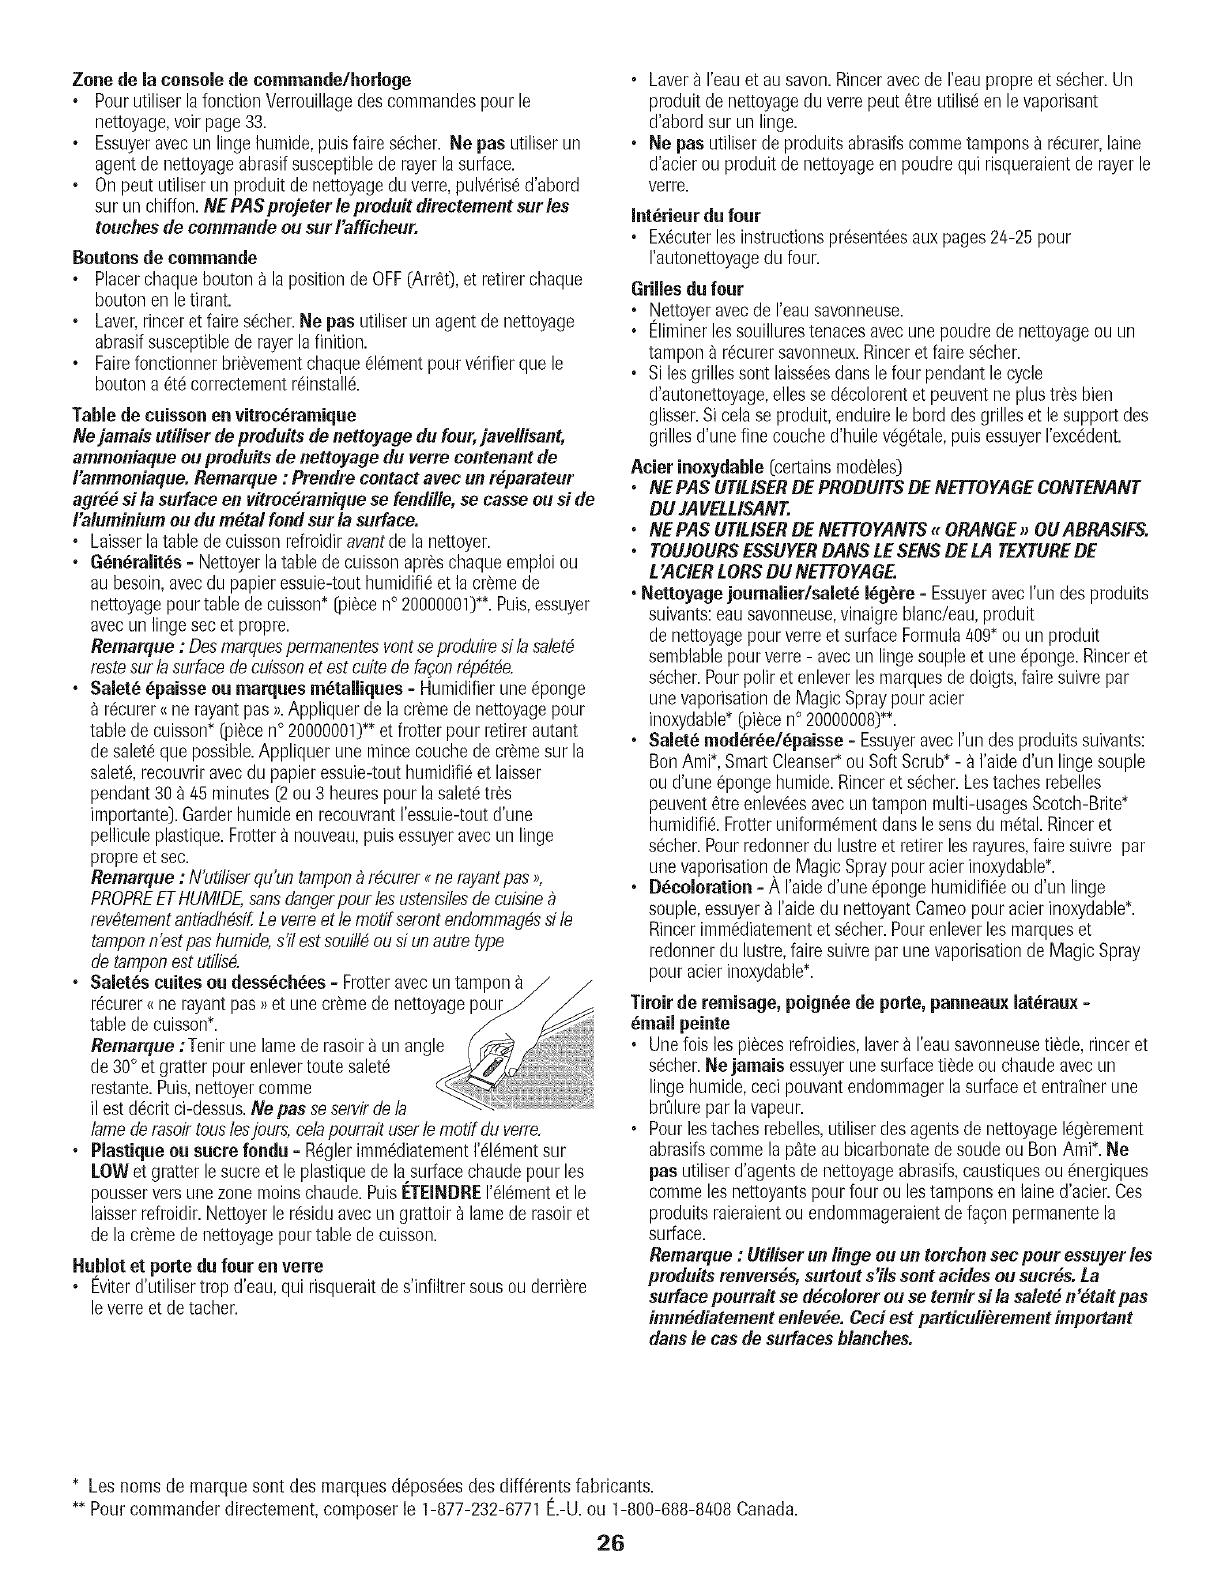
Remarque :Tenirunelamederasoir_un angle
de30°etgratterpourenlevertoutesalete
restante.Puis,nettoyercomme
il estdecritci-dessus.Nepas sesel!/irdela
lamederasoirtouslesjours,colapourraituserlemotifduverre.
Piastiqueou sucrefondu=ReglerimmediatementI'elementsur
LOWetgratterlesucreetle plastiquedela surfacechaudepourlos
pousserversunezonemoinschaude.PuisETEINDREI'el_mentet le
laisserrefroidir.Nettoyerleresiduavecungrattoir_ lamederasoiret
de lacremedenettoyagepourtabledecuisson.
Hublotet portedufour enverre
Eviterd'utilisertropd'eau,qui risqueraitdes'infiltrersousouderriere
leverreetdetacher.
Laver_ I'eauetausavon.Rinceravecde I'eaupropreetsecher.Un
produitde nettoyageduverrepout6treutiliseen levaporisant
d'abordsur unlinge.
Ne pasutiliserdeproduitsabrasifscommetampons_ recurer,laine
d'acierouproduitdenettoyageenpoudrequirisqueraientderayerle
verre.
Int_rieurdufour
Executorlosinstructionspresenteesauxpages24-25pour
I'autonettoyagedu four.
Grillesdufour
NettoyeravecdeI'eausavonneuse.
Eliminerlessouillurestenacesavecunepoudredenettoyageou un
tampon_ recurersavonneux.Rinceretfairesecher.
Silosgrillessontlaisseesdanslefourpendantle cycle
d'autonettoyage,oliossedecolorentet peuventneplustresbien
glisser.Sicolaseproduit,enduirele borddesgrilleset lesupportdes
grillesd'unefinecouched'huilevegetale,puisessuyerI'excedent.
Acierinoxydable[certainsmodules]
NEPAS UTILISERBEPROBUITSBENETTOYAGECONTENANT
BUJAVELLISANT.
NEPASUT/LISERDENETTOYANTS_ ORANGE, OUABRASIFS.
TOUJOURSESSUYERBANSLESENSBELA TEXTUREBE
L'ACIERLORSBU NETTOYAGE.
Nettoyage journalier/salet_I_g_re=EssuyeravecI'undesproduits
suivants:eausavonneuse,vinaigreblanc/eau,produit
denettoyagepourverreetsurfaceFormula409*ouunproduit
semblablepourverre- avecun lingosoupleet uneeponge.Rinceret
s_cher.Pourpoliretenleverlosmarquesdedoigts,fairesuivrepar
unevaporisationdeMagicSpraypouracier
inoxydable*(pieceno20000008)**.
Salet_mod_r_e/_paisse =Essuyeravecrun desproduitssuivants:
BonAmi*,SmartCleanser*ouSoftScrub*- _ I'aided'un lingosouple
ou d'uneepongehumide.Rincerets_cher.Lostachesrebelles
peuventetreenleveesavecuntamponmulti-usagesScotch-Brite*
humidifie.Frotteruniformementdartslesonsdu m_tal.Rinceret
secher.Pourredonnerdu lustreetrotifer losrayures,fairesuivre par
unevaporisationde MagicSpraypouracierinoxydable*.
D_coloration =A I'aided'uneepongehumidifieeoud'un lingo
souple,essuyer_I'aidedu nettoyantCameopouracierinoxydable*.
Rincerimmediatementetsecher.Pourenleverlosmarqueset
redonnerdu lustre,fairesuivreparunevaporisationdeMagicSpray
pouracierinoxydable*.
Tir_irderemisage,poign_edeporte,panneauxlat_raux-
_mail peinte
Unefoislospi_cesrefroidies,laver_I'eausavonneusetilde, rinceret
s_cher.Nejamais essuyerunesurfacetiedeouchaudeavecun
lingohumide,cecipouvantendommagerlasurfaceetentrainerune
brOlureparlavapeur.
Pourlostachesrebelles,utiliserdesagentsde nettoyageleg_rement
abrasifscommelapateaubicarbonatede soudeou BonAmi*.Ne
pasutiliserd'agentsdenettoyageabrasifs,caustiquesouenergiques
commelosnettoyantspourfourou lostamponsen lained'acier.Cos
produitsraieraientouendommageraientdefagonpermanentela
surface.
Remarque : Utiliserunlingoou un torchon secpouressuyerlos
produits renvers_s,surtout s'ils sont acides ou sucrds.La
surfacepourrait sed_colorer ou se remit si la salet_ n'dtait pas
imm_diatement enlev_e. Ceciest particuli_rement important
dartslecas desurfaces blanches.
* Losnomsde marquesontdesmarquesdepos_!esdesdiff_rentsfabricants.
** Pourcommanderdirectement,composerle 1-877-232-6771E.-U.ou 1-800-688-8/408Canada.
26
Porte du four
Pieds de r glage de I'aplomb
i
Remarque : Onpeut percevoirunecertaine{{61asticitc!_ Iorsde la|
fermeturede la portedu four d'unecuisini_reneuve;ceci est
1
normal;ceteffet disparaftprogressivement.
Hublot du four
Pour protbger le hublot de la porte du four :
1. Ne pas utiliserde produits nettoyantsabrasifscommedes
tamponsa rc!cureren lained'acierou desproduits de nettoyage
en poudrequi risqueraientde rayerle verre.
2. Ne pas heurterle hublotenverreavecun ustensile,un articlede
mobilier,un jouet,etc.
3. Ne pas fermerla portedu four avantquelesgrillesne soienten
placedartslefour.
Toutede!gradatiOndu hublotdeverre- rayure,choc,tension,etc.-
peutaffaiblir sastructureetaugmenterle risquede brisa unedate
ult6rieure.
Lampe du four
Pour remplacer I'ampoule du four :
1. Apr_sle refroidissementdu four, CABOCHON
maintenirlecabochontout en
enlevantla piecem6tallique
qui la maintienten place.
Rernarque: Lecabochon
tomberasion ne lemaintient
pasen place.
2. Enleverlecabochonet
I'ampoule.
3. Installeruneampoulede 40watts pour appareilm6nager.
4. R6installerlecabochonet lefil m6talliquede retenue.
5. R6tablirI'alimentationde lacuisini_re.R6glerde nouveau
I'horloge.
RESSORTDERETENUE
(ill m6tdlique)
Tiroir de remisage
DE L 'APLOMB
Letiroir de remisagepeut 6treenlev6pourvouspermettrede
nettoyersousla cuisini6re.
D_pose :
1. Vider letiroir et le tirerjusqu'_la positionde la premierebut6e.
2. SouleverI'avant.
3. Tirerjusqu'a laposition de lasecondebut6e.
4. Saisirle tiroir par lesc6t6set soulever/tirerpour rextraire.
R_installation :
1. Ins6rerlesextrc!mit6sdesglissi_resdutiroir danslesrailsde la
cuisiniSre.
2. SouleverI'avantdu tiroir et pousserdoucementjusqu'_ la
position de lapremi6rebut6e.
3. Souleverdenouveaule tiroir etle pousserpour lefermer.
Prise de courant au×iliaire
(modeles canadiens seulement)
La prisede courantauxiliaireest situ6een bas/_gauchedu dosseret.
Veillera ceque le cordond'alimentationdeI'appareilutilis_nerepose
passur un _k!mentde latablede cuissonou aproximitc!;la raiseen
marchede rc!lc!mentchauffantferait subirdes ................
/ ...................
dommagesaucordond'alimentationeta la
prisedecourant.
Unappareilsuscitantune demandedecourant
de plusde 10A provoqueraI'ouverturedu
disjoncteurqui protegela prisedecourant
auxiliaire.Pourr6armerle disjoncteur,appuyer _ AB
surle commutateursitu_sur le bord inf6rieur _,,_
2 7 du dosseret. DISJONCTEUR
Pourlaplupartdesproblbmesobservbs,essayerd'abordlossoiuSons
possibles,_droite.
Vdrifierqueloscommandosdufoursontcorrectementr_gl_s.
Vc!rifiersilefourestbienraccord_aucircuit61ectrique.
Inspecter/r@rmerledisjoncteur.Inspecter/remplacerlosfusibles.
Contr61erlasourced'alimentationc!lectrique.
Non=fonc_onnementderappareil=total oupa_eJ.
D_terminersiloscommandesdes616mentsdesurfaceet/oudufoursont
cenvenablementr6gl6es.Voirpages29et34.
D_terminersilaportedufours'estd#verrouillc!eaprasuneop6ration
d'autonettoyage.Voirpage25.
D6terminersilefourestrc!gl#pourunecuissondiff6r6eouunnettoyage
diff#r&Voirpages25et35.
V_dfiersileverrouillagedescommandosestenmarche.Voirpage33.
Vc!rifiersilacommandoestenmodesabbatVoirpage38.
Uhodogeouloslampesfoncf_onnent,losmotsparaissent_ ranicheur,
maislefour nechaulfepus.
Loscommandossontpeut-6treprogramm6espourunefonctiondecuisson
etmaintienouded6marragediffer&
Lafonctiondeverrouillagedescommandosestpeut-6treactiv6e.
Voirpage33.
R_sultatsdecuissonaufourcliff,rentsdesattentesoudeceux
produitspariefourant_deur.
D6terminersi1'6ventdufourestobstru&Voirsonemplacementpage39.
S'assurerquelacuisini_reestd'aplomb.
Lear_lagesdetemp6raturevarientsouvententreunfourned etlefour
qu'ilremplace.Onobservesouventuned(!dvedur6glagedeteml_rature
d'unfouramesurequ'ilvieillit;ilpeatdevenirpluschaudoumoinschaud.
Voirpage37pourleainstructionsd'ajustementdelatemperaturedufour.
Remarque:IIn'estpasutiledemodifierler6glagedetemp6raturesila
variationn'affectequ'uneoudeuxrecettes.
R_sultatsinco_rectslois delacaissonaugdl,ou_missionexcessive
defum_e.
Dc!terminerlapositiondesgrilles.Lesalimentspeuvent6tretropprosde
I'dl6mentdugril.
EI6mentdugrilpaspr6chauff&
Utilisationincorrectedefeuilled'aluminium.Nejamais gamirlagrillede
I_chefriteavecdelafeuilled'aluminium.
Portedufourfem_6edurantlacuissonaugril.Laisserlaportedufour
entrouverted'environ10cm[4pouces)- premierebutte.
Enleverrexc_sdegraissesurlapiecedeviandeavantlacuissonaugril.
Utilisationd'unelechdritesouill_e.
Latension_lectriquedelamaisonestpeut-_trebasse.
Impossibilit_d'autonettoyagedufour.
D_!terminerqueI'appareiln'apus_t_programm_pourunautonettoyage
differ&Voirpage25.
V_!dfierquelaporteestfemale.
VdrifiersilacommandeestenmodesabbatVoirpage38.
Lefourestpeut8treaunetempdraturesup_rieure_205°C(400°F).La
temperaturedufourdolt8treinfdrieure_205° C(400° F)pourpouvoir
programmeruncycled'autonettoyage.
LefournesenettoiepascerrectemenL
Untempsdenettoyagepluslongpout_tren_cessaire.
Onn'apus_limin_avantI'op@ationd'autonettoyagelosaccumulations
excessivesderdsidus,particuli_rementlosr_sidusd'alimentsacidesou
sucres.
Laportedefournesedeverrouillepusapr_srautonettoyage.
L'int(!rieurdufourestencorechaud.Attendreenvironuneheureapr_s
rach_vementdelap_rioded'autonettoyage.IIestpossibled'ouvrirlaporte
apr_sladisparitiondumessageLOCK[Verrouillage)surrafticheur.
Lescommandosetlaportesontpeut-Streverrouilldes.Voirpage33.
Lasurface_dessuslissemontredessignesd'usure.
Finesrayuresouabrasions.
- S'assurerquelasurfacedecuissonetlefonddesustensilessont
propres.Nepasfakeglisserd'ustensilesenverreouenm_talsurla
surface.S'assurerquelefonddesustensilesn'estpusrugueu_:Utiliser
leaagentsdenettoyagerecommand_s.Voirpage26.
Marquesdem_!tal.
- Nepusfaireglisserd'ustensilesm_!talliquessurlasurface.Uneloisla
surfacerefroidie,lanettoyeraveclacr_medenettoyagepourtablede
cuisson.Voirpage26.
Marquesettachesbrunes.
- Enleverrapidementlosproduitsrenvers_s.Nejamaisessuyerlasurface
avecune@ongeouunlingosailS'assurerquelatabledecuissonet
quelefonddesustensilessontpropres.
Zonesavecrefietm_!tallique.
- D@Otsmin_rauxenprovenancedeI'eauetdelanourriture.Utiliserlos
agentsdenettoyagerecommand_!s.Voirpage26.
PiqOresou6caillements.
- Enleverrapidementleaproduitssucresquiontd_bord_!.Voirpage26
Accumulationd'humidit_surlehublotoavapeursortantdeI'_ven_.
Ceciestnormaldurantlacuissond'alimentscontenantbeaucoupd'eau.
Utilisationexcessived'humidit_!Iorsdunettoyageduhublot.
Emissiond'uneforteodeuroudefum_eIols delaraiseenmarche
dufour.
Ceciestnormalpourunfourneufetdisparaftapr_squelquesutilisations.Un
cycled'autonettoyage<<bn)lera>>plusrapidementlesodeurs.
Laraiseenmarched'unventilateuraide_ retirerfum_eetodeurs.
P_sencedesalet_ssurlasole.Proc_deraun autonettoyage.
Codesd'anomalie.
LeamotsBAKE(Caissoncourante)ouLOCKpeuventclignoterrapidement
rafiicheurpourpr_venird'uneerreuroud'unprobl_me.SilemotBAKEou
LOCKparaitaI'afficheur,appuyersurlatoucheCANCEL(Annule0.Silemot
BAKEouLOCKcontinue_clignoter,d_!brancherrappareil.Attendrequelques
minutes,puisrebrancherI'appareil.Silemotcontinue_clignoter,
d_brancherI'appareiletprendrecontactavecunr@arateurautoris_!.
Silefourus1tr_ssale,losflamm_chespeuventproduireuncoded'anomalieau
coursducycled'autonettoyage.AppuyersurlatoucheCANCELetlaisserle
fourrefroidircompl_tement,essuyerlasalet_enexc_spuisreprogrammer
rautonettoyage.Silecoded'anomalier@pparait,prendrecontactavecun
r@arateurautoris_!.
Desbruitssefont entendre.
Lefourfaitplusieursbruitsfaibles.IIestpossibled'entendrelosrelaisdufour
quisemettentenmarcheets'arr_tentCeciestnormal.
Alolsquelefourser_chauffeetserefroidiLilestpossibled'entendredesbruits
correspondantaladilatationet_lacontractiondespi6cesm_talliques.Ceciest
normaletn'endommagepusI'appareil.
IIn'yanihipniaffichage.
Lefourestpeut-_treenmodesabbatVoirpage38.
SAbclignotepaisresteallum&
Lefourestenmodesabbat.Pourannuler,appuyersurlatoucheClerk
2 8 (Horloge)etmaintener-laenfonc_ependanto'bqsecondes.
Culssonsurlesurfece
Boutons de commande
PermettentI'utilisationdes_16mentschauffantsdesurface,avecune
progressioncontinuedela puissanceentrelosr6glagesextr6mes
Low (Basse)et High(Elevc!e).On poutrc!glerun boutona toute
positionentrecosdeuxextr6mes.
R6glage des commandos
1. PlacerI'ustensilesurI'c!lc!ment.
2. Enfonceret fairetournerle boutonjusqu'_la positiond6sirc!e
(rotationdartsunsonsou dartsI'autre).
Desrnarquessur letableaude commandoidentifient1'61c!ment
command6parchaquebouton.Parexemple,le O O
graphique_droiteindique I'c!16ment Front 000
avant!gauche.
3. IIy aunt6moin lumineuxpour les_16mentssurle tableaude
commando.LorsqueI'un desboutonsdecommanded'un 616ment
de surfaceest aliment& let6moin s'illurnine.Let6moins'c!teint
d_squ'on interromptI'alimentationde I'c!lc!ment.
L'616mentfonctionnerapar intermittencepour maintenirle
rc!glageprc!6tablidechaleur,m6meau niveauHigh(Elev_).
4. Apr_sune cuisson,ramenerle boutona la positionOFF(Arr6t).
RetirerI'ustensile.
Suggestions de r glage
Ladimensionet letyped'ustensile,letype etla quantit6d'aliments
cuire,et la puissancedes616mentsd_terminerontcommentr6glerlos
boutonspourlesop6rationsde cuisson.Certainsc!l_mentsontun
r_glagepr6c!tablipour le mijotageet la fusionqui ne n_cessiteque
desajustementsmineursdartsunsonsou dartsI'autresolon
I'alimenta prc!parer.Losautres616mentsont desr_glagesimprim6s
autourdesboutonsqui sont spc!cifiquesde cos_l_ments.Ajuster los
r_glagessolonloschiffres qui donnentlesr_sultatsde cuisson
ti!!sires.Sesereportera la page31au paragraphe
Recommandationssurlesustensilesde cuisine.Losdescriptions
suivantesaideronta choisirlosrc!glagesdonnant losmeilleurs
r6sultats.
Maintien au chaud: Losalimentsrestent_ unetemp6rature
sup_rieure_ 60° C(140°F)sanscontinuer_ cuire. L'alimentest au
dc!partaune temp_!rature_lev_e,puissachaleurest r_duite.Ne
jamaisutiliser le r_!glageMaintien au chaudpour r_!chaufferdes
alimentsfroids.
Mijotage : Desbullesseformenttout juste _ la surface.Les
alimentssont _ unetemperaturesitu_eentre85 et93° C(185et
2000F].Cer_!glagepeut aussiservirpour _tuverdesalimentsou
lospocherou encorepour continuer lacuissond'alimentssous
couvercle.
Ebullition lente : Desbullesseforment_ un rythmemodern.Ce
r_glagepeutaussiservirpourfrire la majorit_desalimentset pour
maintenir I'_bullitionde grandesquantitSsde liquide.
lebullition : Desbullesseformentdansle liquide_ un rythmerapide.
Cer_!glagepeutaussiservirpourfaire brunirlaviande,lafaire sauter
et chaufferI'huilepourfairefrire avantde passer_ un r_glage
inf_rieur.Les3 ou 4 r_!glageslesplus_!lev_!ssur le boutonservent
cesopt!rationsdecuisson.Le r_!glagele plus_lev_serttoujours
porter I'eaua _!bullition.Certains_lSmentsont mSmeunevitesse
plus _lev_epourr_!bullitiondesliquides.
29
Surface dessus lisse
Remarques :
Lorsdespremieresutilisationsde la tablede cuisson,celle-ci
peat _mettre an pea defam_e et des orients. Ceciest
normal.
Lessurfaces _ dessaslisseconserventla chaleur pendant
an certaintemps apr_s rextinction de I'_l_ment. Eteindre
losdl6mentsquelquesminutesavantque la nourriturenesoit
tout ) fait cuite et utiliser lachaleurrestantepour terminerla
cuisson.Lorsquele voyantde surfacechaudes'dteint,on pout
toucher lasurfacede cuissonsansdanger.Enraisonde lafaqon
dont los61_mentsd'unesurface) dessuslisseretiennentla
chaleur,ceux-ci ner@ondront pasauxchangementsde r6glage
aussirapidementquadesdl6mentsen spirale.
Au casoQle contenu d'un ustensilerisquede ddborder,retirer
I'ustensilede lasurfacede cuisson.
Nejamais essayerde soalever la surface de caisson.
Lasurfacea dessuslissepeutsemblerd6color6eIorsqu'elleest
tr6s chaude.Ceciestnormaletdisparaftunefois que lasurface
refroidit.
Zones de caisson
Loszonesde cuissonde la cuisini_resont repr_sentdespar des
cerclespermanentssurla surfacea dessuslisse.Pourune efficacit6
maximum,utiliserunezonede cuissondont lediam_treconvient
I'ustensile.
Le r#cipientne doltpas d#pa._er la zonede cuisson deplus de
12_ 25 mm (I/2 _ 1po).
Lorsqu'unecommandoestraiseen marche,onpoutvoir un
rougeoiement_ traversla surface_ dessuslisse.L'element
fonctionnera enintermittence pourmaintenir le r_glage
pr_tabli dechaleur, m_me au niveauHigh (Elev_).
Pourobtenirplus informationssur losustensilesde cuisine,se
reporter_ la page31au paragrapheRecommandationssurles
ustensilesde cuisine.
FLEXCHOICE MC
£:LEMENT DE 9
CENTRE DE
RECHAUFFAGE
ELEMENT DE 6 po
ELEMENT DE 12 po
Voyant de surface chaude
Levoyantde surfacechaudeestsituc!surle tableaude commande.
IIs'allumeraIorsqu'unesurfacedecuisson,quellequ'ellesoit,sera
chaude.II resteraallum6,m6meapr_sextinctiondelacommande,
jusqu'aceque la zonenit refroidi.
Centre de r6chauffage
Utiliserle centre de rdchauffagepour maintenirtildes desaliments
cults,comme16gumes,sauceset assiettes-dinersallantau four.
R_glage de la commande :
1. Appuyersur le boutonet letourner.Lostem )draturesde
rdchauffagesontapproximativeset indiqu6espar Min, 2-8 et Max.
Cependant,lacommandepeut6tre rdgldea OFF
toute positionsitu6eentreMin et Max.
Max
2. LorsqueI'opdrationde rc!chauffageest
termin6e,mettrelacommandea OFF Min 8
[Arr6t]et rotifer la nourriture. Le
voyantde surfacechaudes'dteindra 2
Iorsquelasurfacedu centrede ....
rdchauffageaurarefroidi, s
_emarqae8 :
Nejamais rc!chaufferd'alimentspendantplusd'uneheure (les
cauls,pour30 minutes),la qualit6desalimentsrisquantde se
d6tc!riorer.
Ne pas r6chaufferdesalimentsfroids sur lecentre de
rdchauffage.
Losrdglagesde chaleurvarierontsalonletype et la qualitd
d'aliments.Conservertoujourslesalimentsauxtemperatures
approprides.L'USDArecommandequalostemperaturessoient
situ_esentre60et 75°C [140et 170°F).
R_glages sugg_r_s
m
_in = 2 Pains/p_tisseries Saucesdeviande
Platsmijotds Oeufs
2 =5 Soupes(cr_mes) Assiette-dineravecnourriture
RagoOts Sauces
L_gumes Viandes
5 =Max Alimentsfrits Boissonschaudes
Soupes(liquides)
Rernarq_es :
N'utiliserqua desplats etdesustensilesrecommanddspour
I'utilisationsursurfacede cuissonet enfour.
Seservirtoujoursdegantsisolantspour retirerla nourrituredu
centrede rdchauffage.Losustensileset assiettesseront eneffet
tr_s chauds.
Toutela nourrituredolt_tre recouverted'un couvercleou d'une
feuilled'aluminiumpour prdserversaqualitdalimentaire.
Pourrdchaufferdesp_tisserieset despains,laissertoujours
une ouvertureau niveaudu couverclepour permettre
I'humidit_de s'dchapper.
Ne pas utiliser de pelliculeplastiquepour recouvrirlos
aliments.Le plastiquepourraitfondresur la surfaceet il serait
tr_s difficilede I'enlever.
3O
[:.l_ment FlexChoice Mc (certains modeles)
L'616mentFlexChoiceMcest un c!lc!menta OFF
polyvalencede r6glagequi permet une Meit ,i_h
chaleurMelt (fusion) pourla fusion de 2
chocolatou de beurre.IIestsitu6 a I'arri_re
gauche.
Lerc!glageMelt estsitu6 entre2et OFF 4
(Arr6t).Lesr6glagesdechaleurendehorsde .....................
Medium
cettezonefonctionnentcommeceuxd'un
c!16mentnormal,soit entre2 et High(Elevc!e).
Remarque : Lorsde la pr6parationd'alimentsaveclosr_glages I
normaux,lazonede cuissonpeut prendrequelquesminutespour
1/refroidir jusquau rc!gageMet.
L
Conseils de protection de la
surface & dessus lisse
Nettoyage (plus d'informations _ la page 26]
Avantde s'enservirlapremiSrefois,nettoyerla tablede cuisson.
Nettoyerlatablede cuissonchaquejour ou apr_schaque
utilisation.Cesmesurespr6serverontI'apparencede la tablede
cuissonet6viterontqu'elle nes'abime.
Encasde renversementIorsdecuisson,nettoyerimm6diatement
le produitrenvers6surla surfacede cuissonpendantqu'elleest
encorechaudeafin d'c!viterun plusgrand nettoyagepar la suite.
Userdeprudence,essuyerlosrenversementsavecun lingo propre
etsec.
Ne paslaisserlesproduitsrenvers_ssur lasurfacede cuissonou
sur la garniturede latablede cuissonpendantune Ionguedurc!e.
Nejamais utiliser de poudredenettoyageabrasiveou de tampons
rc!curerqui raieraientlasurface.
Nejamais utiliser dejavellisant,ammoniaqueou autresproduits
de nettoyagenonspc!cifiquementrecommand_spour la
vitrocc!ramique.
Pour _viter los marques et los rayures
Ne pas utiliserdecasserolesen verre.Ellespourraientrayerla
surface.
° Nejamais utiliser de supportm_talliqueouanneaude wok entre
un r6cipientet lasurfacede cuisson.Cosobjetspeuventmarquer
ou rayerla surface.
Ne pasfaireglisserde rc!cipientsm_talliquessur lasurfacede
cuissonbrOlante.IIspourraientlaisserdesmarquesqui devront
6trenettoy6esimm6diatement.G/oirNettoyage,page26.)
Veiller_ ceque lefond desr6cipientsetla zonedecuissonsoient
propresavantd'allumer1'_16ment,afind'c!viterlosrayures.
Pouremp6cherquelasurfacede cuissonen vitroc6ramiquenese
trouve ray6eouabim6e,nepasy laisserde sucre,de solou de
graisse.PrendreI'habituded'essuyerlasurfacede cuissonavecun
lingepropre ou un essuie-toutavantde I'utiliser.
Nejamais faireglisser de r6cipientsmc!talliques_paissur la
surfaceau risquede la rayer.
Pour _viter los taches
Nejamais utiliserde lingo ou d'c!pongesalepour nettoyerla
surfacede cuisson.IIslaisseraientunfilm, cequi pourraitd_colorer
la surfacede cuissonIorsqu'elleestutilis6e.
L'utilisationcontinued'une surfacede cuissonsaliepeut entrainer
I'apparitionde tachespermanentes.
Pour 6viter d'autres dommages
Ne paslaisserfondrede plastique,desucreni d'alimentsriches
ensucresur latablede cuisson.Sicolaseproduisait
accidentellement,nettoyerimm6diatement.G/oirNettoyage,page
26.)
Nejamais laisserle contenud'une casserolebouillirjusqu'ace
qu'ellesoitvide carcolapourraitabimerla surfacede cuissonet la
casserole.
Nejamais utiliserla tablede cuissoncommesurfacede travailou
commeplanche_ ddcouper.
Nejamais cuired'alimentsdirectementsur latablede cuisson,
sans rdcipient.
Nejamais utiliserun petit r6cipientsur un grand 61_ment.Non
seulementily a g_chisd'6nergiemaisil pouten r6sulterdes
projectionsqui vont brOlersur lasurfacede cuissonetdevront6tre
nettoydes.
Ne pasutiliser desr_cipientsspeciauxnon platsqui seraienttrop
grandsou _ fond indgalcommeloswoks_ fond rond,losplaques
chauffantesou r_cipientsdegrandetaille afondonduld.
Ne pasutiliser de rdcipientsen aluminium.L'aluminiumrisquede
fondre surle verre.Sile m_talfondsur latable decuisson,nepas
I'utiliser.Appelerun rdparateuragrdd.
Recommandations sur
les ustensiles
L'utilisationdu bonustensilepoutemp_cherde nombreux
probl_mescommela ndcessitddecuire plusIonguementla
nourritureetla difficultd a obtenirdesr_sultatsuniformes.Debons
ustensilesr_duisentlosdur_esde cuisson,utilisentmoinsd'dnergie
etcuisentde faqonplus uniforme.
r-_ ._
Tests pour v_rifier si los _-_::::_"
ustensiles ont un fond plat
V_rifierque lesustensilessont plats.
Test de la r_gle :
1. Placerune r%le en traversdu fondde I'ustensile.
2. Latenirface _ la lumi_re.
3. Aucunelumi_reou tr_s peu nedolt _trevisiblesouslar_gle.
Test de la bulle :
1. Mettre 2,5cm (1 po) d'eaudansI'ustensile.PlacerI'ustensilesur
la surfacede cuissonet tournerla commandosur Nigh [Elevd).
2. Observerlaformationde hullosIorsqueI'eauchauffe.Desbulles
uniformessignifientde bonnesperformancesetdesbulles
indgalesindiquentla prdsencedezonespluschaudesdonnant
une cuissonindgale.
31
Desustensilesbfond
lisse,plat
Desustensilesen
mat_riaux@ais
Desustensilesde la
m_medimensionde
I'_l_ment
Despoign_esqui Desustensilesavecdespoign_!escass_es
tiennent bien ouqui ne tiennentpas.Despoign_es
Iourdesqui font se renverserI'ustensile.
Descouverclesqui Descouverclesqui fermentreal.
fermentbien
Deswoksafond plat Deswoksavecunfond suranneau.
Desustensiles_fond rainur_!ou gondola.
Desustensiles_fond in%al necuisentpas
efficacementet peuventparfoisnepas
fairebouillir lesliquides.
Desustensilesenverreou en mStalpeu
@ais.
Desustensilespluspetitsou plusgrands
[de 2,5cm [1 po]] que I'_!l_!ment.
Ustensiles de grande taille et
pour los conserves
Toutesles marmites pourlosconserveset iesgrandes
casserolesdoiventavoirun fondplat et doivent _tre fabriqu_es
en mat_riau _pais. Ceciesttr_simportantpour lessurfaces
dessuslisse.La basene dolt pasd@asserde I'_!l_mentde plusde
2,5cm (1pc).
Siles marmites_ conserveset leacasserolesnesent pasconformes
coshermes,losdur_esdecuissonseront plusIongueset lossurfaces
de cuissonpourront8treendommag_!es.
Certainesmarmitespourlesconservessent conguesavecdesbases
pluspetitespour _treutilis_!essur dessurfaces_dessuslisse.
Pourla preparationdeconserves,ne choisirque le r_glage
High [E:iev_e)jusqu'_ ce que I'eau commence _ bouillirouque
la pressionsuffisantesoit atteinteclansla marmite.R_duireau r_!glage
le plusfaible,maintenantI'_bullitionou la pression.Si la chaleurn'est
pasdiminu_e,la surfacede cuissonpourrait_treendommag_!e.
Culssondenslefour
Tableau de commando
A B C D E
j
( Clean )
Broil
Convect
Bake
Keep
G 14
I
Delay
4
I J K L NI N
Letableaude commandeeatcongupour faciliter laprogrammation.Lafen_tred'affichageindiqueI'heure,lesfonctionsavecminuterieet
fonctionsdu four. Letableaudecommandorepr6sent_comprendla convectionetd'autrescaract_!ristiquessp_!cifiquesau mod_le.[Lestyle
_eutvariersolonle mod_le.]
Bake(Cuisson
courante]
Broil(Gril]
Clean(Nettoyage)
Delay(D@marrage
differS]
Touches
num_riques
Autoset
(Programmation
automatique]
S'utilisepourlacuissoncouranteetle
rOtissage.
S'utilisepourlacuissonaugrilet lerissolage
surpattiesup_rieur_.
S'utilisepourprogrammerle cycle
d'autonettoyage.
Programmelefourpourdebuterunecuisson
ouun nettoyageplustard.
S'utilisentpourprogrammertemperatureset
durees.
S'utilisepourprogrammerrapidementlos
temperatures.
KeepWarm
(Maintienau (baud)
Convect(Convection
Cook& Hold
(Cuissonetmaintier
Favorite(FavorO
Timer(Minuterie]
Clock[Horloge]
OvenLight
(Lampedu fouO
CANCEL[AnnuleO
S'utilisepourmaintenirauchauddanslefour
lesalimentscults.
S'utilisepourlacuissonetle rOtissageavec
convection.
Pourcuirependantunedureepre6tablie,avec
maintienauchaudpendantuneheure.
S'utilisepourprogrammeretsauvegarderune
m_thodeparticuli6redecuissonetmaintien.
Programmelaminuterie.
S'utilisepourprogrammerI'heuredujour.
S'utilisepourallumeroueteindrelalumi_redufour.
Annule touteslosoperationssaul minuterieethorloge.
32
Utilisation des touches
, Appuyersur latouchedCsirCe.
, Appuyersur lestouchesnumc!riquespour entrer ladurc!eou la
tempc!rature.
, Appuyersur latoucheAutoset 0 (Programmationautomatique)
pourentrer latempc!rature.
Unbip retentitIorsqueI'on appuiesurunetouche.
Undouble bip retentiten casd'erreurde programmation.
Remarque: Quatresecondesapr_savoirentr6leschiffresou la
touche Autoset0,ladurCeou latempCratureserontautomati-
quementenregistrc!es.Si plusde30 secondess'Ccoulententrela
pressionsurunetouche de fonctionet cellosurlostouches
numCriquesoulatouche Autoset0,lafonction estannulCeet
I'afficheurrevienta I'affichageprCcc!dent.
Clock (Horloge)
L'horlogepout6treprogrammCepour afficherladurCedunsun
formatde 12ou 24 heures.L'horlogeest programmCeen usinepour
un formatde 12heures.
Changement de I'horloge _ un format de 24 heures :
1. Appuyersur lestouchesCANCEL
(Annuler)etFavorite (Favori)et maintenirla
pressionpendanttroissecondes.
12Hrclignote a I'afficheur.
2. Appuyersur latouche Autoset 0 pour
sClectionner24Hr; appuyerde nouveaupour
choisir 12Hr.
3. ProgrammerI'heureensuivantlesinstructions D
donnc!esdartslasection R#glagede I'horloge. Autoset""
R_glage de I'horloge :
1. Appuyersurla toucheClock (Horloge).
L'heureclignote _ I'afficheur.
2. AppuyersurlestouchesnumCriquesappropriCespour
programmerI'heuredujour.
Deuxpoints clignotent_ I'afficheur.
3. Appuyera nouveausur latoucheClockou attendrequatre
secondes.
Losdeuxpointsrestent.
Lorsquele courant61ectriquearriveou apr_sune interruptionde
courant,la derni_reheureavantI'interruptionde courantvaclignoter.
PourrappelerI'heuredujour Iorsqu'uneautrefonctionde durc!e
s'affiche,appuyersur latouche Clock.
L'heurede I'horlogenepout 6trechangCeIorsquele four ac!t6
programmc!pour unecuissonou un nettoyagediffc!rc!ou pour la
fonctionde cuissonet maintien.
Annulation de I'affichage de I'heure : ___
Si I'onne dCsirepasI'affichagede I'heuredujour :
Appuyersur lestouchesCANCELet Clock et les
maintenirainsipendanttrois secondes.L'heuredu __
jour disparaitde I'afficheur.
LorsqueI'affichagede I'heureestannulS,appuyersur latouche
Clockpour afficherbri_vementI'heuredujour.
33
LorsqueI'affichagede I'heureestannulS,apr_s15minutes,lefour
passeen modeAttente pour6conomiserde I'c!nergie.L'afficheur
seraviergeet1'Cclairagedu four nefonctionnerapus.Pour_{rc!veiller
_lescommandes_ partirdu modeattente,appuyersurn'importe
quelletouche.Undoublebip retentira.
R_afflchage de I'heure :
Appuyersur lestouchesCANCEL(Annuler)et Clocket les
maintenirainsipendanttrois secondes.L'heuredu jour rc!apparait
I'afficheur.
Timer (Minuterie)
Laminuteriepout6treprogrammCedeune minute (0:01)jusqu'_
99 heureset 59minutes(99:59).
La minuteriepout6treutilisc!eind@endammentdetoute autre
activit6du four. Ellepout 6treaussiprogrammCealorsqu'uneautre
fonctiondu four esten coursd'utilisation.
La minuterienecommandopaslefour. Ellene sortqu'_
c!mettredesbips.
Programmation de la minuterie :
1. Appuyersur la toucheTimer (Minuterie).
, 0:00et le mot TIMERclignotenta I'afficheur.
2. Appuyersur lostouchesnum(!riquesappropric!esjusqu'a ceque
I'heurejusteparaisse_ I'afficheur.
, Losdeuxpointset le motTIMERcontinuent_ clignoter.
3. Appuyera nouveausur latouche"rimer ou attendre quatre
secondes.
. Losdeuxpointss'arrCtentde clignoteret le d_!comptede la
dur_e commence.
Laderni_reminutedud_compteseraaffich_!esousforme de
secondes.
4. A lafin de la durocprogramm_e,unbip long retentitet lemot
End(Fin)seraaffich_!.
5. Appuyersur la toucheTimer pour effacer
I'afficheur.
Annulation de la minuterie :
1. Appuyersur la toucheTimeret la maintenir
ainsipendanttroissecondes.
OU Autoset
2. Appuyersur la toucheTimer et surla touche num_!rique{{ 0 _.
Verrouiilage des commandes
et de la porte du four
La portedu four etlestouchespeuvent_treverrouill_!espourdes
raisonsde s_curit_,nettoyageou pour emp(_chertoute utilisation
non souhait_e.Lestouchesnefonctionnerontpussiellessont
verrouillSes.
Sile four esten cours d'utilisation,lestoucheset la portene peuvent
_treverrouill_!es.
L'heureactuelledu jour resteraa I'afficheurIorsquelestoucheset la
porteserontverrouill_!es.
Verroaillage :
Appuyersur lestouchesCANCEL(Annuler]et --//_-¢^ r,frE_-_
Cook & Hold (Cuissonet maintien)et les
maintenirainsipendanttroissecondes.(Appuyer
d'abordsur latoucheCANCEL.)
OFF(Arr6t)paraita I'afficheur.
Lemot LOCK[Verrouillage)clignote
Iorsquela porteesten cours deverrouillage.
D_verroaillage :
Appuyersur lostouchesCANCELet Cook& Hold et lesmaintenir
ainsipendanttroissecondes.(Appuyerd'abordsurla touche
CANCEL.)Le mot OFFdisparaitde I'afficheur.
Rernarque : Laportedu four et lostouchesne peuvent6tre I
B
[verrouill6essi latempc!raturedu four estde 205° C(400° F)ou plus.j
Codes d'anomalie
LosmotsBAKE(Cuissoncourante)ou LOCKpeuventclignoter
rapidementa I'afficheurpour prc!veniren casd'erreurou de
probl_me.Sitel estlecas,appuyersur latouche CANCEL.Si les
motsBAKEou LOCKcontinuent_ clignoter,d6brancherI'appareil.
Attendrequelquesminutes,puisrebrancherI'appareil.Si un des
motscontinuea clignoter,d6brancherI'appareiletprendrecontact
avecun r@arateurautorisc!.
Bake (Caisson courante)
Programmation de la caisson coarante :
1. Appuyersurla toucheBake.
Lemot BAKEclignote. Bake ';
000clignote a I'afficheur.
2. S_lectionnerlatemperaturedu four. Appuyersur [I
latoucheAutoset e (Programmationautomatique]pour Aulosd'J
175° C(350° F)ou sur lestouchesnum6riquesappropric!es.
Chaquepressionadditionnellede latoucheAutoset0
augmentelatemp6raturede 15° C(25° F].
Latemp6raturepout6treprogramm6ede 75a 285° C
(170) 550° F).
3. Appuyerde nouveausur latoucheBake ou attendrequatre
secondes.
Lemot BAKEs'arr6tede clignoteret s'allumea I'afficheur.
38° (100°)ou la temp6raturer_elledu four,si latemp6mtureest
deplusde 38° C (100° F),seraaffichc!e.Elleaugmenterapar
intervallede 3° C (5°F]jusqu'aceque la temp6rature
pr@rogramm6esoit atteinte.
4. Laisserlefour pr6chaufferpendant8 _ 15minutes.
Lorsquelatemp6ratureprogrammc!epour lefour est atteinte,
un hip long retentit.
Latempc!ratureprogramm6es'affiche.
Pourrappelerla temperatureprogrammc!ependantle
prc!chauffage,appuyersurla toucheBake.
Placerlanourrituredartslefour.5,
6. V6rifierI'avancementde la cuisson_ la dur_eminimalede
cuisson.CuireplusIongtempsau besoin.
7. Lorsquelacuissonestterminc!e,appuyersur la _PAKIr'_I'_
touche CANCEL.
8. Retirerla nourrituredu four.
Remarques :
. Pourchangerla ternp4raturedu fourpendantla cuisson,appuyer
sur Bake, puissur latoucheAutoset 0 ou lestouches
num6riquesappropric!esjusqu'a ceque la temp6ratured_sir6e
soit affich6e.
. Pourchangerla temp4raturedufourIorsdupr4chauffage,
appuyerdeuxfoissur latoucheBake, puissur latouche
Autoset 0 ousur lostouchesnum6riquesappropric!esjusqu'a
ceque latemp6raturedc!sir6esoit affichc!e.
. Si I'onoublied'arr6terlefour, il s'arr6teraautomatiquement
apr_s12heures.Si I'ond6siredc!sactivercettefonction,voir
page38.
Differences de caisson entre I'ancien four et
le nouveau
IIest normalde remarquerquelquesdiff6rencesdansladurocde
cuissonentreun four neufet un four ancien.VoirAjustementdela
temp4raturedufour_ la page37.
Caisson et rotissage avec
convection
Pourla caissonavec convection,entrer la temperature de
cuissonnormale. Lacommander_duitautomatiquementla
temp_!ratureprogrammSede 15° C(25° F].Latemperatureentr_!e
seraaffich_e.
Programmation de la caisson avec convection :
1. Appuyersur la toucheConveet(Convection).......................................
. Le mot BAKEet I'ic6neventilateurclignotent. Convect
.000 clignote) I'afficheur.
2. S_lectionnerlatemperaturedu four. Appuyersur _'_
latoucheAutoset e pour 175°C (350°F)ou sur los
U
touchesnum_riquesappropri_es. ,\utosd
Chaquepressionadditionnellesur latoucheAutoset0
augmentelatemp(!raturede 15° C(25°F).Latemperaturedu
four pout_treprogramm_ede 75a 285°C (170_ 550°F).
3. Appuyer) nouveausur latoucheConvect ouattendre
quatresecondes.
LemotBAKEs'arr_tede clignoter.
38° (100°)ou la temperaturer_elledu four,si la temperature
est de plusde 38° C(100° F],seraaffich_e.Elleaugmenterapar
intervallede 3°C(5°F)jusqu'_ceque la temperature
pr@rogramm(!esoit atteinte.
L'ic6neventilateursemet_ tourner. (_O__}
suite
34
4. Laisserlefour prc!chaufferpendant8 _ 15minutes.
Lorsquela temp@atureprogrammc!epour lefour estatteinte,
un bip long retentit.
LatempCratureprogrammCes'affiche.
PourrappelerlatempCratureprogrammCependantle
prCchauffage,appuyersurla toucheConvect [Convection).
5. Placerlanourrituredansle four.
6. V@ifierI'avancementde la cuissona la durc!eminimalede
cuisson. Cuireplus Iongtempsau besoin.
7. Lorsquelacuissonest termin_e,appuyersur ii_¢Aklr'H'_
latouche CANCEL[Annular).
8. Retirerla nourrituredu four.
Caisson et maintien
LorsdeI'utilisationde I'optionCook& Hold(Cuissonet maintien),le
fourse met_ chaufferimmCdiatementunefois qua la commandea
c!t_programm(!e.Puis,lefour cult pendantla durCespCcifiCe.Lorsque
cettedurc!es'est_coulCe,le four maintientla nourritureau chaud
pendantune heureau maximum,puiss'Cteintautomatiquement.
Programmation de Caisson et maintien :
1. Appuyersurla toucheCook & Hold.
Lemot HOLD(Maintien)clignotepour indiquer .................
que laprogrammationde cuissonetmaintienest
en cours.
00:00clignote_I'afficheur.
2. SClectionnerladurc!ed_sirCedecuissonen utilisantlestouches
numCriques.
Lemot HOLDcontinue a clignoter.
Ladurc!es'allumea I'afficheur.
Ladurc!epout 6trerCglc!ede 10minutes[00:10)_ 11heures
et59 minutes[11:59).
3. Alors quale mot HOLDclignote,appuyersurla
touche Bake (Cuissoncourante)ou Convectet Bake
s_lectionnerla temp@aturedufour. Appuyersur
latoucheAutoset 0 (Programmation
automatique)pour 175°C (350°F)ou surles __
touchesnum&iques appropriCes.
kJ
Aubsd
Lemot correspondant_la fonctiondCsirCeclignote.
Latemperaturedu four peut6treprogrammCede 75 _ 285° C
[170_ 550° F).
4. Appuyera nouveausur latouchede fonctiondc!sirc!eOU
attendrequatresecondes.
Lemot correspondant_la fonctiond_sirCeresteallum&
Ladurc!ede cuissonparait_ I'afficheur.
Latemp@aturerc!elledu foursaraaffichCependantle
prCchauffage.
Latemp@atureprogrammCes'afficheIorsquelefour est
prCchauffc!.
Lorsqae la daree de caisson s'est ecoalee :
Quatrebipsretentissent.
. LosrootsHOLDetWARM [Chaud)s'allument.
° 75° (170°)parait_ I'afficheur.
° L'heuredu jour paraita I'afficheur.
Apr_s ane heare de MAINTIEN AU CHAUD :
Lefours'Cteintautomatiquement.
, LesrootsHOLDetWARMs'Cteignent.
° Retirerla nourrituredu four.
Aunalation de Cook & Hold _ tout moment :_
Appuyersur latouche CANCEL.Retirerla nourriture (CANCEl)
du four.
Caisson et maintien diff r s
Avecla fonctiondiffc!rCe,lefour semet a cuireplustarddonsla
journc!e.Programmerla durCed'attentedc!sir_!eavantqua le four
nesemetteen marcheet la dur_ede cuissond(!sir_!e.Lefour
commencea chauffer_ I'heures_lectionn_!eetcult pour ladurra
sp_!cifi_!e.
Ladur_!ed'attentepout _treprogramm_!ede 10minutes[00:10)
11heureset59 minutes[11:59).
Programmation d'an cycle de caisson et
maintien differes :
1. Appuyersurla touche Delay 1 [Diff@_!e).
Le motDELAYclignotea I'afficheur.
° 00:00clignote_ I'afficheur.
2. A I'aidedestouchesnum_riquesappropriCes,entrerladur4e
d'attenteavantquene d4butele cyclede cuissonet maintien.
3. Appuyersurla touche Cook &Hold.
° LosrootsHOLD[Maintien)et DELAY[Diffdrde)
clignotenta I'afficheur.
° 00:00clignote a I'afficheur.
4. Entrerladur4ed#sir4edecuisson_ I'aidedestouches
num_!riques.
5. Appuyersurla touche Bake ou Convect.
6. Programmerla temp4raturedu fourd_sir_een
appuyantsur latoucheAutoset 0 ou sur les
touchesnum@iquesappropri_es.
° 175° (350°) s'allumeIorsqueI'onappuiesurla
touche Autoset0.
U
° Apr_squatresecondes,la durCed'attente ,\utoset
entrCeparaita I'afficheur.
1
Delay
35
Lemot HOLD(Maintien}s'6teint.
LesrootsBAKE(Cuissoncourante}et DELAY(Differ6e}restent
allum6spour rappelerqu'uncyclede cuissonet maintien
diff6r@a_t6programm&
_emar_ues :
Ne pus utiliserlecyclede cuissonet maintiendiffer@ pour des
articlesqui n@essitentqua le four soit pr@hauff_,commalos
g_teaux,lespetitsbiscuitsetlospains.
Ne pas utiliserlecyclede cuissonet maintiendiff6r@ sile four
est dc!jachaud.
Maintien aa chaad
Pourmaintenirauchauddunsle four desalimentscultsetchauds
ou pour r@haufferpainsetassiettes.
Programmation du Maintien au chaud :
1. Appuyersurla toucheKeep Warm .......................................
(Maintienau chat]d}. = Keep
° LemotWARM(Chat]d}clignote _ I'afficheur.
° 000clignotea I'afficheur.
2. S_lectionnerlatempc!raturede maintienau chaud.
Appuyersurla toucheAutoset 0 (Programmation
U
automatique}ousurlostouchesnum6riques Autoset
appropri6es.
75° (170°}s'allumeIorsqueI'onappuiesurla touche
Autoset0.
Chaquepressionsur latoucheAutoset0 augmentela
temp6raturede 3° C(5°F}.
Latempc!raturede maintienau chaudpeut6tre
programmc!ede 63a 90° C 045 a 190° F}.
Lemot WARMet latemp6ratureseront affich@pendantque la
fonction estactive.
Annalation du maintien au chaud :
1. Appuyersurla toucheCANCEL[Annule0.
2. Retirerla nourrituredu four.
Reilrlarqtles :
° Pourobtenir desqualit6salimentaireset nutritivesoptimales,
lesalimentsne doiventpas6tregard_sauchaudplusde 1
2 heures.
° Pouramp@herlesalimentsde class@her,losrecouvrirde
papieraluminium,sansserrer,ou d'un couvercle.
° Pourr_chaufferdespetits pains:
- recouvrirlespetitspainsde papieraluminiumsansserreret
lesplacerau four.
- appuyersurleatouchesKeep Warm etAatoset O.
- r6chaufferpendant15_ 20 minutes.
Pour r_cbaafferdesassiettes :
- placerdeuxpilesde quatreassiettesmaximumduns lefour.
- appuyersurlostouchesKeep Warm etAatoset O.
- r@haufferpendant5 minutes,arr6terle four et laisserles
assiettesat]four pendantencore15minutes.
- n'utiliserqua desassiettespouvantaller au four,_ vc!rifier
aveclefabricant.
- ne pas poserdesassiettesti6des surune surfacefroide,los
changementsrapidesde tempc!raturepouvantcasser
I'assietteoula fendiller.
Caisson aa gril
Programmation de la caisson aa gril :
1. Appuyersur latouche Broil (Gril}. Broil
•Les motsBROILetSET
(Valide0clignotent_ I'afficheur.
2. Appuyersur latouche Autoset 0 unefoispour N
programmerun gril atemp(!rature61ev@ou deux
Autose[
fois pour programmerun gril a temp6raturebasse.
° LesrootsHI (€16v6e)ou LO (Basso)serontaffich@.
, S61ectionnerHi broil (Gril_ temp6rature_lev6e}(285° C
[550°F]} pour un gril normal.S_lectionnerLO broil (Gril
temp6raturebasso}(230° C[450° F]) pour un gril
tempc!ratureinf6rieured'aliments_ cuissonplusIongue
commala volaille.
Apr_squatresecondes,lefour semeten marche.
Le mot BROILresteallumc!.
LesmotsHI ou LOresentallum&
4. Pour un rissolage maximum, pr@hauffer I'c!16mentde gril
pendant 3 ou 4 minutes avant d'ajouter la nourriture.
suite
36
5. Placerlanourrituredansle four.Laisserlaportedu four ouverte
d'environ10cm [4po) _remi_re but6e].
6. Retournerlaviandeunefois a la moiti6 de ladurde decuisson.
7. LorsqueI'alimentestcult,appuyersur latouche
CANOE[ (Annuler).Retirerla nourritureetla
I_chefritedu four.
L'heuredu jour r6apparait_ I'afficheur.
Remarques :
Pourde meilleursr_sultatsIorsdugril,seservird'un ustensile
prdvupourcetype de cuisson.
Pr6voirdesdur6esde cuissonau gril plusIongueset un
rissolage16g_rementmoinsdor_si I'appareilfonctionnesur un
circuit de208volts.
Legril au r6glageHIestutilisdpour la majorit6desopdrations
de cuissonau gril.Utiliserle gril au r6glageLOpour la cuisson
de metsdevantcuireplus Iongtemps,afin de leur permettre
d'6trebien cultssans rissolageexcessif.
Pourchangerla temp4raturedu fourpendantla cuissonaugril,
appuyersurla touche Broil (Gril),puissurla toucheAutoset 0
(Programmationautomatique]pour changerentrela cuisson
au gril a tempdrature_lev_e(HI]et lacuissonau gril
tempdraturebasso(LO].
Losdurdesde cuissonau gril peuvent6tre plusIonguesavec
unetemp(!raturedegril inf6rieure.
. Retournerla plupartdesalimentsIorsquela moiti6de la durde
prdvuepour la cuissonau gril s'est 6coul6e.
Changement de la
temperature °F/°C
1. Lerc!glageparddaut de I'usinepourlatemp6ratureesten
Fahrenheit.
2. Pourmodifierce r6glage,appuyersur lostouchesCANCELet
Bake (Cuissoncourante)simultan6mentet maintener-les
enfoncc!espendanttroissecondes.
Tableau de cuisson au gril
B_u|
3. Unbip retentitet le r6glagecourant(°Fou°C)paraita I'afficheur.
(Sivous nefaitespasdechangement,la cuisini_reretourneau
rc!glageexistantapr_s30 secondes.]
4. Pourmodifier le r6glage,appuyersur latoucheAutoset O.
Appuyer_ nouveausur latouchepour retournerau rc!glage
existant.Attendercinqsecondesetle rc!glageseraeffectu&
Ajustement de la temperature
du four
Laprc!cisiondestemp6raturesdu four a €!t6soigneusementv6rifi6e
I'usine.IIest normalde remarquerquelquesdiffc!rencesdartsla
cuissonou la couleurdu rissolageobtenuentreun four neufet un
four ancien.Au fur eta mesureque le four est moinsneuf,sa
tempc!raturepeutvarier.
IIest possibled'ajusterlatemp6raturedu four si I'on penseque le
four ne cult pasou ne rissolepascorrectement.Pourd6ciderde
I'ajustement_ apporter,rc!glerle four a unetempc!raturede15°C
[25°F)plus_lev_eouplus bassoque latemp6ratureindiqu6edarts
la recette,puisfairecuirela pr@aration.Losr6sultatsde {{I'essai>>
de cuissondoiventdonner uneidle du nombrede degr_sduquel la
temp_!raturedolt _treajust_e.
Ajustement de la temperature du four :
1.
2.
Appuyersur latouche Bake.
Entrer285°C [550° F]en appuyantsur los
touchesnum_riquesappropri_!es.
Appuyersur latouche Bake et la maintenirainsipendant
plusieurssecondesoujusqu'_ceque O°paraissea I'afficheur.
Sila temperaturedu foura _t_ pr_c_demmentajust_e,le
changementseraaffich& Parexemple,si latemperaturedu four
a _t_r_duitede 8° C(15° F],I'afficheurindiquera-8° (-15°).
Appuyersur latoucheAutoset 0 pour ajusterla temp_!rature.
A chaquefois que I'on appuiesur latoucheAutoset0,la
temperaturechangede3 °C[5 °F).Latemperaturedu four pout
_treaugment_!eou diminu_ede 3 a 20°C [5b 35 °F).
Bifteck,2,5cm (1 po)d'@aisseur
Hamburgers, 2 cm (3/4 po] d'@aisseur
Porc
Bacon
COtelettes,2,5cm (1po]
Tranchedejambon
Volaille
Demi-poitrine
A point
Bien cult
Bien cults
Fruitsde met
Damesde poisson,beurr_es,2,5cm (1po) d'@aisseur
Queuesdehomard,85_ 115g (3a 4 onces)chacune
6
6
6 ou 7
6
6
6
8 minutes
10 minutes
9 minutes
6 - 10minutes
10- 11minutes
5 minutes
LOBroil -
Grila temp_!raturebasso
15minutes
10 - 15 minutes
7 - 10 minutes
Rernarque: Cetableaun'estqu'unguide de suggestions.Losdur_espeuventvarierselonI'aliment_ cuire.
37
7 - 12 minutes
8 - 14 minutes
6 - 9 minutes
(sans retourneO
12 - 14 minutes
3 - 7 minutes
LOBroil -
Grila temp(!raturebasso
15- 25 minutes
(sans retourner)
(sans retourneO
Appuyersurla toucheAutoset0 (Programmationautomatique)
pouraugmenterlatemp6raturedu four (5,10... 35).Continuer
d'appuyersur latouche Autoset0 pour diminuerla temp6rature
du four (-35,-30... -5].
5. L'heuredu jour r_apparaitautomatiquementa I'afficheur.
II n'estpasn6cessaireder6ajusterla tempdraturedu four en cas
de panneou d'interruption de courant.L'ajustementde la
temp6ratures'appliqueseulementauxfonctionsdecuisson
courante,cuissonavecconvectionet r6tissageavecconvection
(certainsmodules).Lestemp6raturesdegril et de nettoyagene
peuvent6treajust6es.
Arr t automatique/
Mode sabbat
Lefours'arr6teautomatiquementapr_s12heuress'il a 6t6
accidentellementlaiss6en marche.Cettecaract6ristiquedes_curit6
peut6trearr6t6e.
Pour annuler I'arr_t 12 heures et faire fonctionner le
four en continu pendant 72 heures :
1. Appuyersur latouche Clock (Horloge)et la
maintenirainsipendantcinqsecondes.
, SAbseraaffich_et clignoterapendantcinq secondes.
, SAbseraensuiteaffichc!encontinujusqu'_cequ'on I'arr6te
oujusqu'_ceque ladur6elimitede 72 heuressoitatteinte.
, Le mot BAKE(Cuissoncourante)seraaussiaffichc!siun cycle
de cuissoncouranteeaten coursalorsque lefour est en mode
sabbat.
, La CUISSONAU FOURestlaseulefonctionqui est
op4rationnelleenmodesabbat.Touteslosautresfonctions
(Minuterie,Maintienauchaud,Nettoyage,etc.,}sontverrouill4es
pendantlemodesabbat.
, Uncycledecuissonet maintienpout6treprogramm6durant
le modesabbat.Cependant,un cycledecuissonet maintien
diff@_sn'estpaspossible.
Annulation du [node sabbat :
1. Appuyersur latouche Clockpendanttroissecondes.
SAbclignote pendantcinqsecondes.
L'heuredujour revienta I'afficheur.
OU
2. Apr_s72 heures,le modesabbatsetermine.
SAbclignote pendant5 secondes.
, L'heuredu jour revient_ I'afficheur.
Favori
Latouche Favorite(Favori]permetdesauvegarderla durocet la
tempc!ratured'unefonctionde cuissonet maintien.
Pourprogrammerun cycleFavori,unefonctionde cuissonet maintien
dolt 6treactiveou tout juste programm6e.
Program[nation d'un nouveau cycle favori ou
sauvegarde d'un cycle en cours de caisson et
[naintien co[nine favori :
1. Programmerun cyclede cuissonet maintiencommeil est d6crit
lasectionCuissonetmaintien ala page35.
2. Appuyersur la touche Favoriteet la maintenir
ainsipendanttroissecondes.
° Lecyclecuissonetmaintiennouvellementprogramm6ouen
cours defonctionnementserasauvegard&
° Unbip sonoreretentitpour indiquer que leacommandosont
accept6le r6glagefavori.
De[narrage d'un cycle progra[n[n_ darts favori :
1. Appuyersur la touche Favorite.
, Ladurocet latemp@aturedu cycleprogramm6de cuissonet
maintienserontaffich(ges(siaucuncyclede cuissonet
maintienn'a6t6programmc!,{{nonE>>seraaffich6).
2. Appuyersur la touche Bake ou Convect(Convection).
° Lecyclefavori commenceimm6diatement.
, Lemot correspondantau cyclesc!lectionn_s'allume
I'afficheur.
° Ladur6ede cuissons'allume_ I'afficheur.
Lorsque la dur6e de caisson s'est 6coul6e :
, Lemot correspondantau cycles(!lectionn6s'6teint.
,Les rootsHOLD(Maintien)etWARM(Chaud)s'allument.
75° (170°)parait_ I'afficheur.
Annulation d'un cycle favori en tours :
1. Appuyersur la toucheCANCEL(Annuler).
Lecyclefavorisauvegard6neserapasaffectc!.
2. Retirerla nourrituredu four.
Remarques :
° Lemodesabbatpout 6tremisen marcheatout moment,que le
four soiten marcheou non.
Lemodesabbatne peut pas6tremis en marchesi lostouches
sontverrouill6esou la porteverrouill6e.
Lamajoritc!desmessagesettous loshipssontdc!sactivc!s
Iorsquele modesabbateatactif.
° Sile four eaten modecuissonIorsquele modesabbatest
programm6,le motBAKEs'6teintIorsquela cuissoncouranteeat
annulc!e.IIn'yauraaucunsignalsonoreaudible.
° Lecycled'autonettoyageetle verrouillageautomatiquede la
porte nefonctionnentpaspendantle modesabbat.
° Lalampedu four ne s'allumepasautomatiquementa I'ouverture
de la porte Iorsquelefour eaten modesabbat.SiI'_clairagedu
four estsouhait_pendantle modesabbat,la lampedevra6tre
allum_!eavantque le modesabbat ned_!bute.
° Lorsquele modesabbata d_marr_,I'afficheurindique
imm_!diatementla temp@atureprogramm_!eplutOtque la
temp@aturer6ellede la cavit_!du four.Aucun bip de pr6chauffage
neretentit.
° Si I'on appuiesurla toucheCANCELun cyclede cuissoncourante
au fourseraannul_!.Cependant,le programmateurresteraen
modesabbat.
Apr_sune pannede courant,le fourrevienten modesabbatavec
72 heuresrestantesetaucuncycleactif.
38
i[clairage du four
La lampe du four s'allume automatiquement
I'ouverturede la porte.Lorsquela porteest fermGe,
appuyersurOven Light (Lampedufour) pour allumeroudteindrela
lampe.Le four produitun signalsonorechaquefois que I'onappuie
surOvenLight.
Ventilateur du four
Unventilateurde convectionsert _ fairecirculer rair chauddansle
four Iorsquela caractGristiquede convectionest sGlectionnGe.
Remarque :11s'arrGte Iorsqueron ouvrela porte.I
automatiquement
J
f
Event du four
Lorsquele fourfonctionne,lessurfacesvoisinesde I'c!ventpeuvent
devenirassezchaudespourentrainerdesbrQlures.Nejamais
bloquerI'_vent.
L'_vent est situ_ sous le protecteurd'_vent du dosseret,sur la
cuisini_re. EVENT
DUFOUR Ne pas mettrede
plastiquesprosde
I'_vent,la chaleur
pouvantlos
ddormer ou los
fairefondre.
Sole du four
ProtGgerlasoledesproduits renversGs,en particulieracidesou
sucrds,ceux-cipouvantddcolorerrdmailvitrifi_. Utiliserdes
ustensilesde la bonnedimensionpourdviterque losproduits nese
renversentou passentpar-dessusI'ustensileen bouillant.Ne pas
placer d'ustensiles ou de feuille d'aluminiumdirectement sur
la sole dufour.
Grilles du four
Lefour comportedeauxgrillesavec,pourchacune,un dispositifde
calage.
Extraction :
1. Tirerla grille en lignedroite
jusqu'_cequ'elles'arrGte_ la
positiondecalage.
2. Souleverlagrille a ravantpour
pouvoirI'extraire.
Reinstallation :
1. Placerlagrille sur lessupportsdansle four.
2. Soulever16g_rementI'avant.Faireglisserlagrille vers rarri_re
au-del_ de la positionde calage.
3. Abaisserlagrilleet la faireglisserdartslefour.
Nejamais couvrirla totalit_ d'unegrille de papierd'aluminium
ni mettre d'aluminiumsur la sole dufour. Cela nedonnerait
pasde bobs r_sultatsdabs la cuissonde g_teaux et la sole
pourraitse trouver abim_e.
Positions des grilles
Grille 7 : (positionla
plushaute): Pourfaire
griller du pain ou passer
au gril desaliments
minceset nongras.
Grille6 : UtilisGepour la
majorit6desopGrations
de cuissonau gril.
Grille 5 : Pourla cuisson
surplusieursgrilles.
_1" 4
du four
CUJSSOn avec corwectlon
sur deaux grilles
Grille4 : Pourla plupartdescuissonsde p_tisseriessur unetOle
biscuitsou un moule_ g_teauroul& destartesauxfruitsou mets
surgelGs.Utilisc!eaussipour passerau gril desmorceauxdepoulet.
Grille 3 : Pourlosplats mijotc!s,cuissonde michesde pain,savarins
ou tartesa lacr_me.
Grille2 : Pourle rOtissagede petitescoupesdeviande,tartes
surgelGes,soufflGsou g_teauxdesanges.UtilisGeaussipour la
cuissonsurplusieursgrilles.
Grille 1 : Pourle rGtissagede grossespi_cesde viandeet la volaille.
Sole du four : Placerlagrille sur les
cGtdsrelevGsde la sole.Donneune place
supplGmentairepour lacuissonde
grandesquantitGs.
CUISSONSUR PLUSIEURSGRILLES:
Utiliserlespositions2 et5 ou 3 et 6.
i
Remarque: Pourla cuissonavecconvectionsurdeuxgrilles,
vdrifier losalimentsa la dur_eminimalesuggdrdepour dviterun
exc_sdecuissonou de coloration.
Cuissen de g_teau× _ etages sur deux grilles
Pourde meilleursr_sultatspour lacuissondeg_teauxsurdeux
grilles,utiliser lospositions2 et 4 pour unecuissontraditionnelleet
lospositions2 et 5pour une cuissonavecconvection.
Placerlosg_teauxsurla grille,commeil estindiqud.
39
Bemrquess
40
P
GARANTIE DES GROS APPAREILS MENAGERS
MAYTAG CORPORATION
GARANTIE LIMITI_E
Pendant un an & compter de la date d'achat, Iorsque ce gros appareil menager est utilise et entretenu conformement aux instructions
jointes a ou fournies avec le produit, la marque Maytag de Whirlpool Corporation ou Whirlpool Canada LP (ci-apres designees
"Maytag") paiera pour les pieces specifiees par I'usine et la main-d'oeuvre pour corriger les vices de mat@iaux ou de fabrication. Le
service doit 6tre fourni par une compagnie de service designee par Maytag. Cette garantie limitee est v.alide uniquement aux €:tats-Unis
ou au Canada et s'applique exclusivement Iorsque I'appareil est utilise dans le pays ou il a ete achet& A I'exterieur du Canada et des 50
€tats des 12tats-Unis, cette garantie limit_e ne s'applique pas. Une preuve de la date d'achat original est exigee pour obtenir un service
dans le cadre de la presente garantie limitee.
ARTICLES EXCLUS DE LA GARANTIE
La pr6sente garantie limit6e ne couvre pas :
1. Les visites de service pour rectifier I'installation du gros appareil menager, montrer a I'utilisateur comment utiliser I'appareil,
remplacer ou reparer des fusibles ou rectifier le c&blage ou la plomberie du domicile.
2. Les visites de service pour reparer ou remplacer les ampoules electriques de I'appareil, les filtres a air ou les filtres a eau. Les pieces
consomptibles ne sent pas couvertes par la garantie.
3. Les reparations Iorsque le gros appareil menager est utilise a des fins autres que I'usage unifamilial normal ou Iorsque les
instructions d'installation et/ou les instructions de I'operateur ou de I'utilisateur fournies ne sont pas respectees.
4. Les dommages imputables a :accident, modification, usage impropre ou abusif, incendie, inondation, actes de Dieu, installation
fautive ou installation non conforme aux codes d'electricite ou de plomberie, ou I'utilisation de pieces consomptibles ou de produits
nettoyants non approuves par Maytag.
5. Les defauts apparents, notamment les eraflures, les bosses, fissures ou tout autre dommage au fini du gros appareil menager,
moins que ces dommages soient dus a des vices de materiaux ou de fabrication et soient signales a Maytag dans les 30 jours
suivant la date d'achat.
6. Toute perte d'aliments due a une defaillance du refrig6rateur ou du congelateur.
7. Les coots associes au transport du gros appareil menager du domicile pour reparation. Ce gros appareil menager est con(_u pour
_tre repare a domicile et seul le service a domicile est couvert par la presente garantie.
8. Les reparations aux pieces ou systemes resultant d'une modification non autorisee faite a I'appareil.
g. Les frais de transport pour le service d'un produit si votre gros appareil est situe dans une region eloignee ou un service d'entretien
Maytag autorise n'est pas disponible.
10. La depose et la reinstallation de votre gros appareil si celui-ci est installe dans un endroit inaccessible ou n'est pas installe
conformement aux instructions d'installation fournies.
11. Les gros appareils m_nagers dont les numeros de serie et de modele originaux ont ete enleves, modifies ou qui ne peuvent pas _tre
facilement identifies. La presente garantie est nulle si le numero de serie d'usine a ete modifie ou enleve du gros appareil menager.
Le coot d'une reparation ou des pieces de rechange dans le cadre de ces circonstances exclues est a la charge du client.
CLAUSE D'EXONCRATION DE RESPONSABILIT¢ AU TITRE DES GARANTIES IMPLICITES; LIMITATION DES RECOURS
LE SEUL ET EXCLUSIF RECOURS DU CLIENT DANS LE CADRE DE LA PR¢SENTE GARANTIE LIMITI2E CONSISTE EN LA
REPARATION PRC:VUE CI-DESSUS. LES GARANTIES IMPLICITES, Y COMPRIS LES GARANTIES APPLICABLES DE QUALITE
MARCHANDE ET D'APTITUDE A UN USAGE PARTICULIER, SONT LIMITEES A UN AN OU A LA PLUS COURTE PERIODE AUTORISC:E
PAR LA LOI. MAYTAG N'ASSUME AUCUNE RESPONSABILITE POUR LES DOMMAGES FORTUITS OU INDIRECTS. CERTAINES
JURIDICTIONS NE PERMETI-ENT PAS L'EXCLUSION OU LA LIMITATION DES DOMMAGES FORTUITS OU INDIRECTS, OU LES
LIMITATIONS DE LA DURI2E DES GARANTIES IMPLICITES DE QUALIT¢: MARCHANDE OU D'APTITUDE A UN USAGE PARTICULIER,
DE SORTE QUE CES EXCLUSIONS OU LIMITATIONS PEUVENT NE PAS S'APPLIQUER DANS VOTRE CAS. CE'FI-E GARANTIE VOUS
CONFI2RE DES DROITS JURIDIQUES SP¢CIFIQUES ET VOUS POUVEZ 12GALEMENT JOUIR D'AUTRES DROITS QUI PEUVENT
VARIER D'UNE JURIDICTION/_, UNE AUTRE.
/_,I'exterieur du Canada et des 50 12tatsdes Ctats-Unis, cette garantie ne s'applique pas. Contactez votre marchand Maytag autorise
pour determiner si une autre garantie s'applique.
Si vous avez besoin de service, voir d'abord la section "Depannage" du Guide d'utilisation et d'entretien. Apres avoir verifie la section
".D_pannage", de I'aide supplementaire peut _tre trouvee en v@ifiant la section "Assistance ou service" ou en appelant Maytag. Aux
E.-U., composer le 1-800-688-9900. Au Canada, composer le 1-800-807-6777.
9/07
]_2__A G Estufa ei6ctrica con control a precisi6n
sensible al tacto 800 - Cubierta lisa
Tabla as
lnstrucciones importantes
sobre Seguridad ............. 43=45
Cuidado y limpieza ...................46=48
Horno autolimpiante
Prooedimientos de limpieza
Mantenimiento ..........................48=49
Ventana del homo
Luzdel homo
Localizaci6n y soluci6n
de averias ...................................49=50
Cocinando en la estufa ............51 =54
Controles supenores
Cubiertas lisas
Cocinando en el homo ............ 54=61
Horneado
'Cook & Hold
'Cook & Hold' diferido
Asar a la parrilla
IVlantener caliente
Cierre autom_tico/IVIodo sab_tico
Parrillas del homo
Garantia y servicio .... P_gina tiltima
Para asegurar funcionamiento correcto y seguro: El
electrodom_stico debe set instalado debidamente y puesto a
tierra por un t8cnico calificado. No intente ajustar, reparar,
prestar servicio o reemplazar ninguna piezade este producto a
menos que sea espedficamente recomendado en esta gu{a.
Todas las reparaciones deben set realizadas por un t6cnico
calificado.
Siempredesenchufe el electrodom_stico antes de efectuar
alguna reparaci6n.
Lasadvertencias e instrucciones importantes sobre seguridad
que aparecen en esta gufa no est_n destinadas a cubrir todas
las posibles circunstancias y situaciones que puedan ocurrir.
Se debe ejercer sentido comQn,precauci6n y cuidado cuando
instale, realice mantenimiento o haga funcionar el artefacto.
Siempre p6ngase en contacto con el fabricante si surgen
problemas o situaciones que usted no comprenda.
Reconozca los simbolos, advertencias,
etiquetas de seguridad
Lea y siga todas las instrucciones antes de usar este
electrodorn_stico para evitar el riesgo potencial de incendio,
choque electrico, lesi6n personal o da_o al electrodomestico
como resultado de su uso inapropiado. Utilice este
electrodomestico solamente para el prop6sito que ha sido
destinado segQnse describe en esta gu{a.
Paravefificar si el dispositivo est_ debidamente instalado,mire
debajo de la estufa con una linterna para asegurarse de que
uno de los tornillos niveladores traseros est6 debidamente
enganchado en la ranura del soporte. Eldispositivo antivuelco
asegura el tornillo niveiador trasero al piso cuando est_
debidamente enganchado. Estodebe verificarse cada vez que
la estufa sea movida.
Para evitar un incendio o da o
causado per el humo
Aseg_rese de que se hayan retirado todos losmateriales de
empaque del electrodomestico antesde su uso.
No coloque matefiales combustibles cerca del electrodomestico.
No se deben guardar en el homo materiales inflamables.
Muchos pl_sticos son afectados por el calor. Mantenga los
pl_sticos alejados de las piezasdel electrodomestico que se
pueden entibiar o calentar.
Paraevitar incendios de grasa, no permita acumuhci6n de
grasa de cocinar o de otros materiales inflamables en el homo o
en su cercan{a.
En case de incendio
Use un extinguidor con producto quimico seco o del tipo
espuma o bicarbonato para apagar el incendio o lasllamas.
Nunca useagua en un incendio de grasa.
1. Apague el homo para evitar que la llama se disperse.
43
2. NUNCA levante o mueva una sart6n en llamas.
3. Apague el fuego o la llama cerrando la puerta del horno.
Apague la campana de ventihci6n para evitar que las llamas se
dispersen.Apague las llamas y luego encienda la campana para
expulsar el humo y el olor.
Seguridad para los ni os
No toque un foco caliente del homo con un paffo hQmedopues
se puede quebrar. Si el foco se quiebra, desenchufe el
eiectrodomestico antesde sacar el foco para evitar sufrir un
choque electrico.
NUNOA use papel de aluminio para cubrir las parrillas del homo
ni el panel inferior del homo. El uso incorrecto puede resultar en
un riesgo de choque electrico, incendio o daffo al
eiectrodomestico. Use papel de aluminio solamente como se
indica en esta gufa.
NUNCA deje a los niffos solos o sin supervisi6n cuando el
homo este en uso o cuando este caliente. No se debe nunca
permitir que los niffos se sienten o se paren en ninguna pieza
del eiectrodomestico pues se pueden lesionar o quemar.
Se les debe enseffar a los niffos que el eiectrodomestico y los
utensiiios que est_n en el pueden estar calientes. Deje enfriar
los utensiiios caiientes en un lugar seguro, fuera del alcance de
los niffos. Se les debe enseffar a los niffos que un
eiectrodomestico no es un juguete y que no deben jugar con
los controies u otras piezas del artefacto.
Instrucciones generales
Seguridad al cocinar
NUNCA caliente un contenedor de alimento cerrado en el horno.
La acumulaci6n de presi6n puede reventar el contenedor
causando una lesi6n personal graveo da_o al electrodomestico.
Use tomaollas secos y gruesos. Lostomaollas hQmedospueden
causar quemaduras por vapor. No se deben usar toallas de secar
los platos ni otros sustitutos en vez de lostomaollas porque ellos
pueden pasarsobre loselementos calientes y prenderse fuego o
pueden quedar atrapados en las piezas del electrodomestico.
Use vestimentas apropiadas. Las ropas sueltaso ropas con
mangas largas sueltas no sedeben usarcuando se est_
cocinando. La ropa se puede prender fuego y causar quemaduras
si entra en contacto con loselementos calefactores.
Siemprecoloque las parrillas del horno en las posiciones deseadas
cuando el horno este frfo. Deslice la parrilla del horno hacia
afuera para agregar o retirar alimento usando tomaollas secosy
gruesos. Siempreevite colocar o retirar alimento del homo sin
sacar la parrilla hacia afuera. Si una parrilla debe set movida
cuando este caliente, useun tomaollas seco. No deje que el
tomaolla entre en contacto con el elemento caliente del horno.
Paraevitar posibles riesgos para el usuario y da_o al
electrodomestico, no use este producto como una estufa para
calentar o entibiar una habitaci6n. Adem_s no useel horno
como un lugar para guardar alimentos o utensilios de cocina.
No obstruya la circulaci6n del aire bloqueando el respiradero del
horno.
NO TOQUELOS ELEMENTOSCALEFACTORESNI LASSUPERFI-
CIESINTERIORESDEL HORNO. Loselementos calefactores
pueden estar calientes at_ncuando su color sea obscuro. Las
superficies interiores de cualquier homo secalientan Iosuficiente
como para causar quemaduras. Durante ydespues del uso, no
toque ni permita que las ropas u otros materiales inflamables
entren en contacto con los elementos calefactores o lassuperfi-
cies interiores del homo hasta que no se hayan enfriado. Otras
superficies que pueden estar calientes incluyen la cubierta, las
superficies que est_n dirigidas hacia la cubierta, el respiradero
del homo, lassuperficie cercana a la abertura del respiradero, la
puerta del homo y la _rea que la rode& y la ventanilla del homo.
Use las parrillas solamente en el homo en que fueron enviadas/
compradas.
Tenga cuidado cuando abra la puerta del homo. Primero deje que
salga el aire o vapor caliente antes de sacar o volver a colocar el
alimento en el homo.
ADVERTENCIA SOBRE ALIMENTOS PREPARADOS: Siga las
instrucciones del fabricante del alimento. Si un contenedor de
alimento congelado de pl_stico y/o su tapa se deform& comba o
de otra manera se da_a durante la cocci6n, inmediatamente
descarte el alimento y su contenedor. Elalimento puede estar
contaminado.
No permita que el papel de aluminio o la sonda de la came toque
el elemento calefactor.
Siempreapague todos los controles cuando haya terminado de
cocinar.
Seguridad sobre el uso
de utensilios
Siga las instrucciones del fabricante cuando use bolsas para
cocinar en el homo.
cent.
44
El rendimiento y funcionamiento seguro de este electrodomestico
ha sido comprobado usando utensilios de cocina tradicionales.
No useningOn dispositivo o accesorio que no haya sido
espedficamente recomendado en esta gufa. No use sistemas de
convecci6n agregables a homos. Eluso de dispositivos o
accesorios que no sean expresamente recomendados en esta
gufa puede crear peligros graves de seguridad, afectar el
rendimiento y reducir la vida t_ti[de loscomponentes de este
eiectrodomestico.
Si el utensilio es m_s pequeffo que el elemento, una porci6n del
elemento quedar_ expuesta y puede encender la ropa o un
tomaollas.
Solamente ciertos tipos de utensiiios de vidrio, vidrio cer_mico,
cer_mica, gres u otros utensiiios vidriados son convenientes para
cocinar en la superficie o en el homo sin quebrarse debido al
repentino cambio de temperatura. Siga las instrucciones del
fabricante del utensiiio cuando usevidrio.
Seguridad en la limpieza
Limpie con cuidado la cubierta. Apague todos los controles y
espere que seenfrien laspiezas del eiectrodomestico antes de
tocarlas o limpiarlas. Tenga cuidado para evitar quemaduras de
vapor si usa una esponja o un paffo mojado para limpiar los
derrames en una superficie caliente. Algunos limpiadores
pueden producir vapores nocivos cuando se aplican en una
superficie caliente.
Limpie solamente las piezas indicadas en esta guia.
Homo autolimpiante
Gire los mangos de los utensiiios hacia el centro de la cubierta,
no hacia la habitaci6n ni sobre otto elemento superior. Esto
reduce el riesgo de quemaduras, encendido de materiales
infiamabies o derrames si el utensiiio es tocado accidentaimente
o alcanzado por niffos pequeffos.
Cubierta
No limpie la junta de [apuerta. Lajunta de [apuerta es
esencia[ para obtener un buen sel[o. Se debe tener cuidado de
no frotar, daffar ni mover [ajunta.
No use [impiadores de homo ni forros de homo de ning_n tipo
alrededor ni en ninguna parte del homo autolimpiante.
NUNCA deje loselementos superiores sin supervisi6n,
especialmente cuando est_ usando los ajustes de calor altos. Un
derrame sin recibir [adeb[da atenci6n puede causar humo y un
derrame de grasa puede causar un incendio.
Esteelectrodomest[co tiene diferentes tamaffos de elementos
superiores. Seleccione utensiHosque tengan basesplanas 1o
suficientemente grandes para cubrir el elemento. La relaci6n
adecuada entre el utensilio y el elemento mejorar_ [a eficiencia a[
cocinar.
CUBiERTA DEVIDRIO CERAMiCO: NUNCA cocine sobre una
cubierta quebrada. Si la cubierta de la estufa se quiebra, los
agentes de limpieza y los derrames pueden penetrar y crear un
riesgo de choque electrico. P6ngaseen contacto con un t6cnico
caiificado inmediatamente.
Ollas freidoras
Use extremo cuidado cuando mueva la olia con aceite o descarte
[agrasa caliente. Dejeque [a grasa seenfffe antes de intentar
mover [aolla.
Campanas de ventilaci6n
Limpie con frecuencia [acampana y los fiitros a fin de evitar que
seacumule en elios grasa u otros materiaies infiamabies y para
evitar incendios de grasa.
Cuando prepare aiimentos fiameados debajo de [a campana,
encienda el ventiiador.
Aviso y advertencia
importante sobre seguridad
La Propuesta 65 de [a Leyde 1986del Estadode California
Sobre Seguridad y Contaminaci6n del Agua Potable (California
Safe Drinking Water and Toxic Enforcement Act of 1986)exige
que el Gobernador de California publique una [istade [as
sustancias que segQnel estado de California causan c_ncer o
daffo al sistema reproductivo y exige que las empresas
adviertan a sus clientes sobre la exposici6n potencia[ a tales
sustancias.
Se advierte a los usuarios de este electrodomestico que cuando
el homo est_ funcionando en el ciclo de autolimpieza, puede
haber exposici6n de bajo nivel a algunas de las sustancias
indicadas en la list& incluyendo mon6xido de carbono. La
exposici6n a estassustancias puede set reducida aun mfnimo
ventilando el homo a[ exterior en forma adecuada, abriendo las
ventanasy/o [a puerta en la habitaci6n en donde est_ ubicado
el electrodomestico durante el ciclo de autolimpieza.
AVISO IMPORTANTE RESPECTOA LOS PAJAROS
DOMESTICOS: Nunca mantenga los p_jaros en la cocina o en
las habitaciones donde puedan Ilegar los humos de la cocina.
Los p_jaros tienen un sistema respiratorio muy sensitivo. Los
humos producidos durante el ciclo de autoiimpieza del homo
pueden ser perjudiciales o mortaies para los p_jaros. Los
humos que despide el aceite de cocina recalentado, la grasa,
margarina y los utensiiios antiadherentes recaientados pueden
tambien ser perjudiciaies.
Conserve estas instrucciones para referencia futura
45
CuldedoIlmptem
Homo autolimpiante
Para programar 'Self=Clean' (Autolimpieza):
Nora:Latemperaturade]horno debeser inferiora 205°C [400°F)
para programarun ciclo de limpieza.
J
1. Cierrela puertadel homo.
2. Oprimalatecla 'Clean' (Limpieza).
'CLEAN'destellaen el indicadorvisual. "........................................
3,
'SET'[Establacer)destellaen el indicadorvisual.
Oprimalatecla 'Autoset O' [ProgramaciCn
autom_itica).
. 'MEd' (Suciedadmediana,3horas)sedespliegaen el
indicador.
Elciclo de autolimpiezausatemperaturasde cocciCnsuperioresalas
normalespara limpiarautom_ticamentetodo el interiordel homo.
Limpieel homoconfrecuenciaremoviendolosderramespara evitar
humoexcesivoy Ilamaradas.No permitaque seacumuledemasiado
sucioen el homo.
Duranteel procesode limpieza,lacocina debeestarbienventilada
paraeliminarlosoloresnormalesasociadoscon la limpieza.
Antes de la autolimpieza
1. Apague la luzdel homoantesde la limpieza.Laluzdel horno
puedefundirse duranteel ciclo de limpieza.
2. Retiretodoslosutensiliosy lasparrillasdel homo. Lasparrillas
del homosedescolorar_ny nose deslizar_inf_icilmentedespuCs
de un ciclode autolimpiezasi noson retiradasdel homo.
3. Limpieel marcodel homo,el marcode _ _TE--]
la puerta,el _ireafuerade lajunta de la \ ,
puertay alrededorde la aberturaen la
junta de la puerta,con un agentede
limpiezano abrasivetalcomo 'Bon
AmP o condetergentey agua.El
procesode autolimpiezanolimpia
estasareas. Eliasdebenserlimpiadasparaevitarqualasuciedad
se horneeduranteel ciclo de autolimpieza. [Lajunta esel sello
alrededorde la puertayventanadel homo.]
4. Paraevitarda_ono limpie nifrote lajunta situadaalrededordela
puertadel homo.Lajunta est,1dise_adaparasellar
hermc!ticamenteel calorduranteel ciclo de limpieza.
5. Limpieel excesode grasao derramesde laparte inferiordel
homo. Estoevitahumoexcesivoo Ilamaradasduranteel ciclo de
limpieza.
6. Limpielosderramesazucaradoso _cidostales comopapadulce
(camote),tomateso salsasa basede leche.La porcelana
esmaltadaesresistenteal _cidopero no a pruebade_icidos.El
acabadode porcelanapuededescolorarsesi losderrames_cidos
o azucaradosnosonlimpiadosantesde un ciclo de autolimpieza.
4. Oprimalatecla 'Autoset O'paradesplegarlosajustesde
autolimpieza.
'HVy'[Suciedadintensa,4 horas]
'MEd' [Suciedadmediana,3 horas)
'LITE'(Suciedadleve,2horas)
AIseleccionarel niveldesuciedaddel homoseprograma
autom_iticamenteel tiempo de limpieza.
5. Despuc!sdecuatro segundos,el homocomenzar_alimpiar.
° Si la puertanosecierra,seoir_ unasepalsonoray la palabra
'door' [Puerta]sedesplegar_ien el indicadorvisual. Si lapuerta
no escerradadentrode 30segundos,laoperaciOnde
autolimpiezaser_canceladay el indicadorvolveraadesplegar
la horadel dfa.
. 'CLEAN'aparecer_en el indicadorvisual.
. 'LOCK'destellar_ien el indicadorvisual. Unavezqua la puerta
sebloquea,la palabra'LOCK'permanecer_iluminadasin
destellar.
. Eltiempo de limpiezacomenzar_ila cuentaregresivaen el
indicador.
Para diferir un cicIo de autolimpieza:
1. Oprimalatecla 'Delay 1' [Diferido). 1
/
'DELAY'destella. Delay
'00:00'destellar_en el indicadorvisual.
2. Programelacantidadde tiempo quausteddeseadiferir el ciclo
usandolasteclasnumCricasapropiadas.
3. Oprimalatecla 'Clean'. Clean
'SET'destellaenel indicadorvisual.
4. Optima latecla 'Aatoset 0'.
. Sedespliega'LITE'(niveldesuciedadlevel. U
5. Optima latecla 'Autoset o' paradesplegarlos /\utoset
ajustesde autolimpieza.
'HVy'[Suciedadintensa,4 horas]
'MEd' [Suciedadmediana,3 horas)
'LITE'(Suciedadleve,2horas)
AIseleccionarel niveldesuciedaddel homoseprograma
autom_ticamenteel tiempo de limpieza.
*Los nombresde losproductossonmarcasregistradasdesusrespectivosfabricantes.
cont.
46
6. Despu6sdecuatrosegundos,laspalabras'CLEAN'(Limpieza)y
'DELAY'(Diferido)seiluminar_ny 'LOCK'(Bloqeado)destellar_i
en el indicadorvisual. Cuandola puertadel homosecierra,
'LOCK'dejar_de destellaryseiluminar_permanentepara
mostrarqueel homoest_programaticparauna operaciOnde
limpiezadiferida. Enel indicadoraparecer_el tiempodiferido.
Procedimientos de limpieza
Durante el ciclo de autolimpieza
Cuandoaparece'LOCK'enel indicador,la puertano sepuedeabrir.
Paraevitardafio ala puerta,no fuereelapuerta paraabrirlaeuando
la palabra'LOCK'est,1desplegadaen el indicadorvisual.
Name y olores
Ustedpuedever humoy sentirclot lasprimerasvecesque el borne
eslimpiado. Estoesnormalydisminuir_conel tiempo.
Tambi#npuedeocurrirhumosi el homoest_demasiadosucio o si
seha dejadoun utensilioen el homo.
Sonidos
A medidaque el bornese calienta,usted puedeoff sonidosde
piezasmet_ilicasquese expandenycontraen. Estoesnormaly no
dafiar_el homo.
Despu6s del ciclo de autolimpieza
Aproximadamenteuna hera despu6sdel fin del ciclo de limpieza,
'LOCK'desaparecer& Lapuertaahorapuedesetabierta.
Alguna suciedad puedequedar come aria lovecenizagristipo
polvo. Retffelaconun patio hQmedo.Si la suciedadpermanece
despu6sde limpiarla,significaque el ciclo de limpiezano fueIo
suficientementelargo. La suciedadser_eliminadaduranteel
pr6ximociclode limpieza.
Si las parrillasdel homo fueron dejadasenel homo y no se
deslizansuavemente despu_sde un ciclode limpieza, limpie
lasparrillasy lossoportesde lasparrillascon una pequefiacantidad
de aceitevegetalparahacerlasdeslizarconm_isfacilidad.
Puedenaparecer lineasdelgadasen la porcelanaal pasarper
ciclosde calentamientoy enfriamiento. Estoesnormaly no
afectar_el rendimiento.
Una deseoloraci6nblanca puedeapareeer despu_sdel ciclo
de limpiezasilos alimentos _cidos o azucarados no fueron
limpiadosantes del ciclode aatolimpieza. EstadescoloraciOnes
normaly no afectar_iel rendimiento.
NOtaS:
, Si sedejaabiertala puertadel homo,la palabra'door'
destellar_ienel indicadorvisualyseescuchar_unaserial
sonorahastaque la puertaseacerraday latecla 'Clean'sea
oprimidanuevamente.
, Si transcurrenm_sde cincosegundosdespu6sde oprimir la
tecla 'Clean'y antesde oprimirla tecla 'AutosetO'
(Programaci6nautom_tica),elprogramavolver_i
autom_ticamenteal despliegueprevio.
, Lapuertadel homosedafiar_sisefuerzaparaabrirla cuando
la palabra'LOCK'contin0adesplegadaen el indicador.
Protectortrasero y cubierta- porcelanaesmaltada
Laporcelanaesmaltadaesvidriofundidoen metalypuedeagrietarseo
picarsesino seusacorrectamente.Esresistentea los;icidos,noa
pruebade_icidos.Todoslosderrames,especialmentelosderrames
azucaradoso addicosdebenserlimpiadosinmediatamenteconun
patioseco.
Cuandoseenfrfe,laveconaguajabonosa,enjuagueyseque.
Nunca limpieunasuperficietibiao calienteconun patioh[_medo.
Estopuedecausaragrietamientoo picaduras.
Nanca uselimpiadoresde homo,agentesdelimpiezaabrasiveso
c_iusticosenel acabadoexteriorde laestufa.
Area del relojy de lasteclas de control
Paraactivar'ControlLock'[Bloqueode loscontroles)parala limpieza,
verp%ina 55.
Limpieconun patiohL3medoysecar.No useagentesdelimpieza
abrasivespuespuedenrayarlasuperficie.
Sepuedeusarlimpiavidriossiserocianen el patioprimero.
NOrociedirectamenteen el panel.
PeriiJasdecontroJ
Retirelasperillascuandoestenenlaposici6n'OFF'(Apagado]
tir_ndolashaciaadelante.
Lave,enjuaguey seque.No useagentesde limpiezaabrasivespues
puedenrayarelacabado.
Enciendacadaquemadorparaasegurarsedeque lasperillashan
sidecorrectamentereinstaladas.
Cubierta =Vidriecer_mico
Nuncauselimpiadores dehomo,blanqueadorcon cloro,
amoniacoo limpiadoresde vidrie quecentengaamoniaco.Neta:
Llamea un reparadorautorizado si lacubiertade vidrio cer#mico
seagrieta, quiebra o el papel de a/uminio sederritesobrela
cubierta.
Dejequelacubiertaseenfrfeantesde limpiarla.
Generalidades- Limpielacubiertadespuesde cadauseo cuando
seanecesarioconunatoalladepapelht_meday con'Cooktop
CleaningCreme*(CremadeLimpiezaparaCubiertas)(PiezaNo.
20000001)**.Lustreconun patiolimpioyseco.
Nora:Sedesanollarbnmanchaspermanentessilasuciedadsedeja
quesecocineunayotravezusandolacubiertacuandoest#sucia.
Manchas rebeldeso marcasde metal - Humedezcaunaesponja
degomaquenodejemamaso queno raye.Aplique
'CooktopCleaningCreme*(CremadeLimpiezaparaCubiertas)
(piezano.20000001)**yfrote parasacartantasuciedadcomesea
posible.Apliqueunacapadelgadadecremasobrelasuciedad,
cubraconunatoallade papelhOmeday d6jelareposar
durante30a 45minutes(2- 3 horasparamuchasuciedad).
MantengahOmedocubriendolatoallade papelconenvolturade
pl_stico.Restrieguenuevamente,hego limpieconunpatiosecoy
limpio.
* Loshombresde losproductosson mamasregistradasde sus respectivosfabricantes.
** Parahacerpedidos,Ilameal 1-877-232-6771EE.UU.o 1-800-688-8408Canad&
47
Nora:SolamenteuseesponjasLIMPIAS,HUMEDASy queno rayeny
queseansegurasparautensiliosconacabadoantiadherente.
Sedaflarfid disefloy el vidriosilaesponjanoesd mojada,sib
esponjaestfisuciaoseusaotto tipodeesponja.
SuciedadesQuemadase Pegadas=Restriegueconuna
esponjaquenodejemarcasy 'CooktopCleaningCreme'*
(CremadeLimpiezaparaCubiertas}. _ j
IVeta: Sostengaun restregadorconhojadeafeitara _ J_
un ;ingulode30oyrestrieguecualquiersuciedad
quepermanezca.Luegolimpiecomese
describi6anteriormente.Neuselahojade
afeitarparalimpiezadiariapuespuede
desgastarel disenodelvidrio.
PI_sUeoe az_car derretida- Inmediatamenteenciendael
elementoatemperatura'LOW'(Baja}yrestrieguey raspeelazticaro
el pl_sticodelasuperficiecalientehaciaun _reafrfa. Luego'OFF'
(Apague}el elementoydejequeseenfr[e.Limpieelresidueconun
raspadorconhojadeafeitary 'CooktopCleaningCreme'*.
Ventanay puertadel herne=Vidrie
Eviteusarcantidadesexcesivasdeaguapuespuedeescurrirse
debajoodetr_isdelvidriocausandomanchas.
LaveconaguayjabOn. Enjuagueconagualimpiay seque.El
limpiadordevidriopuedeusarsesiserociaen unpa_oprimero.
, No usematerialesabrasivestalescomeesponjasde restregar,
limpiadoresen polvoo esponjasde lanadeaceropuespueden
rayarelvidrio.
Interier del herne
Sigalasinstruccionesen lasp_ginas46-47paraprogramarunciclo
deautolimpieza.
Parrillasdel homo
LimpiarconaguaconjabOn.
Sacarlasman@asdificilesconpolvodelimpiezao unaesponjaIlena
conjab@. Enjuagueyseque.
Lasparrillassedescolorar_npermanentementey puedenno
deslizarseconsuavidadsisondejadasenelhomoduranteunciclo
deautolimpieza.Si estosucede,limpielaparrillay lossoportesen
relieveconunapeque_acantidaddeaceitevegetalpararestaurarla
facilidaddemovimiento,luegolimpieelexcesodeaceite.
Acere inoxidable(modelosselectos)
NOUSENINGUNPRODUCTODELIMPIEZAQUECONTENGA
BLANQUEADORA BASEDECLORO.
NOUSELIMPIADORES'ORANGE'NI LIMPIADORES
ABRASIves.
SIEMPRELIMPIELAS SUPERFICIESDEACEROA FAVORDEL
GRANO.
Limpieza diaria/Suciedadleve=Limpieconunode lossiguientes
- aguaconjab6n,unasoluci6ndevinagreblancoconagua,
limpiadorparasuperficiesyvidrio'Formula409'*o un limpiavidrios
similar- usandounaesponjao un pa_osuave.Enjuagueyseque.
Parapuliry evitarmamasde los@dos,useel producto'Stainless
SteelMagicSpray'*(PiezaNo.20000008}**.
Sudedad mederada/Intensa=Limpieconunodelossiguientes-
'BanAmi'*,'SmartCleanser'*o 'SoftScrub'*- usandounaesponja
hOmedao unpa_osuave.Enjuaguey seque.Lasmanchasdificiles
puedenserquitadasconunaesponjamulti-use'Scotch-Brite'*
ht_meda;frote afavordelgrano.Enjuagueyseque.Pararestaurarel
lustreysacarlasvetas,aplique'StainlessSteelMagicSpray'*.
, Desceleraci6n- Useunaesponjamojadao un pa_osuave,limpie
conlimpiadordeacero'CameoStainlessSteelCleaner'*.Enjuague
inmediatamenteyseque.Paraeliminarlasestr[asy restaurarel lustre,
usedespu6srociadorparaaceroinoxidable'StainlessSteelMagic
Spray'*.
Gavetaealentadora, manijade la puerta, paneleslaterales=
Esmaltepintade
Cuandoest6fr[a,laveconaguatibiajabonosa,enjuagueyseque.
Nuncalimpieunasuperficietibiao calienteconun pa_ohOmedo
puesestopuededaflarla superficieycausarunaquemaduraacausa
delvapor.
Paramanchasrebeldes,useagentesde limpiezalevementeabrasives
talcomapastade bicarbonateo'BenAmi'*.No useagentesde
limpiezaabrasives,c_usticoso_sperostalcomeesponjasdelanade
aceroolimpiadoresdehornos.Estosproductospuedenrayaroda_ar
permanentementelasuperficie.
Nota: Useuna tealla o unpa#o secopara limpiarlosderrames,
especia/mentelos derrames acidicos o azucarados.La
superficie sepuededescoloraro perdere/bri/Io si el derrame
nose/impiaimnediatamente.Estoes especia/mente
importante en/assuperficies blancas.
* Losnombresde losproductossonmarcasregistradasde susrespectivosfabricantes.
** Parahacerpedidos,Ilameal 1-877-232-6771EE.UU.o 1-800-688-8408Canad&
Puerta del homo
Nora: Lapuertadel homoen unaestufanuevapuedesentirse
"esponjosa"cuandosecierra. Estoesnormaly disminuir_iconel
use.
Ventana del homo
Para proteger la ventana de la puerta del homo:
1. No useagentesde limpiezaabrasivestales comeesponjasde
restregarde lanade aceroo limpiadoresen polvopuesellos
pueden rayarelvidrio.
2. Ne golpeeel vidrio conelias,sartenes,muebles,juguetesu otros
objetos.
3. No cierrela puertadel homohastaque lasparrillasdel homono
est6nen sulugar.
AIgolpear,rayar,hacervibraro esforzarel vidriopuededebilitarsu
estructuracausandounmayorriesgode roturaen unafecha
posterior.
cont.
48
Luz del homo Gaveta de almacenamiento
Para reempiazar el foco del homo:
1. Cuandoel hornoest6fifo,sujete latapade la bombillaen su
lugar,luegodesliceel retch de alambrefuerade lacubierta.
Nora: La cubiertade la bombillasecaer_si no essujetaen su
lugarcuandoest_sacandoelret6ndealambre.
2. Saquelacubiertadelfoco yel foco.
CUBIERTA DE
3. Coloqueun foco de 40watts para LABOMBILLA
electrodom6sticos.
4. Vuelvaa colocarla cubierta
de la bombillayaseg[_rela
con el ret6ndealambre.
5. Vuelvaa enchufarla estufa. J RETENDEALAMBRE
Vuelvaa colocarla hora
correcta.
Tomillos niveladores
TORNILLO NIVELADOR
Lagavetade almacenamientopuedeser retiradaparaque usted
puedalimpiardebajode la estufa.
Para sacar:
1. Vade lagavetay deslfcelahaciaafuerahastala primeraposici6n
tope.
2. Levantela partedelanterade la gaveta.
3. Tfrelahastala segundaposici6ndetope.
4. Sujetelosladosy levantela gavetapara retirarla.
Para velvet a colocar:
1. Insertelosextremosde lascorrederasde la gavetaen losrieles
de la estufa.
2. Levantela partedelanterade la gavetay suavementeempt_jelaa
laprimeraposici6ndetope.
3. Levantelagavetanuevamentey empOjelahastaquequede
completamentecerrada.
Tomacorriente para
electrodom sticos peque os
(Modelos Canadiensessolamente)
Eltomacorrienteparaelectrodom6sticos
peque_osest4ubicadoen el lado inferior
izquierdodel protectortrasero.Aseg0resedeque
loscordonesel_ctricosno descansensobrelos
elementossuperioresocercade ellos. Siel
elementosuperiorest_ encendido,el cord6ny el
electrodomc!sticopuedenda_arse.
Eldisyuntordeltomacorrientepara
electrodomc!sticospeque_ospuededispararsesiel artefacto
peque_oenchufadoen_1esde m4sde 10amps. Parareponerel
disyuntor,oprimael interruptorsituadoen el borde inferiordel
protectortrasero.
0
DISYUNTOR
Parala mayeriadelos problemas,verifiqueprimero
Io siguiente.
Revisesi loscontrolesdel hornoest_ndebidamenteajustados.
Verifiquesiel enchufeest4firmementeinsertadoenel
tomacorriente.
Verifiqueovuelvaa reponereldisyuntor. Verifiqueo reemplaceel
fusible.
Verifiqueel suministrode energ[aelc!ctrica.
Todala estula o parte deella nofunciena.
Revisesila superficiey/oloscontrolesdel homoest_n
debidamenteajustados.Vetp4ginas51y56.
Verifiquesi lapuertadel homosehadesbloqueadodespu6sdel
ciclode autolimpieza.Verp_gina47.
Revisesiel homoest_ajustadoparahomeadodiferidoo programa
de limpieza.Verp_ginas47y 57.
Verifiquesi 'ControlLock'(Bloqueodecontrol) est4activado.
Vetp4g.55.
Verifiquesiel controlest_en ModoSab_tico.Verp_g.59.
49
Elreloj,laspalabrasenel indicadorvisualy/o las luces
funcionanperoel homono se calienta.
Elbornepuedeestarprogramaticparauna funciCnde'Cook& Hold'
(CocciCny Mantener Caliente)ouna funci6ndiferida.
Puedeestaractivadalacaracterfsticade bloqueodeloscontrolesdel
homo.(Vetp_ig.55.)
Losresultadosdel horneadono son coreese esperabano son
diferentesa los del homoanterior.
Asegt_resede queel respiraderodel borneno est6bloqueado.Ver
p_igina60 parala ubicaciCn.
Verifiqueparaasegurarsede quela estufaest,1nivelada.
Lastemperaturasamenudovarianentreun homonuevoyuno
antiguo. A medidaquepasael tiempo,latemperaturadelhomo
cambiaypuedehacersem_iscalienteo m4sfrfa. Vet p_gina60 para
lasinstruccionescomeajustarlatemperaturadel homo. Nota: No
serecomiendaajustarlatemperaturasihatenidoproblemascon
solounao dosrecetas.
Losalireentos nose asan a laparrillaenforrea debidao salen
dereasiadohureo.
Verifiquelasposicionesdelasparrillasdel borne.Elalimentopuede
estarmuycercadelelemento.
Elelementode asarnorue precalentado.
Elpapelde aluminioseus0de maneraincorrect& Nunca forreel
insertodel asadorconpapeldealuminio.
La puertadel homo estabacerradamientrasseasabaa la parrilla.
Dejela puertaabiertaen la primeraposiciOn(alrededorde 10cm
[4pulgadas]).
Recorteelexcesode grasade la cameantesde ponerlaa asara la
parrilla.
Seus0unaasaderasucia.
Elvoltajedel hogarpuedeserbajo.
Elhomonose autolirepia.
Verifiqueparaasegurarsede queel ciclono est6ajustadoparaun
comienzodiferido.Verp_gina47.
Verifiquesila puertaest4cerrada.
Verifiquesiel controlest,1enModeSab_tico.Verp_g.59.
Elhomopuedeestara m_isde 205° C(400°F). Latemperaturadel
homodebeserinferiora205°C(400° F]paraprogramarun ciclode
limpieza.
Elhornono se lirepi6en [orrea debida.
Puedequeseanecesariountiempode limpiezam_slargo.
Losderramesexcesivos,especialmentedealimentosazucaradosy/o
_cidosno Deron limpiadosantesdel ciclodeautolimpieza.
Lapuertadel hornonose desbioqueadespu_sdelciclode
autoiirepieza.
Elinteriordel hornotodav[aest,1caliente. Dejequepase
aproximadamenteunaheraparaqueel homoseenfr[eantesde que
secompleteun ciclode autolimpieza.Lapuertapuedeserabierta
cuandodesaparezcalapalabra'LOCK'(Bloqueado)delindicador
visual.
Elcontrolyla puertapuedeestarbloqueada.Verp_g.55.
Lasuperficiesuavereuestra desgaste.
Abrasioneso rayaduraspequefias.
- AsegOresede que lacubiertay la parteinferiordel utensilioest6
limpia.No desliceutensiliosdevidrioo de metala travCsde la
cubierta.AsegOresede que laparteinferiordel utensiliono
sea_spera.Uselosagentesde limpiezarecomendados.
Verp4g.47.
Mamasde metal.
- No desliceutensiliosde metala tray,s de lacubierta.Cuando
est6fria, limpiela cubiertaconCremaparaLimpiezade
Cubiertas.Vetp_ig.47.
Manchasy estriasmarrones.
- Retirelosderramesr_pidamente.Nunca limpiecon un patioo
esponjasucia.Asegt3resedequelacubiertayla parteinferiordel
utensilioest_limpia.
Areascon unbrillomet41ico.
- Dep6sitosmineralesdelaguay delosalimentos.Uselosagentes
de limpiezarecomendados.Verp_g.47.
Picaduraso descascarillado.
- Limpielosderramesazucaradosinmediatamente.Verp_g.47.
Sejunta hureedaden laventana del homo o sale vaporper el
respiraderodel homo.
Estoesnormalcuandosecocinanalimentosconalto contenido
de humedad.
Seus6humedadexcesivacuandolimpi6la ventana.
Hayun olor fuerte o hureolovecuando se enciendeel homo.
Estoesnormalen unaestufanuevaydesaparecer_despuc!sde
unospocosuses.AI iniciarun ciclo de autolimpiezase
"quemar4n"losoloresm4srdpidamente.
Siseenciendeel ventiladorayudar_a eliminarel humoy/o el clot.
Suciedadexcesivade alimentosen el panelinferiordel homo.
Useun ciclo de autolimpieza.
C6digosde errores
'BAKE'(Horneado)o'LOCK'puedendestellarr4pidamenteenel
indicadorparaavisarleque hayun erroro un problema. Si'BAKE'
o 'LOCK'aparecenenel indicadorvisual,optima latecla
'CANCEL' (Cancelar]. Si'BAKE'o 'LOCK'contint_andestellando,
desconectela energfaelCctricaalelectrodom_stico.Espereunos
pocosminutosyvuelvaa reconectarla energ[aelCctrica.Si
contint_andestellando,desconectelaenerg[aelCctricadel
electrodomc!sticoy Ilameal tCcnicodeservicioautorizado.
Siel homoeat4demasiadosucio,puedenocurrir demasiadas
IlamaradasIocual resultar4en un c6digode errordurantela
limpieza. Oprimalatecla 'CANCEL' ydeje queel homoseenfrfe
completamente,limpieel excesode suciedady luegovuelvaa
programarel ciclo de limpieza.Siel c6digode error reaparece,
Ilamea untCcnicoautorizado.
Se escuchanruidos.
Elhomoemite variessonidosbajos. Ustedpuedeoff losrelc!sdel
homo cuandoseenciendenyseapagan.Estoesnormal.
A medidaque el homose calientay seenfria,ustedpuedeoff
sonidosde piezasmet_licasque seexpandeny contraen. Estoes
normaly no dafiar_isuelectrodomCstico.
No se escuchan se[=alessonoras y el indicadorvisualno
se actJva.
Elborne puedeestarenModeSab_tico. (Verp4g.59).
'SAb' desteffay luego se despliegacontinuareente.
Elhomoest4 en modesab_tico.Paraanular el modesab_tico,
oprimay mantengaoprimidala tecla'Clock' (Reloj]durantecinco
segundos.
5O
Co¢inaMoenlaestufa
Controles superiores
Useestoscontrolesparaencenderloselementossuperiores.Sedis-
ponede una selecci6ninfinita deajustesdel calordesde'Low' (Bajo)
hasta'High' (Alto). Lasperillaspuedencolocarseen cualquierade
estosajusteso entreellos.
Programaci6n de los controles
1. Coloqueelutensiliosobreel elementosuperior.
2. Oprimay gire la perilla en cualquierdirecci6n hasta el
ajustede calordeseado. O O
Enel paneldecontrol seencuentramarcado Front oOo
cualelementocontrolacadaperilla. Porejemplo,el dibujo
a laderechaindicaelelementodelanteroizquierdo.
3. Enel paneldecontrol hayuna luzindicadoradel elemento.
Cuandoseenciendealgunade lasperillasde control,la luzse
ilumina. La luzseapagar_icuandotodos loselementossuperiores
seapaguen.
Cuandoseenciendeun control,sepuedepercibirun brillo a Io
largode la superficielisa.Elelementopasar_pot ciclosde
encendidoy apagadopara mantenerel ajustede calor
seleccionado,inclusiveen el ajuste'High' (Alto).
4. Despu6sdecocinarcoloquela perilla en la posici6n'OFF'
(Apagado). Retireel utensilio.
Ajustes de caior sugeridos
Eltamafioytipo de utensilio,el tipoy cantidadde alimentoqueest6
calentandoy la potenciadecarlaelementoindividualdeterminar_nla
posici6nidealde laperilla parala cocci6n.Algunoselementostienen
un ajustede cocci6nafuego lentoyparaderretirque requerir_un
ajustepequefiode la temperaturadependiendodel alimentoque
estc!preparando.Losotroselementosmuestranlosajustes
exclusivosdedichos elementosimpresosalrededorde lasperillas.
Ajustela temperaturaa losn0merosque ofrecenlosresultadosde
cocciOndeseados.Parainformaci6nsobrelosutensiliosyotros
factoresque afectanlosajustesdel calor,consultelasecci6n
Recomendacionessobrelosutensiliosen la p%ina 53.Lassiguientes
descripcionesleayudar_ina elegirel ajusteque le dar_los
resultados6ptimos.
'Hold' (Calentar)o 'Warm' (Mantenercaliente}:Losalimentos
mantienenuna temperaturasobrelos60° C(140°F}sinque sigan
cocin_indose.Losalimentosest_incalientesen principioy luegose
reducelatemperatura.Nuncauseestosajustespararecalentar
alimentosfrios.
'Simmer' (Cocci6na fuegolento): Losalimentosforman burbujas
que apenasIlegana lasuperficie.Losalimentostienenuna
temperaturaentre85°C (185° F)y93° C (200°F).Elajustede
cocciOnafuego lentotambi6n puedeserusadoparaherviro
escalfaralimentoso seguircocinandoalimentoscubiertos.
'Slow Boil' (Hen/orlento):Losalimentosformanburbujas
moderadamente.Elajustedehen/orlentotambi_n puedeser usado
parala mayoriade lasfriturasy paramantenerlacocci6nde
grandescantidadesde I[quido.
'Boil' (Hervir):Losalimentosformanburbujasagran velocidad.Este
ajustetambi_npuedesetusadoparadorar came,parapreparar
alimentossalteados,parasofreiry paracalentaraceiteparafrdr
antesde reducirlatemperatura.Los3 o 4 ajustesm_saltosde la
perillaseusanparaestostipos de cocciOn.Elajustem_isalto
siempreseusaparahacerhervirel agua.Algunoselementos
ofrecenunavelocidadinclusomayorparahervirI[quidos.
51
Cubiertas lisas
Notas:
Lacubierta de la estufapuedeemitir un pocode humoy
olor la primeravezquese utiliza. Estoesnormal.
Lascubiertaslisas retienen elcalor per an cierto periodo
despu_sqae se haapagade la estafa. Apagueloselementos
unospocosminutosantesdeque losalimentosesten
completamentecocinadosy useel calorrestanteparacompletar
la cocci6n.Cuandola hz desuperficiecalienteseapaga [vera
continuaci6n],el _readondesecocinaestar_fr[a altacto.
Debidoa la maneraenque retienenelcalor,loselementoslisos
no responder_ntan r_pidamentea loscambiosen losajustes
como loselementosespirales.
Encasodeun posiblederrame,retireel utensiliode lacubierta
de la estufa.
Nanca trate de levantar la cubierta.
La superficielisapuedeversedescoloridacuandoest_caliente.
Estoes normaly desaparecer_cuandolasuperficieseenfr[e.
Elementos superiores
Loselementossuperioresensu estufaest_n identificadospot
drculos permanentesenla superficielisa. Paracocinarde manera
m_iseficiente,useun utensilioque seadel mismotamahoque el
elemento.
Los utensilies no debenextenderse robsallb de 12a 25 mm
(1/2 a 1pulgada) del tama_e del elemente.
Cuandoseenciendeun control,sepuedevet un resplandora trav6s
de la supefficielisa.Elelemento pasaRiper cicles de encendide
y apagado para mantenerel ajuste deealor seleccionado,ann
en el ajaste 'High' [Alto).
Paramayorinformaci6nsobrelosutensiliosconsultela secci6n
Recomendacionessobrelosutensiliosen la p_gina53.
FLEXCHOICE MR
ELEMENTO DE 9"
ELEMENTO DE 12"
Sinembargo,el control puedecolocarseen cualquierposici6n
entre'Min' y 'Max'.
2. Cuandohayaterminado,gire elcontrol a la posici6n'OFF'
(Apagado).Lahz indicadorade superficiecalienteseapagar_
cuandose hayaenfriadola superficiedel_reacalentadora.
Notas:
Nuncacalientealimentosdurantem_sde unahora [los huevos
durante30 minutos),puessepuededeteriorarla calidaddel
alimento.
, No calientealimentosfr[osen el _ireacalentadora.
° Losajustesvariar_ndependiendodel tipoy cantidadde
alimento.Siempremantengael alimentoalas temperaturas
apropiadasdelalimento.ElUSDArecomiendatemperaturas
entre60°- 75°C [140°- 170°F] paralosalimentos.
Ajastes sugeridos
IVlin =2 Panes/Pastelitos Salsas
Cacerolas Huevos
2 = 5 Sopas[Crema] Platodeservircon comida
Estofados Salsas
Verduras Carnes
5 =Max Alimentosfritos Bebidascalientes
Sopas[L[quido)
Notas:
° Usesolamenteutensiliosy platosrecomendadosespec[ficamente
parausaren el homo yen la cubiertalisa.
° Siempreuseguantesparael homo cuandoretire losalimentos
del _reacalentadorapueslosutensiliosylosplatos estar_in
calientes.
, Todoslosalimentosdebencubrirse conunatapao conpapelde
aluminiopara mantenerla calidadde losalimentos.
° Cuandosecalientanpastelitosy paneslatapadebe teneruna
aberturaparadejarsalir la humedad.
° No useenvolturade pl_sticoparatapar losalimentos.Elpl_istico
sepuedederretiren la superficieyset maydificil de limpiar.
Luz indicadom de superficie caliente
Laluzindicadorade superficiecalienteseencuentraen el panelde
control.La hz se iluminar_icuandocualquierade loselementos
superioresest6caliente.Permanecer_encendidaaOndespu6sde
que el control seaapagado,hastaque el _reasehayaenfriado.
Area calentadom
Useel _ireacalentadoraparamantenercalienteslos
alimentosya cocinados,tal comoverduras,
salsasy platosdeservir resistentesal homo.
Ajuste del control:
1. Oprimay girela perilla.Las
temperaturasde calentamientoson
aproximadasy est_inindicadasen el
control como'Min' 2-8 y 'Max'.
OFF
Elemento FlexChoice MR (modelos selectos]
Elelemento'FlexOhoiceMR',enteramente
funcional,proporcionaun ajustede calor
ultrabajo'Melt' (Derretir] parapara derretir
chocolateo mantequilla.Se encuentraen la
posici6ntraseraderecha.
Elajuste'Melt' seencuentraentre2y 'OFF'.
Losajustesdecalorsituadosfuerade esta_irea
funcionancomoun elementonormal,con Medium
ajustesdesde2 [Bajo] hasta'High'.
OFF
Melt High
2
i
Nota: Cuandouselosajustesnormalesparaprepararalimentos, |
puedequelasuperficiedecocci6ndemoreunospocosminutosen
1
[enfriarsepara egar a ajustedecaor Me t.
52
Consejos para proteger la
cubierta lisa
Limpieza (ver p4gina 47 para mayor informaciOn_)
Antes de usar por primera vez, limpie la cubierta.
Limpie la cubierta diariamente o despu6s de cada uso. Esto la
mantendr_ con una buena apariencia y puede evitar que se da_e.
Si se produce un derrame cuando estd cocinando, limpielo
inmediatamente de la cubierta cuando 6sta est6 caliente para
evitar una limpieza m_s diffcil despuds. Tenga mucho cuidado,
limpie el derrame con una toalla seca y limpia.
No deje que los derrames permanezcan sobre la cubierta o sobre
la moldura de la cubierta por un per[odo de tiempo prolongado.
Nunca use polvos de limpieza abrasivos ni esponjas de restregar
que puedan rayar la cubierta.
Nunca use blanqueador a base de cloro, amonfaco ni otros
limpiadores que no hayan sido espec[ficamente recomendados
para usar en el vidrio cerdmico.
Para evitar marcas y rayaduras
No use utensilios de vidrio. Pueden rayar lasuperficie.
Nunca coloque un soporte o un aro de wok entre la cubierta y el
utensilio. Estos art[culos pueden marcar o rayar la cubierta.
No deslice utensilios de aluminio a travds de una cubierta caliente.
Los utensilios pueden dejar marcas que deben set limpiadas
inmediatamente. [Ver Limpieza, pdgina 47.)
Aseg0rese de que la cubierta y la parte inferior del utensilio estdn
limpias antes de encender la estufa a fin de evitar rayaduras.
Para evitar las rayaduras o da_o a la cubierta de vidrio cer_mico,
no deje az0car, sal o grasas sobre los elementos. Limpie la
cubierta con un paso limpio o con toallas de papel antesde usarla.
Nunca deslice utensilios de metal pesados atravc!sde la cubierta
pues pueden rayarla.
Para evitar las manchas
Nunca use un pa0o o una esponja sucia para limpiar la cubierta
de la estufa. Esto puede dejar una pel[cula que puede manchar la
cubierta despu6s que el area se calienta.
Si se contin0a cocinando sobre una superficie sucia se puede/
podrd producir una mancha permanente.
Para evitar etros da os
No deje queen la cubierta caliente se derritan pl_sticos, az0car o
alimentos con alto contenido de az0car. Si esto sucede, limpie
inmediatamente. [Ver Limpieza, p4gina 47.]
Nunca deje que una olla hierva hasta quedar seca pues esto
da_ard la superficie y el utensilio.
Nunca use la cubierta como una superficie de trabajo ni como una
tabla de cortar.
Nunca cocine alimentos directamente sobre la cubierta.
No use un utensilio peque_o en un elemento grande. Esto no s61o
desperdicia energ[a sino que tambi6n pueden producirse derrames
calientes sobre la cubierta los cuales requieren limpieza adicional.
53
No useutensiliosespecialesque noseanpianos,detama_omayor
o desniveladostal comolaparte inferiorredondade loswoks,con
fondosacanaladosy/o parrillasyollasde grantama_opara
prepararconservas.
No useahminio ni contenedoresde papelde ahminio. Elaluminio
sepuedederretiren la cubiertade vidriocer_mico.Siel metalse
derriteen la cubierta,no usela estufa. Llamea un t6cnico
autorizado.
Recomendaciones sobre los
utensilios
Si se usan los utensilios correctos se pueden ahorrar muchos
problemas, tal como prolongaci6n del tiempo de cocciOn de los
alimentos u obtenciOn de resultados no consistentes. Los utensilios
correctos reducen el tiempo de cocciOn, usan menos energia
el6ctrica y cocinan los alimentos de manera mds uniforme.
Prueba de las elias planas
Verifique si sus ollas son planas.
La prueba de la regla:
1. Coloque una regla a trav6s del fondo de la olla.
2. Col0quela a la luz.
3. Poca o ninguna luz debe verse debajo de la regla.
La prueba de la burbuja:
1. Coloque una pulgada de agua en la olla. Coloque la olla en la
cubierta y gire el control a 'High' [Alto].
2. Observe laformaci6n de burbujas a medida que el agua se
calienta. Las burbujas uniformes significan buen rendimiento y
las burbujas no irregulares indican puntos calientes y cocci6n
dispareja.
Utensilios pianos y Los utensilios con rondos acanalados
suaves, o arqueados. Los utensilios con fondos
irregulares no cocinan uniformemente
los alimentos y algunas veces no
pueden hervir I[quido.
Los utensilios de metales delgados o de
vidrio.
Utensiliosde material
grueso.
Utensiliosque sean Losutensiliosm_speque_oso mds
del mismotama_o grandesque el elementoen 2,5cm
queel elemento. [1 pulgada].
Mangosseguros. Losutensiliosconmangossueltoso rotos.
Mangospesadosquepuedeninclinarel
utensilio.
Tapasherm6ticas. Lastapassueltas.
Woksconfondo Loswoks confondoapoyadoen un aro.
piano.
Utensilios para preparar
conservas y de tamales
grandes
Tedas laselias para prepararcenservasy laselias grandes
debentenet rondosplanesy debenset hechesde materiales
grueses. Estoesmuyimportantepara lascubiertaslisas.Labaseno
debeserrodsde2,5cm (1 pulgada)m_sgrandequeel elemento.
Cuandolaseliasde prepararconservasy laseliasdetamales
grandesno cumplenestosrequisites,la cocci6npuedendemorar
m_stiempoyse puedenda_arlascubiertasde lasestufas.
Algunaseliasde prepararconservastienen basespeque_aspara
usarlasen lassuperficieslisasde lasestufas.
Cuandeest_ preparandecenservas,useel ajaste de caler alto
hastaque el agua cemience a herviro se Iograla presi6nen el
ella.Reduzcael caloral ajusterodsbajo que mantengael hervoro la
presiOn.Si nose reduceel calor,sepuededa_arla cubiertade la
estufa.
to¢inandoenelhorn_ oo
Panel de control
A B C D
; Clean : 1 2
Delay 3
8
/
G H I J K L IVi N
Elpaneldecontrol hasidediseffadoparasuf_cil programaci6n.Elindicadorvisualen el panelde control muestrala heradel dia,el
temporizadory lasfuncionesdel borne.Elpanelde control mostradoarribaincluyelascaracter[sticasde convecciOny adem_slas
caracteffsticasespecfficasde otros modelos. [Elestilo delpanel de controlvaffasegOnel modelo.)
A 'Bake'[Hornea0
'Broil'(Asara
laparrilla)
'Clean'(Limpieza)
'Delay'[Diferido)
Teclasnumericas
'Autoset'[ProgramaciOn
automdtica)
'KeepWarm'
[Mantenercaliente]
'Convect'(Convecci6n)
'Cook& Hold'[Cocci6n
,mantenercaliente)
Favorite'(Favorite)
'Timer'0-emporizado0
'Clock'(Reloj)
M 'OvenLight'
[Luzdelhomo]
'CANCEL'(Cancela0
Seusaparahornearyasar.
Seusaparaasaralaparrillaydorarlos
alimentos.
Seusaparaprogramarunciclodeautolimpieza.
Programael homoparacomenzara
hornearo limpiarsea unaheraposterior.
Seusanparaprogramarlostiemposy
temperaturas.
Seusaparaprogramartemperaturas
conrapidez.
Seusaparamantenercalienteenel
homoelalimentococinado.
Seusaparahornearo adadoperconvecci6n.
Seusaparahornearduranteuntiempo
seleccionado,luegomantieneelalimento
calienteduranteunahera.
Seusaparaguardarunprocedimientoespedfico
de'Cook& Hold'.
Programaaltemporizador.
Seusaparaprogramarlaheradeldia.
Seusaparaeneenderoapagarlaluzdehomo.
Cancelatodaslasfuncionesa excepci6n
deltemporizadoryel reloj.
Use de las teclas
Oprimalatecla deseada.
Optimalasteclasnum6ricasparaprogramarel tiempoo la
temperatura.
Optimalatecla 'Autoset O'para programarlatemperatura.
Seescuchardunasepalsonoracadavezque oprimaunatecla.
Seescuchardndosse_alessonorassi ocurreun erroren la
programaciOn.
Nora: Cuatrosegundosdespudsdehaberoprimidolasteclas
num6ricaso lateclaAutoset0,seprogramar_autom_ticamente
el tiempo o la temperatura.Si transcurrenm_sde30segundos
despudsde haberoprimidouna teclado funci6n yantesde
oprimir lasteclasnum6ricaso latecla Autoset0,lafunci6nser_
canceladay el indicadorvisualvolver_al despliegueanterior.
'Clock' (Reloj )
Elreloj puedeserajustadoparadesplegarla herayaseaenformate
de 12horaso 24 horas.El relojha sideprogramadoen la f_brica
parael formatede 12betas.
cent.
54
Para cambiar el reloj a formato de 24 horas:
1. Oprimay mantengaoprimidaslasteclas
'CANCEL' (Cancela0y'Favorite' (Favorito}
durante tressegundos.
'12Hr'destellaen lapantalla.
2. Oprimalatecla 'Autoset O'paraseleccionar
24 horas;opr[malanuevamentepara
seleccionar'12Hr'. tP}
U
3. Programelahoradel d[asiguiendolas
instruccionesindicadasenla secci6n Autosct
Programaci@delreloj.
Programaci6n del reloj:
1. Oprimalatecla 'Clock' (Reloj}.
Enel indicadordestellalahoradel d[a.
2. Oprimalasteclasnumc!ricasapropiadasparaprogramarla hora
del d[a.
Losdospuntosdestellanenel indicador.
3. Oprimalatecla 'Clock' nuevamenteo esperecuatrosegundos.
Losdospuntos permanecer_niluminados.
Cuandose conectaenergfael@tricaal homoo despu@deuna
interrupci6nde la energfael@trica,la 01timahoradel reloj previaa
la interrupciOndestellar4en el indicador.
Paradesplegarla horadel d[acuandoel indicadorest6 mostrando
otrafunciOndetiempo,optima latecla 'Clock'.
La horadel reloj no puedeset cambiadacuandoel homohasido
programadopara'DelayCook' (CocciOnDiferido},'DelayClean'
(LimpiezaDiferido}o 'Cook& Hold' (CocciOny MantenerCaliente
Diferido}.
Para cancelar el despliegue del reloj:
Si nodeseaque el indicadorvisualmuestrelahora del d[a:
Oprimay mantengaoprimidalasteclas
'CANCEL'y 'Clock' durantetressegundos.La --
horadel dfadesaparecer_del indicador.
Cuandose cancelaeldesplieguedel reloj,oprima
la tecla'Clock' paradesplegarbrevementela
horadel d[a.
Cuandose cancelaeldesplieguedel reloj,despu_sde 15minutos,el
control del homopasar_a Modode Reservaparaahorrarenerg[a.El
indicadorvisualestar_ien blancoy la luzdel homo nofuncionar&
Paraactivarel controly sacarlodel modode reserva,oprima
cualquiertecla.Seescuchardndosso,ales sonoras.
Para restaurar el despliegue del reloj:
Oprimay mantengaoprimidalasteclas'CANCEL'y 'Clock' durante
tressegundos.La horadel dfareaparecer_del indicador.
'Timer' (Temporizado0
Eltemporizadorpuedeset programadode un minuto (0:01}hasta99
horasy 59minutos(99:59),
Eltemporizadorpuedeset usadoindependientementedecualquier
otraactividaddel homo,Adem_ispuedeserprogramadocuandootra
funci6n del homoest6en funcionamiento.
Eltemporizadorno controlael homo,Solamentecontrolauna sepal
sonora.
Para programar el temporizador:
1. Optima latecla 'Timer'.
, Enel indicadorvisualdestellar_'0:00'y 'TIMER'.
2. Oprimalasteclasnum6ricasapropiadashastaqueel tiempo
correctoaparezcaen el indicadorvisual.
° Losdospuntosy 'TIMER'continuar4ndestellando.
3. Optima nuevamentelatecla'Timer' o esperecuatrosegundos.
, Losdospuntosdejan de@stellar yel tiempo comienzala
cuenta regresiva.
, El01timominutode la cuentaregresivadeltemporizadorse
desplegar_ensegundos.
4. AIfinal del tiempo programatic,seescucharaunasepalsonora
largay 'End'(Fin)sedesplegar_en el indicadorvisual.
Optima latecla 'Timer' paradespejarel indicadorvisual.
5,
Para cancelar el temporizador:
1. Optimay mantengaoprimidala tecla'Timer'
durante tressegundos.
U
2. Oprimalatecla 'Timer' y optima '0' usando
lasteclasnum6ricas.
m0
Autoset
Bloqueo de los controles y de
la puerta del homo
Eltecladoy lapuertadel horno puedenser bloqueadospara
seguridad,limpiezao evitarel usono autorizado.Lasteclasno
funcionancuandoest_nbloqueadas.
Siel homoest_enfuncionamiento,lasteclasni lapuertapuedeser
bloqueada.
La horaactualdelaliapermanecer_ien el indicadorcuandolasteclas
yla puertaest6bloqueada.
Para bloquear: @
Optimay mantengaoprimidaslasteclas
'CANCEL'y 'Cook & Hold'durantetres
segundos.(Oprimaprimerolatecla 'CANCEL').
, Enel indicadorvisualaparece'OFF'.
° 'LOCK'destellacuandola puertaseest_
bloqueando.
Para desbloquear:
Oprimay mantengaoprimidaslasteclas'CANCEL'y 'Cook & Hold'
durantetressegundos.(Oprimaprimerolatecla'CANCEL').'OFF'
desaparecedel indicadorvisual.
I Nora: y puertadel homo nopuede bloquearse
Lasteclas la si la
temperaturadel homo es205 C(400 F}osuperior.
-o, o
C6digos de errores
'BAKE'(Hornear)o 'LOCK'(Bloqueado}puedendestellar
r@idamenteparaadvertirleque hayun error o un problem&Si
'BAKE'o 'LOCK'destellanen el indicadorvisual,oprimale tecla
'CANCEL'. Si'BAKE'o 'LOCK'continOandestellando,desconectela
corrienteel@tricahaciael artefacto.Espereunospocos minutosy
vuelvaa conectarlacorrienteel@trica.Si laspalabrasaOncontint3an
destellando,desconectela corrienteel@trica haciael artefactoy
Ilamea unt@nico deservicioautorizado.
55
Horneado
Para programar 'Bake' (Hornear):
1. Oprimalatecla'Bake'. : Bake ;
'BAKE'y '000'destellarden el indicadorvisual. ................................
2. Seleccionela temperaturadel homo.Oprimala tecla
'Autoset e' (ProgramaciOnAutomdtica)para 175° C
U
(350° F)o lasteclasnum6ricasapropiadas. Autoset
Cadavezqueoprimalatecla'Autoset0' laternperaturase
aumentar_en 15°C (25° F).
Latemperaturadel homo puedeser programadade 75°a
285°C (170°a 550°F).
3. Oprimala tecla 'Bake' nuevamenteo esperecuatrosegundos.
'BAKE'dejarddedestellary seiluminar_en el indicadorvisual.
Enel indicadorvisualsedesplegar_38° (100°) o la temperatura
realdel homosiesque essuperiora 38° C(100° F).La
temperaturaaumentardenincrementosde 3° C (5° F)hasta
Ilegara latemperaturaprogramada.
4. Espereaqueel homoseprecalientedurante8-15 minutes.
Cuandoel homo Ilegaa latemperaturaprogramadase
escuchar_unasepalsonoralarga.
Latemperaturaprogramadasedesplegarden el indicador
visual.
Paraverificarlatemperaturaprogramadaduranteel
precalentamientodel homo,optima la tecla'Bake'.
5. Coloqueel alimentoenel homo.
6. Verifiqueel progresode la cocci6ncuandohayatranscurridoel
tiempo m[nimorecomendado.ContinQelacocci6nsies necesario.
7. AI t6rmino de lacocci6n,oprimalatecla'CANCEL'.
8. Retireelalimentodelhomo.
Notas:
Paracambiarla tempemturadel homoduranteelpmcesode
coccidn,oprimala tecla 'Bake', luegooprima'Autoset e' o las
teclasnum6ricasapropiadashastaquesedesplieguela
temperaturadeseada.
Paracambiarla tempemturadel homodurante'Preheat',optima
dosvecesla tecla 'Bake',luegooprima'Aetoset O'olasteclas
num6ricasapropiadashastaque sedesplieguelaternperatura
deseada.
Si olvidaapagarel homo,seapagar_autom_ticamentedespu_s
de transcurrir12 horas.Si deseadesactivarestacaracter[stica,
yeala p_gina59.
Diferencias del horneado entre st= homo
antiguo y su homo nuevo
Esnormalobservaralgunasdiferenciasen el tiempode horneadode
suhomo antiguoy su homonuevo.Vea "Ajustedelatemperaturadel
homo"on lap_gina60.
56
Horneado o asado per
convecci6n
Cuandohornee per cenvecci6n,programela temperatura
normalde horneado.Elcontrol reducirdautomdticamentela
temperaturaprogramadaen 15° C(25° F).Enel indicadorvisualse
desplegar_latemperaturaprogramada.
Para programar 'Convect Bake' (Horneado per
Convecci0n):
1. Oprimala tecla'Convect'. Corlvec":t
'BAKE'y el [conedelventiladordestellardn. .................................................
'000'destellar_enel indicadorvisual, i'_
U
2. Seleccionela temperaturadel homo.Oprimala tecla
'AutosetO'para 175°C (350° F)o lasteclas Au[oset
num6ricasapropiadas.
Cadavezque oprimalatecla 'Autoset O'la temperaturase
aumentarden 15°C [25° F).Latemperaturadel homopuede
serprogramadade 75°a 285° C(170° a 550° F).
3. Oprimala tecla 'Convect' nuevamenteo esperecuatro
segundos.
'BAKE'dejar_dedestellar.
Enel indicadorvisualsedesplegard38° (100°)o la
temperaturarealdel homosi esqueessuperiora38°C
(100° F).Latemperaturaaumentar_en incrementosde3° C
(5°F)hastaIlegara la temperaturaprogramada.
Eliconodel ventiladorcomenzar_agirar.
7. AI t6rminode la cocci6n,oprima latecla 'CANCEL'.
8. Retireel alimentodel homo.
4. Espereaque el homo seprecalientedurante8-15 minutes.
, Cuandoel homoIlegaa la temperaturaprogramadase
escuchardunasepalsonoralarga.
, Sedesplegardlatemperaturaprogramada.
, Paraverificar latemperaturaprogramadaduranteel
precalentamientodel homo,oprimalatecla 'Convect'.
5. Coloqueelalimentoen el homo.
6. Verifiqueel progresode lacocciOncuandohayatranscurridoel
tiempo m[nimorecomendado.ContinOela cocci6nsiesnecesario.
@
'Cook & Hold' (CocciOny
mantener caliente)
Cuandoseusala opci6n'Cook& Hold',el homocomienzaa calentar
inmediatamentedespu6sde que el control ha sideprogramatic.
Luego,el homococinaduranteun perfodode tiempoespecificado.
Cuandoesetiempo expira,el homo mantendr_el alimentocaliente
hastaduranteuna heray luegoseapagar_autom_ticamente.
Para programar 'Cook & Hold':
1. Oprimalatecla 'Cook& Hold'.
'HOLD'(Mantener)destellar_para indicarleque usted
estdprogramando'Cook& Hold'.
'00:00'destellarden el indicadorvisual.
2. Seleccionelacantidaddetiempoqueusteddeseacocinar
usandolasteclasnumc!ricas.
'HOLD'(Mantene0continOadestellando.
Eltiemposeiluminar_enelindicadorvisual.
Eltiempopuedeprogramarsede10minutes[00:10)a
11horns,59minutes(11:59).
3. CuandoHOLDest6destellando,oprima'Bake'
(Horneado),o'Conveet'(Convecci6n)y
seleccionelatemperaturadelhomo.Oprimala
tecla'AutosetO'[ProgramaciOnAutom_itica)para
175°C[350°F)oInsteclasnum6ricasapropiadas. U
Enel indicadorvisualdestellar_elnombredel Autoset
ciclo deseado.
Latemperaturadel homopuedeserprogramadade75° a
285° C[170° a550° F).
4. Oprimanuevamentelatecla del ciclo deseadoOesperecuatro
segundos.
Elhombredel ciclo deseadopermanecer_iluminado.
Enel indicadorvisualsedesplegar_eltiempode cocci6n.
Latemperaturarealdel homosedesplegar_iduranteel
precalentamiento.
Latemperaturaprogramadasedesplegar_cuandoel homose
hayaprecalentado.
Cuando haya expirado el tiempo de cocci6n:
Seescuchar_ncuatrose_alessonoras.
'HOLD'y 'WARM' [Caliente)seiluminar_n.
Enel indicadorsedesplegara75° 070°).
Lahera deldfaseiluminar_en el indicadorvisual.
cocinarel alimento.Elhomocomienzaa calentaren la hera
seleccionadaycocinaduranteel tiempo especificado.
Eltiempodiferidopuedeprogramarsede10minutes[00:10)hasta
11horns,59minutes(11:59).
Para programar un title de 'Cook & Hold' diferido:
1. Oprimalatecla 'Delay 1' [Diferido). 1
m
, 'DELAY'sedestellaen el indicador.
Delay
, '00:00'destellaen el indicador.
2. UsandoInsteclasnum6ricasapropiadas,programelacantidadde
tiempoque usteddeseadiferirel comienzodel ciclo 'Cook&
Hold'.
3. Oprimalatecla 'Cook & Hold'.
° 'HOLD'y 'DELAY'destellanen el indicador
visual.
° '00:00'destellaenel indicadorvisual.
4. Prodramelacantidadde tiempoque usteddeseacocinarusando
Insteclasnumc!ricas.
5. Optima'Bake' o 'Convect'.
6. Programelatemperaturadelhomodeseada
oprimiendolatecla 'Autoset O'o Insteclas
numc!ricasapropiadas. 0
, '175°, ('350°') seiluminar_icuandoseoprime
'Autoset 0'. Autoset
Despu_sdecuatrosegundos,el tiempo diferidoprogramatic
aparecerfien el indicadorvisual.
'HOLD'seapaga.
Laspalabras'BAKE'y'DELAY'permaneceniluminadaspara
recordarlequese haprogramaticun ciclo de 'Cook& Hold'
diferido.
Despu6s de ann hera en 'HOLD WARM' (Mantener
caliente):
El homoseapagaautom_ticamente.
'HOLD'y 'WARM'seapagan.
° Retireelalimentodel homo.
Para cancelar 'Cook & Hold' (Cocci6n y mantener
caiiente) en cuaiquier memento:
Oprimala tecla 'CANCEL' [Cancelar).Retireelalimento _/_, __,.,-_"_"_
del homo.
'Delay Cook & Hold'
(Cocci6n y mantener caliente diferido)
Cuandousa'Delay'(Diferido),el homo comienzaa cocinarm_s
tardeenel dfa.Programelacantidadde tiempo que usteddesea
diferir antesde que seenciendael homoy cuantotiempodesea
57
Notas:
° No use'Cook& Hold'diferido paraarticulosque requierenun
homoprecalentado,talescomepasteles,galletasy panes.
No use'Cook& Hold'diferidosi el homoyaest_caliente.
'Keep Warm' (Mantener caliente)
Paramantenercalientesen formaseguraalimentoscalienteso para
calentarpanesy plates.
Para programar 'Keep Warm': ..............................................
1. Oprimalatecla 'Keep Warm'en el indicador Keep
warm
visual. ..................................
° 'WARM' (Caliente)destellaen el indicadorvisual.
° '000'destellaenel indicadorvisual.
2. Seleccionelatemperaturade 'KeepWarm'. (._
Oprimalatecla 'AutosetO' [Programaci6nAutom_itica)Autoset
o Insteclasnum6ricasapropiadas.
° 75° [170°)seiluminar_cuandoseoprimalatecla 'Autoset0'.
° Cadavezque optima latecla 'Autoset 0', latemperatura
aumentar_en C (5° F).
Latemperaturade'KeepWarm'puedeset programadade 83°a
90° C (145°a 190° F).
'WARM'y latemperaturasedesplegar_nen el indicadorcuando
lafunciOnestc!activa.
'Broiling' (Asar a la parrilla)
Para cancelar 'Keep Warm' (Mantenir calient):
1. Oprimala tecla'CANCEL' (Cancelar).
2. Retireel alimentodel homo.
NOtaS:
Paracalidad6ptimade losalimentos,losalimentoscocinados
en el hornodebenser mantenidoscalientesper no m_sde 1a
2 horas.
Paraevitarque losalimentossesequen,eQbraloslevemente
conpapel dealuminioo una tap&
. Para calentarpanecilles:
- cubralevementelospanecillosconpapeldealuminioy
colOquelosen el homo.
- oprimalasteclas'Keep Warm' y 'Autoset O'
(ProgramaciCnautom_tica).
- calientedurante15a 20 minutos.
, Para calentarplates:
- coloque2filas de cuatroplatoscadauna en el homo.
- optima lasteclas'Keep Warm' y 'Auteset 0%
- calientelosplatosdurantecinco minutos,apagueel homoy
deje losplatosen el homodurante15minutosm_is.
- usesolamenteplatosresistentesal homo,verifiquecon el
fabricante.
- no coloquelosplatoscalientessobreuna superficiefr[a
puesel cambior_pidode temperaturapuedecausarfisuras
superficialeso rotura.
Tabla de asar a la parrilla
Para programar 'Broil':
1. Optima latecla 'Broil'.
, 'BROIL'y 'SET'(Validar)destellanen el indicador ................................................................
visual.
2. Optima latecla 'Auteset O'unavezpara 'HIbroil' (Asar U
a laparrilla contemperaturaalta)o dosvecespara Au[ose[
'LO broil'(Asara la parrillacontemperaturabaja).
, Enel indicadorvisualsedesplegar_'HI' (Alto)o 'LO'(Bajo).
, Selecciones'Il! broil' (285° C [550° F]) paraasadoa la parrilla
normal. Seleccione'LO broil' (230°C [450° F])paraasara la
parrilla contemperaturabajaalimentosque debenser
cocinadospor m_stiempo,tal comola came deave.
3. DespuCsdecuatro segundos,elhomocomenzar_a funcionar.
, 'BROIL'continuar_iihminado.
, 'HI' o 'LO'permanecer_niluminados.
4. Paraun dorado6ptimo,precalienteel elementode asara la
parrilla durante3 a 4 minutosantesde colocarel alimento.
5. Coloqueel alimentoen el homo. Dejelapuertaabierta
aproximadamente10cm (cuatropulgadas)(elprimertope).
6. Dc!vueltaa lacame unavezaproximadamentea
mitadde la cocciCn.
cent.
Came de res
Biftec,2,5cm (1")
A medicasar
Bienasado
Bienasado
6
6
607
8 minutos
10 minutos
9 minutos
7 - 12 minutos
8 - 14 minutos
6 - 9 minutos
Hamburguesas,1,9cm (3/4")de grosor
Came de cerde
Tocino 6 6 - 10minutes (nosed_ivuelta)
Chuletas,2,5cm (1") 6 10- 11minutes 12- 14minutes
RebanadadejamCn 6 5 minutes 3 - 7 minutes
Came de ave 'LOBroil' 'LO Broil'
Mitadesde pechugas 4 15minutes 15- 25 minutes
10 - 15 minutos
7 - 10 minutos
IVlarisces
Filetesdepescado,conmantequilla,2,5cm (1") de grosor
Colasde langosta,85-115g [3-4 onzas)carlauna
Neta: Estatabla essCIounagu[a. Lostiempospuedenvariarconel tipo de alimentoqueseest_cocinando.
58
(no sed_ivuelta)
(no sed_ivuelta)
7. Cuandoelalimentoest6cocinado,oprimalatecla
'CANCEL'(Cancelar).Retireelalimentoyla
asaderadelhomo.
Laheradeld[avolver_adesplegarseenel
indicadorvisual.
Notas:
. Paramejoresresultadoscuandoasea la parrilla,useuna
asaderadise_adapara asara la parrilla.
Lostiemposde asara la parrillaaumentar_nyel doradoser_
m_sclare siel electrodomCsticoesinstaladoen uncircuito de
208voltios.
'HI' [Alto]se usapara la mayor[ade losasadosa la parrilla.
Use'LO'(Bajo)cuandoasea la parrillaalimentosque
necesitancocci6nprolongada. Latemperaturainferiorpermite
queel alimentosecocinehastaquedar bienasadosindorarse
demasiado.
Paracambiarla temperaturadel homodurantelaasarala
parrilla,oprima latecla'Broil' [Asado),luegooprimala tecla
'Autoset O' [Programaci6nautom_tica)paracambiarel ajuste
deasadoentre'LO'y 'HI'.
. Lostiemposde asadoa laparrilla puedenset m_slargos
cuandoseseleccionalatemperaturam_sbajadeasara la
parrilla.
Elmayorde losalimentosdebeserdadovueltacuandoestda
mitaddel tiempode asar.
Cambio de la temperatura
de °F/°C
1. Elajustedef_bricade la medidadetemperaturaesFahrenheit.
2. Paracambiarel ajuste,oprimay mantengaoprimidaslasteclas
'CANCEL'y 'Bake' al mismotiempoduranteties segundos.
3. Escuchardunasepalsonorayel ajusteactual (°Fo °C)se
desplegardenla pantalla.[Sino serealizaning_n cambio,la
estufaregresar_al ajusteactualdespu_sde 30 segundos).
4. Paracambiarel ajuste,oprimala tecla 'Autoset 0'. Oprfmala
nuevamentepararegresaral ajusteanterior.Esperecinco
segundosy el ajusteseguardard.
Cierre autom tico/
Mode sab tico
Elhomoseapagar_automdticamentedespudsde 12horassi usted
Iodejaaccidentalmenteencendido. Estacaracteristicade seguridad
puedeserdesactivada.
Para cancelar el cierre autom_tieo de 12 betas y
dejar que el homo funcione eontinuamente durante
72 horas:
1. Oprimay mantengaoprimidala tecla'Clock'
[Reloj)durantecincosegundos.
'SAb'sedesplegar_ydestellarddurantecinco segundos.
'SAb'sedesplegar_continuamentehastaquesedesactiveo
hastaque transcurrael I[mitede 72betas.
'BAKE'[Horneado]tambiCnsedesplegar_si seestdusando
un ciclo de horneadocuandoel homoest_enModesabdtico.
LafunciSn'BAKE'esla Onicaquesepuedeutilizarconel mode
sab#tico.Lasdemosfunciones(temporizador,mantener
caliente,autolimpieza,etc..)sebloquear#nduranteel mode
sab#tico.
Sepuedeprogramar'Cook& Hold'(Cocci6ny mantener
caliente)duranteel Modesab_tico,sin embargonose puede
programar'DelayCook& Hold'.
Para eancelar el Mode Sab_tico:
1. Oprimalatecla 'Clock' durantecincosegundos.
° 'SAb'destellar_durantecincosegundos.
Laheradel d[areaparecer_enel indicadorvisual.
O
2. Despudsde72horas,el modesab_ticoterminard.
. 'SAb'destellar_durantecincosegundos.
. Laheradel d[areaparecer_en el indicadorvisual.
Notas:
. ElModesabdticopuedeser activadoencualquiermemento,
est6o no el homoencendido.
. ElModeSabdticonosepuedeactivarsilasteclasestdn
bloqueadasocuandola puertaest_ bloqueada.
La mayor[ade losmensajesytodas lasse_alessonorasest_n
desactivadascuandoel Modesab_ticoest_active.
Siel homoestdhorneandocuandoel Modesab_ticoes
programado,'BAKE'seapagar_cuandosecanceleel
horneado. Noseemitirdnsefialessonoras.
° Mientrasel homoest6en ModeSabdticola luzdel homose
encender_autom_ticamentecuandose abrala puerta. Sise
deseala luzdel homoduranteel Modesab_tico,dstadebeset
encendidaantesde que comienceel Modesab_tico.
CuandocomienzaelModeSabdtico,latemperaturaquese
despliegaser_la temperaturaprogramadaenvezde la
temperaturarealde la cavidaddel homo. Noseemitir_ la
sepalsonorade precalentamiento.
Elciclo de autolimpiezaybloqueoautomdticodelapuertano
funcionardduranteel Mode sabdtico.
Sioprimela tecla 'CANCEL'secancelar_un ciclo 'Bake',sin
embargoel control permanecer_en Modesabdtico.
. Sifalla lacorrienteelCctrica,cuandovuelvalaenerg[ael homo
seactivarden Modesab_ticocon72 horasrestantesy ningOn
ciclo active.
'Favorite' (Favorite)
Latecla 'Favorite'le permiteguardaren memoriael tiempoy la
temperaturadeun ciclo 'Cook& Hold'.
Paraprogramarun ciclo favorite,debeestaractivao recientemente
programadaunafunci6n de 'Cook& Hold'.
Para programar un nuevo title Favorite o para
guardar come Favorite un cido 'Cook & Hold' que
est_ en progreso:
1. Programeunciclode 'Cook& Hold'comesedescribeenla
secciOnCoccidny mantenercalienteen lasp_ginas56-57.
2. Optimay mantengaoprimidala tecla'Favorite'
durante tressegundos.
59
Elciclo 'Cook& Hold'(Cocci0ny mantenercaliente)
recientementeprogramadoo en progresoser_guardado
en memoria.
Seoir_ unasepalsonorapara indicarque el control ha
aceptadoel ajuste'Favorite'(Favorite).
Para comenzar un ciclo programado come Favorite:
1. Oprimalatecla 'Favorite'.
Sedesplegar_eltiempoy la temperaturaparael ciclo 'Cook&
Hold'programado(si no hayciclo 'Cook& Hold' programatic,
enel indicadorvisualsedesplegar_i'nonE'.)
2. Oprimalatecla 'Bake'(Horneado)o 'Convect' (ConvecciOn).
Elciclo Favoritecomenzar_inmediatamente.
Elhombredel ciclo seleccionadosese iluminar_ien el
indicadorvisual.
Eltiempo de cocci0nse iluminar_en el indicadorvisual.
Cuando ha expirado el tiempo de cocci6n:
Elnombredel ciclo seleccionadoseseapagar&
Se iluminar_n'HOLD'(Mantene0 y 'WARM'.
Enel indicadorsedesplegar_'75°, ('170°').
Para cancelar un title favorite en progreso:
1. Oprimalatecla 'CANCEL' (Cancelar). (/P&_IC'N-'_
Elciclo favoriteguardadoen memoriano
ser_iafectado.
2. Retireel alimentodel homo.
Ajuste de la temperatura
del homo
Laexactitudde lastemperaturasdel hornoescuidadosamente
probadaen laf_brica. Esnormalnotaralgunadiferenciaentrela
temperaturade horneadoo en el dorado,entreun homo nuevoy un
homo antiguo. A medidaque el homose usa,la temperaturadel
homo puedecambiar.
Ustedpuedeajustarla temperaturadel homo,si consideraquesu
homo noest_horneandoo dorandoenforma correcta. Paradecidir
cuantodebecambiarlatemperatura,programelatemperaturadel
homo a 15°C (25° F)mdsalta o mdsbajaque latemperatura
indicadaen sus recetas,luego hornee. Losresultadosdela "prueba"
puedendarleunaideade cuantodebe ajustarlatemperatura.
Para ajustar la temperatura del homo:
1. Oprimalatecla 'Bake'. ...........................................................
2. Programe285° C(550° F)oprimiendolasteclas Bake
numSricasapropiadas.
3. Oprimay mantengaoprimidala tecla'Bake' durantevaries
segundoso hastaque aparezcaenel indicadorvisual.
Si latemperaturadel homoha sidepreviamenteajustada,el
cambio aparecer_enel indicadorvisual. Perejemplo,si la
temperaturadel homofue reducidaen C (15° F)el indicador
mostrar_'- 8°,('-15°').
4. Oprimalatecla 'Autoset O'(ProgramaciOnAutomdtica)para
ajustar latemperatura.
Cadavezqueseoptima latecla 'AutosetO',latemperatura
cambiaen C (5°F). Latemperaturadel homopuedeser
aumentadao disminuidaen 3° a 20° C(5° a35° F).
5,
Si oprimelatecla 'Autoset0', latemperaturadel homopasar_
per un ciclo de aumentodetemperatura[5, 10... 35).Si
continOaoprimiendolatecla 'AutosetO',la temperaturadel homo
pasar_per un ciclo de descensode temperatura(-35,
-30...4).
Lahera deld[areaparecer_autom_iticamenteenel indicador
visual.
Nonecesitareajustarla temperaturadel homosi hayuna fallao
interrupciOnde energ[ael6ctrica. Elajustedelatemperaturaes
v_ilidopara'Bake','ConvectBake'y 'ConvectRoast'solamente.
Lastemperaturasde asara la parrillayde limpiezano pueden
serajustadas.
Ventilador del homo
Seusaunventiladordeconvecci6nparacircular el airecalienteen
el homo cuandoseseleccionalaopci6nde convecciOn.
Nota: Elventiladorde convecci6nseapagar_autom_ticamentecarlavezquese abrala puertadel homo.
Respiradero del homo
Cuandoel horno est_en use,el _ireacercadel respiraderopuede
calentarseIosuficientecome paracausarquemaduras.Nunca
bloqueela aberturadel respiradero.
Elrespiraderodel homose encuentra debajodel respaido
protectordesu estufa.
RESPIRADERO
HORNO NO coloquepl_sticos
cercade la abertura
del respiraderopues
el calorque sale
puededeformaro
derretirel pl_stico.
'Oven Light' (Luz del homo)
La luzdel homoseenciendeautom_iticamente
s_emprequeseabre la puertadel homo. Cuandose
cierrala puerta,oprimalatecla 'Oven Light' para
encendero apagarla luzdel homo. Seescuchar_
una sepalsonoracadavezqueseoprimalatecla 'OvenLight'.
Panel inferior del homo
Protejael panelinferiordel hornocontraderrames,especiahnente
azucaradosoaddicos,puespuedendescolorarla porcelana
esmaltada.Useel utensiliode tamaffocorrectoa fin de evitar
derrames.No coloqueutensiliosni papelde aluminio
direetamente en la parte inferiordel homo.
6O
Parrillas del homo
Elhomotiene dosparrillas. Todaslasparrillastienen un bordecon
topede enganche.
Para retirar la parrilla:
1. Tirede la parrilladerechohacia
afuerahastaquesedetengaen
la posici6ndel topede
enganche.
2. Levanteelfrentede la parrillay
tire de la parrilla haciaafuera.
Para reinstalar la parrilla:
1. Coloquelaparrilla en lossoportesde la parrilla enel horno.
2. Inclinelevementehaciaarribael extremodelantero;deslicela
parrillahaciaatrdshastaque pasosobrelostopesdeenganche.
3. Bajeel frente de la parrillay deslicelahaciaadentrodel homo.
Nuncacubra una parrillacompleta con papelde alaminio ni
coloquepapelde aluminio en el panelinferior del homo. Se
afectar_n los resultadosdel homeado y se puededafiar el
panelinferior del homo,
PARRILLA3: Paracacerolas,horneadode pan,tortasen moldesde
tuboo paysde natilla.
PARRILLA2: Seusaparaasartrozospeque_osde came,pays
congelados,sufl_sdepostreo pastelesesponjososyhorneadocon
dosparrillas.Tambi6nseusaparahorneadocon parrillasmOltiples.
PARRILLA1:Seusaparaasartrozos
grandesde camey camede ave.
Panel inferiordel homo:Coloquela
parrilladel hornoen losladoslevantados
del panelinferiordel homo. Usepara
disponerde espacioadicionalcuando
cocinecomidasgrandesen el homo.
HORNEADOCON PARRiLLASMULTIPLES:Usela posici6n2y 5
o3y6.
Nora:Cuandosehorneapot convecci6ncondosparrillas,revise
losalimentosenel tiempo mfnimosugeridoparaevitarque
queden demasiadodoradoso demasiadococinados.
Homeado de pasteles de capas en
[los parrillas
Paraobtenermejoresresultadoscuandohorneapastelesendos
parrillas,uselaposici6n2y 4 parahorneadoregulary la posici6n2y
5 para horneadopor convecci6n.
Coloquelospastelesen lasparrillascomosemuestra.
Posiciones de la parrilla
PARRILLA7 {la posici6n
m4salta):Paratostarpan
o asara la parrilla
alimentosdelgados,no
grasosos.
PARRILLA6: Seusa
parala mayoriade los
asadosa la parrilla.
PARRILLA5: Para
horneadocon parrillas
mOltiples.
homo
Horneado pot convecci6n
con dos parrillas
PARRILLA4: Seusaparahornearla mayoriade losalimentosen
una bandejade horneargalletaso un moldepara rollo de
mermelada,paysdefrutaso alimentoscongeladosdepreparaci6n
r_pida.Tambi6nsepuedeusarparaasarpresasdepolio a la parrilla.
61
62
P P
GARANTIA DE LOS ELECTRODOMESTICOS PRINCIPALES
DE MAYTAG CORPORATION
GARANTJA LIMITADA
Durante un afio a partir de lafecha de compra, siempre y cuando se de a este electrodomestico principal un uso y mantenimiento de
conformidad con las instrucciones adjuntas o provistas con el producto, la marca Maytag de Whirlpool Corporation o Whirlpool
Canada LP (en Io sucesivo denominado "Maytag") se hara cargo del costo de las piezas especificadas de fabrica y del trabajo de
reparaci6n para corregir defectos en los materiales o en la mano de obra. El servicio debera ser suministrado por una compahfa de
servicio designada por Maytag. Esta garantfa limitada es valida solamente en Estados Unidos o en CanadA, y se aplica solamente
cuando el electrodomestico principal se use en el pals en el que se ha comprado. Esta garantia limitada no tiene vigor fuera de los
cincuenta Estados Unidos y CanadA. Se requiere una prueba de la fecha de compra original para obtener servicio bajo esta garantfa
limitada.
EXCLUSlONES DE LA GARANTJA
Esta garantia limitada no cubre:
1. Visitas de servicio tecnico para corregir la instalaci6n de su electrodomestico principal, para enser_arle a usar su electrodomestico
principal, para cambiar o reparar fusibles domesticos o para corregir la instalacidn electrica o de la tuberia de la casa.
2. Visitas de servicio tecnico para reparar o reemplazar focos para electrodomesticos, filtros de aire o filtros de agua. Estas piezas de
consumo estan excluidas de la cobertura de la garantia.
3. Reparaciones cuando su electrodomestico principal se use de un modo diferente al domestico normal de una familia, o cuando se
use de un modo contrario alas instrucciones publicadas para el usuario u operador y/o las instrucciones de instalaci6n.
4. Dafios causados por accidente, alteracidn, uso indebido, abuso, incendio, inundacidn, actos fortuitos, instalacidn incorrecta,
instalaci6n que no este de acuerdo con los c6digos electricos o de plomerfa, o el empleo de artfculos de consumo o productos de
limpieza no aprobados por Maytag.
5. Dafios esteticos, incluyendo rayaduras, abolladuras, desportilladuras u otro dafio al acabado de su electrodomestico principal, a
menos que el mismo sea debido a defectos en los materiales o la mano de obra y se le informe a Maytag en un lapso de 30 dias a
partir de la fecha de compra.
6. Cualquier perdida de comida debido a fallas del refrigerador o del congelador.
7. Costos relativos a la remoci6n de su electrodomestico principal desde su hogar para obtener reparaciones. Este electrodomestico
principal esta diseSado para ser reparado en el hogar y Qnicamente el servicio de reparaci6n en el hogar esta cubierto bajo esta
garantia.
8. Reparaciones de piezas o sistemas como resultado de modificaciones no autorizadas que se hayan efectuado en el
electrodomestico.
9. Gastos de viaje y transporte para obtener servicio para el producto, si su electrodomestico principal esta ubicado en un lugar
remoto en el cual no haya disponible un tecnico de servicio autorizado por Maytag.
10. La remoci6n y reinstalaci6n de su electrodomestico principal, si estuviera instalado en un lugar inaccesible o si no estuviera
instalado de conformidad con las instrucciones de instalaci6n publicadas.
11. Electrodomesticos principales con n0meros de modelo/serie que se hayan removido, alterado o que no puedan ser identificados
con facilidad. Esta garantia se anulara si el n_mero de serie aplicado en la fabrica ha sido alterado o removido de su
electrodomestico principal.
El costo de la reparaci6n o el reemplazo bajo estas circunstancias excluidas, correra por cuenta del cliente.
EXCLUSION DE GARANTIAS IMPLJCITAS; LIMITACION DE RECURSOS
EL 0NICO Y EXCLUSIVO RECURSO DEL CLIENTE SEGUN LOS TERMINOS DE ESTA GARANTIA LIMITADA SERA EL DE REPARAR
EL PRODUCTO SEGUN SE ESTIPULA EN LA PRESENTE. LAS GARANTIAS IMPLIC.ITAS, INCLUYENDO LAS GARANTIAS DE
COMERCIABILIDAD O DE CAPACIDAD PARA UN PROPOSITO PART!CULAR, SERAN LIMITADAS A UN ANO O AL PERIODO MAS
CORTO PERMITIDO POR LEY. MAYTAG NO SE RESPONSABILIZARA POR DANOS INCIDENTALES O CONSECUENTES. ALGUNOS
ESTADOS Y PROVlNCIAS NO PERMITEN LAS EXCLUSlONES O LIMITACIONES POR DANOS INCIDENTALES O CONSECUENTES, O
LIMITACIONES ACERCA DE CUANTO DEBE DURAR UNA GARANTIA IMPLICITA DE COMERCIABILIDAD O CAPACIDAD, DE MODO
QUE LAS LIMITACIONES O EXCLUSIONES ARRIBA MENCIONADAS PUEDEN NO APLICARSE EN SU CASO. ESTA GARANTIA LE
OTORGA DERECHOS LEGALES ESPECIFICOS Y ES POSIBLE QUE USTED TENGA TAMBICN OTROS DERECHOS QUE PUEDEN
VARIAR DE UN ESTADO A OTRO O DE UNA PROVlNCIA A OTRA.
Si usted se encuentra fuera de los cincuenta Estados Unidos y CanadA, p6ngase en contacto con su distribuidor autorizado de Maytag
para determinar si corresponde otra garantfa.
Si necesita servicio, consulte primero la secci6n "Soluci6n de problemas" del Manual de uso y cuidado. Despues de consultar la
secci6n "Soluci6n de problemas", puede encontrar ayuda adicional en la secci6n "Ayuda o servicio tecnico," o Ilamando a Maytag. En
EE.UU., Ilame al 1-800-688-9900. En CanadA, Ilame al 1-800-807-6777.
9/07
@Registered Trademark/TM Trademark of Maytag Corporation or its related companies.
Part No. 8113P687-60 Used under license by Maytag Limited in Canada
©2006 @Mama registrada/TMMarca de comercio de Maytag Corporation o sus compaflias asociadas. A/01/08
All rights reserved. Usada bajo licencia por Maytag Limited en Canada Printed in U.S.A.
Todos los derechos reservados. @Marque d6pos_e/TMMarque de commerce de Maytag Corporation ou de ses compagnies affili_es. Impreso en EE,UU.
Tous droits reserves. Utilise sous licence par Maytag Limited au Canada Imprim_ aux E.-U.
/