kiddy evostar1 Directions For Use Manual
- Categoría
- Cochecitos
- Tipo
- Directions For Use Manual

EN
Directions for use
ES
Manual de uso
evostar1

1 2
3 4
5 6
7 8
2
1
1
CLICK
2
1
2

9 10
11 12
13 14
15 16
1
2
2
CLICK
1
2
1

17 18
19 20
21 22
23 24
2
2
1
1
c
b
a
c
b
a
d
CLICK
1
2

25 26
27 28
CLICK
29
1
2
3
30
31
1
2
32
CLICK
2
c
b
a
1
1
2

33 34
35 36
37 38
39 40
CLICK
1
2
CLICK
1
2
1
2

41 42
43 44
1
2
3
45
47
46
CLICK
UPPER CAR
SEAT
ADAPTORS
(STRAIGHT)
LOWER CAR
SEAT
ADAPTORS
(CURVED)
CLICK
1
2
48

49
50
51


EN
10
IMPORTANT/PRODUCT INFORMATION 12
1. Important Safety Information 13
2. Chassis 15
2.1 Fitting/removing the front wheels 15
2.2 Fitting/removing the rear wheels 15
2.3 Opening the chassis 16
2.4 Operating the parking brake 16
2.5 Operating the front swivel wheels 16
2.6 Adjusting the handle height 16
2.7 Folding the chassis 16
3. Seat Unit 17
3.1 Fitting the seat unit to the chassis 17
3.2 Fitting the bumper bar 17
3.3 Removing the bumper bar 18
3.4 Adjusting the seat unit 18
3.5 Adjusting the calf support 18
3.6 Fitting/removing the seat unit hood 18
3.7 Using the 5 point safety harness 18
3.8 Removing the seat unit from the chassis 19
4. Carrycot 19
4.1 Assembling the carrycot 19
4.2 Attaching the carrycot apron 20
4.3 Adjusting the carrycot hood 20
4.4 Fitting the carrycot 20
4.5 Removing the carrycot 20
5. Car Seat Adaptors 22
5.1 Fitting the car seat adaptors 22
5.2 Fitting the car seat parent facing only 22
5.3 Removing the car seat 23
5.4 Removing the car seat adaptors 23

EN
1111
6. Using the Evostar 1 in tandem mode 24
6.1 Fitting the tandem adaptors 24
6.2 Removing the tandem adaptors 24
6.3 Fitting the tandem seat units 24
6.4 Removing the tandem seat units 24
6.5 Fitting the tandem carrycots 25
6.6 Removing the tandem carrycots 25
6.7 Fitting the tandem car seat adaptors 25
6.8 Removing the tandem car seat adaptors 26
6.9 Fitting the tandem car seats 26
6.10 Removing the tandem car seats 26
7. Care and Maintenance 27
8. Warranty 28

EN
12
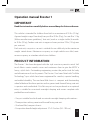
Operation manual Evostar 1
IMPORTANT
Read the instructions carefully before use and keep for future reference.
This vehicle is intended for children from birth to a maximum of 55 lbs (25 kg).
Age and weight usage: Pram body/carrycot 0 to 20 lbs (9 kg), Car seat 0 to 13 kg
(follow manufacturers guidelines), Seat unit (used as a single stroller) 6 months
to 55 lbs (25 kg), Tandem seat units in upper or lower position 33 lbs (15 kg) max
per seat unit.
Each seat unit, carrycot or car seat is suitable for one child only to the maximum
weight stated above. Maximum occupancy as single vehicle one child, maxi-
mum occupancy as a tandem vehicle two children.
PRODUCT INFORMATION
The Evostar 1 has been designed with the style conscious parent in mind. Soft
touch fabrics create smooth curves and continuous lines to give the KIDDY a
luxury, stylish look. Outstanding engineering creates the perfect ride for baby
and ultimate ease of use for parents. The Evostar 1 has been fitted with Tru-Ride
Technology® tyres which have been engineered for comfort, superior handling
and added durability. The one-hand fold chassis is compact and freestanding
when folded and the three position recline, parent and forward facing seat unit
is spacious and comfortable. A lie flat carrycot can be purchased as an optional
extra, is suitable for occasional overnight sleeping and comes complete with
padded liner and mattress.
• Carrycot suitable from birth and occasional overnight sleeping with mattress.
• Three position recline, parent and forward facing seat unit.
• One-hand fold, compact chassis.
• Five position handle height adjustment. 37-41.3 inches (94 - 105 cm).
12

EN
13
• Fixed or swivel front wheels.
• Features PU Polymer Tru-Ride Technology® tyres.
• Quick release wheels.
• All round suspension.
• Car seat adaptors available as optional extra to add a Group 0+
infant carrier car seat.
• Co-ordinating accessories include; changing bag, footmuff and cup holder.
• Option to convert to a double mode of transport with the addition of the tan-
dem adaptor kit.
Weights and dimensions:
Chassis weight with wheels - 21.4 lbs (9,7 kg).
Chassis weight with wheels and seat unit - 29.7 lbs (13,5 kg). Carrycot weight - 7.5
(3,4 kg).
Stroller with wheels folded - 26.4 x 11.4 x 23.2 inches (67 x 29 x 59 cm).
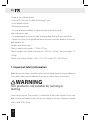
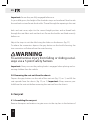
1. Important Safety Information
Read these instructions carefully before use and keep them for future reference.
Your child’s safety may be affected if you do not follow these instructions.
WARNING
This product is not suitable for running or
skating.
Pram body/carrycot: This product is suitable for a child who cannot sit up unai-
ded, roll over and cannot push itself up on its hands and knees. Maximum weight
of the child 20 lbs (9 kg).
13

EN
14
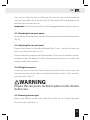
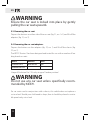
WARNING
Never leave your child unattended.
WARNING
Ensure that all the locking devices are engaged be-
fore use.
WARNING
To avoid injury ensure that your child is kept away
when unfolding and folding this product.
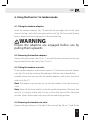
WARNING
Take also care that you don‘t entrap extremities in
moveable parts.
WARNING
Do not let your child play with this product.
WARNING
This seat unit is not suitable for children under 6
months.
WARNING
Always use the restraint system in combination
with the seat unit.
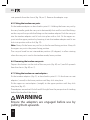
WARNING
Check that the pram body or seat unit or car seat at-
tachment devices are correctly engaged before use.
14

EN
15
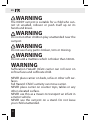
WARNING
Only use the Evostar 1 tandem in the congurations
as described and illustrated on page 25 or g. 46-52.
WARNING
The maximum weight for the shopping basket is 4.4
lbs (2 kg).
WARNING
Only use the Evostar 1 seat units, carrycots, accesso-
ries and car seats recommended by KIDDY.
2. Chassis
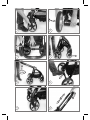
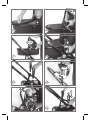
2.1. Fitting/removing the front wheels.
Press the quick release button on the back of the wheel housing on the chassis
and push the front wheel onto axle (fig. 1).
The wheels are marked L for left and R for right from the perspective of standing
in front of the chassis.
Important: Check the wheels are secure by pulling downwards.
To remove; press the quick release button on the back of the wheel housing on
the chassis and pull the wheel away from the axle.
2.2. Fitting/removing the rear wheels.
Press the button in the centre of the rear wheel and push onto the rear wheel
housing (fig. 2; no 1). Important: Check the wheels are secure by pulling out-
wards.
To remove; press the button in the centre of the rear wheel and pull the wheel
15

EN
16
away from the wheel housing (fig.2; no. 2).
2.3. Opening the chassis.
Ensure the chassis is stood upright. Push the travel locks down on the side (fig. 3;
no. 1) and bottom (fig. 3; no. 2) of the chassis.
Tip: If the locks are stiff pull the chassis together to allow release.
Allow the front of the chassis to move forwards. You may have to pull forward
gently to assist this (fig 4).
Lift the handle upwards until you hear the lock engage with a click (fig. 5).
WARNING
Ensure the locking devices are engaged before use.
2.4. Operating the parking brake.
Press down on the pedal to engage the parking brake. Press down and release to
disengage the parking brake (fig. 6).
WARNING
Never leave the vehicle without rst fully engaging
the parking brake.
2.5. Operating the front swivel wheels.
Press the button until it clicks to switch between fixed or swivel wheel travel
(fig. 7).
2.6. Adjusting the handle height.
Rotate the central section of the handle forward (fig. 8; no. 1) and slide into the
desired position (fig 8; no. 2). Note: The handle has 5 height positions.
2.7. Folding the chassis.
Important: Remove the seat unit/carrycot/car seat and any adaptors before att-
16

EN
17
empting to fold the chassis and ensure the shopping basket is empty.
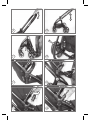
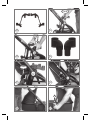
Note: The chassis will not fold unless the handle is in the lowest position and
seats, carrycots adaptors etc have been removed from the chassis. Engage the
parking brake.
Ensure the handle is in its lowest position. Ensure the front wheels are unlocked
and in the swivel position. Fully rotate the central section of the handle bar to-
wards you, the hub locks will release (fig. 9; no 1).
Lower the handle towards the floor (fig. 10; no. 2). Lift the carry handle and lift the
chassis upwards to allow the front of the chassis to move towards the rear of the
chassis (fig. 11). Secure the chassis using the travel locks (fig. 12).
3. Seat Unit
3.1. Fitting the seat unit to the chassis.
Important: Ensure that both the legs are in the same position before attempting
to attach the seat unit to the chassis (fig. 13). Failure to do so may cause damage
to the seat unit.
Insert the seat unit legs into the main housings on the chassis until the seat locks
in place with a click (fig. 14).
WARNING
Ensure the seat unit is locked in place on the chassis
before use.
Note: The seat unit can be used in forward facing or parent facing modes. Simply
attach the seat unit in the same way in your preferred facing mode.
3.2. Fitting the bumper bar.
Slot the bumper bar into the sockets on the seat unit whilst holding down the
17

EN
18
release button (fig. 15). Important: Ensure the bumper bar is locked in place
before use by pulling the bumper bar upwards.
3.3. Removing the bumper bar
Press the small buttons on the seat unit under the bumper bar (fig. 16; no. 1) and
pull the bumper bar away from the seat unit (fig.16; no. 2).
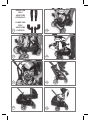
Note: The bumper bar can be released one side at a time to allow easy access for
placing your child in or removing your child from the seat unit (fig. 17).
3.4. Adjusting the seat unit.
Lift the adjustment handle on the top side of the seat unit (fig. 18; no. 1) and
adjust the seat to the desired position (fig. 18; no. 2). The seat unit will lock into
position when the handle is released.
Note: The seat unit has 3 positions.
3.5. Adjusting the calf support.
Pull the calf support upwards to raise.
Depress both grey buttons at the side of the footrest (fig. 19; no. 1) to lower into
the desired position.
Note: The calf support has 4 positions (fig. 19; no. 2).
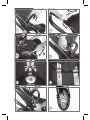
3.6. Fitting/removing the seat unit hood.
Attach and fasten the zip; push the plastic clips firmly onto the seat unit frame
then close the clips (fig. 20). To remove; unfasten the clips from the seat unit
frame and open the zip.
3.7. Using the 5 point safety harness.
Fit together the two connectors on the harness straps and push firmly into the
buckle housing until they click together (fig. 21).
18

EN
19
Important: Ensure they are fully engaged before use.
As your child grows, the height of the shoulder straps can be altered. Reach inside
the seat back rest and locate the buckles. Thread through the opening in the seat
back and seat cover, adjust to the correct height position and re-thread back
through the seat fabric and seat back rest. Ensure the buckles are fitted correctly
before use.
Adjust the straps to suit the child using the sliders on the harness (fig. 22).
To release the connectors depress the grey button on the buckle housing, the
two connectors will release from the main housing.
WARNING
To avoid serious injury from falling or sliding out al-
ways use a 5 point safety harness.
Important: Always ensure the parking brake is engaged when placing and re-
moving children from the vehicle.
3.8. Removing the seat unit from the chassis.
Depress the grey buttons on the side of the seat unit (fig. 23; no. 1) and lift the
seat upwards from the chassis (fig. 23; no. 2). Important: Always remove your
child from the seat unit before removing the seat unit from the chassis.
4. Carrycot
4.1. Assembling the carrycot.
Remove the apron and mattress to gain access to the stay bars in the bottom of
19

EN
20
the carrycot. Using the tabs, pull the stay bars into the clips on the baseboard
until you hear them click into place (fig. 24). Reposition the lining and place the
mattress back into the carrycot.
Important: Ensure that the stay bars are fully engaged before using the carrycot.
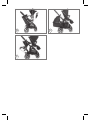
4.2. Attaching the carrycot apron.
Fasten the zip of the apron to the zip on the carrycot and pull all the way around
(fig. 25).
4.3. Adjusting the carrycot hood.
Depress the buttons on the side of the hood (fig. 26; no. 1) and pull up until you
hear it click into place (fig. 26; no. 2).
Depress the buttons again to put the hood down. The carrycot hood has an inter-
mediate position (45 degrees) to allow viewing when the carrycot is used in the
tandem mode, lower position.
4.4. Fitting the carrycot.
Lower the carrycot onto the chassis parent facing. Insert the carrycot legs into
the main housings on the chassis and push down firmly until it clicks and locks
onto the chassis (fig. 27).
WARNING
Ensure the carrycot is locked in place on the chassis
before use.
4.5. Removing the carrycot.
Depress the buttons on the side of the carrycot (fig. 28; no. 1)and lift upwards
from the chassis (fig 28; no. 2).
20

EN
21
WARNING
The KIDDY carrycot is suitable for a child who can-
not sit unaided, rollover or push itself up on its
hands and knees.
WARNING
Do not let other children play unattended near the
carrycot.
WARNING
Do not use if any part is broken, torn or missing.
WARNING
Do not add a mattress which is thicker than 30mm.
WARNING
Suocation Hazard! Infant carrier can roll over on
soft surfaces and suocate child.
NEVER place carrier on beds, sofas or other soft sur-
faces.
Fall Hazard: Child´s activity can move carrier.
NEVER place carrier on counter tops, tables or any
other elevated surface.
NEVER use this as a means to transport an infant in
a motor vehicle.
NEVER use the carrycot on a stand. Do not leave
your child unattended.
21

EN
22
Important:
• Only use the carrycot on a horizontal, firm, level and dry surface.
• Inspect the handle and base of the carrycot on a regular basis.
• Be aware of the risk of open fire and other strong heat sources such as electric
fires, gas fires etc in the vicinity of the carrycot.
• This carrycot is not a safe means of transport by car and should NEVER be used
as such.
• Before carrying or lifting, make sure that the handle is in the correct position
of use
• Always make sure that the head of the child in the carrycot is never below the
body of the child
• Do not add another mattress on the mattress provided by the manufacturer
5. Car Seat Adaptors
5.1. Fitting the car seat adaptors.
Insert the car seat adaptors onto the left and right sides of the main chassis
housings (fig. 29).
The adaptors are marked L for left and R for right from the perspective of standing
behind the handle of the chassis. Press down firmly until they click into place.
WARNING
Ensure the adaptors are engaged before use by
pulling them upwards.
5.2. Fitting the car seat parent facing only.
Align the car seat with the adaptors and press down firmly until the car seat clicks
into place (fig. 30).
22

EN
23
WARNING
Ensure the car seat is locked into place by gently
pulling the car seat upwards.
5.3. Removing the car seat.
Depress the buttons on either side of the car seat (fig. 31; no. 1+2) and lift off the
adaptors (fig. 31; no. 3).
5.4. Removing the car seat adaptors.
Depress the buttons on the adaptors (fig. 32; no. 1) and lift off the chassis (fig.
32; no. 2).
The KIDDY Evostar1 has been designed and tested for use with a number of lea-
ding brand car seats.
Usage of Evolution Pro 2 XL only at upper Tandem position!
WARNING
Do not use any car seat unless specically recom-
mended by KIDDY.
For car seats used in conjunction with a chassis, this vehicle does not replace a
cot or a bed. Should your child need to sleep, then it should be placed in a suita-
ble pram body, cot or bed.
23
KIDDY MaxiCosi Nuna
Evolution Pro 2 Mico Max 30 Pipa
Evolution Pro 2 XL

EN
24
6. Using the Evostar 1 in tandem mode
6.1. Fitting the tandem adaptors.
Insert the tandem adaptors (fig. 33) onto the left and right sides of the main
chassis housings until it locks into place with a click (fig. 34). Ensure the locating
hook is aligned with the locating pin on the rear lower leg.
WARNING
Ensure the adaptors are engaged before use by
pulling them upwards.
6.2. Removing the tandem adaptors.
Depress the grey buttons (fig. 35; no. 1), un-hook the lower section from the rear
leg and remove from the chassis (fig. 35; no. 2).
6.3. Fitting the tandem seat units.
Fit the tandem adaptors as described in point 6.1. Fit the lower seat unit adaptor
cups (fig. 36) on to the seat legs (left and right). With the chassis handle fully
extended, lower the seat unit into the tandem adaptors until it locks into place
with a click (fig. 37).
Note: The adaptor cups are only for use with the tandem seat in the lower po-
sition.
Note: Always fit the lower seat first in the forward facing position. The lower seat
unit has a 2 position recline only. Do not try force the seat into the 3rd recline
position. Always fit the upper seat unit in the forward facing position.
6.4. Removing the tandem seat units.
Depress the grey buttons on the side of the seat unit (fig. 38; no. 1) and lift the
24

EN
25
seat upwards from the chassis (fig. 38; no. 2). Remove the adaptor cups.
6.5. Fitting the tandem carrycots.
Fit the tandem adaptors as described in point 6.1. Holding the lower carrycot by
the carry handle; guide the carrycot in horizontally foot-end first until the fittings
on the carrycot line up with the fittings on the tandem adaptor. Push the carrycot
into the tandem adaptor until it locks into place with a click. Fit the upper car-
rycot into the upper position by lowering it into the tandem adaptor until it too
locks into position with a click (fig. 39).
Note: Always fit the lower carrycot first, in the forward facing position. Always fit
the upper carrycot in the parent facing position.
The carrycot hood has an intermediate position (45 degrees) to allow viewing
when the carrycot is used in the tandem mode, lower position.
6.6. Removing the tandem carrycots.
Depress the buttons on the side of the carrycots (fig. 40; no.1) and lift upwards
from the chassis (fig. 40; no. 2).
6.7. Fitting the tandem car seat adaptors.
Fit the tandem adaptors (fig. 41) as described in point 6.1. Fit the lower car seat
adaptors (curved) to the lower position until they click into place.
Fit the upper car seat adaptors (straight) to the upper position until they click
into place (fig. 42).
The adaptors are marked L for left and R for right from the perspective of standing
behind the handle of the chassis.
WARNING
Ensure the adaptors are engaged before use by
pulling them upwards.
25

EN
26
6.8. Removing the tandem car seat adaptors.
Depress the grey buttons on the car seat adaptors (fig. 43; no. 1) and lift off the
chassis (fig. 43; no. 2).
6.9. Fitting the tandem car seats.
Lower the car seats onto the adaptors and press down firmly until the car seats
clicks into place (fig. 44).
WARNING
Ensure the car seat is locked into place by gently
pulling the car seat upwards.
Note: Always fit the lower car seat first, parent facing. Always fit the upper car
seat parent facing.
6.10. Removing the tandem car seats.
Depress the buttons on either side of the car seat (fig. 45; no. 1+2) and lift off the
adaptors (fig. 45; no. 3).
TANDEM MODES
WARNING
Never attempt to use the Evostar 1 in any other
combinations than shown.
1. Tandem Seat Units (g. 46)
2. Tandem Carrycots (g. 47)
3. Forward facing lower carrycot, parent facing upper car seat (g. 48)
4. Forward facing lower seat unit, parent facing upper car seat (g. 49)
5. Forward facing lower carrycot, forward facing upper seat unit (g. 50)
6. Parent facing lower Car Seat, forward facing upper seat unit (g. 51)
26

EN
27
7. Care and maintenance
• Regularly check screws, rivets, bolts and fastenings to ensure they are locked
tight and secure. Replace any parts in an inferior condition. When using this pro-
duct during the winter, by the sea or off-road it is important to clean using clean
fresh water and dry thoroughly. Salt water and salt and grit from the roads will
corrode metal parts unless removed.
• Check on a regular basis that all chassis locking devices are working correctly.
• If any part of the product is damaged, contact your local KIDDY retailer imme-
diately.
• Do not expose the product to excessive sunlight for extended periods of time,
even normal exposure to sunlight may cause change to the colour of the fabrics.
• Take care not to tear fabrics when transporting the product.
• Light oil or silicone spray can be used to lubricate moving parts. Use petroleum
jelly to lubricate the front axle stubs. Periodically remove the front swivel wheel
units to clean and lubricate using petroleum jelly.
• Ensure zips are either fully open or closed to prevent damage.
• Do not place items on top of the hood/canopy, it could damage the fabrics or
render the product unsafe.
• Any load attached to the handle and/or on the back of the backrest and/or on
the sides of the vehicle will affect the stability of the vehicle. Do not hang any
load from the handle or chassis when using as a tandem vehicle.
• Tyres can leave marks on some surfaces such as vinyl flooring and carpet.
• Fabrics should be cleaned in accordance to the care labels.
• Do not place fabrics in a washing machine, hand wash or sponge clean only
using a mild detergent and warm water (30°C).
• Do not use a buggy board with this product as it will invalidate your warranty.
Should you find a defect with this product:
Keep your original receipt of purchase safe with your warranty information as it
will be required should you unfortunately find a defect. The receipt must show
the date of purchase clearly. In the first instance you must contact the original
place of purchase. Exchanging or returning the product cannot be requested.
Repairs to any part of this product do not extend the warranty period. Do not
27

EN
28
return your product direct to the manufacturer.
Servicing of your KIDDY product.
We recommend that this product is regularly maintained and is serviced by a KID-
DY authorized dealer at least every 12 months and before upgrading to a tandem
mode. Only replacement parts supplied or recommended by the manufacturer/
distributor shall be used.
Disclaimer.
Whilst we believe the information set out in this instruction manual to be correct
and reliable at the time of print, we do not accept responsibility for its accuracy
and we shall not be liable for its interpretation and its use. We reserve the right
to change, modify add or delete product specifications at any time without prior
notice.
8. Warranty
We provide a 2-year guarantee for manufacturing or material defects. The gua-
rantee period commences on the day of purchase.
A receipt is required for all claims.
The guarantee is limited to products which have been handled appropriately and
are returned in a clean and sound condition. The guarantee does not extend to:
- Normal wear and tear and damage due to excessive load during use (e.g.
wheels).
- Damage caused by inappropriate or improper use. - Damage and rust caused
by road salt.
Fabrics:
All our fabrics meet the highest standards regarding colourfastness against UV
radiation. However all materials discolour when they are exposed to UV light.
This will be considered as normal wear and tear and not a material defect. No
guarantee can be assumed in this case.
Please contact your specialist dealer immediately in the event of a warranty claim.
The KIDDY team wish you and your child a good and safe trip at all times.
28

ES
29
IMPORTANTE/INFORMACIÓN SOBRE EL PRODUCTO 31
1. Información importante de seguridad 32
2. Chasis 34
2.1 Montaje/desmontaje de las ruedas delanteras 34
2.2 Montaje/desmontaje de las ruedas delanteras 35
2.3 Apertura del chasis 35
2.4 Uso del freno de bloqueo 36
2.5 Funcionamiento de las ruedas delanteras giratorias 36
2.6 Ajuste de la altura de la empuñadura 36
2.7 Plegado del chasis 36
3. Unidad de asiento 37
3.1 Montaje del asiento en el chasis 37
3.2 Montaje del apoyabrazos de seguridad 37
3.3 Desmontaje del apoyabrazos de seguridad 37
3.4 Ajuste del asiento 38
3.5 Ajuste del reposapiés 38
3.6 Montaje/desmontaje de la capota del asiento 38
3.7 Uso del arnés de seguridad de 5 puntos 38
3.8 Desmontaje del asiento del chasis 39
4. Capazo 39
4.1 Ajuste del capazo 39
4.2 Colocación del cubrepiés del capazo 39
4.3 Ajuste de la capota del capazo 40
4.4 Montaje del capazo 40
4.5 Desmontaje del capazo 40
5. Adaptadores para portabebés 42
5.1 Montaje de los adaptadores para portabebés 42
5.2 Montaje del portabebés mirando sólo hacia usted 42
5.3 Desmontaje del portabebés 43
5.4 Desmontaje de los adaptadores para portabebés 43

ES
30
6. Uso de Evostar 1 en modo tándem 44
6.1 Montaje de los adaptadores para tándem 44
6.2 Desmontaje de los adaptadores para tándem 44
6.3 Montaje de los asientos en tándem 44
6.4 Desmontaje de los asientos en tándem 45
6.5 Montaje de los capazos en tándem 45
6.6 Desmontaje de los capazos en tándem 45
6.7 Montaje de los adaptadores para portabebés en tándem 45
6.8 Desmontaje de los adaptadores para portabebés en tándem 46
6.9 Montaje de los portabebés en tándem 46
6.10 Desmontaje de los portabebés en tándem 46
7. Cuidado y mantenimiento 47
8. Garantía 49
30

ES
31
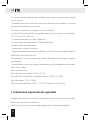
Manual de uso de Evostar 1
IMPORTANTE
Leer las intrucciones cuidadosamente antes del uso y mantenerlas para
futuras consultas.
Este producto está pensado para niños desde su nacimiento hasta un máximo
de 55 lbs (25 kg). Edad y peso de uso: cochecito/capazo de 0 a 20 lbs (9 kg);
portabebés de 0 a 28.5 lbs (13 kg) (conforme a las pautas del fabricante); unidad
de asiento (como silla individual) de 6 meses a 55 lbs (25 kg); unidad de asiento
en modo tándem, en posición superior e inferior, hasta un máximo de 33 lbs (15
kg) por asiento.
Cada asiento, capazo o portabebés está pensado para un solo niño conforme
a los pesos máximos detallados previamente. La capacidad máxima en el uso
individual es de un niño, y de dos niños en el modo tándem.
INFORMACIÓN SOBRE EL PRODUCTO
Evostar 1 se ha diseñado teniendo en cuenta a los padres que se interesan por
productos de moda. Tejidos suaves al tacto que definen finas curvas y líneas con-
tinuas aportan al producto KIDDY un aspecto de lujo y estilo. Una ingeniería so-
bresaliente crea el artículo perfecto para llevar a su bebé, con un uso realmente
cómodo para los padres. Evostar 1 incorpora ruedas con Tru-Ride Technology®
diseñadas como sinónimo de comodidad, excelente manejo y durabilidad aña-
dida. El chasis se pliega con una sola mano, es compacto y se sujeta por sí solo
una vez plegado; la unidad de asiento ofrece tres posiciones de reclinado, se
puede orientar hacia adelante o hacia atrás, es amplia y muy cómoda. El capazo
en posición plana se puede adquirir como un extra opcional, siendo idóneo para
dormir por la noche de forma ocasional; incluye un revestimiento acolchado y
un colchón.
31

ES
32
• El capazo está pensado para el uso desde el nacimiento y como cuna ocasional
con el colchón.
• La unidad de asiento ofrece tres posiciones distintas de reclinado, y se puede
orientar hacia adelante o hacia atrás.
• El chasis es compacto y se pliega con una sola mano.
• La altura de la empuñadura se puede regular en cinco posiciones diferentes.
37-41.3 inches (94 - 105 cm).
• Las ruedas delanteras son fijas o giratorias.
• Incluye ruedas de poliuretano Tru-Ride Technology®.
• Ruedas de desmontaje rápido.
• Suspensión en todos los puntos.
• Dispone de adaptadores para portabebés como extra opcional para añadir un
asiento de coche del Grupo 0+.
• Dispone de accesorios a juego como: bolso cambiador, saco para pies o soporte
para bebidas.
• Posibilidad de conversión a modo tándem gracias al kit adaptador, acomodan-
do así a dos bebés.
Pesos y dimensiones:
Peso del chasis con ruedas: 21.4 lbs (9,7 kg).
Peso del chasis con ruedas y unidad de asiento: 29.7 lbs (13,5 kg).
Peso del capazo: 7.5 lbs (3,4 kg).
Silla con ruedas plegadas: 26.4 x 11.4 x 23.2 inches (67 x 29 x 59 cm).
1. Información importante de seguridad
Lea detenidamente las presentes instrucciones antes de usar este artículo y guár-
delas para consultarlas en el futuro.
No seguir estas instrucciones puede comprometer la seguridad del bebé.
32

ES
33
ADVERTENCIA
Este producto no está pensado para correr ni pati-
nar.
Cochecito/capazo: Este producto está pensado para un niño que aún no se pue-
de sentar, dar la vuelta ni levantar por sí solo con ayuda de las manos y rodillas. El
peso máximo del niño es de 20 lbs (9 kg).
ADVERTENCIA
Nunca deje al niño sin supervisión.
ADVERTENCIA
Asegúrese de que todos los dispositivos de bloqueo
se han ajustado antes del uso.
ADVERTENCIA
Asegúrese también de no pillar ninguna parte cor-
poral con los componentes móviles.
ADVERTENCIA
Para evitar daños, asegúrese de alejar al niño al ple-
gar y desplegar este producto.
ADVERTENCIA
No deje que el niño juegue con este producto.
ADVERTENCIA
Esta unidad de asiento está pensada para niños ma-
yores de 6 meses.
33

ES
34
ADVERTENCIA
Utilice siempre el sistema de retención junto con la
unidad de asiento.
ADVERTENCIA
Compruebe que el cochecito o la unidad de asiento
o los dispositivos de acople del portabebés están
correctamente ajustados antes de su uso.
ADVERTENCIA
Utilice sólo Evostar 1 en modo tándem según lo de-
scrito e ilustrado en la página 25 o en las guras 46
a 52.
ADVERTENCIA
El peso máximo de la cesta portaobjetos es de 4.4
lbs (2 kg).
ADVERTENCIA
Utilice sólo las unidades de asiento, capazos, acce-
sorios y portabebés recomendados por KIDDY para
Evostar 1.
2. Chasis
2.1 Montaje/desmontaje de las ruedas delanteras.
Pulse el botón de liberación rápida en el reverso del alojamiento de la rueda en el
chasis y presione la rueda delantera hacia el eje (fig. 1).
34

ES
35
Las ruedas indicarán „L“ para izquierda y „R“ para derecha desde la perspectiva de
la parte frontal del chasis.
Importante: Compruebe que las ruedas se han fijado correctamente empuján-
dolas hacia abajo.
Para el desmontaje: pulse el botón de liberación rápida en el reverso del aloja-
miento de la rueda en el chasis, y retire la rueda del eje.
2.2. Montaje/desmontaje de las ruedas traseras.
Presione el botón en el centro de la rueda trasera y empújelo hacia el alojamiento
de dicha rueda trasera (fig. 2, núm. 1). Importante: Compruebe que las ruedas se
han fijado correctamente empujándolas hacia afuera.
Para el desmontaje: presione el botón en el centro de la rueda trasera y retire la
rueda del alojamiento donde estaba acoplada.
2.3. Apertura del chasis.
Asegúrese de que el chasis está en posición vertical. Presione los bloqueos de
transporte hacia abajo en el lateral (fig. 3; núm. 1) y en la parte inferior (fig. 3;
núm. 2) del chasis.
Consejo: Si los dispositivos de bloqueo ofrecen resistencia, tire del chasis hacia
el mismo lado o júntelo para que se suelten.
Deje que la parte frontal del chasis se desplace hacia adelante. Puede que tenga
que empujar hacia adelante con cuidado para conseguirlo (fig. 4).
Levante la empuñadura (o manillar) hacia arriba hasta que escuche un clic de
bloqueo (fig. 5).
ADVERTENCIA
Asegúrese de que todos los dispositivos de bloqueo
se han ajustado antes del uso.
35

ES
36
2.4. Uso del freno de bloqueo.
Pise el pedal para accionar el freno de bloqueo (o estacionamiento). Pise de nue-
vo y suelte el pedal para quitar el freno (fig. 6).
ADVERTENCIA
Nunca suelte la silla sin haber accionado antes el
freno de bloqueo.
2.5. Funcionamiento de las ruedas delanteras giratorias.
Pulse el botón hasta que haga clic y alterne entre la posición fija o giratoria de
las ruedas (fig. 7).
2.6. Ajuste de la altura de la empuñadura.
Gire la parte central de la empuñadura hacia arriba (fig. 8, núm. 1) y deslícela a
la posición deseada (fig. 8, núm. 2). Nota: La empuñadura se puede regular en 5
posiciones diferentes.
2.7. Plegado del chasis.
Importante: Retire la unidad de asiento/el capazo/el portabebés y cualquier
adaptador antes de intentar plegar el chasis, y asegúrese de que la cesta porta-
objetos está vacía.
Nota: El chasis no se plegará a menos que la empuñadura esté en la posición
más baja y el asiento, capazo, adaptadores, etc. se hayan retirado del chasis. Ac-
cione el freno de bloqueo.
Asegúrese de que la empuñadura está en su posición más baja. Cerciórese de
que las ruedas delanteras se han desbloqueado y están en la posición giratoria.
Gire completamente la parte central de la empuñadura hacia usted, los blo-
queos se liberarán (fig. 9, núm. 1).
Baje la empuñadura hacia el suelo (fig. 10, núm. 2). Levante el asa de transporte
36

ES
37
y tire del chasis hacia arriba para permitir que la parte frontal de éste se mueva
hacia la parte trasera del chasis (fig. 11). Por último, los bloqueos de transporte
fijarán el plegado del chasis (fig. 12).
3. Unidad de asiento
3.1. Montaje del asiento en el chasis.
Importante: Asegúrese de que ambas piezas están en la misma posición antes de
intentar acoplar la unidad de asiento en el chasis (fig. 13). De no hacerlo correcta-
mente se podría dañar el asiento.
Inserte las piezas de acople de la unidad de asiento en los principales alojamien-
tos en el chasis, hasta que escuche un clic de bloqueo en su posición (fig. 14).
ADVERTENCIA
Asegúrese de que la unidad de asiento se ha ajusta-
do correctamente en el chasis antes de su uso.
Nota: La unidad de asiento se puede utilizar orientada hacia adelante o mirando
hacia usted. Simplemente coloque la unidad de asiento como se indica y según
la orientación que desee.
3.2. Montaje del apoyabrazos de seguridad.
Inserte el apoyabrazos de seguridad en las respectivas ranuras de la unidad de
asiento mientras mantiene pulsado el botón de liberación (fig. 15). Importante:
Asegúrese de que el apoyabrazos queda debidamente bloqueado antes de su
uso; para ello empújelo hacia arriba.
3.3. Desmontaje del apoyabrazos de seguridad.
Pulse los botones pequeños en la unidad de asiento debajo del apoyabrazos (fig.
16, núm. 1) y retire el apoyabrazos del asiento (fig. 16, núm. 2).
37

ES
38
Nota: El apoyabrazos de seguridad se debe soltar primero de un lado, lo que faci-
litará que podamos sentar o levantar al niño de una manera más cómoda (fig. 17).
3.4. Ajuste del asiento.
Levante la pestaña de ajuste dispuesta en la parte superior del asiento (fig. 18,
núm. 1) y regúlela en la posición deseada (fig. 18, núm. 2). El asiento se bloqueará
en la posición elegida al soltar dicha pestaña.
Nota: La unidad del asiento tiene 3 posiciones.
3.5. Ajuste del reposapiés.
Empuje el reposapiés hacia arriba para levantarlo.
Pulse ambos botones grises a los lados del reposapiés (fig. 19, núm. 1) para bajar-
lo a la posición deseada.
Nota: El reposapiés tiene 4 posiciones (fig. 19, núm. 2).
3.6. Montaje/desmontaje de la capota del asiento.
Acople y cierre la cremallera; ajuste los clips de plástico con firmeza en la estruc-
tura de la unidad de asiento y después cierre dichos clips (fig. 20). Para el desmon-
taje, suelte los clips de la estructura de la unidad de asiento y abra la cremallera.
3.7. Uso del arnés de seguridad de 5 puntos.
Junte los dos conectores de extremo en cada tira del arnés y presiónelos firme-
mente para que entren en la hebilla; escuchará un clic de ajuste (fig. 21).
Importante: Asegúrese de que se han ajustado correctamente antes de su uso.
A medida que el niño crece, se deben regular las tiras del arnés en los hombros.
Localice las hebillas en el interior del respaldo del asiento. A través de la apertura
en el respaldo del asiento y en el revestimiento, ajuste la altura de las tiras y vuel-
va a colocarlas de nuevo en el tejido del asiento y en el respaldo. Asegúrese de
que las hebillas se han ajustado correctamente antes de su uso.
38

ES
39
Ajuste las tiras a la medida del niño con ayuda de los deslizantes dispuestos en
el arnés (fig. 22). Para soltar los conectores, pulse el botón gris en el centro de la
hebilla, así éstos se soltarán del alojamiento principal.
ADVERTENCIA
Para evitar daños serios utilice siempre el arnés de
seguridad de 5 puntos.
Importante: Asegúrese siempre de accionar el freno de bloqueo al acostar, sen-
tar o levantar al niño (o niños) de la silla.
3.8. Desmontaje del asiento del chasis.
Apriete los botones grises a cada lado del asiento (fig. 23, núm. 1) y tire del asien-
to hacia arriba separándolo del chasis (fig. 23, núm. 2). Importante: Siempre
levante al niño de la silla antes de quitar la unidad de asiento del chasis.
4. Capazo
4.1. Ajuste del capazo.
Retire el cubrepiés y el colchón para poder acceder a las varillas de sostén en la
parte inferior del capazo. Con ayuda de las lengüetas, presione las varillas en los
clips de la base hasta que escuche un clic de ajuste en su posición (fig. 24). Vuelva
a colocar el revestimiento y el colchón en el capazo.
Importante: Asegúrese de que las varillas de sostén están debidamente ajusta-
das antes de utilizar el capazo.
4.2. Colocación del cubrepiés del capazo.
Cierre el cubrepiés con la cremallera alrededor del contorno del capazo (fig. 25).
39

ES
40
4.3. Ajuste de la capota del capazo.
Apriete los botones a cada lado de la capota (fig. 26, núm. 1) y súbala hasta que
escuche un clic de ajuste en su posición (fig. 26, núm. 2).
Apriete los botones de nuevo para bajar la capota. La capota del capazo tiene
una posición intermedia (45 grados) para permitirle ver el capazo al usarlo en
modo tándem, en la posición inferior.
4.4. Montaje del capazo.
Coloque el capazo sobre el chasis, orientándolo hacia usted. Inserte las dos piezas
de acople del capazo en los alojamientos principales del chasis, y presione con
firmeza hacia abajo hasta que escuche un clic de ajuste y bloqueo en el chasis
(fig. 27).
ADVERTENCIA
Asegúrese de que el capazo se ha ajustado correc-
tamente en el chasis antes de su uso.
4.5. Desmontaje del capazo.
Apriete los botones a cada lado del capazo (fig. 28, núm. 1) y levántelo hacia
arriba separándolo del chasis (fig. 28, núm. 2).
ADVERTENCIA
El capazo KIDDY está pensado para un niño que aún
no se pueda sentar, dar la vuelta ni levantar por sí
solo con ayuda de las manos y rodillas.
ADVERTENCIA
No deje que otros niños jueguen junto al capazo,
sin supervisión.
40

ES
41
ADVERTENCIA
No lo utilice si le falta alguna pieza o si está rota o
desgastada.
ADVERTENCIA
No utilice un colchón de grosor superior a 30 mm.
ADVERTENCIA
¡Peligro de asxia! El capazo puede rodar sobre su-
percies suaves y asxiar al niño.
NUNCA coloque el capazo en camas, sofás u otras
supercies blandas.
Peligro de caída: La actividad del niño puede mover
el capazo.
NUNCA coloque el capazo sobre encimeras, mesas
o cualquier otra supercie elevada.
NUNCA use esto como un medio para transportar a
un bebé en un vehículo de motor.
NUNCA utilice el capazo sobre un soporte. No deje
nunca al niño sin supervisión.
Importante:
• Apoye el capazo únicamente sobre una superficie horizontal, firme, estable y
seca.
• Revise con regularidad la empuñadura y la base del capazo.
• Tenga cuidado de que no haya fuego u otras fuentes peligrosas de calor, como
chispas, un fuego de gas, etc. cerca del capazo.
41

ES
42
• Este capazo no es un medio de transporte seguro en un vehículo y NUNCA
debería utilizarse como tal.
• Asegúrese de que el asa del asiento está en la posición correcta antes de levan-
tar o transportar la cubeta para bebé.
• Asegúrese siempre de que la cabeza del niño no queda por debajo del cuerpo
al transportarlo en el portabebés.
• No coloque ningún otro colchón sobre el colchón suministrado o recomenda-
do por KIDDY.
5. Adaptadores para portabebés
5.1. Montaje de los adaptadores para portabebés.
Inserte los adaptadores del portabebés en los lados izquierdo y derecho de los
alojamientos principales del chasis (fig. 29).
Los adaptadores llevarán la marca „L“ para izquierda y „R“ para derecha, vistos des-
de detrás de la empuñadura del chasis. Presione con firmeza hasta que escuche
un clic de ajuste.
ADVERTENCIA
Asegúrese de que los adaptadores se han ajustado
correctamente antes de su uso; para ello, empújelos
hacia arriba.
5.2. Montaje del portabebés mirando sólo hacia usted.
Alinee el portabebés con respecto a los adaptadores y presiónelo con firmeza
hacia abajo hasta que escuche un clic de ajuste (fig. 30).
ADVERTENCIA
42

ES
43
Asegúrese de que se ha bloqueado en su posición
empujando con cuidado el portabebés hacia arriba.
5.3. Desmontaje del portabebés.
Apriete los botones a cada lado del portabebés (fig. 31, núm. 1 y 2) y sepárese de
los adaptadores (fig. 31, núm. 3).
5.4. Desmontaje de los adaptadores para portabebés.
Apriete los botones en los adaptadores (fig. 32, núm. 1) y sepárelos del chasis
(fig. 32, núm. 2).
El producto KIDDY se ha diseñado y probado para el uso con varios portabebés
de marcas líderes.
El uso de Kiddy Evolution Pro 2 XL is únicamente en la parte superior del tándem.
ADVERTENCIA
No utilice ningún portabebés a menos que haya
sido recomendado especícamente por KIDDY.
En el caso de portabebés utilizados junto con un chasis, éstos no deben enten-
derse ni reemplazar a ninguna cuna o cama. Si el niño necesita dormir, deberá
cambiarlo a un cochecito, cuna o cama adecuado.
43
KIDDY MaxiCosi Nuna
Evolution Pro 2 Mico Max 30 Pipa
Evolution Pro 2 XL

ES
44
6. Uso de Evostar 1 en modo tándem
6.1. Montaje de los adaptadores para tándem.
Inserte los adaptadores para tándem (fig. 33) en los lados izquierdo y derecho de
los alojamientos principales del chasis, hasta que escuche un clic de bloqueo en
la posición correcta (fig. 34). Asegúrese de que el gancho de posicionamiento
está alineado con el pasador de posicionamiento en la pieza inferior trasera.
ADVERTENCIA
Asegúrese de que los adaptadores se han ajustado
correctamente antes de su uso; para ello, empújelos
hacia arriba.
6.2. Desmontaje de los adaptadores para tándem.
Apriete los botones grises (fig. 35; núm. 1), desenganche la pieza de la parte tra-
sera y retírela del chasis (fig. 35; no. 2).
6.3. Montaje de los asientos en tándem.
Coloque los adaptadores para tándem según se describe en el apartado 6.1. Co-
loque las piezas para adaptar la unidad de asiento (fig. 36) en los lados del asiento
(izquierdo y derecho). Con la empuñadura del chasis totalmente extendida, pre-
sione el asiento sobre los adaptadores para tándem hasta que escuche un clic de
bloqueo en su posición (fig. 37).
Nota: Las piezas para adaptar la unidad de asiento sirven únicamente para el
modo tándem en la posición inferior.
Nota: Siempre coloque primero el asiento inferior en posición hacia adelante. La
unidad de asiento inferior sólo tiene 2 posiciones de reclinado. No intente forzar
el asiento hacia una tercera posición de reclinado. Siempre coloque primero el
asiento superior en posición hacia adelante.
44

ES
45
6.4. Desmontaje de los asientos en tándem.
Apriete los botones grises a cada lado del asiento (fig. 38, núm. 1) y tire del asien-
to hacia arriba separándolo del chasis (fig. 38, núm. 2). Retire las piezas de adap-
tación.
6.5. Montaje de los capazos en tándem.
Coloque los adaptadores para tándem según se describe en el apartado 6.1. Su-
jete el capazo en la parte inferior con ayuda del asa de transporte; guíe el capazo
en horizontal con la parte de los pies primero hasta que los ajustes en el capazo
se alineen con los ajustes en el adaptador para tándem. Presione el capazo contra
el adaptador para tándem hasta que escuche un clic de bloqueo. Coloque ahora
el segundo capazo en la posición superior deslizándolo sobre el adaptador para
tándem hasta que escuche un clic de bloqueo (fig. 39).
Nota: Siempre coloque primero el capazo inferior, en posición hacia adelante.
Siempre coloque el capazo superior orientado hacia usted.
La capota del capazo tiene una posición intermedia (45 grados) para permitirle
ver el capazo al utilizarlo en modo tándem, en la posición inferior.
6.6. Desmontaje de los capazos en tándem.
Apriete los botones a cada lado de los capazos (fig. 40, núm. 1) y levántelos hacia
arriba separándolos del chasis (fig. 40, núm. 2).
6.7. Montaje de los adaptadores para portabebés en tándem.
Coloque los adaptadores para tándem (fig. 41) según se describe en el apartado
6.1. Coloque los adaptadores para portabebés inferiores (curvados) en la posición
inferior hasta que escuche un clic de bloqueo.
Coloque los adaptadores para portabebés superiores (rectos) en la posición su-
perior hasta que escuche un clic de bloqueo (fig. 42).
Los adaptadores llevarán la marca „L“ para izquierda y „R“ para derecha, vistos des-
de detrás de la empuñadura del chasis.
45

ES
46
ADVERTENCIA
Asegúrese de que los adaptadores se han ajustado
correctamente antes de su uso; para ello, empújelos
hacia arriba.
6.8. Desmontaje de los adaptadores para portabebés en tándem.
Apriete los botones grises en los adaptadores del portabebés (fig. 43, núm. 1) y
sepárese del chasis (fig. 43, núm. 2).
6.9. Montaje de los portabebés en tándem.
Alinee los portabebés con respecto a los adaptadores y presione con firmeza
hacia abajo hasta que hagan clic en su posición (fig. 44).
ADVERTENCIA
Asegúrese de que se ha bloqueado en su posición
empujando con cuidado el portabebés hacia arriba.
Nota: Siempre coloque primero el portabebés inferior, orientado hacia usted.
Siempre coloque el portabebés superior orientado hacia usted.
6.10. Desmontaje de los portabebés en tándem.
Apriete los botones a cada lado del portabebés (fig. 45, núm. 1 y 2) y sepárese de
los adaptadores (fig. 45, núm. 3).
46

ES
47
MODOS TÁNDEM
ADVERTENCIA
Nunca intente utilizar el producto Evostar 1 en nin-
guna combinación diferente a las mostradas.
1. Asientos en tándem (g. 46)
2. Capazos en tándem (g. 47)
3. Capazo orientado hacia adelante en parte inferior, portabebés orien-
tado hacia usted en parte superior (g. 48)
4. Unidad de asiento orientada hacia adelante en parte inferior, portabe-
bés orientado hacia usted en parte superior (g. 49)
5. Capazo orientado hacia adelante en parte inferior, unidad de asiento
orientada hacia adelante en parte superior (g. 50)
6. Portabebés orientado hacia usted en parte inferior, unidad de asiento
orientada hacia adelante en parte superior (g. 51)
7. Cuidado y mantenimiento
• Revise con regularidad los tornillos, remaches, pernos y dispositivos de sujeción
para asegurarse de que están bloqueados y que su ajuste es seguro. Reemplace
cualquier pieza que presente deterioro. Si utiliza este producto en invierno, junto
al mar o por caminos no asfaltados, es importante que lo limpie con agua corri-
ente y que lo seque bien. El agua salada y la suciedad adherida pueden oxidar las
piezas de metal de no limpiarse correctamente.
• Compruebe con regularidad que todos los dispositivos de bloqueo del chasis
funcionan correctamente.
• Si alguna pieza del producto presenta daños, contacte de inmediato con el pro-
47

ES
48
veedor local de KIDDY.
• No exponga el producto a la luz directa del sol durante períodos prolongados,
incluso la exposición normal a la luz del sol puede alterar el color de los tejidos.
• Tenga cuidado para evitar el desgarro de los tejidos al transportar el producto.
• Puede lubricar las piezas móviles con un aceite ligero o un atomizador de sili-
cona. Utilice vaselina para lubricar las ruedas delanteras. Con regularidad retire la
rueda giratoria frontal para su limpieza y lubricado con vaselina.
• Asegúrese de que las cremalleras se abren y cierran completamente para evitar
daños.
• No coloque objetos sobre la capota/protectores, ya que podría dañar los tejidos
o comprometer la seguridad del producto.
• Cualquier peso añadido a la empuñadura y/o en la parte posterior del respaldo,
así como en los lados de la silla podría afectar a su estabilidad. No cuelgue ningún
peso de la empuñadura ni del chasis cuando utilice la silla en el modo tándem.
• Las ruedas pueden dejar marcas en superficies concretas como alfombras o
suelos de vinilo.
• Los tejidos se deben limpiar conforme a las etiquetas de cuidado.
• No lave los tejidos en la lavadora, utilice únicamente el lavado a mano o con una
esponja con detergente suave y agua templada (30°C).
• No utilice ninguna plataforma de paseo con este producto ya que invalidará
la garantía.
En caso de detectar cualquier defecto en este producto:
Guarde el recibo original de compra en un lugar seguro junto con la información
de la garantía ya que lo necesitará ante el infortunio de encontrar un defecto. El
recibo debe detallar claramente la fecha de compra. En el primer caso, debe con-
tactar con el lugar donde adquirió el producto. No podrá solicitar la devolución
o el cambio del producto. Las reparaciones de cualquier pieza de este producto
no deben exceder el período de garantía. No devuelva el producto directamente
al fabricante.
48

ES
49
Reparación de su producto KIDDY.
Recomendamos que las tareas de reparación y mantenimiento de este producto
sean realizadas de forma regular por un proveedor autorizado de KIDDY, al menos
cada 12 meses e incluso antes si lo utiliza en el modo tándem. En el reemplazo
de piezas sólo deben utilizarse aquellas suministradas o recomendadas por el
fabricante/distribuidor.
Exención de responsabilidades.
Aunque creemos que la información detallada en este manual de uso es correcta
y fiable en el momento de su impresión, no nos responsabilizamos de su precis-
ión y tampoco asumiremos responsabilidad alguna respecto a su interpretación
o uso. Nos reservamos el derecho de cambiar, modificar, añadir o eliminar especi-
ficaciones del producto en cualquier momento y sin previo aviso.
8. Garantía
Ofrecemos 2 años de garantía por defectos de fabricación o materiales. El perío-
do de garantía comienza el día de la compra.
Para cualquier reclamación se exigirá el justificante de compra.
La garantía está limitada a productos que se hayan manipulado debidamente y
que se devuelvan limpios y en buen estado.
La garantía no cubre:
- El desgaste y deterioro normal, y los daños por una carga excesiva durante el
uso (p. ej. ruedas).
- Los daños causados por un uso inapropiado o indebido.
- Los daños y el óxido provocados por la sal vertida en invierno.
49

ES
5050
Tejido:
Todos nuestros tejidos cumplen las más altas normas relativas a inalterabilidad
cromática por radiación UV. Sin embargo, todos los materiales se destiñen cuan-
do se exponen a la luz UV. Esto se considera un desgaste y deterioro normal, y no
un defecto de los materiales. En este caso, no se puede asumir ninguna garantía.
Contacte con su distribuidor especializado de inmediato si quiere ejercer algún
derecho de la garantía.
El equipo de KIDDY le desean a usted y su hijo un buen viaje, y siempre
con total seguridad.

Status 12/2016
KIDDY USA, Inc.
STE 100
685 Dividend Dr.
Peachtree City, GA 30269
USA
P 1-855-92-KIDDY
www.kiddyusa.com
-
 1
1
-
 2
2
-
 3
3
-
 4
4
-
 5
5
-
 6
6
-
 7
7
-
 8
8
-
 9
9
-
 10
10
-
 11
11
-
 12
12
-
 13
13
-
 14
14
-
 15
15
-
 16
16
-
 17
17
-
 18
18
-
 19
19
-
 20
20
-
 21
21
-
 22
22
-
 23
23
-
 24
24
-
 25
25
-
 26
26
-
 27
27
-
 28
28
-
 29
29
-
 30
30
-
 31
31
-
 32
32
-
 33
33
-
 34
34
-
 35
35
-
 36
36
-
 37
37
-
 38
38
-
 39
39
-
 40
40
-
 41
41
-
 42
42
-
 43
43
-
 44
44
-
 45
45
-
 46
46
-
 47
47
-
 48
48
-
 49
49
-
 50
50
-
 51
51


kiddy evostar1 Directions For Use Manual
- Categoría
- Cochecitos
- Tipo
- Directions For Use Manual
en otros idiomas
- English: kiddy evostar1
Artículos relacionados
Otros documentos
-
Mima xari User Manual & Warranty
-
iCandy Peach 2 Manual de usuario
-
Silver Cross Wayfarer Pushchair & Carrycot Manual de usuario
-
-
Cosatto Giggle 3 in 1 Instructions Manual
-
-
-
 ickle bubba Aston Rose Travel System Guía del usuario
