Parkside PWS 230 Operation and Safety Notes
- Categoría
- Herramientas eléctricas
- Tipo
- Operation and Safety Notes

PWS 230
Kompernaß GmbH
Burgstraße 21
44867 Bochum (Germany)
Estado de las informaciones · Versione delle informazioni
Last Information Update · Stand der Informationen: 10 / 2007
Ident.-No.: PWS 230102007-5
ES Instrucciones de utilización y de seguridad Página 5
IT / MT Indicazioni per l’uso e per la sicurezza Pagina 17
GB / MT Operation and Safety Notes Page 29
DE / AT Bedienungs- und Sicherheitshinweise Seite 41
AMOLADORA RADIAL DE MANO
SMERIGLIATRICE ANGOLARE
Winkelschleifer
Bedienungs- und Sicherheitshinweise
Angle grinder
Operation and Safety Notes
AmolAdorA rAdiAl
de mAno
Instrucciones de utilización y de seguridad
smerigliAtrice AngolAre
Indicazioni per l’uso e per la sicurezza
Klappen Sie vor dem Lesen die Seite mit den Abbildungen aus und machen Sie sich anschließend
mit allen Funktionen des Gerätes vertraut.
Before you begin reading this information, please unfold the page with the illustrations and familiarize
yourself with all functions of the tool.
Prima di leggere aprire la pagina con le immagini e prendere confidenza con le diverse funzioni
dell’apparecchio.
Antes de empezar a leer abra la página que contiene las imágenes y, en seguida, familiarícese
con todas las funciones del dispositivo.

A B
D
E
C
F
4
14
15
18
19
20
16
11 12
13 17
1
4
5
7
6
3
0
I
2
8 9 10

5 ES
Índice
Introducción
Uso correcto .................................................................................................................Página 6
Componentes ................................................................................................................Página 6
Contenido del envío .....................................................................................................Página 7
Datos técnicos ...............................................................................................................Página 7
Seguridad
Indicaciones de seguridad ..........................................................................................Página 7
Seguridad en el lugar de trabajo ...............................................................................Página 7
Seguridad eléctrica ......................................................................................................Página 7
Seguridad de las personas ..........................................................................................Página 8
Manejo y uso cuidadoso de las herramientas eléctricas..........................................Página 9
Indicaciones de seguridad específicas para el aparato .........................................Página 9
Indicaciones de trabajo ...............................................................................................Página 12
Accesorios originales y adicionales ...........................................................................Página 13
Puesta en funcionamiento
Montaje de la carcasa de protección con cierre rápido ..........................................Página 13
Montar el mango adicional .........................................................................................Página 14
Montaje y cambio de la muela de tronzar y desbastar ...........................................Página 14
Manejo
Conexión y desconexión .............................................................................................Página 14
Mantenimiento y limpieza .........................................................................Página 15
Eliminación ..............................................................................................................Página 15
Informaciones
Asistencia ......................................................................................................................Página 15
Declaración de conformidad / Fabricante .................................................................Página 16

6 ES
Introducción
Amoladora radial
de mano PWS 230
Q
Introducción
Familiarícese con el funcionamiento del
dispositivo antes de ponerlo en marcha
e infórmese sobre cómo trabajar adecua
damente con herramientas eléctricas. Para ello, lea
las siguientes instrucciones de uso.
Guarde estas instrucciones en un lugar seguro. En
caso de transferir el aparato a terceros entrégueles
también toda la documentación.
Q
Uso correcto
El equipo está diseñado para cortar, desbastar y cepi-
llar materiales metálicos o de piedra sin la utilización de
agua. Cualquier otro uso o modificación del aparato se
considera inadecuado y conlleva considerables peligros
de accidente. No asumiremos la responsabilidad por
los daños ocasionados debido a un uso distinto del
adecuado. El aparato no ha sido diseñado para uso in-
dustrial.
Q
Componentes
1
Mango del aparato (giratorio)
2
Interruptor de conexión / desconexión
3
Bloqueo de seguridad
4
Botón de desbloqueo
5
Cubierta de las escobillas de carbón
6
Mango adicional
7
Cubierta de protección
8
Palanca de tensión
9
Resalto
10
Tornillo de ajuste
11
Botón de bloqueo del husillo
12
Rosca (3 x) para el mango adicional
13
Tuerca de fijación
14
Husillo de montaje
En estas instrucciones de uso se utilizan los siguientes pictogramas / símbolos:
¡Lea las instrucciones de uso!
W
Vatio (potencia efectiva)
¡Siga las indicaciones de prevención y
seguridad!
Herramienta eléctrica de clase de protección II;
aislamiento doble
¡Tenga cuidado con las descargas eléctricas!
Tensiones eléctricas peligrosas - Peligro de vida!
Use gafas de protección, protección auditiva,
mascarilla y guantes de protección.
¡Peligro de explosión!
Mantenga a los niños y otras personas alejados
durante el manejo de herramientas eléctricas.
¡Peligro de incendio!
Mantenga el aparato protegido de la lluvia y la
humedad. Si penetra agua en un aparato eléctri-
co aumenta el riesgo de descarga eléctrica.
V
~
Voltios (tensión alterna)
Un aparato, cable de red o clavija de red daña-
do significa peligro de vida por descarga eléctri-
ca. Controle regularmente el estado del aparato,
del cable de alimentación la clavija de red.
n
0
Dimensión de la rotación en punto muerto
¡Evacue el embalaje y el aparato de forma
respetuosa con el medio ambiente!

7 ES
Introducción / Seguridad
15
Brida de apoyo
16
Ranura
17
Llave de ajuste
18
Muela de desbastar*
19
Muela para tronzar metal*
20
Muela para tronzar piedra*
* (no viene incluido)
Q
Contenido del envío
1 amoladora angular PWS 230
1 mango adicional
1 cubierta de protección
1 llave de ajuste
1 manual de instrucciones
1 cuadernillo «Garantía y asistencia»
Q
Datos técnicos
Tensión nominal: 230 V
~
50 Hz
Potencia nominal: 2000 W
Revoluciones nominales: n
0
= 6500 / r.p.m
Muela: Ø 230 mm
Husillo de montaje: M14 / rosca
Clase de protección: II /
¡Es necesario llevar
protección auditiva!
Información sobre ruido y vibración:
Nivel de ruido establecido a partir de valoración A.
Nivel de presión acústica: 90 dB (A)
Nivel de potencia acústica: 103 dB (A)
Aceleración calificada, típicamente.
Vibración mano-brazo: < 2,5 m / s
2
Valor de medición calculado según EN 50144.
Q
Seguridad
Indicaciones de seguridad
J ¡Atención! Al usar herramientas eléctricas de-
ben observarse las siguientes medidas básicas
para la protección de las descargas eléctricas y
de los peligros de lesiones e incendios. Lea y ten-
ga en cuenta estas disposiciones antes de utilizar
el equipo. El incumplimiento de las indicaciones
incluidas a continuación puede provocar descar-
gas eléctricas, incendios y / o lesiones graves.
Q
Seguridad en el lugar de trabajo
J Mantenga el lugar de trabajo limpio y ordenado.
Procure que haya iluminación suficiente en el
lugar de trabajo. El desorden y los lugares de
trabajo mal iluminados pueden provocar
accidentes.
J
¡Peligro de explosión! No utilice
el aparato en áreas potencialmente
explosivas en las que haya líquidos,
gases o polvos inflamables. Las herramientas
eléctricas producen chispas que podrían
encender el polvo o los vapores.
J
Mantenga a los niños y a otras per-
sonas alejados de la herramienta
eléctrica cuando la esté utilizando.
Las distracciones pueden hacerle perder el con-
trol del aparato.
Q
Seguridad eléctrica
Evite el peligro de muerte por
descarga eléctrica:
J El conector debe ser el adecuado para la toma
de corriente. No se debe modificar de ningún
modo el enchufe del aparato. No utilice nunca
adaptadores con los aparatos que están pro-
vistos de derivación a tierra. Los conectores sin
modificar y las tomas adecuadas reducen el
riesgo de descarga eléctrica.

8 ES
Seguridad
J Evite el contacto físico con superficies conecta-
das a tierra, tales como tubos metálicos, radia-
dores, cocinas o frigoríficos. Existe un riesgo
muy elevado de descarga eléctrica si su cuerpo
deriva a tierra.
J
Mantenga el aparato protegido de
la lluvia y la humedad. Si penetra
agua en un aparato eléctrico aumen-
ta el riesgo de descarga eléctrica.
J No utilice el cable para otros fines, como por
ejemplo para transportar o colgar el aparato o
para tirar del enchufe al desenchufarlo. Mantenga
el cable al resguardo del calor, del aceite, de
los bordes afilados o de las piezas móviles del
aparato. Los cables o enchufes dañados o retor-
cidos aumentan el riesgo de descarga eléctrica.
J
Los aparatos, cables de red o enchu-
fes dañados conllevan peligro de
muerte por descarga eléctrica. Con-
trole regularmente el estado del aparato, el
cable de alimentación y la clavija.
J En trabajos al aire libre utilice únicamente ex-
tensiones que estén autorizadas para el uso en
exteriores. El uso de una extensión adecuada
para su empleo en exteriores disminuye el riesgo
de descarga eléctrica.
J Agárrelo sólo por las empuñaduras aisladas,
cuando pueda coincidir con conducciones
eléctricas ocultas o con el propio cable de red.
J El contacto con una conducción en tensión
coloca también en tensión las partes metálicas
del aparato y produce una descarga eléctrica.
J
¡Advertencia! ¡Peligro de ex-
plosión! Utilice los dispositivos de
búsqueda adecuados para detectar
los cables de abastecimiento ocultos o consulte
a los proveedores locales para ello.
El contacto con las conducciones de electricidad
puede provocar incendios y descargas eléctricas.
Si se daña una conducción de gas puede pro-
vocarse una explosión.
La perforación de una conducción de agua
causa daños materiales efectivos o puede pro-
ducir una descarga eléctrica.
J No ponga el aparato en funcionamiento si
alguna de estas piezas se encuentra dañada.
En caso de peligro extraiga el enchufe de la
toma de corriente inmediatamente.
J ¡Advertencia! - No abra nunca el aparato.
Las reparaciones o trabajos de mantenimiento
deben ser realizados por personal del punto de
asistencia o por personal técnico electricista.
Q
Seguridad de las personas
J Esté siempre atento y preste siempre atención a
lo que está haciendo. Al trabajar con herra-
mientas eléctricas proceda con prudencia. No
utilice el aparato si se encuentra desconcentrado,
cansado o bajo el efecto de drogas, alcohol o
medicamentos. Incluso un simple momento de
descuido durante el uso del aparato podría cau-
sar lesiones graves.
J
Lleve equipo de protección individual
y siempre unas gafas de protección.
Si lleva equipo de protección indivi-
dual, como mascarilla antipolvo, zapatos de
seguridad antideslizantes, guantes, casco de
seguridad o protección auditiva, en función del
tipo y la utilización de la herramienta eléctrica,
reducirá el riesgo de lesiones.
J Para trabajar al aire libre, se recomiendan
guantes de goma y zapatos antideslizantes.
J Evite que el aparato se ponga en marcha acci-
dentalmente. Asegúrese de que el interruptor
está en la posición «DESCONECTADO» antes
de introducir el enchufe en la toma de corriente.
Si al mover el aparato ha puesto el dedo sobre
el interruptor de conexión / desconexión o si
conecta el aparato al suministro eléctrico ya
encendido, podrían producirse accidentes.
J Extraiga las herramientas de ajuste o llaves
antes de encender el aparato.
Cualquier herramienta o llave que se encuentre
en una pieza giratoria del aparato puede pro-
vocar lesiones.
J No confíe excesivamente en sus capacidades.
Procure estar en una posición segura y mantenga
en todo momento el equilibrio. De este modo
podrá controlar mejor el aparato, especialmente
en situaciones inesperadas.
J Utilice ropa adecuada. No use joyas ni ropas
flojas. Mantenga su cabello, ropa y guantes

9 ES
Seguridad
alejados de las partes móviles. Si tiene el pelo
largo, utilice una redecilla. La ropa floja, las
joyas que no permanezcan ajustadas al cuerpo
y el pelo largo pueden engancharse en las pie-
zas móviles.
J Si es posible montarlos, utilice dispositivos de
aspiración o recolección de polvo. En ese
caso, tenga en cuenta que los dispositivos de
aspiración de polvo deben estar indicados es-
pecíficamente para este tipo de aplicación. El
uso correcto de estos dispositivos disminuye los
peligros causados por el polvo.
Existe peligro de incendio al trabajar con apa-
ratos eléctricos que disponen de un saco co-
lector de polvo o que pueden estar conectados
con el aparato correspondiente mediante un
dispositivo de aspiración. Bajo condiciones ad-
versas, como por ejemplo en caso de chispas,
o al pulir el metal o los restos de metal en ma-
dera puede encenderse el polvo de madera
en la bolsa para polvo (o en el saco de filtro
de la aspiradora). Esto puede ocurrir especial-
mente cuando el polvo de la madera está mez-
clado con restos de laca o de otras sustancias
químicas y la pieza a pulir se ha calentado
después de haber trabajado con ella por largo
tiempo. Por ello, evite totalmente un recalenta-
miento de la pieza a pulir y del aparato. Vacíe
siempre antes de hacer una pausa el saco co-
lector de polvo o el del filtro del aspirador.
J No permita que otras personas toquen la
herramienta o el cable de extensión.
Q
Manejo y uso cuidadoso de
las herramientas eléctricas
J No sobrecargue el dispositivo. Emplee en su
trabajo la herramienta eléctrica adecuada
para el mismo. Si usa la herramienta adecuada
dentro de la potencia indicada trabajará mejor
y de forma más segura.
J No utilice una herramienta eléctrica cuyo inte-
rruptor tenga algún defecto. Una herramienta
eléctrica que no se puede encender o apagar
es un peligro y debe repararse.
J Retire la clavija del enchufe antes de realizar
ajustes en el aparato, cambiar accesorios o
depositar el aparato sobre una superficie. Esta
medida de precaución evita que se ponga en
marcha el aparato por accidente.
J Conserve las herramientas eléctricas que no
use fuera del alcance de los niños.
No permita utilizar el aparato a personas que
no estén familiarizadas con él o que no hayan
leído estas indicaciones. Las herramientas eléc-
tricas son peligrosas si las usan personas sin
experiencia.
J Cuide el aparato. Compruebe que las piezas
móviles funcionen correctamente y no se atas-
quen, y que no haya piezas rotas o tan dañadas
que perjudiquen al funcionamiento del aparato.
Haga reparar las piezas dañadas antes de usar
el equipo. La causa de muchos accidentes es el
uso de herramientas eléctricas que no han reci-
bido el mantenimiento adecuado.
J Utilice la herramienta eléctrica, los accesorios,
las herramientas adicionales, etc. de acuerdo
con estas indicaciones y del modo que se des-
cribe para este tipo de aparato en concreto.
Tenga en cuenta las condiciones de trabajo y
la actividad que se va a realizar. El uso de
herramientas eléctricas para fines diferentes de
los previstos puede provocar situaciones
peligrosas.
Indicaciones de seguridad
específicas para el aparato
J Asegúrese de que el aparato está desconectado
antes de introducir el enchufe en la toma de
corriente.
J En caso de utilizar el aparato en el exterior,
conéctelo a un interruptor de corriente de fuga
con una corriente de desconexión máxima de
30 mA.
J Utilice exclusivamente una extensión homolo-
gada para exteriores.
J Sujete la pieza de trabajo. Utilice dispositivos
de sujeción / tornillo de banco para sujetar la
pieza de trabajo. Así se mantiene más segura
que con las manos.
J No sujete nunca el aparato con un tornillo de
banco.

10 ES
Seguridad
J Proteja siempre sus manos del área lateral y
frontal del dispositivo y de las superficies que
se van a trabajar, ya que si resbala podría
sufrir lesiones.
J En caso de peligro, extraiga inmediatamente
el enchufe de la toma de corriente.
m ¡Advertencia! ¡Peligro de lesiones! En
caso de corte de corriente o si se desenchufa
el equipo, desbloquear inmediatamente el inte-
rruptor de CONEXIÓN / DESCONEXIÓN.
Colóquelo en la posición “DESCONECTADO”.
Así evitará que el aparato se vuelva a poner
en marcha inesperadamente, con el consecuente
riesgo de lesiones.
J No ponga en funcionamiento el aparato con
el cable de red o enchufe dañado.
J No toque el cable de red en caso de desco-
nectarse o sufrir daños durante el funcionamiento.
Extraiga inmediatamente el enchufe de la toma
y a continuación haga reparar el aparato exclu-
sivamente por un técnico o por el punto de
asistencia que le corresponda.
J No utilice el aparato si está húmedo ni en am-
bientes húmedos.
J En caso de utilizar el aparato en el exterior,
conéctelo a un interruptor de corriente de fuga
con una corriente de desconexión máxima de
30 mA. Utilice exclusivamente una extensión
homologada para exteriores.
J No sostenga ni cuelgue el aparato por el cable
de red. Mantenga apartado el cable de red
siempre por detrás del aparato.
J Las muelas deben guardarse y usarse con cui-
dado y según las indicaciones del fabricante.
J Asegúrese de que las herramientas de amolar
estén colocadas según las instrucciones del fa-
bricante.
J Procure utilizar capas de separación si así se
requiere y se suministran con la herramienta de
amolar.
J Antes de usar el aparato, asegúrese de que
hay una herramienta de amolar correctamente
colocada y sujeta. Deje que la herramienta
marche en vacío durante 30 segundos en una
posición segura y párela inmediatamente si
detecta vibraciones importantes o defectos. Si
esto sucede, compruebe la máquina para co-
nocer la causa.
J En caso de que se suministre una cubierta de
protección junto con la herramienta eléctrica,
no utilice nunca esa herramienta sin la cubierta.
J Asegúrese, en el caso de herramientas de
amolar con casquillo roscado, que la rosca
sea lo suficientemente larga para acoger la
longitud de husillo.
J No trabaje en zonas ocultas en las que pueda
haber conducciones de electricidad, gas o
agua. Utilice los dispositivos de búsqueda ade-
cuados o consulte a los proveedores locales.
El contacto con las conducciones de electrici-
dad puede provocar incendios y descargas
eléctricas.
Si se daña una conducción de gas, se puede
provocar una explosión. La perforación de una
conducción de agua puede causar daños mate-
riales efectivos o producir una descarga eléctrica.
¡Peligro de incendio por chispas!
Al cortar / lijar metales se producen chispas.
Por lo tanto, es imprescindible que procure no
poner a nadie en peligro y que no haya mate-
riales inflamables en las proximidades del
área de trabajo.
m ¡Advertencia! ¡Vapores tóxicos! Traba-
jar con polvo nocivo / tóxico supone un riesgo
para la salud de quien maneja el aparato o de
las personas que estén cerca.
J
Use gafas de protección, protección
auditiva, mascarilla y guantes de
protección.
J En caso de trabajo prolongado con materiales
de madera, metal, o piedra que liberen polvo
insalubre, conecte el aparato a un dispositivo
externo de aspiración de polvo adecuado.
J Al trabajar con piedra, acople un dispositivo
de aspiración de polvo adecuado. El dispositi-
vo debe ser adecuado para la aspiración de
polvo de piedra.
m ¡Advertencia! ¡Peligro de descarga
eléctrica por polvo metálico! Al trabajar
con metales puede depositarse polvo conductivo
en el interior del equipo. En estos casos, se debe
soplar con aire comprimido desde afuera fre-
cuentemente el compartimiento del motor, traba-
jar con aspiración de polvo y accionar el equipo
a través de un interruptor de corriente de fuga

11 ES
Seguridad
(corriente de desconexión máxima de 30 mA).
J Al trabajar plásticos, pinturas, lacas, etc. pro-
cure que haya ventilación suficiente.
J No humedezca los materiales ni las superficies
en las que va a trabajar con líquidos que con-
tengan disolvente. Con el calentamiento durante
el raspado pueden formarse vapores tóxicos o
perjudiciales para la salud.
J Use ropa de trabajo ajustada al cuerpo y si
tiene el pelo largo utilice una redecilla para el
pelo o un sombrero adecuado.
J Por motivos de seguridad, este aparato se
debe utilizar únicamente con el mango adicional.
J La cubierta de protección regulable se debe
montar siempre para trabajar con muelas de
tronzar o de desbastar.
J Utilice el aspirador si se produjera una sobre-
carga de polvo. Utilice únicamente dispositivos
de aspiración de polvo autorizados.
J Utilice únicamente herramientas autorizadas.
Compruebe si la indicación de revoluciones
por minuto de la muela es mayor o igual a la
velocidad nominal del dispositivo.
J Asegúrese de que las medidas de la herramienta
de amolar se adaptan a las medidas de la
amoladora.
J Tenga en cuenta la dirección de giro y mantenga
el dispositivo de tal modo que las chispas y las
virutas no salgan disparadas hacia su cuerpo.
J Asegúrese de que las medidas de la muela co-
incidan con las del equipo y de que se ajusta
sin problemas a la brida de montaje.
J Evite pulir las pinturas que contienen plomo u
otros materiales perjudiciales para la salud.
J No trabaje con material que contenga amianto.
El amianto puede ser cancerígeno.
J Utilice el aparato sólo para corte en seco o
rectificado en seco.
J Compruebe la muela antes de usarla. No utilice
productos rotos, agrietados o que presenten
algún otro tipo de daño.
J Asegúrese de que las herramientas de amolar
estén colocadas según las instrucciones del fa-
bricante.
J Evite el contacto con la muela de tronzar o
desbastar cuando está en movimiento.
J Utilice el aparato sólo con las muelas de tron-
zar o desbastar instaladas.
J Nunca utilice el aparato para un fin distinto al
descrito y úselo solamente con piezas y acce-
sorios originales.
J ¡Utilice únicamente herramientas de amolar
con un número de revoluciones al menos igual
de alto que el mayor número de revoluciones
de la máquina en marcha en vacío! Si las mue-
las giran a una velocidad mayor que la admitida
podrían quedar inutilizables.
J Asegúrese de que las dimensiones de la muela
se adaptan al aparato.
Asimismo la muela debe ajustarse sin huelgo
al asiento del eje con árbol de acoplamiento.
No utilice piezas reductoras o adaptadores.
J No haga presión lateral sobre las muelas de
tronzar.
J No utilice muelas de tronzar para lijar hacia
un lado.
J Antes de utilizar las herramientas para amolar
compruebe que no presentan daños. Deben
poder montarse sin problemas y girar sin difi-
cultad. Realice una prueba de funcionamiento
de al menos 30 segundos sin carga. No utilice
herramientas de amolar dañadas, con cantos
o que vibren.
J Cuide la herramienta. Mantenga las herra-
mientas de corte afiladas y limpias para realizar
un trabajo mejor y más seguro.
Siga las instrucciones para engrasar y cambiar
la herramienta.
J Acople un protector de manos cuando trabaje
con accesorios externos como p. ej. discos
abrasivos de goma / cepillos de vaso / cepillos
de disco / discos abrasivos laminados (no in-
cluidos en el envío).
J Acerque el aparato, una vez conectado, a la
pieza de trabajo. Después de trabajar la pieza
eleve el aparato y sólo entonces desconéctelo.
J Evite posturas no adecuadas.
Durante el trabajo sujete siempre el aparato fir-
memente con las dos manos (vea también la
fig. D). Procure estar en una posición segura.
J El mango adicional debe estar montado con el
aparato en todos los trabajos.
J Observe la dirección de giro de la muela. Su-
jete el aparato de modo que las chispas o el

12 ES
Seguridad
polvo no se acerquen al cuerpo al desprenderse.
J Una vez desconectado, deje que el aparato se
detenga antes de depositarlo.
La herramienta de amolar sigue girando cuando
se ha desconectado la herramienta.
J Evite el bloqueo de la muela de tronzar y la
consiguiente fuerza de reacción repentina del
aparato. En caso de producirse un bloqueo,
desconecte el aparato inmediatamente. Man-
téngalo sobre la pieza hasta que la muela se
pare. Sólo entonces puede extraer la muela de
tronzar de la pieza.
J No vuelva a encender el aparato mientras la
muela de tronzar se encuentre en la pieza.
J Cuando al trabajar se genere polvo, asegúrese
de que las aberturas de ventilación no están
cubiertas. Si fuera necesario eliminar el polvo,
desconecte en primer lugar la herramienta
eléctrica del suministro de alimentación (utilice
objetos no metálicos) y evite que se dañen las
piezas internas.
J Las herramientas eléctricas que no se utilicen
deben dejarse en un lugar seco, alto o cerrado,
fuera del alcance de los niños.
J Utilice el dispositivo con atención y cuidado.
Proteja el aparato de las sacudidas y golpes.
J Controle regularmente el cable de conexión
de la herramienta eléctrica; en caso de estar
dañado deberá ser reparado por un técnico
especializado. Compruebe regularmente los
cables de prolongación y reemplácelos si pre-
sentan daños. Mantenga el mango seco, limpio
y sin aceite ni grasa.
J Compruebe que la herramienta eléctrica no
presenta daños. Antes de volver a utilizar la
herramienta, es indispensable comprobar que
los dispositivos de protección o las piezas lige-
ramente dañadas funcionan sin problemas.
Compruebe que las piezas móviles funcionen
correctamente y no se atasquen, y que no
haya piezas dañadas. Todas las piezas deben
estar montadas correctamente y cumplir todas
las condiciones necesarias para garantizar el
correcto funcionamiento de la herramienta
eléctrica. Sólo personal de un taller especiali-
zado reconocido debe reparar o cambiar las
piezas y los dispositivos de protección dañados,
a no se que en las instrucciones de uso se indi-
que de otra manera. Los interruptores defec-
tuosos deben ser reemplazados por un taller
de atención al cliente. No utilice ninguna he-
rramienta eléctrica con un interruptor de co-
nexión y desconexión que no funcione.
Indicaciones concernientes a la estática
Ranuras, por ejemplo, en paredes portantes:
Las ranuras en paredes portantes deben realizarse
conforme a DIN 1053 parte 1 o a las disposicio-
nes específicas del país.
Es imprescindible que respete estas prescripciones.
Antes de comenzar el trabajo, pida asesoramiento
al responsable de cálculos estáticos, al arquitecto
responsable o a la dirección de la construcción
competente.
Q
Indicaciones de trabajo
¡Indicación! Las muelas abrasivas sólo pueden
ser utilizadas para las posibilidades de uso reco-
mendadas. De lo contrario, podrían romperse,
dañarse y causar heridas
Desbastar
¡No utilice nunca discos de corte
para desbastar!
J Mueva de un lado a otro la amoladora radial
de mano con presión moderada sobre la pieza
de trabajo.
J En el caso de materiales blandos desplace el
disco de desbaste en un ángulo plano, en el
caso de materiales duros en un ángulo más
pronunciado.
Tronzar
No utilice nunca muelas de
desbastar para tronzar.
m ¡Peligro! Desplace el aparato
siempre en sentido contrario a la
marcha a través de la pieza de
trabajo. En caso de tomar un

13 ES
Seguridad / Puesta en funcionamiento
sentido opuesto existe riesgo de retroceso El
aparato puede ser presionado en el corte.
J Acerque el aparato siempre conectado contra
la pieza de trabajo. Después de trabajar la pieza
eleve el aparato y sólo entonces desconéctelo.
J Durante el trabajo sujete siempre el aparato
firmemente con las dos manos (vea también la
fig. D). Procure mantenerse en una postura
firme y segura.
J Para lograr el mejor poder abrasivo, mueva
adelante y atrás el dispositivo regularmente en
un ángulo de entre 15 y 30 grados (entre la
muela y la pieza de trabajo) sobre la pieza de
trabajo.
J Al trabajar en superficies inclinadas, no se
debe presionar el dispositivo con mayor fuerza
sobre la superficie de trabajo. Si disminuyen
las revoluciones, se debe reducir la presión
para posibilitar así un trabajo seguro y efectivo.
Si de repente se bloqueara o frenara el aparato
por completo, se debe desconectar inmediata-
mente la corriente de la red.
J Cortar: Procure que el avance sea moderado.
No ladee la muela.
J Las muelas de tronzar o de desbastar se calien-
tan mucho durante el trabajo, déjelas enfriar
por completo antes de tocarlas.
J Jamás utilice el aparato para otros fines distin-
tos a los especificados.
J Preste siempre atención a que el aparato esté
desconectado antes de introducir el enchufe en
la toma de corriente.
J En caso de peligro, extraiga inmediatamente el
enchufe de la toma de corriente. Ocúpese de
que se puede acceder con facilidad y sin pro-
blemas al aparato y al enchufe.
J Al hacer pausas en el trabajo, al realizar cual-
quier trabajo en el propio aparato y si no se va
a utilizar el mismo, extraiga siempre el enchufe
de la toma.
El aparato debe mantenerse siempre limpio,
seco y libre de aceite o grasas lubricantes.
J ¡Proceda con sumo cuidado! Preste siempre
mucha atención a lo que está haciendo y pro-
ceda con prudencia. No utilice bajo ningún
concepto el aparato si está distraído o si no se
encuentra bien.
Q
Accesorios originales y
adicionales
J Emplee exclusivamente los accesorios indicados
en el manual de instrucciones. El uso de herra-
mientas adicionales o accesorios diferentes a
aquellos recomendados en el manual de ins-
trucciones puede suponer un riesgo de lesiones
para usted.
Q
Puesta en funcionamiento
Tenga en cuenta la tensión de red. La tensión de la
fuente de corriente debe coincidir con las especifi-
caciones de la placa de características del apara-
to. Los aparatos indicados para 230 V, también
pueden funcionar con 220 V.
Q
Montaje de la carcasa de
protección con cierre rápido
J Antes de proceder a los trabajos, desenchufe
siempre el equipo de la toma de corriente.
m ¡Peligro de lesiones! Utilice la amoladora
angular siempre con la cubierta de protección.
La cubierta de protección debe colocarse de
forma segura en la amoladora angular. Coló-
quela de modo que se alcance el grado máximo
de seguridad, es decir, que la menor parte
posible de la muela abrasiva esté dirigida
abiertamente al operario. La cubierta de pro-
tección debe proteger al operario contra un
contacto accidental con fragmentos que puedan
desprenderse o con la muela abrasiva.
j Abra la palanca de tensión
8
.
j Coloque la cubierta protectora
7
con el re-
salto
9
en la ranura
16
.
j Gire la cubierta protectora
7
en la posición
requerida (posición de trabajo). El lado cerrado
de la cubierta protectora
7
debe señalar
siempre hacia el usuario.
j Cierre la palanca de fijación
8
para fijar la
cubierta de protección
7
.
En caso necesario, puede modificarse la fuerza
de apriete del cierre
10
aflojando o apretando

14 ES
Puesta en funcionamiento / Manejo
el tornillo de ajuste.
Asegúrese de que la cubierta de protección
7
está colocada de forma fija sobre el cuello
del husillo.
Q
Montar el mango adicional
m ¡Atención! Por motivos de seguridad, este
aparato se debe utilizar únicamente con el
mango adicional
6
.
J Antes de proceder a los trabajos, desenchufe
siempre el equipo de la toma de corriente.
j El mango adicional
6
se puede atornillar a la
izquierda, derecha o arriba en el cabezal del
aparato dependiendo del tipo de trabajo.
Q
Montaje y cambio de la muela
de tronzar y desbastar
Prestar atención a las dimensiones de las muelas
de tronzar o desbastar. El diámetro de la abertura
debe adaptarse sin holgura a la brida de apoyo.
No utilizar piezas reductoras o adaptadores.
J Antes de proceder a los trabajos, desenchufe
siempre el equipo de la toma de corriente.
J Compruebe la muela de tronzar o desbastar. No
debe presentar daños o grietas ni estar húmeda.
m ¡Riesgo de quemaduras! Póngase siempre
guantes de protección a la hora de cambiar
las muelas de tronzar o desbastar. Las muelas
se calientan mucho durante el trabajo. No las
toque hasta que se hayan enfriado.
j Advertencia: Utilice únicamente muelas que
estén limpias.
j ¡Utilice únicamente herramientas de amolar
con un número de revoluciones al menos igual
de alto que el mayor número de revoluciones
de la máquina en marcha en vacío!
j Accione el botón de bloqueo del husillo
11
sólo si el husillo de montaje se encuentra en re-
poso
14
.
j Presione el botón de bloqueo del husillo
11
para bloquear el mecanismo.
j Afloje la tuerca de fijación
13
con ayuda de
la llave de ajuste
17
fig. C.
j Coloque la muela de desbastar o de tronzar
con el lado marcado hacia el equipo en la brida
de apoyo
15
.
j A continuación, coloque la tuerca de fijación
13
, con la parte levantada hacia arriba, nue-
vamente en el husillo de montaje
14
.
j Presione el botón de bloqueo del husillo
11
para bloquear el mecanismo.
j Fije nuevamente la tuerca de fijación
13
con la
llave de ajuste
17
.
j Advertencia: En caso de que, tras el cam-
bio de la muela, ésta se mueva en forma irre-
gular u oscile, deberá cambiarla nuevamente
de inmediato.
j Deje funcionar al aparato en marcha en vacío,
por razones de seguridad, unos 30 segundos
después de cambiar la muela. Preste atención
a ruidos insólitos y chispas. Compruebe que
todas las piezas de sujeción estén correcta-
mente colocadas.
j Asegúrese de que la flecha indicadora de sen-
tido de giro de las muelas de tronzar o desbas-
tar (también de las muelas diamantinas) y el
sentido de giro del aparato (flecha indicadora
del sentido de giro en el cabezal del equipo)
coinciden.
Q
Manejo
Q
Conexión y desconexión
Advertencia: Conecte la amoladora angular an-
tes de que entre en contacto con el material y, sólo
entonces, acérquela a la pieza de trabajo.
Conexión del dispositivo
j Accione el bloqueo de seguridad
3
.
Pulse el interruptor CONEXIÓN / DESCO-
NEXIÓN
2
.
Desconexión del dispositivo
j Suelte el interruptor CONEXIÓN / DESCO-
NEXIÓN
2
.

15 ES
Manejo / Mantenimiento y limpieza / Eliminación / Informaciones
Activar el funcionamiento continuo:
j Accione el bloqueo de seguridad
3
y man-
téngalo presionado.
Pulse el interruptor de CONEXIÓN/DESCO-
NEXIÓN
2
en la zona del bloqueo de co-
nexión hasta que este se bloquee.
Desactivar el funcionamiento continuo:
j Pulse el interruptor CONEXIÓN / DESCO-
NEXIÓN
2
y suéltelo.
Girar el mango del aparato
j Antes de proceder a los trabajos, desenchufe
siempre el equipo de la toma de corriente.
j El mango
1
puede girarse 90° hacia la dere-
cha o hacia la izquierda.
j De este modo, el interruptor de Conexión /
Desconexión
2
puede ponerse en una posi-
ción más adecuada.
j Pulse el botón de desbloqueo
4
y gire el
mango
1
hacia la derecha o hacia la izquierda.
j Deje que el mango
1
se encaje.
Q
Mantenimiento y limpieza
J Antes de proceder a los trabajos, desenchufe
siempre el equipo de la toma de corriente.
J Para la limpieza del aparato no utilice ningún
objeto afilado. No deben entrar líquidos al
interior del dispositivo.
j Encargue el recambio de las escobillas de car-
bón exclusivamente al punto de asistencia o a
un taller especializado reconocido. De lo con-
trario, el aparato no necesita mantenimiento.
j Limpie regularmente el dispositivo, de preferen-
cia inmediatamente después de finalizar el
trabajo.
j Limpie la carcasa con un paño suave; no utili-
zar, en ningún caso, bencina, disolventes o
detergentes que puedan dañar el plástico.
j Para la limpieza a fondo del aparato se necesita
una aspiradora.
j Los orificios de ventilación deben permanecer
siempre libres.
j Retire con un pincel el polvo de lijado que
haya quedado adherido.
Q
Eliminación
El embalaje se compone de materiales
reciclables que puede desechar en los
puntos locales de recogida selectiva.
¡No ponga las herramientas
eléctricas
en los contenedores
de basura doméstica!
Según la Directiva europea 2002 / 96 / CE sobre
residuos de aparatos eléctricos y electrónicos y en
cumplimiento con el derecho nacional, las herra-
mientas eléctricas usadas se tienen que separar y
reciclar sin dañar el medioambiente.
Para deshacerse de un aparato que ya no sirva
pregunte a las autoridades locales o municipales.
Q
Informaciones
Q
Asistencia
Consulte los puntos de atención al cliente de su
país en la documentación de la garantía.
J Haga reparar los aparatos únicamente por
personal técnico cualificado y con repuestos
originales. Así se garantiza que el aparato
seguirá siendo seguro.
J Si es necesario cambiar el enchufe o el cable
de alimentación, encargue este trabajo al
fabricante del aparato o a su servicio de aten-
ción al cliente. Así se garantiza que el aparato
seguirá siendo seguro.

16 ES
Informaciones
Q
Declaración de conformidad /
Fabricante
Nosotros, Kompernaß GmbH, Burgstr. 21,
44867 Bochum (Alemania), declaramos
por el presente documento que este producto
cumple las siguientes directivas europeas:
Directiva de máquinas (98 / 37 / EC)
Directiva europea de baja tensión
(2006 / 95 / EC)
Compatibilidad electromagnética
(2004 / 108 / EC)
Tipo / Denominación del aparato:
Amoladora radial de mano PWS 230
Bochum, 31.10.2007
Hans Kompernaß
- Gerente -
Queda reservado el derecho a realizar modificaciones técnicas
para el perfeccionamiento del dispositivo.

17 IT/MT
17 IT/MT
Indice
Introduzione
Utilizzo conforme allo scopo previsto ........................................................................Pagina 18
Versione .........................................................................................................................Pagina 18
Volume della fornitura ..................................................................................................Pagina 19
Dati tecnici ....................................................................................................................Pagina 19
Sicurezza
Indicazioni di sicurezza ...............................................................................................Pagina 19
Sicurezza dell’area di lavoro ......................................................................................Pagina 19
Sicurezza elettrica ........................................................................................................Pagina 19
Sicurezza delle persone ..............................................................................................Pagina 20
Utilizzo attento di dispositivi elettrici ..........................................................................Pagina 21
Precauzioni specifiche per l’uso dell’attrezzo ...........................................................Pagina 21
Indicazioni relative alla lavorazione ..........................................................................Pagina 24
Apparecchi / accessori originali .................................................................................Pagina 25
Messa in servizio
Montare la scatola di protezione con chiusura rapida .............................................Pagina 25
Montare l’impugnatura supplementare ......................................................................Pagina 26
Montare / sostituire la mola di tranciatura e di sgrossatura ....................................Pagina 26
Utilizzo
Accensione e spegnimento ..........................................................................................Pagina 26
Manutenzione e pulizia ................................................................................Pagina 27
Smaltimento ...........................................................................................................Pagina 27
Informazioni
Assistenza......................................................................................................................Pagina 28
Dichiarazione di conformità / Fabbricante .................................................................Pagina 28

18 IT/MT
Smerigliatrice angolare PWS 230
Q
Introduzione
Prima di avviare l‘apparecchio per la
prima volta, familiarizzarsi con le sue
funzioni, ed informarsi sul modo migliore
di maneggiare gli apparecchi elettrici. A questo
proposito, leggere le istruzioni d’uso fornite in seguito.
Conservare queste istruzioni d’uso in buono stato.
In caso di passaggio dell’apparecchio a terzi, conse-
gnare anche tutta la documentazione ad esso relativa.
Q
Utilizzo conforme allo
scopo previsto
L’apparecchio in oggetto è adatto per il taglio, la
sgrossatura e la spazzolatura di materiali metallici
ed in pietra senza l’utilizzo di acqua. Ogni altro
utilizzo dell’apparecchio ed ogni sua modifica, si
intendono non conformi allo scopo previsto, deter-
minano un elevato rischio di incidenti, e di conse-
guenza è vietato. Il produttore non si assume alcuna
responsabilità per eventuali danni derivanti dall’uso
non conforme dell’apparecchio.
L’apparecchio non è destinato all’utilizzo commerciale.
Q
Versione
1
Impugnatura (girevole)
2
Interruttore ON / OFF
3
Blocco di accensione
4
Tasto di sblocco
5
Copertura della spazzola di carbone
6
Impugnatura supplementare
7
Scatola di protezione
8
Leva di tensione
9
Naso di codifica
10
Vite di aggiustaggio
11
Tasto di arresto del mandrino
12
Filettatura (3 x) per l’impugnatura supplementare
Nel presente manuale di istruzioni per l’uso vengono utilizzati i seguenti pittogrammi / simboli:
Leggere il manuale di istruzioni per l’uso!
W
Watt (potenza attiva)
Rispettare le avvertenze e le indicazioni per la
sicurezza!
Attrezzo elettrico della classe di protezione II,
isolamento doppio di protezione
Attenzione, rischio di scossa elettrica! Tensione
elettrica pericolosa – pericolo di morte!
Indossare occhiali protettivi, protezioni per
l’udito, mascherina antipolvere e guanti protettivi.
Pericolo di esplosione!
Tenere lontani i bambini e altre persone durante
l’uso dell’elettroutensile.
Pericolo d’incendio!
Tenere l’apparecchio al riparo da pioggia o umi-
dità. La penetrazione di acqua nell’apparecchio
elettrico aumenta il rischio di scossa elettrica.
V
~
Volt (tensione alternata)
I danni all’apparecchio, al cavo o alla spina
com-portano il pericolo di morte a causa di
scossa elettrica. Controllare regolarmente le con-
dizioni dell’apparecchio, del cavo e della spina.
n
0
N° di giri a vuoto
Smaltire l’imballaggio dell’apparecchio in modo
ecocompatibile
Introduzione

19 IT/MT
13
Dado tenditore
14
Morsetto di registrazione
15
Flangia di inserimento
16
Scanalatura di codifica
17
Chiave di tensione
18
Mola per sgrossare*
19
Mola per tranciare il metallo*
20
Mola per tranciare la pietra*
* non compresi nella fornitura
Q
Volume della fornitura
1 smerigliatrice angolare PWS 230
1 impugnatura supplementare
1 scatola di protezione
1 chiave di tensione
1 manuale di Istruzioni per l’uso
1 fascicolo „Garanzia e servizio di assistenza“
Q
Dati tecnici
Tensione nominale: 230 V
~
50 Hz
Potenza nominale: 2000 W
Velocità nominale: n
0
6500 min
-1
Mola: Ø 230 mm
Morsetto di registrazione: M14 / Filettatura
Tipo di protezione: II /
Utilizzare un dispositivo di
protezione auricolare!
Informazioni relative a
rumore e vibrazioni:
Livello di pressione acustica con filtro di
ponderazione A rilevato.
Livello di pressione acustica:
90 dB (A)
Livello di potenza sonora: 103 dB (A)
Accelerazione rilevata, tipica.
Vibrazione mano-braccio: < 2,5 m / s
2
Valori misurati trasmessi secondo EN 50144.
Q
Sicurezza
Indicazioni di sicurezza
J Attenzione! Utilizzando apparecchi elettrici,
devono essere osservate tutte le disposizioni di
sicurezza a protezione dai rischi di scossa elet-
trica, di lesione o di incendi. Tutte le indicazioni
fornite devono essere lette con attenzione e ri-
spettate. Eventuali errori nell’osservanza delle
indicazioni di seguito riportate possono provo-
care scosse elettriche, incendi e / o gravi lesioni.
Q
Sicurezza dell’area di lavoro
J Mantenere l’area di lavoro pulita e sgombra.
Fare in modo che essa sia bene illuminata. Il
disordine o una cattiva illuminazione delle
aree di lavoro possono provocare incidenti.
J
Pericolo di esplosione! Non uti-
lizzare l’apparecchio in un ambiente
a rischio di esplosione, nel quale si
trovino liquidi, gas o polveri infiammabili. I di-
spositivi elettrici generano infatti scintille, le
quali possono innescare la polvere o i vapori.
J
Durante l’utilizzo del dispositivo elet-
trico tenere lontani bambini e persone
estranee. In caso di distrazione potre-
ste perdere il controllo dell’apparecchio.
Q
Sicurezza elettrica
Evitare il pericolo di morte a
seguito di scossa elettrica:
J La spina di connessione dell’apparecchio deve
essere adatto alla presa elettrica nella quale
essa viene inserita. In nessun caso l’adattatore
Introduzione / Sicurezza

20 IT/MT
deve essere modificato. Non utilizzare spine
con apparecchi messi a terra. Spine non modi-
ficate e prese adatte riducono il rischio di una
scossa elettrica.
J Evitare il contatto del corpo con superfici messe
a terra, quali ad esempio quelle di tubi, calori-
feri, cucine economiche e frigoriferi. Sussiste un
elevato rischio di scossa elettrica, qualora il
Vostro corpo fosse messo a terra.
J
Mantenere l’apparecchio lontano da
pioggia o umidità. La penetrazione
di acqua in un apparecchio elettrico
accresce il rischio di scossa elettrica.
J Non utilizzare il cavo in modo non conforme,
cioè per tirare l’apparecchio, per appenderlo
o per estrarre la spina dalla presa elettrica.
Tenere il cavo lontano da calore, olio, spigoli
acuti o di parti in movimento dell’apparecchio.
Cavi danneggiati o attorcigliati accrescono il
rischio di scossa elettrica.
J
Un apparecchio, un cavo di alimen-
tazione o una spina danneggiati
posso
no rappresentare un pericolo di
morte
attraverso una scossa elettrica. Controllare
regolarmente lo stato dell’apparecchio, del cavo
di alimentazione e della spina.
J In caso di lavori all’aperto utilizzare solamente
prolunghe ammesse anche per un loro utilizzo
all‘aperto. L’utilizzo di una tale prolunga riduce
il rischio di scossa elettrica.
J Impugnare l’apparecchio solamente per mezzo
di impugnature isolate, nel caso in cui l’appa-
recchio incontri un cavo nascosto o il cavo di
alimentazione dell’apparecchio medesimo.
J Il contatto con un cavo in tensione può mettere
in tensione gli elementi metallici dell’apparecchio
e determinare una scossa elettrica.
J
Avvertimento!
Pericolo di esplosione!
Utilizzare un apparecchio di ricerca
adatto al fine di rintracciare l’eventuale presen-
za di cavi di alimentazione nascosti, oppure
chiedere l’intervento della compagnia locale di
fornitura dei servizi suddetti.
Il contatto con condutture elettriche può deter-
minare lo scoppio di un incendio o una scossa
elettrica. Danni provocati ad una conduttura
del gas può determinare esplosioni.
La penetrazione in una conduttura dell’acqua
può determinare danni alle cose o provocare
una scossa elettrica.
J Non riavviare apparecchi con pezzi danneg-
giati. In caso di pericolo estrarre subito il cavo
di alimentazione.
J Avvertimento! – Non aprire mai l‘apparecchio.
Fare eseguire lavori di riparazione o di sostitu-
zione di pezzi solamente dal personale del
centro di assistenza o da elettricisti qualificati.
Q
Sicurezza delle persone
J Fare sempre estrema attenzione a ciò che si fa
e accostarsi al lavoro con il dispositivo elettrico
sempre in modo cosciente. Non utilizzare l’ap-
parecchio quando si è stanchi o sotto l’influsso
di droghe, alcol o medicinali. Un solo attimo di
disattenzione nell’utilizzo dell’apparecchio può
provocare serie lesioni.
J
Indossare sempre l’equipaggiamento
di protezione personale e gli occhiali
protettivi. Indossando l’equipaggia-
mento di protezione personale, quale una ma-
schera antipolvere, scarpe di sicurezza anti-
sdrucciolevoli, un casco di protezione o una
protezione auricolare, a seconda del tipo e
dell’utilizzo dell’apparecchiatura elettrica,
riduce il rischio di lesioni.
J In caso di utilizzo all’aperto, si raccomanda
l’uso di guanti in gomma e calzature dalla suo-
la antiscivolo.
J Assicurarsi che l’interruttore si trovi in posizione
“OFF” prima di inserire la spina nella presa
elettrica. L’avere in mano l’apparecchio con il
dito posto trovasse sull’interruttore ON / OFF o
l’avere l’apparecchio è già inserito quando si
infila la spina nella presa di alimentazione
elettrica può provocare incidenti.
J Prima di avviare l’apparecchio, rimuovere il
dispositivo di regolazione o la chiave per dadi.
Un utensile o una chiave che si trovi in una
parte di apparecchio in rotazione può provo-
care lesioni.
J Non sopravvalutarsi mai. Assicurarsi di essere
Sicurezza

21 IT/MT
in una posizione eretta sicura e mantenere in
ogni istante l’equilibrio. In questo modo è pos-
sibile controllare l’apparecchio in eventuali si-
tuazioni improvvise.
J Indossare un abbigliamento appropriato. Non
indossare un abbigliamento largo o gioielli.
Mantenere capelli, abbigliamento e guanti lon-
tano da parti in movimento. Abbigliamento
sciolto, gioielli o capelli lunghi possono essere
trascinati da parti in movimento.
J Si prega di utilizzare dei dispositivi aspirapolvere
oppure di raccolta, se questi possono essere
montati. Vi preghiamo di accertarVi che gli ap-
parecchi aspirapolvere devono essere partico-
larmente adatti per questo tipo di impiego.
L’uso corretto di questi attrezzi evita i pericoli
dovuti alla formazione di polvere.
Durante l’utilizzo di apparecchi elettrici, dotati
di un sacchetto per la polvere o di un dispositivo
aspirapolvere o che possono essere collegati
al relativo apparecchio, sussiste pericolo d’in-
cendio! In condizioni sfavorevoli, come ad
esempio la presenza di scintille nella smeriglia-
tura di metalli o resti metallici nel legno, la pol-
vere di legno nel sacchetto raccogli-polvere
(oppure nel sacchetto del filtro dell’aspirapol-
vere) può bruciare da sola. Ciò può succedere
in particolare quando la polvere di legno è
mescolata a resti di vernice o ad altre sostanze
chimiche ed il prodotto da smerigliare si surri-
scalda, in seguito ad una lunga lavorazione. Vi
preghiamo quindi di evitare assolutamente un
surriscaldamento del prodotto da smerigliare e
svuotare sempre nelle pause il sacchetto del fil-
tro e della polvere .
J Non lasciare che altre persone entrino in con-
tatto con l’attrezzo elettrico oppure con il cavo
di prolunga.
Q
Utilizzo attento di
dispositivi elettrici
J Non sovraccaricare l’apparecchio. Per un de-
terminato lavoro utilizzare sempre il dispositivo
elettrico a ciò appropriato. Con il dispositivo
elettrico appropriato si lavora meglio e con
maggiore sicurezza nello specifico ambito di
utilizzo.
J
Non utilizzare dispositivi elettrici il cui interruttore
sia difettoso.
Un dispositivo elettrico che non si
può più accendere e spegnere rappresenta un
pericolo, e deve essere riparato.
J Estrarre la spina dalla presa elettrica prima di
eseguire regolazioni all‘apparecchio, di sostitu-
ire di accessori o di riporre l’apparecchio.
Queste misure di prudenza impediscono l’avvio
involontario dell’apparecchio.
J Mantenere il dispositivo elettrico non utilizzato
fuori dalla portata di bambini. Non fare utiliz-
zare l’apparecchio da persone che non lo
conoscano o del quale non abbiano letto le
istruzioni d’uso. I dispositivi elettrici sono peri-
colosi se utilizzati da persone inesperte.
J Avere cura dell’apparecchio. Controllare se
parti mobili dell’apparecchio funzionano per-
fettamente e non si bloccano, se parti di esso
sono rotte o danneggiate, che la funzionalità
dell’apparecchio non sia messa a rischio.
Fare
riparare le parti danneggiate prima di utilizzare
di nuovo l’apparecchio.
Molti incidenti sono
provocati dal fatto che i dispositivi elettrici non
vengono sottoposti ad una corretta manuten-
zione.
J Utilizzare dispositivi elettrici, accessori, i dispo-
sitivi da inserire ecc, in conformità alle presenti
istruzioni e nel modo descritto per questo parti-
colare tipologia di apparecchio. In questo sen-
so, tenere presente le condizioni di lavoro e
l’attività da eseguire. L’utilizzo di dispositivi
elettrici per scopi diversi da quelli previsti può
provocare situazioni di pericolo.
Precauzioni specifiche per
l’uso dell’attrezzo
J Assicurarsi che l’apparecchio sia spento, prima
di infilare la spina nella presa di corrente.
J Se si lavora all’aperto, collegare l’apparecchio
all’interruttore di protezione della corrente di
dispersione (FI)-con un massimo di 30 mA di
corrente di scatto.
J Utilizzare esclusivamente un cavo di prolunga
Sicurezza

22 IT/MT
adatto per l’utilizzo all’aperto.
J Assicurare il pezzo da lavorare. Utilizzare i
dispositivi tensori / morsa a vite per fissare il
pezzo da lavorare. In questo modo è fissato
meglio, rispetto a tenerlo solo in mano.
J Non fissare in nessun caso l’apparecchio ad
una morsa a vite.
J Non appoggiare in nessun caso le mani accanto
o davanti all’apparecchio nella superficie da
lavorare, poiché in caso di scivolamento, vi è
un serio pericolo di ferimento.
J In caso di pericolo, estrarre immediatamente la
spina dalla presa di corrente.
m Avvertimento! Pericolo di ferimento!
In caso di black-out elettrico o quando la spina
viene estratta dalla presa, sbloccare immedia-
tamente l’interruttore ON- / OFF. Portarlo nella
posizione OFF. Ciò evita una riaccensione in-
controllata dell’apparecchio che potrebbe ri-
sultare molto pericolosa.
J Non utilizzare l’apparecchio con cavo di rete
danneggiato.
J Non toccare il cavo di rete se viene danneg-
giato o rotto durante il funzionamento dell’ap-
parecchio. Estrarre subito la spina dalla presa
di corrente e lasciar riparare l’apparecchio
esclusivamente da un esperto o dall’apposito
servizio di assistenza.
J Non utilizzare l’apparecchio quando è umido
o in ambiente umido.
J Se si lavora all’aperto, collegare l’apparecchio
all’interruttore di protezione della corrente di
dispersione (FI)-con un massimo di 30 mA di
corrente di scatto. Utilizzare esclusivamente un
cavo di prolunga adatto per l’utilizzo all’aperto.
J Non trasportare l’apparecchio supportandolo
con il cavo di rete e non appendere l’apparec-
chio al cavo di rete. Allontanare il cavo di rete
sempre dall’apparecchio indietro.
J Dopo l’utilizzo, le mole devono essere conser-
vate e maneggiate con cura, secondo le indi-
cazioni del produttore.
J Assicurarsi che le mole siano installate secondo
le indicazioni del produttore.
J Assicurarsi che vengano usati degli strati inter-
medi, se sono messi a disposizione e sono ri-
chiesti insieme alle mole.
J Prima di utilizzare l’apparecchio, assicurarsi
che la mola sia installata e fissata bene. Lascia-
re funzionare l’attrezzo a vuoto per almeno
30 secondi in posizione sicura e fermarlo subito,
se si presentano delle oscillazioni eccessive
oppure se vengono rilevati dei difetti. Se ciò si
verifica, esaminare la macchina per scoprire la
causa dell’anomalia.
J Se viene fornita una scatola di protezione in-
sieme all’apparecchio elettrico, non utilizzare
mai l’apparecchio senza di questa.
J Assicurarsi che la mola con inserto filettato sia
dotata di filettatura lunga a sufficienza per re-
gistrare la lunghezza del mandrino.
J Non lavorare in ambienti nascosti, dove po-
trebbero esservi condutture elettriche, del gas
o idriche. Utilizzare degli appositi rivelatori op-
pure fare richiesta all’azienda di fornitura locale.
Il contatto con condutture elettriche può causare
un incendio o scosse elettriche.
Il danneggiamento di una conduttura del gas
può causare un’esplosione. La penetrazione in
una conduttura dell’acqua può comportare
danni materiali o scosse elettriche.
Pericolo d’incendio dovuto a fuga di
scintille!
Se si tranciano / smerigliano dei metalli vi è for-
mazione di scintille. Accertarsi quindi assoluta-
mente che nessuna persona si trovi nella zona
di pericolo e che non si trovi nessun materiale
infiammabile nei pressi.
m Avvertimento! Vapori nocivi! L’attività
con presenza di polveri nocive / velenose rap-
presenta un pericolo per l’operatore o per altre
persone che si trovano nelle vicinanze.
J
Indossare delle protezioni per l’udito,
degli occhiali protettivi, una maschera
protettiva contro la polvere e dei
guanti protettivi.
J Durante la lavorazione del legno, del metallo
e di sostanze da cave di pietra, per i quali si
formano delle polveri nocive alla salute, colle-
gare l’apparecchio ad un dispositivo aspirapol-
vere esterno.
J Collegare quindi anche per la lavorazione della
pietra un dispositivo appropriato aspirapolvere.
Il dispositivo aspirapolvere deve essere appro-
Sicurezza

23 IT/MT
priato all’aspirazione della polvere di pietra.
m Avvertimento! Pericolo di scossa elettrica
dato dalla polvere metallica! Nella lavorazio-
ne del metallo può formarsi una polvere con-
duttrice all’interno dell’apparecchio. In questi
casi, ripulire spesso l’alloggiamento del motore
con aria compressa, lavorare con dispositivo
aspira-polvere e far funzionare l’apparecchio
con interruttore di protezione FI - (corrente di
scatto 30 mA).
J Assicurarsi di disporre di un’aerazione suffi-
ciente durante la lavorazione di plastiche, co-
lori, vernici, ecc.
J impregnare i materiali o le superfici da lavorare
non con liquidi contenenti solventi. Attraverso il
riscaldamento di rifilature possono formarsi dei
vapori dannosi alla salute / velenosi.
J indossare un abbigliamento aderente al corpo
e, in caso di capelli lunghi, indossare un copri-
capo.
J Per ragioni di sicurezza, questo apparecchio
può essere utilizzato solo con un’impugnatura
supplementare.
J La scatola di protezione regolabile deve essere
sempre montata con le mole per sgrossare o
per tranciare.
J Utilizzare sempre l’aspirapolvere, in caso di
carico eccessivo di polvere. Utilizzare esclusi-
vamente dei dispositivi speciali ed appropriati
di aspirazione della polvere.
J Utilizzare esclusivamente degli attrezzi appro-
priati allo scopo. Verificare che la velocità indi-
cata sulla mola corrisponda la velocità nomi-
nale dell’apparecchio.
J Assicurarsi che la misura della mola sia adatta
alla molatrice.
J Fare attenzione alla direzione dei giri e tenere
l’apparecchio sempre in modo che le scintille e
la polvere di molatura non siano rivolti verso il
corpo.
J Assicurarsi che le misure della mola corrispon-
dano all’apparecchio e che la mola si adatti
senza problemi alla flangia di inserimento.
J Evitare la molatura di colori contenenti piombo
o altre sostanze nocive.
J Il materiale contenente amianto non deve esse-
re lavorato. L’amianto è una sostanza cancero-
gena.
J Utilizzare l’apparecchio esclusivamente per
tranciatura e molatura asciutte.
J Controllare la mola prima di ogni utilizzo; non
utilizzare strumenti rotti, spezzati oppure dan-
neggiati in altri modi.
J Assicurarsi che le mole siano installate secondo
le indicazioni del produttore.
J Evitare il contatto con la mola di tranciatura e
con quella di sgrossatura in movimento.
J Utilizzare l’apparecchio solo con la mola di
tranciatura o quella di sgrossatura installata.
J Utilizzare l’apparecchio solo per l’uso consen-
tito ed esclusivamente con i pezzi e gli acces-
sori originali.
J Utilizzare solo delle mole, la cui velocità ammes-
sa è almeno pari alla velocità a vuoto dell’ap-
parecchio. Le mole, che si muovono più veloce-
mente di quanto ammesso, possono rovinarsi.
J Assicurarsi che la misura della mola sia adatta
alla molatrice.
La mola deve adattarsi all’albero del mandrino
di inserimento senza gioco. Non utilizzare ri-
duttori o adapter.
J Non applicare nessuna pressione laterale alla
mola di tranciatura.
J Non utilizzare nessuna mola di tranciatura per
smerigliare lateralmente.
J Controllare le mole prima di utilizzarle. La
mola deve essere montata senza problemi e
potersi muovere liberamente. Eseguire un fun-
zionamento di prova di almeno 30 secondi
senza sollecitazione. Non utilizzare delle mole
danneggiate, non circolari o che vibrano.
J Maneggiare con cura i propri attrezzi. Mante-
nere le mole affilate e pulite per poter lavorare
meglio ed in modo più sicuro.
Seguire le indicazioni per la lubrificazione e la
sostituzione degli attrezzi
J Per l’attività con accessori esterni, come ad es.
ferraccia / spazzole circolari / spazzole a disco /
mola a scomparti, indossare una protezione
per le mani (non compresa nella fornitura).
J Tenere l’apparecchio acceso verso il pezzo da
lavorare. A conclusione del lavoro, allontanare
l’apparecchio dal pezzo lavorato e poi spegnerlo.
J Evitare una posizione corporea inusuale.
Durante l’utilizzo, tenere sempre l’apparecchio
Sicurezza

24 IT/MT
ben fermo con entrambe le mani (vedi anche
fig. D). Accertarsi di avere una posizione ben
fissa.
J L’impugnatura supplementare deve essere
sempre montata per tutti i lavori con l’apparec-
chio.
J Fare attenzione al senso di rotazione della
mola. Tenere l’apparecchio sempre in modo
che le scintille e la polvere di molatura non sia-
no rivolti verso il corpo.
J Lasciare che l’apparecchio spento giunga al
completo arresto prima di deporlo.
La mola continua a girare, anche dopo che
l’apparecchio è stato spento.
J Evitare che la mola di tranciatura si blocchi e
che porti ad un brusco movimento di reazione
nell’apparecchio. In caso di pericolo, estrarre
immediatamente la spina dalla presa di corrente.
Mantenerlo fermo fino a che non si è comple-
tamente arrestato. Estrarre poi la mola di tran-
ciatura dall’attrezzo.
J Non accendere l’apparecchio fintanto che la
mola di tranciatura si trova nell’attrezzo.
J Assicurarsi che, durante i lavori ad elevata for-
mazione di polvere, le fessure di aerazione sia-
no libere. Se dovesse essere necessario rimuo-
vere la polvere, staccare prima l’apparecchio
dalla rete di corrente (non utilizzare oggetti
metallici) ed evitare le parti danneggiate all’in-
terno.
J Gli apparecchi inutilizzati devono essere ripo-
sti in luogo sicuro, sopraelevato e chiuso, al di
fuori della portata dei bambini.
J Maneggiare l’apparecchio con cautela e con
cura.
Proteggere l’apparecchio dalle scosse e dagli
urti.
J Controllare periodicamente i collegamenti
dell’apparecchio e farli sostituire da un tecnico,
se danneggiati. Controllare periodicamente i
cavi di prolunga e farli sostituire da un tecnico,
se danneggiati. Mantenere le impugnature
asciutte, pulite e prive di olio e grasso.
J Verificare che l’apparecchio non presenti danni.
Prima di ogni utilizzo successivo, i dispositivi di
sicurezza o le parti leggermente danneggiate
devono essere testati nella loro funzionalità
senza problemi e consona allo scopo. Verficare
che le parti in movimento funzionino senza
problemi e che non restino incastrate, nonché
che non siano danneggiate. Tutte le componenti
devono essere montate correttamente e soddi-
sfare tutte le condizioni per assicurare il funzio-
namento senza problemi dell’apparecchio. I di-
spositivi di sicurezza e le altre parti devono
essere riparate e sostituite professionalmente
da tecnici esperti, a meno che non sia riportato
diversamente nelle istruzioni per l’uso. Interruttori
danneggiati devono essere sostituiti in un’officina
specializzata. Non utilizzare apparecchi nei
quali l’interruttore non può essere acceso o spento.
Indicazioni per la statica
Crepe, ad es. nelle pareti portanti:
crepe nelle pareti poratnti sono soggette alla norma
DIN 1053 Parte 1 o a normative nazionali speciali.
Osservare assolutamente tali disposizioni. Prima di
iniziare il lavoro, chiedere consiglio allo specialista
dell’analisi degli sforzi, agli architetti o al direttore
dei lavori responsabile.
Q
Indicazioni relative alla
lavorazione
Nota! E‘ possibile utilizzare solamente abrasivi
adatti alle modalità d’uso suggerite. In caso contra-
rio essi possono rompersi, essere danneggiati e
provocare lesioni.
Sgrossatura
Non utilizzare in nessun caso
mole da taglio per eseguire
sgrossatura!
J Movimentare la smerigliatrice angolare eserci-
tando una moderata pressione sul pezzo da
lavorare in avanti ed indietro.
J
In caso di lavorazione su materiale soffice, gui-
dare la mola di sgrossatura con un angolo piatto,
in caso di lavorazione di materiale duro con un
angolo un poco più spiovente.
Sicurezza

25 IT/MT
Taglio
Non utilizzare in nessun caso
mole di sgrossatura per
eseguire tagli!
m Pericolo! Movimentare l’appa-
recchio attraverso il pezzo sempre
con una rotazione in senso oppo-
sto rispetto alla posizione in
cui si trova l’operatore. In caso di utilizzo con
una rotazione in senso contrario rispetto a quel-
la suggerita, sussiste il pericolo di contraccolpo.
L’apparecchio può essere premuto dal taglio.
J Movimentare l’apparecchio, sempre in stato di
funzionamento, attraverso il pezzo. Una volta
terminata la lavorazione, sollevare l’apparec-
chio dal pezzo e solo in questa fase spegnerlo.
J Durante la lavorazione tenere l’apparecchio
con entrambe le mani (vedi anche Fig. D). Assi-
curarsi di mantenere sempre una posizione ritta
e sicura.
J Per un migliore molatura movimentare l’appa-
recchio avanti e indietro sul pezzo in modo uni-
forme mantenendo in un angolo di 15°-30°
(tra mola e pezzo).
J In caso di lavorazione di superfici oblique l’ap-
parecchio non deve essere premuto sul pezzo
con grande forza. Qualora il numero di giri
diminuisse fortemente, è necessario ridurre la
forza di pressione, al fine di garantire una la-
vorazione sicura ed efficace. Qualora l’appa-
recchio venisse improvvisamente frenato o si
bloccasse, esso deve essere subito scollegato
dalla rete di alimentazione elettrica.
J
Taglio: Lavorare con avanzamento non eccessi-
vamente veloce e non angolare la mola di taglio.
J Durante la lavorazione, le mole di sgrossatura
e di taglio diventano molto calde – prima di
toccarle lasciare che si raffreddino completa-
mente.
J Non utilizzare mai l’apparecchio per scopi
diversi da quelli per i quali è stato previsto.
J
Fare sempre attenzione a che l’apparecchio sia
spento prima di inserire il cavo di alimentazione
nella spina.
J In caso di pericolo, estrarre subito la spina dalla
presa elettrica. Fare in modo che l’apparecchio
e la spina di rete siano facilmente accessibili,
ed in caso di emergenza, possano essere rag-
giunti senza problemi.
J Estrarre sempre la spina dalla presa elettrica
nei momenti di pausa del lavoro, prima
dell’esecuzione di qualsiasi intervento sull’ap-
parecchio, ed in caso di mancato utilizzo.
L’apparecchio deve essere sempre pulito,
asciutto e privo di tracce di olio o di grasso.
J
Fare sempre estrema attenzione a ciò che si fa
e accostarsi al lavoro sempre in modo cosciente.
I
n nessun caso utilizzare l’apparecchio quando
non si è concentrati o non vi sentite bene.
Q
Apparecchi / accessori originali
J Utilizzare esclusivamente apparecchi / accessori
indicati nelle Istruzioni per l’uso. L’utilizzo di
apparecchi / accessori diversi da quelli indicati
nelle Istruzioni per l’uso può comportare rischio
di ferimento.
Q
Messa in servizio
Fare attenzione alla tensione nominale. La tensione
di rete della fonte di corrente deve corrispondere a
quella indicata nella targhetta dell’apparecchio.
Gli apparecchi che portano il contrassegno 230 V
possono funzionare anche con 220 V.
Q
Montare la scatola di
protezione con chiusura rapida
J Prima di qualsiasi attività all’apparecchio,
estrarre sempre la spina dalla presa di corrente.
m Pericolo di ferimento! Utilizzare la smeri-
gliatrice angolare sempre con la scatola di
protezione. La scatola di protezione deve esse-
re instalalta in modo sicuro alla smerigliatrice
angolare. Installarla in modo che sia garantito
un elevato livello di sicurezza, ossia che la parte
più piccola della mola sia rivolta verso l’opera-
tore. La scatola di protezione deve proteggere
l’operatore dai frammenti e dall’attrezzo smeri-
gliatore.
Sicurezza / Messa in servizio

26 IT/MT
j Aprire la leva di tensione
8
.
j Inserire la scatola di protezione
7
con il naso
di codifica
9
nella scanalatura di codiifca
16
.
j Ruotare la scatola di protezione
7
nella posi-
zione richiesta (posizione di lavoro). La parte
chiusa della scatola di protezione
7
deve es-
sere sempre rivolta verso l’operatore.
j Chiudere la leva di tensione
8
al gancio della
scatola di protezione
7
.
Se necessario, la tensione della chiusura può
essere modificata rilasciando o tirando la vite
di aggiustaggio
10
.
Assicurarsi che la scatola di protezione
7
sia
fissata bene al collo del mandrino.
Q
Montare l’impugnatura
supplementare
m Attenzione! Per ragioni di sicurezza, questo
apparecchio può essere utilizzato solo con
l’impugnatura supplementare
6
.
J Prima di qualsiasi attività all’apparecchio,
estrarre sempre la spina dalla presa di corrente.
j Avvitare l’impugnatura supplementare
6
a se-
conda della tipologia di lavoro verso sinistra,
destra o verso l’alto o alla testa dell’apparec-
chio.
Q
Montare / sostituire la mola di
tranciatura e di sgrossatura
Fare attenzione alle dimensioni delle mole di mola
di tranciatura e di sgrossatura. Il diametro del foro
deve adattarsi alla flangia di inserimento senza
gioco. Non utilizzare nessun riduttore o adapter.
J Prima di qualsiasi attività all’apparecchio,
estrarre sempre la spina dalla presa di corrente.
J Esaminare sempre la mola di tranciatura o di
sgrossatura. Non deve essere né danneggiata
né umida e nemmeno presentare delle crepe.
m Pericolo di ustione! indossare sempre dei
guanti protettivi nella sostituzione della mola di
tranciatura o di sgrossatura. La mola di trancia-
tura o di sgrossatura si surriscalda durante
l’uso. Non toccarla prima che si sia completa-
mente raffreddata.
j Indicazione: utilizzare esclusivamente delle
mole pulite.
j Utilizzare solo delle mole, la cui velocità am-
messa è almeno pari alla velocità a vuoto
dell’apparecchio.
j Attivare il tasto d’arresto del mandrino
11
solo
a mandrino di inserimento completamente fer-
mo
14
.
j Attivare il tasto d’arresto del mandrino
11
per
bloccare il meccanismo.
j Svitare il dado tenditore
13
utilizzando la chia-
ve di tensione
17
fig. C.
j Inserire la mola di tranciatura o di sgrossatura
con la parte scritta verso l’apparecchio, sul
mandrino di inserimento
15
.
j Inserire poi il dado tenditore
13
con la parte
sollevata verso l’alto, sul mandrino di inseri-
mento
14
.
j Attivare il tasto d’arresto del mandrino
11
per
bloccare il meccanismo.
j Serrare bene il dado tenditore
13
utilizzando
la chiave di tensione
17
fig. C.
j Indicazione: se la mola ruota in modo anor-
male, dopo la sua sostituzione, tale mola deve
essere subito risostituita.
j Lasciare correre a vuoto l’apparecchio per
30 secondi, dopo la sostituzione della mola.
Accertarsi che non vi siano rumori anormali o
formazione di scintille. Verificare che tutte le
parti di fissaggio siano installate correttamente.
j Accertarsi che la freccia di direzione sulla
mola di tranciatura o di sgrossatura (anche
mola di tranciatura diamante ) ed il senso di
rotazione dell’apparecchio (freccia di direzio-
ne sulla testa dell’apparecchio) corrispondano.
Q
Utilizzo
Q
Accensione e spegnimento
Indicazione: accendere sempre l’apparecchio
prima del contatto con il materiale e poi portarlo
sul pezzo da lavorare.
Messa in servizio / Utilizzo

27 IT/MT
Accendere l’apparecchio
j attivare il blocco di accensione
3
.
premere poi l’interruttore ON / OFF
2
.
Spegnere l’apparecchio
j rilasciare l’interruttore ON / OFF
2
.
Accendere il funzionamento continuo
j attivare il blocco di accensione
3
e tenerlo
premuto.
Premere l’interruttore ON / OFF
2
nella posi-
zione del blocco di accensione, fino a quando
questo si arresta.
Spegnere il funzionamento continuo
j Premere l’interruttore ON / OFF
2
e poi rila-
sciarlo.
Girare l’impugnatura dell’apparecchio
j Prima di qualsiasi attività all’apparecchio,
estrarre sempre la spina dalla presa di corrente.
j L’impugnatura dell’apparecchio
1
può essere
ruotata di 90° a destra o a sinistra.
j Così l’interruttore ON / OFF
2
può essere po-
sto in una posizione ottimale, a seconda della
tipologia di lavoro.
j Premere il tasto di sblocco
4
e ruotare l’impu-
gnatura dell’apparecchio
1
verso sinistra o
verso destra.
j Lasciare innestarsi l’impugnatura dell’apparec-
chio
1
.
Q
Manutenzione e pulizia
J Prima di eseguire qualsiasi intervento sull’ap-
parecchio estrarre la spina dalla presa!
J Non utilizzare alcun oggetto aguzzo per la
pulizia dell‘apparecchio. Nessun liquido deve
penetrare fino all’interno dell’apparecchio.
j Fare eseguire la sostituzione delle spazzole in
carbonio solamente dal personale del centro
di assistenza o da un’officina specializzata ri-
conosciuta.
Altrimenti, l’apparecchio non neces-
sita di manutenzione.
j pulire l’apparecchio con regolarità, preferibil-
mente subito dopo la fine del lavoro.
j Pulire l’alloggiamento con un panno asciutto –
in nessun caso utilizzare benzina, solventi o
detergenti che possano corrodere la materia
plastica.
j Per una pulizia profonda dell’apparecchio è
necessario utilizzare un aspirapolvere.
j Le aperture dell’aria devono sempre essere
libere.
j
Rimuovere con un pennello la polvere di molatu-
ra che dovesse essersi eventualmente attaccata.
Q
Smaltimento
L’imballaggio è composto da materiali
ecologici, che possono essere smaltiti
presso i siti di riciclaggio locali.
Non introdurre attrezzi elettrici
nei rifiuti di casa!
In conformità alla direttiva europea 2002 / 96 / EG
sui rifiuti di apparecchiature elettriche ed elettroniche
e relativa trasposizione nel diritto nazionale, gli
utensili elettrici usati devono essere raccolti separa-
tamente e riciclati in maniera compatibile con l’am-
biente.
Informazioni sulle possibilità di smaltimento di ap-
parecchi giunti al termine della loro vita utile sono
disponibili presso le amministrazioni comunali.
Utilizzo / Manutenzione e pulizia / Smaltimento

28 IT/MT
Informazioni
Q
Informazioni
Q
Assistenza
Il centro di assistenza competente per ciascun pae-
se è indicato nei documenti di garanzia.
J Affidare la riparazione dell’apparecchio esclu-
sivamente a personale specializzato e qualifi-
cato e con pezzi di ricambio originali, a garan-
zia della sicurezza dell’apparecchio.
J La sostituzione della spina o del cavo di ali-
mentazione deve essere eseguita esclusiva-
mente dal fabbricante dell’apparecchio o dal
relativo servizio clienti, a garanzia della sicu-
rezza dell’apparecchio.
Q
Dichiarazione di conformità /
Fabbricante
L’azienda Kompernaß GmbH, Burgstr. 21,
44867 Bochum, Germania, dichiara la conformità
del presente prodotto alle seguenti direttive UE:
Direttiva macchine (98 / 37 / EC)
Direttiva CE sulla bassa tensione
(2006 / 95 / EC)
Compatibilità elettromagnetica
(2004 / 108 / EC)
Tipo / Denominazione dell’apparecchio:
Smerigliatrice angolare PWS 230
Bochum, 31.10.2007
Hans Kompernaß
- Amministratore -
Si riservano modifiche tecniche ai fini di ulteriori sviluppi.

29 GB/MT
Table of Content
Introduction
Proper use .....................................................................................................................Page 30
Features and equipment ...............................................................................................Page 30
Included items ...............................................................................................................Page 31
Technical information ...................................................................................................Page 31
Safety
Safety advice ................................................................................................................Page 31
Workplace safety .........................................................................................................Page 31
Electrical safety .............................................................................................................Page 31
Personal safety ..............................................................................................................Page 32
Careful handling and use of electrical power tools ..................................................Page 33
Safety advice relating specifically to this device .......................................................Page 33
Advice on use ...............................................................................................................Page 36
Original accessories /attachments ..............................................................................Page 36
Preparing for use
Attaching the disc guard cover using the quick-release fastener .............................Page 36
Attaching the auxiliary handle ....................................................................................Page 37
Attaching and replacing roughing / grinding / cutting discs .....................................Page 37
Operation
Switching on and off ....................................................................................................Page 37
Maintenance and cleaning ........................................................................Page 38
Disposal ......................................................................................................................Page 38
Information
Service centre ...............................................................................................................Page 38
Declaration of Conformity / Manufacturer ................................................................Page 39

30 GB/MT
Introduction
Angle grinder PWS 230
Q
Introduction
Please make sure you familiarise yourself
fully with the way the device works
before you use it for the first time and
that you understand how to handle electrical pow-
er tools correctly. To help you do this please read
the accompanying operating instructions. Keep
these instructions in a safe place. If you pass the
device on to anyone else, please ensure that you
also pass on all the documentation.
Q
Proper use
The device is intended for the dry cutting, rough
grinding and brushing of metal and stone. Any other
use or modification to the device shall be considered
as improper use and could give rise to considerable
dangers. We will not accept liability for loss or
damage arising from improper use. The device is
not intended for commercial use.
Q
Features and equipment
1
Hand grip (rotatable)
2
ON / OFF switch
3
Safety lock-out
4
Unlocking button
5
Carbon brushes cover
6
Auxiliary handle
7
Disc guard cover
8
Clamping lever
9
Coded projection
10
Adjuster screw
11
Spindle lock button
12
Threaded hole (3 x) for auxiliary handle
13
Clamping nut
14
Mounting spindle
15
Mounting flange
16
Coded groove
17
Spanner
The following pictogrammes / symbols are used in these operating instructions:
Read the operating instructions!
W
Watts (effective power)
Always heed warning labels and
safety instructions!
Protection category II power tool;
double insulated
Caution - Danger of electric shock! Hazardous
voltage – danger to life!
Wear hearing protection, dust protection mask,
protective glasses and protective gloves.
Explosive material!
Keep children and other unauthorised personnel
at a safe distance when using electrical tools.
Risk of fire!
Keep the device away from rain or moisture.
Water entering an electrical device increases the
risk of electric shock.
V
~
Volt (AC)
Damaged appliances, power cables and power
plugs mean potentially fatal risks from electric
shock. Regularly check the condition of the appli-
ance, the power cables and the power plugs.
n
0
Rated idle running speed
Dispose packaging and appliance in an
environmentally-friendly way!

31 GB/MT
Introduction / Safety
18
Roughing / grinding disk*
19
Cutting disc for metal*
20
Cutting disc for masonry*
* not included
Q
Included items
1 Angle grinder PWS 230
1 Auxiliary handle
1 Disc guard cover
1 Spanner
1 Operating instructions
1 Booklet covering “Warranty and service”
Q
Technical information
Rated voltage: 230 V
~
50 Hz
Rated power consumption: 2000 W
No-load speed: n
0
6500 min
-1
Grinding disc: Ø 230 mm
Mounting spindle: M14 / threaded
Protection class: II /
Wear hearing protection!
Noise and vibration data:
Refers to A-weighted sound level.
Sound pressure level: 90 dB (A)
Sound power level: 103 dB (A)
Weighted acceleration, typical.
Hand-arm vibration: < 2.5 m / s
2
Values determined in accordance with EN 50144
Q
Safety
Safety advice
J Attention! In order to protect yourself from the
danger of electric shock, injury or fire when
using electrical power tools, please observe
the following safety precautions. Read and
take note of these instructions and advice be-
fore you use the device. Failure to observe the
instructions and advice given below may result
in electric shock, fire and/or serious injury.
Q
Workplace safety
J
Keep your working area clean and clutter-free.
Ensure that your working area is well lit. Untidy
or poorly lit working areas can lead to accidents.
J Risk of explosion! Do not work
with the device in potentially explo-
sive environments in which there are
inflammable liquids, gases or dusts. Electrical
power tools create sparks, which can ignite
dusts or fumes.
J
Keep children and other people
away while you are operating the
electrical power tool. Distractions
can cause you to lose control of the device.
Q
Electrical safety
To avoid danger to life from
electric shock:
J The mains plug on the device must match the
mains socket. The plug must not be modified in
any way. Do not use an adapter plug with
devices fitted with a protective earth. Unmodi-
fied plugs and matching sockets reduce the risk
of electric shock.
J Avoid touching earthed surfaces such as pipes,
radiators, ovens and refrigerators with any part
of your body. There is an increased risk of elec-
tric shock if your body is earthed.

32 GB/MT
Safety
J
Keep the device away from rain or mois-
ture. Water entering an electrical device
increases the risk of electric shock.
J
Do not use the mains lead for any purpose for
which it was not intended, e.g. to carry the de-
vice, to hang it up or to pull the mains plug out of
the mains socket. Keep the mains lead away from
heat, oil, sharp edges or moving parts of the
device. Damaged or tangled mains leads or plugs
increase the risk of electric shock.
J A damaged device, mains lead or
plug presents a serious danger to life
from electric shock. Frequently check
the condition of the device, mains lead and plug.
J When working outdoors always use extension
cables that are also approved for use outdoors.
The use of an extension cable suitable for out-
door use reduces the risk of electric shock.
J Hold the device only by the insulated handles;
bear in mind that you might cut through a con-
cealed cable or the device’s mains lead.
J Contact with a live wire can cause metal parts
of the device to become live and lead to elec-
tric shock.
J
Warning! Risk of explosion!
Use a suitable detector to locate con-
cealed services supply cables /
pipes or approach your local public utilities
services providers.
Contact with electricity cables can lead to fire
or electric shock. Damaging a gas pipe can
lead to an explosion.
Penetration of a water pipe can lead to property
damage or to electric shock.
J Do not use the device if it has any damaged
parts. If a dangerous situation arises pull out
the mains plug from the socket immediately.
J Warning! - Never open the device.
Always have any repairs carried out or re-
placement parts fitted at the service centre or
by an electrical equipment repair specialist.
Q
Personal safety
J Remain alert at all times and always watch what
you are doing. Work carefully when using an
electrical power tool. Do not use the device if
you cannot concentrate or are tired or under
the influence of drugs, alcohol or medication.
Just one moment of carelessness when using
the device can lead to serious injury.
J
Wear personal protective equipment
and always wear safety glasses. The
wearing of personal protec-
tive equipment such as dust masks, non-slip safe-
ty shoes, protective gloves, safety helmets or ear
protectors, appropriate to the type of electrical
power tool used and work undertaken, reduces
the risk of injury.
J We recommend that you wear rubber gloves
and anti-slip footwear when working outdoors.
J Avoid unintentional operation of the device.
Make sure that the switch is in the “OFF” position
before you insert the mains plug into the sock-
et. Accidents can happen if you carry the de-
vice with your finger on the ON / OFF switch
or you have already switched the device on
before you connect it to the mains.
J Remove any setting tools or spanners before
you switch the device on.
A tool or spanner left attached to a rotating
part of a device can lead to injury.
J Do not overestimate your own abilities. Keep
proper footing and balance at all times. By
doing this you will be in a better position to
control the device in unforeseen circumstances.
J Wear suitable clothing. Do not wear loose cloth-
ing or jewellery. Keep your hair, clothing and
gloves clear of moving parts. If you have long
hair, wear a hair net. Clothing, jewellery or
hair that is loose or hangs from your body,
head or limbs can become trapped in moving
parts.
J Use dust extraction or trapping equipment if
these facilities can be fitted. If you use a vacuum
dust extraction device, make sure that it is spe-
cially designed to be used for this purpose. The
correct use of these devices reduces the hazard
presented by dust.

33 GB/MT
Safety
There is the danger of fire when working with
electrical devices that have a dust bag or can
be connected to a vacuum dust extraction de-
vice. Under certain conditions the wood dust in
the dust extraction bag (or in the vacuum’s filter
bag) can self-ignite, e.g. as a result of flying
sparks generated when machining metals or
metal objects left in wood. This can happen
particularly if the wood dust is mixed with paint
residue or other chemicals and the waste parti-
cles are hot from prolonged machining. There-
fore you must empty the dust collection bag or
filter bag of the vacuum extraction device before
pausing or stopping work and always avoid
overheating the waste particles or the device.
J Do not allow other people to touch the electrical
power tool or the extension lead.
Q
Careful handling and use
of electrical power tools
J Do not overload the device. Always use an
electrical power tool that is intended for the
task you are undertaking. By using the right
electrical power tool for the job you will work
more safely and achieve a better result.
J Do not use an electrical power tool if its switch
is defective. An electrical power tool that can
no longer be switched on and off is dangerous
and must be repaired.
J Pull the mains plug from the socket before you
make any adjustments to the device, change
accessories or when the device is put away.
This precaution is intended to prevent you from
unintentionally starting the device.
J When not in use always ensure that electrical
power tools are kept out of reach of children.
Do not let anyone use the device if he or she is
not familiar with it or has not read the instructions
and advice. Electrical power tools are dangerous
when they are used by inexperienced people.
J Look after the device carefully. Check that
moving parts are working properly and move
freely. Check for any parts that are broken or
damaged enough to detrimentally affect the
functioning of the device. Have damaged parts
repaired before you use the device. Many
accidents have their origins in poorly maintained
electrical power tools.
J Use the electrical power tool, accessories,
inserted tools etc. in accordance with these
instructions and advice, and the stipulations
drawn up for this particular type of device. In
doing this, take into account the working
conditions and the task in hand. The use of
electrical power tools for purposes other than
those intended can lead to dangerous situations.
Safety advice relating
specifically to this device
J Before you insert the mains plug into the socket,
ensure that the device is switched off.
J If you use the device outdoors, always connect
it through a residual current device (RCD) with
a maximum trip current of 30 mA.
J If using an extension lead, always use one that
is approved for outdoor use.
J Securely support the workpiece. Use clamps or
a vice to grip the workpiece firmly. This is much
safer than holding it in your hand.
J Never hold the device itself in a vice.
J Never support yourself by placing your hands
near or in front of the device or the workpiece
surface. A slip can result in injury.
J If a dangerous situation arises, pull the mains
plug immediately out of the mains socket.
m Warning! Danger of injury! Unlock the
ON / OFF switch immediately if a power failure
occurs or the plug is pulled out of the mains
socket. Place the switch in the OFF position.
This is intended to prevent the device restarting
inadvertently and the possible resulting injury.
J Do not operate the device if the mains lead or
mains plug is damaged.
J Do not touch the mains lead if it becomes dam-
aged or cut through while you are using the
device. Pull the plug out of the mains socket im-
mediately and have the device repaired by a
suitably qualified person or at your service centre.
J Do not operate the device if it is damp and do
not use it in a damp environment.

34 GB/MT
Safety
J If you use the device outdoors, always connect
it through a residual current device (RCD) with
a maximum trip current of 30 mA. If using an
extension lead, always use one that is approved
for outdoor use.
J Do not suspend or carry the device by the
mains lead. Always work with the mains lead
leading away from the rear of the device.
J Grinding discs must be carefully kept and han-
dled in accordance with the manufacturer’s
instructions.
J Make sure that abrasive consumables and tools
are attached in accordance with the manufac-
turer’s instructions and advice.
J Ensure that any spacers supplied or required
for the use of certain abrasive consumables
and tools are properly installed.
J Before you use the device make sure that the
abrasive consumable or tool is correctly attached
and firmly fastened in place. Allow the tool to
run under no-load conditions for 30 seconds in
a safe position. Stop the device immediately if
a significant amount of vibration occurs or if
any defects are found. In this event check over
the machine to find the cause of the problem.
J Never use the electrical power tool without its
disc guard cover, if it was supplied with one.
J When using abrasive consumables and tools
with a threaded insert make sure that the threaded
hole is long enough for the spindle length.
J Do not work in areas where there may be con-
cealed electricity cables or gas or water pipes.
Use a suitable detector or ask your local utility
service providers. Contact with electricity cables
can lead to fire or electric shock.
Damaging a gas pipe can lead to an explosion.
Penetration of a water pipe can lead to property
damage or to electric shock.
Danger of fire from flying sparks!
Cutting or grinding metal creates flying sparks.
For this reason, always make sure that nobody
is placed in any danger and that there are no
inflammable materials near the working area.
m Warning! Noxious fumes! Working with
harmful / noxious dusts represents a risk to the
health of the person operating the device and
to anyone near the working area.
J
Wear hearing protection, protective
glasses, a dust protection mask and
protective gloves.
J For longer periods of cutting or grinding wood,
metal or stone materials that give rise to dusts
that are hazardous to health, connect the device
to a suitable external vacuum dust extraction
device.
J Connect a suitable vacuum dust extraction de-
vice when you are working on stone or masonry.
The vacuum dust extraction device must be one
approved for use with stone dusts.
m Warning! Danger of electric shock
from metal dust! Machining metal can result
in electrically conductive dust being deposited
inside the device. In these circumstances the
inside of the motor compartment must be blown
out at frequent intervals with compressed air,
vacuum dust extraction used and the device
operated through a residual current device
(RCD) with a maximum trip current of 30 mA.
J Ensure that there is adequate ventilation when
machining surfaces containing plastic or cov-
ered with paint, varnish etc.
J Do not soak the materials or the surface you
are about to work on with liquids containing
solvents. The heat generated during abrasion
can give rise to poisonous vapours or gases
that are hazardous to health.
J Wear close-fitting clothing and keep long hair
inside a hairnet or suitable headwear.
J For safety reasons this tool must always be
used with the auxiliary handle in place.
J The adjustable disc guard cover must always
be in place when working with roughing /
grinding or cutting discs.
J Use the vacuum dust extraction facility if your
work generates large amounts of dust. Use
vacuum dust extraction devices particularly ap-
proved for the purpose.
J Use permitted consumables and tools only.
Check that the speed given on the discs is
greater than or equal to the rated no-load
speed of the device.
J Ensure that the dimensions of the abrasive con-
sumable or tool matches the grinder.
J Take note of the direction of rotation and always

35 GB/MT
Safety
hold the device in such a way that the sparks
and grinding debris are thrown away from
your body.
J Make sure that the dimensions of the disc are
suitable for the device and that the disc is of a
type that fits properly on to the mounting flange.
J Avoid abrading paints containing lead or other
substances hazardous to health.
J Do not machine materials containing asbestos.
Asbestos is a known carcinogen.
J Use the device for dry cutting or dry grinding only.
J Before you use a disc check that it is not broken,
cracked or damaged in any other way.
J Make sure that abrasive consumables and tools
are attached in accordance with the manufac-
turer’s instructions and advice.
J Avoid contact with a moving roughing / grind-
ing or cutting disc.
J Operate the device only with an attached
roughing / grinding or cutting disc.
J Never use the device for a purpose for which it
was not intended nor with non-original parts /
accessories.
J Use only abrasive consumables and tools with
an allowable speed at least as high as the no-
load speed of the device! If you operate a disc
at a speed higher than its permitted maximum
this can lead to destruction of the disc.
J Make sure that the dimensions of the disc are
suitable for the device.
The disc must fit without play on to the mounting
flange shaft. Do not use a reducer piece or
adapter.
J Do not subject cutting discs to any sideways
pressure.
J Do not use cutting discs sideways for grinding.
J Check abrasive consumables and tools before
use. The abrasive consumable or tool must be
properly attached and able to turn freely. Test
the operation of the device for at least 30 sec-
onds under no-load conditions. Do not use
abrasive consumables or tools that are dam-
aged, non-circular or vibrate.
J Look after your tools carefully. Keep cutting
tools sharp and clean. This way you will work
more safely and achieve better results.
Follow the advice on tool lubrication and con
sumables replacement.
J Attach a hand guard (not included) for machin-
ing with external accessories, such as a rubber
sanding plate / cup brush / disc brush / flap disc.
J Switch on the device before placing it against
the workpiece. After machining lift the device
from the workpiece before switching it off.
J Avoid placing your body in an unnatural position.
Always hold the device securely with both
hands (see Fig. D) while working. Always keep
proper footing and balance.
J The auxiliary handle must always be fitted
whenever you are using the device.
J Take note of the direction of rotation of the
abrasive disc. Hold the device in such a way
that sparks and grinding debris are thrown
away from your body.
J Switch the device off and allow it to come to a
standstill before you put it down.
The abrasive consumable or tool will continue
to rotate after you have switched off the device.
J Do not allow the cutting disc to become trapped
as this can lead to kickback. If the cutting disc
becomes trapped, switch the device off imme-
diately. Hold the device still until the disc comes
to a complete stop. Only then can you remove
the cutting disc from the workpiece.
J Do not switch on the device if the cutting disc is
in the workpiece.
J Ensure that the ventilation slots do not become
blocked if you are creating lots of dust while
working. Should it be necessary to remove
dust, first disconnect the electrical power tool
from the mains supply, use non-metallic objects
and avoid damaging the internal components.
J When not being used electrical power tools
should be stored in dry conditions in a high or
closed place, out of reach of children.
J Handle the device carefully and treat it with
respect.
Protect the device from sharp blows and impacts.
J Check the condition of the mains lead on your
electrical power tool regularly and have any
damage repaired by a competent specialist.
Check the condition of extension leads regularly
and replace them if they are damaged. Keep
the handle and hand grip clean, dry and free
of oil and grease.

36 GB/MT
Safety / Preparing for use
J Check the electrical power tool for damage.
Before the electrical power tool is used any fur-
ther, carefully check the safety equipment or
any slightly damaged parts to see that they are
still working properly. Check that all moving
parts on the tool are working properly, can
move freely and are not damaged. All parts
must be correctly attached and fulfil all the
requirements necessary to allow the electrical
power tool to operate properly. Damaged
safety equipment and components should be
repaired or replaced at a competent electrical
equipment repair centre unless otherwise indi-
cated in the operating instructions. Damaged
switches must be replaced at a Customer Service
Centre. Never use an electrical power tool that
cannot be switched on and off properly.
Advice on structural engineering matters
Slots in load-bearing walls:
Slots cut in load-bearing walls must comply with
DIN 1053 Part 1 or the regulations applicable in
your country.
Observe the requirements of these documents. Be-
fore you start a task, seek the advice of a compe-
tent structural engineer, architect or the relevant site
management staff.
Q
Advice on use
Note! Discs must be used only for their recommended
purposes, otherwise they could disintegrate, become
damaged or cause accidents.
Roughing discs
Never use cutting discs for
roughing or grinding!
J Move the angle grinder using even pressure to
and fro over the workpiece.
J Hold the roughing or grinding disc at a flat angle
to the workpiece when working on a soft material.
Use a slightly steeper angle for harder materials.
Cutting discs
Never use roughing or grinding
discs for cutting!
m D a n g e r ! Always guide the
device through the workpiece
against the direction of rotation
of the disc. If you work in the
other direction there is the risk of kickback. The
device may be forced out of the cut.
Q
Original accessories /
attachments
J Use only the accessories and attachments de-
tailed in the operating instructions. The use of
parts or accessories other than those recom-
mended in the operating instructions could
lead to you suffering an injury.
Q
Preparing for use
Take note of the mains voltage. The mains voltage
at the mains socket must match that shown on the
rating plate on the device. Devices marked with
230 V can also be operated at 220 V.
Q
Attaching the disc guard cover
using the quick-release fastener
J Pull the mains plug out of the mains socket be-
fore you carry out any task on the device.
m Danger of injury! Always use the angle
grinder with the disc guard cover in place. The
disc guard cover must be securely attached to
the angle grinder. To ensure the highest level of
safety while using the device, ensure that the
smallest possible area of the grinding or cutting
tool is exposed to the operator at all times. The
disc guard cover is there to protect the operator
from pieces breaking off and accidental contact
with the grinding or cutting tool.
j Open the clamping lever
8
.

37 GB/MT
Preparing for use / Operation
j Insert the disc cover guide
7
with the coded
projection
9
in the coded groove
16
.
j Turn the disc guard cover
7
into the desired
position (working position). The closed side of
the disc guard cover
7
must always be facing
the operator.
j Close the clamping lever
8
to firmly clamp
the disc guard cover
7
in place.
If necessary the clamping force of the connection
can be adjusted by tightening or loosening the
adjuster screw
10
.
Ensure that the disc guard cover
7
sits firmly
on the spindle collar.
Q
Attaching the auxiliary handle
m Caution! For safety reasons this device must
always be used with the auxiliary handle
6
in
place.
J Pull the mains plug out of the mains socket be-
fore you carry out any task on the device.
j Screw the auxiliary handle
6
on the left, right
or on the top of the head of the device.
Q
Attaching and replacing
roughing / grinding / cutting discs
Take note of the dimensions of the roughing / grind-
ing or cutting discs. The circular hole must fit on to
the mounting flange without play. Do not use a re-
ducer piece or adapter.
J Pull the mains plug out of the mains socket be-
fore you carry out any task on the device.
J Check the condition of the roughing / grinding
or cutting discs. They must be free of damage,
moisture or cracks.
m Danger of burns! Always wear protective
gloves when changing a roughing / grinding or
cutting disc. Roughing / grinding and cutting
discs become hot during use. Do not touch
them until after they have cooled down.
j Note: Always ensure the discs are free of dirt
before use.
j Use only abrasive consumables or tools with
an allowable speed at least as high as the no-
load speed of the device.
j Press the spindle lock button
11
only after the
mounting spindle
14
has reached a standstill.
j Press the spindle lock button
11
to block the
drive.
j Release the clamping nut
13
using the spanner
17
, Fig. C.
j Place the roughing / grinding or cutting disc on
to the mounting flange
15
with its labelled side
facing towards the device.
j Then replace the clamping nut
13
, with its
raised side facing upwards, on to the mounting
spindle
14
.
j Press the spindle lock button
11
to block the
drive.
j Tighten the clamping nut
13
again with the
spanner
17
.
j Note: Replace a new disc immediately if it
runs unevenly or vibrates after being exchanged.
j After replacing a disc let the device run under
no-load conditions for 30 seconds as a safety
check. Look out for unusual noises or generation
of sparks. Check that all the fastened-on parts
are correctly attached.
j Pay attention to see that the arrow showing the
direction of rotation on the roughing / grinding
or cutting discs (including diamond cutting discs)
corresponds with the direction of rotation of the
device (see arrow on the head of the device).
Q
Operation
Q
Switching on and off
Note: Always switch on the angle grinder before
bringing it into contact with the workpiece material.
Switching on the device
j Press the safety lock-out
3
.
Then press the ON / OFF switch
2
Switching off the device
j Release the ON / OFF switch
2
.

38 GB/MT
Operation / Maintenance and cleaning / Disposal / Information
Switching on continuous operation mode
j Press the safety lock-out
3
and keep it
pressed.
Press the ON / OFF switch
2
in the area of
the safety lock-out until the latter locks.
Switching off continuous operation mode:
j Press and then release the ON / OFF switch
2
Rotating the hand grip
j Pull the mains plug out of the mains socket be-
fore you carry out any task on the device.
j The hand grip
1
can be rotated by 90° to
the right or left.
j This allows the On / Off switch
2
to be
brought into the most comfortable position for
any working conditions.
j Press the unlocking button
4
and rotate the
hand grip
1
to the right or left.
j Make sure the hand grip
1
engages.
Q
Maintenance and cleaning
J Pull the mains plug out of the mains socket
before you carry out any task on the device.
J Do not use sharp objects for cleaning the
device. Do not allow any liquids to enter the
device.
j Have the carbon brushes replaced only at the
service centre or an accredited electrical
equipment repair centre. The device requires
no other maintenance.
j Clean the device frequently; for best results do
this immediately after you have finished using it.
j Use a dry cloth to clean the housing – under
no circumstances use petrol, solvents or cleaning
agents that attack plastic.
j A vacuum cleaner is required to thoroughly
clean the device.
j Ventilation openings must always be kept free.
j Remove any adhering dust with a narrow paint
brush.
Q
Disposal
The packaging is wholly composed of
environmentally-friendly materials that can
be disposed of at a local recycling centre.
Do not dispose of electric tools in
the household waste!
In accordance with European Directive
2002 / 96 / EC (covering waste electrical and elec-
tronic equipment) and its transposition into national
legislation, worn out electrical power tools must be
collected separately and taken for environmentally
compatible recycling.
Contact your local refuse disposal authority for
more details of how to dispose of your worn out
electrical devices.
Q
Information
Q
Service centre
The service centre for your country is shown in the
warranty documentation.
J Have your device repaired only by qualified
specialist personnel using original manufactur-
er parts only. This will ensure that your device
remains safe to use.
J If the plug or mains lead needs to be replaced,
always have the replacement carried out by
the manufacturer or its service centre. This will
ensure that your device remains safe to use.

39 GB/MT
Information
Q
Declaration of Conformity /
Manufacturer
We, Kompernaß GmbH, Burgstr. 21,
44867 Bochum, Germany, declare
that this product complies with the
following EU directives:
Machinery Directive (98 / 37 / EC)
EU Low Voltage Directive (2006 / 95 / EC)
Electromagnetic Compatibility
(2004 / 108 / EC)
Type / device description:
Angle grinder PWS 230
Bochum, 31.10.2007
Hans Kompernaß
- Managing Director -
We reserve the right to make technical modifications in the course
of further development.

40

41 DE/AT
41 DE/AT
Inhaltsverzeichnis
Einleitung
Bestimmungsgemäßer Gebrauch...............................................................................................Seite 42
Ausstattung ....................................................................................................................Seite 42
Lieferumfang .................................................................................................................Seite 43
Technische Daten ..........................................................................................................Seite 43
Sicherheit
Sicherheitshinweise.......................................................................................................Seite 43
Arbeitsplatz-Sicherheit .................................................................................................Seite 43
Elektrische Sicherheit ....................................................................................................Seite 43
Sicherheit von Personen ...............................................................................................Seite 44
Sorgfältiger Umgang und Gebrauch von Elektrowerkzeugen .................................Seite 45
Gerätespezifische Sicherheitshinweise ......................................................................Seite 45
Arbeitshinweise .............................................................................................................Seite 48
Originalzubehör / -zusatzgeräte .........................................................................................Seite 49
Inbetriebnahme
Schutzhaube mit Schnellverschluss montieren ...........................................................Seite 49
Zusatz-Handgriff montieren .........................................................................................Seite 50
Schrupp- / Trennscheibe montieren / wechseln ...........................................................Seite 50
Bedienung
Ein- und Ausschalten .....................................................................................................Seite 50
Wartung und Reinigung ...............................................................................Seite 51
Entsorgung...............................................................................................................Seite 51
Informationen
Service ...........................................................................................................................Seite 51
Konformitätserklärung / Hersteller
............................................................................................Seite 52

42 DE/AT
Winkelschleifer PWS 230
Q
Einleitung
Machen Sie sich vor der ersten Inbetrieb-
nahme mit den Funktionen des Gerätes
vertraut und informieren Sie sich über
den richtigen Umgang mit Elektrowerkzeugen.
Lesen Sie hierzu die nachfolgende Bedienungsan-
leitung. Bewahren Sie diese Anleitung gut auf.
Händigen Sie alle Unterlagen bei Weitergabe des
Gerätes an Dritte ebenfalls aus.
Q
Bestimmungsgemäßer Gebrauch
Das Gerät ist zum Trennen, Schruppen und Bürsten
von Metall- und Steinwerkstoffen ohne Verwendung
von Wasser geeignet. Jede andere Verwendung
oder Veränderung des Gerätes gilt als nicht bestim-
mungsgemäß und birgt erhebliche Unfallgefahren.
Für aus bestimmungswidriger Verwendung entstan-
dene Schäden übernehmen wir keine Haftung. Das
Gerät ist nicht für den gewerblichen Einsatz bestimmt.
Q
Ausstattung
1
Gerätegriff (drehbar)
2
EIN- / AUS-Schalter
3
Einschaltsperre
4
Entriegelungstaste
5
Abdeckung Kohlebürsten
6
Zusatz-Handgriff
7
Schutzhaube
8
Spannhebel
9
Codiernase
10
Justierschraube
11
Spindel-Arretiertaste
12
Gewinde (3 x) für Zusatz-Handgriff
13
Spannmutter
14
Aufnahmespindel
15
Aufnahmeflansch
Einleitung
In dieser Bedienungsanleitung werden folgende Piktogramme / Symbole verwendet:
Bedienungsanleitung lesen!
W
Watt (Wirkleistung)
Warn- und Sicherheitshinweise beachten! Schutzklasse II
Vorsicht vor elektrischem Schlag! Gefährliche
elektrische Spannung – Lebensgefahr!
Tragen Sie einen Gehörschutz, eine Atem- /
Staubschutzmaske, Schutzhandschuhe und eine
Schutzbrille.
Explosionsgefahr!
Halten Sie Kinder und andere Personen während
der Benutzung des Elektrowerkzeugs fern.
Brandgefahr!
Halten Sie das Gerät von Regen oder Nässe fern.
Das Eindringen von Wasser in ein Elektrogerät er-
höht das Risiko eines elektrischen Schlages.
V
~
Volt (Wechselspannung)
Ein beschädigtes Gerät, Netzkabel oder
Netzstecker bedeuten Lebensgefahr durch elek-
trischen Schlag. Kontrollieren Sie regelmäßig
den Zustand von Gerät, Netzkabel, Netzstecker.
n
0
Bemessungs-Leerlaufdrehzahl
Entsorgen Sie Verpackung und Gerät
umweltgerecht!

43 DE/AT
16
Codiernut
17
Spannschlüssel
18
Schruppscheibe*
19
Trennscheibe für Metall*
20
Trennscheibe für Stein*
* nicht im Lieferumfang enthalten
Q
Lieferumfang
1 Winkelschleifer PWS 230
1 Zusatz-Handgriff
1 Schutzhaube
1 Spannschlüssel
1 Bedienungsanleitung
1 Heft „Garantie und Service“
Q
Technische Daten
Nennspannung: 230 V
~
50 Hz
Nennleistung: 2000 W
Nenndrehzahl: n
0
6500 min
-1
Schleifscheibe: Ø 230 mm
Aufnahmespindel: M14 / Gewinde
Schutzklasse: II /
Gehörschutz tragen!
Geräusch- und Vibrationsinformationen:
Geräuschpegel mit A-Bewertung ermittelt.
Schalldruckpegel: 90 dB (A)
Schallleistungspegel: 103 dB (A)
Bewertete Beschleunigung, typischerweise.
Hand-Arm-Vibration: 2,5 m / s
2
Messwerte ermittelt entsprechend EN 50144.
Q
Sicherheit
Sicherheitshinweise
J Achtung! Beim Gebrauch von Elektrowerkzeu-
gen sind zum Schutz gegen elektrischen Schlag,
Verletzungs- und Brandgefahr folgende grund-
sätzliche Sicherheitsmaßnahmen zu beachten.
Lesen und beachten Sie diese Bestimmungen,
bevor Sie das Gerät benutzen. Fehler bei der
Einhaltung der nachstehend aufgeführten An-
weisungen können elektrischen Schlag, Brand
und / oder schwere Verletzungen verursachen.
Q
Arbeitsplatz-Sicherheit
J Halten Sie Ihren Arbeitsbereich sauber und
aufgeräumt. Sorgen Sie für gute Beleuchtung
des Arbeitsbereiches. Unordnung und unbeleuch-
tete Arbeitsbereiche können zu Unfällen führen.
J
Explosionsgefahr! Arbeiten Sie
mit dem Gerät nicht in explosionsge-
fährdeter Umgebung, in der sich
brennbare Flüssigkeiten, Gase oder Stäube be-
finden. Elektrowerkzeuge erzeugen Funken, die
den Staub oder die Dämpfe entzünden können.
J
Halten Sie Kinder und andere Personen
während der Benutzung des Elektro-
werkzeugs fern. Bei Ablenkung können
Sie die Kontrolle über das Gerät verlieren.
Q
Elektrische Sicherheit
Vermeiden Sie Lebensgefahr
durch elektrischen Schlag:
J Der Netzstecker des Gerätes muss in die Steckdose
passen. Der Stecker darf in keiner Weise verändert
werden. Verwenden Sie keine Adapterstecker
gemeinsam mit schutzgeerdeten Geräten.
Unveränderte Stecker und passende Steckdosen
verringern das Risiko eines elektrischen Schlages.
J Vermeiden Sie Körperkontakt mit geerdeten
Oberflächen, wie von Rohren, Heizungen,
Einleitung / Sicherheit

44 DE/AT
Herden und Kühlschränken. Es besteht erhöhtes
Risiko durch elektrischen Schlag, wenn Ihr Kör-
per geerdet ist.
J
Halten Sie das Gerät von Regen oder
Nässe fern. Das Eindringen von
Wasser in ein Elektrogerät
erhöht das Risiko eines elektrischen Schlages.
J Zweckentfremden Sie das Kabel nicht, z.B. um
das Gerät zu tragen, aufzuhängen oder um den
Stecker aus der Steckdose zu ziehen. Halten Sie
das Kabel fern von Hitze, Öl, scharfen Kanten
oder sich bewegenden Geräteteilen. Beschädigte
oder verwickelte Kabel oder Stecker erhöhen
das Risiko eines elektrischen Schlages.
J
Ein beschädigtes Gerät, Netzkabel
oder Netzstecker bedeuten Lebens-
gefahr durch elektrischen Schlag.
J Kontrollieren Sie regelmäßig den Zustand von
Gerät, Netzkabel, Netzstecker.
J Verwenden Sie bei Arbeiten im Freien nur
Verlängerungskabel, die auch für den Außen-
bereich zugelassen sind. Die Anwendung
eines für den Außenbereich geeigneten
Verlängerungs kabels verringert das Risiko eines
elektrischen Schlages.
J Fassen Sie das Gerät nur an isolierten Hand-
griffen an, wenn es eine verborgene Leitung
oder das eigene Netzkabel treffen kann. Der
Kontakt mit einer spannungsführenden Leitung
kann Metallteile des Gerätes unter Spannung
setzen und zu einem elektrischen Schlag führen.
J
Warnung! Explosionsgefahr!
Verwenden Sie geeignete Suchgeräte,
um verborgene Versorgungsleitungen
aufzuspüren oder ziehen Sie die örtliche Ver-
sorgungsgesellschaft hinzu.
Der Kontakt mit Elektroleitungen kann zu Feuer
und elektrischem Schlag führen. Beschädigung
einer Gasleitung kann zur Explosion führen.
Eindringen in eine Wasserleitung verursacht
Sachbeschädigung oder kann einen elektrischen
Schlag verursachen.
J Nehmen Sie Geräte mit beschädigten Teilen
nicht mehr in Betrieb. Ziehen Sie bei Gefahr
sofort den Netzstecker.
m Warnung! - Öffnen Sie niemals das Gerät.
Lassen Sie Reparatur- oder Austauscharbeiten
nur von der Servicestelle oder einer Elektro-
fachkraft durchführen.
Q
Sicherheit von Personen
J Seien Sie stets aufmerksam und achten Sie immer
darauf, was Sie tun. Gehen Sie mit Vernunft an
die Arbeit mit einem Elektrowerkzeug. Benutzen
Sie das Gerät nicht, wenn Sie unkonzentriert
oder müde sind bzw. unter dem Einfluss von
Drogen, Alkohol oder Medikamenten. Bereits
ein Moment der Unachtsamkeit beim Ge-
brauch des Gerätes kann zu ernsthaften Verlet-
zungen führen.
J
Tragen Sie persönliche Schutzausrü-
stung und immer eine Schutzbrille.
Das Tragen persönlicher Schutzaus-
rüstung wie Staubmaske, rutschfeste Sicher-
heitsschuhe, Schutzhandschuhe, Schutz helm
oder Gehörschutz, je nach Art und Einsatz des
Elektrowerkzeuges, verringert das Risiko von
Verletzungen.
J Bei Arbeiten im Freien sind Gummihandschuhe
und rutschfestes Schuhwerk empfehlenswert.
J Vermeiden Sie eine unbeabsichtigte Inbetrieb-
nahme. Vergewissern Sie sich, dass sich der
Schalter in der „AUS“-Position befindet, bevor
Sie den Stecker in die Steckdose stecken. Wenn
Sie beim Tragen des Gerätes den Finger am
EIN- / AUS-Schalter haben oder das Gerät be-
reits eingeschaltet an die Stromversorgung an-
schließen, kann dies zu Unfällen führen.
J Entfernen Sie Einstellwerkzeuge oder Schrauben-
schlüssel, bevor Sie das Gerät einschalten.
Ein Werkzeug oder Schlüssel, der sich in
einem drehenden Geräteteil befindet, kann zu
Verletzungen führen.
J Überschätzen Sie sich nicht. Sorgen Sie für einen
sicheren Stand und halten Sie jederzeit das
Gleichgewicht. Dadurch können Sie das Gerät
insbesondere in unerwarteten Situationen besser
kontrollieren.
J Tragen Sie geeignete Kleidung. Tragen Sie kei-
ne weite Kleidung oder Schmuck. Halten Sie
Haare, Kleidung und Handschuhe fern von
sich bewegenden Teilen. Tragen Sie bei langen
Sicherheit

45 DE/AT
Haaren ein Haarnetz. Lockere, nicht eng anlie-
gende Kleidung, Schmuck oder Haare können
von sich bewegenden Teilen erfasst werden.
J Verwenden Sie Staubabsaug- oder auffangein-
richtungen, wenn diese montiert werden können.
Beachten Sie dabei, dass Staubsauggeräte für
diesen speziellen Einsatzbereich geeignet sein
müssen. Das korrekte Verwenden dieser Einrich-
tungen verringert Gefährdungen durch Staub.
Beim Arbeiten mit Elektrogeräten, die über einen
Staubsack verfügen oder durch eine Staubab-
saugvorrichtung mit dem entsprechenden Gerät
verbunden werden können, besteht Brandgefahr!
Unter ungünstigen Bedingungen, wie z.B. bei
Funkenflug, beim Schleifen von Metall oder
Metallresten in Holz, kann sich Holzstaub im
Staubsack (oder im Filtersack des Staubsaugers)
selbst entzünden. Dies kann insbesondere dann
geschehen, wenn der Holzstaub mit Lackresten
oder anderen chemischen Stoffen vermischt ist
und das Schleifgut nach langem Arbeiten heiß
ist. Vermeiden Sie deshalb unbedingt eine
Überhitzung des Schleifguts und des Gerätes,
und entleeren Sie vor Arbeitspausen stets den
Staub- bzw. Filtersack des Staubsaugers.
J Lassen Sie andere Personen nicht das Elektro-
werkzeug oder das Verlängerungskabel berühren.
Q
Sorgfältiger Umgang
und Gebrauch von
Elektrowerkzeugen
J Überlasten Sie das Gerät nicht. Verwenden Sie
für Ihre Arbeit das dafür bestimmte Elektrowerk-
zeug. Mit dem passenden Elektrowerkzeug ar-
beiten Sie besser und sicherer im angegebenen
Leistungsbereich.
J Benutzen Sie kein Elektrowerkzeug, dessen
Schalter defekt ist. Ein Elektrowerkzeug, das
sich nicht mehr ein- oder ausschalten lässt, ist
gefährlich und muss repariert werden.
J Ziehen Sie den Stecker aus der Steckdose, be-
vor Sie Geräteeinstellungen vornehmen, Zube-
hörteile wechseln oder das Gerät weglegen.
Diese Vorsichtsmaßnahme verhindert den un-
beabsichtigten Start des Gerätes.
J Bewahren Sie unbenutzte Elektrowerkzeuge
außerhalb der Reichweite von Kindern auf.
Lassen Sie Personen das Gerät nicht benutzen,
die mit diesem nicht vertraut sind oder diese
Anweisungen nicht gelesen haben. Elektro-
werkzeuge sind gefährlich, wenn sie von uner-
fahrenen Personen benutzt werden.
J Pflegen Sie das Gerät mit Sorgfalt. Kontrollie-
ren Sie, ob bewegliche Geräteteile einwand-
frei funktionieren und nicht klemmen, ob Teile
gebrochen oder so beschädigt sind, dass die
Funktion des Gerätes beeinträchtigt ist. Lassen
Sie beschädigte Teile vor dem Einsatz des Ge-
rätes reparieren. Viele Unfälle haben ihre Ursa-
che in schlecht gewarteten Elektrowerkzeugen.
J Halten Sie Schneidwerkzeuge scharf und sau-
ber. Sorgfältig gepflegte Schneidwerkzeuge
mit scharfen Schneidkanten verklemmen sich
weniger und sind leichter zu führen.
J Verwenden Sie Elektrowerkzeug, Zubehör,
Einsatz
werkzeuge usw. entsprechend diesen
Anweisungen
und so, wie es für diesen spezi-
ellen Gerätetyp vorgeschrieben ist. Berücksich-
tigen Sie dabei die Arbeitsbedingungen und
die auszuführende Tätigkeit. Der Gebrauch
von Elektrowerkzeugen für andere als die
vorge sehenen Anwendungen kann zu gefähr-
lichen Situationen führen.
Gerätespezifische
Sicherheitshinweise
J Stellen Sie sicher, dass das Gerät ausgeschaltet
ist, bevor Sie den Netzstecker in die Steckdose
stecken.
J Schließen Sie, wenn Sie im Freien arbeiten,
das Gerät über einen Fehlerstrom (FI)-Schutz-
schalter mit maximal 30 mA Auslösestrom an.
J Verwenden Sie nur ein für den Außenbereich
zugelassenes Verlängerungskabel.
J Sichern Sie das Werkstück. Benutzen Sie
Spannvorrichtungen / Schraubstock um das
Werkstück festzuhalten. Es ist damit sicherer
gehalten, als mit Ihrer Hand.
J Spannen Sie auf keinen Fall das Gerät in einen
Schraubstock fest.
Sicherheit

46 DE/AT
J Stützen Sie auf keinen Fall die Hände neben
oder vor dem Gerät und der zu bearbeitenden
Fläche ab, da bei einem Abrutschen Verletzungs-
gefahr besteht.
J Ziehen Sie bei Gefahr sofort den Netzstecker
aus der Steckdose.
m Warnung! Verletzungsgefahr! Entrie-
geln Sie bei einem Stromausfall oder wenn der
Netzstecker gezogen wird, sofort den EIN- /
AUS-Schalter. Bringen Sie ihn in AUS-Position.
Dies verhindert einen unkontrollierten Wieder-
anlauf, bei dem Sie sich verletzen können.
J Betreiben Sie das Gerät nicht mit beschädigtem
Netzkabel oder Netzstecker.
J Berühren Sie nicht das Netzkabel, wenn es
während des Betriebs beschädigt oder durch-
trennt wird. Ziehen Sie sofort den Netzstecker
und lassen Sie das Gerät anschließend aus-
schließlich von einem Fachmann oder der zu-
ständigen Servicestelle reparieren.
J Betreiben Sie das Gerät nicht wenn es feucht ist
und auch nicht in feuchter Umgebung.
J Schließen Sie, wenn Sie im Freien arbeiten, das
Gerät über einen Fehlerstrom (FI)-Schutzschalter
mit maximal 30 mA Auslösestrom an. Verwen-
den Sie nur ein für den Außenbereich zugelas-
senes Verlängerungskabel.
J Tragen Sie das Gerät nicht am Netzkabel und
hängen Sie es nicht am Netzkabel auf. Führen
Sie das Netzkabel immer nach hinten vom Gerät
weg.
J Schleifscheiben müssen sorgsam nach Anwei-
sungen des Herstellers aufbewahrt und gehand-
habt werden.
J Vergewissern Sie sich, dass Schleifwerkzeuge
nach den Anweisungen des Herstellers ange-
bracht sind.
J Sorgen Sie dafür, dass Zwischenlagen verwen-
det werden, wenn sie mit dem Schleifwerkzeug
zur Verfügung gestellt und gefordert werden.
J Sorgen Sie dafür, dass ein Schleifwerkzeug vor
Gebrauch richtig angebracht und befestigt wird.
Lassen Sie das Werkzeug im Leerlauf 30 Sekun-
den in einer sicheren Lage laufen, sofort anhal-
ten, wenn beträchtliche Schwingungen auftreten
oder wenn Mängel festgestellt werden. Wenn
dieser Zustand eintritt, überprüfen Sie die Ma-
schine, um die Ursache zu ermitteln.
J Wenn eine Schutzhaube mit dem Elektrowerk-
zeug geliefert wird, niemals das Elektrowerk-
zeug ohne diese Schutzhabe verwenden.
J Vergewissern Sie sich bei Schleifwerkzeugen mit
Gewindeeinsatz, dass das Gewinde lang
genug ist, um die Spindellänge aufzunehmen.
J Arbeiten Sie nicht in verborgenen Bereichen, in
denen Elektro-, Gas- oder Wasserleitungen
liegen können. Verwenden Sie geeignete Such-
geräte oder fragen Sie die örtliche Versorgungs-
gesellschaft. Der Kontakt mit Elektroleitungen
kann zu Feuer und elektrischem Schlag führen.
Das Beschädigen einer Gasleitung kann zu einer
Explosion führen. Eindringen in eine Wasserlei-
tung kann Sachbeschädigung verursachen oder
zu elektrischem Schlag führen.
Brandgefahr durch Funkenflug!
Wenn Sie Metalle trennen / schleifen entsteht
Funkenflug. Achten Sie deshalb unbedingt
darauf, dass keine Personen gefährdet werden
und sich keine brennbaren Materialien in der
Nähe des Arbeitsbereiches befinden.
m Warnung! Giftige Dämpfe!
Das Bearbei-
ten
von schädlichen / giftigen Stäuben stellt
eine Gesundheitsgefährdung für die Bedienper-
son oder in der Nähe befindliche Personen dar.
J
Tragen Sie einen Gehörschutz,
Schutzbrille, Staubschutzmaske und
Schutzhandschuhe.
J Schließen Sie bei längerem Bearbeiten von
Holz,Metall und Steinwerkstoffen, bei denen
gesundheitsgefährdende Staube entstehen, das
Gerät an eine geeignete externe Absaugvorrich-
tung an.
J Schließen Sie beim Bearbeiten von Stein eine
geeignete Staubabsaugung an. Die Staubab-
saugung muss zum Absaugen von Gesteins-
staub zugelassen sein.
m Warnung! Stromschlaggefahr durch
Metallstaub! Bei Bearbeitung von Metall
kann sich ein leitfähiger Staub im Inneren des
Gerätes absetzen. In diesen Fällen öfter den
Motorraum von außen mit Druckluft ausblasen,
mit Staubabsaugung arbeiten und Gerät über
einen FI - Schutzschalter (Auslösestrom 30mA)
betreiben.
Sicherheit

47 DE/AT
J Sorgen Sie bei der Bearbeitung von Kunststoffen,
Farben, Lacken, etc. für ausreichende Belüftung.
J Tränken Sie Materialien oder zu bearbeitende
Flächen nicht mit lösungsmittelhaltigen Flüssig-
keiten. Durch die Erwärmung beim Schaben
können gesundheitsschädliche / giftige Dämpfe
entstehen.
J Tragen Sie eng anliegende Kleidung und bei
langen Haaren ein Haarnetz oder eine geeig-
nete Kopfbedeckung.
J Aus Sicherheitsgründen darf dieses Gerät nur
mit dem Zusatz-Handgriff verwendet werden.
J Die verstellbare Schutzhaube muss bei Arbeiten
mit Schrupp- oder Trennscheiben immer montiert
sein.
J Verwenden Sie bei hoher Staubbelastung die
Staubabsaugung. Verwenden Sie nur speziell
zugelassene Staubabsaugeinrichtungen.
J Verwenden Sie nur zulässige Werkzeuge. Über-
prüfen Sie, ob die Drehzahlangabe auf den
Schleifscheiben größer oder gleich der Nennge-
schwindigkeit des Gerätes ist.
J Stellen Sie sicher, dass die Maße des Schleif-
werkzeugs zum Schleifer passen.
J Beachten Sie die Drehrichtung und halten Sie
das Gerät immer so, dass Funken und Schleif-
staub vom Körper wegfliegen.
J Stellen Sie sicher, dass die Abmessungen der
Scheibe mit dem Gerät übereinstimmen und
dass die Scheibe problemlos auf die Aufnahme-
flansch passt.
J Vermeiden Sie das Schleifen von bleihaltigen
Farben oder anderen gesundheitsschädlichen
Materialien.
J Asbesthaltiges Material darf nicht bearbeitet
werden. Asbest gilt als krebserregend.
J Verwenden Sie das Gerät nur für Trockenschnitt
bzw. Trockenschliff.
J
Kontrollieren Sie die Scheibe vor ihrer Verwendung;
keine abgebrochenen, gesprungenen oder an-
derweitig beschädigten Erzeugnisse verwenden.
J Vergewissern Sie sich, dass Schleifwerkzeuge
nach den Anweisungen des Herstellers ange-
bracht sind.
J Vermeiden Sie den Kontakt mit der laufenden
Schrupp- oder Trennscheibe.
J Verwenden Sie das Gerät nur mit angebrachter
Schrupp- oder Trennscheibe.
J Verwenden Sie das Gerät niemals zweckent-
fremdet und nur mit Originalteilen / -zubehör.
J Verwenden Sie nur Schleifwerkzeuge, deren
zulässige Drehzahl mindestens so hoch ist wie
die Leerlaufdrehzahl des Gerätes. Scheiben,
die sich schneller drehen als zulässig, können
zerstört werden.
J Stellen Sie sicher, dass die Abmessungen der
Scheibe mit dem Gerät übereinstimmen.
Die Scheibe muss ohne Spiel auf die Aufnahme-
Flanschwelle passen. Verwenden Sie keine
Reduzierstücke oder Adapter.
J Setzen Sie Trennscheiben keinem seitlichen
Druck aus.
J Benutzen Sie keine Trennscheiben, um seit-
wärts zu schleifen.
J Kontrollieren Sie die Schleifwerkzeuge vor
dem Gebrauch. Das Schleifwerkzeug muss ein-
wandfrei montiert sein und sich frei drehen kön-
nen. Führen Sie einen Probelauf mindestens 30
Sekunden ohne Belastung durch. Verwenden
Sie keine Schleifwerkzeuge, die beschädigt,
unrund sind oder vibrieren.
J Pflegen Sie Ihre Werkzeuge mit Sorgfalt. Halten
Sie die Schneidwerkzeuge scharf und sauber,
um besser und sicherer arbeiten zu können.
Befolgen Sie die Hinweise zur Schmierung und
zum Werkzeugwechsel.
J Montieren Sie für Arbeiten mit externem Zubehör,
wie z.B. Gummischleifteller / Topfbürste / Scheiben-
bürste / Fächerschleifscheibe einen Hand-
schutz (nicht im Lieferumfang enthalten).
J Führen Sie das Gerät eingeschaltet gegen das
Werkstück. Heben Sie das Gerät nach der Be-
arbeitung vom Werkstück ab und schalten Sie
es dann aus.
J Vermeiden Sie abnormale Körperhaltung.
Halten Sie das Gerät während der Arbeit immer
fest mit beiden Händen (siehe auch Abb. D).
Sorgen Sie für einen sicheren Stand.
J Der Zusatzgriff muss bei allen Arbeiten mit dem
Gerät montiert sein.
JBeachten Sie die Drehrichtung der Schleifschei-
be. Halten Sie das Gerät so, dass Funken oder
Schleifstaub vom Körper weg fliegen.
J Lassen Sie das ausgeschaltete Gerät zum
Sicherheit

48 DE/AT
Stillstand kommen, bevor Sie es ablegen.
Das Schleifwerkzeug läuft nach, nachdem das
Werkzeug abgeschaltet wurde.
J Vermeiden Sie, dass die Trennscheibe blockiert
und zu einer ruckartigen Reaktionskraft des
Gerätes führt. Schalten Sie im Falle einer Blockade
das Gerät sofort aus. Halten Sie es ruhig, bis die
Scheibe zum Stillstand gekommen ist. Ziehen Sie
erst dann die Trennscheibe aus dem Werkstück.
JSchalten Sie das Gerät nicht ein, solange sich
die Trennscheibe im Werkstück befindet.
J Sorgen Sie dafür, dass bei staubigen Arbeiten
die Lüftungsöffnungen frei sind. Falls es erforder-
lich werden sollte, den Staub zu entfernen,
trennen Sie zuerst das Elektrowerkzeug vom
Stromversorgungsnetz (verwenden Sie nichtme-
tallische Objekte) und vermeiden Sie das Be-
schädigen innerer Teile.
J Unbenutzte Elektrowerkzeuge sollten an einem
trockenen, hochgelegenen oder abgeschlos-
senen Ort, außerhalb der Reichweite von Kin-
dern, abgelegt werden.
J Behandeln Sie das Gerät vorsichtig und sorgfältig.
Schützen Sie das Gerät vor Schlag und Stoß.
J Kontrollieren Sie regelmäßig die Anschlussleitung
des Elektrowerkzeugs, und lassen Sie diese bei
Beschädigung von einem anerkannten Fachmann
erneuern. Kontrollieren Sie Verlängerungs-
leitungen regelmäßig und ersetzen Sie diese,
wenn sie beschädigt sind. Halten Sie Handgriffe
trocken, sauber und frei von Öl und Fett.
J Überprüfen Sie das Elektrowerkzeug auf
eventuelle Beschädigungen. Vor weiterem
Gebrauch des Elektrowerkzeugs sollten Schutz-
vorrichtungen oder leicht beschädigte Teile
sorgfältig auf ihre einwandfreie und bestim-
mungsgemäße Funktion untersucht werden.
Überprüfen Sie, ob bewegliche Teile einwandfrei
funktionieren und nicht klemmen oder ob Teile
beschädigt sind. Sämtliche Teile müssen richtig
montiert sein und alle Bedingungen erfüllen,
um den einwandfreien Betrieb des Elektrowerk-
zeugs zu gewährleisten. Beschädigte Schutz-
vorrichtungen und Teile sollten sachgemäß durch
eine anerkannte Fachwerkstatt repariert oder
ausgewechselt werden, soweit nichts anderes
in der Gebrauchsanweisung angegeben ist.
Beschädigte Schalter müssen bei einer Kun-
dendienstwerkstatt ersetzt werden. Benutzen
Sie keine Elektrowerkzeuge, bei denen sich der
Schalter nicht ein- und ausschalten lässt.
Hinweise zur Statik
Schlitzen z. B. in tragende Wände:
Schlitze in tragenden Wänden unterliegen der Norm
DIN 1053 Teil 1 oder länderspezifischen Festlegungen.
Halten Sie diese Vorschriften unbedingt ein. Ziehen
Sie vor Arbeitsbeginn den verantwortlichen Statiker,
Architekten oder die zuständige Bauleitung zu Rate.
Q
Arbeitshinweise
Hinweis! Schleifkörper dürfen nur für die emp-
fohlenen Einsatzmöglichkeiten verwendet werden.
Andernfalls könnten sie zerbrechen, beschädigt
werden und Verletzungen verursachen.
Schruppschleifen
Verwenden Sie niemals Trenn-
scheiben zum Schruppen!
J Bewegen Sie den Winkelschleifer mit mäßigem
Druck über das Werkstück hin und her.
J Führen Sie bei weichem Material die Schrupp-
scheibe in einem flachen Winkel über das
Werkstück, bei hartem Material in einem etwas
steileren Winkel.
Trennschleifen
Verwenden Sie niemals
Schruppscheiben zum Trennen!
m Gefahr! Führen Sie das Gerät
immer im Gegenlauf durch das
Werkstück. Bei entgegengesetzter
Richtung besteht die Gefahr eines
Rückschlags. Das Gerät kann aus dem Schnitt ge-
drückt werden.
J Führen Sie das Gerät immer eingeschaltet ge-
gen das Werkstück. Heben Sie das Gerät
nach der Bearbeitung vom Werkstück ab und
schalten Sie es erst dann aus.
Sicherheit

49 DE/AT
J Halten Sie das Gerät während der Arbeit im-
mer fest mit beiden Händen (siehe auch Abb.
D). Sorgen Sie für einen sicheren Stand.
J Für die beste Schleifwirkung bewegen Sie das
Gerät gleichmäßig in einem Winkel von 15°
bis 30° (zwischen Schleifscheibe und Werk-
stück) auf dem Werkstück hin und her.
J Beim Bearbeiten von schrägen Flächen darf
das Gerät nicht mit großer Kraft auf das Werk-
stück gedrückt werden. Wenn die Drehzahl
stark abfällt, müssen Sie die Andruckkraft redu-
zieren, um sicheres und effektives Arbeiten zu
ermöglichen. Sollte das Gerät plötzlich voll-
kommen gebremst oder blockiert sein, muss
der Netzstrom sofort ausgeschaltet werden.
J Trennen: Arbeiten Sie mit mäßigem Vorschub
und verkanten Sie die Trennscheibe nicht.
J Schrupp- und Trennscheiben werden beim Ar-
beiten sehr heiß – lassen Sie sie vor dem Be-
rühren vollständig abkühlen.
J Verwenden Sie das Gerät niemals zweckent-
fremdet.
J Achten Sie immer darauf, dass das Gerät aus-
geschaltet ist, bevor Sie den Netzstecker in die
Steckdose stecken.
J Ziehen Sie bei Gefahr sofort den Netzstecker
aus der Steckdose. Sorgen Sie dafür, dass das
Gerät und der Netzstecker leicht zugänglich
und im Notfall problemlos erreichbar sind.
J Ziehen Sie bei Arbeitspausen, vor allen Ar-
beiten am Gerät und bei Nichtgebrauch immer
den Netzstecker aus der Steckdose. Das Gerät
muss stets sauber, trocken und frei von Öl oder
Schmierfetten sein.
J Seien Sie stets aufmerksam! Achten Sie immer
darauf, was Sie tun, und gehen Sie stets mit
Vernunft vor. Benutzen Sie das Gerät in keinem
Fall, wenn Sie unkonzentriert sind oder sich un-
wohl fühlen.
Q
Originalzubehör / -zusatzgeräte
J Benutzen Sie nur Zubehör und Zusatzgeräte,
die in der Gebrauchsanweisung angegeben
sind. Der Gebrauch anderer als in der Bedie-
nungsanleitung empfohlenen Teile oder an-
deres Zubehör kann eine Verletzungsgefahr für
Sie bedeuten.
Q
Inbetriebnahme
Beachten Sie die Netzspannung. Die Netzspannung
der Stromquelle muss mit den Angaben auf dem
Typenschild des Gerätes übereinstimmen. Geräte,
die mit 230 V bezeichnet sind, können auch mit
220 V betrieben werden.
Q
Schutzhaube mit
Schnellverschluss montieren
J Ziehen Sie vor allen Arbeiten am Gerät den
Netzstecker aus der Steckdose!
m Verletzungsgefahr! Verwenden Sie den
Winkelschleifer immer mit der Schutzhaube.
Die Schutzhaube muss sicher am Winkelschlei-
fer angebracht werden. Stellen Sie diese so
ein, dass ein Höchstmaß an Sicherheit erreicht
wird, d.h. der kleinstmögliche Teil des Schleif-
körpers zeigt offen zur Bedienperson. Die
Schutzhaube soll die Bedienperson vor Bruch-
stücken und zufälligem Kontakt mit dem
Schleifkörper schützen.
j Öffnen Sie den Spannhebel
8
.
j Setzen Sie die Schutzhaube
7
mit der Codier-
nase
9
in die Codiernut
16
.
j Drehen Sie die Schutzhaube
7
in die erfor-
derliche Stellung (Arbeitsposition). Die geschlos-
sene Seite der Schutzhaube
7
muss stets zum
Bediener zeigen.
j Schließen Sie den Spannhebel
8
zum Fest-
klemmen der Schutzhaube
7
.
Falls erforderlich, kann die Spannkraft des Ver-
schlusses durch Lösen oder Anziehen der Justier-
schraube
10
verändert werden.
Stellen Sie sicher, dass die Schutzhaube
7
fest auf dem Spindelhals sitzt.
Sicherheit / Inbetriebnahme

50 DE/AT
Q
Zusatz-Handgriff montieren
m Vorsicht! Aus Sicherheitsgründen darf dieses
Gerät nur mit dem
Zusatz-Handgriff
6
verwen-
det werden.
J Ziehen Sie vor allen Arbeiten am Gerät den
Netzstecker aus der Steckdose!
j Schrauben Sie den Zusatz-Handgriff
6
je
nach Arbeitsweise links, rechts oder oben am
Gerätekopf ein.
Q
Schrupp- / Trennscheibe
montieren / wechseln
Die Abmessungen der Schrupp- oder Trennscheiben
beachten. Der Lochdurchmesser muss ohne Spiel
zum Aufnahmeflansch passen. Keine Reduzierstücke
oder Adapter verwenden.
J Ziehen Sie vor allen Arbeiten am Gerät den
Netzstecker aus der Steckdose.
J Überprüfen Sie die Schrupp- oder Trennscheibe.
Sie darf weder beschädigt noch feucht sein oder
Risse aufzeigen.
m
Verbrennungsgefahr!
Tragen Sie beim
Wechseln
von Schrupp- und Trennscheiben im-
mer Schutz handschuhe. Schrupp- und Trenn-
scheiben werden beim Arbeiten sehr heiß. Fassen
Sie diese nicht an, bevor sie abgekühlt sind.
j Hinweis: Verwenden Sie unbedingt nur
schmutzfreie Scheiben.
j Verwenden Sie nur Schleifwerkzeuge, deren
zulässige Drehzahl mindestens so hoch ist wie
die Leerlaufdrehzahl des Gerätes.
j Betätigen Sie die Spindel-Arretiertaste
11
nur
bei stillstehender Aufnahmespindel
14
.
j Drücken Sie die Spindel-Arretiertaste
11
zum
Blockieren des Getriebes.
j Lösen Sie die Spannmutter
13
mit Hilfe des
Spannschlüssels
17
Abb. C.
j Setzen Sie die Schrupp- oder Trennscheibe, mit
der beschrifteten Seite zum Gerät, auf den Auf-
nahmeflansch
15
.
j Setzen Sie anschließend die Spannmutter
13
,
mit der erhobenen Seite nach oben, wieder
auf die Aufnahmespindel
14
.
j Drücken Sie die Spindel-Arretiertaste
11
zum
Blockieren des Getriebes.
j Ziehen Sie die Spannmutter
13
mit dem
Spannschlüssel
17
wieder fest.
j Hinweis: Wenn die Scheibe nach dem
Wechsel unruhig läuft oder schwingt, muss diese
Scheibe sofort wieder ausgewechselt werden.
j
Lassen Sie das Gerät nach einem Scheiben-
wechsel sicherheitshalber 30 Sekunden im Leer-
lauf laufen. Achten Sie auf ungewöhnliche Ge-
räusche und Funkenentwicklung. Überprüfen Sie,
ob alle Befestigungsteile korrekt angebracht sind.
j Achten Sie darauf, dass der Drehrichtungspfeil
auf den Schrupp- oder Trennscheiben (auch Dia-
mant-Trennscheiben) und die Drehrichtung des
Gerätes (Drehrichtungspfeil auf dem Geräte-
kopf) übereinstimmen.
Q
Bedienung
Q
Ein- und Ausschalten
Hinweis: Schalten Sie den Winkelschleifer immer
vor Materialkontakt ein und führen Sie das Gerät
erst dann auf das Werkstück.
Gerät einschalten
j Betätigen Sie die Einschaltsperre
3
.
Drücken Sie anschließend den EIN- / AUS-
Schalter
2
.
Gerät ausschalten
j Lassen Sie den EIN- / AUS-Schalter
2
los.
Dauerbetrieb einschalten
j Betätigen Sie die Einschaltsperre
3
und halten
diese gedrückt.
Drücken Sie den EIN- / AUS-Schalter
2
im Be-
reich
der Einschaltsperre, bis diese arretiert.
Dauerbetrieb ausschalten
j Drücken Sie den EIN- / AUS-Schalter
2
und
lassen Sie ihn los.
Gerätegriff drehen
j Ziehen Sie vor allen Arbeiten am Gerät den
Netzstecker aus der Steckdose!
Inbetriebnahme / Bedienung

51 DE/AT
j Der Gerätegriff
1
lässt sich um 90° nach
rechts oder nach links drehen.
j Dadurch kann der EIN- / AUS-Schalter
2
je
nach Arbeitsbedingung in eine günstigere
Position gebracht werden.
j Drücken Sie die Entriegelungstaste
4
und dre-
hen Sie den Gerätegriff
1
nach rechts oder
links.
j Lassen Sie den Gerätegriff
1
einrasten.
Q
Wartung und Reinigung
JZiehen Sie vor allen Arbeiten am Gerät
den Netzstecker aus der Steckdose!
JVerwenden Sie keine scharfen Gegenstände
zur Reinigung des Gerätes. Es dürfen keine
Flüssigkeiten in das Innere des Gerätes gelangen.
j Lassen Sie den Austausch der Kohlebürsten
ausschließlich durch die Servicestelle oder
eine anerkannte Fachwerkstatt durchführen. An-
sonsten ist das Gerät wartungsfrei.
j Reinigen Sie das Gerät regelmäßig, am besten
immer direkt nach Abschluss der Arbeit.
j Reinigen Sie das Gehäuse mit einem trockenen
Tuch – verwenden Sie auf keinen Fall Benzin,
Lösungsmittel oder Reiniger, die Kunststoff
angreifen.
j Zur gründlichen Reinigung des Gerätes wird
ein Staubsauger benötigt.
j Lüftungsöffnungen müssen immer frei sein.
j Entfernen Sie anhaftenden Schleifstaub mit
einem Pinsel.
Q
Entsorgung
Die Verpackung besteht aus umwelt-
freundlichen Materialien, die Sie über
die örtlichen Recyclingstellen entsorgen
können.
Werfen Sie Elektrowerkzeuge
nicht in den Hausmüll!
Gemäß Europäischer Richtlinie 2002 / 96 / EG
über Elektro- und Elektronik-Altgeräte und Umset-
zung in nationales Recht müssen verbrauchte Elek-
trowerkzeuge getrennt gesammelt und einer um-
weltgerechten Wiederverwertung zugeführt werden.
Möglichkeiten zur Entsorgung des ausgedienten
Gerätes erfahren Sie bei Ihrer Gemeinde- oder
Stadtverwaltung.
Q
Informationen
Q
Service
Die zuständige Servicestelle Ihres Landes entneh-
men Sie bitte den Garantieunterlagen.
J Lassen Sie Ihre Geräte nur von qualifiziertem
Fachpersonal und nur mit Originalersatzteilen
reparieren. Damit wird sichergestellt, dass die
Sicherheit des Gerätes erhalten bleibt.
J Lassen Sie den Austausch des Steckers oder
der Anschlussleitung immer vom Hersteller des
Elektrowerkzeugs oder seinem Kundendienst
ausführen. Damit wird sichergestellt, dass die
Sicherheit des Gerätes erhalten bleibt.
Bedienung / Wartung und Reinigung / Entsorgung / Informationen

Q
Konformitätserklärung /
Hersteller
Wir, Kompernaß GmbH, Burgstr. 21, 44867 Bochum,
Deutschland, erklären hiermit für dieses Produkt die
Übereinstimmung mit folgenden EG-Richtlinien:
Maschinenrichtlinie (98 / 37 / EG)
EG-Niederspannungsrichtlinie
(2006 / 95 / EG)
Elektromagnetische Verträglichkeit
(2004 / 108 / EG)
Typ / Gerätebezeichnung:
Parkside Winkelschleifer PWS 230
Bochum, 31.10.2007
Hans Kompernaß
- Geschäftsführer -
Technische Änderungen im Sinne der Weiterentwicklung
sind vorbehalten.
Informationen
52 DE/AT
-
 1
1
-
 2
2
-
 3
3
-
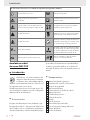 4
4
-
 5
5
-
 6
6
-
 7
7
-
 8
8
-
 9
9
-
 10
10
-
 11
11
-
 12
12
-
 13
13
-
 14
14
-
 15
15
-
 16
16
-
 17
17
-
 18
18
-
 19
19
-
 20
20
-
 21
21
-
 22
22
-
 23
23
-
 24
24
-
 25
25
-
 26
26
-
 27
27
-
 28
28
-
 29
29
-
 30
30
-
 31
31
-
 32
32
-
 33
33
-
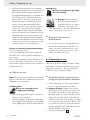 34
34
-
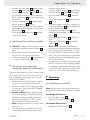 35
35
-
 36
36
-
 37
37
-
 38
38
-
 39
39
-
 40
40
-
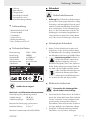 41
41
-
 42
42
-
 43
43
-
 44
44
-
 45
45
-
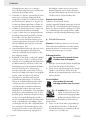 46
46
-
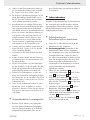 47
47
-
 48
48
-
 49
49
-
 50
50


Parkside PWS 230 Operation and Safety Notes
- Categoría
- Herramientas eléctricas
- Tipo
- Operation and Safety Notes
En otros idiomas
- italiano: Parkside PWS 230
- English: Parkside PWS 230
- Deutsch: Parkside PWS 230
Documentos relacionados
-
Parkside PWS 230 SE - MANUEL 2 Operation and Safety Notes
-
Parkside PWS 125 A1 ANGLE GRINDER Operation and Safety Notes
-
-
Parkside PWS 1010 Operation and Safety Notes
-
-
Parkside PWS 230 D4 Instrucciones de operación
-
-
-
Parkside PWS 230 C3 Translation Of The Original Instructions
-