Kenmore 911.47812200 El manual del propietario
- Categoría
- Microondas
- Tipo
- El manual del propietario

Double 30" Electric Self-Cleaning
Built-In Wall Oven with Upper
Microwave
Use & Care Guide
Horno El_ctrico
Doble de 30" Empotrado con Autolimpieza
y Microondas Superior
Guia para el Uso y Cuidado
Models, Modelos 911.47812, 47813, 47814, 47819
229c4020P3 12-2
(SR-10501-2)
Sears, Roebuck and Co.,
Hoffman Estates, IL 60179 U.S_. www.sears.com
20P312-2 ENv01

SELF-CLEANINGBUILT-IN
WALLOVENWITHMICROWAVE
TABLEOFCONTENTS,
Oven Safety .......................... 34_
Removal of Packaging Tape ....6
Features of Your Oven .............. 7
Microwave Oven Control .......... 8
Power Level .......................... 8-9
Time Cook I .............................. 9
Time Cook Guide ...................... 9
Time Cook II ........................... 10
Time Defrost ........................... 10
Add 30 Seconds ..................... 10
Express Cook ......................... 10
Auto Feature ........................... 10
Timed Defrosting Guide ......... 11
Humidity Sensor ..................... 12
Popcorn .................................. 12
Reheat .................................... 12
Potato ..................................... 12
Beverage ................................ 13
Snacks .................................... 13
Snacks Guide ......................... 13
Cook ....................................... 13
Cook Guide ............................ 13
Upper Oven Clock .................. 14
Kitchen Timer ......................... 14
Display On/Off ........................ 14
Reminder ................................ 14
Delay Start .............................. 14
Sound On/Off .......................... 14
Lower Oven Control ................ 15
Lower Oven Display ............... 16
Lower Oven Clock .................. 17
Lower Oven Kitchen Timer ._.. 17
Lower Oven Tones ................. 18
Lower Oven F Code ............... 18
Lower Oven Cooking Tips.. 19-21
Baking With Margarine ........... 20
Baking .................................... 22
Broiling ................................... 23
Setting Special Features .. 24-25
Self-Cleaning Cycle .......... 26-27
Microwave Oven Interior ........ 28
Microwave Oven Floor ............ 28
MicrowaveOvenDoorWindow_.28
Outside Oven Surfaces .......... 28
Microwave Control Panel ........ 28
Lower Oven Control Panel...... 29
Broiler Pan and Grid ............... 29
Oven Racks ............................ 29
Wails of the Oven ................... 29
Glass ...................................... 29
Oven Light Bulb ...................... 30
Removable Oven Racks ......... 30
Oven Door .............................. 31
Before Calling for
Service .............................. 32-34
Temperature Adjustment ........35
Warranty ................................. 36
Service Numbers .................... 76
For your convenience and future reference, please write down your model
and serial numbers in the space provided. They are located on the inside
wall of the microwave when the microwave oven door is opened.
MODEL NUMBER: SERIAL NUMBER:
© Sears, Roebuck and Co.
2
20P312-2 ENv01

IMPORTANTSAFETY
INSTRUCTIONS
SAVE THESE INSTRUCTIONS
Read all instructions before using this appliance. When using gas or
electrical appliances, basic safety precautions should be followed,
including the following:
IMPORTANT: To insuresafety for
yourself, famiqyand home, please
read your Owner's Manual carefully.
Keep it handy for reference. Pay
close attention to Safety Sections. BE
SURE your appliance is installedand
grounded by a qualified technician,
• DO NOT leave children alone
or unattended near an appliance
in use
• TEACH CHILDREN not to play with
controls or any part of the appliance
and net to sit, climb or stand on the
door, or any part of the appliance.
• CAUTION: NEVER STORE items
of interest to children in cabinets
above the appliance. Children
climbing on the appliance could
be seriously injured,
• KEEP TillS book for later use.
• NEVER TRY to repair or replace
any part of the appliance unless
instructions are given inthis manual.
All otherwork should be done by a
qualified technician.
• NEVER USE your appliance for
warming or heating the room.
• ALWAYS KEEP combustible wall
coverings, curtains, dishcloths,
towels, potholders and other linens
a safe distance from the appliance.
• NEVER USE a towel or other bulky
cloth as a potholder. Make sure the
potholder is dry. Moist potholders
could cause steam burns. DO NOT
let potholders touch hot surfaces.
• ALWAYS KEEP your appliance
clear of things that will burn
(gasoline and other flammable
vapors or liquids).
• ALWAYS KEEP the oven area
free from things that will burn. Food,
wooden utensils and grease buildup
could catch fire. Plastic utensils
could melt and canned foods could
explode. Your appliance should
never be used as a storage area.
• NEVER HEAT unopened food
containers. Pressure buildup can
cause the container to burst and
cause injury.
• NEVER LEAVE containers of fat
or drippings inyour oven.
• NEVER TRY to clean a hot surface.
Some cleaners produce noxious
fumes and wet cloths or sponges
could cause steam burns.
• BE SURE the oven is securely
installed in a cabinet that is firmly
attached to the house structure.
• LARGE SCRATCHES OR
IMPACTS to glass doors can lead
to broken or shattered glass.
• DO NOT touch heating elements,
surfaces near them or interior oven
surfaces. These may be hot enough
to cause burns even though they
are dark in color. During and after
use, do not touch or let clothing or
flammable material contact the
elements or hot surfaces until they
have had time to cool. Other
surfaces near the oven vent
openings, oven door and window
surfaces may also be hot enough
to cause burns.
3
20P312-2 ENv01

IMPORTANTSAFETY
INSTRUCTIONS
,aJ
I
• PLACEOVENRACKSinthedesired
positionwhiletheoveniscool.Ifracksmust
bemovedwhileovenishot,donotlet
potholdercontactthehotovenelement.
• AFTERBROILING,atwaystakethebroiler
panandgridoutoftheoven
andcleanthem.Leftovergreaseinthebroiler
pancouldcatchfirethenexttimeyouuse
youroven.
• ALWAYSUSEcarewhenopeningtheoven
doorLethotairandsteamescapebefore
movingfoods.
• NEVERUSEaluminumfoiltolinetheoven
bottom.Improperuseoffoilcouldstarta fire,
orelectricalshockcouldresult,
• NEVERBLOCKtheovenventopening.
• CLEANONLYthepartslistedinthismanual
Followallcleaninginstructions.
Besuretoremovethebroilerpanandgrid
beforeself-cleaning
• NEVERRUB,move,cleanordamagethe
doorgasketonserf-cleaningovens,Itis
essentialforagoodseal.
• NEVERTRYtocleanutensils,cookware,
removableparts,orbroilerpanandgridin
these_f-cleencycle,
• DONOTUSEovencleaners-
Nocommercialovencleanerorprotective
coatingofanykindshouldbeusedinor
aroundanypartoftheoven.
• IFTHESELF-CLEANINGmode
malfunctions,turntheovenoffand
disconnectlhepowersupply,Haveit
servicedbyaqualifiedtechnician.
• AFANshouldbeheardsometimeduringthe
self-cleencycle.Ifnot,callforsewicebefore
nextserf-cleancycle.
IMPORTANTSAFETYNOTICE
TheCaliforniaSafeDrinkingWaterandToxic
EnforcementActrequiresthegovernorof
Californiato publisha listofsub_ancas
knowntothestatetocausebirthdefectsor
otherreproductiveharmandrequires
businessestowaretheircustomersof
potentialespoeuretosuchsohetencen.
Thefiberglassinsulationinaserf-claanlag
ovenwillgiveoffaverysmallamountof
cad)onmonoxideduringthecleaningcycle.
Exposurecanberelalmizodbyventingwith
anopendoororwthdoworusinga
ventilationfanorhood.
IMPORTANT: The health ofsome birdsis
extremelysensitive to the fumes given off
daring the self-cleaning cycleof anyoven,
Movebirdstoanotherwell-ventilatedroom.
READAND UNDERSTAND
THIS INFORMATIONNOWi
BesureeveryoneInyourhomeknowswhat
todeincaseoffire.Neverusewaterona
greasefire;Itwillonlyspreadtheflames.
OVENFIRE:
Donottrytomovethepan!
1, Closetrfeovendoorandturn
controlsoff,
2. ftfiresentinues,carefullyopenthedoor,
throwbakingsodaonthefire,
o,ruseadrychemical,foamor
ha!on-typeextinguisher.
4
When using electrical
appliances, basic safety
precautions should be
followed, Including the following:
WARNING: To reduce the risk of
burns, electric shock, fire, injury
to persons or exposure to
excessive microwave energy:
• Read all Instructions before
using this appliance.
• Read and follow the specific
microwave safety' Instructions. ,
20P312-2ENvO1

IMPORTANTSAFETY
INSTRUCTIONS
• THIS APPLIANCE must be
grounded. Connect only to properly
grounded outlet. See the Grounding
Instructions in the Installation
Instructions,
• USE this appliance only for its
intended use as described in this
manual. Do not use corrosive
chemicals or vapors in this
appliance. This microwave oven is
specifically designed to heat or
cook food and is not intended for
laboratory or industrial use.
• INSTALL or locate this appliance
only in accordance with the
provided Installation Instructions.
• DO NOT cover or block any
openings on the appliance.
• THIS MICROWAVE oven is not
approved or tested for marine use
• DO NOT operate this appliance if it
is not working properly or if it has
been damaged or dropped,
• AS WITH ANY APPLIANCE, close
supervision is necessary when used
by children.
• DO NOT overcook food. Carefully
attend appliance if paper, plastic
or other combustible materials are
placed inside the oven to facilitate
cooking.
• REMOVE wire twist-tiesfrom paper
or plasticbags before placing inthe
oven,
• DO NOT use your microwave oven
to dry newspapers.
• DO NOT use recycled paper
products. Recycled paper towels,
napkins and waxed paper can
contain metal flecks which may
cause arcing or ignite. Paper
products containing nylon or nylon
filaments should be avoided.
• DO NOT heat food in closed
containers, such as glass jars,
which may explode.
• DO NOT pop popcorn in your
microwave unless you use popcorn
labeled for use in microwave ovens
• DO NOT overcook potatoes. They
could dehydrate and catch fire,
causing damage to your oven.
• DO NOT operate the microwave oven
if it is empty.
• DO NOT use your microwave oven
as a storage space,
• IF MATERIAL INSIDE the even
should ignite, close the door, turn
the oven off and disconnect the
power to the appliance.
• OVERSIZED food or oversized
metal cookware should not be used
in a microwave oven. Electrical
shook or fire could occur.
• DO NOT clean with metal scouring
pads. Pieces can break off the pad,
causing electrical shock.
• DO NOT defrost frozen beverages
that have narrow-necked bottles
Pressure could build up, causing
the bottle to burst.
• USE POTHOLDERS when
removing cookwarefrom the oven.
Cookware could become hot during
cooking due to the transferredheat
from the food.
• BE CAREFUL touchingthe walls
or the oven bottom during orafter
cooking. The waftsand floor could
become hot.
• DO NOT boil eggs in a microwave
oven. Pressure will build up inside
the egg yolk and will cause the egg
to burst.
• USE PLASTIC containers that are
approved by the manufacturer for
microwave use. Do not allow
children to use plastic containers
unless supervised. Do not subject
empty containers to microwaving
5
20P312-2 ENv01

IMPORTANTSAFETY
INSTRUCTIONS
• FOODSWITHUNBROKENOUTERSKIN,
suchaspotatoes,sausages,tomatoes,
apples,eggyolks,chickenliverandother
giblets,shouldbe piercedtoallowsteam
to escapeduringcooking,
• MAKESUREPLASTICWRAPSused
duringmicrowavecookingareapproved
formicrowaveuse.
• SUPERHEATEDWATER:Microwaved
waterandotherliquidsdonot always
bubblewhentheyreachtheboilingpoint.
Theycanactuallyget superheatedandnot
bubbleatall.
Superheatedliquidwillbubbleup
out ofthecupwhenitis movedor when
somethinglikea spoonor teabag isput
intoit.
Topreventthisfromhappeningand
causinginjury,do notheatanyliquidfor
morethan2 minutespercup.
Afterheating,letthecup standinthe
microwavefor30secondsbeforemoving
itor puttinganythingintoit.
Spontaneousbelling:Undercertain
specialcircumstances,liquidsmaystartto
boilduringor shortlyafterremovalfromthe
microwaveoven,Topreventburnsfrom
splashingliquid,werecommendthe
followingbeforeremovingthecontainer
fromtheoven:
- Allowthe oentainertostandin the
ovenfor30to40secondsafterthe
ovenhasshutoff.
- Donotboil liquidsin narrow-necked
containerssuchas softdrinkbottles,
wineflasksandespeciallynarrow-
neckedcoffeecups.Evenifthe
containeris opened,excessive
steamcanbuildupand causeitto
burst or overflow,
• DONOTheatbabyfoodin glassjars in
themicrowave.
• BOILABLECOOKINGPOUCHESand
tightlyclosedplasticbags shouldbe slit,
piercedorventedasdirectedbypackage.
Iftheyarenotventedinsomeway,
pressurewillcausethemtoburst.
• O0NOTattempttooperatethisoven
withthedooropensinceopen-door
operationcanresultinharmfulexposure
tomicrowaveenergy.ItIs Important
notto defeatortamperwiththe safety
interlocks.
• DONOTplaceanyobjectbetweenthe
ovenfrontfaceandthe dooror allowsoil
or cleanerresidueto accumulateon
sealingsurfaces.
• THEOVENshouldnotbeadjustedor
repairedbyanyoneexceptproperly
qualifiedservicepersonnel.
• DONOToperatetheovenif itisdamaged.
Itisparticularlyimportantthattheeven
doercloseproperlyandthatthereisno
damagetothe:
1.door(bent)
2.hingesandlatches(brokenor
loosened)
3.doorsealsandsealingsurfaces.
Toremovetheadhesiveresidueleftfrom
packagingtape,usehouseholddishwashing
liquid,mineraloilor cookingoil. Withasoft
cloth,rubintotheareaandallowtosoak.
Rinseand drywell.Repeatprocedureusing
anappliancepolishtoinsurenodamageis
done.Thisshouldbedonebefo_ the
ovenIsturnedonforthe firsttime.The
tapecannotberemovedoncetheoven
hasheated.Packagingtapemaybefound
in thefollowingareas:DoorHandle,Control
PanelArea,DoorTrimandOvenArea.
SAVE THESE INSTRUCTIONS
6
20P312-2 ENv01

OPERATION
FEATURESOFYOUROVE#
Model & SeriaL
Microwave Oven Light
Turntable
Upper Oven Vent
,& GHII
Microwave
Lower Oven
Auto Self-Clean
Open Door Push
Lower Oven Vent
Broiler Pan &
Grid
Oven Rack
Guides
III
;witch
Removable
Oven Rack
Oven Door Gasket
7
20P312-2 ENv01

OPERATION
_ MICROWAVE O'v_l
)
SENSO_ COO_NG CON_Mr_'_ COO_NG
Withyournew MicrowaveOven,you can
microwaveby time, byusing the Sensor
features,or by usingthe Autofeatures,
TIME COOK EXPRESS COOK
TIME DEFROST ADD 30 SEC
TimeFeaturesallowyouto setthe exact
amountoftime neededto preparefoods,
upto 99minutesand 59seconds.
Below is a list of buttons that control
Sensor features.
POPCORN
REHEAT
POTATO
When power is restored, all digits
in the display will light up, then the
display will read "RESET."
This feature adds flexibility to
microwave cooking. Each level
of power gives you microwave
energy with acertain percent of
the power. Such as:
1= 10%of power 6= 60%of power
2= 20% ofpower 7= 70%of power
3= 30% ofpower 8= 80% ofpower
4= 40% ofpower 9= 90% ofpower
5=50%of power 0= 100%of power
Most of your cooking will be done
using 100% of power. Foods will
cook faster but will need to be
stirred, rotated or turned over
more frequently.
Using a lower level of power will
cook foods more evenly and need
less stirring or rotating. Some
foods may have a better flavor,
texture or appearance if one of
the lower power levels is used. A
lower power is much better for
foods that have tendencies to boil
over,
POWER Stews,lesstendercutsofmeat
When using sensor cooking, the oven will IIB/B. FOODS
automatically adjust the cooking time for 10 Fish,bacon,vegetables,boilingliquids
you by detecting the humidity released 7 Meat,poultry+casserolesorreheating
during cooking. The cooking time will vary 5
according to the types and amounts of 2or3 Defrosting,simmering
foods. 1 Keepngfoodswarm,softeningbutter
BEV COOK
SNACKS AUTO DEFROST
Whenusingconveniencefeatures,the
ovenallowsyou to easilyselect quantities
or cookingtimesfor a varietyof popular
items.
The power level may be entered or
changed immediately after entering
the feature time, such as TIME
COOK, TIME DEFROST or
EXPRESS COOK, The power level
may also be changed during atime
countdown,
8
2OP312-2 ENv01

OPERATION
1. Pressthe TIME COOKpad or the
TIME DEFROSTpad.
2. Pressthe NUMBERpads to seta
cookingor defrosting time
3. Pressthe POWERLEVELpad.
4. Pressa NUMBERpad to setthepower
levelyou need.
5. Pressthe STARTpad
TIME COOK1 isautomaticallysetfor
powerlevel 10,but youcan changethis
levelto oneyouprefer.Youmayseta
cookingtime up to99 minutesand 59
seconds.
1. Pressthe TIMECOOK pad
2. Pressthe NUMBERpads to enteryour
preferredcookingtime
3. Ifyou wishto changethe power level,
pressthe POWERLEVELpadand
thenpressaNUMBERpadto select
yourpreferredpowerlevel.
4. Pressthe STARTpad
Ifyouopen the ovendoor duringcooking
tocheck foods,when the door isclosed
pressthe STARTpad to continue
cooking.
VEGETABLE
Beans
_(esh)
[frozen)
Broccoli
(fresh)
(frozenchopped)
_mts
(fresh,sliced',
(frozen)
Cornonthe
cob
(fresh}
(frozen)
Mixedreg.
(frozen)
Peas
(fresh,shelled)
(frozen)
potatoes
fresh, cubed,
white
flesh,whole,
sweetorwhite
TIME COOK GUIDE
(Use power level 10 unless noted)
WEIGHT
11b
10ozpackage
1 bunch
P/. to 1V2Ibs.)
10 oz. package
10oz. package
10oz. package
1to 5ears
ear
2to6ears
10oz. package
2Ibs.unshelled
10oz. package!
4 potatoes
6 to8oz.each)
t (6to8oz)
COOKING'lIME
10to 15min.
4toBmin
5 to9 rain.
4to7 min.
4to 8rain.
i 3to 7 min.
1_hrnin.perear
3to 6 rain.
2to3rain.perear
2to6min.
7 to 10min,
2to6 min.
9to 12min.
1to 4 min.
COMMENTS
In 1_qt. casserole,place V2cup water
in 1-qt.casserole,place2 tablespoonswater
In2-qt, casserole,place '/2cup water
In 1-qt.casserole.
In 1_/z_!t. casserole,place V4cup water.
In 1-qt.casserole,place 2 tablespoonswater
In 2-qt.obtong glass baking dish, placecorn. Ifcon
is in nowater,huskcorn and add V4cup water.
Rearrangeafter halfthetime,
Place in 2-qt. oblong glass bakingdish. Coverwith
vented plastic wrap. Rearrangeafterhaftthe time,
In 1-qhcasserole,place 3tablespoonswater.
In 1-qt.casserole,place _ cup water
In 1-qt.casserole,place 2 tablespoonswater
Peelandcut into 1-inchcubes. Place in2-qt.
casserolewithV2cup water.Stirafter halfthe time.
Piercewith cooking fork.Placein centerof the oven
Let stand5 minutes
9
20P31_2ENv01

OPERATION
TimedCooking
TIME COOKII allowsyou to change
powerlevelsautomaticallyduring
cooking.
1. PresstheTIME COOKpad
2. PresstheNUMBERpads toenter your
firstcooking time.
3. Ifyou wishto change the powerlevel,
pressthe POWERLEVELpadand
thenpressthe NUMBERpad to select
your preferredpower level
4. Pressthe TIME COOKpad again
5. Pressthe NUMBERpadsagain to
enter yoursecond preferredcooking
time.
6. Ifyou wishto change the powerlevel,
pressthe POWERLEVEl. pad and
thenpressthe NUMBERpad to select
yourpreferredpowerlevel.
7. Pressthe STARTpad
Atthe endofthe first cookingtime
countdown,the secondcookingtime will
startits countdown.
lllh'd..'Oe]..%7+/o/..'_IrJ
Allowsyou to defrostfor a selectedlength
of time,The PowerLevelis automatically
setfor level3 but can be changed, When
using higherpower levels,foodswill need
to be checked morefrequently
TO SET TIME DEFROST:
1. Pressthe TIME DEFROSTpad.
2. Pressthe NUMBERpads to enterthe
defrosting time,
3. Pressthe STARTpad.
A
Ir,Je]m]Fcrdf**].,_e]_?lm],.']
Youcanusethisfeaturetwoways:
• Itwill add 30 secondstothe time
counting down eachtimethe pad is
pressed.
• Itcan be used asa quick way toset 30
seconds ofcookingtime.
Thisisaquickwayto setcookingtimefrom
1to6minutes.
PressoneoftheExpressCookpads(from
1to6) for1to6minutesofcookingatpower
level10,
Thepowercan bechangedwhilethetimeis
countingdown.PressthePOWERLEVEL
padandenteranumberfrom1to0+
10
AutoDefrostautomaticallysetsthedefrosting
timesandpowerlevelstogiveeven
defrostingresultsformeats,poultryandfish.
UseTimeDefrostformostotherfrozenfoods.
TOSETAUTODEFROST:
1. PresstheAUTODEFROSTpad.
2. UsingtheConversionGuide,enterthe
foodweight.
3. PresstheSTARTpad.
Lookforthehandyguidelocatedonthe
insidefrontofthemicrowaveoven.
• Removemeatfrompackageandplaceon
amicrowave-safedish.
• Twiceduringdefrost,theovensignals
"TURn."Ateach"TURn"signal,turnthe
fondover.Removedefrostedmeator
shieldwarmareaswithsmallpiecesoffoil.
• Afterdefrosting,mostmeatsneedtostand
5minutestocompletedefrosting.Large
roastsshouldstandforabout30minutes.
CONVERSIONGUIDE
Iftheweightoffoodisstatedinpoundsand
ounces,theouncesmustbeconvertedto
tenths(.1)ofa pound.
CONVERSION CHART for
Auto Defrost
FOOD WEIGHT FOOD WEIGHT
IN OUNCES IN TENTHS
1-2 ,1
3 .2
_7 .4
8 .5
9-10 .6
11 .7
12-13 .8
14-15 .9
20P312-2 ENv01

OPERATION
TimedCooking
F0qO
Breads, Cakes
Buns and roils
Sweet rolls
Fish and Seafood
Fillets, frozen (! Ib)
Shellfish,smallpiecesI1Ib)
Meat
Bacon (1 Ib,)
Franks(lib.)
Ground meat(1 Ib)
Roast:beef.lamb,veaL,pork
Steaks,chops and
cutlets
PouHry
Chicken, broiler,fryer
cut up (2V2to 3 Ibs)
Chicken,whole
(2V2to 3 Ibs)
Cornish Hen
Turkeybreast
(4 to 6 ths.)
TIMED DEFROSTING GUIDE
TIME COMMENTS
V4min.
2to 4 min.
6to 9 min. Placeblock incasserole dish.Turnoverand break up
to 7 min, after halfthetime,
2 to5rnin. Placeu_penedpackageinoven.Letstand5minutesgterpahosfin9
tto5min, Placeunopenedpackagein oven.Microwavejustuntilfranks
canbeseparated,Letstand5minutes,if necessary,to
completedefrosting.
Ire6rain. Turnmeatover afterhaltthetime.Usepowerlevel1,
)to13min.palb.
to8rain,parlb. Placeunwrappedmeatincookingdish.Turnoverafterhalf
thetimeandshieldwarmareaswithfoil.Whenfinished,
separatepiecesand_etstandtocompletedefrosting,
14to 20min. Placewrappedchickenin dish.Unwrapandturnoverafterhalf
thehme.Whenfinished,separatepiecesandmicrowave2to4
minutesmore,Ifnecessary.Letstandtofinishdefrosting.
20to 25min, Placewrapped chicken in dish.Afterhalfthetime,
unwrapandturn chickenover,Shield warmareaswith foil
Finishdefrosting. Ifnecessary,runcold waterin thecavity
untilgiblets can be removed.
7to 13rain. Place unwrappedhenintheoven.breast side up.Turn
_erlb. overafter halfthetime. Runcool waterin thecavityuntil
giblets can beremoved.
to 8min, Placeunwrapped breast indish,breast sidedown. After
_erlb. halfthetime, turnover andshield warm areaswithfoil,
Finishdefrosting,Letstand 1to2 hours inrefrigeratorto
complete defrosting,
• Foods frozenin paper or plasticcan be
defrostedin thepackage.Closed
packages shouldbe slit, piercedor
ventedafter foodhas partiallydefrosted.
Plasticstoragecontainers shouldbe
partiallyuncovered.
• Family-size,prepackaged frozendinners
can be defrostedandmicrowaved.Ifthe
food isin a foil container,transferit toa
microwave-safedish
• Foodsthatspoileasilyshouldnot be
allowedtosit out for morethanonehour
afterdefrosting.Roomtemperature
promotesthe growthofharmfulbacteria.
• Formoreevendefrostingof larger
foods,such asroasts,useAutoDefrost
Be surelarge meatsarecompletely
defrostedbeforecooking.
• Whendefrosted,food shouldbecool
and softenedinall areas,Ifyou still
noticeicy spots,justlet standafew
minutes.
11
20P312-2ENV01

OPERATION
SensorCooking
TheSensorFeaturedetectsthe increasing
humidityreleasedduring cooking.The
ovenautomaticallyadjuststhecooking
time tovarioustypes and amountsof food
• The propercontainers andcoversare
essentialfor best sensorcooking
• Alwaysuse microwave-safecontainers
andcover themwith lidsor vented
plastic wrap.Never usetight-sealing
plastic containers,whichcan prevent
steamfromescaping and causefoodto
overcook,
• Besurethe outside ofthe cooking
containersand the inside ofthe
microwaveoven aredry beforeplacing
food in theoven.Beadsofmoisture
turning intosteamcan misleadthe
sensor
Use onlywith prepackaged microwave
popcorn weighing 1.75to 3.5 ounces,
TO USE THE POPCORNFEATURE:
Followpackage instructionsusingTIME
COOK ifthe package is lessthan1.75
ouncesor largerthan 3.5 ounces.Piecethe
packageof popcorn in the centerofthe
microwave.
1. Pressthe POPCORNpad.
if youopen the door while"POP" is in the
display,"ERROR" will appear.Closethe
door andpressthe STARTpad.
2. HOWTOADJUSTTHE POPCORN
PROGRAMTO PROVIDEA SHORTER
OR LONGERCOOKTIME:
Ifyoufind thatthe brandof popcorn
you use underpopsor overcooks
consistently,youcan add or subtract
20to 30 secondsto/fromthe automatic
popping time.
TO ADDTIME:
After pressingthePOPCORNpad, press
9 immediatelyafterthe ovenstartsfor an
extra 20seconds, Press9 againto add
another 10seconds (total30 seconds
additionaltime).
TO SUBTRACTTIME:
After pressingthe POPCORNpad, press
1immediatelyafter the ovenstartsfor
20 secondsless cookingtime, Press1
againtoreducecookingtime another10
seconds(total 30seconds lesstime).
TheReheatFeaturereheatssingle
servingsof previouslycookedfoodsor a
plateofleftovers.
1. Placecoveredfood in theoven,
2. Pressthe REHFJ&Tpad. Theovenwill
start immediately,
3. Theoven signalswhen steamis
sensedand thetime remainingbegins
counting down.
Do not openthe oven door untiltime is
finishedcounting down, Ifthe door is
opened, closeit and pressthe START
padimmediately.
After removingfood fromthe oven,stir,if
possible,to even outthe temperature,if
the food isnot hot enough,usethe TIME
COOKpad to reheatfor more time,
Reheatedfoodsmay havewide
vedatlon intemperature.Someareas
maybe extremelyhot.
FOODSNOTRECOMMENDEDFOR
REHEATING:
• Bread Products
• Foodsthat must bereheateduncovered
• Foodsthat needto be stirred
• Foodsthat call fora dry lookor crisp
surface after reheating
ThePotatoFeaturecooksYzto2Ibs.of
potatoes
1. Pierceskinwithforkandplacepotatoeson
theturntable.Ifcookingthreeor more
potatoes,arrangein astarpattern.
2. PressthePOTATOpad.Theovenstarts
immediately.Theovensignalswhensteam
issensedandthetimeremainingbegins
countingdown.
Donotopentheovendooruntiltimeisfinished
countingdown.Ifthedoorisopened,closeit
andpresstheSTARTpadimmediately.Iffood
isnotdoneenough,usetheTIMECOOKpad
12 tocookformoretime.
20P312-2 ENVOI

OPERATION
ConvenienceFeatures
To use the Beverage Feature:
Press the BEV pad once for a 4 oz.
beverage, twice for an 8 oz. beverage
or three times for a 12 oz. beverage.
Drinks heated with the Beverage
Feature may be very hot. Remove
the container with care.
The Snacks Feature automatically
sets the microwaving times and
power levels to warm a variety of
snack foods.
1. Press the SNACKS pad.
2. Select snack type 1 to 6. (See
chart below.)
3. Enter the number of items or the
food weight in ounces.
4, Press the START pad.
You can press and hold the SNACKS
pad during cooking to display the
remaining microwaving time.
Snacks Guide
FOOD TYPE
1Bread, rolls,muffins
2 Sandwiches
3 Pizza(leftovers)
4 Desserttoppin£s
5 Soup
6 Cheesedip
QUANTITYOR WEIGHT
to4
to 2
to 4
lto4
8to 40oz.
4to 16 oz.
J
[_oXa_1
The Cook Feature automatically sets
the cooking times and power levels
for a variety of foods.
1, Press the COOK pad.
2. Select food type 1 to 9. (See Cook
Guide at right.)
3. Enter weight of food in ounces
4. Press the START pad.
Press and hold the COOK pad
during cooking to display the
remaining cook time.
FOODTYPE
1Canned
Vegetables
(VEG t)
2 Frozen
Vegetables
(VEG2)
3Fresh
Vegetables
(VEG3)
4Potatoes
5 Fish
6 Chicken
Pieces
7 Ground
Meat
(beef, pork
turkey)
8 Bacon
9 £_zza
(frozen,
Miclc_aveable)
Cook Guide
YEIGHT COMMENTS
Ito20oz. Use microwave-safe
;asseroleor bowl,
_overwith lid or vented
Jlasticwrap.
Ito16oz. Jsemicrowave-safe
.'asseroleor bowl.
:o!lowpackage
nstructionsfor adding
t_ater.Coverwith lidor
_entedplastic wrap
Ito 16oz. Jse microwave-safe
.'asseroleor bowl.Add
2tablespoonswater for
eachserving. Cover
withlid or vented
plasticwrap.
3to40oz Pierceskin withfork.
Placepotatoesonthe
turntable.
]to 16oz Useoblong, square or
rounddish.Coverwith
ventedplastic wrap or
waxpaper,
_fo40oz Useoblong, square
or rounddish.Covet
with lidor vented
plasticwrap,
3to48oz Use roundcasserole
dish.Crumble meatinto
dish.Cover with lid or
ventedplastic wrap.
2to 10oz Layerstripsonaplate,4to
alayer.Covereachlayer
withapapertowel
4to 16oz Followpackage
instructionsto prepare
)izzafor microwaving,
NOTE: You cannot enter a weight that
is more or less than the weight listed
in the Cook Guide above.
13
20P312-2 ENv01

OPERATION
OtherFeatures
Press the CLOCK pad to enter the
time of day or to check the time of
day while microwaving.
To Set the Clock:
1. Press the CLOCK pad.
2. Enter the time of day.
3. Press the START or CLOCK pad.
Press the KITCHEN TIMER MIN/SEC
pad to set the timer up to 99 minutes
and 99 seconds. Press the number
pads to set the time. Press the
KITCHEN TIMER MIN/SEC pad again
to start. Pressthe KITCHEN TIMER
MIN/SEC pad twice to clear the
display,
Using the Kitchen Timer does not turn
on the microwave energy.
The reminder feature can be used like
an alarm clock.
1. Press the REMINDER pad.
2. Enter the time of day you want the
oven to remind you. (Be sure the
microwave clock shows the correct
time of day.)
3. Press the START pad.
When the Reminder Signal occurs,
press the CLEAR/OFF pad to turn it
off. The Reminder time may be
displayed by pressing the
REMINDER pad.
NOTE: The REM indicator will remain
lit to show that the Reminder Feature
is set. To clear the Reminder before it
occurs, press the CLEAR/OFF pad.
The REM indicator light will go off.
Toturn the clock display on or off,
press and hold the 0 pad for about
3 seconds. The DISPLAY ON/OFF
feature cannot be used while the
cooking features are being used.
Delay Start allows you to set the
microwave to delay the start time of
cooking
1. Press the DELAY START pad.
2. Press the NUMBER pads to select
the time of day you want the oven
to turn on and start cooking. Make
sure the clock is showing the
correct time of day.
3. Select'liME DEFROST, AUTO
DEFROST or TIME COOK, Enter
the amount of defrost or cook time,
or weight of food for Auto Defrost.
4. Press the START pad.
The Delay Start time will be showing
in the display plus Start Time. The
oven will automatically start at the
delayed start time set. The time of day
may be displayed by pressing the
CLOCK pad.
Toturn the control sound on or off,
press and hold the NUMBER 8
SOUND ON/OFF pad for3 to 4
seconds, The display willflash "OFF"
and the display will return to the time
of day. "MUTE" will remain in the
display. Toturn the sound back on,
press and hold the NUMBER 8
SOUND ON/OFF pad for 3 to 4
seconds. "ON" will flash in the
display, mute will disappear and the
display will return to the time of day.
14
20P312q ENv01

OPERATION
LowerOvenControl
LOWEROVEN
OVEN llMER
@@ ®®®
®® ®@
Your new touch pad control will allow you toset various functions with ease.
Below are the features of your oven control and a description of each.
BAKING - Cookfoods in thetraditional
thermalovenwitha temperaturerange of
170°Fto 550°F.
BROIMNG Cookmeatat 550°FHI or
450°FLOWfromthe direct heatofthe
upperelement insidethe oven.
TIME BAKING- Choosebake and the
temperatureyou preferto use. Thenset
howlongyou wantfoodsto cook.
DELAYEDBAKINGor
CLEANING Choosebake or cleanand
thetemperatureyoupreferto use, setthe
timeof day youpreferthe oventoturn on,
sethowlong you preferfoodsto cook.
SELF-CLEANING- Cleanstheoven for
4hours, but youcan changethis length
oftime to between3and 5 hours.
NOTE:The ovendoor will automatically
latch andwill onlyunlatchoncetheoven
has cooleddown.
The NUMBERpadssettheoven
temperature,timeof day,delay starttime,
cookingtime,clean timeand thekitchen
timer
The STARTpadmustbe pressedto
activateanyovenfunction.
TheOVENCOOKINGT1MEpad isused
whensettingthelengthofbakingtime.
TheDELAYSTARTTIME pad isusedto
setthetimeof dayyou prefertheovento
turnonandstartbakingorcleaning.
WhenDELAYSTARTTIME isusedwith
OVENCOOKINGTIME,theovenwillalso
turn offautomaticallyatthe endofthe
cookingtime.
TheCLEAR/OFFpad isused tocancel
anyovenfunctionand the endof cycle
tone. Itwill not cancelthe clock or
KitchenTImer.
TheHOUR/MINKITCHENT1MERON/
OFFpad isusedtoturnthekitchen timer
onor off.Itwiltnotcontrolanyother
functions.
15
20P312-2ENv01

OPERATION
OvenControl,ClockandTimer
Oven Temperature
IndiCator "On" Indicator
Oven Function Oven Function
Indicator Indlcator
The display is an easy reference to use while learning your control. Below are
descriptions of how the display works:
OVENTEMPERATURE INDICATOR -
This indicator has a multiple purpose.
• Displays the temperature
• Displays error code "ERR"
If the oven temperature indicator
flashes "ERR," then you have set
an invalid time or temperature
Press the CLEAR/OFF pad to clear
the control and reset your oven
function,
• Displays Control Problems
If your control flashes "F" and
a number or letter, you have
experienced an oven problem.
Please read the section on
F CODES in this manual.
ON INDICATOR - Lights when the
oven function is set.
SET INDICATOR The set indicator
will flash in combination with an oven
function or timed function to let you
know you need to set a time or
temperature, Example: "SET" and
"BAKE" will flash to let you know you
need to set the bake temperature,
TIME INDICATOR - Displays the time
of day, cooking time, delayed start
time, cleaning time or the time set on
the kitchen timer.
• Displays reminder code "PUSH
START" If the oven time indicator
flashes the words "PUSH START,"
then you need to press the START
pad to activate your setting.
OVEN FUNCTION INDICATORS -
Display which oven function has been
set, when the oven door locks and if
the function is delayed.
16
20P312-2 ENVOI

OPERATION
ClockandTimer
The clock must be set for the correct
timeof day before a delayed oven
function can work properly. The time
of day cannot be changed during a
delayed oven function, but can be
changed during a bake or broil
function.
HOW TO SET THE CLOCK
1. Press the CLOCK pad.
2. Press the NUMBER pads to set the
time.
3. Press the START pad.
RECALL THE CLOCK
While using your oven for timed
cooking, press the CLOCK pad if you
wish to check the time of day. The
current time of day will show in the
display.
POWER FAILURE
If you have had a power failure, the
time flashing in the display may be
incorrect. Reset the Clock.
Any oven function that was in process
will need to be reset.
The Kitchen Timer is used to
time cooking processes or other
household activities. It does not
control the oven. It can be set for
up to 9 hours and 59 minutes, Itwill
count down in minutes until the last
68 seconds is reached, then the
control will beep once. When the
countdown reaches :0, the control will
beep 3times followed by one beep
every 6 seconds until the HOUR/MIN
KITCHEN TIMER ON/OFF pad is
pressed. This 6-seeend tone can be
canceled. See tones on the following
page,
HOW TO SET THE TIMER
1. Press the HOUR/MIN KITCHEN
TIMER ON/OFF pad.
2. Press NUMBER pads to set time.
3. Press the START pad,
4. When the countdown has reached
zero, press the HOUR/MIN
KITCHEN TIMER ON/OFF pad.
To cancel the timer during the
countdown, press the HOUR/MIN
KITCHEN TIMER ON/OFF pad twice.
17
20P312-2 ENv01

OPERATION
OvenControl,ClockandTimer
Your new control has a series of tones
that will sound at different times.
These tones may sound while you set
the control for an oven function, or at
the end of the oven function. It will
also alert you that there may be a
problem with the functions. Below
are the types of tones and a brief
description of each.
TONES WHILE SETTING THE
CONTROL When you press a touch
pad, you will hear a beep. This beep
will let you know you have placed
enough pressure on the pad to
activate it.
END OF TIMED CYCLE TONE -
At the end of atimed cooking
function, you will hear 3 short beeps
followed by 1 beep every 6 seconds.
This 6-second beep will continue
to sound until the CLEAR/OFF
pad is pressed, or you may select
the special feature to cancel this
6-second beep from sounding at the
end of future cycles.
TO CANCEL THE 6-SECOND BEEP:
1. Press and hold the BAKE and
BROIL pads, at the same time, for
3seconds, until the display shows
"SF."
2. Press the HOUR/MIN KITCHEN
TIMER ON/OFF pad. The
display will show "CON BEEP"
(continuous beep).
3. Press the HOUR/MIN KITCHEN
TIMER ON/OFF pad again. The
display will show "BEEP" (beep
canceled).
4. Press the START pad
If you would like to return the
6-second beep, repeat steps above
until the display shows your choice
and press the START pad.
A'rrENTION TONE This tone will
sound if you make an error or an
oversight is made while setting an
oven function.
Examples would be:
a. Setting a clean cycle and the oven
door is not properly closed.
b. Setting a function and not pressing
the START pad.
¢. Pressing an additional function pad
without first setting a temperature
or time.
d. "ERR" will flash if you set an
invalid temperature. Press the
CLEAR/OFF pad to clear the
control and reset your oven
function.
Any of these can be quickly identified
by watching the display.
PREHEAT TONE - Whenyou
selectacooking mode,set anoven
temperatureand presstheSTARTpad,
theoven startsto heat.When the
temperature inside the oven reaches
the temperature you have set, a tone
will sound to let you know the oven is
ready for baking.
If you set an oven function and the
control beeps while the display is
flashing "F" and a number "F..4" or
letter "FI," there may be a problem
with the control or oven. Simply press
the CLEAR/OFF pad and wait about
an hour. Try setting the function
again. Ifthe code repeats, write down
the code and call for service. Tell the
technician what code was flashing.
18
20P312_2 ENv01

OPERATION
OvenCookingTips
It is normal to have some odor when
using your oven for the first time. To
help eliminate this odor, ventilate the
room by opening a window or
using a vent hood.
IMPORTANT: Never cover the oven
bottom or oven rack with aluminum
foil. Improper use can cause poor
heat flow, poor baking results and
may damage the oven finish. To
prevent staining from spillovers, you
may place a piece of aluminum foil or
a cookie sheet on the rack below the
food which may spill over.
The oven vent is located under the
control panel, This area could
become hot during oven use, it is
normal for steam to come out of
the vent and/or collect moisture
underneath when oven is in use,The
vent is important for proper air
circulation. Never block this vent.
OvenVent _ II
In the back of the ovenyou will notice
a small tube. This is a heat sensor
that maintains the temperature of the
oven. Never move or bend this tube.
OvenTemperature _e
Sensor _
Preheating is bringing the oven
temperature up to the temperature
you will be using during baking. Let
the oven preheat thoroughly when
recipes call for preheating.
The low temperature zone of your
oven (between 170°F and 200°F) is
available to keep hot cooked foods
warm. However, foods should not be
kept at these temperatures longer
than 2 hours.
19
20P3";2-2 ENv01

OPERATION
OvenCookingTips
ro]_ rnE_,_iJI
To prolong the life of your oven
light bulb, follow this helpful tip:
Always turn the light off when the
oven is not in use or during a clean
cycle. If your oven light is left on for
an extended period of time, the oven
will be warm when the door isopened
due to the heat generated from the
oven light bulb.
Most recipes for baking have been
developed using high-fat products
such as butter or margarine (80% fat
by weight--the federal requirement
for products labeled "margarine").
You will get poor results if cakes,
pies, pastries, cookies or candies are
made with low-fat spreads. Low-fat
spreads contain less fat and more
water. The high moisture content of
these spreads affects the texture and
flavor of favorite baked recipes. The
lower the fat content of a spread
product, the more noticeable these
differences become. To ensure best
results, use margarine, butter or stick
spreads containing at least 70%
vegetable oil.
The Oven Temperature Sensor at the
back of the oven continuously senses
and controls the temperature inside
the oven. To keep a constant set
temperature, the elements will cycle
(turn on and off during cooking).
Baking results will be better if baking
pans are centered in the oven as
much as possible. If baking with more
than one pan, place the pans so each
has at least 1to 1V2'of air space
around it. Place pans so one is not
directly above the other.
FLAT COOKIE SHEETS, without
sides, allow air to circulate all around
the cookies for even browning.
SHINY PANS reflect heat and are
perfect for cakes and quick breads
that need a light golden brown crust,
GLASS, DARK NON-STICK OR
DARKENED-BY-AGE BAKEWARE
absorbs heat, and can be used for
yeast breads, pie crust or foods
that need a brown crust. The oven
temperature, when using these pans,
should be reduced by 25°F.
20
20P312-2 ENv01

OPERATION
OvenCookingTips
The oven racks are designed with
stops, a convenience as well as a
safety precaution. The guides have a
bump to prevent the racks from
tilting when racks are pulled out of
the oven, This design allows the racks
to be inserted in only one way.
Your oven has six (6) rack positions.
The top position is onty a guide, It
cannot be used as a rack position.
Guide
f'J:l:l;#llt
Always place oven racks In the
proper position while oven is cool.
CAUTION: When you are using the rack
in the lowest position (1), you will need
to use caution when pulling the rack
out.We recommend that you pull the
rack out several inches andthen, using
two potholders, pull the rack out by
holding the sides of it. The rack is low
and you could be burned if you place
your hand in the middle ofthe rack and
pull all theway out, Bevery careful not
to burn your hand on the door when
using arack in the lowest position (1).
You may feel that your new oven
cooks differently than the oven it
replaced. We recommend that you
use your new oven a few weeks
to become more familiar with it,
following the times given in your
recipes as a guide. If you feel your
oven is too hot or too cool for your
cooking preference, see Do It
Yourself Temperature Adjustment
in the back of this manual to make
the adjustment.
When using your convenient Delay
Start operation, foods such as dairy
products, fish, poultry, etc., should
never sit more than 1 hour before
cooking Room temperature and the
heat from the oven light promote
bacterial growth.
Opening the door often to check
foods will cause heat loss and poor
baking results.
21
20P312-2 ENv01

OPERATION
Raking&Roasting
(_ 1. PresstheBAKEpad.
(_ 2. Pressthe NUMBERpads to
setthe oven temperature
you preferto use.
<_3. Pressthe STARTpad.
BAKING SHELF POSITION CHART
TYPE OF FOOD SHELF POSITION
Frozen pies (on 3 or 4
cookie sheet)
Angel food cake, 3 or 4
bundt or pound
cakes
Biscuits, muffins, 3 or 4
brownies, cookies,
cupcakes, _ayer
cakes, pies
Casseroles 3 or 4
Turkey or Roast 1
Tosettheoventocook foraspecific time
andturnoff automatically.
(_ I. Press the BAKE pad.
(_) 2. Press the NUMBER pads
to set the oven temperature
you prefer to use.
3. Press the OVEN
COOKING TIME pad.
(_ 4. Pressthe NUMBERpads
to setthe amountof time
you preferyourfoodsto
cook.
<_ 5. Pressthe STARTpad.
Tosetthe ovento turnon atalatertime of
day, cook fora specific amountoftime,
andturn offautomatically:
(_1. PresstheBAKEpad.
(_ 2. PresstheNUMBERpads to
set theoventemperature
you preferto use.
3. ressthe OVENCOOKING
TIME pad.
(_) 4. Pressthe NUMBERpads to
setthe amountoftime you
preferyourfoodsto cook.
5. ressthe DELAYSTART
TIME pad.
(_) 6. PresstheNUMBERpads
tosetthe time of dayyou
preferthe ovento turn on
<_7. Pressthe STARTpad
The ovenwillturn off at theend ofthe
cooldngUmeunlessthe COOKAND
HOLDfeaturehasbeenactivated.
(Seethe SettingSpecialFeatures
sectionformoreInformationonthe
COOKAND HOLDfeature.)
22
20P312-2 ENv01

OPERATION
Broiling
Broiling iscooking by direct heat
from the upper element. The oven
door should remain opened to the
broil stop position during broiling.
Itis not necessary to preheat the oven
when broiling. Use the broiler pan and
grid that came with your oven. Both
are designed for proper drainage of
fat and liquids.
lf foil is used, it must
be molded tightly to
the grid and sirs cut
into the foil to match
those of the grid. This allows
fats and liquids to drain into the
broiler pan, preventing fire and
excessive smoke.
1
Always remove the pan and
grid from the oven. .._
Storing or forgetting a
soiled broiler pan In
the oven is a potential smoke or
fire hazard.
The U.S. Department of Agriculture
recommends to cook meat and
poultry thoroughly--meat to at least
an INTERNAL temperature of 160°F
and poultry to at least an INTERNAL
temperature of 180°F. Cooking to
these temperatures usually protects
against food-borne illness.
The closer you place foods to the
broil element, the faster foods brown
on the outside yet remain red to pink
in the center.
Moving meats away from the element
will allow the meat to cook to the
center while browning on the outside.
Cook side 1 at least 2 minutes longer
than side 2. If your oven is connected
to 208 volts, you may want to use a
higher rack position and/or broil
foods longer.
The size, weight, thickness, starting
temperature and your preference of
the aloneness of the meat will affect
broiling. This chart is based on meats
at refrigerator temperature.
FOOD RACK TOTAL
•OSmON TIME IMIN.)
Steak 1" thick 3 9-11
Ground beef 3 16-18
patties -
1" thick
Pork Chops -
1/2" thick 3 27-29
Fish (fillets) 3 11-13
Chicken (pieces] 2 45-55
la. Press the BROIL pad. (This will
automatically set HI Broil.)
lb. While the set indicator is flashing
in the display, press the BROIL
pad again if you prefer to use Lo
Broil. Use Lo Broil to cook foods
such as poultry or thick cuts of
meat thoroughly without over-
browning them.
2. Press the START pad.
3. When broiling is finished, press
the CLEAR/OFF pad.
23
20P312-2 ENV01

OPERATION
SettingSpecialFeatures
Your new touch pad control has
additional features that you may
choose to use. After making a
selection, if you want to change that
setting, follow the steps until the
display shows your choice.
2. (s) Press the BROIL pad. The
control display will show the
degrees sign and "F."
(b) Press the BROIL pad again.
This will change "F" (Fahrenheit)
to "C" (Celsius).
3. Pressthe START pad.
The control is automatically set to turn
off the oven after 12 hours baking or
3 hours broiling should you forget and
leave the oven on. If you want to
remove this feature:
1. Press and hold, at the same time,
the BAKE and BROIL pads for
3 seconds, until the display
shows "SF"
2. Press the DELAY START TIME
pad. The display shows "12Shdn"
(12 hour shutoff), Press the DELAY
START TIME pad again. The
display will show "no Shdn" (no
shutoff).
3. Press the START pad.
The oven control is set for the
Fahrenheit temperature selections.
Most recipes are given using the
Fahrenheit scale. You can change
this 1ouse the Celsius selection.
1. Press and hold, at the same time,
the BAKE and BROIL pads for
3 seconds, until the display
shows "SF"
The control is set to use the 12-hour
clock. Ifyou prefer to use the 24-hour
Military Time clock or black out the
display:
1. Press and hold, at the same time,
the BAKE and BROIL pads for
3 seconds, until the display
shows "SF."
2. (a) Pressthe CLOCK pad. The
display shows "12hr." If this is
your choice, press the START
pad.
(b) Press the CLOCK pad again.
The display will show "24hr."
Example: 5:00 on the 12-hour
clock will show 17:00 hours on the
military clock. If this is your choice,
press the START pad.
(c) Press the CLOCK pad again.
The display will show "Off." Ifthis
is your choice, press the START
pad. The display will not show
time. (The Delay Start Time feature
will not operate.)
24
20P312-2 ENv01

OPERATION
SettingSpecialFeatures
The control will allow you to lock
the touch pads so they cannot be
activated when pressed. If you're
worried about leaving the oven
unsupervised, activate this feature.
1. Press and hold, at the same time,
the BAKE and BROIL pads for
3 seconds, until the display
shows "SF."
2. (a) Press the CLEAN pad. The
display shows "LOC OFF"
(lockout off).
(b) Press the CLEAN pad again.
The display will show "LOC ON"
(lockout on).
3. Press the START pad.
To unlock the control, repeat steps
1and 2. PressSTART pad when the
displays shows "LOC OFF."
This feature can only be set when
the oven Is not in usa. When this
feature is on, the display will show
"LOC," if a touch pad is pressed.
(This feature will not affect the Clock,
Timer or Oven Light pads.)
Your new control has a cook and hold
feature for timed cocking only that will
keep hot cooked foods warm up to 3
hours, after the timed cooking is
finished. To activate this feature:
1. Press and hold, at the same time,
the BAKE and BROIL pads for
3 seconds, until the display
shows "SF."
2. (a) Pressthe OVEN COOKING
TIME pad. The display will show
"HLd OFF."
(b) Press the OVEN COOKING
TIME pad again to activate the
feature. The display will show
"HLd ON."
3. Pressthe START pad.
25
20P3!2-2 ENVOI

CAREANDCLEANING
Self-Cleaning Cycle
1. Removethe broiler pan and grid,
utensilsand any foil that may be in
the oven.
2. The gray porcelain-coated oven
racks may stay in the oven during
the self-clean cycle.
3. Soil on the front frame, and outside
the gasketon the door liner will
need to be cleaned by hand.
Front Frame
/ rDoorGasket _
DoorLiner"------"
Cleantheseareas with hotwater,
soap-filledpads,or cleanserssuch as
SoftScrub®to removeany soil. Rinsewell
with cleanwaterand dry.
Do not useoven cleaners--no
commercialoven cleaneror protective
coating ofany kindshouldbe used in or
around anypart ofthe oven.
4. Wipe up anyheaw spiUoversonthe
ovenbottom.
5. Do notclean thedoorgasket.The
fiberglass materialof theovendoor
gasketcannotwithstandabrasion.
Itisessentialfor the gasketto remain
intact.Ifyou noticeit becomingworn
orfrayed, itshould bereplaced.
The door gasket isdesigned to have
an 10" gap at the bottom of the door.
This allows for proper air circulation.
Door Panel Gasket
t
DoorUner
It is normal for your oven door to give
the appearance of not having a good
seal against the oven. This isdue to
the gasket. The location of the gasket
on the door maintains a good seal
and prevents any heat loss.
_ tensils should never
be left In the oven
during a clean cycle.
Gray porcelain-coated
oven racks may safely be
cleaned In the oven during a
self-clean cycle. It will be
necessary to grease the edges
of the oven rack with a light
coating of vegetable oll after a
clean cycle. This will help
maintain the ease of sliding the
recks In and out of the oven.
For the first clean cycle, vent
the room with an opened
window or hood vent. This will
reduce the odor produced when
heating new parts.
26
20P312-2 ENv01

CAREANDCLEANING
Self-CleaningCycle
The Clean Cycle, including cooldown
time, is automatically set for 4 hours,
but you may change this from 3 hours
if oven is lightly soiled, up to 5 hours if
oven is heavily soiled.
1. Press the SELF CLEAN
pad. 4 hours will show in
the display.
(_ 2. If you want to change
the length of clean time,
press the NUMBER
pads.
(_3. Press the START pad.
After the cycle, you may notice some
white ash in the oven. Just wipe it up
with a damp cloth or sponge
If white spots remain, scrub them
with a soap-filled steel-wool pad. Be
sure to rinse thoroughly. These are
usually deposits of salt that cannot
be removed during the cycle.
If your oven is equipped with
porcelain oven racks, it will be
necessary to grease the edges with a
light coating of vegetable oil after the
clean cycle. This will help maintain
the ease of sliding the racks in and
out of the oven,
If for any reason you are not
satisfied with the cleaning results,
just repeat the cycle.
Simply press the CLEAR/OFF
pad. You will need to wait for the
oven temperature to drop below the
lock temperature (approx, 1 hour)
before attempting to open the door.
"LOCKED" will go out in the disp/a_
27
20P312-2 ENv01

CAREANDCLEANING
CleaningMicrowaveOven
CLEANING MATERIAL
• Plastic scouring pad
• Damp cloth
• Dishwashing detergent
• Warm water
Clean with mild dishwashing detergent
and water, then rinse wellwith damp
cloth. If desired, a container of water
can be boiled in the oven using
microwave energy. This will help
loosen soil. For hard-to-clean soil,
clean gently with a plastic scouring
pad. Do not use abrasive cleaners,
which could scratch or damage the
surface.
CLEANING MATERIALS
• Nonabrasive nylon mesh
scouring pad
• Nonabrasive cleanser
• Warm water
• Dishwashing detergent
TO REMOVE THE GLASS
TURNTABLE
Grasp the glass turntable on both
sides and lift straight up.
Glass
Tumtable --
Turntable
Support
TO CLEAN
Wash withwarm sudsy water. For
harder to remove soil, gently rub
with a nylon mesh scouring pad
and nonabrasive cleanser, Rinse
thoroughly.
TO REPLACE THE GLASS
TURNTABLE
Replace the glass turntable.Make
sure the glass turntable is aligned
properly with the turntable support.
CLEANING MATERIALS
• Softcloth
• Warm water
• Dishwashing detergent
Wipe off spills or spatters while they
are still warm. Use mild dishwashing
detergent and warm water, then rinse
with clean water, and dry with soft
cloth.
CLEANING MATERIALS
• Warm water
• Soft cloth
• Dishwashing detergent
Clean with mild dishwashing
detergent and warm water. Rinse with
clean water and dry with soft cloth.
CLEANING MATERIALS
• Soft cloth
Open the oven door to prevent the
oven from turning on while cleaning.
Wipe the control panel with a damp
cloth. Dry immediately with a dry
cloth to prevent spotting.
28
2OP3!2-2 ENV01

CAREANDCLEANING
CleaningLowerOven
_eJW:i:Eelrj:l_Ege]_Wll;{e]l=1,J_l:lnm
CLEANING MATERIALS
• Dishwashing detergent
• Warm water
• Soft cloth
Do not use abrasive cleaners,
Industrial cleaners or bleach,
TO CLEAN
Wipe with warm soapy water. Rinse
and dry well,
Clean only astouch-up between
clean cycles. Use dishwashing liquid,
warm water or soap-filled pad. Rinse
well after cleaning and dry.
NEVER USE OVEN CLEANERS IN
OR AROUND ANY PART OF THE
OVEN.
When cleaning, be sure not to bend
or displace the temperature sensor
located on the back wall of the oven.
Oven
Temperature :_
Sensor _/
CLEANING MATERIALS
• Dishwashing detergent
• Warm water
• Soap-filled scouring pad
• Commercial oven cleaner
TO CLEAN
Allow the pan to soak. Sprinkle the
grid with dishwashing detergent and
cover with a damp cloth or paper
towel. Scour as needed. Rinse and
dry well. You may also place both the
pan and grid in the dishwasher.
CLEANING MATERIALS
• Glass cleaner
• Paper towels
• Baking soda
TO CLEAN
For everyday cleaning, use glass
cleaner and a paper towel. For
stubborn soil, use paste of baking
soda and water. Rinse thoroughly,
29
20P312-2 ENv01

CAREANDCLEANING
RemovableParts
_ isconnect electrical powerTM
to the oven at the main
circuit breaker or fuse box
before attempting to replace the
oven light bulb. Do not touch a
hot light bulb with wet hands or a
wet cloth. Watt until the bulb Is
cooled end use a dry cloth.
Live Socket
Bulb Collar
TO REMOVE THE COVER
1. Disconnect electrical power to the
oven at the main circuit breaker or
fuse box.
2, Hold your hand under cover and
firmly twist cover.
REPLACE THE LIGHT BULB
Unscrew the light bulb and replace it
with a 40-watt appliance bulb.
TO REPLACE COVER
1. Place the bulb cover into the
groove of the bulb socket and turn
1/4 turn clockwise.
2. Reconnect the electrical power to
the oven.
For improved lighting inside the oven,
clean the glass cover frequently using
a wet cloth. Caution: This should
only be done when the oven Is
completely cool.
TO REMOVE Bumpin
1. Pullthe RackGuldeI_ /
racks RaisedBack _ /
Outto _ tl_ I_k_
the stop lock position_,_
2. Pull up the front of the rack and
slide under the bump of the rack
guide.
TO CLEAN
Clean with warm water and
' detergent. For hard to remove stains,
gently scrub with a scouring pad or
a soap-filled pad. Rinse well.
Gray porcelain-coated oven racks
may also be cleaned in the oven
during the self-clean cycle, it is
necessary to wipe the edges of gray
porcelain-coated oven racks with a
light coating of vegetable oil after
cleaning. This will help maintain the
ease of sliding the racks in and cut
of the oven.
TO REPLACE
1. Place the raised back of the rack
onto the rack guides.
2. Lift the front of the rack until the
raised back slides under the bump
of the rack guides.
3. Slide the rack all the way back.
30
20P312-2 ENv01

CAREANDCLEANING
RemovableParts
_B:_j_fe]r__,r:lif:_r, lri:i_Isl, Ti}:jl
The doorisveryheavy.Becarefulwhen
removingandliftingthedoor. Donot lift
the doorbythe handle.
TO REMOVE
Removable Oven Door (cont.)
3. Fullyopen the :Arm
door. If the door
will notfully open,
the indentationis
not seated
correctly in the
bottomedge of
the slot.
4. Pushthe hinge HingeLock
1. Fullyopenthe door. locks up against Push hinge locks
2. Pull thehinge locks /_ II ,=_.,, the frontframe of upto lock
down toward the door //_ the oven cavity,to
frame,tothe unlocked the looked
position.This may position
requireaflat-blade 5. Closethe oven
screwdriver, door.
HingeLock
TO CLEANOUTSIDEOF DOOR
Pullhingelocks
downto unlock
3. Firn_ygrasp both
sidesof the door at
the top.
4. Closedoor to the
doorremoval
position,which is
hatfwaybetween
thebrodstop and
fullyclosed.
5. Liftdoor up RemovalPosition
andout uatilthe hinge
armis clear oftheslot,
TO REPLACE
1. Firmlygrasp both
sidesof the door Hinge
atthetop Arm
2. Withthe door at
the sameangle Edgeof
asthe removal Slot
position,seatthe
indentationofthe
hingearminto Indentation
the bottomedgeof
the hingeslot.Thenotch
in the hingearmmust be
fullyseated intothe
bottomofthe slot.
• Usesoapandwaterto thoroughlyclean
the top, sides andfrontoftheovendoor.
Rinsewell.Youmayalso usea glass
cleaner toclean the glassonthe outside
of the door.Do notlet waterdrip intothe
vent openings.
• Spillage of marinades,fruit
juices,tomatosauces and basting
materialscontaining acids maycause
discolorationand shouldbewiped up
immediately.Whensurfaceis cool,
clean and rinse.
• Do notuseoven cleaners,cleaning
powders or harshabrasivesonthe
outsideof thedoor.
• If anystainon the doorventtrim
is persistent,usea softabrasivecleaner
anda sponge scrubberfor best results.
TO CLEAN INSIDEOFDOOR
• Becausethearea insidethe gasketis
cleaned duringthe self-cleancycle, you
donotneed toc_eanthis by hand.
• Theareaoutsidethe gasketand
the doorliner can becleaned with
asoap-filLedpad, hotwaterand
detergent. Rinsewell withavinegar
andwatersolution,
31
20P312-2 ENVOI

BEFORECALLINGFORSERVICE
Tosaveyou timeand money,beforemakinga service call checkthe listbelowfor any
problem youmay feelyou havewith the performanceof youroven. Ifthe problem is
somethingyou cannotfix, usethe ConsumerServiceNumberslocated atthe back ofthis
guide. Whenmakingany calls,havethe Model NO.,SerialNo.,RepairPartsList,Use
and CareGuideand the Dateof Purchaseavailable.
PROBLEM POSSIBLE CAUSE POSSIBLE SOLUTION
The display of your Oven malfunction, Press the CLEAR/OFF pad, Let the
control is flashing oven oool for t hour and enter an oven
"F' followed by a or cleaning operation. If code repeats,
number or letter, call for service.
Oven and oven a. No power to oven. a. Check the circuit breaker or fuse.
control win not Make sure the power cord is
work. plugged in.
b. The clock is in the b. See the setting special features
black-out mode. section of this manual.
Oven temperature Oven control calibration. See the temperature adjustment
seems inaccurate, instructions following this section,
Oven will not Clean cycle isnot Oven temperature must drop below the
unlock, finished. Oven is too hot. 1oaktemperature before the door will
unlock.
Ovenlight will a. Light switch in off s. Check oven light switch on the
not work. position, control panel.
b. Oven light bulb loose b. Check the oven light bulb.
or burned out,
Oven will not Degrees_elsius option See the setting special features section
accept bake selected, of this manual.
setpoint.
Oven did not a. Controls were not set a. Check the self-cleaning section of
clean or results properly, this manual,
were poor. b. Oven was soiled b. Heavy spillovers should be removed
heavily, before the cycle is set. You can also
repeat the cycle.
e. Clean cycle was c. The normal clean cycle should last 4
interrupted, hours for heavily soiled oven.
All theseare normalonyour MicrowaveOven:
• Steamor vaporescaping from aroundthe door
• Light reflectionaroundthe door orouter case.
• Dullthumping soundwhilethe oven is in use,
• Microwavefan may operatewith bothovensoff. It iscoolingthecontrol andwill turn
itselfoff.
• Dimmingovenlightand change in blowersound mayoccur whileoperatingatpower
levelsotherthan high.
• SomeTV-Radiointerferencemight be noticedwhileusingyour_crewave oven.Ltis
similartothe interferencecausedby other smallappliances and does notindicatea
problemwith youroven. 32
20P312-2 ENVOI

BEFORECALLINGFORSERVICE
PROBLEM POSSIBLE CAUSE POSSIBLE SOLUTION
Fannoise. A cooling fan may This is normal,Thecoolingfan will
automaticallyturnon. turn on tocool internal parts. Itmay
runfor up to t 1/2hoursafter the
ovenisturned OFF.
Oven smokes,a. Dirtyoven. a. Checkfor heavyspiflover.
b. Improperuseof b. Use offoil notrecommended
aluminumfoil.
c. Broilerpan containing c. Clean panand grid aftereach use.
greaseleftin the oven.
Ovenrack Rackswereleft in the Wipethe rackedges
doesnot ovenduring a self-chart with asmallamountof
slide easily, cycle, vegetable oil
Oven a. Oveninsulationmay emit a. Putoven throughself-cleancycle
emits odorduring the firstfew to speed up processofodor
odor. usages. "wearingoff."
b. Failureto wipeout b. Wipe excesssoiloff beforeusing
excessSOiL oven.
Cannot Microwavekitchentimer Use loweroventimer,(Microwave
microwave operating, cookingand microwavekitchentimer
cook. cannot be used atthesametime)
Foodsdo s. C'venwasootpreheated. a. Besureto preheatuntilthe tone
not bake sounds,when recipecallsfor it
property, b. Improperrack or pan b. Maintainuniformair spacearoundpans
placement, andutensils.SeeOven CookingTips
section.
c. Keepvent clear.
o. Ovenvent blockedor
covered,
d. Improper aseoffoil
e. Impropertemperature
settingfor utensil used.
f. Oven temperatureneeds
adjustment.
g. Ovenand oven rack not
revel.
h. Ovencontrolsimproperly
set.
d. Racks sbeuldnotbe coveredduring
baking.
e. Reducetemperature25degrees for
glassor dult/darkenedpans.
f. Checkthe temperatureadjustment
sectionofthismanual.
g. Checkthe installationinstructionsfor
leveling,
h. Seethe bakingsection.
33
20P312-2 ENv01

BEFORECALLIN8FORSERVICE
PROBLEM POSSIBLE CAUSE
Foodsdo not a. Improperrack position
broil properly.
b. Ovenpreheated.
c. Improperuseoffoil.
d. Ovendoorclosed during
broiling,
a. Lowvoltage(208Volts)
f. Improper broilingtime
g. Ovenoontmlsimproperlyset.g.
POSSIBLE SOLUTION
a. Check broil panplacement;see
broilingsection.
b. Do not preheatwhen broiling,
c. Checkbroiling section.
doOpendoor to broil stop.
e. Use higher rack positionand/or
longer cookingtime,
f. Check broilingchart in broiling
section.
Seethe broiling section.
Foods
overcooked
or
undercooked
in the
microwave.
a. Notenoughtimesetwhen a.
u_ngTimeCookfunction
becausestartingtemperatures
offoodsvariedwidely.
b. Incorrectpowerlevelentered,b.
e. Dishnotrotated,turned,or e.
stirredascalledforinrecipe.
d. Toomanydishesinovenat d.
tt_ sametime.
e. Foodnotthoroughly e.
defrosted
f. Improperuseofcoverings f.
Varying densityand amountof
foodswill sometimesrequiremore
cooking.
Is recipetested andreliable?
Followrecipe instructions
Do not overcrowd the oven
Checkthetimeddefrosting
sectionofthismanual.
Fotlowinstructionsin thismanual
andrecipe
34
20P312-2 ENv01

"DO-IT- YOURSELF"
TEMPERATURE
ADJUSTMENT
You may feel that your new oven
cooks differently than the oven it
replaced. We recommend that you
use your new even a few weeks to
become more familiar with it,
following the times given in your
recipes as a guide.
Ifyou think your new oven is too hot
(burning foods) or not hot enough
(foods are undercooked), you can
adjust the temperature yourself. The
appearance and texture of foods isa
better indicator of oven accuracy than
an oven thermometer. These
thermometers can vary by 20-40
degrees from the true temperature of
the oven. In addition, the oven door
must be opened to read these
thermometers. Opening the door will
change the temperature of the oven.
To decide how much to change
the temperature, set the oven
temperature 25 degrees higher
(if foods are undercooked) or
25 degrees lower (if foods are
burning) than the temperature in your
recipe, then bake. The results of this
"test" should give you an idea of how
much the temperature should be
changed.
(_1. While the oven is net in
use, press and hold
down both the BAKE
"P and BROIL pad for 3
(_) seconds, until the
disp ay shows "SF."
(_2. Pressthe BAKE pad.
A factory-set 2-digit
number will show in the
display, usually "00."
If you think the oven
is not hot enough,
(_ 3a. Pressthe NUMBER
pad to increase (+) the
temperature as much
as +35°F
If you think the oven
is too hot,
3b. Pressthe BAKEpad again and the
NUMBER pads to
(_ decrease (-) the
,,,,,_, temperature down as
much as -35°F.
<_>4. Press theSTART pad.
This increased or decreased
temperature setting will remain in
memory until the above steps are
repeated. A power failure will not
affect this setting.
The broil and self-clean temperatures
will not be affected.
35
20P312 2 ENV01

BUILT-IN
WALLOVEN/MICROWAVE
WARRANTY
f
FULL ONE-YEAR WARRANTY ON ALL PARTS
If, within one year from the date of installation,any part fails to function
properly due to a defect in material or workmanship, Sears will repair or
replace it, at our option, free of charge.
Ifthis product is subjected to other than private family use, the above
warranty is effective for only 90 days.
WARRANTY SERVICE IS AVAILABLE BY CALLING SEARS SERVICE AT
1-800-4-MY-HOME °.
This warranty gives you specific legal rights, and you may also have other
rights which vary from state to state.
Sears Roebuck and Co. Dept. 817 WA Hoffman Estates, IL 60179
Master Protection Agreements
Congratulationson makinga smart
purchase.YournewKenmore®appliance
is designedand manufacturedfor yearsof
dependableoperation,But likeall
products, it mayrequirepreventive
maintenanceor repairfromtime totime.
That'swhenhavinga MasterProtection
Agreementcan saveyoumoneyand
aggravation.
Purchasea MasterProtection
Agreementnowand protect yourself from
unexpectedhassleand expense.
TheMaster ProtectionAgreement
alsohelps extendthe lifeofyour new
appliance.Here'swhat'sincluded
in the Agreement:
v' Expertsendca by our 12,000
professionalrepairspecialists
v' Unlimitedserviceand nochargefor
partsand laboronall covered repairs
v""No-lemon" guarantee- replacement
ofyourcoveredproduct if morethan
threeproductfailuresoccur within
twelvemonths
v' Productreplacementifyourcovered
productcan't befixed
v_AnnualPreventiveMaintenance
Checkat yourrequest- noextra
charge
38
v' Fasthelpby phone- non4echnical
and instructionalassistanceon
productsrepairedinyourhome, plus
convenientrepairscheduling
v' Powersurgeprotectionagainst
electrical damagedueto power
fluctuations
v' Rentalralmbursorcent if repairof your
covered producttakes longerthan
promised
Once youpurchasethe Agreement,a
simple phonecall isall thatit takesfor you
toschedule service,Youcan call anytime
day or night,or schedule a service
appointmenton-line.
Searshasover12,000professionalrepair
specialists,whohaveaccess toover4.5
millionqualitypartsand accessories.
That'sthe kindof professionalismyou can
countonto help prolongthe lifeof your
newpurchasefor yearstocome.
PurchaseyourMasterProtection
Agreementtoday!
Somelimitationsand exclusionsapply.
ForpricesandadditionalInformation,
call 1-800-827-6655.
Sears Installation Service
ForSearsguaranteedprofessional
installationofhomeappliances and items
likegarage dooropenersandwater
heaters,call 1-800-4-MY-HOMEQ.
20P312-2 ENV01

HORNODEPAREDCONAUTOLIMPIEZA YMICROONDAS
INDICE
Seguridad en el uso
del homo ................................. 39-41
C6mo saear lacinta de empaque ...41
Caracteflsticas de su homo ......... 42
Control del homo microondas ..... 43
Nivel de poder ........................ 43_A
Cantidad de tiempo para
cocinar I ....................................... 44
Gula para la canlidad de tiempo
para cocinar ................................. 44
Cantidad de tiempo para
cocinar II...................................... 45
Tiempo para descongelar ........... 45
Agregue 30 segundos ................. 45
Cocinado expreso ....................... 45
Funci0n autom_tica ..................... 46
Guia para el tiempo
de descongelaci6n ...................... 47
Sensor de humedad .................... 48
Popcorn ....................................... 48
C6mo recalentar .......................... 49
Papas ........................................... 49
Bebidas ........................................ 50
Bocadillos .................................... 50
Gula para bocadillos ................... 50
C6mo cocinar .............................. 50
Gula para cocinar ........................ 50
Reloj superior ............................... 51
Cron0metro .................................. 51
Encendido/Apagado del dial ....... 51
Funci6n para recordar ................. 51
Comienzo demorado ................... 51
Encendido/Apagado del sonido ,. 51
Control del horno inferior ............. 52
Dial del horno inferior ................... 53
Reloj del horno inferior .................. 54
Cron6metro del homo inferior ....., 54
Tonos del homo inferior ................ 55
Cddigo F del homo inferior ........... 55
Consejos para eocinar en el
homo inferior ........................... 56-58
Horneado con margarina .............. 57
C6mo hornear ............................... 59
COn'_ asar a la parrilla .................. 60
Funciones especiales ............. 6142
Ciclo de autolimpieza ............. 63_4
Interior del microondas ................. 65
Fondo del micrOondas .................. 65
Ventar_a de la pue_la dal
microondas ................................... 65
Superficies exteriores del homo ...65
Panel de control microondas ........ 65
Panel de control homo
inferior ........................................... 66
Cacerola y parrilla para asar ........66
Parrillas del homo ......................... 66
Parades del homo ........................ 66
Vidflo del puerta de1homo ........... 66
Foco de la luz del homo ............... 67
Parrillas del homo removibles .>_..67
Puerta del homo ........................... 68
ARes de Ilamar para
un servicio ............................... 69-71
Ajustes a la temperatura ............... 72
Garantla ........................................ 75
NQmeros de servicio ..................... 76
Para su convenlencla y referencla futurei per favor ascribe los numeres de mo_lo
y sede en el eepac|o qua se provee. Est_n ubicados en |a pared |ntedor del
mlcroondaa cuando la puerta del mlcroondas es ablerta.
NUMERO DE MODELO: NUMERO DE SERIE:
© Sears, Roebuck and Co.
37
20P312-2 SI:'v02

INSTRUCCIONESDESEGURIDADIMPORTANTES
GUARDE ESTAS INSTRUCCIONES
Lea todae las instrucclorms antes de usar este aparato. Cuando use aparatos a gas o
eldctdcos, se debedan seguir precauclones de seguddad, Incluyendo Io slgulente:
IMPORTANTE: Para garantizar su
seguridad, Lade su (amitia y Lade st_
hogar, per favor lea su Manual del
Consumidor cuidadosamente. Mant@ngalo
a la mane para referencias. Ponga rnucha
atenci0n alas secciones de seguridad.
ASEGURESE que su estufa sea instalada
per un tecnico especializade y que haga
tierra adecuadamente.
• NO DI=JE a los nines solos o sin
supervision cerca de una estufa en
funcionamiento.
• ENSE_IE A LOS NIXIes A: No jugar
con los controles o cualquier parte de la
estufa, no sentarse, subirse o pararse
sobre la puerta del homo o cualquier
pane de la estufa.
• PRECAUCION: NUNCA GUARDE
articulos que sear de interes para los
niflosen los gabinetes sob_e el estufa.
Los nit]os que se suban sobre la estufa
poddan resultar gravemente heridos.
• GUARDE ESTE libro para un use future.
• NUNCA "I'RATE de reparar o reernplazar
una parte de la estufa a menos que las
instrucciones se den en este manual.
Todo otto _abajo debefia set hecho pot
un tecnico especializado,
• NUNCA USE su estufa para entibiar o
calentar una habitaciOn.
• SlEMPRE MANTENGA los
revestimientos combustibles de las
parades, cortinas y otros parses a una
distancia p_udente de la es_ufa.
• NUNCA USE una toalla u otro pa_o
abultado come agrraderas. Aseg0rese
que la agarradera este sac& Las
agarraders h0medas poddan causar
quemaduras per vapor. NO PERMITA
que las agarraderas toquen las
superficies catientes.
• SIEMPRE MANTENGA su homo
despejada de cosas que se podrfan
quemar (gasollna y otros vapores y
IIquidos inflamables).
• SIEMPRE MANTENGA La_rea de la
homo despejada de cosas que se
prodrlan quemar. La acumulacibn de
comida y grasa y tos utensitios de
madera se prodrian incendiar. Los
utenailios de pl&stico se prodrlan derretir
y las comidas en conservas poddan
explotar. Su homo nunca se debeda
usar para almacenar cosas.
• NUNCA OALIENTE contenedores de
alimer_to_cefteck_s.E_aumento de _a
presi0n puede causar que el contenedor
explore y cause heridas,
• NUNOA DEJE contenedores con grasa
o goteaduras dentro o oerca de [a
estufa.
• NUNCA TRA'rE de limpiar una cubierta
caLiente. Urea esponja o un pa#o ca_ente
puede causar quemaduras per vapor.
Algunos limpiadores pueden produc#
vapores t0xices sobre una superficie
caliente.
• ASEGIJRESE que el homo este
instalado firmemente en un gabinete que
est_ b(en pegade a la pared.
• RASGUI_OS GRANDES O IMPACTOS
sobre las superficies de vidrio de las
puertas podrian romper o agrietar
el vidrio.
• NO TOQUE las superficies para
calentar, las superficies cerea de elias o
las superficies interiores,Estas podrfan
estar suficientemente calientes para
quemar aunque se vean de color
oscuro. Durante y despues del use, no
toque o permita que ta ropa o materiates
inflamables hagan contacto con las
superficies calientes hasta que hayan
tenido tiempo de enfriarse. Las otras
suprficies cerca de las ventanillas de
venfilacibn del homo, puertas, ventanas
y las superficies para cocinar tambi_n
podden estar sufieientemeQte calientes
para causar quemaduras.
38
2OP312-2 SPY02

INSTRUCCIONES
DESEGURIDAD
IMPORTANTES
• COLOQUELASPARRILLASDELHORNOenLa
posici0ndeseadem_entrasel homoest_frle.Silas
parrillassededenmovermientraselhomoest_
caliente,nopermitaquelaagarraderahaga
contactoconel quernadercalientedelhomo,
• DESPUESDEASARALA PARRILLA,siempre
saquelacacerolaylaparril_aparaasarde_homoy
limpielas.Lossobradosdegrasaenlacacerola
paraasarpodrianincer_diarselapr6ximavezque
usteduse
el homo,
• SIEMPRETENGACUIDADOcuandeabra
lapuertadelhomo.Dejequeelairecalientey el
vaporescadenantesdemoverlosaJirnentos.
• NUNCAUSEpapeldea_umJn_paraforrar
el fonpode1homo.Eluseinadecuadodelpapelde
al_Jminiopodflaresuttarenungolpedecorrienteo
enunincend,o.
• NUNCAOBSI_UYAla aberturadelaventilaci6n
delhomo.
• UMPIESOLAMENTElaspartesqueselistanen
estemanual.Sigatodas_asinstruccionesparala
limpieza,
• NUNCAFRIEGUE,mueva,limpieodane
elsellodelapuertaenloshornoscon
autolimpieza.Esesencialparaunbuensellado.
• NUNCATRATEdelimpiarlosutensilios,ollas,
padesremoviblesolacacerolaylaparrillapara
asarenelciclodeautolimp_eza.
• NUNCAUSEIimpiadoresparahornos.Ning_Jn
Ifmp_adercomercialsedeberlausardentroo
alrededordeningunapartedei homo.
• SI LAFUNCtONDEAUTOUMPIEZA
falla,apagueelhomoydesconecteIs
electr_cidad.H0galeunservtciopotuntL,cnico
calificodo.
• UNVENTILADOR debeescucharseenalgOn
momentodurante el ciclo de limpiezaautorn_bca.
Si noIoescucha, I;arnepara solicitarunt_nico
antes de queocurra elproximociclo delimpieza
autom0t_ca.
iADVERTENCIADE SEGURIDAD
IMPORTMITE!
CaliforniaSafeOdnldngWaterandToxic
EnforcementActrequiemqueelgobemadorde
CallfomlapubllqueunaUstadesubstanclasqueel
estadosepaquepq'oducendefectosdenadratento
uotrosdefios reproductlvosyrequiemquelos
hombresdenegodosadvlertanasusclle_ del
contactopotenclalatalessubstanclas.Elalslante
defibradevlddoenelhomoconauto_impleza
emltlriunamaypequefiacantldeddemo_6xldo
decarbonodetenteelrick)deaut_lmpleza.El
contactosepeedemlnlmlzarven_ilandoconuna
peertaoventanaablertao usandoanvontlladoro
unacamporeedeventl_J_n.
IMPORTANTE:Lasaluddea(guno_I_Jamses
extmmadamentesensltlvaa
losvapomsproduddosporelclclode
autollmplezadecaalqulerhomo,Po_galos
I_larose_otrahabltacl_ queest__ venUlada.
;LEAY COMPRENDAESTAINFORMACION
AHOR_
Asegdresequetodos_ suhogarsepanque
hacerancasodeIncendlo,Nuncauseaguasobre
unIncendlodegrasa;estoso_amenteextender_
lasllamas.
FUEGOENELHORNO:
iNobatedemoverlacacemla!
1. Cierrela puerladelhomoy apagueloscontroles.
2. Sielincendiocontint_a,cuidedosarrenteabrala
puerta,arrojesodaparacocinarsobreetfuego,o
useunex_ntordequlmicoseco,espurnao
"halon'.
_ uandouse aparatosei6ctricos,
sedeben segulrprocauclone=
I_slcas de seguddad, Inclwendo
leesslgulentes:
ADVEWrENCIA= Para reducirelrlesgo
de quemadums,golpesde cordente,
Incendlo,heddaspersonaleso exposlck_n
_ce_lva aenergfa de mlcroondas:
Lea todaslaaInstruccloneaantesde
usareste aparato.
Lea ysiga las Instruccionesde
seguddadespeciflcasdel microondas.
39
20P312-2 S1:_02

INSTRUCCIONES
DESEGURIDAD
IMPORTANTES
• ESTE APARATO debe hacer tierra.
Conecte solamente a un recept_c_k_
que haga tierra. Vea las instrucciones
para hacer tierra en las instrucciones
para la instalaci6n.
• USE ESTE APARATO solamente para
su uso apropiado como se describe en
este manual. No use quimicos o vapores
corrosivosen este aparato. _s_ehoTno
a microondas est_[especlficamente
dish,ado papa ca_entar o cocinar
alimentos, y no tiene un prop6sito
industriaJo de laboratorio.
• INSTALE O UBIQUE este aparato
solamente de acuerdo con I_as
instruccione$ para instalaci_)nque
se proveen.
• NO CUBRA u obstruya ninguna abertura
de este aparato.
• ESTE HORNO MtCROONDA,_ no estt_
aprobado o probado parta uso madtimo.
• NO HAGA FUNCIONAR este aparato si
no est_ funcionando bien o si ha sido
daf_ado o se ha dejado caer.
• COMO CUALQUIER OTRO APARATO
EU[CTRICO, ss necesita una vigilancia
muy de cerca cuando se usa por los
niflos.
• NO SOBRECOCINE la comida. Vigile el
homo cuidadosamente ei papel, pr_stico
u otroe materials combustibles Sa t_an
colocado dentro del homo para facilitar
la cocci6n.
• SAOUE LAS AMARRAS DE ALAMBRE
de las bolsas de papel o pl_stioo antes
de ponerlas en el horno.
• NO USE su horno microondas para
secar periddicos.
* NO USE productos de papel reciclado.
Las toallas y las servi_etas de papel
reciclado y el papel de cera pueden
¢ontener part(culas de metal que
poclrlan producir arcos o incendiarse.
Los productos de papel que contienen
nil6n o filamentos de nil6n debedan
evitarse.
• NO ¢ALIENTE atimentos en
contenedores cerrados, tales como
frascos de vidrio, los cuales poddan
explotar.
• NO PREPARE "popcorn" en su
horno microondas a rnenos que use un
"popcorn" que sea marcado para uso en
los horace micfoondas.
• NO COCINE DEMASIADO las papas.
Se podrian deshidratar e incendiarse,
causando dar_oa su homo.
• NO HAGA FUNCIONAR el homo
microondss si est_ v_clo.
• NO USE su homo microondas para
almacenar cosas.
• SI EL MATERIAL DENTRO del homo
se incendia, cisrre la puerta, apague et
homo y desconecte IBelectricidad al
aparato.
• ALIMENTOS DE TAMAI_IO GRANDE y
uter_silios de metal demasiado grande
no debedan usarse en un homo
microondas. Se podrla producir un
golpe de corrisnte o un incendio.
• NO LIMPIE con lanillas para fregar de
metal. SS podflan quebrar tragmentos
de la lanilla, causando un golpe de
corfiente.
• NO DESCONGELE bebidas congeladas
que tienen boteUas de cuello angosto.
Podda subir la presiSn y causar que la
botella explote.
• USE AGARRADERAS cuando saque
los utensilios del homo. Los utensilios se
poddan calentar cuando Cocine debido
a la transferencia del calor desde la
comida.
• TENGA CUIDADO si toca las paredes o
eLrondo deLh_rno durante ydespu_s
que cocine. LSSparedes y el rondo
podrlan estaf cafientes.
• NO HIERVA huevos en un homo
mioroondas. La subida de presl0n
dentro de la yema del huevo podrla
causar qua el huevo explote.
• USE CONTENEDORES de pl&stico que
sean aprobados pot el fabricante para
uso con microondas. No permita que los
niSos usen contenedores de pl_stico a
menos que est_n siendo vigilados. NO
exponga contenedores va¢los 8 las
microondas.
40
20P312-2 S1:_2 40 2/14/03, 12:55 PM

INSTRUCClONES
DESEGURIDAD
IMPORTANTES
• ALIMENTOSCON PIEL O CJ_SCARA
ENTERA,talescome papas, salchiehas,
tomates,manzanas, higadede Oollo,yeroas
de huevoy otraspartes del polio,debedarl
tenorhoyospara porto]tit queel vapor
escapedurante la cccciSn
• ASEGURESEOUE LOS ENVOLTORIOSDE
PLAS'IlCO queose cuando cocine a
microondassean aprobados parause con
m_croondas.
• AGUASUPERCALENTADA:El agua
sometida acalentamientode microondasy
otrosliqoidos nosiempre hacenburbujas
cuando alcanzansu punto de ebullici6n De
boche1podeiansupeecaLentarsey nohervir
en Ioabsolute,
Los liquidos supercalentadoshacen burbujas
quesalondel envasecuando sonmovidos o
euando algo come unacucharao una bolsita
de t_le sonintroducidas
Pareevitarque esto suceday que cause
a_gunalesk3n,ao calie_teni_g_nLiquidoper
m_s de 2 minutesper taza. Despu_sde
oalentado,dole ]ataza per unos30
segundos enel interiordel microondas antes
de moverloo de introducir algo ensu interior
Ebullic16nespontanea:Bajo cier_as
circunstanciasespeciales, losliquidos
podriancomenzara hervtrduranteo poco
despu_ de removerlos del microondas.
Paraevitarquemaduras debidas aderrames
de llquidos calientes, recomendamosIo
siguientedespues de removerelenvase
de_ho_:
- Permitaque el envase permanezcaen el
interior def homo per 306 40segundos
despues de que el homohayadetenido
el calentamiento
- Nohierva Ilquidos enenvasescon cuellos
estrechos come botellasde bebidas, de
vinos,otazasde cat_concue{toe
especialmente estrechos.At}nsi el
envasees abierto, vaporexcesivo podria
causar MRreboso o underrame.
• NO CALIENTEcomida pare losbeb_s en
|fasces de vidfio con micmondas.
• ALAS BOLSASpara cocinar herviblesy
boLeasde pi&sticoherm!_ticamentecerradas
se los deberlan hacerhoyos,tajaduraso
deberian serventiladas comese instruyeen
el paquete. Si nosonventiladas de alguna
manera, la presi6ncausar_que se revienten.
• NOTRATE de operar estehomo con la
puertaabiertaya que e_tuncionamientocon
la puerta ebiertapuede resultaren una
exposicbn dahinaa la energia de
mieroondas. Es Impodante no desr.,onectar
o Interferlrcon losslstemasde segurfdad.
• NOCOLOQUE ning_nobjeto entreel lrente
del horr_ y la puertao permita la
acumu_aci¢_de sue_edado _esidL_ode
limpiadotes en lassuperficies decierre.
• ELHORNO nodebeda seraiustadoo
reparado per nadie exceptoper unservicio
de personalespecializado.
• NO HAGAFUNCIONARELHORNO
si est_ dar_ado.Es particu_armente
importanceq_eel h_no eie_e correctamente
y Quenohaya dar_oa:
1 puerta (doblada)
2 bisagras ycerrojos(quebfados o
sueltos)
3. sello de la puertaysellosde las
superficies.
Paresacar el residue del adhesive0e la cinta
de empaque,use un detergente llquidopara
lavarplates, aceitemineralo parecocinar. Con
unpaf_osuavetrote e__ea y pe_m_aque se
remoje. Enjuaguey seque bien. Repitael
procedimiento usandoun pulidorpare homes
parB asegurarseque e_borneno haside
darlado. Entosedebeda hacer antesque el
homo seonclerlda per pdmera ve'z.La chute
no sepuedeesesr una vezqes el homo ha
side caleotado. Lacinta deempaque se
puede encontrar en las_{eas siguientes:
Manillade la puerta,Area del panel decontrol,
Moldura de la puertay Areade)homo.
GUARDE ESTAS INSTRUCCIONES
41
20P312-2 SPy02 41 2/14/03. 12:55 PM

OpE_ClON
(:ARACl_JSI'ICASDESUHoRNO
42
4_

OPERACION
_ER I_OWA_IE OVeN
( J
SEP430R _NG 0_'_
Con su nuevoHorro Micrcendas, usteclpuede
hornear acierta cantidad detiempo,usando
las funcionessensoras,o usandolas funcbnes
aulom&ticas.
TIEMPO pARACOCINAR
TIEMPODE DESCONGELACION
COCINADOEXPRESO
ASREGUE30 SEGUNOOS
Laslunciones de tiempo_epermiten
seleccionar lacantidad exacta de tiempo que
se necesitapara preparar _osalimentos,haste
99minutesy 59segundos.
M&Sabaip hayuna li_ de botonesque
contro_arlasfuncionesdel Sensor.
POPCORN POTATO
REHEAT (p/_p_) _VIELOE
(RECALENTAMIENTO) FOgER
Cuando cocine con el sistemadel sensor,el 10
hotro ajustar&autom&ticamentela ¢antidad 7
de tiempopara coeinar cuando detectela 5
humedad emitidarnientrascocina. Lacantidad
de tlempo variar&de acuerdo a lostipos yatas 2 o 3
cantidades de alimentos. 1
Cuando se encuentreusando las
caracteristicasde conveniencia,el homo le
permite seleccionar f&cUmentecentidadeso
tiempos para co_inado para variesarticulos
populates.
Cuando la electdcidad Ilegue nuevamente,
todos los digitos del dial se encender&n,
luegoe_dia_mostrar& "RESET."
Esta funci6n agrega flexibilidad cuando
cocine en el microondas. Carla nivel de
poder le da energia de microondas con un
cierto porcenta.ge de pealer. Tel come:
1:10°4 de poder 6= 60%de #oder
2= 20% de poder 7= 70% de poder
3= 30% de poder 8= 80% de poder
4= 40% de poder 9= 90% de poder
5= 50% de poder O= 100%de poder
La mayoda de Ioque usted cocine eer&
hecho usando el pealer a 100°,$.Los
alimentos se cocinar&n m_s r_pido pero
necesitan ser revueltos, rotados o dados
vuelta m;_sfrecuentemente.
Usando un nivet n_s bajo cocinar&
la comida en forma m&s pareja y
necesitar& darla vuelta y rotarla menos.
A_gunos a_imen_ospodrian quedar con
mejor saber, texture o aparieneia si se usa
un nivel de poder m_.s bajo. Un poder m_s
bajo es mucho meier pare _osalirn_ntos
que tienen la tendencia a subirse.
AUMENTOS
Pescado,tocino,vegetales,hewirllquidos
Came.ave&¢acerolaso recalentar
Estofados.cortesdecernesm&sduros
Mantenerloselimentostibios,eblandar
mantequilla
Elnivel de poder puede serseleccionado
ocambiado inmediatamentedespues de
BEV.(BFJBIDAS} AUTODEFROST seleccionar lafunci_ detiempo, ta_come
SNACKS(BOCADILLOS) (DESCO_ T|EMPOPARACOCINAR,TIEMPOPARA
COOK(COCINAR) AUTOMATICO) DESCONGELARo COCINADOEXPRESO.
El nivelde pealertambi_npuede set cambiado
43 durante lacuenta de!tiempohaciaatrds.
20P312-2 ePvO2 43 2/14_)& 12:55 PM

OPERACION
1, Empujeelbotdn TIME COOKo el boron
TIMEDEFROST.
2. Empujelos botonescon losNUMEROS
paraseleccionar una cant[dad detiempo
paracocinar odescongelar.
3. Empujeel botdn POWERLEVEL.
4. Empujeuno botdn con elNUMEROpara
seteccionare! nivelde poder que usted
necesita.
5. Empujeelbotdn START.
VEGETALES
:dloles
frescos)
coqgatados)
3r0¢€o_i
fresco)
cono,_adep_.,_do)
fr_.as,cortades)
cmgatadas)
_ demal7
ifresco)
iconge_o)
icongelades)
desgranadas)
[c_agatades)
res_, coda_as,
blancas)
r_cas, enters,
_ulcesoblanc.as)
ELTtEMPOPAPACOCtNARI est&
programado parael nivel depoder 10,pero
puede cambiareste nivelpot uno que usted
pref_era.Usted puedeseleccionar una
cantidad de tiempo paracocinar hasta99
minutos y 59 segundos.
1. Empujeel botdn TIMECOOK.
2. Empuie losbotonesde _osNUMEROSpara
seleccionar su cantidad detiempo para
cocina[ pr64erido.
3. Sidesea cambiar el nivel depoder,empuje
el bot6nPOWERLEVEL y luego empuje
unobotdnNUMBER paraseleccionar su
nivelde poder preferido.
4. EmpujeelbotdnSTART.
Siusted abre la puerta mientrascocina para
mirarla comida, cuando lapuerta est_cerrada
empuje el botOnSTARTpara seguir
cocinando,
GUiADECANI1DADDE"I1EMPOPAPACOCINAR
(Useelnivelde xxler10amenosq_JesedlgaIocontrario)
PESO
1lb. 10a15min,
paquate10oz, 4a 8rain
1paquete 5a9rain.
(1¼alY21b.)
Paquete10oz. 4almin
Paqueat10oz. 4aBram
Paquate10oz. 3a7mm.
1a5 1_ rain.por
_ZOrCa
1mazorca 3a6min.
2a6mazofcas 2a3 rain.per
[11azofca
Paquete10oz. 2a6min.
2ib,s_ Tal0_.
des(jrat,at
Paquete10oz. 2a6rain.
i Apapas _12_n,
(6a8_ c_le_a)
1 (6aSoz.) 1a4min.
COMENTARIO$
Encace_o_ade1cuar[oymedioconmediatazadeagua
Encacerolade1cuarioceq2cucharadasdeagua.
Encacerolade2cu_oscon_/_atzadeagua
Encacerolade1cuarto.
Encacerolade1cuartoymed]oconV4tazadeagua.
Encacerdade1cudeocoa2c_haradasdeagL&
Co_ueelrna(zenplatoparai'ernearobioegado.Sielmatzno
eat_enagua;si_amaze'caest_pe_ada,denga¼tazadeagua
RearregledespdesdeLamitaddattiempo,
Pongaenplatodeviddeparahomeardatongado.Cubracon
pl_at_paraenvo_erveqtilado.Reatregledes!_s delam_ad
del_iernpo.
Encacerolade1cuarlocon3cucharadasdeagua,
Eecacefot_de1c_to cor_¼_azadeagua,
Encacerolade1oJar[oco_2cucharadesde_gua
Pe_yt_t_ ¢e1' 9¢ega_ t,zc,ac__ 2cuar_sco_
rred_atazadeagu&Re_ _ delamira0detiempo
Hagahoyosconuntenedercee0cirePor42aene_centre_
homo._lataserlr_ pot5min.
44
20P312-2 SPY02 44 2/14/03, 12:55 PM

OPERACION
Tiempoparacocinar
El TIEMPO PARA COCINAR II le
permite cambiar los niveles de poder
aulom_ticamente mientras coclna.
1. Empuje el bot6n TIME COOK.
2. Empuie los botones de losNUMEROS
para seleccionar la cantidad de tiempo
para cocinar.
3. Si desea cambiar el nivel de poder,
empuje el botdn POWER LEVEL y
fuego empuje los botones de los
NUMEROS para seleccionar
el nivel de poder deseado.
4. Empuje et bot6n TIME COOK
nuevamente.
5. Empuje nuevamente los botones de
los NUMEROS para seleccionar su
segundo tiempo para cocinar
preferido.
6. Si desea cambiar el nivel de poder,
empuje el bot6n POWER LEVEL y
luego empuje el bot6n NUMBER para
selecoionar su nivel de poder
preferido.
7. Empuje el botdn START.
AI final de la cuenta del primer tiempo
para cocinar, el segundo tiempo para
cocinar empezar& su cuenta,
Le permite descongelar por una cantidad
de tiempo seleccionada. El nivet de poder
se selecciona autorn_ticamente a 3, pero
puede ser cambiado. Cuando se usen
niveles de poder m_s altos, los alimentos
se deben revisar m_s frecuentemente.
C6MO SELECCIONAR LA CANTIDAD
DE TIEMPO PARA DESCONGELAR:
1. Empuje el bot6n TIME DEFROST.
2. Empuje los botones de losNUMEROS
para seleccionar el tiempo para
descongelar.
3. Empuje elbot6n START,
Usted puede usar esta funci6n de dos
maneras:
• Agregr_ 30 segundos al tiempo de la
cuenta cada vez que empuje el bot6n
• Se puede usar como una r_pida manera
para programar 30 segundos de tiempo
para cocinar.
Esto es una r&pida manera para cocinar
de 1 a 6 minutos,
Empuje uno de los botones Express Cook
(de 1 a 6) para cocinar de 1 a 6 minutos a
nivel de poder 10.
El poder puede ser cambiado durante la
cuenta. Empuje el botdn POWER LEVEL y
entre un nOmero de 1a O,
45
20P312-2 SPY02 45 2/14/03.12:55 PM

OPERACION
Tiempoparacocinar
El descongelador autom_tico programa
autom&ticamente las cantidades de
tiernpo para descongelar y los niveles de
poder para descongelar parejamente
carries, ayes y pescado. Use e_
descongelador autom&tico para la mayoda
de las otras comidas congeladas.
PARA PROGRAMAR EL
DESCONGELADO AUTOMATICO:
1, Empuje los botones AUTO DEFROST,
2. Usando la Gufa de Conversi0n, entre el
peso de la comida.
3. Empuje el botOn START.
Busque la gufa pr&c_ica ubicada en el
frente del interior del microondas,
• Saque la carne del paquete y p6ngala
sobre un plato para microondas.
• Dos veces durante la desconge_aciO_ e_
homo da la serial TURn (DAR VUELTA).
A cada seSal de DAR VUELTA, de
vuelta la comida para elotro lade. Saque
la came descongelada o cubra las &reas
c81ienles con pequefios pedazos de
papel de aluminio.
• Despu0s de descongelar, las carnes
necesitan 5 minutos mAs afuera para
completar la descongelaci6n. Los
pedazos de asados grandes debedan
dejarse afuera pot unos 30 minutos.
GU|A DE CONVERSION
Si el peso de la comida se da en libras y
onzas, _asonzas deben se[ conver_das a
d0cimos (.1) de libra.
TABLA DE CONVERSION papa
descongelaclbn automdtlca
PESO OE LA COMIDA PESO DE LA
EN ONZAS COMIDA EN
DECIMOS
3 2
4J_ 3
_-7 4
8 5
9-10 6
11 7
12-13 8
1,_15 9
48
20P312-2 SF%'02 46 2/14]03, 12:55 PM

OPERACION
Tiempoparacocinar
GUiA PARA LA CANTIDAD DE TIEMPO PARA DESCONGELAR
ALIMENTO TIEMPO COMENTARIOS
Panes, queqt_s
Panecitlo_y POlilIos V, min
Boli$1osdulces 2 a 4 min.
Peseadosy
ma€18¢o$
Filetescongelapos (lib) Pongael blOqueen la cacerola DOvueltay quiebre
Madscos, pequef_ospedezos(lfb) despuds de _amitad deltiempo
came
Bacon (lib.)
Chdezos(llb,}
Came molide (1}b)
Asado: res, cordero, ternera, cerdo
Bistecs, chule_s, pedazos
A'#e$
Polio, asado, dilO en pod azce (21_a 3 Ib)
Polio,entero(2P2a 3 Ib)
Gallina
Pechuga de pave(4 a 6 Ib)
6a9 min
3a 7 min.
2aSmin
2aSmin
4 a6min
9 a f3 rnin.per Ib
4a_]min porlb
14 a2Omin
20a25 min
7 a 13 rain.pot Ib,
3a8 min porlb
ongaelpoquete sin abrir en el homo D¢_leloafuera
or5 minutosdespuds de descongetarlo.
Ponga elpaquete sinabrir en elhomo Enc_nde
el m_croondashastaque los chonzosse puedan
separar.Dejelos afuerapor 5 minutos, sies necesario,
paradee se terminen de descongelar
Odvueltala came despues de la mitad del tiempo
Use el nivelde poder 1
Ponga la came sinenvoltorioen unplato para cocinar
Dd vueltadesouds de la mitaddel dempo ycubra las
dreastibias con "foil" Cuando termine, separe los
pedezc_ y permita quadescansen hasta quese
descongelen completamente
Ponga el polioenvueltoen un p_ato Desenvuelva
yde vueltadespL_S de lamitad del tiempo Cuanpo
ermine,separe las presasy ponga en el microondas
_or2a 4 minutes m_s,si es necesario Oeielo
descansar paraque se terminede descongelar
Pongael 130110envueito en un plato Despuds dela
mitad deltiampo desenvuelva _,de vuelta el polb
Cubra las t_reastibiascon 'foil Terminede
descongelar, si es necesar_ohaga correr agua Idaen
lacavided hasta deelas presas intedores se pueden
sac_r
Pongalagallinadesenvueltaenelhorneconla
pochugahacia ardde. Dd vueltadespods de la mitad
deltiempo. Ha£a co_reragua bia en la cavidad hasta
qualas presasin_eriores88 pueden sacar.
Ponga la pechugadesenvueltaen un plato con
la pochuJg_ahacia aba o.Despues de la mitad del
tiempo,dd_ vueltay cubralas_reas tibiascon "foil'.
Terminede descongelar Dejela descansar de 1 a 2
horasen elrefrigeradorpara completar la
descongelaci6n
• Lascomidascongefadasenpapolo pldstico
edenset descon_iades en e_poquete. Apu
lospaquetescerradossetes debehaeercortes,
hoyos, o serventiladesdespots que hayanside
parcialmentedescongeladosLos contenedores
de pt_sticosparaguardarcomida debedan abrirse
parcialmente.
• Lasc_ides empaquetadesde tamattode familia
puedenset descongeladas ycocinadesen s_
microondas.Si ]acc_nida estdenunecntenedorde
aluminio,c_nbielo a un platoparamicroondes.
• LOSaJimentosdee se ethan a perder f_cilmenteno
deberian dejarse expuestos permds de unahera
despods deset descongelados La temporatura
arnbiente promueve el crecimiento de bacterias
daf_inas.
• Paraunadescongelack)n m_s pare a de las
comides grandes,talescome los asados, use el
Auto Defrost AsegQresequa las carnes grandes
estdn completamentedescongelades antes de ser
cocinadas.
• Cuande seandescongeladas, la comide dededa
estarfda pore blandesen todaspades Si usted
noralugares congelades, dejelosdescansar unos
47 pocos minutes
20P312-2 8Fh*02 47 2/14,03, 12:55 PM

OPERAClON
CGmococinarconel sensor
Las funciones del sensor detectan
el aumento de la humedad emitida
durante la cocci6n. El homo ajusta
autom&ticamente la cantidad de tiempo
para cocinar para varios tipos y
cantidades de comida.
• Los contenedores y las tapas adecuadas
son esenciales para obtener los mejores
resultados.
• Siempre use contenedores para
microondas y c0bralos con tapas o
papel de pl&stico ventilados. Nunca use
contenedores de pl&stico sellados que
eviten que el vapor escape y causen
que la comida se cocine demasiado.
• Aseg[_rese que la parte exterior de los
contenedores para cocinar y que el
interior del microondas esten secos
antes de poner la comida en el horno.
Las gotas de humedad que se
transforman en vapor pueden hacer que
el sensor se equivoque
Use st31amentepopcorn preempaquet_do
para mieroondas que pose entre 1.75 a 3.5
onzas.
PARA USAR LA FUNCION PARA
POPCORN:
Siga las instrucciones del paquete usando
TIME COOK si el paquete pesa menos de
1.75 onzas o m&s de 3.5 onzas. Ponga el
paquete en el centro clel microondas.
1. Empuje el bot6n POPCORN.
Si abre la puerta mientras se muestra
"POP" aparecer& "ERROR." Cierre la
puerta y empuje el bot6n START,
2. COMO AJUSTAR EL PROGRAMA
DE POPCORN PARA PROVEER UN
TIEMPO PARA COCINAR MENOR O
MAYOR:
Si usted encuentra que la marca de
popcorn que usa se cocina poco o
demasiado consistentemente, usted
puede agregar o sustraer de 20 a 30
segundos de/al tiempo autom&tico.
PARA AGREGAR TIEMPO:
Despu_s de empujar POPCORN, empuje
9 inmediat_mente despu_s que el homo
empiece para 20 segundos extras. Empuje
9 nuevamente para agregar otros t0
segundos (total de 30 segundos de
tiempo adicional).
PARA SUSTRAER TIEMPO:
Despu(_s de empujar POPCORN, empuje
1 inmediatamente despu_s que el homo
empiece para 20 segundos menos de
tiempo. Empuje I nuevamente para reducir
el tiempo otros 10 segundos (total de 30
segundos menos).
48
20P312-2 SPy02 48 2/14_3_ 12:55 PM

OPERAClON
CGmococinarconelsensor
La funcidn para recalentar recalienta
porciones individuales que ya han sido
cocinadas o un plato de sobrados.
1. Coloque la comida cubierta en el
_Of130,
2. Empuje el bot6n REHEAT. El homo
empezar& inmediatamente.
8. El homo da una se¢ial cuando detecta
vapor y comie_za Lac_enta de_tiempo
que queda.
No abra la puerta del homo hasta que la
cuenta haya terminado. Si 13puerta se
abre, cierrela y empuje el bot6n START
inmediatamente.
Despu#_sde sacar la comida del homo,
revuelva si es posible para emparejar la
temperatura. Si la comida no est_ Io
sulic_enteme_te caLiente, use _ME COOK
para recalentar por m&s tiempo. Los
allmentos recalentados pueden tene_
una gran vaHacl6n en temperatura.
Algunas dreas podrian estar
extvemadamente _|l_c_.
ALIMENTOS NO RECOMENDADOS
PARA SER RECALENTADOS:
• Productos de pan
• Comidas q_e t_er_e_que ser
recalentadas sin estar tapadas
• Comidas que tienen que ser revueltas
• Comidas que deben quedar con texiura
seca o una corteza dura clespues de ser
recalentadas
Lafuncidn para cocinar papas cocina de Vza 2
Ibs de papas.
1. Haga hoyitosen la c_scara con untenedor
y ponga las papas en la bandejagiratoria.
Si cocina 3 o m_s papas,coldquelas en
forma de estrella.
2. Empujeel potOnPOTATO.Elhomo
empieza inmedialamenle.EthoTnodauna
seaaicuando detecta vapor y empieza la
cuenta del tiempoque queda.
NOabfa la puerta del homohasta que
la cuenta hayaterminado.Si lapuerta se
abre,cierrela y empuje el botdnSTART
inmediatamente.$i la comidano est_ bien
cocida, useTIMECOOK para cocinar por
m&stiempo.
49
20P312-2 8Fv02 49 2/14/03, 12:55 PM

OPERAClON
Funcionesparasuconvenlencia
Para user la funci5n para las bebides:
empuje BEVERAGE una vez para una
bebida de 4 oz., dos veces para una
bebida de 8 oz., o tres veces pare una
bebida de 12 oz.
Las bebldas que se callenten con la
fiJnci6n papa las 10ebldas poddan ester
muy cellentes. Saque el contenedor con
culdado.
La funci0n para bocadiitos pfograma
autom&ticamente los programas de tiempo
y nivel de poder para calentar una
var_edad _e bocadiltos.
1. Empuje el boron SNACKS.
2. Seleccione el ripe de bocadillo de 1a
6. (Vea ia table de m&s abaio.)
3. Entre el n0mero de items o el peso de
la comida en onzas.
4. Empuje el botSn START.
Usted puede empujar y sujetar el bot6n
SNACKS mientras cocina para mostar el
tiempo que queda pare cocinar.
Guia pare bocedlllos
1190 OE COMIOA CJ,_AO O PESO
1pan1boliUo,pandulceI 1 a 4
2 Sandwiches ] 1 a 2
3 Pizza _sebrados) { 1 a 4
4 Cremas de 13ostreI 1a 4
5 Sopa 18 a 40 onzas
6 Salsa de quese 14 a 16 onzas
La funcibn pare cocinar autom_tieamente
programa el tiempo y los niveles de poder
pare cocinar one variedad de comities.
1. Empo}e el bot5n COOK.
2. Seleccione el tipo de comida de 1a 9,
(Vea la Gula pare Cocinar a la
derecha.)
3. Entre el peso de la comida en onzas.
4. Empuje el bot6n START.
Empuje y sujete el bot6n COOK mientras
coc_napare rnostrar el tiempo que queda
para cocinar.
"ilPO_E COffiDA
1Vegelates
en leta
(VEG1)
2 Vegetates
con lado_
(VE_)
3 Vegetales
frescos
(VEG3)
4 Papas
5 Pescade
6 Presas
de polio
7 Cerne
molida
(re8, cerdo,
pave)
8 Tocino
(bacon)
Gu|a para cocinar
9 pizza
(congeada,
pare
micrcondas.Cubracontapeo
ape!depl_co ventilado.
1at5 oz._t.Js_cace_,e,b_ £a_B
rneroonda&Siga
instrucoionesdelpaquetepare
agregaragua.Cubracontape
0papelde!_&sticoventilade.
_,a 16oz.IUsecaceola0b01opafa
microe_das,Agreguedos
cucharadasdeaguapercada
se_d0,Cul_acontape0de
_l_sticove_do.
Ba40oz.IHagahoyltose_lac_scara
conun_edof.Po_galas
papassobre_abandeja
ra_o_ia,
4a 16oz.I Jseplatooblongade,redondo
cuadrado.Cubraconpapel
Jepl_sticoodecera
i _tilade.
4a40oz.I Jseplatoob_gado,fedo_de
>cuadmdo.Cubracontapao
0ape1dep_%'tJc0ventilad0.
8a48oz.IJsecacer01aredenda.
_shagalacames0btela
cac_01a.Cb_acontape0
papeldepl_ico ventilade.
2a 10oz. PmgaImjasencapess_bre
unplato,4p0_cape.Cubra
cadacapaconunat0allade
papeL
4a 15_z. S_ _r_',_coc__ paq_e
parapreparerpizzaener
rnicroc_das.
NOTA: Usted no puede entrar un peso
que sea mayor o menor que el peso que
se lista en la Gula pare Cocinar de arriba.
50
20P312-2 SP_2 50 2J1_.tO3,'12:55 PM

OPERACION
OtrasFunciones
Empuje el botdn CLOCK para entrar la
hora del dla over la hora mientras est_
cocinando.
PARA PONER EL RELOJ:
1. Empu]e et botOn CLOCK.
2. Ponga la hora del dla.
3. Empuje el botbnSTART o CLOCK.
Presione para aiustar el sincronizador de
tiempo hasta 99 minutos y 99 segundos.
Presione el nO'nero de teclas para aiusta[
el tiempo. Presione el botdn de KITCHEN
• riMER MIN/SEO para iniciar. Presione el
botbn KITCHEN TIMER MIN/SEC dos
veoes para borrar la pantalla.
Usaret crondmetro no iniciar la energia de
micrcondas.
Para encender o apagar el dial del reloj,
empuje y sujete el botdn 0 por unos 3
segundos. La funcidn ENOENDIDO/
APAGADO DEL DIAL no puede set
usada mientras las funoiones para
Cocinar se estAn usando.
La funcidn para recordar se puede usaf
como un reloj de alarm&
1. Empuje el botbn REMINDER.
2. Entre la hora del dla en la cual desea
que el homo le recuerde. (Aseg_rese
que el reloj del microondas muestre la
correcta hora del dla,)
3. Empuie el bot0n START.
Cuando se prenda la serial de recuerdo,
empuje el botOn CLEAR/OFF para
apagarla. La hora para recordar se puede
rnostrar empujando el bot0n REMINDER.
NOTA: El indicador REM permanecer_
encendido para mostraf que ta Funci0n
para Recordar est& en efecto. Para
eliminar el recordador antes de que
ocurra, empuie el bot0n CLEAR/OFF.
/a luz del indicador REMse apagar&
El comienzo demorado le permite
programar garb que el m_croondas
comience a cocinar en forma demorada.
1. Empuje el bot0n DE!..AYSTART.
2. Empuje los botones de los NUMEROS
para seleccionar la hora del dla en que
desea queef homo se encienda y
comience a cocinar. AsegLirese que el
reloj est0 mostrando la correcta hora
del dia.
3. SeteccionellMEDEFROST, AUTO
DEFROST, o TIME COOK. Entre la
oantidad de tiempo para descongelar
o el tiempo para cocinar, o el peso de
la comida para descongelaciOn
automatica
4, Empuje el baton START.
La hora de Comienzo Demorado se ver_
en el dial ademas de "Start "rime". E_
homo comenzar& autom&ticamente en la
hora demorada seleccionada. La hora del
dla se puede ver empujando el botOn
CLOCK.
Para encender o apagar el control
det sonido,empuje y suieteel botOn
NUMBER 8 SOUND OR/OFF por 3 o 4
segundos, El dial pestat_ear_ "OFF" y el
dial volver& a la hora del dla. "MUTE"
permanecer_, en el dial. Para encender
nuevamente el sonido, empuje y sujete et
botOn NUMBER 8 SOUND OR/OFF por 3
o 4 segundos, "ON" pesta_ear;_ en el
dial, mute desaparecer_ y el dial volver_ a
la hora del dia.
51
20P312-2 SPvO2 51 2/14/03, 12:55 PM

OPERACION
Controldel homoinferior
LOWER OVEN
OVEN TIMER
®®®
®®®
@@ @®® @@
Su nuevo control a botones le permitir& seleocionar les varies funciones con facilidad.
Abajo est_n les funciones del control del homo y la descripci6n de eada una.
HORNEAR - Cocina la comida en
un homo termal tradicional con una
temperature de 170°F a 550°E
ASAR A LA PARRILLA- Cocina ;a
came a 550°F Hi o 450°F Lo desde el
calor directo del elemento superior dentro
del homo.
HORNEADOAUTOMATICO- Seleccione
horneary latemperaturaque prefiereuser
Luego programe lacantidad de tiempoque
desea usarparacocinar la comida.
HORNEADOY LIMPIEZADEMORAOA-
Seleccionehornear o limpiar y letemperatura
que prefiereusa, programeta heradel dia
en que desea que el homose encienda, o
programe la centidad detiempo que desea
para cocinarle comida.
AUTOUMPIEZA - Limpia el homoper 4 betas,
perousted puede cambiaresta cantidad de
tiempo a entre3 y 5 horas.
NOTA: La puerla det homo secerrara con
cerrojoautom_ticamenteyel ce[roto seabrir_
s6tocuandoel homose haya enfdado.
Los botones para los NLIMEROS
programan la temperatura del homo,
hera del dla, tiempo demorado, tiempo
para cocci6n, tiempo para limpieza y
cronbmetro de la cocina.
El bot0n START debe set ernpujado para
activer cualquier funci6n.
El bot6n OVEN COOKING TIME se usa
pare porgramar la csntidad de tiempo
pare hornear.
El bot6n DELAY START TIME se usa para
programar la hera del die en que desea
que el borne se enclenda y empiece a
hornear o limpiar. Cuando se use la NORA
BE ¢OMIENZO DEMORADO con el
"REMPO PARA COCINAR EN EL
HORNO, el homo tarnbi_n se apagar_
autom_ticamente al final de la cantidad
de tiempo pera cocinar.
El bot6n CLEAR/OFF se usa para
canceler cuelquier funci6n del homo y del
tone de fin de ciclo. No cancelard el reloj
o el Cron6metro de la Coclna.
El botOn HOUR/MIN KITCHEN TIMER ON/
OFF es usado para encender y apagar el
sincronizador de tiempo de la cocina. No
controlar_ ninguna otra funci(_n.
52
20P312-2 SPY02 52 2/14/03,12:55 PM

OPERAClON
Controldel homoioferior,
Reloj y CronGmetro
Indicador de
temperatura del homo Indlcador de encendldo
\
programa _._O_.,,_ROiL I_U-llLeU_OI I_r Ir,0_,,._ ra
Indlcador de Indlcador de
funcl6n del homo funcl6n del homo
El panel es una referencia f&cil de usar mientras usa los controles. Abajo est& la
descripci6n de c6mo funciona.
INDICADOR DE LA TEMPERATURA
DEL HORNO - Este indicador tiene un
prop6sito m_ltiple.
• Muestra la temperatura
• Muestra el c/_€l|gode error "ERR" -
Si el indicador de temperatura del
homo pestafiea "ERR", entonces
usted ha programado un tiempo o una
temperatura incorrecta. Empuje el bot6n
CLEAR/OFF para despejar el control y
reprogamar la funci6n del homo.
• Muestra problemas del control - Si el
control hace pestaflear "F" y un nQmero
o letra, ha experimentado un problerna
con el homo, For favor lea la secci6n
F-CODES en su manual.
INDICADOR ENCENDIDO - Se
encender_ cuando se programa una
funci6n del homo.
INDICADOR DE PROGRAMA El
indicador de programa pestafiear_ en
combinaci6n con una funci0n del homo o
una funci6n autom_tica para avisarle
que necesita programar un tiempo o una
temperatura. Ejemplo: "SET" y "BAKE"
pestaflear&n para avisarle que tiene que
programar la temperatura para hornear.
INDICADOR DE LA HORA- Muestra la
hora del alia, tiempo de coeci6n, hora de
comienzo demorado, hora de limpieza o la
hora programada en el cron6metro de la
cooina.
• Muestra el c6dlgo para recordar
"PUSH START" - Si el inclicadorde
la temperatura del homo pestafiea las
palabras "PUSH" y "START", entonces
usted tiene que empujar el bot6n START
para activar su programa.
INDICADORES DE LAS FUNCIONES
DEL HORNO - Muestran qu_ funci0n ha
sido programada, cuando la puerta del
homo est& enganchada, y si la funciSn
es demorada.
53
20p312-2 SI:>v02 53 2/14_)3,12:55 PM

OPERACION
RelojyCronGmetreInferior
El reloj debe ponerse a la correcta hora
del dla antes que una funci6n demorada
del homo funcione oorreotamente. La hora
del dia no se puede cambiar durante una
funci6n demorada del homo,
C(_MO PONER EL RELOJ
1. Empuje el bot6n CLOCK.
2. Empuje los botones con los NUMEROS
para poner la hora.
3. Empu}e el bot6n START.
PARA VOLVER AL RELOJ
Mientras est_ usando el homo para
cocinar en forma automatica, empuje el
bot6n CLOCK, si desea ver la hora del
dla. La hora presente del dia se ver_ en
el dial.
CORTE ELECTRICO
Si ocurre un torte de corriente, la hora que
se muestra en el dial estar_ incorrecta.
Ponga nuevamente el reloj a la hora.
Cualquier funci6n para cocinar del homo
que estaba en proceso tendr_ que ser
reprogramada.
El cron6metro de la cocina se usa para
medir el tiempo de losprocesos para
cocinar u otras actividades del hogar. No
controla el horno. Se puede programar
hasta 9 horas y 59 minutos. Contar_ hacia
atr_s en minutos basra que Ilegue a los
dltlmos 60 segundos. Cuando la cuenta
Ilegue a :0, el control sonar_ 3 veces
seguido de un sonido cada 6 segundos
hasta que se empuje el bot6n HOUR/MIN
KITCHEN TIMER ON/OFF. El sonido de
cada 6 segundos se puede eliminar para
ciclos futuros si se desea. Para las
instrucciones de c6mo eliminar estos
sonidos continuos, yea tonos en [a p_gina
siguiente.
COMO PROGRAMAR EL CRONOMETRO
1. Empuje el bot6n HOUR/MIN KITCHEN
TIMER ON/OFF.
2. Empuje los botones con los NUMEROS
para programar la cantidad de tiempo.
3. Empuje el botOn START
4. Cuando la euenta fleguea cero,
empuje el bot6n HOUR/MIN KITCHEN
TIMER ON/OFF.
Para cancelar el cron(_netro durante la
cuenta, empuje el bot6n HOUR/MIN
KITCHEN TIMER ON/OFF dos veces.
54
20P312-2 SPY02 54 2J'14_}3,12:55 pM

OPERAClON
ControlDel Homo, Relojy
CronGmetroInferior
El nuevo control tiene una serie de tongs
que sonarAn a tiempos diferentes. Estos
tongs pueden sonar mientras usted
programa una funci6n del homo, o al final
de una funci6n del homo. Tambien le
avisar& si existe un problema con una de
las funciones. M_s abajo est&n los lipos
de tongs y una breve descripci6n de cada
LinG.
TONGS MIENTRAS PROGRAMA EL
CONTROL - Cuando empuje un bot6n
usted escuchar& un tonG. Este tong le bar&
saber que aplic6 suficiente presi6n sobre
el bot6n para activarlo.
TONG AL FINAL DE UN CICLO
AUTOMATICO - Despu_s de una
funci6n para cocinar autorn_tica, usted
escuohar& tres tonGs cortos seguidos por
un tong cada 6 segundos. El tong de cada
6 segundos seguir_ sonando hasta que
empuje el bot6n CLEAR/OFF ousted
decida seleocionar el programa especial
para cancelar y evitar que el tong de
6 segundos suene al final de un ciclo
futuro.
C6MO CANCELAR EL TONG DE
6 SEGUNDOS:
1. Empuje y sujete losbotches BAKE
y BROIL, a la mlsma vez, por 3
segundos, hasta que el dial muestre
"SF".
2. Empuje el bot6n HOUR/MIN KITCHEN
TIMER ON/OFF. El dial mostrar&
"CON BEEP" (tong continuo).
3. Empuje el bot0n HOUR/MIN KITCHEN
11MER ON/OFF nuevamente. El dial
mostrar_ "BEEP*' (tong cancelado).
4. Empuje el bot6n START.
Si desea volver a los tongs de cada 6
segundos, repita los pasos de arriba hasta
que el dial muestre su selecci6n y empuje
"START" (comienzo).
TONG DE ATENCION Este tonG sonar&
si hace un error u omite algo mientras
programa una funci6n del homo.
Unos ejemplos sedan:
a. Programar un ciclo de limpieza y la
puerta del homo no est& bien cerrada.
b. Programar una funci6n y no empujar el
bot6n START.
c. Empujar un bot6n para una funci0n
adicional sin programar pnmero la
temperatura o el tiempo.
d. "ERR" pestatlear_ si usted programa
una temperatura inv_lida. Empu}e el
bot6n CLEAR/OFF para poner el diat
en bianco y reprogramar la funci6n det
horno.
Cualquiera de estos se puede identificar
r&pidamente con mirar el dial
TONG DE PRECALENTAMIENTO -
Cuando usted seleccione un modo de
cocinado, ajuste la temperatura del homo,
y presione el bot6n para el comienzo
(START) para que el horno comience a
calentar. Cuando la temperatura dentro del
homo Ilega a la temperatura que usted
program{), sonar_ un tong para avisarle
que el homo est_ listo para hornear.
Si usted programa una funei6n del homo
y el control hate sonar un tonG mientras
una "F" y un m3mero tal como "F--4" o
letra tal oomo "FI" est_n pestafieando en
el dial, podda existir un problema con el
control o el homo. Simplemente empuje
el bot6n CLEAR/OFF y espere una hora.
Trate de programar la funci6n
nuevamente. Si el c6digo se repite,
escriba el c6digo que pestafiea y Ilame
para un servicio. DIgale al tecnico que
codigo estaba pestaf_eando.
55
20P312-2 SP'_)2 55 Z/14_03. 12:55 PM

OPERACION
ConsejosPara Cocinar
EnE1HomoInferior
JA
re]IEe]_] [ile_;]_lJ:l;tll:l
I__
Es normal sentir un poco de olor cuando
use su homo pot primera vez. Esto es
causado por el calentamiento de las
partes nuevas y de] ais]ante, Para ayudar
a eliminar este olor, ventlle la habltacl6n
abrJl)lldo una ventana o usando ufla
campana de venUlaci6n.
gn la parte trasera del homo usted notar&
un pequeno tubo. Esto es un sensor de
calor que mantiene la temperatura del
homo. Nunca mueva o doble este tubo.
Sensor de
temperatura del
homo
JI
p.r_J_ll r,]=JF:flllJ_ll;IEej
q__
IMPORTANTE: Nunca cubra el fondo del
homo o la parrilla del homo con papel de
aluminio. El uso inadecuado puede causar
una mala circulaoi6n del calor, pobres
resultados al hornear, y podrla dar_ar el
acabado del horno. Para preven+r
manchas debido a derrames, usted podria
colocar un pedazo de papel de aluminio o
una bandeja para galletas sobre la parrilla
debajo de la comida que se podria
derramar.
El precalentamiento es subir la
temperatura a la temperatura que va a
usar cuando hornee. Permita que el homo
se precaliente bien cuando las recetas
requieren precalentamiento.
La zona de temperatura baja de su homo
(entre 170°F y 200°F) est,. disponible para
mantener tibios los alimentos que se ha
cocinado calientes+ Sin embargo, los
alimentos no se debertan mantener a
estas baias temperaturas por m&s de
2 horas.
La ventilaci5n del homo est;_ubicada
bajo el panel de control. Esta _rea se
podrla calentar mucho durante el uso del
homo. Es normal que salga vapor de la
ventilaci(_n y/o que se produzca humedad
debajo cuando el homo no est_ en uso. La
ventilaci6n es importante para lacorrecta
circulation del aire. flunca obstruya la
ventllacl_n.
Ventllacl6n "I _ _ I
del homo _"_ ._1_I
I11
Para prolongar la vida del foco de la luz
del homo, siga estos consejos: Siempre
apague la Iuz cuando el homo no este en
uso _ durante un ciclo de limpieza+ Si la
luz del homo se deja encendida por un
largo periodo de tiempo, el homo estar_
libio cuando abra la puerta debido al calor
generado por el foco de la luz del homo.
56
20P312-2 Sl:ht02 56 2J14/03, 12:55 PM

OPERACION
ConsejosPara Cocinar
EnE1HomoInferior
La mayoda de las recetas para hornear
ban sido desarrolladas utilizando
productos con un alto contenido de
manteca tales como mantequilla y
margarina (80% de manteca pot pes_l
requerimiento federal para los productos
marcados "margarina"). Usted obtendr_
malos resultados si los queques, pasteles,
tortas, galletas o dulces son hechos con
mantequilla con bajo contenido de
manteca. Las mantequillas y margarinas
con bajo eontenido de aceite contienen
menos manteca y m_s agua. El alto
contenido de agua de la mantequilla o
margarina afecta la textura y el sabor de
sus recetas para hornear favoritas.
Mientras m&s bajo sea el contenido de
manteca de la mantequilla o margarina,
m_s se notar_n estas diferencias. Para
asegurar los mejores resultados, use
margarina, mantequilla u otras barras de
estos productos que contengan por Io
menos 70% de aceite vegetal.
El Sensor de Temperatura de] Homo en la
parte trasera del homo mide y controla
conlinuamente latemperatura dentro del
horno. Para mantener una temperatura
programada constante, los elementos
har&n un ciclo de encendido y apagado
mientras el homo cocina.
Los resultados del homeado ser_ mejor si
las cacerolas para hornear est_n centradas
en el homo Iom_s posible. Si est_
horneando con m&sde un utensi_io,
col0que!os de manera que cada uno tenga
por Iomenos de 1' a 1V2'de espacio de aire
a su alrededor, Coloque losutensilios
de maneraque n_ngunoquede directamente
encima de otro
L_S BANDEJAS BAJAS para galletas
permiten que el aire circule alrededor de
las galletas para que se doren en forma
pareja.
LOS UTENSILIOS BRILLANTES son
perfectos para que los queques y panes
r_pidos tengan una corteza cal_ dorada.
UTENSlUOS DE VIDRIO, OSCUROS
CONTRA PEGADURAS, U OPACOS
POR LA EDAD, absorben el calor y
pueden ser usados para panes con
levadura, cortezas para pasteles o
alimentos que tengan una corteza
cafe, Cuando use estos utensilios, la
temperatura del homo se deber(a reducir
en 25°F.
57
20P312-2 SPy02 57 2J14_03, 12:55 PM

OPERACION
ConsejosPara Cocinar
EnE1HomoInferior
Las parrillas del homo est_n disefiadas
con topes, una convenienoia y tambi_n
una precauci6n de seguridad. Cuando las
parrillas est&ncolocadas correctamente
en e_horno, las guias tienen un tope para
prevenir que las parrillas se den vuetta
cuando se sacan del homo, Este diserlo
perrniteque las parrillas puedan ser
insertadas de s61ouna manera.
Su horno tiene seis (6) posiciones para las
parrillas. La posici6n de m&s arriba es
solamente una gufa. No puede ser usada
como posici6n para una parrilla.
Gu|a
Slempre coloque las pardllas del homo
en la poslcl6n correcta cuando el homo
e_itdfdo.
PRECAUClON: Cuando usted este
usendo la parrilla en la posici6n m_s bala
(1), necesitar_ tener cuidado cuando
saque la parrilla. Recomendamos que tire
la parrilla varias pulgadas hacia afuera y
entonoes, usendo dos agarraderas, tire la
parrilla hacia afuera sujet&ndola de los
lados. La parrilla est_ bad y usted se
podrfa quemar si coloca [a mano en el
medio de la par rilla y la saca
completamente hacia afuera. Tenga
cuidado de no quemarse la mane en la
puerta cuando use una pardlla en la
posici6n m&s baja (1).
Usted podfla pensar que su horno nuevo
cocina diferentemente al homo que
reemplaz6. Le reoomendamos que use su
homo nuevo pot varias semanas para que
se familiafice m_s con el, siguiendo los
tiempos que se dan en la receta como
una gufa. Si cree que su homo estA
funcionando demasiado catiente o fifo
para su preferencia, vea Ajustes-Httgalos
Usted Mismo en la parte de atr&s de este
manual para hacer los ajustes.
Cuando use su conveniente operaci6n de
Comienzo Demorado, los allment_ tales
como productos Idctaos, pescado, ayes,
etc., nunca se deberlan deJar expuestos
por rods de una hora antes de ser
coclnados. La temperatura ambiente y
el calor de la luz del homo promueven
el crecimiento de bacterias.
Si abre la puerta frecuentemente para
mirar los alimentos, causar& una perdida
de calory malos resultados cuando
hornee.
.58
20P312-2 SPY02 58 2/14/03, 12:55 PM

OPERACION
CGmoHornearYAsar
(_ 1. Empuje el botdn BAKE.
(_ 2. Empuje los botones
con los NUMEROS para
seleccionar la temperatura
del homo que prefiere
usar.
<_ 3. Empuje el botdn START.
TABLA PARA LA POSICION DE LAS
PARRILLAS PARA HORNEAR
TIPO DE COMIDA POSlClONDEPARRILLA
Pastelescongelados (sobre 3o 4
bandejas para galletas)
Queque _angelfood", o 3o 4
queques
Pancillos, panes duLces, 3o4
"muffins", "brownies'r,
galletas, quequitos, tortas,
pasteles
Cacerolas 3o4
Pavo oAsado 1
Para programar que el homo cocine por
un tiempo especifico y se apague
autom&ticamente.
(_ 1. Empuje el bot(SnBAKE.
(_) 2. Empuje losbotonescon losNUMEROS para
seleccionar la temperatura
del homo que prefiere usar.
3. Empuje el bot6n OVEN
COOKING TIME.
(_ 4. Empuje los botones
con los NUMEROS para
programar la cantidad
de tiempo que prefiere
para cocinar los
alimentos
<_ 5. Empuje el botOn START.
Para programar que el homo empiece en
forma demorada, cocine por un tiempo
especlfico y se apague autom_ticamente.
(_) 1. Empuje el bot6n BAKE.
(_ 2. Empuje los botones
con los NUMEROS para
seleccionar la temperatura
del homo que prefiere
usar.
3. Empuje el botOn OVEN
COOKING TIME.
(_ 4. Empuje los botones
con los NUMEROS para
programar la cantidad de
tiempo que prefiere para
cocinar los afimentos.
5. Empuje el bot0n DELAY
START TIME,
(_) 6. Empuje los botones
con losNUMEROS para
programar la hora del dla
en lacual prefiere que el
horl3o se encienda.
<_ 7. Empuje el bot6n START.
El homo se apagard al tdrmlno del
tlempo para coclnar a menos que el
programa para MANTENCION DE
TEMPERATUBA se haya actlvado. (Vea
la seccl<_nde "Cbmo Programar
Funclones Especlales.")
59
20P312-2 SPvO2 59 2J14/03, 12:5_ PM

OPERACION
CGmoAsarALaParrilla
Asar es cocinar al calor directo del
elemento superior./a puerta del homo
debefla permanecer abierta en la posici6n
de tope para asar cuando ase a la parrilla.
No es necesario precalentar el homo
cuando ase a la parri!la. Use la cacerola
y la parrilla para asar que viene con su
estvfa. Ambas est_n disefladas para
drenar adecuadamente la grasa y los
liquidos.
_ Cuando use de
pal)el
alumlnlo, el impel de
alumlnlo debe estar
moldeado flrmemente a la
parrtlla y los cortes en el papel deben
colncldlr con los cortes de la pantlla.
Esto permlte que la grasa y los
liquldos calgan a la cacerola,
evltando que se produzca un Incendlo
y humo exceslvo.
Slempre saque la
cacerola y la _'_
pardlla del homo.
Guardar y olvldar
una cacero|8 p_ra
asar sucla en el homo
es un pellgro para produclr un
Incendlo o humo,
El Departamento de Agricultura de los
Estados Unidos recomienda cocinar la
came y las aves completamente_la
came a un ealor INTERNO de por Io
menos 160°F y las ayes a un oalor
INTERNO de por Io menos t80°F.
El cocinar a estas temperaturas
generalmente protege contra
enfermedades causadas por
los alimentos,
Mientras m&s cerca coloque los alimentos
del elemento para asar, m&s r_pido se
dorar&n por afuera, pero quedando rojo o
rosado en el centro.
Colocando las cames lejos del elemento
permitir& que las cames se cocinen en el
centro mientras se doran por afuera.
Usando estas posiciones, cocine el lado 1
pot Iomenos 2 minutos mAsque el lado 2.
Si su homo estA conectado a 208 voltios,
usted podria usar una posici6n de parrilla
m&s alta y/o cocinar los alimentos pot m_s
tiempo.
El tamaf_o, peso, grosor, temperatura
inicial y su preferencia personal afectar& el
asado a la parrilla. Esta tabla est_ basada
en cames a la temperatura del
refrigerador,
POSICION TIEMPO
DE TOTAL
ALIMENTO PARRILLA (mlnutos)
BIstec1"degrue=o 3 9-11
Tor'lasdeem,,e 3 16-18
mollda- 1"degru_
Chuletasdecerd0- 3 27-29
1/2"degrm_o
Pmcado(flletes) 3 11-13
P_lo(presas) 2 45-55
fJEe_e]_rJ[eJr_,r,..'.Tzy.'m'_,WlF,_ll'.1_,y;t:tlBB'_l
la. Empuje el botOn BROIL. (Esto
automlttlcamente progmma ASADO
en HI-ALTO)
lb. Mientras el indicador de programa
pestar_ea en el dial, empuje
nuevamente el bot6n BROIL si
prefiere asar en Bajo (Lo). Ase en LO
(Bajo) para cocinar bien alimentoe
tales eomo ayes o cortes de came
gruesos sin que se doren demasiado.
2. Empuje eLbot6n START.
3. Cuando termine de asar, empuje el
bot6n CLEAR/OFF.
6O
20P312-2 SP'.,O2 80 2/';4_)3,12:56 I'M

OPERACION
CGmoSeleccionarProgramas
EspecialesDelControl
El nuevo control a botones tiene
programas adicionales que usted puede
seleecionar. Las funciones para cocinar,
limpiar y crondmetros no deben estar en
use.
El control se programa autom&ticamente
para apagarse despu_s de hornear por
12 horas o despu_s de asar a la parrilla
por 3 horas en caso que se le divide y
deje el homo encendido, Si desea eliminar
este programa:
1. Empuje y sujete, al mlsmo tlempo,
por 3 segundos, los botones BAKE y
BROIL, has_ que el dial muestre "SF."
2. Empuje el botdn DELAY STARTTIME
El dial muestra "12Shdn" (apagado en
12 horas). Empuje el botdn DELAY
START'nME nuevamente. El dial
mostrar_ "no Shdn" (no apagado).
3. Empuje el botOn START.
Su control est& programado para usar el
reloj en 12horas. Si usted prefiere usar
Hora Militar de 24 horas o poner el dial en
blanco:
1. Empuje y sujete, al mlsmo tlempo, por
3 segundos, el botdn BAKE y BROIL
hasta que el dial muestre "SF."
2. (a) Empuje el botdn CLOCK. El
dial mostrarA "12hr." Siesta es su
seleccidn, empuje el bot6n START.
(b) Empuje el botdn CLOCK
nuevamente. El dial mostrar& "24hr."
Ejemplo: 5:00 en el reloj de 12 horas
leer& 17:00 en el reloj de 24 horas. Si
_sta es su seleccidn, empuje el botdn
START.
(c) Empuje el botdn CLOCK
nuevamente. El dial ahora mostrar&
"OFF," (La hora no se mostrar_ en el
dial). Si _sta es su selecci(dn, empuje
START. La hora no se mostrar_ en el
dial. La funcidn para programas
demorados no funciona cuando el
reloi est& apagado.
El control del homo est,_ programado
para la seleecidn de temperaturas en
Fahrenheit, La mayoda de las recetas
se dan usando la escala Fahrenheit.
Seleccion de temperatura en grados
Fahrenheit y Centigrados. Usted puede
cambiar esIo para usar la seleccidn en
Centlgrados.
1. Empuje y sujete, al mlsmo Uempo,
los botones BAKE y BROIL por
3 segundos, hasta que el dial
muestre "SF."
2. (a) Empuje el botdn BROIL. El dial
del control mostrard el signo para
grado y "F."
(b) Empuje el botbn BROIL
nuevamente. Esto cambiar_. "F"
(Fahrenheit) a =C" (CenUgrado).
3. Empuje el botdn START.
61
20P312-2 SPY02 61 2J14/03,12:56 PM

OPERACION
CGmoSeleccionarProgramas
EspecialesDelControl
J
El control le permitir& cerrar los botones
de manera que no se puedan activar
cuando los empuje. Si se preocupa de
dejar el homo sin supervisi6n, active este
programa.
1, Empuje y sujete, al mlsmo tlempo,
pot 3 segundos, los botones BAKE y
BROIL basra que el dial muestre "SF"
2, (a) Empuje el bot6n CLEAN. El dial
muestra "LOC OFF' (cierre inactivo),
(b) Empuje el bot6n CLEAN
nuevamente. El dial mostrar_ "LOC
ON" (cierre activado).
3. Empuje el botcSnSTART.
Para abrir el Control,repitalospasos 1y 2
Presione e! bct6n START cuando la pantalla
muestre "LOC OFF".
Este programa se puede selecclonar
solamente cuando el homo no estti en
uso. Cuando este programa este
activado, e! control sonar_ y el dial
mostrar& "LOC," si se empuja un bot0n.
(Losbotones Clock, Timer o Oven Light no
son atectados,)
El nuevo control tiene un programa de
mantenci6n de temperatura para cocinar
autom&ticamente solamente que
mantendr& la comida que ha sido
cocinada tibia hasta 3 horas despues que
el cocinado autom_tico termina. Para
activar este programa:
1. Empuje y suiete, al mlsmo tlempo,
por 3 segundos los botones BAKE y
BROIL basra que el dial muestre "SF."
2. (a) Empuie el botOn OVEN COOKING
TIME. El dial mostrar& "HLd OFF."
(b) Empuje el bot6n OVEN COOKING
TIME nuevamente para activar este
program& El dial mostrar_ "HLd ON."
3. Empuje el botdn START.
62
20P312-2 SPy02 62 2/14_3, 12:56 PM

CUIDADOYLIMPIF.ZA
CicloDeAutolimpieza
1. Saque lacacerola y la parrilla paraasar,
utensiliosy cualquier papelde aluminio
que podria quedar en el homo.
2. Lasparrillas cubiertas deporcelana gris
mismas pueden ser guardadas en el homo
durante el ciclo de limpieza autom_tica.
3. Lasuciedad sobre el marco frontal
y afueradel sello del revestimientode la
puertanecesitar_ serlimpiadaa mano.
/
Marco frontal
I--
D.
T° Selio de la puerta
Revestlmlento de la puerta
\
Limpieestas _reascon aguacaliente, lanillas
con jabSno limpiadores comoSoft Scrub®para
sacar cualquier suciedad. Enjuaguebien con
agua limpiay seque.
No use limpiadoresde hornos ningt_n
limpiador dehornospara usoscomerciales o
revestimientode protecciSn debe set usadoen
el interioro alrededor del homo
4. Limpie cualquier derrame pesado
del fondo del homo.
5. NOlimpie e!sello de la puertadel homo.
ELmaterialde fibra de vidrio de la puetta
del homo no soporta laabrasion.Es
esencial queel sello permanezca infacto
S{usted noraque se est&gastando o
trizando, deberla ser reemplazado
El sello de la puerta esttLdisetlado para
que tenga un espacio de 10"en el fondo
del horno.
Panel de la puerta Sello
?
Revestlmento de la puerta
Esto permite lacirculaciOn adecuada
del aire. Es normal que su horno de la
apariencia de no tener un buen sello
sobre el homo. Esto se debe al sello,
La ubicaci6n del sello sobre la puerta
mantiene la puerta sellada y previene
cualquier perdida de calor.
" Los utenslllos nunca se
_ deber[an deJar dentro del
lhopml_z_umnteun clclo de
I-as parrlllas cublertas de porcelana
grls pueden ser Ilmplades con
seguHdad en el Interior del homo
durante el clclo de llmpleza
automdtlca. Serd necesado para
engrasar los extremos de la parrllla
del homo con una capa I|gera de
acelte vegetal despu6s de un clclo
de llmpieza. Esto ayudard a que se
haga f;tcll desllzar los estantes o
reJlllas en el homo.
Durante e_primer clclo de limpleza,
ventlle la habltacl6n con una ventan|
ablerta o una campana de
ventllacl6n. Esto evltar_ el olor fuerte
producldo por el calentamlento de
las partes nuevas.
63
20P312-2 SPY02 63 2/14_)3, 12:56 PM

CUIDADOYUMPIEZA
CicloDeAutolimpieza
El Ciclo de Limpieza est& programado
para 4 horas, pero usted podda cambiar
esto desde 3 horas si el homo esta
levemente sucio a 5 horas si el homo est&
muy sucio,
1. Empuje el bot6n SELF
CLEAN. Mostrar& 4 horas
en el dial.
(_ 2. Si desea cambiar la
cantidad de tiempo para
limpiar, empuje los botones
de los NUMEROS.
<_3. Empuje el bot6n START.
Despues del ciclo usted podrfa notar un
poco de cenizas blancas en el horno.
Simplemente llmpielas con un patio o
esponja hQmeda.
Si aigunas manchas blancas persisten,
frieguelas con una lanillade acero con
jab6n. Asegurese de enjuagar bien. Estas
son generalmente dep6s_tos de sal que no
se pueden sacar durante el ciolo.
Si su homo est& equipado con parrillas de
porcelana, set& necesario para engrasar
los extremos con una capa ligera de
aceite vegetal despues del ciclo de
limpieza. Esto ayudar_ a que se haga f_cil
deslizar los estantes o rejillas en el homo.
SI por alguna raz6n usted noqueda
satlsfecho con los resultados de la
Ilmpleza, slmplemente replta el clclo.
Simplemente empuje el bot6n CLEAR/
OFF. Usted necesitar& esperar a que la
temperatura del homo baje m&s que la
temperatura de enganche (aprox. 1hora)
antes de tratar de abrir la puerta,
"LOCKED" desaparecer_ del dial.
84
20P312-2 SPv02 64 2J14/03,12;56 PM

CUIDADO Y LIMPIEZA
LimpiezaMicroondas
MATERIALES DE LIMPIEZA
• Lanilla para fregar de pl_stico
• Patio h_medo
• Detergente liquido para platos
• Agua tibia
Limpie con un detergente para platos
suave y ague, entonces enjuague bien
con un patio hQmedo. Si desea, puede
hacer hervir un oontenedor con agua en
el homo usando energia de microondas.
Esto ayudar& a soltar la suciedad. Para
suciedad diflcil de limpiar, limpie
cuidadosamente con una lanilla pare
fregar de plAstico.
No use nmpladores abraslvos que
puedan rayar on dahar la superficle.
C6MO UMPIAR
Lave con jaboncillo tibio. Para suciedad
m&s dificil de limpiar, friegue suavemente
con una lanilla de nilbn y un limpiador que
no sea abrasivo, Enjuague bien.
C(_MO COLOCAR LA BANDEJA
GIRATORIA DE VIDRIO:
Coloque la bandeja giratofia de vidrio, y
asegQrese que la bandeja giratoria de
vidrio este bien alineada con el soporte
de la bandeja giratoria.
MATERIALES DE LIMPIEZA
• Pano Suave
• Agua tibia
• Detergente pare platos
Limpie las salpicaduras o derrames
mientras est_n tibios. Use un detergente
para platos suave y ague tibia, luego
enjuague con ague limpia, seque con un
paf_o suave.
MATERIALES DE UMPIEZA
• Lanilla para fregar de nil6n no abrasive
• Limpiadores no abrasivos
• Agua tibia
• Detergente pare platos
COMO SACAR LA BANDEJA
GIRATORIA:
Tome la bandeja giratoriade ambos lados
y lev&ntela derecho hacia arriba.
BandeJa de
vlddo -_
Soporte de ,/ /_ _
la bandeJa -,.:......,__./_ _ ,
MATERIALES DE LIMPIEZA
• Ague tibia
• PaSo suave
• Detergente para platos
Limpie con un detergente para platos
suave y agua tibia. Enjuague con agua
limpia y seque con un patio suave.
MATERIALES DE UMPIEZA
• Paf_o suave
Abra la puerta del homo para prevenir
que el homo se enoienda mientras Ioest_
limpiando. Limpie el panel de control con
un patio ht3medo. Seque inmediatamente
con un patio seco pare prevenir manchas.
65
20P312-2 SPy02 65 2/14/03,12:56 PM

CUIDADOYLIMPIEZA
LimpiezaHomoInferior
MATERIALES DE UMPIEZA
• Detergente liquido para platos
• Agua tibia
• Patio suave
No use limpadores abraslvos,
Ilmpladores Industrlales o
blanquedores (cloro).
C_)MO UMPIAR
Limpie con agua tibia con jabdn.
Enjuague y seque bien,
Limpie solamente para retocarlas entre
ciclos de limpieza. Use detergentes
liquidos para platos, agua tibia o lani_las
con jab6n. Enjuague bien despu_s de
limpiar y seque.
NUNCA USE LIMPIADORES PARA
HORNOS DENTRO O ALREDEDOR OE
CUALQUIER PARTE DEL HORNO.
Cuando limpie, asegt_rese de no doblar
o mover el sensor de la temperatura
ubicado en la pared trasera del homo.
Sensor de _
teml_mtum del
homo _
MATERIALES DE MMPIEZA
• Detergente I(quido para platos
• Agua tibia
• Lanillas de acero con jat:xSn
• Limpiador comercial para hornos
COMO MMPIAR
Permita que lacacerola se remoje. Ponga
detergente para platos sobre [aparrilla y
oubra con un paf_o o una toalla hOmeda
pot un rato. Friegue a medida que sea
necesario. Lave, enjuague y seque bien.
Usted tambien podda poner la cacerola y
la parri[la en la lavadora de platos.
MATERIALES DE LIMPIEZA
• Limpiador para vidrio
• Toallas de papel
• Soda para homear
C(_MO UMPIAR
Para limpiezadiaria, use un limpiador
para vidriosy una toalla de papel. Para
suciedad pesada, use una pasta de soda
para hornear y agua. Enjuague bien.
66
20P312-2 SPY02 66 2]14/03, 12:56 PM

CUIDADO Y LIMPIEZA
Partes Removibles
_ PRECAUCION:Desconecteel
poder el_._tdco haclaelhomo
en la caja delcircelto principal
o en la caja de losfuslblos
antes de tmtar de reemplazarelfoco de la
luzdel homo. No toqueun foco de ialuz
caUenteconlasmarlo_mojadas o con un
patiohOmedo.Esperea que el focose
enfdey use un patio seco.
Collar con
electricidad Scquete
Cublerta
del faco
COMO SACAR LA CUBIERTA
1. Desconecte la electricidad hacia el
homo en el circuito principal o en la
caja de los fusibles.
2. Ponga la rnano debajo de la cubierta y
haga girar la cubierta firmemente.
REEMPLACE EL FOCO DE LA LUZ
Desatomilie el foco de la luz y reempl_celo
con un foco para hornos de 40 watts.
PARA RECOLOCAR LA CUBIERTA
1. Coloque la cubierta en la ranura del
soquete del foco y girar la cubierta 1/4
de vuelta en direcci6n del reloj.
2. Reconecte la electricidad hacia et
homo.
ParameJorar la luz dentro del homo, limpie la
cubierta de vidrio frecuentemente con un
patio mojado. Precaucl6n: Esto se deberia
hacer solamente cuando el homo ester
completamente frlo.
Topeen
levantada _
de la _rrllla
C0MO SACAR
1. Tire las parrillas hasta la posici6n de
tope.
2. Levante el frente de la parrilla y
deslicela bajo el tope de la gula para
las parrillas.
C(_MO LIMPIAR
Limpie con agua tibia y detergente. Para
sacar manchas duras, lriegue levemente
con lana para fregar o con una lanilla con
jabbn. Enjuague bien.
Las parriltas cubiertas de porcelana gris
pueden set limpiaclas con seguridad en
el interior del homo durante el eiclo de
limpieza autom&tica. Ser& necesarlo para
engrasar los extremos de la parrilla del
homo con una capa ligera de aceite
vegetal despues de un ciclo de limpieza.
Esto ayudar& a que se haga fAcil deslizar
los estantes o rejillas en el horno.
PARA COLOCAR NUEVAMENTE
1. Coloque la parte levantada de atr_s de
laparrilla sobre las gulas.
2. Levante el frente de la parrilla hasta
que la parte levantada de atr_s se
deslice por debajo del tope de las
guias.
8. Deslice la parrilla hasta atr&s.
67
20P312-2 SPY02 67 2/14KI3,12:56 PM

CUIDADOYLIMPIEZA
PartesRemovibles
La puertaes muypesada.Tengeculdado
cuandommuevay levante lapuerta, No
levante[a puerlapor la manija.
co=os.cA.
1. Ab_ala puerta I_tl-r,d J_
completamente,
2. Tire bostopes de las
b]sagrashacia abajo
haciaelmarco de la
puerta,ala posicibn Cerradurade
de abierto, Esto blsagra
podda requerir un Tirede losclerms
destorni[ladorde de labisagrahacia
cabezaplan& abaJoparaabrir
3. Tomefirmemente
los ladosde la
puerta dearriba.
4. Ciefre la puertaala
posici_,nde saque
la cual se encuentra
entre la posici6n
intermediay
totalmentecerrada.
5. Levantelapuerta y
haga unmovimiento
de extracci6n haste
que el brazo de la
bisagrasalga
de la ranura.
Posici6n
de 1tuque
C(_MOPONERLANUEVAMENTIE
1, Tomefirmemente
losdos ladosde
lapuertadearriba.
2, Con lapuertaenel
mismo_nguIo de
extracci0n,coloquela
hendidura del brazo de
labisagra dentro del
borde del fondo de la /
ranurade la bisagra. Indencl6n
La muesca enelbrazo
de tabisagra debe estar
totalmenteasentadaen
efrondo de la ranura.
Puerta removlble delhomo (conL)
3. Abracompletamentela Brm[odelabisagm
/
puerta,Si lapuertano /| Ill
abrecompletamente,la
hendiduranoest_
asentada
eorrectamenteen el
extremoinferiorde la
tenure.
4. Empujelostopes de las
bisagras haciaarriba Cerradurade
contra elmarco frontal bisagra
de la cavidad del EmpuJede los
homo, ala posiciC)nde cierresde la
cierre, bisagmhacia
a_ba para
5. Cierrela puefta cerrar
del homo.
COMOUMPIAR AFUERA
DE LA PUERTA
• UseiabOny agua para limpiarbien la
eupefficie, ladosy frente dela puerta del
homo. Enjuague bien. Usted_mbi_n podrla
userun limpiador devidrio pare limpiarel
vidrio exteriorde la puerta.No permitaque el
agua gotee dentrode las aberturasde la
ventilaci0n.
• Losderramesde salsasparaaliSar,jugos
de ITuta,salsasde tomate ymaterialespare
sasonarquecontengan_cidos podrian
causerunadescoloraci6n yse debedan
limpiarinmediatamente.Cuandola
superficiese en#le, limpie yenjuague.
• Nouse limpiadorespara hornos,po_/ospara
limpiaroabrasivos duros en[aparte exterior
de la puerta.
• Sicualquier manchasobre la moldurade
laventilaci6n de la puertapersiste,useun
limpiador abrasivo suavey unffegadorde
esponja paremejoresresultados.
C(_MOUMPIAR ADENTRO
DELA PUERTA
• Debido aque el t=readentrode!sello se
limpiadurante elciclo de autolimpieza,usted
nonecesita limpiar estoa mano,
• El&reaafueradel sello y el revestimientode
la puertase pueden limpiarcon unalanilla
Ilenacon jabbn, aguecalientey detergente
Enjuaguebien con unasolucibnde vinagre
y agua.
68
2OP312-2 SPvO2 68 2/14/03, 12:56 PM

ANTESDELLAMARPARAUNSERVICIO
Paraahorrartiempoy dinero,antesdenamarparaunservlclO,revisela listadernt{sabajoparacualquier
problemaqueustedc[eaquatier_ conelfuncionamientodesuhomo.Siel problemaesalgoquaustedno
puedereparar,uselosN0merosdeServicioparael Consor_dorquaseencuentranalfinaldeestegula
Cuandohagaunllamado,tengadlsponlbleeln_memdemodela,ndmerodeserle,llstadepartespara
mparaclone_gu{adeusoyculdadoylafechadecompra.
PROBLEMA POSIBLE CAUSA POSIBLE SOLUCION
El dialdel control Mal funcionamientode el Empujeel bot6nCLEAR/OFF.Permitaque
posta_ea una "P homo, la estufaseenfrieperunaherayponga
segulda por unnumem nuevamenteel homoenfuncionamiento.
o letra, Siel problemaserepite,Ilameparaun
servicio.
Elhornoyloscontroles a. Nopasaelectricidadael a. Reviselacajadelcircuitoolos
del homo nofunclonan, homo. fusibles.Aseg_resequa el cord6n
de la corriente esteenchufado,
b. El relojest_ en la funci(_n b. Veala secci6n de "C6mo
en blanco. PregrammarFunciones Especiales"
eneste manual
Latemperaturadelhomo CalibraciOn del Vealas instruccionespara ajustarla
pareceeslarInexacta. control del horno, temperatura quesiguenesta secci6n.
La puetta del homo no El ciclo de limpieza noha Latemperatura de[homo debe bajara
sedesengancha, terminado.El homoest_ menosde ia temperaturade enganche
demasiado caliente, antesqua la puertapueda abrirse.
Laluzdelhomono & Interrupto{dela]uzenposici_)na. Reviselaposici6ndelirlterruptorde
funclona, deapagado, la luzdel homo
b. F0c0delaiuzes_suelt00qu_a_.b. Reviseelfocedelaluzdelhomo.
Elhomo no Se seleccion6 la opcidn en Vea la secci{3r_de fLJnciones
aceptaprograma grades Centigrades. especiales.
parehornosr,
Elhomo no se Ilmpl6 o a, Loscontrolesnose a. Leala secci6n deautolimpiezade
los reiultados lueron pus_eronbien, estemanual.
males, b. Elhomoestabademasiado b. Los derramesgrandessedebedan
sucio, limpiarantesdeprogramarunciele.
Usted tambi_npodriarepetirel ciclo.
c. Elciclodelimpiezafue c. Elciclodelimpiezanormaldebeda
interrumpido, set de 4horas.
El homo humea, a. Homosucio. a. Veaquenohayandeaatnesgrandes.
b. Malusodepapeldealuminio.b, Noserecomiendaelusodelpapelde
alurninio.
c. _dej6iacacerolapa[aasar c. Umpielacacerolaylaparrilladespu_sde
congrasadentrodelixxn0, cadause.
Todo asto osnormalen $u Homo Mlcroondas:
• Escapede vaporalrededor de lapuerta.
• Reflecci6nde luzalrededordel marcoexterior de lapuerta,
• Ruidoapagado mientrasel homo est_ enuse
• Elventiladordel microondas podria oporar con ambos hornos apagados.Est_enfriando elcontrot
y se apagar_so!o.
• Disminucibnde la luzdel homo y cambio enel sonido del ventiladorpodrlan ocurrirsi seopera a
unnivel de poder quanosea alto.
• Algode interferencia con laTV,y radio se p_drla notar cuandouseel homo microondas.Es
similara la interferenciacausada per otros aparatoselectr!oos peque_osy no indica unproblema
con SU horno.
69
20P312-2 SPv02 69 2/14/03,12:56 PM

ANTESDELLAMARPARAUNSERVlCIO
PROBLEMA POSIBLE CAUSA POSIBLE SOLUCION
La pardlla del Las parriilas fueron Pase un trapo mojado con un
homo no se dejadas en el interior del poco de aceite vegetal a los
desllza con homo durante el proceso extremos de la pardlla,
facllldad, de limpieza autom_tica.
El Ilorno a. El aislante del homo a, Ponga el homo en un ciclo de
emlte un olor. podr(a emitir un olar autolimpieza para acelerar el
durante _os pfimeros proceso de eliminar el olo_.
USOS
b, No limpiar e{exceso b. Limpie el exceso de suciedad antes
de suciedad, de usar el homo.
NO se puede El cron6metro de la Use el cronSmetro del homo inlerior.
co¢lnar en el cocina est& en operaciOn. (No se puede cocinar en el
mlcroondas, microondas y usar el eronOmetro de la
Cocina a la misma vez).
ll.m
a. AsegOrese de preealentar hasta que
suene el tono, cuando la receta Io
requiera.
b. Mantenga un espaeio de aire
uni_orme alrededor de las alias y
utensilios. Vea la secci6n para
cocinar en el Homo.
¢. Mantenga la ventilaci0n despejada.
Los allmentos a. El homo no se
no se hornean precalent6.
adecuadamente.
b, Posici0n incorrecta de ]a
pardLLao I&cace[ala..
c. La ventiiaci6n del homo
est& obstruida o
cubierta.
d. Usa incorrecto del papel
de aluminio.
e. Temperatura incorrecta
para el utensilio usado.
f. Latemperatura del
homo necesita ajoste.
g. El homo o la parrilla del
hairdo r_o_st&n
niveladas,
h. Controles del homo real
d. No cubra las pamllas cuando
homee.
e. Reduzca la temperatura en 25
grados para utensilios de vidrio,
osourosu opacos.
f. Revise la secei6n de ajustes a la
temperatura que sigue esta seccibn.
g. Vea 1asinstrucciones de instalaci(Sn
para La_ivelaci6n.
h. Vea lasecci(3n para hornear.
puestos
Ruldo del
vantllador.
Un ventilador de retrigeraci_)n
se podfla eneender
autom_ticamente
Esto es normal. El ventilador cie
refrigeraci0r_ se encender& para
refrigerar las partes internas. El
ventilador podria funcionar par 1 1/2
horas despues de que el homo se haya
apagado (OFF).
70
20P312-2 SPv02 70 2J14/03, 12:56 PM

ANTESDELLAMARPARAUNSERVICIO
PROBLEMA POSIBLE CAUSA
Los ailmentos a. Posici0n incorreota de la
no se asan parrilla.
adecuadamente.
b. El horno se precalent6.
¢. Mal uso de papel de
aluminio.
d. La puerta del homo se
cerr6 durante el asado a
la parrilla.
e. Voltage bajo
(208 Voltios).
f. Cantidad detiempo
incorrecia para asar.
g. Controles del homo real
puestos.
POSIBLE SOLUCION
a. Revise la posici6n de las caceroias;
vea ]a secci6n para asar a la
parrilla.
b. No precaliente cuando ase a la
parrifla.
c. Lea la secci6n para asar a la
parrilla.
d. Abra la puerta a la posici6n de tope
para asar.
e. Use una posici6n de parrilla m&s
alia y/o ase pot m&s tiempo.
f. Vea la tabla para asar en la secci6n
de c6mo asar a la parrilla.
g. Vea la secci0n para asar.
Las comlda8
se cocinan
demaslado
o muy poco.
a. Insuficiente eantidad de
tiempo cuando se cocina
con la funci6n de tiempo
porque las iamperaturas
iniciales de los alimentos
vaflan mucho.
b. Se program6 un nivel de b.
poder incorrecto.
c. El plato no se hizo glrar, no c.
se revolvi6 como Io requiere
la receta.
d. Demasiados platos en el d.
homo a la misma vez.
e, Los alimentos no se e.
descongelaron bien.
f. Mal uso de las cubiertas, f.
a. La variaci6n de ]a densidad de la
comida algunas veces requiere m_s
tiempo de cocci6n.
LEs la receia probada y conliable?
Siga las instrucciones de la receia.
No Ilenedemasiado el homo.
Vea la secci0n de la
descongelacibn del manual.
Siga las instrucciones en este
manual yen la receia.
71
20P312-2 SP'.'02 71 ?J14/03, 12:56 PM

AJUSTESDE TEMPERATURA-
"HAGALOSUSTEDMISMO"
Usted podrla pensar que 8u nuevo homo
cocina diferentemente al homo que
reemplaz6. Recomendamos que use su
homo nuevo unas pocas semanas para
que se familiarice con el, siguiendo los
tiempos que se dan en las recetas como
una guia.
Si cree que su nuevo homo esta
funcionando demasiado ca]iente (quema
la comida) o no calienta Iosuficiente (la
comida no queda bien coclda) usted
mismo puede ajustar la temperatura. La
apariencia y la textura de los alimentos
son mejores indicadores de la exactitud
de un homo que un terrnOmetro. Estos
tern_metros pueden variar entre 20-40
grados de la verdarer temperatura del
homo. Adem&s, la puerla se tiene que
abrir para leer estos term6metros. Abrir la
puerta cambiar& la temperatura del homo.
Para decidir en cu&nto cambiar la
temperatura, suba la temperatura del
homo en 25 grados (si los alimentos no
quedan bien cocidos) o baje la
temperatura en 25 grados (si la comida se
quema) de la temperatura de la receta,
luego homee. Los resultados de esta
"prueba" le debeflan dar una idea de
cu_nto se deberia cambiar la temperatura.
(_ 1. Mientras el homo no est&
en uso, empuje y sujete
los botones BAKE y
._. BROIL, por 3 segundos,
hasta que eldial muestre
"SF."
2. Empuje el bot6n BAKE.
Un n_mero puesto en
f&brica de des digitos
aparecer& en el dial,
generalmente "00."
Sl plensa que el homo
no esti suflclentemeflte
callente,
(_ 3a. Empuje el bot6n de los
NUMEROS para
aumentar (+) la
temperatura hasta un
m&ximo de +35°F.
SI plensa que el homo
est_ demaslado cal|ente,
(_3b. Empuje el botOn BAKE y
el bot6n de los NUMEROS
para baJar (-) la
(_ temperatura hasta un
m_ximo de -35°F.
<_4. Empuje el bot6n START.
Este aumento o disminuici6n en la
posici6n de la temperatura permanecer_
en la memoria hasta que los pasos de
arriba sean repetidos. Un corte de
corriente no afectar& esta posicibn.
Las temperaturas para asar a la parrilla no
ser&n afectadas.
72
20P312-2 SP','02 72 2/14/03, 12:56 PM

73
20P312-2 SPv02 73 2J14/03, 12:56 PM

GARANTIADELHORNODE
PAREDEMPOTRADO
f UN AI_IOCOMPLETO DE GARANTIA PARA TODAS LAS PARTES
Si, dentro de un a_o de la fecha de instalaci6n, cualquier parte deja de
funcionar adecuadamente debido a un defecto en el material o la obra de
mano, Sears la reparar& o reemplazar& a nuestra opci6n, sin costo.
Si este producto es sometido a un uso que no sea el familiar privado, la
garantia de arriba es efectiva pot solamente 90 dias.
EL SERVIClO DE GARANTIA ESTA DISPONIBLE AL LLAMAR A SEARS
SERVICE AL 1-800_I-MY-HOME e.
Esta garantia le brinda derechos legales especificos, y usted tambien
podria tener otros derechos que varian de estado a estado.
Sears Roebuck and Co. Dept. 817 WA Hoffman Estates, IL 60179
74
20P312-2 SP_02 74 2/14_3,12:56 PM

Contrato de protecci6n
maestra
Felicitaciones por su compra
inteligente. Su nuevo aparato
Kenmore®estA dise_ado y fabricado
para muohos afios de operaci6n
confiable. Sin embargo, al igual que
todos los productos, puede requerir
de mantenimiento o reparaci6n
preventivas en cualquier momento. Es
ahi cuando el contrato de protecci6n
maestra le puede ahorrar dinero y
molestias.
Adquiera un Contrato de protecci6n
maestra ahora mismo y prot_jase
contra inconvenientes y gastos
inesperados,
El Contrato de protecci6n maestra
tambien le ayuda a ampliar la vida de
su electrodomestico. Lo siguiente es
Io que se incluye en el contrato:
V' Servicio experto por parte de
nuestros 12,000 especialistas
profesionales de reparaci6n
Servicio ilimitado sin costo por
partes y mano de obra en todas las
reparaciones cubiertas
V' Garantia total - reposici6n de su
producto cubierto si ocurren mAs
de tres fallas del producto dentro
de doce meses
Reposici6n del producto si el
producto cubierto no se puede
reparar
=/Revlsl6n anual de mantefllmlento
preventlvo a su solioitud - sin
cargo adicional
v"Ayuda telefbnica r_plda -
asistencia no t_onica y de
instrucciones sobre los productos
reparados en su casa, adem&s
de una conveniente programaci6n
de reparaciones
Proteccion contra descargas
el6ctricas para dafios debido a
fluctuaciones electricas
Reembolso por alquller si la
reparaci6n del producto cubierto
toma mAs tiempo del prometido
Una vez adquiera el contrato, solo
necesita una Ilamada telef6nica para
programar el servicio. Puede Ilamar a
cualquier hora del d[a o de la noche o
programar la citadel servicio por
Internet.
Sears cuenta con m_.s de 12,000
especialistas profesionales de
reparaci6n, quienes tienen acceso a
mAs de 4.5 millones de partes y
accesorios de calidad. Este es el tipo
de profesionalismo en el que puede
contra para ayudar a prolongar la
vida de su nueva compra para los
arias venideros, iAdquiera el Contrato
de protecci6n maestra boy mismo!
Apllcan clertas Iimitaclones y
exclusiones.
Para preclos e informaci6n
adiclonal, Ilame al 1-800-827-6655.
Servlclo de Instalacl6n de Sears
Para la instalaci6n profesional
garantizada de Sears de
electrodomesticos y arttculos para el
hogar como dispositivos para abrir
puertas de garaje y calentadores de
agua, en los EE.UU. Ilame at
1,-8004-MY-HOME ®,
75
20P312-2 SPY02 75 Z/14/03, 12:56 PM

Your Home
Forrepair-in your home-of ell majorbrandappliances,
lawn andgardenequipment, or heating and cooling systems,
no matter who made it, no matter who sold it!
Forthe replacement parts, accessoriesand
owner's manuals that you needto do-it-yoursetf.
For Sears professional installation of home appliances
and items like garagedoer openers and water heaters.
1-800-4-MY-HOME _ (1-8S0-469-4663)
C_II anytime, day or night (U.S.A. and Canada)
www,seal_.com www._lears.Ga
Our Home
Forrepairof carry-initemslikevacuums, lawnequipment,
and electronics,call orgo on-linefor the locationofyour nearest
Sears Parts & Repair Center.
1-800-488-1222
Ca, anytime, day or night (U.S.A. only)
WWW.SeBIlS.com
To purchasea protectionagreement(U.S.A.)
or maintenanceagreement(Canada) ona productservicedby Sears:
1-800-827-6655 (U.S.A.) 1-600-361-6665 (Canada)
Pare pedir servicio de reparacibn Au Canada pour service en fran_ais:
adomicilio,yparaordenarpiezas: 1.800.LE.FOYER.C
1-888"SU-HOGAR _ (1-800 533-6937)
(1-8_8-784_$427) www.sears,ca
SE/AVR8
o _an_ Roatx_ and CO,
76
20P312-2 SPy02 76 2/14/03, 12:56 PM
-
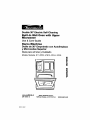 1
1
-
 2
2
-
 3
3
-
 4
4
-
 5
5
-
 6
6
-
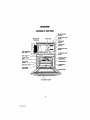 7
7
-
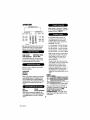 8
8
-
 9
9
-
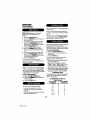 10
10
-
 11
11
-
 12
12
-
 13
13
-
 14
14
-
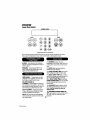 15
15
-
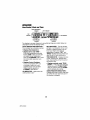 16
16
-
 17
17
-
 18
18
-
 19
19
-
 20
20
-
 21
21
-
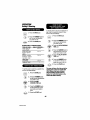 22
22
-
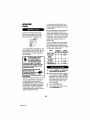 23
23
-
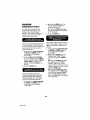 24
24
-
 25
25
-
 26
26
-
 27
27
-
 28
28
-
 29
29
-
 30
30
-
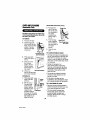 31
31
-
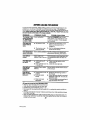 32
32
-
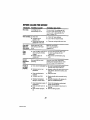 33
33
-
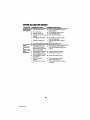 34
34
-
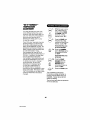 35
35
-
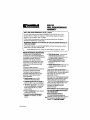 36
36
-
 37
37
-
 38
38
-
 39
39
-
 40
40
-
 41
41
-
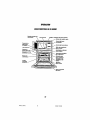 42
42
-
 43
43
-
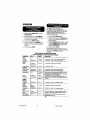 44
44
-
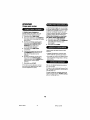 45
45
-
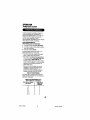 46
46
-
 47
47
-
 48
48
-
 49
49
-
 50
50
-
 51
51
-
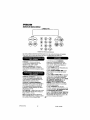 52
52
-
 53
53
-
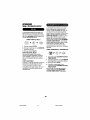 54
54
-
 55
55
-
 56
56
-
 57
57
-
 58
58
-
 59
59
-
 60
60
-
 61
61
-
 62
62
-
 63
63
-
 64
64
-
 65
65
-
 66
66
-
 67
67
-
 68
68
-
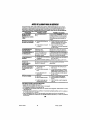 69
69
-
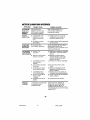 70
70
-
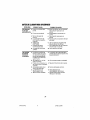 71
71
-
 72
72
-
 73
73
-
 74
74
-
 75
75
-
 76
76


Kenmore 911.47812200 El manual del propietario
- Categoría
- Microondas
- Tipo
- El manual del propietario
en otros idiomas
- English: Kenmore 911.47812200 Owner's manual
Artículos relacionados
-
Kenmore 91147793200 El manual del propietario
-
-
-
-
-
-
Kenmore Kenmore 911.47692 El manual del propietario
-
Kenmore 40180092010 El manual del propietario