Panasonic CT-20G6DE El manual del propietario
- Tipo
- El manual del propietario
Este manual también es adecuado para
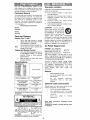
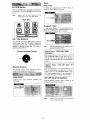
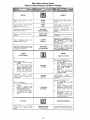
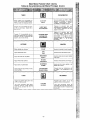
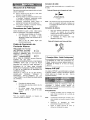
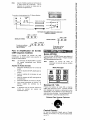
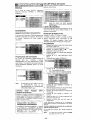
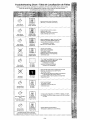
El Panasonic CT-20G6DE es un televisor con una pantalla de 20 pulgadas y un chasis de estado sólido para una larga duración. Ofrece una variedad de opciones de conexión, incluidas entradas de audio y video, entradas de antena VHF/UHF y una salida de audio para conectar a un amplificador. También cuenta con un temporizador de apagado, un temporizador de programación y un bloqueo de canales para control parental. Además, incluye un sintonizador de radio FM incorporado con 9 posiciones de memoria para estaciones.
El Panasonic CT-20G6DE es un televisor con una pantalla de 20 pulgadas y un chasis de estado sólido para una larga duración. Ofrece una variedad de opciones de conexión, incluidas entradas de audio y video, entradas de antena VHF/UHF y una salida de audio para conectar a un amplificador. También cuenta con un temporizador de apagado, un temporizador de programación y un bloqueo de canales para control parental. Además, incluye un sintonizador de radio FM incorporado con 9 posiciones de memoria para estaciones.


-
 1
1
-
 2
2
-
 3
3
-
 4
4
-
 5
5
-
 6
6
-
 7
7
-
 8
8
-
 9
9
-
 10
10
-
 11
11
-
 12
12


Panasonic CT-20G6DE El manual del propietario
- Tipo
- El manual del propietario
- Este manual también es adecuado para
El Panasonic CT-20G6DE es un televisor con una pantalla de 20 pulgadas y un chasis de estado sólido para una larga duración. Ofrece una variedad de opciones de conexión, incluidas entradas de audio y video, entradas de antena VHF/UHF y una salida de audio para conectar a un amplificador. También cuenta con un temporizador de apagado, un temporizador de programación y un bloqueo de canales para control parental. Además, incluye un sintonizador de radio FM incorporado con 9 posiciones de memoria para estaciones.
en otros idiomas
- English: Panasonic CT-20G6DE Owner's manual
Artículos relacionados
-
Panasonic CT 20SX11 Manual de usuario
-
-
-
-
-
-
-