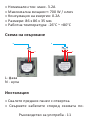
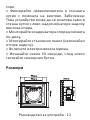
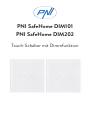
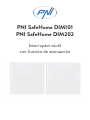
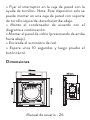
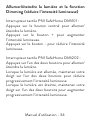
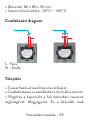
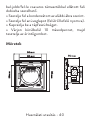
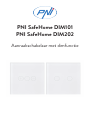
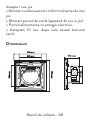
El PNI SafeHome DIM202 es un interruptor táctil de pared 2 en 1 para controlar la iluminación de tu hogar. Con su diseño elegante y moderno, el DIM202 se integra perfectamente en cualquier decoración. Además, su pantalla táctil capacitiva permite un control fácil e intuitivo de la iluminación. Puedes encender o apagar las luces con solo un toque, o mantener presionado el botón para atenuarlas. El regulador es compatible con luces LED, halógenas e incandescentes.
El PNI SafeHome DIM202 es un interruptor táctil de pared 2 en 1 para controlar la iluminación de tu hogar. Con su diseño elegante y moderno, el DIM202 se integra perfectamente en cualquier decoración. Además, su pantalla táctil capacitiva permite un control fácil e intuitivo de la iluminación. Puedes encender o apagar las luces con solo un toque, o mantener presionado el botón para atenuarlas. El regulador es compatible con luces LED, halógenas e incandescentes.


-
 1
1
-
 2
2
-
 3
3
-
 4
4
-
 5
5
-
 6
6
-
 7
7
-
 8
8
-
 9
9
-
 10
10
-
 11
11
-
 12
12
-
 13
13
-
 14
14
-
 15
15
-
 16
16
-
 17
17
-
 18
18
-
 19
19
-
 20
20
-
 21
21
-
 22
22
-
 23
23
-
 24
24
-
 25
25
-
 26
26
-
 27
27
-
 28
28
-
 29
29
-
 30
30
-
 31
31
-
 32
32
-
 33
33
-
 34
34
-
 35
35
-
 36
36
-
 37
37
-
 38
38
-
 39
39
-
 40
40
-
 41
41
-
 42
42
-
 43
43
-
 44
44
-
 45
45
-
 46
46
-
 47
47
-
 48
48
-
 49
49
-
 50
50
-
 51
51
-
 52
52
-
 53
53
-
 54
54
-
 55
55
-
 56
56
-
 57
57
-
 58
58
-
 59
59
-
 60
60
-
 61
61
-
 62
62
-
 63
63
-
 64
64
-
 65
65
-
 66
66
-
 67
67
-
 68
68
-
 69
69
-
 70
70
-
 71
71


El PNI SafeHome DIM202 es un interruptor táctil de pared 2 en 1 para controlar la iluminación de tu hogar. Con su diseño elegante y moderno, el DIM202 se integra perfectamente en cualquier decoración. Además, su pantalla táctil capacitiva permite un control fácil e intuitivo de la iluminación. Puedes encender o apagar las luces con solo un toque, o mantener presionado el botón para atenuarlas. El regulador es compatible con luces LED, halógenas e incandescentes.
en otros idiomas
- français: PNI SafeHome DIM202 Manuel utilisateur
- italiano: PNI SafeHome DIM202 Manuale utente
- Deutsch: PNI SafeHome DIM202 Benutzerhandbuch
- polski: PNI SafeHome DIM202 Instrukcja obsługi