Clifford 4110P El manual del propietario
- Categoría
- Alarma de carro
- Tipo
- El manual del propietario
Este manual también es adecuado para

OWNER’S GUIDE
MODEL
The company behind Viper
®
Auto Security
Systems is Directed.
Since its inception, Directed has had one
purpose, to provide consumers with the fin-
est vehicle security and accessories avail-
able. The recipient of nearly 100 patents and
Innovations Awards in the field of advanced
electronic technology.
Quality Directed products are sold and ser-
viced throughout North America and around
the world.
Call (800) 876-0800 for more information
about our products and ser vic es.
Directed is committed to delivering
world class quality products and
services that excite and delight our
customers.
®
NO ONE DARES
COME CLOSE
®
4110V
©
2014 Directed. All rights reserved. G4110VML 2014-07
Vista, CA 92081
www.viper.com

i
© 2014 Directed. All rights reserved.
Congratulations
Congratulations on the purchase of your state-of-the-art keyless entry
and remote start system. Reading this Owner’s Guide prior to using
your system will help maximize the use of your system and its many
features. For any additional questions please contact your authorized
Directed dealer or contact Directed at 1-800-753-0600. (U.S. only)
Important information
Government Regulations and Safety information
Read the Government Regulations and Warning! Safety
First sections of this manual prior to operating this system.
Warning! Failure to heed this information can result in
death, personal injury or property damage and may also
result in the illegal use of the system beyond its intended
purpose.
Your Warranty
Your system comes with a warranty. The warranty terms are detailed at
the end of this guide. Make sure that you receive the proof of purchase
from your dealer, indicating the product was installed by an authorized
Directed dealer.
Replacement remote controls
Please see your authorized dealer or visit us at www.directedstore.com
to order additional remote controls. Remote control part numbers are
found on the back of the device.


Contents
Congratulations ................................................................................................i
Government Regulations and Safety information ........................................... i
Remote Control .................................................................................................3
Remote control functions.....................................................................................3
Standard configuration ..............................................................................3
Using the system .............................................................................................5
Locking ....................................................................................................5
Unlocking ................................................................................................5
Disabling (optional) Starter Kill ..................................................................5
Panic Mode .............................................................................................6
Remote Start ............................................................................................. 6
Valet Take-Over ........................................................................................8
Car Finder ...............................................................................................8
Battery Information ............................................................................................9
Battery replacement ..................................................................................9
Battery Disposal .......................................................................................9
Patent Information .............................................................................................9
Government Regulations ..................................................................................10
Warning! Safety first .......................................................................................11
Caution .................................................................................................12
Limited lifetime consumer warranty ....................................................................13


3
© 2014 Directed. All rights reserved.
Remote Control
Feature Description
Internal Antenna Used for transmitting information
Transmit LED Active when transmitting information
Command buttons (4)
AUX
AUX
AUX
Your 1-way remote coin cell battery can be changed by using a small at blade screwdriver to pry case apart. Replace battery and then snap case together.
AUX
AUX
AUX
Your 1-way remote coin cell battery can be changed by using a small at blade screwdriver to pry case apart. Replace battery and then snap case together.
AUX
AUX
AUX
Your 1-way remote coin cell battery can be changed by using a small at blade screwdriver to pry case apart. Replace battery and then snap case together.
Used to perform arming, disarming, auxiliary channel and
remote start commands
Remote control functions
The remote buttons are used to send commands to the system. The but-
tons indicated below are for standard configuration.
Standard configuration
AUX
AUX
AUX
Your 1-way remote coin cell battery can be changed by using a small at blade screwdriver to pry case apart. Replace battery and then snap case together.
Button
The lock function is controlled by pressing
AUX
AUX
AUX
Your 1-way remote coin cell battery can be changed by using a small at blade screwdriver to pry case apart. Replace battery and then snap case together.
on the remote control
for one second. When held for approximately two seconds, Panic is
activated.
AUX
AUX
AUX
Your 1-way remote coin cell battery can be changed by using a small at blade screwdriver to pry case apart. Replace battery and then snap case together.
Button
The unlocking function is controlled by pressing
AUX
AUX
AUX
Your 1-way remote coin cell battery can be changed by using a small at blade screwdriver to pry case apart. Replace battery and then snap case together.
on the remote con-
trol for one second. You can also turn Panic off with this button.
Button
Silent Mode
™
and an optional auxiliary function are controlled by
pressing
. Silent Mode works by pressing for less than one
second before locking or unlocking. An optional auxiliary function such
as trunk release may be controlled by pressing and holding
for
approximately two seconds.

4
© 2014 Directed. All rights reserved.
AUX
AUX
AUX
Your 1-way remote coin cell battery can be changed by using a small at blade screwdriver to pry case apart. Replace battery and then snap case together.
Button
The remote start function of your system is controlled by pressing this
button for one second.
AUX
AUX
AUX
Your 1-way remote coin cell battery can be changed by using a small at blade screwdriver to pry case apart. Replace battery and then snap case together.
and Buttons
Car Finder is controlled by pressing these two buttons.
AUX
AUX
AUX
Your 1-way remote coin cell battery can be changed by using a small at blade screwdriver to pry case apart. Replace battery and then snap case together.
and
AUX
AUX
AUX
Your 1-way remote coin cell battery can be changed by using a small at blade screwdriver to pry case apart. Replace battery and then snap case together.
and Buttons
When simultaneously pressed these buttons control the optional rear
window defogger during remote starting. The parking lights flash three
times to confirm activation. Once activated the defogger will turn on
whenever the vehicle is remote started.
The parking lights flash twice when the defogger is deactivated. The
defogger does not turn on when the vehicle is remote started.
Important note: Defogger is an optional feature. Additional parts and
labor may be required. See your Directed dealer for details.
AUX
AUX
AUX
Your 1-way remote coin cell battery can be changed by using a small at blade screwdriver to pry case apart. Replace battery and then snap case together.
and
AUX
AUX
AUX
Your 1-way remote coin cell battery can be changed by using a small at blade screwdriver to pry case apart. Replace battery and then snap case together.
Buttons
Timer mode is activated when these buttons are pressed simultaneously.
When you activate timer mode the parking lights flash four times, after a
1-second delay the engine starts. To turn the engine off, without exiting
timer mode press the
AUX
AUX
AUX
Your 1-way remote coin cell battery can be changed by using a small at blade screwdriver to pry case apart. Replace battery and then snap case together.
.
The system remains in timer mode and will start every 3 hours for a
maximum of 6 starts unless cancelled by turning on the ignition, or by
activating the brake or neutral safety shutdown wires.
The parking lights flash 4 times indicating timer mode is exited.

5
© 2014 Directed. All rights reserved.
Using the system
Lock
Press and release
AUX
AUX
AUX
Your 1-way remote coin cell battery can be changed by using a small at blade screwdriver to pry case apart. Replace battery and then snap case together.
Doors lock. The horn honks once, and the parking lights flash.
To Lock and Panic
Press and hold
AUX
AUX
AUX
Your 1-way remote coin cell battery can be changed by using a small at blade screwdriver to pry case apart. Replace battery and then snap case together.
. To lock the system, then activate Panic. For
Panic to be effective,the optional horn honk feature must be con-
nected. Press the
AUX
AUX
AUX
Your 1-way remote coin cell battery can be changed by using a small at blade screwdriver to pry case apart. Replace battery and then snap case together.
or
AUX
AUX
AUX
Your 1-way remote coin cell battery can be changed by using a small at blade screwdriver to pry case apart. Replace battery and then snap case together.
button to stop Panic output.
Unlock
Press and release
AUX
AUX
AUX
Your 1-way remote coin cell battery can be changed by using a small at blade screwdriver to pry case apart. Replace battery and then snap case together.
The doors unlock. The horn honks and the parking lights flash.
Remote Start
Press and release
AUX
AUX
AUX
Your 1-way remote coin cell battery can be changed by using a small at blade screwdriver to pry case apart. Replace battery and then snap case together.
Activates (or if On, deactivates) the remote starter. The engine turns On,
or the engine turns Off accordingly. The parking lights flash.
If a Remote start configuration issue prevents the engine from starting,
the parking lights flash a Remote Start fault report to identify the fault.
AUX
Press and hold
An optional auxiliary function such as trunk release may be controlled
by pressing and holding
for approximately two seconds.

6
© 2014 Directed. All rights reserved.
Disabling (optional) Starter Kill
If your remote control is lost or damaged, you can manually override
the starter kill. To do this, you must have the ve hi cle's ignition key and
know where the Valet button is located. Be sure to check with the in-
staller for the location of the Valet button.
To override the starter kill, turn the ignition on and press and release
the valet button within10 seconds. The vehicle should start. If it does
not start, you may have waited too long; turn the ignition off and repeat
the process.
Location of Valet button: ____________________
Remote Start
This feature allows you to remotely start and run your vehicle for a
pro gram ma ble period of time. This makes it possible to warm up the
engine, and adjust the interior tem per a ture of the ve hi cle with the cli-
mate control system. If interior heating or cooling is desired, the climate
controls must be preset, and the fan blower must be set to the desired
level prior to remote starting the vehicle.
Satmode,
bank
selector
AUDIO
PWR
12
REWFF
PLAY/PROG NR
3456
DISC- DISC+
11:53
XM1-1 CH-001
CH
VOL
SCAN
SOUND
AM/FM
CD/AUX
SAT
RADIO
SEEK
SKIP
RPT
DISP -
MODE
A.SEL
RDM
TUNE
AUTO
OFF
DUAL
A/C
MODE
Channel control
Category
Control
Text selector.
Hold for 10secto toggle
channelor category
tune
modes.
Toggles
Scan
mode
Bank and
present
indicator
Channel
and text
indicator
Preset 1-6.
Hold until beepto
savetoapreset.
CATEGORY
Tune mode
indicator
MODE
DUAL
OFF
AUTO
MAP/
GUIDE
MENU
SETUP
INFO
ZOOM
CANCEL
AUDIO
AUTO
MODE
A/C
LOAD
DISC
TAPE
AM/FM
DISP
MODE
SCAN RPT A.SEL/RDM-SEEK +
1
2
34
5
6
DISC-
DISC+
VOL
PWR
PUSH
TUNE
SOUND
PUSH
XM1-1
VOL
CH
CHANNEL
CATEGORY
NAME
TITLE
:
:
:
:
1
CH
2
CH
3
CH
6
CH
5
CH
4
CH
MODE SCAN SOUND
001-HITS1
POP
MUSICNAME
MUSIC TITLE
Channel control
Category
Control
001 014 018
040 065
115
Toggles between
channel and
category
modes
Bank and
present
indicator
Upper display
text mode
selector
Sat mode
and bank
selector
Preset 1-6.
Press until
beepto save
to a preset.
Channeland text
Indicator
fields
Toggles
Scan
mode
Tune mode
indicator
ANTENNA
SC OUTPUT
Sirius-Ready, SAT Radio Ready or select OEM headunits with optional Honda Bus Compatible Translator
Headunit bus cableSiriusConnect Cable
HON-SC1
Honda Bus
Compatible
Translator
Warning! (1) Never remote start your vehicle when
the keys are in the ignition, except when performing
Valet Take-Over, and (2) Never start the vehicle if it
is not in PARK or NEUTRAL
To remote start the vehicle:
• Press the
AUX
AUX
AUX
Your 1-way remote coin cell battery can be changed by using a small at blade screwdriver to pry case apart. Replace battery and then snap case together.
button on the remote control for 1 second.
• The parking lights flash to confirm that the vehicle is attempting to
start. In gasoline vehicles the engine will start 4 seconds after the
parking lights flash, in diesel vehicles the engine starts after the
WAIT-TO-START timer has expired.

7
© 2014 Directed. All rights reserved.
• Once the vehicle has started, it will run for the pre- pro gram med
period of time (12, 24, or 60 minutes) or until a shutdown input
is trig gered.
Satmode,
bank
selector
AUDIO
PWR
12
REWFF
PLAY/PROG NR
3456
DISC- DISC+
11:53
XM1-1 CH-001
CH
VOL
SCAN
SOUND
AM/FM
CD/AUX
SAT
RADIO
SEEK
SKIP
RPT
DISP -
MODE
A.SEL
RDM
TUNE
AUTO
OFF
DUAL
A/C
MODE
Channel control
Category
Control
Text selector.
Hold for 10secto toggle
channelor category
tune
modes.
Toggles
Scan
mode
Bank and
present
indicator
Channel
and text
indicator
Preset 1-6.
Hold until beepto
savetoapreset.
CATEGORY
Tune mode
indicator
MODE
DUAL
OFF
AUTO
MAP/
GUIDE
MENU
SETUP
INFO
ZOOM
CANCEL
AUDIO
AUTO
MODE
A/C
LOAD
DISC
TAPE
AM/FM
DISP
MODE
SCAN RPT A.SEL/RDM-SEEK +
1
2
34
5
6
DISC-
DISC+
VOL
PWR
PUSH
TUNE
SOUND
PUSH
XM1-1
VOL
CH
CHANNEL
CATEGORY
NAME
TITLE
:
:
:
:
1
CH
2
CH
3
CH
6
CH
5
CH
4
CH
MODE SCAN SOUND
001-HITS1
POP
MUSICNAME
MUSIC TITLE
Channel control
Category
Control
001 014 018
040 065
115
Toggles between
channel and
category
modes
Bank and
present
indicator
Upper display
text mode
selector
Sat mode
and bank
selector
Preset 1-6.
Press until
beepto save
to a preset.
Channeland text
Indicator
fields
Toggles
Scan
mode
Tune mode
indicator
ANTENNA
SC OUTPUT
Sirius-Ready, SAT Radio Ready or select OEM headunits with optional Honda Bus Compatible Translator
Headunit bus cableSiriusConnect Cable
HON-SC1
Honda Bus
Compatible
Translator
Warning! It is unsafe to operate a vehicle’s motor in a
garage or other closed off area. Breathing the ex haust
from the vehicle is hazardous to your health. Never
activate the remote start in an enclosed space.
When you are ready to drive the vehicle:
1. Insert the ignition key and turn it to the ON (not the START)
po sition.
2. Press the brake pedal. The remote start system shuts down and the
engine continues to run because the ignition has been turned on.
Note: If the brake pedal is pressed before the key is in the ON position,
the engine will shut down.
While the vehicle is running during remote start operation, the system
monitors the ve hi cle and automatically shuts down the engine if it receives
any of the following shut-down inputs:
• The brake pedal is pressed.
• The hood is opened.
• The shutdown toggle switch is put into the OFF position.
• The pre-programmed run time (12, 24, or 60 minutes) has elapsed.
• Remote control button
AUX
AUX
AUX
Your 1-way remote coin cell battery can be changed by using a small at blade screwdriver to pry case apart. Replace battery and then snap case together.
is pressed once.

8
© 2014 Directed. All rights reserved.
Valet Take-Over
The Valet Take-Over feature allows the vehicle to remain running after
the key has been removed from the ignition. This feature is useful for
occasions when you wish to exit and lock the vehicle for short periods
of time, but would like to leave the engine running and the climate
controls on.
To perform Valet Take-Over:
1. Before turning off the engine, press and release
AUX
AUX
AUX
Your 1-way remote coin cell battery can be changed by using a small at blade screwdriver to pry case apart. Replace battery and then snap case together.
on the remote
control for 1 second.
2. Turn the ignition key to the OFF position. The engine will stay run-
ning until the pre- pro gram med time has elapsed or a shutdown
input is received. (See the previous Remote Start section for a
complete list of shut-down inputs.)
Important: This feature will not work if the brake pedal is being
pressed.
Car Finder
Car finder allows you to locate your vehicle, by having the system flash
the parking lights.
To activate:
1. Press and release the
AUX
AUX
AUX
Your 1-way remote coin cell battery can be changed by using a small at blade screwdriver to pry case apart. Replace battery and then snap case together.
and buttons at the same time.
2. The lights flash 5 times slowly allowing you to locate your ve-
hicle.

Battery Information
The remote control is powered by two 3V, CR2016 batteries. When
the battery begins to weaken, operating range is reduced and the LED
on the remote control dims.
Battery replacement
Locate the small slot on the side of the remote control. Insert a small
slotted screwdriver or equivalent tool into slot and pry the case apart.
Replace battery, while verifying the correct polarity and then snap case
back together.
Battery Disposal
Directed cares about the environment. If you need to dispose
of the battery, please do so in accordance with your munici-
pal requirements for battery disposal.
Patent Information
This product is covered by one or more of the following United States
patents:
Remote Start Patents:
5,349,931; 5,872,519; 5,914,667; 5,952,933; 5,945,936;
5,990,786; 6,028,372; 6,467,448; 6,561,151; 7,191,053;
7,483,783
Vehicle Security Patents:
5,467,070; 5,532,670; 5,534,845; 5,563,576; 5,646,591;
5,650,774; 5,673,017; 5,712,638; 5,872,519; 5,914,667;
5,952,933; 5,945,936; 5,990,786; 6,028,505; 6,452,484
Other patents pending

10
© 2014 Directed. All rights reserved.
Government Regulations
This device complies with Part 15 of FCC rules. Operation is subject to the fol-
lowing two conditions: (1) This device may not cause harmful interference, and
(2) This device must accept any interference received, including interference that
may cause undesirable operation.
This equipment has been tested and found to comply with the limits for a class B
digital device, pursuant to Part 15 of the FCC Rules. These limits are designed to
provide reasonable protection against harmful interference in a residential instal-
lation. This equipment generates and can radiate radio frequency energy and,
if not installed and used in accordance with the instruction manual, may cause
harmful interference to radio communications. However, there is no guarantee
that interference will not occur in a particular installation. If this equipment does
cause harmful interference to radio or television, which can be determined by
turning the equipment OFF and ON, the user is encouraged to try to correct the
interference by one or more of the following measures:
• Reorient or relocate the receiving antenna.
• Increase the separation between the equipment and receiver.
• Connect the equipment into an outlet on a circuit different from that to which
the receiver is connected.
• Consult the dealer or an experienced radio / TV technician for help.
This device complies with the Industry Canada Radio Standards Specification
RSS 210. Its use is authorized only on a no-interference, no-protection basis; in
other words, this device must not be used if it is determined that it causes harm-
ful interference to services authorized by IC. In addition, the user of this device
must accept any radio interference that may be received, even if this interference
could affect the operation of the device.
Warning:
Changes or modifications not expressly approved by the party responsible for
compliance could void the user’s authority to operate this device.

11
© 2014 Directed. All rights reserved.
Warning! Safety first
The following safety warnings must be observed at all times:
Due to the complexity of this system, installation of this product must only be
performed by an authorized Directed dealer.
When properly installed, this system can start the vehicle via a command signal
from the remote control. Therefore, never operate the system in an enclosed area
or partially enclosed area without ventilation (such as a garage). When parking
in an enclosed or partially enclosed area or when having the vehicle serviced,
the remote start system must be disabled using the installed toggle switch. It is
the user’s sole responsibility to properly handle and keep out of reach from chil-
dren all remote control devices to assure that the system does not unintentionally
remote start the vehicle. THE USER MUST INSTALL A CARBON MONOXIDE
DETECTOR IN OR ABOUT THE LIVING AREA ADJACENT TO THE VEHICLE.
ALL DOORS LEADING FROM ADJACENT LIVING AREAS TO THE ENCLOSED
OR PARTIALLY ENCLOSED VEHICLE STORAGE AREA MUST AT ALL TIMES
REMAIN CLOSED. These precautions are the sole responsibility of the user.
Use of this product in a manner contrary to its intended mode of operation may
result in property damage, personal injury, or death. (1) Never remotely start the
vehicle with the vehicle in gear, and (2) Never remotely start the vehicle with
the keys in the ignition. The user must also have the neutral safety feature of the
vehicle periodically checked, wherein the vehicle must not remotely start while
the car is in gear. This testing should be performed by an authorized Directed
dealer in accordance with the Safety Check outlined in the product installation
guide. If the vehicle starts in gear, cease remote start operation immediately and
consult with the authorized Directed dealer to fix the problem.
After the remote start module has been installed, contact your authorized dealer
to have him or her test the remote start module by performing the Safety Check
outlined in the product installation guide. If the vehicle starts when performing

12
© 2014 Directed. All rights reserved.
the Neutral Safety Shutdown Circuit test, the remote start unit has not been
properly installed. The remote start module must be removed or the installer must
properly reinstall the remote start system so that the vehicle does not start in gear.
All installations must be performed by an authorized Directed dealer.
OPERATION OF THE REMOTE START MODULE IF THE VEHICLE STARTS IN
GEAR IS CONTRARY TO ITS INTENDED MODE OF OPERATION. OPERAT-
ING THE REMOTE START SYSTEM UNDER THESE CONDITIONS MAY RESULT
IN PROPERTY DAMAGE OR PERSONAL INJURY. YOU MUST IMMEDIATELY
CEASE THE USE OF THE UNIT AND SEEK THE ASSISTANCE OF AN AU-
THORIZED Directed DEALER TO REPAIR OR DISCONNECT THE INSTALLED
REMOTE START MODULE. DIRECTED WILL NOT BE HELD RESPONSIBLE OR
PAY FOR INSTALLATION OR REINSTALLATION COSTS.
Caution
This product is designed for fuel injected, automatic transmission ve-
hicles only. Use of this product in a standard transmission vehicle is
dangerous and contrary to the product's intended use.

13
© 2014 Directed. All rights reserved.
Limited lifetime consumer warranty
Directed Electronics. (“Directed”) promises to the original purchaser to repair or replace (at
Directed’s election) with a comparable reconditioned model any Directed unit (hereafter the
“unit”), excluding without limitation the siren, the remote transmitters, the associated sensors
and accessories, which proves to be defective in workmanship or material under reason-
able use during the lifetime of the vehicle provided the following conditions are met: the
unit was purchased from an authorized Directed dealer, the unit was professionally installed
and serviced by an authorized Directed dealer; the unit will be professionally reinstalled in
the vehicle in which it was originally installed by an authorized Directed dealer; and the
unit is returned to Directed, shipping prepaid with a legible copy of the bill of sale or other
dated proof of purchase bearing the following information: consumer’s name, telephone
number and address; the authorized dealers name, telephone number and address; com-
plete product description, including accessories; the year, make and model of the vehicle;
vehicle license number and vehicle identification number. All components other than the
unit, including without limitation the siren, the remote transmitters and the associated sensors
and accessories, carry a one-year warranty from the date of purchase of the same. ALL
PRODUCTS RECEIVED BY DIRECTED FOR WARRANTY REPAIR WITHOUT PROOF OF
PURCHASE FROM AN AUTHORIZED DEALER WILL BE DENIED. This warranty is non-
transferable and is automatically void if: the unit’s date code or serial number is defaced,
missing or altered; the unit has been modified or used in a manner contrary to its intended
purpose; the unit has been damaged by accident, unreasonable use, neglect, improper
service, installation or other causes not arising out of defects in materials or construction.
The warranty does not cover damage to the unit caused by installation or removal of the
unit. Directed, in its sole discretion, will determine what constitutes excessive damage and
may refuse the return of any unit with excessive damage.
TO THE MAXIMUM EXTENT ALLOWED BY LAW, ALL WARRANTIES, INCLUDING
BUT NOT LIMITED TO EXPRESS WARRANTY, IMPLIED WARRANTY, WARRANTY OF
MERCHANTABILITY, FITNESS FOR PARTICULAR PURPOSE AND WARRANTY OF NON-
INFRINGEMENT OF INTELLECTUAL PROPERTY, ARE EXPRESSLY EXCLUDED; AND
DIRECTED NEITHER ASSUMES NOR AUTHORIZES ANY PERSON OR ENTITY TO ASSUME
FOR IT ANY DUTY, OBLIGATION OR LIABILITY IN CONNECTION WITH ITS PRODUCTS.
DIRECTED DISCLAIMS AND HAS ABSOLUTELY NO LIABILITY FOR ANY AND ALL ACTS
OF THIRD PARTIES INCLUDING ITS AUTHORIZED DEALERS OR INSTALLERS. DIRECTED
SECURITY SYSTEMS, INCLUDING THIS UNIT, ARE DETERRENTS AGAINST POSSIBLE
THEFT. DIRECTED IS NOT OFFERING A GUARANTEE OR INSURANCE AGAINST
VANDALISM, DAMAGE OR THEFT OF THE AUTOMOBILE, ITS PARTS OR CONTENTS;
AND HEREBY EXPRESSLY DISCLAIMS ANY LIABILITY WHATSOEVER, INCLUDING
WITHOUT LIMITATION, LIABILITY FOR THEFT, DAMAGE AND/OR VANDALISM. THIS
WARRANTY DOES NOT COVER LABOR COSTS FOR MAINTENANCE, REMOVAL OR
REINSTALLATION OF THE UNIT OR ANY CONSEQUENTIAL DAMAGES OF ANY KIND.

14
© 2014 Directed. All rights reserved.
IN THE EVENT OF A CLAIM OR A DISPUTE INVOLVING DIRECTED OR ITS SUBSIDIARY,
THE VENUE SHALL BE SAN DIEGO COUNTY IN THE STATE OF CALIFORNIA.
CALIFORNIA STATE LAWS AND APPLICABLE FEDERAL LAWS SHALL APPLY AND GOVERN
THE DISPUTE. THE MAXIMUM RECOVERY UNDER ANY CLAIM AGAINST DIRECTED
SHALL BE STRICTLY LIMITED TO THE AUTHORIZED DIRECTED DEALER’S PURCHASE
PRICE OF THE UNIT. DIRECTED SHALL NOT BE RESPONSIBLE FOR ANY DAMAGES
WHATSOEVER, INCLUDING BUT NOT LIMITED TO, ANY CONSEQUENTIAL DAMAGES,
INCIDENTAL DAMAGES, DAMAGE TO VEHICLE, DAMAGES FOR THE LOSS OF TIME,
LOSS OF EARNINGS, COMMERCIAL LOSS, LOSS OF ECONOMIC OPPORTUNITY
AND THE LIKE. NOTWITHSTANDING THE ABOVE, THE MANUFACTURER DOES OFFER
A LIMITED WARRANTY TO REPLACE OR REPAIR THE CONTROL MODULE SUBJECT TO
THE CONDITIONS AS DESCRIBED HEREIN. THIS WARRANTY IS VOID IF THE UNIT
HAS NOT BEEN PURCHASED FROM DIRECTED, OR AN AUTHORIZED DIRECTED
DEALER, OR IF THE UNIT HAS BEEN DAMAGED BY ACCIDENT, UNREASONABLE USE,
NEGLIGENCE, ACTS OF GOD, NEGLECT, IMPROPER SERVICE, OR OTHER CAUSES
NOT ARISING OUT OF DEFECT IN MATERIALS OR CONSTRUCTION.
Some states do not allow limitations on how long an implied warranty will last or the exclu-
sion or limitation of incidental or consequential damages. This warranty gives you specific
legal rights and you may also have other rights that vary from State to State.
This warranty is only valid for sale of product(s) within the United States of America and
in Canada. Product(s) sold outside of the United States of America or Canada are sold
“AS-IS” and shall have NO WARRANTY, express or implied.
For further details relating to warranty information of Directed products, please visit the
support section of Directed’s website at: www.directed.com
This product may be covered by a Guaranteed Protection Plan (“GPP”). See your
authorized Directed dealer for details of the plan or call Directed Customer Service at
1-800-876-0800.
920-10011-01 2011-06

Manuel D’Utilisation


iii
© 2014 Directed. Tous droits réservés.
Félicitations
Nous vous félicitons d’avoir acheté l’un de nos systèmes haut de
gamme de télédémarrage et de sécurité. La lecture préalable du
présent manuel permet d’optimiser l’utilisation du système et de mieux
tirer parti de sa richesse fonctionnelle. Pour toute autre question,
veuillez vous adresser à un détaillant agréé Directed.
Information importante
Réglementations gouvernementales et consignes de sécurité
Lisez les sections Réglementations gouvernementales et
Avertissement ! La sécurité avant tout dans le présent
manuel avant d’utiliser ce système.
Avertissement ! Le non respect de ces consignes peut
entraîner la mort, des blessures corporelles ou des dom-
mages matériels, et peut aussi être considéré comme
une utilisation illégale du système au-delà de l’utilisation
prévue.
Votre garantie
Votre système est livré avec une garantie. Les conditions de la garantie
sont décrites à la fin de ce guide. Assurez-vous de recevoir la preuve
d’achat auprès de votre revendeur indiquant que le produit a été
installé par un détaillant Directed autorisé.
Télécommandes de remplacement
Veuillez consulter votre revendeur autorisé ou visitez notre site www.

iv
© 2014 Directed. Tous droits réservés.
directedstore.com pour commander des télécommandes supplémen-
taires. Les numéros de pièce des télécommandes sont trouvent à
l’arrière de l’appareil.
Brevets
Ce produit est couvert par un ou plusieurs brevets. Voir les informations
associées (Patent Information) dans le guide en langue anglaise.

Contenu
Félicitations ....................................................................................................... iii
Information importante ....................................................................................... iii
Réglementations gouvernementales et consignes de sécurité ....................iii
Votre garantie .....................................................................................iii
Télécommandes de remplacement ..........................................................iii
Brevets ...............................................................................................................iv
Télécommande .................................................................................................... 2
Fonctions de la télécommande .............................................................................. 2
Configuration standard......................................................................... 2
Utilisation de votre système .................................................................................. 5
Verrouillage ........................................................................................ 5
Déverrouillage ..................................................................................... 5
Télédémarrage* .................................................................................. 5
AUX .................................................................................................. 5
Désactivation (facultative) de l’antidémarreur .......................................... 6
Démarrage à distance .......................................................................... 6
Relève du Valet .................................................................................... 8
Localisation de véhicule ........................................................................ 8
Information de pile ............................................................................................. 9
Remplacement de pile .......................................................................... 9
Élimination de la pile ........................................................................... 9
Réglementations gouvernementales ..................................................................... 10
Avertissement ! La sécurité d’abord ..................................................................... 12
Mise en garde : ................................................................................. 13
Garantie à vie limitée pour l’utilisateur ............................................................... 14

2
© 2014 Directed. Tous droits réservés.
Télécommande
Fonction Description
Antenne interne Utilisé pour transmettre de l'information
Voyant DEL de transmis-
sion
Actif lors de la transmission d'information
Touches de commande (4)
AUX
AUX
AUX
Your 1-way remote coin cell battery can be changed by using a small at blade screwdriver to pr y case apart. Replace battery and then snap case together.
,
AUX
AUX
AUX
Your 1-way remote coin cell battery can be changed by using a small at blade screwdriver to pry case apart. Replace battery and then snap case together.
, ,
AUX
AUX
AUX
Your 1-way remote coin cell batter y can be changed by using a small at blade screwdriver to pry case apar t. Replace batter y and then snap case together.
Utilisés pour effectuer l’armement, le désarmement, le
canal auxiliaire et les commandes de télédémarrage.
Fonctions de la télécommande
Les touches de la télécommande sont utilisées pour envoyer des com-
mandes au système. Les touches ci-dessous sont utilisées pour la con-
figuration standard.
Configuration standard
Touche
AUX
AUX
AUX
Your 1-way remote coin cell battery can be changed by using a small at blade screwdriver to pr y case apart. Replace battery and then snap case together.
La fonction de verrouillage est contrôlée en appuyant sur
AUX
AUX
AUX
Your 1-way remote coin cell battery can be changed by using a small at blade screwdriver to pr y case apart. Replace battery and then snap case together.
de la
télécommande pendant une seconde. Si maintenu pendant plus de
1,5 secondes, la fonction Panique est activée.
Touche
AUX
AUX
AUX
Your 1-way remote coin cell battery can be changed by using a small at blade screwdriver to pry case apart. Replace battery and then snap case together.
La fonction de déverrouillage est contrôlée en appuyant sur
AUX
AUX
AUX
Your 1-way remote coin cell battery can be changed by using a small at blade screwdriver to pry case apart. Replace battery and then snap case together.
de la
télécommande pendant une seconde. Vous pouvez également désac-
tiver la fonction panique avec cette touche.
Touche
La fonction Silent Mode™ (mode silencieux) et une fonction auxiliaire
facultative sont contrôlées en appuyant sur
. Le mode silencieux
est mis en fonction en appuyant sur
pendant moins d’une sec-

3
© 2014 Directed. Tous droits réservés.
onde avant le verrouillage/déverrouillage. Une fonction auxiliaire fac-
ultative telle que l’ouverture du coffre peut être contrôlée en appuyant
et en maintenant enfoncé
pendant 1,5 seconde.
Touche
AUX
AUX
AUX
Your 1-way remote coin cell batter y can be changed by using a small at blade screwdriver to pry case apar t. Replace batter y and then snap case together.
La fonction de démarrage à distance de votre système est contrôlée
en appuyant sur cette touche pendant une seconde.
Touches
AUX
AUX
AUX
Your 1-way remote coin cell batter y can be changed by using a small at blade screwdriver to pry case apar t. Replace batter y and then snap case together.
et
Le localisateur de véhicule est contrôlé en appuyant sur ces deux
touches.
Touches
AUX
AUX
AUX
Your 1-way remote coin cell battery can be changed by using a small at blade screwdriver to pr y case apart. Replace battery and then snap case together.
et
AUX
AUX
AUX
Your 1-way remote coin cell batter y can be changed by using a small at blade screwdriver to pry case apar t. Replace batter y and then snap case together.
et
Lorsque ces touches sont enfoncées simultanément, celles-ci contrôlent
le dégivreur facultatif de lunette arrière pendant le démarrage à dis-
tance. Les feux de stationnement clignotent trois fois pour confirmer
l’activation. Une fois activé le dégivreur s’actionnera chaque fois que
le véhicule est démarré à distance.
Les feux de stationnement clignotent deux fois lorsque le dégivreur
est désactivé. Le dégivreur ne s’activera pas lorsque le véhicule est
démarré à distance.
Remarque importante : Le dégivrage est une fonctionnalité facultative.
Des pièces et de la main-d’œuvre supplémentaires peuvent être requi-
ses. Consultez votre détaillant autorisé Directed pour plus de détails.
Touches
AUX
AUX
AUX
Your 1-way remote coin cell battery can be changed by using a small at blade screwdriver to pr y case apart. Replace battery and then snap case together.
et
AUX
AUX
AUX
Your 1-way remote coin cell battery can be changed by using a small at blade screwdriver to pry case apart. Replace battery and then snap case together.
Le mode minuterie est activé lorsque ces touches sont enfoncées en
même temps. Lorsque vous activez le mode minuterie, les feux de
stationnement clignotent quatre fois, après un délai de 1 seconde, le
moteur démarre. Pour arrêter le moteur, sans sortir du mode minuterie,
appuyer sur
AUX
AUX
AUX
Your 1-way remote coin cell batter y can be changed by using a small at blade screwdriver to pry case apar t. Replace batter y and then snap case together.
.

4
© 2014 Directed. Tous droits réservés.
Le système demeure en mode minuterie et continue de démarrer à
toutes les 3 heures jusqu’à ce qu’il soit annulé en mettant la clé de
contact ou en appuyant sur les freins, ou en activant l’arrêt de sécurité
du point mort.
Les feux de stationnement clignotent 4 fois pour confirmer que le mode
minuterie est désactivé.

5
© 2014 Directed. Tous droits réservés.
Utilisation de votre système
Verrouillage
Appuyer sur le bouton suivant et relâcher
AUX
AUX
AUX
Your 1-way remote coin cell battery can be changed by using a small at blade screwdriver to pr y case apart. Replace battery and then snap case together.
Les cornements de klaxon, et clignotements de feux de stationnement.
Verrouillage et Panique
Appuyer et maintenir
AUX
AUX
AUX
Your 1-way remote coin cell battery can be changed by using a small at blade screwdriver to pr y case apart. Replace battery and then snap case together.
.
Le système verrouille et, then activate Panique. Pour la panique à
pour travailler, la caractéristique facultative de cornement de
klaxon doit être reliée. Appuyer sur le bouton
AUX
AUX
AUX
Your 1-way remote coin cell battery can be changed by using a small at blade screwdriver to pr y case apart. Replace battery and then snap case together.
ou
AUX
AUX
AUX
Your 1-way remote coin cell battery can be changed by using a small at blade screwdriver to pry case apart. Replace battery and then snap case together.
pour
arrêter la sortie.
Déverrouillage
Appuyer et relâcher
AUX
AUX
AUX
Your 1-way remote coin cell battery can be changed by using a small at blade screwdriver to pry case apart. Replace battery and then snap case together.
Les cornements de klaxon, et clignotements de feux de stationnement.
Télédémarrage*
Appuyer sur le bouton suivant et relâcher
AUX
AUX
AUX
Your 1-way remote coin cell batter y can be changed by using a small at blade screwdriver to pry case apar t. Replace batter y and then snap case together.
Active (ou si activé, désactive) le démarreur à distance. Le moteur se
met en marche, et clignotements de feux de stationnement. Si un pro-
blème de configuration de démarrage à distance empêche le moteur
de démarrer, les feux de stationnement clignotent indiquant un rapport
de faille de démarrage à distance afin d’identifier la faille.
AUX
Appuyer sur le bouton suivant et le maintenir enfoncé
Une fonction auxiliaire facultative telle que l’ouverture du coffre peut
être contrôlée en appuyant et en maintenant enfoncé
pendant
2 seconde.

6
© 2014 Directed. Tous droits réservés.
Désactivation (facultative) de l’antidémarreur
Si votre télécommande est endommagée ou perdue, vous pouvez sur-
passer manuellement l’antidémarreur. Pour ce faire, vous devez avoir
la clé de contact du véhicule et savoir où se trouve le bouton Valet.
S’assurer de vérifier avec l’installateur l’emplacement du bouton Valet.
Pour surpasser l’antidémarreur, mettre le contact et appuyer et relâcher
le bouton Valet dans les 10 secondes. Le véhicule devrait se mettre
en marche. S’il ne démarre pas, vous avez peut-être attendu trop
longtemps; enlever le contact et répéter le processus.
Emplacement du bouton Valet: _________________________
Démarrage à distance
Cette fonction vous permet de démarrer à distance votre véhicule pour
une durée programmée d’avance. Cela vous permettra de réchauffer
le moteur, aussi bien que d’ajuster la température intérieure du véhi-
cule avec le système de climatisation. Si le réchauffement ou refroid-
issement de l’intérieur est désiré, les contrôles climatiques doivent être
préréglés, et la soufflerie de l’éventail réglée au niveau désiré avant
de démarrer à distance le véhicule.
Satmode,
bank
selector
AUDIO
PWR
12
REWFF
PLAY/PROG NR
3456
DISC- DISC+
11:53
XM1-1 CH-001
CH
VOL
SCAN
SOUND
AM/FM
CD/AUX
SAT
RADIO
SEEK
SKIP
RPT
DISP -
MODE
A.SEL
RDM
TUNE
AUTO
OFF
DUAL
A/C
MODE
Channel control
Category
Control
Text selector.
Hold for 10secto toggle
channelor category
tune
modes.
Toggles
Scan
mode
Bank and
present
indicator
Channel
and text
indicator
Preset 1-6.
Hold until beepto
savetoapreset.
CATEGORY
Tune mode
indicator
MODE
DUAL
OFF
AUTO
MAP/
GUIDE
MENU
SETUP
INFO
ZOOM
CANCEL
AUDIO
AUTO
MODE
A/C
LOAD
DISC
TAPE
AM/FM
DISP
MODE
SCAN RPT A.SEL/RDM-SEEK +
1
2
34
5
6
DISC-
DISC+
VOL
PWR
PUSH
TUNE
SOUND
PUSH
XM1-1
VOL
CH
CHANNEL
CATEGORY
NAME
TITLE
:
:
:
:
1
CH
2
CH
3
CH
6
CH
5
CH
4
CH
MODE SCAN SOUND
001-HITS1
POP
MUSICNAME
MUSIC TITLE
Channel control
Category
Control
001 014 018
040 065
115
Toggles between
channel and
category
modes
Bank and
present
indicator
Upper display
text mode
selector
Sat mode
and bank
selector
Preset 1-6.
Press until
beepto save
to a preset.
Channeland text
Indicator
fields
Toggles
Scan
mode
Tune mode
indicator
ANTENNA
SC OUTPUT
Sirius-Ready, SAT Radio Ready or select OEM headunits with optional Honda Bus Compatible Translator
Headunit bus cableSiriusConnect Cable
HON-SC1
Honda Bus
Compatible
Translator
Avertissement! (1) Ne jamais faire démarrer le
véhicule à distance avec les clés dans le contact,
excepté lors de la relève de Valet, et (2) ne jamais
démarrer le véhicule s’il n’est pas en position PARK
ou POINT MORT
Pour faire démarrer à distance le véhicule:
• Appuyer sur la touche
AUX
AUX
AUX
Your 1-way remote coin cell batter y can be changed by using a small at blade screwdriver to pry case apar t. Replace batter y and then snap case together.
de la télécommande pendant 1
seconde.

7
© 2014 Directed. Tous droits réservés.
• Les feux de stationnement clignotent pour confirmer que le
véhicule essaie de démarrer. Dans les véhicules à essence, le
moteur démarrera 4 secondes après le clignotement des feux
de stationnement, dans les véhicules à moteur diesel, le moteur
démarrera après l’expiration de la minuterie D’ATTENTE-DE-
DÉMARRAGE.
• Dès que le véhicule aura démarrée, il fonctionnera pendant la
durée préprogrammée (12, 24 ou 60 minutes) ou jusqu’à ce
qu’un arrêt soit déclenché.
Satmode,
bank
selector
AUDIO
PWR
12
REWFF
PLAY/PROG NR
3456
DISC- DISC+
11:53
XM1-1 CH-001
CH
VOL
SCAN
SOUND
AM/FM
CD/AUX
SAT
RADIO
SEEK
SKIP
RPT
DISP -
MODE
A.SEL
RDM
TUNE
AUTO
OFF
DUAL
A/C
MODE
Channel control
Category
Control
Text selector.
Hold for 10secto toggle
channelor category
tune
modes.
Toggles
Scan
mode
Bank and
present
indicator
Channel
and text
indicator
Preset 1-6.
Hold until beepto
savetoapreset.
CATEGORY
Tune mode
indicator
MODE
DUAL
OFF
AUTO
MAP/
GUIDE
MENU
SETUP
INFO
ZOOM
CANCEL
AUDIO
AUTO
MODE
A/C
LOAD
DISC
TAPE
AM/FM
DISP
MODE
SCAN RPT A.SEL/RDM-SEEK +
1
2
34
5
6
DISC-
DISC+
VOL
PWR
PUSH
TUNE
SOUND
PUSH
XM1-1
VOL
CH
CHANNEL
CATEGORY
NAME
TITLE
:
:
:
:
1
CH
2
CH
3
CH
6
CH
5
CH
4
CH
MODE SCAN SOUND
001-HITS1
POP
MUSICNAME
MUSIC TITLE
Channel control
Category
Control
001 014 018
040 065
115
Toggles between
channel and
category
modes
Bank and
present
indicator
Upper display
text mode
selector
Sat mode
and bank
selector
Preset 1-6.
Press until
beepto save
to a preset.
Channeland text
Indicator
fields
Toggles
Scan
mode
Tune mode
indicator
ANTENNA
SC OUTPUT
Sirius-Ready, SAT Radio Ready or select OEM headunits with optional Honda Bus Compatible Translator
Headunit bus cableSiriusConnect Cable
HON-SC1
Honda Bus
Compatible
Translator
Avertissement! Il est non-sécuritaire de faire fonc-
tionner un moteur de véhicule dans un garage ou
autre zone fermée. Respirer les vapeurs de tuyau
d’échappement peut être dangereux pour votre
santé. Ne jamais activer le démarrage à distance
dans tout espace fermé.
Lorsque vous êtes prêt à conduire le véhicule :
1. Mettre la clé de contact et la mettre à ON (pas à START)
2. Appuyer sur la pédale de frein. Le système de télédémarrage
s’arrête mais le moteur continue de fonctionner parce que le con-
tact a été mis.
Note : Si la pédale de frein est appuyée avant que la clé ne soit à la
position ON, le moteur s’arrêtera.
Tandis que le véhicule fonctionne pendant l’opération de télédémar-
rage, le système surveillera le véhicule et arrêtera automatiquement
le moteur si l’une des conditions suivantes est reçue par le système:
• La pédale de frein est appuyée
• Le capot est ouvert.

8
© 2014 Directed. Tous droits réservés.
• L’interrupteur à bascule d’arrêt est placé à la position OFF.
• La durée de fonctionnement préprogrammée (12, 24 ou 60 min-
utes) est échue.
• La touche de télécommande
AUX
AUX
AUX
Your 1-way remote coin cell batter y can be changed by using a small at blade screwdriver to pry case apar t. Replace batter y and then snap case together.
est enfoncée une fois.
Relève du Valet
La fonction de relève du Valet permet au véhicule de continuer de
fonctionner après avoir enlevé la clé du contact. Cette fonction est
utile lorsque vous voulez sortir et verrouiller le véhicule pour une courte
période de temps, mais aimeriez laisser le moteur rouler et la climati-
sation fonctionner.
Pour effectuer la relève du Valet:
1. Avant d’arrêter le moteur, appuyer et relâcher
AUX
AUX
AUX
Your 1-way remote coin cell batter y can be changed by using a small at blade screwdriver to pry case apar t. Replace batter y and then snap case together.
sur la télécom-
mande pendant 1 seconde.
2. Mettre le contact à OFF. Le moteur continuera de fonctionner
jusqu’à ce que la durée préprogrammée soit écoulée ou qu’un
signal d’arrêt soit reçu. (Voir la section précédente sur le démar-
rage à distance pour une liste complète de signal d’arrêt).
Important : Cette fonction ne fonctionnera pas si la pédale de frein
est appuyée.
Localisation de véhicule
Le localisateur de véhicule permet de retrouver votre véhicule, en fai-
sant clignoter les feux de stationnement.
Pour l’activer:
1. Appuyer et relâcher les touches
AUX
AUX
AUX
Your 1-way remote coin cell batter y can be changed by using a small at blade screwdriver to pry case apar t. Replace batter y and then snap case together.
et en même temps.
2. Les lumières clignotent lentement 5 fois vous permettant ainsi de
localiser votre véhicule.

9
© 2014 Directed. Tous droits réservés.
Information de pile
La télécommande est alimentée par deux piles CR2016 de 3V.
Lorsque la pile commence à faiblir, la portée d’opération est réduite et
le voyant DEL sur la télécommande diminuera d’intensité.
Remplacement de pile
Localiser la petite fente sur le côté de la télécommande. Insérer un pe-
tit tournevis ou outil équivalent dans la fente et enlever le boîtier. Rem-
placer la pile tout en vérifiant la polarité et remettre le boîtier en place.
Élimination de la pile
Directed se soucie de l’environnement. Si vous avez besoin
de vous débarrasser de la pile, veuillez le faire en re-
spectant les exigences municipales de recyclage de pile.

10
© 2014 Directed. Tous droits réservés.
Réglementations gouvernementales
Cet appareil est conforme à la section 15 du règlement de la FCC. Son fonc-
tionnement est soumis aux deux conditions suivantes : 1) cet appareil ne doit
pas produire d’interférences nuisibles, et 2) cet appareil doit accepter toutes
les interférences reçues, y compris celles pouvant entraîner un fonctionnement
indésirable.
Cet appareil a été testé et reconnu compatible avec les limites des appareils
numériques de classe B, en application de la section 15 des règles de la FCC.
Ces limites ont été établies de façon à offrir une protection raisonnable con-
tre les interférences nuisibles dans les installations résidentielles. Ce matériel
produit et peut rayonner une énergie radiofréquence, de sorte que s’il n’est pas
installé et utilisé conformément au manuel d’instructions, il peut entraîner des
interférences nuisibles avec les radiocommunications. Il est toutefois impossible
de garantir que des interférences ne se produiront pas dans une installation
donnée. Si cet appareil entraîne des interférences nuisibles à la réception de
la radio ou de la télévision, ce qui peut se vérifier en le mettant hors tension
puis de nouveau sous tension, l’utilisateur peut prendre une ou plusieurs des
mesures suivantes pour essayer de corriger les interférences :
• Modifier l’orientation ou l’emplacement de l’antenne réceptrice.
• Augmenter la distance entre l’appareil et le récepteur.
• Brancher l’appareil sur une prise de courant d’un circuit différent de celui
auquel le récepteur est connecté.
• Consulter le détaillant ou un technicien spécialisé en radio et télévision
pour obtenir d’autres conseils.
Cet appareil est conforme au Cahier des charges sur les Normes Radioélec-
triques CNR-210 d’Industrie Canada. Son utilisation n’est autorisée que suiv-
ant un principe de non-interférence, non-protection ; en d’autres termes, cet
appareil ne doit pas être utilisé s’il a été déterminé qu’il entraîne des inter-
férences nuisibles pour les services autorisés par IC. En outre, l’utilisateur de cet
appareil doit accepter toutes interférences radio pouvant être reçues, même si

11
© 2014 Directed. Tous droits réservés.
celles-ci peuvent perturber le fonctionnement de l’appareil.
AVERTISSEMENT ! Les changements ou modifications non explicitement ap-
prouvés par la partie responsable de la conformité peuvent annuler le droit de
l’utilisateur à utiliser cet appareil.

12
© 2014 Directed. Tous droits réservés.
Avertissement ! La sécurité d’abord
Les avertissements de sécurité suivants doivent être respectés en tout temps:
En raison de la complexité de ce système, l’installation de ce produit ne doit
être effectuée par un détaillant autorisé Dirtected.
Lorsqu’il est correctement installé, ce système peut démarrer le véhicule via un
signal de l’émetteur de la télécommande. Ainsi, ne jamais faire fonctionner
ce système dans un espace clos ou partiellement clos, espace sans ventilation
(comme un garage). Lorsque vous stationnez dans un espace clos ou partiel-
lement clos ou lors d’un entretien du véhicule, le système de démarrage à
distance doit être désactivé en utilisant l’interrupteur à bascule. Il incombe à
l’utilisateur de manipuler correctement et à garder hors de la portée des enfants
tous les émetteurs de la télécommande pour s’assurer que le système ne démar-
rera pas le véhicule à distance de manière non intentionnelle. L’UTILISATEUR
DOIT INSTALLER UN DÉTECTEUR DE MONOXYDE DE CARBONE DANS
OU PRÈS D’UNE ZONE URBAINE ADJACENTE AU VÉHICULE. TOUTES LES
PORTES DES ZONES URBAINES DONNANT ACCÈS À L’ESPACE FERMÉ
OU PARTIELLEMENT FERMÉ CONTENANT LE VÉHICULE DOIVENT DEMEU-
RER VERROUILLÉES EN TOUT TEMPS. Ces précautions sont de la seule respon-
sabilité de l’utilisateur.
L’utilisation de ce produit d’une manière contraire à son mode de fonc-
tionnement proposé peut entraîner des dommages matériels, des blessures
ou la mort. (1) Ne jamais faire démarrer à distance le véhicule si les vitesses
sont engagées, et (2) Ne jamais faire démarrer le véhicule à distance avec
les clés dans le contact. L’utilisateur doit aussi avoir la fonction de sécurité de
point mort du véhicule contrôlée périodiquement, de sorte que le véhicule ne
puisse pas démarrer à distance alors que les vitesses sont engagées. Ce test
devrait être effectué par une personne autorisée de Directed en conformité
avec le Contrôle de sécurité décrit dans le guide d’installation du produit. Si le

13
© 2014 Directed. Tous droits réservés.
véhicule démarre avec les vitesses engagées, arrêter les opérations de démar-
rage à distance immédiatement et consulter le détaillant Directed autorisé pour
résoudre le problème.
Après l’installation du module de démarrage à distance, contactez votre rev-
endeur agréé pour qu’il teste le module de démarrage à distance en effectu-
ant les vérifications de sécurité tel que décrit dans le guide d’installation du
produit. Si le véhicule démarre lors du test du circuit d’arrêt de la sécurité du
point mort, l’appareil de démarrage à distance n’a pas été installé correcte-
ment. Le module de démarrage à distance doit être enlevé ou l’installateur doit
réinstaller le système de démarrage à distance afin que le véhicule ne démarre
pas lorsque les vitesses sont engagées.
Toutes les installations doivent être activées par un détaillant autorisé Directed.
LE FONCTIONNEMENT DU MODULE DE DÉMARRAGE À DISTANCE SI LE
VÉHICULE DÉMARRE LES VITESSES ENGAGÉES EST CONTRAIRE À SON
MODE DE FONCTIONNEMENT PROPOSÉ. FAIRE FONCTIONNER LE SYS-
TÈME DE DÉMARRAGE À DISTANCE SOUS CES CONDITIONS POURRAIT
ENTRAÎNER DES DOMMAGES CORPORELS OU MATÉRIELS. VOUS DEVEZ
IMMÉDIATEMENT CESSEZ D’UTILISER CET APPAREIL ET DEMANDER L’AIDE
D’UN DÉTAILLANT AUTORISÉ Directed POUR RÉPARER OU DÉBRANCHER
LE MODULE DE DÉMARRAGE À DISTANCE. DIRECTED NE SERA PAS TENU
RESPONSABLE OU NE PAIERA PAS POUR LES COÛTS D’INSTALLATION OU
DE RÉINSTALLATION.
Mise en garde :
Ce produit est destiné pour les véhicules à carburant injecté seulement.
L’utilisation de ce produit sur un véhicule à transmission manuelle est dangereux
et contraire à l’utilisation proposée du produit.
un certain risque.

14
© 2014 Directed. Tous droits réservés.
Garantie à vie limitée pour l’utilisateur
Directed Electronics (« Directed ») s’engage envers l’acheteur initial, à réparer ou rem-
placer (selon le choix de Directed) par un dispositif comparable remis en état, tout
dispositif Directed (appelé ci-dessous le « dispositif ») à l’exclusion, et sans que ce soit
limitatif, de la sirène, des émetteurs de télécommande et des capteurs et accessoires
associés, dans le cas où le dispositif présenterait des vices de matériaux ou de fabrication
après une utilisation raisonnable pendant la durée de vie du véhicule, à condition que
les conditions suivantes soient remplies : le dispositif a été acheté auprès d’un détaillant
agréé Directed ; le dispositif a été installé par un professionnel et entretenu par un détail-
lant agréé Directed ; le dispositif sera réinstallé par un professionnel dans le véhicule dans
lequel il avait été installé à l’origine par un détaillant agréé Directed ; et le dispositif a
été retourné à Directed en port payé avec une copie lisible de la facture ou autre preuve
d’achat datée portant les informations suivantes : nom, numéro de téléphone et adresse
de l’acheteur ; nom, numéro de téléphone et adresse du détaillant agréé ; description
complète du produit, y compris des accessoires ; année, marque et modèle du véhicule
; numéro d’immatriculation et numéro d’identification du véhicule. Tous les composants
autres que le dispositif, y compris et sans que ce soit limitatif, la sirène, les émetteurs de
télécommande et les capteurs et accessoires associés, bénéficient d’une garantie d’un an
à compter de leur date d’achat. TOUS LES PRODUITS REÇUS PAR DIRECTED POUR UNE
RÉPARATION SOUS GARANTIE SANS PREUVE D’ACHAT AUPRÈS D’UN DÉTAILLANT
AGRÉÉ SERONT REFUSÉS. Cette garantie non transférable est automatiquement annulée
si : le code de date ou le numéro de série du dispositif est dégradé, manquant ou
modifié ; le dispositif a été modifié ou utilisé de façon contraire à l’usage prévu ; le
dispositif a été endommagé par un accident, une utilisation abusive, la négligence, un
mauvais entretien, l’installation ou d’autres causes ne résultant pas de vices de matériaux
ou de fabrication. La garantie ne couvre pas les dommages au dispositif résultant de
l’installation ou de la dépose du dispositif. Directed, à sa seule discrétion, déterminera ce
qui constitue des dommages excessifs et pourra refuser le renvoi d’un dispositif présentant
des dommages excessifs.
DANS TOUTE LA MESURE OÙ LA LOI LE PERMET, TOUTES LES GARANTIES, Y COMPRIS
MAIS SANS QUE CE SOIT LIMITATIF, TOUTE GARANTIE EXPLICITE, TOUTE GARANTIE
IMPLICITE, TOUTE GARANTIE DE VALEUR MARCHANDE OU D’ADAPTATION À UN
USAGE PARTICULIER, ET TOUTE GARANTIE DE NON VIOLATION DE PROPRIÉTÉ
INTELLECTUELLE, SONT EXPRESSÉMENT EXCLUES ; ET DIRECTED N’ASSUME ET
N’AUTORISE AUCUNE PERSONNE NI ENTITÉ À ASSUMER POUR ELLE UN DEVOIR,
UNE OBLIGATION OU UNE RESPONSABILITÉ QUELCONQUE EN RELATION AVEC SES
PRODUITS. DIRECTED REFUSE ET DÉNIE ABSOLUMENT TOUTE RESPONSABILITÉ POUR
TOUTE ACTION DE PARTIES TIERCES, Y COMPRIS SES INSTALLATEURS ET DÉTAILLANTS
AGRÉÉS. LES SYSTÈMES DE SÉCURITÉ DIRECTED, Y COMPRIS CE DISPOSITIF, SONT
DES DISPOSITIFS DE DISSUASION CONTRE UN ÉVENTUEL VOL. DIRECTED N’OFFRE

15
© 2014 Directed. Tous droits réservés.
PAS DE GARANTIE NI D’ASSURANCE CONTRE LE VANDALISME, LES DOMMAGES
OU LE VOL D’UNE AUTOMOBILE, DE SES PIÈCES OU DE SON CONTENU, ET PAR
LA PRÉSENTE, DIRECTED DÉCLINE EXPRESSÉMENT TOUTE RESPONSABILITÉ, QUELLE
QU’ELLE SOIT, Y COMPRIS MAIS SANS QUE CE SOIT LIMITATIF, LA RESPONSABILITÉ
POUR LE VOL, LES DOMMAGES OU LE VANDALISME. CETTE GARANTIE NE
COUVRE PAS LES FRAIS DE MAIN D’ŒUVRE POUR L’ENTRETIEN, LA DÉPOSE OU
LA RÉINSTALLATION DU DISPOSITIF, NI AUCUN DOMMAGE INDIRECT D’AUCUNE
SORTE. DANS LE CAS D’UNE RÉCLAMATION OU D’UN LITIGE IMPLIQUANT
DIRECTED OU SA FILIALE, LES PROCÉDURES SE TIENDRONT DANS LE COMTÉ DE
SAN DIEGO DANS L’ÉTAT DE CALIFORNIE AUX ÉTATS-UNIS D’AMÉRIQUE. LES LOIS
DE L’ÉTAT DE CALIFORNIE ET LES LOIS FÉDÉRALES EN VIGUEUR S’APPLIQUERONT
POUR LA RÉSOLUTION DU LITIGE. L’INDEMNISATION MAXIMALE DANS LE CADRE
DE TOUTE RÉCLAMATION CONTRE DIRECTED SERA STRICTEMENT LIMITÉE AU PRIX
D’ACHAT DU DISPOSITIF AUPRÈS DU DÉTAILLANT AGRÉÉ DIRECTED. DIRECTED N’EST
PAS RESPONSABLE POUR LES DOMMAGES QUELS QU’ILS SOIENT, Y COMPRIS
MAIS SANS QUE CE SOIT LIMITATIF, LES DOMMAGES DIRECTS, LES DOMMAGES
INDIRECTS, LES DOMMAGES AU VÉHICULE, LES DOMMAGES POUR LES PERTES
DE TEMPS, LE MANQUE À GAGNER, LES PERTES COMMERCIALES, LES PERTES
ÉCONOMIQUES, ET LES AUTRES DOMMAGES SIMILAIRES. NONOBSTANT CE QUI
PRÉCÈDE, LE FABRICANT OFFRE UNE GARANTIE LIMITÉE POUR LE REMPLACEMENT OU
LA RÉPARATION DU MODULE DE COMMANDE, DANS LES CONDITIONS DÉFINIES
ICI. CETTE GARANTIE EST NULLE SI LE DISPOSITIF N’A PAS ÉTÉ ACHETÉ AUPRÈS
DE DIRECTED, OU D’UN DÉTAILLANT AGRÉÉ DIRECTED, OU SI LE DISPOSITIF A ÉTÉ
ENDOMMAGÉ PAR UN ACCIDENT, UNE UTILISATION ABUSIVE, LA NÉGLIGENCE,
UN CAS DE FORCE MAJEURE, UN MAUVAIS ENTRETIEN, OU D’AUTRES CAUSES NE
RÉSULTANT PAS DE VICES DE MATERIAUX OU DE FABRICATION.
Certains états et provinces ne permettent pas de limitation sur la durée des garanties
implicites, ou l’exclusion ou la limitation des dommages directs ou indirects. Cette garan-
tie vous confère des droits spécifiques, et vous pouvez également bénéficier d’autres
droits selon votre juridiction.
Cette garantie n’est valide que pour la vente des produits aux États-Unis d’Amérique et
au Canada. Les produits vendus en dehors des États-Unis d’Amérique ou du Canada
sont vendus « en l’état » et ne bénéficient d’AUCUNE GARANTIE, ni explicite ni implicite.
Pour plus de détails concernant la garantie des produits Directed, veuillez visiter le site
Web de Directed, section d’assistance : www.directed.com.
Ce produit peut être couvert par un plan de protection de garantie (« GPP », Guaranteed
Protection Plan). Pour obtenir des détails sur ce plan, adressez-vous à un détaillant agréé
Directed ou téléphonez au service à la clientèle de Directed au 1-800-876-0800.
920-10011-02 2011-06


Guía Del Propietario


iii
© 2014 Directed. Reservados tados los clerechos
¡Felicitaciones!
Debemos felicitarlo por la compra del sistema de encendido y se-
guridad por control remoto de última generación. La lectura de este
Manual del Usuario con anterioridad al uso del sistema le ayudará
a maximizar el uso de dicho sistema y de sus múltiples funciones. En
caso de querer realizar alguna consulta comuníquese con el distri-
buidor autorizado de Directed.
Información importante
Reglamentos del gobierno e información de seguridad
Lea las secciones Reglas del gobierno y ¡Advertencia! Se-
guridad primero de este manual antes de hacer funcionar
el sistema.
Advertencia! No seguir estas instrucciones puede causar
muerte, lesiones personales o daños a la propiedad, y
también uso ilegal del sistema fuera de su objetivo pre-
visto.
Su Garantía
Su sistema viene con una garantía. Las condiciones de la garantía se
detallan al final de esta guía. Asegúrese de que usted reciba el com-
probante de compra del concesionario, indicando que el producto fue
instalado por un distribuidor autorizado de Directed.

iv
© 2014 Directed. Reservados tados los clerechos
Controles remotos de reemplazo
Por favor consulte a su distribuidor autorizado o visítenos en www.
directedstore.com para ordenar controles remotos adicionales. Los
números de parte del control se encuentran en la parte posterior del
dispositivo.
Información de patentes
Este producto se encuentra cubierto por una o más patentes. Véase la
información sobre las patentes (Patent Information) en la guía en inglés.

Índice
¡Felicitaciones! ................................................................................................iii
Información importante ..................................................................................... iii
Reglamentos del gobierno e información de seguridad ................................ iii
Su Garantía ............................................................................................ iii
Controles remotos de reemplazo ............................................................... iv
Información de patentes .................................................................................... iv
Control remoto ..................................................................................................2
Funciones del control remoto ..............................................................................2
Configuración estándar .............................................................................2
Uso del sistema ...............................................................................................5
Bloqueo ...................................................................................................5
Desbloqueo..............................................................................................5
Encendido remoto .....................................................................................5
AUX ........................................................................................................6
Inhabilitación (opcional) de la anulación de arranque ...................................6
Arranque a distancia (Encendido remoto) ....................................................6
Transferencia de control al valet .................................................................8
Buscador de automóvil ..............................................................................9
Información sobre la Pila ...................................................................................9
Cambio de la pila ....................................................................................9
Disposición de la pila ................................................................................9
Reglamentos del gobierno ................................................................................10
¡Advertencia! Seguridad primero ......................................................................11
Precaución .............................................................................................12
Garantía limitada de por vida para el consumidor ..............................................13

2
© 2014 Directed. Reservados tados los clerechos
Control remoto
Función Descripción
Antena interna Se usa para la transmisión de información
LED de transmisión Activo cuando transmite información
Botones de comando (4)
AUX
AUX
AUX
Your 1-way remote coin cell battery can be changed by using a small at blade screwdriver to pr y case apart. Replace battery and then snap case together.
AUX
AUX
AUX
Your 1-way remote coin cell battery can be changed by using a small at blade screwdriver to pr y case apart. Replace battery and then snap case together.
AUX
AUX
AUX
Your 1-way remote coin cell batter y can be changed by using a small at blade screwdriver to pry case apar t. Replace batter y and then snap case together.
Aplicación de los comandos de activación, desactivación,
canal auxiliar y encendido remoto
Funciones del control remoto
Los botones del control remoto permiten enviar comandos al sistema.
Los botones indicados a continuación son para la configuración es-
tándar.
Configuración estándar
AUX
AUX
AUX
Your 1-way remote coin cell battery can be changed by using a small at blade screwdriver to pr y case apart. Replace battery and then snap case together.
Botón
La función de bloqueo se controla oprimiendo y manteniendo oprimido
el botón
AUX
AUX
AUX
Your 1-way remote coin cell battery can be changed by using a small at blade screwdriver to pr y case apart. Replace battery and then snap case together.
del control remoto durante 1 segundo. Cuando se man-
tiene oprimido más de 1.5 segundos, se activa la función de pánico.
AUX
AUX
AUX
Your 1-way remote coin cell battery can be changed by using a small at blade screwdriver to pry case apart. Replace battery and then snap case together.
Botón
La función de desbloqueo se controla oprimiendo y manteniendo
oprimido el botón
AUX
AUX
AUX
Your 1-way remote coin cell battery can be changed by using a small at blade screwdriver to pr y case apart. Replace battery and then snap case together.
del control remoto durante 1 segundo. También
se puede desactivar la función de pánico con este botón.
Botón
La modalidad silenciosa Silent Mode™ y una de las funciones auxili-
ares opcionales se controlan oprimiendo el botón
La modali-
dad silenciosa funciona oprimiendo y manteniendo oprimido el botón

3
© 2014 Directed. Reservados tados los clerechos
v durante menos de 1 segundo antes de bloquear o desbloquear.
Una de las funciones auxiliares opcionales, tales como la apertura del
maletero, se puede controlar oprimiendo y manteniendo oprimido el
Botón
durante 1.5 segundos.
AUX
AUX
AUX
Your 1-way remote coin cell batter y can be changed by using a small at blade screwdriver to pry case apar t. Replace batter y and then snap case together.
Botón
La función de arranque a distancia (encendido remoto) del sistema se
controla oprimiendo este botón durante 1 segundo.
AUX
AUX
AUX
Your 1-way remote coin cell batter y can be changed by using a small at blade screwdriver to pry case apar t. Replace batter y and then snap case together.
and
Botones
El buscador de auto se controla oprimiendo estos dos botones.
AUX
AUX
AUX
Your 1-way remote coin cell battery can be changed by using a small at blade screwdriver to pr y case apart. Replace battery and then snap case together.
and
AUX
AUX
AUX
Your 1-way remote coin cell batter y can be changed by using a small at blade screwdriver to pry case apar t. Replace batter y and then snap case together.
and Botones
Cuando se oprimen simultáneamente, estos tres botones controlan el
desempañador de ventana trasero opcional durante el arranque a dis-
tancia. Las luces de estacionamiento destellan 3 veces para confirmar
la activación. Una vez activado, el desempañador se enciende cu-
ando el vehículo se arranca a distancia.
Las luces de estacionamiento destellan dos veces cuando el desem-
pañador se desactiva. El desempañador no se enciende cuando el
vehículo se arranca a distancia.
Nota importante: El desempañador es una característica opcional.
Es posible que se necesiten piezas y mano de obra adicionales. Para
saber los detalles, consulte a su distribuidor Directed.
AUX
AUX
AUX
Your 1-way remote coin cell battery can be changed by using a small at blade screwdriver to pr y case apart. Replace battery and then snap case together.
and
AUX
AUX
AUX
Your 1-way remote coin cell battery can be changed by using a small at blade screwdriver to pr y case apart. Replace battery and then snap case together.
Botones
La modalidad de temporizador se activa cuando estos botones se
oprimen simultáneamente. Cuando se activa la modalidad de tempo-
rizador, las luces de estacionamiento destellan 4 veces y el motor se
enciende después de un retraso de 1 segundo. Para apagar el motor

4
© 2014 Directed. Reservados tados los clerechos
sin salir de la modalidad de temporizador, oprima el botón
AUX
AUX
AUX
Your 1-way remote coin cell batter y can be changed by using a small at blade screwdriver to pry case apar t. Replace batter y and then snap case together.
.
El sistema se mantiene en modalidad de temporizador y arranca el
vehículo cada 3 horas un máximo de 6 veces a menos que la modali-
dad se cancele pasando la llave a la posición de encendido (ON)
o activando el freno o los cables de apagado de seguridad neutral.
Las luces de estacionamiento destellan 4 veces indicando que se ha
salido de la modalidad de temporizador.

5
© 2014 Directed. Reservados tados los clerechos
Uso del sistema
Bloqueo
Presione y libere
AUX
AUX
AUX
Your 1-way remote coin cell battery can be changed by using a small at blade screwdriver to pr y case apart. Replace battery and then snap case together.
Las puertas se bloquean, el cuerno toca la bocina, as luces de estac-
ionamiento parpadean.
Bloquea y modo Pánico
Presione y mantenga
AUX
AUX
AUX
Your 1-way remote coin cell battery can be changed by using a small at blade screwdriver to pr y case apart. Replace battery and then snap case together.
Se bloqueo el sistemea, entonces active el pánico. Para que el
pánico trabaje, la característica opcional del bocinazo del cuer-
no debe ser conectada. Presione el botón
AUX
AUX
AUX
Your 1-way remote coin cell battery can be changed by using a small at blade screwdriver to pr y case apart. Replace battery and then snap case together.
o
AUX
AUX
AUX
Your 1-way remote coin cell battery can be changed by using a small at blade screwdriver to pr y case apart. Replace battery and then snap case together.
para detener
la salida.
Desbloqueo
Presione y libere
AUX
AUX
AUX
Your 1-way remote coin cell battery can be changed by using a small at blade screwdriver to pr y case apart. Replace battery and then snap case together.
Las puertas se desbloquean. El cuerno toca la bocina.
Encendido remoto
Presione y libere
AUX
AUX
AUX
Your 1-way remote coin cell batter y can be changed by using a small at blade screwdriver to pry case apar t. Replace batter y and then snap case together.
Activa (o si estuviese Activado, desactiva) el encendido remoto. El mo-
tor y las luces de estacionamiento se encenderán o el motor y las luces
de estacionamiento se apagarán, según sea el caso. El cuerno toca la
bocina. Si un problema de configuración del Encendido remoto evita
que el motor arranque, las luces de estacionamiento parpadearán de
modo tal de identificar un informe de anomalía en el Encendido re-
moto para identificar la falla.

6
© 2014 Directed. Reservados tados los clerechos
AUX
Presione y mantenga
.
Una de las funciones auxiliares opcionales, tales como la apertura del
maletero, se puede controlar oprimiendo y manteniendo oprimido el
Botón
durante 2 segundos.
Inhabilitación (opcional) de la anulación de arranque
Si el control remoto se pierde o se daña, usted puede desactivar manu-
almente la anulación de arranque. Para hacer esto, debe tener la llave
del vehículo y saber dónde está ubicado el botón del valet. Pregúntele
al instalador dónde se encuentra el botón de valet.
Para cancelar la anulación de arranque, pase la llave a la posición
de encendido (ON) y oprima y suelte el botón de valet en menos de
10 segundos. El vehículo debe arrancar. Si no arranca, puede haber
esperado demasiado; pase la llave a la posición de apagado (OFF)
y repita el proceso.
Ubicación del botón de valet: ________________________________
Arranque a distancia (Encendido remoto)
Esta característica permite arrancar el vehículo a distancia y dejar
andando el motor durante un período de tiempo programable. Esto
permite calentar el motor y ajustar la temperatura interior del vehículo
con el sistema de control de clima. Si desea calefaccionar o enfriar
el interior, los controles de clima deben configurarse de antemano y
el ventilador debe ajustarse al nivel deseado antes de arrancar el
vehículo a distancia.

7
© 2014 Directed. Reservados tados los clerechos
Satmode,
bank
selector
AUDIO
PWR
12
REWFF
PLAY/PROG NR
3456
DISC- DISC+
11:53
XM1-1 CH-001
CH
VOL
SCAN
SOUND
AM/FM
CD/AUX
SAT
RADIO
SEEK
SKIP
RPT
DISP -
MODE
A.SEL
RDM
TUNE
AUTO
OFF
DUAL
A/C
MODE
Channel control
Category
Control
Text selector.
Hold for 10secto toggle
channelor category
tune
modes.
Toggles
Scan
mode
Bank and
present
indicator
Channel
and text
indicator
Preset 1-6.
Hold until beepto
savetoapreset.
CATEGORY
Tune mode
indicator
MODE
DUAL
OFF
AUTO
MAP/
GUIDE
MENU
SETUP
INFO
ZOOM
CANCEL
AUDIO
AUTO
MODE
A/C
LOAD
DISC
TAPE
AM/FM
DISP
MODE
SCAN RPT A.SEL/RDM-SEEK +
1
2
34
5
6
DISC-
DISC+
VOL
PWR
PUSH
TUNE
SOUND
PUSH
XM1-1
VOL
CH
CHANNEL
CATEGORY
NAME
TITLE
:
:
:
:
1
CH
2
CH
3
CH
6
CH
5
CH
4
CH
MODE SCAN SOUND
001-HITS1
POP
MUSICNAME
MUSIC TITLE
Channel control
Category
Control
001 014 018
040 065
115
Toggles between
channel and
category
modes
Bank and
present
indicator
Upper display
text mode
selector
Sat mode
and bank
selector
Preset 1-6.
Press until
beepto save
to a preset.
Channeland text
Indicator
fields
Toggles
Scan
mode
Tune mode
indicator
ANTENNA
SC OUTPUT
Sirius-Ready, SAT Radio Ready or select OEM headunits with optional Honda Bus Compatible Translator
Headunit bus cableSiriusConnect Cable
HON-SC1
Honda Bus
Compatible
Translator
¡Advertencia!(1) No arranque nunca el vehículo con las llaves
puestas, excepto cuando esté haciendo una transferencia de
control al valet y (2) No arranque nunca el vehículo si no tiene
la palanca de marchas en la posición de estacionado (P) o
neutro (N)
Para arrancar el vehículo a distancia:
• Oprima el botón
AUX
AUX
AUX
Your 1-way remote coin cell batter y can be changed by using a small at blade screwdriver to pry case apar t. Replace batter y and then snap case together.
del control remoto y manténgalo oprimido
durante 1 segundo.
• Las luces de estacionamiento destellan para confirmar que el
vehículo está intentando arrancar. En vehículos de gasolina, el
motor arranca 4 segundos después de que las luces de estacio-
namiento destellan. En vehículos diesel, el motor arranca cuando
se acaba el tiempo establecido en el temporizador de espera
para arrancar.
• Una vez que el vehículo arranque, el motor andará durante el
período de tiempo preestablecido (12, 24 ó 60 minutos) o has-
ta que la señal de apagado se active.
Satmode,
bank
selector
AUDIO
PWR
12
REWFF
PLAY/PROG NR
3456
DISC- DISC+
11:53
XM1-1 CH-001
CH
VOL
SCAN
SOUND
AM/FM
CD/AUX
SAT
RADIO
SEEK
SKIP
RPT
DISP -
MODE
A.SEL
RDM
TUNE
AUTO
OFF
DUAL
A/C
MODE
Channel control
Category
Control
Text selector.
Hold for 10secto toggle
channelor category
tune
modes.
Toggles
Scan
mode
Bank and
present
indicator
Channel
and text
indicator
Preset 1-6.
Hold until beepto
savetoapreset.
CATEGORY
Tune mode
indicator
MODE
DUAL
OFF
AUTO
MAP/
GUIDE
MENU
SETUP
INFO
ZOOM
CANCEL
AUDIO
AUTO
MODE
A/C
LOAD
DISC
TAPE
AM/FM
DISP
MODE
SCAN RPT A.SEL/RDM-SEEK +
1
2
34
5
6
DISC-
DISC+
VOL
PWR
PUSH
TUNE
SOUND
PUSH
XM1-1
VOL
CH
CHANNEL
CATEGORY
NAME
TITLE
:
:
:
:
1
CH
2
CH
3
CH
6
CH
5
CH
4
CH
MODE SCAN SOUND
001-HITS1
POP
MUSICNAME
MUSIC TITLE
Channel control
Category
Control
001 014 018
040 065
115
Toggles between
channel and
category
modes
Bank and
present
indicator
Upper display
text mode
selector
Sat mode
and bank
selector
Preset 1-6.
Press until
beepto save
to a preset.
Channeland text
Indicator
fields
Toggles
Scan
mode
Tune mode
indicator
ANTENNA
SC OUTPUT
Sirius-Ready, SAT Radio Ready or select OEM headunits with optional Honda Bus Compatible Translator
Headunit bus cableSiriusConnect Cable
HON-SC1
Honda Bus
Compatible
Translator
¡Advertencia! No es seguro hacer funcionar el motor del ve-
hículo en un garaje o en un lugar cerrado. Respirar los gases
de escape del vehículo es peligroso para la salud. No active
nunca el arranque a distancia en un espacio cerrado.
Cuando esté listo para manejar el vehículo:
1. Inserte la llave y pásela a la posición de encendido ON (no a
la posición de arranque START).
2. Pise el pedal del freno. El sistema de arranque a distancia se
desactiva y el motor continúa funcionando porque se ha pasado
la llave a la posición de encendido (ON).

8
© 2014 Directed. Reservados tados los clerechos
Nota: Si el pedal de freno se pisa antes de que la llave esté en la
posición de encendido (ON), el motor se apaga.
Cuando el vehículo está funcionando durante la operación de ar-
ranque a distancia, el sistema vigila el vehículo y apaga automática-
mente el motor si recibe una de las siguientes señales de apagado:
• Se pisa el pedal del freno.
• Se abre el capó.
• El interruptor de apagado se pone en la posición de apagado
(OFF).
• El período de funcionamiento preestablecido (12, 24 ó 60 minu-
tos) se acaba.
• Se oprime el botón
AUX
AUX
AUX
Your 1-way remote coin cell batter y can be changed by using a small at blade screwdriver to pry case apar t. Replace batter y and then snap case together.
del control remoto.
Transferencia de control al valet
La característica de transferencia de control al valet le permite al motor
continuar andando después de que se ha sacado la llave del encen-
dido. Esta característica es útil cuando uno desea salir del vehículo,
cerrarlo y dejarlo cerrado durante cortos períodos de tiempo con el
motor andando y los controles de clima encendidos.
Para hacer una transferencia de control al valet:
1. Antes de apagar el motor, oprima y mantenga oprimido el botón
AUX
AUX
AUX
Your 1-way remote coin cell batter y can be changed by using a small at blade screwdriver to pry case apar t. Replace batter y and then snap case together.
del control remoto durante 1 segundo.
2. Pase la llave a la posición de apagado (OFF). El motor sigue an-
dando hasta que pase el período de funcionamiento preestableci-
do o se reciba una señal de apagado. (En la sección Arranque a
distancia hay una lista completa de señales de apagado)
Importante: Esta característica no funciona si el pedal de freno está
pisado

9
© 2014 Directed. Reservados tados los clerechos
Buscador de automóvil
El buscador de automóvil permite ubicar el vehículo indicándole al
sistema que haga destellar las luces de estacionamiento.
Para activarlo:
1. Oprima y mantenga oprimido el botón
AUX
AUX
AUX
Your 1-way remote coin cell batter y can be changed by using a small at blade screwdriver to pry case apar t. Replace batter y and then snap case together.
y el botón al
mismo tiempo.
2. Las luces destellan 5 veces lentamente permitiéndole a usted
ubicar el vehículo.
Información sobre la Pila
El control remoto tiene dos pilas tipo moneda (3V CR2016) que dura
aproximadamente un año con uso normal. Cuando la pila comienza
debilitarse, se reduce el alcance y los indicadores luminosos del con-
trol remoto comienzan a opacarse.
Cambio de la pila
Ubique la pequeña ranura en el lado del control remoto. Inserte un
destornillador plano pequeño o una herramienta equivalente en la
ranura y haga palanca para abrir la caja. Al cambiar la pila verifique
la polaridad, luego cierre la caja a presión.
Disposición de la pila
Directed se preocupa por el medioambiente. Si necesita
desechar la batería, hágalo conforme a los requisitos de su
municipio con respecto a la disposición de baterías.

10
© 2014 Directed. Reservados tados los clerechos
Reglamentos del gobierno
Este dispositivo cumple con la Parte 15 del Reglamento de la FCC. El funciona-
miento está sujeto a lo siguiente: (1) este dispositivo no debe causar interferen-
cia perjudicial y (2) este dispositivo debe aceptar toda interferencia, incluso la
que pueda causar funcionamiento no deseado.
Este equipo ha sido sometido a pruebas y se ha determinado que cumple
con los límites establecidos para un dispositivo digital Clase B, en con-
formidad con la Parte 15 del Reglamento de la FCC. Estos límites se han
fijado para ofrecer una protección razonable contra la interferencia perju-
dicial en una instalación residencial. Este equipo genera, emplea y puede
radiar energía de frecuencias de radio y, si no se instala y emplea de acu-
erdo con las instrucciones, puede causar interferencia perjudicial en las co-
municaciones de radio. Sin embargo, no hay garantía de que no habrá in-
terferencia en una instalación en particular. Si este equipo causa interferencia
perjudicial a la recepción de radio o de televisión, lo cual puede determi-
narse apagando y encendiendo el equipo, el usuario puede tratar de cor-
regir la interferencia por medio de una o varias de las siguientes medidas:
• Reorientar o reubicar la antena de recepción.
• Alejar el equipo del receptor.
• Conectar el equipo y el receptor a tomacorrientes de circuitos
diferentes.
• Consultar al distribuidor o a un técnico experimentado de radio
y televisión.
Este dispositivo cumple con la especificación RSS 210 de los estándares de
radio de Industry Canada. Su uso se autoriza sin interferencia ni protección;
en otras palabras, este dispositivo no debe utilizarse si se determina que causa
interferencia dañina a servicios autorizados por Industry Canada. Además, el
usuario debe aceptar toda la interferencia de radio que reciba, aunque esta
interferencia afecte el funcionamiento del dispositivo.

11
© 2014 Directed. Reservados tados los clerechos
Advertencia:
Los cambios o modificaciones no aprobados expresamente por el fabricante
pueden anular la autorización del usuario para hacer funcionar este dispositivo.
¡Advertencia! Seguridad primero
Las siguientes advertencias de seguridad se deben respetar en todo momento.
Debido a la complejidad del sistema, sólo un distribuidor autorizado de
Directed debe instalar este producto.
Cuando se instala correctamente, este sistema puede arrancar el vehículo por
medio de una señal desde el control remoto. Por lo tanto, nunca se debe
hacer funcionar el sistema en un lugar cerrado o parcialmente cerrado y sin
ventilación (tal como un garaje). Cuando se estacione en un lugar cerrado o
parcialmente cerrado, o cuando se le haga servicio al vehículo, el sistema de
arranque a distancia se debe deshabilitar por medio del interruptor instalado.
Es responsabilidad exclusiva del usuario manejar correctamente y mantener
fuera del alcance de los niños todos los dispositivos de control para que el
sistema no arranque el vehículo a distancia accidentalmente. EL USUARIO
DEBE INSTALAR UN DETECTOR DE MONÓXIDO DE CARBONO EN EL ÁREA
DE VIVIENDA ADYACENTE AL VEHÍCULO. TODAS LAS PUERTAS QUE DEN
A LAS ÁREAS DE VIVIENDA ADYACENTE AL LUGAR DE ESTACIONAMIENTO
DEL VEHÍCULO CERRADO O PARCIALMENTE CERRADO DEBEN ESTAR CER-
RADAS EN TODO MOMENTO. Estas precauciones son responsabilidad ex-
clusiva del usuario.
Utilizar este producto de manera contraria al modo de operación previsto pu-
ede causar daños a la propiedad, lesiones personales o muerte. (1) No ar-
ranque nunca el vehículo con el control remoto si el vehículo tiene una marcha
puesta y (2) No arranque nunca el vehículo con el control remoto cuando las
llaves estén en el encendido. El usuario también debe hacer revisar periódica-
mente la característica de seguridad neutral del vehículo, que le impide al vehí-

12
© 2014 Directed. Reservados tados los clerechos
culo arrancar a distancia cuando tiene puesta una marcha. Sólo un distribuidor
autorizado de Directed debe hacer esta prueba, según la verificación de segu-
ridad estipulada en la guía de instalación del producto. Si el vehículo arranca
con una marcha puesta, suspenda inmediatamente el arranque a distancia y
consulte al distribuidor autorizado de Directed para arreglar el problema.
Después de que se instale el módulo de arranque a distancia, comuníquese con
su distribuidor autorizado para que ponga a prueba el módulo de arranque
con la verificación de seguridad que se estipula en la guía de instalación de
producto. Si el vehículo arranca cuando se está llevando a cabo la prueba del
circuito de desactivación por seguridad neutral, la unidad de arranque a distan-
cia no se ha instalado correctamente. El módulo de arranque a distancia debe
quitarse o el instalador debe volver a instalar el sistema de arranque a distancia
de manera que el vehículo no arranque con una marcha puesta. El distribuidor
autorizado de Directed debe hacer todas las instalaciones.
HACER FUNCIONAR EL MÓDULO DE ARRANQUE A DISTANCIA SI EL
VEHÍCULO ARRANCA CON UNA MARCHA PUESTA VA CONTRA EL MODO
DE OPERACIÓN PREVISTO. HACER FUNCIONAR EL SISTEMA DE AR-
RANQUE A DISTANCIA EN ESTAS CONDICIONES PUEDE CAUSAR DAÑOS
A LA PROPIEDAD O LESIONES PERSONALES. USTED DEBE DEJAR DE USAR
INMEDIATAMENTE LA UNIDAD Y SOLICITAR LA ASISTENCIA DE UN DIS-
TRIBUIDOR AUTORIZADO DE DIRECTED PARA REPARAR O DESCONECTAR
EL MÓDULO DE ARRANQUE A DISTANCIA INSTALADO. Directed NO SE
HACE RESPONSABLE NI PAGA LOS COSTOS DE INSTALACIÓN O NUEVA
INSTALACIÓN.
Precaución
Este producto ha sido diseñado sólo para vehículos con motor de
inyección y transmisión automática. Utilizar este producto en vehículos
de transmisión estándar es peligroso y va contra el uso previsto del
producto.

13
© 2014 Directed. Reservados tados los clerechos
Garantía limitada de por vida para el consumidor
Directed Electronics. (“Directed”) le promete al comprador original que reparará o reemplazará
(a elección de Directed) con un modelo comparable reacondicionado, cualquier unidad de
Directed (en lo adelante, la “unidad”), excluyendo, pero sin limitarse a la sirena, los transmisores
a remoto y los sensores y accesorios conexos, que demuestre estar defectuosa en cuanto a su
mano de obra o materiales bajo un uso razonable durante la vida útil del vehículo, siempre
que reúna las siguientes condiciones: La unidad se compró de un comerciante autorizado de
Directed; la unidad fue instalada y mantenida profesionalmente por un comerciante autorizado
de Directed; un comerciante autorizado de Directed reinstalará la unidad profesionalmente en
el vehículo en el cual fue instalada inicialmente, y la unidad se devuelve a Directed, con los
gastos de envío pagados por anticipado, junto con una copia legible del comprobante de
venta u otra prueba fechada de la compra, con la siguiente información: el nombre, número de
teléfono y dirección del consumidor; el nombre, número de teléfono y dirección del comerciante
autorizado; una descripción completa del producto, incluidos los accesorios; el año, la marca
y el modelo del vehículo; el número de licencia del vehículo y el número de identificación
del vehículo. Todo otro componente que no sea la unidad, incluyendo, pero sin limitarse a la
sirena, los transmisores a remoto y los sensores y accesorios conexos, conllevan una garantía
de un año a partir de la fecha de compra de los mismos. TODO PRODUCTO QUE DIRECTED
RECIBA PARA SU REPARACIÓN BAJO LA GARANTÍA QUE NO TENGA PRUEBA DE COMPRA
DE UN COMERCIANTE AUTORIZADO, SERÁ RECHAZADO. Esta garantía no es transferible y
se cancela automáticamente si: el código de fecha o el número de serie de la unidad ha sido
alterado, desfigurado o no existe; la unidad ha sido modificada o utilizada de una manera con-
traria al propósito deseado; la Unidad ha sido dañada accidentalmente, por el uso inadecuado
de la misma, por descuido, servicio incorrecto o instalación inadecuada, o por otras causas
que no tengan su origen en algún defecto en sus materiales o mano de obra. Esta garantía no
cubre daños a la unidad causados por su instalación o desmontaje. Directed podrá, a su entero
juicio, determinar lo que constituye un daño excesivo, y podrá rehusar la devolución de cualquier
unidad con daños excesivos.
SEGÚN PROCEDA EN DERECHO, TODAS LAS GARANTÍAS, INCLUYENDO, PERO SIN
LIMITARSE A LAS GARANTÍAS EXPRESAS, LAS GARANTÍAS IMPLÍCITAS, LAS GARANTÍAS DE
COMERCIABILIDAD Y APTITUD PARA UN FIN O USO EN PARTICULAR, Y LAS GARANTÍAS
DE NO VIOLACIÓN DE LA PROPIEDAD INTELECTUAL, ESTÁN EXPRESAMENTE EXCLUIDAS,
Y DIRECTED NO ASUME, NI AUTORIZA QUE PERSONA O ENTIDAD ALGUNA ASUMA EN
NOMBRE DE ELLA, NINGÚN DEBER, OBLIGACIÓN O RESPONSABILIDAD RELACIONADA
CON SUS PRODUCTOS. DIRECTED DENIEGA Y ABSOLUTAMENTE NO ES RESPONSABLE
POR CUALESQUIERA ACTOS DE TERCEROS, INCLUIDOS SUS COMERCIANTES O
INSTALADORES AUTORIZADOS. LOS SISTEMAS DE SEGURIDAD DE DIRECTED, INCLUSO
ESTA UNIDAD, SON UN FACTOR DISUASIVO CONTRA POSIBLES ROBOS. DIRECTED NO
ESTÁ OFRECIENDO UNA GARANTÍA O SEGURO CONTRA VANDALISMO, DAÑO O ROBO

DEL AUTOMÓVIL, DE SUS PIEZAS O CONTENIDOS, Y POR LA PRESENTE DIRECTED DENIEGA
RESPONSABILIDAD ALGUNA EN LO ABSOLUTO, INCLUYENDO, PERO SIN LIMITARSE A LA
RESPONSABILIDAD POR ROBO, DAÑOS, Y/O VANDALISMO. ESTA GARANTÍA NO CUBRE
COSTOS DE PERSONAL PARA EL MANTENIMIENTO, DESMONTAJE O REINSTALACIÓN DE
LA UNIDAD, NI DAÑOS Y PERJUICIOS EMERGENTES DE NINGUNA CLASE. EN CASO DE
ALGUNA RECLAMACIÓN O DISPUTA QUE IMPLIQUE A DIRECTED O A SU FILIAL, EL LUGAR
PARA LA RESOLUCIÓN DE LA DISPUTA SERÁ EL CONDADO DE SAN DIEGO EN EL ESTADO
DE CALIFORNIA. LAS LEYES ESTATALES DE CALIFORNIA Y LAS LEYES FEDERALES PERTINENTES
SERÁN APLICABLES Y GOBERNARÁN LA DISPUTA. LA INDEMNIZACIÓN MÁXIMA BAJO
CUALQUIER RECLAMACIÓN CONTRA DIRECTED DEBERÁ LIMITARSE ESTRICTAMENTE AL
PRECIO DE COMPRA DE LA UNIDAD DE UN COMERCIANTE AUTORIZADO DE DIRECTED.
DIRECTED NO SE RESPONSABILIZARÁ POR DAÑOS NI PERJUICIOS, INCLUYENDO, PERO SIN
LIMITARSE A DAÑOS Y PREJUICIOS EMERGENTES, INCIDENTALES, DAÑOS AL VEHÍCULO,
DAÑOS POR PÉRDIDA DE TIEMPO, PÉRDIDA DE INGRESOS, PÉRDIDA COMERCIAL, PÉRDIDA
DE OPORTUNIDAD ECONÓMICA. Y OTRAS SIMILARES. NO OBSTANTE LO ANTERIOR,
EL FABRICANTE OFRECE UNA GARANTÍA LIMITADA PARA REEMPLAZAR O REPARAR EL
MÓDULO DE CONTROL, SUJETO A LAS CONDICIONES DESCRITAS ANTERIORMENTE.
ESTA GARANTÍA ES INVÁLIDA SI LA UNIDAD NO SE COMPRÓ EN DIRECTED O MEDIANTE
UN COMERCIANTE AUTORIZADO DE DIRECTED, O SI LA UNIDAD HA SIDO DAÑADA
ACCIDENTALMENTE DEBIDO A UN USO ARBITRARIO DE LA MISMA, POR NEGLIGENCIA,
CASO FORTUITO, ABANDONO, SERVICIO INAPROPIADO, U OTRAS CAUSAS QUE NO
SEAN POR DEFECTO EN LOS MATERIALES O EN LA MANO DE OBRA.
Algunos estados no permiten límites sobre el tiempo de duración de una garantía implícita, o
sobre la exclusión o limitación de daños incidentales o emergentes. Esta garantía le otorga
derechos legales específicos, y Ud. pudiera también tener otros derechos que varían de un
estado a otro.
Esta garantía es válida solamente para la venta de producto(s) dentro de los Estados Unidos de
América y en el Canadá. El o los productos vendidos fuera de los Estados Unidos de América
o del Canadá, se venden “en el estado en que se encuentran” y no estarán cubiertos por
NINGUNA GARANTÍA, expresa o implícita.
Para más detalles relacionados con información sobre la garantía de productos de Directed,
favor de visitar la sección de apoyo de Directed en su sitio Web, www.directed.com
Este producto pudiera estar cubierto por un Plan de Protección Garantizada (“GPP”, sus siglas
en inglés). Para detalles sobre este Plan, vea a su comerciante autorizado de Directed, o
comuníquese con el Servicio de Atención al Cliente de Directed, llamando al 1-800-876-0800.
920-10011-03 2011-06
Transcripción de documentos
The company behind Viper® Auto Security Systems is Directed. Since its inception, Directed has had one purpose, to provide consumers with the finest vehicle security and accessories available. The recipient of nearly 100 patents and ® Innovations Awards in the field of advanced electronic technology. Quality Directed products are sold and serviced throughout North America and around the world. Call (800) 876-0800 for more information about our products and services. NO ONE DARES COME CLOSE ® © 2014 Directed. All rights reserved. Vista, CA 92081 www.viper.com G4110VML 2014-07 Directed is committed to delivering world class quality products and services that excite and delight our customers. O W N E R’ S GUIDE M O D E 4110V L Congratulations Congratulations on the purchase of your state-of-the-art keyless entry and remote start system. Reading this Owner’s Guide prior to using your system will help maximize the use of your system and its many features. For any additional questions please contact your authorized Directed dealer or contact Directed at 1-800-753-0600. (U.S. only) Important information Government Regulations and Safety information Read the Government Regulations and Warning! Safety First sections of this manual prior to operating this system. Warning! Failure to heed this information can result in death, personal injury or property damage and may also result in the illegal use of the system beyond its intended purpose. Your Warranty Your system comes with a warranty. The warranty terms are detailed at the end of this guide. Make sure that you receive the proof of purchase from your dealer, indicating the product was installed by an authorized Directed dealer. Replacement remote controls Please see your authorized dealer or visit us at www.directedstore.com to order additional remote controls. Remote control part numbers are found on the back of the device. © 2014 Directed. All rights reserved. i Contents Congratulations .................................................................................................i Government Regulations and Safety information ............................................i Remote Control..................................................................................................3 Remote control functions.....................................................................................3 Standard configuration...............................................................................3 Using the system ..............................................................................................5 Locking.....................................................................................................5 Unlocking.................................................................................................5 Disabling (optional) Starter Kill ...................................................................5 Panic Mode..............................................................................................6 Remote Start..............................................................................................6 Valet Take-Over.........................................................................................8 Car Finder................................................................................................8 Battery Information.............................................................................................9 Battery replacement...................................................................................9 Battery Disposal........................................................................................9 Patent Information..............................................................................................9 Government Regulations...................................................................................10 Warning! Safety first........................................................................................11 Caution..................................................................................................12 Limited lifetime consumer warranty.....................................................................13 Remote Control Feature Description Internal Antenna AUX Transmit LED AUX AUX Used for transmitting information Active when transmitting information Used to perform arming, disarming, auxiliary channel and remote start commands Command buttons (4) Your 1-way remote coin cell battery can be changed by using a small flat blade screwdriver to pry case apart. Replace battery and then snap case togethe AUX AUX AUX Remote control functions AUX AUX AUX Your 1-way remote coin cell battery can be changed by using a small flat blade screwdriver to pry case apart. Replace battery and then snap case together. The remote buttons are used to send commands to the system. The buttons indicated below are for standard configuration. Your 1-way remote coin cell battery can be changed by using a small flat blade screwdriver to pry case apart. Replace battery and then snap case together. Standard configuration Button The lock function is controlled by pressing on the remote control for one second. When held for approximately two seconds, Panic is activated. AUX AUX AUX AUX AUX AUX Button The unlocking function is controlled by pressing on the remote control AUX for one second. You can also turn Panic off with this button. Your 1-way remote coin cell battery can be changed by using a small flat blade screwdriver to pry case apart. Replace battery and then snap case together. Your 1-way remote coin cell battery can be changed by using a small flat blade screwdri AUX AUX AUX AUX AUX Button Silent Mode™ and an optional auxiliary function are controlled by pressing . Silent Mode works by pressing for less than one second before locking or unlocking. An optional auxiliary function such as trunk release may be controlled by pressing and holding for approximately two seconds. Your 1-way remote coin cell battery can be changed by using a small flat blade screwdriver to pry case apart. Replace battery and then snap case together. Your 1-way remote coin cell battery can be changed by using a sma © 2014 Directed. All rights reserved. 3 Your 1-way remote coin cell battery can be changed by using a small flat blade screwdriver to pry case apart. Replace battery and then snap case together. Button The AUX remote start function of your system is controlled by pressing this button for one second. AUX AUX AUX AUX Your 1-way remote coin cell battery can be changed by using a small flat blade screwdriver to pry case apart. Replace battery and then snap case together. and Buttons AUX Car Finder is controlled by pressing these two buttons. Your 1-way remote coin cell battery can be changed by using a small flat blade screwdriver to pry case apart. Replace battery and then snap case together. and and Buttons When simultaneously pressed these buttons control the optional rear window defogger during remote starting. The parking lights flash three times to confirm activation. Once activated the defogger will turn on AUX whenever the vehicle is remote started. AUX AUX Your 1-way remote coin cell battery can be changed by using a small flat blade screwdriver to pry case apart. Replace battery and then snap case together. The parking lights flash twice when the defogger is deactivated. The defogger does not turn on when the vehicle is remote started. Important note: Defogger is an optional feature. Additional parts and labor may be required. See your Directed dealer for details. Buttons and AUX AUX Timer mode is activated when these buttons are pressed simultaneously. AUX When youAUXactivate timer mode the parking lights flash four times, after a 1-second delay the engine starts. To turn the engine off, without exiting AUX timer mode press the . AUX AUX AUX AUX Your 1-way remote coin cell battery can be changed by using a small flat blade screwdriver to pry case apart. Replace battery and then snap case together. Your 1-way remote coin cell battery can be changed by using a small flat blade screwdriver to pry case apart. Replace battery and then Your 1-way remote coin cell battery can be changed by using a small flat blade screwdriver to pry case apart. Replace battery and then snap case together. The system remains in timer mode and will start every 3 hours for a maximum of 6 starts unless cancelled by turning on the ignition, or by activating the brake or neutral safety shutdown wires. The parking lights flash 4 times indicating timer mode is exited. 4 © 2014 Directed. All rights reserved. Using the system Lock Press and release Doors lock. The horn honks once, and the parking lights flash. AUX AUX AUX To Lock and Panic Press and hold . To lock the system, then activate Panic. For Panic to be effective,the optional horn honk feature must be connected. Press the or button to stop Panic output. Your 1-way remote coin cell battery can be changed by using a small flat blade screwdriver to pry case apart. Replace battery and then snap case together. AUX AUX AUX Unlock AUX AUX AUX AUX AUX Your 1-way remote coin cell battery can be changed by using a small flat blade screwdriver to pry case apart. Replace battery and then snap case together. Press and release AUX AUX The doors unlock. AUX The horn honks and the parking lights flash. AUX Your 1-way remote coin cell battery can be changed by using a small flat blade screwdriver to pry case apart. Replace battery and then snap case together. Your 1-way remote coin cell battery can be changed by using a small flat blade screwdriver to pry case apart. Replace battery and then snap case together. AUX Remote Start AUX AUX Your 1-way remote coin cell battery can be changed by using a small flat blade screwdriver to pry case apart. Replace battery and then snap case to Your 1-way remote coin cell battery can be changed by using a small flat blade screwdriver to pry case apart. Replace battery and then snap case together. Press and release Activates (or if On, deactivates) the remote starter. The engine turns On, or the engine turns Off accordingly. The parking lights flash. If a Remote start configuration issue prevents the engine from starting, the parking lights flash a Remote Start fault report to identify the fault. AUX Press and hold An optional auxiliary function such as trunk release may be controlled by pressing and holding for approximately two seconds. © 2014 Directed. All rights reserved. 5 Disabling (optional) Starter Kill If your remote control is lost or damaged, you can manually override the starter kill. To do this, you must have the vehicle's ignition key and know where the Valet button is located. Be sure to check with the installer for the location of the Valet button. To override the starter kill, turn the ignition on and press and release the valet button within10 seconds. The vehicle should start. If it does not start, you may have waited too long; turn the ignition off and repeat the process. Location of Valet button: ____________________ Remote Start This feature allows you to remotely start and run your vehicle for a programmable period of time. This makes it possible to warm up the engine, and adjust the interior temperature of the vehicle with the climate control system. If interior heating or cooling is desired, the climate controls must be preset, and the fan blower must be set to the desired level prior to remote starting the vehicle. Warning! (1) Never remote start your vehicle when the keys are in the ignition, except when performing Valet Take-Over, and (2) Never start the vehicle if it AUX is not in PARK or NEUTRAL AUX AUX To remote start the vehicle: • Press the button on the remote control for 1 second. • The parking lights flash to confirm that the vehicle is attempting to start. In gasoline vehicles the engine will start 4 seconds after the parking lights flash, in diesel vehicles the engine starts after the WAIT-TO-START timer has expired. Your 1-way remote coin cell battery can be changed by using a small flat blade screwdriver to pry case apart. Replace battery and then snap case together. 6 © 2014 Directed. All rights reserved. • Once the vehicle has started, it will run for the pre-programmed period of time (12, 24, or 60 minutes) or until a shutdown input is triggered. Warning! It is unsafe to operate a vehicle’s motor in a garage or other closed off area. Breathing the exhaust from the vehicle is hazardous to your health. Never activate the remote start in an enclosed space. When you are ready to drive the vehicle: 1. Insert the ignition key and turn it to the ON (not the START) position. 2. Press the brake pedal. The remote start system shuts down and the engine continues to run because the ignition has been turned on. Note: If the brake pedal is pressed before the key is in the ON position, the engine will shut down. and While the vehicle isBank running during remote startChannel operation, the system Tune mode present and text indicator shuts downindicator indicator monitors the vehicle and automatically the engine if it receives Sat mode, any of the following shut-down inputs: bank selector • Category • Control • • Toggles • AM/FM RPT - MODE 11:53 DISP The brake pedal is pressed. AUX CD/AUX A.SEL SAT RDM The hood is opened. AUX XM1-1 CH-001 SEEK TUNE SKIP The shutdown toggle switch is put into the OFF position. The pre-programmed run time (12, 24, or 60 minutes) has elapsed. 2 3 once.4 5 6 Remote control button 1 is pressed AUX CATEGORY CH RADIO REW FF PLAY/PROG Your 1-way remoteDISCcoin cell battery can be changed by using a small flat blade screwdriver to pry case apart. Rep NR DISC+ Scan mode SCAN VOL AUDIO PWR AUT O © 2014 Directed. All rights reserved. OFF SOUND E A/C MOD 7 Valet Take-Over The Valet Take-Over feature allows the vehicle to remain running after the key has been removed from the ignition. This feature is useful for occasions when you wish to exit and lock the vehicle for short periods of time, but would like to leave the engine runningAUXand the climate controls on. AUX AUX To perform Valet Take-Over: 1. Before turning off the engine, press and release on the remote control for 1 second. 2. Turn the ignition key to the OFF position. The engine will stay running until the pre-programmed time has elapsed or a shutdown input is received. (See the previous Remote Start section for a complete list of shut-down inputs.) Your 1-way rem Important: This feature will not work if the brake pedal is being pressed. Car Finder Car finder allows you to locate your vehicle, by having the system flash AUX the parking lights. AUX AUX To activate: 1. Press and release the and buttons at the same time. 2. The lights flash 5 times slowly allowing you to locate your vehicle. Your 1-way remote coin cell battery can be changed by using a small flat blade screwdriver to pry case apart. Rep 8 © 2014 Directed. All rights reserved. Battery Information The remote control is powered by two 3V, CR2016 batteries. When the battery begins to weaken, operating range is reduced and the LED on the remote control dims. Battery replacement Locate the small slot on the side of the remote control. Insert a small slotted screwdriver or equivalent tool into slot and pry the case apart. Replace battery, while verifying the correct polarity and then snap case back together. Battery Disposal Directed cares about the environment. If you need to dispose of the battery, please do so in accordance with your municipal requirements for battery disposal. Patent Information This product is covered by one or more of the following United States patents: Remote Start Patents: 5,349,931; 5,872,519; 5,914,667; 5,952,933; 5,945,936; 5,990,786; 6,028,372; 6,467,448; 6,561,151; 7,191,053; 7,483,783 Vehicle Security Patents: 5,467,070; 5,532,670; 5,534,845; 5,563,576; 5,646,591; 5,650,774; 5,673,017; 5,712,638; 5,872,519; 5,914,667; 5,952,933; 5,945,936; 5,990,786; 6,028,505; 6,452,484 Other patents pending Government Regulations This device complies with Part 15 of FCC rules. Operation is subject to the following two conditions: (1) This device may not cause harmful interference, and (2) This device must accept any interference received, including interference that may cause undesirable operation. This equipment has been tested and found to comply with the limits for a class B digital device, pursuant to Part 15 of the FCC Rules. These limits are designed to provide reasonable protection against harmful interference in a residential installation. This equipment generates and can radiate radio frequency energy and, if not installed and used in accordance with the instruction manual, may cause harmful interference to radio communications. However, there is no guarantee that interference will not occur in a particular installation. If this equipment does cause harmful interference to radio or television, which can be determined by turning the equipment OFF and ON, the user is encouraged to try to correct the interference by one or more of the following measures: • Reorient or relocate the receiving antenna. • Increase the separation between the equipment and receiver. • Connect the equipment into an outlet on a circuit different from that to which the receiver is connected. • Consult the dealer or an experienced radio / TV technician for help. This device complies with the Industry Canada Radio Standards Specification RSS 210. Its use is authorized only on a no-interference, no-protection basis; in other words, this device must not be used if it is determined that it causes harmful interference to services authorized by IC. In addition, the user of this device must accept any radio interference that may be received, even if this interference could affect the operation of the device. Warning: Changes or modifications not expressly approved by the party responsible for compliance could void the user’s authority to operate this device. 10 © 2014 Directed. All rights reserved. Warning! Safety first The following safety warnings must be observed at all times: Due to the complexity of this system, installation of this product must only be performed by an authorized Directed dealer. When properly installed, this system can start the vehicle via a command signal from the remote control. Therefore, never operate the system in an enclosed area or partially enclosed area without ventilation (such as a garage). When parking in an enclosed or partially enclosed area or when having the vehicle serviced, the remote start system must be disabled using the installed toggle switch. It is the user’s sole responsibility to properly handle and keep out of reach from children all remote control devices to assure that the system does not unintentionally remote start the vehicle. THE USER MUST INSTALL A CARBON MONOXIDE DETECTOR IN OR ABOUT THE LIVING AREA ADJACENT TO THE VEHICLE. ALL DOORS LEADING FROM ADJACENT LIVING AREAS TO THE ENCLOSED OR PARTIALLY ENCLOSED VEHICLE STORAGE AREA MUST AT ALL TIMES REMAIN CLOSED. These precautions are the sole responsibility of the user. Use of this product in a manner contrary to its intended mode of operation may result in property damage, personal injury, or death. (1) Never remotely start the vehicle with the vehicle in gear, and (2) Never remotely start the vehicle with the keys in the ignition. The user must also have the neutral safety feature of the vehicle periodically checked, wherein the vehicle must not remotely start while the car is in gear. This testing should be performed by an authorized Directed dealer in accordance with the Safety Check outlined in the product installation guide. If the vehicle starts in gear, cease remote start operation immediately and consult with the authorized Directed dealer to fix the problem. After the remote start module has been installed, contact your authorized dealer to have him or her test the remote start module by performing the Safety Check outlined in the product installation guide. If the vehicle starts when performing © 2014 Directed. All rights reserved. 11 the Neutral Safety Shutdown Circuit test, the remote start unit has not been properly installed. The remote start module must be removed or the installer must properly reinstall the remote start system so that the vehicle does not start in gear. All installations must be performed by an authorized Directed dealer. OPERATION OF THE REMOTE START MODULE IF THE VEHICLE STARTS IN GEAR IS CONTRARY TO ITS INTENDED MODE OF OPERATION. OPERATING THE REMOTE START SYSTEM UNDER THESE CONDITIONS MAY RESULT IN PROPERTY DAMAGE OR PERSONAL INJURY. YOU MUST IMMEDIATELY CEASE THE USE OF THE UNIT AND SEEK THE ASSISTANCE OF AN AUTHORIZED Directed DEALER TO REPAIR OR DISCONNECT THE INSTALLED REMOTE START MODULE. DIRECTED WILL NOT BE HELD RESPONSIBLE OR PAY FOR INSTALLATION OR REINSTALLATION COSTS. Caution This product is designed for fuel injected, automatic transmission vehicles only. Use of this product in a standard transmission vehicle is dangerous and contrary to the product's intended use. 12 © 2014 Directed. All rights reserved. Limited lifetime consumer warranty Directed Electronics. (“Directed”) promises to the original purchaser to repair or replace (at Directed’s election) with a comparable reconditioned model any Directed unit (hereafter the “unit”), excluding without limitation the siren, the remote transmitters, the associated sensors and accessories, which proves to be defective in workmanship or material under reasonable use during the lifetime of the vehicle provided the following conditions are met: the unit was purchased from an authorized Directed dealer, the unit was professionally installed and serviced by an authorized Directed dealer; the unit will be professionally reinstalled in the vehicle in which it was originally installed by an authorized Directed dealer; and the unit is returned to Directed, shipping prepaid with a legible copy of the bill of sale or other dated proof of purchase bearing the following information: consumer’s name, telephone number and address; the authorized dealers name, telephone number and address; complete product description, including accessories; the year, make and model of the vehicle; vehicle license number and vehicle identification number. All components other than the unit, including without limitation the siren, the remote transmitters and the associated sensors and accessories, carry a one-year warranty from the date of purchase of the same. ALL PRODUCTS RECEIVED BY DIRECTED FOR WARRANTY REPAIR WITHOUT PROOF OF PURCHASE FROM AN AUTHORIZED DEALER WILL BE DENIED. This warranty is nontransferable and is automatically void if: the unit’s date code or serial number is defaced, missing or altered; the unit has been modified or used in a manner contrary to its intended purpose; the unit has been damaged by accident, unreasonable use, neglect, improper service, installation or other causes not arising out of defects in materials or construction. The warranty does not cover damage to the unit caused by installation or removal of the unit. Directed, in its sole discretion, will determine what constitutes excessive damage and may refuse the return of any unit with excessive damage. TO THE MAXIMUM EXTENT ALLOWED BY LAW, ALL WARRANTIES, INCLUDING BUT NOT LIMITED TO EXPRESS WARRANTY, IMPLIED WARRANTY, WARRANTY OF MERCHANTABILITY, FITNESS FOR PARTICULAR PURPOSE AND WARRANTY OF NONINFRINGEMENT OF INTELLECTUAL PROPERTY, ARE EXPRESSLY EXCLUDED; AND DIRECTED NEITHER ASSUMES NOR AUTHORIZES ANY PERSON OR ENTITY TO ASSUME FOR IT ANY DUTY, OBLIGATION OR LIABILITY IN CONNECTION WITH ITS PRODUCTS. DIRECTED DISCLAIMS AND HAS ABSOLUTELY NO LIABILITY FOR ANY AND ALL ACTS OF THIRD PARTIES INCLUDING ITS AUTHORIZED DEALERS OR INSTALLERS. DIRECTED SECURITY SYSTEMS, INCLUDING THIS UNIT, ARE DETERRENTS AGAINST POSSIBLE THEFT. DIRECTED IS NOT OFFERING A GUARANTEE OR INSURANCE AGAINST VANDALISM, DAMAGE OR THEFT OF THE AUTOMOBILE, ITS PARTS OR CONTENTS; AND HEREBY EXPRESSLY DISCLAIMS ANY LIABILITY WHATSOEVER, INCLUDING WITHOUT LIMITATION, LIABILITY FOR THEFT, DAMAGE AND/OR VANDALISM. THIS WARRANTY DOES NOT COVER LABOR COSTS FOR MAINTENANCE, REMOVAL OR REINSTALLATION OF THE UNIT OR ANY CONSEQUENTIAL DAMAGES OF ANY KIND. © 2014 Directed. All rights reserved. 13 IN THE EVENT OF A CLAIM OR A DISPUTE INVOLVING DIRECTED OR ITS SUBSIDIARY, THE VENUE SHALL BE SAN DIEGO COUNTY IN THE STATE OF CALIFORNIA. CALIFORNIA STATE LAWS AND APPLICABLE FEDERAL LAWS SHALL APPLY AND GOVERN THE DISPUTE. THE MAXIMUM RECOVERY UNDER ANY CLAIM AGAINST DIRECTED SHALL BE STRICTLY LIMITED TO THE AUTHORIZED DIRECTED DEALER’S PURCHASE PRICE OF THE UNIT. DIRECTED SHALL NOT BE RESPONSIBLE FOR ANY DAMAGES WHATSOEVER, INCLUDING BUT NOT LIMITED TO, ANY CONSEQUENTIAL DAMAGES, INCIDENTAL DAMAGES, DAMAGE TO VEHICLE, DAMAGES FOR THE LOSS OF TIME, LOSS OF EARNINGS, COMMERCIAL LOSS, LOSS OF ECONOMIC OPPORTUNITY AND THE LIKE. NOTWITHSTANDING THE ABOVE, THE MANUFACTURER DOES OFFER A LIMITED WARRANTY TO REPLACE OR REPAIR THE CONTROL MODULE SUBJECT TO THE CONDITIONS AS DESCRIBED HEREIN. THIS WARRANTY IS VOID IF THE UNIT HAS NOT BEEN PURCHASED FROM DIRECTED, OR AN AUTHORIZED DIRECTED DEALER, OR IF THE UNIT HAS BEEN DAMAGED BY ACCIDENT, UNREASONABLE USE, NEGLIGENCE, ACTS OF GOD, NEGLECT, IMPROPER SERVICE, OR OTHER CAUSES NOT ARISING OUT OF DEFECT IN MATERIALS OR CONSTRUCTION. Some states do not allow limitations on how long an implied warranty will last or the exclusion or limitation of incidental or consequential damages. This warranty gives you specific legal rights and you may also have other rights that vary from State to State. This warranty is only valid for sale of product(s) within the United States of America and in Canada. Product(s) sold outside of the United States of America or Canada are sold “AS-IS” and shall have NO WARRANTY, express or implied. For further details relating to warranty information of Directed products, please visit the support section of Directed’s website at: www.directed.com This product may be covered by a Guaranteed Protection Plan (“GPP”). See your authorized Directed dealer for details of the plan or call Directed Customer Service at 1-800-876-0800. 920-10011-01 2011-06 14 © 2014 Directed. All rights reserved. Manuel D’Utilisation Félicitations Nous vous félicitons d’avoir acheté l’un de nos systèmes haut de gamme de télédémarrage et de sécurité. La lecture préalable du présent manuel permet d’optimiser l’utilisation du système et de mieux tirer parti de sa richesse fonctionnelle. Pour toute autre question, veuillez vous adresser à un détaillant agréé Directed. Information importante Réglementations gouvernementales et consignes de sécurité Lisez les sections Réglementations gouvernementales et Avertissement ! La sécurité avant tout dans le présent manuel avant d’utiliser ce système. Avertissement ! Le non respect de ces consignes peut entraîner la mort, des blessures corporelles ou des dommages matériels, et peut aussi être considéré comme une utilisation illégale du système au-delà de l’utilisation prévue. Votre garantie Votre système est livré avec une garantie. Les conditions de la garantie sont décrites à la fin de ce guide. Assurez-vous de recevoir la preuve d’achat auprès de votre revendeur indiquant que le produit a été installé par un détaillant Directed autorisé. Télécommandes de remplacement Veuillez consulter votre revendeur autorisé ou visitez notre site www. © 2014 Directed. Tous droits réservés. iii directedstore.com pour commander des télécommandes supplémentaires. Les numéros de pièce des télécommandes sont trouvent à l’arrière de l’appareil. Brevets Ce produit est couvert par un ou plusieurs brevets. Voir les informations associées (Patent Information) dans le guide en langue anglaise. iv © 2014 Directed. Tous droits réservés. Contenu Félicitations ........................................................................................................ iii Information importante........................................................................................ iii Réglementations gouvernementales et consignes de sécurité ..................... iii Votre garantie...................................................................................... iii Télécommandes de remplacement........................................................... iii Brevets................................................................................................................iv Télécommande..................................................................................................... 2 Fonctions de la télécommande............................................................................... 2 Configuration standard......................................................................... 2 Utilisation de votre système................................................................................... 5 Verrouillage......................................................................................... 5 Déverrouillage...................................................................................... 5 Télédémarrage*................................................................................... 5 AUX ................................................................................................... 5 Désactivation (facultative) de l’antidémarreur........................................... 6 Démarrage à distance........................................................................... 6 Relève du Valet..................................................................................... 8 Localisation de véhicule......................................................................... 8 Information de pile .............................................................................................. 9 Remplacement de pile........................................................................... 9 Élimination de la pile............................................................................ 9 Réglementations gouvernementales...................................................................... 10 Avertissement ! La sécurité d’abord...................................................................... 12 Mise en garde :.................................................................................. 13 Garantie à vie limitée pour l’utilisateur ................................................................ 14 Télécommande Fonction Description Antenne interne Utilisé pour transmettre de l'information AUX AUX Voyant DEL de transmisAUX sion Actif lors de la transmission d'information Utilisés pour effectuer l’armement, le désarmement, le canal auxiliaire et les commandes de télédémarrage. Touches de commande (4) Your 1-way remote coin cell battery can be changed by using a small flat blade screwdriver to pry case apart. Replace battery and then snap case , , , AUX AUX Fonctions de la télécommande AUX AUX AUX AUX Your 1-way remote coin cell battery can be changed by using a small flat blade screwdriver to pry case apart. Replace battery and then snap case together. Les touches de la télécommande sont utilisées pour envoyer des commandes au système. Les touches ci-dessous sont utilisées pour la configuration standard. Your 1-way remote coin cell battery can be changed by using a small flat blade screwdriver to pry case apart. Replace battery and then snap case together. Configuration standard Touche La fonction de verrouillage est contrôlée en appuyant sur de la télécommande pendant une seconde. Si maintenu pendant plus de 1,5 secondes, la fonction Panique est activée. AUX AUX AUX AUX AUX AUX Touche La fonction de déverrouillage est contrôlée en appuyant sur de la télécommande pendant une seconde. Vous pouvez également désacAUX tiver la fonction panique avec cette touche. AUX Your 1-way remote coin cell battery can be changed by using a small flat blade screwdriver to pry case apart. Replace battery and then snap case together. AUX AUX AUX AUX Your 1-way remote coin cell battery can be changed by using a small flat blade screwdriver to pry case apart. Replace battery and then snap case together. Touche La fonction Silent Mode™ (mode silencieux) et une fonction auxiliaire facultative sont contrôlées en appuyant sur . Le mode silencieux est mis en fonction en appuyant sur pendant moins d’une sec2 © 2014 Directed. Tous droits réservés. Yo onde avant le verrouillage/déverrouillage. Une fonction auxiliaire facAUX ultative telle AUX que l’ouverture du coffre peut être contrôlée en appuyant et en maintenant enfoncé pendant 1,5 seconde. AUX Your 1-way remote coin cell battery can be changed by using a small flat blade screwdriver to pry case apart. Replace battery and then snap case together. Touche AUX La fonction AUX de démarrage à distance de votre système est contrôlée en appuyant sur cette touche pendant une seconde. AUX AUX AUX Your 1-way remote coin cell battery can be changed by using a small flat blade screwdriver to pry case apart. Replace battery and then snap case together. Touches et AUX Le localisateur de véhicule est contrôlé en appuyant sur ces deux touches. Touches et et Lorsque ces touches sont enfoncées simultanément, celles-ci contrôlent le dégivreur facultatif de lunette arrière pendant le démarrage à distance. Les feux de stationnement clignotent trois fois pour confirmer AUX l’activation. Une fois activé le dégivreur s’actionnera chaque fois que le véhicule est démarré à distance. Your 1-way remote coin cell battery can be changed by using a small flat blade screwdriver to pry case apart. Replace battery and then snap case together. AUX AUX Your 1-way remote coin cell battery can be changed by using a small flat blade screwdriver to pry case apart. Replace battery and then snap case together. Les feux de stationnement clignotent deux fois lorsque le dégivreur est désactivé. Le dégivreur ne s’activera pas lorsque le véhicule est démarré à distance. Remarque importante : Le dégivrage est une fonctionnalité facultative. Des pièces et de la main-d’œuvre supplémentaires peuvent être requises. Consultez votre détaillant autorisé Directed pour plus de détails. Touches et Le mode minuterie est activé lorsque ces touches sont enfoncées en AUX même temps. Lorsque vous activez le mode minuterie, les feux de AUX AUX stationnement clignotent quatre fois, après un délai de 1 seconde, le AUX moteur démarre. Pour arrêter le moteur, sans sortir du mode minuterie, appuyer sur . AUX AUX AUX AUX AUX Your 1-way remote coin cell battery can be changed by using a small flat blade screwdriver to pry case apart. Replace battery and then snap case together. Your 1-way remote coin cell battery can be changed by using a small flat blade screwdriver to pry case apart. Replace battery and then snap case together. Your 1-way remote coin cell battery can be changed by using a small flat blade screwdriver to pry case apart. Replace battery and then snap case together. © 2014 Directed. Tous droits réservés. 3 Le système demeure en mode minuterie et continue de démarrer à toutes les 3 heures jusqu’à ce qu’il soit annulé en mettant la clé de contact ou en appuyant sur les freins, ou en activant l’arrêt de sécurité du point mort. Les feux de stationnement clignotent 4 fois pour confirmer que le mode minuterie est désactivé. 4 © 2014 Directed. Tous droits réservés. Utilisation de votre système Verrouillage Appuyer sur le bouton suivant et relâcher Les cornements de klaxon, et clignotements de feux de stationnement. Verrouillage et Panique AUX Appuyer et maintenir . Le système verrouille et, then activate Panique. Pour la panique à pour travailler, la caractéristique facultative de cornement de klaxon doit être reliée. Appuyer sur le bouton ou pour AUX arrêter la sortie. AUX AUX Your 1-way remote coin cell battery can be changed by using a small flat blade screwdriver to pry AUX AUX AUX AUX Your 1-way remote coin cell battery can be changed by using a small flat blade screwdriver to pry case apart. Replace battery and then snap case together. AUX Déverrouillage AUX AUX AUX Y Appuyer et relâcher AUX Les cornements de klaxon, et clignotements de feux de stationnement. AUX AUX AUX Your 1-way remote coin cell battery can be c AUX AUX Télédémarrage* Your 1-way remote coin cell battery can be changed by Your 1-way remote coin cell battery can be changed by using a small flat blade screwdriver to pry case apart. Replace battery and then snap case together. Appuyer sur le bouton suivant et relâcher Active (ou si activé, désactive) le démarreur à distance. Le moteur se met en marche, et clignotements de feux de stationnement. Si un problème de configuration de démarrage à distance empêche le moteur de démarrer, les feux de stationnement clignotent indiquant un rapport de faille de démarrage à distance afin d’identifier la faille. AUX Appuyer sur le bouton suivant et le maintenir enfoncé Une fonction auxiliaire facultative telle que l’ouverture du coffre peut être contrôlée en appuyant et en maintenant enfoncé pendant 2 seconde. © 2014 Directed. Tous droits réservés. 5 Désactivation (facultative) de l’antidémarreur Si votre télécommande est endommagée ou perdue, vous pouvez surpasser manuellement l’antidémarreur. Pour ce faire, vous devez avoir la clé de contact du véhicule et savoir où se trouve le bouton Valet. S’assurer de vérifier avec l’installateur l’emplacement du bouton Valet. Pour surpasser l’antidémarreur, mettre le contact et appuyer et relâcher le bouton Valet dans les 10 secondes. Le véhicule devrait se mettre en marche. S’il ne démarre pas, vous avez peut-être attendu trop longtemps; enlever le contact et répéter le processus. Emplacement du bouton Valet: _________________________ Démarrage à distance Cette fonction vous permet de démarrer à distance votre véhicule pour une durée programmée d’avance. Cela vous permettra de réchauffer le moteur, aussi bien que d’ajuster la température intérieure du véhicule avec le système de climatisation. Si le réchauffement ou refroidissement de l’intérieur est désiré, les contrôles climatiques doivent être préréglés, et la soufflerie de l’éventail réglée au niveau désiré avant de démarrer à distance le véhicule. Avertissement! (1) Ne jamais faire démarrer le véhicule à distance avec les clés dans le contact, excepté lors de la relève de Valet, et (2) ne jamais démarrer le véhicule s’il n’est pas en position PARK AUX ou POINT MORT AUX AUX Pour faire démarrer à distance le véhicule: • Appuyer sur la touche de la télécommande pendant 1 seconde. Your 1-way remote coin cell battery can be changed by using a small flat blade screwdriver to pry case apar 6 © 2014 Directed. Tous droits réservés. • • Les feux de stationnement clignotent pour confirmer que le véhicule essaie de démarrer. Dans les véhicules à essence, le moteur démarrera 4 secondes après le clignotement des feux de stationnement, dans les véhicules à moteur diesel, le moteur démarrera après l’expiration de la minuterie D’ATTENTE-DEDÉMARRAGE. Dès que le véhicule aura démarrée, il fonctionnera pendant la durée préprogrammée (12, 24 ou 60 minutes) ou jusqu’à ce qu’un arrêt soit déclenché. Avertissement! Il est non-sécuritaire de faire fonctionner un moteur de véhicule dans un garage ou autre zone fermée. Respirer les vapeurs de tuyau d’échappement peut être dangereux pour votre santé. Ne jamais activer le démarrage à distance dans tout espace fermé. Lorsque vous êtes prêt à conduire le véhicule : 1. Mettre la clé de contact et la mettre à ON (pas à START) 2. Appuyer sur la pédale de frein. Le système de télédémarrage s’arrête mais le moteur continue de fonctionner parce que le contact a été mis. Note : Si la pédale de frein est appuyée avant que la clé ne soit à la position ON, le moteur s’arrêtera. Bank and Channel Tune mode indicator present indicator Tandis Sat mode, bank selector and text indicator que le véhicule fonctionne pendant l’opération de télédémarrage, le système surveillera le véhicule et arrêtera automatiquement RPT AM/FM 11:53 le moteur si l’une des conditions suivantes est reçue par le système:DISP - MODE Category Control • • CATEGORY CD/AUX SAT RADIO CH XM1-1 SEEK La pédale de frein est appuyée SKIP Le capot est ouvert. REW Toggles © 2014 Directed. Tous droits réservés. 1 Scan mode FF 2 A.SEL RDM CH-001 TUNE PLAY/PROG 3 NR 4 DISC- 5 DISC+ 6 7 • • • AUX AUX L’interrupteur à bascule d’arrêt est placé à la position OFF. AUX La durée de fonctionnement préprogrammée (12, 24 ou 60 minutes) est échue. La touche de télécommande est enfoncée une fois. Your 1-way remote coin cell battery can be changed by using a small flat blade scre Relève du Valet La fonction de relève du Valet permet au véhicule de continuer de fonctionner après avoir enlevé la clé du contact. Cette fonction est utile lorsque vous voulez sortir et verrouiller le véhicule pour une courte période de temps, mais aimeriez laisser le moteur AUX rouler et la climatisation fonctionner. AUX AUX Pour effectuer la relève du Valet: 1. Avant d’arrêter le moteur, appuyer et relâcher sur la télécommande pendant 1 seconde. 2. Mettre le contact à OFF. Le moteur continuera de fonctionner jusqu’à ce que la durée préprogrammée soit écoulée ou qu’un signal d’arrêt soit reçu. (Voir la section précédente sur le démarrage à distance pour une liste complète de signal d’arrêt). Your 1-way remote Important : Cette fonction ne fonctionnera pas si la pédale de frein est appuyée. Localisation de véhicule Le localisateur de véhicule permet deAUXretrouver votre véhicule, en faisant clignoter les feux de stationnement. AUX AUX Pour l’activer: 1. Appuyer et relâcher les touches et en même temps. 2. Les lumières clignotent lentement 5 fois vous permettant ainsi de localiser votre véhicule. Your 1-way remote coin cell battery can be changed by using a small fla 8 © 2014 Directed. Tous droits réservés. Information de pile La télécommande est alimentée par deux piles CR2016 de 3V. Lorsque la pile commence à faiblir, la portée d’opération est réduite et le voyant DEL sur la télécommande diminuera d’intensité. Remplacement de pile Localiser la petite fente sur le côté de la télécommande. Insérer un petit tournevis ou outil équivalent dans la fente et enlever le boîtier. Remplacer la pile tout en vérifiant la polarité et remettre le boîtier en place. Élimination de la pile Directed se soucie de l’environnement. Si vous avez besoin de vous débarrasser de la pile, veuillez le faire en respectant les exigences municipales de recyclage de pile. © 2014 Directed. Tous droits réservés. 9 Réglementations gouvernementales Cet appareil est conforme à la section 15 du règlement de la FCC. Son fonctionnement est soumis aux deux conditions suivantes : 1) cet appareil ne doit pas produire d’interférences nuisibles, et 2) cet appareil doit accepter toutes les interférences reçues, y compris celles pouvant entraîner un fonctionnement indésirable. Cet appareil a été testé et reconnu compatible avec les limites des appareils numériques de classe B, en application de la section 15 des règles de la FCC. Ces limites ont été établies de façon à offrir une protection raisonnable contre les interférences nuisibles dans les installations résidentielles. Ce matériel produit et peut rayonner une énergie radiofréquence, de sorte que s’il n’est pas installé et utilisé conformément au manuel d’instructions, il peut entraîner des interférences nuisibles avec les radiocommunications. Il est toutefois impossible de garantir que des interférences ne se produiront pas dans une installation donnée. Si cet appareil entraîne des interférences nuisibles à la réception de la radio ou de la télévision, ce qui peut se vérifier en le mettant hors tension puis de nouveau sous tension, l’utilisateur peut prendre une ou plusieurs des mesures suivantes pour essayer de corriger les interférences : • • • • Modifier l’orientation ou l’emplacement de l’antenne réceptrice. Augmenter la distance entre l’appareil et le récepteur. Brancher l’appareil sur une prise de courant d’un circuit différent de celui auquel le récepteur est connecté. Consulter le détaillant ou un technicien spécialisé en radio et télévision pour obtenir d’autres conseils. Cet appareil est conforme au Cahier des charges sur les Normes Radioélectriques CNR-210 d’Industrie Canada. Son utilisation n’est autorisée que suivant un principe de non-interférence, non-protection ; en d’autres termes, cet appareil ne doit pas être utilisé s’il a été déterminé qu’il entraîne des interférences nuisibles pour les services autorisés par IC. En outre, l’utilisateur de cet appareil doit accepter toutes interférences radio pouvant être reçues, même si 10 © 2014 Directed. Tous droits réservés. celles-ci peuvent perturber le fonctionnement de l’appareil. AVERTISSEMENT ! Les changements ou modifications non explicitement approuvés par la partie responsable de la conformité peuvent annuler le droit de l’utilisateur à utiliser cet appareil. © 2014 Directed. Tous droits réservés. 11 Avertissement ! La sécurité d’abord Les avertissements de sécurité suivants doivent être respectés en tout temps: En raison de la complexité de ce système, l’installation de ce produit ne doit être effectuée par un détaillant autorisé Dirtected. Lorsqu’il est correctement installé, ce système peut démarrer le véhicule via un signal de l’émetteur de la télécommande. Ainsi, ne jamais faire fonctionner ce système dans un espace clos ou partiellement clos, espace sans ventilation (comme un garage). Lorsque vous stationnez dans un espace clos ou partiellement clos ou lors d’un entretien du véhicule, le système de démarrage à distance doit être désactivé en utilisant l’interrupteur à bascule. Il incombe à l’utilisateur de manipuler correctement et à garder hors de la portée des enfants tous les émetteurs de la télécommande pour s’assurer que le système ne démarrera pas le véhicule à distance de manière non intentionnelle. L’UTILISATEUR DOIT INSTALLER UN DÉTECTEUR DE MONOXYDE DE CARBONE DANS OU PRÈS D’UNE ZONE URBAINE ADJACENTE AU VÉHICULE. TOUTES LES PORTES DES ZONES URBAINES DONNANT ACCÈS À L’ESPACE FERMÉ OU PARTIELLEMENT FERMÉ CONTENANT LE VÉHICULE DOIVENT DEMEURER VERROUILLÉES EN TOUT TEMPS. Ces précautions sont de la seule responsabilité de l’utilisateur. L’utilisation de ce produit d’une manière contraire à son mode de fonctionnement proposé peut entraîner des dommages matériels, des blessures ou la mort. (1) Ne jamais faire démarrer à distance le véhicule si les vitesses sont engagées, et (2) Ne jamais faire démarrer le véhicule à distance avec les clés dans le contact. L’utilisateur doit aussi avoir la fonction de sécurité de point mort du véhicule contrôlée périodiquement, de sorte que le véhicule ne puisse pas démarrer à distance alors que les vitesses sont engagées. Ce test devrait être effectué par une personne autorisée de Directed en conformité avec le Contrôle de sécurité décrit dans le guide d’installation du produit. Si le 12 © 2014 Directed. Tous droits réservés. véhicule démarre avec les vitesses engagées, arrêter les opérations de démarrage à distance immédiatement et consulter le détaillant Directed autorisé pour résoudre le problème. Après l’installation du module de démarrage à distance, contactez votre revendeur agréé pour qu’il teste le module de démarrage à distance en effectuant les vérifications de sécurité tel que décrit dans le guide d’installation du produit. Si le véhicule démarre lors du test du circuit d’arrêt de la sécurité du point mort, l’appareil de démarrage à distance n’a pas été installé correctement. Le module de démarrage à distance doit être enlevé ou l’installateur doit réinstaller le système de démarrage à distance afin que le véhicule ne démarre pas lorsque les vitesses sont engagées. Toutes les installations doivent être activées par un détaillant autorisé Directed. LE FONCTIONNEMENT DU MODULE DE DÉMARRAGE À DISTANCE SI LE VÉHICULE DÉMARRE LES VITESSES ENGAGÉES EST CONTRAIRE À SON MODE DE FONCTIONNEMENT PROPOSÉ. FAIRE FONCTIONNER LE SYSTÈME DE DÉMARRAGE À DISTANCE SOUS CES CONDITIONS POURRAIT ENTRAÎNER DES DOMMAGES CORPORELS OU MATÉRIELS. VOUS DEVEZ IMMÉDIATEMENT CESSEZ D’UTILISER CET APPAREIL ET DEMANDER L’AIDE D’UN DÉTAILLANT AUTORISÉ Directed POUR RÉPARER OU DÉBRANCHER LE MODULE DE DÉMARRAGE À DISTANCE. DIRECTED NE SERA PAS TENU RESPONSABLE OU NE PAIERA PAS POUR LES COÛTS D’INSTALLATION OU DE RÉINSTALLATION. Mise en garde : Ce produit est destiné pour les véhicules à carburant injecté seulement. L’utilisation de ce produit sur un véhicule à transmission manuelle est dangereux et contraire à l’utilisation proposée du produit. un certain risque. © 2014 Directed. Tous droits réservés. 13 Garantie à vie limitée pour l’utilisateur Directed Electronics (« Directed ») s’engage envers l’acheteur initial, à réparer ou remplacer (selon le choix de Directed) par un dispositif comparable remis en état, tout dispositif Directed (appelé ci-dessous le « dispositif ») à l’exclusion, et sans que ce soit limitatif, de la sirène, des émetteurs de télécommande et des capteurs et accessoires associés, dans le cas où le dispositif présenterait des vices de matériaux ou de fabrication après une utilisation raisonnable pendant la durée de vie du véhicule, à condition que les conditions suivantes soient remplies : le dispositif a été acheté auprès d’un détaillant agréé Directed ; le dispositif a été installé par un professionnel et entretenu par un détaillant agréé Directed ; le dispositif sera réinstallé par un professionnel dans le véhicule dans lequel il avait été installé à l’origine par un détaillant agréé Directed ; et le dispositif a été retourné à Directed en port payé avec une copie lisible de la facture ou autre preuve d’achat datée portant les informations suivantes : nom, numéro de téléphone et adresse de l’acheteur ; nom, numéro de téléphone et adresse du détaillant agréé ; description complète du produit, y compris des accessoires ; année, marque et modèle du véhicule ; numéro d’immatriculation et numéro d’identification du véhicule. Tous les composants autres que le dispositif, y compris et sans que ce soit limitatif, la sirène, les émetteurs de télécommande et les capteurs et accessoires associés, bénéficient d’une garantie d’un an à compter de leur date d’achat. TOUS LES PRODUITS REÇUS PAR DIRECTED POUR UNE RÉPARATION SOUS GARANTIE SANS PREUVE D’ACHAT AUPRÈS D’UN DÉTAILLANT AGRÉÉ SERONT REFUSÉS. Cette garantie non transférable est automatiquement annulée si : le code de date ou le numéro de série du dispositif est dégradé, manquant ou modifié ; le dispositif a été modifié ou utilisé de façon contraire à l’usage prévu ; le dispositif a été endommagé par un accident, une utilisation abusive, la négligence, un mauvais entretien, l’installation ou d’autres causes ne résultant pas de vices de matériaux ou de fabrication. La garantie ne couvre pas les dommages au dispositif résultant de l’installation ou de la dépose du dispositif. Directed, à sa seule discrétion, déterminera ce qui constitue des dommages excessifs et pourra refuser le renvoi d’un dispositif présentant des dommages excessifs. DANS TOUTE LA MESURE OÙ LA LOI LE PERMET, TOUTES LES GARANTIES, Y COMPRIS MAIS SANS QUE CE SOIT LIMITATIF, TOUTE GARANTIE EXPLICITE, TOUTE GARANTIE IMPLICITE, TOUTE GARANTIE DE VALEUR MARCHANDE OU D’ADAPTATION À UN USAGE PARTICULIER, ET TOUTE GARANTIE DE NON VIOLATION DE PROPRIÉTÉ INTELLECTUELLE, SONT EXPRESSÉMENT EXCLUES ; ET DIRECTED N’ASSUME ET N’AUTORISE AUCUNE PERSONNE NI ENTITÉ À ASSUMER POUR ELLE UN DEVOIR, UNE OBLIGATION OU UNE RESPONSABILITÉ QUELCONQUE EN RELATION AVEC SES PRODUITS. DIRECTED REFUSE ET DÉNIE ABSOLUMENT TOUTE RESPONSABILITÉ POUR TOUTE ACTION DE PARTIES TIERCES, Y COMPRIS SES INSTALLATEURS ET DÉTAILLANTS AGRÉÉS. LES SYSTÈMES DE SÉCURITÉ DIRECTED, Y COMPRIS CE DISPOSITIF, SONT DES DISPOSITIFS DE DISSUASION CONTRE UN ÉVENTUEL VOL. DIRECTED N’OFFRE 14 © 2014 Directed. Tous droits réservés. PAS DE GARANTIE NI D’ASSURANCE CONTRE LE VANDALISME, LES DOMMAGES OU LE VOL D’UNE AUTOMOBILE, DE SES PIÈCES OU DE SON CONTENU, ET PAR LA PRÉSENTE, DIRECTED DÉCLINE EXPRESSÉMENT TOUTE RESPONSABILITÉ, QUELLE QU’ELLE SOIT, Y COMPRIS MAIS SANS QUE CE SOIT LIMITATIF, LA RESPONSABILITÉ POUR LE VOL, LES DOMMAGES OU LE VANDALISME. CETTE GARANTIE NE COUVRE PAS LES FRAIS DE MAIN D’ŒUVRE POUR L’ENTRETIEN, LA DÉPOSE OU LA RÉINSTALLATION DU DISPOSITIF, NI AUCUN DOMMAGE INDIRECT D’AUCUNE SORTE. DANS LE CAS D’UNE RÉCLAMATION OU D’UN LITIGE IMPLIQUANT DIRECTED OU SA FILIALE, LES PROCÉDURES SE TIENDRONT DANS LE COMTÉ DE SAN DIEGO DANS L’ÉTAT DE CALIFORNIE AUX ÉTATS-UNIS D’AMÉRIQUE. LES LOIS DE L’ÉTAT DE CALIFORNIE ET LES LOIS FÉDÉRALES EN VIGUEUR S’APPLIQUERONT POUR LA RÉSOLUTION DU LITIGE. L’INDEMNISATION MAXIMALE DANS LE CADRE DE TOUTE RÉCLAMATION CONTRE DIRECTED SERA STRICTEMENT LIMITÉE AU PRIX D’ACHAT DU DISPOSITIF AUPRÈS DU DÉTAILLANT AGRÉÉ DIRECTED. DIRECTED N’EST PAS RESPONSABLE POUR LES DOMMAGES QUELS QU’ILS SOIENT, Y COMPRIS MAIS SANS QUE CE SOIT LIMITATIF, LES DOMMAGES DIRECTS, LES DOMMAGES INDIRECTS, LES DOMMAGES AU VÉHICULE, LES DOMMAGES POUR LES PERTES DE TEMPS, LE MANQUE À GAGNER, LES PERTES COMMERCIALES, LES PERTES ÉCONOMIQUES, ET LES AUTRES DOMMAGES SIMILAIRES. NONOBSTANT CE QUI PRÉCÈDE, LE FABRICANT OFFRE UNE GARANTIE LIMITÉE POUR LE REMPLACEMENT OU LA RÉPARATION DU MODULE DE COMMANDE, DANS LES CONDITIONS DÉFINIES ICI. CETTE GARANTIE EST NULLE SI LE DISPOSITIF N’A PAS ÉTÉ ACHETÉ AUPRÈS DE DIRECTED, OU D’UN DÉTAILLANT AGRÉÉ DIRECTED, OU SI LE DISPOSITIF A ÉTÉ ENDOMMAGÉ PAR UN ACCIDENT, UNE UTILISATION ABUSIVE, LA NÉGLIGENCE, UN CAS DE FORCE MAJEURE, UN MAUVAIS ENTRETIEN, OU D’AUTRES CAUSES NE RÉSULTANT PAS DE VICES DE MATERIAUX OU DE FABRICATION. Certains états et provinces ne permettent pas de limitation sur la durée des garanties implicites, ou l’exclusion ou la limitation des dommages directs ou indirects. Cette garantie vous confère des droits spécifiques, et vous pouvez également bénéficier d’autres droits selon votre juridiction. Cette garantie n’est valide que pour la vente des produits aux États-Unis d’Amérique et au Canada. Les produits vendus en dehors des États-Unis d’Amérique ou du Canada sont vendus « en l’état » et ne bénéficient d’AUCUNE GARANTIE, ni explicite ni implicite. Pour plus de détails concernant la garantie des produits Directed, veuillez visiter le site Web de Directed, section d’assistance : www.directed.com. Ce produit peut être couvert par un plan de protection de garantie (« GPP », Guaranteed Protection Plan). Pour obtenir des détails sur ce plan, adressez-vous à un détaillant agréé Directed ou téléphonez au service à la clientèle de Directed au 1-800-876-0800. 920-10011-02 2011-06 © 2014 Directed. Tous droits réservés. 15 Guía Del Propietario ¡Felicitaciones! Debemos felicitarlo por la compra del sistema de encendido y seguridad por control remoto de última generación. La lectura de este Manual del Usuario con anterioridad al uso del sistema le ayudará a maximizar el uso de dicho sistema y de sus múltiples funciones. En caso de querer realizar alguna consulta comuníquese con el distribuidor autorizado de Directed. Información importante Reglamentos del gobierno e información de seguridad Lea las secciones Reglas del gobierno y ¡Advertencia! Seguridad primero de este manual antes de hacer funcionar el sistema. Advertencia! No seguir estas instrucciones puede causar muerte, lesiones personales o daños a la propiedad, y también uso ilegal del sistema fuera de su objetivo previsto. Su Garantía Su sistema viene con una garantía. Las condiciones de la garantía se detallan al final de esta guía. Asegúrese de que usted reciba el comprobante de compra del concesionario, indicando que el producto fue instalado por un distribuidor autorizado de Directed. © 2014 Directed. Reservados tados los clerechos iii Controles remotos de reemplazo Por favor consulte a su distribuidor autorizado o visítenos en www. directedstore.com para ordenar controles remotos adicionales. Los números de parte del control se encuentran en la parte posterior del dispositivo. Información de patentes Este producto se encuentra cubierto por una o más patentes. Véase la información sobre las patentes (Patent Information) en la guía en inglés. iv © 2014 Directed. Reservados tados los clerechos Índice ¡Felicitaciones! ................................................................................................. iii Información importante...................................................................................... iii Reglamentos del gobierno e información de seguridad................................. iii Su Garantía............................................................................................. iii Controles remotos de reemplazo................................................................ iv Información de patentes..................................................................................... iv Control remoto...................................................................................................2 Funciones del control remoto...............................................................................2 Configuración estándar..............................................................................2 Uso del sistema ................................................................................................5 Bloqueo....................................................................................................5 Desbloqueo..............................................................................................5 Encendido remoto......................................................................................5 AUX.........................................................................................................6 Inhabilitación (opcional) de la anulación de arranque....................................6 Arranque a distancia (Encendido remoto).....................................................6 Transferencia de control al valet..................................................................8 Buscador de automóvil...............................................................................9 Información sobre la Pila....................................................................................9 Cambio de la pila.....................................................................................9 Disposición de la pila.................................................................................9 Reglamentos del gobierno.................................................................................10 ¡Advertencia! Seguridad primero.......................................................................11 Precaución..............................................................................................12 Garantía limitada de por vida para el consumidor...............................................13 Control remoto Función Descripción Antena interna AUX LED de transmisión AUX AUX Se usa para la transmisión de información Activo cuando transmite información Aplicación de los comandos de activación, desactivación, canal auxiliar y encendido remoto Botones de comando (4) Your 1-way remote coin cell battery can be changed by using a small flat blade screwdriver to pry case apart. Replace battery and then snap case together Funciones del control remoto AUX AUX AUX AUX AUX LosAUXbotones del control remoto permiten enviar comandos al sistema. Los botones indicados a continuación son para la configuración estándar. Your 1-way remote coin cell battery can be changed by using a small flat blade screwdriver to pry case apart. Replace battery and then snap case together. Your 1-way remote coin cell battery can be changed by using a small flat blade screwdriver to pry case apart. Replace battery and then snap case together. Configuración estándar Botón La función de bloqueo se controla oprimiendo y manteniendo oprimido el botón del control remoto durante 1 segundo. Cuando se mantiene oprimido más de 1.5 segundos, se activa la función de pánico. AUX AUX AUX Botón AUX AUX Your 1-way remote coin cell battery can be changed by using a small flat blade screwdriver to pry case apart. Replace battery and then snap case together. AUX La función de desbloqueo se controla oprimiendo y manteniendo oprimido el botón del control remoto durante 1 segundo. También AUX se puede desactivar la función de pánico con este botón. AUX AUX Your 1-way remote coin cell battery can be changed by using a small flat blade screwdriver to pry case apart. Replace battery and then snap case together. Your 1-way remote coin cell battery can be changed by using a small flat blade screwdriver to pry case apart. Replace battery and then snap case together. AUX Botón AUX AUX La modalidad silenciosa Silent Mode™ y una de las funciones auxiliares opcionales se controlan oprimiendo el botón La modalidad silenciosa funciona oprimiendo y manteniendo oprimido el botón Your 1-way remote coin cell battery can be changed by using a small flat blade screwdriver to pry case apart. Replace battery and then snap case together. 2 © 2014 Directed. Reservados tados los clerechos v durante menos de 1 segundo antes de bloquear o desbloquear. Una de las funciones auxiliares opcionales, tales como la apertura del AUX maletero, se puede controlar oprimiendo y manteniendo oprimido el AUX Botón durante 1.5 segundos. AUX Your 1-way remote coin cell battery can be changed by using a small flat blade screwdriver to pry case apart. Replace battery and then snap case together. AUX Botón AUX La AUX función de arranque a distancia (encendido remoto) del sistema se controla oprimiendo este botón durante 1 segundo. AUX AUX Your 1-way remote coin cell battery can be changed by using a small flat blade screwdriver to pry case apart. Replace battery and then snap case together. and Botones AUX El buscador de auto se controla oprimiendo estos dos botones. Your 1-way remote coin cell battery can be changed by using a small flat blade screwdriver to pry case apart. Replace battery and then snap case together. and and Botones Cuando se oprimen simultáneamente, estos tres botones controlan el desempañador de ventana trasero opcional durante el arranque a distancia. Las luces de estacionamiento destellan 3 veces para confirmar AUX la activación. Una vez activado, el desempañador se enciende cuando el vehículo se arranca a distancia. AUX AUX Your 1-way remote coin cell battery can be changed by using a small flat blade screwdriver to pry case apart. Replace battery and then snap case together. Las luces de estacionamiento destellan dos veces cuando el desempañador se desactiva. El desempañador no se enciende cuando el vehículo se arranca a distancia. Nota importante: El desempañador es una característica opcional. Es posible que se necesiten piezas y mano de obra adicionales. Para saber los detalles, consulte a su distribuidor Directed. Botones and La modalidad de temporizador se activa cuando estos botones se AUX oprimen simultáneamente. Cuando se activa la modalidad de temporizador, las luces de estacionamiento destellan 4 veces y el motor se AUX enciende después de un retraso de 1 segundo. Para apagar el motor AUX AUX AUX AUX Your 1-way remote coin cell battery can be changed by using a small flat blade screwdriver to pry case apart. Replace battery and then snap case together. Your 1-way remote coin cell battery can be changed by using a small flat blade screwdriver to pry case apart. Replace battery and then snap case together. © 2014 Directed. Reservados tados los clerechos 3 sin salir de la modalidad de temporizador, oprima el botón . El sistema se mantiene en modalidad de temporizador y arranca el vehículo cada 3 horas un máximo de 6 veces a menos que la modalidad se cancele pasando la llave a la posición de encendido (ON) o activando el freno o los cables de apagado de seguridad neutral. Las luces de estacionamiento destellan 4 veces indicando que se ha salido de la modalidad de temporizador. 4 © 2014 Directed. Reservados tados los clerechos Uso del sistema Bloqueo Presione y libere Las puertas se bloquean, el cuerno toca la bocina, as luces de estacionamiento parpadean. AUX AUX AUX Bloquea y modo Pánico Your 1-way remote coin cell battery can be changed by using a small flat blade screwdriver to pry case apart. Replace battery and then snap case together. Presione y mantenga Se bloqueo el sistemea, entonces active el pánico. Para que el pánico trabaje, la característica opcional del bocinazo del cuerno debe ser conectada.AUXPresione el botón o para detener la salida. AUX AUX Your 1-way remote coin cell battery can be changed by using a small flat blade screwdriver to pry case apart. Replace battery and then snap case together. AUX AUX Desbloqueo AUX AUX Presione y libere AUX Las puertas se desbloquean. El cuerno toca la bocina. AUX AUX AUX Encendido remoto AUX AUX Your 1-way remote coin cell battery c Your 1-way remote coin cell battery can be changed by using a small fl AUX AUX Your 1-way remote coin cell battery can be changed by using a small flat blade screwdriver to pry case apart. Replace battery and then snap case toge Presione y libere Activa (o si estuviese Activado, desactiva) el encendido remoto. El motor y las luces de estacionamiento se encenderán o el motor y las luces de estacionamiento se apagarán, según sea el caso. El cuerno toca la bocina. Si un problema de configuración del Encendido remoto evita que el motor arranque, las luces de estacionamiento parpadearán de modo tal de identificar un informe de anomalía en el Encendido remoto para identificar la falla. Your 1-way remote coin cell battery can be changed by using a small flat blade screwdriver to pry case apart. Replace battery and then snap case together. © 2014 Directed. Reservados tados los clerechos 5 AUX Presione y mantenga . Una de las funciones auxiliares opcionales, tales como la apertura del maletero, se puede controlar oprimiendo y manteniendo oprimido el Botón durante 2 segundos. Inhabilitación (opcional) de la anulación de arranque Si el control remoto se pierde o se daña, usted puede desactivar manualmente la anulación de arranque. Para hacer esto, debe tener la llave del vehículo y saber dónde está ubicado el botón del valet. Pregúntele al instalador dónde se encuentra el botón de valet. Para cancelar la anulación de arranque, pase la llave a la posición de encendido (ON) y oprima y suelte el botón de valet en menos de 10 segundos. El vehículo debe arrancar. Si no arranca, puede haber esperado demasiado; pase la llave a la posición de apagado (OFF) y repita el proceso. Ubicación del botón de valet: ________________________________ Arranque a distancia (Encendido remoto) Esta característica permite arrancar el vehículo a distancia y dejar andando el motor durante un período de tiempo programable. Esto permite calentar el motor y ajustar la temperatura interior del vehículo con el sistema de control de clima. Si desea calefaccionar o enfriar el interior, los controles de clima deben configurarse de antemano y el ventilador debe ajustarse al nivel deseado antes de arrancar el vehículo a distancia. 6 © 2014 Directed. Reservados tados los clerechos ¡Advertencia!(1) No arranque nunca el vehículo con las llaves puestas, excepto cuando esté haciendo una transferencia de control al valet y (2) No arranque nunca el vehículo si no tiene la palanca de marchas en la posición de estacionado (P) o neutro (N) AUX AUX AUX Para arrancar el vehículo a distancia: Your 1-way remote coin cell battery can be changed by using a small flat blade screwdriver to pry case apart. Replace battery a • Oprima el botón del control remoto y manténgalo oprimido durante 1 segundo. • Las luces de estacionamiento destellan para confirmar que el vehículo está intentando arrancar. En vehículos de gasolina, el motor arranca 4 segundos después de que las luces de estacionamiento destellan. En vehículos diesel, el motor arranca cuando se acaba el tiempo establecido en el temporizador de espera Bank and Channel para arrancar. present Tune mode and text indicator indicator indicator • Una vez que el vehículo arranque, el motor andará durante el Sat mode, bank selectorperíodo de tiempo preestablecido (12, 24 ó 60 minutos) o hasRPT ta que laAMseñal de apagado se active. /FM 11:53 DISP - MODE CATEGORY CD/AUX SAT RADIO Category Control XM1-1 CH-001 SEEK ¡Advertencia! No es seguro hacer funcionar el motor del veSKIP hículo en un garaje o en un lugar cerrado. Respirar los gases de escape del vehículo es peligroso para la salud.6 No active 1 2 3 4 5 nunca el arranque a distancia en un espacio cerrado. REW Toggles Scan mode CH PLAY/PROG FF SCAN VOL NR DISC- A.SEL RDM TUNE DISC+ SOUND Cuando esté listo para manejar el vehículo: 1. 2. Inserte la llave y pásela a la posición de encendido ON (no a AUDIO la posición de arranque START). E PWR MOD /C Pise el pedal del freno. El sistema de arranque aAdistancia se O motor continúa funcionando porque se ha pasado desactiva AyUTel la llave a la posiciónOFde encendido (ON). F DUA L © 2014 Directed. Reservados tados los clerechos 7 Nota: Si el pedal de freno se pisa antes de que la llave esté en la posición de encendido (ON), el motor se apaga. Cuando el vehículo está funcionando durante la operación de arranque a distancia, el sistema vigila el vehículo y apaga automáticamente el motor si recibe una de las siguientes señales de apagado: • • • • • Se pisa el pedal del freno. Se abre el capó. El interruptor de apagado se pone en la posición de apagado AUX (OFF). AUX El período de funcionamiento preestablecido (12, 24 ó 60 minutos) se acaba. Se oprime el botón del control remoto. AUX Your 1-way remote coin cell battery can be changed by using a small flat blade screwdriver to pry case apart. Replace b Transferencia de control al valet La característica de transferencia de control al valet le permite al motor continuar andando después de que se ha sacado la llave del encendido. Esta característica es útil cuando uno desea salir del vehículo, cerrarlo y dejarlo cerrado durante cortos períodos de tiempo con el motorAUXandando y los controles de clima encendidos. AUX AUX Para hacer una transferencia de control al valet: 1. Antes de apagar el motor, oprima y mantenga oprimido el botón del control remoto durante 1 segundo. 2. Pase la llave a la posición de apagado (OFF). El motor sigue andando hasta que pase el período de funcionamiento preestablecido o se reciba una señal de apagado. (En la sección Arranque a distancia hay una lista completa de señales de apagado) Importante: Esta característica no funciona si el pedal de freno está pisado 8 Your 1-way remote coin cell battery can be changed by using a small flat blade screwdriver to pry case apart. Replace battery and then snap case together. © 2014 Directed. Reservados tados los clerechos Buscador de automóvil AUX El buscador de automóvil permite ubicar el vehículo indicándole al sistema que haga destellar las luces de estacionamiento. AUX AUX Para activarlo: 1. 2. Your 1-way remote coin cell battery can Oprima y mantenga oprimido el botón y el botón al mismo tiempo. Las luces destellan 5 veces lentamente permitiéndole a usted ubicar el vehículo. Información sobre la Pila El control remoto tiene dos pilas tipo moneda (3V CR2016) que dura aproximadamente un año con uso normal. Cuando la pila comienza debilitarse, se reduce el alcance y los indicadores luminosos del control remoto comienzan a opacarse. Cambio de la pila Ubique la pequeña ranura en el lado del control remoto. Inserte un destornillador plano pequeño o una herramienta equivalente en la ranura y haga palanca para abrir la caja. Al cambiar la pila verifique la polaridad, luego cierre la caja a presión. Disposición de la pila Directed se preocupa por el medioambiente. Si necesita desechar la batería, hágalo conforme a los requisitos de su municipio con respecto a la disposición de baterías. © 2014 Directed. Reservados tados los clerechos 9 Reglamentos del gobierno Este dispositivo cumple con la Parte 15 del Reglamento de la FCC. El funcionamiento está sujeto a lo siguiente: (1) este dispositivo no debe causar interferencia perjudicial y (2) este dispositivo debe aceptar toda interferencia, incluso la que pueda causar funcionamiento no deseado. Este equipo ha sido sometido a pruebas y se ha determinado que cumple con los límites establecidos para un dispositivo digital Clase B, en conformidad con la Parte 15 del Reglamento de la FCC. Estos límites se han fijado para ofrecer una protección razonable contra la interferencia perjudicial en una instalación residencial. Este equipo genera, emplea y puede radiar energía de frecuencias de radio y, si no se instala y emplea de acuerdo con las instrucciones, puede causar interferencia perjudicial en las comunicaciones de radio. Sin embargo, no hay garantía de que no habrá interferencia en una instalación en particular. Si este equipo causa interferencia perjudicial a la recepción de radio o de televisión, lo cual puede determinarse apagando y encendiendo el equipo, el usuario puede tratar de corregir la interferencia por medio de una o varias de las siguientes medidas: • • • • Reorientar o reubicar la antena de recepción. Alejar el equipo del receptor. Conectar el equipo y el receptor a tomacorrientes de circuitos diferentes. Consultar al distribuidor o a un técnico experimentado de radio y televisión. Este dispositivo cumple con la especificación RSS 210 de los estándares de radio de Industry Canada. Su uso se autoriza sin interferencia ni protección; en otras palabras, este dispositivo no debe utilizarse si se determina que causa interferencia dañina a servicios autorizados por Industry Canada. Además, el usuario debe aceptar toda la interferencia de radio que reciba, aunque esta interferencia afecte el funcionamiento del dispositivo. 10 © 2014 Directed. Reservados tados los clerechos Advertencia: Los cambios o modificaciones no aprobados expresamente por el fabricante pueden anular la autorización del usuario para hacer funcionar este dispositivo. ¡Advertencia! Seguridad primero Las siguientes advertencias de seguridad se deben respetar en todo momento. Debido a la complejidad del sistema, sólo un distribuidor autorizado de Directed debe instalar este producto. Cuando se instala correctamente, este sistema puede arrancar el vehículo por medio de una señal desde el control remoto. Por lo tanto, nunca se debe hacer funcionar el sistema en un lugar cerrado o parcialmente cerrado y sin ventilación (tal como un garaje). Cuando se estacione en un lugar cerrado o parcialmente cerrado, o cuando se le haga servicio al vehículo, el sistema de arranque a distancia se debe deshabilitar por medio del interruptor instalado. Es responsabilidad exclusiva del usuario manejar correctamente y mantener fuera del alcance de los niños todos los dispositivos de control para que el sistema no arranque el vehículo a distancia accidentalmente. EL USUARIO DEBE INSTALAR UN DETECTOR DE MONÓXIDO DE CARBONO EN EL ÁREA DE VIVIENDA ADYACENTE AL VEHÍCULO. TODAS LAS PUERTAS QUE DEN A LAS ÁREAS DE VIVIENDA ADYACENTE AL LUGAR DE ESTACIONAMIENTO DEL VEHÍCULO CERRADO O PARCIALMENTE CERRADO DEBEN ESTAR CERRADAS EN TODO MOMENTO. Estas precauciones son responsabilidad exclusiva del usuario. Utilizar este producto de manera contraria al modo de operación previsto puede causar daños a la propiedad, lesiones personales o muerte. (1) No arranque nunca el vehículo con el control remoto si el vehículo tiene una marcha puesta y (2) No arranque nunca el vehículo con el control remoto cuando las llaves estén en el encendido. El usuario también debe hacer revisar periódicamente la característica de seguridad neutral del vehículo, que le impide al vehí© 2014 Directed. Reservados tados los clerechos 11 culo arrancar a distancia cuando tiene puesta una marcha. Sólo un distribuidor autorizado de Directed debe hacer esta prueba, según la verificación de seguridad estipulada en la guía de instalación del producto. Si el vehículo arranca con una marcha puesta, suspenda inmediatamente el arranque a distancia y consulte al distribuidor autorizado de Directed para arreglar el problema. Después de que se instale el módulo de arranque a distancia, comuníquese con su distribuidor autorizado para que ponga a prueba el módulo de arranque con la verificación de seguridad que se estipula en la guía de instalación de producto. Si el vehículo arranca cuando se está llevando a cabo la prueba del circuito de desactivación por seguridad neutral, la unidad de arranque a distancia no se ha instalado correctamente. El módulo de arranque a distancia debe quitarse o el instalador debe volver a instalar el sistema de arranque a distancia de manera que el vehículo no arranque con una marcha puesta. El distribuidor autorizado de Directed debe hacer todas las instalaciones. HACER FUNCIONAR EL MÓDULO DE ARRANQUE A DISTANCIA SI EL VEHÍCULO ARRANCA CON UNA MARCHA PUESTA VA CONTRA EL MODO DE OPERACIÓN PREVISTO. HACER FUNCIONAR EL SISTEMA DE ARRANQUE A DISTANCIA EN ESTAS CONDICIONES PUEDE CAUSAR DAÑOS A LA PROPIEDAD O LESIONES PERSONALES. USTED DEBE DEJAR DE USAR INMEDIATAMENTE LA UNIDAD Y SOLICITAR LA ASISTENCIA DE UN DISTRIBUIDOR AUTORIZADO DE DIRECTED PARA REPARAR O DESCONECTAR EL MÓDULO DE ARRANQUE A DISTANCIA INSTALADO. Directed NO SE HACE RESPONSABLE NI PAGA LOS COSTOS DE INSTALACIÓN O NUEVA INSTALACIÓN. Precaución Este producto ha sido diseñado sólo para vehículos con motor de inyección y transmisión automática. Utilizar este producto en vehículos de transmisión estándar es peligroso y va contra el uso previsto del producto. 12 © 2014 Directed. Reservados tados los clerechos Garantía limitada de por vida para el consumidor Directed Electronics. (“Directed”) le promete al comprador original que reparará o reemplazará (a elección de Directed) con un modelo comparable reacondicionado, cualquier unidad de Directed (en lo adelante, la “unidad”), excluyendo, pero sin limitarse a la sirena, los transmisores a remoto y los sensores y accesorios conexos, que demuestre estar defectuosa en cuanto a su mano de obra o materiales bajo un uso razonable durante la vida útil del vehículo, siempre que reúna las siguientes condiciones: La unidad se compró de un comerciante autorizado de Directed; la unidad fue instalada y mantenida profesionalmente por un comerciante autorizado de Directed; un comerciante autorizado de Directed reinstalará la unidad profesionalmente en el vehículo en el cual fue instalada inicialmente, y la unidad se devuelve a Directed, con los gastos de envío pagados por anticipado, junto con una copia legible del comprobante de venta u otra prueba fechada de la compra, con la siguiente información: el nombre, número de teléfono y dirección del consumidor; el nombre, número de teléfono y dirección del comerciante autorizado; una descripción completa del producto, incluidos los accesorios; el año, la marca y el modelo del vehículo; el número de licencia del vehículo y el número de identificación del vehículo. Todo otro componente que no sea la unidad, incluyendo, pero sin limitarse a la sirena, los transmisores a remoto y los sensores y accesorios conexos, conllevan una garantía de un año a partir de la fecha de compra de los mismos. TODO PRODUCTO QUE DIRECTED RECIBA PARA SU REPARACIÓN BAJO LA GARANTÍA QUE NO TENGA PRUEBA DE COMPRA DE UN COMERCIANTE AUTORIZADO, SERÁ RECHAZADO. Esta garantía no es transferible y se cancela automáticamente si: el código de fecha o el número de serie de la unidad ha sido alterado, desfigurado o no existe; la unidad ha sido modificada o utilizada de una manera contraria al propósito deseado; la Unidad ha sido dañada accidentalmente, por el uso inadecuado de la misma, por descuido, servicio incorrecto o instalación inadecuada, o por otras causas que no tengan su origen en algún defecto en sus materiales o mano de obra. Esta garantía no cubre daños a la unidad causados por su instalación o desmontaje. Directed podrá, a su entero juicio, determinar lo que constituye un daño excesivo, y podrá rehusar la devolución de cualquier unidad con daños excesivos. SEGÚN PROCEDA EN DERECHO, TODAS LAS GARANTÍAS, INCLUYENDO, PERO SIN LIMITARSE A LAS GARANTÍAS EXPRESAS, LAS GARANTÍAS IMPLÍCITAS, LAS GARANTÍAS DE COMERCIABILIDAD Y APTITUD PARA UN FIN O USO EN PARTICULAR, Y LAS GARANTÍAS DE NO VIOLACIÓN DE LA PROPIEDAD INTELECTUAL, ESTÁN EXPRESAMENTE EXCLUIDAS, Y DIRECTED NO ASUME, NI AUTORIZA QUE PERSONA O ENTIDAD ALGUNA ASUMA EN NOMBRE DE ELLA, NINGÚN DEBER, OBLIGACIÓN O RESPONSABILIDAD RELACIONADA CON SUS PRODUCTOS. DIRECTED DENIEGA Y ABSOLUTAMENTE NO ES RESPONSABLE POR CUALESQUIERA ACTOS DE TERCEROS, INCLUIDOS SUS COMERCIANTES O INSTALADORES AUTORIZADOS. LOS SISTEMAS DE SEGURIDAD DE DIRECTED, INCLUSO ESTA UNIDAD, SON UN FACTOR DISUASIVO CONTRA POSIBLES ROBOS. DIRECTED NO ESTÁ OFRECIENDO UNA GARANTÍA O SEGURO CONTRA VANDALISMO, DAÑO O ROBO © 2014 Directed. Reservados tados los clerechos 13 DEL AUTOMÓVIL, DE SUS PIEZAS O CONTENIDOS, Y POR LA PRESENTE DIRECTED DENIEGA RESPONSABILIDAD ALGUNA EN LO ABSOLUTO, INCLUYENDO, PERO SIN LIMITARSE A LA RESPONSABILIDAD POR ROBO, DAÑOS, Y/O VANDALISMO. ESTA GARANTÍA NO CUBRE COSTOS DE PERSONAL PARA EL MANTENIMIENTO, DESMONTAJE O REINSTALACIÓN DE LA UNIDAD, NI DAÑOS Y PERJUICIOS EMERGENTES DE NINGUNA CLASE. EN CASO DE ALGUNA RECLAMACIÓN O DISPUTA QUE IMPLIQUE A DIRECTED O A SU FILIAL, EL LUGAR PARA LA RESOLUCIÓN DE LA DISPUTA SERÁ EL CONDADO DE SAN DIEGO EN EL ESTADO DE CALIFORNIA. LAS LEYES ESTATALES DE CALIFORNIA Y LAS LEYES FEDERALES PERTINENTES SERÁN APLICABLES Y GOBERNARÁN LA DISPUTA. LA INDEMNIZACIÓN MÁXIMA BAJO CUALQUIER RECLAMACIÓN CONTRA DIRECTED DEBERÁ LIMITARSE ESTRICTAMENTE AL PRECIO DE COMPRA DE LA UNIDAD DE UN COMERCIANTE AUTORIZADO DE DIRECTED. DIRECTED NO SE RESPONSABILIZARÁ POR DAÑOS NI PERJUICIOS, INCLUYENDO, PERO SIN LIMITARSE A DAÑOS Y PREJUICIOS EMERGENTES, INCIDENTALES, DAÑOS AL VEHÍCULO, DAÑOS POR PÉRDIDA DE TIEMPO, PÉRDIDA DE INGRESOS, PÉRDIDA COMERCIAL, PÉRDIDA DE OPORTUNIDAD ECONÓMICA. Y OTRAS SIMILARES. NO OBSTANTE LO ANTERIOR, EL FABRICANTE OFRECE UNA GARANTÍA LIMITADA PARA REEMPLAZAR O REPARAR EL MÓDULO DE CONTROL, SUJETO A LAS CONDICIONES DESCRITAS ANTERIORMENTE. ESTA GARANTÍA ES INVÁLIDA SI LA UNIDAD NO SE COMPRÓ EN DIRECTED O MEDIANTE UN COMERCIANTE AUTORIZADO DE DIRECTED, O SI LA UNIDAD HA SIDO DAÑADA ACCIDENTALMENTE DEBIDO A UN USO ARBITRARIO DE LA MISMA, POR NEGLIGENCIA, CASO FORTUITO, ABANDONO, SERVICIO INAPROPIADO, U OTRAS CAUSAS QUE NO SEAN POR DEFECTO EN LOS MATERIALES O EN LA MANO DE OBRA. Algunos estados no permiten límites sobre el tiempo de duración de una garantía implícita, o sobre la exclusión o limitación de daños incidentales o emergentes. Esta garantía le otorga derechos legales específicos, y Ud. pudiera también tener otros derechos que varían de un estado a otro. Esta garantía es válida solamente para la venta de producto(s) dentro de los Estados Unidos de América y en el Canadá. El o los productos vendidos fuera de los Estados Unidos de América o del Canadá, se venden “en el estado en que se encuentran” y no estarán cubiertos por NINGUNA GARANTÍA, expresa o implícita. Para más detalles relacionados con información sobre la garantía de productos de Directed, favor de visitar la sección de apoyo de Directed en su sitio Web, www.directed.com Este producto pudiera estar cubierto por un Plan de Protección Garantizada (“GPP”, sus siglas en inglés). Para detalles sobre este Plan, vea a su comerciante autorizado de Directed, o comuníquese con el Servicio de Atención al Cliente de Directed, llamando al 1-800-876-0800. 920-10011-03 2011-06-
 1
1
-
 2
2
-
 3
3
-
 4
4
-
 5
5
-
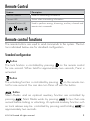 6
6
-
 7
7
-
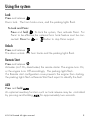 8
8
-
 9
9
-
 10
10
-
 11
11
-
 12
12
-
 13
13
-
 14
14
-
 15
15
-
 16
16
-
 17
17
-
 18
18
-
 19
19
-
 20
20
-
 21
21
-
 22
22
-
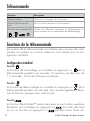 23
23
-
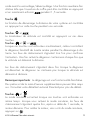 24
24
-
 25
25
-
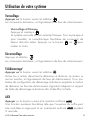 26
26
-
 27
27
-
 28
28
-
 29
29
-
 30
30
-
 31
31
-
 32
32
-
 33
33
-
 34
34
-
 35
35
-
 36
36
-
 37
37
-
 38
38
-
 39
39
-
 40
40
-
 41
41
-
 42
42
-
 43
43
-
 44
44
-
 45
45
-
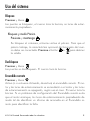 46
46
-
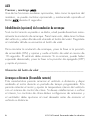 47
47
-
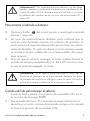 48
48
-
 49
49
-
 50
50
-
 51
51
-
 52
52
-
 53
53
-
 54
54
-
 55
55


Clifford 4110P El manual del propietario
- Categoría
- Alarma de carro
- Tipo
- El manual del propietario
- Este manual también es adecuado para
En otros idiomas
- français: Clifford 4110P Le manuel du propriétaire
- English: Clifford 4110P Owner's manual
Documentos relacionados
Otros documentos
-
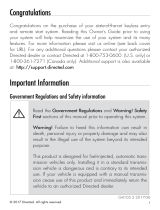 AstroStart RS-405 El manual del propietario
-
Viper 4105V El manual del propietario
-
Automate AM6.2 El manual del propietario
-
-
Avital 4108L Manual de usuario
-
-
-
Directed 4112P El manual del propietario
-
Python 4205P El manual del propietario
