Braster In-home Breast Examination System Manual de usuario
- Tipo
- Manual de usuario

EN
USER MANUAL
Braster System – in-home breast examination system
PL
INSTRUKCJA OBSŁUGI
System Braster – system domowej profilaktyki
raka piersi
ES
MANUAL DE INSTRUCCIONES
Sistema de exploración de mamas para uso
doméstico –Sistema Braster
HU
FELHASZNÁLÓI KÉZIKÖNYV
Otthoni emlővizsgáló rendszer – Braster Rendszer
Braster Care App
11001001
BRASTER –
AR

Braster S.A.
Rev. 6,2018.06.19_EN_PL_HU_ES_AR
CONTACT THE MANUFACTURER
KONTAKT DO PRODUCENTA
PÓNGASE EN CONTACTO CON EL FABRICANTE
VEGYE FEL A KAPCSOLATOT A GYÁRTÓVAL
OFFICE / BIURO / OFICINA / IRODA /
Poland / Polska / Polonia / Lengyelország /
Poland / Polska / Polonia / Lengyelország /

EN
USER MANUAL 5
PL
INSTRUKCJA OBSŁUGI 31
ES
MANUAL DE INSTRUCCIONES 57
HU
FELHASZNÁLÓI KÉZIKÖNYV 83
109

Caution
Uwaga
Precaución
Vigyázat
Warning
Ostrzeżenie
Advertencia
Figyelem
Operating instructions (read the user manual)
Instrukcja postępowania (zapoznaj się z instrukcją obsługi)
Instrucciones de uso (lea el manual de instrucciones)
Üzemeltetési útmutató (olvassa el a felhasználói kézikönyvet)
( )
Serial number
Numer seryjny urządzenia
Número de serie
Sorozatszám
The device contains an applied part
Urządzenie zawiera część aplikacyjną
El dispositivo contiene una parte aplicada
Az eszköz egy gyakorlatban használt részt is tartalmaz
EXPLANATION OF SYMBOLS USED IN THE USER MANUAL, ON THE LABEL AND ON THE PACKAGING
WYJAŚNIENIE SYMBOLI STOSOWANYCH W INSTRUKCJI, NA ETYKIECIE I OPAKOWANIU
EXPLICACIÓN DE LOS SÍMBOLOS UTILIZADOS EN EL MANUAL DE INSTRUCCIONES, EN LA ETIQUETA Y EL EMBALAJE
A FELHASZNÁLÓI KÉZIKÖNYVBEN, A CÍMKÉN ÉS A CSOMAGOLÁSON HASZNÁLT SZIMBÓLUMOK MAGYARÁZATA
Date of manufacture
Data wyprodukowania
Fecha de fabricación
Gyártás dátuma
Manufacturer’s name and address
Producent
Nombre y dirección del fabricante
A gyártó neve és címe
Power supply information
Informacja o zasilaniu
Información sobre la tensión de funcionamiento
Tápegység adatai
The device with a matrix on is fitted with protection against solid particles (diameter ≥ 12.5 mm)
and dripping water when tilted up to 15°
Urządzenie z założoną matrycą posiada ochronę przed ciałami stałymi (o średnicy 12,5 mm
i większej) oraz pionowo padającymi kroplami wody przy obudowie nachylonej do 15°
El dispositivo con matriz encendida está equipado con protección contra partículas sólidas
(diámetro ≥12,5 mm) y goteos cuando se inclina hasta 15°
Az érzékelővel rendelkező eszköz szilárd részecskékkel (átmérő ≥ 12,5 mm) és csepegő vízzel
szembeni védelemmel van felszerelve, ha max. 15°-ig dönti
15 ( 12.5 ≤ )
Operating conditions (ambient temperature and humidity)
Ograniczenie dopuszczalnych temperatur oraz wilgotności powietrza podczas pracy urządzenia
Condiciones de funcionamiento (temperatura y humedad ambiente)
Működési feltételek (környezeti hőmérséklet és páratartalom)
( )
Storage and transport conditions (ambient temperature and humidity)
Ograniczenie dopuszczalnych temperatur oraz wilgotności powietrza podczas transportu
i przechowywania urządzenia
Condiciones de almacenamiento y transporte (temperatura y humedad ambiente)
Tárolási és szállítási feltételek (környezeti hőmérséklet és páratartalom)
( )

4
This symbol means that the medical device satisfies the requirements of the Directive 93/42/EEC
Symbol wskazujący, że wyrób medyczny jest zgodny z wymaganiami dyrektywy 93/42/EWG
Este símbolo indica que el dispositivo sanitario cumple los requisitos de la directiva 93/42/CEE
Ez a szimbólum azt jelenti, hogy az orvostechnikai eszköz megfelel a 93/42/EGK irányelv
követelményeinek
EEC/93/42
The device communicates wirelessly via WiFi
Urządzenie komunikuje się bezprzewodowo przez sieć Wi-Fi
El dispositivo se comunica de forma inalámbrica mediante Wi-Fi
Az eszköz vezeték nélkül, WiFi segítségével kommunikál
WiFi
The device needs to be protected from moisture
Należy chronić urządzenie przed wilgocią
El dispositivo debe ser protegido contra la humedad
Az eszközt óvni kell a nedvességtől
The device needs protection from light sources
Należy chronić urządzenie przed promieniami słonecznymi
El dispositivo necesita protección contra las fuentes de luz
Az eszközt óvni kell a fényforrásoktól
This symbol means that you must follow all applicable principles for disposal of this type of waste
Symbol wskazujący, że należy postępować zgodnie z wszystkimi mającymi zastosowanie
zasadami utylizacji odpadów tego rodzaju
Este símbolo indica que debe respetar todos los principios aplicables para la eliminación de
este tipo de desechos
Ez a szimbólum azt jelenti, hogy az összes, ilyen típusú hulladék ártalmatlanítására vonatkozó
elvet követnie kell

5
ENGLISH
USER MANUAL

7
ENGLISH
TABLE OF CONTENTS
GLOSSARY 8
IMPORTANT SAFETY INFORMATION 9
INTRODUCTION 10
1. DESCRIPTION AND INTENDED USE 11
1.1. DESCRIPTION 11
1.2. INTENDED USE 11
1.2.1. INDICATIONS 11
1.2.2. CONTRAINDICATIONS 12
2. OPERATING PRINCIPLES OF THE DEVICE 12
3. PACKAGE CONTENTS 13
4. OVERVIEW OF THE BRASTER DEVICE INTERFACE 13
5. MATRIX REPLACEMENT 15
6. DEVICE PREPARATION PRIOR TO EXAMINATION 15
6.1. PREPARATION OF THE BRASTER DEVICE BEFORE THE FIRST EXAMINATION 15
6.2. PREPARATION OF THE BRASTER DEVICE BEFORE SUBSEQUENT EXAMINATIONS 16
7. EXAMINATION 16
7.1. IMPORTANT INFORMATION 16
7.2. HOW TO PERFORM AN EXAMINATION 17
7.2.1. PREPARATION 17
7.2.2. QUESTIONS 18
7.2.3. TURNING THE DEVICE ON/OFF 18
7.2.4. DEVICE CONNECTION 19
7.2.4.1. CONNECTING TO AN iOS DEVICE 19
7.2.4.2. CONNECTING TO AN ANDROID DEVICE 19
7.2.5. ACCLIMATIZATION 20
7.2.6. MATRIX SELECTION 20
7.2.7. EXAMINATION 21
7.2.8. SENDING THE RESULTS TO THE TELEMEDICAL CENTER 23
8. TROUBLESHOOTING THE MOBILE APP 23
9. CHARGING 24
10. SAFE OPERATION 25
11. DISINFECTION 25
12. CLEANING AND MAINTENANCE 26
13. SERVICING AND TECHNICAL SUPPORT 26
14. DECLARATION OF CONFORMITY 27
15. TECHNICAL AND OPERATIONAL SPECIFICATION OF THE DEVICE 27
16. ADVERSE EVENT AND MEDICAL INCIDENTS 28
17. FCC REGULATORY STATEMENT 29
18. CANADIAN REGULATORY STATEMENT 29
19. DISPOSAL 30

8 9
ENGLISH
IMPORTANT SAFETY INFORMATION
This section is provided to familiarize the user with critical information needed before the device is used. Additional warnings and
precautions are also given in the other sections of the User Manual.
WARNINGS
Warnings are statements that alert the user to the possibility of injury, death, or other serious adverse reactions associated with
the use or misuse of the device.
! It is important to note that an examination with the use of Braster System does not replace existing diagnostic methods currently used in clinical practice (such
as mammography, ultrasound, MRI). Be sure to undergo routine mammography or ultrasound screening as recommended by your physician.
! Any use, operation and servicing of the device breeching this User Manual is prohibited and may cause damage to the device or disrupt its operation. The
device must be used and operated as stipulated in the User Manual and serviced in a place indicated by BRASTER S.A. The manufacturer will not be held
responsible for any consequences of improper use of the device.
! The device must not be charged while an examination is in progress. Use of the device while charging may lead to electrocution. Avoid contact with the device
while it is being charged.
! Do not use the device if the housing of the device is damaged, as that may cause electrocution.
! The device should be charged using a USB Power Adapter (parameters: DC 5V 1A) which complies with IEC 60950-1 or IEC 60601-1. Switch the device o
before charging it.
CAUTIONS
Cautions are statements that alert the user to the possibility of a problem with the device associated with its use or misuse, i.e.
device failure, device malfunction, damage to the device or data loss.
! To ensure the safety and appropriate operation of the device, read the information on precautionary measures set out in the chapter of this User Manual titled
“Important Safety Information” and other information included herein before using the device. The illustrations and screenshots used in this User Manual may
slightly dier from the actual appearance of the device and mobile app.
! According to BRASTER’s most recent studies thermographic matrices lose their properties after 36 months from their first use. If you use the matrices after the
lapse of 36 months from their first use, a reliable interpretation of the examination will not be possible. To ensure proper operation of the device, replace the set
of matrices after 36 months since the first use. However, please note that BRASTER S.A. still conducts studies on the matrices lifetime and the lifespan can be
extended even further in the future.
! The device and matrices may be damaged if stored in a hot and/or moist place and/or in direct sunlight. Store them in a dry, cool and shaded place.
! You will pay for data transfer in accordance with your operator’s tari.
! You must only use the parts indicated in the User Manual and connect the Braster device to devices that are mentioned in the User Manual. Do not modify the
Braster device. If you use parts other than those indicated in the User Manual or if you modify the Braster device or connect it to devices that are not mentioned
in the User Manual, you may encounter problems with its operation and/or cause damage that will be attributed to the user, for which the manufacturer will not be
held responsible.
! Charge the device for at least 30 minutes before the first examination.
GLOSSARY
Braster automatic interpretation (Braster AI) – software responsible for analyzing the thermal images, along with the medical
information provided by the user via the Braster Care mobile application.
Braster device or device – a device composed of an image acquisition device and a thermographic matrix manufactured by
Braster S.A.
Braster e-store – www.braster.eu where the Braster device, examination packages and the set of thermographic matrices can
be purchased. Please note that in some markets the Braster device as well as examination packages and other services can be
purchased only from a local distributor.
Examination package – a pre-paid package of automatic thermogram interpretations, encompassing a specific number of
interpretations.
Image acquisition device – the device used in the examination. On the image acquisition device, there is an ON/OFF button,
a USB slot and an grip. The device is also fitted with electronics and image acquisition system. The inner part of the device
consists of a blackened chamber which ensures the appropriate quality of the thermographic images. The image acquisition
device is an electronic device and is controlled by a mobile app.
Liquid crystal foil – an element of the liquid crystal matrix. The foil contains liquid crystals, which map thermal variations in the
breast, creating color images (thermograms).
Liquid crystal thermographic matrix (or liquid crystal matrix or thermographic matrix) – an element of the Braster device
composed of a liquid crystal foil and a plastic clamp. The thermographic image is generated on the inner side of the foil surface,
i.e. on the side facing inwards (towards the inside of the device). The matrix is an applied part of the device, which means that
it comes into contact with the skin of the breast.
Mammography – a radiological examination of the breast, performed on women, in which a series of pictures of the mammary
gland is taken using x-rays. With its ability to visualize a number of characteristic changes and lesions, mammography is used
for detection of breast cancer and other nipple pathologies before they manifest clinically. The ecacy of the examination is
strictly connected with the structure of the breast, for that reason it is recommended for women older than 50 years of age.
Mobile app – the Braster Care app, software which is needed to perform the breast examination with the Braster device. It
needs to be downloaded onto the user’s mobile device (smartphone or tablet) before the first examination. The app is free of
charge and available via Google Play (for Android) or via the App Store (for iOS).
Mobile device – a smartphone or tablet (for system requirements, go to: https://www.braster.eu/system).
My Account – an account on myaccount.braster.eu, where the user must register in order to conduct the examinations. In My
Account the user can, for example, check the results of a thermographic examination.
Telemedical center – BRASTER’S S.A. infrastructure in which the users’ data is stored and where the software needed for the
provision of the services, in particular the results of examinations, oered by BRASTER S.A. is kept.
Thermogram (or thermographic image) – a graphic representation of the thermal image created on the surface of the liquid
crystal foil which maps temperature distribution across the breast.
Ultrasound – a non-invasive method in which ultrasound is used to visualize tissue. Ultrasound imaging is a basic diagnostic
tool used for detecting pathological changes in breast, including breast cancer.
User – a woman who uses the Braster System – in-home breast examination system.

10 11
ENGLISH
1. DESCRIPTION AND INTENDED USE
1.1. DESCRIPTION
The Braster System – in-home breast examination system, hereinafter referred to as the “Braster System”, is a medical device
intended for thermographic breast examination. The system consists of:
• the Braster device, which is composed of:
− the image acquisition device, and
− three thermographic matrices;
• the Braster Care mobile app;
• the Braster AI automatic interpretation software.
See Fig. 1: Components of the Braster System
1. The Braster Care app 2. The Braster device 3. The Braster AI software
During the examination apply the Braster device to the breast area. The device is fitted with a liquid crystal foil which creates
color images when it comes in contact with the surface of the breasts. At the end of the examination the acquired thermographic
images are stored in the mobile app and sent to the telemedical center, where they are automatically analyzed by Braster AI.
Should any potentially dangerous pathological changes be indicated, you will be instructed to consult your doctor.
The Braster medical device does not perform measurements, but instead records temperature distribution across the breast,
based on which the thermographic images are analyzed.
The Braster examination DOES NOT REPLACE EXISTING DIAGNOSTIC METHODS CURRENTLY USED IN CLINICAL
PRACTICE (SUCH AS MAMMOGRAPHY AND ULTRASOUND). It is a useful complementary tool to the aforementioned
examinations.
1.2. INTENDED USE
1.2.1. INDICATIONS
The Braster System – in-home breast examination system is intended for domestic breast examination by women of legal age
as an adjunct to examinations such as ultrasound and mammography. The device detects thermal irregularities that require
confirmationby diagnostic methods or healthcare consultation.
INTRODUCTION
This User Manual comes with the Braster System – in-home breast examination system intended for breast self-examination by
the user. Read the User Manual before using the device for the first time. The User Manual contains the necessary information
on all of the functions and features of the device, its safety and the breast examination process.
It is recommended that you retain this User Manual for future reference.
BRASTER S.A. is the owner of an innovative, proprietary technology for the manufacturing of liquid crystal mixtures and special-
purpose liquid crystal emulsions. This manufacturing process was developed based on Continuous Liquid Crystal Film (CLCF)
technology. The technology used by BRASTER S.A. is protected by international patents.
Improper operation of the device which is inconsistent with the User Manual may pose risk to the health and life of the
user or third persons. You must comply with the User Manual when using the product. Only use the Braster device if
you have become familiar with the product and have read the User Manual.
The device must only be used for the purpose intended by the manufacturer. Arbitrary use of the product which is
inconsistent with the User Manual may result in the loss of guarantee rights and claims in case of damage.

12 13
ENGLISH
3. PACKAGE CONTENTS
The package contains:
• an image acquisition device, model: BRA-1.0 (see Fig. 2A ),
• a set of three thermographic matrices numbered 1, 2 and 3, model: TMS-1.0 (see Fig. 2B ),
• a mini USB cable,
• a cleaning cloth,
• a user manual,
• a quick start guide.
4. OVERVIEW OF THE BRASTER DEVICE INTERFACE
See Fig. 3: The Braster device interface
1. Grip
2. Examination idicator
3. Power status
4. Mini-USB slot
5. ON/OFF button
ON/OFF Button – turns the device on/o
• to turn the device on press the button and hold it for 2 seconds.
• after the examination is finished or after 10 minutes of inactivity the device will turn o automatically. To turn the device o
in emergency mode press the button and hold it for 5 seconds.
Grip – activates acquisition of thermographic images
• The grip is pressed – acquisition of thermographic images is active (activated Examination idicator).
• The grip is not pressed – acquisition of thermographic images is not active.
1.2.2. CONTRAINDICATIONS
The Braster System is not intended for women who are undergoing or have undergone breast cancer treatment, i.e. breast-
conserving surgery, mastectomy (unilateral or bilateral), systematic treatment (chemotherapy, hormonal therapy, biological
therapy) and radiation therapy.
Temporary contraindications against using the Braster System:
• pregnancy or breastfeeding (up to three months after weaning);
• general infection, with a body temperature of or in excess of 38˚C;
• breast infection with pain, skin redness and bruises (when the said symptoms are present);
• the second phase of the menstrual cycle – due to changes in breast physiology in the menstrual cycle, it is best to perform
the thermographic examination between day three and day twelve of the cycle;
• i nadequate temperature (too hot or too cold) in the room where the examination is to be performed – the ambient
temperature must be between 20˚C and 25˚C;
• surgical procedure in the breast area with benign lesion diagnosis:
– fine-needle biopsy (FNB) – up to four weeks after the procedure,
– core-needle biopsy (CNB) or Mammotome’s breast biopsy – up to 6 months after the procedure,
– breast tumor resection – up to 12 months after the procedure;
• aesthetic implant placement, filler injections (e.g. hyaluronic acid) and lipotransfer – up to 12 months after the procedure.
2. OPERATING PRINCIPLES OF THE DEVICE
The Braster device uses a type of technology known as contact thermography. Contact thermography is a medical imaging
technique for detecting changes in tissue metabolism. In medicine, thermography is based on a phenomenon known as the
“dermo-thermal eect”, in which the thermal processes that occur in the organ examined (inside the body) manifest on the
surface of the skin as temperature anomalies.
The neoplastic process is characterized by a higher metabolic rate among other things through the formation of a dense
pathological capillary network. Pathological lesions with suspected malignancy have a characteristic morphological structure
and higher temperature than normal areas of the body. As a result, they are shown in the thermogram as areas of dierent
colors.
Contact thermography is a complementary examination. It complements commonly performed examinations such as ultrasound
and mammography.

14 15
ENGLISH
5. MATRIX REPLACEMENT
Step 1 (Fig. 5A ) Pull the edge of the matrix in the place where there is a notch in the body of the device. Preferably hold the
notch on the matrix with your thumb and support the matrix from below with your other fingers.
Step 2 (Fig. 5B ) Pull the matrix o the device.
Step 3 (Fig. 5C ) Attach the matrix, pushing it parallel to the housing. Preferably hold the notch on the matrix with your thumb
and support the matrix from below with your other fingers.
6. DEVICE PREPARATION PRIOR TO EXAMINATION
6.1. PREPARATION OF THE BRASTER DEVICE BEFORE THE FIRST EXAMINATION
a. After unpacking the device, check it for completeness. The box should contain: the image acquisition device, three matrices
(numbered 1, 2 and 3), a mini USB cable, a user manual, quick start guide and a cleaning cloth. If you find that any of those
elements are missing, immediately fill in the complaint form available on the Braster website.
b. The matrix is a part of the device, which means that it comes into direct contact with the skin. Therefore, before using, clean
and disinfect the inner and outer surfaces of all matrices (as per the description and by using the measures specified in
chapters 11 and 12 of the User Manual).
c. Charge the device for at least 30 minutes before the first examination.
d. Download the free Braster Care mobile app onto your smartphone or tablet and create your account on myaccount.braster.eu
in order to perform an examination. You can do this while the battery is being charged. The instruction on how to download
the mobile app include:
1. Download the Braster Care app from the App Store, if your mobile device has the iOS operating system (i.e. is an iPhone
or an iPad), or from Google Play, if your mobile device has the Android operating system;
2. Install the Braster Care app on your mobile device;
3. Start the Braster Care app on your mobile device and read the INTRO;
4. Click the SIGN UP link at the bottom of the screen.
Tab. 1. Indicator colors in user interface
Mini-USB slot – is located under the rubber cap. To access the slot, you need to raise the cap. The mini-USB slot is intended for:
• updating software for the image acquisition device,
• battery charging.
Device label – placed in the shadowed chamber of the device, visible when the matrix is removed. The label contains the serial
number of the device, which is also the name of the WiFi signal broadcast by the device, and password (see Fig. 4A : Position
of the label, and 4B : Sample label with name of the WiFi signal and the password: 1. Name of the WiFi signal broadcast by the
device, 2: Password to WiFi signal broadcast by the device).
Do not remove the label. Write down the data which is on the label and keep it in a safe place.
Examination Indicator Status Power Indicator Status Description
No light No light The device is o
No light Blinking green The device is on
No light Steady green
The device is connected
with a mobile device
Pulsing white Steady green
Thermogram acquisition
in progress
No light Steady orange Charging in progress
No light Blinking orange
The examination cannot be performed.
The battery level is too low.
Steady white No light/orange Firmware upgrade mode
Blinking white No light/orange
Firmware upgrade
in progress

16 17
ENGLISH
• make sure that you have bought the examination package – if you have not, you may purchase it in the Braster e-store or,
depending on the country, the e-store or other outlets of the local distributor.
REMEMBER
Do not perform an examination in a room where the temperature is lower than 20˚C or higher than 25˚C.
Due to changes in breast physiology during the menstrual cycle, it is best to perform the thermographic examinations
between day three and day twelve of the cycle.
If you no longer menstruate, or your menstrual cycles are irregular (fluctuations of more than 10 days), we recommend
performing the examination at equal intervals once a month; e.g., between the 1st and 5th day of the month or on the
1st weekend of the month.
1. On the day before the examination:
• avoid procedures which may increase blood circulation in the breast area (physiotherapy, massages, etc.).
2. On the day of the examination:
• avoid procedures which may increase blood circulation in the breast area (physiotherapy, massages, etc.);
• make sure that you are between days three and twelve of your menstrual cycle or, if you do not menstruate, that about 30
days have passed from your previous exam;
• do not take a bath or a shower within approximately two hours before the examination;
• do not consume any alcoholic beverages;
• do not use peelings on your breasts and/or neckline and do not perform armpit depilation, as this may irritate your skin;
• refrain from sources of heat or cold, such as heaters or air conditioners, for at least thirty minutes before and during the
examination;
• avoid intense physical eort for approximately two hours prior to the examination;
• do not use cosmetics and do not wet the skin on your breasts within two hours prior to the examination – your skin should
be clean and dry;
• do not have a sauna or a steam bath.
7.2. HOW TO PERFORM AN EXAMINATION
7.2.1. PREPARATION
• Place the Braster device in front of you. Make sure it is turned o. Have at hand your mobile device with the Braster Care
app installed (as stated in chapter 6 of the User Manual). Check that your mobile device is connected to the Internet.
e. Register your individual account as instructed (please note, that we recommend registering and using your individual account
on PC’s or laptops, since it has been designed for large screens):
1. If after clicking the SIGN UP link you are not redirected automatically, go to www.braster.eu and click the MY ACCOUNT button;
2. Fill in the data. In the
type of account
field select “Braster – for home use” and click the SIGN UP button;
3. Go to your e-mail account and find the e-mail from us with the activation link. If you cannot find it in the main folder, check
the “Spam” folder;
4. After you have activated the account by clicking the activation link, type your login (the e-mail address which you used
during registration) and password (the one which you used during registration) on the login page, and click LOG IN;
5. Fill in all medical and personal data in the survey.
If you do not complete this survey the first time you log in, you will not be able to perform the examination;
6. Activate your examination package by going to the tab “Activation codes” and clicking the button “Activate the
package”;
7. Log out from My Account after completing the registration.
f. When charging is complete, start the app and follow the instructions described in chapter 7.
6.2. PREPARATION OF THE BRASTER DEVICE BEFORE SUBSEQUENT EXAMINATIONS
a. When preparing for an examination, first clean the surface of the liquid crystal matrices. You should clean all of the matrices,
with particular attention to the surface on the inner side of each matrix. It is important to use the recommended cleaning
and disinfection agents and thoroughly clean the surface of the foil so as to not leave any fingerprints, smudges, etc. as it
can alter the interpretation of the thermographic examination (for more information see chapter 11 titled “Disinfection” and 12
titled “Cleaning and Maintenance”).
b. When the matrices have been cleaned, start the app and follow the instructions provided in chapter 7.
7. EXAMINATION
7.1. IMPORTANT INFORMATION
Do not use the device while it is being charged.
Before the first examination:
• download the free Braster Care app from Google Play or the App Store onto your mobile device;

18 19
ENGLISH
7.2.4. DEVICE CONNECTION
Establishing a connection between the Braster device and a mobile device diers slightly for Android and iOS.
To connect the Braster device follow the instructions displayed on subsequent screens on your mobile device.
Position the device to see the label with the name of the Braster WiFi signal and password. The label is inside the device and is
visible only when the matrix has been removed (Fig. 4A & 4B ).
7.2.4.1. CONNECTING TO AN iOS DEVICE
Click “Settings” on the connection screen. Go to the WiFi settings. From the list of WiFi signals select the Braster signal
specified on the label and enter the password. Return to the app. A message will display information whether a connection has
been established successfully.
Do not worry if you went back to the main screen of your mobile device and not to the app directly, you may go back to the
application again. At this point you should already be connected to the device.
If, for some reason, you are unable to go to the WiFi settings on the connection screen in the app, leave the app, go to “Settings”
in your mobile device, select the “WiFi” tab and select the signal of your Braster device and enter the password. Afterwards,
you may return to the app.
7.2.4.2. CONNECTING TO AN ANDROID DEVICE
Select the signal of your Braster device on the connection screen and enter the password (the signal’s name and password
are given on the device label located inside the device). A message will display information whether a connection has been
established successfully.
The app will remember your login and password, so there will be no need for you to re-enter them when performing an
examination in the future.
YOUR MOBILE DEVICE WILL NOT HAVE ACCESS TO THE INTERNET WHEN IT IS CONNECTED TO THE BRASTER DEVICE
• Start the Braster Care mobile app on your smartphone or tablet.
• Log into the app by entering your login and password (which are the same as for your individual account on myaccount.
braster.eu).
• Click START to begin the examination. You do not need to undress at this stage yet.
During the examination the mobile device will display a navigation screen with all of the stages. The stage you are currently
going through will be highlighted in the app. Click the name of the stage to begin. The navigation screen will be displayed after
each stage. Note that you must go through all of the stages of the examination one by one. The app will not let you skip any
stage. Once you have finished a step, you will not be able to return to it.
7.2.2. QUESTIONS
In this part of the examination you will answer questions which will check whether you are eligible to perform the examination
on that particular day. These questions will also be useful for interpretation of the results. Some of them will be YES or NO
questions. If your answer enables you to perform the examination, you will be redirected to the next screen. However, if you
are unable to perform the examination, an explanatory note will be displayed. You can always return to the previous question
by clicking BACK.
In some of the questions you will select your answer from a number of options. Always remember to answer truthfully, as your
answers aect the reliability of the results.
7.2.3. TURNING THE DEVICE ON/OFF
Turn the device on by pressing the ON/OFF button for two seconds. When the device is on, the battery icon will flash green.
When the device is connected to your mobile device, the battery icon will be steady green.
In normal conditions the device turns itself o automatically once the examination is completed. To switch the device o in the
emergency mode, press the ON/OFF button and hold it for five seconds.
The device turns o automatically after ten minutes of inactivity. Therefore, if you find it necessary to interrupt the examination
for more than ten minutes, you will be required to turn the Braster device on and connect it to the mobile device once again to
continue.

20 21
ENGLISH
7.2.7. EXAMINATION
Before you start the examination, read the instructions displayed when you select “Examination” on the navigation screen.
From those instructions, you will learn exactly what to do during the examination and how to apply the device to your breasts.
To ensure top quality thermographic images during the examination:
• apply the device perpendicular to your breast (see Fig. 7: correctly applied device);
• do not lift your breast;
• do not move the device across your breast, instead hold it firmly in one place (see Fig. 8: improperly applied device);
• do not move the device away until instructed;
• keep the grip pressed as long as the examination is in progress;
• do not touch your breast with your hands during the examination.
Depending on the breast size which you entered in “My data” tab in your individual account on myaccount.braster.eu, you will
be required to make three or five applications to each breast.
ALWAYS BEGIN WITH YOUR RIGHT BREAST
This is very important, as the thermographic images of your breasts produced in individual examinations are compared to
one another. We compare the image(s) from current examination with images produced during your last five examinations.
By comparing images produced during the past examinations we can observe if there have been any changes in structural or
thermal asymmetry over time.
Breast size 1, 2 or 3
If your breast size is 1, 2 or 3, see Fig. 9A for size 1 or 2 and Fig. 9B for size 3. During the examination you will have to perform:
1) One central application to the breast, making sure that the lower edge of the matrix, i.e. the black part (the thermographic
foil), adheres to your breast (not your abdomen). Do not push your breast up.
7.2.5. ACCLIMATIZATION
The next stage of the examination is a six-minute acclimatization, i.e. regulation and stabilization of breast skin temperature. To
do this, you will be required to undress from the waist up. Acclimatization is key if you want to obtain good quality thermographic
images during the examination. Only with a properly conducted acclimatization can you be sure that the results will be reliable.
To complete the acclimatization process, follow the instructions displayed on subsequent app screens.
7.2.6. MATRIX SELECTION
At this stage, you need to select the matrix for the examination. Your Braster device was provided with a set of three matrices.
Each of them works in a dierent range of temperatures. Remember that your body temperature depends on, among other
factors, the day of your menstrual cycle, your age and metabolism. In order to produce a high-resolution thermographic image
that will show the distribution of temperatures across your breasts, you will have to select a matrix before each examination.
To select a matrix, make one application of the Braster device to the central area of each breast. Make sure, that the whole
matrix adheres tightly to the body. The app will guide you step by step through this process.
First place matrix No. 2 on the device (the number of the matrix is stated on the plastic frame). Follow the instructions displayed
on subsequent screens.
! START THE MATRIX SELECTION WITH YOUR RIGHT BREAST.
When instructed apply the device centrally to your breast and press the grip (see. Fig. 3: to see the location of the grip). The
clicking sound means that the grip has been pressed correctly.
Remember to hold the grip down as long as the examination is in progress. Do not move the device across your breast, hold
it firmly in one place. When instructed, release the button and move the device away from your breast (see Fig. 6: device
application to the breast).
! REPEAT THESE STEPS FOR YOUR LEFT BREAST.
If matrix No. 2 is suitable for you, you can start the examination. If it does not suit you, you will be asked to remove matrix No. 2
and repeat the applications with matrix No. 1 or 3. You may be asked to return to matrix no. 2 if it is more suitable for the patient’s
body temperature. Once the appropriate matrix has been selected, you can start the examination.

22 23
ENGLISH
The applications may overlap, but do not worry if in your case they do not overlap as shown in the illustrations. The crucial thing
is to make sure that your entire breast is covered.
Follow the instructions displayed on the screen of your mobile device. Each application takes about 15 seconds which may
be extended for transfer if the WiFi conditions are poor (a lot of other transmitters or radio noise). The time interval between
applications lasts approximately 10-15 seconds (depending on your breast temperature and the ambient temperature). The
matrix should not be in contact with your body during this time.
7.2.8. SENDING THE RESULTS TO THE TELEMEDICAL CENTER
Once you have made all applications, you will be informed that the examination has come to an end and that you are able to
send your collected data to the manufacturer’s telemedical center for analysis. Please note that before you send the data,
you should first disconnect your mobile device from the Braster device and connect to a WiFi network. Due to the size of the
thermographic images produced during the examination, it is not recommended to send them via mobile data but by a WiFi
network. The examination results will be sent to your account on myaccount.braster.eu within two business days.
If you select “Finish” after having sent the examination, you will be redirected to the start screen, where you can check the
status of the examination (“Sent for analysis”). When the results of the examination have been sent to your account from the
telemedical center, the status will change to “Result available”.
You do not need to send the collected data for analysis immediately after completing the examination. You can send them
whenever it is convenient for you, when you have access to Internet (preferably via WiFi). When you are ready, go to the app
and select “List of examinations”, click on the last exam and choose whether to send it or delete it. Please note that you must
either delete the results or send them for analysis before you carry out a new examination, otherwise the system will not let
you perform your next exam.
The app will let you know when the result of your examination is available. To read it, go to your individual account on myaccount.
braster.eu.
8. TROUBLESHOOTING THE MOBILE APP
In certain circumstances, carrying out an examination will not be possible. Below you may find tips on how to troubleshoot
certain problems.
8.1. The Braster device uses WiFi technology to transmit data to the mobile device. WiFi technology, by design, relies on
sharing radio bandwidth with other users. If the WiFi environment in your location is overcrowded and/or many other WiFi
2) One upper application to the outer part of your breast, on the border with your axilla, making sure that the edge of the matrix,
i.e. the black part (the thermographic foil), touches upon the lateral edge of your breast and does not extend beyond it.
3) One upper application to the inner part of your breast, making sure that the edge of the matrix, i.e. the black part (the
thermographic foil), does not extend to your other breast and your sternum.
The applications may overlap, but do not worry if in your case they do not overlap as shown in the illustrations. The crucial thing
is to make sure that your entire breast is covered.
Follow the instructions displayed on the screen of your mobile device. Each application takes about 15 seconds which may
be extended for transfer if the WiFi conditions are poor (a lot of other transmitters or radio noise). The time interval between
applications lasts approximately 10-15 seconds (depending on your breast temperature and the ambient temperature). The
matrix should not be in contact with your body during this time.
Breast size 4 or 5
If your breast size is 4 or 5 see Fig. 10A for size 4 and Fig. 10B for size 5, during the examination you will have to perform:
1) One central application to your breast, making sure that the lower edge of the matrix, i.e. the black part (the thermographic
foil), adheres to your breast (not your abdomen). Do not push your breast up.
Divide the breast into four equal quadrants, as if there was a vertical and a horizontal line crossing the center of your breast.
Now perform:
2) One application to the lower-outer quadrant of your breast, making sure that the lower edge of the matrix, i.e. the black part
(the thermographic foil), adheres to your breast (not your abdomen). Do not push your breast up.
3) One application to the upper-outer quadrant of your breast, on the border with the axilla, making sure that the edge of the
matrix, i.e. the black part (the thermographic foil), touches upon the lateral edge of the breast and does not extend beyond it.
4) One application to the upper-inner quadrant of your breast, making sure that the edge of the matrix, i.e. the black part (the
thermographic foil), does not extend to your other breast but runs across the centerline of your sternum.
5) One application to the lower-inner quadrant of your breast. The lower edge of the matrix, i.e. the black part (the thermographic
foil), should adhere to your breast (not your abdomen). Do not push the breast up.

24 25
ENGLISH
When the device is connected to the charger, the Power status indicator will be lit as steady orange. The indicator turns itself
o when the battery is fully charged. Full charging takes approximately three hours. The device must be disconnected from
the power source via the USB cable, which must be safely disconnected from the mains supply when charging is complete.
10. SAFE OPERATION
Follow the recommendations below to ensure the safe operation of the Braster device:
• Before you use the device for the first time, charge the battery using the USB cable provided.
• Only use accessories and materials supplied or recommended by the manufacturer.
• Never let the Braster device or the matrices come into contact with water.
• After the examination, store the device with a matrix on. Place the device with the matrix facing downwards, making sure
that dust does not get into the matrix. Keep the device in the original box.
• Do not place any items into the image acquisition device, this may cause damage to the internal framework of the device.
For any damage caused by the user, the manufacturer will not be held responsible.
• Do not allow the foil on the matrix to come into contact with any sharp objects.
• During the examination, do not place any objects between the image acquisition device and the mobile device. If objects
are placed between, the connection between the image acquisition device and the mobile device may be lost.
• The device can only be repaired by the manufacturer’s servicing team. Any other attempt to repair the device will void the
warranty.
• Keep the device away from children.
11. DISINFECTION
Before each examination disinfect the inner and outer surfaces of all of the three matrices. Disinfection consists of spraying
Softasept or disinfectants based on isopropyl alcohol over entire matrix, on both sides, and cleaning it thoroughly with a
disposable cotton gauze or tissue. By disinfecting you make sure that the surface is free of pathogenic microorganisms such
as bacteria, viruses and fungi.
The device must not be washed or immersed in water. Do not clean the applied parts of the matrices, which come into
contact with your breast skin, with any mechanical agents that may cause damage to such surfaces (e.g. brushes) and
do not use agents that contain organic solvents (e.g. gasoline, acetone) as, once damaged, matrices will not be fit for
further use.
signals are available, performance of the Braster device may be decreased resulting in a longer registration time during
applications or even, in extreme WiFi conditions, inability to register a full set of images. In this situation, please go to a
place where the WiFi environment is not overcrowded or return to the examination later that day.
8.2. If you have not bought an examination package or have used up all purchased examinations, the app will display an
appropriate message and the examination will be impossible. You will have to buy an examination package to continue. To
do this, go to the Braster e-store or depending on the country, the e-store or other outlet of the local distributor. If you do
not want to purchase an examination package right now, select “Cancel the Examination”.
8.3. If the battery level of your smartphone or tablet is too low, the examination will be impossible to perform until the device has
been charged to a level indicated in the message. Select “Cancel the Examination” to return to the start screen.
8.4. If there is not enough disc space in your mobile device to save a complete examination, the examination will be impossible
to perform until the appropriate amount of disc space is made available. Select “Cancel the Examination” to return to the
start screen.
8.5. If after entering your login and password to the Braster Care app a “Server is unavailable” message is displayed, you should
install an additional certificate. Please contact our contact center by e-mail to find out more: contactcenter@braster.eu.
9. CHARGING
Charge the device with a USB-A charger consistent with IEC 60950-1 or IEC 60601-1, charger parameters: DC 5V 1A, USB slot
(specification of the feeding device). Switch the device o before charging. For safety purposes, while charging, place the
device in a position where you may easily remove the USB cable from the device.
The device must not be charging while an examination is in progress.
Do not turn the device on while it is being charged.
To charge the battery, pull the rubber cap with the USB sign situated on the side of the Braster device next to the ON/OFF
button. Connect one end of the USB cable to the Braster device and the other end to the charger (the plug is not included in the
set). Connect the charger to a power source (see Fig. 11: location of the USB slot: 1. mini-USB slot, 2. USB slot).

26 27
ENGLISH
14. DECLARATION OF CONFORMITY
BRASTER S.A. hereby declares that the Braster System conforms with the essential requirements and other relevant provisions
of the Directive 93/42/EEC and the Directive 2011/65/EU. If you would like to receive the declaration of conformity, contact the
manufacturer (contact details are given on the last page of this User Manual).
ELECTROMAGNETIC COMPATIBILITY
The Braster device is intended for use in an electromagnetic environment with controlled RF interference. The customer or
the user of the image acquisition device may help prevent electromagnetic interference by maintaining the minimum required
distance between the mobile device and cellular radio devices (transmitters). This equipment is not subject to the protection
from harmful interference and may not cause interference with duly authorized systems.
15. TECHNICAL AND OPERATIONAL SPECIFICATION OF THE DEVICE
Weight of the image
acquisition device (excluding
matrix)
305 g
Weight of one matrix 87 g
Device size (excluding
matrix)
diameter 17.2 cm
height 13 cm
Limits of storage conditions
−25°C to +5°C (-13°F to +41°F), and
+5°C to +35°C (+41°F to +95°F) in ambient humidity of up to 90%, without condensation, and
+35°C to +70°C (+95°F to +158°F) with vapor pressure of up to 50 hPa
Recommended storage
conditions
−5°C to +60°C (+23°F to +140°F)
humidity between 10% and 90% (without condensation)
12. CLEANING AND MAINTENANCE
Wipe thoroughly both surfaces of all of the three matrices with the cloth provided. It is important that the surface of the matrix
is clean, i.e. free of any visible contamination (e.g. fingerprints, dust). The inner side of the matrix is technologically matted. The
foil surface on the inner side of the matrix bears directional scratches, which have been made deliberately in a technological
procedure performed in order to achieve appropriate light diusion in the working space of the image acquisition device.
The image acquisition device and the matrices must be kept in the original packaging, at temperatures between −5°C and
+60°C. Do not expose the device to UV radiation (e.g. from UV lamps used for air disinfection or from the sun).
13. SERVICING AND TECHNICAL SUPPORT
If you require technical support or if you want to report a malfunction of the device or any other unexpected circumstances,
contact your local distributor of the Braster System or the manufacturer. Contact details are available on www.braster.eu.
USER RESPONSIBILITIES
The Braster device must be used in accordance with the recommendations given in this User Manual and labels. Do not use
the device if it has been damaged. Any parts that are missing, incomplete, damaged or worn out must be immediately replaced
at an authorized service point (details are available on www.braster.eu). Any actions connected with repairs or replacements
may only be performed by personnel of an authorized service point. The manufacturer is not liable for any damages caused by
non-compliance with the user manual.
Warranty
The Braster device is covered by the manufacturer’s warranty for 24 months. The warranty shall only be valid if accessories
and spare parts approved by BRASTER S.A. are used and the device is used as described in the user manual and according to
the intended use.
Any repairs of the Braster device must be made by personnel of an authorized service point. Any repairs performed by
unauthorized persons will result in voiding of the warranty.

28 29
ENGLISH
17. FCC REGULATORY STATEMENT
This device complies with part 15 of the FCC rules. Operation is subject to the following two conditions: (1) this device may not
cause harmful interference, and (2) this device must accept any interference received, including interference that may cause
undesired operation.
The Braster device has been tested and found to comply with the limits for a Class B digital device. These limits are designed
to provide reasonable protection against harmful interference in a residential installation. The Braster device generates, uses,
and may radiate radio frequency energy and, if not installed and used in accordance with the User Manual, may cause harmful
interference to radio communications. However, there is no guarantee that interference will not occur in a particular installation.
If the device does cause harmful interference to radio or television reception, which can be determined by turning the device o
and on, the user is encouraged to try to correct the interference by one or more of the following measures:
• Reorient or relocate the receiving antenna.
• Increase the separation between the device and receiver.
• Connect the device to an outlet on a circuit dierent from that to which the receiver is connected.
• Consult the dealer or an experienced radio/TV technician for help.
Any changes or modifications not approved by the party responsible for compliance will void the user’s authority to
operate this equipment. This transmitter must not be co-located or operating in conjunction with any other antenna or
transmitter. The manufacturer is not responsible for any radio or TV interference caused by unauthorized modifications
to this device.
This equipment complies with FCC radiation exposure limits set forth for an uncontrolled environment in accordance with FCC
rule part 2.1093 and KDB 447498.
18. CANADIAN REGULATORY STATEMENT
The Braster device complies with ISED Canada License-exempt RSSs. Operation is subject to the following two conditions: (1)
this device may not cause interference, and (2) this device must accept any interference, including interference that may cause
undesired operation of the device.
This device complies with the safety requirements for RF exposure in accordance with RSS-102 Issue 5 for portable conditions.
The Braster device contains an internal, integrated antenna and it cannot operate in conjunction with any other antenna or
transmitter.
16. ADVERSE EVENT AND MEDICAL INCIDENTS
Any adverse event or serious incidents that occur in relation to the device should be reported to the manufacturer on the address
given in Section “Contact the Manufacturer” and to the competent authority of the country in which the user is established.
Limits of operating
conditions
+5°C to +40°C (+41°F to +104°F)
humidity between 15% and 90% (without condensation)
Recommended operating
conditions
+20°C to +25°C (+68°F to +77°F)
humidity between 30% and 85%
protected against UV radiation
The limits of the operating conditions guarantee the electrical safety of the device. To protect the thermographic matrices
against excess wear and damage, keep them in the recommended operating and storage conditions.
Maximum approved opera-
tion altitude
3500 m above sea level
Approved atmospheric
pressure
(for the device to be used)
700–1060 hPa
The device can be paired
with
A smartphone or tablet with a WiFi module and a RAM of at least 100 MB.
For system requirements, go to: https://www.braster.eu/system
Charger DC 5V 1A with a USB slot and meeting the IEC 60950-1 or IEC 60601-1 standards

30
L’appareil Braster est conforme aux RSS exclus de la licence ISED Canada. L’exploitation est autorisée aux deux conditions
suivantes: (1) l’appareil ne doit pas produire de brouillage, et (2) l’utilisateur de l’appareil doit accepter tout brouillage
radioélectrique subi, même si le brouillage est susceptible d’en compromettre le fonctionnement.
Cet appareil est conforme aux exigences de sécurité pour l’exposition aux radiofréquences conformément au RSS-102 Issue 5
pour les conditions portables.
Le dispositif Braster contient une antenne interne intégrée et il ne peut pas fonctionner avec d’autres antennes ou transmetteurs.
19. DISPOSAL
This symbol is used by the Company as part of the resource-ecient initiative and health and environment
protection, in accordance with governmental instructions. The symbol means that the electronic device
(including batteries) must not be thrown away together with conventional household waste. Should you need
more information on the dedicated waste collection points, please contact your local authorities.

31
POLSKI
INSTRUKCJA OBSŁUGI

33
POLSKI
SPIS TREŚCI
SŁOWNIK POJĘĆ 34
WAŻNE INFORMACJE DOTYCZĄCE BEZPIECZEŃSTWA 35
WSTĘP 36
1. OPIS I PRZEZNACZENIE 37
1.1. OPIS 37
1.2. PRZEZNACZENIE 37
1.2.1. WSKAZANIA 37
1.2.2. PRZECIWWSKAZANIA 38
2. ZASADA DZIAŁANIA URZĄDZENIA 38
3. ZAWARTOŚĆ OPAKOWANIA 39
4. OPIS INTERFEJSU URZĄDZENIA BRASTER 39
5. WYMIANA MATRYC 41
6. PRZYGOTOWANIE URZĄDZENIA PRZED BADANIEM 41
6.1. PRZYGOTOWANIE URZĄDZENIA PRZED PIERWSZYM BADANIEM 41
6.2. PRZYGOTOWANIE URZĄDZENIA BRASTER PRZED KOLEJNYM BADANIEM 42
7. BADANIE 42
7.1. UWAGI DOTYCZĄCE PRZEPROWADZANIA BADANIA 42
7.2. JAK PRZEPROWADZIĆ BADANIE 43
7.2.1. PRZYGOTOWANIE 43
7.2.2. PYTANIA 44
7.2.3. WŁĄCZANIE I WYŁĄCZANIE URZĄDZENIA BRASTER 44
7.2.4. ŁĄCZANIE Z URZĄDZENIEM BRASTER 45
7.2.4.1. ŁĄCZANIE W SYSTEMIE iOS 45
7.2.4.2. ŁĄCZANIE W SYSTEMIE ANDROID 45
7.2.5. AKLIMATYZACJA 46
7.2.6. WYBÓR MATRYCY 46
7.2.7. BADANIE 47
7.2.8. WYSYŁANIE BADANIA DO CENTRUM TELEMEDYCZNEGO 49
8. ROZWIĄZYWANIE POTENCJALNYCH PROBLEMÓW W APLIKACJI MOBILNEJ 50
9. ŁADOWANIE URZĄDZENIA BRASTER 51
10. UWAGI DOTYCZĄCE URZĄDZENIA BRASTER 51
11. DEZYNFEKCJA 52
12. CZYSZCZENIE I KONSERWACJA 52
13. SERWIS I WSPARCIE TECHNICZNE 53
14. DEKLARACJA ZGODNOŚCI 53
15. SPECYFIKACJA TECHNICZNA I EKSPLOATACYJNA URZĄDZENIA BRASTER 54
16. DZIAŁANIA NIEPOŻĄDANE I INCYDENTY MEDYCZNE 55
17. UTYLIZACJA 55

34 35
POLSKI
WAŻNE INFORMACJE DOTYCZĄCE BEZPIECZEŃSTWA
Celem tego rozdziału jest przedstawienie użytkowniczce najważniejszych informacji niezbędnych przed pierwszym użyciem
urządzenia. Dodatkowe ostrzeżenia oraz środki ostrożności znajdują się również w innych rozdziałach instrukcji obsługi.
OSTRZEŻENIA
Ostrzegają użytkownika przed możliwością obrażeń, śmierci lub innych poważnych działań niepożądanych związanych z użyciem
lub niewłaściwym użyciem urządzenia.
! Należy zauważyć, że badanie przy użyciu Systemu Braster nie zastępuje innych metod diagnostycznych stosowanych obecnie w praktyce klinicznej (np.
mammografii, USG, rezonansu magnetycznego). W związku z tym należy pamiętać o regularnym badaniu mammograficznym lub USG zgodnie z zaleceniami lekarza.
! Używanie, obsługiwanie oraz serwisowanie wyrobu w sposób niezgodny z niniejszą instrukcją jest niedozwolone i może doprowadzić do uszkodzenia wyrobu
lub zaburzenia jego pracy. Wyrób musi być używany i obsługiwany zgodnie z instrukcją obsługi oraz serwisowany w miejscu wskazanym przez firmę BRASTER
S.A. Wytwórca nie ponosi odpowiedzialności za skutki powstałe w wyniku nieprawidłowego używania wyrobu.
! Urządzenie nie może być ładowane w czasie przeprowadzania badania. Korzystanie z urządzenia podczas ładowania może doprowadzić do porażenia
prądem elektrycznym. Należy unikać kontaktu z urządzeniem podczas jego ładowania.
! Nie należy używać urządzenia z uszkodzoną obudową, gdyż może to doprowadzić do porażenia prądem.
! Ładowanie urządzenia należy przeprowadzić za pomocą zasilacza USB (parametry: DC 5V 1A), zgodnego z normą IEC 60950-1 lub IEC 60601-1. Przed
rozpoczęciem ładowania należy wyłączyć urządzenie.
UWAGI
Ostrzegają użytkownika przed możliwymi problemami z urządzeniem związanymi z jego użytkowaniem lub niewłaściwym
wykorzystaniem, tj. awarią urządzenia, nieprawidłowym działaniem urządzenia, uszkodzeniem urządzenia lub utratą danych.
! Przed przystąpieniem do korzystania z wyrobu, w celu zagwarantowania bezpiecznej i prawidłowej pracy urządzenia, należy zapoznać się z informacjami
o środkach ostrożności zamieszczonymi w rozdziale „Ważne informacje dotyczące bezpieczeństwa” oraz z pozostałymi informacjami
zawartymi w niniejszej instrukcji obsługi. Ilustracje i zrzuty ekranu użyte w niniejszej instrukcji obsługi mogą nieznacznie różnić się od rzeczywistego wyglądu
urządzenia i aplikacji mobilnej.
! Zgodnie z najbardziej aktualnymi badaniami przeprowadzonymi przez firmę BRASTER S.A. matryce termograficzne tracą swoje właściwości po 36 miesiącach
od pierwszego użycia. Używanie matryc po upływie 36 miesięcy od pierwszego użycia uniemożliwia przeprowadzenie procesu wiarygodnej interpretacji
badania. Aby zapewnić prawidłowe działanie urządzenia, należy wymienić zestaw matryc po upływie 36 miesięcy. Należy jednak mieć na uwadze, że
BRASTER S.A. nadal prowadzi badania nad żywotnością matryc i w przyszłości może ona zostać wydłużona.
! Przechowywanie urządzenia i matryc w gorącym, wilgotnym i/lub nasłonecznionym miejscu może doprowadzić do ich uszkodzenia. Urządzenie i matryce
należy przechowywać w suchym, chłodnym i zaciemnionym miejscu.
! Opłata za transfer danych jest zgodna z taryfą operatora.
! Należy korzystać wyłącznie z części wskazanych w instrukcji obsługi, nawiązywać połączenie wyłącznie między urządzeniem Braster a urządzeniami wskazanymi
w instrukcji obsługi i nie należy wprowadzać modyfikacji do urządzenia Braster. Korzystanie z części innych niż wskazane w instrukcji obsługi, nawiązywanie
SŁOWNIK POJĘĆ
Aplikacja mobilna –aplikacja Braster Care, oprogramowanie niezbędne do przeprowadzenia badania piersi przy pomocy
urządzenia Braster. Przed pierwszym badaniem należy ją pobrać na swoje urządzenie mobilne: smartfon lub tablet. Aplikacja
jest bezpłatna i dostępna dla systemu Android w sklepie Google Play oraz dla systemu iOS w sklepie App Store.
Braster automatyczna interpretacja (Braster AI) – oprogramowanie do automatycznej interpretacji obrazów termograficznych
otrzymanych w badaniu i informacji medycznych dostarczonych przez użytkownika za pośrednictwem aplikacji mobilnej Braster Care.
Centrum telemedyczne – infrastruktura należąca do BRASTER S.A., w której są gromadzone i przechowywane dane
użytkowniczek, oraz w której znajduje się oprogramowanie niezbędne do świadczenia usług oferowanych przez firmę
BRASTER S.A, w szczególności do dostarczania wyników badania piersi urządzeniem Braster.
Ciekłokrystaliczna matryca termograficzna (inaczej matryca ciekłokrystaliczna lub matryca termograficzna) – element
urządzenia Braster, który składa się z folii ciekłokrystalicznej oraz obejmy z tworzywa sztucznego. Obraz termograficzny
jest generowany na powierzchni folii od strony wewnętrznej, czyli tej skierowanej do środka urządzenia. Matryca jest częścią
aplikacyjną urządzenia, która ma bezpośredni kontakt ze skórą piersi.
e-sklep Braster – dostępny pod adresem
www.braster.eu
, w którym można zakupić urządzenie Braster, pakiety badań oraz
zestaw matryc termograficznych. Należy pamiętać, że na niektórych rynkach urządzenie Braster, pakiet badań i inne usługi
można nabyć tylko u lokalnego dystrybutora.
Folia ciekłokrystaliczna – element matrycy ciekłokrystalicznej. Folia zawiera ciekłe kryształy, które odwzorowują zmiany
cieplne zachodzące w piersi, tworząc barwne obrazy (termogramy).
Głowica rejestrująca – urządzenie służące do wykonania badania. Na głowicy rejestrującej znajduje się przycisk włącznika,
gniazdo USB oraz uchwyt. Głowica jest wyposażona w układ elektroniczny i kamerę rejestrującą. Wewnętrzną część głowicy
stanowi wyczerniona komora zapewniająca odpowiednią jakość pobieranych obrazów termograficznych. Głowica rejestrująca
jest urządzeniem elektronicznym sterowanym przez aplikację mobilną.
Mammografia – radiologiczna metoda badania piersi u kobiet. Polega na wykonaniu serii zdjęć gruczołu przy użyciu promieni
rentgenowskich. Jej zdolność do uwidoczniania szeregu charakterystycznych zmian pozwala na wczesne rozpoznanie raka
piersi oraz innych patologii sutka zanim staną się one jawne klinicznie. Skuteczność badania jest ściśle związana z budową
piersi, dlatego zaleca się je kobietom po 50. roku życia.
Moje Konto – konto na stronie
mojekonto.braster.eu
, w którym użytkowniczka musi zarejestrować się, aby przeprowadzić
badanie. W Moim Koncie użytkowniczka może sprawdzić np. wynik badania termograficznego.
Pakiet badań – płatny z góry pakiet automatycznych interpretacji obrazów termograficznych, zawierający określoną liczbę badań.
Termogram (inaczej obraz termograficzny) – zapis obrazu cieplnego powstałego na powierzchni folii ciekłokrystalicznej, który
odwzorowuje rozkład temperatury na powierzchni piersi.
Ultrasonografia – nieinwazyjna metoda wykorzystująca ultradźwięki do obrazowania zmian w tkankach. Badanie USG jest
podstawową metodą diagnostyczną do wykrywania patologicznych zmian w piersiach, w tym raka piersi.
Urządzenie Braster lub urządzenie – urządzenie składające się z głowicy rejestrującej oraz matrycy termograficznej.
Urządzenie mobilne – smartfon lub tablet (wymagania systemowe są dostępne na stronie:
https://www.braster.eu/system
).
Użytkowniczka – kobieta, która korzysta z Systemu Braster – systemu domowej profilaktyki raka piersi.

36 37
POLSKI
1. OPIS I PRZEZNACZENIE
1.1. OPIS
System Braster – system domowej profilaktyki raka piersi, dalej zwany Systemem Braster, jest wyrobem medycznym
przeznaczonym do wykonywania termograficznych badań piersi. System ten składa się z:
• urządzenia Braster, w skład którego wchodzą:
− głowica rejestrująca;
− trzy matryce ciekłokrystaliczne;
• aplikacji mobilnej Braster Care;
• oprogramowania do automatycznej interpretacji Braster AI.
Zob. rys. 1: Elementy Systemu Braster
1. Aplikacja Braster Care 2. Urządzenie Braster 3. Oprogramowanie Braster AI
W trakcie badania użytkowniczka przykłada urządzenie Braster do powierzchni piersi. Urządzenie jest wyposażone w folię
ciekłokrystaliczną, na powierzchni której pod wpływem ciepła ciała tworzą się barwne obrazy (niewidoczne dla użytkowniczki).
Na koniec badania zarejestrowane obrazy termograficzne są zapisywane w aplikacji mobilnej, a następnie przesyłane do
centrum telemedycznego. Tam są automatycznie analizowane przez Braster AI. W razie wykrycia potencjalnie niebezpiecznych
zmian patologicznych użytkowniczka otrzymuje zalecenia dotyczące dalszych działań.
Urządzenie Braster nie wykonuje pomiarów, ale zapisuje rozkład temperatury na powierzchni piersi, na podstawie którego
analizowane są obrazy termograficzne.
Badanie za pomocą Systemu Braster NIE ZASTĘPUJE INNYCH METOD DIAGNOSTYCZNYCH STOSOWANYCH OBECNIE
W PRAKTYCE KLINICZNEJ (takich jak MAMMOGRAFIA, USG). Stanowi ono natomiast cenne uzupełnienie wyżej
wymienionych badań.
1.2. PRZEZNACZENIE
1.2.1. WSKAZANIA
System Braster – system domowej profilaktyki raka piersi jest przeznaczony do badania piersi w warunkach domowych przez
kobiety pełnoletnie w ramach uzupełnienia badań takich jak USG i mammografia. Urządzenie wykrywa zmiany termiczne, które
wymagają potwierdzenia przy użyciu standardowych metod diagnostycznych lub w ramach konsultacji medycznej.
połączenia między urządzeniem Braster a urządzeniami innymi niż wskazane w instrukcji obsługi oraz wprowadzanie modyfikacji do urządzenia Braster może
zakłócić jego poprawne działanie i doprowadzić do powstania szkód z winy użytkowniczki, za które wytwórca nie ponosi odpowiedzialności.
! Należy ładować urządzenie przez co najmniej 30 minut przed pierwszym użyciem.
WSTĘP
Niniejsza instrukcja obsługi stanowi wyposażenie wyrobu medycznego System Braster – system domowej profilaktyki raka
piersi służącego do przeprowadzania samodzielnego badania piersi. Przed pierwszym użyciem urządzenia należy zapoznać
się z jej treścią. Instrukcja zawiera wszelkie niezbędne informacje dotyczące funkcji wyrobu, bezpieczeństwa jego używania
oraz sposobu przeprowadzania badania.
Zaleca się zachowanie instrukcji obsługi urządzenia do przyszłego użytku.
BRASTER S.A. jest właścicielem innowacyjnej, autorskiej receptury wytwarzania mieszanin związków ciekłokrystalicznych
i specjalistycznej emulsji ciekłokrystalicznej. Ten proces wytwarzania został opracowany w oparciu o technologię ciągłego
filmu ciekłokrystalicznego (CLCF – Continuous Liquid Crystal Film). Rozwiązania stosowane przez firmę BRASTER S.A.
są zabezpieczone międzynarodowymi zgłoszeniami patentowymi.
Korzystanie z urządzenia w sposób niezgodny z instrukcją obsługi może powodować zagrożenie dla zdrowia i życia
użytkowniczki lub osób trzecich. Podczas używania wyrobu należy przestrzegać zapisów instrukcji obsługi. Z wyrobu
Braster mogą korzystać tylko osoby, które zapoznały się z wyrobem i jego instrukcją obsługi.
Wyrobu należy używać tylko i wyłącznie zgodnie z jego przewidzianym zastosowaniem. Stosowanie samowolne,
niezgodne z zasadami określonymi w instrukcji obsługi, może spowodować utratę praw gwarancyjnych i wszelkich
roszczeń w przypadku powstania uszkodzenia.

38 39
POLSKI
3. ZAWARTOŚĆ OPAKOWANIA
Opakowanie zawiera:
• głowicę rejestrującą Braster, model: BRA-1.0 (zob. rys. 2A );
• zestaw trzech matryc termograficznych ponumerowanych odpowiednio 1, 2, 3, model: TMS-1.0 (zob. rys. 2B );
• przewód mini-USB;
• ściereczkę do czyszczenia matryc;
• instrukcję obsługi;
• instrukcję Szybki Start.
4. OPIS INTERFEJSU URZĄDZENIA BRASTER
Zob. rys. 3: Interfejs urządzenia Braster
1. Uchwyt
2. Dioda badania
3. Dioda statusu zasilania
4. Gniazdo mini-USB
5. Przycisk włącznika
Przycisk włącznika – włączanie/wyłączanie urządzenia
• aby włączyć urządzenie, należy nacisnąć przycisk i przytrzymać przez 2 sekundy;
• urządzenie wyłącza się samoczynnie po zakończeniu badania lub po 10 minutach bezczynności. Aby wyłączyć urządzenie
w trybie awaryjnym, należy nacisnąć przycisk i przytrzymać przez 5 sekund.
Uchwyt – aktywacja rejestracji obrazów termograficznych w trakcie badania.
• wciśnięty uchwyt w trakcie badania – aktywna rejestracja obrazów termograficznych (aktywacja Diody badania),
• niewciśnięty uchwyt – nieaktywna rejestracja obrazów termograficznych.
1.2.2. PRZECIWWSKAZANIA
Z Systemu Braster nie powinny korzystać kobiety będące w trakcie lub po leczeniu przeciwnowotworowym z powodu raka
piersi, tj. po chirurgicznym leczeniu oszczędzającym, mastektomii jednostronnej lub obustronnej, terapii lekowej (chemioterapii,
hormonoterapii, leczeniu biologicznym) bądź radioterapii.
Czasowym przeciwwskazaniem do stosowania Systemu Braster jest:
• ciąża lub karmienie piersią (do 3 miesięcy od zakończenia karmienia);
• infekcja uogólniona, w trakcie której temperatura ciała wynosi 38˚C lub więcej;
• stan zapalny piersi przebiegający z bólem, zaczerwienieniem skóry i zasinieniem (w trakcie występowania wymienionych objawów);
• druga faza cyklu miesiączkowego − ze względu na fizjologiczne zmiany w strukturze piersi podczas cyklu miesiączkowego
optymalny czas na wykonanie badania termograficznego przypada pomiędzy 3. a 12. dniem cyklu;
• nieodpowiednia temperatura (zbyt wysoka lub zbyt niska) w pomieszczeniu, w którym będzie przeprowadzone badanie
– temperatura otoczenia powinna mieścić się w zakresie 20–25˚C;
• zabieg chirurgiczny w obrębie piersi z rozpoznaniem zmiany łagodnej:
– biopsja cienkoigłowa – do 4 tygodni po zabiegu;
– biopsja gruboigłowa lub mammotomiczna piersi – do 6 miesięcy po zabiegu;
– usunięcie guzka piersi – do 12 miesięcy po zabiegu;
• wszczepienie implantów estetycznych, ostrzykiwanie (np. kwasem hialuronowym) i lipotransfer – do 12 miesięcy po zabiegu.
2. ZASADA DZIAŁANIA URZĄDZENIA
W wyrobie Braster wykorzystano technologię termografii kontaktowej. Jest to technika obrazowania medycznego, która
wykrywa zmiany w metabolizmie tkankowym. Podstawę termografii w medycynie stanowi tzw. efekt dermotermiczny polegający
na rejestrowaniu na powierzchni skóry procesów termicznych zachodzących w obserwowanych narządach wewnątrz ciała.
Proces nowotworowy charakteryzuje się wyższym tempem metabolizmu, m.in. poprzez tworzenie gęstej sieci patologicznych
naczyń włosowatych. Zmiany patologiczne z podejrzeniem cech nowotworu złośliwego są charakterystyczne pod względem
morfologicznym i mają wyższą temperaturę w stosunku do miejsc zdrowych. Ze względu na te właściwości są one widoczne
na termogramach jako barwne obszary.
Termografia kontaktowa jest badaniem komplementarnym, uzupełniającym w stosunku do badań takich jak mammografia czy
ultrasonografia gruczołu piersiowego.

40 41
POLSKI
5. WYMIANA MATRYC
Krok 1 (zob. rys. 5A ) Znajdź na styku urządzenia z matrycą wyprofilowane miejsce, chwyć w tym miejscu za krawędź matrycy i pociągnij.
Najlepiej chwyć kciukiem miejsce wyprofilowane, przytrzymując matrycę od spodu pozostałymi palcami.
Krok 2 (zob. rys. 5B ) Odciągnij matrycę od urządzenia.
Krok 3 (zob. rys. 5C ) Zamontuj matrycę, wciskając ją równolegle do obudowy. Najlepiej chwyć kciukiem miejsce wyprofilowane
na matrycy, przytrzymując matrycę od spodu pozostałymi palcami.
6. PRZYGOTOWANIE URZĄDZENIA PRZED BADANIEM
6.1. PRZYGOTOWANIE URZĄDZENIA PRZED PIERWSZYM BADANIEM
a. Po rozpakowaniu urządzenia sprawdź kompletność zestawu. W opakowaniu powinny znajdować się: głowica rejestrująca,
trzy matryce oznaczone kolejno numerami 1, 2, 3, przewód mini-USB, instrukcja obsługi, instrukcja Szybki Start i ściereczka
do czyszczenia matryc termograficznych. W przypadku niekompletności zestawu niezwłocznie wypełnij formularz reklamacji
dostępny na stronie
www.braster.eu
.
b. Matryca jest częścią aplikacyjną urządzenia, czyli elementem, który ma bezpośredni kontakt ze skórą. Dlatego przed
pierwszym użyciem należy zdezynfekować i wyczyścić zewnętrzne i wewnętrzne powierzchnie wszystkich matryc (zgodnie
z opisem oraz za pomocą środków podanych w rozdziałach 11 i 12 instrukcji).
c. Przed pierwszym badaniem ładuj urządzenie przez co najmniej 30 minut.
d. Aby przeprowadzić badanie, pobierz bezpłatną aplikację Braster Care na swoje urządzenie mobilne i zarejestruj się na stronie
mojekonto.braster.eu
. Możesz to zrobić w czasie ładowania baterii. W tym celu:
1. Pobierz aplikację Braster Care ze sklepu App Store, jeżeli korzystasz z urządzenia mobilnego posiadającego system
operacyjny iOS (iPhone/iPad), lub Google Play, jeżeli korzystasz z urządzenia mobilnego posiadającego system
operacyjny Android;
2. Zainstaluj aplikację Braster Care na swoim urządzeniu mobilnym;
3. Uruchom aplikację Braster Care oraz przeczytaj INTRO;
4. Wciśnij przycisk ZAREJSTRUJ SIĘ na dole ekranu.
Tab. 1. Objaśnienie kolorów diod interfejsu urządzenia
Gniazdo mini-USB –znajduje się pod gumową zaślepką. Aby mieć do niego dostęp, należy podnieść zaślepkę. Gniazdo mini-USB
jest przeznaczone do:
• aktualizacji oprogramowania głowicy rejestrującej,
• ładowania baterii urządzenia.
Etykieta urządzenia – znajduje się w zaczernionej komorze urządzenia i jest widoczna po zdjęciu matrycy. Na etykiecie
umieszczono numer seryjny urządzenia, który jest równocześnie nazwą sieci Wi-Fi urządzenia, i hasło do tej sieci (zob. rys. 4A :
Umiejscowienie etykiety urządzenia i 4B : Przykładowa etykieta zawierająca nazwę sieci Wi-Fi i hasło: 1. Nazwa sieci Wi-Fi
udostępnianej przez urządzenie, 2. Hasło do sieci Wi-Fi udostępnianej przez urządzenie).
Nie odklejaj etykiety z urządzenia. Na wszelki wypadek zapisz dane z etykiety i przechowuj w bezpiecznym miejscu.
Dioda badania Dioda statusu zasilania Opis
Nie świeci Nie świeci Urządzenie wyłączone
Nie świeci Błyska na zielono Urządzenie włączone
Nie świeci Świeci zielonym światłem stałym
Urządzenie połączone
z urządzeniem mobilnym
Pulsuje na biało Świeci zielonym światłem stałym
Urządzenie w trakcie rejestracji
termogramu
Nie świeci
Świeci pomarańczowym
światłem stałym
Urządzenie w trakcie ładowania baterii
Nie świeci Błyska na pomarańczowo
Poziom naładowania baterii niewystar-
czający do przeprowadzenia badania
Świeci białym światłem stałym Nie świeci/świeci na pomarańczowo Tryb aktualizacji oprogramowania
Błyska na biało Nie świeci/świeci na pomarańczowo Trwa aktualizacja oprogramowania

42 43
POLSKI
• upewnij się, że masz wykupiony pakiet badań − jeśli nie, wykup go w e-sklepie Braster lub, w zależności od kraju, w sklepie
internetowym lub stacjonarnym lokalnego dystrybutora.
PAMIĘTAJ
Nie przeprowadzaj badania w pomieszczeniu, w którym temperatura jest niższa niż 20˚C lub wyższa niż 25˚C.
Ze względu na fizjologiczne zmiany w strukturze piersi w czasie trwania cyklu miesiączkowego optymalny czas na
wykonanie badania termograficznego przypada pomiędzy 3. a 12. dniem cyklu.
Jeśli nie miesiączkujesz lub Twój cykl miesiączkowy jest nieregularny (wahania dłuższe niż 10 dni), zalecamy
wykonywanie badania raz w miesiącu w równych odstępach czasu, np. między 1. a 5. dniem miesiąca lub w każdy
pierwszy weekend miesiąca.
1. W dniu poprzedzającym badanie:
• unikaj zabiegów, które mogą wywołać większy przepływ krwi w obrębie piersi (zabiegi fizjoterapeutyczne, masaże itp.).
2. W dniu badania:
• unikaj zabiegów, które mogą wywołać większy przepływ krwi w obrębie piersi (zabiegi fizjoterapeutyczne, masaże itp.);
• upewnij się, że jesteś między 3. a 12. dniem cyklu miesiączkowego, a jeśli nie miesiączkujesz, że od poprzedniego badania
upłynęło 30 dni;
• nie bierz kąpieli ani prysznica przez około 2 godziny przed badaniem;
• nie spożywaj napojów alkoholowych;
• nie wykonuj peelingów skóry piersi i dekoltu oraz depilacji pach − mogą one podrażnić powierzchnię skóry;
• nie przebywaj w pobliżu źródeł ciepła lub zimna, takich jak grzejniki czy klimatyzatory przez około 30 min. przed badaniem
i w trakcie badania;
• unikaj intensywnego wysiłku fizycznego przez około 2 godziny przed badaniem;
• unikaj kosmetyków i wilgoci na skórze piersi przez około 2 godziny przed badaniem – skóra powinna być czysta i sucha;
• nie korzystaj z sauny lub łaźni parowej.
7.2. JAK PRZEPROWADZIĆ BADANIE
7.2.1. PRZYGOTOWANIE
• Umieść urządzenie Braster przed sobą. Upewnij się, że jest wyłączone. Przygotuj swoje urządzenie mobilne z zainstalowaną
aplikacją Braster Care (zgodnie z instrukcjami instalacji aplikacji opisanymi w rozdziale 6 instrukcji). Upewnij się, że Twoje
urządzenie mobilne jest połączone z Internetem.
e. Zarejestruj się zgodnie ze wskazówkami (zalecamy, aby do rejestracji i logowania się na swoje indywidualne konto korzystać
z komputera, ponieważ zostało ono zaprojektowane dla dużych ekranów):
1. Jeżeli po naciśnięciu przycisku „Zarejestruj się” nie zostaniesz automatycznie przekierowana, wejdź na stronę
www.braster.eu
i naciśnij przycisk MOJE KONTO;
2. Uzupełnij wszystkie dane. W polu typ konta wybierz „Braster – do użytku domowego” i wciśnij przycisk „Zarejestruj się”;
3. Wejdź na swoje konto poczty elektronicznej i znajdź e-mail z linkiem aktywacyjnym. Jeśli nie znajdziesz go w folderze
głównym, sprawdź folder „Spam”;
4. Gdy aktywujesz już konto kliknięciem w link aktywacyjny, na stronie logowania wpisz swój login (czyli adres e-mail
podany przy rejestracji) oraz hasło (podane przy rejestracji), a następnie kliknij „Zaloguj się”;
5. Uzupełnij swoje dane medyczne i osobowe w ankiecie. Jeżeli nie wypełnisz ankiety przy pierwszym logowaniu,
przeprowadzenie badania nie będzie możliwe;
6. Aktywuj swój pakiet badań w zakładce „Kody aktywacyjne”, a następnie kliknij „Aktywuj pakiet”;
7. Po dokonaniu rejestracji wyloguj się z portalu.
f. Gdy ładowanie urządzenia Braster zakończy się, uruchom aplikację i postępuj zgodnie ze wskazówkami opisanymi w rozdziale 7.
6.2. PRZYGOTOWANIE URZĄDZENIA BRASTER PRZED KOLEJNYM BADANIEM
a. Przygotowanie do każdego badania rozpoczynaj od dezynfekcji i dokładnego wyczyszczenia powierzchni matryc
ciekłokrystalicznych. W tym celu korzystaj z zalecanych środków. Konieczne jest wyczyszczenie wszystkich matryc, ze
szczególnym uwzględnieniem powierzchni folii po wewnętrznej stronie matrycy. Upewnij się, że powierzchnia folii została
wyczyszczona z odcisków palców, smug, kurzu itp., ponieważ zanieczyszczenia mogą mieć wpływ na interpretację badania
termograficznego (więcej informacji możesz znaleźć w rozdziale 11 „Dezynfekcja” i 12 „Czyszczenie i konserwacja”).
b. Po wyczyszczeniu matryc uruchom aplikację i postępuj zgodnie ze wskazówkami opisanymi w rozdziale 7.
7. BADANIE
7.1. UWAGI DOTYCZĄCE PRZEPROWADZANIA BADANIA
Nie korzystaj z urządzenia w trakcie ładowania baterii.
Przed pierwszym badaniem:
• pobierz bezpłatną aplikację Braster Care ze sklepu App Store lub Google Play na swoje urządzenie mobilne;

44 45
POLSKI
7.2.4. ŁĄCZENIE Z URZĄDZENIEM BRASTER
Połączenie z urządzeniem Braster przebiega nieco inaczej w przypadku urządzenia mobilnego z systemem iOS i nieco inaczej
w przypadku urządzenia z systemem Android.
W celu nawiązania połączenia z urządzeniem Braster postępuj zgodnie z instrukcjami wyświetlanymi w aplikacji.
Ustaw urządzenie w taki sposób, aby widzieć etykietę z nazwą sieci Wi-Fi i hasłem. Etykieta znajduje się wewnątrz urządzenia
i jest widoczna po zdjęciu matrycy (rys. 4A i 4B ).
7.2.4.1. ŁĄCZENIE W SYSTEMIE iOS
Na ekranie łączenia z urządzeniem kliknij „Ustawienia”. Z listy sieci Wi-Fi wybierz sieć Braster określoną na etykiecie urządzenia
i wprowadź hasło. Następnie wróć do aplikacji. Po chwili pojawi się komunikat informujący o nawiązaniu połączenia.
Nie przejmuj się, jeżeli zamiast powrotu do aplikacji wróciłaś do ekranu głównego swojego urządzenia mobilnego. Możesz
wejść do aplikacji ponownie. Powinnaś znaleźć się na etapie, na którym będziesz już połączona z urządzeniem.
Jeżeli z jakiegoś powodu nie możesz przejść do ustawień sieci Wi-Fi, opuść aplikację, przejdź do „Ustawień” na swoim
urządzeniu mobilnym, wybierz zakładkę „Wi-Fi”, a następnie wybierz sieć Twojego urządzenia Braster i wprowadź hasło. Potem
możesz wrócić do aplikacji.
7.2.4.2. ŁĄCZENIE W SYSTEMIE ANDROID
Na ekranie łączenia wybierz sieć Twojego urządzenia Braster. Wprowadź hasło z etykiety urządzenia (nazwa i hasło urządzenia
podane na etykiecie urządzenia znajdują się wewnątrz urządzenia). Po chwili pojawi się komunikat informujący o nawiązaniu
połączenia.
Przy kolejnym badaniu aplikacja powinna już pamiętać Twój login i hasło, dlatego nie będziesz musiała ponownie ich
wprowadzać.
W TRAKCIE POŁĄCZENIA Z URZĄDZENIEM BRASTER NIE BĘDZIESZ MIAŁA DOSTĘPU DO INTERNETU NA SWOIM
URZĄDZENIU MOBILNYM.
• Uruchom aplikację mobilną Braster Care na swoim smartfonie lub tablecie.
• Zaloguj się do aplikacji, wprowadzając swój login i hasło (login i hasło są takie same jak te do indywidualnego konta
użytkowniczki na stronie
mojekonto.braster.eu
).
• Rozpocznij badanie, klikając „Start”. Nie rozbieraj się jeszcze.
W trakcie badania aplikacja będzie wyświetlała ekran nawigacji pokazujący wszystkie etapy badania. Jasne podświetlenie
będzie wskazywało etap, na którym aktualnie jesteś. Aby rozpocząć dany etap, kliknij w jego nazwę. Ekran nawigacji będzie
pokazywał się po zakończeniu każdego etapu. Pamiętaj, że musisz kolejno przechodzić przez wszystkie etapy badania.
Aplikacja nie pozwoli Ci pominąć żadnego z nich. Po zakończeniu danego etapu nie będziesz mogła do niego wrócić.
7.2.2. PYTANIA
W tej części odpowiesz na pytania, które sprawdzą, czy danego dnia możesz zbadać piersi Brasterem. Te pytania będą również
przydatne do interpretacji wyników. W części pytań będziesz miała do wyboru odpowiedź TAK lub NIE. Jeżeli wybrana przez
Ciebie odpowiedź pozwala na przeprowadzenie badania, zostaniesz przekierowana do kolejnego ekranu. Jeżeli jednak
odpowiedź, którą zaznaczyłaś, wyklucza możliwość wykonania badania, wyświetli się informacja wyjaśniająca, dlaczego nie
powinnaś przeprowadzać badania. Z poziomu każdego pytania możesz wrócić do poprzedniego pytania, klikając WRÓĆ.
W części pytań będziesz mogła wybrać odpowiedź spośród kilku opcji. Pamiętaj, aby odpowiadać zgodnie z prawdą, gdyż
Twoje odpowiedzi wpływają na wiarygodność wyniku.
7.2.3. WŁĄCZANIE I WYŁĄCZANIE URZĄDZENIA BRASTER
Aby włączyć urządzenie, przytrzymaj przez 2 sekundy przycisk włącznika. Gdy urządzenie jest włączone, ikona baterii miga na
zielono. Gdy urządzenie połączy się z urządzeniem mobilnym, ikona baterii zmieni się na zielone światło ciągłe.
W normalnych warunkach po zakończeniu badania urządzenie wyłącza się samoczynnie. Aby jednak awaryjnie wyłączyć
urządzenie, przytrzymaj przycisk włącznika przez 5 sekund.
Urządzenie wyłącza się automatycznie po 10 minutach bezczynności. W związku z tym, jeśli z jakiegoś powodu w trakcie
badania będziesz miała przerwę dłuższą niż 10 minut, to aby dokończyć badanie, będziesz musiała jeszcze raz włączyć
urządzenie i nawiązać połączenie między urządzeniem mobilnym a urządzeniem Braster.

46 47
POLSKI
7.2.7. BADANIE
Zanim rozpoczniesz badanie zapoznaj się z instrukcjami przeprowadzania badania, które wyświetlą się po kliknięciu w „Badanie”
na ekranie nawigacyjnym. Dzięki nim dowiesz się, co dokładnie będziesz robić w trakcie badania i poznasz najważniejsze
zasady dotyczące przykładania urządzenia do piersi.
W celu zapewnienia najwyższej jakości obrazów termograficznych powstających w trakcie badania:
• przykładaj urządzenie prostopadle do piersi (zob. rys. 7: Prawidłowe przyłożenie urządzenia do piersi);
• nie podnoś piersi;
• nie przesuwaj urządzenia po piersi, tylko trzymaj je pewnie w jednym miejscu (zob. rys. 8: Nieprawidłowe przyłożenie
urządzenia do piersi);
• nie odsuwaj urządzenia od piersi, dopóki nie pojawi się odpowiedni komunikat;
• przez cały okres skanowania trzymaj dociśnięty uchwyt;
• uważaj, aby w trakcie badania nie dotykać piersi rękoma.
W zależności od rozmiaru piersi, który podałaś w zakładce „Moje dane” na stronie
mojekonto.braster.eu
, będziesz musiała
wykonać trzy lub pięć przyłożeń do każdej z piersi.
ZAWSZE ROZPOCZYNAJ BADANIE OD PRAWEJ PIERSI
Zasada ta jest niezwykle ważna, ponieważ obrazy termograficzne Twoich piersi uzyskane w poszczególnych badaniach są
ze sobą porównywane. W czasie analizy porównujemy obraz termograficzny z bieżącego badania z obrazami otrzymanymi
podczas ostatnich pięciu badań. Porównując obrazy z poprzednich badań, można zaobserwować, czy z upływem czasu
nastąpiły jakiekolwiek zmiany asymetrii strukturalnej lub termicznej.
Rozmiar piersi 1, 2 lub 3
Jeśli Twój rozmiar piersi to 1, 2 lub 3, (zob. rys. 9A dla rozmiaru 1 lub 2 i rys. 9B dla rozmiaru 3), to podczas badania będziesz
musiała wykonać następujące przyłożenia:
7.2.5. AKLIMATYZACJA
Kolejnym krokiem badania jest sześciominutowa aklimatyzacja, tj. unormowanie i ustabilizowanie temperatury skóry piersi.
W tym celu będziesz musiała rozebrać się od pasa w górę. Aklimatyzacja jest bardzo istotna dla jakości obrazu termograficznego
powstającego podczas badania. Tylko odpowiednio przeprowadzona aklimatyzacja zapewni wiarygodne wyniki badania.
Aby przejść przez proces aklimatyzacji, wykonuj polecenia wyświetlane na kolejnych ekranach aplikacji.
7.2.6. WYBÓR MATRYCY
Na tym etapie ustalisz, której matrycy powinnaś użyć do przeprowadzenia badania. Wraz z urządzeniem otrzymałaś zestaw
trzech matryc. Każda z nich dostosowana jest do pracy w innym zakresie temperatur. Pamiętaj, że temperatura Twojego
ciała zależy m.in. od dnia cyklu, wieku i przemiany materii. Aby otrzymać wysokiej jakości obraz termograficzny, który będzie
najlepiej odwzorowywał rozkład temperatur Twojej piersi, będziesz musiała przechodzić przez proces wyboru matrycy przy
każdym badaniu.
W celu wybrania matrycy wykonasz po jednym przyłożeniu do centralnej części każdej z piersi. Aplikacja poprowadzi Cię krok
po kroku przez ten proces.
W pierwszej kolejności załóż na urządzenie matrycę nr 2 (numer matrycy znajduje się na obejmie). Następnie postępuj zgodnie
z instrukcjami wyświetlanymi na kolejnych ekranach.
! ROZPOCZNIJ DOBÓR MATRYCY OD PRAWEJ PIERSI
Gdy na ekranie pojawi się odpowiednie polecenie, przyłóż urządzenie centralnie do piersi, jednocześnie dociskając uchwyt
(zob. rys. 3: aby zobaczyć umiejscowienie uchwytu). Charakterystyczne kliknięcie oznacza, że uchwyt został dobrze dociśnięty.
Pamiętaj, aby trzymać uchwyt dociśnięty tak długo, jak długo trwa badanie. Upewnij się, że cała matryca ściśle przylega do
ciała. Nie przesuwaj urządzenia po powierzchni piersi, tylko trzymaj je pewnie w jednym miejscu. Gdy pojawi się odpowiedni
komunikat, zwolnij uchwyt i odsuń urządzenie od piersi (zob. rys. 6: przyłożenie urządzenia do piersi).
! POWTÓRZ TE SAME CZYNNOŚCI DLA PIERSI LEWEJ
Jeśli matryca nr 2 będzie dla Ciebie odpowiednia, będziesz mogła rozpocząć badanie. Jeśli okaże się nieodpowiednia,
zostaniesz poproszona o zdjęcie matrycy numer 2, założenie matrycy nr 1 lub 3 na urządzenie i o powtórzenie przyłożeń.
Może się tak zdarzyć, że będziesz musiała wrócić do matrycy nr 2 i nią wykonać badanie. Gdy odpowiednia dla Ciebie matryca
zostanie dobrana, będziesz mogła rozpocząć właściwe badanie.

48 49
POLSKI
5) Jedno przyłożenie do dolnej wewnętrznej części piersi. Dolna krawędź matrycy powinna przylegać do piersi. Pamiętaj, aby
nie podciągać piersi do góry.
Przyłożenia matrycy mogą się na siebie nakładać. Nie przejmuj się jednak, jeśli na Twojej piersi nie nakładają się tak samo jak
na obrazku. Najważniejsze, aby przyłożenia w sumie objęły całą pierś.
Postępuj zgodnie z instrukcją wyświetlaną na ekranie urządzenia mobilnego. Każde przyłożenie trwa około 15 sekund. Czas ten
jednak może się wydłużyć, jeżeli badanie jest wykonywane w słabych warunkach sieci Wi-Fi (np. duża liczba innych nadajników
sygnału Wi-Fi w okolicy lub zakłócenia radiowe). Czas pomiędzy przyłożeniami wynosi około 10–15 sekund (w zależności od
temperatury piersi i otoczenia). Ważne, aby w tym czasie matryca urządzenia nie miała kontaktu z ciałem.
7.2.8. WYSYŁANIE BADANIA DO CENTRUM TELEMEDYCZNEGO
Po wykonaniu wszystkich przyłożeń zostaniesz powiadomiona, że badanie dobiegło końca i będziesz mogła wysłać zebrane
dane do centrum telemedycznego Braster w celu analizy. Pamiętaj, że aby wysłać obrazy do analizy, trzeba najpierw rozłączyć
się z siecią Braster i połączyć się z siecią domową. Ze względu na rozmiar obrazów termograficznych wykonanych podczas
badania nie zaleca się wysyłania ich za pomocą danych komórkowych, ale przez sieć Wi-Fi. Wynik badania pojawi się w ciągu
2 dni roboczych na stronie
mojekonto.braster.eu
.
Gdy wyślesz badanie, naciśnij „Zakończ”. Zobaczysz ponownie ekran startowy, na którym będziesz mogła sprawdzić
status wykonanego badania („Wysłane do analizy”). Kiedy na Twoje konto zostanie przesłany wynik badania z centrum
telemedycznego, jego status zmieni się na „Wynik dostępny”.
Nie musisz wysyłać obrazów do analizy bezpośrednio po zakończeniu badania. Możesz to zrobić w innym dogodnym dla Ciebie
momencie, gdy będziesz miała dostęp do Internetu (najlepiej przez sieć Wi-Fi). Gdy będziesz gotowa, wystarczy, że wejdziesz w
aplikację, wybierzesz „Listę Badań” i klikając w odpowiednie badanie, będziesz mogła zdecydować, czy chcesz je wysłać czy
usunąć. Pamiętaj jednak, że musisz wysłać obrazy do analizy lub usunąć je z aplikacji zanim przystąpisz do kolejnego badania.
W przeciwnym razie system nie pozwoli Ci wykonać nowego badania.
Aplikacja powiadomi Cię, gdy wynik Twojego badania będzie już dostępny. Aby się z nim zapoznać, wejdź na swoje konto na
stronie
mojekonto.braster.eu.
1) Jedno centralne przyłożenie, tak aby dolna krawędź matrycy (a właściwie folia termograficzna, czyli jej czarna część)
przylegała do piersi (a nie brzucha). Pamiętaj, aby nie podciągać piersi do góry.
2) Jedno przyłożenie do górnej zewnętrznej części piersi na granicy z pachą, tak aby krawędź matrycy dotykała bocznej
krawędzi piersi i nie wychodziła za nią.
3) Jedno przyłożenie do górnej wewnętrznej części piersi, tak aby krawędź matrycy nie zachodziła na drugą pierś oraz mostek.
Przyłożenia mogą się na siebie nakładać. Nie przejmuj się jednak, jeśli na Twojej piersi nie nakładają się tak samo jak na
obrazku. Najważniejsze, aby przyłożenia w sumie objęły całą pierś.
Postępuj zgodnie z instrukcją wyświetlaną na ekranie urządzenia mobilnego. Każde przyłożenie trwa około 15 sekund. Czas ten
jednak może się wydłużyć, jeżeli badanie jest wykonywane w słabych warunkach sieci Wi-Fi (np. duża liczba innych nadajników
sygnału Wi-Fi w okolicy lub zakłócenia radiowe). Czas pomiędzy przyłożeniami wynosi około 10–15 sekund (w zależności od
temperatury piersi i otoczenia). Ważne, aby w tym czasie matryca urządzenia nie miała kontaktu z ciałem.
Rozmiar piersi 4 lub 5
Jeśli Twój rozmiar piersi to 4 lub 5 (rys. 10A dla rozmiaru 4 i rys. 10B dla rozmiaru 5), to podczas badania będziesz musiała
wykonać następujące przyłożenia:
1) Jedno centralne przyłożenie, tak aby dolna krawędź matrycy (a właściwie folia termograficzna, czyli jej czarna część)
przylegała do piersi (a nie brzucha). Pamiętaj, aby nie podciągać piersi do góry.
Następnie podziel pierś na 4 równe części, wyobrażając sobie pionową i poziomą linię przechodzącą przez środek piersi.
Teraz wykonaj:
2) Jedno przyłożenie do dolnej zewnętrznej części piersi, tak aby dolna krawędź matrycy przylegała do piersi (a nie brzucha).
Pamiętaj, aby nie podciągać piersi do góry.
3) Jedno przyłożenie do górnej zewnętrznej części piersi na granicy z pachą, tak aby krawędź matrycy dotykała bocznej
krawędzi piersi i nie wychodziła za nią.
4) Jedno przyłożenie do górnej wewnętrznej części piersi, tak aby krawędź matrycy nie nachodziła na drugą pierś, ale
przylegała do środkowej linii mostka.

50 51
POLSKI
9. ŁADOWANIE URZĄDZENIA BRASTER
Ładowanie urządzenia należy przeprowadzić za pomocą ładowarki USB-A zgodnej z normą IEC 60950-1 lub IEC 60601-
1, parametry ładowarki to DC 5V 1A z gniazdem USB. Przed rozpoczęciem ładowania wyłącz urządzenie. Ze względów
bezpieczeństwa podczas ładowania umieść urządzenie w pozycji, w której można łatwo wyjąć przewód USB z urządzenia.
Zabrania się ładowania urządzenia podczas przeprowadzania badania.
Zabrania się uruchamiania urządzenia podczas ładowania.
W celu naładowania baterii w urządzeniu Braster odsuń gumową zaślepkę od gniazda USB znajdującego się z boku urządzenia
obok przycisku włącznika. Jeden koniec przewodu USB podłącz do urządzenia Braster, a drugi do ładowarki (pamiętaj,
że wtyczka nie wchodzi w skład zestawu) lub włączonego komputera. Podłącz ładowarkę do źródła zasilania (zob. rys. 11:
Umiejscowienie gniazda USB: 1. gniazdo mini-USB, 2. gniazdo USB).
Po podłączeniu urządzenia do ładowarki lub komputera dioda statusu zasilania będzie świecić światłem pomarańczowym
stałym. W momencie pełnego naładowania baterii dioda statusu zasilania zgaśnie. Czas potrzebny do pełnego naładowania
baterii wynosi ok. 3 godzin. Po zakończeniu ładowania, należy odłączyć urządzenie od źródła zasilania, bezpiecznie wyciągając
przewód USB z gniazdka.
10. UWAGI DOTYCZĄCE EKSPLOATACJI URZĄDZENIA BRASTER
W celu bezpiecznego używania urządzenia Braster przestrzegaj poniższych zaleceń:
• Przed pierwszym użyciem urządzenia naładuj baterię za pomocą dołączonego przewodu USB.
• Korzystaj wyłącznie z akcesoriów i materiałów dostarczonych przez wytwórcę lub przez niego rekomendowanych.
• Nie dopuszczaj do kontaktu głowicy rejestrującej i matryc z wodą.
• Po zakończeniu badania przechowuj urządzenie z założoną matrycą. Stawiaj urządzenie matrycą do dołu, dbając o to, by
wnętrze głowicy nie zostało zakurzone. Zaleca się przechowywanie urządzenia w oryginalnym opakowaniu.
• Nie umieszczaj żadnych przedmiotów w głowicy rejestrującej, gdyż grozi to uszkodzeniem urządzenia. W przypadku
uszkodzeń spowodowanych przez użytkowniczkę producent nie ponosi odpowiedzialności.
• Nie dopuszczaj do kontaktu folii ciekłokrystalicznej z ostrymi przedmiotami.
8. ROZWIĄZYWANIE POTENCJALNYCH PROBLEMÓW W APLIKACJI MOBILNEJ
W pewnych okolicznościach możliwość przeprowadzania badania zostanie zablokowana. Aby ją odblokować, zostaniesz
poproszona o wykonanie dodatkowych działań.
8.1. Urządzenie Braster wykorzystuje technologię Wi-Fi do przesyłania danych do urządzenia mobilnego. Technologia Wi-
Fi polega na dzieleniu pasma radiowego z innymi urządzeniami. Jeżeli w Twojej okolicy znajduje się wiele urządzeń
nadających sygnał Wi-Fi, to wydajność urządzenia Braster może ulec zmniejszeniu, co może wydłużyć czas rejestracji
obrazów w trakcie przyłożeń, a nawet, w skrajnych przypadkach, uniemożliwić zarejestrowanie pełnego zestawu
obrazów. W takiej sytuacji należy przejść do miejsca, w którym znajduje się mniej nadajników Wi-Fi lub wrócić do badania
w późniejszym czasie tego samego dnia.
8.2. Jeśli nie posiadasz wykupionego pakietu badań lub wykorzystałaś wszystkie badania, w aplikacji wyświetli się odpowiedni
komunikat informujący o tym. Możliwość przeprowadzenia badania zostanie zablokowana. Aby kontynuować, będziesz
musiała wykupić pakiet badań. Możesz to zrobić, przechodząc do e-sklepu Braster lub w zależności od Twojego kraju
do sklepu elektronicznego lub stacjonarnego lokalnego dystrybutora. Jeśli jednak nie chcesz w danym momencie
dokonywać zakupu, kliknij „Przerwij badanie”.
8.3. Jeśli poziom naładowania baterii Twojego urządzenia jest zbyt niski, wykonanie badania zostanie zablokowane, dopóki
nie naładujesz urządzenia mobilnego do wskazanego w komunikacie poziomu. Aby wrócić do ekranu startowego, kliknij
„Przerwij badanie”.
8.4. Jeśli Twoje urządzenie mobilne ma zbyt mało dostępnej pamięci, aby zapisać kompletne badanie, wykonanie badania
zostanie zablokowane, dopóki nie zwolnisz odpowiedniej ilości pamięci w urządzeniu mobilnym. Aby wrócić do ekranu
startowego, kliknij „Przerwij badanie”.
8.5. Jeśli po wprowadzeniu swojego loginu i hasła do aplikacji Braster Care wyświetlony zostanie komunikat „Serwer jest
niedostępny”, zainstaluj dodatkowy certyfikat. Aby uzyskać więcej informacji, skontaktuj się z naszą infolinią:
infolinia@
braster.eu.

52 53
POLSKI
13. SERWIS I WSPARCIE TECHNICZNE
W celu uzyskania pomocy technicznej lub zgłoszenia nieprawidłowego działania urządzenia i innych nieprzewidzianych
zdarzeń należy skontaktować się z lokalnym dystrybutorem Systemu Braster lub producentem. Odpowiednie dane kontaktowe
można znaleźć na stronie internetowej
www.braster.eu.
ODPOWIEDZIALNOŚĆ UŻYTKOWNIKA
Urządzenia Braster należy używać zgodnie z zaleceniami zawartymi w niniejszej instrukcji obsługi i na etykietach. Nie
należy używać uszkodzonego urządzenia. Części brakujące, niekompletne, uszkodzone lub wyeksploatowane powinny
zostać natychmiast wymienione w autoryzowanym serwisie gwarancyjnym (szczegóły dostępne na stronie
www.braster.eu
).
W razie potrzeby wszystkie czynności związane z naprawami lub wymianami mogą być przeprowadzane tylko przez personel
autoryzowanego serwisu. Producent nie ponosi odpowiedzialności za jakiekolwiek szkody spowodowane nieprzestrzeganiem
instrukcji obsługi.
GWARANCJA
Urządzenie Braster jest objęte 24 miesięczną gwarancją producenta. Gwarancja jest ważna tylko wtedy, gdy używane
są akcesoria i części zamienne zatwierdzone przez firmę BRASTER S.A. oraz urządzenie jest używane zgodnie z opisem
w instrukcji obsługi i przeznaczeniem.
Wszelkie naprawy urządzenia Braster muszą być dokonane przez personel autoryzowanego serwisu. Wszelkie naprawy
przeprowadzane przez nieupoważnione osoby mogą spowodować utratę gwarancji.
14. DEKLARACJA ZGODNOŚCI
Spółka Braster oświadcza, że wyrób Braster jest zgodny z istotnymi wymogami i innymi odpowiednimi postanowieniami
dyrektywy 93/42/EWG oraz dyrektywy 2011/65/UE. Jeśli chcesz otrzymać deklarację zgodności, skontaktuj się z producentem
(dane kontaktowe znajdują się na ostatniej stronie niniejszej instrukcji obsługi).
KOMPATYBILNOŚĆ ELEKTROMAGNETYCZNA
Urządzenie Braster jest przeznaczone do stosowania w środowisku elektromagnetycznym z kontrolowanymi zakłóceniami
spowodowanymi przez promieniowanie RF. Użytkownik głowicy rejestrującej może pomóc w zapobieganiu powstawania
zakłóceń elektromagnetycznych przez utrzymywanie odpowiedniej minimalnej odległości pomiędzy przenośnymi i radiowymi
urządzeniami komunikacyjnymi (nadajnikami). Urządzenie Braster nie jest chronione przed szkodliwymi zakłóceniami i nie
może powodować zakłóceń w autoryzowanych systemach.
• W trakcie badania nie stawiaj żadnych przedmiotów pomiędzy głowicą rejestrującą a urządzeniem mobilnym. Może to
spowodować zerwanie połączenia między głowicą rejestrującą a urządzeniem mobilnym.
• Naprawa urządzenia może być przeprowadzona wyłącznie przez serwis producenta. Inne próby naprawy skutkują utratą
gwarancji.
• Nie dopuszczaj dzieci do kontaktu z urządzeniem.
11. DEZYNFEKCJA
Przed każdym badaniem należy zdezynfekować wewnętrzną i zewnętrzną powierzchnię wszystkich trzech matryc. Dezynfekcja
polega na rozpyleniu preparatu Softasept lub środka dezynfekującego na bazie alkoholu izopropylowego na całej powierzchni
matrycy, po obu stronach, i dokładnym wyczyszczeniu jednorazowym gazikiem lub chusteczką. Celem dezynfekcji jest
uzyskanie powierzchni wolnej od drobnoustrojów chorobotwórczych takich jak bakterie, wirusy i grzyby.
Urządzenia nie należy myć wodą ani zanurzać w wodzie. Nie należy również czyścić powierzchni roboczych matryc
stykających się ze skórą piersi środkami mechanicznymi mogącymi spowodować uszkodzenie tych powierzchni (np.
szczotką) lub używać do czyszczenia środków zawierających jakiekolwiek rozpuszczalniki organiczne (np. benzynę,
aceton), ponieważ w przypadku uszkodzenia powierzchni matryce nie nadają się do dalszego używania.
12. CZYSZCZENIE I KONSERWACJA
Obie powierzchnie matrycy należy przetrzeć ściereczką dołączoną do zestawu. Przed badaniem powierzchnia matrycy
powinna być czysta i pozbawiona zanieczyszczeń (np. śladów palców, kurzu).
Po wewnętrznej stronie matrycy występuje zmatowienie technologiczne. Powierzchnia folii ma kierunkowe zadrapania, które
zostały wykonane w trakcie procesu technologicznego w celu uzyskania odpowiedniego rozproszenia światła w przestrzeni
roboczej głowicy rejestrującej.
Głowicę oraz wszystkie matryce należy przechowywać w oryginalnym opakowaniu, w temperaturze od −5°C do +60°C.
Nie należy wystawiać urządzenia na działanie promieniowania UV (np. pochodzącego od lamp UV używanych do
dezynfekcji powietrza lub światła słonecznego).

54 55
POLSKI
Dopuszczalna maksymalna
wysokość używania
3500 m nad poziomem morza
Dopuszczalne wartości
ciśnienia atmosferycznego
podczas pracy urządzenia
700–1060 hPa
Urządzenie współpracuje
ze smartfonem lub tabletem z modułem Wi-Fi oraz z co najmniej 100 MB RAM
Aby zapoznać się z wymaganiami systemowymi, wejdź na:
https://www.braster.eu/system
Ładowarka DC 5V 1A z gniazdem USB zgodna z normą IEC 60950-1 lub IEC 60601-1
16. DZIAŁANIA NIEPOŻĄDANE I INCYDENTY MEDYCZNE
Wszelkie zdarzenia niepożądane lub incydenty medyczne, które wystąpiły w związku z używaniem urządzenia Braster, należy
zgłaszać producentowi na adres podany w sekcji „Dane kontaktowe producenta” oraz do właściwego organu w kraju, w którym
użytkownik ma siedzibę.
17. UTYLIZACJA
Nasza firma umieszcza ten symbol w ramach inicjatywy efektywnego korzystania z zasobów oraz w ramach
ochrony zdrowia i środowiska zgodnie z instrukcjami rządowymi. Oznacza on, że sprzęt elektroniczny (w tym
baterie i akumulatory) nie może być wyrzucany razem ze zwykłymi odpadami z gospodarstwa domowego.
Aby uzyskać więcej informacji o wyznaczonych punktach utylizacji, skontaktuj się z lokalnymi władzami.
15. SPECYFIKACJA TECHNICZNA I EKSPLOATACYJNA URZĄDZENIA BRASTER
Waga głowicy rejestrującej
(bez matrycy)
305 g
Waga pojedynczej matrycy 87 g
Rozmiar urządzenia
(bez matrycy)
średnica 17,2 cm
wysokość 13 cm
Graniczne warunki
przechowywania
−25°C do +5°C (-13°F do +41°F)
i +5°C do +35°C (+41°F do +95°F) w wilgotności otoczenia do 90%, bez kondensacji,
i +35°C do +70°C (+95°F do +158°F) z ciśnieniem pary do 50 hPa
Zalecane warunki
przechowywania
−5°C do +60°C (+23°F do +140°F)
wilgotność od 10% do 90% (bez kondensacji)
Graniczne warunki pracy
+5°C do +40°C (+41°F do +104°F)
wilgotność od 15% do 90% (bez kondensacji)
Zalecane warunki pracy
+20°C do +25°C (+68°F do +77°F)
wilgotność od 30% do 85%
ochrona przed promieniowaniem UV
Graniczne warunki pracy gwarantują bezpieczeństwo elektryczne urządzenia. W celu ochrony matryc termograficznych
przed nadmiernym zużyciem i uszkodzeniem należy stosować się do zalecanych warunków pracy i przechowywania.

56

57
ESPAÑOL
MANUAL
DE INSTRUCCIONES

59
ESPAÑOL
ÍNDICE
GLOSARIO 60
NOTAS IMPORTANTES DE SEGURIDAD 61
INTRODUCCIÓN 62
1. DESCRIPCIÓN Y USO PREVISTO 62
1.1. DESCRIPCIÓN 62
1.2. USO PREVISTO 63
1.2.1. INDICACIONES 63
1.2.2. CONTRAINDICACIONES 63
2. PRINCIPIOS DE APLICACIÓN DEL DISPOSITIVO 64
3. CONTENIDO DEL PAQUETE 65
4. DESCRIPCIÓN DE LA INTERFAZ DEL DISPOSITIVO BRASTER 65
5. SUSTITUCIÓN DE LA MATRIZ 67
6. PREPARACIÓN DEL DISPOSITIVO ANTES DE LLEVAR A CABO UNA EXPLORACIÓN 66
6.1. PREPARACIÓN DEL DISPOSITIVO BRASTER ANTES DE USARLO POR PRIMERA VEZ 67
6.2. PREPARACIÓN DEL DISPOSITIVO BRASTER ANTES DE USARLO EN LAS SIGUIENTES EXPLORACIÓNES 68
7. EXPLORACIÓN 68
7.1. INFORMACIÓN IMPORTANTE 68
7.2. REALIZACIÓN DE UNA EXPLORACIÓN 70
7.2.1. PREPARACIÓN 70
7.2.2. PREGUNTAS 70
7.2.3. ENCENDIDO Y APAGADO DEL DISPOSITIVO 70
7.2.4. CONEXIÓN DE DISPOSITIVOS 71
7.2.4.1. CONEXIÓN A UN DISPOSITIVO iOS 71
7.2.4.2. CONEXIÓN A UN DISPOSITIVO ANDROID 71
7.2.5. ACLIMATACIÓN 72
7.2.6. SELECCIÓN DE LA MATRIZ 72
7.2.7. EXPLORACIÓN 73
7.2.8. ENVÍO DE LOS RESULTADOS AL CENTRO TELEMÉDICO 75
8. SOLUCIÓN DE PROBLEMAS EN LA APLICACIÓN PARA DISPOSITIVO MÓVIL 76
9. CARGA 76
10. OPERACIÓN SEGURA 77
11. DESINFECCIÓN 78
12. LIMPIEZA Y MANTENIMIENTO 78
13. SERVICIO Y SOPORTE TÉCNICO 78
14. DECLARACIÓN DE CONFORMIDAD 79
15. ESPECIFICACIÓN TÉCNICA Y OPERATIVA DEL DISPOSITIVO 80
16. EVENTOS ADVERSOS E INCIDENTES MÉDICOS 81
17. DESECHO 81

60 61
ESPAÑOL
NOTAS IMPORTANTES DE SEGURIDAD
Esta sección se proporciona para familiarizar a la usuaria con información crítica necesaria antes de usar el dispositivo. Advertencias
y precauciones adicionales se indican también en las otras secciones del Manual de instrucciones.
ADVERTENCIAS
Las advertencias son declaraciones que alertan a la usuaria de la posibilidad de lesiones, muerte u otras reacciones adversas
graves asociadas con el uso o mal uso del dispositivo.
! Es importante tener en cuenta que una exploración con el uso del Sistema Braster no reemplaza los métodos de diagnóstico existentes que se utilizan
actualmente en la práctica clínica (como la mamografía, la ecografía o la resonancia magnética). Asegúrese de visitar a su médico regularmente para
hacerse sus mamografías o ecografías.
! Cualquier uso funcionamiento y servicio de este dispositivo que viole este Manual de instrucciones está prohibido y puede ocasionar daños o un mal
funcionamiento del dispositivo. El dispositivo debe ser utilizado y operado como se estipula en el Manual de instrucciones y debe ser reparado en el
lugar indicado por BRASTER S.A. El fabricante no se hará responsable de las consecuencias del uso indebido del dispositivo.
! El dispositivo no se puede cargar durante el proceso de una exploración. El uso del dispositivo durante la carga puede provocar electrocución. Evite el
contacto con el dispositivo durante la carga.
! No use el dispositivo si la carcasa está dañada; puesto que puede provocar una descarga eléctrica.
! El dispositivo deberá cargarse usando un adaptador de corriente USB (parámetros: CC 5 V 1 A) que cumpla con IEC 60950-1 o IEC 60601-1. Antes de
cargar, es recomendable apagar el dispositivo.
PRECAUCIONES
Las precauciones son declaraciones que alertan a la usuaria de la posibilidad de un problema con el dispositivo asociado con su
uso o mal uso, es decir, fallo, mal funcionamiento, daños en el dispositivo o pérdida de datos.
! Para garantizar la seguridad y el funcionamiento correcto del dispositivo, lea la información sobre las medidas de precaución en el capítulo de este
Manual de instrucciones titulado “Información importante de seguridad” y otra información contenida en este manual antes de utilizar el dispositivo. Las
ilustraciones y los pantallazos usados en este Manual de instrucciones pueden diferir ligeramente del producto real y de la aplicación para dispositivo móvil.
! De acuerdo con los estudios más recientes de Braster, las matrices termográficas pierden sus propiedades después de 36 meses desde su primer uso.
Usar las matrices transcurridos 36 meses desde su primer uso hace que sea imposible una interpretación fidedigna de la exploración. Para asegurar
el correcto funcionamiento del dispositivo, cambie el juego de matrices después de 36 meses desde el primer uso. Sin embargo, tenga en cuenta que
BRASTER S.A. todavía realiza estudios sobre la vida útil de las matrices y que la vida útil puede ampliarse aún más en el futuro.
!
El dispositivo y las matrices pueden dañarse si se almacenan en un lugar caliente y/o húmedo y/o bajo la luz solar directa. Guárdelos en un lugar fresco, seco y oscuro.
! Los costes de transferencia de datos dependen de la tarifa de su operadora.
! Use únicamente las piezas indicadas en el Manual de instrucciones, conecte únicamente los dispositivos indicados en el Manual de instrucciones
y no modifique el dispositivo Braster de ningún modo. No modifique el dispositivo Braster. Usar piezas diferentes de las indicadas en el Manual de
instrucciones, conectar el dispositivo Braster a dispositivos diferentes de los indicados en el Manual de instrucciones o modificar el dispositivo Braster
GLOSARIO
Interpretación Automática de Braster (Braster IA) – software responsable del análisis de las imágenes térmicas, junto con la
información médica proporcionada por la usuaria través de la aplicación móvil Braster Care.
Dispositivo Braster o dispositivo: un dispositivo compuesto por un dispositivo de adquisición de imágenes y una matriz
termográfica fabricada por BRASTER S.A.
Braster e-store: www.braster.eu donde se puede adquirir el dispositivo Braster, los paquetes de exploración y el juego de matrices
termográficas. Tenga en cuenta que en algunos mercados el dispositivo Braster, así como los paquetes de exploración y otros
servicios, solo se pueden comprar a un distribuidor local.
Paquete de exploración: un paquete de prepago de interpretaciones automáticas de termograma que abarca un número específico
de interpretaciones.
Dispositivo de adquisición de imágenes: el dispositivo utilizado para llevar a cabo la exploración. En el dispositivo de adquisición
de imágenes hay un botón ENCENDIDO/APAGADO, una ranura USB y un asa. El dispositivo también está equipado con sistema de
adquisición de imágenes y sistema electrónico. La parte interna del dispositivo consiste en una cámara ennegrecida que garantiza
la calidad adecuada de las imágenes termográficas. El dispositivo de adquisición de imágenes es un dispositivo electrónico
controlado por una aplicación para dispositivo móvil.
Lámina de cristal líquido: una parte de la matriz de cristal líquido. La lámina contiene cristales líquidos que reflejan los cambios
térmicos en la mama mediante imágenes de colores (termografía).
Matriz termográfica de cristal líquido (o matriz de cristal líquido o matriz termográfica): un elemento del dispositivo Braster
compuesto de una lámina de cristal líquido y una abrazadera de plástico. La imagen termográfica se genera en el lado interno de la
superficie de la lámina, es decir, en el lado que mira hacia adentro (hacia el interior del dispositivo). La matriz es la parte funcional
del dispositivo, esto es: el elemento que entra en contacto con la piel de la mama.
Mamografía: exploración radiológica de la mama realizado en mujeres en el que se toman una serie de imágenes de la glándula
mamaria con rayos X. Con su capacidad para visualizar una serie de cambios y lesiones características, la mamografía se usa para
detectar el cáncer de mama y otras patologías del pezón antes de que se manifiesten clínicamente. La eficacia de la exploración
está estrictamente relacionada con la estructura de la mama, por eso se recomienda para mujeres mayores de 50 años.
Aplicación para dispositivo móvil: la aplicación Braster Care, el software que se necesita para realizar la exploración de las mamas
con el dispositivo Braster. Debe descargarse en el dispositivo móvil de la usuaria (teléfono inteligente o tableta) antes de la primera
exploración . La aplicación es gratuita y está disponible a través de Google Play (para Android) o a través de la App Store (para iOS).
Dispositivo móvil: un teléfono inteligente o tableta (para los requisitos del sistema, vaya a: https://www.braster.eu/system).
Mi Cuenta: una cuenta en micuenta.braster.eu, donde la usuaria debe registrarse para realizar las exploraciones. En Mi Cuenta la
usuaria puede, por ejemplo, verificar los resultados de una exploración termográfica.
Centro telemédico: infraestructura de BRASTER S.A. en la que se almacenan los datos de las usuarias y donde se guarda el
software necesario para la prestación de los servicios, en particular los resultados de los exámenes, ofrecidos por BRASTER S.A.
Termograma (imagen termográfica): un registro de la imagen térmica creada en la superficie de la lámina de cristal líquido que
muestra la distribución de temperatura en la superficie de la mama.
Ecografía: un método no invasivo que se sirve de ultrasonidos para visualizar tejido. La ecografía es una herramienta básica de
diagnóstico utilizada para detectar cambios patológicos en la mama, incluido el cáncer de mama.
Usuaria: una mujer que usa el Sistema de exploración de mamas para uso doméstico Braster.

62 63
ESPAÑOL
• la aplicación para dispositivo móvil Braster Care;
• el software de interpretación automática Braster AI.
Vea la Fig. 1: Componentes del Sistema Braster
1. La aplicación Braster Care 2. El dispositivo Braster 3. El software Braster AI
Durante la exploración, la usuaria coloca el dispositivo Braster sobre la mama. El dispositivo está equipado con una lámina de
cristal líquido que crea imágenes en color cuando entra en contacto con la superficie de las mamas. Al final de la exploración,
las imágenes termográficas grabadas se guardan en la aplicación para dispositivo móvil y se envían al centro telemédico. A
continuación son interpretadas automáticamente por Braster AI. Si se indican cambios patológicos potencialmente peligrosos, se
le solicitará que consulte a su médico.
El dispositivo médico Braster no realiza mediciones, sino que registra la distribución de la temperatura a través de la mama, en base
a la cual se analizan las imágenes termográficas.
El exploración Braster NO REEMPLAZA LOS MÉTODOS DE DIAGNÓSTICO ACTUALMENTE UTILIZADOS EN LA PRÁCTICA
CLÍNICA (COMO LA MAMOGRAFÍA Y LA ECOGRAFÍA). Es una herramienta complementaria útil para los exámenes antes
mencionados.
1.2. USO PREVISTO
1.2.1. INDICACIONES
El Sistema de exploración de mamas para uso doméstico Braster – Sistema Braster está destinado para la exploración doméstica
de mamas por mujeres mayores de edad como complemento a exámenes como la ecografía y la mamografía. El dispositivo detecta
irregularidades térmicas que requieren confirmaciónmediante métodos de diagnóstico o consulta médica.
1.2.2. CONTRAINDICACIONES
El Sistema Braster no está concebido para mujeres que estén siguiendo o hayan seguido un tratamiento para el cáncer de
mama, esto es: después de un tratamiento de conservación de la mama, mastectomía o doble mastectomía, tratamiento médico
(quimioterapia, terapia hormonal, tratamiento biológico) o radioterapia.
de cualquier modo puede causar problemas de funcionamiento y/o provocar averías responsabilidad de la usuaria de las que el fabricante no se hace
responsable.
! Cargue el dispositivo al menos durante 30 minutos antes de usarlo por primera vez.
INTRODUCCIÓN
Este Manual de instrucciones forma parte del Sistema de exploración de mamas para uso doméstico Braster diseñado para la
autoexploración de mamas por parte de la usuaria. Lea este Manual de instrucciones antes de utilizar el dispositivo por primera
vez. El Manual de instrucciones incluye toda la información necesaria acerca de las funciones y características del dispositivo, de
su uso seguro y de cómo llevar a cabo las exploraciones.
Es recomendable guardar este Manual de instrucciones para poder consultarlo en el futuro.
BRASTER S.A. es el propietario de una innovadora tecnología patentada para la fabricación de mezclas de cristales líquidos y
emulsiones de cristales líquidos para fines especiales. Este proceso de fabricación se desarrolló basándose en la tecnología CLCF
(película de cristal líquido continuo). La tecnología de BRASTER S.A. está protegida por solicitudes de patentes internacionales.
No obstante, un uso impropio del dispositivo inconsistente con el Manual de instrucciones pueden suponer una amenaza
para la salud y el bienestar de la usuaria o de terceros. Cuando use el producto debe respetar las instrucciones recogidas
en el Manual de instrucciones. El dispositivo Braster pueden usarlo únicamente personas familiarizadas con el producto
y que hayan leído el Manual de instrucciones.
El dispositivo debe utilizarse únicamente con la finalidad para el que fue concebido. Un uso que se desvíe de las directrices
contempladas en el Manual de instrucciones puede anular la garantía y cualquier otra reclamación por daños.
1. DESCRIPCIÓN Y USO PREVISTO
1.1. DESCRIPCIÓN
El Sistema de exploración de mamas para uso doméstico Braster, en lo sucesivo el “Sistema Braster”, es un dispositivo sanitario
activo concebido para llevar a cabo exámenes termográficos de mama. El sistema consta de:
• el dispositivo Braster, que se compone de:
− el dispositivo de adquisición de imágenes, y
− tres matrices termográficas;

64 65
ESPAÑOL
3. CONTENIDO DEL PAQUETE
El paquete incluye:
• un dispositivo de adquisición de imágenes, modelo: BRA-1.0 (ver Fig. 2A ),
• un juego de tres matrices termográficas numeradas 1, 2 y 3, modelo: TMS-1.0 (ver Fig. 2B ),
• un cable mini-USB,
• un paño para limpiar las matrices,
• un manual de instrucciones,
• una guía de inicio rápido.
4. DESCRIPCIÓN DE LA INTERFAZ DEL DISPOSITIVO BRASTER
Vea la Fig. 3: La interfaz del dispositivo Braster
1. Asa
2. Indicador de exploración
3. Estado de energía
4. Ranura mini-USB
5. Botón de ENCENDIDO/APAGADO
Botón de ENCENDIDO/APAGADO: enciende/apaga el dispositivo
• para encender el dispositivo, mantenga pulsado el botón durante 2 segundos.
• cuando finalice la exploración o después de 10 minutos de inactividad, el dispositivo se apagará automáticamente. Para apagar
el dispositivo en el modo de emergencia, mantenga pulsado el botón durante 5 segundos.
Asa: activación de la adquisición de imágenes termográficas
• Ha pulsado el asa: la adquisición de imágenes termográficas está activa (indicador de exploración activado).
• No ha pulsado el asa: la adquisición de imágenes termográficas no está activa.
Las contraindicaciones temporales para usar el Sistema Braster son las siguientes:
• embarazo o lactancia (hasta tres meses después de terminar de lactar);
• infección general durante la cual la temperatura del cuerpo es de 38˚C o superior;
• mastitis dolorosa, con rojeces y durezas (cuando estos síntomas están presentes);
• segunda fase del ciclo menstrual; debido a los cambios fisiológicos en el tejido mamario durante el ciclo menstrual, el momento
ideal para llevar a cabo la exploración termográfica es entre el tercer y el decimosegundo día del ciclo;
• t emperatura inadecuada (demasiado alta o baja) en la habitación en la que se va a llevar a cabo la exploración: la temperatura
ambiente de estar entre 20˚C y 25˚C;
• cirugía en la mama con un diagnóstico de cambio benigno:
– biopsia con aguja fina (FNB): hasta cuatro semanas después del procedimiento,
– biopsia con aguja gruesa (CNB) o biopsia de mama con Mammotome: hasta 6 meses después del procedimiento,
– resección de tumor de mama: hasta 12 meses después del procedimiento;
• colocación de implantes estéticos, inyecciones de relleno (por ejemplo, ácido hialurónico) y lipotransferencia: hasta 12 meses
después del procedimiento.
2. PRINCIPIOS DE APLICACIÓN DEL DISPOSITIVO
El dispositivo Braster usa un tipo de tecnología denominada termografía por contacto. La termografía por contacto es una técnica
de imágenes médica para detectar cambios en el metabolismo de los tejidos. La base de la termografía en medicina es el efecto
conocido como “dermotérmico”, que consiste en registrar los procesos térmicos en la superficie de la piel que están produciéndose
en los órganos observados dentro del cuerpo como anomalías de temperatura.
El proceso neoplásico se caracteriza por una tasa metabólica más alta entre otras cosas a través de la formación de una red
capilar patológica densa. Las lesiones patológicas de las que se suponga que pueden ser tumores malignos son características en
términos morfológicos y tienen una temperatura mayor que las zonas sanas. Debido a estas propiedades, se las representa como
áreas distintos colores en los termogramas.
La termografía por contacto es una exploración complementaria. Complementa exámenes realizados comúnmente como ecografías
y mamografías.

66 67
ESPAÑOL
5. SUSTITUCIÓN DE LA MATRIZ
Paso 1 (Fig. 5A ) Tire del borde de la matriz en el lugar donde hay una muesca en el cuerpo del dispositivo. Lo mejor es agarrar la
muesca en la matriz con el pulgar y sostener la matriz con los dedos por debajo.
Paso 2 (Fig. 5B ) Tire de la matriz hasta extraerla del dispositivo.
Paso 3 (Fig. 5C ) Introduzca la matriz empujándola en paralelo con la carcasa. Lo mejor es agarrar la muesca en la matriz con el
pulgar y sostener la matriz con los dedos por debajo.
6. PREPARACIÓN DEL DISPOSITIVO ANTES DE LLEVAR A CABO UNA
EXPLORACIÓN
6.1. PREPARACIÓN DEL DISPOSITIVO BRASTER ANTES DE USARLO POR PRIMERA VEZ
a. Después de abrir el paquete, compruebe si el dispositivo está completo. La caja debería contener lo siguiente: dispositivo de
adquisición de imágenes, tres matrices (etiquetadas como 1, 2 y 3), un cable mini-USB, un manual de instrucciones, la guía de
inicio rápido y un paño para limpiar las matrices. Si falta alguno de esos elementos, complete de inmediato el formulario de
reclamo disponible en el sitio web de Braster.
b. La matriz es la parte funcional del dispositivo, esto es: el elemento que entra en contacto directo con la piel de la mama. Por
lo tanto, antes de usarla, debe limpiar y desinfectar las superficies externas e internas de todas las matrices (conforme a las
instrucciones y usando las medidas especificadas los capítulos 11 y 12 del Manual de instrucciones).
c. Cargue el dispositivo al menos durante 30 minutos antes de usarlo por primera vez.
d. Descargue la aplicación para dispositivo móvil gratuita Braster Care en su teléfono inteligente o tableta y cree su cuenta en
micuenta.braster.eu para realizar una exploración. Puede hacerlo mientras el dispositivo se carga. Las instrucciones sobre cómo
descargar la aplicación para dispositivo móvil incluyen:
1. Descargue la aplicación Braster Care desde App Store, si su dispositivo móvil tiene el sistema operativo iOS (es decir, es un
iPhone o iPad) o desde Google Play, si su dispositivo móvil tiene el sistema operativo Android;
2. Instale la aplicación Braster Care en su dispositivo móvil;
3. Inicie la aplicación Braster Care en su dispositivo móvil y lea la INTRODUCCIÓN;
4. Haga clic en el enlace REGISTRARSE en la parte inferior de la pantalla.
Tabla 1. Colores indicadores en la interfaz de la usuaria
Ranura mini-USB: se encuentra debajo de un tapón de goma. Para acceder a la ranura, levante el tapón. La finalidad de la ranura
mini-USB es:
• actualizar el software del dispositivo de adquisición de imágenes,
• cargar la batería.
Etiqueta del dispositivo: se encuentra en la cámara oscura del dispositivo y se puede ver extrayendo la matriz. La etiqueta contiene
el número de serie del dispositivo, que es al mismo tiempo el nombre de la señal Wi-Fi emitida por el dispositivo y, a su vez, la
contraseña (ver Fig. 4A : Posición de la etiqueta, y 4B : Ejemplo de etiqueta con el nombre de la señal Wi-Fi y la contraseña:
1. Nombre de la señal Wi-Fi emitida por el dispositivo, 2: Contraseña de la señal Wi-Fi emitida por el dispositivo).
No despegue la etiqueta. Copie la información de la etiqueta y guárdela en lugar seguro.
Estado del indicador de la exploración Estado del indicador de alimentación Descripción
Sin luz Sin luz Dispositivo apagado
Sin luz Verde parpadeante Dispositivo encendido
Sin luz Verde constante
Dispositivo conectado
con un dispositivo móvil
Blanco pulsante Verde constante
Adquisición de termograma
en curso
Sin luz Naranja constante Dispositivo cargando
Sin luz Naranja parpadeante
La exploración no puede ser realizado.
El nivel de la batería es demasiado bajo.
Blanco constante Sin luz/naranja Modo de actualización de firmware
Blanco parpadeante Sin luz/naranja
Actualización de firmware
en curso

68 69
ESPAÑOL
Antes de la primera exploración:
• descargue la aplicación Braster Care gratuita desde Google Play o App Store en su dispositivo móvil;
• asegúrese de haber comprado el paquete de exploración; si no lo ha hecho, puede comprarlo en la Braster e-store o, según el
país, en la tienda electrónica u otros puntos de venta del distribuidor local.
RECUERDE
No lleve a cabo la exploración si la temperatura de la habitación es inferior a 20˚C o superior a 25˚C.
Debido a los cambios fisiológicos en el tejido mamario durante el ciclo menstrual, el momento ideal para llevar a cabo la
exploración termográfica es entre el tercer y el decimosegundo día del ciclo.
Si ya no menstrúa o sus ciclos menstruales son irregulares (fluctuaciones de más de 10 días), recomendamos realizar la
exploración a intervalos iguales una vez al mes; por ejemplo, entre el 1.er y el 5.° día del mes o el 1.er fin de semana del
mes.
1. Un día antes de la exploración:
• evite cualquier tratamiento que pueda aumentar la circulación sanguínea en las mamas (tratamientos de fisioterapia, masajes, etc.).
2. El día de la exploración:
• evite cualquier tratamiento que pueda aumentar la circulación sanguínea en las mamas (tratamientos de fisioterapia, masajes, etc.);
• asegúrese de encontrarse entre el tercero y el duodécimo día del ciclo menstrual y, si no está menstruando, asegúrese de que
hayan transcurrido 30 días desde la última exploración;
• no tome un baño o una ducha dentro de aproximadamente dos horas antes de la exploración;
• no consuma ninguna bebida alcohólica;
• no use peelings en sus mamas y/o escote y no se depile las axilas, ya que esto puede irritar su piel;
• evite de fuentes de calor o frío, como calentadores o aires acondicionados, durante al menos treinta minutos antes y durante la
exploración;
• evite el esfuerzo físico intenso durante aproximadamente dos horas antes de la exploración;
• no use cosméticos y no moje la piel de sus mamas dentro de las dos horas previas a la exploración; su piel debe estar limpia y
seca;
• no use saunas ni baños de vapor.
e. Registre su cuenta individual como se indica (tenga en cuenta que recomendamos registrar y usar su cuenta individual en PC o
portátiles, ya que ha sido diseñada para pantallas grandes):
1. Si después de hacer clic en el enlace REGISTRARSE no se le redirige automáticamente, vaya a micuenta.braster.eu;
2. Complete los datos. En el campo
tipo de cuenta
seleccione “Braster: (para uso doméstico)” y haga clic en el botón REGISTRARSE;
3. Inicie sesión en su cuenta de correo electrónico y abra el mensaje que contiene el enlace de activación. Si no lo encuentra
en su bandeja de entrada de correo, mire en la carpeta “Correo no deseado”;
4. En cuanto active su cuenta haciendo clic en el enlace de activación, introduzca su nombre de usuaria (la dirección de correo
electrónico que indicase durante el registro) y contraseña (indicada durante el registro) en la página de inicio de sesión y
haga clic en INICIAR SESIÓN;
5. Complete todos los datos médicos y personales en la encuesta.
Si no completa esta encuesta la primera vez que inicia sesión, no podrá realizar la exploración;
6. Active su paquete de exploración yendo a la ficha “Códigos de activación” y haciendo clic en el botón “Activar el paquete”;
7. Salga de Mi cuenta después de completar el registro.
f. En cuanto termine de cargar, abra la aplicación y siga las instrucciones como se describe en el apartado 7.
6.2. PREPARACIÓN DEL DISPOSITIVO BRASTER ANTES DE USARLO EN LOS SIGUIENTES
EXPLORACIÓNES
a. Prepárese para cada exploración limpiando minuciosamente la superficie de las matrices de cristal líquido. Debe limpiar todas
las matrices, prestando especial atención a la superficie en el lado interno de cada matriz. Es importante utilizar los agentes de
limpieza y desinfección recomendados y limpiar bien la superficie de la lámina para no dejar huellas dactilares, manchas, etc.,
ya que pueden alterar la interpretación de la exploración termográfica (para más información, consulte el capítulo 11 titulado
“Desinfección” y 12 titulado “Limpieza y mantenimiento”).
b. Cuando las matrices se hayan limpiado, inicie la aplicación y siga las instrucciones proporcionadas en el capítulo 7.
7. EXPLORACIÓN
7.1. INFORMACIÓN IMPORTANTE
No use el dispositivo durante la carga.

70 71
ESPAÑOL
En condiciones normales, el dispositivo se apagará solo una vez terminado la exploración. Para apagar el dispositivo en el modo
de emergencia, mantenga pulsado el botón ENCENDIDO/ APAGADO durante cinco segundos.
El dispositivo se apagará automáticamente después de diez minutos de inactividad. Por lo tanto, si considera que es necesario
interrumpir la exploración durante más de diez minutos, se le pedirá que encienda el dispositivo Braster y lo vuelva a conectar al
dispositivo móvil para continuar.
7.2.4. CONEXIÓN DE DISPOSITIVOS
Establecer una conexión entre el dispositivo Braster y un dispositivo móvil difiere ligeramente para Android e iOS.
Para establecer una conexión con el dispositivo Braster, siga las instrucciones de las secuencias que se muestran en el dispositivo
móvil.
Coloque el dispositivo para ver la etiqueta con el nombre de la señal Wi-Fi y la contraseña de Braster. La etiqueta está dentro del
dispositivo y solo es visible cuando se ha retirado la matriz (Fig. 4A y 4B ).
7.2.4.1. CONEXIÓN A UN DISPOSITIVO iOS
Cuando se encuentre en la pantalla de conexión, haga clic en “Ajustes”. Vaya a los ajustes de Wi-Fi. De la lista de señales Wi-Fi,
seleccione la señal Braster especificada en la etiqueta e ingrese la contraseña. Después vuelva a la aplicación. Verá un mensaje
informativo indicando si la conexión se ha establecido con éxito.
No se preocupe si volvió a la pantalla principal de su dispositivo móvil y no a la aplicación directamente, puede volver a la aplicación
nuevamente. Debería encontrarse en la fase donde ya está conectada al dispositivo.
Si por cualquier razón no puede entrar a los ajustes de Wi-Fi de la pantalla de conexión de la aplicación, salga de la aplicación,
acceda a los “Ajustes” de su dispositivo móvil, seleccione la ficha “Wi-Fi”, seleccione la señal de su dispositivo Braster e introduzca
la contraseña. Después, puede regresar a la aplicación.
7.2.4.2. CONEXIÓN A UN DISPOSITIVO ANDROID
Seleccione la señal de su dispositivo Braster en la pantalla de conexión e ingrese la contraseña (el nombre y la contraseña de
la señal se encuentran en la etiqueta del dispositivo ubicada dentro del dispositivo). Verá un mensaje informativo indicando si la
conexión se ha establecido con éxito.
En la siguiente exploración la aplicación recordará su nombre de usuaria y contraseña, por lo que no será necesario volver a
escribirlos.
7.2. REALIZACIÓN DE UNA EXPLORACIÓN
7.2.1. PREPARACIÓN
• Coloque el dispositivo Braster frente a usted. Asegúrese de que esté apagado. Tenga a mano su dispositivo móvil con la
aplicación Braster Care instalada (como se indica en el capítulo 6 del Manual de instrucciones). Compruebe que su dispositivo
móvil esté conectado a Internet.
• Abra la aplicación para dispositivo móvil Braster Care en su teléfono inteligente o tableta.
• Inicie sesión en la aplicación ingresando su nombre de usuaria y contraseña (que son los mismos que para su cuenta individual
en micuenta.breaster.eu).
• Inicie la exploración pulsando INICIAR. No es necesario que se desvista en esta fase.
Durante la exploración el dispositivo móvil mostrará la pantalla de navegación con todas las fases de la prueba. La fase en la que se
encuentra aparecerá resaltada en la aplicación. Para iniciar una fase cualquiera, haga clic en su nombre. La pantalla de navegación
aparecerá después de concluir cada una de las fases. Tenga en cuenta que es obligatorio seguir todas las fases de la exploración.
La aplicación no le permitirá saltarse ninguna de ellas. Una vez concluido un paso, no podrá regresar.
7.2.2. PREGUNTAS
En esta parte de la exploración responderá a preguntas que verificarán si es elegible para realizar la exploración ese día en
particular. Estas preguntas también serán útiles para la interpretación de los resultados. Algunas preguntas se responden con SÍ
o NO. Si la respuesta seleccionada le permite llevar a cabo la exploración, se la redirigirá a la siguiente pantalla. Sin embargo, si
no puede realizar la exploración, se mostrará una nota explicativa. Independientemente de la pregunta en la que se encuentre,
siempre puede volver a la anterior pulsando VOLVER.
Algunas respuestas permiten seleccionar varias opciones. Recuerde responder sinceramente, ya que la validez de los resultados
depende de ello.
7.2.3. ENCENDIDO Y APAGADO DEL DISPOSITIVO
Encienda el dispositivo pulsando el botón ENCENDIDO/APAGADO durante unos dos segundos. Cuando el dispositivo está
encendido, el icono de batería parpadea en color verde. Si el dispositivo está conectado a su dispositivo móvil, el icono de batería
se ilumina permanentemente en color verde.

72 73
ESPAÑOL
! REPITA LOS MISMOS PASOS PARA LA MAMA IZQUIERDA.
Si la matriz núm. 2 es adecuada para usted, puede pasar directamente al proceso de exploración. Si no se ajusta bien a su mama,
se le pedirá que extraiga la matriz núm. 2 y que monte la matriz núm. 1 o 3 en el dispositivo para repetir el procedimiento. Tan pronto
como encuentre la matriz adecuada, podrá empezar la exploración propiamente dicha.
7.2.7. EXPLORACIÓN
Antes de empezar la exploración, lea las instrucciones que se mostrarán después seleccionar “EXPLORACIÓN” en la pantalla de
navegación. Las instrucciones le dirán exactamente qué hacer durante el proceso de exploración y aprenderá cómo colocar el
dispositivo sobre sus mamas.
Para obtener la máxima calidad de imagen termográfica durante la exploración, debe:
• aplique el dispositivo perpendicular a su mama (vea Fig. 7: colocación correcta del dispositivo);
• no levante su mama;
• no mueva el dispositivo alrededor de su mama, manténgalo fijo en un punto (vea Fig. 8: colocación incorrecta del dispositivo);
• no mueva el dispositivo hasta que se lo indiquen;
• mantenga presionado el asa durante la exploración;
• no toque sus mamas con las manos durante la exploración.
Según el tamaño de la mama que ingresó en la pestaña “Mis datos” de su cuenta individual en micuenta.braster.eu, se le solicitará
que realice tres o cinco aplicaciones en cada mama.
EMPIECE SIEMPRE LA EXPLORACIÓN POR LA MAMA DERECHA.
Esto es muy importante, ya que las imágenes termográficas de sus mamas producidas en los exámenes individuales se comparan
entre sí. Comparamos la(s) imagen(es) de la exploración actual con las imágenes producidas durante los últimos cinco exámenes.
Al comparar imágenes producidas durante los exámenes anteriores, podemos observar si ha habido algún cambio en la asimetría
estructural o térmica a lo largo del tiempo.
SU DISPOSITIVO MÓVIL NO TENDRÁ ACCESO A INTERNET CUANDO ESTÁ CONECTADO AL DISPOSITIVO BRASTER
7.2.5. ACLIMATACIÓN
El siguiente paso de la exploración es una aclimatación de seis minutos, esto es: la normalización y estabilización de la temperatura
de la piel de la mama. Para hacer esto, se le pedirá que se desnude de la cintura para arriba. La aclimatación es un proceso muy
importante que contribuye a la calidad de la imagen termográfica captada durante la exploración. Únicamente con una aclimatación
correcta se obtendrán resultados fiables.
Para concluir el proceso de aclimatación, siga las instrucciones de las pantallas siguientes de la aplicación.
7.2.6. SELECCIÓN DE LA MATRIZ
En esta fase puede decidir qué matriz va a usar para la exploración. Su dispositivo Braster fue provisto con un juego de tres
matrices. Cada una se adapta a una gama de temperaturas diferente. Recuerde que la temperatura de su cuerpo depende, entre
otros factores, del día de su ciclo menstrual, su edad y metabolismo. Para obtener una imagen termográfica de alta resolución
capaz de mostrar óptimamente la distribución de temperaturas de su mama, deberá seleccionar una matriz cada vez que lleve a
cabo una exploración.
Para seleccionar una matriz, realice una aplicación del dispositivo Braster en el área central de cada mama. Asegúrese de que toda
la matriz se adhiere firmemente al cuerpo. La aplicación le guiará paso a paso a través de este proceso.
Coloque primero la matriz núm. 2 en el dispositivo (el número de la matriz se indica en el marco de plástico). A continuación, siga
las instrucciones que se mostrarán en las sucesivas pantallas.
! INICIE LA SELECCIÓN DE LA MATRIZ CON SU MAMA DERECHA.
Cuando vea la instrucción, coloque el dispositivo en la parte central de su mama y pulse el asa (vea. Fig. 3: para ver la ubicación
del asa). Oirá el clic característico si el asa se ha pulsado correctamente.
Recuerde mantener presionada el asa durante todo la exploración. No mueva el dispositivo alrededor de la mama, manténgalo fijo
en un punto. Cuando vea el mensaje correspondiente, suelte el botón y retire el dispositivo de su mama (vea Fig. 6: aplicación
del dispositivo sobre la mama).

74 75
ESPAÑOL
3) Una aplicación en la parte superior exterior de la mama, en el límite con la axila, de forma que el borde de la matriz (es decir, la
parte negra (la lámina termográfica)) toque el lateral de la mama y no se salga de él.
4) Una aplicación en la parte superior interior de la mama, de forma que el borde de la matriz (es decir, la parte negra (la lámina
termográfica)) no cubra la otra mama si no que pase por la línea central del esternón.
5) Una aplicación en la parte inferior interior de su mama. El borde inferior de la matriz (es decir, la parte negra (la lámina
termográfica)) debe adherirse a su mama (no su abdomen). No levante la mama.
Las aplicación pueden superponerse, pero no se preocupe si en su caso no se superponen como se muestra en las ilustraciones.
El factor más importante es que cubra toda la mama.
Siga las instrucciones que se muestran en la pantalla del dispositivo móvil. Cada aplicación tarda unos 15 segundos, que pueden
extenderse para la transferencia si las condiciones de Wi-Fi son malas (muchos otros transmisores o ruido de radio). El intervalo de
tiempo entre aplicaciones dura aproximadamente 10-15 segundos (dependiendo de la temperatura de su mama y la temperatura
ambiente). La matriz no debe estar en contacto con su cuerpo durante este tiempo.
7.2.8. ENVÍO DE LOS RESULTADOS AL CENTRO TELEMÉDICO
Una vez que haya realizado todas las aplicaciones, se le informará que la exploración ha finalizado y que puede enviar los
datos recopilados al centro telemédico del fabricante para su análisis. Tenga en cuenta que antes de enviar los datos, primero
debe desconectar su dispositivo móvil del dispositivo Braster y conectarse a una red Wi-Fi. Debido al tamaño de las imágenes
termográficas producidas durante la exploración, no se recomienda enviarlas a través de datos móviles, sino mediante una red Wi-
Fi. Los resultados de la exploración se enviarán a su cuenta en micuenta.braster.eu dentro de dos días hábiles.
Si selecciona “Finalizar” después de haber enviado la exploración, se le redirigirá a la pantalla de inicio, donde puede verificar el
estado de la exploración (“Enviado para el análisis”). Cuando los resultados de la exploración sean enviados a su cuenta desde el
centro telemédico, el estado cambiará a “Resultado disponible”.
No hace falta que envíe los dato recopilados a analizar inmediatamente después de la exploración. Puede enviarlos cuando sea
conveniente para usted, cuando tenga acceso a Internet (preferiblemente a través de Wi-Fi). Cuando esté listo, vaya a la aplicación
y seleccione “Lista de exámenes”, haga clic en la última exploración y seleccione si lo enviará o lo eliminará. Tenga en cuenta que
debe eliminar los resultados o enviarlos para su análisis antes de llevar a cabo una nueva exploración, de lo contrario, el sistema
no le permitirá realizar su próxima exploración.
La aplicación le notificará que puede acceder a sus resultados tan pronto como estén disponibles. Para leerlos, vaya a su cuenta
individual en micuenta.braster.eu.
Tamaño de mama 1, 2 o 3
Si el tamaño de sus mamas es 1, 2 o 3, vea Fig. 9A para el tamaño 1 o 2 y Fig. 9B para el tamaño 3. Durante la exploración, debe
realizar:
1) Una aplicación central en la mama de forma que el borde inferior de la matriz (es decir, la parte negra (la lámina termográfica))
quede cerca de la mama (no del abdomen). No levante su mama.
2) Una aplicación en la parte superior exterior de la mama, en el límite con la axila, de forma que el borde de la matriz (es decir, la
parte negra (la lámina termográfica)) toque el lateral de la mama y no se salga de él.
3) Una aplicación en la parte superior interior de la mama, de forma que el borde de la matriz (es decir, la parte negra (la lámina
termográfica)) no cubra la otra mama ni el esternón.
Las aplicación pueden superponerse, pero no se preocupe si en su caso no se superponen como se muestra en las ilustraciones.
El factor más importante es que cubra toda la mama.
Siga las instrucciones que se muestran en la pantalla del dispositivo móvil. Cada aplicación tarda unos 15 segundos, que pueden
extenderse para la transferencia si las condiciones de Wi-Fi son malas (muchos otros transmisores o ruido de radio). El intervalo de
tiempo entre aplicaciones dura aproximadamente 10-15 segundos (dependiendo de la temperatura de su mama y la temperatura
ambiente). La matriz no debe estar en contacto con su cuerpo durante este tiempo.
Tamaño de mama 4 o 5
Si el tamaño de sus mamas es 4 o 5, vea Fig. 10A para el tamaño 4 y Fig. 10B para el tamaño 5, durante la exploración deberá
realizar:
1) Una aplicación central en su mama de forma que el borde inferior de la matriz (es decir, la parte negra (la lámina termográfica))
se adhiera a su mama (no al abdomen). No levante su mama.
Divida la mama en cuatro partes iguales imaginando que una línea horizontal y otra vertical pasan por el centro de la mama.
Ahora realice:
2) Una aplicación en la parte inferior exterior de la mama, de forma que el borde inferior de la matriz (es decir, la parte negra (la
lámina termográfica)) se adhiera a su mama (no al abdomen). No levante su mama.

76 77
ESPAÑOL
El dispositivo no se puede cargar durante el proceso de una exploración.
No encienda el dispositivo durante la carga.
Para cargar la batería tiene que extraer el tapón de goma con la señal USB que hay ubicado en el lateral del dispositivo Braster,
junto al botón de ENCENDIDO/APAGADO. Conecte un extremo del cable USB al dispositivo Braster y el otro extremo al cargador
(no se incluye en el pack). Conecte el cargador a una fuente de alimentación (vea Fig. 11: ubicación de la ranura USB: 1. Ranura
mini-USB, 2. ranura USB).
Cuando el dispositivo esté conectado al cargador, el indicador de estado de alimentación se iluminará constantemente en color
naranja. Cuando la batería esté completamente cargada, el indicador se apagará. El tiempo necesario para que la batería se cargue
por completo es de unas tres horas. El dispositivo debe estar desconectado de la fuente de alimentación a través del cable USB,
que debe ser desconectado de modo seguro del suministro de alimentación una vez completada la carga.
10. OPERACIÓN SEGURA
Siga las recomendaciones a continuación para garantizar el funcionamiento seguro del dispositivo Braster:
• Antes de utilizar el dispositivo por primera vez, se recomienda cargar la batería utilizando el cable USB suministrado.
• Use únicamente los accesorios y materiales suministrados o recomendados por el fabricante.
• Nunca permita que el dispositivo Braster o las matrices entren en contacto con el agua.
• Tras concluir la exploración, guarde el dispositivo con la matriz montada. Coloque el dispositivo con la matriz mirando hacia
abajo para asegurarse de que la matriz no acumule polvo. Mantenga el dispositivo en su caja original.
• No coloque ningún elemento en el dispositivo de adquisición de imágenes, ya que podría dañar la estructura interna del
dispositivo. El fabricante no será responsable de ningún daño causado por la usuaria.
• No permita que la lámina en la matriz entre en contacto con objetos afilados.
• Durante la exploración, no ponga ningún objeto entre el dispositivo de adquisición de imágenes y el dispositivo móvil. Si se
colocan objetos entre ellos, la conexión entre el dispositivo de adquisición de imágenes y el dispositivo móvil puede perderse.
• El dispositivo puede repararse únicamente por el equipo de reparaciones del fabricante. Cualquier otro intento de reparar el
dispositivo anulará la garantía.
• Manténgalo fuera del alcance de los niños.
8. SOLUCIÓN DE PROBLEMAS EN LA APLICACIÓN PARA DISPOSITIVO MÓVIL
En determinadas circunstancias, no será posible llevar a cabo una exploración. A continuación, puede encontrar sugerencias sobre
cómo solucionar ciertos problemas.
8.1. El dispositivo Braster usa tecnología Wi-Fi para transmitir datos al dispositivo móvil. La tecnología WiFi, por diseño, depende
de compartir ancho de banda de radio con otros usuarios. Si el entorno Wi-Fi en su ubicación está superpoblado y hay muchas
otras señales Wi-Fi disponibles, el rendimiento del dispositivo Braster puede reducirse, lo que resulta en un tiempo de registro
más largo durante las aplicación o incluso, en condiciones extremas de Wi-Fi, incapacidad para registrar un conjunto completo
de imágenes. En esta situación, vaya a un lugar donde el entorno Wi-Fi no esté superpoblado o regrese a la exploración más
tarde ese día.
8.2. Si no ha comprado un paquete de exploración o ha agotado todos las exploraciones compradas, la aplicación mostrará un
mensaje apropiado y la exploración será imposible. Para continuar, tendrá que adquirir un paquete de exploración. Para ello,
vaya a la Braster e-store o según el país, la tienda electrónica u otro punto de venta del distribuidor local. Si no desea comprar
un paquete de exploración en este momento, seleccione “Cancelar la exploración”.
8.3. Si el nivel de batería de su teléfono inteligente o tableta es demasiado bajo, la exploración será imposible de realizar hasta
que el dispositivo se haya cargado al nivel indicado en el mensaje. Seleccione “Cancelar la exploración” para regresar a la
pantalla de inicio.
8.4. Si no hay suficiente espacio en el disco en su dispositivo móvil para guardar una exploración completa, la exploración
será imposible de realizar hasta que la cantidad adecuada de espacio en el disco esté disponible. Seleccione “Cancelar la
exploración” para regresar a la pantalla de inicio.
8.5. Si después de ingresar su nombre de usuario y contraseña en la aplicación Braster Care aparece un mensaje “El servidor
no está disponible”, debe instalar un certificado adicional. Póngase en contacto con nuestro centro de contacto por correo
electrónico para obtener más información: contactcenter@braster.eu.
9. CARGA
Cargue el dispositivo con un cargador USB-A compatible con IEC 60950-1 o IEC 60601-1, parámetros del cargador: CC 5 V 1 A con
ranura USB (especificación del cargador). Apague el dispositivo antes de cargarlo. Para su seguridad, durante la carga, coloque el
dispositivo en una posición en la que usted pueda retirar fácilmente el cable USB del dispositivo.

78 79
ESPAÑOL
RESPONSABILIDADES DE LA USUARIA
El dispositivo Braster debe utilizarse como se indica en las recomendaciones del Manual de instrucciones y en las etiquetas. No use
el dispositivo si está dañado. Las piezas que falten, estén dañadas incompletas, dañadas o desgastadas deben ser reemplazadas
inmediatamente en un punto de servicio autorizado (los detalles están disponibles en www.braster.eu). Si fueran necesarias,
cualquier reparación o sustitución deberán llevarlas a cabo únicamente personal de un centro de reparaciones autorizado. El
fabricante no será responsable por los daños causados por no respetar el Manual de instrucciones.
Garantía
El dispositivo Braster está cubierto por una garantía del fabricante durante 24 meses. La garantía solo será válida si se utilizan
accesorios y repuestos aprobados por BRASTER S.A. y el dispositivo se utiliza como se describe en el manual de instrucciones y
de acuerdo con el uso previsto.
Todas las reparaciones del dispositivo Braster debe realizarlas BRASTER S.A. Las reparaciones efectuadas por personal sin
autorización tendrán como resultado la anulación de la garantía.
14. DECLARACIÓN DE CONFORMIDAD
BRASTER S.A. declara por la presente que el Sistema Braster cumple con los requisitos esenciales y cualesquiera otras disposiciones
aplicables o exigibles de la Directiva 93/42/CEE y la Directiva 2011/65/UE. Si desea recibir la declaración de conformidad, póngase
en contacto con el fabricante (encontrará los detalles de contacto en la última página de este Manual de instrucciones).
COMPATIBILIDAD ELECTROMAGNÉTICA
El dispositivo Braster está diseñado para su uso en un entorno electromagnético con interferencia de RF controlada. El cliente o
la usuaria del dispositivo de adquisición de imágenes puede ayudar a prevenir la interferencia electromagnética manteniendo la
distancia mínima requerida entre el dispositivo móvil y los dispositivos radio celular (transmisores). Este equipo no está sujeto a la
protección contra interferencias dañinas y no puede causar interferencias con sistemas debidamente autorizados.
11. DESINFECCIÓN
Antes de cada exploración, desinfecte las superficies internas y externas de las tres matrices. La desinfección consiste en pulverizar
Softasept o desinfectantes a base de alcohol isopropílico sobre toda la matriz, en ambos lados, y limpiarla a fondo con una gasa o
tela desechable de algodón. La finalidad de la desinfección es obtener una superficie limpia de microorganismos patógenos, tales
como bacterias, virus y hongos.
El dispositivo no debe limpiarse con agua ni sumergirse en ella. Las superficies de funcionamiento de las matrices que
entren en contacto con la piel de la mama no deben limpiarse con herramientas mecánicas que puedan dañarlas (por
ejemplo, cepillos) ni con productos que contengan cualquier disolvente orgánico (por ejemplo, bencina o acetona), ya que
si la superficie de la matriz se daña, no podrá volver a utilizarse.
12. LIMPIEZA Y MANTENIMIENTO
Limpie bien ambas superficies de las tres matrices con el paño provisto. Es importante que la superficie de la matriz esté
limpia, es decir, libre de cualquier contaminación visible (por ejemplo, huellas dactilares, polvo). El lado interno de la matriz está
tecnológicamente enmarañado. La superficie de la lámina en el lado interno de la matriz presenta arañazos direccionales, que se
han realizado deliberadamente en un procedimiento tecnológico realizado para lograr una difusión de luz adecuada en el espacio
de trabajo del dispositivo de adquisición de imágenes.
El dispositivo de adquisición de imágenes y las matrices deben guardarse en el embalaje original a temperaturas que
oscilen entre −5 °C y +60 °C. El dispositivo no debe exponerse a la radiación de rayos UV (procedentes de las lámparas UV
que se usan en la desinfección de aire o a la luz del sol).
13. SERVICIO Y SOPORTE TÉCNICO
Si necesita asistencia técnica o si desea informar un mal funcionamiento del dispositivo o cualquier otra circunstancia inesperada,
póngase en contacto con su distribuidor local del Sistema Braster o con el fabricante. Encontrará los datos de contacto en el sitio
web www.braster.eu.

80 81
ESPAÑOL
16. EVENTOS ADVERSOS E INCIDENTES MÉDICOS
Cualquier evento adverso o incidente grave que ocurra en relación con el dispositivo debe ser comunicado al fabricante en la
dirección indicada en la sección “Contacto con el fabricante” y la autoridad competente del país en el que está establecida la
usuaria.
17. DESECHO
Nuestra empresa usa este símbolo como parte de la iniciativa para ahorrar recursos, así como para proteger la
salud y el medio ambiente, conforme a las directrices publicadas por el gobierno. Recuerda a las usuarias que los
dispositivos electrónicos (incluidas baterías) no se pueden desechar junto con la basura común del hogar. Para
obtener más información sobre puntos de recogida de residuos, contacte con las autoridades locales.
Altitud de operación máxima
aprobada
3.500 m sobre el nivel del mar
Presión atmosférica aprobada
(para el dispositivo a usar)
700 a 1.060 hPa
El dispositivo se puede empa-
rejar con
Un teléfono inteligente o tableta con un módulo Wi-Fi y una RAM de al menos 100 MB.
Para conocer los requisitos del sistema, vaya a: https://www.braster.eu/system
Cargador CC 5 V 1 A con ranura USB y conforme a las normas IEC 60950-1 o IEC 60601-1
15. ESPECIFICACIÓN TÉCNICA Y OPERATIVA DEL DISPOSITIVO
Peso del dispositivo de
adquisición de imágenes (sin
la matriz)
305 g
Peso de cada matriz 87 g
Tamaño del dispositivo (exclu-
ida la matriz)
diámetro 17,2 cm
altura 13 cm
Límites de las condiciones de
almacenamiento
−25°C a +5°C (-13°F a +41°F), y
+5°C a +35°C (+41°F a +95°F) con una humedad relativa de hasta un 90% sin condensación, y
+35°C a +70°C (+95°F a +158°F) con una presión de vapor de hasta 50 hPa
Condiciones de almacena-
miento recomendadas
−5°C a +60°C (+23°F a +140°F)
con una humedad de entre un 10% y un 90% (sin condensación)
Límites de las condiciones de
funcionamiento
+5°C a +40°C (+41°F a +104°F)
con una humedad de entre un 15% y un 90% (sin condensación)
Condiciones de funciona-
miento recomendadas
+20°C a +25°C (+68°F a +77°F)
humedad entre 30% y 85%
protegido contra la radiación UV
Los límites de las condiciones de funcionamiento garantizan la seguridad eléctrica del dispositivo. Para proteger las matri-
ces termográficas de un desgaste excesivo y de daños, observe las condiciones recomendadas de funcionamiento y de
almacenamiento.

82

83
MAGYAR
FELHASZNÁLÓI
KÉZIKÖNYV

85
MAGYAR
TARTALOMJEGYZÉK
SZÓJEGYZÉK 86
FONTOS BIZTONSÁGI INFORMÁCIÓK 87
BEVEZETÉS 88
1. JELLEMZŐK ÉS JAVASOLT HASZNÁLAT 88
1.1. JELLEMZŐK 88
1.2. JAVASOLT HASZNÁLAT 89
1.2.1. JAVALLATOK 89
1.2.2. ELLENJAVALLATOK 89
2. AZ ESZKÖZ MŰKÖDÉSI ALAPELVEI 90
3. A DOBOZ TARTALMA 90
4. A BRASTER ESZKÖZ INTERFÉSZÉNEK ÁTTEKINTÉSE 91
5. ÉRZÉKELŐ CSERÉJE 93
6. AZ ESZKÖZ ELŐKÉSZÍTÉSE A VIZSGÁLAT ELŐTT 93
6.1. A BRASTER ESZKÖZ ELŐKÉSZÍTÉSE AZ ELSŐ VIZSGÁLAT ELŐTT 93
6.2. A BRASTER ESZKÖZ ELŐKÉSZÍTÉSE A KÖVETKEZŐ VIZSGÁLATOK ELŐTT 94
7. VIZSGÁLAT 94
7.1. FONTOS INFORMÁCIÓK 94
7.2. A VIZSGÁLAT ELVÉGZÉSE 96
7.2.1. ELŐKÉSZÜLET 96
7.2.2. KÉRDÉSEK 96
7.2.3. AZ ESZKÖZ BE-/KIKAPCSOLÁSA 96
7.2.4. ESZKÖZ CSATLAKOZÁSA 97
7.2.4.1. CSATLAKOZTATÁS iOS KÉSZÜLÉKHEZ 97
7.2.4.2. CSATLAKOZTATÁS ANDROID KÉSZÜLÉKHEZ 97
7.2.5. AKKLIMATIZÁLÓDÁS 98
7.2.6. ÉRZÉKELŐ KIVÁLASZTÁSA 98
7.2.7. VIZSGÁLAT 99
7.2.8. AZ EREDMÉNYEK MEGKÜLDÉSE A TÁVGYÓGYÁSZATI KÖZPONTBA 101
8. A MOBIL APPLIKÁCIÓ HIBAELHÁRÍTÁSA 101
9. TÖLTÉS 102
10. BIZTONSÁGOS MŰKÖDÉS 103
11. FERTŐTLENÍTÉS 103
12. TISZTÍTÁS ÉS KARBANTARTÁS 104
13. SZERVIZ ÉS MŰSZAKI SEGÍTSÉGNYÚJTÁS 104
14. MEGFELELŐSÉGI NYILATKOZAT 105
15. AZ ESZKÖZ MŰSZAKI ÉS ÜZEMELTETÉSI SPECIFIKÁCIÓI 105
16. NEMKÍVÁNATOS ESEMÉNY ÉS ORVOSI ESETEK 107
17. ÁRTALMATLANÍTÁS 107

86 87
MAGYAR
FONTOS BIZTONSÁGI INFORMÁCIÓK
Ez a rész ismerteti a felhasználóval azokat a lényeges információkat, amelyekre az eszköz használata előtt szüksége van.
További figyelmeztetéseket és óvintézkedéseket a Felhasználói kézikönyv más részeiben is talál.
FIGYELMEZTETÉSEK
A figyelmeztetések olyan állítások, amelyek a felhasználó figyelmét az eszköz használatából vagy nem megfelelő használatából
eredő sérülés, halál vagy egyéb mellékhatás lehetőségére hívják fel.
! Fontos megjegyezni, hogy a Braster Rendszer használatával történő vizsgálat nem helyettesíti a jelenleg a klinikai gyakorlatban használt diagnosztikai
módszereket (például mammográfia, ultrahang, MRI). Ügyeljen arra, hogy ne mulassza el az orvos által ajánlott mammográfiás vagy ultrahangos
szűréseket.
! Az eszköz minden, a jelen Felhasználói kézikönyvvel ellentétes használata, működtetése és javítása tilos, és az eszköz károsodását vagy meghibásodását
okozhatja. Az eszközt a Felhasználói kézikönyvben foglaltaknak megfelelően kell használni és működtetni, és a BRASTER S.A. által megjelölt helyen
szervizeltetni. A gyártó az eszköz helytelen használatából eredő semmilyen következményért nem vállal felelősséget.
! Az eszközt nem szabad tölteni, amíg vizsgálat van folyamatban. Az eszköz töltés közbeni használata áramütéshez vezethet. Töltés közben ne érintse
meg az eszközt.
! Ne használja az eszközt, ha az eszköz burkolata sérült, mivel az áramütést okozhat.
! Az eszközt az IEC 60950-1 vagy IEC 60601-1 szabványoknak megfelelő USB hálózati adapterrel (paraméterek: 5 V DC, 1A) töltse. Töltés előtt kapcsolja
ki az eszközt.
ÓVINTÉZKEDÉSEK
Az óvintézkedések olyan állítások, melyek az eszköz használatából vagy nem megfelelő használatából eredő, eszközzel
kapcsolatos problémára, azaz az eszköz meghibásodására, az eszköz károsodására vagy adatvesztésre figyelmeztetik
a felhasználót.
! Az eszköz biztonságos és megfelelő használatának biztosítása érdekében az eszköz használata előtt olvassa el a Felhasználói kézikönyv „Fontos
biztonsági információ” című fejezetében foglalt óvintézkedésekkel kapcsolatos, és más abban foglalt információkat. A jelen Felhasználói kézikönyvben
használt illusztrációk és képernyőképek kissé eltérhetnek az eszköz és a mobil applikáció tényleges megjelenésétől.
! A Braster legutóbbi tanulmányai szerint a termográfiai érzékelők az első használatot követő 36 hónap elteltével elveszítik tulajdonságaikat. Amennyiben
az első használatot követő 36 hónap eltelte után használja az érzékelőket, nem lehetséges a vizsgálat megbízható elemzése. Az eszköz megfelelő
működése érdekében az első használat után 36 hónappal cserélje ki az érzékelő-készletet. Ne feledje azonban, hogy a BRASTER S.A. továbbra is
tanulmányozza az érzékelők élettartamát és az élettartam a jövőben meghosszabbodhat.
! Forró és/vagy nedves és/vagy közvetlen napsütésnek kitett helyen tárolva az eszköz és az érzékelők megsérülhetnek. Tárolja őket száraz, hűvös és
sötét helyen.
! Az adatátvitelért a szolgáltató díjszabásának megfelelően fizet.
SZÓJEGYZÉK
Braster automatikus kiértékelés (Braster Al) – a hőképek elemzéséért felelős szoftver a felhasználó által a Braster Care mobil
applikáción keresztül megadott orvosi adatokkal együtt.
Braster eszköz vagy eszköz – egy képi adatgyűjtő eszközből és egy termográfiai érzékelőből álló, a BRASTER S.A. által gyártott
eszköz.
Braster e-bolt – a www.braster.eu oldal, ahol a Braster eszköz, a vizsgálati csomag és a termográfiai érzékelő készlete
megvásárolható. Kérjük, vegye figyelembe, hogy bizonyos piacok esetében a Braster eszköz, valamint a vizsgálati csomag és az
egyéb szolgáltatások kizárólag a helyi forgalmazótól beszerezhetők.
Vizsgálati csomag - egy előre fizetett automatikus termogram csomag, amely meghatározott számú elemzést tartalmaz.
Képi adatgyűjtő eszköz – a vizsgálat során alkalmazott eszköz. A képi adatgyűjtő eszközön van egy BE/KI kapcsoló gomb, egy
USB nyílás és egy markolat. Az eszköz elektronikus és képalkotó rendszerrel is fel van szerelve. Az eszköz belső részében egy
sötétített kamra található, amely biztosítja a termográfiai kép megfelelő minőségét. A képi adatgyűjtő eszköz elektronikus eszköz,
amelyet egy mobil applikáció vezérel.
Folyadékkristály fólia – a folyadékkristályos érzékelő egy eleme. A fólia folyadékkristályokat tartalmaz, amelyek a mellben lévő
termikus változásokat térképezik fel, és színes képeket (termogramokat) hoznak létre.
Folyadékkristályos termográfiai érzékelő (vagy folyadékkristályos érzékelő vagy termográfiai érzékelő) – a Braster eszköz egy
eleme, amely folyadékkristály fóliából és műanyag rögzítőpántból áll. A termográfiai kép a fólia felületének belső oldalán jön létre,
azaz a befelé néző oldalán (az eszköz belseje felé). Az érzékelő az eszköz a gyakorlatban használt része, ami azt jelenti, hogy
érintkezésbe kerül a mell bőrével.
Mammográfia – a mell nőkön végzett radiológiai vizsgálata, melynek során röntgen sugarak segítségével készítenek képfelvételeket
az emlőmirigyekről. A számos jellemző elváltozás és sérülés megjelenítésének képessége miatt a mammográfiát az emlőrák és más
mellbimbó-patológiák kimutatására használják, még azok klinikai tüneteinek megjelenése előtt. A vizsgálat hatékonysága szorosan
összefügg a mell szerkezetével, ezért 50 évnél idősebb nők számára ajánlják.
Mobil applikáció – a Braster Care applikáció egy szoftver, amely szükséges a Braster eszközzel történő mellvizsgálat elvégzéséhez.
Le kell tölteni a felhasználó mobil készülékére (okostelefon vagy táblagép) az első vizsgálat előtt. Az alkalmazás ingyenes és a
Google Play (Android rendszerhez) vagy az App Store (iOS rendszerhez) áruházakban elérhető.
Mobil készülék – okostelefon vagy táblagép (a rendszerkövetelményekért látogasson el a https://www.braster.eu/system oldalra).
Saját Fiók – egy fiók a sajatfiok.braster.eu oldalon, ahol a felhasználónak regisztrálnia kell a vizsgálatok elvégzéséhez. A Saját
Fiókon belül a felhasználó például ellenőrizheti a termográfiai vizsgálat eredményeit.
Távgyógyászati központ – BRASTER S.A. infrastruktúrája, amelyben a felhasználó adatait tárolják, és ahol a BRASTER S.A. által
kínált szolgáltatások, különösen a vizsgálatok eredményei nyújtásához szükséges szoftvert őrzik.
Termogram (vagy termográfiai kép) – a folyadékkristály fólia felületén létrehozott termikus kép grafikus ábrázolása, amely a mellen
belüli hőmérséklet eloszlást térképezi fel.
Ultrahang - egy nem invazív módszer, amely során ultrahangot használnak a szövetek megjelenítésére. Az ultrahangos képalkotás
egy alapvető diagnosztikai eszköz, amely a mell patológiás, például az emlőrák okozta elváltozásainak kimutatására szolgál.
Felhasználó - a Braster otthoni emlővizsgáló rendszert használó nő.

88 89
MAGYAR
− a képi adatgyűjtő eszköz, és
− három termográfiai érzékelő;
• a Braster Care mobil applikáció;
• a Braster AI automatikus elemző szoftver.
Lásd 1. ábra: A Braster Rendszer alkotóelemei:
1. A Braster Care applikáció 2. A Braster eszköz 3. A Braster AI szoftver
A vizsgálat során alkalmazza a Braster eszközt a mell területén. Az eszközön egy folyadékkristály fólia található, amely színes
képeket hoz létre a mell felületével való érintkezéskor. A vizsgálat végén a készített termográfiai képeket a mobil applikáció tárolja
és küldi el a távgyógyászati központba, ahol azokat a Braster AI automatikusan elemzi. Amennyiben bármilyen potenciálisan
veszélyes patológiás elváltozás található, akkor felszólítják Önt, hogy forduljon orvoshoz.
A Braster orvosi eszköz nem végez méréseket, azonban rögzíti a hőmérséklet-eloszlást a mellben, és a termográfiai képek
elemzéseit ezek alapján végzik.
A Braster emlővizsgálat NEM HELYETTESÍTI A JELENLEG A KLINIKAI GYAKORLATBAN HASZNÁLT MÓDSZEREKET
(PÉLDÁUL A MAMMOGRÁFIÁT ÉS AZ ULTRAHANGOT). Ez a fent említett vizsgálatok egy hasznos kiegészítő eszköze.
1.2. JAVASOLT HASZNÁLAT
1.2.1. JAVALLATOK
A Braster otthoni emlővizsgáló rendszer – Braster Rendszer felnőtt nők otthon végezhető mellvizsgálatára szolgál, az ultrahangos és
mammográfiai vizsgálatok kiegészítéseként. Az eszköz termikus szabálytalanságokat észlel, amelyek diagnosztikai módszerekkel
vagy egészségügyi tanácsadással végzett megerősítést igényelnek.
1.2.2. ELLENJAVALLATOK
A Braster Rendszer nem a mellrák elleni kezelésen, azaz mellmegtartó műtéten, masztektómián (egyoldalú vagy kétoldalú),
rendszeres kezelésen (kemoterápia, hormonterápia, biológiai terápia) vagy sugárkezelésen részt vevő vagy azon átesett nők
vizsgálatára szolgál.
A Braster Rendszer használatának ideiglenes ellenjavallatai:
• terhesség vagy szoptatás (az elválasztástól számított három hónapig);
! Ha a Felhasználói kézikönyvben meghatározottaktól eltérő alkatrészeket használ, vagy ha módosítja a Braster eszközt vagy a Felhasználói kézikönyvben
nem említett készülékekhez csatlakoztatja, nehézségei adódhatnak annak működése során és/vagy a felhasználónak tulajdonítható kárt okozhat,
amelyért a gyártó nem vállal felelősséget.
! Kizárólag a Felhasználói kézikönyvben meghatározott alkatrészeket használjon, és a Felhasználói kézikönyvben említett készülékekhez csatlakoztassa
a Braster eszközt. Ne módosítsa a Braster eszközt.
! Az első vizsgálat előtt minimum 30 percig töltse az eszközt.
BEVEZETÉS
Jelen Felhasználói kézikönyv a Braster otthoni emlővizsgáló rendszer részét képezi, amely a felhasználó által, az otthonában
végzett önálló mellvizsgálatra szolgál. Az eszköz első használata előtt olvassa el a Felhasználói kézikönyvet. A Felhasználói
kézikönyv tartalmazza az eszköz összes funkciójára és jellemzőjére, annak biztonságára és a mellvizsgálat folyamatára vonatkozó
szükséges információkat.
Ajánlott a jelen Felhasználói kézikönyv megőrzése a későbbi tájékozódás céljából.
A BRASTER S.A. egy innovatív, szabadalmaztatott technológia tulajdonosa a folyadékkristály keverékek és speciális célra készített
folyadékkristály emulziók gyártását illetően. Ezt a gyártási folyamatot a folyamatos folyadékkristály film (CLCF) technológia alapján
fejlesztették ki. A BRASTER S.A. által alkalmazott technológiát nemzetközi szabadalmak védik.
Az eszköz, a Felhasználói kézikönyvvel ellentétes, nem megfelelő működtetése veszélyt jelenthet a felhasználó vagy
harmadik személy egészségére és életére. A termék használata során a Felhasználói kézikönyvben foglaltakat be
kell tartani. Csak azt követően használja a Braster eszközt, hogy megismerte a terméket és elolvasta a Felhasználói
kézikönyvet.
Az eszközt csak a gyártó által meghatározott rendeltetési célra szabad használni. A termék önkényes, a Felhasználói
kézikönyvvel ellentétes használata kár esetén a garancia jogok és követelések elvesztésével járhat.
1. JELLEMZŐK ÉS JAVASOLT HASZNÁLAT
1.1. JELLEMZŐK
A Braster otthoni emlővizsgáló rendszer, a továbbiakban: „Braster Rendszer”, termográfiai emlővizsgálatra szánt orvosi eszköz.
A rendszer a következőkből áll:
• a Braster eszköz, amely a következőket tartalmazza:

90 91
MAGYAR
4. A BRASTER ESZKÖZ INTERFÉSZÉNEK ÁTTEKINTÉSE
Lásd a 3. ábrát: A Braster eszköz interfésze:
1. Markolat
2. Vizsgálati indikátor
3. Áramellátás állapota
4. Mini-USB nyílás
5. BE/KI gomb
BE/KI gomb – az eszköz be-/kikapcsolása
• az eszköz bekapcsolásához nyomja meg a gombot és tartsa lenyomva 2 másodpercig;
• a vizsgálat elvégzését követően, vagy 10 percnyi inaktivitás után az eszköz automatikusan kikapcsol. Az eszköz vészhelyzeti
módban történő kikapcsolásához nyomja meg a gombot és tartsa lenyomva 5 másodpercig.
Markolat – aktiválja a termográfiai kép készítését
• A markolat le van nyomva – a termográfiai kép készítése aktív (aktivált Vizsgálati indikátor).
• A markolat nincs lenyomva – a termográfiai kép készítése nem aktív.
• általános fertőzés, 38 ˚C-os vagy azt meghaladó testhőmérséklettel;
• a mell fájdalommal járó fertőzése, bőrpír és zúzódások (amikor az említett tünetek jelen vannak);
• a menstruációs ciklus második fázisában – a mell élettani változásai miatt a menstruációs ciklus során; a termográfiai vizsgálat
elvégzésének legmegfelelőbb időpontja a ciklus harmadik és tizenkettedik napja között van;
• a szoba nem megfelelő hőmérséklete (túl meleg vagy túl hideg), ahol a vizsgálatot végzi – a környezeti hőmérsékletnek 20°C
és 25 °C között kell lennie;
• sebészi beavatkozás az emlőben jóindulatú elváltozás diagnózissal:
– vékonytű biopszia (FNB) - a beavatkozást követő négy hétig,
– vastagtű biopszia (CNB) vagy Mammotome mellbiopszia – a beavatkozást követő legfeljebb 6 hónapig,
– emlőtumor reszekció – a beavatkozást követő 12 hónapig;
• esztétikai implantátum elhelyezése, töltőanyag injekciók (pl. hialuronsav) és zsírátültetés – a beavatkozást követő 12 hónapig.
2. AZ ESZKÖZ MŰKÖDÉSI ALAPELVEI
A Braster eszköz a kontakt termográfia néven ismert technológia egy típusát használja. A kontakt termográfia egy orvosi képalkotó
technika a szöveti anyagcsere változásainak kimutatására. Az orvostudományban, a termográfia a „dermo-termikus hatás” néven
ismert jelenségen alapszik, amelyben a vizsgált szervben (a test belsejében) előforduló termikus folyamatok a bőr felületén
hőmérséklet anomáliák formájában manifesztálódnak.
A neoplasztikus folyamat gyorsabb anyagcserével párosul, többek között egy sűrű patológiás kapilláris hálózat kialakulása révén.
A feltételezett rosszindulatú patológiás elváltozások jellemző morfológiai szerkezettel és magasabb hőmérséklettel rendelkeznek,
mint a test normál területei. Ennek eredményeképpen, a termogramon eltérő színű területként jelennek meg.
A kontakt termográfia egy kiegészítő vizsgálat. Az olyan általában végzett vizsgálatokat egészíti ki, mint például az ultrahang és a
mammográfia.
3. A DOBOZ TARTALMA
A doboz tartalma:
• képi adatgyűjtő eszköz, modell: BRA-1.0 (lásd a 2A. ábrát),
• három termográfiai érzékelőből álló készlet, 1, 2 és 3 számozással, modell: TMS-1.0 (lásd a 2B. ábrát),
• egy mini USB kábel,
• egy törlőruha,
• egy felhasználói kézikönyv,
• egy gyorsindító.

92 93
MAGYAR
5. ÉRZÉKELŐ CSERÉJE
1. lépés ( 5A. ábra) Húzza az érzékelő szélét arra a helyre, ahol bemetszés van az eszközön. Lehetőség szerint tartsa hüvelykujjával
az érzékelő bemetszését, a többi ujjával pedig támassza alá az érzékelőt.
2. lépés ( 5B. ábra) Húzza le az érzékelőt az eszközről.
3. lépés ( 5C. ábra) Rögzítse az érzékelőt a burkolattal párhuzamosan nyomva. Lehetőség szerint tartsa hüvelykujjával az érzékelő
bemetszését, a többi ujjával pedig támassza alá az érzékelőt.
6. AZ ESZKÖZ ELŐKÉSZÍTÉSE A VIZSGÁLAT ELŐTT
6.1. A BRASTER ESZKÖZ ELŐKÉSZÍTÉSE AZ ELSŐ VIZSGÁLAT ELŐTT
a. Az eszköz kicsomagolása után, ellenőrizze, hogy hiánytalan-e. A doboznak a következőket kell tartalmaznia: képi adatgyűjtő
eszköz, három érzékelő (1, 2, és 3 számú), egy mini USB kábel, egy Felhasználói kézikönyv, egy gyorsindító és egy törlőruha.
Ha úgy találja, hogy bármelyik alkotóelem hiányzik, azonnal töltse ki a Braster weboldalán elérhető panaszbejelentő űrlapot.
b. Az érzékelő az eszköz részét képezi, ami azt jelenti, hogy közvetlenül érintkezik a bőrrel. Ezért, a használat előtt tisztítsa és
fertőtlenítse az érzékelők belső és külső felületét (a leírás szerint és a felhasználói kézikönyv 11. és 12. fejezetében foglalt
intézkedések segítségével).
c. Az első vizsgálat előtt minimum 30 percig töltse az eszközt.
d. Töltse le az ingyenes Braster Care mobil applikációt okostelefonjára vagy táblagépére, és hozzon létre egy fiókot a sajatfiok.
braster.eu oldalon a vizsgálat elvégzéséhez. Ezt a műveletet elvégezheti az akkumulátor töltése során. A mobil applikáció
letöltésének útmutatója a következő:
1. Töltse le a Braster Care applikációt az App Store-ból, ha mobil készüléke iOS operációs rendszerrel rendelkezik (pl. egy
iPhone vagy iPad esetén), vagy a Google Play-ről, ha mobil készüléke Android operációs rendszerrel rendelkezik;
2. Telepítse a Braster Care applikációt mobil készülékére;
3. Indítsa el a Braster Care applikációt mobil készülékén és olvassa el a BEVEZETŐT;
4. Kattintson a REGISZTRÁCIÓ hivatkozásra a képernyő alján.
Fül. 1. Jelzőszínek a felhasználói felületen
Mini-USB nyílás - a gumi sapka alatt található. A nyílás eléréséhez fel kell emelnie a sapkát. A mini-USB nyílás a következőkre
szolgál:
• a képi adatgyűjtő eszköz szoftverének frissítése,
• akkumulátor töltése.
Az eszköz címkéje – az eszköz sötétített kamrájában található, az érzékelő eltávolítása esetén látható. A címke tartalmazza az
eszköz sorozatszámát, amely egyben az eszköz által sugárzott Wi-Fi jel neve is, és a jelszót (lásd a 4A. ábra: A címke elhelyezkedése,
és 4B. ábra: Címke minta a Wi-Fi jel nevével és a jelszóval: 1. Az eszköz által sugárzott Wi-Fi jel neve, 2: az eszköz által sugárzott
Wi-Fi jel jelszava).
Ne távolítsa el a címkét. Írja le a címkén található adatokat és tartsa biztonságos helyen.
Vizsgálati kijelző állapota Bekapcsolásjelző állapota Jellemzők
Nem világít Nem világít Az eszköz ki van kapcsolva
Nem világít Villogó zöld Az eszköz be van kapcsolva
Nem világít Állandó zöld
Az eszköz csatlakoztatva van
egy mobil készülékkel
Pulzáló fehér Állandó zöld
Termogram készítése
folyamatban
Nem világít Állandó narancs Töltés folyamatban
Nem világít Villogó narancs
A vizsgálat nem végezhető el. Az akku-
mulátor töltöttségi szintje túl alacsony.
Állandó fehér Nem világít/narancssárga Firmware frissítési mód
Villogó fehér Nem világít/narancssárga
Firmware frissítése
folyamatban

94 95
MAGYAR
• győződjön meg arról, hogy megvette a vizsgálati csomagot – ha még nem, akkor megvásárolhatja a Braster e-boltban, vagy az
országtól függően az e-boltban vagy a helyi forgalmazó egyéb beszerzési helyein.
NE FELEDJE
Ne végezze el a vizsgálatot 20°C-nál alacsonyabb vagy 25°C-nál magasabb hőmérsékletű helyiségben.
Az emlő fiziológiájában a menstruációs ciklus során bekövetkező változások miatt, a termográfiai vizsgálatok elvégzése a
ciklus harmadik és tizenkettedik napja között a legmegfelelőbb.
Ha már nem menstruál, vagy menstruációs ciklusa rendszertelen (több mint 10 napos ingadozások), javasoljuk, hogy
a vizsgálatokat azonos időközönként, havonta egyszer végezze el; pl. a hónap 1. és 5. napja között vagy a hónap 1.
hétvégéjén.
1. A vizsgálat előtti napon:
• kerülje az olyan eljárásokat, amelyek növelhetik a mell vérkeringését (fizioterápia, masszázs stb.).
2. A vizsgálat napján:
• kerülje az olyan eljárásokat, amelyek növelhetik a mell vérkeringését (fizioterápia, masszázs stb.);
• győződjön meg arról, hogy menstruációs ciklusának harmadik és tizenkettedik napja között van, vagy ha nem menstruál, hogy
körülbelül 30 nap telt el az előző vizsgálat óta;
• ne fürödjön vagy zuhanyozzon körülbelül két órával a vizsgálat előtt;
• semmilyen alkoholtartalmú italt ne fogyasszon;
• ne használjon bőrradírt a mellén és/vagy a dekoltázsán, és ne végezzen szőrtelenítést a hónalján, mivel ez irritálhatja a bőrt;
• a vizsgálat előtt legalább 30 percig és a vizsgálat közben tartsa magát hő- vagy hidegforrástól, mint például fűtőtesttől vagy
légkondicionálótól távol;
• kerülje az erős fizikai erőfeszítést körülbelül két órával a vizsgálat előtt;
• ne használjon kozmetikumokat a mellén és ne nedvesítse be a bőrét két órán belül a vizsgálat előtt – a bőre legyen tiszta és
száraz;
• ne menjen szaunába vagy gőzfürdőbe.
e. Az útmutató szerint regisztrálja saját fiókját (kérjük, vegye figyelembe, hogy ajánlott a saját fiók regisztrálását és használatát
asztali számítógépen vagy laptopon végezni, mert nagy képernyőre tervezték):
1. Amennyiben a REGISZTRÁCIÓ linkre kattintás után az átirányítás nem történik meg automatikusan, látogasson el a
sajatfiok.braster.eu oldalra;
2. Töltse ki az adatokat. A
fiók típusa
mezőben válassza a „Braster – otthoni használatra” lehetőséget, majd kattintson a
REGISZTRÁCIÓ gombra;
3. Lépjen be e-mail fiókjába, és keresse meg az aktiváló linket tartalmazó, tőlünk kapott e-mailt. Ha nem találja a fő mappában,
ellenőrizze a „Levélszemét” mappát;
4. Miután aktiválta fiókját az aktiváló linkre kattintással, írja be a felhasználónevét (a regisztráció során használt e-mail cím) és
jelszavát (a regisztráció során megadott) a bejelentkezési oldalon, majd kattintson a BEJELENTKEZÉS lehetőségre;
5. Töltse ki a kérdőív összes orvosi és személyes adatra vonatkozó kérdését.
Ha nem tölti ki a kérdőívet az első bejelentkezés alkalmával, nem fogja tudni elvégezni a vizsgálatot;
6. A vizsgálati csomag aktiválásához nyissa meg az „Aktiválási kódok” fület, és kattintson a „Csomag aktiválása” gombra;
7. Lépjen ki a Saját Fiókból a regisztráció befejezése után.
f. A töltés befejezését követően indítsa el az applikációt és kövesse a 7. fejezetben foglalt utasításokat.
6.2. A BRASTER ESZKÖZ ELŐKÉSZÍTÉSE A KÖVETKEZŐ VIZSGÁLATOK ELŐTT
a. A vizsgálatra való előkészület során először tisztítsa meg a folyadékkristályos érzékelők felületét. Minden érzékelőt meg kell
tisztítania, különös tekintettel az érzékelő belső oldalának felületére. Fontos az ajánlott tisztító- és fertőtlenítőszerek használata
és a fólia felületének alapos megtisztítása, hogy ne hagyjon ujjlenyomatokat, szennyeződéseket stb., mert az megváltoztathatja
a termográfiai vizsgálat értelmezését (további információért lásd a 11. „Fertőtlenítés” és a 12. „Tisztítás és karbantartás” fejezetet).
b. Az érzékelők megtisztítását követően, indítsa el az applikációt és kövesse a 7. fejezetben foglalt utasításokat.
7. VIZSGÁLAT
7.1. FONTOS INFORMÁCIÓK
Töltés közben ne használja az eszközt.
Az első vizsgálat előtt:
• töltse le az ingyenes Braster Care applikációt mobil készülékére a Google Play vagy App Store áruházból;

96 97
MAGYAR
Az eszköz tíz perc használaton kívüli állapotot követően automatikusan kikapcsol. Ezért, ha szükségesnek tartja a vizsgálat 10
percnél hosszabb időre történő megszakítását, be kell kapcsolnia a Braster eszközt és újra csatlakoztatnia kell a mobil készülékéhez
a folytatáshoz.
7.2.4. ESZKÖZ CSATLAKOZÁSA
A Braster eszköz és a mobil készülék közötti kapcsolat létrehozása az Android és iOS rendszerek esetén kicsit eltér.
A Braster eszköz csatlakoztatásához kövesse a mobil készüléken egymást követő képernyőkön megjelenő utasításokat.
Helyezze úgy el az eszközt, hogy láthatóvá váljon a címkén a Braster Wi-Fi jel neve és jelszava. A címke az eszköz belsejében
található és csak az érzékelő eltávolítása után látható ( 4A. és 4B. ábra).
7.2.4.1. CSATLAKOZTATÁS iOS KÉSZÜLÉKHEZ
Kattintson a „Beállítások” elemre a csatlakozási képernyőn. Lépjen a Wi-Fi beállításokhoz. A Wi-Fi jelek listájából válassza ki a
címkén megadott Braster jelet, és adja meg a jelszót. Térjen vissza az applikációhoz. Egy üzenet jelenik meg, mely tájékoztatja Önt
arról, hogy a kapcsolat sikeresen létrejött-e.
Ne aggódjon, ha a mobil készülék fő képernyőjére lépett vissza az applikáció helyett, vissza tud lépni az alkalmazáshoz. Ennél a
pontnál már csatlakoznia kell az eszközhöz.
Ha valamilyen okból kifolyólag az applikáció kapcsolati képernyőjén nem tud a Wi-Fi kapcsolat beállításaihoz lépni, lépjen ki az
alkalmazásból, lépjen a mobil készülék „Beállítások” menüpontjához, válassza ki a „Wi-Fi” fület, válassza ki Braster eszközének
jelét, majd adja meg a jelszót. Ezt követően visszatérhet az applikációhoz.
7.2.4.2. CSATLAKOZTATÁS ANDROID KÉSZÜLÉKHEZ
Válassza ki a Braster eszköz jelét a kapcsolati képernyőn, majd adja meg a jelszót (a jel neve és a jelszó az eszköz belsejében
elhelyezett címkén találhatók). Egy üzenet jelenik meg, mely tájékoztatja Önt arról, hogy a kapcsolat sikeresen létrejött-e.
Az applikáció megjegyzi felhasználónevét és jelszavát, így a jövőben nem kell megadnia azokat, ha el szeretné végezni a vizsgálatot.
MOBIL KÉSZÜLÉKÉNEK NINCS INTERNETKAPCSOLATA AMÍG A BRASTER ESZKÖZHÖZ CSATLAKOZIK
7.2. A VIZSGÁLAT ELVÉGZÉSE
7.2.1. ELŐKÉSZÜLET
• Helyezze a Braster eszközt Önnel szembe. Győződjön meg róla, hogy ki van kapcsolva. Legyen kéznél mobil készüléke a
telepített Braster Care applikációval (a Felhasználó kézikönyv 6. fejezetében foglaltak szerint). Ellenőrizze, hogy mobil
készülékén van-e internetkapcsolat.
• Indítsa el a Braster Care mobil applikációt okostelefonján vagy táblagépén.
• Jelentkezzen be az alkalmazásba a felhasználónév és a jelszó megadásával (amelyek azonosak az Ön saját fiókjával a sajatfiok.
braster.eu oldalon).
• Kattintson a START gombra a vizsgálat megkezdéséhez. Ebben a szakaszban még ne vetkőzzön le.
A vizsgálat során a mobil készüléken a navigációs képernyő jelenik meg az összes szakasz kijelzésével. A folyamatban lévő
szakaszt az applikáció kiemeléssel jelzi. Kattintson az elindítani kívánt szakasz nevére. Minden egyes szakasz után a navigációs
képernyő jelenik meg. Ne feledje, hogy a vizsgálat minden szakaszán egyenként végig kell mennie. Az alkalmazás nem engedi,
hogy bármelyik szakaszt átugorja. Miután egy lépést befejezett, nem fog tudni visszalépni rá.
7.2.2. KÉRDÉSEK
A vizsgálat ezen részében olyan kérdésekre kell választ adnia, amelyek ellenőrzik, hogy alkalmas-e a vizsgálat elvégzésére az
adott napon. Ezek a kérdések az eredmény elemzése során is hasznosak lesznek. Néhány közülük IGEN vagy NEM kérdés lesz.
Amennyiben a válasza lehetővé teszi a vizsgálat elvégzését, akkor a következő képernyőre lép tovább. Azonban, ha nem tudja
elvégezni a vizsgálatot, egy magyarázó megjegyzés jelenik meg. Mindig visszatérhet az előző kérdésre a VISSZA lehetőségre
kattintva.
Néhány kérdés esetében adott számú lehetőségből kell kiválasztania a helyes választ. Mindig őszinte választ adjon, mivel a válaszai
befolyásolják az eredmények megbízhatóságát.
7.2.3. AZ ESZKÖZ BE-/KIKAPCSOLÁSA
Kapcsolja be az eszközt a BE/KI gomb körülbelül két másodpercig tartó megnyomásával. Az eszköz bekapcsolt állapotában az
akkumulátor ikon zölden villog. Ha az eszközt csatlakoztatta mobil készülékéhez, az akkumulátor ikon folyamatos zöld színnel
világít.
Normál körülmények között az eszköz automatikusan kikapcsolja magát a vizsgálat befejezését követően. Az eszköz vészhelyzeti
módban történő kikapcsolásához nyomja meg az BE/KI gombot és tartsa lenyomva öt másodpercig.

98 99
MAGYAR
7.2.7. VIZSGÁLAT
A vizsgálat megkezdése előtt olvassa el a navigációs képernyőn a „Vizsgálat” lehetőség megnyomása után megjelenő utasításokat.
Ezek az utasítások ismertetik a vizsgálat során elvégzendő teendőket és az eszköz mellen való alkalmazásának módját.
A kiváló minőségű termográfiai képek biztosítása a vizsgálat során:
• a mellével párhuzamosan alkalmazza az eszközt (lásd 7. ábra: megfelelően alkalmazott eszköz);
• ne emelje fel a mellét;
• ne mozgassa az eszközt a melle körül, hanem tartsa erősen egy helyen (lásd 8. ábra: nem megfelelően alkalmazott eszköz);
• ne távolítsa el az eszközt, amíg az utasítás meg nem jelenik;
• tartsa lenyomva a markolatot, amíg a vizsgálat folyamatban van;
• ne érintse meg a mellét a kezével a vizsgálat során.
A sajatfiok.braster.eu oldalon a saját fiókjában az „Adataim” fül alatt megadott mellmérettől függően, három vagy öt különböző
pozícióban kell a vizsgálatot végrehajtania mindkét mellén.
MINDIG A JOBB MELLÉVEL KEZDJE
Ez nagyon fontos, mivel az egyes vizsgálatok során a melleiről készített termográfiai képeket egymással összehasonlításra
kerülnek. A jelenlegi vizsgálat képeit összehasonlítjuk az öt előző vizsgálat során készített felvételekkel. A korábbi vizsgálatok során
készített képek összehasonlításával megfigyelhetjük, hogy az eltelt idő alatt észlelhetők-e változások a szerkezeti vagy termikus
aszimmetriában.
1, 2 vagy 3-as mell méret
Ha a mell mérete 1, 2 vagy 3-as, lásd a 9A. ábrát az 1 vagy 2-es, és a 9B. ábrát a 3-as mérethez. A vizsgálat során a következőket
el kell végeznie:
1) Egy középponti alkalmazást a mellen, ügyelve arra, hogy az érzékelő alsó széle (azaz a fekete rész (a termográfiai fólia)) a
melléhez tapad (nem a hasához). Ne nyomja fel a mellét.
7.2.5. AKKLIMATIZÁLÓDÁS
A vizsgálat következő szakasza a hatperces akklimatizáció, azaz a mell hőmérsékletének szabályozása és stabilizálása. Ehhez
deréktól felfelé le kell vetkőznie. Az akklimatizáció kulcsfontosságú, ha a vizsgálat során jó minőségű termográfiai képeket szeretne
kapni. Csak egy megfelelően végrehajtott akklimatizációval lehet biztos abban, hogy az eredmények megbízhatóak lesznek.
Az akklimatizáció folyamatának befejezéséhez kövesse az applikáció következő képernyőin megjelenő utasításokat.
7.2.6. ÉRZÉKELŐ KIVÁLASZTÁSA
Ebben a szakaszban kell kiválasztania az érzékelőt a vizsgálathoz. A Braster eszközhöz három érzékelőből álló készletet
mellékeltünk. Ezek mindegyik különböző hőmérsékleti tartományban működik. Ne feledje, hogy testhőmérséklete, egyéb tényezők
mellett, függ a menstruációs ciklus napjától, életkorától és anyagcseréjétől. Annak érdekében, hogy nagy felbontású termográfiai
képet kapjon, amely megmutatja a mellén belüli hőmérséklet eloszlását, minden vizsgálat előtt érzékelőt kell választania.
A érzékelő kiválasztásához alkalmazza a Braster eszközt a mellek középső részén. Győződjön meg róla, hogy a teljes érzékelő
szorosan odatapad a testéhez. Az applikáció lépésről lépésre végigvezeti Önt ezen a folyamaton.
Először helyezze a 2. számú érzékelőt az eszközre (az érzékelő száma a műanyag kereten található). Ezután kövesse az egymást
követő képernyőkön megjelenő utasításokat.
! AZ ÉRZÉKELŐ KIVÁLASZTÁSÁT A JOBB MELLÉVEL KEZDJE.
Ha az utasítás megjelenik, helyezze az eszközt a melle közepére, majd nyomja meg a markolatot (lásd 3. ábra: a markolat
helyének meghatározásához). A kattanó hang azt jelzi, hogy a markolatot megfelelően benyomta.
Ne feledje, hogy a markolatot addig kell benyomva tartania, amíg a vizsgálat folyamatban van. Ne mozgassa az eszközt a melle
körül, tartsa határozottan egy helyen. Ha az utasítás megjelenik, engedje fel a gombot, és távolítsa el az eszközt a mellétől
(lásd 6. ábra: az eszköz alkalmazása a mellen).
! ISMÉTELJE MEG EZEKET A LÉPÉSEKET A BAL MELLÉN.
Ha a 2. számú érzékelő megfelel Önnek, megkezdheti a vizsgálatot. Ha nem megfelelő, akkor a rendszer megkéri, hogy távolítsa
el a 2. érzékelőt és ismételje meg az alkalmazást az 1. vagy a 3. számú érzékelővel. Amikor kiválasztotta a megfelelő érzékelőt,
megkezdheti a vizsgálatot.

100 101
MAGYAR
Az alkalmazások átfedhetik egymást, de ne aggódjon, ha az Ön esetében nem az ábrákon látható módon fedik át egymást. A fontos
az, hogy mindenképpen lefedje az egész mellet.
Kövesse a mobil készüléke képernyőjén megjelenő utasításokat. Minden alkalmazás kb. 15 másodpercig tart, amely
meghosszabbítható az átvitel idejével, ha a Wi-Fi jel gyenge minőségű (sok más adó vagy rádiózaj miatt). Alkalmazások között eltelt
idő körülbelül 10-15 másodpercig tart (a mell hőmérsékletétől és a környezeti hőmérséklettől függően). Ez idő alatt az érzékelő nem
érintkezhet a testével.
7.2.8. AZ EREDMÉNYEK MEGKÜLDÉSE A TÁVGYÓGYÁSZATI KÖZPONTBA
Miután az összes alkalmazást elvégezte, tájékoztatást kap arról, hogy a vizsgálat véget ért, és hogy az összegyűjtött adatokat
megküldheti elemzésre a gyártó távgyógyászati központjába. Kérjük, vegye figyelembe, hogy az adatok megküldése előtt,
először le kell választania mobil készülékét a Braster eszközről és kapcsolódnia kell a Wi-Fi hálózathoz. A vizsgálat során készített
termográfiai képek mérete miatt nem ajánlott azokat mobil adatátvitellel küldeni, hanem Wi-Fi hálózaton keresztül. A vizsgálati
eredményeket két munkanapon belül megküldjük a sajatfiok.braster.eu oldalon található fiókjába.
Ha a vizsgálat megküldését követően kiválasztja a „Befejezés” lehetőséget, a kezdőképernyőre lép, ahol ellenőrizheti a vizsgálat
állapotát („Elküldve elemzésre”). Amikor a vizsgálat eredményei megérkeztek a fiókjába a távgyógyászati központtól, az állapot
„Eredmény elérhető”-re változik.
Nem kell rögtön a vizsgálat befejezése után elküldenie az összegyűjtött adatokat elemzésre. Bármikor elküldheti azokat, amikor
Önnek kényelmes, amennyiben internetkapcsolattal rendelkezik (lehetőleg Wi-Fi-n keresztül). Ha készen áll, nyissa meg az
alkalmazást, és válassza a „Vizsgálatok jegyzéke” lehetőséget, kattintson az utolsó vizsgálatra, majd válassza ki a küldés vagy
a törlés lehetőséget. Kérjük, vegye figyelembe, hogy az új vizsgálat elvégzése előtt az eredményeket törölnie kell, vagy el kell
küldenie elemzésre, különben a rendszer nem engedi a következő vizsgálat elvégzését.
Az applikáció tájékoztatja Önt, ha a vizsgálata eredményei elérhetők. Azok elolvasásához lépjen be a sajatfiok.braster.eu oldalon
található egyéni fiókjába.
8. A MOBIL APPLIKÁCIÓ HIBAELHÁRÍTÁSA
Bizonyos körülmények között a vizsgálat végrehajtása nem lehetséges. Az alábbiakban tippeket találhat az egyes problémák
megoldásához.
8.1. A Braster eszköz Wi-Fi technológiát használ a mobil készülékre történő adatátvitelhez. A Wi-Fi technológia, tervezése alapján a
más felhasználókkal történő rádió-sávszélesség megosztáson alapszik. Ha a tartózkodási helyén a Wi-Fi környezet túlzsúfolt és/
2) Egy felső alkalmazást a mell külső részén, a hónalj határvonala mentén, ügyelve arra, hogy az érzékelő széle (azaz a fekete rész
(a termográfiai fólia)) a mell oldalsó részét érintse, és ne nyúljon azon túl.
3) Egy felső alkalmazást a mell belső részén, ügyelve arra, hogy az érzékelő széle (azaz a fekete rész (a termográfiai fólia)) ne
nyúljon át a másik mellére és a szegycsontra.
Az alkalmazások átfedhetik egymást, de ne aggódjon, ha az Ön esetében nem az ábrákon látható módon fedik át egymást. A fontos
az, hogy mindenképpen lefedje az egész mellet.
Kövesse a mobil készüléke képernyőjén megjelenő utasításokat. Minden alkalmazás kb. 15 másodpercig tart, amely
meghosszabbítható az átvitel idejével, ha a Wi-Fi jel gyenge minőségű (sok más adó vagy rádiózaj miatt). Alkalmazások között eltelt
idő körülbelül 10-15 másodpercig tart (a mell hőmérsékletétől és a környezeti hőmérséklettől függően). Ez idő alatt az érzékelő nem
érintkezhet a testével.
4-es vagy 5-ös mellméret
Ha mellmérete 4-es vagy 5-ös, lásd a 10A. ábrát a 4-es mérethez és a 10B. ábrát az 5-ös mérethez, a vizsgálat során a
következőket kell elvégeznie:
1) Egy középponti alkalmazást a mellén, ügyelve arra, hogy az érzékelő alsó széle (azaz a fekete rész (a termográfiai fólia)) a mellére
tapadjon (ne a hasára). Ne nyomja fel a mellét.
Ossza a mellét négy egyenlő részre, mintha egy függőleges és egy vízszintes vonal haladna át a melle középpontján.
Most végezzen el:
2) Egy alkalmazást a mell alsó külső reszen, ügyelve arra, hogy az érzékelő alsó széle (azaz a fekete rész (a termográfiai fólia)) a
mellére tapadjon (ne a hasára). Ne nyomja fel a mellét.
3) Egy alkalmazást a mell felső külső reszen, a hónalj határvonala mentén, ügyelve arra, hogy az érzékelő széle (azaz a fekete rész
(a termográfiai fólia)) a mell oldalsó részét érintse, és ne nyúljon azon túl.
4) Egy alkalmazást a mell felső belső reszen, ügyelve arra, hogy az érzékelő széle (azaz a fekete rész (a termográfiai fólia)) ne
nyúljon át a másik mellére, de keresztül fusson a szegycsont középvonalán.
5) Egy alkalmazást a mell alsó belső reszen. Az érzékelő alsó széle (azaz a fekete rész (a termográfiai fólia)) tapadjon a melléhez
(ne a hasához). Ne nyomja fel a mellet.

102 103
MAGYAR
Az akkumulátor feltöltéséhez húzza ki a Braster eszköz oldalán, a BE/KI gomb mellett található, USB jelzéssel ellátott gumi
sapkát. Csatlakoztassa a USB kábel egyik végét a Braster eszközhöz, a másik végét a töltőhöz (a dugó nem része a készletnek).
Csatlakoztassa a töltőt egy áramforráshoz (lásd 11. ábra: az USB nyílás helye: 1. mini-USB nyílás, 2. USB nyílás).
Ha csatlakoztatta az eszközt a töltőhöz, az Áramellátás állapotjelzője folyamatos narancs színnel világít. Az állapotjelző kialszik, ha
az akkumulátor teljesen feltöltött. Teljes töltés körülbelül három órát vesz igénybe. Az eszközt le kell választani az áramforrásról az
USB-kábelen keresztül, melyet biztonságosan kell leválasztani a hálózati áramforrásról, amikor a töltés befejeződött.
10. BIZTONSÁGOS MŰKÖDÉS
Kövesse a lenti javaslatokat a Braster eszköz biztonságos működésének biztosítása érdekében:
• Mielőtt először használná az eszközt, töltse fel az akkumulátort a mellékelt USB kábel segítségével.
• Kizárólag a gyártó által rendelkezésre bocsátott vagy ajánlott tartozékokat és anyagokat használjon.
• Soha ne hagyja, hogy a Braster eszközt vagy az érzékelőket víz érje.
• A vizsgálat elvégzése után a felhelyezett érzékelővel együtt tárolja az eszközt. Helyezze el az eszközt érzékelővel lefelé,
ügyelve arra, hogy ne kerülhessen por az érzékelőbe. Tartsa az eszközt az eredeti dobozban.
• Ne helyezzen semmit a képi adatgyűjtő eszközbe, mert ezzel károsíthatja az eszköz belső keretét.A gyártó semmilyen, a
felhasználó által okozott kárért nem tehető felelőssé.
• Ne hagyja, hogy az érzékelőn található fólia éles tárgyakkal kerüljön kapcsolatba.
• A vizsgálat során ne helyezzen semmilyen tárgyat a képi adatgyűjtő eszköz és a mobil készülék közé. Ha bármilyen tárgy kerül
közéjük, a képi adatgyűjtő eszköz és a mobil készülék közötti kapcsolat megszakadhat.
• Az eszközt csak a gyártó szerviz csapata javíthatja. Az eszköz bármilyen más módon történő javítása a garancia elvesztésével jár.
• Az eszközt tartsa gyermekektől távol.
11. FERTŐTLENÍTÉS
Minden vizsgálat előtt fertőtlenítse mindhárom érzékelő belső és a külső felületét. A fertőtlenítés során permetezzen izopropilalkohol
alapú Softaseptet vagy fertőtlenítőszert az érzékelő mindkét oldalára, és alaposan tisztítsa meg egy eldobható géz vagy pamut
ruhával. A fertőtlenítés során győződjön meg arról, hogy a felület mentes a kórokozó mikroorganizmusoktól, mint például a
baktériumoktól, vírusoktól és gombáktól.
vagy sok más Wi-Fi jel is elérhető, a Braster eszköz teljesítménye csökkenhet, ami hosszabb regisztrációs időt eredményezhet
az alkalmazások során, vagy szélsőséges Wi-Fi feltételek mellett, nem lesz képes az összes képet regisztrálni. Ebben az esetben
kérjük, menjen olyan helyre, ahol a Wi-Fi környezet nem túlzsúfolt, vagy aznap, egy későbbi időpontban folytassa a vizsgálatot.
8.2. Ha még nem vásárolt vizsgálati csomagot vagy az összes megvásárolt vizsgálatot felhasználta, az applikáció egy megfelelő
üzenetet jelenít meg, és nem fog tudni vizsgálatot végezni. Vásárolni kell egy vizsgálati csomagot a folytatáshoz. Ehhez
látogasson el a Braster e-boltba, vagy az országtól függően, az e-boltba vagy a helyi forgalmazó más beszerzési helyére. Ha
nem szeretne most vizsgálati csomag vásárolni, válassza a „Vizsgálat megszakítása” lehetőséget.
8.3. Ha okostelefonja vagy táblagépe akkumulátorának töltöttségi szintje túl alacsony, a vizsgálat nem hajtható végre mindaddig,
amíg az eszköz töltöttsége el nem éri az üzenetben meghatározott szintet. Válassza ki a „Vizsgálat megszakítása” lehetőséget
kezdőképernyőre való visszatéréshez.
8.4. Ha nincs elég tárhely mobil készülékén a teljes vizsgálat elmentéséhez, a vizsgálat nem hajtható végre mindaddig, amíg a
megfelelő mennyiségű tárhely rendelkezésre nem áll. Válassza ki a „Vizsgálat megszakítása” lehetőséget kezdőképernyőre
való visszatéréshez.
8.5. Ha a Braster Care applikációban a felhasználónév és a jelszó megadása után a „Szerver nem elérhető” üzenet jelenik meg,
egy kiegészítő tanúsítványt kell telepítenie. Kérjük, további információért lépjen kapcsolatba ügyfélszolgálatunkkal e-mailben:
contactcenter@braster.eu.
9. TÖLTÉS
Töltse fel az eszközt egy, az IEC 60950-1 vagy IEC 60601-1 szabványoknak megfelelő USB-A töltővel, töltő paraméterei: 5 V DC
1A, USB nyílás (a töltő eszköz műszaki adatai). Töltés előtt kapcsolja ki az eszközt. Töltés közben biztonsági okokból helyezze az
eszközt olyan helyre, ahol könnyen eltávolíthatja az USB kábelt az eszközből.
Az eszközt nem szabad tölteni, amíg vizsgálat van folyamatban.
Töltés közben ne kapcsolja be az eszközt.

104 105
MAGYAR
Garancia
A Braster eszközre 24 hónapos gyártói garancia vonatkozik. A garancia csak akkor érvényes, ha a BRASTER S.A. által jóváhagyott
kiegészítőket és alkatrészeket használják, és az eszközt a jelen felhasználói kézikönyvben foglaltaknak megfelelően és
rendeltetésszerűen használják.
A Braster eszköz bármilyen javítását a BRASTER S.A. végezheti. Bármilyen, illetéktelen személy által végzett javítás a garancia
elvesztésével jár.
14. MEGFELELŐSÉGI NYILATKOZAT
BRASTER S.A. kijelenti, hogy a Braster Rendszer megfelel a 93/42/EGK irányelv és a 2011/65/EU irányelv alapvető követelményeinek
és egyéb vonatkozó rendelkezéseinek. Ha szeretné megkapni a megfelelőségi nyilatkozatot, vegye fel a kapcsolatot a gyártóval (az
elérhetőségi adatait a jelen Felhasználói kézikönyv utolsó oldalán találja).
ELEKTROMÁGNESES KOMPATIBILITÁS
A Braster eszközt vezérelhető rádiófrekvenciás (RF) interferenciával rendelkező elektromágneses környezetben való használatra
tervezték. A vásárló vagy a képi adatgyűjtő eszköz felhasználója is segíthet elkerülni az elektromágneses interferenciát a mobil
készülék és a celluláris rádiófrekvenciás eszközök (jeladó) közötti minimum távolság betartásával. Ez a berendezés nem tartozik a
káros interferencia elleni védelemhez, és nem okozhat interferenciát a megfelelően jóváhagyott rendszerekkel.
15. AZ ESZKÖZ MŰSZAKI ÉS ÜZEMELTETÉSI SPECIFIKÁCIÓI
A képi adatgyűjtő eszköz
súlya (a érzékelő kivételével)
305 g
Egy érzékelő súlya 87 g
Az eszköz vízzel nem mosható vagy vízbe nem meríthető. Ne tisztítsa az érzékelők alkalmazható részeit, melyek a melle
bőrével érintkeznek olyan mechanikus anyagokkal, amelyek károsodást okozhatnak az ilyen felületeken (pl. kefék), és ne
használjon szerves oldószereket tartalmazó anyagokat (pl. benzin, aceton), mert az egyszer sérült érzékelőket többet nem
lehet használni.
12. TISZTÍTÁS ÉS KARBANTARTÁS
Alaposan törölje le mindhárom érzékelő mindkét felületét a mellékelt törlőruhával. Fontos, hogy az érzékelő felülete tiszta legyen,
azaz bármilyen látható szennyeződéstől (pl. ujjlenyomatok, por) mentes. Az érzékelő belső oldala technológiailag matt. Az érzékelő
belső oldalán lévő fóliafelületen irányított karcolások vannak, amelyeket egy technológiai eljárás során helyeztek el, a megfelelő
fénydiúzió elérése érdekében a képi adatgyűjtő eszköz munkaterületén.
A képi adatgyűjtő eszközt és a mátrixokat az eredeti csomagolásban kell tartani, −5 °C és +60 °C-os hőmérséklet között. Ne
tegye ki az eszközt UV sugárzásnak (például a levegő fertőtlenítésére használt UV-lámpából vagy a napból).
13. SZERVIZ ÉS MŰSZAKI SEGÍTSÉGNYÚJTÁS
Ha a műszaki segítségnyújtásra van szüksége vagy az eszköz meghibásodását vagy bármilyen más váratlan körülményt szeretne
bejelenteni, vegye fel a kapcsolatot Braster Rendszer helyi forgalmazójával vagy a gyártóval. Az elérhetőségek a www.braster.eu
oldalon találhatók.
A FELHASZNÁLÓ FELELŐSSÉGEI
A Braster eszközt a jelen Felhasználói kézikönyvben és a címkéken található javaslatoknak megfelelően kell használni. Ne
használja az eszközt, ha károsodott. A hiányzó, hiányos, sérült vagy elhasználódott alkatrészeket azonnal ki kell cserélni egy
hivatalos szervizközpontban (a részletek a www.braster.eu oldalon érhetők el). A javítással vagy cserével kapcsolatos bármilyen
tevékenységet csak a hivatalos szervizpont személyzete végezhet el. A gyártó semmilyen, a Felhasználói kézikönyv megsértéséből
eredő kárért nem vállal felelősséget.

106 107
MAGYAR
16. NEMKÍVÁNATOS ESEMÉNY ÉS ORVOSI ESETEK
Bármilyen az eszközzel kapcsolatosan felmerülő nemkívánatos eseményt vagy súlyos balesetet jelenteni kell a gyártó felé a „Gyártó
elérhetősége” részben megadott címen és a felhasználó tartózkodási helyének országában illetékes hatóság felé.
17. ÁRTALMATLANÍTÁS
Ezt a szimbólumot a Vállalat az erőforrás-hatékonysági kezdeményezés és az egészség- és környezetvédelem
részeként a kormányzati utasításoknak megfelelően használja. A szimbólum azt jelenti, hogy az elektronikus
eszközt (beleértve az akkumulátorokat) nem szabad a kommunális hulladékba dobni. Amennyiben további
információra van szüksége a kijelölt hulladékfelvevő helyekről, kérjük, vegye fel a kapcsolatot a helyi
hatóságokkal.
Töltő
5 V DC 1A egy USB nyílással és az IEC 60950-1 vagy IEC 60601-1 szabvány követelmény-
einek megfelelő
Eszköz mérete (a érzékelő
kivételével)
átmérő 17,2 cm
magasság 13 cm
A tárolási körülmények
határértékei
–25 °C és +5 °C (–13 °F és +41 °F) között, és
+5 °C és +35 °C (+41 °F és +95 °F) között max. 90%-os környezeti páratartalom mellett, kon-
denzáció nélkül, és
+35 °C és +70 °C (+95 °F és +158 °F) között legfeljebb 50 hPa páranyomás mellett
Ajánlott tárolási feltételek
− 5 °C és +60 °C (+23 °F és +140 °F) között
páratartalom: 10% és 90% között (kondenzáció nélkül)
A működési feltételek
határértékei
+5 °C és +40 °C (+41 °F és +104 °F) között
páratartalom: 15% és 90% között (kondenzáció nélkül)
Ajánlott működési feltételek
+20 °C és +25 °C (+68 °F és +77 °F) között
páratartalom 30% és 85% között
UV-sugárzás ellen védett
A működési feltételek határértékei biztosítják az eszköz elektromos biztonságát. A termográfiai érzékelők túlzott kopás és
sérülés elleni védelme érdekében, tartsa azokat az ajánlott működési és tárolási körülmények között.
Maximálisan jóváhagyott
működési magasság
3500 m tengerszint feletti magasság
Jóváhagyott légköri nyomás
(a használni kívánt eszközhöz)
700–1060 hPa
Az eszköz párosítható
Wi-Fi egységgel és min. 100 MB RAM-mal rendelkező okostelefonnal vagy táblagéppel.
A rendszerkövetelményekért látogasson el a https://www.braster.eu/system oldalra

108

109

110111
ةيبرعلا
111
111
112
113 .1
113 .1.1
113 .2.1
113 .1.2.1
113 .2.2.1
114 .2
114 .3
115 Braster .4
116 .5
116 .6
116 Braster .1.6
117 Braster .2.6
118 .7
118 .1.7
119 .2.7
119 .1.2.7
119 .2.2.7
119 / .3.2.7
119 .4.2.7
120 iOS .1.4.2.7
120 ANDROID .2.4.2.7
120 .5.2.7
120 .6.2.7
121 .7.2.7
123
.8.2.7
123 .8
124 .9
124 .10
125 .11
125 .12
125 .13
126 .14
126 .15
128 .16
128 .17
Braster
.Braster Care – (Braster AI)
.BRASTER S.A.
– Braster
Braster . Braster www.braster.eu – Braster
.
.
–
.
. USB (ON/OFF) / . –
. .
.(
)
. –
. Braster – ( )
.
.( )
. –
.
50 .
( )
.Braster
Braster Care –
.(iOS ) App Store (Android ) Google Play
.
.(https://www.braster.eu/system : ) –
. – – . myaccount.braster.eu –
BRASTER S.A. –
BRASTER S.A.
.
– ( )
. –
.
.Braster –
. .
.
.( )
Braster !
.
.BRASTER S.A. .
!
.
. . . !

112113
ةيبرعلا
. !
. .IEC 60601-1 IEC 60950-1 ( 1 5 :) USB !
.
. “ „
!
.
.
36
.
36 Braster
!
. BRASTER S.A. .
36
. . / / !
.
!
.
/ Braster
!
.Braster . Braster
!
. 30 !
.
.
Braster
.
.
. "BRASTER S.A."
. "BRASTER S.A."
. (CLCF)
Braster . .
.
. .
.1
.1.1
: . "Braster " Braster
: Braster •
−
−
Braster Care •
.(Braster AI) Braster •
Braster 1
Braster .3 Braster .2 Braster Care .1
. . Braster
.(Braster AI) Braster
.
.
Braster
. .( )
Braster
.2.1
.1.2.1
. Braster
– Braster
.
.2.2.1
) ( )
: Braster
. (

114115
ةيبرعلا
:Braster
( ) •
38 •
( ) •
– •
25 20 – (
) •
: •
– (FNB) –
6 – (CNB)
12 –
–
.
12 – (Lipotransfer) ( ) •
.2
. .
Braster
. ( ) " "
.
. .
. .
.3
:
( A2 ) BRA-1.0 : •
( B2 ) TMS-1.0 : 3 2 1
•
USB •
•
•
. •
Braster .4
Braster :3
.1
.2
.3
USB .4
(ON/OFF) / .5
/ – (ON/OFF) /
. •
.
.
10 •
–
.( ) – •
. – •

116117
ةيبرعلا
.1
: USB .
. – USB
•
. •
) WiFi
. –
.( WiFi :(2) WiFi .1 . WiFi : B4 : A4
. .
.5
.
. ( A5 ) 1
. ( B5 ) 2
.
.
( C5 ) 3
.6
Braster .1.6
USB (3 2 1 ) :
. .
.
Braster
.
.
.
/
/
12 11
) .
.
.(
. 30 .
.
. myaccount.braster.eu
Braster Care .
:
Google Play (iPad iPhone ) iOS App Store Braster Care
.1
Android
Braster Care .2
Braster Care .3
. (SIGN UP) .4
:(
)
.
myaccount.braster.eu (SIGN UP)
.1
“ „ Braster –
. .2
“ „ .
.3
(
) (
) .4
(LOG IN) " "
. .5
(Activate the package) “ „ (Activation codes) “ „
.6
. (My Account) “„ .7
.7 .
Braster .2.6
. . .
" 12 " " 11 )
.("
.7 .

118119
ةيبرعلا
.7
.1.7
.
:
App Store Google Play
Braster Care •
. Braster
–
•
. 25 20
.
( 10 )
.
:
.1
.( ) •
:
.2
( ) •
30
•
•
•
/ •
•
•
– •
. •
.2.7
.1.2.7
.
.( 6 ) Braster Care
. .
Braster •
.
Braster Care •
.(myaccount.braster.eu
)
•
.
. (START) “„ •
. . .
.
. .
.
.2.2.7
."" "" .
.
.(BACK) ""
.
.
.
.
/ .3.2.7
. . (ON/OFF) /
.
(ON/OFF) / .
.
. Braster
.
.4.2.7
.iOS Android
Braster
.
Braster
.( B4 & A4 )
.Braster WiFi

120121
ةيبرعلا
iOS .1.4.2.7
. .
Braster WiFi .WiFi . (Settings) ""
.
. .
"WiFi"
(Settings) "" WiFi
.
.
Braster
ANDROID .2.4.2.7
. .( ) Braster
.
Braster
.5.2.7
. .
.
.
.
.6.2.7
– . .Braster .
.
. –
.
. . Braster
. .( ) 2
. !
. .( :3 .)
:6 )
.
.
.(
.
!
.
.3 1 2
.
2
.7.2.7
. (Examination) ""
.
:
( :7 )
•
•
( :8 ) •
•
•
.
•
.
myaccount.braster.eu
(My data) ""
. () .
.
3 2 1
:
.3 B9 2 1 A9 3 2 1

122123
ةيبرعلا
.
.( ) (( ) ) (1
. (( ) ) (2
.
(( ) ) (3
.
.
.( ) WiFi 15 .
.
.( )
15 10
5 4
:
5 B10 4 A10 5 4
.
.( ) (( ) )
(1
.
:
.
.( ) (( ) ) (2
. (( ) ) (3
.
(( ) ) (4
.
.( ) (( ) ) .
(5
.
.
.( ) WiFi 15 .
.
.( )
15 10
.8.2.7
.
.WiFi
.WiFi Braster
. myaccount.braster.eu
.(" ")
(Finish) ""
." "
.(WiFi )
.
. (List of examination) " "
.
.myaccount.braster.eu .
.8
. .
WiFi . WiFi . WiFi Braster .1.8
WiFi Braster WiFi /
.
WiFi .
.
.
.2.8
.(Cancel the Examination) " " . Braster
“ „ .
.3.8
. (Cancel the Examination)
(Cancel the Examination) “ „ .
.4.8
.
:
.
Braster Care “ „ .5.8

124125
ةيبرعلا
.9
. .( ) 1 5 USB : IEC-60601-1 IEC-60950-1 USB-A
. USB
.
.
Braster USB .(ON/OFF) / Braster USB
.(USB .2 USB .1 :USB :11 ) .( )
.
.
.
. USB
.10
:Braster
. USB •
. •
. Braster •
. . . •
.
. •
. •
.
. •
. . •
.
•
.11
Soasept .
. .
( ) .
.
( )
.12
.( )
.
.
.
) . +60 −5
.(
.13
.www.braster.eu .
Braster
. .
Braster
. .(www.braster.eu )
.
BRASTER S.A.
.
24 Braster
.
. .BRASTER S.A.

126127
ةيبرعلا
.14
.EU/2011/65 EEC/93/42 Braster BRASTER S.A.
.( )
.
Braster
. .( )
.15
305 ( )
87
17.2
13
( )
( +41 -13) +5 −25
90% ( +95 +41) +35 +5
50 ( +158 +95) +70 +35
( +140 +23) +60 −5
( ) 90% 10%
( 104 +41 ) +40 +5
( ) 90% 15%
( +77 +68) +25 +20
85% 30%
. .
3500
1060 – 700
( )
. 100 RAM WiFi
https://www.braster.eu/system :
IEC 60601-1 IEC 60950-1 USB 1 5

128
ةيبرعلا
.16
. "
"
.17
) .
. (
.
-
 1
1
-
 2
2
-
 3
3
-
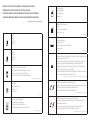 4
4
-
 5
5
-
 6
6
-
 7
7
-
 8
8
-
 9
9
-
 10
10
-
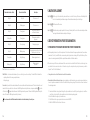 11
11
-
 12
12
-
 13
13
-
 14
14
-
 15
15
-
 16
16
-
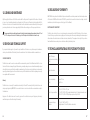 17
17
-
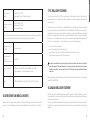 18
18
-
 19
19
-
 20
20
-
 21
21
-
 22
22
-
 23
23
-
 24
24
-
 25
25
-
 26
26
-
 27
27
-
 28
28
-
 29
29
-
 30
30
-
 31
31
-
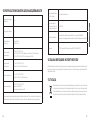 32
32
-
 33
33
-
 34
34
-
 35
35
-
 36
36
-
 37
37
-
 38
38
-
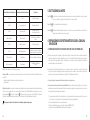 39
39
-
 40
40
-
 41
41
-
 42
42
-
 43
43
-
 44
44
-
 45
45
-
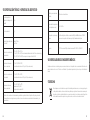 46
46
-
 47
47
-
 48
48
-
 49
49
-
 50
50
-
 51
51
-
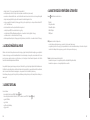 52
52
-
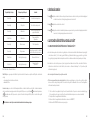 53
53
-
 54
54
-
 55
55
-
 56
56
-
 57
57
-
 58
58
-
 59
59
-
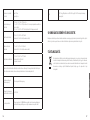 60
60
-
 61
61
-
 62
62
-
 63
63
-
 64
64
-
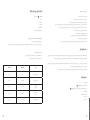 65
65
-
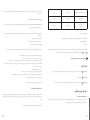 66
66
-
 67
67
-
 68
68
-
 69
69
-
 70
70
-
 71
71
-
 72
72


Braster In-home Breast Examination System Manual de usuario
- Tipo
- Manual de usuario
en otros idiomas
Otros documentos
-
koban KCTE-160 WIFI El manual del propietario
-
3B SCIENTIFIC L51 Manual de usuario
-
 YellowJacket Yellow Jacket 52030F Thermal Imager Instrucciones de operación
-
GE JES1097SMSS Manual de usuario
-
GE JES1097SMSS Guía del usuario
-
Beurer BM 67 El manual del propietario
-
Haier QVM7167RNSS El manual del propietario
-
 Latchways Personal Rescue Device® Instrucciones de operación
-
Beurer BC57 Manual de usuario
-
Milwaukee M18 FORCELOGIC 12T Manual de usuario

