Aqara H1 Manual de usuario

Tipo
Manual de usuario
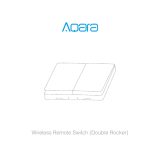
Wireless Remote Switch H1 (Double Rocker)
User Manual
Manuel d’utilisation du Wireless Remote
Switch H1 (Double Rocker)
Betriebsanleitung für das Wireless Remote
Switch H1 (Double Rocker)
Wireless Remote Switch H1 (Double Rocker)
Manual de Usuario
Manuale utente Interruttore Remoto
Wireless H1 (Rocker doppio)
󽶳
󽶴
·01
·14
·27
·40
·52
·64
·77
·86
󴥝󶄙󸔌󳇞󸹨󸻰󽶳󼶯󹂂󸬸󼶰󵂬󲾓󲿇󱇉
󽶳󼶯󼶰󰸴󵂬󷬆󳘻󳞵
Product Overview
The Aqara Wireless Remote Switch H1 (Double Rocker) is a new
wireless remote switch. It supports single press in the high-speed
click mode, and 7 functions in the multi-function mode including
single press le button, single press right button, double press le
button, double press right button, long press le button and long
press right button. It is able to be placed or attached anywhere
indoors. It also works with the Aqara hub and other Aqara smart
devices to implement a variety of smart scenes.
* An Aqarahub is required. Some functions require specific models of the Aqara
hub. Please visit www.aqara.com/support for more details.
Slot
Indicator Light
Button
Long press for 10s: binding/reset
Quickly press five times: Effective
communication range test / device searching
01
Quick Setup
This product works with Aqara Home app. You can scan the following
QR code to download the Aqara Home app from the Apple App store.
Android users can find the Aqara Home app on Google Play. With the
Aqara Home app, it can work with other Aqara smart devices.
1. Before activating the accessory, please make sure you have
downloaded the Aqara Home app and the Aqara hub that
supports Zigbee 3.0 installed.
2. Please open the app, go to the homepage and select “+” in the top
right corner to enter Add Accessory page. Select “Aqara Wireless
Remote Switch H1 (Double Rocker)” and add it according to the
instructions.
3. Please visit www.aqara.com/support for more information.
02
Installation Methods
* To ensure stable connections, please avoid setting up the device on metallic
surfaces.
* If adding fails, please move the hub closer to the product and try again.
* Press the switch quickly for 5 times, if the hub makes voice prompts, it indicates
that the accessory can communicate effectively with the hub.
* Different hubs have different ways to indicate the effective connection. Please
refer to the instructions of your model of the Aqara hub.
󽶳
Adhesive-free, place it on a surface directly.
* Effective Range Test: Aer it is bound with the hub, put the device at
the preferred location and press the button of the device quickly for
5 times, if the hub makes voice prompts, it indicates that the
accessory can communicate effectively with the hub.
03
*Please keep the surface clean and dry.
󽶴
Remove the protective film from the adhesive tape and attach the
device on the desired surface.
󽶵
Open the back of the Wireless Remote Switch H1 (Double
Rocker) with a flat-blade screwdriver, drill through the
thin piece at the screw of the back cover with a sharp
tool or an electric drill (Attention! Make sure you are drilling the
back cover, not the main part of the switch that incorporates
hardware and buttons), fix it to the wall box with the screw that
04
󽶵
Open the back of the Wireless Remote Switch H1 (Double Rocker) with a
screwdriver.
1
Drill through the back cover with an awl/electric drill to install the screw.
2
comes with the box, and then put the cover of the Wireless Remote
Switch H1 (Double Rocker) back.
05
Battery Replacement
Open the back of the Wireless Remote Switch H1 (Double Rocker)
with a flat-blade screwdriver, remove the old battery and replace it
with a new battery (battery model: CR2450), and then put the cover
back.
Fix the screw and put the cover back.
3
06
Open the cover of the Wireless Remote Switch H1 (Double Rocker) with a
screwdriver.
1
Replace with new battery.
2Put the cover back.3
07
Switch Modes
1. On the Device page on the app, find the corresponding device in the
device list.
2. Select the corresponding device to enter the page of the device.
3. Select the three black dots on the upper right corner on the page of
the device and enter the Device Settings page.
4. Select More Settings.
5. Select Switch Modes, select the desired mode, and complete the
corresponding configuration according to the instructions on the
app.
* When the corresponding device is not found, you can quickly press the switch 5
times, and the corresponding device will flash in the Device list.
* During the mode switching process, quickly press the switch 5 times to better
realize the device mode switching.
* To implement the above steps, please refer to Aqara Home app.
08
Indicator Status Description
Specifications
Indicator Status
Blue light flashes once Button press detected
Binding
Bound successfully
Failed to bind
Flash once every 2s for 20s
Blue light flashes 2 times
Continuous blue for 1s
Description
Model: WRS-R02 Weight: 82.5 g
Item Dimensions: 85.8 × 86 × 12.5 mm
Wireless Connectivity: Zigbee 3.0
Battery Model: CR2450
Operating Temperature: -10°C to 50°C
Operating Humidity: 0-95% RH, no condensation
Zigbee Frequency Range: 2405-2480 MHz
Zigbee Power Transmission: ≤13 dBm
09
Warnings
1. This product is not a toy, please keep children away from this
product.
2. This product is designed for indoor use only. Do not use it in
humid environment or outdoors.
3. Do not spill water or other liquids on this product.
4. Do not place this product near a heat source. Place the switch in
a well ventilated area.
5. Do not attempt to repair the product by yourself. All repairs
should be performed by authorized personnel.
6. This product is designed only for improving the convenience of
household life. If the user violates the product instructions and
this warning, the manufacturer is not responsible for any risks
and property losses caused thereby.
Online Customer Service: www.aqara.com/support
Manufacturer: Lumi United Technology Co., Ltd.
Address: 8th Floor, JinQi Wisdom Valley, No.1 Tangling Road,
Liuxian Ave, Taoyuan Residential District, Nanshan District,
Shenzhen, China 10
EU Declaration of Conformity
Hereby, [Lumi United Technology Co., Ltd.] declares that the radio
equipment type [Wireless Remote Switch H1(Double Rocker), WRS-R02] is in
compliance with Directive 2014/53/EU. The full text of the EU declaration of
conformity is available at the following internet address:
http://www.aqara.com/DoC/
CAUTION
Risk of explosion if the battery is replaced by an incorrect type.
Under normal use of condition, this equipment should be kept a separation
distance of at least 20cm between the antenna and the body of the user.
Dispose of used batteries according to the instructions.
Do not ingest battery, Chemical Burn Hazard.
This product contains a coin / button cell battery. If the coin / button cell battery is
swallowed, it can cause severe internal burns in just 2 hours and can lead to death.
Keep new and used batteries away from children.
If the battery compartment does not close securely, stop using the product and
keep it away from children.
If you think batteries might have been swallowed or placed inside any part of the
body, seek immediate medical attention.
11
WEEE Disposal and Recycling Information
All products bearing this symbol are waste electrical and electronic
equipment (WEEE as in directive 2012/19/EU) which should not be mixed with
unsorted household waste. Instead, you should protect human health and the
environment by handing over your waste equipment to a designated collection
point for the recycling of waste electrical and electronic equipment, appointed by
the government or local authorities. Correct disposal and recycling will help
prevent potential negative consequences to the environment and human health.
Please contact the installer or local authorities for more information about the
location as well as terms and conditions of such collection points.
Disposal of a battery into fire or a hot oven, or mechanically crushing or cutting of
a battery, that can result in an explosion
Leaving a battery in an extremely high temperature surrounding environment that
can result in an explosion or the leakage of flammable liquid or gas
A battery subjected to extremely low air pressure that may result in an explosion or
the leakage of flammable liquid or gas
12
Symbol on the product or on its packaging indicates that this
product may not be treated as household waste. Instead it shall be
handed over to the applicable collection point for the recycling of
electrical and electronic equipment.
UK Declaration of Conformity
Hereby, [Lumi United Technology Co., Ltd] declares that the radio
equipment type [Wireless Remote Switch H1(Double Rocker), WRS-R02] is in
compliance with Directive 2017 (SI 2017 No. 1206, as amended by SI 2019 No. 696).
The full text of the UK
declaration of conformity is available at the following internet address: http://ww-
w.aqara.com/DoC/.
13
Apercu general du produit
Le Aqara Wireless Remote Switch H1 (Double Rocker) est un
nouveau commutateur à distance sans fil. Il ne nécessite quʼun
seul appui dans le mode clic haute vitesse, et 7 fonctions dans le
mode multifonction, y compris appui simple sur le bouton
gauche, appui simple sur le bouton droit, double appui sur le
bouton gauche, double appui sur le bouton droit, appui long sur le
bouton gauche et appui long sur le bouton droit. Il peut être placé
ou attaché nʼimporte où à lʼintérieur. Il travaille également avec le
Aqara Hub et autres appareils intelligents Aqara pour
implémenter une variété de scènes intelligentes.
* Un Aqara Hub est nécessaire. Certaines fonctions nécessitent des modèles
spécifiques du Aqara Hub. Voir www.aqara.com/support plus de détails.
Fente
Voyant
Bouton
Appui long pendant 10 s : liaison / réinitialisation
Appui rapide cinq fois : test de portée de
communication efficace / recherche de périphérique
14
Installation rapide
Ce produit fonctionne avec application Aqara Home. Vous
pouvez scanner le code QR suivant pour télécharger application
Aqara Home depuis lʼApp Store Apple. Les utilisateurs Android
peuvent trouver application Aqara Home sur Google Play. Avec
application Aqara Home, il peut fonctionner avec autres
appareils intelligents Aqara.
1. Avant dʼactiver lʼaccessoire, assurez-vous dʼavoir téléchargé
application Aqara Home et le Hub Aqara qui supporte Zigbee 3.0
installé.
2. Veuillez bien vouloir ouvrir l'application, ensuite rendez vous sur
la page d'accueil et sélectionnez « + » dans le coin supérieur droit
pour accéder à la page Ajouter un accessoire. Sélectionnez «
Aqara Wireless Remote Switch H1 (Double Rocker) » et ajoutez-le
15
Méthodes d'installation
Test de portée efficace : Après avoir été lié au hub, placez l'appareil à
l'emplacement désiré et appuyez rapidement sur le bouton de
l'appareil 5 fois, si le hub émet des signaux sonores, cela indique que
l'accessoire peut communiquer efficacement avec le hub.
* En cas dʼéchec de lʼajout, veuillez rapprocher le hub du produit et réessayez.
* Appuyez rapidement sur le commutateur 5 fois, si le hub émet des signaux
sonores, cela signifie que l'accessoire peut communiquer efficacement avec
le hub.
* Différents hubs ont différentes manières d'indiquer la connexion effective.
Veuillez donc vous référer aux instructions de votre modèle d'Aqara Hub.
*Pour vous assurer de bénéficier de connexions stables, veuillez éviter de
disposer lʼappareil sur des surfaces métalliques.
en suivant les instructions.
3. Veuillez consulter www.aqara.com/support pour plus d'informa
tions.
16
󽶳
Sans adhésif, disposez-le directement sur une surface.
󽶴
Retirez le film protecteur du ruban adhésif et fixez appareil sur la
surface désirée.
* Veuillez bien vouloir vous assurer que la surface est propre et sèche.
17
󽶵
Veuillez ouvrir l'arrière du Wireless Remote Switch H1 (Double
Rocker) avec un tournevis à lame plate. Percez ensuite la pièce mince
au niveau de la vis du couvercle arrière avec un outil pointu ou une
perceuse électrique (Attention ! Veuillez vous assurer que est bien
le couvercle arrière que vous percez, et non la partie principale du
commutateur qui incorpore le matériel et les boutons), fixez-le à la
boîte murale avec la vis jointe à la boîte, puis remettez le couvercle
du Wireless Remote Switch H1 (Double Rocker) à sa place.
Veuillez ouvrir lʼarrière de commutateur à distance sans fil H1
(Double Culbuteurs) à lʼaide un tournevis.
1
18
2Veuillez percer le couvercle arrière avec un poinçon / perceuse
électrique pour installer la vis.
3Veuillez fixer la vis et remettez le couvercle à sa place.
19
Remplacement de la pile
Veuillez ouvrir arrière du Wireless Remote Switch H1 (Double Rocker)
à aide un tournevis à lame plate, retirez ensuite l'ancienne pile et
remplacez-la avec une nouvelle pile (modèle de pile : CR2450), puis
remettez le couvercle à sa place.
Veuillez ouvrir le couvercle du Wireless Remote Switch H1 (Double
Rocker) à lʼaide un tournevis
1
20
Changer de modes
1. Sur la page Périphérique de lʼapplication, trouvez lʼappareil
correspondant dans la liste des périphériques.
2. Sélectionnez lʼappareil correspondant pour accéder à la page de
appareil.
3. Sélectionnez les trois points noirs dans le coin supérieur droit de
la page de lʼappareil et accéder à la page Paramètres de lʼappareil.
4. Sélectionnez plus de paramètres.
5. Sélectionnez Changer de modes, sélectionnez le mode souhaité
et complétez la configuration correspondante suivant les
instructions de l'application.
Remplacez avec une nouvelle pile
2Remettez le couvercle à sa place.3
21
* Au cas où vous ne trouvez pas le périphérique correspondant, vous pouvez
appuyer rapidement 5 fois sur le commutateur et le périphérique correspon
dant clignotera dans la liste des périphériques.
* Pendant le processus de changement de mode, appuyez rapidement sur le
commutateur 5 fois pour mieux effectuer le changement de mode de
l'appareil.
* Pour implémenter les étapes ci-dessus, veuillez-vous référer à lʼapplication
Aqara Home.
Description de l'état du voyant
Etat du voyant
Bleu clignotant une fois Appui de bouton détec
Liaison
Liaison réussie
Échec de liaison
Clignote une fois toutes les 2s
pendant 20s
Bleu clignotant deux fois
Bleu continu pendant 1s
Description
22
Caractéristiques
Modèle : WRS-R02
Dimensions de lʼarticle : 85.8 × 86 × 12.5 mm
Poids: 82.5 g
Connectivité sans fil : Zigbee 3.0
Modèle de batterie : CR2450
Température de fonctionnement : -10°C à 50°C
Humidité de fonctionnement : 0-95% RH, pas de condensation
Gamme de fréquences en zigbee: 2405-2480 MHz
Transmission dʼénergie Zigbee: ≤13 dBm
Avertissement
1. Ce produit n'est pas un jouet, veuillez le tenir hors de la portée
des enfants.
2. Ce produit est destiné à un usage interne uniquement. Veuillez
ne pas lʼutiliser pas dans un environnement humide ou à
extérieur.
3. Ne renversez pas dʼeau ou dʼautres liquides sur ce produit.
4. Ne placez pas ce produit près dʼune source de chaleur. Veuillez
23
Déclaration de conformité pour l’Union européenne
Par la présente, [Lumi United Technology Co., Ltd.] déclare que cet
Service client en ligne : www.aqara.com/support
Fabricant: Lumi United Technology Co., Ltd.
Adresse: 8th Floor, JinQi Wisdom Valley, No.1 Tangling Road,
Liuxian Ave, Taoyuan Residential District, Nanshan District,
Shenzhen, China
Dans des conditions normales dʼutilisation, cet équipement doit être maintenu
à une distance dʼau moins 20 cm entre lʼantenne et le corps de lʼutilisateur.
placer lʼinterrupteur dans une zone bien ventilée.
5. Nʼessayez pas de réparer le produit par vous-même. Toutes les
réparations doivent être effectuées par du personnel autorisé.
6. Ce produit est conçu uniquement pour améliorer la commodité
de la vie domestique. Si lʼutilisateur enfreint les instructions du
produit et cet avertissement, le fabricant nʼest pas responsable
des risques et des pertes matérielles qui en découleraient.
24
PRÉCAUTION
Risque exposition si la batterie est remplacée par un type
incorrect.
Jetez les batteries usées selon les instructions du fabricant.
N'avalez pas la batterie car vous courez un risque de brûlure chimique. Ce
produit contient une pile bouton.
L'ingestion de la pile bouton peut provoquer de graves brûlures internes en
seulement 2 heures et entraîner la mort.
Conservez les piles neuves et usées hors de la portée des enfants.
Si le compartiment de la pile ne se ferme pas correctement, arrêtez dʼutiliser le
produit et mettez hors de la portée des enfants.
Si vous pensez que la pile a peut-être été avalée ou qu'elle peut avoir pénétré
une partie du corps, consultez immédiatement un médecin.
Élimination d'une batterie dans le feu ou dans un four chaud, ou écrasement ou
coupure mécanique d'une batterie, qui peut entraîner une explosion.
Laisser une batterie dans un environnement environnant à température
extrêmement élevée qui peut entraîner une explosion ou une fuite de liquide ou
équipement radio de type [Wireless Remote Switch H1(Double Rocker),
WRS-R02] est conforme à la Directive européenne 2014/53/UE. Lʼintégralité de la
déclaration de conformité pour lʼUE est disponible à adresse suivante :
http://www.lumiunited.com/DoC/
25
Informations sur la réglementation DEEE sur la mise au
rebut et le recyclage
Tous les produits portant ce symbole deviennent des déchets
équipements électriques et électroniques (DEEE dans la Directive
européenne 2012/19/UE) qui ne doivent pas être mélangés aux déchets
ménagers non triés. Vous devez contribuer à la protection de environne-
ment et de la santé humaine en apportant lʼéquipement usagé à un point de
collecte dédié au recyclage des équipements électriques et électroniques,
agréé par le gouvernement ou les autorités locales. Le recyclage et la
destruction appropriés permettront éviter tout impact potentiellement
négatif sur environnement et la santé humaine. Contactez lʼinstallateur ou
les autorités locales pour obtenir plus dʼinformations concernant lʼemplace-
ment ainsi que les conditions dʼutilisation de ce type de point de collecte.
Le symbole sur le produit ou son emballage indique que le
présent produit ne peut pas être considéré comme un déchet
ménager. Il doit être remis à un point de collecte approprié pour
le recyclage des équipements électriques et électroniques.
de gaz inflammable.
Une batterie soumise à une pression d'air extrêmement basse pouvant
entraîner une explosion ou une fuite de liquide ou de gaz inflammable
26
Produktübersicht
Das Aqara Wireless Remote Switch H1 (Double Rocker) ist ein neues
Wireless-Remote-Switch. Es unterstützt die Einzelbetätigung im
Hochgeschwindigkeitsmodus, und 7 Funktionen im Multifunktions-
modus, einschließlich die Einzelbetätigung der linken Taste,
Zweifachbetätigung der rechten Taste, lange Betätigung der linken
Taste und lange Betätigung der rechten Taste, Es kann überall in den
Innenräumen untergebracht werden. Es arbeitet mit dem Aqara Hub
und anderen Smarten Geräten von Aqara zusammen, um eine
Vielzahl smarter Anwendungen zu ermöglichen.
* Ein Aqara Hub ist erforderlich. Einige Funktionen erfordern spezifische
Modelle des Aqara Hubs. Besuchen Sie www.aqara.com/support um mehr
Details zu erfahren.
Steckplatz
Anzeigeleuchte
Taste
10 Sekunden lang gedrückt halten:
Binden/Zurücksetzen
Schnelles Drücken fünf Mal: Test der effektiven
Reichweite / Suche nach dem Gerät
27
Schnelleinrichtung
Dieses Produkt arbeitet mit der Aqara Home App zusammen. Sie
können den folgenden QR Code scannen, um die Aqara Home App
im Apple App Store herunterzuladen. Die Anwender von Android
können die Aqara Home App im Google Play finden. Mit der Aqara
Home App kann es mit anderen smarten Geräten von Aqara
zusammenarbeiten.
1. Vor dem Aktivieren des Zuberhörs stellen Sie bite sicher, dass Sie
die Aqara Home App heruntergeladen haben und dass der Aqara
Hub Zigbee 3.0 unterstützt und installiert wurde.
2. Öffnen Sie die App und gehen Sie zur Hauptseite, wählen Sie dort
“+” im oberen rechten Bildschirmrand aus, um zur Seite
“Hinzufügen von Zubehör” zu wechseln (Add Accessory). Wählen
Sie dort „Aqara Wireless Remote Switch H1 (Double Rocker) aus
28
* Wenn das Hinzufügen scheitert, bringen Sie den Hub etwas näher zum Gerät
und versuchen Sie es erneut.
* Drücken Sie die Taste schnell 5 Mal nacheinander, wenn der Hub eine
Spracheingabe verlangt, dann bedeutet es, dass die Verbindung erfolgreich
aufgebaut wurde.
* Verschiedene Hubs haben verschiedene Optionen, um eine erfolgreiche
Verbindung anzuzeigen. Schlagen Sie bitte in der Anleitung zu Ihrem Modell
des Aqara Hubs nach.
Installationsmethoden
Test der effektiven Reichweite: Nachdem das Gerät mit dem Hub
verbunden ist, bringen Sie das Gerät an den bevorzugten Ort und
drücken Sie schnell 5 Mal die Taste am Gerät nacheinander, wenn der
Hub daraufhin eine Spracheingabe verlangt, dann bedeutet das,
dass die Verbindung zwischen dem Gerät und dem Hub erfolgreich
aufgebaut ist.
und fügen Sie es im Einklang mit den Anweisungen hinzu.
3. Besuchen Sie bitte www.aqara.com/support, um mehr Details zu
erfahren.
29
* Um eine stabile Verbindung zu gewährleisten, vermeiden Sie bitte das
Aufstellen des Geräts auf Metalloberflächen.
* Stellen Sie bitte sicher, dass die Oberfläche sauber und trocken ist.
Option 1:
Ohne Klebstoffe, direktes Aufstellen an einer Oberfläche
Option 2:
Entfernen Sie die Schutzfolie von der Klebeplatte und bringen Sie
das Gerät an die gewünschte Oberfläche an.
30
Option 3:
Nehmen Sie die Rückwand des Wireless Remote Switch H1 (Double
Rocker) mit einem flachen Schraubenzieher, machen Sie eine
Bohrung in der Rückwand mit einer Bohrmaschine oder einem
scharfen Werkzeug (Achtung! Stellen Sie sicher, dass Sie die
Rückwand bohren, nicht die eigentlichen Bestandteile des Switches,
die Hardware und Tasten beherbergen), befestigen Sie die
Hinterwand an der Wand Ihres Raums mit der mitgelieferten
Schraube, und bringen Sie danach die Hinterwand an das Wireless
Remote Switch H1 (Doube Rocker) wieder an.
Nehmen Sie die Hinterwand des Wireless Remote Switch H1 (Double
Rocker) mit einem Schraubenzieher ab.
1
31
Machen Sie eine Bohrung in der Hinterwand mit einem scharfen Werkzeug/einer
Bohrmaschine, um eine Schraube einlegen zu können.
2
Befestigen Sie die Schraube und bringen Sie die Hinterwand wieder an das Gerät an.
3
32
Austausch von Batterien
Entfernen Sie die Hinterwand des Wireless Remote Switch H1
(Double Rocker) mit einem Schraubenzieher, entfernen Sie die alte
Batterie und ersetzen Sie sie mit einer neuen Batterie (Modell der
Batterie CR2450), danach bringen Sie die Hinterwand wieder an das
Gerät an.
Entfernen Sie die Hinterwand des Wireless Remote Switch H1 (Double
Rocker) mit einem Schraubenzieher.
1
33
Modelle der Switches
1. Auf der Geräteseite der App können Sie das entsprechende Gerät
in der Geräteliste finden.
2. Wählen Sie das entsprechende Gerät aus, um zur Geräteseite zu
wechseln.
3. Wählen Sie die drei schwarzen Punkte in der oberen rechten
Bildschirmecke auf der Geräteseite aus und wechseln Sie zur
Seite Geräteeinstellungen (Device Settings).
4. Wählen Sie „Erweiterte Einstellungen“ aus (More Settings)
5. Wählen Sie die Switch Modes aus, wählen Sie den gewünschten
Modus aus und stellen Sie die dazugehörigen Einstellungen im
Einklang mit den Anweisungen der App fertig.
Tauschen Sie die Altbatterie
gegen die neue Batterie aus.
2Bringen Sie die Hinterwand wieder an.3
34
* Wenn ein entsprechendes Gerät nicht gefunden werden kann, können Sie
die Taste am Switch 5 Mal nacheinander schnell drücken, und das entsprech
ende Gerät wird in der Geräteliste erscheinen.
* Während des Vorgangs der Modusumschaltung drücken Sie die Taste am
Switch 5 Mal schnell nacheinander, um die Umschaltung des Modus des
Geräts besser umzusetzen.
* Um die oben genannten Schritte umzusetzen, schlagen Sie bitte in der Aqara
Home App nach.
Beschreibung des Status der Anzeigeleuchte
Status der Anzeigeleuchte
Die Leuchte leuchtet
einmal blau auf Ein Tastendruck wurde erkannt
Das Binden
Das Binden war erfolgreich
Das Binden ist fehlgeschlagen
Im Laufe von 2 Sekunden alle 2
Sekunden einmal blinken
Das blaue Licht leuchtet 2 Mal auf
Ununterbrochenes blaues
Leuchten 1 Sekunde lang
Beschreibung
35
Warnhinweise
1. Bei diesem Produkt handelt es sich um kein Spielzeug, halten Sie
bitte Kinder fern von diesem Produkt.
2. Dieses Produkt kann nur in den Innenräumen verwendet werden.
Bitte nutzen Sie es nicht in feuchten Umgebungen oder im
Außenbereich.
3. Bitte kein Wasser oder andere Flüssigkeiten an dieses Produkt
spritzen lassen.
Gerätedaten
Modell: WRS-R02
Abmessungen des Geräts: 85,8 X 86 X 12,5 mm
Gewicht: 82,5 g
Protokoll der Drahtlosverbindung: Zigbee 3.0
Batteriemodell: CR2450
Betriebstemperaturbereich: -10°C to 50°C
Zulässige Raumfeuchtigkeit: 0-95% RH, keine Kondensatbildung
Frequenzbereich des Zigbee-Protokolls: 2405-2480 MHz
Strahlungsleistung des Zigbee-Protokolls: ≤13 dBm
36
Online-Kundensienst: www.aqara.com/support
Hersteller: Lumi United Technology Co., Ltd.
Adresse: 8th Floor, JinQi Wisdom Valley, No.1 Tangling Road,
Liuxian Ave, Taoyuan Residential District, Nanshan District,
Shenzhen, China
4. Bringen Sie dieses Produkt bitte nicht in die Nähe von Hitzequel
len. Platzieren Sie den Switch an einem gut belüeten Ort.
5. Versuchen Sie es bitte nicht, das Gerät selbstständig zu
reparieren. Sämtliche Reparaturarbeiten müssen von
autorisierten Fachkräen durchgeführt werden.
6. Dieses Produkt ist nur dazu vorgesehen, Ihr alltägliches Leben
komfortabler zu machen. Wenn der Benutzer gegen die
Produktanleitung und diese Warnhinweise verstößt, kann der
Hersteller nicht für sämtliche Risiken und Vermögensverluste
habar gemacht werden, die dadurch verursacht werden.
37
EU-Konformitätserklärung
Hiermit bestätigt [Lumi United Technology Co., Ltd.], dass das
Funkgerät des Typs [Wireless Remote Switch H1(Double Rocker),
WRS-R02] mit der Verordnung 2014/53/EU in Einklang steht. Der vollständige
Wortlaut der EU-Konformitätserklärung ist unter der folgenden Internetadresse
abrufbar: http://www.lumiunited.com/DoC/
ACHTUNG
Bei Verwendung des falschen Batterietyps besteht Explosionsgefahr.
Unter normalen Einsatzbedingungen muss dieses Gerät einen Abstand von
mindestens 20 cm zwischen der Antenne und dem Körper des Benutzers
einhalten.
Entsorgen Sie Leere Akkus Gemäß den Anweisungen.
Nehmen Sie die Batterie nicht ein, Verätzungs- gefahr.
Dieses Produkt enthält eine Münz- /Knopfzellenbatterie. Sollte die Münz-
/Knopfzellenbatterie verschluckt werden, kann sie ernsthae innere Verbrennun-
gen verursachen und innerhalb von zwei Stunden zum Tod führen.
Bewahren Sie neue und benutzte Batterien fern von Kindern auf.
Sollte das Batteriefach nicht sicher schließen, nutzen Sie das Produkt nicht
weiterhin und halten Sie es fern von Kindern.
Falls Sie den Verdacht haben, dass die Batterie verschluckt oder in andere
Körperöffnungen gelangt sein könnte, suchen Sie unmittelbar medizinische Hilfe
auf.
38
WEEE-Informationen zur Entsorgung und zum Recycling
Alle mit diesem Symbol gekennzeichneten Produkte sind Elektroschrott
und Elektrogeräte (WEEE entsprechend EU-Richtlinie 2012/19/EU) und
dürfen nicht mit unsortiertem Haushaltsmüll vermischt werden. Schützen Sie
stattdessen Ihre Mitmenschen und die Umwelt, indem Sie Ihre zu entsorgenden
Geräte an eine dafür vorgesehene, von der Regierung oder einer lokalen Behörde
eingerichtete Sammelstelle zum Recycling von Elektroschrott und Elektrogeräten
bringen. Eine ordnungsgemäße Entsorgung und Recycling helfen, negative
Auswirkungen auf die Gesundheit von Umwelt und Menschen zu vermeiden.
Wenden Sie sich bitte an den Installateur oder lokale Behörden, um Informationen
zum Standort und den allgemeinen Geschäsbedingungen solcher Sammelstellen
zu erhalten.
Ein Symbol auf dem Produkt oder seiner Verpackung weist darauf hin,
dass dieses Produkt nicht mit dem Hausmüll entsorgt werden darf.
Stattdessen muss es bei der entsprechenden Recyclingstelle für
elektrische und elektronische Geräte abgegeben werden.
Entsorgung einer Batterie in ein Feuer oder einen heißen Ofen oder mechanisches
Quetschen oder Schneiden einer Batterie, was zu einer Explosion führen kann.
Lassen Sie eine Batterie in einer Umgebung mit extrem hohen Temperaturen, die zu
einer Explosion oder zum Austreten brennbarer Flüssigkeiten oder Gase führen
kann.
Eine Batterie, die einem extrem niedrigen Ludruck ausgesetzt ist, der zu einer
Explosion oder zum Austreten brennbarer Flüssigkeiten oder Gase führen kann
39
Resumen del Producto
El Aqara Wireless Remote Switch H1 (Double Rocker) es un nuevo
interruptor remoto inalámbrico. Soporta pulsación simple en el
modo de clic de alta velocidad, y 7 funciones en el modo
multifunción incluyendo pulsación simple del botón izquierdo,
pulsación simple del botón derecho, pulsación doble del botón
izquierdo, pulsación doble del botón derecho, pulsación larga del
botón izquierdo y pulsación larga del botón derecho. Puede
colocarse o fijarse en cualquier lugar interior, o instalarse en marcos
de interruptores. También funciona con Aqara Hub y otros dispositi-
vos inteligentes de Aqara para implementar una gran variedad de
escenas inteligentes.
* Se requiere un Aqara Hub. Algunas funciones requieren modelos específicos
del Aqara Hub. Ver www.aqara.com/support para más detalles.
Ranura
Luz indicadora
Botón
Pulsación larga durante 10 segundos:
unir/restablecer
Cinco pulsaciones rápidas: Prueba de rango de
comunicación efectiva / búsqueda de dispositivos
40
Configuración Rápida
Este producto funciona con la aplicación Aqara Home. Puede
escanear el siguiente código QR para descargar la aplicación Aqara
Home desde la Apple App Store. Los usuarios de Android pueden
encontrar la aplicación Aqara Home en Google Play. Con la aplicación
Aqara Home, puede funcionar con otros dispositivos inteligentes de
Aqara.
1. Antes de activar el accesorio, por favor asegúrese de que ha
descargado la aplicación Aqara Home y el Aqara Hub que soporta
Zigbee 3.0 está instalado.
2. Por favor, abra la aplicación, vaya a la pantalla principal y
seleccione "+" en la esquina superior derecha para entrar en la
página de Añadir Accesorio. Seleccione "Aqara Wireless Remote
Switch H1 (Double Rocker)" y añádalo según las instrucciones.
3. Por favor, consulte www.aqara.com/support para obtener más
información. 41
* Si la adición falla, por favor acerque el hub al producto e inténtelo de nuevo.
* Presione el interruptor rápidamente 5 veces, si el hub hace indicaciones de
voz, indica que el accesorio puede comunicarse adecuadamente con el hub.
* Los diferentes hubs tienen diferentes maneras de indicar la conexión
efectiva. Por favor, consulte las instrucciones de su modelo Aqara Hub.
* Para asegurar conexiones estables, por favor, evite colocar el dispositivo
sobre superficies metálicas.
Métodos de Instalación
Prueba de Rango Efectivo: Después de que se haya unido al hub,
coloque el dispositivo en el lugar deseado y presione el botón del
dispositivo rápidamente durante 5 veces, si el hub realiza
indicaciones de voz, indica que el accesorio puede comunicarse de
manera adecuada con el hub.
Opción 1:
Sin adhesivo, colóquelo directamente sobre una superficie.
42
*Por favor, asegúrese de que la superficie esté limpia y seca.
Opción 2:
Retire la película protectora de la cinta adhesiva y coloque el
dispositivo en la superficie deseada.
Opción 3:
Abra la parte trasera del Wireless Remote Switch H1 (Double Rocker)
con un destornillador de punta plana, taladre a través de la pieza
delgada en el tornillo de la cubierta trasera con una herramienta
afilada o un taladro eléctrico (¡Atención! Asegúrese de que es
taladrando la tapa trasera, no la parte principal del interruptor que
incorpora el hardware y los botones), fíjela a la caja de la pared con
43
Abra la parte trasera del Wireless Remote Switch H1 (Double Rocker)
con un destornillador.
1
Perfore la tapa trasera con un punzón/taladro eléctrico para instalar el tornillo.
2
el tornillo que viene con la caja, y luego vuelva a poner la tapa del
Wireless Remote Switch H1 (Double Rocker).
44
Fije el tornillo y vuelva a colocar la cubierta.3
Reemplazo de las Pilas
Abra la parte posterior del Wireless Remote Switch H1 (Double
Rocker) con un destornillador de punta plana, retire la pila vieja y
reemplácela por una nueva (modelo de pila: CR2450), y luego vuelva
a colocar la tapa.
45
Reemplácela por una pila nueva.
2 Vuelva a colocar la tapa.3
Abra la tapa del Wireless Remote Switch H1 (Double Rocker) con un
destornillador.
1
46
Modos de Interruptor
1. En la pantalla de dispositivos de la aplicación, busque el
dispositivo correspondiente en la lista de dispositivos.
2. Seleccione el dispositivo correspondiente para entrar en la
página del dispositivo.
3. Seleccione los tres puntos negros en la esquina superior derecha
de la página del dispositivo y entre en la página Configuración
del Dispositivo.
4. Seleccione Más Ajustes.
5. Seleccione Modos de Interruptor, seleccione el modo deseado y
realice la configuración correspondiente de acuerdo con las
instrucciones de la aplicación.
* Cuando no se encuentre el dispositivo correspondiente, puede pulsar
rápidamente el interruptor 5 veces, y el dispositivo correspondiente
parpadeará en la lista de dispositivos.
* Durante el proceso de cambio de modo del interruptor, presione
rápidamente el interruptor 5 veces para realizar mejor el cambio de modo
del dispositivo.
* Para implementar los pasos anteriores, por favor consulte la aplicación
Aqara Home.
47
Especificaciones
Modelo: WRS-R02
Dimensiones del Artículo: 85.8 X 86 X 12.5 mm
Peso: 82.5 g
Conectividad Inalámbrica: Zigbee 3.0
Modelo de Pila: CR2450
Temperatura de Funcionamiento: -10°C a 50°C
Humedad de Funcionamiento: 0-95% RH, sin condensación
Rango de Frecuencia Zigbee: 2405-2480 MHz
Transmisión de Potencia Zigbee: ≤13 dBm
Estado del Indicador
Luz azul parpadea una vez Pulsación del botón detectada
Unión
Unión exitosa
Fallo al unir
Parpadea cada 2 s durante 20 s
Luz azul parpadea dos veces
Azul continuo durante 1 s
Descripción
Descripción del Estado del Indicador
48
Advertencias
1. Este producto no es un juguete, por favor mantenga a los niños
alejados de este producto.
2. Este producto está diseñado sólo para uso en interiores. No lo
utilice en ambientes húmedos o al aire libre.
3. No derrame agua u otros líquidos sobre este producto.
4. No coloque este producto cerca de una fuente de calor. Coloque
el interruptor en un área bien ventilada.
5. No intente reparar el producto usted mismo. Todas las
reparaciones deben ser realizadas por personal autorizado.
6. Este producto está diseñado sólo para mejorar la comodidad de
la vida doméstica. Si el usuario infringe las instrucciones del
producto y esta advertencia, el fabricante no se hace
responsable de los riesgos y las pérdidas de propiedad
causadas por ello.
Servicio de Atención al Cliente Online: www.aqara.com/support
Correo Electrónico: [email protected]om
Fabricante: Lumi United Technology Co., Ltd.
Dirección: 8th Floor, JinQi Wisdom Valley, No.1 Tangling Road, Liuxian
Ave, Taoyuan Residential District, Nanshan District, Shenzhen, China
49
Declaración de conformidad de la UE
Por la presente, [Lumi United Technology Co., Ltd.] declara que el tipo
PRECAUCIÓN
Existe riesgo de explosión si la batería se reemplaza por un tipo
incorrecto.
Deseche las baterías usadas de acuerdo con las instrucciones.
No ingiera la batería, Peligro de Quemaduras Químicas.
Este producto contiene una batería de botón. Si la batería de botón es ingerida,
puede causar quemaduras internas severas en solo 2 horas y puede llevar a la
muerte.
Guarde las baterías nuevas y usadas lejos del alcance de los niños.
Si el compartimiento para la batería no cierra de manera segura, deje de usar el
producto y manténgalo lejos de los niños.
Si cree que las baterías podrían haber sido ingeridas o colocadas dentro de
cualquier parte del cuerpo, busque atención médica de inmediato.
En condiciones normales de uso, este equipo debe mantenerse a una
distancia de, al menos, 20 cm entre la antena y el cuerpo del usuario.
de equipo radioeléctrico [Wireless Remote Switch H1(Double Rocker), WRS-R02]
cumple con la Directiva 2014/53/UE. Encontrará el texto completo de la
declaración de conformidad de la UE en esta dirección de Internet: http://ww-
w.lumiunited.com/DoC/
50
Directiva RAEE de información de eliminación y reciclaje
Todos los productos que llevan este símbolo son residuos de aparatos
eléctricos y electrónicos (RAEE según la directiva 2012/19/UE) que no deben
mezclarse con residuos domésticos sin clasificar. En su lugar, debe proteger la salud
humana y el medio ambiente entregando sus equipos de desecho a un punto de
recogida para el reciclaje de residuos de equipos eléctricos y electrónicos,
designado por el gobierno o las autoridades locales. La eliminación y el reciclado
correctos ayudarán a evitar posibles consecuencias negativas para el medio
ambiente y la salud humana. Póngase en contacto con el instalador o con las
autoridades locales para obtener más información sobre la ubicación y las
condiciones de dichos puntos de recogida.
El símbolo en el producto o en su embalaje indica que no puede ser
tratado como basura doméstica. En su lugar, se depositará en el
punto de recogida correspondiente para el reciclado de aparatos
eléctricos y electrónicos.
Desechar una batería en el fuego o en un horno caliente, o aplastar o cortar
mecánicamente una batería, lo que puede provocar una explosión.
Dejar una batería en un entorno circundante de temperatura extremadamente
alta que puede provocar una explosión o la fuga de líquidos o gases
inflamables.
Una batería sometida a una presión de aire extremadamente baja que puede
provocar una explosión o la fuga de líquidos o gases inflamables.
51
Panoramica del prodotto
L'interruttore remoto wireless Aqara H1 (Rocker doppio) è un nuovo
interruttore remoto wireless. Supporta la pressione singola nella
modalità di clic ad alta velocità e 7 funzioni nella modalità multifunzi-
one tra cui pressione singola del pulsante sinistro, singola pressione
del pulsante destro, doppia pressione del pulsante sinistro, doppia
pressione del pulsante destro, pressione prolungata del pulsante
sinistro e pressione lunga del pulsante destro. Può essere posizionato
o fissato ovunque all'interno o installato su telai di interruttori.
Funziona anche con l'hub Aqara e altri dispositivi intelligenti Aqara
per implementare una varietà di scene intelligenti.
* È richiesto un hub Aqara. Alcune funzioni richiedono modelli specifici
dell'Aqara Hub. Vedere www.aqara.com/support per maggiori dettagli.
Slot
Indicatore luminoso
Pulsante
Premere a lungo per 10 secondi: associare/reset
Premere rapidamente cinque volte: test del
raggio di comunicazione efficace / ricerca del
dispositivo
52
1. Prima di attivare l'accessorio, assicurati di aver scaricato l'app
Aqara Home e l'Aqara Hub che supporta Zigbee 3.0 installato.
2. Aprire l'app, andare nella home page e selezionare "+" nell'angolo
in alto a destra per accedere alla pagina Aggiungi accessorio.
Selezionare "Aqara Wireless Remote Switch H1 (Double Rocker)" e
aggiungerlo secondo le istruzioni.
3. Per ulteriori informazioni, vedere www.aqara.com/support.
Configurazione rapida
Questo prodotto funziona con l'app Aqara Home. Puoi scansionare il
seguente codice QR per scaricare l'app Aqara Home dall'App Store di
Apple. Gli utenti Android possono trovare l'app Aqara Home su
Google Play. Con l'app Aqara Home, può funzionare con altri
dispositivi intelligenti Aqara.
53
Opzione 1:
senza adesivo, posizionalo direttamente su una superficie.
Metodi di installazione
Test della portata effettiva: dopo che è stato associato all'hub,
posizionare il dispositivo nella posizione preferita e premere il
pulsante del dispositivo rapidamente per 5 volte, se l'hub emette
messaggi vocali, indica che l'accessorio può comunicare efficace-
mente con l'hub.
* Se l'aggiunta non riesce, avvicinare l'hub al prodotto e riprovare.
* Premere rapidamente l'interruttore per 5 volte, se l'hub emette istruzioni
vocali, indica che l'accessorio può comunicare efficacemente con l'hub.
* Hub diversi hanno modi diversi per indicare la connessione effettiva. Fare
riferimento alle istruzioni del proprio modello di Aqara Hub.
* Per garantire connessioni stabili, evitare di installare il dispositivo su superfici
metalliche.
54
* Assicurati che la superficie sia pulita e asciutta.
Opzione 2:
rimuovere la pellicola protettiva dal nastro adesivo e fissare il
dispositivo sulla superficie desiderata.
Opzione 3:
aprire il retro dell'interruttore remoto wireless H1 (Rocker doppio)
con un cacciavite a lama piatta, forare il pezzo sottile alla vite del
coperchio posteriore con uno strumento affilato o un trapano
elettrico (Attenzione! Assicurarsi di forare il coperchio posteriore,
non la parte principale dell'interruttore che incorpora hardware e
pulsanti), fissarlo alla scatola a muro con la vite fornita con la
scatola, quindi rimontare il coperchio dell'interruttore remoto
wireless H1 (Rocker doppio).
55
Aprire il retro dell'interruttore remoto wireless H1 (Rocker doppio) con un
cacciavite.
1
Forare attraverso il coperchio posteriore con un punteruolo / trapano
elettrico per installare la vite.
2
56
Fissare la vite e rimettere il coperchio.3
Sostituzione della batteria
Aprire il retro dell'interruttore remoto wireless H1 (Rocker doppio)
con un cacciavite a lama piatta, rimuovere la vecchia batteria e
sostituirla con una nuova (modello batteria: CR2450), quindi
rimettere il coperchio.
57
Sostituire con una nuova batteria.
2Riposizionare il coperchio.3
Aprire il coperchio dell'interruttore remoto wireless H1 (Rocker doppio)
con un cacciavite.
1
58
1. Nella pagina Dispositivo dell'app, trova il dispositivo corrisponden-
te nell'elenco dei dispositivi.
2. Selezionare il dispositivo corrispondente per accedere alla pagina
del dispositivo.
3. Selezionare i tre punti neri nell'angolo in alto a destra nella pagina
del dispositivo e accedere alla pagina Impostazioni dispositivo.
4. Selezionare Altre impostazioni.
5. Selezionare Cambia modalità, selezionare la modalità desiderata e
completare la configurazione corrispondente in base alle istruzioni
sull'app.
Cambia modalità
* Quando il dispositivo corrispondente non viene trovato, è possibile premere
rapidamente l'interruttore 5 volte e il dispositivo corrispondente lampeggerà
nell'elenco dei dispositivi.
* Durante il processo di commutazione della modalità, premere rapidamente
l'interruttore 5 volte per realizzare meglio la commutazione della modalità del
dispositivo.
* Per implementare i passaggi precedenti, fare riferimento all'app Aqara Home.
59
Descrizione stato indicatore
Specifiche
Modello: WRS-R02
Dimensioni prodotto: 85,8 X 86 X 12,5 mm
Peso: 82,5 g
Connettività Wireless: Zigbee 3.0
Modello batteria: CR2450
Temperatura di operazione: -10°C to 50°C
Umidità di operazione: 0-95% RH, senza condensa
Campo di frequenza Zigbee: 2405-2480 MHz
Trasmissione di Potenza Zigbee: ≤13 dBm
Stato indicatore
La luce blu lampeggia una volta Rilevata la pressione del pulsante
Associazione
Associazione riuscita
Associazione fallita
Lampeggia una volta ogni
2 secondi per 20 secondi
La luce blu lampeggia 2 volte
Blu fisso per 1 sec.
Descrizione
60
1. Questo prodotto non è un giocattolo, tenere fuori dalla portata dei
bambini.
2. Questo prodotto è progettato solo per uso interno. Non utilizzarlo
in ambienti umidi o all'aperto.
3. Non versare acqua o altri liquidi su questo prodotto.
4. Non posizionare questo prodotto vicino a una fonte di calore.
Posizionare l'interruttore in un'area ben ventilata.
5. Non tentare di riparare il prodotto da soli. Tutte le riparazioni
devono essere eseguite da personale autorizzato.
6. Questo prodotto è progettato solo per migliorare la comodità della
vita domestica. Se l'utente viola le istruzioni del prodotto e questa
avvertenza, il produttore non è responsabile per eventuali rischi e
danni alla proprietà causati da ciò.
Avvertenze
Servizio clienti online: www.aqara.com/support
Produttore: Lumi United Technology Co., Ltd.
Indirizzo: 8th Floor, JinQi Wisdom Valley, No.1 Tangling Road,
Liuxian Ave, Taoyuan Residential District, Nanshan District,
Shenzhen, China 61
Dichiarazione di conformità europea
Con la presente, [Lumi United Technology Co., Ltd.] dichiara che
l'apparecchiatura radio di tipo [Wireless Remote Switch H1(Double Rocker),
WRS-R02] è conforme alla Direttiva 2014/53/UE. Il testo completo della
dichiarazione di conformità UE è disponibile al seguente indirizzo Internet:
https://www.aqara.com/DoC/
ATTENZIONE
Se la batteria viene sostituita con una di tipo sbagliato, potrebbe
sussistere rischio di esplosione.
Smaltire le batterie esaurite come indicato nelle istruzioni.
Non ingerire niente dalla batteria, Pericolo Ustioni Chimiche.
Questo prodotto contiene una batteria a bottone. Se la qualcosa della batteria a
bottone venisse inghiottito, potrebbe causare gravi ustioni interne in sole 2 ore
con rischi letali.
Mantenere le batterie nuove e quelle esaurite lontano dalla portata dei bambini.
Se il vano della batteria non si chiude saldamente, smettere di usare il prodotto
e tenerlo lontano dalla portata dei bambini.
Se ritenete che qualcosa dalle batterie sia stato ingoiato od inserito in qualsiasi
parte del corpo, cercate immediatamente un medico.
Smaltimento di una batteria nel fuoco o in un forno caldo, o schiacciamento
In condizioni d'uso normali, questa apparecchiatura deve essere tenuta a una
distanza minima di 20 cm tra lʼantenna e il corpo dellʼutente.
62
Informazioni sullo smaltimento e sul riciclaggio dei RAEE
Tutti i prodotti contrassegnati da questo simbolo sono rifiuti di
apparecchiature elettriche ed elettroniche (RAEE in base alla direttiva
2012/19/UE) che non devono essere smaltiti assieme a rifiuti domestici non
differenziati. Al contrario, è necessario proteggere ambiente e la salute umana
consegnando i rifiuti a un punto di raccolta autorizzato al riciclaggio di rifiuti di
apparecchiature elettriche ed elettroniche, predisposto dalla pubblica
amministrazione o dalle autorità locali. Lo smaltimento e il riciclaggio corretti
aiutano a prevenire conseguenze potenzialmente negative allʼambiente e alla
salute umana. Contattare lʼinstallatore o le autorità locali per ulteriori informazi-
oni sulla sede e per i termini e le condizioni di tali punti di raccolta.
Il simbolo sul prodotto o sulla sua confezione indica che il prodotto
non può essere trattato come rifiuto domestico. Al contrario, deve
essere consegnato a un punto di raccolta autorizzato al riciclaggio di
rifiuti di apparecchiature elettriche ed elettroniche.
meccanico o taglio di una batteria, che può provocare un'esplosione.
Lasciare una batteria in un ambiente circostante a temperatura estremamente
elevata che può provocare un'esplosione o la perdita di liquidi o gas
infiammabili.
Una batteria soggetta a una pressione dell'aria estremamente bassa che può
provocare un'esplosione o la perdita di liquidi o gas infiammabili.
63
Обзор продукта
Беспроводной дистанционный выключатель H1 Aqara (2
клавиши) - это новый беспроводной дистанционный
выключатель. Он поддерживает функцию упрощённого
высокоскоростного нажатия, а также 7 функций в
многофункциональном режиме, в том числе однократное
нажатие левой кнопки, однократное нажатие правой кнопки,
двойное нажатие левой кнопки, двойное нажатие правой
кнопки, длительное нажатие левой кнопки и длительное
нажатие правой кнопки. Его можно разместить или прикрепить
в любом месте. Он также работает со шлюзом Aqara и другими
умными устройствами Aqara посредством автоматизаций и
сценариев умного дома.
* Требуется шлюз Aqara. Для поддержки некоторых функций требуются
определенные модели шлюза Aqara. См. www.aqara.com/support для
получения более подробной информации.
64
Быстрая установка
Этот продукт работает с приложением Aqara Home. Вы можете
отсканировать следующий QR-код для загрузки приложения
Aqara Home в Apple App Store. Пользователи Android могут
найти приложение Aqara Home в Google Play, App Gallery и др. В
приложении Aqara Home продукт может работать с другими
умными устройствами Aqara.
Защёлка
Индикатор
Кнопка
Длительное нажатие 10 сек: привязка /
сброс Быстрое нажатие пять раз: проверка
эффективного диапазона связи / поиск
устройства
65
Способы установки
1. Перед активацией аксессуара убедитесь, что Вы загрузили
приложение Aqara Home и инициализировали шлюз Aqara,
поддерживающий Zigbee 3.0.
2. Откройте приложение, перейдите на домашнюю страницу и
выберите «+» в правом верхнем углу для перехода на
страницу добавления аксессуаро. Выберите Беспроводной
выключатель H1 (2 клавиши) и добавьте его в соответствии с
инструкциями.
3. Для дополнительной информации посетите сайт www.aqa-
ra.com/support
* Если добавление не удалось, переместите шлюз ближе к устройству и
повторите попытку.
* Быстро нажмите выключатель 5 раз, если шлюз издает голосовые
подсказки, это означает, что аксессуар может эффективно
взаимодействовать со шлюзом.
* Разные шлюзы имеют различные способы указания эффективного
соединения. Пожалуйста, обратитесь к инструкциям по Вашей модели
шлюза Aqara.
66
Вариант 1:
без использования клея, поместите устройство непосредственно
на поверхность.
* Убедитесь, что поверхность
чистая и сухая.
Вариант 2:
снимите защитную пленку с липкой ленты и прикрепите устройство
к нужной поверхности.
* Тестирование эффективного диапазона: после того, как устройство
привязано к шлюзу, поместите устройство в нужное место и быстро
нажмите кнопку устройства 5 раз. Если воспроизводит
соответствующие голосовые подсказки, это означает, что устройство
может эффективно взаимодействовать со шлюзом.
* Для обеспечения стабильного соединения избегайте установки
устройства на металлические поверхности.
67
Откройте заднюю панель устройства с помощью отвертки.
1
Вариант 3:
откройте заднюю панель Беспроводного выключателя H1 (2
клавиши) с помощью шлицевой отвертки, просверлите тонкую
деталь у винта задней крышки с помощью острого инструмента
или электродрели (Внимание! Убедитесь, что Вы
просверливаете заднюю крышку, а не основную часть
выключателя, которая включает аппаратное обеспечение и
кнопки), прикрепите его к настенной коробке с помощью
винтов, которые поставляются с устройством, а затем
установите обратно крышку Беспроводного выключателя H1 (2
клавиши)
68
Просверлите заднюю крышку с помощью шила/электрической дрели
для установки винтов.
2
Закрутите винты и поставьте крышку на место.3
69
Замена батареи
Откройте заднюю панель Беспроводного выключателя
H1 (2 клавиши) с помощью шлицевой отвертки. Извлеките
старую батарею и замените ее на новую (модель батареи:
CR2450), затем установите крышку на место.
Откройте крышку Беспроводного выключателя H1 (2 клавиши) с
помощью отвертки.
1
70
1. На странице Устройств в приложении найдите
соответствующее устройство в списке устройств.
2. Выберите соответствующее устройство, чтобы перейти на
страницу устройства.
3. Выберите три черные точки в правом верхнем углу страницы
устройства и войдите на страницу Настроек устройства.
4. Выберите Дополнительные настройки.
5. Выберите Режимы выключателя, выберите нужный режим и
выполните соответствующую настройку в соответствии с
Режимы выключателя
Замените батарею на новую.
2Установите крышку на место.3
71
Статус индикатора
Однократное мигание синим Обнаружено нажатие кнопки
Привязка
Успешная привязка
Не удалось привязать
В течение 20 с мигает
однократно каждые 2 с
Мигает синим 2 раза
Непрерывно горит синим 1 с
Описание
Описание статуса индикатора
* Если соответствующее устройство не найдено, Вы можете быстро
нажать выключатель 5 раз, и соответствующее устройство загорится в
Списке устройств.
* При переключении режимов быстро нажмите выключатель 5 раз, чтобы
лучше ознакомиться с переключением режимов устройства.
* Чтобы выполнить вышеуказанные шаги, обратитесь к приложению Aqara
Home.
инструкциями в приложении.
72
Спецификации
Модель: WRS-R02
Размеры изделия: 85,8 х 86 х 12,5 мм
Вес: 82,5 г
Беспроводное подключение: Zigbee 3.0
Модель батареи: CR2450
Рабочая температура: от -10 до 50
Влажность при эксплуатации: 0-95% относительной влажности,
без конденсации
Диапазон частот Zigbee: 2405-2480 МГц
Передача мощности Zigbee: ≤13 дБ
1. Это устройство содержит батарею таблеточного типа. При проглатывании
батареи таблеточного типа, она может вызвать серьезные внутренние ожоги,
которые могут привести к смерти в течение 2 часов.2. При замене этой
батареи на батарею неправильного типа, существует опасность возгорания
Внимание: Не глотайте батарею во избежание химических
ожогов.
73
Онлайн-служба поддержки клиентов: www.aqara.com/support
Эл. почта: support@aqara.com
Производитель: Lumi United Technology Co., Ltd.
Адрес: 8th Floor, JinQi Wisdom Valley, No.1 Tangling Road, Liuxian
Ave, Taoyuan Residential District, Nanshan District, Shenzhen,
China
или взрыва.
3. Храните старые и новые батареи в недоступном для детей месте.
4. Если крышка батарейного отсека устройства не может быть надежно
закрыта, пожалуйста, прекратите использование устройства и поместите его
в недоступное для детей место.
5. Если Вы считаете, что батарея могла быть проглочена или попала в
какую-либо часть Вашего тела, немедленно обратитесь за медицинской
помощью.
6. Бросание батареи в огонь или горячую духовку, разрезание и механическое
разрушение батареи может привести к взрыву.
7. Размещение батареи в среде с очень высокой температурой может
вызвать взрыв или утечку воспламеняющейся жидкости и газа.
8. Размещение батареи под очень низким давлением может
вызвать взрыв или утечку воспламеняющейся жидкости или
газа.
74
Сделано в Китае
1. Этот прибор - НЕ игрушка. Пожалуйста, не допускайте к нему детей.
2. Данный прибор предназначен только дляиспользования внутри
помещений. Не используйте его во влажных средах или на открытом
воздухе.
3. Оберегайте прибор от воздействия влаги, не допускайте попадания
воды или других жидкостей на устройство.
4. Не размещайте прибор вблизи источников тепла.
5. Не помещайте прибор в закрытый корпус, если там нет нормальной
вентиляции.
6. Не пытайтесь отремонтировать прибор самостоятельно. Все ремонтные
работы должны выполняться авторизованным специалистом.
Этот прибор предназначен только для повышения удобства, качества
домашних развлечений и напоминания о статусе устройства. Он не
предназначен для использования в качестве охранного оборудования для
дома, офиса, склада или любых других мест. Если пользователь нарушает
инструкции по использованию прибора, производитель не несет никакой
ответственности за риски и повреждения имущества.
Температура эксплуатации: -10° – +50°C 14° – 122°F
Рабочая влажность: 0 – 95% RH, без конденсации
75
1. Извлеките элемент питания;
2. Обратитесь в сервисный центр для получения консультации или ремонта
оборудования
* Оборудование не нуждается в периодическом обслуживании в течение
срока службы
Правила и условия хранения и транспортировки Оборудование должно
быть защищено от внешних воздействий. Допустимая температура
окружающего воздуха: -20° – +60°C (-4° – 140°F)
Информация о мерах при неисправности оборудования
76
󳈥󳳕
󳃘󵞑󴪸
󳃞󸢍
󸹐󳃞󽶳󽶲󵢰󸲊󽶯󶁗󲎌󸠇󶏍
󲮎󸑯󹻅󳃞󰳒󳻡󽶯󳟘󳓟󸑡󰻕󸁅󹂗󴏯󷩳󷨅󱀕
󳊤󵾡
󵂤󱛂󳯯󸏯
󴥝󶄙󸔌󳇞󸹨󸻰󽶳󼶯󹂂󸬸󼶰󳙮󰰊󵥋󳖎󱭕󵌴󴥝󶄙󸔌󳇞󸹨󸻰󱫈󹟗󸑯󹻅󳏧󳴘
󲨌󰰗󳒻󳃐󱠳󳃞󼶳󱫈󱷣󱍶󶜈󳴘󲨌󰰗󳒻󳃐󱠳󳃞󲠆󸬸󱠳󳃞󱖔󸬸󹂂󳃞󲠆󸬸󹂂󳃞󱖔
󸬸󸹐󳃞󲠆󸬸󸹐󳃞󱖔󸬸󵮢󽶹󵥋󱍶󶜈󱖏󰵕󳓓󶏍󲽞󸑿󳇚󱫈󲎞󱆒󰵴󰷱󱫑󳖢󸖅󱖏
󶥃󶃁󸻰󱙱󱆮󰴾󳛞󶜈󷨅󱀕󸛦󱖮󰸴󵂬󼶳󲐩󴹰󱖩󵥋󳛞󶜈󱱚󳛎
󶃁󸻰󳙮󲭓󹃏󵌴󳟘󰳚󱍶󶜈󹃏󷣒󴰒󲎌󱭕󷌝󵌴󶃁󸻰󲿊󶜈󲐩󴹰󲲼󱖏󷧾󱞗
󼶳󴶢󱕨󳞭󱷣󵾹󵲒
77
󲮎󸑯󷨅󲎌
󷪋󵂤󱛂󱖏󶥃 󲻖󵂬󸛦󱖮󰸴󵂬󲲼󱖏󰵕󳆠󳈟󰵕󰰗󰳆󶂶󵚱󼶳󲬎󷉖
󳢾󲻖󵂬󱞊󲤚󰰗󸈽 󲻖󵂬󵤋󲤍󱺞󳢾󳙮󲍨󱒜󵂬󲾓󼶳󱖏󰵕󲿓󸹨
󴶢󱕨󲻖󵂬󵤋󲤍󰸴󵂬󲻖󵂬󵤋󲤍󼶳󵂤
󱛂󱖏󰵕󸛦󱖮󱆮󰴾󳛞󶜈󷨅󱀕󲠅󰷽
󽶳󱫈󴛃󴉩󰱰󱋦󼶳󷭃󵚮󰻋󲲼󲠗󰰗󸈽󰲾󳒻󳃐󽶵󽶲󵌴󲻖󵂬󵤋󲤍
󱙱󶃁󸻰
󽶴󷭃󲿓󸹨󲻖󵂬󵤋󲤍󼶳󸒡󱆎󹖚󹊼󼶳󱫈󱖔󰰖󷥊󸕡󳏣󽸲󽸳󸒡󱆎󽬀󱍷󸛦󰵮󹊼󹆬󸕡󳏣󽸳
󴥝󶄙󸔌󳇞󸹨󸻰󽶳󼶯󹂂󸬸󼶰󽸲󼶳󳦰󳐆󷬁󳘻󳽡󹛷󲍯󲽘󽬀󱍷
󽶵󷭃󱕊󸺥󰲾󷥰󳞭󱷣󰻕󲱝
78
󲍨󷝬󳖢󴇐
󳟘󳓟󸁅󹂗󴏯󷩳󽶯󶥃󶃁󸻰󶁗󲎌󲫴󼶳󲑫󷨅󱀕󳓓󶏍󱫈󱖮󸔸󰷥󶏍󼶳󴦇󲫴󲮎󸑯󹻅󳃞
󷨅󱀕󳃞󸢍󽶷󳻡󼶳󱺞󳢾󶃁󸻰󵌫󱉵󷫦󹊡󳈡󵞑󼶳󱋟󷚒󳘻󷪋󸛦󰵮󱖏󰵕󶥃󶃁󸻰󸒡󷙧
󳟘󳓟󸑡󰻕
󱺞󳢾󽬀󱍷󱸋󳓵󼶳󷭃󲑫󶃁󸻰󵣱󱏃󱊾󸁅󹂗󵂤󱛂󳞭󸎥󵌴󰷥󶏍󼶳󱇌󷩳󰰊󳻡
󲮎󸑯󹻅󳃞󸹨󸻰󽶷󳻡󼶳󱺞󳢾󶃁󸻰󵌫󱉵󷫦󹊡󳈡󵞑󼶳󱋟󷚒󳘻󸛦󰵮󱖏󰵕󶥃󶃁󸻰󸒡󷙧󳟘󳓟󸑡󰻕
󰰙󱖲󵌴󶃁󸻰󳃘󵞑󸑿󳇚󳟘󳓟󵌴󳖢󲨌󰰙󱖲󷭃󱕊󸺥󲲼󲾧󰸴󵂬󵌴󶃁󸻰󱭕󷌝󷬁󳘻
󴢢󵚮󰻋󸑿󳇚󵦹󲎌󼶳󷭃󰰙󷣒󲑫󷨅󱀕󲍨󷝬󱫈󸠍󲔌󷚒󹆬󰰖
󸕡󹋂󽶳󽶯
󰰙󰸴󵂬󵹴󱖮󱍜󼶳󵏣󳇚󳓓󱫈󳸏󹆬󰰖
79
󷭃󵚮󰻋󵹴󷺠󷚒󹆬󰲰󴍼󰲰󴫴
󸕡󹋂󽶴󽶯
󳎀󰰗󶡜󲡸󰻋󷳀󶡒󼶳󴦇󲫴󲑫󷨅󱀕󷺠󱊾󲲼󷫂󴢢󱖮󸔸󵌴󰷥󶏍
󸕡󹋂󽶵󽶯
󵂬󰰊󲌆󷕙󶀹󱉿󲿓󸹨󴥝󶄙󸔌󳇞󸹨󸻰󽶳󼶯󹂂󸬸󼶰󵌴󶚝󹆬󼶳󵂬󸧳󱊶󵌴󲠅󽦘󲽞󹃆󸵎󱫈
󲫴󶽏󷕙󶀹󷌊󸵎󲌀󼶯󴇲󲵭󽶬󷭃󵚮󷫂󸵎󲌀󵌴󰷥󶏍󳙮󲫴󶽏󼶳󰰙󳙮󱐏󱗢󵘳󰵮󱙱󳃞󸢍󵌴
󸹨󸻰󰱛󹟉󸘩󱊈󼶰󼶳󵂬󱐏󷝬󵎭󹀚󸽮󵌴󷕙󸠙󲑫󱆮󱩿󲎌󱫈󴮴󰰖󸹨󸻰󵎭󰰖󼶳󴦇󲫴󲑫󴥝
󶄙󸔞󵤋󸹨󸻰󽶳󼶯󹂂󸬸󼶰󶽏󳓓󱩒󱔋󷌊
80
󵂬󷕙󶀹󱉿󲿓󸹨󴥝󶄙󸔌󳇞󸹨󸻰󽶳󼶯󹂂󸬸󼶰󵌴󲫴󶽏
1
󰸴󵂬󸩩󲋺󹃆󸵎󱫈󲫴󶽏󷌊󸵎󲌀󼶳󰵕󲍨󷝬󷕙󶀹
2
81
󳐱󶃶󷕙󶀹󼶳󴦇󲫴󲑫󶽏󳓓󱩒󱔋󷌊3
󳞭󳈷󹃆󴄣
󵂬󰰊󲌆󷕙󶀹󱉿󲿓󸹨󴥝󶄙󸔌󳇞󸹨󸻰󽶳󼶯󹂂󸬸󼶰󵌴󲫴󶽏󼶳󱕨󱉵󶥋󹃆󴄣󼶳󳞭󳈷󴢢󳖎
󹃆󴄣󼶯󹃆󴄣󱭕󷌝󽶯󽶴󽶶󽶷󽶲󼶰󼶳󴦇󲫴󲑫󲫴󶽏󷝬󱺒
82
󵂬󷕙󶀹󱉿󲿓󸹨󴥝󶄙󸔌󳇞󸹨󸻰󽶳󼶯󹂂󸬸󼶰󵌴󲫴󶽏
1
󳞭󳈷󳖎󹃆󴄣
2󲑫󲫴󶽏󷝬󱺒3
83
󱊋󳈷󳴘󲨌
󳃘󵞑󴪸󴱼󲷞󷬁󳘻
󽶳󹻅󸹨󲻖󵂬󵤋󲤍󵌴󽸲󷨅󱀕󽸳󹊼󹆬󼶳󱫈󷨅󱀕󱊝󷚒󰱉󳀔󱊾󲑵󲻖󵌴󷨅󱀕
󽶴󸕡󳏣󵏩󲻖󵌴󷨅󱀕󼶳󸒡󱆎󷨅󱀕󹊼󹆬
󽶵󸕡󳏣󷨅󱀕󹊼󹆬󱖔󰰖󷥊󵌴󰰕󰼖󹺬󹻅󼶳󸒡󱆎󽸲󷨅󱀕󷨅󶏍󽸳󹊼󹆬
󽶶󸕡󳏣󽸲󳞭󱷣󷨅󶏍󽸳
󽶷󸕡󳏣󽸲󱊋󳈷󳴘󲨌󽸳󼶳󸕡󳏣󲾧󹃏󵌴󳴘󲨌󼶳󴦇󲫴󳦰󳐆󲻖󵂬󵤋󲤍󰰖󵌴󷬁󳘻󲍯󲽘󵏩
󲻖󵌴󸛦󶏍
󱺞󳢾󳀔󰰙󱊾󵏩󲻖󵌴󷨅󱀕󼶳󲲼󱖏󰵕󲮎󸑯󹻅󳃞󸹨󸻰󽶷󳻡󼶳󵏩󲻖󵌴󷨅󱀕󲑫󱫈󷨅󱀕󱊝󷚒󰱉󸹠󴭋
󱫈󳴘󲨌󱊋󳈷󸓪󵤋󰱉󼶳󲮎󸑯󹻅󳃞󸹨󸻰󽶷󳻡󼶳󱖏󰵕󳞭󱺒󱫑󲐩󴹰󷨅󱀕󳴘󲨌󱊋󳈷
󷣒󱯶󷙧󰰖󸏯󳽡󹛷󼶳󷭃󱕊󶔔󲻖󵂬󵤋󲤍
󳃘󵞑󴪸󴱼󲷞
󷆻󴪸󸹠󴭋󰰊󳻡 󳷹󴏯󱊾󹻅󳃞󳃞󸢍
󶁗󲎌
󶁗󲎌󲽘󱍶
󶁗󲎌󱸋󳓵
󴀸󽶴󵢰󸹠󴭋󰰊󳻡󼶳󳃐󶊜󽶴󽶲󵢰
󷆻󴪸󸹠󴭋󱆖󳻡
󷆻󴪸󸹐󰳿󽶳󵢰
󳈟󸏯
84
󷣩󳦳
󷲝󱘕
󱭕󷌝󽶯󽶲󽶴
󵂤󱛂󲒹󲑒󽶯󽶺󽶷󽶺󽶺󽶸󽶳󽶴󽶷
󸠇󸠉󽶯󽶺󽶴󽶷
󴥝󶄙󸑿󳇚󽶯󽶵󽶲
󹃆󴄣󱭕󷌝󽶯󽶴󽶶󽶷󽶲
󲠅󰷽󴒿󲤳󽶯󽶳󽶲󶤙󽶷󽶲
󲠅󰷽󴛤󲤳󽶯󵏩󲑵󴛤󲤳󽶲󽶻󽶷󼶬󼶳󴥝󱉎󵿷
󹌔󴷏󵲘󱪡󽶯󽶴󽶶󽶲󽶷󽶴󽶶󽶺󽶲
󹃆󱍲󱁊󸊘󽶯󽶤󽶳󽶵
󽶳󳠘󵂤󱛂󰰙󳙮󴷼󽦘󼶳󷭃󷴂󱅭󵫣󸔞󹂗󳠘󵂤󱛂
󽶴󳠘󵂤󱛂󸠢󲑵󲎞󱆒󰸴󵂬󴾬󱳠󷨅󷦸󷭃󱐆󱫈󴘫󴛤󴾬󱳠󲽞󲾓󱷛󰸴󵂬
󽶵󷭃󱐆󲑫󴃣󲽞󱆮󰴾󴌕󹟉󴜦󱊾󳠘󵂤󱛂󰰖
󽶶󷭃󱐆󲑫󳠘󵂤󱛂󹆤󸎥󴪄󴒐󷭃󲑫󵂤󱛂󳓓󶏍󱫈󸑡󹎨󶩃󱺒󵌴󱫑󳖢
󽶷󷭃󱐆󶤆󷙧󱣴󷩳󰻥󴹽󵂤󱛂󵂤󱛂󶂶󰻥󹃏󷣒󵂻󲑭󳯆󰴖󱛧󸒡󷙧
󽶸󳠘󵂤󱛂󱁫󵂬󳖦󳈡󹟗󲏅󲓊󵂠󴉩󰺙󱊶󲯫󱺞󳢾󵂬󲾓󸔂󱕜󵂤󱛂󷬁󳘻󱙱󷲝󱘕󼶳
󷞰󸑳󱞊󲑵󵂻󳽞󲨗󷾰󵌴󰵴󰷱󹎨󹀡󱙱󷹹󵂤󳊈󱸋󳯯󰰙󷹸󷺋
󱫈󶄙󲎚󲾓󳟝󱏋󽶯
󹃆󲋺󸘾󵱵󽶯
󷞰󸑳󱞊󽶯󶂙󵸧󶗤󱌪󵢮󳀘󳟘󸾀󱆞󱖛
󱫑󱫦󽶯󰱉󱪝󴎒󱫕󲠭󱒠󲔕󱒆󳦿󴒐󷙶󸓻󵃵󰵃󱷼󸓻󱲘󲞵󸁠󽶳󷌝󸠍󹙠󳛞󷶶󱷼󲥶󽶺󳳻
85
     
󳃘 󵞑

󸹐󳁩󽶳󽶲󽶯󳇚󶂊
󲮎󸑯󽶷󱩒󳁩󽶯󳟘󱎘󸑡󰻕󸁅󹂗󳬿󷨠
󳬿󵾡󳶂󶜈
󷞰󱛂󳯯󷣒
󽶳󼶯󱵈󳇈󲨌󼶰󹟗󸑯
󱷣󳶂󶜈󳖎󱭕
󹟗󸑯󲠆 󱖔 
󱋇󲬓󱷣󳶂󶜈󲠆
      󲠆         󲠆   󸹐 󳁩 󱖔  
      󱖔         󱖔   󸹐 󳁩 󲠆   
󱖔󱖲󳚈󽶹󳶂󶜈󱖩󱱚󲾧
 󶏍   󱕨󰵁   󷨅 󱀕   󱕗   󰴾 
󸑿󱏃󴉩󸅳
󳠘󷞰󱛂󳶂󶜈󵿟󱖮󱊶󵂬󲭓󷣒󰰊󸘩
󳶂󶜈󴰒󲎌󲭓󷣒󷪍󵾹󳻡
󱕈󴧩󽶯
86
󷨅 󲎌
󳠘󷞰󱛂 󰹥󲌈󳻡
 
 󸑡󰴾󷞰󱛂󳇚󶂊

󽶳󳠘󷞰󱛂󽶵󽶲󳶂󶜈󵿟󱖮󰸴
󵂬       󷬆 󳘻 󳞵  󲫽 
󸐓󱍷
󽶴󷾰󱏃󱖔󰰖󼶲󸐓
󱍷󱆎󽶳󼶯󱵈󳇈󲨌󼶰󸕡
󳁄󶂊󳇚󶂊󸕡󳁄󳇚󶂊󲽘󱍶
󲫽󳏪󰷽󸒡
󽶵󲭓󷣒󱱚󱖮󳻡󱕈󴧩󽶯

87
󱕨󰵁󳖢󴇐
󸑡󰻕󸁅󹂗󳬿󷨠󽶯󰳁󸕡󱕨󰵁󰷥󶏍󲮎󸑯󽶷󱩒󳁩
󳈡󵞑󹊡󱉵󸹵󸑡󰻕
󵞑
󳖢󴇐󽶳󽶯
󲭓󷣒󰷥󶏍󵏣󳇚󶏍
󸐓󱍷󱸋󳓵󱱚󱖮󸎥󱇌󷩳󷙧
󲮎󸑯󽶷󱩒󳁩󳈡󵞑󹊡󱉵
󸹵󸑡󰻕󵞑
󳇚󶂊󲽘󱍶󱉵󳖢󲨌󵄠󲎖󹀂
󳶂󶜈󵿈󰴯󴒘
󲍨󲎌󴥝󶄙󸑡󰻕󵚮󰻋󸠍󲓰󷚒󹆬󱕨󰵁
88
󳖢󴇐󽶴󽶯
󰻋󷳀󱌍󲭓󷣒󰷥󶏍󷺠󰵁
󷭃󵚮󰻋󵹴󷺠󷚒󹆬󰲰󴍼󰲰󴫴
󳖢󴇐󽶵󽶯
󽶳󼶯󱵈󳇈󲨌󼶰󽶳󲌆󱭕
󸹨󸨪󽶺󽶸󱭕
󰷥󶏍󷄆󸘩󲿓󳁂󰵁󲓰󱛂󽶺󽶸󱭕󱩿
󲎌󲫴󽶳󼶯󱵈󳇈󲨌󼶰
󵏣
89
󽶳󼶯󱵈󳇈󲨌󼶰
󸹨
1
󰷥󶏍󲿓󳁂
2
90
󱩿󲎌󲫴󵏣3
 󰳭 󳈷
    󽶳 󲌆 󱭕     󸹨  󱖀  󱕨  󱷛  󳖎  
󼶯󷣩󳦳󽶯󽶴󽶶󽶷󽶲󼶰󳈷󵏣
91
󽶳󼶯󱵈󳇈󲨌󼶰
󸹨
1
󳖎 󳈷
2󵏣3
92
󱊋󳟁
󽶳󷪋󲪏󷣥

󽶴󷪋󲪏󱆎
󽶵󱖔󰰖󰰕󹺭
󷨅󲎌󱆎
󽶶󷪍󵾹󷨅󲎌󸕡󳁄
󽶷󱊋󳟁󷪋󲪏󸕡󳁄󳃘󵞑
󲫽󷨅󲎌󲍯󲽘
󷪋󲪏󷣥󱱚󱖮󵾝󳘂󽶷󱩒󳁩
󷪋󲪏󳈡󵞑
󱊋󳟁󰱉󲮎󸑯󽶷󱩒󳁩󱊋󳟁󶩃

󰵕󰰖󲿇󹋃󱕈󴧩󷙧
93
󱯺 󳠘 
󷞰󱛂󱭕󵄒󽶯󽶲󽶴
󷞰󱛂󽶯󽶺󽶷󽶺󽶺󽶸󽶳󽶴󽶷
󷞰󱛂󳽝󱙐󸠇󸠉󽶯󽶺󽶴󽶷
󳇚󶂊󽶯󽶵󽶲
󷣩󳦳󽶯󽶴󽶶󽶷󽶲
󰷽󳯆󴏫󲤳󽶯󽶳󽶲󽶷󽶲
󰷽󳯆󴑹󲤳󽶯󽶤󽶻󽶷󱉎󵿷
󱘾󴇨󳔙󵲘󱩲󽶯󽶴󽶶󽶲󽶷󽶴󽶶󽶺󽶲
󸐞󰻕󹃆󱍲󽶯󽶤󽶳󽶵
󳈡󵞑󴱰󲷞󷬆󳘻
󳈡󵞑󴱰󲷞
󹆃  󽶳 󱩒  󳁩󱏃󰷽󳬿󱉵
󳇚󶂊󰱉
󳇚󶂊󲽘󱍶
󳇚󶂊󱸋󳓵
󽶴󴀶󽶳󱩒󽶴󽶲󳃐󶂊
󹆃  󽶴 󱩒 
󹆃󽶳󴢡󴠊
󴱰󲷞󷬆󳘻
94
󽶯

󽶯󴎒󱫕󶄇󵸧󶗤󱌪󵢮󳀘󳟘󸾀󱆞󱖛
󰷪󲾧󽶯󴎒󲠭󱒠󲔕󱑳󳦿󴒐󷙶󸓻󵃵󰵃󱷼󸓻󱲘󲞵󸁠󽶳󱖚󸠍󹙠󳛞󷶶󽶺󸿬
󲍨󱆔󹆬󴇲󲵭󰳅󹋂
󽶳󳠘󷞰󱛂󲋺󳲌󳠘󷞰󱛂󹂗
󽶴󳠘󷞰󱛂󲎞󱇃󰸴󵂬󴑹󲤳󹟗󴾬󱳠󲓓󱷛󰸴󵂬
󽶵󸽖󴑹󴇲󲵭󴃣󰴾󴌕󰷯󳠘󷞰󱛂
󽶶󳠘󷞰󱛂󸎥󶏍󳽝󲡼󳈷󴂴󸾀
󲏣󸹦󰷥󶏍󶏍
󽶷󳠘󷞰󱛂󶤆󱊈󰻥󴹽󳆨󳴦󲑡󸹜󰷽󳯆
󷙧
󽶸󳠘󷞰󱛂󲏅󲥂󵂠󴉩󲁈󳯨󲯫󱊶󰺙󲯫󱖹󰰖󷨅󱀕󴱰󲷞󴇲󲵭󱠌󷾰
󸔸󵂬󷞰󱛂󰸴󵂬󷬆󳘻󳞵󱕗󳠘󴇲󲵭󰳅󹋂󸔂󱕜
󱱚󱖮󵂠󱕗󷹹󵂦󳊈󱸋󲑜󰿑󷺋󰵴
󷹸
95
  • Page 1 1
  • Page 2 2
  • Page 3 3
  • Page 4 4
  • Page 5 5
  • Page 6 6
  • Page 7 7
  • Page 8 8
  • Page 9 9
  • Page 10 10
  • Page 11 11
  • Page 12 12
  • Page 13 13
  • Page 14 14
  • Page 15 15
  • Page 16 16
  • Page 17 17
  • Page 18 18
  • Page 19 19
  • Page 20 20
  • Page 21 21
  • Page 22 22
  • Page 23 23
  • Page 24 24
  • Page 25 25
  • Page 26 26
  • Page 27 27
  • Page 28 28
  • Page 29 29
  • Page 30 30
  • Page 31 31
  • Page 32 32
  • Page 33 33
  • Page 34 34
  • Page 35 35
  • Page 36 36
  • Page 37 37
  • Page 38 38
  • Page 39 39
  • Page 40 40
  • Page 41 41
  • Page 42 42
  • Page 43 43
  • Page 44 44
  • Page 45 45
  • Page 46 46
  • Page 47 47
  • Page 48 48
  • Page 49 49
  • Page 50 50
  • Page 51 51
  • Page 52 52
  • Page 53 53
  • Page 54 54
  • Page 55 55
  • Page 56 56
  • Page 57 57
  • Page 58 58
  • Page 59 59
  • Page 60 60
  • Page 61 61
  • Page 62 62
  • Page 63 63
  • Page 64 64
  • Page 65 65
  • Page 66 66
  • Page 67 67
  • Page 68 68
  • Page 69 69
  • Page 70 70
  • Page 71 71
  • Page 72 72
  • Page 73 73
  • Page 74 74
  • Page 75 75
  • Page 76 76
  • Page 77 77
  • Page 78 78
  • Page 79 79
  • Page 80 80
  • Page 81 81
  • Page 82 82
  • Page 83 83
  • Page 84 84
  • Page 85 85
  • Page 86 86
  • Page 87 87
  • Page 88 88
  • Page 89 89
  • Page 90 90
  • Page 91 91
  • Page 92 92
  • Page 93 93
  • Page 94 94
  • Page 95 95
  • Page 96 96
  • Page 97 97
  • Page 98 98
  • Page 99 99
  • Page 100 100

Aqara H1 Manual de usuario

Tipo
Manual de usuario