Silvercrest 333931 El manual del propietario
- Categoría
- Pequeños electrodomésticos de cocina
- Tipo
- El manual del propietario

IAN 333931_2001
5-SPEED HAND/STAND MIXER
BATIDORA DE MANO/DE PIE DE 5 VELOCIDADES
SHMS 250 A1
5-SPEED HAND/STAND MIXER
Operating instructions
BATIDORA DE MANO/DE PIE DE
5 VELOCIDADES
Instrucciones de uso
CV_333931_SHMS250A1_LB9.indd 1-3 15.04.20 16:18

US - EN Operating instructions Page 1
US - ES Instrucciones de uso Página 21
Before reading, unfold the page containing the illustrations and familiarize yourself
with all functions of the device.
Antes de empezar a leer abra la página que contiene las imágenes y, en seguida,
familiarícese con todas las funciones del dispositivo.
CV_333931_SHMS250A1_LB9.indd 1-3 15.04.20 16:18

B
A
CV_333931_SHMS250A1_LB9.indd 4-6 15.04.20 16:18

US-EN │ 1 ■
SHMS 250 A1
Contents
Introduction ...........................................2
Warning types ........................................2
Intended use ..........................................2
Safety instructions .....................................3
Important safety instructions ........................................3
Important Cord Information ........................................5
Package contents and initial inspection ....................6
Appliance description ...................................7
Technical specifications ..................................7
Setting up ............................................8
Operation ............................................8
Speed levels ....................................................8
Kneading and whisking ...........................................9
Puréeing ..................................................... 11
Cleaning .............................................13
Storage .............................................14
Disposal .............................................14
Disposal of the appliance ........................................ 14
Disposal of the packaging ....................................... 14
3 year limited warranty ................................15
Distributor ...........................................16
Recipes ..............................................17
Braided yeast bun. . . . . . . . . . . . . . . . . . . . . . . . . . . . . . . . . . . . . . . . . . . . . . 17
Chocolate-amaretto crème ....................................... 18
Chocolate crème .............................................. 18
Aioli ........................................................ 19
Herb Vinaigrette ............................................... 19
IB_333931_SHSM250A1_LB9.indb 1 08.04.20 08:54

■ 2 │ US-EN SHMS 250 A1
Introduction
Congratulations on the purchase of your new appliance.
You have selected a high-quality product.
The operating instructions are part of this product. They contain
important information about safety, usage, and disposal. Before using
the product, please familiarize yourself with all operating and safety
instructions. Use the product only as described and for the specified
range of applications. Please also pass these operating instructions on
to any future owner.
Warning types
The following warning types are used in these operating instructions:
This is the safety alert symbol. It is used to alert you to po-
tential injury hazards. Obey all safety messages that follow this
symbol to avoid possible injury and death.
► WARNING indicates a hazardous situation that, if not avoided,
could result in death or serious injury.
► NOTICE indicates information that is considered important, but not
hazardous (e.g. messages related to property damage).
Intended use
This appliance is only intended for kneading dough, mixing liquids
(e.g. fruit juices), whipping cream and puréeing fruit. It is only suitable
for processing food.
Do not use the blender to purée boiling food (e.g. soups). This appli-
ance is intended solely for use in private households. Do not use it for
commercial purposes.
IB_333931_SHSM250A1_LB9.indb 2 08.04.20 08:54

US-EN │ 3 ■
SHMS 250 A1
Safety instructions
This section contains important safety instructions for using the appliance. This
appliance complies with statutory safety regulations. Improper use may result
in personal injury and property damage.
IMPORTANT SAFETY INSTRUCTIONS
When using electrical appliances, basic safety precautions should
always be followed, including the following:
1. READ ALL INSTRUCTIONS.
2. To protect against risk of electrical shock do not immerse hand
element, cord or electrical plug in water or other liquid.
3. This appliance is not intended for use by persons with reduced
physical, sensory or mental capabilities or lack of experience
and knowledge, unless they are supervised by a person who is
responsible for their safety or receive instructions from this person
on how to use the product.
4. This appliance should not be used by children and care should
be taken when used near children.
5. Close supervision is necessary when any appliance is used by
or near children.
6. Children should be supervised to ensure they do not play with
the appliance.
7. Unplug the appliance from outlet when not in use, before putting
on or taking off parts, and before cleaning.
8. To disconnect the power cord, always pull the plug from the out-
let; do not pull the power cord itself. Otherwise the power cord
could be damaged!
9. Always check the appliance and all parts for signs of visible
damage before use. Safety can only be ensured if the appliance
is in flawless condition.
10. Arrange for defective power plugs and/or cables to be replaced
as soon as possible by a qualified technician or by our Customer
Service Department to avoid the risk of injury.
IB_333931_SHSM250A1_LB9.indb 3 08.04.20 08:54

■ 4 │ US-EN SHMS 250 A1
11. Do not operate any appliance with a damaged cord or plug or
after the appliance malfunctions or has been dropped or dam-
aged in any manner. Return the appliance to a service center
for examination and repair.
12. The use of attachments not recommended or sold by the manu-
facturer may cause fire, electric shock or injury.
13. Do not use the appliance outdoors.
14. Do not let the cord hang over the edge of table or counter.
Do not let the cord touch hot surfaces, including the stove.
15. Never attempt to fit attachments with differing functions at the
same time.
16. Avoid contacting moving parts.
17. Keep hands, hair, clothing, as well as spatulas and other uten-
sils away from beaters during operation to reduce the risk of
injury to persons or damage to the mixer.
18. Keeps hands and utensils out of the container while operating
to prevent the possibility of severe injury to persons or damage
to the appliance. A scraper may be used but only when the ap-
pliance is not running.
19. Remove beaters from mixer before washing.
20. Be careful when handling and cleaning the blender. The blades
are extremely sharp!
21. To reduce the risk of injury, never place blender on base with-
out mixing bowl properly attached.
22. When mixing liquids, especially hot liquids, use a tall container
or process small quantities at a time to reduce spillage.
23. Do not use the blender to purée boiling food. This can lead to
deformation of the blender!
24. Never purée food in a cooking pot that is still on the hot stove!
Contact between the hot bottom of the pot and the blender can
damage the blender!
IB_333931_SHSM250A1_LB9.indb 4 08.04.20 08:54

US-EN │ 5 ■
SHMS 250 A1
25. The appliance must always be supervised during use.
26. Do not use the appliance for anything other than its intended use.
FOR HOUSEHOLD USE ONLY!
SAVE THESE INSTRUCTIONS!
Important Cord Information
This appliance has a polarized plug. To reduce the risk of electric
shock, this plug is intended to fit into a polarized outlet only one way.
If the plug does not fit fully into the outlet, reverse the plug. If it still
does not fit, contact a qualified electrician. Do not attempt to modify
the plug in any way.
► A short power-supply cord (or detachable power-supply cord)
should be used to reduce the risk resulting from becoming entan-
gled in or tripping over a longer cord.
► Longer detachable power-supply cords or extensions cords are
available and may be used if care is exercised in their use.
► If a longer detachable power-supply cord or extension cord is
used:
1) The marked electrical rating of the cord set or extension cord
should be at least as great as the electrical rating of the
appliance;
2) The cord should be arranged so that it will not drape over the
countertop or tabletop where it can be pulled on by children
or tripped over unintentionally; and
3) If the appliance is of the grounded type, the cord set or extension
cord should be a grounding-type-3-wire cord.
IB_333931_SHSM250A1_LB9.indb 5 08.04.20 08:54

■ 6 │ US-EN SHMS 250 A1
Package contents and initial inspection
This appliance comes standard with the following components:
▯ 1 hand mixer
▯ 1 mixer stand
▯ 1 mixing bowl with lid
▯ 2 kneading hooks
▯ 2 whisks
▯ 1 blender
▯ 1 dough scraper
▯ Operating instructions
► Packaging materials should not be used as a toy. There is a risk of
suffocation!
1) Remove all parts of the appliance and the operating instructions
from the box.
2) Remove all packaging materials and transport safeguards.
3) Clean all parts of the appliance as described in the section en-
titled “Cleaning”.
►Check the package for completeness and for signs of visible
damage. If the delivery is incomplete or damage has occurred as
a result of defective packaging or during transport, contact the
customer service hotline (see “3 year limited warranty” section).
IB_333931_SHSM250A1_LB9.indb 6 08.04.20 08:54

US-EN │ 7 ■
SHMS 250 A1
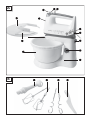
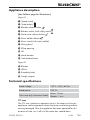
Appliance description
(See fold-out page for illustrations)
Figure A:
Speed switch
Turbo button /
Blender release button
Blender socket (with safety catch)
Hand mixer release button
Mixer holder release
Mixer stand (with mixer holder)
Mixing bowl
Filling opening
Lid
- Hand element
3Tool-release button
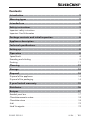
Figure B:
! Blender
. Whisk
0 Kneading hook
6Dough scraper
Technical specifications
Rated voltage 120 V ∼ (AC), 60 Hz
Rated power 250 W
Short time duty (maximum load): Mixer: 10 min.
Blender: 1 min.
CO time
The CO time (continuous operation time) is the amount of time an
appliance can be operated without the motor overheating and be-
coming damaged. After the appliance has been operated for this
duration of time, turn it off until the motor has cooled down.
IB_333931_SHSM250A1_LB9.indb 7 08.04.20 08:54

■ 8 │ US-EN SHMS 250 A1
Setting up
1) Place the mixer stand on a level surface. There are 4 suction
cups on the underside of the mixer stand that prevent the appli-
ance from slipping during use.
2) Ensure that the power socket is always easily accessible in the
event of an emergency.
Operation
► Never use containers made from glass or other easily breakable
materials. These containers may be damaged and cause injuries.
Kneading hooks 0
for kneading heavy
doughs, e.g. yeast
dough.
Whisks . for stirring
batter or cake mixture
or for whipping cream.
Blender ! for
puréeing fruits/veg-
etables, e.g. apples.
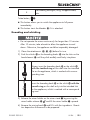
Speed levels
Level on the
speed switch Use
0 Appliance is turned off.
1Good starting speed for mixing "soft" ingredients
such as flour, butter, etc.
2 For blending liquid ingredients.
3 For mixing cake and bread doughs.
4 For whipping butter, sugar, for desserts, etc.
IB_333931_SHSM250A1_LB9.indb 8 08.04.20 08:54

US-EN │ 9 ■
SHMS 250 A1
5For beating meringue, icing, whipped cream,
etc.
Turbo button / :
■ This button allows you to switch the appliance to full power
immediately.
■ This button starts the blender ! if it is attached.
Kneading and whisking
► Do not operate the mixer continuously for longer than 10 minutes.
After 10 minutes, take a break to allow the appliance to cool
down. Otherwise, the appliance could be irreparably damaged.
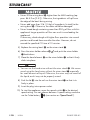
1) Clean the attachments (!, ., 0) before first use.
2) Push the whisks . or the kneading hooks 0 into the slots on the
hand element - until they click audibly and firmly into place.
Always insert the kneading hook 0 or the whisk .
with the toothed ring on the shaft into the intended
slot on the appliance, which is marked with a corre-
sponding icon.
Insert the kneading hook 0 or the whisk . with the
smooth ring on the shaft only into the intended slot
on the appliance, which is marked with a correspond-
ing icon.
3) Release the mixer holder on the mixer stand by pressing the
mixer holder release and lift the mixer holder upward.
4) Remove the mixing bowl and fill it with the ingredients. Quanti-
ties depend on the amount to be prepared.
IB_333931_SHSM250A1_LB9.indb 9 08.04.20 08:54

■ 10 │ US-EN SHMS 250 A1
► Never fill the mixing bowl higher than the MAX marking (ap-
prox. 84.5 fl oz [2.5 l]). Otherwise, the ingredients will spill over
the edge of the bowl during mixing.
► Never add more than 3 lb (1.5 kg) of ingredients (in total) to the
mixing bowl . Otherwise, the motor could be damaged.
► Never knead dough containing more than 900 g of flour with this
appliance! Larger quantities of flour can result in overloading the
appliance!
If necessary, divide dough with higher flour quantities into several
portions and knead them one after the other. However, do not
exceed the specified CO time of 10 minutes.
5) Replace the mixing bowl on the mixer stand .
6) Press the mixer holder release and push the mixer holder
back down.
7) Place the hand element - on the mixer holder so that it firmly
clicks into place.
►You can use the hand mixer without the mixer stand . We recom-
mend using the hand mixer without the mixer stand especially
for small amounts of liquid. Otherwise, the mixer may not reach all
the liquid, and it may not be properly mixed.
8) Push the lid into the rails on the mixer stand so that it sits
firmly in place.
9) Insert the plug into a power socket.
10) To start the appliance, move the speed switch to the desired
speed setting. You can choose between 5 speed settings and also
use the Turbo button / (see section on "Speed levels").
IB_333931_SHSM250A1_LB9.indb 10 08.04.20 08:54

US-EN │ 11 ■
SHMS 250 A1
►If you want to add ingredients during mixing, open the filling
opening on the lid and add the ingredients. Close the filling
opening afterwards to prevent ingredients from splashing out!
►If ingredients stick to the edge of the mixing bowl and can-
not be reached by the kneading hooks 0/whisks ., turn off the
hand mixer. Remove the lid . Use the dough scraper 6 to push
the stuck ingredients back into the middle of the mixing bowl .
Replace the lid . Turn the hand mixer back on.
11) To remove the contents of the bowl, turn off the hand mixer. Pull
the lid off to the side.
12) Press the mixer holder release , lift the mixer holder and
remove the mixing bowl from the mixer stand . You can now
remove the contents of the bowl.
►For safety reasons, the whisks . and kneading hooks 0 can only
be released if the speed switch is set to the position “0”.
►If you want to remove the whisks . or kneading hooks 0, you
must first remove the hand element -: To do this, press the hand
mixer release button and remove the hand element -.
Then press the tool-release button 3 to release the whisks . or
the kneading hooks 0.
Puréeing
► Do not operate the blender ! for longer than 1 minute at a time.
After one minute of use, allow the appliance to cool down fully.
► Never use the blender ! for hard food items such as: coffee
beans, ice cubes, sugar, cereals, chocolate, raw/hard vegetables,
etc. This could result in serious damage to the appliance.
► Do not use the blender ! to purée boiling food (e.g. soups).
Remove the pot from the hotplate before puréeing.
IB_333931_SHSM250A1_LB9.indb 11 08.04.20 08:54

■ 12 │ US-EN SHMS 250 A1
1) Use the blender ! to purée foods.
2) Open the safety catch of the blender socket by pushing it to
the side and holding it firmly.
►The blender ! can only be used if the whisks . or the kneading
hooks 0 are not installed.
3) Push the blender ! into the blender socket and push it down
firmly. The blender ! must audibly click into place.
4) To avoid overflowing, the container used for blending should
only be filled to about 2/3 of its capacity. Select a suitably large
container.
►Ensure that there is a sufficient amount of liquid in the purée
container. To ensure effective mixing of the ingredients, the food
should cover at least the lower section of the blender !.
►Do not turn the hand mixer on until the blender ! has been
inserted into the ingredients.
5) Insert the plug into a power socket.
6) Press the Turbo button / . Keep the button pressed down
during the whole procedure. The appliance stops as soon as it is
released.
7) When you have finished working with the blender !, release the
Turbo button / and remove the plug from the power socket.
8) To remove the blender ! from the blender socket , press the
blender release button on both sides of the hand element
- at the same time. The blender ! is now released from the
blender socket .
9) Remove the blender ! with a snapping motion from the blender
socket .
IB_333931_SHSM250A1_LB9.indb 12 08.04.20 08:54

US-EN │ 13 ■
SHMS 250 A1
►If the blender ! still cannot be removed from the blender socket ,
pull the safety catch open a little. Then the blender ! can be
removed.
Cleaning
► Before cleaning the appliance, disconnect the power plug from the
power socket! There is a risk of electric shock!
► Never immerse the hand element - in water or other liquids!
► Take care when cleaning the blender !! The blade is extremely
sharp!
► Never submerge the blender ! completely under water. Clean
only the lower part with the blade under running water. Do not
allow water to get inside the blender !. Otherwise, the appliance
could be irreparably damaged.
The whisks ., the kneading hooks 0, the mixing bowl ,
the lid and the dough scraper 6can also be cleaned in
the dishwasher. If possible, place everything in the top tray of
the dishwasher.
■ Clean the hand element - containing the motor using a damp
cloth only; if necessary, add a little mild detergent.
■ Clean the mixer stand using a damp cloth only; if necessary,
add some mild detergent.
■ The whisks . and the kneading hooks 0 can be cleaned under
running water or in warm water with detergent. Dry all parts thor-
oughly after cleaning. We recommend cleaning the attachments
directly after use. This removes food residue and reduces the risk of
bacterial contamination.
■ Clean the mixing bowl , the lid and the dough scraper 6 in
warm water with a small amount of dish detergent.
IB_333931_SHSM250A1_LB9.indb 13 08.04.20 08:54

■ 14 │ US-EN SHMS 250 A1
■ Clean the lower part of the blender ! in warm water with a little
detergent or under running water. Wipe the upper part with a
damp cloth. If necessary, add a small amount of mild detergent
onto the cloth. Afterwards, wipe off with a cloth moistened only
with water to ensure that no detergent remains on the appliance.
Storage
■ Store the cleaned appliance in a clean, dust-free, and dry location.
Disposal
Disposal of the appliance
Electrical appliances may not be thrown away as part of normal
household trash. If you can no longer use your electrical appliance,
dispose of it in accordance with the legal provisions applicable in your
state. This will ensure that old electric appliances are recycled and en-
vironmental pollution is kept to a minimum. Further information about
disposal is available on the internet at www.epa.gov.
Disposal of the packaging
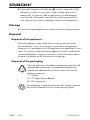
Note the marking on the different packaging materials and
separate them accordingly. The packaging materials are
marked with abbreviations (a) and numbers (b) with the
following meanings:
1–7: Plastics,
20–22: Paper and cardboard,
80–98: Composites.
The packaging is made of environmentally friendly materials
that can be disposed of at your local recycling center.
IB_333931_SHSM250A1_LB9.indb 14 08.04.20 08:54

US-EN │ 15 ■
SHMS 250 A1
3 year limited warranty
What does this warranty cover?
The warranty covers:
▯ Damage, breakage or inoperability due to defect.
▯ Damage not caused by normal wear and tear or failure to follow the
safety and maintenance instructions provided in the user manual.
What is not covered by the warranty?
The warranty does not cover damage caused by:
▯ Normal wear and tear of the product, including fragile parts (such
as switches, glass, etc.);
▯ Improper use or transport;
▯ Disregarding safety and maintenance instructions;
▯ Accidents or acts of nature (e.g. lightning, fire, water, etc.);
▯ Tampering with the product (such as removing cover, unscrewing
screws etc.)
Consequential and incidental damages are also not covered under
this warranty. However, some states do not allow the exclusion or
limitation of incidental or consequential damages, so this limitation or
exclusion may not apply to you.
What is the period of coverage and warranty resolution?
The warranty is for 3 years from the date of purchase.
At our discretion, product will either be refunded or replaced.
What will we not do?
We will not:
▯ Start a new warranty period upon product exchange;
▯ Repair product.
IB_333931_SHSM250A1_LB9.indb 15 08.04.20 08:54

■ 16 │ US-EN SHMS 250 A1
How to process the warranty?
To initiate, please:
▯ Call customer service at 1 (844) 543-5872
▯ Visit the Website Customer Service Platform at
www.lidl.com/contact-us
or
▯ Visit a LIDL store for further assistance
To ensure the quickest warranty return process, please have the fol-
lowing available:
▯ The original sales receipt that includes the date purchased;
▯ The product and manual in the original package;
▯ A statement of the problem.
What must you do to keep the warranty in effect?
▯ Retain the original receipt;
▯ Follow all product instructions;
▯ Do not repair or modify the product.
How does state law relate to this warranty?
This warranty gives you specific legal rights, and you may also have
other rights which vary from state to state. All implied warranties are
limited by the duration and terms of this warranty. Some states do not
allow limitations on how long an implied warranty lasts, so the above
limitation may not apply to you.
Distributor
LIDL US LLC.
ARLINGTON
VA 22202
IB_333931_SHSM250A1_LB9.indb 16 08.04.20 08:54

US-EN │ 17 ■
SHMS 250 A1
Recipes
Braided yeast bun
▯ 17.6 oz (500 g) flour
▯ 2.1 oz (60 g) butter
▯ 2.1 oz (60 g) sugar
▯ 0.2 oz (7 g) salt
▯ 1.5 oz (42 g) yeast (1 pack of fresh yeast)
▯ 6.8 fl oz (200 ml) milk
▯ 1 egg
▯ 1 egg yolk
▯ Some sugar, according to taste
1) Place the yeast in some lukewarm milk with sugar.
2) Once the yeast has raised a little, add all the ingredients to the mix-
ing bowl .
3) Knead the ingredients thoroughly with the kneading hooks 0.
4) Allow the dough to stand for about 20 minutes.
5) Now form the braided bun and allow the dough to rise for another
30 minutes.
6) Brush the bun with a little egg yolk.
►If you like, you can sprinkle a little sugar on the braided bun.
7) Preheat the oven to around 400 °F (200 °C) (convection) and
bake the bread for approx. 25 minutes until it is golden brown.
IB_333931_SHSM250A1_LB9.indb 17 08.04.20 08:54

■ 18 │ US-EN SHMS 250 A1
Chocolate-amaretto crème
▯ 16.9 fl oz (500 ml) cream
▯ 16.9 fl oz (500 ml) mascarpone
▯ 3.5 oz (100 g) nut-nougat cream
▯ 5 tbsp. Amaretto
▯ 1–2 tbsp. honey
1) Add the cream and the mascarpone to the mixing bowl and
mix it using the whisks ..
2) Add the Amaretto, the honey and the nut-nougat cream a little at a
time and mix everything thoroughly.
3) Fill the crème into dessert bowls and chill before eating.
Chocolate crème
▯ 10.6 oz (300 g) cream
▯ 7 oz (200 g) plain chocolate
1) Heat up the cream.
2) Crumble the chocolate and melt it in the cream.
3) Put the chocolate mix into the refrigerator and allow it to cool until
set.
4) Once the mix has cooled down and settled, beat it with the
whisks . until creamy.
►You can also use this chocolate crème as a filling for other
pastries.
IB_333931_SHSM250A1_LB9.indb 18 08.04.20 08:54

US-EN │ 19 ■
SHMS 250 A1
Aioli
▯ 17.6 oz (500 g) mayonnaise
▯ 1 cup of sour cream
▯ 1.7 oz (50 g) garlic
▯ 2 tsp. mustard (medium)
▯ 1 pack of mixed herbs (frozen)
▯ 1 pinch of sugar
▯ ½ tsp. salt
▯ ½ tsp. pepper
1) Peel the garlic and crush it in a garlic crusher.
2) Add the mayonnaise, the sour cream and the garlic to the mixing
bowl and mix it thoroughly using the whisks ..
3) Gradually add the mustard, the herbs, the sugar, the pepper and
the salt and mix everything thoroughly.
4) Finally, season to taste.
Herb Vinaigrette
▯ 3–4 sprigs of flat-leaf parsley
▯ 3–4 sprigs of basil
▯ 1 lemon
▯ 1 tsp. mustard (medium)
▯ 1 clove of garlic
▯ Salt, Pepper
▯ 3.4 fl oz (100ml) olive oil
▯ 1 pinch of sugar (optional)
1) Add the leaves of the herbs, the lemon juice, the mustard, the gar-
lic, salt and pepper to a high-sided mixing container.
2) Mix everything using the blender ! adding the oil slowly until the
sauce is creamy.
3) Season the vinaigrette and add some sugar if desired.
IB_333931_SHSM250A1_LB9.indb 19 08.04.20 08:54

■ 20 │ US-EN SHMS 250 A1
IB_333931_SHSM250A1_LB9.indb 20 08.04.20 08:54

US-ES │ 21 ■
SHMS 250 A1
Contenido
Introducción .........................................22
Tipos de advertencias .................................22
Uso previsto ........................................22
Instrucciones de seguridad ............................23
Instrucciones importantes de seguridad ............................ 23
Información importante sobre el cable ............................. 25
Contenido del empaque e inspección inicial ...............26
Descripción del electrodoméstico .......................27
Especificaciones técnicas ..............................27
Colocación ..........................................28
Operación ..........................................28
Niveles de velocidad .......................................... 28
Amasado y batido ............................................ 29
Preparación de puré ........................................... 32
Limpieza ...........................................33
Almacenamiento .....................................34
Eliminación .........................................35
Eliminación del dispositivo ...................................... 35
Eliminación del empaque ....................................... 35
Garantía limitada de 3 años ...........................36
Importador .........................................37
Recetas .............................................38
Panecillo de levadura trenzado .................................. 38
Crema de chocolate-amaretto ................................... 39
Crema de chocolate ........................................... 39
Aioli ....................................................... 40
Vinagreta de hierbas .......................................... 40
IB_333931_SHSM250A1_LB9.indb 21 08.04.20 08:54

■ 22 │ US-ES SHMS 250 A1
Introducción
Felicidades por la compra de su nuevo electrodoméstico.
Ha seleccionado un producto de alta calidad.
El instructivo de uso es parte de este producto. Contiene información
importante sobre seguridad, uso y eliminación. Antes de usar el
producto, familiarícese con todas las instrucciones de uso y seguri-
dad. Use el producto solamente como se describe y para la variedad
de aplicaciones especificada. También entregue este instructivo de
operación a cualquier propietario futuro.
Tipos de advertencias
Los siguientes tipos de advertencias se usan en este instructivo de
operación:
Este es el símbolo de alerta de seguridad. Se usa para
alertarle sobre peligros de lesiones potenciales. Obedezca
todos los mensajes de seguridad a continuación de este
símbolo para evitar posibles lesiones y la muerte.
► ADVERTENCIA indica una situación peligrosa que, si no se evita,
podría provocar la muerte o lesiones graves.
► AVISO indica información que se considera importante, pero no
está relacionada con peligro (por ejemplo, mensajes relacionados
con daños materiales).
Uso previsto
Este electrodoméstico está diseñado solamente para amasar pasta,
mezclar líquidos (por ejemplo, jugos de fruta), batir crema y preparar
puré de fruta. No es adecuado para procesar alimentos.
No use la batidora para preparar puré de comida hirviendo (por
ejemplo, sopas). Este electrodoméstico está diseñado exclusivamente
para uso en hogares privados. No lo use para fines comerciales.
IB_333931_SHSM250A1_LB9.indb 22 08.04.20 08:54

US-ES │ 23 ■
SHMS 250 A1
Instrucciones de seguridad
Esta sección contiene instrucciones de seguridad importantes para el uso del
electrodoméstico. Este electrodoméstico cumple con las normas de seguridad
legales. El uso inadecuado puede provocar lesiones personales y daños
materiales.
INSTRUCCIONES IMPORTANTES DE
SEGURIDAD
Al usar electrodomésticos, siempre deben seguirse precauciones
básicas de seguridad como las siguientes:
1. LEA TODAS LAS INSTRUCCIONES.
2. Para protegerse contra descargas eléctricas, no sumerja el
mango, el cable o la clavija en agua u otro líquido.
3. Este electrodoméstico no ha sido fabricado para uso por parte
de personas con capacidades físicas, sensoriales o mentales
limitadas, o falta de experiencia y conocimiento, a menos que
sean supervisadas por una persona responsable de su segu-
ridad o que hayan recibido instrucción de dicha persona con
respecto al uso del producto.
4. Los niños deben ser supervisados para asegurar que no jueguen
con el electrodoméstico.
5. Los niños no deben usar este electrodoméstico, y se debe tener
cuidado cuando se use cerca de niños.
6. Se requiere supervisión estrecha cuando cualquier dispositivo
sea usado por o cerca de los niños.
7. Desconecte el electrodoméstico de la toma de corriente cuando
no lo use, antes de colocar o retira partes y antes de limpiarlo.
8. Para desconectar el electrodoméstico de la corriente eléctrica,
siempre tome la clavija de alimentación, no el cable. ¡De lo con-
trario, el cable de alimentación podría dañarse!
9. Revise siempre el electrodoméstico y todas las partes por posibles
signos de daños antes de usarlos. La seguridad solamente puede
garantizarse si el electrodoméstico está en condición impecable.
IB_333931_SHSM250A1_LB9.indb 23 08.04.20 08:54

■ 24 │ US-ES SHMS 250 A1
10. Solicite que un técnico calificado o nuestro departamento de
Servicio al Cliente sustituyan las clavijas y/o los cables de
alimentación dañados tan pronto como sea posible para evitar
el riesgo de lesiones.
11. No opere ningún dispositivo con el cable o la clavija dañados
o después de que el mismo haya fallado, se haya caído o haya
sido dañado de alguna manera. Envíe el dispositivo a un cen-
tro de servicio para inspección y reparación.
12. El uso de accesorios que el fabricante no recomiende o venda
puede provocar fuego, descargas eléctricas o lesiones.
13. No use el electrodoméstico en exteriores.
14. No permita que el cable cuelgue sobre el borde de una mesa o
barra. No permita que el cable toque superficies calientes, inclu-
yendo la estufa.
15. Nunca intente colocar accesorios con diferentes funciones al
mismo tiempo.
16. Evite el contacto con las partes móviles.
17. Mantenga las manos, el cabello, la ropa, así como las espá-
tulas y otros utensilios alejados de los batidores durante el
uso para reducir el riesgo de lesiones a personas o daño a la
mezcladora.
18. Mantenga las manos y utensilios fuera del recipiente mientras
opera, para prevenir el riesgo de lesiones graves a personas
o daños al electrodoméstico. Puede usarse una espátula, pero
solamente cuando el electrodoméstico no esté funcionando.
19. Retire los batidores de la mezcladora antes de lavarla.
20. Tenga cuidado cuando maneje y limpie la batidora. ¡El aspa
es sumamente filosa!
21. Para reducir el riesgo de lesiones, nunca coloque la licuadora
en la base sin mezclar el recipiente correctamente.
22. Cuando mezcle líquidos, especialmente líquidos calientes, use
un recipiente alto o procese cantidades pequeñas cada vez
para reducir los derrames.
IB_333931_SHSM250A1_LB9.indb 24 08.04.20 08:54

US-ES │ 25 ■
SHMS 250 A1
23. No use la batidora para preparar puré de comida hirviendo.
¡Esto puede causar deformación de la batidora!
24. ¡Nunca prepara puré de comida en una olla de cocción que
aún esté en la estufa caliente! ¡El contacto entre la parte infe-
rior caliente de la olla y la batidora puede dañar la batidora!
25. El electrodoméstico siempre debe supervisarse durante el uso.
26. No use el electrodoméstico para ningún otro fin que no sea el
previsto.
EXCLUSIVO PARA USO DOMÉSTICO!
CONSERVE ESTE INSTRUCTIVO!
Información importante sobre el cable
Este electrodoméstico tiene una clavija polarizada. Para reducir el
riesgo de descargas eléctricas, esta clavija está diseñada para intro-
ducirse en un contacto polarizado sólo de una manera. Si la clavija
no se introduce totalmente en el contacto, inviértala. Si aún así no se
introduce, póngase en contacto con un electricista calificado.
No intente modificar la clavija de ningún modo.
► Se deberá usar un cable de fuente de alimentación corto (o cable
de alimentación desprendible) para reducir los riesgos resultantes
de enredarse o tropezarse con un cable más largo.
► Están disponibles cables de fuente de alimentación desprendibles
o extensiones más largos y pueden usarse si se tiene cuidado en
su uso.
► Si se usa un cable de fuente de alimentación desprendible o una
extensión más largos:
1) Las características eléctricas marcadas en el juego de cable
o extensión deberán ser por lo menos similares a las del
electrodoméstico;
2) El cable deberá ser tendido de tal manera que no cuelgue
sobre la barra o mesa donde pueda ser jalado por niños o
con el que pueda tropezarse involuntariamente; y
3) Si el electrodoméstico es del tipo aterrizado, el juego de cable
o extensión deberá ser un cable de 3 hilos de tipo aterrizado.
IB_333931_SHSM250A1_LB9.indb 25 08.04.20 08:54

■ 26 │ US-ES SHMS 250 A1
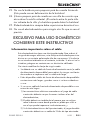
Contenido del empaque e inspección inicial
Este dispositivo se entrega de manera estándar con los siguientes
componentes:
▯ 1 mezcladora manual
▯ 1 soporte de mezcladora
▯ 1 recipiente para mezclar con tapa
▯ 2 ganchos para amasar
▯ 2 batidores
▯ 1 batidora
▯ 1 raspador de masa
▯ Instructivo de uso
► Los materiales de empaque no deben usarse como un juguete.
Existe el riesgo de asfixia.
■ Retire todas las partes del dispositivo y el instructivo de operación
de la caja.
■ Retire todos los materiales de empaque e inmovilizadores de
transporte.
■ Limpie todas las partes del dispositivo como se describe en la
sección “Limpieza”.
►Verifique que el paquete esté completo y no muestre signos visi-
bles de daño. Si la entrega está incompleta o si ha ocurrido daño
debido al empaque defectuoso o durante el transporte, póngase
en contacto con la línea directa de servicio al cliente (vea la sec-
ción “Garantía limitada de 3 años”).
IB_333931_SHSM250A1_LB9.indb 26 08.04.20 08:54

US-ES │ 27 ■
SHMS 250 A1
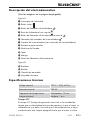
Descripción del electrodoméstico
(Vea las imágenes en la página desplegable)
Figura A:
Interruptor de velocidad
Botón turbo /
Botón de liberación de la batidora
Base de la batidora (con seguro)
Botón de liberación de la mezcladora manual
Liberador del retenedor de la mezcladora
Soporte de la mezcladora (con retenedor de la mezcladora)
Recipiente para mezclar
Abertura de llenado
Tapa
- Mango
3Botón de liberación de herramienta
Figura B:
! Batidora
. Batidor
0 Gancho de amasado
6Raspador de masa
Especificaciones técnicas
Voltaje nominal 120 V ∼ (CA), 60 Hz
Potencia nominal 250W
Operación de tiempo corto
(carga máxima):
Mezcladora: 10 min
Batidora: 1 min
Tiempo OC
El tiempo OC (tiempo de operación continua) es la cantidad de
tiempo que un electrodoméstico puede operarse sin que el motor se
sobrecaliente y se dañe. Una vez que el electrodoméstico se haya
usado durante este tiempo, apáguelo hasta que el motor se enfríe.
IB_333931_SHSM250A1_LB9.indb 27 08.04.20 08:54

■ 28 │ US-ES SHMS 250 A1
Colocación
1) Coloque el soporte de la mezcladora sobre una superficie
nivelada. Hay 4 ventosas en la parte inferior del soporte de la
mezcladora que evitan que el electrodoméstico se deslice
durante el uso.
2) Asegure que la toma de corriente sea siempre fácilmente accesi-
ble en caso de una emergencia.
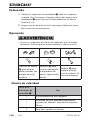
Operación
► Nunca use recipientes de vidrio o de materiales que se rompen
fácilmente. Estos recipientes pueden dañarse y causar lesiones.
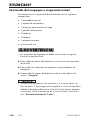
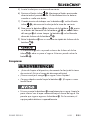
Ganchos de amasar
0 para amasar
pastas pesadas, por
ejemplo pasta de
levadura.
Batidores . para
revolver mantequilla
o preparación de
pastel, o para crema
batida.
Batidora ! para
preparar puré de
frutas o verduras, tal
como de manzanas.
Niveles de velocidad
Nivel en el
interruptor de
velocidad
Uso
0 El electrodoméstico está apagado.
1
Velocidad de inicio aceptable para mezclar
ingredientes "blandos" como harina, mantequi-
lla, etc.
2 Para batir ingredientes líquidos.
IB_333931_SHSM250A1_LB9.indb 28 08.04.20 08:54

US-ES │ 29 ■
SHMS 250 A1
3 Para mezclar pastas de pastel y pan.
4 Para batir mantequilla, azúcar, para postres, etc.
5Para batir merengue, glaseado, crema batida,
etc.
Botón turbo / :
■ Este botón le permite cambiar el electrodoméstico a potencia total
inmediatamente.
■ Este botón inicia la batidora ! si está colocada.
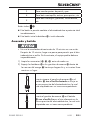
Amasado y batido
► No use la mezcladora durante más de 10 minutos en una sesión.
Después de 10 minutos, haga una pausa para permitir que el elec-
trodoméstico se enfríe. De lo contrario, el equipo podría dañarse
irreparablemente.
1) Limpie los accesorios (!, ., 0) antes de cada uso.
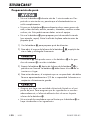
2) Empuje los batidores . o los ganchos de amasar 0 dentro de
las ranuras del mango - hasta que hagan clic y se inserten firme-
mente en su lugar.
Inserte siempre el gancho de amasar 0 o el
batidor . con el anillo dentado en el eje en
la ranura prevista del electrodoméstico, la cual
está etiquetada con un icono correspondiente.
Inserte el gancho de amasar 0 o el batidor
. con el anillo liso en el eje solamente en la
ranura prevista del electrodoméstico, la cual está
etiquetada con un icono correspondiente.
IB_333931_SHSM250A1_LB9.indb 29 08.04.20 08:55

■ 30 │ US-ES SHMS 250 A1
3) Para liberar el retenedor de la mezcladora en el soporte de la
mezcladora , presione el liberador del retenedor de la mez-
cladora y levante el retenedor de la mezcladora .
4) Retire el recipiente para mezclar y llénelo con los ingredientes.
Las cantidades dependen de la cantidad que va a preparar.
► Nunca llene el recipiente para mezclar más de la marca MAX
(aprox. 84.5 fl oz [2.5 l]). De lo contrario, los ingredientes se
derramarán del recipiente durante el mezclado.
► Nunca agregue más de 3 lb (1.5 kg) de ingredientes (en total) al
recipiente para mezclar . Si lo hace, el motor podría dañarse.
► ¡No amase nunca con este aparato masas que contengan más de
900 g de harina! ¡Una cantidad superior de harina podría sobre-
cargar el aparato!
En caso necesario, divida las masas con un mayor contenido de
harina en varias porciones y amáselas de forma consecutiva. No
obstante, no supere nunca la duración de 10 minutos especificada
para el funcionamiento corto.
5) Vuelva a colocar el recipiente para mezclar en el soporte de la
mezcladora .
6) Presione el liberador del retenedor de la mezcladora y em-
puje el retenedor de la mezcladora nuevamente hacia abajo.
7) Coloque el mango - en la mezcladora de manera que haga
clic y se inserte firmemente en su lugar.
►Puede usar la mezcladora manual sin el soporte de la mezclado-
ra . Recomendamos usar la mezcladora manual sin el soporte
de la mezcladora especialmente para pequeñas cantidades
de líquido. De lo contrario, la mezcladora podría no alcanzar
todo el líquido y este podría no mezclarse adecuadamente.
8) Presiona la tapa dentro de los rieles del soporte de la mezcla-
dora de manera que quede apoyada firmemente en su lugar.
9) Inserte la clavija en una toma de corriente.
IB_333931_SHSM250A1_LB9.indb 30 08.04.20 08:55

US-ES │ 31 ■
SHMS 250 A1
10) Para comenzar a operar el electrodoméstico, cambie el interruptor
de velocidad al ajuste de velocidad deseado. Puede seleccionar
entre 5 ajustes de velocidad y también usar el botón turbo /
(consulte la sección "Niveles de velocidad").
►Si desea agregar ingredientes durante el mezclado, abra la
abertura de llenado en la tapa y agregue los ingredientes.
¡Cierre la abertura de llenado posteriormente para evitar que
los ingredientes salpiquen!
►Si los ingredientes se pegan en el borde del recipiente para mez-
clar y los ganchos de amasar 0 o los batidores . no pueden
alcanzarlos, apague la mezcladora manual.
Quite la tapa . Use el raspador de masa 6 para empujar los
ingredientes adheridos hacia la parte central del recipiente de
mezclado . Vuelva a colocar la tapa . Encienda nuevamente
la mezcladora manual.
11) Para remover el contenido del recipiente, apague la mezcladora
manual. Haga la tapa hacia un lado.
12) Presione el liberador del retenedor de la mezcladora ,
levante el retenedor de la mezcladora y retire el recipiente de
mezclado del soporte de la mezcladora . Ahora puede
remover el contenido del recipiente.
►Por razones de seguridad, los batidores . y los ganchos de
amasar 0 solo pueden liberarse si el interruptor de velocidad
está en la posición “0”.
►Si desea retirar los batidores . o los ganchos de amasar 0,
primero debe retirar el mango -: Para hacer esto, presione el
botón de liberación de la mezcladora manual y retire el
mango -. Después presione el botón de liberación de la
herramienta 3 para soltar los batidores . o los ganchos de
amasar 0.
IB_333931_SHSM250A1_LB9.indb 31 08.04.20 08:55

■ 32 │ US-ES SHMS 250 A1
Preparación de puré
► No use la batidora ! durante más de 1 minuto cada vez. Des-
pués de un minuto de uso, permita que el electrodoméstico se
enfríe completamente.
► Nunca use la batidora ! para alimentos duros como granos de
café, cubos de hielo, azúcar, cereales, chocolate, verduras crudas
o duras, etc. Esto podría causar daños serios al equipo.
► No use la batidora ! para preparar puré de comida hirviendo
(por ejemplo, sopas). Retire la olla de la placa caliente antes de
preparar puré.
1) Use la batidora ! para preparar puré de alimentos.
2) Para abrir el seguro de la base de la batidora , empújelo ha-
cia un lado y sosténgalo firmemente.
►La batidora ! solo puede usarse si los batidores . o los gan-
chos de amasar 0 no están instalados.
3) Empuje la batidora ! dentro de la base de la batidora y
presione con firmeza. La batidora ! debe hacer clic cuando se
inserte en su lugar.
4) Para evitar derrames, el recipiente que se use para batir solo debe
llenarse aproximadamente a 2/3 de su capacidad. Seleccione un
recipiente suficientemente grande.
►Asegure que haya una cantidad suficiente de líquido en el reci-
piente de puré. Para asegurar que los ingredientes se mezclen
adecuadamente, el alimento deberá cubrir al menos la parte
inferior de la batidora !.
►No encienda la mezcladora manual hasta que la batidora ! se
haya introducido en los ingredientes.
IB_333931_SHSM250A1_LB9.indb 32 08.04.20 08:55

US-ES │ 33 ■
SHMS 250 A1
5) Inserte la clavija en una toma de corriente.
6) Presione el botón turbo / . Mantenga el botón presionado
durante todo el procedimiento. El electrodoméstico se detiene
cuando se suelta este botón.
7) Cuando termine de trabajar con la batidora !, suelte el botón
turbo / y desconecte la clavija de la toma de corriente.
8) Para retirar la batidora ! de la base de la batidora , presio-
ne el botón de liberación de la batidora en ambos lados
del mango - al mismo tiempo. La batidora ! se ha liberado
ahora de la base de la batidora .
9) Retire la batidora ! con un movimiento rápido de la base de la
batidora .
►Si la batidora ! aún no puede retirarse de la base de la ba-
tidora , abra un poco el seguro. Entonces puede retirar la
batidora !.
Limpieza
► ¡Antes de limpiar el dispositivo, desconecte la clavija de la toma
de corriente! ¡Existe el riesgo de descarga eléctrica!
► ¡Nunca sumerja el mango - en agua u otros líquidos!
► ¡Tenga cuidado cuando limpie la batidora !! ¡El aspa es suma-
mente filosa!
► Nunca sumerja la batidora ! completamente en agua. Limpie la
parte inferior con el aspa solamente bajo el chorro del agua. No
permita que ingrese agua en la batidora !. De lo contrario, el
equipo podría dañarse irreparablemente.
IB_333931_SHSM250A1_LB9.indb 33 08.04.20 08:55

■ 34 │ US-ES SHMS 250 A1
Los batidores ., los ganchos de amasar 0, el recipiente
para mezclar , la tapa y el raspado de masa 6
pueden limpiarse también en la máquina lavaplatos. Si es
posible, coloque todo en la bandeja superior de la máquina
lavaplatos.
■ Limpie el mango - que contiene el motor solamente con una tela
humedecida y, si es necesario, agregue un poco de detergente
moderado.
■ Limpie el soporte de la mezcladora solamente con una tela
humedecida y, si es necesario, agregue un poco de detergente
moderado.
■ Los batidores . y los ganchos de amasar 0 pueden limpiarse
bajo el chorro del agua o en agua tibia con detergente. Después
de limpiar, seque todas las partes completamente. Recomendamos
limpiar los accesorios inmediatamente después de usarlos. Esto
remueve los residuos de alimentos y reduce el riesgo de contamina-
ción bacteriana.
■ Limpie el recipiente para mezclar , la tapa y el raspador de
masa 6 en agua tibia con una pequeña cantidad de detergente
para trastes.
■ Limpie la parte inferior de la batidora ! en agua tibia con un
poco de detergente o bajo el chorro del agua. Limpie la parte
superior con una tela humedecida. Si es necesario, agregue un
poco de detergente moderado a la tela. Posteriormente, frote con
un paño humedecido solo con agua para asegurarse de que no
queden residuos de detergente en el electrodoméstico.
Almacenamiento
■ Guarde el electrodoméstico limpio en un lugar limpio, libre de
polvo y seco.
IB_333931_SHSM250A1_LB9.indb 34 08.04.20 08:55

US-ES │ 35 ■
SHMS 250 A1
Eliminación
Eliminación del dispositivo
Los dispositivos eléctricos no deben ser desechados como parte
de la basura doméstica normal. Si ya no puede usar su dispositivo
eléctrico, elimínelo de conformidad con las disposiciones legales
aplicables en su estado. Esto asegura que los dispositivos eléctricos
usados sean reciclados y la contaminación ambiental se mantenga
a un nivel mínimo. Puede encontrar más información sobre la elimi-
nación de desechos en Internet en www.epa.gov.
Eliminación del empaque
Observe las marcas en los diferentes materiales de empa-
que y sepárelos según sea conveniente. Los materiales de
empaque están marcados con abreviaturas (a) y números
(b) con los siguientes significados:
1–7: Plásticos,
20–22: Papel y cartón,
80–98: Materiales compuestos.
Los materiales de empaque están hechos de materiales
que no dañan el medio ambiente y que puede desechar
en su centro de reciclaje local.
IB_333931_SHSM250A1_LB9.indb 35 08.04.20 08:55

■ 36 │ US-ES SHMS 250 A1
Garantía limitada de 3 años
¿Lo que cubre la presente garantía?
La garantía incluye:
▯ Daños, quebraduras o incapacidad para funcionar debido a
defectos.
▯ Daños que no hayan sido causados por el desgaste propio del uso
o por no seguir las instrucciones de seguridad y mantención inclui-
das en el manual para el usuario.
¿Lo que no cubre esta garantía?
La garantía no cubre daños causados por:
▯ El desgaste propio del uso del producto, incluidas las partes frági-
les (como interruptores, piezas de vidrio, etc.).
▯ Uso o transporte no indicado del producto.
▯ Desatención a las instrucciones de seguridad y mantención.
▯ Accidentes o causas de fuerza mayor (e.g. relámpagos, incendio,
inundación, etc.).
▯ Manipulación mal intencionada del producto (retirar la cubierta,
tornillos, etc.).
La presente garantía tampoco cubre daños indirectos o emergentes.
Sin embargo algunos estados no permiten la exclusión o limitación de
daños indirectos o emergentes, por lo que dicha exclusión o limita-
ción pudiera no aplicarse en su caso.
¿Período de cobertura y resolución de la garantía?
La garantía es válida por 3 años a partir de la fecha de compra. La
empresa, según lo estime conveniente, devolverá el dinero o repon-
drá el producto.
¿La empresa no?
▯ Dará inicio a un nuevo período de garantía al hacerse el cambio del
producto.
▯ Reparará el producto.
IB_333931_SHSM250A1_LB9.indb 36 08.04.20 08:55

US-ES │ 37 ■
SHMS 250 A1
¿Cómo se tramita la garantía?
Recomendamos que primero usted:
▯ Llame al Servicio de atención al cliente al 1 (844) 543-5872.
▯ Visite el Portal de atención al cliente en
www.lidl.com/contact-us
▯ Visite una de nuestras tiendas LIDL en caso de cualquier inquietud.
A fin de acelerar el trámite de la garantía, tenga a bien contar con lo
siguiente:
▯ Recibo de venta original que incluya la fecha de compra.
▯ Producto y manual en su empaque original.
▯ Descripción del problema.
¿Qué debe hacer usted para mantener la garantía
vigente?
▯ Guardar el recibo original.
▯ Seguir todas las instrucciones para el uso del producto.
▯ No realizar ninguna reparación ni alteración al producto.
¿De qué manera influyen las leyes estatales con esta
garantía?
La presente garantía le otorga derechos legales específicos, y pudie-
ra usted contar con otros derechos los cuales varían de un estado a
otro. Todas las garantías implícitas se encuentran limitadas
a la duración y términos de la presente garantía. Algunos estados no
permiten limitaciones al período de tiempo y términos de la garantía
implícita, por lo que dichas limitaciones pudieran no aplicarse en su
caso.
Importador
LIDL US LLC.
ARLINGTON
VA 22202
IB_333931_SHSM250A1_LB9.indb 37 08.04.20 08:55

■ 38 │ US-ES SHMS 250 A1
Recetas
Panecillo de levadura trenzado
▯ 17.6 oz (500 g) de harina
▯ 2.1 oz (60 g) de mantequilla
▯ 2.1 oz (60 g) de azúcar
▯ 0.2 oz (7 g) de sal
▯ 1.5 oz (42 g) de levadura (1 paquete de levadura fresca)
▯ 6.8fl oz (200ml) de leche
▯ 1 huevo
▯ 1 yema de huevo
▯ Una poca de azúcar al gusto
1) Coloque la levadura en leche tibia con azúcar.
2) Una vez que la levadura se haya elevado un poco, agregue to-
dos los ingredientes al recipiente para mezclar .
3) Bata los ingredientes profusamente con los ganchos de amasar 0.
4) Permita que la masa repose durante aproximadamente 20 minutos.
5) Ahora forme el panecillo trenzado y permita que la masa se eleve
durante otros 30 minutos.
6) Cepille el panecillo con un poco de yema de huevo.
►Si desea, puede esparcir un poco de azúcar sobre el panecillo.
7) Precaliente el horno a alrededor de 400 °F (200 °C) (convección)
y hornee el pan durante aproximadamente 25 minutos hasta que
adquiera un tostado dorado.
IB_333931_SHSM250A1_LB9.indb 38 08.04.20 08:55

US-ES │ 39 ■
SHMS 250 A1
Crema de chocolate-amaretto
▯ 16.9 fl oz (500 ml) de crema
▯ 16.9 fl oz (500 ml) de mascarpone
▯ 3.5 oz (100 g) de crema de nuez nogada
▯ 5 cucharadas de amaretto
▯ 1–2 cucharadas de miel
1) Agregue la crema y el mascarpone al recipiente para mezclar
y mezcle con los batidores ..
2) Agregue el amaretto, la miel y la crema de nuez nogada un poco
cada vez y mezcle todo completamente.
3) Vierta la crema en recipientes para postre y enfríe antes de comer.
Crema de chocolate
▯ 10.6 oz (300 g) de crema
▯ 7 oz (200 g) de chocolate solo
1) Caliente la crema.
2) Desmorone el chocolate y derrita en la crema.
3) Coloque la mezcla de chocolate en el refrigerador y permita que
se enfríe hasta endurecer.
4) Una vez que la mezcla se haya enfriado y endurecido, revuélvala
con los batidores . hasta que se haga cremosa.
►También puede usar esta crema de chocolate como relleno para
otra repostería.
IB_333931_SHSM250A1_LB9.indb 39 08.04.20 08:55

■ 40 │ US-ES SHMS 250 A1
Aioli
▯ 17.6 oz (500 g) de mayonesa
▯ 1 copa de crema agria
▯ 1.7 oz (50 g) de ajo
▯ 2 cucharaditas de mostaza (mediana)
▯ 1 paquete de hierbas mezcladas (congeladas)
▯ 1 pizca de azúcar
▯ ½ cucharadita de sal
▯ ½ cucharadita de pimienta
1) Pele el ajo y tritúrelo.
2) Agregue la mayonesa, la crema agria y el ajo al recipiente para
mezclar y mezcle completamente con los batidores ..
3) Agregue gradualmente la mostaza, las hierbas, el azúcar, la pi-
mienta y la sal, y mezcle todo completamente.
4) Finalmente, condimente al gusto.
Vinagreta de hierbas
▯ 3–4 ramitas de perejil de hoja plana
▯ 3–4 ramitas de albahaca
▯ 1 limón
▯ 1 cucharadita de mostaza (mediana)
▯ 1 diente de ajo
▯ Sal, pimienta
▯ 3.4 fl oz (100ml) de aceite de oliva
▯ 1 pizca de azúcar (opcional)
1) Agregue las hojas de las hierbas, el jugo de limón, la mostaza, el
ajo, la sal y la pimienta en un recipiente para mezclar de lados
altos.
2) Mezcle todo con la batidora ! y agregue el aceite lentamente
hasta que la salsa quede cremosa.
3) Sazone la vinagreta y agregue un poco de azúcar si desea.
IB_333931_SHSM250A1_LB9.indb 40 08.04.20 08:55

IAN 333931_2001
LIDL US LLC.
ARLINGTON
VA 22202
Made in /Hecho en: China
Last Information Update · Estado de las informaciones:
03 / 2020 · Ident.-No.: SHMS250A1-032020-1
9
CV_333931_SHMS250A1_LB9.indd 1-3 15.04.20 16:18
-
 1
1
-
 2
2
-
 3
3
-
 4
4
-
 5
5
-
 6
6
-
 7
7
-
 8
8
-
 9
9
-
 10
10
-
 11
11
-
 12
12
-
 13
13
-
 14
14
-
 15
15
-
 16
16
-
 17
17
-
 18
18
-
 19
19
-
 20
20
-
 21
21
-
 22
22
-
 23
23
-
 24
24
-
 25
25
-
 26
26
-
 27
27
-
 28
28
-
 29
29
-
 30
30
-
 31
31
-
 32
32
-
 33
33
-
 34
34
-
 35
35
-
 36
36
-
 37
37
-
 38
38
-
 39
39
-
 40
40
-
 41
41
-
 42
42
-
 43
43
-
 44
44


Silvercrest 333931 El manual del propietario
- Categoría
- Pequeños electrodomésticos de cocina
- Tipo
- El manual del propietario
En otros idiomas
- English: Silvercrest 333931 Owner's manual
Documentos relacionados
-
Silvercrest 288046 El manual del propietario
-
Silvercrest SHMS 300 C2 Operating Instructions Manual
-
-
-
Silvercrest 90843 Instrucciones de operación
-
-
-
-
Silvercrest SKMP 1300 B3 Operating Instructions Manual
-
Otros documentos
-
Tefal HT3105MX Manual de usuario
-
Ambiano GT-SF-KMR-01 Manual de usuario
-
UFESA BV4635 Operating Instructions Manual
-
Bosch MUM 6N11 UC Manual de usuario
-
-
-
Bifinett KH 1132 Operating Instructions Manual
-
KitchenAid KHM7210OB Guía del usuario