Omron Healthcare HEM-7361T-EBK Manual de usuario
- Categoría
- Unidades de presión arterial
- Tipo
- Manual de usuario

Instruction Manual
1
EN
FR
DE
IT
ES
NL
RU
TR
AR
Symbols
Automatic Upper Arm Blood Pressure Monitor
M7 Intelli IT (HEM-7361T-EBK)
X7 Smart (HEM-7361T-ESL)
Read Instruction manual and before use.
FR
Lire le mode d’emploi et avant l’utilisation.
DE
Lesen Sie vor der Verwendung Gebrauchsanweisung und .
IT
Leggere il manuale di istruzioni e prima dell’uso.
ES
Lea el manual de instrucciones y antes del uso.
NL
Lees gebruiksaanwijzing en voor gebruik.
RU
.
TR
Kullanmadan önce, kullanım kılavuzu ve 'yi okuyun.
AR
Symboles/ Symbole/ Simboli/ Símbolos/
Symbolen/ / Semboller/

EN1
1. Introduction
Thank you for purchasing the OMRON Automatic Upper Arm Blood Pressure
Monitor. This blood pressure monitor uses the oscillometric method of blood
pressure measurement. This means this monitor detects your blood movement
through your brachial artery and converts the movements into a digital reading.
1.1 Safety Instructions
This instruction manual provides you with important information about the
OMRON Automatic Upper Arm Blood Pressure Monitor. To ensure the safe
and proper use of this monitor, READ and UNDERSTAND all of the safety and
operating instructions. If you do not understand these instructions or have
any questions, contact your OMRON retail outlet or distributor before
attempting to use this monitor. For specific information about your own
blood pressure, consult with your physician.
1.2 Intended Use
The device is a digital monitor intended for use in measuring blood pressure
and pulse rate in adult patient population. The device detects the appearance
of irregular heartbeats during measurement and gives a warning signal with
readings. It is mainly designed for general household use.
The device can detect an irregular pulse suggestive of Atrial Fibrillation
(Afib).
Please note that the device is not intended to diagnose Afib. A diagnosis of Afib
can only be confirmed by Electrocardiogram (ECG). If the Afib symbol appears,
consult your physician.
1.3 Receiving and Inspection
Remove this monitor and other components from the packaging and inspect
for damage. If this monitor or any other components is damaged, DO NOT USE
and consult with your OMRON retail outlet or distributor.
2. Important Safety Information
Read the Important Safety Information in this instruction manual before using
this monitor. Follow this instruction manual thoroughly for your safety.
Keep for future reference. For specific information about your own blood
pressure, CONSULT WITH YOUR PHYSICIAN.
2.1 Warning
Indicates a potentially hazardous situation
which, if not avoided, could result in death or
serious injury.
• DO NOT use this monitor on infants, toddlers, children or persons who
cannot express themselves.
• DO NOT adjust medication based on readings from this blood pressure
monitor. Take medication as prescribed by your physician. ONLY a physician
is qualified to diagnose and treat high blood pressure and Afib.
• DO NOT use this monitor on an injured arm or an arm under medical treatment.
• DO NOT apply the arm cuff on your arm while on an intravenous drip or
blood transfusion.
• DO NOT use this monitor in areas containing high frequency (HF) surgical
equipment, magnetic resonance imaging (MRI) equipment, computerized
tomography (CT) scanners. This may result in incorrect operation of the
monitor and/or cause an inaccurate reading.
• DO NOT use this monitor in oxygen rich environments or near flammable gas.
• Consult with your physician before using this monitor if you have common
arrhythmias such as atrial or ventricular premature beats or atrial fibrillation;
arterial sclerosis; poor perfusion; diabetes; pregnancy; pre-eclampsia or renal
disease. NOTE that any of these conditions in addition to patient motion,
trembling, or shivering may affect the measurement reading.
• NEVER diagnose or treat yourself based on your readings. ALWAYS consult
with your physician.
• To help avoid strangulation, keep the air tube and AC adapter cable away
from infants, toddlers and children.
• This product contains small parts that may cause a choking hazard if
swallowed by infants, toddlers and children.
Data Transmission
• This product emits radio frequencies (RF) in the 2.4 GHz band. DO NOT use
this product in locations where RF is restricted, such as on an aircraft or in
hospitals. Turn off the Bluetooth® feature in this monitor, remove batteries
and/or unplug the AC adapter when in RF restricted areas.
AC Adapter (optional accessory) Handling and Usage
• DO NOT use the AC adapter if this monitor or the AC adapter cable is
damaged. If this monitor or the cable is damaged, turn off the power and
unplug the AC adapter immediately.
• Plug the AC adapter into the appropriate voltage outlet. DO NOT use in a
multi-outlet plug.
• NEVER plug in or unplug the AC adapter from the electric outlet with wet hands.
• DO NOT disassemble or attempt to repair the AC adapter.
Battery Handling and Usage
• Keep batteries out of the reach of infants, toddlers and children.
2.2 Caution
Indicates a potentially hazardous situation which, if
not avoided,may result in minor or moderate injury
to the user or patient, or cause damage to the
equipment or other property.
• Stop using this monitor and consult with your physician if you experience
skin irritation or discomfort.
• Consult with your physician before using this monitor on an arm where
intravascular access or therapy, or an arteriovenous (A-V) shunt, is present
because of temporary interference to blood flow and could result in injury.
• Consult with your physician before using this monitor if you have had a mastectomy.
EN

EN2
EN
• Consult with your physician before using this monitor if you have severe
blood flow problems or blood disorders as cuff inflation can cause bruising.
• DO NOT take measurements more often than necessary because bruising,
due to blood flow interference, may occur.
• ONLY inflate the arm cuff when it is applied on your upper arm.
• Remove the arm cuff if it does not start deflating during a measurement.
• DO NOT use this monitor for any purpose other than measuring blood pressure
and/or detecting the possibility of Afib.
• During measurement, make sure that no mobile device or any other
electrical device that emit electromagnetic fields is within 30 cm of this
monitor. This may result in incorrect operation of the monitor and/or cause
an inaccurate reading.
• DO NOT disassemble or attempt to repair this monitor or other components.
This may cause an inaccurate reading.
• DO NOT use in a location where there is moisture or a risk of water splashing
this monitor. This may damage this monitor.
• DO NOT use this monitor in a moving vehicle such as in a car or on an aircraft.
• DO NOT drop or subject this monitor to strong shocks or vibrations.
• DO NOT use this monitor in places with high or low humidity or high or low
temperatures. Refer to section 6.
• During measurement, observe the arm to ensure that the monitor is not
causing prolonged impairment to blood circulation.
• DO NOT use this monitor in high-use environments such as medical clinics or
physician offices.
• DO NOT use this monitor with other medical electrical (ME) equipment
simultaneously. This may result in incorrect operation of the monitor and/or
cause an inaccurate reading.
• Avoid bathing, drinking alcohol or caffeine, smoking, exercising and eating
for at least 30 minutes before taking a measurement.
• Rest for at least 5 minutes before taking a measurement.
• Remove tight-fitting, thick clothing and any accessories from your arm while
taking a measurement.
• Remain still and DO NOT talk while taking a measurement.
• ONLY use the arm cuff on persons whose arm circumference is within the
specified range of the cuff.
• Ensure that this monitor has acclimated to room temperature before taking
a measurement. Taking a measurement after an extreme temperature
change could lead to an inaccurate reading. OMRON recommends waiting
for approximately 2 hours for the monitor to warm up or cool down when
the monitor is used in an environment within the temperature specified
as operating conditions after it is stored either at the maximum or at the
minimum storage temperature. For additional information on operating and
storage / transport temperature, refer to section 6.
• DO NOT use this monitor after the durable period has ended. Refer to section 6.
• DO NOT crease the arm cuff or the air tube excessively.
• DO NOT fold or kink the air tube while taking a measurement. This may cause
an injury by interrupting blood flow.
• To unplug the air plug, pull on the plastic air plug at the base of the tube, not
the tube itself.
• ONLY use the AC adapter, arm cuff, batteries and accessories specified for
this monitor. Use of unsupported AC adapters, arm cuffs and batteries may
damage and/or may be hazardous to this monitor.
• ONLY use the approved arm cuff for this monitor. Use of other arm cuffs may
result in incorrect readings.
• Inflating to a higher pressure than necessary may result in bruising of the arm
where the cuff is applied. NOTE: refer to “If your systolic pressure is more than
210mmHg” in section 13 of instruction manual
for additional information.
• Read and follow the “Correct Disposal of This Product” in section 7 when
disposing of the device and any used accessories or optional parts.
Data Transmission
• DO NOT replace batteries or unplug the AC adapter while your readings are
being transferred to your smart device. This may result in incorrect operation
of this monitor and failure to transfer your blood pressure data.
AC Adapter (optional accessory) Handling and Usage
• Fully insert the AC adapter into the outlet.
• When unplugging the AC adapter from the outlet, be sure to safely pull from
the AC adapter. DO NOT pull from the AC adapter cable.
• When handling the AC adapter cable:
Do not damage it. / Do not break it. / Do not tamper with it. / DO NOT pinch
it. / Do not forcibly bend or pull it. / Do not twist it. / DO NOT use it if it is
gathered in a bundle. / DO NOT place it under heavy objects.
• Wipe any dust off of the AC adapter.
• Unplug the AC adapter when not in use.
• Unplug the AC adapter before cleaning this monitor.
Battery Handling and Usage
• DO NOT insert batteries with their polarities incorrectly aligned.
• ONLY use 4 “AA” alkaline or manganese batteries with this monitor. DO NOT
use other types of batteries. DO NOT use new and used batteries together.
DO NOT use different brands of batteries together.
• Remove batteries if this monitor will not be used for a long period of time.
• If battery fluid should get in your eyes, immediately rinse with plenty of clean
water. Consult with your physician immediately.

EN3
• If battery fluid should get on your skin, wash your skin immediately with
plenty of clean, lukewarm water. If irritation, injury or pain persists, consult
with your physician.
• DO NOT use batteries after their expiration date.
• Periodically check batteries to ensure they are in good working condition.
2.3 General Precautions
• When you take a measurement on the right arm, the air tube should be at
the side of your elbow. Be careful not to rest your arm on the air tube.
• Blood pressure may differ between the right and left arm, and may result in a
different measurement value. Always use the same arm for measurements. If
the values between both arms differ substantially, check with your physician
on which arm to use for your measurements.
Battery Handling and Usage
• Disposal of used batteries should be carried out in accordance with local
regulations.

EN4
EN
•
3. Error Messages and Troubleshooting
If any of the below problems occur during measurement, check to make sure that no other electrical device is within 30 cm. If the problem persists, please refer to
the table below.
Display/Problem Possible Cause Solution
appears or the arm
cuff does not inflate.
The [START/STOP] button was pressed
while the arm cuff is not applied.
Press the [START/STOP] button again to turn the monitor off.
After inserting the air plug securely and applying the arm cuff
correctly, press the [START/STOP] button.
Air plug is not completely plugged
into the monitor.
Insert the air plug securely.
The arm cuff is not applied correctly. Apply the arm cuff correctly, then take another measurement.
Refer to section 7 of instruction manual
.
Air is leaking from the arm cuff. Replace the arm cuff to the new one. Refer to section 14 of
instruction manual
.
appears or a
measurement cannot
be completed after
the arm cuff inflates.
You move or talk during a measurement
and the arm cuff does not inflate
sufficiently.
Remain still and do not talk during a measurement. If “E2”
appears repeatedly, inflate the arm cuff manually until the
systolic pressure is 30 to 40mmHg above your previous
readings. Refer to section 13 of instruction manual
.
Due to the systolic pressure is above
210mmHg, a measurement cannot be
taken.
appears
The arm cuff is inflated exceeding the
maximum allowable pressure.
Do not touch the arm cuff and/or bend the air tube while
taking a measurement. If inflating the arm cuff manually, refer
to section 13 of instruction manual
.
appears
You move or talk during a measurement.
Vibrations disrupt a measurement.
Remain still and do not talk during a measurement.
appears
The pulse rate is not detected correctly. Apply the arm cuff correctly, then take another measurement.
Refer to section 7 of instruction manual
. Remain still and
sit correctly during a measurement.
If the “
” symbol continues to appear, we recommend you
to consult with your physician.
/ /
appears
does not flash during
a measurement

EN5
Display/Problem Possible Cause Solution
appears
Blood pressure measurements were
not taken correctly in an Afib mode
measurement.
Apply the arm cuff correctly, then take another measurement.
Refer to section 7 of instruction manual
. Remain still and
sit correctly during a measurement. Refer to section 8 of
instruction manual
.
appears
The monitor has malfunctioned. Press the [START/STOP] button again. If “Er” still appears,
contact your OMRON retail outlet or distributor.
appears
The montior cannot connect to a smart
device or transmit data correctly.
Follow the instructions shown in the “OMRON connect” app. If
the “Err” symbol still appears after checking the app, contact
your OMRON retail outlet or distributor.
flashes
The monitor is waiting for pairing with
the smart device.
Refer to section 5 of instruction manual
for pairing your
monitor with your smart device, or press [START/STOP] button
to cancel pairing and turn your monitor off.
flashes
The monitor is ready to transfer your
readings to the smart device.
Open the “OMRON connect” app to transfer your readings.
flashes
More than 80 readings are not
transferred.
Pair or transfer your readings to the “OMRON connect” app
so you can keep them in memory in the app, and this error
symbol disappears.
The date and time is not set.
appears
100 readings are not transferred.
flashes
Batteries are low. Replacing all 4 batteries with new ones is recommended.
Refer to section 4 of instruction manual
.
appears or the
monitor is turned off
unexpectedly during
a measurement
Batteries are depleted. Immediately replace all 4 batteries with new ones. Refer to
section 4 of instruction manual
.
Nothing appears on the display
of the monitor.
Battery polarities are not properly
aligned.
Check the battery installation for proper placement. Refer to
section 4 of instruction manual
.
Readings appear too high or
too low.
Blood pressure varies constantly. Many factors including stress, time of day, and/or how you apply the arm
cuff, may affect your blood pressure. Review sections 2 of instruction manual
.
Any other communication
issue occurs.
Follow the instructions shown in the smart device, or visit the “Help” section in the “OMRON connect” app
for further help. If the problem still persists, contact your OMRON retail outlet or distributor.

EN6
EN
Display/Problem Possible Cause Solution
Any other problem occurs.
Press the [START/STOP] button to turn the monitor off, then press it again to take a measurement. If the
problem continues, remove all batteries and wait for 30 seconds. Then re-install batteries. If the problem
still persists, contact your OMRON retail outlet or distributor.
Troubleshooting for Afib indicator function:
What is different between the
Afib indicator function and
ECG?
The Afib indicator function and ECG use completely different technologies. An ECG measures the electrical
activity of the heart and can be used to diagnose Afib. The Afib indicator function detects irregular
heartbeat and can suggest the possibility of Afib with a sensitivity of 95.5% and specificity of 93.8%.
Refer
to section 11 for details.
If the “ ” symbol does not
appear, it means there is no
possibility of Afib?
Even if the “ ” symbol does not appear, there is still a possibility of Afib.
Should I consult with my
physician if the “
” symbol
appears?
We recommend you to consult with your physician because there is a possibility of Afib. However, the “
”
symbol may be displayed for other reasons, such as other heart arrhythmias.
What is different between
Afib indicator function and
irregular heart beat function?
The irregular heartbeat function detects irregularities in the pulse waves in one measurement. The Afib
indicator function suggests the possibility of Afib when blood pressure is measured 3 consecutive times.
What should I do if the “
”
symbol sometimes appears?
Afib does not always have symptoms. We recommend you to consult with and follow the directions of
your physician.
I have been diagnosed with
Afib by the physician, but the
“
” symbol does not appear.
Afib may not occur at the time of specific blood pressure measurements. We recommend you to consult
with your physician regularly.
Is the blood pressure reading
reliable when the “
”
symbol appears?
Afib or an irregular heartbeat can influence your blood pressure measurements and make it difficult to get
an accurate reading. Repeated measurements may be required to overcome variabilities.* In Afib mode,
the blood pressure measurement is taken 3 times, and the average is displayed. The monitor will indicate
an error message (E5/E6) if the influence of the irregular heartbeat is too severe to give a measurement
result. If this occurs repeatedly, we recommend that you consult with your physician.
* Prof. Roland Asmar et al. European Society of Hypertension Recommendations for Conventional, Ambulatory and Home Blood Pressure Measurement

EN7
4. Limited Warranty
Thank you for buying an OMRON product. This product is constructed of high
quality materials and great care has been taken in its manufacturing. It is
designed to give you every satisfaction, provided that it is properly operated
and maintained as described in the instruction manual.
This product is warranted by OMRON for a period of 3 years after the date of
purchase. The proper construction, workmanship and materials of this product
is warranted by OMRON. During this period of warranty OMRON will, without
charge for labour or parts, repair or replace the defect product or any defective
parts.
The warranty does not cover any of the following:
A. Transport costs and risks of transport.
B. Costs for repairs and / or defects resulting from repairs done by unauthorised
persons.
C. Periodic check-ups and maintenance.
D. Failure or wear of optional parts or other attachments other than the main
device itself, unless explicitly warranted above.
E. Costs arising due to non-acceptance of a claim (those will be charged for).
F. Damages of any kind including personal caused accidentally or from misuse.
G. Calibration service is not included within the warranty.
H. Optional parts have a one (1) year warranty from date of purchase. Optional
parts include, but are not limited to the following items: cuff and cuff tube.
Should warranty service be required please apply to the dealer whom the
product was purchased from or an authorised OMRON distributor. For the
address refer to the product packaging / literature or to your specialised
retailer. If you have difficulties in finding OMRON customer services, contact us
for information:
www.omron-healthcare.com
Repair or replacement under the warranty does not give rise to any extension
or renewal of the warranty period.
The warranty will be granted only if the complete product is returned together
with the original invoice / cash ticket issued to the consumer by the retailer.
5. Maintenance
5.1 Maintenance
To protect your monitor from damage, follow the directions below:
Changes or modifications not approved by the manufacturer will void the user
warranty.
Caution
DO NOT disassemble or attempt to repair this monitor or other components.
This may cause an inaccurate reading.
5.2 Storage
• Keep your monitor in the storage case when not in use.
1. Remove the arm cuff from the monitor.
Caution
To unplug the air plug, pull on the plastic air plug at the base of the tube, not
the tube itself.
2. Gently fold the air tube into the arm cuff. Note: Do not bend or crease the
air tube excessively.
3. Place your monitor and other components in the storage case.
• Store your monitor and other components in a clean, safe location.
• Do not store your monitor and other components:
• If your monitor and other components are wet.
• In locations exposed to extreme temperatures, humidity, direct sunlight,
dust or corrosive vapors such as bleach.
• In locations exposed to vibrations or shocks.
• To protect your monitor during storage, an optional LCD cover is available as
accessory. Refer to section 15 of Instruction Manual
.
5.3 Cleaning
• Do not use any abrasive or volatile cleaners.
• Use a soft dry cloth or a soft cloth moistened with mild (neutral) detergent to
clean your monitor and arm cuff, and then wipe them with a dry cloth.
• Do not wash or immerse your monitor and arm cuff or other components in
water.
• Do not use gasoline, thinners or similar solvents to clean your monitor and
arm cuff or other components.
5.4 Calibration and Service
• The accuracy of this blood pressure monitor has been carefully tested and is
designed for a long service life.
• It is generally recommended to have the unit inspected every two years to
ensure correct functioning and accuracy. Please consult your authorised
OMRON dealer or the OMRON Customer Service at the address given on the
packaging or attached literature.

EN8
EN
6. Specications
Product Category Electronic Sphygmomanometers
Product description Automatic Upper Arm Blood Pressure
Monitor
Model (Code) M7 Intelli IT (HEM-7361T-EBK) /
X7 Smart (HEM-7361T-ESL)
Display LCD digital display
Cuff pressure range 0 to 299mmHg
Blood pressure
measurement range
SYS: 60 to 260mmHg
DIA: 40 to 215mmHg
Pulse measurement range
40 to 180 beats / min.
Accuracy Pressure: ±3mmHg
Pulse: ±5% of display reading
Inflation Automatic by electric pump
Deflation Automatic pressure release valve
Measurement method Oscillometric method
Transmission method Bluetooth
®
Low Energy
Wireless communication Frequency range: 2.4GHz (2400 -
2483.5 MHz) / Modulation: GFSK
Effective radiated power: <20dBm
Operation mode Continuous operation
IP classification Monitor: IP20
Optional AC adapter: IP21
Rating DC6V 4.0W
Power source 4 “AA” batteries 1.5 V or optional
AC adapter (INPUT AC 100 - 240V
50/60Hz 0.12 - 0.065A)
Battery life Approximately 1000 measurements
(using new alkaline batteries)
The number of times may decrease when
using Afib mode because one Afib indication
consists of 3 regular measurements.
Durable period (Service
life)
Monitor: 5 years / Cuff: 5 years /
Optional AC adapter: 5 years
Operating conditions +10 to +40°C / 15 to 90% RH
(non-condensing) / 800 to 1060hPa
Storage / Transport
conditions
-20 to +60°C / 10 to 90% RH
(non-condensing)
Weight Monitor: approximately 460g
(notincluding batteries)
Arm cuff: approximately 163g
Dimensions
(approximately value)
Monitor: 191mm (W) × 85mm (H) ×
120mm (L) / Arm cuff:145mm ×
532mm (air tube: 750mm)
Cuff circumference
applicable to the monitor
220 to420 mm
Memory Stores up to 100 readings per user
Contents Monitor, arm cuff (HEM-FL31), 4 “AA”
batteries, Instruction Manual
and
, setup instructions, storage case
Protection against
electric shock
Internally powered ME equipment
(When using only batteries)
Class II ME equipment (Optional AC
adapter)
Applied part Type BF (arm cuff)
Note
• These specifications are subject to change without notice.
• This monitor is clinically investigated according to the requirements of
ISO81060-2:2013. In the clinical validation study, K5 was used on 85 subjects
for determination of diastolic blood pressure.
• This device has been validated for use on pregnant and pre-eclampsia patients
according to the Modified European Society of Hypertension Protocol*.
• This device has been validated for use on diabetic (TypeII) population**.

EN9
• IP classification is degrees of protection provided by enclosures in
accordance with IEC60529. This monitor and optional AC adapter are
protected against solid foreign objects of 12.5mm diameter and greater
such as a finger. The optional AC adapter is protected against vertically
falling water drops which may cause issues during a normal operation.
* Topouchian J et al. Vascular Health and Risk Management 2018:14 189–197
** Chahine M.N. et al. Medical Devices: Evidence and Research 2018:11 11–20
About a wireless communication interference
This product operates in an unlicensed ISM band at 2.4GHz. In the event
this product is used near other wireless devices such as microwave and
wireless LAN, which operate on the same frequency band as this product,
there is a possibility that interference may occur. If interference occurs, stop
the operation of the other devices or relocate this product away from other
wireless devices before attempting to use it.
7. Correct Disposal of This Product (Waste
Electrical & Electronic Equipment)
This marking shown on the product or its literature, indicates that
it should not be disposed of, with other household wastes at the
end of its working life.
To prevent possible harm to the environment or human health
from uncontrolled waste disposal, please separate this product
from other types of wastes and recycle it responsibly to promote
the sustainable reuse of material resources.
Household users should contact either the retailer where they purchased this
product, or their local government office, for details of where and how they can
return this item for environmentally safe recycling.
Business users should contact their supplier and check the terms and
conditions of the purchase contract. This product should not be mixed with
other commercial waste for disposal.
8. Important Information regarding
Electromagnetic Compatibility (EMC)
HEM-7361T-EBK/ESL conforms to the EN60601-1-2:2015 Electromagnetic
Compatibility (EMC) standard.
Further documentation in accordance with this EMC standard is available at
OMRON HEALTHCARE EUROPE at the address mentioned in this instruction
manual or at: www.omron-healthcare.com.
9. Guidance and Manufacturer’s Declaration
• This blood pressure monitor is designed according to the European Standard
EN1060, Non-invasive sphygmomanometers Part 1: General Requirements
and Part 3: Supplementary requirements for electromechanical blood
pressure measuring systems.
• Hereby, OMRON HEALTHCARE Co., Ltd., declares that the radio equipments
type HEM-7361T-EBK/ESL is in compliance with Directive 2014/53/EU.
• The full text of the EU declaration of conformity is available at the following
internet address: www.omron-healthcare.com
• This OMRON product is produced under the strict quality system of OMRON
HEALTHCARE Co., Ltd., Japan. The Core component for OMRON blood
pressure monitors, which is the Pressure Sensor, is produced in Japan.
• Please report to the manufacturer and the competent authority of the
Member State in which you are established about any serious incident that
has occurred in relation to this device.
10. How to Calculate Weekly Averages
Morning Weekly Average Calculation
This is the average for the measurements taken during the morning (4:00 - 9:59)
between Sunday and Saturday. The 2 or 3 readings taken within the first
10minute timeframe in the morning between 4:00 - 9:59 will be used to
calculate the morning average for each day.
Evening Weekly Average Calculation
This is the average for the measurements taken during the evening (19:00 - 1:59)
between Sunday and Saturday. The 2 or 3 readings taken within the last
10minute timeframe in the evening between 19:00 - 1:59 will be used to
calculate the evening average for each day.
Within 10 min.
Measurements
in the morning
Measurements
in the morning
Within 10 min.

EN10
EN
11. Useful Information
What is Blood Pressure?
Blood pressure is a measure of the force of blood flowing against the walls of
the arteries. Arterial blood pressure is constantly changing during the course of
the heart’s cycle.
The highest pressure in the cycle is called the Systolic Blood Pressure; the lowest
is the Diastolic Blood Pressure. Both pressures, the Systolic and Diastolic, are
necessary to enable a physician to evaluate the status of a patient’s blood pressure.
What is Arrhythmia?
Arrhythmia is a condition where the heartbeat rhythm is abnormal due to flaws in
the bio-electrical system that drives the heartbeat. Typical symptoms are skipped
heartbeats, premature contraction, an abnormally rapid (tachycardia) or slow
(bradycardia) pulse.
What is Afib?
Atrial fibrillation (also called AFib or AF) is a quivering or irregular heartbeat
(arrhythmia) that can lead to blood clots, stroke, heart failure and other heart-
related complications. During atrial fibrillation, the heart’s two upper chambers (the
atria) beat chaotically and irregularly — out of coordination with the two lower
chambers (the ventricles) of the heart. Episodes of atrial fibrillation can come and
go, or you may develop atrial fibrillation that doesn’t go away and may require
treatment.
Afib indicator function detects the possibility of Afib with an accuracy of 94.2%
(with sensitivity of 95.5% and specificity of 93.8%) as demonstrated in the study*
with Single-lead ECG as reference measurement.
*M. Ishizawa, T. Noma, T. Minamino et al., Multiple measurements with
automated blood pressure monitor can detect atrial fibrillation with high
sensitivity and specificity in general cardiac patients, ESC Congress 2018

SD1
Symbols Description
FR
Description des symboles
NL
Beschrijving van symbolen
DE
Beschreibung der Symbole
RU
IT
Descrizione dei simboli
TR
Simgelerin Açıklaması
ES
Descripción de los símbolos
AR
Applied part - Type BF Degree of protection against
electric shock (leakage current)
FR
Partie appliquée - Type BF
Degré de protection contre
les chocs électriques
(courant de fuite)
DE
Anwendungsteil– Typ BF
Schutz vor Stromschlägen
(Ableitstrom)
IT
Parti applicate - Tipo BF
Livello di protezione contro
le folgorazioni (corrente di
dispersione)
ES
Partes en contacto: Tipo
BF Grado de protección
contra descargas eléctricas
(corriente de fuga)
NL
Toegepast
onderdeel - Type BF-
beschermingsgraad tegen
elektrische schokken
(lekstroom)
RU
- BF
( )
TR
Uygulanan parça - Tip BF
Elektrik çarpmasına karşı
koruma derecesi (kaçak
akım)
Class II equipment. Protection against electric shock
FR
Équipement de classe II.
Protection contre les chocs
électriques
DE
Gerät der Klasse II. Schutz
vor Stromschlägen
IT
Apparecchiatura di
ClasseII. Protezione contro
le folgorazioni
ES
Equipo de Clase II.
Protección contra
descargas eléctricas
NL
Apparatuur van KlasseII.
Bescherming tegen
elektrische schokken
RU
II.
TR
Sınıf II ekpman. Elektrk
çarpmasına karşı koruma
IP XX
Ingress protection degree provided by IEC 60529
FR
Degré de protection selon
CEI60529
DE
Grad des Eindringschutzes
gemäß IEC60529
IT
Livello di protezione IP in
base a IEC 60529
ES
Grado de protección según
la norma internacional
IEC60529
NL
Beschermingsklasse
volgens IEC60529
RU
,
,
IEC 60529
TR
Su grmesne karşı koruma
dereces IEC 60529
tarafından verlmştr
CE Marking
FR
Marquage CE
DE
CE-Kennzeichnung
IT
Contrassegno CE
ES
Marcado CE
NL
CE-merkteken
RU
TR
CE İşaret
Serial number
FR
Numéro de série
DE
Seriennummer
IT
Numero di serie
ES
Número de serie
NL
Serienummer
RU
TR
Ser numarası
LOT number
FR
Numéro de LOT
DE
LOT-Nummer
IT
Numero di lotto
ES
Número de lote
NL
Partijnummer
RU
TR
Parti numarası
Medical device
FR
Dispositif médical
DE
Medizinprodukt
IT
Dispositivo medico
ES
Producto sanitario
NL
Medisch apparaat
RU
TR
Tıbbi cihaz
BF
AR
AR
AR
)CE
AR
AR
AR
II
AR

SD2
Indicates the manufacturer’s catalogue number
FR
Indique le numéro de
catalogue du fabricant
DE
Angabe der Hersteller-
Katalognummer
IT
Indica il numero di
catalogo del produttore
ES
Indica el número de
catálogo del fabricante
NL
Geeft het
catalogusnummer van de
fabrikant aan
RU
TR
Üretcnn katalog
numarasını belrtr
Temperature limitation
FR
Limitation de température
DE
Temperaturbegrenzung
IT
Limite di temperatura
ES
Limitación de la
temperatura
NL
Temperatuurbegrenzing
RU
TR
Sıcaklık sınırlaması
Humidity limitation
FR
Limitation d’humidité
DE
Luftfeuchtigkeits-
begrenzung
IT
Limite di umidità
ES
Limitación de la humedad
NL
Vochtigheidsbegrenzing
RU
TR
Nem sınırlaması
Atmospheric pressure limitation
FR
Limitation de pression
atmosphérique
DE
Luftdruckbegrenzung
IT
Limite di pressione
atmosferica
ES
Limitación de la presión
atmosférica
NL
Luchtdrukbegrenzing
RU
TR
Atmosferk basınç
sınırlaması
Indication of connector polarity
FR
Indication de la polarité
des connecteurs
DE
Anzeige der
Steckerpolarität
IT
Indicazione della polarità
dei connettori
ES
Indicación de la polaridad
del conector
NL
Indicatie van polariteit van
aansluiting
RU
TR
Bağlantı polarite
göstergesi
For indoor use only
FR
Pour un usage à l’intérieur
uniquement
DE
Nur für die Nutzung in
Innenbereichen
IT
Solo per uso in interni
ES
Para uso solo en interiores
NL
Alleen voor gebruik
binnenshuis
RU
TR
Sadece ç mekanda
kullanım çn
OMRON’s trademarked technology for blood
pressure measurement
FR
Technologie brevetée
OMRON pour la mesure de
la pression artérielle
DE
Markenrechtlich
geschützte Technologie
von OMRON zur
Blutdruckmessung
IT
Tecnologia brevettata
OMRON per la misurazione
della pressione arteriosa
ES
La tecnología de OMRON
para medir la presión
arterial
NL
Technologie voor
bloeddrukmeting onder
handelsmerk van OMRON
RU
OMRON
TR
OMRON'un kan basıncı
ölçümü çn tcar markalı
teknolojsdr
AR
AR
AR
OMRON
AR
AR
AR
AR

SD3
Identifier of cuffs compatible for the device
FR
Identificateur des brassards
compatibles avec l’appareil
DE
Kennzeichnung der mit
dem Gerät kompatiblen
Manschetten
IT
Identifica i bracciali
compatibili con il
dispositivo
ES
Identificador para
manguitos compatibles
con el dispositivo
NL
Identificatie van
manchetten die
compatibel zijn met het
apparaat
RU
,
TR
Chaz le uyumlu
kollukların tanıtım şaret
Marker on the cuff to be positioned above the
artery
FR
Repère sur le brassard, à
positionner au-dessus de
l’artère
DE
Markierung auf der
Manschette, die oberhalb
der Arterie liegen muss
IT
Contrassegno sul bracciale
da posizionare al di sopra
dell’arteria
ES
La marca del manguito
debe colocarse sobre la
arteria
NL
Markering op de manchet
die boven de slagader
moet worden geplaatst
RU
TR
Kolluk üzerndek şaretn
konumu artern üzerne
gelmeldr
,
Manufacturer’s quality control mark
FR
Marque de contrôle de la
qualité du fabricant
DE
Qualitätskontrollzeichen
des Herstellers
IT
Contrassegno controllo
qualità del produttore
ES
Marca del control de
calidad del fabricante
NL
Symbool voor
kwaliteitscontrole van
fabrikant
RU
TR
Üretcnn kalte kontrol
şaret
Not made with natural rubber latex
FR
Ne contient pas de latex de
caoutchouc naturel
DE
Enthält kein Naturlatex
IT
Non contiene lattice di
gomma naturale
ES
No contiene látex de
caucho natural
NL
Bevat geen
natuurrubberlatex
RU
TR
Doğal kauçuk lateksten
üretlmemştr
Arm circumference
FR
Circonférence du bras
DE
Armumfang
IT
Circonferenza del braccio
ES
Perímetro de brazo
NL
Armomtrek
RU
TR
Kol çevres
Necessity for the user to consult this instruction manual
FR
L’utilisateur doit consulter
le mode d’emploi
DE
Der Benutzer muss diese
Gebrauchsanweisung
lesen
IT
L’utente deve consultare
il presente manuale di
istruzioni
ES
Es necesario que el usuario
consulte este manual de
instrucciones
NL
De gebruiker dient deze
gebruiksaanwijzing te
raadplegen
RU
TR
Kullanıcı, bu kullanım
kılavuzuna başvurmalıdır
AR
AR
AR
AR
AR
AR

SD4
Need for the user to follow this instruction manual
thoroughly for your safety.
FR
L’utilisateur doit suivre
attentivement ce mode
d’emploi pour votre
sécurité.
DE
Damit die Sicherheit
gewährleistet ist, muss
der Benutzer diese
Gebrauchsanweisung
sorgfältig befolgen.
IT
Per la propria sicurezza,
l’utente deve seguire
attentamente il presente
manuale di istruzioni.
ES
Es necesario que el usuario
siga rigurosamente este
manual de instrucciones
para su seguridad.
NL
Voor de eigen veiligheid
dient de gebruiker zich
zorgvuldig aan deze
gebruiksaanwijzing te
houden.
RU
.
TR
Güvenlk açısından
kullanıcının bu kullanım
kılavuzuna dkkatle
uyması gerekr.
Direct current
FR
Courant continu
DE
Gleichstrom
IT
Corrente diretta
ES
Corriente directa
NL
Gelijkstroom
RU
TR
Doğru akım
Alternating current
FR
Courant alternatif
DE
Wechselstrom
IT
Corrente alternata
ES
Corriente alterna
NL
Wisselstroom
RU
TR
Alternatf akım
Date of manufacture
FR
Date de fabrication
DE
Herstellungsdatum
IT
Data di fabbricazione
ES
Fecha de fabricación
NL
Productiedatum
RU
TR
Üretm tarh
Prohibited action
FR
Action interdite
DE
Verbotene Aktion
IT
Operazione proibita
ES
Acción prohibida
NL
Verboden handeling
RU
TR
Yasaklanmış eylem
AR
AR
AR
AR
AR

SD5
To indicate generally elevated, potentially hazardous, levels of non-ionizing radiation, or to indicate equipment or systems.
e.g. in the medical electrical area that include RF transmitters or that intentionally apply RF electromagnetic energy for
diagnosis or treatment.
FR
Pour indiquer des niveaux généralement élevés, potentiellement
dangereux, de rayonnement non ionisant, ou pour indiquer
l’équipement ou les systèmes, par exemple dans le domaine de
l’électricité médicale qui comprennent des émetteurs RF ou qui
utilisent intentionnellement l’énergie électromagnétique RF pour le
diagnostic ou le traitement.
DE
Als Hinweis auf allgemein erhöhte, potenziell gefährliche Stufen
nicht-ionisierender Strahlung oder als Hinweis auf Geräte oder
Systeme zum Beispiel im medizinisch-elektrischen Bereich, etwa HF-
Übertragungsgeräte, bzw. auf solche, die elektromagnetische HF-
Strahlung zur Diagnose oder Behandlung verwenden.
IT
Indica livelli generalmente elevati, potenzialmente pericolosi, di
radiazioni non ionizzanti oppure indica apparecchiature o sistemi
(ad esempio per le aree elettromedicali in cui sono presenti
trasmettitori RF o in cui viene intenzionalmente applicata energia
elettromagnetica a radiofrequenza per la diagnosi o il trattamento).
ES
Para indicar niveles de radiación no ionizante generalmente
elevados y potencialmente peligrosos, o bien para indicar equipos
o sistemas, como los usados en el ámbito electro médico, que
incorporen transmisores de radiofrecuencia o que apliquen energía
electromagnética de radiofrecuencia intencionadamente para
diagnósticos o tratamientos.
NL
Geeft in het algemeen verhoogde, potentieel gevaarlijke niveaus aan
van niet-ioniserende straling of duidt op apparatuur of systemen,
bijvoorbeeld in de medische elektrische omgeving, die RF-zenders
bevatten of die opzettelijk elektromagnetische RF-energie toepassen
voor diagnose of behandeling.
RU
(,
),
,
.
TR
Genellkle yüksek ve zararlı olablecek yonlaşmayan radyasyon
sevyelern belrtr veya RF vercler çeren veya tanı ya da tedav
amacıyla blnçl olarak RF elektromanyetk enerj uygulayan (örneğn
medkal elektrk alanında bulunan) ekpman ve sstemler belrtr.
AR

SD6
The Bluetooth® word mark and logos are registered trademarks owned by the Bluetooth SIG, Inc. and any use of such marks by OMRON HEALTHCARE Co., Ltd. is
under license. Other trademarks and trade names are those of their respective owners. App Store is a service mark of Apple Inc., registered in the U.S and other
countries. Google Play logo are trademarks of Google LLC.
FR
La marque verbale et les logos Bluetooth® sont des marques déposées
détenues par Bluetooth SIG, Inc. et l’utilisation de ces marques par OMRON
HEALTHCARE Co., Ltd. se fait sous licence. Les autres marques commerciales
et noms de marque sont ceux de leurs détenteurs respectifs. AppStore est
une marque de service d’Apple Inc., déposées aux États-Unis et dans d’autres
pays. Le logo GooglePlay est une marque commerciale de GoogleLLC.
DE
Die Bluetooth®-Wortmarke und -Logos sind eingetragene Marken
der Bluetooth SIG, Inc. und die Verwendung solcher Marken durch
OMRON HEALTHCARE Co., Ltd. erfolgt in Lizenz. Andere Marken und
Markennamen gehören ihren jeweiligen Eigentümern. AppStore ist eine
Dienstleistungsmarke der AppleInc., die in den USA und anderen Ländern
eingetragen ist. Das Google Play-Logo ist eine Marke der Google LLC.
IT
Il marchio e i logotipi Bluetooth® sono marchi commerciali registrati di
Bluetooth SIG, Inc. e l’utilizzo di tali marchi da parte di OMRON HEALTHCARE
Co., Ltd. è stato concesso in licenza. Gli altri marchi e nomi commerciali sono
di proprietà dei rispettivi titolari. App Store è un marchio commerciale di
Apple Inc., registrato negli Stati Uniti e in altri Paesi. Il logo Google Play è un
marchio commerciale di Google LLC.
ES
El nombre y los logotipos de Bluetooth® son marcas registradas de
Bluetooth SIG, Inc. y cualquier uso de dichas marcas hecho por OMRON
HEALTHCARE Co., Ltd. se ha llevado a cabo con su licencia correspondiente.
Otras marcas registradas también pertenecen a sus respectivos propietarios.
App Store es una marca de servicio registrada de Apple Inc. en EE. UU. y en
otros países. El logotipo de Google Play es una marca comercial de Google
LLC.
NL
Het woordmerk en de logo’s van Bluetooth® zijn gedeponeerde
handelsmerken van Bluetooth SIG, Inc. en enig gebruik hiervan door
OMRON HEALTHCARE Co., Ltd. geschiedt onder licentie. Overige
handelsmerken en handelsnamen zijn van hun respectievelijke eigenaren.
App Store is een servicemerk van Apple Inc. en gedeponeerd in de V.S. en in
andere landen. Het Google Play-logo is een handelsmerk van Google LLC.
RU
Bluetooth®
, Bluetooth
SIG, Inc., OMRON
HEALTHCARE Co., Ltd. .
. App Store Apple Inc.,
. Google Play
Google LLC.
TR
Bluetooth® marka adı ve logoları, Bluetooth SIG Inc. kuruluşunun tescilli
ticari markalarıdır ve OMRON HEALTHCARE Co., Ltd. bu markaları lisans
kapsamında kullanmaktadır. Diğer ticari markalar ve ticari isimler, ilgili
sahiplerine aittir. App Store, Apple Inc. firmasının ABD ve diğer ülkelerde
tescilli hizmet markasıdır. Google Play logosu, GoogleLLC firmasının ticari
markasıdır.
Bluetooth
®
AR
.
Play

Issue Date:
2019-09-04
Date de publication:
Ausgabedatum:
Data di pubblicazione:
Fecha de publicación:
Uitgiftedatum
:
Teslim Tarihi:
IM1-HEM-7361T-E-02-09/2019
2895864-6B

Automatic Upper Arm
Blood Pressure Monitor
M7 Intelli IT (HEM-7361T-EBK)
X7 Smart (HEM-7361T-ESL)
Instruction Manual
2
Read Instruction manual and before use.
FR
Lire le mode d’emploi et vant l’utilisation.
DE
Lesen Sie vor der Verwendung Gebrauchsanweisung und .
IT
Leggere il manuale di istruzioni e prima dell’uso.
ES
Lea el manual de instrucciones y antes del uso.
NL
Lees gebruiksaanwijzing en voor gebruik.
RU
.
TR
Kullanmadan önce, kullanım kılavuzu ve 'yi okuyun.
AR

1
Package Contents...........................................1
FR
Contenu de l’emballage
NL
Inhoud van de verpakking
DE
Packungsinhalt
RU
IT
Contenuto della confezione
TR
Paketin İçindekiler
ES
Contenido del envase
AR
2
Preparing for a Measurement........................4
FR
Préparation pour une prise
de mesure
NL
Een meting voorbereiden
DE
Vorbereiten einer Messung
RU
IT
Preparazione per la
misurazione
TR
Ölçüm Hazırlığı
ES
Preparación para una
medición
AR
3
Downloading the "OMRON connect" App.....5
FR
Téléchargement de
l’application «OMRON
connect»
NL
De app “OMRON connect“
downloaden
DE
Herunterladen der App
„OMRON connect“
RU
«OMRON connect»
IT
Download dell'app “OMRON
connect”
TR
"OMRON Connect"
Uygulamasını İndirme
ES
Descarga de la aplicación
“OMRON connect”
AR
4
Inserting Batteries..........................................6
FR
Mise en place des piles
NL
De batterijen plaatsen
DE
Einlegen von Batterien
RU
IT
Inserimento delle batterie
TR
Pilleri Takma
ES
Introducción de las pilas
AR
5
Pairing Your Smart Device..............................7
FR
Jumelage de votre appareil
intelligent
NL
Uw smartapparaat koppelen
DE
Koppeln mit Smartphone
oder Tablet
RU
-
IT
Associazione del dispositivo
smart
TR
Akıllı Cihazınızın
Eşleştirilmesi
ES
Sincronización con un
dispositivo inteligente
AR
6
Setting Date and Time Manually....................8
FR
Réglage manuel de la date
et de l’heure
NL
Datum en tijd handmatig
instellen
DE
Manuelles Einstellen von
Datum und Uhrzeit
RU
IT
Impostazione manuale di
data e ora
TR
Tarih ve Saatin Manuel
Olarak Ayarlanması
ES
Ajuste manual de la fecha y
la hora
AR
7
Applying the Cuff on the Left Arm.................9
FR
Pose du brassard sur le bras
gauche
NL
De manchet op de linkerarm
aanbrengen
DE
Anbringen der Manschette
am linken Arm
RU
IT
Applicazione del bracciale
sul braccio sinistro
TR
Kolluğun Sol Kola Takılması
ES
Colocación del manguito en
el brazo izquierdo
AR
8
Sitting Correctly..............................................11
FR
Position assise correcte
NL
Correct zitten
DE
Korrekte Körperhaltung
RU
IT
Come sedersi nel modo
corretto
TR
Düzgün Oturma
ES
Cómo sentarse
correctamente
AR
1

9
Selecting User ID (1 or 2)................................13
FR
Sélection de l’ID Utilisateur
(1 ou 2)
NL
Gebruikers-ID selecteren
(1of 2)
DE
Auswahl der Benutzer-ID
(1oder 2)
RU
(1 2)
IT
Selezione dell’ID utente
(1o 2)
TR
Kullanıcı Kimliğini Seçme
(1veya 2)
ES
Selección de ID de usuario
(1o 2)
)
AR
10
Taking a Measurement...................................14
FR
Réalisation d’une mesure
NL
Een meting verrichten
DE
Eine Messung vornehmen
RU
IT
Misurazione
TR
Bir Ölçüm Yapma
ES
Obtención de una lectura
AR
11
Checking Readings in Comparison Mode......18
FR
Vérification des mesures en
mode de comparaison
NL
Metingen bekijken in
vergelijkingsmodus
DE
Überprüfen von Messwerten
im Vergleichsmodus
RU
IT
Controllo dei risultati in
modalità Confronto
TR
Karşılaştırma Modunda
Ölçüm Değerlerini Kontrol
Etme
ES
Comprobación de
las lecturas en modo
comparativo
AR
12
Using Memory Functions...............................23
FR
Utilisation des fonctions de
mémoire
NL
Geheugenfuncties
gebruiken
DE
Verwendung der
Speicherfunktion
RU
IT
Uso delle funzioni di
memoria
TR
Hafıza Fonksiyonunun
Kullanılması
ES
Uso de las funciones de
memoria
AR
13
Other Settings...............................................26
FR
Autres réglages
NL
Andere instellingen
DE
Weitere Einstellungen
RU
IT
Altre impostazioni
TR
Diğer Ayarlar
ES
Otros ajustes
AR
14
Optional Medical Accessories........................29
FR
Accessoires médicaux en
option
NL
Optionele medische
accessoires
DE
Medizinisches optionales
Zubehör
RU
IT
Accessori medicali opzionali
TR
Opsiyonel Tıbbi Aksesuarlar
ES
Accesorios médicos
opcionales
AR
15
Other Optional Parts.......................................30
FR
Autres pièces en option
NL
Overige optionele
onderdelen
DE
Weitere optionale Teile
RU
IT
Altri componenti opzionali
TR
Diğer Aksesuarlar
ES
Otras piezas opcionales
AR
2

3
1
Package Contents
FR
Contenu de l’emballage
NL
Inhoud van de verpakking
DE
Packungsinhalt
RU
Комплект поставки
IT
Contenuto della confezione
TR
Paketin İçindekiler
ES
Contenido del envase
AR
1
Instruction Manual
2
Instruction Manual

4
2
Preparing for a Measurement
FR
Préparation pour une prise de mesure
NL
Een meting voorbereiden
DE
Vorbereiten einer Messung
RU
Подготовка к измерению
IT
Preparazione per la misurazione
TR
Ölçüm Hazırlığı
ES
Preparación para una medición
AR
30 minutes before
FR
30minutes avant
DE
30 Minuten vorher
IT
30 minuti prima
ES
30minutos antes
NL
30 minuten ervoor
RU
30
TR
30 dakika önce
AR
5 minutes before: Relax and rest.
FR
5minutes avant: détente et repos.
DE
5 Minuten vorher: ruhig hinsetzen.
IT
5 minuti prima: rilassarsi e stare a riposo.
ES
5minutos antes: relájese y descanse.
NL
5 minuten ervoor: ontspan en rust.
RU
5 : .
TR
5 dakika önce: Gevşeyin ve dinlenin.
AR

5
3
Downloading the "OMRON connect" App
FR
Téléchargement de l’application «OMRON connect»
NL
De app “OMRON connect“ downloaden
DE
Herunterladen der App „OMRON connect“
RU
Загрузка приложения «OMRON connect»
IT
Download dell'app “OMRON connect”
TR
"OMRON Connect" Uygulamasını İndirme
ES
Descarga de la aplicación “OMRON connect”
AR
omron connect

6
4
Inserting Batteries
FR
Mise en place des piles
NL
De batterijen plaatsen
DE
Einlegen von Batterien
RU
Установка элементов питания
IT
Inserimento delle batterie
TR
Pilleri Takma
ES
Introducción de las pilas
AR
AA, 1.5V × 4
1
2
3

7
5
Pairing Your Smart Device
FR
Jumelage de votre appareil intelligent
NL
Uw smartapparaat koppelen
DE
Koppeln mit Smartphone oder Tablet
RU
Синхронизация со смарт-устройством
IT
Associazione del dispositivo smart
TR
Akıllı Cihazınızın Eşleştirilmesi
ES
Sincronización con un dispositivo inteligente
AR
1
2 3
Bluetooth
ON
Follow the instructions.
FR
Suivez les instructions.
DE
Befolgen Sie die Anweisungen.
IT
Attenersi alle istruzioni.
ES
Siga las instrucciones.
NL
Volg de instructies.
RU
.
TR
Talimatları izleyin.
AR
The date and time will automatically be set when your monitor is paired with the app.
FR
La date et l’heure seront automatiquement réglées lorsque votre tensiomètre sera jumelé avec l’application.
DE
Wenn Ihr Messgerät mit der App verknüpft ist, werden Datum und Uhrzeit automatisch eingestellt.
IT
La data e l’ora verranno impostate automaticamente una volta che il misuratore verrà associato alla app.
ES
La fecha y la hora se ajustarán automáticamente cuando el monitor se sincronice con la aplicación.
NL
De datum en tijd worden automatisch ingesteld wanneer uw bloeddrukmeter is gekoppeld aan de app.
RU
.
TR
Ölçüm cihazınız uygulamayla eşleştirildiğinde tarih ve saat otomatik olarak ayarlanır.
AR

8
6
Setting Date and Time Manually
FR
Réglage manuel de la date et de l’heure
NL
Datum en tijd handmatig instellen
DE
Manuelles Einstellen von Datum und Uhrzeit
RU
Установка даты и времени вручную
IT
Impostazione manuale di data e ora
TR
Tarih ve Saatin Manuel Olarak Ayarlanması
ES
Ajuste manual de la fecha y la hora
AR
If your monitor is paired with your smart device, date
and time is set automatically. When you need to set them
manually, set year > month > day > hour > minute.
FR
Si votre tensiomètre est jumelé avec votre appareil intelligent, la date
et l’heure sont réglées automatiquement. Si vous devez les régler
manuellement, réglez dans l’ordre année > mois > jour > heure >
minute.
DE
Wenn Ihr Messgerät mit Ihrem Smartphone oder Tablet gekoppelt ist,
werden Datum und Uhrzeit automatisch eingestellt. Bei manueller
Einstellung müssen Sie Jahr > Monat > Tag > Stunde > Minute
einstellen.
IT
Se il misuratore viene accoppiato con un dispositivo smart, la data
e l’ora verranno impostate automaticamente. Se occorre impostarle
manualmente, impostare anno > mese > giorno > ore > minuti.
ES
Si el monitor está sincronizado con su dispositivo inteligente, la
fecha y la hora se ajustarán automáticamente. Cuando tenga que
configurarlas manualmente, ajuste año > mes > día > hora > minuto.
NL
Als uw bloeddrukmeter gekoppeld is met uw smartapparaat, worden
de datum en tijd automatisch ingesteld. Wanneer u ze handmatig
moet instellen, stelt u jaar > maand > dag > uur > minuut in.
RU
-,
.
, > > > > .
TR
Ölçüm cihazınız akıllı cihazınızla eşleştirilmişse tarih ve saat otomatik
olarak ayarlanır. Bunları manuel olarak ayarlamanız gerektiğinde,
yıl>ay > gün > saat > dakika değerini ayarlayın.
AR
Year
Month
Day
Hour
Minute
Back / Forward
FR
Arrière / Avant
NL
Terug / vooruit
DE
Zurück / Vorwärts
RU
/
IT
Indietro / Avanti
TR
İleri / Geri
ES
Atrás / Adelante
AR
daymonthyear
minutehour

9
7
Applying the Cuff on the Left Arm
FR
Pose du brassard sur le bras gauche
NL
De manchet op de linkerarm aanbrengen
DE
Anbringen der Manschette am linken Arm
RU
Расположение манжеты на левой руке
IT
Applicazione del bracciale sul braccio sinistro
TR
Kolluğun Sol Kola Takılması
ES
Colocación del manguito en el brazo izquierdo
AR
1-2 cm
3
4
1
2
A
B
Click

10
A
Tube side of the cuff should be 1 - 2cm above the
inside elbow.
FR
Le côté tuyau du brassard doit être positionné 1 à 2cm
au-dessus de l’intérieur du coude.
DE
Das Manschettenstück mit dem Schlauch muss 1 bis 2cm
oberhalb des Ellbogens liegen.
IT
Il lato del bracciale con il tubo deve trovarsi al di sopra del
gomito interno, a una distanza di circa 1 o 2cm.
ES
El lado del tubo del manguito deberá quedar 1 o 2cm por
encima de la parte interna del codo.
NL
De kant met de slang van de manchet moet 1 - 2 cm boven de
binnenkant van de elleboog liggen.
RU
1 - 2
.
TR
Kolluğun boru tarafı, dirsek içinin 1-2 cm üstünde olmalıdır.
AR
B
Make sure that air tube is on the inside of your
arm and wrap the cuff securely so it can no
longer slip round.
FR
Assurez-vous que le tuyau à air se trouve du côté intérieur de
votre bras et enroulez fermement le brassard de manière qu’il
ne puisse plus tourner.
DE
Stellen Sie sicher, dass der Luftschlauch an der Arminnenseite
sitzt, und befestigen Sie die Manschette sicher, so dass sie
nicht verrutscht.
IT
Assicurarsi che il tubo dell’aria si trovi all’interno del braccio
e avvolgere il bracciale saldamente in modo che non possa
ruotare.
ES
Asegúrese de que el tubo de aire se encuentra en la cara
interna del brazo y enrolle el manguito con firmeza para que
no pueda deslizarse.
NL
Zorg ervoor dat de luchtslang zich aan de binnenkant van uw
arm bevindt en wikkel de manchet stevig rond uw arm zodat
deze niet meer kan wegglijden.
RU
,
, .
TR
Hava borusunun kolunuzun iç tarafında olduğundan emin
olun ve kolluğu kaymayacak şekilde sabit şekilde sarın.
AR
If taking measurements on the right arm, refer to:
FR
Pour la prise de mesures au bras droit,
voir:
DE
Bei Messungen am rechten Arm siehe:
IT
Se la misurazione viene eseguita al
braccio destro, fare riferimento a:
ES
Si va a realizar mediciones en el brazo
derecho, consulte:
NL
Als u metingen aan de rechterarm
uitvoert, raadpleeg dan:
1
Instruction Manual
RU
.
TR
Sağ koldan ölçüm yapıyorsanız aşağıdakilere bakın:
AR

11
8
Sitting Correctly
FR
Position assise correcte
NL
Correct zitten
DE
Korrekte Körperhaltung
RU
Сядьте правильно
IT
Come sedersi nel modo corretto
TR
Düzgün Oturma
ES
Cómo sentarse correctamente
AR
1
2
3

12
1
Sit with your back and arm supported.
FR
S’asseoir de façon à ce que le dos et le bras soient bien soutenus.
DE
Mit dem Rücken anlehnen und den Arm auf eine Unterlage legen.
IT
Sedere con la schiena e il braccio ben sostenuti.
ES
Siéntese de modo que la espalda y el brazo estén bien apoyados.
NL
Zit met uw rug en arm ondersteund.
RU
, -.
TR
Sırtınız ve kolunuz desteklenecek şekilde oturun.
AR
2
Place the arm cuff at the same level as your heart.
FR
Le brassard doit se trouver au même niveau que votre cœur.
DE
Die Manschette auf Herzhöhe platzieren.
IT
Posizionare il bracciale allo stesso livello del cuore.
ES
Coloque el manguito al mismo nivel que el corazón.
NL
Plaats de armmanchet op hetzelfde niveau als uw hart.
RU
.
TR
Kolluğu kalbinizle aynı düzeye getirin.
AR
3
Keep feet flat, legs uncrossed, remain still and do not talk.
FR
Garder les pieds à plat, les jambes non croisées, ne pas bouger et ne pas parler.
DE
Füße flach auf den Boden stellen, die Beine nicht kreuzen, still halten und nicht sprechen.
IT
Tenere i piedi ben poggiati, non incrociare le gambe, rimanere fermi e non parlare.
ES
Mantenga los pies planos, las piernas sin cruzar, quédese quieto y no hable.
NL
Houd de voeten plat, benen niet gekruist, zit stil en praat niet.
RU
, , .
TR
Ayaklarınızı düz, bacaklarınızı açık tutun, hareketsiz kalın ve konuşmayın.
AR

13
9
Selecting User ID (1 or 2)
FR
Sélection de l’ID Utilisateur (1 ou 2)
NL
Gebruikers-ID selecteren (1 of 2)
DE
Auswahl der Benutzer-ID (1 oder 2)
RU
Выберите идентификатор пользователя (1 или 2)
IT
Selezione dell’ID utente (1 o 2)
TR
Kullanıcı Kimliğini Seçme (1 veya 2)
ES
Selección de ID de usuario (1 o 2)
(
AR
Switching user ID enables you to save readings for 2 people.
FR
Changer d’ID Utilisateur permet d’enregistrer les résultats pour 2personnes.
DE
Mit verschiedenen Benutzer-IDs lassen sich Messwerte für 2Personen speichern.
IT
Cambiare ID utente permette di registrare i risultati relativi a 2 persone.
ES
Cambiar de ID de usuario le permite guardar las lecturas de 2personas.
NL
Door het wisselen van gebruikers-ID kunt u metingen voor 2 personen opslaan.
RU
2- .
TR
Kullanıcı kimlikleri arasında geçiş yapma, 2 kişi için ölçüm değerlerini kaydetmenizi sağlar.
AR

14
10
Taking a Measurement
FR
Réalisation d’une mesure
NL
Een meting verrichten
DE
Eine Messung vornehmen
RU
Выполнение измерений
IT
Misurazione
TR
Bir Ölçüm Yapma
ES
Obtención de una lectura
AR
When the [START/STOP] button is pressed, the measurement is taken and saved
automatically. Open the app to transfer the reading.
FR
Après une pression sur le bouton [START/STOP], la mesure démarre et le résultat est enregistré
automatiquement. Ouvrir l’application pour transférer le résultat.
DE
Beim Drücken der Taste [START/STOP] erfolgt die Messung. Die Messwerte werden automatisch
gespeichert. Öffnen Sie die App, um die Messwerte zu übertragen.
IT
Quando si preme il pulsante [START/STOP], la misurazione viene eseguita e salvata
automaticamente. Aprire la app per trasferire i risultati.
ES
Al pulsar el botón [START/STOP], se obtiene la medición, que se guarda automáticamente. Abra la
aplicación para transferir la lectura.
NL
Wanneer op de knop [START/STOP] wordt gedrukt, wordt de meting automatisch uitgevoerd en
opgeslagen. Open de app om de meting te versturen.
RU
, [START/STOP] ,
. , .
TR
[START/STOP] düğmesine basıldığında ölçüm yapılır ve otomatik olarak kaydedilir. Ölçüm değerini
aktarmak için uygulamayı açın.
AR
Instruction Manual
3.
1
Instruction Manual
P.18

15
Taking a measurement in Afib mode
FR
Réalisation d’une mesure en mode fibrillation auriculaire
DE
Vornehmen einer Messung im Afib-Modus
IT
Misurazione in modalità Afib
ES
Obtención de una lectura en modo fibrilación auricular
NL
Een meting in Afib-modus afnemen
RU
TR
Afib modunda ölçüm yapma
AR
In the Afib mode, your monitor automatically takes 3
consecutive readings at 30-second intervals and displays
the average. If there is a possibility of Afib, “Afib indicator
symbol” (
) will appear.
This is not a diagnosis, it is only a potential finding for Afib.
You should contact your physician to discuss the findings.
If you are experiencing any symptoms, contact a medical
professional.
FR
En mode fibrillation auriculaire, votre moniteur effectue
automatiquement 3mesures consécutives à 30secondes d’intervalle
et affiche la moyenne. S’il y a une possibilité de fibrillation auriculaire,
le «symbole indicateur de fibrillation auriculaire» (
) s’affiche.
Il ne s’agit pas d’un diagnostic mais seulement de l’indication
d’une fibrillation auriculaire possible. Vous devriez consulter votre
médecin pour discuter des résultats. Si vous ressentez un symptôme
quelconque, consultez un professionnel de la santé.
DE
Im Afib-Modus nimmt das Messgerät automatisch 3Messungen
hintereinander im Abstand von je 30Sekunden vor und zeigt den
Mittelwert an. Wenn die Möglichkeit von Vorhofflimmern besteht,
erscheint das „Afib-Hinweissymbol“ (
).
Dabei handelt es sich nicht um eine Diagnose, sondern lediglich um
einen Befund, dass Vorhofflimmern vorliegen könnte. Wenden Sie sich
an Ihren Arzt, um den Befund weiter abzuklären. Konsultieren Sie bei
Auftreten von Symptomen eine medizinische Fachkraft.
IT
Nella modalità Afib, il misuratore esegue automaticamente 3
misurazioni consecutive a intervalli di 30 secondi e visualizza la media.
In caso di potenziale presenza di fibrillazione atriale (Afib) viene
visualizzato il “simbolo dell’indicatore Afib” (
).
Questa non è una diagnosi ma è soltanto un rilevamento della
potenziale presenza di fibrillazione atriale (Afib). È opportuno
rivolgersi al proprio medico curante per discutere questo risultato. Se
si dovessero riscontrare eventuali sintomi, rivolgersi a un medico.
ES
En el modo fibrilación auricular, el monitor realiza 3 mediciones
consecutivas automáticamente a intervalos de 30 segundos y muestra
el valor promedio. Si existe una posible fibrilación auricular, aparecerá
el “símbolo indicador de fibrilación auricular” (
).
Esto no es un diagnóstico, simplemente la detección de una posible
fibrilación auricular. Deberá ponerse en contacto con su médico para
hablar de los resultados. En caso de padecer síntomas, póngase en
contacto con un profesional sanitario.
NL
In de Afib-modus neemt uw meter automatisch 3 achtereenvolgende
metingen met intervallen van 30 seconden en toont vervolgens het
gemiddelde. Als er een mogelijkheid is op Afib verschijnt het “Afib-
indicatorsymbool” (
).
Dit is geen diagnose, het is slechts een vaststelling dat er mogelijk
sprake is van Afib. Neem contact op met uw arts om de bevindingen
te bespreken. Neem contact op met een medische professional als u
symptomen ondervindt.
RU
3
30- , .
« » (
).
, .
. -
, .
TR
Cihazınız Afib modunda iken, otomatik olarak 30 saniyelik aralıklarda
ardışık 3 ölçüm yapar ve ortalamayı gösterir. Afib olasılığı varsa "Afib
gösterge sembolü" (
) görünür.
Bu bir tanı değildir, yalnızca olası Afib bulgusudur. Doktorunuzla
iletişime geçerek bulguları konuşmanız gerekir. Semptom yaşıyorsanız
bir tıp uzmanıyla iletişime geçin.
AR

16
1
2
2 sec+
Instruction Manual
3.
1
Instruction Manual
P.18

17
Taking a measurement in guest mode
FR
Réalisation d’une mesure en mode Invité
DE
Vornehmen einer Messung im Gast-Modus
IT
Misurazione in modalità Ospite
ES
Obtención de una lectura en modo de invitado
NL
Een meting in gastmodus afnemen
RU
TR
Konuk modunda ölçüm yapma
AR
The guest mode can be used to take a single measurement
for another user. No readings are stored in the memory,
and the Afib mode is not available when the guest mode is
selected.
FR
Le mode Invité permet de mesurer la pression artérielle d’une autre
personne une seule fois. Les résultats ne sont pas enregistrés dans
la mémoire et le mode fibrillation auriculaire n’est pas disponible
lorsque le mode Invité est sélectionné.
DE
Soll eine einzelne Messung bei einem anderen Benutzer durchgeführt
werden, kann dafür der Gast-Modus aktiviert werden. Im Gast-Modus
werden keine Messwerte gespeichert und der Afib-Modus steht nicht
zur Verfügung.
IT
La modalità Ospite può essere utilizzata per eseguire una singola
misurazione su un diverso utente. I risultati ottenuti non vengono
memorizzati e la modalità Afib non è disponibile quando si seleziona
la modalità Ospite.
ES
Para realizar una única medición para otro usuario, se puede utilizar
el modo de invitado. Cuando se selecciona el modo de invitado, no se
guardan lecturas en la memoria y el modo de fibrilación auricular no
está disponible.
NL
De gastmodus kan worden gebruikt om één enkele meting uit
te voeren voor een andere gebruiker. Er worden geen metingen
opgeslagen in het geheugen en de Afib-modus is niet beschikbaar
wanneer de gastmodus is geselecteerd.
RU
.
, ,
.
TR
Konuk modu, başka bir kişi için tek bir ölçüm yapmak üzere
kullanılabilir. Konuk modu seçildiğinde, ölçüm değerleri hafızada
saklanmaz ve Afib modu kullanılamaz.
AR
1
2
While holding the button down, press the [START/STOP] button.
FR
Tout en maintenant le bouton enfoncé, appuyer sur le bouton [START/STOP].
DE
Halten Sie die Taste gedrückt und drücken Sie gleichzeitig die Taste [START/STOP].
IT
Mentre si tiene premuto il pulsante
,
premere il pulsante [START/STOP].
ES
Mientras mantiene pulsado el botón , pulse el botón [START/STOP].
NL
Houd de knop
ingedrukt en druk tegelijkertijd op de knop [START/STOP].
RU
, [START/STOP].
TR
düğmesn basılı tutarken, [START/STOP] düğmesne basın.
AR

18
11
Checking Readings in Comparison Mode
FR
Vérification des mesures en mode de comparaison
NL
Metingen bekijken in vergelijkingsmodus
DE
Überprüfen von Messwerten im Vergleichsmodus
RU
Проверка результатов измерений в режиме
сравнения
IT
Controllo dei risultati in modalità Confronto
TR
Karşılaştırma Modunda Ölçüm Değerlerini Kontrol
Etme
ES
Comprobación de las lecturas en modo comparativo
AR
Prior reading
FR
Mesure antérieure
DE
Vorheriger Messwert
IT
Valore precedente
ES
Lectura anterior
NL
Eerdere meting
RU
TR
Önceki ölçüm değeri
AR
1
2
3
4
6
5
1
2
3
5
4
6
1
Appears when the reading was taken in Afib mode.
FR
S’affiche lorsque la mesure a été effectuée en mode Fibrillation
auriculaire.
DE
Erscheint, wenn der Messwert im AFib-Modus ermittelt wurde.
IT
Appare quando la misurazione è stata effettuata in modalità Afib.
ES
Aparece cuando la lectura fue realizada en el modo de fibrilación
auricular.
NL
Verschijnt wanneer de meting in de Afib-modus werd verricht.
RU
, .
TR
Ölçüm Afb moduna alınınca görünür.
AR

19
2
Appears if an atrial fibrillation (Afib)* was detected
during the Afib mode measurement. If it continues
to appear, we recommend you to consult with and
follow the directions of your physician.
FR
S’affiche si une fibrillation auriculaire* a été détectée durant une
mesure en mode fibrillation auriculaire. S’il continue d’apparaître,
nous vous recommandons de consulter votre médecin et de
suivre ses recommandations.
DE
Wird angezeigt, wenn bei einer Messung im Afib-Modus
Vorhofflimmern (Afib)* erkannt wurde. Wird das Symbol weiterhin
angezeigt, sollten Sie sich an einen Arzt wenden und dessen
Anweisungen befolgen.
IT
Viene visualizzato se durante una misurazione in modalità Afib
è stata rilevata la presenza di fibrillazione atriale (Afib)*. Se il
simbolo continua ad apparire, è consigliabile rivolgersi al proprio
medico curante e seguirne le indicazioni.
ES
Aparece si se detecta fibrilación auricular (Afib)* durante la
medición en modo fibrilación auricular. Si esto sigue apareciendo, le
recomendamos que consulte a su médico y siga sus recomendaciones.
NL
Verschijnt als er een atriumfibrillatie (Afib)* is gedetecteerd tijdens
de Afib-modusmeting. Als dit blijft verschijnen raden we u aan
contact op te nemen met uw arts en zijn of haar aanwijzingen op
te volgen.
RU
,
()*.
,
.
TR
Afib modunda ölçüm esnasında bir atrial fibrilasyon (Afib)*
saptandığında görünür. Görünmeye devam ediyorsa doktorunuza
danışmanızı ve kendisinin yönergelerini izlemenizi öneririz.
AR
3
Appears if "SYS" is 135mmHg or above and/or
"DIA" is 85mmHg** or above.
FR
S’affiche si «SYS» est égale ou supérieure à 135mmHg et/ou
«DIA» égale ou supérieure à 85mmHg**.
DE
Wird angezeigt, wenn „SYS“ 135mmHg oder mehr beträgt und/
oder wenn „DIA“ 85mmHg** oder mehr beträgt.
IT
Viene visualizzato se la pressione sistolica “SYS” è pari o superiore
a 135mmHg e/o la pressione diastolica “DIA” è pari o superiore a
85mmHg**.
ES
Aparece si “SYS” es 135mmHg o superior y/o “DIA” es 85mmHg**
o superior.
NL
Verschijnt als “SYS” 135 mmHg of hoger is en/of “DIA” 85 mmHg**
of hoger is.
RU
, «SYS» 135 ... / «DIA»
85...** .
TR
"SYS" 135 mmHg ya da üstünde olduğunda ve/veya "DIA"
85mmHg** ya da üstünde olduğunda görünür.
AR
4
Cuff is tight enough.
FR
Le brassard est suffisamment serré.
DE
Manschette sitzt ausreichend straff.
IT
Il bracciale è stretto a sufficienza.
ES
El manguito está lo suficientemente prieto.
NL
Manchet zit strak genoeg.
RU
.
TR
Kolluk yeterince sıkıdır.
AR
4
Apply cuff again MORE TIGHTLY.
FR
Poser le brassard en le serrant davantage.
DE
Manschette STRAFFER ziehen.
IT
Applicare di nuovo il bracciale STRINGENDOLO DI PIÙ.
ES
Vuelva a poner el manguito MÁS PRIETO.
NL
Breng de manchet STRAKKER aan.
RU
.
TR
Kolluğu tekrar, DAHA SIKI bir şekilde takın.
AR
DIA
SYS

20
5
Appears when your body moves during a
measurement. Remove the arm cuff, wait
2-3minutes and try again.
(It does not appear when the possibility of Afib is
detected during a Afib mode measurement)
FR
S’affiche si vous bougez pendant une mesure. Retirer le brassard,
attendre 2 à 3 minutes et essayer à nouveau.
(Ne s’affiche pas si la possibilité d’une fibrillation auriculaire est
détectée pendant une mesure en mode fibrillation auriculaire.)
DE
Wird angezeigt, wenn Sie sich während der Messung bewegen.
Nehmen Sie die Manschette ab, warten Sie 2–3Minuten und
versuchen Sie es erneut.
(Wird nicht angezeigt, wenn bei einer Messung im Afib-Modus
mögliches Vorhofflimmern erkannt wird)
IT
Viene visualizzato se l’utilizzatore si muove durante la misurazione.
Rimuovere il bracciale, attendere 2-3minuti e riprovare.
(Il simbolo non appare quando viene rilevata una potenziale presenza
di fibrillazione atriale durante una misurazione in modalità Afib)
ES
Aparece cuando se mueve el cuerpo durante una medición. Retire
el manguito, espere unos 2 o 3minutos e inténtelo de nuevo.
(No aparece cuando se detecta una posible fibrilación auricular
durante una medición en modo fibrilación auricular)
NL
Verschijnt wanneer uw lichaam tijdens een meting beweegt.
Verwijder de armmanchet, wacht 2-3 minuten en probeer het
opnieuw.
(Het verschijnt niet wanneer de mogelijkheid op Afib is gedetecteerd
tijdens de Afib-modusmeting)
RU
.
, 2-3 .
( ,
)
TR
Bir ölçüm esnasında vücudunuz hareket ettiğinde görünür.
Kolluğu çıkarın, 2-3 dakika bekleyip tekrar deneyin.
(Afib modundaki bir ölçümde Afib olasılığı tespit edildiğinde
görünmez)
AR
6
Appears when an irregular rhythm* is detected
during a measurement. If it continues to appear, it
is recommended to consult your physician.
(It does not appear during a Afib mode measurement)
FR
S’affiche lorsqu’un rythme irrégulier* est détecté pendant une
mesure. S’il continue d’apparaître, il est recommandé de consulter
votre médecin.
(Ne s’affiche pas pendant une mesure en mode fibrillation auriculaire)
DE
Wird angezeigt, wenn während einer Messung ein
unregelmäßiger Herzschlag* erkannt wird. Wird das Symbol
weiterhin angezeigt, sollten Sie sich an Ihren Arzt wenden.
(Wird bei einer Messung im Afib-Modus nicht angezeigt)
IT
Viene visualizzato se nel corso di una misurazione viene rilevato
un ritmo cardiaco irregolare*. Se il simbolo continua ad apparire
è consigliabile rivolgersi al proprio medico curante.
(Il simbolo non viene visualizzato durante le misurazioni in modalità Afib)
ES
Aparece cuando se detecta un ritmo irregular* durante una medición. Si
esto sigue apareciendo, le recomendamos que consulte a su médico.
(No aparece durante una medición en modo fibrilación auricular)
NL
Verschijnt wanneer tijdens een meting een onregelmatig ritme*
wordt gedetecteerd. Neem contact op met uw arts als dit blijft
verschijnen.
(Het verschijnt niet tijdens een Afib-modusmeting)
RU
,
*. ,
.
( )
TR
Bir ölçüm esnasında düzensiz ritim* saptandığında görünür.
Görünmeye devam ederse doktorunuza danışmanız önerilir.
(Afib modundaki ölçüm esnasında görünmez)
AR

21
* Afib and an irregular heartbeat rhythm are defined as a rhythm that is 25% less or 25% more than the
average rhythm detected while your monitor is measuring blood pressure. The difference between the Afib
indicator function and irregular heartbeat function is:
Afib indicator function: detects Afib possibility in 3-times measurement.
Irregular heartbeat function: detects irregular heartbeat including Afib in 1 measurement.
FR
* La fibrillation auriculaire et les pulsations cardiaques irrégulières sont des pulsations dont la fréquence est supérieure ou inférieure de 25% par
rapport à la moyenne détectée lorsque l’appareil mesure la pression artérielle. La différence entre la fonction indicateur de fibrillation auriculaire
et la fonction pulsations cardiaques irrégulières est la suivante:
Fonction indicateur de fibrillation auriculaire: détecte la possibilité d’une fibrillation auriculaire par une mesure répétée 3fois.
Fonction pulsations cardiaques irrégulières: détecte des pulsations cardiaques irrégulières, y compris une fibrillation auriculaire, en 1mesure.
DE
* Vorhofflimmern (Afib) und unregelmäßiger Herzschlag sind definiert als ein Herzrhythmus, der 25% unter oder 25% über dem mittleren
Herzrhythmus liegt, der während der Blutdruckmessung erkannt wird. Der Unterschied zwischen Afib-Hinweisfunktion und Erkennung
unregelmäßiger Herzschläge ist:
Afib-Hinweisfunktion: Erkennt bei 3-maliger Messung möglicherweise vorliegendes Vorhofflimmern.
Erkennung unregelmäßiger Herzschläge: Erkennt unregelmäßigen Herzschlag einschließlich Vorhofflimmern bei 1-maliger Messung.
IT
* Per Afib e battito cardiaco irregolare si intende la presenza di variazioni inferiori del 25% o superiori del 25% nel ritmo rispetto al ritmo medio
rilevato dall’apparecchio durante la misurazione della pressione arteriosa. La differenza tra la funzione dell’indicatore Afib e la funzione battito
cardiaco irregolare è la seguente:
la funzione dell’indicatore Afib rileva la potenziale presenza di fibrillazione atriale mediante 3 misurazioni ripetute.
La funzione battito cardiaco irregolare rileva il battito irregolare inclusa la fibrillazione atriale in 1 misurazione.
ES
* La fibrilación auricular y un ritmo de latido cardíaco irregular se definen como aquel ritmo que es el 25% inferior o el 25% superior al ritmo
cardíaco medio detectado mientras el monitor mide la presión arterial. La diferencia entre la función de indicador de fibrilación auricular y la
función de latido cardíaco arrítmico es:
Función de indicador de fibrilación auricular: detecta una posible fibrilación auricular en 3 mediciones.
Función de latido cardíaco irregular: detecta un latido irregular incluyendo fibrilación auricular en 1 medición.
NL
* Afib en onregelmatige hartslag zijn gedefinieerd als een hartritme dat meer dan 25% lager of 25% hoger is dan het gemiddelde hartritme
tijdens het meten van de bloeddruk door de meter. Het verschil tussen de Afib-indicatorfunctie en onregelmatige hartslagfunctie is: Afib-
indicatorfunctie: detecteert de mogelijkheid op Afib in een driemalige meting.
Onregelmatige hartslagfunctie: detecteert onregelmatige hartslag inclusief Afib in één meting.
RU
* — , 25% 25% ,
. :
: .
: , , .
TR
* Afib ve düzensiz kalp atışı ritmi, ölçüm cihazınız tansiyon ölçümü yaparken saptanan ortalama ritme göre %25’ten az ya da %25'ten fazla sapma
gösteren ritim olarak tanımlanır. Afib göstergesi fonksiyonu ve düzensiz kalp atışı fonksiyonu arasındaki fark şu şekildedir:
Afib göstergesi fonksiyonu: 3 kez yapılan ölçümde Afib olasılığını tespit eder.
Düzensiz kalp atışı fonksiyonu: 1 ölçümde, Afib de dahil olmak üzere düzensiz kalp atışını tespit eder.
AR

22
Error messages or other problems? Refer to:
1
Instruction Manual
FR
Messages d’erreur ou autres problèmes? Voir:
DE
Weitere Fehlermeldungen oder Probleme siehe:
IT
Messaggi di errore o altri problemi? Fare
riferimento a:
ES
¿Hay mensajes de error u otros problemas?
Consulte:
NL
Foutmeldingen of andere problemen?
Raadpleeg:
RU
? .
TR
Hata mesajları veya başka sorunlar mı var? Bkz:
AR
** The high blood pressure definition is based on the 2018 ESH/ESC Guidelines.
FR
** La définition de l’hypertension est basée sur les recommandations ESH/ESC 2018.
DE
**Die Definition für Bluthochdruck basiert auf den 2018 ESH/ESC-Richtlinien.
IT
** La definizione di alta pressione arteriosa si basa sulle linee guida 2018 di ESH/ESC.
ES
** La definición de presión arterial alta se basa en las guías 2018 ESH/ESC.
NL
** De definitie van hoge bloeddruk is gebaseerd op de ESH/ESC-richtlijnen uit 2018.
RU
** 2018 ESH/ESC.
TR
** Yüksek tansiyon tanımı, 2018 ESH/ESC Kılavuzlarını temel alır.
AR
ESH
.ESC(

23
12
Using Memory Functions
FR
Utilisation des fonctions de mémoire
NL
Geheugenfuncties gebruiken
DE
Verwendung der Speicherfunktion
RU
Использование функции памяти
IT
Uso delle funzioni di memoria
TR
Hafıza Fonksiyonunun Kullanılması
ES
Uso de las funciones de memoria
AR
Before using memory functions, select your user ID.
FR
Avant d’utiliser les fonctions de mémoire, sélectionner votre ID Utilisateur.
DE
Wählen Sie vor dem Verwenden der Speicherfunktionen Ihre Benutzer-ID aus.
IT
Prima di utilizzare le funzioni di memoria selezionare il proprio ID utente.
ES
Antes de usar las funciones de memoria, seleccione su ID de usuario.
NL
Selecteer uw gebruikers-ID voordat u geheugenfuncties gebruikt.
RU
.
TR
Hafıza fonksiyonunu kullanmadan önce kullanıcı kimliğinizi seçin.
AR
12.1 Readings Stored in Memory
FR
Mesures stockées en mémoire
DE
Gespeicherte Messungen
IT
Risultati conservati in memoria
ES
Lecturas guardadas en la memoria
NL
Meetwaarden opgeslagen in het geheugen
RU
TR
Hafızada Saklanan Ölçüm Değerleri
AR
Stores up to 100 readings.
FR
Mémorise jusqu’à
100résultats.
DE
Es werden bis zu
100Messwerte gespeichert.
IT
Conserva fino a 100 risultati.
ES
Almacena hasta 100lecturas.
NL
Slaat tot maximaal
100metingen op.
RU
100.
TR
100 adede kadar ölçüm değeri
saklar.
AR

24
Morning/Evening Weekly Averages
FR
Moyennes hebdomadaires matin/soir
DE
Wöchentliche Morgen-/Abendmittelwerte
IT
Media settimanale mattutina e serale
ES
Valor promedio semanal de mañana y noche
NL
Weekgemiddelden van ochtend- en avondwaarden
RU
/
TR
Sabah/Akşam Haftalık Ortalamaları
AR
Appears if "SYS" is 135mmHg or above and/or
"DIA" is 85mmHg or above in the morning
weekly average.
wk ago
wks ago
wks ago
wks ago
FR
S’affiche si «SYS» est égale ou supérieure à 135mmHg et/ou «DIA» égale ou supérieure à 85mmHg dans la moyenne hebdomadaire du matin.
DE
Wird angezeigt, wenn im wöchentlichen Morgenmittelwert „SYS“ 135mmHg oder mehr und/oder „DIA“ 85mmHg oder mehr beträgt.
IT
Viene visualizzato se la pressione sistolica “SYS” è pari o superiore a 135mmHg e/o la pressione diastolica “DIA” è pari o superiore a 85mmHg
nellamedia mattutina settimanale.
ES
Aparece si “SYS” es 135mmHg o superior y/o “DIA” es 85mmHg o superior en el promedio semanal de mañana.
NL
Verschijnt als “SYS” 135 mmHg of hoger is en/of “DIA” 85 mmHg of hoger is in het ochtendweekgemiddelde.
RU
, «SYS» 135... / «DIA» 85... .
TR
Sabah haftalık ortalamasında "SYS" 135 mmHg ya da üstünde olduğunda ve/veya "DIA" 85 mmHg** ya da üstünde olduğunda görünür.
AR
To know how to calculate weekly averages, refer to section10 of the Instruction Manual .
FR
Pour savoir comment calculer les moyennes hebdomadaires, se reporter à la section10 du Mode d’emploi .
DE
Wie die wöchentlichen Mittelwerte berechnet werden, ist in Abschnitt10 der Gebrauchsanweisung beschrieben.
IT
Per sapere come calcolare le medie settimanali, consultare la sezione10 del manuale di istruzioni .
ES
Para saber cómo calcular mediciones semanales, consulte la sección10 del manual de instrucciones .
NL
Zie paragraaf 10 van de gebruiksaanwijzing voor aanwijzingen hoe u het wekelijkse gemiddelde kunt berekenen.
RU
, , . 10 .
TR
Haftalık ortalamaların nasıl hesaplanacağını öğrenmek için, Kullanım Kılavuzu 'de bölüm 10'a bakın.
AR
.
DIA
SYS

25
12.3 Average of the Latest 2 or 3 Readings Taken within a
10Minute Span
FR
Moyenne des 2 ou 3 dernières mesures prises en l’espace de 10minutes
DE
Mittelwert der letzten 2 oder 3Messwerte, die in einem 10-Minuten-Zeitrahmen erfasst
wurden
IT
Media degli ultimi 2 o 3 risultati ottenuti nell’arco di 10 minuti
ES
Promedio de las 2 o 3últimas lecturas realizadas en un intervalo de 10minutos
NL
Gemiddelde van de laatste 2 of 3 metingen uitgevoerd binnen een tijdspanne van
10minuten
RU
2- 3- ,
10
TR
10 Dakika Aralıkta Alınan Son 2 veya 3 Ölçüm Değerinin Ortalaması
AR
3 sec+
12.4 Deleting All Readings for 1 User
FR
Suppression de toutes les mesures pour 1utilisateur
DE
Löschen aller Messwerte für Benutzer 1
IT
Eliminazione di tutti i risultati relativi a 1 utente
ES
Eliminación de todas las lecturas de un usuario
NL
Alle meetresultaten voor 1 gebruiker wissen
RU
TR
1 Kullanıcı için Tüm Ölçüm Değerlerini Silme
AR
4sec+ 4sec+
1 2 3 4 5

26
13
Other Settings
FR
Autres réglages
NL
Andere instellingen
DE
Weitere Einstellungen
RU
Другие настройки
IT
Altre impostazioni
TR
Diğer Ayarlar
ES
Otros ajustes
AR
13.1 Disabling/Enabling Bluetooth
FR
Désactivation/activation de Bluetooth
DE
Deaktivieren/Aktivieren der Bluetooth-Funktion
IT
Disattivazione/attivazione della funzione Bluetooth
ES
Activar o desactivar el Bluetooth
NL
Bluetooth uitschakelen/inschakelen
RU
/ Bluetooth
TR
Bluetooth'u Devre Dışı Bırakma/Etkinleştirme
AR
10 sec+
3 sec+
Bluetooth is enabled by default.
FR
Bluetooth est activé par défaut.
DE
Die Bluetooth-Funktion ist standardmäßig aktiviert.
IT
La funzione Bluetooth è attiva per impostazione
predefinita.
ES
El Bluetooth está activado por defecto.
NL
Bluetooth is standaard ingeschakeld.
RU
Bluetooth .
TR
Bluetooth varsayılan olarak etkindir.
AR
Bluetooth
Bluetooth

27
13.2 Restoring to the Default Settings
FR
Réinitialisation aux réglages par défaut
DE
Wiederherstellen der Standardeinstellungen
IT
Ripristino delle impostazioni predefinite
ES
Restablecimiento a los ajustes de fábrica
NL
De standaardinstellingen herstellen
RU
TR
Varsayılan Ayarları Geri Yükleme
AR
4 sec+
1
2
4
4 sec+
3

28
If your systolic pressure is more than 210mmHg:
After the arm cuff starts to inflate, press and hold the [START/STOP] button until the monitor inflates 30 to 40mmHg higher
than your expected systolic pressure.
FR
Si votre pression systolique est supérieure à 210mmHg:
Lorsque le brassard commence à se gonfler, appuyer sur le bouton [START/STOP] et le maintenir enfoncé jusqu’à ce que le tensiomètre atteigne une pression
de gonflage supérieure de 30 à 40mmHg à votre pression systolique attendue.
DE
Nachdem die Manschette begonnen hat, sich aufzupumpen, drücken Sie die [START/STOP]-Taste, und halten Sie sie gedrückt, bis ein Druck von
30bis 40mmHg über Ihrem erwarteten systolischen Druck erreicht ist.
IT
Se la pressione sistolica è superiore a 210mmHg:
Quando il bracciale inizia a gonfiarsi, premere e mantenere premuto il pulsante [START/STOP] finché il misuratore non raggiunge una pressione da
30a40mmHg superiore rispetto al valore di pressione sistolica atteso.
ES
En caso de que su presión arterial sistólica esté por encima de 210mmHg:
Una vez que el manguito comience a inflarse, mantenga pulsado el botón [START/STOP] hasta que el monitor indique que el inflado está entre 30 y 40mmHg
por encima de la presión arterial sistólica estimada.
NL
Als uw systolische druk hoger is dan 210 mmHg:
Zodra de armmanchet wordt opgepompt, houdt u de knop [START/STOP] ingedrukt totdat de meter 30 tot 40 mmHg hoger aangeeft dan uw verwachte
systolische druk.
RU
, , [START/STOP] ,
, 30-40...
TR
Sistolik basıncınız 210 mmHg'den fazlaysa:
Manşet şişmeye başladıktan sonra, [START/STOP] düğmesine basın ve ölçüm cihazı beklediğiniz sistolik basınç değerinden 30 ila 40 mmHg daha fazla şişene
kadar basılı utun.
AR

29
14
Optional Medical Accessories
FR
Accessoires médicaux en option
NL
Optionele medische accessoires
DE
Medizinisches optionales Zubehör
RU
Дополнительно принадлежности
IT
Accessori medicali opzionali
TR
Opsiyonel Tıbbi Aksesuarlar
ES
Accesorios médicos opcionales
AR
(HHP-CM01)
(HHP-BFH01)
AC Adapter
Arm Cu
(HEM-FL31)
22 - 42 cm
Do not throw the air plug away. The air plug can be applicable to the optional cuff.
FR
Ne pas jeter la prise de gonflage. La prise de gonflage peut être utilisée pour le brassard en option.
DE
Entsorgen Sie den Luftschlauchstecker nicht. Der Luftschlauchstecker wird für die optionale Manschette verwendet.
IT
Non gettare via l’attacco del tubo dell’aria. L’attacco del tubo dell’aria può essere applicato al bracciale opzionale.
ES
No tire el conector para tubo de aire. El conector para tubo de aire puede ser utilizado con el manguito opcional.
NL
Gooi de plug van de luchtslang niet weg. De plug van de luchtslang kan worden gebruikt op de optionele manchet.
RU
. .
TR
Hava tıpasını atmayın. Hava tıpası isteğe bağlı kolluğa uygulanabilir.
AR

https://www.omron-healthcare.com/
30
15
Other Optional Parts
FR
Autres pièces en option
NL
Overige optionele onderdelen
DE
Weitere optionale Teile
RU
Другие дополнительно приобретаемые запасные части
IT
Altri componenti opzionali
TR
Diğer Aksesuarlar
ES
Otras piezas opcionales
AR
Protective LCD Cover
(HEM-CACO-734)

Manufacturer
Fabricant
Hersteller
Produttore
Fabricante
Fabrikant
Üretici
OMRON HEALTHCARE Co., Ltd.
53, Kunotsubo, Terado-cho, Muko, KYOTO, 617-0002 JAPAN
EU-representative
Mandataire dans l’UE
EU-Repräsentant
Rappresentante per l’UE
Representante en la UE
Vertegenwoordiging in de EU
AB temsilcisi
OMRON HEALTHCARE EUROPE B.V.
Scorpius 33, 2132 LR Hoofddorp, THE NETHERLANDS
www.omron-healthcare.com
Importer in EU
Importateur dans l’UE
Importeur in der EU
Importatore per l’UE
Importador en la UE
Importeur in de EU
AB’de İthalatçı
Production facility
Site de production
Produktionsstätte
Stabilimento di produzione
Planta de producción
Productiefaciliteit
Üretim Tesisi
OMRON HEALTHCARE MANUFACTURING VIETNAM CO., LTD.
No.28 VSIP II, Street 2, Vietnam-Singapore Industrial Park II,
Binh Duong Industry-Services-Urban Complex, Hoa Phu Ward,
Thu Dau Mot City, Binh Duong Province, Vietnam
Subsidiaries
Succursales
Niederlassungen
Consociate
Empresas filiales
Dochteronder-
nemingen
Yan Kuruluşlar
OMRON HEALTHCARE UK LTD.
Opal Drive, Fox Milne, Milton Keynes, MK15 0DG, UK
www.omron-healthcare.com
OMRON MEDIZINTECHNIK HANDELSGESELLSCHAFT mbH
Konrad-Zuse-Ring 28, 68163 Mannheim, GERMANY
www.omron-healthcare.com
OMRON SANTÉ FRANCE SAS
3, Parvis de la Gare, 94130 Nogent-sur-Marne, FRANCE
Uniquement pour le marché français:
OMRON Service Après Vente
Nº Vert 0 800 91 43 14
www.omron-healthcare.com
Made in Vietnam / Fabriqué en Vietnam / Hergestellt in Vietnam/ Prodottoin Vietnam / Fabricado en Vietnam / Geproduceerd in Vietnam/ /
Vietnam'da Üretilmiştir /
Issue Date / Date de publication / Ausgabedatum / Datadipubblicazione / Fecha de publicación / Uitgiftedatum / / Teslim Tarihi /
: 2019-09-05
IM2-HEM-7361T-E-02-09/2019
2895865-4B
-
 1
1
-
 2
2
-
 3
3
-
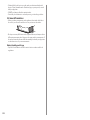 4
4
-
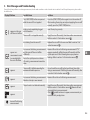 5
5
-
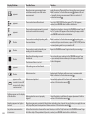 6
6
-
 7
7
-
 8
8
-
 9
9
-
 10
10
-
 11
11
-
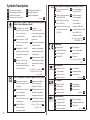 12
12
-
 13
13
-
 14
14
-
 15
15
-
 16
16
-
 17
17
-
 18
18
-
 19
19
-
 20
20
-
 21
21
-
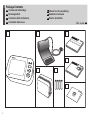 22
22
-
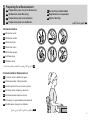 23
23
-
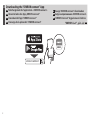 24
24
-
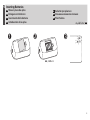 25
25
-
 26
26
-
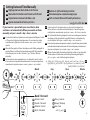 27
27
-
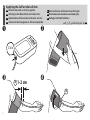 28
28
-
 29
29
-
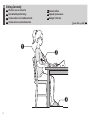 30
30
-
 31
31
-
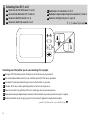 32
32
-
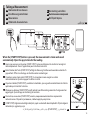 33
33
-
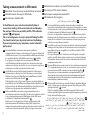 34
34
-
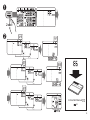 35
35
-
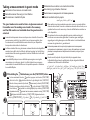 36
36
-
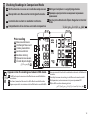 37
37
-
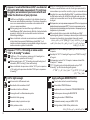 38
38
-
 39
39
-
 40
40
-
 41
41
-
 42
42
-
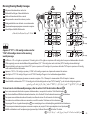 43
43
-
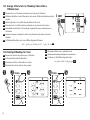 44
44
-
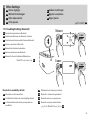 45
45
-
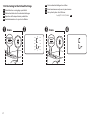 46
46
-
 47
47
-
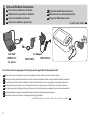 48
48
-
 49
49
-
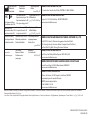 50
50


Omron Healthcare HEM-7361T-EBK Manual de usuario
- Categoría
- Unidades de presión arterial
- Tipo
- Manual de usuario
en otros idiomas
Artículos relacionados
-
Omron Healthcare HEM-7361T-EBK Manual de usuario
-
Omron Healthcare HEM-7360-E Manual de usuario
-
-
Omron Healthcare HEM-7154-E Manual de usuario
-
Omron Healthcare HEM-7155-E Manual de usuario
-
Omron Healthcare HEM-7155T-EBK Manual de usuario
-
-
Omron Healthcare HEM-7360-EO Manual de usuario
-
Omron Healthcare M6 Comfort Manual de usuario
-
Omron Healthcare HEM-7121-E Manual de usuario
Otros documentos
-
Omron HEM-7143T2-ESL Manual de usuario
-
Omron HEM-7155T-EBK Manual de usuario
-
Omron HEM-7155T-ESL Manual de usuario
-
A&D UA-767 Plus BT-Ci Manual de usuario
-
Microlife BP A150 AFIB Manual de usuario
-
Microlife BP B3 AFIB Manual de usuario
-
Omron RX-3 RX-3 Manual de usuario
-
Topcom BD-4601 El manual del propietario
-
Medline MDS7001B Manual de usuario
-
Microlife O3 El manual del propietario