Kenmore 91141475791 El manual del propietario
- Categoría
- Microondas
- Tipo
- El manual del propietario
Este manual también es adecuado para

OWNER'S MANUAL
DOUBLE 30"
ELECTRIC SELF.
CLEANING WALL
OVEN WITH UPPER
MICROWAVE
MODEL NO.
911.41475
911.41479 _
CAUTION:
Before using this range,
read this manual and
follow all its Safety Rules
and Operating
Instructions.
• Safety instructions
• Operation
° Care and Cleaning
• Problem Solving
Sears, Roebuck and Co., Hoffman Estates, IL 60179 U.S.A.
229C4020P13 1 (SR10345)

SELF-CLEANING
WALLOVENWITHMICROWAVE
Tableof Contents
Oven Safety ............................. 3-6
Removal of Packaging Tape .....6
Features of Your Oven .............. 7
Microwave Oven Control ........... 8
Timed Cooking .................... 9-11
To Start Cooking ...................... 9
Kitchen Timer ........................... 9
Holding Time ............................... 9
Timed Defrosting ........................10
Add 30 Seconds ..................... 11
Popcorn ................................... 1t
Auto Sensor Cooking .......... 12-15
Activating the Auto Sensor ..... 12
More/Less ............................ 13
General Information .................. 13
Reheating ............................. !4
Auto Defrost ................................ I5
Lower Oven Control ................. 16
Lower Oven Display ............ 17
Clock and Timer .................... 18
Tones ........................................ 19
Oven Cooking Tips ............. 20-21
Baking ..................................... 22
Broiling .................................... 23
Special Features ....................24-25
Self-Clean Cycle ................ 26-27
To Set A Clean Cycle ................27
To Stop A Clean Cycle ........... 27
After The Cycle .......................... 27
To Set A Delayed Start
Cycle ......................................... 27
Walls Of The Oven .................. 27
Microwave Oven Interior Walls
And Ceiling ................................ 28
Interior Microwave Oven
Floor ......................................... 28
Inside Microwave Oven Door
Window ......................................... 28
Outside Oven Surfaces .............28
Microwave Control Panel ........ 28
Control Panel .......................... 29
Broiler Pan And Grid .............. 29
Oven Racks .......................... 29
Oven Interior ............................. 29
Glass ......................................... 29
Replacing The Oven Light
Bulb .......................................... 30
Oven Door .................................. 30
Before Calling for Service .............
........................................... 31-33
Temperature Adjustment ....... 34
Warranty ................................. 35
Consumer Service Numbers, 36
For your convenience and future reference, please write down
your model and serial numbers in the space provided. They are
located on the front frame behind the Microwave oven door.
MODEL NUMBER=
SERIAL NUMBER:

IMPORTANTSAFETY
INSTRUCTIONS
SAVE THESE iNSTRUCTIONS
Read all instructions before using this appliance. When using gas or
electrical appliances, basic safety precautions should be followed,
including the following:
IMPORTANT: To insure safety for
yourself, family and home, please read
your Owner's Manual carefully. Keep it
handy for reference. Pay close attention to
Safety Sections. BE SURE your
appliance is installed and grounded by a
qualified technician.
, DO NOT leave children alone or
unattended near an appliance in use.
• TEACH CHILDREN not to play with
controls or any part of the appliance and
not to sit, climb or stand on the door or
any part of the appliance.
• CAUTION: NEVER STORE items of
interest to children in cabinets above the
appliance. Children climbing on the
appliance could be seriously injured.
• KEEP THIS book for later use
° NEVER TRY to repair or replace any
part of the appliance unless instructions
are given in this manual. Al! other work
should be done by a qualified techni-
cian.
• NEVER USE your appliance for
warming or heating the room.
• ALWAYS KEEP combustible wall
coverings, curtains, dishcloths, towels,
pothoiders, and other linens a safe
distance from the appliance_
• NEVER USE a towel or other bulky
cloth as a potholder and make sure the
potholder is dry Moist potholders could
cause steam burns DO NOT let
potholders touch hot surfaces.
• ALWAYS KEEP the oven area free
from things that will burn. Food, wooden
o
o
utensils, grease buildup, could catch
fire. Plastic utensils could melt and
canned foods could explode. Your
appliance should never be used as a
storage area.
ALWAYS KEEP your appliance clear
of things that will burn (gasoline and
other flammable vapors or liquids).
NEVER HEAT unopened food
containers. Pressure buildup can cause
the container to burst and cause injury.
NEVER LEAVE jars or cans of fat or
drippings in your oven.
NEVER TRY to clean a hot surface.
Some cleaners produce noxious fumes
and wet cloths or sponges could cause
steam burns°
BE SURE the oven is securely installed
in a cabinet that is firmly attached to the
house structure.
DO NOT touch heating elements,
surfaces near them, or interior oven
surfaces. These may be hot enough to
cause burns even though they are dark
in color During and after use, do not
touch or let clothing or flammable
material contact the elements or hot
surfaces until they have had time to
cool Other surfaces near the oven vent
openings, oven door and window
surfaces may also be hot enough to
cause burns.
3
. PLACE OVEN RACKS in the desired
position whilethe oven is cool, If racks
must be moved while oven is hot, do not
let potholder contact the hot oven element..
° ALWAYS USE care when opening the
oven door Let hot air and steam escape
before moving foods

IMPORTANTSAFETY
INSTRUCTIONS
• AFTER BROILING, alwaystake the
broiler pan and grid outof theoven and
clean them Leftover grease in the broiler
pan could catch fire the next time you use
your oven
• NEVER USE aluminumfoil to line the
oven bottom. Improper useof foilcould
start a fire or result inrisk of electric shock.
° NEVER BLOCK the oven ventopening
. CLEAN ONLY the parts listed in this
READ AND UNDERSTAND
THIS INFORMATION NOW!
Be sure everyone in your home
knows what to do in case of fire.
Never use water on a grease fire;
it will only spread the flames.
OVEN FIRE:
Do not try to move the pan!
1. Close the oven door and turn controls
off
2, tf fire continuescarefully open the door
throw baking soda on the fire or use a
dry chemical foam or halon type
extinguisher
manual Follow all cleaning instructions
Be sure to remove the broiler pan and
grid before self cleaning
• NEVER RUB move or damage the
door gasket on self cleaning ranges
• NEVER TRY to clean utensils
cookware removable parts or broiler
pan and grid in the self clean cycle
• DO NOT USE oven cleaners - No
commercial oven cleaner or protective
coating of any kind should be used in or
around any part of the oven
IMPORTANT SAFETY NOTICE!
The California Safe Drinking Water
and Toxic Enforcement Act re-
quires the governor of California to
publish a list of substances known
to the state to cause birth defects
or other reproductive harm and
requires businesses to warn their
customers of potential exposure to
such substances. The fiberglass
insulation in self. cleaning oven will
give off a very small amount of
carbon monoxide during the
cleaning cycle. Exposure can be
minimized by venting with an open
door or window or using a ventila-
tion fan or hood.
4
When using electrical
appliances, basic safety
precautions should be
followed, including the following:
WARNING: To reduce the risk of
burns, electric shock, fire, injury
to persons or exposure to
excessive microwave energy:
. Read all instructions before
using this appliance.
• Read and follow the specific,
Microwave safety instructions.
• Do not attempt to operate this oven
with the door open since open-door
operation can result in harmful exposure
to microwave energy It is important not
to defeat or tamper with the safety
interlocks
• Do not place any object between the
oven front face and the door or allow soil
or cleaner residue to accumulate on
sealing surfaces
• Do not operate the oven if it is
damaged It is particularly important that
the oven door close properly and that
there is no damage to the: Door Hinges
and Latches or Door Seals
• The oven should not be adjusted or
repaired by anyone except properly
qualified service personnel

IMPORTANTSAFETY
INSTRUCTIONS
• This appliance must be grounded.
Connect only to properly grounded
outlet. See the Grounding Instructions in
the Installation Instructions.
• Use this appliance only for its intended
use as described in this manual. Do not
use corrosive chemicals or vapors in this
appliance This microwave oven is
specifically designed to heat or cook
food, and is not intended for laboratory
or industrial use°
. Install or locate this appliance only in
accordance with the provided Installa-
tion Instructions
° Do not cover or block any openings on
the appliance
• Do not use this product near water, in a
wet basement, near a swimming pool or
near a sink.
° This microwave oven is not ap-
proved or tested for marine use
• Do not operate thisappliance if it is not
working properly or if it has been
damaged or dropped.
• As with any appliance, close
supervision is necessary when used by
children.
° Do not overcook food Carefully attend
appliance if paper, plastic or other
combustible materials are placed inside
the oven to facilitate cooking.
• Remove wire twist-ties from paper or
plastic bags before placing in the oven
° Do not use your microwave oven to dry
newspapers.
• Do not use recycled paper products.
Recycled paper towels, napkins and
waxed paper can contain metal flecks
which may cause arcing or ignite Paper
products containing nylon or nylon
filaments should be avoided
° Do not heat food in closed containers,
such as glass jars, which may explode.
• Do not pop popcorn in your microwave
unless you use popcorn labeled for use
in microwave ovens.
° Do not overcook potatoes, They could
dehydrate and catch fire, causing
damage to your oven
• Do not operate the microwave oven if it
is empty.
, Do not use your microwave oven as a
storage space.
° If material inside the oven should
ignite, close the door, turn the oven off
and disconnect the power to the
appliance..
° Oversized food or oversized metal
cookware should not be used in a
microwave oven, Electrical shock or fire
could occur.
• Do not clean with metal scouring pads
Pieces can break off the pad, causing
electrical shock.
° Do not defrost frozen beverages that
have narrow necked bottles. Pressure
could build up, causing the bottle to
burst,
• Use potholders when removing
cookware from the oVenrCookware could
become hot during cooking due to the
transferred heat from the food
, Be careful touching the walls or the
oven bottom during or after cooking The
walls and floor could become hot.
• Do not boi! eggs in a microwave oven.
Pressure will build up inside the egg yolk
and will cause the egg to burst.
5

IMPORTANTSAFETY
INSTRUCTIONS
• Use plastic containers that are
approved by the manufacturer for
microwave use Do not allow children to
use plastic containers unless super-
vised, Do not subject empty containers
to microwaving.
• Foods with unbroken outer skin, such
as potatoes, sausages, tomatoes,
apples, chicken liver, egg yolks and
other giblets, should be pierced to allow
steam to escape during cooking.
• Make sure plastic wraps used during
microwave cooking are approved for
microwave use
• Spontaneous boiling: under certain
circumstances, liquids may start to boil
during or shortly after removal from the
oven, Stirring the liquid briefly before
removing the container will help prevent
burns or splashing of liquids.
• Do not heat baby food in glass jars in
the microwave.
• Boilable cooking pouches and tightly
closed plastic bags should be slit,
pierced or vented as directed by
package, If they are not vented in some
way, pressure will cause them to burst
To remove the adhesive left from
packaging tape, use household
dishwashing liquid, mineral oil or
cooking oil, With a soft cloth rub into
the area and allow to soak. Rinse and
dry well. Repeat procedure using an
appliance polish to insure no damage
is done, This should be done
before the range is turned on
for the first time. The tape
cannot be removed once the
oven has heated. Packaging tape
may be found in the following areas:
Door handle, Control panel area, Door
trim and Oven area,
6

OPERATION
lEATUllESOFYOUROVEN
Model and
Serial Number
Microwave Turn
Table
Oven Light
Oven Vent and
Grill
Microwave
Control
Lower Oven
Control
Auto Self-Clean
Door Latch
Oven Light
Broiler Pan and
Grid
Oven Rack
Guides
Oven Rack
Ill
Open Door Push
Buttom
Lower Oven
Vent and Grill
Automatic Oven
Light Switch
Element
mperature
Sensor
Bake Element
Oven Door Gasket
7

OPERATION
UPPER MICROWAVE OVEN
AUTO SENSOR CONTROLS
, ,, ,,,,,,,, ,.,, ,, ,
_ POWER LEVEL
AUTODEFROST
, .... ,, ,,,,, ,
IK!M,M./sEo.-'}
TCHENTIMERJ
Your new microwave oven offers a
wide variety of ways to cook foods,
Your microwave uses very short, high
frequency radio waves that move
through the food to generate heat.
Reheating and defrosting is very
convenient because time and
preparation is so short.
DELAYED START COOKING --
allows you to delay the start of cooking
by setting the time you prefer the oven
to turn on. See page 9 on using
Delayed Start Cooking,
TIMED COOKING--allows you to set
your desired length of cooking,
defrosting, or delayed start times using
the power level you prefer See pages
9-11 for detailed instructions on
using the Timed Cook Setting.
AUTO DEFROST -- Auto Defrost
automatically sets the defrosting time and
power level needed. Enter the weight of
foods in pounds and ounces and the oven
will do the rest.
See page 15 on using the Auto
Defrost Setting.
AUTO SENSOR COOKING --by
using the Auto Sensor and Auto Reheat,
your microwave sensor will detect the
amount of steam escaping from foods
and automatically adjust the cooking
power level and cooking time This
method takes all the guesswork out of
cooking. The control automatically shuts
the oven off when cooking is
complete. See pages 12-15 for
detailed instructions on using
the Auto Sensor Setting.
CONTROL LOCKOUT -- Your
control will allow you to lock down the
touch pads so they cannot be activated
when pressed If you're worried about
leaving the oven unsupervised, activate
this feature by pressing the START
pad 3 times. Your control is now locked.
To deactivate this feature press the
CLEAR/OFF pad 3 times
8

OPERATION
TimedCooking
1. Press the POWER LEVEL pad
once to use Power Level High,
Most cooking uses power _evel High
but you may choose the level you
prefer.
2. Press the NUMBER PADS to set
how long you prefer foods to cook.
Example, press 1,0,0, to set 1
minute of cooking time
3. Press the START pad
POWER LEVEL CHART
PRESS
Once
Twice
3 times
4 times
5 times
6 times
POWERLEVE'LI
HIGH
DEFROST
MED. HiGH
MEDIUM
MED, LOW
LOW
YoPOWER
100%
30%
70%
55%
30%
10%
The Min,/Seco Kitchen Timer has 3
functions:
m a Kitchen Timer
-- sets a delay start time
-- sets a hold or standing time
The MIN/SEC Kitchen Timer can be
set for up to 99 minutes and 99 sec-
onds, The Timer will run without using
any microwave energy
1, Press the MIN,/SEC, KITCHEN
TIMER pad
2. Press the NUMBER pads to set the
Minutes and Seconds you will need.
Example, press 1, 3, 0, to set 1
minute and 30 seconds.
3. Press the START pad.,
After the MIN/SEC Kitchen Timer
countdown begins you will not be abte
to set a microwave function until the
Timer countdown reaches zero or the
timer has been canceled.
1. Press the MIN,/SEC. KITCHEN
TIMER pad
2. Press the NUMBER pads to set the
amount of delayed time.
8, Press the POWER LEVEL pad to
select the desired power ieve_
4. Press the NUMBER pads to set the
amount of cooking time.
5, Press the START pad
NOTES ON DELAY COOKING
• Delay start cannot be programmed
with any Auto Sensor Function
, If the oven door is opened during the
delayed portion of the program, the
timer will continue to count down.
The door must be closed
before the cooking portion of
the program can begin.
The MIN./SEC Kitchen Timer can also
be used to set a holding time between
microwave cooking functions or at the
completion of cooking The time can
range from 1 second up to 99 minutes
and 99 seconds A holding or standing
time may be found in some of your
recipes or in a cookbook. See page tl.
9

OPERATION
TimedCooking
Even though your new microwave is
equipped with an Auto Defrost feature,
you also have the option of setting your
own defrost time.
1. Press the POWER LEVEL pad
twice You will see DEFROST
2. Press the Number pad to set how
long you want foods to defrost
Example: press 5,0,0 to set 5
minutes
3. Press the START pad
THINGS TO REMEMBER
ABOUT TIMED DEFROSTING.
. Foods frozen in paper or plastic can
be defrosted in the package Tightly
closed packages should be slit,
pierced or vented after foods have
partially defrosted. Plastic storage
containers should be partially
uncovered
- Prepackaged frozen dinners can be
defrosted and microwaved tf foods
are in a foil container, transfer it to a
microwave safe dish
. For even defrosting, some foods need
to be broken apart or separated
during the defrosting time
• Foods that spoil easily, such as milk,
eggs, fish, stuffings, poultry and pork
should not be allowed to sit for more
than 1 hour after defrosting. Room
temperature promotes bacteria
growth
FOOD DEFROST
TIME
Fish (min per
Fillets pound)
6 to 8 rain
Shrimp 8q0 rain
med,
Scallops 14- t6 rain
Chops 8 -10 rain.
8-!0 min.Chicken
pieces
TIME DEFROSTING CHART
DIRECTIONS
Turn over and
rearrange
halfway through
defrost time
Break apart
halfway through
defrost time,
Remove
defrosted shrimp.
Break apart
halfway through
defrost time.
Remove
defrosted
scallops.
Separate, turn
over and
rearrange halfway
through defrost
time,
Separate halfway
through defrost
time.
1. Press the POWER LEVEL pad
twice
2. Press the number pads to set how
long you want to defrost foods.
3. Press the POWER LEVEL pad until
you see the Power Level you want to
use for cooking.
4. Press the NUMBER pads to set the
length of cooking time. Example:
press 3, 0, 0 to set 3 minutes.
5. Press the START pad.
You can press the Power Level pad
during the cooking to see which
function is in process
10

OPERATION
TimedCooking
1. Press the POWER LEVEL pad until
you see DEFROST.
2. Press the number pads to set how
long you want to defrost foods
3. Press the MIN./SEC. KITCHEN
TIMER pad
4. Press the number pads to set how
long you want the hold or standing
time to be
5. Press the POWER LEVEL pad until
you see the Power Level you want to
use
6. Press the NUMBER pads to set the
length of cooking time Example:
press 3, 0, 0 to set 3 minutes
7. Press the START pad
8. To end the function press the
CLEAR/OFF pad twice
You can press the Power Level pad
during the cooking to see which
function is in process
CHANGING or CANCELING A
FUNCTION
If you have set a function and change
your mind you will need to press the
CLEAR/OFF pad twice to cancel your
settings.
Set the weight of the pre-packaged
microwave popcorn bag to be popped
Press:
Popcorn once - 3.5 oz.
Popcorn twice. 3.0 oz.
Popcorn three times. 1.75 oz.
After making your selection, press the
START pad
NOTES ON USING THE POPCORN
PAD.
• Use pre-packaged room
temperature microwave popcorn
Read manufacturer's instructions
• Place bag in the oven according to
manufacturer's directions
° Pop one bag at a time
• After popping, open bag carefully
Popcorn and steam are extremely
hot
• Do not reheat unpopped kernels or
reuse bag
• Never leave oven unattended when
popping popcorn
CAUTION: if prepack.
aged popcorn is of a
different weight than
the recommended
weight, do not use the popcorn
setting; inadequate popping or
a fire may occur. Follow the
popcorn manufacturer's
_instructions.
The ADD 30 SECONDS feature
provides a convenient way to extend
cooking time by 30 seconds while the
oven display is counting down It will
add 30 seconds to the time shown each
time the pad is pressed
11

OPERATION
AutoSensorCooking
Auto Sensor Cooking allows you to cook
most of your favorite foods without
having to select cooking times and
power levels, The Microwave Control will
do this for you,
1, Press the Auto Sensor pad for the
type food you want to cook°
Example: Canned Vegetables
2. Press the START pad.
NOTES ON AUTO SENSOR COOKING:
oThe Auto Sensor system works by
detecting a build-up of steam by the
sensor, As foods cook steam is
produced When the steam is detected
by the sensor, the control automatically
calculates the remaining cooking time
Remaining time will be shown in the
display,
* When using the Auto Sensor system, the
oven door should not be opened for
longer than one minute Opening the
door may cause inaccurate cooking
results The ideal time to open the oven
door to stir. turn or add foods is when
cooking time begins to count down in
the display.
, The room temperature should not be
above 95° when using the Auto Sensor
Cooking Feature
. Foods less than 4 ounces should be
cooked by power and time only, not by
Auto Sensor Cooking
. When using the Auto Sensor Cooking
feature make sure the glass tray in the
oven is dry, to assure best Auto Sensor
Cooking results
° For proper cooking results using Auto
Sensor Cooking, be sure to cover all
foods, except potatoes. Do not cover
potatoes, Place foods in a casserole
dish with a proper fitting lid that does
not seal, DO NOT use any plastic
snap on lids. tfyou do not have a lid,
you may use plastic wrap that is vented
AUTO
SENSOR COOKING CHART
Canned
Vegetables
Frozen
Vegetables
Fresh
Vegetables
Potatoes
Fish Fillets
Chicken
Pieces
10 oz.
10-28 oz
!/2-2 lbs,
Before
peeling,
trimming
etc )
t-4 whole
_otatoes
8-9 oz
each
112-2lbs
112-3Ibs
Vegetables should
be at room tem-
3erature, When the
remaining cooking
time appears in the
display, open door
and stir foods.
Cover vegetables
with lid or plastic
wrap that is vented
on one corner, Do
not use vegetables
frozen with butter or
sauce.
Cover vegetables
with lid or plastic
wrap that is vented
on one corner.
Whole Potatoes
must be pierced
several times before
cooking
Place whole
potatoes on a
microwave-safe
dish Do not
cover potatoes.
Place fish filletsin a
single layer in a
dish Cover dish
with plastic wrap
that is vented on
one corner. When
time appears in the
display, rearrange
fillets.
Cover chicken
_ieces with plastic
wrap that is vented
on one corner
When time appears
in the display,
rearrange chicken
3feces
12

OPERATION
AutoSensorCooking
After using the Auto Sensor Cooking a
few times, you may decide you would
prefer your foods cooked more or less.
By using the More/Less pad, the Auto
Sensor programs will adjust the
cooking time longer or shorter. If you
are satisfied with the cooking results
using only the Auto Sensor food pads,
you will not need to use the More!Less
pad.
HOW TO USE THE MOREFLESS PAD
1, Press the Auto Sensor pad,
2a, Press the MorejLess pad once
for more cooking,
or
2b. Press the More/Less pad twice
for less cooking
3, Press the START pad,
Plastic wrap should be vented over food
to allow for escaping steam. Seal by
pressing plastic wrap firmly around
edges.
For frozen foods in metal trays remove
foil covering, re-insert tray into box and
close ends of box.
Slit plastic
pouches 1 inch as
shown.. Break food
up thoroughly after
oven signals
Plastic wrap
covering should
be vented over food
to allow for escaping __
steam Seal by
pressing plastic
wrap firmly around
edges
Do not use Paper plates with Auto
Sensor Cooking--they may be used for
Timed Cooking and Defrosting
KEEP DOOR CLOSED
Do not open the oven door while the
word "Auto" or "Reheat" is displayed--
steam escaping from the oven can
affect cooking performance_ if the
door is opened, close the door
and touch START immediately.
CONTAINERS, LIDS AND PLASTICS
Use microwave--safe
casseroles or bowls
for entrees and
vegetables. Cover
with lids that fit. If lids
are not available, use
plastic wrap
13

OPERATION
AutoSensorCooking
o Reheat bread and pastry product&
Use manual power and time
° Reheat raw or uncooked food
• Reheat beverages.
° Reheat frozen foods,
• Reheat foods if the Microwave oven
cavity is warm. If the microwave
oven cavity is too warm, your
cooking results may vary, If you use
your oven and the sensor detects
that the cavity is too warm for the
sensor to work properly, the display
will show you TOO HOT. if this
should happen you can still use the
timed setting,
1. Press the REHEAT pad
2. Press the START pad
The sensor will detect the steam from
the foods and adjust the power level
and heating time for you
REHEATING COOKIHG TiPS
For proper cooking results follow the
directions given. Use the proper
container. To cover containers without
matching lids use plastic wrap that is
vented Large dishes may need two
overlapping pieces of plastic wrap.
Securely mold wrap around sides of
dish. Bones should not pierce through
wrap,
_ CAUTION: Steam
builds up under plastic
wrap and lids. Use
caution when removing
them from the containers, it is
best to remove the wrap or lid
from the side away from you
_irst to release steam,
° All foods must be previously cooked.
and must be at room temperature or
refrigerator temperature,
- Foods should always be
covered loosely with vented
plastic wrap or casserole lid which
does not seal (Do not use any
snap closing lids.)
o Foods weighing less than 4 ounces
and more than 32 ounces should be
reheated by power and time only
14

OPERATION
AutoSensorCooking
This feature allows you to defrost
meat poultry and seafood by weight
using the Auto Defrost of your
Microwave oven The sensor
automatically sets the correct defrost
time and power levels when you set
the weight of the foods being
defrosted After Auto Defrosting meat
needs to stand about 5 minutes You
may take the food out of the oven to
stand if you wish
You must set the weight of
foods by pounds and ounces.
Meats packaged in grocery stores are
labeled with weight in pounds and
hundredths of a pound You will need
to convert this weight into ounces
CONVERSION CHART for
Auto Defrost.
HUNDREDTHS
OF A POUND
.00-.05
.06-,15
.16-.25
.26-.35
.36-.45
,46-,55
.56_.65
,66-.75
.76-,85
.86-.95
OUHCES
0
1-2
3-4
5
6-7
8
9-10
11-12
t3
14-15
1o Press the 1 LB Pad to set the
pound weight
2. Press the 1 oz. pad to set the
ounces you need
8, Press the START pad
If foods are to be turned during the
Defrost the control will beep to let you
know when to turn foods
• The shape and size of food will
determine the maximum weight the
oven can accommodate The
recommended maximum weight is:
4 Pounds - For Meats
6 Pounds. For Poultry
3 Pounds - For Seafood
- Stand time or cooking power level
may be programed after the Auto
Defrost pad is pressed Set a stand
time or cooking power level and
then press Start Pad After the Auto
Defrost function is finished the
stand time or cooking will automati
cally follow
- For successful defrosting meats
should be packaged properly for
freezing Freeze meats poultry and
fish in packages with only 1 or 2
layers of food To aid in separating
layers place two pieces of wax
paper between layers Package in
heavyduty plastic wrap bags or
freezer paper
• Place roasts and whole poultry on a
microwave safe rack in a microwave
safe dish in the oven Check food
for warm spots halfway through
defrosting and shield these areas
with small pieces of foil
15

OVEN
I UGHT I
OPERATION
LOWER THERMAL OVEN
OVEN TIMER
Lt;
(3) ..................
Your new touch pad control will allow you to set many oven functions with ease.
Below are the features of your oven control and a description of each.
BAKING -- Cook foods in the
traditional thermal oven with a
temperature range of 170°F to 550°F,
BROILING -- Cook meat at 550°F
from the direct heat of the upper
element inside the oven.
TIME BAKING -- Choose bake and
the temperature you prefer to use. Then
set how long you want foods to cook
DELAYED BAKING or CLEANING
-- Choose bake or clean and the
temperature you prefer to use, set the
time of day you prefer the oven to turn
on, set how long you prefer foods to
cook.
SELF.CLEANING -- Cleans the oven
for 4 hours, but you can change this
length of time to between 3 and 5 hours.
I6
The NUMBER pads set the
oven temperature, time of day,
delay start time, cooking time,
clean time and the kitchen
timer.
The START pad must be
pressed to activate any oven
function
The OVEN COOKING TIME
pad is used when setting the
length of baking time.
The DELAY START TIME
pad is used to set the time of
day you prefer the oven to turn
on and start baking or
cleaning.
The CLEAR/OFF pad is used
to cancel any oven function
and the end of cycle tone It
will not cancel the
Kitchen Timer,
Press to set or cancel the
HOUR/MIN Kitchen Timer
ON/OFF

FLASHINGINDICATOR
TOALERTYOUTOSETA
TEMPERATUREORATIME
OVENTEMPERATURE
INDICATOR
OPERATION
Clock, Timerand OvenControl
INDICATORTOLETYOUKNOW
THEOVENMSTURNEDOk
CO_V
LOCATIONFORTHETIMEOFDAY
CLOCK,KITCffENTIMER,DELAY
STARTTIME,OVENCOOKING,OR
CLF_N/NGTIME
OVENFUNC_ON OVENFUNCffON
INDICATOR INDICATOR
The display is an easy reference to use while learning your control.. Below are
descriptions of how the display works.
OVEN TEMPERATURE
INDICATOR -- This indicator has a
multiple purpose.
* Displays the temperature
° Displays an error code -- "ERR"
- If the oven temperature indicator
flashes "ERR", then you have set an
invalid time or temperature. Press the
CLEAR/OFF pad to clear the control
and reset your oven function.
oDisplays Control Problems -- If
your control flashes "F" and a
number or letter, you have
experienced an oven problem. Please
read the section on F-CODES in your
manual.
ON INDICATOR -- Lights when the
oven function is Setr
SET INDICATORS -- The set
indicator will flash in combination with
an oven function or timed function to let
you know you need to set a time or
temperature. Example: "SET" and
"BAKE" wilt flash to let you know you
need to set the bake temperature.
TIME INDICATOR -- Displays the
time of day, cooking time, delayed start
time, cleaning time, or the time set on
the kitchen timer.
Displays a reminder code-
"PUSH START" - If the oven time
indicator flashes the words "PUSH
START", then you need to press the
START pad to activate your setting
OVEN FUNCTION iNDICATORS
Displays which oven function has
been set, when the oven door locks,
and if the function is delayed.
17

OPERATION
Clockand Timer
The clock must be set for the correct
time of day before a delayed oven
function can work properly, The time of
day cannot be changed during a
delayed oven function, but can be
changed during a bake or broil
function.
HOW TO SET THE CLOCK
6÷G÷Q
1. Press the CLOCK pad.
2. Press the NUMBER pads to set the
time
3. Press the START pad.
RECALL THE CLOCK
While using your oven for cooking,
press the CLOCK pad if you wish to
check the time of day. The current time
of day will show in the display.
POWER FAILURE
If you have had a power failure, the time
flashing in the display may be incorrect.
Reset your Clock.
Any oven function that was in process
will need to be reset
The Kitchen Timer is used to time
cooking processes or other
household activities, It does not
control the oven. It can be set for up
to 9 hours and 59 minutes. It will
count down in minutes until the last 60
seconds is reached then the control
will beep once, When the countdown
reaches zero, the control wilt beep 3
times followed by one beep every 6
seconds until the HOUR/MIN
KITCHEN TIMER ON/OFF pad is
pressed This 6 second tone can be
canceled See tones on the following
page
HOW TO SET THE TIMER
1. Press the HOUR/MIN KITCHEN
TIMER ON/OFF pad.
2, Press NUMBER pads to set time
3, Press the START pad.
4. When the countdown has reached
zero, press the HOUR/MIN
KITCHEN TIMER ON/OFF pad.
To cancel the timer during the
countdown, press the HOUP_'-AIN
TIMER ON/OFF pad twice.
18

OPERATION
OvenControl,Clockand Timer
Your new control has a series of tones
that will sound at different times These
tones may sound while you set the
control for an oven function, or at the
end of the oven function It will also
alert you there may be a problem with
the functions Below are the types of
tones and a brief description of each
TONES WHILE SETTING THE
CONTROL--When you press a touch
pad you will hear a beef This beep will
let you know you have placed enough
pressure on the pad to activate it
END OF TIMED CYCLE TONE--At
the end of a timed cooking function, you
will hear 3 short beeps followed by 1
beep every 6 seconds This 6 second
beep will continue to sound until the
CLEAR/OFF pad is pressed, or you
may select the special feature to cancel
this 6 second beep from sounding at
the end of future cycles
TO CANCEL THE 6 SECOND
BEEP
1. Press and hold the BAKE and
BROIL pads, at the same time,
for 3 seconds, until the display
shows "SF",
2. Press the KITCHEN TIMER
ONIOFF pad The display will show
"CON BEEP" (continous beep)
3. Press the KITCHEN TIMER
ON/OFF pad again The display will
show "BEEP" (beep canceled)
4. Press the START pad,
If you would like to return the 6 second
beep, repeat steps above until the
display shows your choice and press
start,
ATTENTION TONE
This tone wilt sound if you make an error
or an oversight is made while setting an
oven function,
Examples would be:
a. Setting a clean cycle and the oven
door is not properly closed
b. Setting a timed function and the time
being set is invalid,
c. Pressing an additional function pad
without first setting a temperature or
time
Any of these can be quickly identified
by watching the display
PREHEAT TONE--When you set an
oven temperature, the oven
automatically starts to heat, When the
temperature inside the oven reaches
the temperature you have set. a tone
will sound to let you know the oven is
ready for baking,
If you set an oven function and the
control beeps while the display is
flashing "F" and a number "F-4" or
letter "FI" there may be a problem with
the control, Simply press the
CLEAR/OFF pad and wait about an
hour_ Try setting the function again, tf
the code repeats, write down the code
and call for service Tell the technician
what code was flashing
19

OPERATION
OvenCookingTips
Preheating is bringing the oven
temperature up to the temperature
you will be using during baking
It is normal to have some odor when
using your oven for the first time. To
help eliminate this odor, ventilate
the room by opening a window
or using a vent hood.
iMPORTANT: Never cover the oven
bottom or oven rack with aluminum
foil. improper use can cause poor
heat flow, poor baking results, and
may damage the oven finish.
In the back of the oven you will notice
a small tuber This is a heat sensor
that maintains the temperature of the
oven. Never move or bend this tube.
Oven
Temperature
Sensor
The tow temperature zone of your
oven (between 170 ° and 200°F) is
available to keep hot cooked foods
warm° However, foods should not be
kept at these temperatures longer
than 2 hours.
The oven vent is located under the
control panel. This area could
become hot during oven use. The
vent is important for proper air
circulation, Never block this
vent.
Oven Vent
'--'_ Location
When using your convenient Delay
Start operation, foods such as dairy
products, fish, poultry, etc., should
never sit more than 1 hour before
cooking. Room temperatures and the
heat from the oven light promote
bacterial growth.
Opening the door often to check
foods will cause heat loss and poor
baking results.
2O

OPERATION
OvenCookingTips
GLASS, DARK NON-STICK OR
DARKENED BY AGE
BAKE-WARE, absorbs heat, and can
be used for yeast breads, pie crust or
foods that need a brown crust, The
oven temperature, when using these
pans, should be reduced by 25°F,
The Oven Temperature Sensor at the
back of the oven continuously senses
and controls the temperature inside the
oven. To keep a constant set
temperature, the elements will cycle or
turn on and off during cooking°
The oven racks are designed with stop
locks, a convenience as well as a safety
precaution. The guides have a bump to
prevent the racks from tilting when
racks are pulled out of the oven
If baking with more than one pan,
place the pans so each has at least 1
to 1 t/2" of air space around it. Place
pans so one is not directly above the
other.
Bump in __J tl!
rack guide _l HI
Your oven has six (6) rack positions
Above the top guide cannot be used for
a rack position.
Guide
FLAT COOKIE SHEETS, without
sides, allow air to circulate all around
the cookies for even browning
Always place oven racks in the
proper position while oven is
cool.
SHINY PANS reflect heat, and are
perfect for cakes and quick breads
that need a light golden brown crust.
2t
You may feel that your new oven cooks
differently than the oven it replaced, We
recommend that you use your new oven
a few weeks to become more familiar
with it, following the times given in your
recipes as a guide See Do It Yourself
Temperature Adjustment in the back of
this manual to make the adjustment if
you feel your oven is too hot or too cool
for your cooking preference

OPERATION
Baking
1. Press the BAKE pad_
2. Press the number pads
to set the oven
temperature you prefer to
use,
3, Press the START pad
To set the oven to cook for a specific
time and turn off automatica!ly.
B_ 1. Press the BAKE pad,
m
Press the number pads
to set the oven
temperature you prefer to
use
3. Press the OVENCOOKING TiME pad
1
Press the number pads
to set the amount of time
you prefer your foods to
cook°
5, Press the START pad,
To set the oven to turn on at a Iater time
of day, cook for a specific amount of
time and turn off automatically,
1. Press the BAKE pad,
Press the number pads
to set the oven
temperature you prefer to
use
3.
ICOOKINGI
Press the OVEN
COOKING TIME pad,
Press the number pads
to set the amount of time
you prefer your foods to
cook.
5. Press the DELAY
START TIME pad,
(_ 6. Press the number pads
to set the time of day you
prefer the oven to turn on
7. Press the START pad.
These oven operations may be
used when roasting.
The oven will cut off at the end of the
cooking time unless the cook and
hold feature has been activated,
22

OPERATION
Broiling
Broiling is cooking by
direct heat from the
upper element, The
oven door should
remain opened to the
broil stop position
during broiling
It is not necessary to preheat the
oven when broiling Use the broiler
pan and grid that came with your
range. Both are designed for proper
drainage of fat and liquids.
e,- ............ -
lf foil is used it must
be molded tightly to
the grid and slits cut
into the foil to match
those of the grid. This
allows fats and liquids to
drain into the broiler pan,
preventing fire and
excessive smoke.
Always remove the
pan and grid from
the oven. Storing or
forgetting a soiled broiler
pan in the oven is a
potential smoke or fire
hazard.
k- J
The U,S Department of Agriculture
notes that meat cooked rare is
popular, but meat cooked to only
140°F (rare) means that some food
poisoning organisms may survive.
The closer you place foods to the
broil element, the faster foods brown
on the outside yet remain red to pink
in the center,
Moving meats away from the element
will allow the meat to cook to the
center while browning on the outside
Cook side 1 at least 2 minutes longer
than side 2 If your oven is connected
to 208 volts, you may want to use a
higher rack position and/or broil
foods longer.
The size, weight, thickness, starting
temperature and your preference of
the doneness of the meat will affect
broiling. This chart is based on meats
at refrigerator temperature.
FOOD
RACK
:POSITION
3Steak 1" thick
Grotmd beef
patties
1" thick 3 16-18
Pork Chops-I/2"
thick 3 27-29
Fish (fillets) 3 11-13
Chicken (pieces) 2 45-55
TOTAL
TIME, .(MIN.)
21-23
la. Press the BROIL pad (This
will automatically set HI
Broil}.
lb. While the set indicator is flashing
in the display, press the BROIL
pad again if you prefer to use Lo
Broil. Use Lo Broil to cook foods
such as poultry or thick cuts of
meat thoroughly without
overbrowning them,
2. Press the START pad.
3. When broiling is finished, press
the CLEAR/OFF pad
23

OPERATION
SettingSpecialFeatures
Your new touch pad control has
additional features that you may choose
to use. After making your selection, if
you want to change that setting, follow
the steps until the display shows your
choice.
The control is automatically set to turn
off the oven after 12 hours baking or 3
hours broiling should you forget and
teave the oven on, If you want to
remove this feature:
1. Press and hold, at the same
time, the BAKE and BROIL pads
for 3 seconds, until the display
shows SF.
2, Press the DELAY START TIME
pad, The display shows t2shdn
(12 hour shut-off).
Press the DELAY START TIME
pad again The display will show no
shdn (no shut-off)
3, Press the START pad_
Your oven control is set for the
Fahrenheit temperature selections° Most
recipes are given using the Fahrenheit
scale. You can change this to use the
Celsius selection
1, Press and hold, at the same
time, the BAKE and BROIL pads
for 3 seconds, until the display
shows SF,
2. (a) Press the BROIL pad° The
control display will show the
degrees sign and F,
(b} Press the BROIL pad again.
This will change F (Fahrenheit) to C
(Celsius)
3. Press the START pad,
Your control is set to use the 12 hour
clock. If you prefer to use the 24 hour
Military Time clock or black out the
display:
1. Press and hold, at the same
time, the BAKE and BROIL pads
for 3 seconds, until the display
shows SF
2. (a) Press the CLOCK pad. The
display shows 12hr, If this is your
choice press the START pad,
or
(b) Press the CLOCK pad again.
The display will show 24hr.,
Example: 5:00 on the 12 hour clock
will show17:00 hours on the military
clock. If this is your choice press the
START pad
or
(c) Press the CLOCK pad again_
The display will show OFF If this is
your choice press START, The
display will not show time, (The
Delay Start Time feature will not
operate,)
24

OPERATION
SettingSpecialFeatures
Your control will allow you to lock the
touch pads so they cannot be activated
when pressed, If you're worried about
leaving the oven unsupervised, activate
this feature.
1. Press and hold, at the same
time, the BAKE and BROIL pads
for 3 seconds, until the display
shows SF
2. (a) Press the CLEAN pad, The
display shows LOC OFF (lockout
0%
(b} Press the CLEAN pad again
The display will show LOC ON
(lockout on).
3. Press the START pad.
This feature can only be set
when the oven is not in use.
When this feature is on, the display will
show LOC, if a touch pad is pressed.
(This feature will not affect the Clock,
Timer or Oven light pads°)
Your new control has a cook and hold
feature for timed cooking only that wilt
keep hot cooked foods warm up to 3
hours after the timed cooking is
finished, To activate this feature:
1. Press and hold, at the same
time, the BAKE and BROIL pads
for 3 seconds, until the display
shows SF.
m
(a) Press the OVEN COOKING
TIME pad. The display will show
HLd OFF
(b) Press the OVEN COOKING
TIME pad again to activate the
feature_ The display will show HLd
ON,
3. Press the START pad.
This special feature will allow you to
change the speed; #1 means speed of
change is slow up to #5 which means
speed of change is fast To set the
speed you prefer, follow these steps:
1. Press and hold, at the same
time, the BAKE and BROIL pads
for 3 seconds, until the display
shows SF
2. Press the UP arrow pad, The
display will show the current set
speed.
3. Press the UP arrow to increase the
speed up to the number 5.
or
Press the DOWN arrow pad to
decrease the speed down to the
number 1
4. Press the START pad,
25

Self-CleaningCycle
CAREANDCLEANING
t. Remove the broiler pan and grid,
oven racks, utensils and any foi!
that may be in the oven,
2. Soil on the front frame,l" inside
the oven, and outside the door
gasket will need to be cleaned
by hand.
FRONT FRAME
,
\
,,/' ,F?
_ DOOR LINER
Clean these areas with hot water,
soap-filled steel wool pads or
cleansers such as Soft Scrub® to
remove any soil Rinse well with clean
water and dry°
3. Wipe up any heaw spillovers on
the oven bottom.
4. Do not clean the door gasket. The
fiberglass material of the oven
door gasket cannot withstand
abrasion. It is essential for the
gasket to remain intact If you
notice it becoming worn, frayed,
or displaced on the door, it should
be replaced.
The door gasket is designed to have
a 5-6" gap at the bottom of the door,,
This allows for proper air circulation,
Door Panel Gasket
Door Liner
It is normal for your oven door to give
the appearance of not having a good
seal against the range, This is due to
the gasket,. The location of the gasket
on the oven door maintains a good
seal and prevents any heat loss,
_ Utensils should
never be left in the
oven during a clean
cycle.
The oven racks may be
cleaned during the
self-clean cycle, but will
lose their luster and
become hard to slide, if you
choose to leave them in
during the cycle, wiping
them with vegetable oil
after the cycle will help
them slide easier.
For the first clean cycle,
vent the room with an
opened window or hood
vent.
26

CAREANDCLEANING
Self-CleaningCycle
The Clean Cycle, including cool down
time, is automatically set for 4 hours,
but you may change this from 3 hours
if oven is lightly soiled up to 5 hours if
oven is heavily soiled_
C)
1. Press the CLEAN pad.
4 hours will show in the
display°
2, If you want to change
the length of clean time
press the number
pads.
3. Press the START pad,
Simply press the CLEAR!OFF pad°
You wil! need to wait for the oven
temperature to drop below the lock
temperature (approx_ 1 hour) before
attempting to open the door. Locked
door will go out in the display
After the cycle, you may notice some
white ash in the oven Just wipe it up
with a damp cloth or sponge.
tf white spots remain, scrub them
with a soap-filled steel wool pad. Be
sure to rinse thoroughly. These are
usually deposits of salt that cannot
be removed during the cycle.
If for any reason you are not
satisfied with the cleaning
results, just repeat the cycle.
1. Press the CLEAN pad
11
3,
If you want to change
the length of clean time
press the NUMBER
pads.
Press the DELAY
START TIME pad
Press the NUMBER
pads to set the time you
prefer the clean cycle to
start.
Press the START pad.
27

CAREAND CLEANING
CleaningMicrowaveOven
CLEANING MATERIAL
• Damp cloth
o Plastic scouring pad
• Dishwashing detergent
• Warm water
Clean with mild dishwashing detergent
and water, then rinse well with damp
cloth if desired, a container of water can
be boiled in the oven using microwave
energy. This will help loosen soil. For
hard-to-clean soil, clean gently with a
plastic scouring pad, Do net use
abrasive cleaners which could
scratch or damage the surface.
TO CLEAN
Wash with warm sudsy water, For harder
to remove soil, gently rub with a nylon
mesh scouring pad and nonabrasive
cleanser. Rinse thoroughly
REPLACE THE GLASS TURNTABLE
1. Replace the roller ring,
2. Replace the glass turntable, Make sure
the glass turntable finger fits between
the pulley shaft fingers.
CLEANING MATERIALS
o Soft cloth
. Warm water
o Dishwashing detergent
Wipe off spills or spatters while they
are still warm. Use mild dishwashing
detergent and warm water, then rinse
with clean water, and dry with soft
cloth,
CLEANING MATERIALS
• Non abrasive nylon mesh scouring pad
• Non abrasive cleanser
• Warm water
• Dishwashing detergent
TO REMOVE THE GLASS
TURNTABLE
1, Grasp the glass turntable on both
sides and lift straight up.
2. Lift out the roller ring
Glass Tray
CLEANING MATERIALS
• Warm water
• Soft cloth
• Dishwashing detergent
Clean with mild dishwashing detergent
and warm water,, Rinse with clean water
and dry with soft cloth°
CLEANING MATERIALS
° Soft cloth
Open the oven door to prevent the
oven from turning on while cleaning.
Wipe the control panel with a damp
cloth, Dry immediately with a dry
cloth to prevent spotting.
28

CAREANDCLEANING
CleaningLowerOven
CLEANING MATERIALS
• Dishwashing detergent
• Warm water
• Soft cloth
Do not use abrasive cleaners,
industrial cleaners, or bleach.
Clean only as touch up between
clean cycles Use dishwashing liquid,
warm water, or soap-filled steel wool
pad. Rinse well after cleaning and
dry,
NEVER USE OVEN CLEANERS
IN OR AROUND ANY PART OF
THE OVEN.
When cleaning, be sure not to bend
or displace the temperature sensor
located on the back wall of the oven,
CLEANING MATERIALS
• Dishwashing detergent
° Warm water
• Soap-filled scouring pad
° Commercial oven cleaner
TO CLEAN
Allow the pan to soak. Sprinkle the
grid with dishwashing detergent and
cover with a damp cloth or paper
towel. Rinse and dry well Scour as
needed, You may also place both the
pan and grid in the dishwasher.
CLEANING MATERIALS
o Glass cleaner
• Paper towels
• Baking soda
TO CLEAN
For everyday cleaning, use glass cleaner
and a paper towel. For stubborn soil, use
paste of baking soda and water Rinse
thoroughly
CLEANING MATERIALS
. Dishwashing detergent
• Soap-filled scouring pad or steel wool
pad
° Warm water
TO CLEAN
Wash and rinse well
TO REMOVE
Pull the racks out and up to remove,
TO REPLACE
Set the raised back of the rack on the
pair of rack guides Push until you
reach the stop locks, lift the front of
the rack until it slides easily under
the bump Push back into the oven.
29

CAREANDCLEANING
CleaningRemovableParts
Glass Retainer
._&.._
I
I
Bulb---_
i
I
Live Collar
TO REMOVE THE COVER
1. Disconnect electrical power to the
oven at the main circuit breaker or
fuse box.
2. Unscrew the glass cover and
remove,
Do not touch a hot
oven light bulb. Do
not touch a bulb with
wet hands or wet
cloth, Never touch the
electrically live collar on the
bulb when removing or
replacing the bulb. Do not
REPLACE THE LIGHT BULB
Unscrew the light bulb and replace it with
a 40-watt home appliance bulb,
TO REPLACE COVER
1. Screw down the glass cover
2, Reconnect electrical power
Broil Stop Position
Hinge
TO REMOVE
1. Open the door to the broil stop
position,
2, Grasp the door at each side and lift
up and off the hinges, DO NOT
LIFT DOOR BY THE HANDLE.
P_ L ,,, i , , m
_ AUTION: When
the door is removed
and the hinge arms
are at the broil stop
position, as a precaution,
cover the hinge arms with
toweling or an empty paper
towel roll, Do not bump or
try to move the hinge arms
while working in the oven
area, They could snap back
causing injury to the hands
or damage the porcelain
finish of the front frame.
L
TO REPLACE
2.
3.
4.
5.
6.
Remove the paper towel rolls or
towels.
Make sure the hinge arms are in the
broil stop position
Lift the door by the sides.
Line up the slots at the bottom edge
of the door with the hinge arms,
Slide the door down onto the hinge
arms as far as it will go,
Close the door,
3O

BEFORECALLINGFORSERVICE
To save you time and money, before making a service call check the list below for any
problem you may feel you have with the performance of your range If the problem is
something you cannot fix use the Consumer Service Numbers located at the back of this
manual, When making any calls have the Model No., Repair Parts list,
Use and Care Manual and the Date of Purchase available.
PROBLEM
The display of your
control is flashing.F"
followed by a number
or letter.
POSSIBLE CAUSE
"ln'"l n,,ll i1,11
Range malfunction.
i,ilU, llllll,, i i
Oven will not No power to range
work; totally
inoperative.
I
Foods do not bake
properly.
i,i , i ,n
a. Oven is not preheated.
b, Improper rack or pan
placement.
c. Oven vent blocked or
covered.
POSSIBLE SOLUTION
II I
Press the CLEAR/OFF
pad. Let the oven coot for t
hour and enter an oven or
cleaning operation If code
repeats, calt for service.
a, Check the circuit
breaker or fuse.
ur,
a, Be sure to preheat until
the tone sounds.,
b. Maintain uniform air
space around pans and
utensils. See oven
cooking section.
c, Keep vent clear.
d. Improper use of foil., d.
e, Improper temperature e,
setting for utensil used°
f. Recipe not followed, f,
g. Improper oven control g,
calibration
h, Oven and oven rack not h,
level.
Racks should not be
covered during baking
Reduce temperature 25
degrees for glass or
dull/darkened pans
Check recipe and
measuremenL
Check the temperature
adjustment following this
section
Check the installation
instructions for leveling.
31

BEFORECALLINGFORSERVICE
PROBLEM POSSIBLE CAUSE POSSIBLE SOLUTION
it,tt tnu tttt t t tttJtttttt,tl t t
Oven temperature Oven control calibration, See oven cooking section
seems inaccurate,
Oven light does a. Light switch is in off a. Check switch setting
not work, position.
b. Bulb needs to be
replaced
r.................
Degrees - Celsius option
selected
Oven will not
accept bake
setpoint.
I
Foods do not broil
properly.
a. Improper rack position a.
b. Oven preheated
c, improper use of foil_
b. Check or replace light
bulb,
See special Features
section,
.....rll,l,ll_l,,ii, i i i i
Check broil pan
placement; see broiling
section•
b. Do not preheat when
broiling
c, Check broiling section,
I
Oven will not
unlock.
d. Oven door closed
during broiling,
e. Low voltage (208 voItS)r
f, Improper broiling time,
........................ i, ql
Clean cycle is not
finished
d. Open door to broil stop
position
e. Use higher rack position
and/or longer cooking
time
f. Check broiling chart in
broiling section
' I I
Oven must drop below
the lock temperature
before the door wit1
unlock,
Oven did not clean
or results were
poor.
a. Controls were not set
properly
b. Clean cycle was
interrupted
a. Check the self-
cleaning section of
this manual,
b. The normal clean
cycle should last 4
hours,
Cm Oven was soiled
heavily,
Cll
Heavy spillovers
should be removed
before the cycle is
set, You can also
repeat the cycle,
32

BEFORECALLINGFORSERVICE
PROBLEM
Oven smokes.
POSSIBLE CAUSE
i
Oven emits odor.
....I'Ull'rl " Ill'' I'' '"'llnl I ' IIIII1' I I
a, Dirty oven..
b, Improper use of
aluminum foil.
c,, Broiler pan containing
grease left in the oven.
iiii,Jlii 1.11111 i
a, Oven insulation may
emit odor during the
first few usages.
POSSIBLE SOLUTION
' i1'11",i
b. Failure to wipe out
excess soil prior to the
self-clean cycle.
i i ii ,i, ii i ii1,,1111,,,11,11 iljllll I I i
Cannot microwave Microwave kitchen timer
cook
a. Check for heavy
spillover.
b. Use of foil not
recommended.
c, Clean pan and grid
after each use
i,iiii1,111,i i
a, Put oven through
self-clean cycle to
speed up process of
odor "wearin 9 off".
b, Wipe excess soi! off
before beginning
self-clean cycle.
iii ,1111,,i,i
Use lower oven timer.
operating. (Microwave cooking and
microwave kitchen timer
cannot be used
independently at the same
time,)
33

"DOIT YOURSELF"
TEMPERATURE
ADJUSTMENT
You may feel that your new oven
cooks differently than the oven it
replaced. We recommend that you
use your new oven a few weeks to
become more familiar with it,
following the times given in your
recipes as a guide.
If you think your new oven is too hot
(burning foods) or not hot enough
(foods are undercooked) you can
adjust the temperature yourself The
appearance and texture of foods is a
better indicator of oven accuracy than
oven thermometers, to check the
temperature setting of your new oven.
These thermometers can vary by
20-40 degrees. In addition, the oven
door must be opened to read these
thermometers Opening the door will
change the temperature of the oven.
To decide how much to change the
temperature, set the oven
temperature 25 degrees higher (if
foods are undercooked) or 25
degrees lower (if foods are burning)
than the temperature in your recipe,
then bake. The results of this "test"
should give you an idea of how much
the temperature should be changed.
While the oven is not in
use, press and hold
down both the BAKE
and BROIL pad, for 3
seconds, until the
display shows SF
_3b.
Press the BAKE pad. A
factory set 2 digit
number will show in the
display, usually 00
if you think the oven
is not hot enough,
Press the NUMBER pad
to increase (+) the
temperature up to
+35°F,
if you think the oven
is too hot,
Press the BAKE pad
again and the NUMER
pads to decrease (-)
the temperature down to
.35°F
Press the START pad,
This increased or decreased
temperature setting wilt remain in
memory until the above steps are
repeated. A power failure will not
affect this setting°
The broil and self-clean temperatures
will not be affected.
34

RANGEWARRANTY
f
_FULLONEYEARWARRANTYONTHEFUNCTIONINGOFALLPARTSEXCEPTGLASS
PARTS
If,withinoneyearfromthedateof installation,anypart,otherthan aglasspart,fails tofunction
properlydueto adefectinmaterialor workmanship,Searswill repairor replaceit, freeofcharge°
FULL30-DAY WARRANTYONGLASSPARTSANDFINISHOFPORCELAINENAMEL,
PAINTEDORBRIGHTMETALFINISHEDPARTS
If,within30daysfromthedateof installation,anyglasspartorthe finishonanyporcelainenamd,
_aintedorbrightmetalpartis defectivein materialor workmanship,Searswill replacethepart,free
of charge.
FULL90-DAY WARRANTYONMECHANICALADJUSTMENTS
For90daysfromthe dateof installation,Searswill provide,freeofcharge,anymechanical
adjustmentsnecessaryfor properoperationoftherange,exceptfor normalmaintenance..
Iftherangeissubjectedto otherthanprivatefamilyuse,theabovewarrantycoverageis effectivefor
only90days.
WARRANTYSERVICEISAVAILABLEBYCONTACTINGTHENEARESTSEARSSERVICECENTER/
DEPARTMENTINTHEUNITEDSTATES
Thiswarrantyappliesonlywhile thisproductis in useintheUnitedStates,Thiswarrantygivesyou
specificlegalrights,andyou mayalsohaveotherrightswhichvaryfrom statetostate
SearsRoebuckandCo Dept 817WAHoffmanEstates,tL60179
To further add to the value of your Range,
Buy a Sears Maintenance Agreement.
Years of Ownership Coverage
Replacement of Defective
Parts other than Porcelain
or Glass
2 Mechanical Adjustment
Porcelain and Glass Parts
Annual Preventive Matnten-
4 ance Check at your request
lstYear 2ndYear 3rdYear
W MA MA
90 DAYS
W MAMA
30 DAYS
W MA MA
MAMA MA
W -Warranty MA - M_lnler_nce Agreement
KenmoreRangesaredesigned,manufacturedand testedforyearsof dependableoperation.Yet,any
modernappliancemayrequireservicefrom timetotime TheSearsWarrantyplustheSears
MaintenanceAgreementprovidesprotectionfromunexpectedrepairbillsandassuresyouof enjoying
maximumrangeefficiency.
ThechartabovecomparesthewarrantyandMaintenanceAgreementandshowsyouthe benefitsofa
SearsRangeMaintenanceAgreement.
ContactyourSearsSalesAssociateor LocalSearsServiceCentertodayandpurchaseaSears
MaintenanceAgreement.
35

Fortherepairorreplacementpartsyouneed
delivereddirectlytoyourhome
Call7 am- 7 pm,7 daysaweek
1=800=366-PART
(1-800-366-7278)
Forin-homemajorbrandrepair service
Call24 hoursa day, 7 days a week
t -8OO-4-RIEPAi R
(1-800-473-7247)
Forthe location of a
Searsparts andRepairCenterin yourarea
Call24 hoursa day, 7 daysa week
1=800=488-1 222
_BBBBB
Forinformationonpurchasinga Sears
MaintenanceAgreementor to inquire
aboutan existingAgreement
Call9am- 5 pro,Monday-Saturday
1-800-827-6655
America's Repair Specialists
36

MANUAL DEL CONSUMIDOR
HORNO DOBLE DE 30" DE
PARED CON
AUTOLIMPIEZA Y
MICROONDAS SUPERIOR
MODELO NO.
911. 41475
911. 41479
PRECAUCION:
Lea y siga todas las
reglas y las instrucciones
para el funcionamiento
antes de usar este
producto por primera vez.
• Instrucciones de
Seguridad
• Funcionamiento
• Cuidado y Limpieza
, C6mo Resolver
Problemas
Sears, Roebuck and Co., Hoffman Estates, IL 60179 U.S.A.
229C4020P131 (sR 10345)

Indice
HORNODEPAREDCON
AUTOLIMPIEZAYMICROONDAS
Seguridad en el uso det homo, 3-6
C6mo sacar la cinta de
empaque .................................. 6
Caracteristicas de su horno ..... 7
Control det homo microondas , 8
Cocinado autom_.tico ......... 9-11
Para empezar a cocinar ......... 9
Cron6metro de la cocina ...... 9
Mantenciin de tiempo ..... 9
Tiempo para descongelar ..... 10
Agregue 30 segundos ............ 11
Popcorn (pa!omitas, cabritas) 11
Sensor autom&tico para
cocinar ..................... 12-15
C6mo activar el sensor
autom_.tic ........................... 12
M_slMenos ............................ 13
Informacion Generates , , 13
C6mo recalentar ..................... 14
Descongelaci6n automAtica 15
Control del homo Inferior ......... 16
Dial del homo inferior ....... 17
Reloj y Cron6metro ............ t 8
Tonos ................................. 19
Consejos para cocinar en el
homo ................................ 20-21
Corn6 hornear ....................... 22
Com6 asar a la parrilla .......... 23
Funciones especiales ...... 24-25
Ciclo de ]impieza ................ 26-27
C6mo programar un ciclo de
limpieza .............................. 27
C6mo detener un ciclo .......... 27
Despues del cicto ................. 27
C6mo programar un cic!o de
limpieza demorado ................... 27
Paredes del homo ................. 27
Interior del homo fondo y
techo ...................................... 28
Fondo interior del homo .......... 28
Interior del vidro della puerta del
homo microondas ................ 28
Superficies exteriores de!l
homo ................................... 28
Panel de control microondas. 28
Panel de control .................. 29
Cacerola y parrilla para asar a la
parrilla ................................... 29
Parrillas det homo .......................29
Cavidad det horno ................ 29
Vidrio ................................... 29
C6mo reemplazar e! foco de la
fuz .......................................... 30
Puerta dei homo .................. 30
Antes de llamar para tin servicio ......
.................................................... 27-29
Ajustes a ta temperatura ............ 30
Garantia ...................................... 31
Numeros de servicio para el
consumidor ................................... 32
Para su conveniencia y referencia futura, por favor escriba los nt_meros
de modelo y serie en el espacio que se provee. Est_n ubicados en el
marco frontal detr_s de la puerta.
NUMERO DE MODELO:
NUMERO DE SERIE:
2

INSTRUCCIONESDE
SEGURIDADIMPORTANTES
GUARDEESTASINSTRUCCIONES
Lea todas las instrucciones antes de usar este aparato. Cuando use
aparatos a gas o el_ctricos, se deberian seguir precauciones de seguridad,
incluyendo Io siguiente:
IMPORTANTE: Paragarantizar su seguridad la
de su familia y la de slu hogar por favor lea su
Manual detConsumidor cuidadosamente
Mantenga!oa la mano para referencias Ponga
mucha atenci6n alas secciones deseguridad
ASEGURESE que su estufa seainstalada por un
t_cnico especializado y que hagatierra
adecuadamente
• NO DEJE a los ni_os solos o sin supervisbn
cerca de una estufa en funcionamiento
. ENSEi(IE A LOS NINOS a no jugar con los
controles ocualquier parte del homo, no
sentarse subirse o pararse sobre la puerta del
homo
' PREOAUCION: NUNCA GUARDE
articulos que sean de interes para los nifios en
los gabinetes sobre el homo Los niSosque se
suban sobre el homo podrian resultar
gravemente heddos
• GUARDE ESTE libro para un uso futuro
• NUNCA TRATE de reparar o reemptazar
una parte de del homo a menos que las
instrucciones se den en este manual Todo
otto trabajo deberia set hecho por un t_cnico
especiatizado
• NUNCA USE su homo para entibiar o
calentar una habitaci6n
• SlEMPRE MANTENGA losrevestimientos
combustibles de las paredes cortinas y otros
paSos a una distancia prudente de[ homo
• NUNCA USE una toatla u otto paso abultado
como agrraderas y aseg0rese que la
agarradera est_ seca Las agarraders h0medas
podrian causar quemaduras por vapor NO
PERMITA que las agarraderas toquenlas
superficies calientes
• SIEMPRE MANTENGA el Areade la homo
despejada de cosas que se prodrian quemar
La acumulacbn de comida y grasa y tos
utensilios de madera se prodrian incendiar
Los utensilios de plastico se prodr[an derretir
y las comidas en conservas podrian explotar
Su homo numca se deberia usar para
almacenar cosas
• SIEMPRE MANTENGA ta homo despejada
de cosas que se podrian quemar (gasolina y
otros vapores y liquidos inflamables)
• NUNCA CALIENTE contenedores de
a[imentos cerrados Etaumento de la presi6n
puede causar que el contenedor explote y
cause heridas
• NUNOA DEJE frascos o latas con grasa o
goteaduras dentro o cerca de la estufa
• NUNCA TRATE de timpiar una cubierta
caliente Una esponja o un paso caliente
puede causar quemaduras por vapor
Algunos limpiadores pueden producir vapores
t6xicos sobre una superficie caliente
• ASEGI)RESE que el homo este instalado
firmemente en un gabinete que est_ bien
pegado a tapared
• NO TOQUE las superficies para calentar ]as
superficies cerca de eliaso ias superficies
interiores Estaspodrian estar suficientemente
calientes para quemar aunque sevean de
color oscuro Durantey despues del use no
toque o permita que la ropa o materiales
inflamables hagan contacto con las superficies
calientes hasta que hayantenido tiempo de
enfriarrse Las otras suprficies cerca de las
ventanillas de ventilaci6n del homo puertas
ventanas y las superficies para cocinar tambien
podrian estar suficientemente caiientes para
causar quemaduras
• COLOQUE LAS PARRILLAS DEL
HORNO en la posici6n deseada mientras el
homo este frio Si lasparfitlas se deben mover
mientras el homo esta caliente, no permita que
la agarradera haga contacto con el quemador
caliente del homo
• SIEMPRE TENGA CUIDADO cuando abra
la puerta del homo Deje que e! aire caliente y
el vapor escapen antes de mover los
alimentos

INSTRUCCIONESDE
SEGURIDAD
IMPORTANTES
• DESPUES DE ASAR A LA PARRILLA,
siempre saque lacacerola y ]aparrilla para asar
del homo y l[mpielas Lossobrados de grasa en
ta cacerota para asar podrian incendiarse la
pr6xima vez que usted use el homo
• NUNCA USE papel de aluminio para forrar el
rondo del homo El uso inadecuado del papel
de aluminio podr[a resultar en un golpe de
corriente o en un incendio
,, NUNCA OBSTRUYA la abertura de la
ventilaci6n del homo
• LIMPIE SOLAMENTE las partes que se
tistan en este manual Siga todas las
instrucciones para la limpieza
• NUNCA FRIEGUE, mueva, o dafie el sello
de la puerta en las estufas con autolimpieza
- NUNCA TRATE de limpiar los utensilios,
ollas, partes removibles o tacacerola y la
parrilla para asar en el ciclo de autolimpieza
o HUNCA USE limpiadores para hornos
Ningt_nlimpiador comercial se deberia usar
dentro o alrededor de ninguna parte det
homo
;ADVERTENCIA DE SEGURIDAD
IMPORTANTE!
California Safe Drink;ng Water and
Toxic Enforcement Act requiere que el
gobernador de California publique una
lista de substancias que el estado
sepa que producen defectos de
nac;miento u otros dafios
reproductivos y requiere que los
hombres de negocios adviertan a sus
clientes del contacto potencial a tales
substancias. El aislante de fibra de
vidr;o en el homo con autolimpieza
emitir_ una muy pequefia cantidad de
mon6xido de carbono durante el ciclo
de autolimpieza. El contacto se puede
minimizar ventilando con una puerta o
ventana abierta o usando un ventilador
o una campana de ventilaci6n.
;LEA Y COMPRENDA ESTA
INFORMACION AHORA!
Asegtirese que todos en su hogar
sepan qu_ hacer en caso de incendio.
Nunca use agua sobre un ;ncendio de
grasa_ esto solamente extender_ las
llamas.
FUEGO EN EL HORNO:
;No trate de mover la cacerola!
1. Cierre la puerta del homo y apague tos
controfes
2. Si el incendio contint_a,cuidadosamente
abra la puerta, arroje soda para cocinar
sobre eEfuego, o use un extintor de
quimico seco, espuma o "halon"
_ Cuando use aparatos .
electricos, se deben segmr
precauciones b_sicas de
seguridad, incluyendo las
siguientes: ADVERTENCIA: Para
reducir el riesgo de quemaduras,
golpes de corriente, ;ncend;o,
heridas personales o exposici6n
excesiva a energia de microondas:
• Lea todas las instrucciones antes
de usar este aparato.
• Read and follow the specific, Mi-
o No trate de operar este horno con la
puerta abierta ya que el funcionamiento
con la puerta abierta puede resuttar en
una exposici6n dafiina a la energia de
microondas Es importante no
desconectar o inted:erir con los sistemas
de seguridad,
• No coloque ningOn objeto entre el
frente del homo y la puerta o permita la
acurnulaci6n de suciedad o residuo de
timpiadores en las superficies de cierre
• No haga funcionar el horno si est_
dafiado, Es particularmente importante
que el homo cierre correctamente y que
no haya dafio a: Puerta, Bisagras y
Cerrojos, o Sello de la Puerta,
• El homo no deberia ser ajustado o
reparado por nadie excepto por un
servicio de personal especializado

INSTRUCCIONESDE
SEGURIDAD
IMPORTANTES
• Este aparato debe hacer tierra
Conecte solamente a un recept;_culo
que haga tierra Vea tas instrucciones
para hacer tierra en las instrucciones
para la instalaci6n.
• Use este aparato solamente para su
uso apropiado como se describe en este
manual. No use qufmicos o vapores
corrosivos en este aparato Este homo a
microondas esta espeificamente
disehado para calentar o cocinar
alimentos, y no tiene un prop6sko indus-
trial o de laboratorio
, Instale o ubique este aparato
solamente de acuerdo con las
instrucciones para instalaci6n que se
proveen,
,, No cubra u obstruya ninguna abertura
de este aparato
- Do not cover or block any openings
on the appliance
- Este horno microondas no est,,
aprobado o probado parta uso madtimo
• No haga funcionar este aparato si no
est_ funcienando bien o si ha sido
daSado o se ha dejade caer.
• Como cualquier otro aparato
el_ctrico, se necesita una vigilancia
muy de cerca cuando se usa pot los
ni_os
• No sobrecocine la comida Vigile el
homo cuidadosamente si papel, pl_stico
u otros materiates combustibles se han
cotocado dentro del homo para facilitar
la cocci6n
• Saque las amarras de alambre de
las bolsas de papei o pl_stico antes de
p0nertas en e! homo
• No use su homo microondas para
secar peri6dicos
° No use productos de papel reciclado.
Las toallas y fas servilletas de papeI
reciclado y et papel de cera pueden
contener particulas de metal que
podrian producir arcos o incendiarse.
Los productos de papet que contienen
nil6n o filamentos de nil6n deberian
evitarse
• Do not heat food in closed containers,
such as glass jars, which may explode
° No prepare "pop corn" en su homo
microondas a menos que use un "pop
corn" que sea marcado para uso en los
homos microondas
• No cocine demasiado las papas.
Se podrian deshidratar e incendiarse,
causando daSo a su homo
• No haga funcionar el homo
microondas si estb, vacio..
• No use su homo microondas para
almacenar cosas.
• Si el material dentro del homo se
incendia, cierre la puerta, apague el
homo y desconecte ta electricidad al
aparato
° Alimentos de tama_o grande y
utensilios de metal demasiado grande
no deberian usarse en un homo
microondas Se podda producir un
golpe de corriente o un incendio.
• No limpie con tanillas para fregar de
metal. Se podrian quebrar fragmentos
de la lanitla, causando un golpe de
corfiente.
° No descongele bebidas congeladas
que tienen botellas de cue]!o angosto
Podria subir ta presi6n y causar que la
botelta exptote
'* Use agarraderas cuando saque los
utensitios del homo Los utensilios se
podrian calentar cuando cocine debido
a la transferencia del calor desde la
comida
- Tenga cuidado si toca las paredes o
el rondo del homo durante y despu_s
que cocine Las paredes y el fondo
podrfan estar calientes
• No hierva huevos en un homo
microondas La subida de presi6n
dentro de la yema del huevo podria
causar que el huevo explore
5

INSTRUCCIONESDE
SEGURIDAD
IMPORTANTES
• Use contenedores de plAstico que
sean aprobados por et fabricante para
uso con microondas No permita que los
niNos usen contenedores de p!_stico a
menos que est6n siendo vigilados, No
exponga contenedores vacios alas
microondas.
° Alimentos con piel o cascara
entera, tales como papas, salchichas,
tomates, manzanas, higado de polto,
yemas de huevo y otras partes del pollo,
deberian tenet hoyos para permitir que
el vapor escape durante la cocci6n,
- Asegdrese que los envoltorios de
pl_stico que use cuando cocine a
microondas sean aprobados para uso
con microondas,
° Ebullici6n espont_nea. Bajo ciertas
circunstancias, los liquidos podrfan
empezar a hervir durante o poco tiempo
despu_s que se sacan del homo
Revuelva el Ifquido
• No ealiente comida para los
beb_s en fiascos de vidrio con
microondas
° Alas bolsas para cocinar hervibles y
bolsas de ptAstico hermCticamente
cerradas setes debedan hacer hoyos,
tajaduras o deberian ser ventitadas
como se instruye en el paquete Si no
' son ventiladas de alguna manera, la
presi6n causarA que se revienten
Para sacar el residuo del adhesivo de la
cinta de empaque, use un detergente
liquido para lavar platos, aceite mineral o
para cocinar, Con un paso suave frote el
Area y permita que se remoje Enjuague y
seque bien, Repita el procedlmiento
usando un pulidor para hornos para
asegurarse que el homo no ha sido
da_ado. Esto se deberia hacer
antes que el horno se encienda pot
primera vez. La cinta no se puede
sacar una vez que el homo ha sido
calentado. La cinta de empaque se
puede encontrar en las Areas siguientes:
Manilla de ta puerta, Area del panel de
control, Moldura de la puerta y Area del
homo
6

OPERACION
CARACTERISTICASDESUHORNO
Numbero de
nodelo y serie
Bandeja rotante
para microondas
Luz del horno
RejUla y
ventilacion del
homo
Control dei
homo
microondas
Control del
inferior
Cerrojo de la
puerta para la
limpieza
Luz del homo
Cacerola y
parrilla para
asar
Guia para
parriilas del
homo
Parrillas
removible del
horno
Boton de
empuje dei
homo
Ventilacion y
rejilla del horno
inferior
interruptor
automatico de
la luz del horno
Elemento para
asar a la
parrilla
Sensor de
temperatura
Elemento para
)rnear
Sello de la puerta dei
homo
7

OPERACION
HORNO MICROONDAS SUPERIOR
AUTOSENSORCONTROLS
i , i, , ll,ll , illl ,,i, iii1,111 IH II i,i, ,11,1
..........................
AUTODEFROST
TCHENTIMER
Su nuevohomo microondas drece una gran
variedad de maneras en la cua[ cocinar ]a
comida El homo microondas usaondas de radio
cortas y de alta frecuencia que se mueven a
travCsde losalimentos para generar calor Es
muy conveniente para recalentar y descongelar
porque el [iempo y la preparaci6n sonmuy cortos
COMO COCINAR CON UN COMIENZO
DEMORADO -- le permite comenzara cocinar
en forma demorada programando lahora en la
cuat usted prefiereque el homo se encienda
Vea la p_gina 9 acerca de C6mo Cocinar
en Forma Demorada,
COMO COCINAR EN FORMA
AUTOMATICA--le permite programar la
cantidad de tiempo que desea para cocinar,
descongelar, uhoras de comienzo demorado
usandoel hive]de poder que usted prefiere Vea
la pi_ginas 9.11 para las instrucciones
detalladas de Programas para Cocinar
en Forma Autom_tica.
DESCONGELADOR AUTOMATICO -- Ef
Descongelador Autom_.ticoprograma
autorn_ticamenteel tiempo y el nive!de poder
que se necesita para descongeiar Entree! peso
de los alimentos enlibras y decirnos de libra y el
homo har_.el resto
Vea la p_gina 15 para usar el Programa
para Descongelar Autom_tico,
SENSOR PARA COCINAR
AUTOMATICO -- usando et Sensor
Autom_tico y el Recalentamiento Autom_tico,
su sensor de! homo microondas detectarA la
cantidad de vapor que se escapa de los
alimentos y ajustar_ autom_ticamente el nivel
de poder y el tiempo para cocinar Este
m_todo elimina todo el proceso de tenet
que adivinar cuando cocine E! control
apaga autom_.ticarflente el homo cuando
termina de cocinar Vea p:_ginas 8.11
para instrucciones detalladas de
c6mo usar el Programa de Sensor
Autom_tico.
DEACTIVACION DEL CONTROL - Su
control le puede permitir deactivar los
botones para que no puedan set
activados cuando se lea empuja. Si a
usted le preocupa dejar el homo sin
supervisidn, active esta caraoteristica
empujando el bot6n START 3 veces Su
control est_ ahora deactivado. Para
eliminar esta condici6n empuje el bot6n
CLEAR/OFF 3 veces.
8

OPERACION
CocinadoAutomatico
1. Empuje el bot6n POWER LEVEL una
vez para usar el Nivel de Poder Alto
La mayoria de la cocci6n usa et Nivel
de Poder Alto, pero usted podda usar
el nivel que prefiera
2. Empuje los BOTONES DE LOS
NUMEROS para programar ta
canfidad de tiempo en el cuai desea
cocinar la comida Por ejemplo,
empuje 1,0,0, para programar 1 minuto
de tiempo de cocci6n
3. Empuje el bot6n START
(comienzo),
TABLA DE NIVEL DE PODER
EMPUJE NIVEL DE % DE
1 vez
2 veces
3 veces
4 veces
5 veces
6 veces
PODER
ALTO
DESCONGELAR
MEDIO ALTO
MEDIO
MEDtO BAJO
BAJO
PODER
100%
30%
70%
55%
30%
t0%
EtCron6metro de Min/Sec de la cocina tiene 3
funciones:
-- Cron6metro de la Cocina
-- Programa un comienzo demorado
autom_tico
m Mantiene un tiempo
EtCron6metro de la Cocina se puede programar
hasta 99 minutos y 99 segundos El cron6metro
correr_, sin usar energia microondas
1. Empuje etbotch MIN.tSEC, KITCHEN
TIMER,
2. Empuje los botones de los NUMEROS
para programar los Minutos y losSegundos
que necesitar_ Pot ejemplo, empuje 1,3,0,
para programar t minuto y 30 segundos
3, Empuje el boL6nSTART
Despu_s que el cron6metro de la cocina
empieza a contar, usted no podr_ programar
una funci6n a microondas hasta que la
cuenta del cron6metro Ilegue a cero o et
cron6metro haya sido cancelado
1, Empuje el bot0n MIN.tSEC, KITCHEN
TIMER
2, Empuje los botones de los NUMEROS
para seleccionar la cantidad de tiempo
demorado
3. Empu[e el bot6n POWER LEVEL para
seteccionar el nivel de poder necesitado
4. Empuje los botones de los NUMEROS
para programar la cantidad de tiempo para
cocinar
5. Ernpuje el botch START (comienzo),
NOTAS ACERCA DE COCINAR EN
FORMA DEMORADA
° Un comienzo demorado no se puede
programar con ninguna Funci6n de Sensor
Autom_,tico.
• Si el homo se abre durante la porci6n
demorada de! programa, et cron6metro
continuar_, su cuenta La puerta debe
estar cerrada antes que la porci6n
para cocinar del programa puede
comenzar.
9
El Cron6metro de la Cocina tambi_n puede ser
usado para programar la man_enci6nde un
tiempo entre las funciones para cocinar a
microondas ocuando tacoccbn termine E]
tiempo puede variar desde I segundo hasta99
minutos y 99 segundos Un tiempo de
mantenci6n podria set encontrado en algunas de
sus recetas oen libros de cocina Vea la p_gina
tl

OPERACiON
CocinadoAutomatico
Aunque su nuevo homo microondas est&
equipado con una funci6n de
Descongelaci6n AutomAtica, usted
tambi_n tiene la opci6n de seteccionar su
propio tiempo de descongelaci6n
1. Empuje el bot6n POWER LEVEL 2
veces Usted ver_ DEFROST
2, Empuje los botones de los Numeros
para seleccionar en cuAnto tiempo
desea descongelar la comida Por
eiemplo: empuje 5, 0, 0 para programar
5 minutos
3, Empuje el bot6n START
COSAS QUE DEBE RECORDAR
CUANDO DESCONGELE
AUTOMATICAMENTE.
o Los alimentos congelados en papel o
pl&stico pueden ser descongelados en
et paquete, A los paquetes bien
cerrados sefes debe hacer hoyos,
cortes o deben set ventilados despu_s
que los alimentos se hayan
descongelado parcialmente Los
contenedores de p!_.stico deberfan ser
parcialmente abiertos,
o Las cenas congefadas pueden set
descongeladas y cocinadas a
microondas Si los alimentos estAn en
papel de aluminio, transfi_ralos a un
plato adecuado para microondas
- Para una descongelaci6n pareja.
algunos alimentos necesitan set
separados o quebrados durante el
tiempo de descongelaci6n,
• Los alimentos que se echan a perder
fAcifmente, tales como la leche, retlenos,
ave y cerdo no se deberfan exponer al
aire tibre por m_,s de una hora despues
de ser descongelados La temperatura
ambiente de la habitaci6n promueve el
crecimiento de bacterias
TABLA DE TIEMPO PARA
DESCONGELAR
AUMENTO
Filetes de
pescado
Langostino
meal
Escalopas
Chuletas
Polio
TIEMPO DE
DES-
CONGELACION
(rain pot libra)
6 - 8 min
8-10 min
14 - 16 min
8 -10 min
8-10 min
De vuelta y
arregle a
medio
descongetar.
Quiebre
cuando est_ a
medio
descongelar
Saque
langostino
descongelado.
Quiebre
cuando est_n
a medio
descongelar
Saque
escatopas
descongefadas.
Separe. d6
vuelta, y
arregle a
medio
descongelar_
Separe a
medio
descongelar
1. Empuje el bot6n POWER LEVEL 2
veces.
2. Empuje los botones de los nQmeros
para sefeccionar por cuAnto tiempo
desea descongelar la comida
3. Empuje el bot6n POWER LEVEL
basra que Yea el Nivel de Poder que
desea usar para cocinar,
4. Empuje los botones de los NUMEROS
para programar la cantidad de tiempo
en que desea cocinar, Pot ejemplo:
empuje 3, 0, 0 para programar 3
minutos
5. Empuie el botOn START
Usted puede empujar el bot6n Power
Level (Nive[ de Poder) para ver cu&l
funci6n estA en proceso
10

OPERACION
CocinadoAutomatico
1. Empuje el bot6n POWER LEVEL hasta
que yea DEFROST
2. Empuje los botones de los n0meros para
seleccionar e! tiempo en el cual desea
descongelar los alimentos
3. Empuje el bot6n MIN./SEC, KITCHEN
TIMER
4. Empuje los botones de los numeros para
programar por cu_nto tiempo desea
mantener et tiempo
5. Empuje el bot6n POWER LEVEL hasta
que vea el Nivel de Poder que desea
usar.
6. Empuje los botones de los NUMEROS
para programar la cantidad de tiempo
para cocinar Ejemplo: empuje 3, 0, 0
para programar 3 minutos.
7. Empuje el bot6n START
8. Para terminar la funciOn empuie el bot6n
CLEARtOFF dos veces
Usted puede empujar el bot0n power level
durante la cocci6n para ver cu_l funci6n est_
en proceso,
COMO CAMBIAR 0 CANCELAR UNA
FUNCION
Si usted ha programado una funci6n y se ha
arrepentido, tendr_ que empujar el botOn
CLEAR/OFF 2 veces para cancelar su
programa.
Entre el peso del paquete de popcorn
para microondas que va a preparar
Empuje:
Popcorn 1 vez. 3.5 oz.
Popcorn 2 veces - 3,0 oz.
Popcorn 3 veces. 1.75 oz.
Despues de hacer su selecci6n, empuje et
bot6n START,
NOTAS ACERCA DEL BOTON PARA
POPCORN.
• Use popcorn empaquetado para
microondas a temperatura ambiente
Lea las instrucciones del fabricante,
• Coloque el paquete en el homo de
acuerdo afas direcciones del fabricante
° Prepare un paquete a la vez,
• Despu_s de set preparadoo abra el
paquete con cuidado, Et popcorn y el
vapor est_n extremadamente caliente,
• No recaliente los granos de maiz que no
estan hechos y no reuse e; paquete
• Nunca deje el homo sin vigilancia
cuando est_ haciendo popcorn
_ PRECAUCION: Si el "_
popcorn preempaquetado
es de un peso diferente al
peso recomendado, no
use la posici6n para popcorn, Se
podria obtener un real resultado y
se podria causar un incendio, Siga
las instrucciones del fabricante
del popcorn,
La funci6n de AGREGADO DE 30
SEGUNDOS provee una rnanera conveniente
para extender el tiempo de cocciOn por 30
segundos mientras et dial del homo est,.
contando. Agregar_. 30 segundos al tiempo
cada vez que el bot0n se empuja
11

OPERACION
ComoCocinarConE!
AutoSensor
El Auto Sensor para cocinar le permite
cocinar la mayoria de sus comidas
favoritas sin tener que seleccionar tiempos
y niveles de poder para cocinar. El control
det homo microondas hat& esto por usted.
1. Empuje el bot6n Auto Sensor para
el tipo de comida que desea cocinar.
Ejemplo: Verduras en conserva.
2. Empuje el bot6n START.
NOTAS ACERCA DE COCINAR
CON EL AUTO SENSOR:
° El sistema de! Auto Sensor trabaja
detectando ]a acumulacidn de vapor
por el sensor. A medida que los
alimentos se cocinan se produce vapor
Cuando el vapor es detectado por et
sensor, el control calcula
autom_ticamente el resto del tiempo de
coccidn El tiempo restante se mostrar_
en e! dial
o Cuando use el sistema Auto Sensor, la
puerta ne se deberia abrir por m_s de
un minuto El abrir la puerta podria
causar ma!os resultados de coccidn El
tiempo ideal para abrir la puerta del
homo para revolver, dar vuelta, o
agregar alimentos es cuando el tiempo
para cocinar empieza a contar en e!
dial
° La temperatura de la habitaci6n no
debeda ser m_s de 95 grados cuando
use la funcidn para cocinar con el Auto
Sensor.
• Los alimentos de menos de 4 onzas se
deberian cocinar por poder y tiempo
solamente, no con el sistema de Auto
Sensor
- Cuando use la funci6n para cocinar con
el Auto Sensor asegQrese que la
bandeja en et homo est_ seca, para
asegurar buenos resuttados
° Para buenos resultados cuando cocine
usando el Auto Sensor, aseg0rese de
cubrir todos los alimentos, excepto las
papas NO cubra las papas, Coloque
la comida en una cacerola con una tapa
ajustada que no la selle NO USE
eierres de pl_stico a presi6n
sobre las tapas. Si usted no tiene una
tapa, puede usar una cubierta de papel
de pl_stico que sea ventilad&
TABLA PARA COCINAR CON AUTO
SENSOR
VERDURAS
EN
CONSERVA
VERDURAS
CONGELADAS
VERDURAS
FRESCAS
PAPAS
FILETES DE
PESCADO
PRESAS DE
POLLO
10 oz
10-28 oz
1/2-2 Ibs
(Antes de
pelar,
recortar,
etc,)
1-4
papas
enteras
8-9 oz
cada una
112-2tbs
1/2-3 Ibs
Las verduras
deberian estar a
[emperatura
ambienle Cuando
liernpo restante
aparece en e! dial,
abra ta puerta y
revuelva los
alimentos
Cubra las verduras
con tapa o papel de
31b,stico ventilado
en una eaquina No
use verduras
congeladas con
salsa o mantequilta
Cubra ]asverduras
con tapa o papel de
pl&stico ventitado
en una esquina
Debe hacerles varios
hoyos antes de
cocinadas Ponga
tas papas enteras en
un plato para
microondas No
cubra las papas,
Ponga los tiletes en
un plato uno attado
del otto Cubra el
plato con papal de
_l_stico ventilado en
una esquina Cuando
el tiempo aparezca
en etdial, 0_mbielos
de posici6n
Cubra ias presas
de polio con papel
de pt,_stico
ventilado en una
esquina Cuando el
tiempo aparezca en
et dial, cambielos
de posici6n
12

OPERACION
ComoCocinarConElAuto
Sensor
Despu6s de cocinar con el Auto Sensor
varias veces, usted podria determinar que
preferiria sus comidas un poco m&s o un
poco menos cocida. Usando el bot6n
MAs!Menos. los programas del Auto
Sensor ajustar&n el tiempo de cocci6n a
mAs o menos tiempo Si usted est,.
satisfecho con los resultados de cocina
usando solamente los botones para
cocinar con el Auto Sensor, usted no
necesitar_ el uso del botdn M_s/Menos
COMO USAR EL BOTON MASt
MENOS (MORE/LESS)
1. Empuje el bot6n Auto Sensor
2a, Empuje el bot6n More/Less una vez
para cocinar mAs
0
2b, Empuje el bot6n More/Less dos
veces para cocinar menos
3, Empuje el bot6n START
El papel de plAsfico deberia ser ventilado
sobre ta comida para permitir que escape
el vapor Selle empujando el papel de
plb.stico firmemente alrededor de Ias
oriilas
Para comidas congeladas en bandejas de
metal saque el envoltorio de aluminio.
cotoque nuevamente la bandeja en la caja
y cierre las puntas de la caja
Haga cortes de 1
pulgada en las bolsas
como se muestra
Quiebre bien la
comida despuCs que
el homo da ia se_at
Las cubiertas de papel
de pt_stico debedan ser
ventiladas sobre los
alimentos para permitir
que escape el vapor.
Selle presionando el
envoltorio de pt_stico firmemente
alrededor de las orillas
No use platos de papel cuando cocine
con et Auto Sensor - se podrian usar para
cocinar por tiempo o para descongelar
MANTENGA LA PUERTA CERRADA
No abra la puerta del homo cuando se vean
las palabras "Auto" o "Reheat" - el vapor que
escape del homo afectar_ !os resultados de
]a cocci6n Si ia puerta se abre, cierre
la puerta y toque el bot6n START
inmediatamente.
CONTENEDORES, TAPAS Y
PLASTICOS
Use cacerolas o bolos para
las comidas de rondo y
verduras que sean para uso
en microondas. Cubra con
tapas que ajusten. Si no
tiene tapas disponibles, use papel de
plAstico
13

OPERACION
Com5CocinarConE1Auto
Sensor
• Recalentar productos de pan y pasteles
Use el poder y el tiempo manual.
• Recalentar alimentos crudos o sin
cocinan
• Recalentar bebidas
• Recalentar comidas congeladas
° Recalentar atimentos si la cavidad del
homo estA tibia. Si la cavidad del homo
microondas est& demasiado caliente, los
resultados de la cocci6n podrian vafiar
Si usted usa el homo y el sensor detecta
que la cavidad ester demasiado caliente,
el dial le mostrarb. TOO HOT
(DEMASIADO CALIENTE) Si esto
sucede, usted todavia podria usar el
programa de tiempo
1, Empuje el bot6n REHEAT
2. Empuje el bot6n START,
El sensor detectarA el vapor de los
alimentos y ajustar& el nive! de poder y la
cantidad de tiempo para calentar por
usted,
CONSEJOS PARA RECALENTAR LA
COMIDA:
Para obtener buenos resultados siga las
direcciones que se ofrecen, Use un
contenedor adecuado, Para cubrir
contenedores que no tienen tapas use
papel de pt&stico que est_ ventilado Los
ptatos grandes podrian necesitar dos
pedazos de papeE de plAstico Moldee
bien el pape! alrededor de !os lados de!
plato, Los huesos no deberfan pasar a
tray,s del papek
r
_ RECAUCION: El vapor
se acumula debajo del
papel de pl_stico y de
las tapas. Tenga
cuidado cuando los
saque de los contenedores. Lo
mejor es sacar el papel o la
tapa de la orilla opuesta a usted
primero para que escape el
° Todos los alimentos deben estar
cocinados previamente y deben estar a
temperatura de la habitaci6n o det
refrigerador,
, Los alimentos siempre deberian
estar cubiertos sueltamente con
papel de pl_stico ventitado o con tapas
de cacero[a que no sellen. (No use
tapas que se cierren con
cerradores a presi6n).
• Los alimentos que pesan menos de 4
onzas y mb,s de 32 onzas deberian ser
recatentados por poder y por tiempo
solamente
t4

OPERACION
Com5CocinarConEl Auto
Sensor
Esta funci6n le permite descongefar came,
ave, y mariscos por peso, usando el
descongelador aurora&rico de su homo
microondas. El sensor programa
autom_ticamente el tiempo y el nivel de
poder correcto para descongetar cuando
usted programa el peso de los alimentos
que ser_n descongelados. Despu_s de
descongelar automAticamente, ta came
necesita dejarse sola por unos 5 minutos
Usted podria sacar la comida del homo
para hacer esto si desea.
Usted debe programar el peso de los
alimentos en libros y onzas,
Las tames empaquetadas en las tiendas
vienen marcadas en libras y centesimos de
libra. Usted necesitara convertir este peso a
onzas.
TABLA DE CONVERSION para
Descongelaci6n Autom_tica
ONZAS CENTECIMOS DECIMOS
0
1-2
3-4
5
6-7
8
9-10
11-12
13
14-15
DE LIBRA
.96-,95
.06.. 15
.16-.25
.26..35
.36-.45
.46..55
.56-.65
.66-.75
.76-.85
°86-.95
DE LIBRA
0.0
0.1
0.2
0,3
0.4
0.5
0.6
0.7
0.8
0.9
1. Empuje el bot6n 1LB para programar
el peso en libras°
2. Empuje el bot6n loz para pregramar
las onzas que necesita
3. Empujef el bot6n START
Si los alimentos se deben dar vuelta
durante la descongelaci6n, control sonata
para avisarle cu_ndo dar vuelta los
afimentos_
• La forma y el tama_o de la comida
determinar_ el peso m&ximo que el
homo puede acomodar El peso mAximo
recomendado es:
4 Libras - Para Carnes
6 Libras - Para Ave
3 Libras - Para mariscos
o El tiempo de descanso o el nivel de
poder para cocinar pueden ser
programados despues que se empuja el
bot6n Auto Defrost (Descongelaci6n
autom_tica) Seleccione un tiempo de
descanso o nivel de poder y entonces
empuje el boron START.
° Para descongelar con exito, fas cames
deberian ser envuettas correctamente
para ser congeladas Congele las
carnes, ave y pescado en paquetes con
solamente dos corridas de alimento.
Para ayudar a separar las corridas,
coloque dos pedazos de papel de cera
entre ]as corridas Empaquete en
envoltorios, botsas, o papel para
congeladores de plAstico pesado
• Coloque los asados o ayes enteras
sobre una parrilla para hornos
microondas en un plato dise_iado para
uso en un homo microondas Revise los
puntos calientes de los alimentos a
mediado de ta descongelaci6n, y proteja
estas Areas con pequeSos pedazos de
foil
15

OPERACiON
OVEN
LOWER THERMAL OVEN
Su nuevo control a botones le permitir# sefeccionar muchas funciones del homo con
facifidad Abajo est_n las funciones def control del homo y la descripcidn de cada una
HORNEAR -- Cocina la comida en un
homo termal tradicional con una
temperatura de 170°F a 550°F
ASAR A LA PARRILLA -- Cocina la
came a 550°F desde el calor directo del
elemento superior dentro de] homo
HORNEADO AUTOMATICO --
Seleccione hornear y la temperatura que
prefiere usar_ Luego programe la cantidad
de tiempo que desea usar para cocinar la
comida
HORNEADO Y LIMPIEZA
DEMORADA J Seleccione hornear o
limpiar y ratemperatura que prefiere usar,
programe la hora del dfa en que desea
que el homo se encienda, programe la
cantidad de tiempo que desea para
cocinar ta comida
AUTOLIMPIEZA - Limpia el homo por 4
horas, pero usted puede cambiar esta
cantidad de tiempo a entre 3 y 5 horas
Los botones para los numeros
programan la temperatura del
homo, hora del dia, tiempo
demorado, tiempo para cocci6n,
tiempo para limpieza y
cron6metro de la cocina
EI bot6n START debe ser
empujado para activar cuatquier
funci6n,
EI bot6n OVEN COOKING
TIME se usa para porgramar la
cantidad de tiempo para
hornear,
_1 El bot6n DELAY START
TIME se usa para programar la
T/_,._._ME_Ihora del dia en que desea que
et homo se encienda y empiece
a hornear o limpiar,
El botOn CLEAR/OFF se usa
para cancelar cualquier funci6n
del homo y del tono de fin de
cicto No cancelar_ el
Cron6metro de la Cocina.
0uie o
! TIMER i cancelarHOUR! MIN
OH/OFF'J Kitchen Timer ONtOFF
16

OPERACION
Reloj, CronSmetroDeLa
Cocinay ControlDelHomo
/ND_ADORDE IHDICAgOR_VELE_Yl;A
TEMPEHATURAOEZHDRHOQUEELHORHOSEHAENCENDtDO
LUZiNEBM/TENTEOUE
IEA_SAQUEPROGf_t_EUHA
TEMPERATURA0UN7TEMPO
UDICACIONPAP_4LAHOR_OEL
CRONOJffE_ODELA
COCIHA,HOP_DECOMIENZODEMORADO,
COCCIONENF_HOflgO0TtEMPODE
LIMPIE7.A
IND/CADOflDEFUNCtON IHDICAOORDEFUNCIOHES
OELHDflNO AUTO_fATICAS
El panel es una referencia facit de usar mientras usa los controles Abajo est,, la
descripci6n de c6mo funciona
INDICADOR DE LA TEMPERATURA
DEL HORNO -- Este indicador tiene un
prop6sito mfJitiple
° Muestra la temperatura
• Muestra un c6digo de error--
"ERR" - Si el indicador de temperatura
det homo pesta_ea "ERR", entonces
usted ha programado un tiempo o una
temperatura incorrecta Empuje el bot6n
CLEAR/OFF para despejar el control y
reprogamar la funci6n del homo
• Muestra problemas del control --
Si el contro! hace pesta_ear "F" y un
nt_mero o tetra, ha experimentado un
problema con el homo Por favor lea la
secci6n F-CODES en su manual
INDICADOR ENCENDIDO -- Se
encender_ cuando se programa una
funci6n del homo
INDICADORES DE PROGRAMA --El
indicador de programa pesta_earb, en
combinaci6n con una funci6n del homo o
una funci6n autom_tica para avisarle que
necesita programar un tiempo o una
temperatura Ejemplo: "SET" y "BAKE"
pestaSear_n para avisarle que tiene que
programar la temperatura para hornear
INDICADOR DE LA HORA -- Muestra
la hora del dia, tiempo de cocci6n, hora
de comienzo demorado, hora de limpieza
o la hora programada en et cron6metro
de la cocina
Muestra un c6digo para recordar
"PUSH START" - Si el indicador de ta
temperatura del homo pesta_ea fas
palabras "PUSH" y "START", entonces
usted tiene que empujar el bot6n START
para activar su programa
INDICADORES DE LAS FUHCIONES
DEL HORNO _ Muestran qu_ funci6n
ha sido programada, cuando fa puerta
del homo est_ enganchada, y si la
funci6n es demorada
17

OPERACION
Relojy CronSmetroDeLa
Cocina
El re!oj debe ponerse a ta correcta hora
del dia antes que una funciSn demorada
del homo funcione correctamente La hora
del dfa no se puede cambiar durante una
funci6n demorada del homo
COMO PONER EL RELOJ
@+@9+@
1. Empuje et bot6n CLOCK
2. Empuje los botones con los
NUMEROS para poner ta hora
3. Empuje el bot6n START
PARA VOLVER AL RELOJ
Mientras este usando el homo para
cocinar, empuje el botdn CLOCK, si
desea ver la hora del dia La hora
presente dei dia se vera en el dial
CORTE ELECTRICO
Si ocurre un corte de corriente, la hora
que se muestra en el dial estar&
incorrecta Ponga nuevamente el reloi a la
hora
Cualquier funci6n para cocinar del homo
que estaba en proceso tendr& que set
reprogramada
El cron6metro de la cocina se usa para
medir el tiempo de los procesos para
cocinar u otras actividades del hogar, No
controla el homo Se puede programar
hasta 9 horas y 59 minutos Contar_, hacia
atr_s en minutos hasta que llegue a los
Oltimos 60 segundos Cuando la cuenta
Ilegue a :0, el control sonar& 3 veces
seguido de un sonido cada 6 segundos
hasta que se empuje el bot6n HOUR/MIN
KITCHEN TIMER ONIOFF.
COMO PROGRAMAR EL
CRONOMETRO
1. Empuje el bot6n HOUR/MIN
KITCHEN TIMER ONtOFF
2. Empuje los botones con los
NUMEROS para programar la
cantidad de tiernpo
3. Empuje el bot6n START
4, Cuando la cuenta Ilegue a :0, empuje
el bot6n HOUR/MIN KITCHEN
TIMER ON/OFF.
Para cancelar el cron6metro durante la
cuenta, empuje el bot6n HOURJMIN
TUMER ONIOFF dos veces
18

OPERACION
ControlDelHomo,Reloj y
CronSmetroDeLa Cocina
El nuevo controf tiene una serie de tonos
que sonar&n a tiempos diferentes Estos
tonos pueden sonar mientras usted
programa una funci6n de! homo, o al final
de una funci6n del homo Tambi6n le
avisara si existe un problema con una de
las funciones M_s abajo estan los tipos
de tonos y una breve descripci6n de cada
uno
TONOS MIENTRAS PROGRAMA EL
CONTROL
Cuando empuje un bot6n usted
escuchar& un tono, Este tono te har&
saber que aplic6 suficiente presi6n sobre
el bot6n para activarlo
TONO AL FINAL DE UN CICLO
AUTOMATICO
Despu_s de una funci6n para cocinar
autom_tica, usted escuchar_, tres tonos
cortos seguidos por un tono cada 6
segundos El tono de cada 6 segundos
seguir_ sonando hasta que empuje el
bot6n CLEARIOFF o usted decida
seleccionar el programa especial para
cancelar y evitar que et tono de 6
segundos suene al final de un cicfo futuro.
COMO CANCELAR EL TONO DE 6
SEGUNDOS
1. Empuje y sujete los botones BAKE y
BROIL, a la rnisma vez, por 3
segundos, hasta que el dial muestre
"SF",
2, Empuje el bot6n KITCHEN TIMER
ON/OFF, El dial mostrar_ "CON
BEEP" (tono continuo)
3. Empuje el bot6n KITCHEN TIMER
ONIOFF nuevamente El dial mostrar&
"BEEP" (tono cancelado)
4. Empuje el bot6n START, para
cancelar el tono y salir de este m6dulo
especial
Si desea volver a los tonos de cada 6
segundos, repita los pasos de arriba hasta
que el dial muestre su selecci6n y empuje
"start" (comienzo)
TONO DE ATENCION
Este tono sonata, si hace un error u omite
algo mientras programa una funci6n del
homo
Unos ejemplos sedan:
a. Programar un ciclo de limpieza y la
puerta det homo no estA bien cerrada
b. Programar una funci6n automatica y el
tiempo que se use es incorrecto
e. Empujar un bot6n para una funcion
adicional sin programar prirnero la
temperatura o et tiempo
Cualquiera de estos se puede identificar
r_pidamente con mirar el dial
TONO DE PRECALENTAMIENTO
Cuando programa una temperatura en el
homo, el homo empieza a calentarse
autom_.ticamente Cuando la temperatura
dentro del homo Ilega a la temperatura
que usted program6, sonarA un tono para
avisade que el homo est_ listo para
homear,
Si usted programa una funci6n del horno
y el control hace sonar un tono mientras
una "F" y un numero o "FI" est_n
pestaSeando en el dial, podria existir un
problema con el control. Simplemente
empuje el bot6n CLEAR/OFF y espere
una hora Trate de programar la funci6n
nuevamente, Si et c6digo se repite,
escriba et c6digo que pestaSea y flame
para un servicio Digale al tecnico qu_
codigo estaba pestaSeando.
19

OPERACION
ConsejosPara CocinarEnE!
Homo
El precalentamiento es subir la
temperatura a ?atemperatura que va a
usar cuando hornee
Es normal sentir un poco de olor cuando
use su homo por primera vez Esto es
causado por el cafentamiento de las
partes nuevas y del aislante Para ayudar
a eliminar este olor, ventile la
habitaci6n abriendo una ventana o
usando una campana de
ventilaci6n.
IMPORTANTE: Nunca cubra el rondo
del horno o la parrilla del horno con papel
de aluminio El uso inadecuado puede
causar una mala circulaci6n del calor,
pobres resuitados al hornear, y podda
da_ar el acabado del horno
L__.b'<
La ventilaci6n del horno estA ubicada bajo
el panel de control Esta _rea se podria
calentar mucho durante el uso del homo
La ventilaci6n es importante para la
correcta circulaci6n det aire Nunca
obstruya ia ventilaci6.,
Ventilaci6n
det homo
En la parte trasera del horno usted notarb.
un pequeSo tubo Esto es un sensor de
calor que mantiene ta temperatura del
homo Nunca mueva o dobte este tubo
temperatura del
horno
La zona de temperatura baja de su homo
(entre 170° y 200°F) est& disponible para
mantener tibios los atimentos que se hau
cocinado calientes Sin embargo, los
alimentos no se deberian mantener a estas
bajas temperaturas por m_ts de 2 horas
Cuando use su conveniente operaci6n de
Comienzo Demorado, los alimentos tales
como productos IActeos, pescado, aYes,
etc, nunca se deberian dejar expuestos
por mAs de una hora antes de set
cocinados. La temperatura ambiente y el
cator de la luz det homo promueven el
crecimiento de bacterias
Si abre la puerta frecuentemente para
mirar los alimentos, causar__ una p_rdida
de calory malos resultados cuando
hornee
20

OPERACION
ConsejosParaCocinarEnEl
Homo
UTENSILIOS DE VIDRIO, OSCUROS
CONTRA PEGADURAS, U OPACOS
POR LA EDAD son perfectos para
panes con levadura, cortezas para
pasteles o alimentos que tengan una
corteza caf6 La temperatura del homo se
debeda reducir en 25°F
E{ Sensor de Temperatura del Homo en _a
parte trasera def homo mide y controfa
continuamente la temperatura dentro det
homo Para mantener una temperatura
programada constante, los elementos
har_n un ciclo de encendido y apa9ado
mientras et homo cocina
Si est_ horneando con m_s de un
utensilio, co!6quelos de rnanera que cada
uno tenga por Io menos de 1" a 1 1/2" de
espacio de aire a su alrededor Coloque
los utensiiios de manera que ninguno
quede directamente encima de otto
;ri i !tl4
Las parrillas del homo estan dise_adas
con topes, una conveniencia y tambiCn
una precauci6n de seguridad cuando las
parrillas est_.n colocadas correctamente
en et homo, tas gufas tienen un tope para
prevenir que las parrillas se den vuelta
cusndo se sacan del homo
La posici6n de m_.s arriba es solamente
una guia_ No puede set usada como
posici6n para una parrilla
Guide
Siempre coloque las parrillas del
horno en la posici6n correcta
cuando el homo est_ frio,
Las bandejas bajas para galletas
permiten que et aire circule alrededor de
]as gaitetas para que se doren en forma
pareja
Los utensilios brillantes son perfec-
tos para que los queques y panes r_pidos
tengan una corteza caf_ dorada
21
Usted podria pensar que su homo nuevo
cocina diferentemente al homo que
reemplaz6 Le recomendamos que use su
homo nuevo por varias semanas para que
se familiarice mas con 6I, siguiendo fos
tiempos que se dan en la receta como una
gula Vea Ajustes-Hagalos Usted Mismo
en la parte de atras de este manual para
hacer los ajustes si cree que su homo est_
funcionando demasiado caliente o frio
para su preferencia

OPERACION
CSmoHornear
1, Empuje el bot6n BAKE.
2. Empuje los botones con los
NUMEROS para
seleccionar la temperatura
del homo que prefiere
usar
3. Empuje el bot6n START
Para programar que el homo cocine por
un tiempo especifico y se apague
autom&ticamente
1, Empuje el bot6n
BAKE.
2. Empuje los botones con
los NUMEROS para
seleccionar fa
temperatura def homo
que prefiere usar,
3, Empuje el bot6n
OVEN COOKING
TIME
4. Empuje los botones
con los NUMEROS
para programar la
cantidad de tiempo
que prefiere para
cocinar los alimentos
5. Empuje el bot6n
START
Para programar que el homo empiece en
forma demorada, cocine por un tiempo
especifico y se apague automAticamente
1. Empuje el Bot6n BAKE
@'.
Empuje los botones con los
NUMEROS para
seleccionar la temperatura
del homo que prefiere
usar
Empuje el bot6n OVEN
COOKING TIME
@
m
S_
6.
Empuje los botones con los
NUMEROS para
programar la cantidad de
tiempo que prefiere para
cocinar los alimentos,
Empuje el botOn DELAY
START TIME,
Empuje los botones con los
NUMEROS para
programar la hora del dia
en la cua] prefiere que el
homo se encienda
7. Empuje el bot6n START,
Estas operaciones del homo se
pueden usar para asar.
El homo se apagar_, a! termino del tiempo
para cocinar a menos que el programa
para mantenci6n de temperatura se haya
activado
22

OPERACION
CSmoAsarA LaParrilla
Asar es cocinar al calor directo del
elemento superior La puerta det homo
deberia permanecer abierta en la posici6n
de tope para asat cuando ase a ta parrilla
No es necesario precalentar el homo
cuando ase a la parrilta Use la cacerola y
ta parritta para asar que viene con su
estufa Ambas estAn diser_adas para
drenar adecuadamente la grasa y los
tiquidos
i__ I ii ....
_ uando use papel de
aluminio, el papel de
aluminio debe estar
moldeado firmemente a
la parrilla y los cortes en el
papel deben coincidir con los
cortes de la parri|la. Esto
permite que la grasa y los
liquidos caigan a la cacerola,
evitando que se produzca un
incendio y humo excesivo.
Siempre saque la /<
cacerola y la . ':
parrUla dei horno. _-"_'.i,
Guardar y olvidar _ /
una cacerola para
asar sucia en el
homo es un peligro para producir
un incendio o humo.
El Departamento de Agricultura de los
Estados Unidos nota que las cames
cocinadas crudas son populates, pero
que la came que se cocina hasta s61o
140°F, (cruda) significa que atgunos
organismos venenosos podrian sobrevivir
Mientras mb.s cerca coloque los alimentos
del elemento para asar, mas rapido se
dorar_.n por afuera, pero quedando rojo o
rosado en et centro
Colocando las carnes lejos del elemento
permitira que las carnes se cocinen en et
centro mientras se doran por afuera
Usando estas posiciones, cocine el lado !
por !o menos 2 minutos m_s que el lado 2
Si su homo estA conectado a 208 voltios,
usted podria usar una posici6n de parrilla
mAs atta y/o cocinar los alimentos por mas
tiempo
Et tamar_o, peso, grosor, temperatura
inicial y su preferencia personal afectara el
asado a la parrilla Esta tabla esta basada
en carnes a la temperatura det
refrigerador
ALIMENTO
Bistec 1" de grueso
Tortas de came
molida_l" de grueso
Chu]elas de cerdc_
112" de grueso
Pescado (filetes)
Polio (presas)
POSICION
DE
PARRILLA
3
3
3
2
TtEMPO TOTAL
(minutos)
9-11
16_18
27-29
11-13
45-55
23
la, Empuje el bot6n BROIL(Esto
autom_ticamente programa
ASADO en HI-ALTO)
lb. Mientras el indicador de programa
pestaSea en el dial, empuje
nuevamente el bot6n BROIL si
prefiere asar en BAJO (LO} Ase en
LO (BAJO) para cocinar bien
alimentos tales como ayes o cortes de
came gruesos sin que se doren
demasiado
2. Empuie el bot6n START
3, Cuando termine de asar, empuje el
bot6n CLEARIOFF

OPERACION
Com5SeleccionarProgramas
EspecialesDel Control
El nuevo control a botones tiene
programas adicionales que usted puede
seleccionar Las funciones para cocinar,
limpiar y cron6metros no deben estar en
use
El control se programa autom&ticamente
para apagarse despues de hornear per t2
heras o despues de asar ala parrilla per 3
horas en case que se le olvide y deje el
homo encendido, Si desea eliminar este
programa:
1. Empuje y sujete, ala misma vez, per
3 segundos, el bot6n BAKE y BROIL,
haste que el dial muestre $F
2. Empuje el bot6n DELAY START
TIME, El dial muestra 12shdn
(apagado en 12 horas)
Empuje el bot6n DELAY START
TIME nuevarnente E! dial mostrara no
shdn (no apagado)
3. Empuje el botSn START
2. (a) Empuje el botOn BROIL El dial de!
control mostrar_, el signo para grade y F
[b} Empuje et bot6n BROIL
nuevamente Esto cambiar_ F (Fahren-
heit) a C (Centfgrado),
3. Empuje el bot6n START
Su control est,. programado pare usar el
reloj en !2 horas Si usted prefiere usar
Hera Militar de 24 horas o poner el dial en
blanco, se hace asi:
1. Empuje y sujete, ala misma vez, per
3 segundos, el bot6n BAKE y BROIL
hasta que el dial muestre SF.,
2. (a) Empuje el bot6n CLOCK, El dial
mostrar_ 12hr Si _sta es su
selecciOn, empuje et botOn START
o
(b) Empuje el bot6n CLOCK
nuevamente, El dial mostrar_, 24hr
Ejempto: 5:00 en el reloj de 12 horas
feer_ 17:00 en el reloj de 24 horas. Si
_sta es su selecci6n, empuje et bot6n
START
0
(c) Empuje e! bot6n CLOCK
nuevamente El dial ahora mostrar_&
OFF (La hera no se mostrar__ en e!
dial) Si 6sta es su selecci6n, empuje
START, La hera no se mostrar_ en el
dial La funcion para programas
demorados no funciona cuando el
reloj esta apagado.
El control del homo est_ programado para
la selecci6n de temperaturas en Fahren-
heit La mayoria de las recetas se dan
usando la escala Fahrenheit Seleccion de
temperatura en grades Fahrenheit y
Centigrades, Usted puede cambiar esto
para usar la setecci6n en Cen%rados
Se hace asf:
1. Empuje y sujete, ala misma vez, los
botones BAKE y BROIL per 3
segundos, haste que et dial muestre
SF
24

OPERACION
Com5SeleccionarProgramas
EspecialesDei Control
El control le permitirA cerrar los botones
de manera que no se puedan activar
cuando los empuje Si se preocupa de
dejar e! homo sin supervisidn, active este
programa, Se hace as[:
1. Empuje y sujete, a la misma vez, por
3 segundos, los botones BAKE y
BROIL hasta que el dial muestre SF
2. (a) Empuje et botOn CLEAN El dial
muestra LOC OFF (cierre inactivo)
(b) Empuje et bot6n CLEAN
nuevamente Et dial mostrar_ LOO
ON (cierre activado)
3. Empuje el bot6n START
Este programa se puede
seleccionar solamente cuando el
homo no est_ en uso.
Cuando este programa est_ activado, el
control sonar& y el dial mostrarA LOC, si
se empuja un bot6n,
El nuevo control tiene un programa de
mantencidn de temperatura para cocinar
autom_iticamente solamente que
mantendr& la comida que ha sido
cocinada tibia hasta 3 horas despues que
el cocinado automAtico termina Para
activar este programa:
1. Empuje y sujete, a la misma vez, por
3 segundos los botones BAKE y
BROIL hasta que el dial muestre SF.
2. (a) Empuje et bot6n OVEN COOK-
ING TIME El dial mostrar_ HLd
OFF
(b)Empuje et bot6n OVEN COOK-
ING TIME nuevamente para
activar este programa, El dial
mostrarA HLd ON
3, Empuje el bot6n START
Este Programa Especial le permitir_t
cambiar la velcidad #l significa que el
cambio de velocidad es lento hasta #5
que significa que el cambio de velocidad
es rApido Para seleccionar la velocidad
que prefiere, siga estos pasos:
1. Empuje y sujete, a la misma vez, los
botones BAKE y BROIL pot 3
segundos, hasta que el dial muestre
SF,
2. Empuje el bot6n con la fEecha SUBIR
El dial le mostrar_, una posici6n de
velocidad entre 1 y 5
3. Empuje la flecha SUBIR para aumentar
la vetocidad hasta el numero 5
4_
O
Empuje el bot6n con la flecha BAJAR
para disminuir ta velocidad hasta el
numero 1
Empuje el bot6n START
25

E1CicioDeAutolimpieza
CUIDADOYLIMPIEZA
1. Saque la cacerola y fa parrilla para
asar, la parfilla del homo, utensifios, y
cualquier pape] de aluminio que
podr[a quedar en el homo
2. La suciedad en el frente del marco, 1"
dentro del homo, y atrededor del se]lo
de la puerta de! homo tendra que ser
]impiada a mano
Macro frontal
,i s ,o
Revestimento de la "_
puerta
Limpse estas Areas con agua caliente,
lanillas con jabdn o limpiadores como Soft
Scrub para sacar cualquier suciedad
Enjuague bien con agua limpia y seque
3. Limpie cualquier derrame pesado de!
rondo del homo
4_
No ]impie el sello de la puerta de]
homo E! material de libra de vidrio de
la puerta del homo no soporta la
abrasi6n Es esenciat que et setlo
permanezca intacto. Si nota que se
est_ gastando, trizando, o saliendo de
la puerta, deberia set reemptazado.
El se]lo de la puerta est& disehado para
que tenga un espacio de 5-6' en e! fondo
del homo
Panel de la puerta Sello
Revestimento de la puerta
Esto permite la circulaci6n adecuada de]
aire Es normal que su homo de la
apariencia de no tenet un buen sello sobre
el homo Esto se debe al sello. La
ubicaci6n del selto sobre la puerta def
homo mantiene la puerta sellada y
previene cualquier p_rdida de calor
Los utensilios nunca se
deberian dejar dentro
del homo durante un
ciclo de limpieza,
Las parrillas del horno se
podrian limpiar durante el ciclo
de autolimpieza, pero perder&n
su brillo y se pondr&n dificiles
de deslizar. Si decide dejarlas
dentro durante el ciclo de
limpieza, p_seles aceite vegetal
para que se deslicen m_s
f&cilmente.
Durante el primer ciclo de
limpieza, ventile la habitaci6n
con una ventana abierta o una
campana de ventilaci6n.
26

CUIDADOYLIMPIEZA
CicloDeAutolimpieza
E1Ciclo de Limpieza est_ programado
para 4 horas, pero usted podr[a cambiar
esto desde 3 horas si et homo esta
levemente sucio a 5 horas si el homo est&
muy sucio
_ 1, Empuje el bot6nCLEAN
Mostrar_ 4 horas en el dial
3.
Si desea cambiar la
cantidad de tiempo para
limpiar, empuje el bot6n de
los NUMEROS
Empuje ei bot6n START
Simplemente empuje el bot6n CLEAR/
OFF Usted necesitar_ esperar a que la
temperatura del homo baje m&s que la
temperatura de enganche (aprox 1 hora)
antes de tratar de abrir la puerta "Locked
Door" desaparecera del dial
Despues del ciclo usted podrfa notar un
poco de cenizas blancas en el homo
Simplemente Ifmpielas con un paso o
esponja humeda
Si atgunas manchas blancas persisten,
fri_guelas con una lanilla de acero con
jab6n AsegtJrese de enjuagar bien Estas
son generalmente dep6sitos de sal que no
se pueden sacar durante et ciclo
Si pot alguna raz6n usted no queda
satisfecho con los resultados de la
limpieza, simplemente repita el
ciclo.
1. Empuie el bot6n CLEAN
m
Si desea cambiar la
cantidad de tiempo para
limpiar, empuje el botOn de
los NUMEROS
3. Empuje et bot6n DELAY
START TIME
4. Empuje los botones con los
NUMEROS para
programar la hora de
comienzo del ciclo
5, Empuje el bot6n START
27

CUIDADOYLIMPIEZA
LimpiezaMicroondas
MATERIALES DE LIMPIEZA
,, PaP,o homedo
• Lanilla para fregar de plAstico
• Detergente Ifquido para platos
,, Agua tibia
Limpie con un detergente para platos
suave y agua, entonces enjuague bien
con un patio hOmedo Si desea, puede
hacer hervir un contenedor con agua en el
homo usando energ[a de microondas
Esto ayudarA a soltar ]a suciedad Para
suciedad dificil de timpiar, limpie
cuidadosamente con una tanilla para
ffegar de p!__stico
No use limpiadores abrasivos que
puedan rayar on da6ar la
superficie.
COMO LIMPIAR:
Lave con agua tibia con jab6n Para
suciedad mas dificil de limpiar, frote
levemente con una lanilla de nil6n para
fregar y un timpiador que no sea abrasivo
COMO COLOCAR LA BANDEJA
GIRATORIA DE V|DRIO:
1. Coloque el anillo para los rodilios
2. Cotoque ta bandeia giratoria de vidfio,
asegQrese que ia bandeja giratoria
queda bien ajustada sobre los
contornos de] ejeo
MATERIALES DE LIMPIEZA
• PaSo suave
• Agua tibia
- Detergente para platos
Limpie tas salpicaduras o derrames
mientras est_n tibios Use un detergente
para platos suave y agua tibia, luego
enjuague con agua limpia, seque con un
paso suave
MATERIALES DE UMPIEZA:
° Laniltas de ni!6n que no sean abrasivas
, Lfmpiadores no abrasivos
• Agua tibia
• Detergente para platos
COMO SACAR LA BANDEJA
GIRATORIA:
1. Tome la bandeja giratoria de ambos
lados y lev_nteta derecho hacia arriba
2. Levante el aniflo para los rodillos
BANDEJA DE
v,DR,o
JUEGO DEL'_.:_q-___ _.:_"
ANILLO PARA
LOS RODILLOS_
EJE ._/RODILLO
_._ ,
FONDO _ L_HORNO
.............. MfCROON_A'S...............
28
MATERIALES DE LIMPIEZA
° Agua tibia
° PaSo suave
° Detergente para platos
Limpie con un detergente para ptatos
suave y agua tibia, Enjuague con agua
limpia y seque con un paso suave
MATERIALES DE LIMPIEZA
• Pa6o suave
Abra la puerta det homo para prevenir que
e! homo se encienda mientras Io estA
limpiando Limpie el panel de control con
un paso homedo Seque inmediatamente
con un paso seco para prevenir manchas,

CUIDADO YLIMPIEZA
LimpiezaHomoInferior
QUE MATERIALES DE
LIMPIEZA USAR
• Detergente I[quido para platos
° Agua tibia
° PaSo suave
No use limpadores abrasivos,
limpiadores industriales, o
blanquedores (cloro),
QUE MATEREALES DE LIMPIEZA
USAR
• Detergente liquido para platos
• Agua tibia
• Lanillas de acero con jab6n
• Limpiador comercial para hornos
COMO LIMPIAR
Permita que la cacerola se remoje Ponga
detergente para platos sobre la parrilla y cubra
con un paso o una toalta humeda pot un rato
Friegue a medida que sea necesario Lave,
enjuague, y seque bien Usted tambien podria
poner la cacerola y la parritta en ta lavadora de
ptatos
Limpie solamente para retocarlas entre
cicios de limpiezar Use detergentes
tfquidos para ptatos, agua tibia, o lanillas
de acero con jab6n Enjuague bien
despues de limpiar y seque
NUNCA USE LIMPIADORES PARA
HORNOS DENTRO O ALREDEDOR
DE CUALQUIER PARTE DEL
HORNO.
Cuando iimpie, asegL_rese de no doblar o
mover el sensor de la temperatura
ubicado en la pared trasera del horno
QUE MATERIALES DE LIMPIEZA
USAR
• Limpiador para vidrio
• Toallas de papel
• Soda para hornear
PARA LIMPIAR
Para limpieza diaria, use un limpiador
para vidrios y una toaila de papei Para
suciedad pesada, use una pasta de soda
para hornear y agua Enjuague bien.
QUE MATERIALES DE LIMPIEZA
USAR
• Detergente p ara platos
• Lanillas de acero con jab6n
• Agua tibia
PARA LIMPIAR
Lave y enjuague bien
PARA SACAR
Tire las parritlas hacia afuera y hacia arriba
PARA COLOCARLAS NUEVAMENT
Coloque la parte tevantada de la parrilta sobre
un par de guias para parrillas Ernpuje hasta que
llegue a un tope, levante et frente de la parrilla
hasta que la parte de atr_s se deslice facilmente
bajo el tope Empuje la parrilla hacia elhomo
29

CUIDADOYLIMPIEZA
Partes Removibles
RETENEDOR
DEL VIDRIO
)
FOCO -_
i
I
CUBIERTA DE
VIDR|O
COMO SACAR
Abra la puerta hasta ta posici0n de tope
para asar a la parrilta Tome la puerta de
cada lado y lev__ntela de las bisagras NO
LEVANTE LA PUERTA DE LA
MANILLA /_
z7 _ •
COMO SACAR LA CUBIERTA
1. Desconecte la etectricidad hacia et
horno en e! circuito principal o en la
caja de fusibfes
2, Desatornilie ta cubierta de vidrio y
s_quela
f_ o toque el foco de la
luz caliente del horno.
No toque un foco con
las manos mojadas o
con un pa_o mojado.
Nunca toque el collar con
electricidad de un foco cuando
Io saque o Io reemplace. No
saque ninguno de los tomillos.
REEMPACE EL FOCO DE LA LUZ
Desatornifle el foco de la luz y reempl_.celo
con un foco para hornos residenciales de
40 watts.
1, Atornille la cubierta de vidrio
2, Reconecte la electricidad hacia el
homo
PARA REEMPLAZAR
Saque los tubos de toallas vacios o las
toatlas Aseg_Jrese que los brazes de las
bisagras todavia est_n en la posici6n de
tope para asar. Tome la puerta de cada
lado Levante la puerta sobre cada
bisagra. Ponga las ranuras del fondo de la
puerta en linea con tas bisagras Deslice
la puerta hacia abajo sobre tas bisagras Io
m__sposible
3O

ANTESDELLAMARPARAUN
SERVICIO
Para ahorrar tiempo y dinero, antes de flamar para un servicio, revise ta lista de mb.s abajo
para cualquier problema que usted crea que tiene con et funcionamiento de su estufa Si
el problema es algo que usted no puede reparar, use los Numeros de Servicio para el
Consumidor que se encuentran al final de este manual Cuando haga un Ilamado,
tenga disponible el ntimero de modelo, lista de partes para reparaciones,
manual de uso y cuidado y la fecha de compra.
PROBLEMA POSIBLE CAUSA POSIBLE SOLUCION
i i ii ii i ii1,1111,11 iiiii1,1111,1,,111 i,i
E! dial del control
Mat funcionamiento de ta
pesta_ea una "F" estufa
seguida por un ntimero
o letra.
iiiiiii ,11,
E! homo y los
controles del horno no
funcionan.
ii i ii, iiii
No pasa
electricidad a la
estufa
Empuje el botOn CLEAR/OFF
Permita que la estufa se
enfrie por una hora y ponga
nuevamente el horno en
funcionamiento Si el
problema se repite, llame
para un servicio
i,
Revise ta caja del circuito o
los fusibles Asegurese que e!
cord6n de la corriente este
enchufado
,111 ii1,1 IlL i
Los alimentos no
se hornean
adecuadamente.
a. Et homo se precalent6
b. PosiciOn incorrecta de la
parrilla o la cacerola
c. La ventilaci6n det homo
esta obstruida o cubierta
a. Asegurese de precatentar
hasta que suene el tono
b. Mantenga un espacio de
aire uniforme airededor de
las ollas y utensilios Vea la
secci6n para cocinar en el
Homo
c. Mantenga la ventilacion
despejada
d. Use incorrecto del papel
de aluminio
d. No cubra ]as parrillas
cuando hornee
ew
Temperatura incorrecta
para el utensilio usado
f. No se sigui6 la receta
g. Mala calibraci6n del
control del homo
h. La estufa o la parrilla del
homo no est_n niveladas
e. Reduzca la temperatura en
25 grados para utensitios
de vidrio, oscuros u
opacos
f. _,Esla receta confiable y
probada?
g. Revise la secci6n de
ajustes a la temperatura
que sigue esta secci6n
h. Vea las instrucciones de
instalaci6n para la
nivetaci6n
31

ANTESDELLAMARPARAUN
SERVICIO
PROBLEMA POSIBLE CAUSA POSIBLE SOLUCION
ii i_Uiil,';[;., iii ,. ,, ii i,, i1,,,111111,111,111,,,
La
temperatura
de[ homo
parece estar
inexacta.
La luz del
horno no
funoiona,
Calibracion del
termostato
a. Interruptor de la iuz
en posici6n de
apagado
b, Foco de la luz esta
quemado
Vea los temperatura ajustes
descritos que siguen esta
seccidn
a. Revise la posici6n del
interruptor de la luz del
homo
b, Revise el foco de la luz
del horno
El homo no
acepta
programa
para hornear.
Se seleccion6 la opci6n
en grados Centigrados
Vea la secciOn de funciones
especiales
Los alimentos
no se asan
adecuadamente,
a, Posici6n incorrecta de la
parrilla
b. El homo se precalent6
c. Ma! uso de papel de
aluminio
d. La puerta del homo se
cerr6 durante el asado a
]a parrilia
e, Bajo voltage (208 Voltios)
f. Cant!dad de tiempo
incorrecta para asar
i , i _111i,i1_1, i i i i, ii1,11111.................
a, Revise la posici6n de las
cacerolas; vea la secciOn
para asar a ]a parrilla.
b, No precaliente cuando ase a
ta parrilta
c, Lea la secci6n para asar a la
parrilla
d. Abra la puerta a la posici6n
de tope para asar
e, Use una posici6n de parrilla
m_s atta yio ase por m_s
tiempo
f, Vea la tabla para asar en la
secci6n de c6mo asar a la
parrilla
La puerta del
homo no se
desengancha,
El cicfo de limpieza no ha
terminado
La temperatura del homo
debe bajar a menos de ia
temperatura de enganche
antes que la puerta pueda
abrirse
Ei homo no
se limp!6 o
los
resultados
fueron
malos.
a, Los controles no se
pusieron bien
b. El ciclo de timpieza
rue interrumpido
c, El homo estaba
demasiado sucio
32
a, Lea fa secci6n de
autolimpieza de este
manual
b. El ciolo de limpieza normal
deberia set de 4 horas
c. Los derrames grandes se
debedan limpiar antes de
programar un ciclo Usted
tambi_n podria repetir el
ciclo

ANTESDELLAMARPARAUN
SERVICIO
PROBLEMA
El homo humea.
POS|BLE CAUSA
i i i n_,,llH_,,ll,ii ,i,, I
a, Homo sucio a,
E! homo emite un
olor.
No se puede
cocinar en el
microondas,
b,, Ma! uso de papel de b.
aluminio
c. Se dej0 la cacerola para c.
asar con grasa dentro det
homo
aa
nl,i ,111 , ii,
El aislante del homo podda
emitir un olor duante los
primeros usos
b. No timpiar et exceso de
suciedad antes del cic!o de
autotimpieza
am
,lU,U,,i, i _lllnlu_nll
Et cron6metro de la cocina
est_ en operaci6n
POSlBLE SOLUCION
Vea que no hayan
derrames grandes
No se recomienda el uso
del papel de aluminio
Limpie la cacerola y la
parrilla despues de cada
USO.
, ,11 qq!! ! J ! .........
b_
Ponga el homo en un ciclo
de autolimpieza para
aceterar el proceso de
eliminar el olor,
Limpie el exceso de
suciedad antes de
comenzar un ciclo de
autolimpieza
Use el cronOmetro de! homo
inferior (No se puede cocinar
en el microondas y usar el
cron6metro de la cocina
independientemente a la
misma vez)
33

AJUSTESDETEMPERATURA-
"HAGALOSUSTEDMISMO"
+
Usted podria pensar que su nuevo homo
cocina diferentemente al homo que
reemplaz6 Recomendamos que use su
homo nuevo unas pocas semanas para IZBAKE _ 2,
que se familiarice con _1,siguiendo los
',.____j
tiempos que se dan en las recetas como
una guia
Si cree que su nuevo homo estA
funcionando demasiado caliente (quema
fa comida) o no calienta to suficiente (la
comida no queda bien cocida) usted
mismo puede ajustar ta temperatura La
apariencia y la textura de los alimentos _ 3a,
son mejores indicadores de ta exactitud
de un homo que un term6metro para
hornos, para controlar ta posici6n de la
temperatura de su nuevo homo Estos
term6metros pueden variar entre 20-40
grados Adern&s, ta puerta se tiene que
abrir para leer estos term6metros Abrir la
puerta cambiara la temperatura del homo
Para decidir en cu_nto cambiar ta
Iemperatura, suba la temperatura de! _ 3b.
homo en 25 grados (si los atimentos no
quedan bien cocidos) o baje Ia
temperatura en 25 grados (si ta comida se
quema) de Ia temperatura de fa receta,
luego hornee Los resultados de esta
"prueba" le deberian dar una idea de
cu&nto se deberia cambiar la temperatura.
Mientras e! homo no est,.
en uso, empuje y sujete
los botones BAKE y
BROIL, pot 3 segundos,
hasta queet dial muestre
$F,
Emuje e! bot6n BAKE
Un n_mero puesto en
f,_brica de dos digitos
aparecer& en el dial,
generalmente oo.
Si piensa que el
horno no est_
suficientemente
caliente,
Empuje et bot6n con ta
flecha NUMEROS para
aumentar (+)la
temperatura hasta +35°F
si usted cree queet homo
no est_ funcionando lo
suficientemente caliente, o
Si piensa que el
horno est_
demasiado caliente,
Empuje el bot6n con la
fiecha BAKE y
NUMEROS para bajar
(-) la temperatura hasta -
35°F Sicree queel
hornoest& funcionando
demasiado caliente
(_) 4, Empuje et bot6n START,
Este aumento o disminuicion en la posici6n
de la temperatura permanecer_, en la
memoria hasta que los pasos de arriba
sean repetidos Un corte de corriente no
afectar_ esta posici6n
Las temperaturas para asar a la parrilta no
sera.n afectadas
34

GARANTIADELAESTUFA
UN AI_O DE GARANTiA COMPLETA PARA LAS FUNCIONES DE '_
TODAS LAS PARTES EXCEPTO LAS DE VIDR|O
Si, dentro del lapso de un a_o a partir de la fecha de instalac[6n, cualquier parte que
no sea de vidrio funciona mal debido a un defecto en el material o en la mano de
obra, Sears ta reparar& o ta reemp_azar& sin costo aiguno
GARANTIA TOTAL DE 30 DIAS PARA LAS PARTES DE VIDRIO Y EL
ACABADO DE ESMALTE PORCELANIZADO, PARTES DE METAL
PINTADO O BRILLANTE
Si, dentro de los treinta dias postefiores a la instalaciOn, cualquier parte de vidrio o el
acabado de cualquier esmalte porcelanizado o parte de metal pintado o bri!lante
tiene defectos en el material o mano de obra, Sears reemplazar_ la parle sin costo
alguno.
GARANTIA TOTAL DE 90 DIAS EN AJUSTES MECANICOS
Durante 90 dias a partir de ta fecha de instalaciOn, Sears proporcionar_, sin costo
alguno, cualquier ajuste mecb.nico necesario para la correcta operaciOn de la estufa,
exceptuando el mantenimiento normal
Si ia estufa estA sujeta a otto uso que no sea el privado familiar, la cobertura de la
garantia mencionada ardba sera efectiva sOlo durante 90 dias
EL SERV1C!O DE GARANT1A ESTA DISPQNIBLE CON SOLO PQNERSE EN
CONTACTQ CON EL CENTRO O DEPARTAMENTO DE SERVlCIO SEARS MAS
CERCANO EN LOS ESTADOS UNIDOS.
Esta garantia se aplica sOlo cuando este producto se use en los Estados Unidos
Esta garantia le brinda derechos legales especfficos, y tambien puede tener otros
derechos que vadan de un estado a otto.
Sears, Roebuck and Co, Dept 817 WA, Hoffman Estates, IL 60179
............. J
Para Ampliar El Valor De Su Estufa,
Compre Un Contrato De Mantenimiento Sears.
!
A_Os de cobortura de Ia propied,_d J 1or a_o 2" a_o 3or afio
I
1 Roomp,o=oaop o= o,oo,uo= G AM AM
quono _;oande porte,aria o vldflo
90 DAYS
2 Aj_oto._oo_._oo G AM AM
30 DAYS
3 PartosdeporcDlanayvtd,lo G AM AM
,_ Rovlst6n artualde mantordmionto
=f
preventfvoa sotl¢ttud daustod AM AM AM
G - Gara_U= AM ', Co_lTalo de Mantsnlm]e_o
Las estufas Kenmore estan dise_adas, fabricadas y probadas para brindarle a_os de
operaciOn confiabte Sin embargo, cualquier aparato moderno puede requerir de algt_n
servicio de vez en cuando La garantia Sears, adem_s del contrato de Mantenimiento
Sears, le brinda protecciOn contra cuentas de reparaciones inesperadas y le asegura que
disfrute de la maxima eficiencia de ta estufa
La tabla de arriba compara el contrato de Garantia y de Mantenimiento y le muestra los
beneficios de tener un Contrato de Mantenimiento para su estufa Sears
POngase en contacto con su vendedor de Sears o con el centro de servicio Sears de la
tocalidad hoy mismo y compre un contrato de Mantenimiento Sears
35

f
Sears se complace en ofrecer a sus c|ientes
servicio de reparaci6n de aparatos
electrodom_sticos y electr6nicos de todas las
marcas.
En Sears, usted puede contar con operadores en
espa_ol, a los que puede Ilamar sin cargo alguno.
..... I IIqI _11'l
Para servicio de reparaci6n
a dom;cilio,
Lfame 24 horas al dia, 7 dias a la
semana
t 800-676-5811
Para ordenar piezas con entrega
a domicilio,
Llame de 7 am a 7 pm, 7 dias a ia
semana
t 800-659-7084
S /ARS
36
-
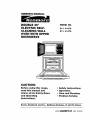 1
1
-
 2
2
-
 3
3
-
 4
4
-
 5
5
-
 6
6
-
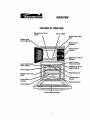 7
7
-
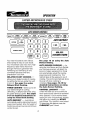 8
8
-
 9
9
-
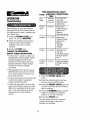 10
10
-
 11
11
-
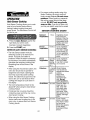 12
12
-
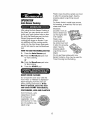 13
13
-
 14
14
-
 15
15
-
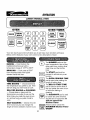 16
16
-
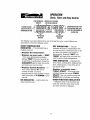 17
17
-
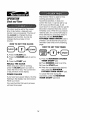 18
18
-
 19
19
-
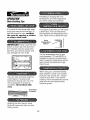 20
20
-
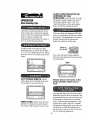 21
21
-
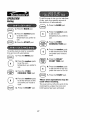 22
22
-
 23
23
-
 24
24
-
 25
25
-
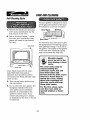 26
26
-
 27
27
-
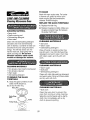 28
28
-
 29
29
-
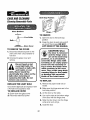 30
30
-
 31
31
-
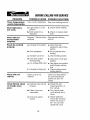 32
32
-
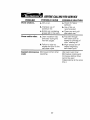 33
33
-
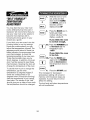 34
34
-
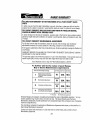 35
35
-
 36
36
-
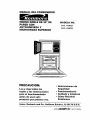 37
37
-
 38
38
-
 39
39
-
 40
40
-
 41
41
-
 42
42
-
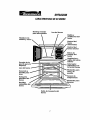 43
43
-
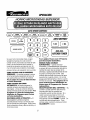 44
44
-
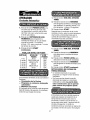 45
45
-
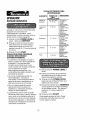 46
46
-
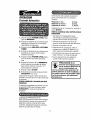 47
47
-
 48
48
-
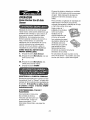 49
49
-
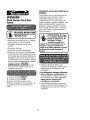 50
50
-
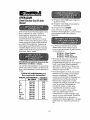 51
51
-
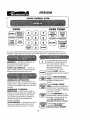 52
52
-
 53
53
-
 54
54
-
 55
55
-
 56
56
-
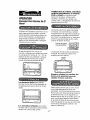 57
57
-
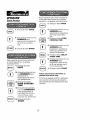 58
58
-
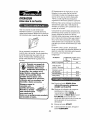 59
59
-
 60
60
-
 61
61
-
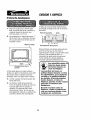 62
62
-
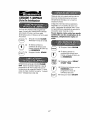 63
63
-
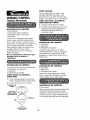 64
64
-
 65
65
-
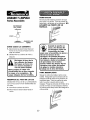 66
66
-
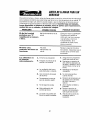 67
67
-
 68
68
-
 69
69
-
 70
70
-
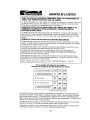 71
71
-
 72
72


Kenmore 91141475791 El manual del propietario
- Categoría
- Microondas
- Tipo
- El manual del propietario
- Este manual también es adecuado para
en otros idiomas
- English: Kenmore 91141475791 Owner's manual
Artículos relacionados
Otros documentos
-
Panasonic NNGD560MEPG El manual del propietario
-
GE JKP90DP3WW El manual del propietario
-
GE JTP9030 Manual de usuario
-
-
-
-
GE Profile PT970SRSS El manual del propietario
-