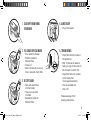
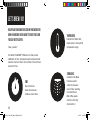
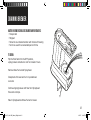
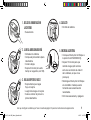
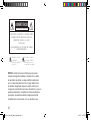
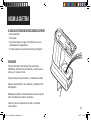
El Bunn GRW es una cafetera de calidad comercial que puede preparar de 4 a 10 tazas de café en solo 3 minutos. Cuenta con un tanque de agua caliente interno que mantiene el agua a la temperatura óptima para preparar café. El cabezal rociador proporciona una distribución uniforme del agua sobre el café molido, lo que garantiza una extracción completa del sabor. La cafetera también cuenta con una función de pausa y servicio que le permite servir una taza de café antes de que se complete el ciclo de preparación.
El Bunn GRW es una cafetera de calidad comercial que puede preparar de 4 a 10 tazas de café en solo 3 minutos. Cuenta con un tanque de agua caliente interno que mantiene el agua a la temperatura óptima para preparar café. El cabezal rociador proporciona una distribución uniforme del agua sobre el café molido, lo que garantiza una extracción completa del sabor. La cafetera también cuenta con una función de pausa y servicio que le permite servir una taza de café antes de que se complete el ciclo de preparación.


-
 1
1
-
 2
2
-
 3
3
-
 4
4
-
 5
5
-
 6
6
-
 7
7
-
 8
8
-
 9
9
-
 10
10
-
 11
11
-
 12
12
-
 13
13
-
 14
14
-
 15
15
-
 16
16
-
 17
17
-
 18
18
-
 19
19
-
 20
20
-
 21
21
-
 22
22
-
 23
23
-
 24
24
-
 25
25
-
 26
26
-
 27
27
-
 28
28
-
 29
29
-
 30
30
-
 31
31
-
 32
32
-
 33
33
-
 34
34
-
 35
35
-
 36
36
-
 37
37
-
 38
38
-
 39
39
-
 40
40
-
 41
41
-
 42
42
-
 43
43
-
 44
44
-
 45
45
-
 46
46
-
 47
47
-
 48
48
-
 49
49
-
 50
50
-
 51
51
-
 52
52
-
 53
53
-
 54
54
-
 55
55
-
 56
56


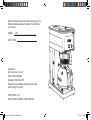
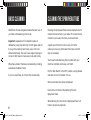
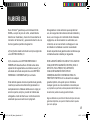
El Bunn GRW es una cafetera de calidad comercial que puede preparar de 4 a 10 tazas de café en solo 3 minutos. Cuenta con un tanque de agua caliente interno que mantiene el agua a la temperatura óptima para preparar café. El cabezal rociador proporciona una distribución uniforme del agua sobre el café molido, lo que garantiza una extracción completa del sabor. La cafetera también cuenta con una función de pausa y servicio que le permite servir una taza de café antes de que se complete el ciclo de preparación.
en otros idiomas
- English: Bunn GRW User manual