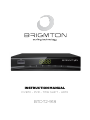
Brigmton BTDT2-918 El manual del propietario
- Categoría
- Decodificadores de TV
- Tipo
- El manual del propietario
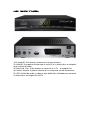
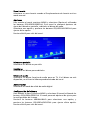
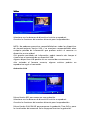
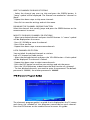
El Brigmton BTDT2-918 es un dispositivo con sintonizador de TDT, PVR y Time Shift que te permite ver y grabar canales de televisión en alta definición. También puedes pausar y reanudar la reproducción de programas en directo, y conectar una memoria USB para almacenar grabaciones y contenidos multimedia. Además, cuenta con una guía electrónica de programación (EPG) que te muestra el horario de los programas.
El Brigmton BTDT2-918 es un dispositivo con sintonizador de TDT, PVR y Time Shift que te permite ver y grabar canales de televisión en alta definición. También puedes pausar y reanudar la reproducción de programas en directo, y conectar una memoria USB para almacenar grabaciones y contenidos multimedia. Además, cuenta con una guía electrónica de programación (EPG) que te muestra el horario de los programas.


-
 1
1
-
 2
2
-
 3
3
-
 4
4
-
 5
5
-
 6
6
-
 7
7
-
 8
8
-
 9
9
-
 10
10
-
 11
11
-
 12
12
-
 13
13
-
 14
14
-
 15
15
-
 16
16
-
 17
17
-
 18
18
-
 19
19
-
 20
20
-
 21
21
-
 22
22
-
 23
23
-
 24
24
-
 25
25
-
 26
26
-
 27
27
-
 28
28
-
 29
29
-
 30
30
-
 31
31
-
 32
32
-
 33
33
-
 34
34
-
 35
35
-
 36
36
-
 37
37
-
 38
38


Brigmton BTDT2-918 El manual del propietario
- Categoría
- Decodificadores de TV
- Tipo
- El manual del propietario
El Brigmton BTDT2-918 es un dispositivo con sintonizador de TDT, PVR y Time Shift que te permite ver y grabar canales de televisión en alta definición. También puedes pausar y reanudar la reproducción de programas en directo, y conectar una memoria USB para almacenar grabaciones y contenidos multimedia. Además, cuenta con una guía electrónica de programación (EPG) que te muestra el horario de los programas.
en otros idiomas
- English: Brigmton BTDT2-918 Owner's manual
Artículos relacionados
Otros documentos
-
Sytech SY-425HD El manual del propietario
-
Denver DTB-142 Manual de usuario
-
-
Denver DVBS-202HD Manual de usuario
-
-
IVIEW 3500STBII Manual de usuario
-
Lenco TFT-1038 El manual del propietario
-
 AXIL RT 0401 HD Manual de usuario
-
Lenco DVP-9463 Manual de usuario
-
