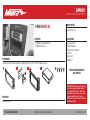
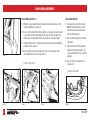
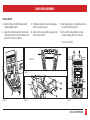
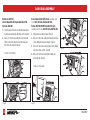
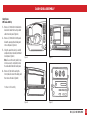
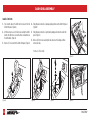
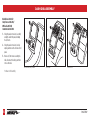
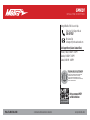
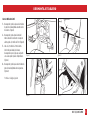
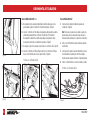
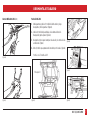
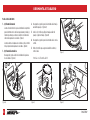
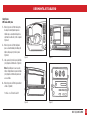
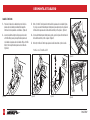
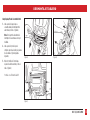
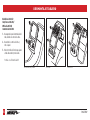
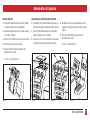
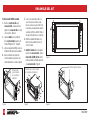
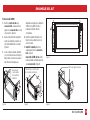
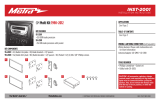
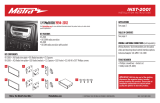
El Metra WM-GMK01 es un kit de instalación para radios de coche que permite instalar una radio DIN o DDIN en vehículos compatibles. El kit incluye todas las piezas necesarias para la instalación, como soportes de radio, tornillos y herramientas especiales. El Metra WM-GMK01 es fácil de instalar y no requiere ninguna modificación del vehículo. Es compatible con una amplia variedad de vehículos, incluyendo Buick, Chevrolet, GMC, Hummer, Pontiac, Saturn y Suzuki.
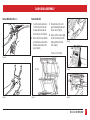
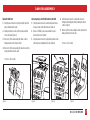
El Metra WM-GMK01 es un kit de instalación para radios de coche que permite instalar una radio DIN o DDIN en vehículos compatibles. El kit incluye todas las piezas necesarias para la instalación, como soportes de radio, tornillos y herramientas especiales. El Metra WM-GMK01 es fácil de instalar y no requiere ninguna modificación del vehículo. Es compatible con una amplia variedad de vehículos, incluyendo Buick, Chevrolet, GMC, Hummer, Pontiac, Saturn y Suzuki.


-
 1
1
-
 2
2
-
 3
3
-
 4
4
-
 5
5
-
 6
6
-
 7
7
-
 8
8
-
 9
9
-
 10
10
-
 11
11
-
 12
12
-
 13
13
-
 14
14
-
 15
15
-
 16
16
-
 17
17
-
 18
18
-
 19
19
-
 20
20
-
 21
21
-
 22
22
-
 23
23
-
 24
24
-
 25
25
-
 26
26
-
 27
27
-
 28
28
-
 29
29
-
 30
30
-
 31
31
-
 32
32
-
 33
33
-
 34
34
-
 35
35
-
 36
36
-
 37
37
-
 38
38
-
 39
39
-
 40
40


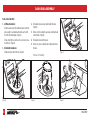
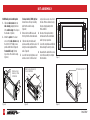
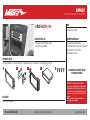
El Metra WM-GMK01 es un kit de instalación para radios de coche que permite instalar una radio DIN o DDIN en vehículos compatibles. El kit incluye todas las piezas necesarias para la instalación, como soportes de radio, tornillos y herramientas especiales. El Metra WM-GMK01 es fácil de instalar y no requiere ninguna modificación del vehículo. Es compatible con una amplia variedad de vehículos, incluyendo Buick, Chevrolet, GMC, Hummer, Pontiac, Saturn y Suzuki.
en otros idiomas
- English: Metra WM-GMK01 User manual
Artículos relacionados
Otros documentos
-
 Metra Electronics 95-2001 Double DIN Instrucciones de operación
-
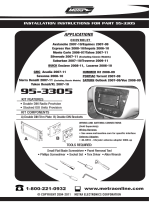 Metra Electronics 95-3305 Manual de usuario
-
iON Acadia Guía del usuario
-
Axxess AXGMLN-02 Installation Instructions Manual
-
-
-
Axxess BACKUPCAM-3 Manual de usuario
-
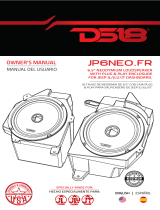 DS18 JP6NEO.FR El manual del propietario
-
Chevrolet L8T Instrucciones de operación


