Mr Handsfree Stereoboomm El manual del propietario
- Categoría
- Radios
- Tipo
- El manual del propietario
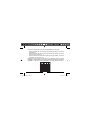
El Mr Handsfree Stereoboomm es un transmisor FM que te permite reproducir audio a través del sistema de sonido de tu coche. Es compatible con una amplia gama de dispositivos de audio, incluyendo reproductores de MP3, teléfonos inteligentes y tabletas. El Stereoboomm también cuenta con un puerto de carga USB para que puedas cargar tus dispositivos mientras conduces. Además, incluye una función de manos libres para que puedas responder llamadas telefónicas sin tener que quitar las manos del volante.
El Mr Handsfree Stereoboomm es un transmisor FM que te permite reproducir audio a través del sistema de sonido de tu coche. Es compatible con una amplia gama de dispositivos de audio, incluyendo reproductores de MP3, teléfonos inteligentes y tabletas. El Stereoboomm también cuenta con un puerto de carga USB para que puedas cargar tus dispositivos mientras conduces. Además, incluye una función de manos libres para que puedas responder llamadas telefónicas sin tener que quitar las manos del volante.


Transcripción de documentos
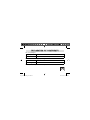
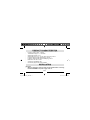
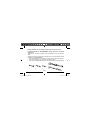
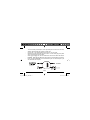
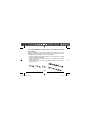
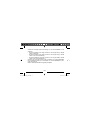
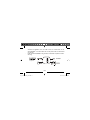
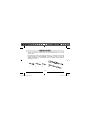
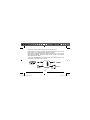
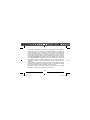
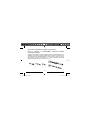
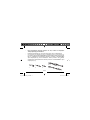
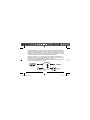
® GB m_StereoBoomm_Cover.indd 1 NL F E I P RU 07.12.2007 19:01:18 DECLARATION OF CONFORMITY We, the undersigned Company: TE-GROUP nv Address: Kapelsestraat 61, 2950 Kapellen - BELGIUM declare, that the following equipment: Product Name: StereoBOOMM® Product Type: FM Transmitter Conforms with the requirements of European Council Directive 99/5/EC m_StereoBoomm_Dec.indd 1 07.12.2007 19:09:53 TABLE OF CONTENTS PRODUCT CHARACTERISTICS .........................2 INSTALLATION .....................................................2 USE WITH AUDIO DEVICE ..................................6 GUARANTEE ........................................................6 m_StereoBoomm_GB.indd 1 07.12.2007 19:12:44 PRODUCT CHARACTERISTICS - Frequency range: 20 Hz – 20 KHz Transmission range: 87.7 – 88.9 Mhz Cable length for FM: 21 cm Cable length for 2.5 mm / 3.5 mm stereo Jack plug: 160 cm Length of charging cable with iPod plug: 160 cm Length of charging cable with mini USB plug: 160 cm Dimensions: 42 x 60 x 16 mm Accessories: installation clips Conversion plugs for DIN / ISO / FAKRA INSTALLATION Important! • Make sure that all the necessary cables are well installed before connecting the StereoBOOMM® to the power supply of the car. GB - 2 m_StereoBoomm_GB.indd 2 07.12.2007 19:12:45 • • During operation, do not attempt to access the sockets of the unit. For disconnecting the StereoBOOMM®, always disconnect the power supply first. - Take out your car radio according to the specifications of your car and your radio. Unplug the antenna plug from your radio and connect it to the female antenna socket of your StereoBOOMM®. • If the car has DIN type (1), make the connection via the conversion plug (3). • If the car has ISO type (2), make the connection directly. • If the car has FAKRA type, make the connection via the conversion plug (4.2). - 4.1 1 2 3 4.2 GB - 3 m_StereoBoomm_GB.indd 3 07.12.2007 19:12:45 - - - Plug the male antenna plug from the StereoBOOMM® into the car radio. • If the car has DIN type (1), make the connection directly. • If the car has ISO type (2), make the connection via the conversion plug (3). • If the car has FAKRA type, make the connection via the conversion plug (4.1). Select a frequency with the 4 dip switches on the StereoBOOMM®. The frequency table is printed on the backside of your StereoBOOMM® and below. Please take a close look at this frequency table! Connect the + wire to the red or yellow wire with a fuse, that goes to your car radio. We recommend to connect the + wire of the StereoBOOMM® to the Ignition wire. GB - 4 m_StereoBoomm_GB.indd 4 07.12.2007 19:12:45 - You can use the provided clips. These clips allow you to connect an extra wire, without cutting through the original car radio wire. Connect the – wire to the black wire that goes to your car radio. Guide the wire with the button and the 2.5 mm / 3.5 mm Jack plug to the place where your audio device is located. Select your charging wire, for mini USB or iPod, and connect this to the StereoBOOMM®. Guide this wire also to the place where your audio device is located. Place your StereoBOOMM® in the hole behind your car radio and place your car radio back into its place. Charging cables GB - 5 m_StereoBoomm_GB.indd 5 07.12.2007 19:12:45 USE WITH AUDIO DEVICE - Connect the Jack plug of your StereoBOOMM® to your audio device. Connect your charging cable to your music device when you need to charge the battery. Select the frequency of the StereoBOOMM® on your car radio (please store this frequency as a preset). Press the control button on the cable of your StereoBOOMM® to switch it on or off. GUARANTEE ® StereoBOOMM is a registered trademark of TE-Group NV. The StereoBOOMM® brand stands for superior product quality and outstanding customer service. That is why StereoBOOMM® warrants this product against all defects in material and workmanship for a period of three (3) years from the date of original purchase of the product. GB - 6 m_StereoBoomm_GB.indd 6 07.12.2007 19:12:46 The conditions of this limited warranty and the extent of responsibility of StereoBOOMM® under this limited warranty are as follows: • This warranty is limited to the original purchaser of the product and is not transferable to any subsequent purchaser/end user. • During the limited warranty period, the sole responsibility of StereoBOOMM® will be limited to repair or replace, at its option, any defective parts of the product if this is needed because of malfunction or failure under normal use and conditions. No charge shall be made to the customer for parts and/or repair labor. • The product must be shipped to an authorized service center in its original and complete packaging, with transportation charges prepaid. StereoBOOMM® will not assume responsibility for any losses or damages during transportation. • To obtain repair or replacement within the terms of this warranty, the customer must provide (a) a proof of purchase (e.g. dated bill of sale); (b) a written specification of the defect(s); (c) a return address and phone number. • This limited warranty does not cover and is void with respect to the following: (a) Products which have been subjected to improper installation, unauthorized GB - 7 m_StereoBoomm_GB.indd 7 07.12.2007 19:12:46 • • repair, improper maintenance, unauthorized modifications or other acts which are not the fault of StereoBOOMM®; (b) Products which have been subjected to misuse, abuse, neglect, improper handling and storage, an accident or physical damage; (c) Products which have been subjected to fire, water, excessive humidity, sand, dirt, extreme changes in temperature or other conditions which are beyond the control of StereoBOOMM®; (d) Products which have been used with non-StereoBOOMM® approved accessories; (e) Products which have the serial number altered, defaced or removed; (f) Products which have been opened, altered, repaired or modified by any unauthorized service center. Excluded from any guarantee are consumable items which may need replacing due to normal wear and tear, such as batteries, headset ear cushions, decorative parts and other accessories. This limited warranty gives you specific legal rights, and you may also have other rights which vary from country to country. GB - 8 m_StereoBoomm_GB.indd 8 07.12.2007 19:12:46 INHOUDSOPGAVE PRODUCTEIGENSCHAPPEN..............................2 INSTALLATIE ........................................................2 GEBRUIK MET AUDIOTOETSEL ........................7 GARANTIE ..............................................................7 m_StereoBoomm_NL.indd 1 07.12.2007 19:04:37 PRODUCTEIGENSCHAPPEN - Frequentiebereik: 20 Hz – 20 KHz Ontvangstbereik: 87.7 - 88.9 Mhz Kabellengte voor FM: 21 cm Kabellengte voor 2.5 mm / 3.5 mm stereo Jack plug: 160 cm Kabellengte voor laadkabel met iPod plug: 160 cm Kabellengte voor laadkabel met mini USB plug: 160 cm Afmetingen: 42 x 60 x 16 mm Accessoires: installatie clips Verloopstekkers voor DIN / ISO / FAKRA INSTALLATIE Belangrijk! • Zorg ervoor dat alle kabels goed aangesloten zijn voor u de StereoBOOMM® verbindt met de stroomvoorziening van de wagen. • Probeer niet tijdens de werking de aansluitingen van het toestel aan te raken. NL - 2 m_StereoBoomm_NL.indd 2 07.12.2007 19:04:37 • Om de StereoBOOMM® los te koppelen, dient u eerst de stroomvoorziening uit te schakelen. - Koppel de autoradio los volgens de specificaties van uw wagen en uw radio. Verwijder de stekker van de antenne uit uw radio en verbind deze met de vrouwelijke antenneaansluiting van uw StereoBOOMM®. • Als de antennekabel in uw wagen voorzien is van het type DIN (1), verbindt u deze met de verloopstekker (3). • Als de antennekabel in uw wagen voorzien is van het type ISO (2), verbindt u deze rechtstreeks. • Als de wagen voorzien is van het type FAKRA, verbindt u deze via de verloopstekker (4.2). 4.1 1 2 3 4.2 NL - 3 m_StereoBoomm_NL.indd 3 07.12.2007 19:04:37 - - Verbind de mannelijke antenneaansluiting van uw StereoBOOMM® met de autoradio. • Als de antennekabel in uw wagen voorzien is van het type DIN (1), verbindt u deze rechtstreeks. • Als de antennekabel in uw wagen voorzien is van het type ISO (2), verbindt u deze met de verloopstekker (3). • Als de antennekabel in uw wagen voorzien is van het type FAKRA, verbindt u deze met de verloopstekker (4.1). Selecteer een frequentie met de 4 dip schakelaars op uw StereoBOOMM®. De frequentietabel wordt op de achterzijde van uw StereoBOOMM® en hieronder weergegeven. Gelieve deze frequentietabel zorgvuldig te bekijken! NL - 4 m_StereoBoomm_NL.indd 4 07.12.2007 19:04:37 - - Verbind de + kabel met de rode of gele kabel met een zekering, die naar uw autoradio gaat. We raden u aan de + kabel van de StereoBOOMM® met de ontstekingskabel te verbinden. U kan hiervoor de bijgeleverde clips gebruiken. Deze clips maken het mogelijk een extra kabel te verbinden zonder de originele kabels van de autoradio door te knippen. Verbind de – kabel met de zwarte kabel die naar uw autoradio gaat. Leid de kabel met de controletoets en de 2.5 mm / 3.5 mm Jack plug naar de plaats waar uw audiotoestel zich bevindt. NL - 5 m_StereoBoomm_NL.indd 5 07.12.2007 19:04:37 - - Selecteer uw laadkabel, voor mini USB of iPod, en verbind deze met de StereoBOOMM®. Leid deze kabel ook naar de plaats waar uw audiotoestel zich bevindt. Plaats uw StereoBOOMM® in het gat achter uw autoradio en plaats uw autoradio terug. Charging cables NL - 6 m_StereoBoomm_NL.indd 6 07.12.2007 19:04:38 GEBRUIK MET AUDIOTOETSEL - Verbind de Jack plug van uw StereoBOOMM® met uw audiotoestel. Verbind uw laadkabel met uw muziektoestel wanneer u de batterij wenst op te laden. Selecteer de frequentie van uw StereoBOOMM® op uw autoradio (gelieve deze frequentie in het geheugen van uw autoradio te programmeren). Druk op de controletoets om uw StereoBOOMM® aan en uit te schakelen. GARANTIE ® StereoBOOMM is een gedeponeerd handelsmerk van TE-Group NV. Het merk StereoBOOMM® staat voor producten van superieure kwaliteit en een uitstekende klantenservice. Daarom garandeert StereoBOOMM® dat dit product vrij is van materiaal- en fabricagefouten gedurende een periode van drie (3) jaar na de oorspronkelijke aankoopdatum van het product. NL - 7 m_StereoBoomm_NL.indd 7 07.12.2007 19:04:38 De voorwaarden van deze beperkte garantie en de omvang van de verantwoordelijkheid van StereoBOOMM® onder deze garantie zijn als volgt: • De garantie geldt alleen voor de originele (eerste) eigenaar en is niet overdraagbaar aan een volgende koper. • De enige verplichting van StereoBOOMM® onder deze garantie beperkt zich tot het repareren of vervangen, naar eigen keuze, van defecte onderdelen van het product, indien dit vereist is omwille van gebreken die voorkomen bij normaal gebruik onder normale omstandigheden. De klant dient niet te betalen voor onderdelen en/of arbeidskosten. • Het defecte product moet verzonden worden naar een geautoriseerd service center in de originele en volledige verpakking. Transportkosten zijn voor rekening van de klant. StereoBOOMM® is niet aansprakelijk voor verlies of schade tijdens het transport. • Om recht te hebben op reparatie of vervanging van het product binnen de garantieperiode dient de klant het volgende te verstrekken: (a) een aankoopbewijs met vermelding van de aankoopdatum; (b) een duidelijke omschrijving van de gebreken; (c) een adres en telefoonnummer. NL - 8 m_StereoBoomm_NL.indd 8 07.12.2007 19:04:38 • • • Deze beperkte garantie geldt niet voor: (a) Producten die blootgesteld werden aan verkeerde installatie, onrechtmatige herstellingen, slecht onderhoud, onrechtmatige aanpassingen of andere daden die niet de fout zijn van StereoBOOMM®; (b) Producten die blootgesteld werden aan misbruik, verwaarlozing, onzorgvuldige behandeling en opslag, een ongeval of materiële schade; (c) Producten die blootgesteld werden aan brand, water, extreme vochtigheid, zand, stof, extreme temperatuurschommelingen of andere omstandigheden buiten de controle van StereoBOOMM®; (d) Producten die gebruikt werden met accessoires die niet door StereoBOOMM® goedgekeurd werden; (e) Producten waarvan het serienummer gewijzigd, onleesbaar of verwijderd is; (f) Producten die geopend, gewijzigd of gerepareerd werden door een niet door StereoBOOMM® geautoriseerd service center. Uitgesloten van elke vorm van garantie zijn gebruiksonderdelen die vervangen moeten worden door normale slijtage, zoals batterijen, oorkussentjes, decoratieve onderdelen en andere accessoires. Deze beperkte garantie geeft u specifieke wettelijke rechten, en mogelijk heeft u nog andere rechten die van land tot land kunnen verschillen. NL - 9 m_StereoBoomm_NL.indd 9 07.12.2007 19:04:38 TABLE DES MATI MATIÈ ÈRES CARACTÉRISTIQUES DU PRODUIT ................2 INSTALLATION ...................................................2 UTILISATION AVEC APPAREIL AUDIO ............6 GARANTIE ..........................................................7 m_StereoBoomm_F.indd 1 07.12.2007 19:02:48 CARACTÉRISTIQUES DU PRODUIT - Bande de fréquence : 20 Hz – 20 KHz Bande de transmission : 87.7 – 88.9 MHz Longueur du câble pour la fréquence FM : 21 cm Longueur du câble pour la fiche stéréo 2.5 mm / 3.5 mm : 160 cm Longueur du câble de chargement avec fiche iPod : 160 cm Longueur du câble de chargement avec fiche mini USB : 160 cm Dimensions : 42 x 60 x 16 mm Accessoires : attaches d’installation Fiches de conversion DIN / ISO / FAKRA INSTALLATION Important! • Assurez-vous que tous les câbles sont bien installés avant de connecter le StereoBOOMM® à l’alimentation de la voiture. • N’essayez pas d’accéder aux prises de l’appareil pendant le fonctionnement. FR - 2 m_StereoBoomm_F.indd 2 07.12.2007 19:02:49 • Si vous voulez déconnecter le StereoBOOMM®, vous devez toujours couper l’alimentation. - Retirez votre autoradio selon les spécifications de votre voiture et de votre radio. Débranchez la fiche antenne de votre radio et connectez-la à la fiche antenne femelle de votre StereoBOOMM®. • Si la fiche antenne de votre voiture est pourvue du type DIN (1), connectezla à la fiche de conversion (3). • Si la fiche antenne de votre voiture est pourvue du type ISO (2), connectezla directement. • Si la fiche antenne de votre voiture est pourvue du type FAKRA, connectezla à la fiche de conversion (4.2). 4.1 1 2 3 4.2 FR - 3 m_StereoBoomm_F.indd 3 07.12.2007 19:02:49 - - Branchez la fiche antenne mâle du StereoBOOMM® sur l’autoradio. • Si la fiche antenne de votre voiture est pourvue du type DIN (1), connectezlà directement. • Si la fiche antenne de votre voiture est pourvue du type ISO (2), connectezla la fiche de conversion (3). • Si la fiche antenne de votre voiture est pourvue du type FAKRA , connectezla à la fiche de conversion (4.1). Sélectionnez une fréquence à l’aide des 4 commutateurs DIP sur le StereoBOOMM®. La table de fréquence est affichée sur la côté postérieur de votre StereoBOOMM® et ci-dessous. Veuillez lire attentivement cette table de fréquence! FR - 4 m_StereoBoomm_F.indd 4 07.12.2007 19:02:50 - - - Connectez le câble + au câble rouge ou jaune avec un fusible qui se connecte à votre autoradio. Nous recommandons de connecter le câble + du StereoBOOMM® au câble d’allumage. Pour ce faire, vous pouvez utiliser les attaches fournies. Ces attaches vous permettent de connecter un câble supplémentaire, sans pour autant devoir couper le câble original de l’autoradio. Connectez le câble – au câble noir qui va vers l’autoradio. Guidez le câble avec le bouton de contrôle et la fiche de 2.5 mm / 3.5 mm à l’endroit où se trouve votre appareil audio. Sélectionnez votre câble de chargement, avec fiche mini USB ou fiche iPod, et connectez ce câble au StereoBOOMM®. Guidez le câble à l’endroit où se trouve votre appareil audio. Placez votre StereoBOOMM® dans l’orifice derrière votre autoradio et remettez en place votre autoradio. FR - 5 m_StereoBoomm_F.indd 5 07.12.2007 19:02:50 Charging cables UTILISATION AVEC APPAREIL AUDIO - Connectez la fiche de votre StereoBOOMM® à votre appareil audio. Connectez le câble de chargement à votre appareil audio quand vous voulez charger la batterie. Sélectionnez la fréquence du StereoBOOMM® sur votre autoradio (veillez à enregistrer cette fréquence comme préréglage). Appuyez sur le bouton de contrôle du câble de votre StereoBOOMM® pour allumer ou éteindre celui-ci. FR - 6 m_StereoBoomm_F.indd 6 07.12.2007 19:02:50 GARANTIE StereoBOOMM® est une marque déposée de TE-Group NV. La marque de StereoBOOMM® est synonyme de produits de qualité supérieure et d’un service après-vente excellent. C’est la raison pour laquelle StereoBOOMM® garantit ce produit contre tout défaut de matériel ou de fabrication pour une période de trois (3) ans à compter de la date d’achat initiale. Les conditions de cette garantie limitée et l’étendue de la responsabilité de StereoBOOMM® en vertu de cette garantie limitée sont les suivantes : • Cette garantie ne s’applique qu’à l’acheteur original du produit et n’est pas transférable à aucun autre acheteur subséquent. • Pendant la période de la garantie limitée, la seule responsabilité de StereoBOOMM® sera de réparer ou de remplacer, à son choix, toute pièce défectueuse du produit si ce sera nécessaire à cause d’un mauvais fonctionnement ou d’une panne quelconque, malgré un usage normal et des conditions normales. Les frais de la réparation et/ou des pièces ne seront pas à la charge du client. FR - 7 m_StereoBoomm_F.indd 7 07.12.2007 19:02:51 • • • Il vous faut envoyer le produit à un centre de service autorisé dans son emballage original et complet, transport prépayé. StereoBOOMM® n’assumera aucune responsabilité pour des pertes ou des dommages pendant le transport. Si ce produit doit être réparé ou remplacé durant la période de la garantie, il doit être accompagné de (a) un preuve d’achat (p.e. contrat de vente daté) ; (b) une spécification écrite du (des) défaut(s) ; (c) l’adresse de l’expéditeur et un numéro de téléphone. Cette garantie limitée ne s’applique pas et est annulée dans les cas suivants: (a) Produits qui ont été soumis à réparation non autorisée, installation incorrecte, entretien inadéquat, modifications non autorisées ou tous autres actes qui ne sont pas la faute de StereoBOOMM®; (b) Produits qui ont été soumis à mauvaise utilisation, abus, négligence, mauvais traitement et stockage, accident ou dommages physiques; (c) Produits qui ont été exposés à feu, eau, humidité excessive, sable, saleté, changements de température extrêmes ou toutes autres conditions indépendantes du contrôle de StereoBOOMM®; (d) Produits qui ont été utilisés avec des accessoires non approuvés par StereoBOOMM®; (e) Produits dont le numéro de série a été modifié, rendu illisible ou FR - 8 m_StereoBoomm_F.indd 8 07.12.2007 19:02:51 • • enlevé; (f) Produits qui ont été ouverts, changés, réparés ou modifiés par un centre de service non autorisé. Exclus de toute garantie sont des produits consommables nécessitant un remplacement résultant d’une usure ou d’un bris normal, tels que des batteries, des oreillettes, des couvertures décoratives et d’autres accessoires. Cette garantie limitée vous procure des droits spécifiques, et vous pourriez avoir d’autres droits qui varient d’un pays à l’autre. FR - 9 m_StereoBoomm_F.indd 9 07.12.2007 19:02:51 ÍNDICE CARACTERÍSTICAS DEL PRODUCTO ..............2 INSTALACIÓN ......................................................3 USO CON EL DISPOSITIVO DE AUDIO ..............6 GARANTÍA............................................................6 m_StereoBoomm_E.indd 1 07.12.2007 19:02:26 CARACTERÍSTICAS DEL PRODUCTO - Rango de frecuencia: 20 Hz – 20 KHz Rango de transmisión: 87.7 – 88.9 Mhz Longitud del cable para FM: 21 cm Longitud del cable para enchufe de toma de estéreo 2.5 mm /3.5 mm: 160 cm Longitud del cable de alimentación con la toma del iPod: 160 cm Longitud del cable de alimentación con la toma mini USB: 160 cm Dimensiones: 42 x 60 x 16 mm Accesorios: clips de instalación Adaptadores para DIN / ISO / FAKRA E-2 m_StereoBoomm_E.indd 2 07.12.2007 19:02:27 INSTALACIÓN - Saque su radio del coche según las especificaciones de su coche y de su radio. Desenchufe el enchufe de antena de la radio y conéctelo al enchufe de antena hembra de su StereoBOOMM®. Para DIN (1) o ISO (2), tiene que utilizar el adaptador (3). Para FAKRA, tiene que utilizar ambos cables de conexión (4.1 +4.2). 4.1 1 2 3 4.2 E-3 m_StereoBoomm_E.indd 3 07.12.2007 19:02:28 - - Enchufe el enchufe de la antena macho de su StereoBOOMM ® en la radio del coche. Seleccione una frecuencia con los 4 interruptores dip StereoBOOMM ®. La tabla de frecuencias está impresa en la parte de atrás de su StereoBOOMM® y abajo. ¡Por favor vea con cuidado esta tabla de frecuencias! Conecte el cable + al cable rojo o amarillo con un fusible que va a la radio del coche. Recomendamos que conecte el cable + del StereoBOOMM® al cable de encendido. Puede utilizar los clips proporcionados. Estos clips le permiten conectar un cable extra, sin cortar el cable original de la radio del coche. E-4 m_StereoBoomm_E.indd 4 07.12.2007 19:02:28 - - Conecte el – cable al cable negro que va a la radio del coche. Dirija el cable con el botón de control y el enchufe de la toma 2.5 mm / 3.5 mm hacia el lugar en que está situado su dispositivo de audio. Seleccione su cable de alimentación, para mini USB o iPod, y conecte este cable al StereoBOOMM®. Oriente este cable también al lugar en que está situado el dispositivo de audio. Coloque su StereoBOOMM® en el agujero detrás de la radio del coche y vuelva a colocar la radio del coche en su sitio. Charging cables E-5 m_StereoBoomm_E.indd 5 07.12.2007 19:02:28 USO CON EL DISPOSITIVO DE AUDIO - Conecte el enchufe de la toma de su StereoBOOMM® a su dispositivo de audio. Conecte su cable de alimentación a su dispositivo de música cuando tenga que cargar la batería. Seleccione la frecuencia del StereoBOOMM® en su radio del coche (por favor, guarde esta frecuencia como preseleccionada). Pulse el botón del control del cable de su StereoBOOMM® para encenderlo o apagarlo. GARANTÍA StereoBOOMM® es una marca registrada de TE-Group NV. La marca StereoBOOMM® representa una calidad de producto superior y una excelente atención al cliente. Por esto es por lo que StereoBOOMM® garantiza este producto contra todos los defectos materiales y de mano de obra durante un periodo de tres (3) años desde la fecha de compra original del producto. E-6 m_StereoBoomm_E.indd 6 07.12.2007 19:02:29 Las condiciones de esta garantía limitada y el alcance de la responsabilidad de StereoBOOMM® bajo esta garantía limitada son las siguientes: • Esta garantía está limitada al comprador original del producto y no es transferible a ningún comprador posterior / usuario final. • Durante el periodo de garantía limitada, la única responsabilidad de StereoBOOMM® estará limitada a reparar o cambiar, a su elección, cualquier pieza defectuosa del producto si esto es necesario debido al mal funcionamiento o al fallo con un uso y condiciones normales. No se cobrará nada al cliente por las piezas y / o mano de obra de la reparación. • El producto se tiene que enviar a un centro de reparación autorizado en su paquete original y completo, con cargos de transporte prepagados. StereoBOOMM® no asumirá ninguna responsabilidad por pérdida o daños durante el transporte. • Para conseguir la reparación o el cambio dentro de los términos de esta garantía, el cliente tiene que proporcionar (a) una prueba de compra (p. ej. la factura de compra con fecha); (b) una especificación por escrito del defecto o los defectos; (c) una dirección de devolución y un número de teléfono. • Esta garantía limitada no cubre y no es válida con respecto a lo siguiente: (a) Productos que se han sometido a una instalación inadecuada, reparación E-7 m_StereoBoomm_E.indd 7 07.12.2007 19:02:29 • • no autorizada, mantenimiento inadecuado, modificaciones no autorizadas u otras acciones que no son defectos de StereoBOOMM®; (b) Productos que se han sometido a un uso inadecuado, abuso, negligencia, manipulación y almacenaje inadecuados, un accidente o daño físico; (c) Productos que han estado sometidos al fuego, agua, humedad excesiva, arena, suciedad, cambios de temperatura extremos u otras condiciones que están más allá del control de StereoBOOMM®; (d) Productos que se han utilizado con accesorios que no son StereoBOOMM® no aprobados; (e) Productos que tienen un número de serie alterado, borrado o quitado; (f) Productos que se han abierto, alterado, reparado o modificado por parte de cualquier centro de reparaciones no autorizado. Están excluidos de cualquier garantía los artículos consumibles que puedan necesitar cambio debido al uso y desgaste normal, como baterías, almohadillas de los auriculares, piezas decorativas y otros accesorios. Esta garantía limitada le da unos derechos legales específicos, y también puede tener otros derechos que varían de un país a otro. E-8 m_StereoBoomm_E.indd 8 07.12.2007 19:02:29 INDICE CARATTERISTICHE DEL PRODOTTO ...............2 MONTAGGIO ........................................................2 UTILIZZO CON APPARECCHI AUDIO ................6 GARANZIA............................................................6 m_StereoBoomm_I.indd 1 07.12.2007 19:13:16 CARATTERISTICHE DEL PRODOTTO - Gamma di frequenza: 20 Hz – 20 KHz Gamma di ricezione: 87.7 - 88.9 Mhz Lunghezza del cavo per ricezione FM: 21 cm Lunghezza del cavo per jack stereo da 2,5 mm / 3,5 mm: 160 cm Lunghezza del cavo di carica con presa iPod: 160 cm Lunghezza del cavo di carica con presa mini USB: 160 cm Dimensioni: 42 x 60 x 16 mm Accessori: clip di montaggio Spine di conversione per DIN / ISO / FAKRA MONTAGGIO Importante: • Assicurarsi che tutti i cavi siano collegati correttamente prima di collegare lo StereoBOOMM® all’alimentazione dell’auto. I-2 m_StereoBoomm_I.indd 2 07.12.2007 19:13:16 • • Non toccare i collegamenti con apparecchio in funzione. Prima di scollegare lo StereoBOOMM® innanzitutto l’alimentazione elettrica. - Scollegare l’autoradio secondo le specifiche dell’auto e dell’autoradio stessa. Scollegare il bocchettone d’antenna dalla radio e collegarlo con la presa femmina d’antenna dello StereoBOOMM®. In caso di DIN (1) o ISO (2) è necessario utilizzare la spina di conversione (3). In caso di FAKRA è necessario utilizzare entrambi i fili di conversione (4.1 + 4.2). disattivare 4.1 1 2 3 4.2 I-3 m_StereoBoomm_I.indd 3 07.12.2007 19:13:16 - - Collegare il bocchettone maschio d’antenna dello StereoBOOMM® all’autoradio. Selezionare una frequenza con l’interruttore a 4 vie dello StereoBOOMM®. La tabella delle frequenze è indicata sul retro dello StereoBOOMM® ed è riportata sotto. Si prega di controllare attentamente tale tabella. Collegare il cavo “+” al cavo rosso o giallo con un fusibile che va all’autoradio. Si consiglia di collegare il cavo “+” dello StereoBOOMM® al cavo di accensione dell’auto. A tale fine è possibile utilizzare le clip fornite in dotazione. Tali I-4 m_StereoBoomm_I.indd 4 07.12.2007 19:13:17 - - clip permettono di collegare un cavo aggiuntivo senza tagliare i cavi originali dell’autoradio. Collegare il cavo “–” al cavo nero che va all’autoradio. Guidare il cavo con i pulsanti di controllo e il jack da 2,5 mm / 3,5 mm al punto in cui si trova l’apparecchio audio. Scegliere il proprio filo di carica per mini USB o iPod, quindi collegarlo allo StereoBOOMM®. Indirizzare il filo anche verso il punto in cui si trova il dispositivo audio. Posizionare lo StereoBOOMM® nel vano dietro all’autoradio e ricollocare l’autoradio nella sede. Charging cables I-5 m_StereoBoomm_I.indd 5 07.12.2007 19:13:17 UTILIZZO CON APPARECCHI AUDIO - Collegare il jack dello StereoBOOMM® all’apparecchio audio. Collegare il cavo di carica al dispositivo di riproduzione musicale per caricare la batteria. Selezionare la frequenza dello StereoBOOMM® nell’autoradio (inserire la frequenza nelle memorie dell’autoradio). Premere il pulsante di controllo per attivare e disattivare lo StereoBOOMM®. GARANZIA StereoBOOMM® è un marchio di fabbrica di TE-Group NV. Il marchio StereoBOOMM® indica la qualità superiore del prodotto e un eccellente servizio di assistenza ai clienti. È per questo che StereoBOOMM® garantisce il prodotto per qualsiasi difetto nei materiali e nella fabbricazione, per un periodo di tre (3) anni dalla data di acquisto originale del prodotto. I-6 m_StereoBoomm_I.indd 6 07.12.2007 19:13:17 Condizioni della presente garanzia e ambito della responsabilità di StereoBOOMM® in virtù della presente garanzia: • La presente garanzia è limitata all’acquirente originale del prodotto ed è intrasferibile ad eventuali secondi acquirenti/utenti finali. • Per la durata della garanzia, la responsabilità di StereoBOOMM® sarà limitata alla riparazione o alla sostituzione, a sua discrezione, di eventuali componenti difettosi del prodotto, qualora sia necessario a causa di malfunzionamento o guasto a seguito di condizioni e utilizzo normali. I ricambi e/o le riparazioni non comporteranno alcun costo per il cliente. • Il prodotto deve essere spedito ad un centro di assistenza autorizzato, con l’imballaggio originale completo e le spese di trasporto prepagate. StereoBOOMM® declina ogni responsabilità per eventuali smarrimenti o danni subiti durante il trasporto. • Per ottenere la riparazione o la sostituzione previste dalla presente garanzia, il cliente deve fornire (a) una prova dell’acquisto (ad es. scontrino completo di data); (b) una descrizione scritta del difetto/dei difetti; (c) l’indirizzo a cui rispedire il prodotto e un recapito telefonico. I-7 m_StereoBoomm_I.indd 7 07.12.2007 19:13:17 • • • La presente garanzia non è valida e non fornisce copertura nei seguenti casi: (a) Prodotti che hanno subito una installazione non corretta, riparazioni non autorizzate, una manutenzione inadeguata, modifiche non autorizzate o altri interventi non attribuibili a StereoBOOMM®; (b) Prodotti sottoposti a usi scorretti, abusi, trascuratezza, manipolazione e conservazione inadeguate, incidenti o danneggiamenti fisici; (c) Prodotti esposti al fuoco, all’acqua, ad umidità eccessiva, alla sabbia, alla sporcizia, a sbalzi estremi di temperatura o ad altre condizioni che esulano dal controllo da parte di StereoBOOMM®; (d) Prodotti utilizzati con accessori non approvati da StereoBOOMM®; (e) Prodotti il cui numero di serie sia stato alterato, cancellato o rimosso; (f) Prodotti aperti, alterati, riparati o modificati da qualsiasi centro di assistenza non autorizzato. Sono esclusi da ogni garanzia tutti gli elementi usurabili che possono richiedere la sostituzione a causa della normale usura e logoramento, come ad esempio le batterie, i cuscinetti per orecchie, le parti decorative ed altri accessori. La presente garanzia fornisce dei precisi diritti legali al cliente, il quale potrebbe godere anche di altri diritti che variano da paese a paese. I-8 m_StereoBoomm_I.indd 8 07.12.2007 19:13:17 ÍNDICE CARACTERÍSTICAS DO PRODUTO ...................2 INSTALAÇÃO .......................................................2 USO COM DISPOSITIVOS AUDIO ......................6 GARANTIA............................................................6 m_StereoBoomm_P.indd 1 07.12.2007 19:13:47 CARACTERÍSTICAS DO PRODUTO - Raio de Frequência: 20 Hz – 20 KHz Radio de Transmissão: 87.7 - 88.9 MHz Comprimento do Cabo para FM: 21 cm Comprimento do Cabo para a ficha Stereo de 2.5 mm / 3.5 mm: 160 cm Comprimento do Cabo de alimentação com ficha de iPod: 160 cm Comprimento do Cabo de alimentação com ficha mini USB: 160 cm Dimensões: 42 x 60 x 16 mm Acessórios: clips de instalação Fichas de Conversão para DIN / ISO / FAKRA INSTALAÇÃ INSTALAÇ ÃO Importante! • Certifique-se que todos os cabos necessários se encontram devidamente instalados antes de conectar o StereoBOOMM® á fonte de alimentação do veículo. P-2 m_StereoBoomm_P.indd 2 07.12.2007 19:13:47 • • Durante a operação, não tente aceder aos sockets da unidade. Para desconectar o StereoBOOMM®, desligue sempre primeiramente a fonte de alimentação. - Retire o seu autorádio de acordo com as especificações do seu carro e do autorádio em questão. Desligue a ficha de antena do seu autorádio e ligue-a ao socket fêmea (de antena) do seu StereoBOOMM®. Para o DIN (1) ou ISO (2), necessita da ficha de conversão (3). Para FAKRA, necessita de utilizar ambos os cabos de conversão (4.1 + 4.2). - 4.1 1 2 3 4.2 P-3 m_StereoBoomm_P.indd 3 07.12.2007 19:13:48 - Ligue a ficha macho de antena do StereoBOOMM® ao autorádio do veículo. Seleccione a frequência com os 4 comutadores do StereoBOOMM®. A tabela de frequência encontra-se impressa na traseira do seu StereoBOOMM® e abaixo. Por favor visualize atentamente a tabela de frequências! - Conecte o fio + ao fio Vermelho ou Amarelo através dos bornes, esse vai para o seu autorádio do veículo. Recomendamos-lhe que ligue o fio + do StereoBOOMM® ao fio da Ignição. Pode utilizar os clips fornecidos. Estes clips permitem-lhe ligar um fio extra, sem necessitar de cortar os fios originais do autorádio do veículo. P-4 m_StereoBoomm_P.indd 4 07.12.2007 19:13:48 - - Conecte o fio – ao fio preto que vai para o seu autorádio do seu veículo. Guie o fio com o botão e a ficha Jack de 2.5 mm / 3.5 mm até ao local onde o seu dispositivo áudio se encontra. Seleccione o seu fio de alimentação, para o mini USB ou iPod, e ligue-o ao seu StereoBOOMM®. Guie igualmente este fio até ao local onde o seu dispositivo audio se encontra alojado. Coloque o seu StereoBOOMM® no espaço atrás do seu autorádio e coloque o seu autorádio novamente no seu local de acomodação. Charging cables P-5 m_StereoBoomm_P.indd 5 07.12.2007 19:13:48 USO COM DISPOSITIVOS AUDIO - Conecte a ficha Jack do seu StereoBOOMM® ao seu dispositivo áudio. Conecte o cabo de alimentação ao seu dispositivo musical quando necessitar carregar a bateria. Seleccione a frequência do StereoBOOMM® no seu autorádio (por favor guarde esta frequência em memória) Pressione o botão de controlo no cabo do seu StereoBOOMM® para alternar entre (ON/OFF) Ligado e Desligado. GARANTIA O StereoBOOMM® é uma marca registada da TE-Group NV. A marca StereoBOOMM® prima por produtos de alta qualidade e um serviço de apoio ao cliente especializado. É por isso que StereoBOOMM® garante este produto contra todos os defeitos de material e fabrico durante um período de três (3) anos desde a data original de compra do produto. P-6 m_StereoBoomm_P.indd 6 07.12.2007 19:13:49 As condições desta garantia limitada e extensão de responsabilidade do StereoBOOMM ® sob esta garantia limitada são as seguintes: • Esta garantia encontra-se limitada ao comprador original do produto e a mesma não é transferível para nenhum outro subsequente comprador/utilizador final. • Durante o período da garantia limitada, a única responsabilidade da StereoBOOMM ® será limitada a reparar ou trocar, segundo sua opção, quaisquer partes deficientes do produto se tal for necessário quer seja devido a mau funcionamento ou falha debaixo do normal uso e condições. Não será efectuada nenhuma cobrança ao cliente pelas partes e/ou trabalho de reparação. • O produto deve ser enviado para um Centro de Serviço Autorizado na sua caixa original e completa, com os pagamentos de envio previamente pagos. A StereoBOOMM® não assumirá responsabilidade alguma por perdas ou danos durante o transporte. • Para obter a reparação ou troca dentro dos termos da garantia, o cliente deve fornecer (a) a prova de compra (e.g. talão datado da compra); (b) uma especificação escrita do(s) defeitos(s); (c) um endereço para retorno do produto e um número de telefone. P-7 m_StereoBoomm_P.indd 7 07.12.2007 19:13:49 • • Esta garantia limitada não cobre e expira automaticamente segundo os seguintes efeitos: (a) Produtos que tenham sido sujeitos a instalação imprópria, reparação não autorizada, manutenção imprópria, modificações não autorizadas ou outros actos os quais não sejam culpa do StereoBOOMM®; (b) Produtos que tenham sido sujeitos a to mau uso, abuso, negligência, manuseamento impróprio e armazenamento indevido, acidente ou danos físicos; (c) Produtos que tenham sido sujeitos a elementos, tais como, fogo, água, humidade excessiva, areia, sujidade, mudanças extremas na temperatura ou outras condições que se encontrem fora do controle do StereoBOOMM ®; (d) Produtos que tenham sido utilizados com acessórios não permitidos e de marca que não StereoBOOMM ®; (e) Produtos que possuam o número de série alterado, desfigurado ou removido; (f) Produtos os quais tenham sido abertos, alterados, reparados ou modificados por quaisquer Centros de Serviço que não sejam autorizados. Excluídos de absolutamente algum tipo de garantia são os itens consumíveis P-8 m_StereoBoomm_P.indd 8 07.12.2007 19:13:49 • os quais podem necessitar de substituição devido a normal utilização de degradação do item em questão, tais como baterias, almofadas de ouvidos dos auriculares, partes decorativas e outros acessórios. Esta garantia limitada dá-lhe direitos legais específicos, podendo igualmente ter outros direitos, os quais podem variara dependendo do país em questão. P-9 m_StereoBoomm_P.indd 9 07.12.2007 19:13:49 СОДЕРЖАНИЕ ТЕХНИЧЕСКИЕ ХАРАКТЕРИСТИКИ .................2 УСТАНОВКА ........................................................2 ИСПОЛЬЗОВАНИЕ С АУДИОУСТРОЙСТВОМ ...................................6 ГАРАНТИЙНЫЙ СЕРТИФИКАТ .........................6 m_StereoBoomm_RU.indd 1 07.12.2007 19:14:08 ТЕХНИЧЕСКИЕ ХАРАКТЕРИСТИКИ - Частотный диапазон: 20Гц – 20КГц Частота передачи: 87,7 – 88,9 МГц Длина FM кабеля: 21см Длина кабеля со штекером 2,5/ 3,5мм для подсоединения аудио устройства: 160см Длина кабеля зарядки: 160см Габаритные размеры: 42 x 60 x 16 мм Аксессуары: установочные клипсы и переходники для FM кабеля стандартов DIN/ ISO/ FAKRA УСТАНОВКА Важно! Перед началом установки StereoBOOMM® убедитесь, что зажигание автомобиля выключено, отсоедините аккумулятор и исключите его случайное подсоединение. RU - 2 m_StereoBoomm_RU.indd 2 07.12.2007 19:14:09 - При выполнении монтажа следите за тем, чтобы не повредить электропроводку автомобиля. - Извлеките автомагнитолу согласно инструкции к ней и к автомобилю. Отсоедините антенный разъем от автомагнитолы и подключите его к антенному разъему StereoBOOMM®. Если автомобиль имеет разъемы типа DIN (1), произведите подсоединение антенного разъема к StereoBOOMM® через переходник (3). Если автомобиль имеет разъемы типа FAKRA, произведите подсоединение антенного разъема к StereoBOOMM® через переходник (4.1). 4.1 1 2 3 4.2 RU - 3 m_StereoBoomm_RU.indd 3 07.12.2007 19:14:09 - - Подсоедините антенный штекер StereoBOOMM® к антенному разъему автомагнитолы. Если автомобиль имеет разъемы типа ISO (2), произведите подсоединение антенного штекера StereoBOOMM® к магнитоле через переходник (3). Если автомобиль имеет разъемы типа FAKRA , произведите подсоединение антенного штекера StereoBOOMM® к магнитоле через переходник (4.2). Выберите частоту с помощью 4 микропереключателей, находящихся на корпусе StereoBOOMM®. Таблица частот находится на задней стороне устройства, а также приведена ниже. RU - 4 m_StereoBoomm_RU.indd 4 07.12.2007 19:14:10 - - Подключите провод «+» к красному или желтому проводу предохранителя, идущим к Вашей автомагнитоле. Рекомендуется подключать провод «+» устройства StereoBOOMM® к проводу зажигания. Монтажные клипсы, входящие в комплект, позволяют подключать дополнительные провода, не разрезая оригинальных проводов Вашей автомагнитолы. Подключите провод «–» к черному проводу, идущему к автомагнитоле. Выведите провод с кнопкой управления и 2,5/ 3,5мм штекером в то место на консоли, где будет располагаться аудио устройство. Разместите StereoBOOMM® в свободном пространстве за автомагнитолой и поместите автомагнитолу на место. Charging cables RU - 5 m_StereoBoomm_RU.indd 5 07.12.2007 19:14:10 ИСПОЛЬЗОВАНИЕ С АУДИОУСТРОЙСТВОМ - - Подключите стерео разъем 2,5 мм/3,5мм StereoBOOMM® к Вашему аудиоустройству. Подключите зарядный кабель к Вашему аудиоустройству при необходимости подзарядить его. Установите частоту передачи StereoBOOMM® на Вашей автомагнитоле (для удобства дальнейшего использования, рекомендуется сохранить эту частоту в памяти автомагнитолы). Нажмите кнопку управления на кабеле Вашего StereoBOOMM® для включения или выключения устройства. ГАРАНТИЙНЫЙ СЕРТИФИКАТ УВАЖАЕМЫЙ ПОКУПАТЕЛЬ! Благодарим Вас за покупку изделия торговой марки StereoBOOMM®, принадлежащей компании TE – Group NV. RU - 6 m_StereoBoomm_RU.indd 6 07.12.2007 19:14:10 Перед эксплуатацией внимательно ознакомьтесь с инструкцией по применению. Помните, что Ваши неправильные действия при использовании изделия могут привести к потере гарантии. Торговая марка StereoBOOMM® обеспечивает отличное качество продукта и профессиональное гарантийное обслуживание. Именно поэтому, гарантийный срок изделия торговой марки StereoBOOMM® составляет один год со дня продажи покупателю. Компания TE-Group NV предоставляет полномочия по осуществлению гарантийного и сервисного обслуживания авторизованным сервисным центром. Адреса авторизованных сервисных центров Вы можете узнать: • По месту приобретения изделия; • На сайте поддержки в сети интернет: www.smile-mobile.com • По телефону: 7 (812) 346 60 66 RU - 7 m_StereoBoomm_RU.indd 7 07.12.2007 19:14:10 StereoBoomm® Hifi/11-07/V03 m_StereoBoomm_Cover.indd 2 07.12.2007 19:01:20-
 1
1
-
 2
2
-
 3
3
-
 4
4
-
 5
5
-
 6
6
-
 7
7
-
 8
8
-
 9
9
-
 10
10
-
 11
11
-
 12
12
-
 13
13
-
 14
14
-
 15
15
-
 16
16
-
 17
17
-
 18
18
-
 19
19
-
 20
20
-
 21
21
-
 22
22
-
 23
23
-
 24
24
-
 25
25
-
 26
26
-
 27
27
-
 28
28
-
 29
29
-
 30
30
-
 31
31
-
 32
32
-
 33
33
-
 34
34
-
 35
35
-
 36
36
-
 37
37
-
 38
38
-
 39
39
-
 40
40
-
 41
41
-
 42
42
-
 43
43
-
 44
44
-
 45
45
-
 46
46
-
 47
47
-
 48
48
-
 49
49
-
 50
50
-
 51
51
-
 52
52
-
 53
53
-
 54
54
-
 55
55
-
 56
56
-
 57
57
-
 58
58
-
 59
59
-
 60
60
-
 61
61


Mr Handsfree Stereoboomm El manual del propietario
- Categoría
- Radios
- Tipo
- El manual del propietario
El Mr Handsfree Stereoboomm es un transmisor FM que te permite reproducir audio a través del sistema de sonido de tu coche. Es compatible con una amplia gama de dispositivos de audio, incluyendo reproductores de MP3, teléfonos inteligentes y tabletas. El Stereoboomm también cuenta con un puerto de carga USB para que puedas cargar tus dispositivos mientras conduces. Además, incluye una función de manos libres para que puedas responder llamadas telefónicas sin tener que quitar las manos del volante.
En otros idiomas
- français: Mr Handsfree Stereoboomm Le manuel du propriétaire
- italiano: Mr Handsfree Stereoboomm Manuale del proprietario
- English: Mr Handsfree Stereoboomm Owner's manual
- русский: Mr Handsfree Stereoboomm Инструкция по применению
- Nederlands: Mr Handsfree Stereoboomm de handleiding
- português: Mr Handsfree Stereoboomm Manual do proprietário
