XXXXXXXX ©CANON INC.2012
series
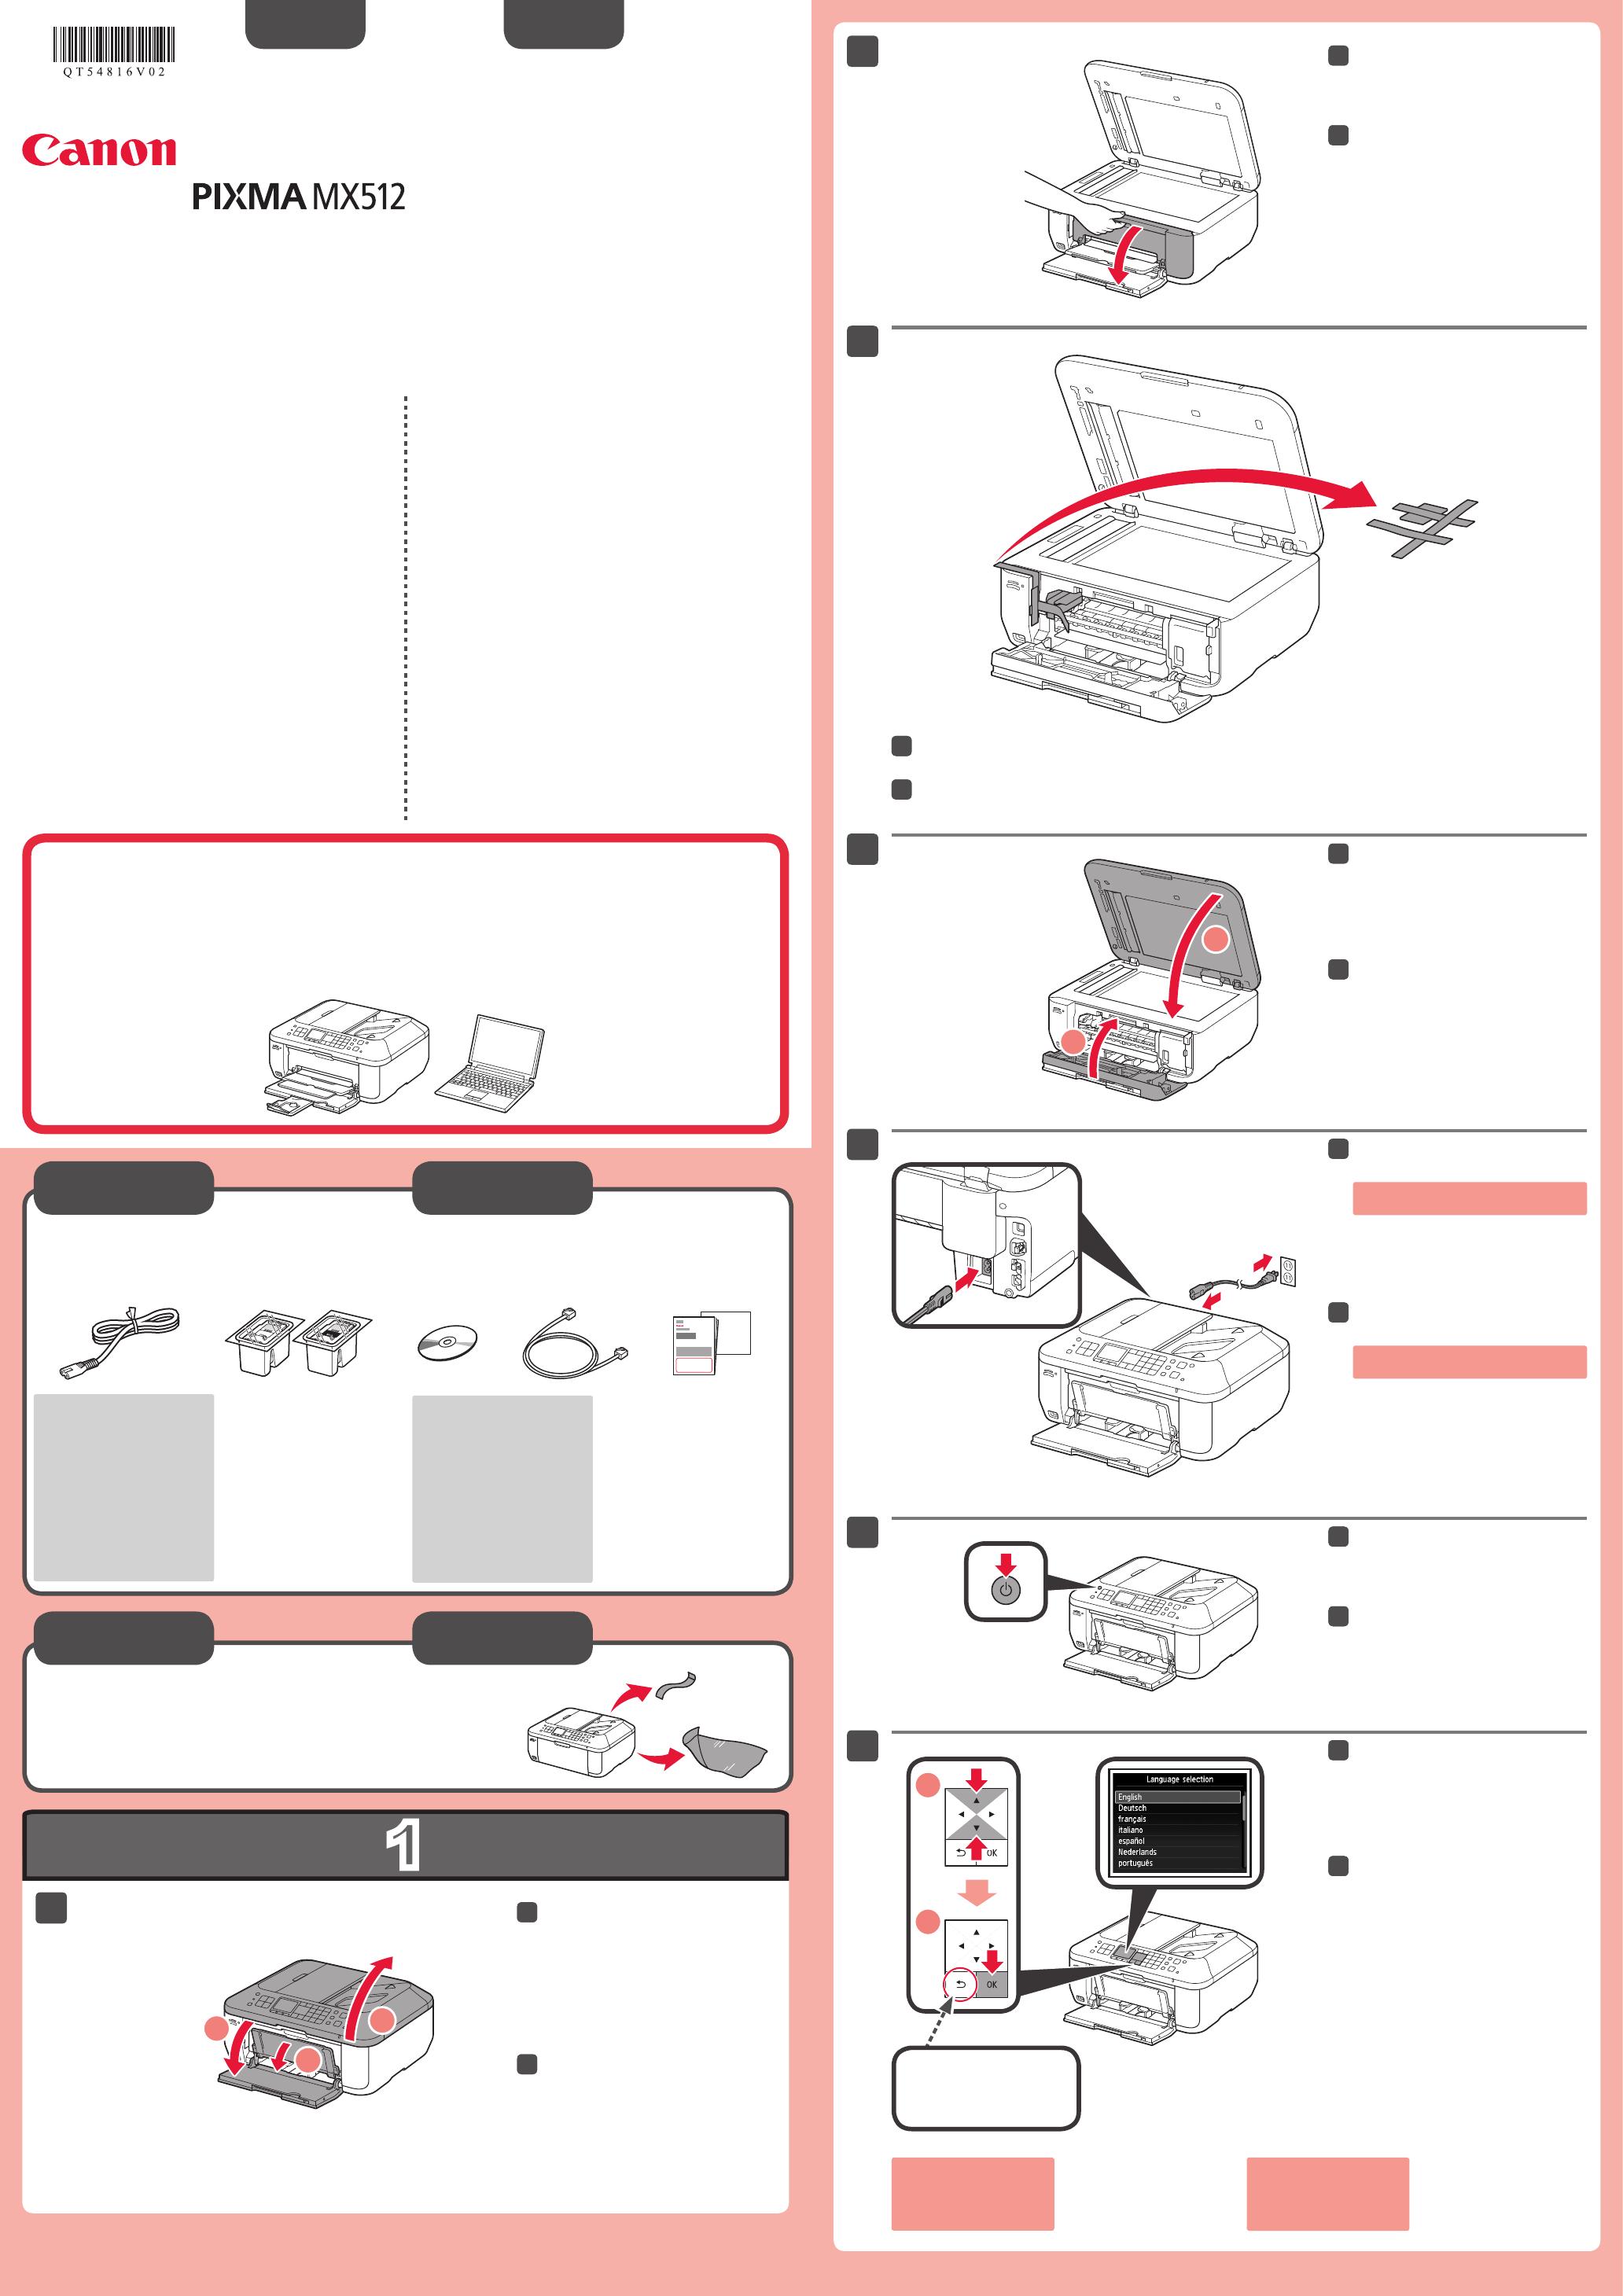
Retire las hojas protectoras (protective sheets) y la cinta (tape).
Compruebe que se le han suministrado los siguientes elementos.
Conexión de red: prepare
el cable Ethernet o los
dispositivos de red, como el
router o el punto de acceso,
según convenga.
Conexión USB: es necesario
un cable USB (no suministrado).
No conecte aún el cable USB o Ethernet.
Conecte el cable de alimentación.
Pulse el botón ACTIVADO (ON).
Abra la cubierta delantera (Front
Cover), la bandeja de salida
del papel (Paper Output Tray)
y la cubierta de documentos
(Document Cover).
Retire la cinta naranja (orange tape) y la bolsa de plástico.
Cierre la tapa de salida del papel
(Paper Output Cover) y la cubierta
de documentos (Document Cover).
Abra la tapa de salida del papel
(Paper Output Cover).
Seleccione su idioma y, a
continuación, pulse el botón OK.
Para cambiar el ajuste
de idioma, pulse el botón
Atrás (Back).
Botón Atrás (Back)
¡Léame en primer lugar!
Consérvelo a mano para utilizarlo
como referencia en el futuro.
Windows es una marca comercial o una marca comercial registrada de Microsoft Corporation
en EE. UU. y/u otros países.
Windows Vista es una marca comercial o una marca comercial registrada de Microsoft
Corporation en EE. UU. y/u otros países.
Macintosh, Mac, Mac OS, AirPort y Bonjour son marcas registradas de Apple Inc.,
registradas en EE. UU. y otros países.
•
•
•
Número de modelo: K10375 (MX512)
Para llevar a cabo la instalación, coloque el equipo cerca del punto de acceso* y del
ordenador.
(* necesario para LAN inalámbrica)
Guía de inicio
ESPAÑOL
Equipo multifunción para ocina Canon Inkjet
Ayuda de Canon
Asistencia técnica por correo electrónico:
www.usa.canon.com/support
Asistencia técnica gratuita: 1-800-OK-CANON
Esta opción proporciona asistencia telefónica técnica personal, sin
cargo por servicio, de lunes a viernes (excepto festivos), durante
el periodo de garantía.
Se dispone de un dispositivo telefónico auxiliar para sordos (TDD) en
1-866-251-3752.
Remove the protective sheets and tape.
Check the included items.
Network connection:
Prepare the Ethernet cable
or network devices such as a
router or an access point as
necessary.
USB connection: A USB
cable (not included) is
required.
Do not connect the USB or Ethernet
cable yet.
Connect the power cord.
Press the ON button.
Open the Front Cover, the Paper
Output Tray, and the Document
Cover.
Remove the orange tape and plastic bag.
Close the Paper Output Cover and
the Document Cover.
Open the Paper Output Cover.
Select your language, then press
the OK button.
To change the language
setting, press the Back
button.
Back button
Getting Started
Read me rst!
Keep me handy for future reference.
Windows is a trademark or registered trademark of Microsoft Corporation in the U.S.
and/or other countries.
Windows Vista is a trademark or registered trademark of Microsoft Corporation in the
U.S. and/or other countries.
Macintosh, Mac, Mac OS, AirPort and Bonjour are trademarks of Apple Inc., registered
in the U.S. and other countries.
•
•
•
Model Number: K10375 (MX512)
To perform setup, place the machine near the access point* and computer.
(* Required for wireless LAN)
ENGLISH
Canon Inkjet Ofce All-In-One
Getting Help from Canon
Email Tech Support — www.usa.canon.com/support
Toll-Free Tech Support— 1-800-OK-CANON
This option provides live telephone technical support, free of
service charges, Monday-Friday (excluding holidays), during the
warranty period.
Telephone Device for the Deaf (TDD) support is available at
1-866-251-3752.
QT5-4816-V02
PRINTED IN XXXXXXXX


