Celestron 18768 Pro Manual de usuario
- Categoría
- Cargadores de bateria
- Tipo
- Manual de usuario

Rechargeable Power Supply
INSTRUCTION MANUAL #18768
ENGLISH

2 I ENGLISH
Table of Contents
Features and contents of PowerTank Lithium Pro . . . . . . . . . . . . . . . . . . . . . . . . 3
Operation Of PowerTank Lithium Pro . . . . . . . . . . . . . . . . . . . . . . . . . . . . . . . 4
Charging the battery . . . . . . . . . . . . . . . . . . . . . . . . . . . . . . . . . . . . . . 4
Checking the Remaining Battery Charge . . . . . . . . . . . . . . . . . . . . . . . . . . . 4
Charging USB Devices . . . . . . . . . . . . . . . . . . . . . . . . . . . . . . . . . . . . 4
Powering a Telescope . . . . . . . . . . . . . . . . . . . . . . . . . . . . . . . . . . . . . 5
Car Battery Port . . . . . . . . . . . . . . . . . . . . . . . . . . . . . . . . . . . . . . . . . 5
Illumination . . . . . . . . . . . . . . . . . . . . . . . . . . . . . . . . . . . . . . . . . . . 5
Attaching the PowerTank Lithium Pro to your Telescope . . . . . . . . . . . . . . . . . . . . . 5
Technical Data . . . . . . . . . . . . . . . . . . . . . . . . . . . . . . . . . . . . . . . . . . 6
Disposal . . . . . . . . . . . . . . . . . . . . . . . . . . . . . . . . . . . . . . . . . . . . . . 6
Warning . . . . . . . . . . . . . . . . . . . . . . . . . . . . . . . . . . . . . . . . . . . . . 6
Celestron Two Year Limited Warranty . . . . . . . . . . . . . . . . . . . . . . . . . . . . . . 6
FCC Note . . . . . . . . . . . . . . . . . . . . . . . . . . . . . . . . . . . . . . . . . . . . 8

ENGLISH I 3
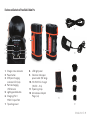
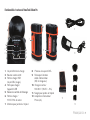
1. Charge status indicator
2. Power button
3. USB port charging
indicator LED (red)
4. Ports for charging
USB devices
5. Lighting control button
6. Charging Port /
12VDC Output Port
7. Tripod leg mount
9
11
8. LED light panel
9. Celestron telescope
power cable (6.5’ long)
10. 100-240V AC charger
(16VDC – 2 A)
11. Tripod leg strap
12. International Adapter
Plugs (x4)
12
10
7
6
8
Features and Contents of PowerTank Lithium Pro
1
2
3
4
5
3

4 I ENGLISH
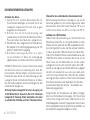
OPERATION OF POWERTANK LITHIUM PRO
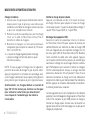
Charging the Battery
1. Determine which AC plug adapter you need for
your location and slide it into place on the
charger body. Make sure it is fully seated and
snaps into place.
2. Pull the rubber cover from the charging port on
the side of the PowerTank Lithium Pro and plug in
the charger’s cable.
3. Plug in the charger to your electrical outlet. The
adapter can accept an input of 100 to 240V
at 50/60Hz.
4. The battery indicator lights will blink when
charging. When charging is complete, all of the
lights will remain lit.
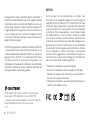
NOTE: If you are traveling internationally with this device,
it may be necessary to change to a different plug adapter.
Simply depress the locking button on the charger (located
directly below the plug), slide the plug adapter off and
replace it with the adapter you need.
Warning: The charger has an output of 16 Volts DC. Do
not attempt to use this charger to power your telescope
directly or significant damage to your telescope will
result.
Checking the Remaining Battery Charge
Press the power button once and the battery indicator
lights will light up showing the amount of power left in the
battery. All four lights means the battery is full, 3 lights is
75%, 2 lights is 50% and 1 light is 25%.
Charging USB Devices
Lift up the rubber seal on the top surface of the PowerTank
Lithium Pro to expose the control panel. Plug one end
of the USB charging cable that came with the device
you wish to charge into one of the two USB ports on the
PowerTank Lithium Pro. Plug the other end of the cable
into your device. Press the Power button on the control
panel once to begin charging. A red light will appear
next to the USB port showing that the power is flowing.
The charger automatically shuts off when the load drops
below 100mA for 1 hour. If you want to end the charging
session early, simply unplug your device’s cable from the
power supply. To turn the battery off press and hold the
Power Button for two seconds.
Some devices such as smartphones and tablets have
quick charging technology. The PowerTank Lithium Pro
has one USB port that supports quick charge devices.
Please make sure you attach your compatible device
into this port to take advantage of the additional speed.

ENGLISH I 5
Powering a Telescope
Pull the rubber cover from the charging/power port on
the side of the PowerTank Lithium Pro and plug in the
telescope power cord. One side of the cable has a
threaded connector for attaching to your telescope.
The smooth end fits into the battery. Press the power
button on the control panel twice to activate power.
Car Battery Port
The PowerTank Lithium Pro comes with a car battery
adapter port that provides 12V DC power (10 amps) to
power other external accessories. Flip up the cap covering
the port and insert your car battery adapter into the port.
Press the power button on the control panel once to
activate power. The battery indicator lights will light up
to show that power is flowing.
Illumination
The LED light panel can be used with red or white light.
Red light will allow you to see in the dark while protecting
your night vision. White light can be used when protecting
your night vision is not important.
To activate the red LEDs, press the lighting control button
once. To increase the brightness, press the button a
second time. To turn it off, press it a third time.
To activate the white LEDs, press and hold the lighting
control button for two seconds. To increase the brightness,
press the button again. To turn it off, press and hold the
button for two seconds.
ATTACHING THE POWERTANK LITHIUM PRO TO YOUR
TELESCOPE
The PowerTank Lithium Pro can be set on a telescope
accessory tray in either horizontal or vertical orientation.
It can also be attached to a tripod leg by using the 2.5 inch
wide hook and loop strap. Slip the strap through the two
slots in the tripod leg mount. Start by wrapping the strap
around the tripod leg, then feeding the end of the strap
through the buckle. Pull the strap back and secure the
hook and loop strap to the desired tension.

6 I ENGLISH
TECHNICAL DATA
Battery Chemistry: Lithium Iron Phosphate (LiFePO4)
Battery Capacity: 158.74 Wh
Input: 16V DC, 2000 mA
Charge time: 6 hours
Output current for telescope: 12V DC @ 5A
Output current for car battery port: 12V DC @ 10A
DISPOSAL
Follow local ordinances when disposing of this product. If
you are unsure of how to dispose of this product, contact
the local authority in your municipality.
WARNING
Unauthorized conversion and/or modification of the device
are inadmissible due to safety reasons. Any usage of this
device other than those described above can damage
the product and lead to associated risks such as short
circuit, fire, electric shock, etc. Please read the operating
instructions thoroughly and keep them for further reference.
We do not assume liability for resulting damages to property
or personal injury if the product has been abused in any
way or damaged by improper use or failure to observe
these operating instructions.
This product is not a toy and should be kept out of reach
of children and pets.
CELESTRON TWO YEAR LIMITED WARRANTY
A. Celestron warrants this product to be free from
defects in materials and workmanship for two years.
Celestron will repair or replace such product or part thereof
which, upon inspection by Celestron, is found to be defective
in materials or workmanship. As a condition to the obligation
of Celestron to repair or replace such product, the product
must be returned to Celestron together with proof-of-purchase
satisfactory to Celestron.
B. The Proper Return Authorization Number must be
obtained from Celestron in advance of return. Please submit
your request to Celestron’s online technical support center
at https://www.celestron.com/pages/technical-support to
receive the number to be displayed on the outside of your
shipping container.

ENGLISH I 7
All returns must be accompanied by a written statement
setting forth the name, address, and daytime telephone
number of the owner, together with a brief description of
any claimed defects. Parts or product for which replacement
is made shall become the property of Celestron.
The customer shall be responsible for all costs of transportation
and insurance, both to and from the factory of Celestron,
and shall be required to prepay such costs.
Celestron shall use reasonable efforts to repair or replace
any product covered by this warranty within thirty days
of receipt. In the event repair or replacement shall require
more than thirty days, Celestron shall notify the customer
accordingly. Celestron reserves the right to replace any
product which has been discontinued from its product line
with a new product of comparable value and function.
This warranty shall be void and of no force of effect in the event
a covered product has been modified in design or function,
or subjected to abuse, misuse, mishandling or unauthorized
repair. Further, product malfunction or deterioration due to
normal wear is not covered by this warranty.
CELESTRON DISCLAIMS ANY WARRANTIES,
EXPRESSED OR IMPLIED, WHETHER OF
MERCHANTABILITY OR FITNESS FOR A
PARTICULAR USE, EXCEPT AS EXPRESSLY SET
FORTH HEREIN. THE SOLE OBLIGATION OF
CELESTRON UNDER THIS LIMITED WARRANTY
SHALL BE TO REPAIR OR REPLACE THE COVERED
PRODUCT, IN ACCORDANCE WITH THE TERMS SET
FORTH HEREIN. CELESTRON EXPRESSLY DISCLAIMS
ANY LOST PROFITS, GENERAL, SPECIAL, INDIRECT
OR CONSEQUENTIAL DAMAGES WHICH MAY RESULT
FROM BREACH OF ANY WARRANTY, OR ARISING OUT
OF THE USE OR INABILITY TO USE ANY CELESTRON
PRODUCT. ANY WARRANTIES WHICH ARE IMPLIED
AND WHICH CANNOT BE DISCLAIMED SHALL
BE LIMITED IN DURATION TO A TERM OF TWO
YEARS FROM THE DATE OF ORIGINAL RETAIL
PURCHASE.
Some states do not allow the exclusion or limitation of
incidental or consequential damages or limitation on how
long an implied warranty lasts, so the above limitations and
exclusions may not apply to you.

8 I ENGLISH
This warranty gives you specific legal rights, and
you may also have other rights which vary from state
to state. Celestron reserves the right to modify or
discontinue, without prior notice to you, any model
or style product. If warranty problems arise, or if
you need assistance in using your product, please
visit Celestron’s online technical support center at
https://www.celestron.com/pages/technical-support.
NOTE: This warranty is valid to U.S.A. and Canadian
customers who have purchased this product from an
authorized Celestron dealer in the U.S.A. or Canada.
Warranty outside the U.S.A. and Canada is valid only to
customers who purchased from a Celestron’s International
Distributor or Authorized Celestron Dealer in the specific
country. Please contact them for any warranty service.
FCC NOTE
This equipment has been tested and found to comply with
the limits for a Class B digital device, pursuant to part
15 of the FCC Rules. These limits are designed to provide
reasonable protection against harmful interference in
a residential installation. This equipment generates,
uses, and can radiate radio frequency energy and, if not
installed and used in accordance with the instructions,
may cause harmful interference to radio communications.
However, there is no guarantee that interference will not
occur in a particular ninstallation. If this equipment does
cause harmful interference to radio or television reception,
which can be determined by turning the equipment off
and on, the user is encouraged to try to correct the
interference by one or more of the following measures:
• Reorient or relocate the receiving antenna.
• Increase the separation between the equipment and receiver.
• Connect the equipment into an outlet on a circuit different
from that to which the receiver is connected.
• Consult the dealer or an experienced radio/TV technician
for help.
©2022 Celestron | All rights reserved
celestron.com/pages/technical-support
2835 Columbia Street • Torrance, CA 90503 USA
(Products or instructions may change without notice or obligation.)
Designed and intended for those 14 years of age and older.
09-22

Batterie Rechargeable
MODE D’EMPLOI #18768
FRANÇAIS

2 I FRANÇAIS
Table des matières
Fonctionnalités et contenu de PowerTank Lithium Pro . . . . . . . . . . . . . . . . . . . . . . 3
Mode d’emploi de PowerTank Lithium Pro . . . . . . . . . . . . . . . . . . . . . . . . . . . . . 4
Charger la batterie . . . . . . . . . . . . . . . . . . . . . . . . . . . . . . . . . . . . . . . 4
Vérifier la charge de pile restante . . . . . . . . . . . . . . . . . . . . . . . . . . . . . . . . . . 4
Recharger des appareils USB . . . . . . . . . . . . . . . . . . . . . . . . . . . . . . . . . . . . 4
Alimenter un télescope . . . . . . . . . . . . . . . . . . . . . . . . . . . . . . . . . . . . . . . . 5
Port de pile de voiture . . . . . . . . . . . . . . . . . . . . . . . . . . . . . . . . . . . . . . . . 5
Illumination . . . . . . . . . . . . . . . . . . . . . . . . . . . . . . . . . . . . . . . . . . . 5
Connecter le PowerTank Lithium Pro à votre télescope . . . . . . . . . . . . . . . . . . . . . . 5
Caractéristiques techniques . . . . . . . . . . . . . . . . . . . . . . . . . . . . . . . . . . . . 6
Mise au rebut . . . . . . . . . . . . . . . . . . . . . . . . . . . . . . . . . . . . . . . . . . . . 6
Avertissement . . . . . . . . . . . . . . . . . . . . . . . . . . . . . . . . . . . . . . . . . . . . 6
Garantie limitée de deux ans de Celestron . . . . . . . . . . . . . . . . . . . . . . . . . . . . 6
Note de la FCC . . . . . . . . . . . . . . . . . . . . . . . . . . . . . . . . . . . . . . . . . . . 8

FRANÇAIS I 3
1. Voyant d’état de la charge
2. Bouton marche/arrêt
3. Port de charge USB
Voyant DEL (rouge)
4. Ports pour charger
Appareils USB
5. Bouton de contrôle de l’éclairage
6. Port de charge /
12 VCC Port de sortie
7. Monture pour jambe du trépied
9
8. Panneau de voyants DEL
9. Télescope Celestron
câble d’alimentation
(6,5’ de longueur)
10. Chargeur secteur
100-240 V (16VCC – 2 A)
11. Sangle pour jambe du trépied
12. Adaptateur international
Prises (x4)
12
10
Fonctionnalités et contenu de PowerTank Lithium Pro
11
7
6
8
1
2
3
4
5
3

4 I FRANÇAIS
MODE D’EMPLOI DE POWERTANK LITHIUM PRO
Charger la batterie
1. Assurez-vous du type de prise d’alimentation secteur
requise pour le type de prise que vous utilisez, puis
installez-la sur le boîtier du chargeur. Assurez-vous que
la prise est complètement insérée.
2. Retirez le cache de caoutchouc du port de charge
situé sur le côté de PowerTank Lithium Pro et
branchez le câble du chargeur.
3. Branchez le chargeur sur votre prise électrique.
L'adaptateur peut accepter un courant de 100 ou de
240 V à 50/60 Hz.
4. Le voyant de charge clignote pendant la charge.
Lorsque la charge est terminée, alors le voyant
s'illumine en continu.
NOTE : Si vous voyagez à l'étranger avec cet appareil, il
peut être nécessaire de changer le type de prise utilisé.
Appuyez simplement sur le bouton de verrouillage situé
sur le chargeur (directement sous la prise), faites glisser la
prise présente puis remplacez-la par le type nécessaire.
Avertissement : Le chargeur délivre un courant de
type CC 16V. Ne tentez pas d'utiliser ce chargeur
pour alimenter votre télescope directement
sous risque de l'endommager de manière
irréversible.
Vérifier la charge de pile restante
Appuyez sur le bouton une fois, et le voyant de niveau
de charge s'illumine pour indiquer le niveau de charge
restante dans la pile. 4 voyants indiquent pleine charge, 3
voyants 75%, 2 voyants 50% et 1 voyant 25%.
Recharger des appareils USB
Soulevez le cache de caoutchouc situé sur le dessus
du PowerTank Lithium Pro pour exposer le panneau de
contrôle. Branchez une extrémité du câble de charge USB
livré avec l'appareil que vous souhaitez recharger sur l'un
des deux ports USB du PowerTank Lithium Pro. Branchez
l'autre extrémité du câble dans votre appareil. Appuyez
sur le bouton marche/arrêt du panneau de contrôle pour
commencer la charge. Un voyant rouge s'illumine à côté du
port USB indiquant que le courant est délivré. Le chargeur
s'éteint automatiquement lorsque la charge demandé
descend en dessous de 100 mA pendant 1 heure. Si vous
souhaitez interrompre la charge avant cela, débranchez
simplement le câble du port d'alimentation. Pour éteindre la
batterie, appuyez sur le bouton d’alimentation et maintenez-
le enfoncé pendant deux secondes.
Certains appareils comme les smartphones et les tablettes
possèdent une technologie de charge rapide. Le PowerTank
Lithium Pro comporte un port USB prenant en charge la
fonction de charge rapide. Assurez-vous de brancher un
appareil tirant parti de cette technologie sur ce port pour le
charger plus rapidement.

FRANÇAIS I 5
Alimenter un télescope
Soulevez le cache de caoutchouc du port de charge/
d'alimentation situé sur le côté du PowerTank Lithium
Pro et branchez-y le câble d'alimentation du télescope.
Un côté du câble a un connecteur fileté à attacher à
votre télescope. L’extrémité lisse s’insère dans la batterie.
Appuyez sur le bouton marche/arrêt du panneau de
contrôle pour commencer la charge.
Port de pile de voiture
Le PowerTank Lithium Pro est équipé d'un port
permettant de recharger les piles de voitures délivrant
un courant de 12V CC (10 ampères) pour alimenter les
accessoires externes. Soulevez le cache protégeant le
port et insérez votre adaptateur de pile de voiture dans ce
dernier. Appuyez une fois sur le bouton d’alimentation du
panneau de commande pour activer l’alimentation. Les
voyants de la batterie s’allument pour montrer que
le pouvoir circule.
Illumination
Le panneau de voyants DEL peut être illuminé en rouge
ou en blanc. La lumière rouge vous permet de voir dans le
noir, tout en préservant votre vision nocturne. Vous pouvez
utiliser la lumière blanche lorsqu'il n'est pas nécessaire de
préserver votre vision nocturne.
Pour activer les voyants DEL rouges, appuyez sur
le bouton de contrôle de l’éclairage une fois. Pour
augmenter la luminosité, appuyez sur le bouton une
seconde fois. Pour l'éteindre, appuyez une troisième fois.
Pour activer les DEL blanches, maintenez le bouton de
contrôle de l'éclairage appuyé pendant deux secondes.
Pour augmenter la luminosité, appuyez sur le bouton
de nouveau. Pour l'éteindre, maintenez le bouton appuyé
pendant deux secondes.
CONNECTER LE POWERTANK LITHIUM PRO À VOTRE
TÉLESCOPE
Le PowerTank Lithium Pro peut être installé sur le plateau
à accessoires d'un télescope en position soit verticale soit
horizontale. Il peut également être fixé à une jambe de
trépied à l'aide de la sangle à crocher et à boucle de 2,5
pouces. Faites glisser la sangle dans les deux fentes de
la monture de jambe de trépied. Commencez en enroulant
la sangle autour de la jambe du trépied, puis faites passer
l'extrémité de cette dernière dans la boucle. Tirez sur
la sangle et sécurisez le crochet en donnant la tension
désirée à cette dernière.

6 I FRANÇAIS
CARACTÉRISTIQUES TECHNIQUES
Type de liquide de pile : Lithium fer Phosphate (LiFePO4)
Capacité de la pile : 158,74 Wh
Entrée : 16V CC, 2000 mA
Temps de charge : 6 heures
Courant d'alimentation pour le télescope : 12V CC @ 5A
Courant d'alimentation pour le port de pile de voiture :
12V CC @ 10A
MISE AU REBUT
Respectez les réglementations locales pour éliminer ce
produit. Si vous n'êtes pas sûr de comment éliminer ce
produit, prenez contact avec les autorités locales.
AVERTISSEMENT
Les conversions ou modifications non autorisées de cet
appareil sont interdites pour des raisons de sécurité. Toute
utilisation de cet appareil autre que décrite dans cette
documentation peut endommager le produit et créer des
risques associés comme un court-circuit, un incendie, une
électrocution, etc. Lisez le mode d'emploi avec attention
et conservez-le pour référence future.
Nous ne pouvons pas être tenus pour responsables
des dommages subits par les objets ou les personnes,
qui résultent d'une utilisation incorrecte du produit, de
dommages éventuels à ce dernier ou du non-respect de
ces instructions.
Ce produit n'est pas un jouet et doit être tenu hors de
portée des enfants et des animaux de compagnie.
GARANTIE LIMITÉE DE DEUX ANS DE CELESTRON
A. Celestron garantit que votre produit est libre de tout
défaut matériel ou de fabrication sur une période de
deux ans. Celestron réparera ou remplacera en tout ou
en partie un produit présentant ce type de défaut après
inspection par Celestron, et confirmation. Comme condition
à l'obligation de Celestron de réparer ou remplacer un tel
produit, le produit doit être retourné à Celestron avec la
preuve d'achat satisfaisante pour Celestron.
B. Un numéro d’autorisation de retour valide doit être obtenu
de Celestron avant le renvoi. Veuillez envoyer votre demande
au centre de support technique en ligne de Celestron à
l’adresse https://www.celestron.com/pages/technical-support
pour recevoir le numéro à afficher à l’extérieur de votre
conteneur d’expédition.

FRANÇAIS I 7
Tous les retours doivent être accompagnés d'une déclaration
écrite indiquant le nom, l'adresse et le numéro de téléphone
de jour du propriétaire, ainsi qu'une brève description des
prétendus défauts. Les pièces ou le produit ayant été l'objet
d'un remplacement deviendront la propriété de Celestron.
Le client est responsable de tous les coûts de transport
et d’assurance, vers et depuis l’usine Celestron, et doivent
donc prépayer ces frais.
Celestron fera des efforts raisonnables pour réparer
ou remplacer tout produit couvert par cette garantie
dans les trente jours suivant sa réception. Dans le cas
où une réparation ou un remplacement nécessitera
plus de trente jours, Celestron en avisera le client en
conséquence. Celestron se réserve le droit de remplacer
tout produit qui a été retiré de sa gamme de produits
disponibles avec un nouveau produit ayant une valeur et
des fonctions équivalentes.
Cette garantie sera nulle et sans effet dans le cas
où la conception ou la fonction d'un produit couvert a
été modifiée, ou lorsque le produit a été soumis à un
usage abusif, à de mauvaises manipulations ou à une
réparation non autorisée. En outre, une défaillance ou une
détérioration du produit due à l'usure normale n'est pas
couverte par cette garantie.
CELESTRON DÉCLINE TOUTE GARANTIE, EXPRESSE
OU IMPLICITE, DE QUALITÉ MARCHANDE OU
D'ADAPTATION À UN USAGE PARTICULIER, À
MOINS DE DISPOSITIONS EXPRESSES DANS CE
DOCUMENT. LA SEULE OBLIGATION DE CELESTRON
EN VERTU DE CETTE GARANTIE LIMITÉE SERA DE
RÉPARER OU REMPLACER LE PRODUIT COUVERT,
EN CONFORMITÉ AVEC LES DISPOSITIONS
DE CE DOCUMENT. CELESTRON DÉCLINE
TOUTE RESPONSABILITÉ POUR TOUTE PERTE
DE PROFITS, TOUT DOMMAGE GÉNÉRAL,
PARTI CU LI E R O U INDIRECT POUVANT RÉSULTER
DE LA VIOLATION DE TOUTE GARANTIE, OU EN
RAISON DE L'UTILISATION DE, OU DE L'INCAPACITÉ
À UTILISER, UN PRODUIT CELESTRON. TOUTE
GARANTIE IMPLICITE QUI EST ET QUI NE PEUT
ÊTRE DÉCLINÉE SERA LIMITÉE À UNE DURÉE
DE DEUX ANS À PARTIR DE LA DATE D'ACHAT
INITIALE.
Certains états ou certaines provinces ne permettent pas
l'exclusion ou la limitation des dommages accessoires
ou indirects ou une limitation sur la durée d'une garantie
implicite, alors dans ces cas les limitations et exclusions
susmentionnées pourraient ne pas s'appliquer à vous.

8 I FRANÇAIS
Cette garantie vous donne des droits légaux
spécifiques, et vous pouvez également avoir d'autres
droits qui varient d'un état ou d'une province à l'autre.
Celestron se réserve le droit de modifier ou de cesser
la production de tout modèle ou style de produit, et cela
sans préavis. En cas de problème de garantie ou si vous
avez besoin d’aide pour utiliser votre produit, visitez le
centre de support technique de Celestron à l’adresse
https://www.celestron.com/pages/technical-support.
NOTE : Cette garantie est valable pour les clients
américains et canadiens qui ont acheté ce produit auprès
d'un revendeur autorisé Celestron aux États-Unis ou au
Canada. La garantie en dehors des É.-U. et du Canada
n'est valable que pour les clients ayant acheté le produit
d'un distributeur international de Celestron ou d'un
distributeur agréé dans le pays en question. Veuillez
communiquer avec eux pour toute réparation sous garantie.
REMARQUE RELATIVE À LA FCC
Cet équipement a été testé et prouvé comme respectant
les limites établies pour un appareil électronique de
Class B dans le respect de la partie 15 des règles de la
FCC. Ces limites visent à protéger convenablement les
particuliers contre les interférences nuisibles dans une
installation résidentielle. Cet équipement génère, utilise
et contient de l'énergie de fréquence radio, s’il n’est pas
installé et utilisée convenablement pourrait créer des
interférences dangereuses pour les communications
radio. Il n'existe cependant aucune garantie que des
interférences ne seront pas produites dans le cadre
d'une installation particulière. Si cet équipement provoque
des interférences nuisibles à la réception de la radio ou de
la télévision, qui peut être déterminé en éteignant et
en allumant l’équipement, l’utilisateur est encouragé à
essayer de corriger les interférences en prenant une ou
plusieurs des mesures suivantes :
• Réorientez ou déplacez l'antenne de réception.
• Augmentez la distance séparant l'équipement et le
récepteur.
• Branchez l'équipement sur une prise ou circuit différent
de celui du récepteur.
• Contactez le revendeur ou un technicien radio ou TV
d'expérience pour obtenir de l'assistance.
© 2022 Celestron | Tous droits réservés • celestron.com/pages/technical-support
2835 Columbia Street • Torrance, CA 90503 USA
(Les produits ou instructions peuvent recevoir des modifications sans préavis ni obligation.)
Conçu et adapté aux personnes de 14 ans et plus.
09-22

Wiederaufladbare Stromversorgung
BEDIENUNGSANLEITUNG # 18768
DEUTSCH

2 I DEUTSCH
Inhaltsverzeichnis
Ausstattung und Lieferumfang des Powertanks Lithium Pro . . . . . . . . . . . . . . . . . . . 3
Bedienen des PowerTank Lithium Pro . . . . . . . . . . . . . . . . . . . . . . . . . . . . . . . 4
Aufladen des Akkus . . . . . . . . . . . . . . . . . . . . . . . . . . . . . . . . . . . . . . 4
Überprüfen des verbleibenden Akkuladezustands . . . . . . . . . . . . . . . . . . . . . . . . 4
Aufladen von USB-Geräten . . . . . . . . . . . . . . . . . . . . . . . . . . . . . . . . . . . 4
Das Teleskop einschalten . . . . . . . . . . . . . . . . . . . . . . . . . . . . . . . . . . . . . . 5
Anschluss für die Autobatterie . . . . . . . . . . . . . . . . . . . . . . . . . . . . . . . . . 5
Beleuchtung . . . . . . . . . . . . . . . . . . . . . . . . . . . . . . . . . . . . . . . . . . 5
PowerTank Lithium Pro an Ihrem Teleskop befestigen . . . . . . . . . . . . . . . . . . . . . . . 5
Technische Daten . . . . . . . . . . . . . . . . . . . . . . . . . . . . . . . . . . . . . . . . . . 6
Entsorgung . . . . . . . . . . . . . . . . . . . . . . . . . . . . . . . . . . . . . . . . . . . . . 6
Achtung . . . . . . . . . . . . . . . . . . . . . . . . . . . . . . . . . . . . . . . . . . . . . . 6
Zweijährige eingeschränkte Garantie von Celestron . . . . . . . . . . . . . . . . . . . . . . . 6
FCC HINWEIS . . . . . . . . . . . . . . . . . . . . . . . . . . . . . . . . . . . . . . . . . . . 8

DEUTSCH I 3
1. Ladestatusanzeige
2. Ein-/Ausschalter
3. LED-Ladeanzeige (rot) des
USB-Anschlusses
4. Anschlüsse zum Laden von
USB-Geräten
5. Taste zur Beleuchtungssteuerung
6. Ladeanschluss/12VDC
Ausgangsanschluss
7. Stativbeinhalterung
9
8. LED-Lichtleiste
9. Celestron Teleskop
Netzkabel (196 cm lang)
10. 100-240V AC-Ladegerät
(16VDC - 2 A)
11. Stativbeingurt
12. Internationaler Adapter
Stecker (x 4)
12
10
Ausstattung und Lieferumfang des Powertanks Lithium Pro
11
7
6
8
1
2
3
4
5
3

4 I DEUTSCH
BEDIENEN DER POWERTANK LITHIUM PRO
Aufladen des Akkus
1. Stellen Sie fest, welchen Netzadapter Sie für
Ihren Standort benötigen, und stecken ihn in das
Ladegerät. Vergewissern Sie sich, dass er ganz
eingesteckt ist und einrastet.
2. Nehmen Sie die Gummiabdeckung vom
Ladeanschluss an der Seite des PowerTank Lithium
Pro und stecken das Kabel des Ladegeräts ein.
3. Schließen Sie das Ladegerät an Ihre Steckdose an.
Der Adapter ist für eine Eingangsspannung von 100
bis 240V bei 50/60 Hz ausgelegt.
4. Die Batterieanzeige leuchtet auf, wenn
sie am Aufladen ist. Wenn der Ladevorgang
abgeschlossen ist, bleiben alle Lichter erleuchtet.
HINWEIS: Wenn Sie mit diesem Gerät international
auf Reisen sind, kann es notwendig sein, dass Sie
einen anderen Steckeradapter verwenden müssen.
Drücken Sie dazu einfach auf die Arretierung auf dem
Ladegerät (direkt unterhalb des Steckers), schieben
Sie den Steckeradapter herunter und bringen Sie den
erforderlichen Adapter an.
Achtung: Dieses Ladegerät hat einen Ausgang von
16 Volt Gleichstrom. Versuchen Sie nicht mit diesem
Ladegerät Ihr Teleskop direkt aufzuladen, dies kann
zu erheblichen Schäden an Ihrem Teleskop führen.
Überprüfen des verbleibenden Akkuladezustands
Batterieanzeige leuchtet auf und zeigt an, wie viel der
Akku noch geladen ist. Vier Lichter zeigen einen vollen
Akkustand an, drei Lichter einen Stand von 75%, zwei
Lichter einen Stand von 50% und ein Licht 25%.
Aufladen von USB-Geräten
Heben Sie die Gummidichtung auf der Oberseite des
PowerTank Lithium Pro an, um das Bedienfeld zu sehen.
Stecken Sie das eine Ende des USB-Ladekabels, das mit
dem Gerät geliefert wurde, das Sie aufladen möchten,
in einen der beiden USB-Anschlüsse des PowerTank
Lithium Pro. Schließen Sie das andere Kabelende an den
USB-Port Ihres Geräts an. Drücken Sie einmal auf die
Power-Taste auf dem Bedienfeld, um mit dem Laden
zu beginnen. Ein rot Licht erscheint neben dem USB-
Anschluss und zeigt an, dass Strom fließt. Das Ladegerät
schaltet sich automatisch aus, wenn das Laden unter
unter 100 mA pro Stunde fällt. Wenn Sie das Aufladen
vorzeitig beenden möchten, ziehen Sie das Netzkabel
Ihres Geräts einfach aus der Steckdose. Um den Akku
auszuschalten, halten Sie den Ein- / Ausschalter zwei
Sekunden lang gedrückt.
Einige Geräte wie Smartphones und Tablets verfügen
über eine Schnellladetechnologie. Der PowerTank
Lithium Pro verfügt über einen USB-Anschluss, der
Schnellladegeräte unterstützt. Vergewissern Sie sich, dass
Sie Ihr kompatibles Gerät an diesen Port anschließen, um
die zusätzliche Ladegeschwindigkeit zu nutzen.

DEUTSCH I 5
Das Teleskop einschalten
Nehmen Sie die Gummiabdeckung vom Lade-/
Netzanschluss an der Seite des PowerTank Lithium Pro
ab und stecken das Teleskopkabel ein. Eine Seite des
Kabels hat einen Gewindeanschluss zum Befestigen
an Ihrem Teleskop. Das glatte Ende passt in die Batterie.
Drücken Sie zweimal auf die Power-Taste auf dem
Bedienfeld, um die Stromversorgung zu aktivieren.
Anschluss für die Autobatterie
Der PowerTank Lithium Pro wird mit einem Adapter für die
Autobatterie geliefert, die12V Gleichstrom (10Ampere)
zur Versorgung anderer externer Geräte bietet. Die
Abdeckung des Anschlusses aufklappen und den
Autobatterieadapter in den Anschluss stecken. Drücken
Sie einmal den Netzschalter auf dem Bedienfeld, um
die Stromversorgung zu aktivieren. Die Batterieanzeige
leuchtet auf um zu zeigen, dass Kraft fließt.
Beleuchtung
Die LED-Lichtleiste kann mit rotem und weißem Licht
verwendet werden. Das rote Licht erleichtert die
Nutzung bei Dunkelheit und schützt Ihre Nachtsicht.
Weißes Licht können Sie verwenden, wenn Ihre
Nachtsicht nicht wichtig ist.
Um die roten LEDs zu aktivieren, drücken einmal die
Lichtsteuerungstaste. Um die Helligkeit zu erhöhen,
drücken Sie die Taste a ein zweites Mal. Zum
Ausschalten, ein drittes Mal drücken.
Um die weißen LEDs zu aktivieren, drücken und halten
Sie die Beleuchtungssteuertaste für zwei Sekunden.
Um die Helligkeit zu erhöhen, drücken Sie die Taste
erneut. Zum Ausschalten, die Taste für zwei Sekunden
drücken und halten.
POWERTANK LITHIUM PRO AN IHREM TELESKOP
BEFESTIGEN
Der PowerTank Lithium Pro kann in einem Teleskop-
Zubehör fach in horizontaler oder vertikaler Richtung
eingesetzt werden. Es kann mit dem 2,5 Zoll breiten
Klettband an einem Stativbein befestigt werden.
Ziehen Sie das Klettband durch die zwei Schlitze
in der Stativbeinhalterung. Beginnen Sie damit,
indem Sie das Klettband um das Stativbein wickeln
und dann das Ende des Bandes durch die Schnalle
ziehen. Ziehen Sie das Bamd zurück und spannen
Sie den Haken und den Schlaufenriemen.

6 I DEUTSCH
TECHNISCHE DATEN
Akkuchemie: Lithium Eisenphosphat (LiFePO4)
Akkukapazität: 158,74Wh
Eingangsleistung: 16V DC, 2000mA
Ladezeit: 6 Stunden
Ausgangsleistung für das Teleskop: 12V DC bei 5A
Ausgangsstrom für Autobatterie-Anschluss: 12V DC bei
10A
ENTSORGUNG
Befolgen Sie bei der Entsorgung dieses Produkts die
örtlichen Bestimmungen. Wenn Sie nicht sicher sind, wie
dieses Produkt zu entsorgen ist, wenden Sie sich an die
örtliche Behörde in Ihrer Gemeinde.
ACHTUNG
Nicht autorisierte Umbauten und/oder Änderung
des Geräts sind aus Sicherheitsgründen unzulässig.
Jegliche Verwendung dieses Geräts außer den oben
beschriebenen kann zu Schäden an dem Produkt
und den damit verbundenen Risiken wie Kurzschluss,
Brand, Stromschlag usw. führen. Lesen Sie bitte die
Bedienungsanleitung sorgfältig durch und bewahren
Sie sie zum späteren Nachschlagen auf.
Für daraus resultierende Schäden an Personen- und
Sachschäden übernehmen wir keine Haftung, wenn das
Produkt in irgendeiner Weise durch missbräuchliche oder
unsachgemäße Handhabung oder Nichtbeachtung dieser
Bedienungsanleitung beschädigt wurde.
Dieses Produkt ist kein Spielzeug und sollte außerhalb der
Reichweite von Kindern und Haustieren aufbewahrt werden.
ZWEIJÄHRIGE EINGESCHRÄNKTE GARANTIE VON
CELESTRON
A. Celestron garantiert, dass dieses Produkt zwei Jahre
lang frei von Material- und Verarbeitungsfehlern ist.
Celestron repariert oder ersetzt ein solches Produkt
oder Teile davon, das nach Überprüfung durch Celestron
einen Material- oder Verarbeitungsfehler aufweist. Als
Voraussetzung für die Verpflichtung von Celestron, dieses
Produkt zu reparieren oder zu ersetzen, muss das Produkt
zusammen mit dem für Celestron zufriedenstellenden
Kaufnachweis an Celestron zurückgeschickt werden.
B. Eine ordnungsgemäße Rücksendenummer muss
vor der Rücksendung bei Celestron eingeholt werden.
Bitte senden Sie Ihre Anfrage an Celestrons Online-
Support-Center unter https://www.celestron.com/
pages/technical-support um die Nummer zu erhalten, die
außerhalb Ihres Versandcontainers angezeigt werden soll.

DEUTSCH I 7
Alle Rücksendungen müssen mit einer schriftlichen
Erklärung über den Namen, die Adresse und die aktuelle
Telefonnummer des Eigentümers, unter der er erreicht
werden kann, sowie eine kurze Beschreibung aller
beanstandeten Defekte versehen sein. Teile oder Produkte,
für die Ersatz erfolgt, werden Eigentum von Celestron.
Der Kunde trägt alle Transportkosten und Versicherungen,
sowohl von und zu der Celestron-Fabrik, und muss diese
Kosten im Voraus bezahlen.
Celestron unternimmt angemessene Anstrengungen,
um das/die von dieser Garantie abgedeckte Produkt
innerhalb von 30 Tagen nach Erhalt zu reparieren
oder zu ersetzen. Falls für Reparatur oder Austausch
mehr als 30 Tage erforderlich sind, muss Celestron
den Kunden entsprechend informieren. Celestron
behält sich das Recht vor, ein Produkt, das aus der
Produktlinie genommen wurde, durch ein neues oder in
Wert und Funktion vergleichbares Produkt zu ersetzen.
Diese Garantie ist nichtig und ohne Wirkung für den
Fall, dass ein von der Garantie abgedecktes Produkt
im Design oder in der Funktion verändert wurde, oder
missbräuchlich, zweckentfremdet, falsch gehandhabt
wurde oder eine nicht autorisierte Reparatur durchgeführt
wurde. Des Weiteren wird eine Produktfehlfunktion oder
Verschlechterung bedingt durch normalen Verschleiß
durch diese Garantie nicht abgedeckt.
CELESTRON LEHNT JEGLICHE GEWÄHRLEISTUNG,
OB AUSDRÜCKLICH ODER STILLSCHWEIGEND,
OB DER MARKTGÄNGIGKEIT ODER DER EIGNUNG
FÜR EINEN BESTIMMTEN ZWECK, AUSSER
DEM HIERIN GENANNTEN, AB. DIE ALLEINIGE
VERPFLICHTUNG VON CELESTRON UNTER
DIESER EINGESCHRÄNKTEN GARANTIE BESTEHT
DARIN, DAS DURCH DIE GARANTIE ABGEDECKTE
PRODUKT IN ÜBEREINSTIMMUNG MIT DEN
HIERIN FESTGEHALTENEN BEDINGUNGEN ZU
REPARIEREN ODER AUSZUTAUSCHEN. CELESTRON
LEHNT AUSDRÜCKLICH JEGLICHE HAFTUNG
FÜR ENTGANGENE PROFITE, ALLGEMEINE,
SPEZIELLE, INDIREKTE ODER FOLGESCHÄDEN
AB, DIE SICH AUS EINER GARANTIEVERLETZUNG
ERGEBEN KÖNNTEN ODER DIE DURCH
NUTZUNG BZW. UNFÄHIGKEIT ZUR NUTZUNG
JEGLICHEN CELESTRON-PRODUKTS ERGEBEN.
JEGLICHE STILLSCHWEIGENDE ODER NICHT
BEANSPRUCHBARE GEWÄHRLEISTUNGEN
IST ZEITLICH AUF ZWEI JAHRE AB DATUM DES
URSPRÜNGLICHEN KAUFS BESCHRÄNKT.
Einige Staaten erlauben keinen Ausschluss oder keine
Beschränkung von zufälligen oder Folgeschäden sowie
keine zeitliche Begrenzung einer stillschweigenden
Garantie; daher könnten die oben genannten
Beschränkungen und Ausschlüsse auf Sie nicht
zutreffen.

8 I DEUTSCH
Diese Gewährleistung gibt Ihnen bestimmte gesetzliche
Rechte, und Sie könnten andere Rechte haben, die von
Staat zu Staat variieren. Celestron behält sich das Recht vor,
jegliches Modell und jeglichen Produkttyp zu modifizieren oder
aus der Produktlinie auszuschließen, ohne Ihnen dies vorher
anzukündigen. Wenn Garantieprobleme auftreten oder Sie
Unterstützung bei der Verwendung Ihres Produkts benötigen,
besuchen Sie das Online-Supportcenter von Celestron unter
https://www.celestron.com/pages/technical-support.
HINWEIS: Diese Garantie ist für Kunden in den USA und
Kanada gültig, die ihr Produkt von einem autorisierten Ce-
lestron-Händler in den USA oder Kanada gekauft haben.
Diese Garantie ist für Kunden außerhalb der USA und Ka-
nada gültig, die ihr Produkt von einem autorisierten Celes-
tron-Händler in dem jeweiligen Land gekauft haben. Wen-
den Sie sich für alle Fragen zur Garantie an diese Händler.
FCC HINWEIS
Dieses Gerät wurde getestet und entspricht den
Anforderungen der Grenzwerte für ein digitales Gerät
der Klasse B gemäß Teil 15 der FCC-Vorschriften. Diese
Grenzen sollen angemessener Schutz gegen schädliche
Störungen in einer Wohnanlage bieten. Dieses Gerät
erzeugt und verwendet Hochfrequenzenergie und kann
diese abstrahlen. Wenn es nicht in Übereinstimmung mit
den Anweisungen installiert und verwendet wird, kann
es Funkstörungen verursachen. Es kann jedoch nicht
garantiert werden, dass bei einer bestimmten Installation
keine Störungen auftreten. Wenn dieses Gerät Störungen
beim Radio- oder Fernsehempfang verursacht, die durch
Aus- und Einschalten des Geräts festgestellt werden
können, sollte der Benutzer versuchen, die Störung
durch eine oder mehrere der folgenden Maßnahmen
zu beheben:
• Richten Sie die Empfangsantenne neu aus oder ändern
Sie ihre Position.
• Vergrößern Sie den Abstand zwischen Gerät und
Empfänger.
• Schließen Sie das Gerät an eine Steckdose an, die nicht
an den Stromkreis des Empfängers angeschlossen ist.
• Wenden Sie sich an den Händler oder einen erfahrenen
Radio-/Fernsehtechniker.
© 2022 Celestron • Alle Rechte Vorbehalten. • celestron.com/pages/technical-support
2835 Columbia Street • Torrance, CA 90503 USA.
(Produkte oder Anleitungen können ohne Mitteilung oder Verpflichtung geändert werden.)
Entwickelt und vorgesehen für Personen im Alter von
14 Jahren und darüber.
09-22

Alimentatore Ricaricabile
MANUALE DI ISTRUZIONI #18768
ITALIANO

2 I ITALIANO
Indice
Caratteristiche e componenti del PowerTank Lithium Pro . . . . . . . . . . . . . . . . . . . . . 3
Funzionamento del PowerTank Lithium Pro . . . . . . . . . . . . . . . . . . . . . . . . . . . . 4
Caricamento della batteria . . . . . . . . . . . . . . . . . . . . . . . . . . . . . . . . . . . . . . . 4
Controllo della carica residua della batteria . . . . . . . . . . . . . . . . . . . . . . . . . . . . 4
Caricamento di dispositivi USB . . . . . . . . . . . . . . . . . . . . . . . . . . . . . . 4
Caricamento di un telescopio . . . . . . . . . . . . . . . . . . . . . . . . . . . . . . . . . . . . 5
Uscita caricabatteria auto . . . . . . . . . . . . . . . . . . . . . . . . . . . . . . . . . . . . . . 5
Illuminazione . . . . . . . . . . . . . . . . . . . . . . . . . . . . . . . . . . . . . . . . 5
Fissaggio del PowerTank Lithium Pro al telescopio . . . . . . . . . . . . . . . . . . . . . . . . 5
Dati tecnici . . . . . . . . . . . . . . . . . . . . . . . . . . . . . . . . . . . . . . . . . . . . . 6
Smaltimento . . . . . . . . . . . . . . . . . . . . . . . . . . . . . . . . . . . . . . . . . . . . 6
Avvertenza . . . . . . . . . . . . . . . . . . . . . . . . . . . . . . . . . . . . . . . . . . . . . 6
Garanzia limitata di due anni Celestron . . . . . . . . . . . . . . . . . . . . . . . . . . . . . . 6
Nota FCC . . . . . . . . . . . . . . . . . . . . . . . . . . . . . . . . . . . . . . . . . . . . . . 8

ITALIANO I 3
1. Indicatore di stato batteria
2. Pulsante di alimentazione
3. Indicatore LED ricarica
porta USB (rosso)
4. Porte per ricarica
dispositivi USB
5. Pulsante di controllo luce
6. Porta di ricarica/
Porta di uscita 12 VCC
7. Attacco gamba treppiede
9
8. Pannello spia LED
9. Cavo di alimentazione
telescopio Celestron
(lunghezza 2 m)
10. Caricatore 100-240 V CA
(16 VCC – 2 A)
11. Fascia gamba treppiede
12. Spine per adattatore
internazionali (x4)
12
10
Caratteristiche e componenti del PowerTank Lithium Pro
11
7
6
8
1
2
3
4
5
3

4 I ITALIANO
FUNZIONAMENTO DEL POWERTANK LITHIUM PRO
Caricamento della batteria
1. Determinare la spina per adattatore CA necessaria
in base al luogo di residenza e farla scorrere in
posizione sul corpo del caricatore. Assicurarsi che
sia posizionata correttamente tramite scatto.
2. Estrarre il tappo in gomma dalla porta di ricarica
sul lato del PowerTank Lithium Pro e inserire
il cavo del caricatore.
3. Collegare il caricatore a una presa di corrente.
L'adattatore accetta una tensione di ingresso
compresa tra 100 e 240 V a 50/60 Hz.
4. Le spie della batteria lampeggiano durante
la ricarica. Al termine della ricarica, tutte le spie
rimangono accese.
NOTA: In caso di viaggi in altri regioni/Paesi con il
dispositivo,potrebbe essere necessario utilizzare una
spina per adattatore diversa. È sufficiente premere il
pulsante di blocco sul caricatore (posto direttamente
sotto la spina), far scorrere via la spina dell'adattatore e
sostituirla con quella richiesta.
Avvertenza: il caricatore ha una tensione di uscita
di 16 Volt CC. Non provare a usare il caricatore per
alimentare direttamente il telescopio o potrebbero
verificarsi danni considerevoli al telescopio.
Controllo della carica residua della batteria
Premere una volta il pulsante di alimentazione e le spie
della batteria si accendono mostrando la quantità di
carica residua nella batteria. Le quattro spie indicano
che la batteria è completamente carica, 3 spie che è
carica al 75%, 2 spie al 50% e 1 spia al 25%.
Caricamento di dispositivi USB
Sollevare la copertura in gomma sulla superficie superiore
del PowerTank Lithium Pro per mostrare il pannello di
controllo. Collegare un'estremità del cavo di ricarica USB
in dotazione con il dispositivo che si desidera ricaricare
in una delle due porte USB sul PowerTank Lithium Pro.
Collegare l'altra estremità del cavo al dispositivo. Premere
una volta il pulsante di alimentazione sul pannello di
controllo per avviare la ricarica. Affianco alla porta USB
appare una spia rosso che mostra che la ricarica è
in corso. Il caricatore si spegne automaticamente quando
il carico scende al di sotto di 100mA per 1 ora. Se si
desidera interrompere la sessione di ricarica in anticipo, è
sufficiente scollegare il cavo del dispositivo dal caricatore.
Per spegnere la batteria premere e tenere premuto il pulsante
di accensione per due secondi.
Alcuni dispositivi come smartphone e tablet sono dotati di
tecnologia per ricarica rapida. Il PowerTank Lithium Pro è
dotato di una porta USB che supporta dispositivi a ricarica
rapida. Assicurarsi di collegare il dispositivo compatibile
a questa porta per approfittare della velocità aggiuntiva.

ITALIANO I 5
Caricamento di un telescopio
Estrarre la copertura in gomma dalla porta di alimentazione/
ricarica sul lato del PowerTank Lithium Pro e collegare
il cavo del telescopio. Un lato del cavo ha un connettore
filettato per il collegamento al telescopio. L’estremità
liscia si inserisce nella batteria. Premere due volte il
pulsante di alimentazione sul pannello di controllo per
avviare l'alimentazione.
Uscita caricabatteria auto
Il PowerTank Lithium Pro è fornito di un'uscita per adattatore
caricabatteria auto che fornisce un'alimentazione da 12 V CC
(10 ampere) per alimentare altri accessori esterni. Sollevare il
tappo che copre l'uscita e inserire l'adattatore caricabatteria
auto nella porta. Premere il pulsante di accensione sul
pannello di controllo una volta per attivare l’alimentazione.
Le spie della batteria si accendono per mostrare che il
potere scorre.
Illuminazione
Il pannello luminoso LED può essere usato con luce
rossa o bianca. La luce rossa consente di vedere al buio
proteggendo la visione notturna. È possibile utilizzare la
luce bianca quando non è importante avere la visione
notturna.
Per attivare i LED rossi premere una volta il pulsante di
controllo della luce. Per aumentare la luminosità, premere
nuovamente il pulsante. Per spegnere le luci, premere una
terza volta.
Per attivare i LED bianchi, tenere premuto il pulsante di
controllo della luce per due secondi. Per aumentare la
luminosità, premere nuovamente il pulsante. Per spegnere
le luci, tenere premuto il pulsante per due secondi.
FISSAGGIO DEL POWERTANK LITHIUM PRO AL TELESCOPIO
Il PowerTank Lithium Pro può essere fissato sul piano del
telescopio con orientamento orizzontale o verticale. Può
anche essere fissato alla gamba di un treppiede tramite
l'ampio gancio da 2,5" e la fascia ad anello. Far scorrere
la fascia attraverso le due aperture nell'attacco della
gamba del treppiede. Iniziare avvolgendo la fascia intorno
alla gamba del treppiede, quindi quindi inserire l'estremità
della fascia nella fibbia. Tirare la fascia e fissare il gancio
e la fascia ad anello alla tensione desiderata.

6 I ITALIANO
DATI TECNICI
Composizione batteria: Litio-ferro-fosfato (LiFePO4)
Capacità della batteria: 158,74 Wh
Ingresso: 16V CC, 2000 mA
Tempo di ricarica: 6 ore
Corrente di uscita per telescopio: 12 V CC @5 A
Corrente di uscita dell'uscita batteria auto:
12 V CC @10 A
SMALTIMENTO
Seguire le normative locali al momento di smaltire il
prodotto. In caso di dubbi sullo smaltimento del prodotto,
contattare le autorità locali del proprio comune.
AVVERTENZA
Conversioni e/o modifiche non autorizzate del dispositivo
non sono ammesse per ragioni di sicurezza. Qualsiasi
utilizzo del dispositivo diverso da quelli indicati sopra
può danneggiare il prodotto e comportare rischi correlati
come cortocircuiti, incendi, scosse elettriche, ecc.
Leggere interamente le istruzioni d'uso e conservarle per
riferimento futuro.
Non ci assumiamo alcuna responsabilità per danni
conseguenti a cose o per lesioni personali in caso di
qualsiasi abuso del prodotto o per danni dovuti a uso
improprio o mancata osservanza delle presenti istruzioni
per l'uso.
Il prodotto non è un giocattolo e deve essere tenuto al di
fuori della portata dei bambini e degli animali domestici.
GARANZIA LIMITATA DI DUE ANNI CELESTRON
A. Celestron garantisce che il prodotto sia priva da
difetti nei materiali e nella fabbricazione per due
anni. Celestron riparerà o sostituirà prodotti o
componenti che, a seguito di controllo da parte di
Celestron, risultino presentare difetti nei materiali o nella
fabbricazione. Come condizione dell’obbligo di Celestron di
riparare o sostituire detto prodotto, il prodotto deve essere
restituito a Celestron assieme a una prova d’acquisto che
sia soddisfacente per Celestron.
B. Prima dell’invio del prodotto per la restituzione
è necessario ottenere da Celestron un codice di
autorizzazione alla restituzione. Invia la richiesta al centro
di supporto tecnico online di Celestron all’indirizzo
https://www.celestron.com/pages/technical-support per
ricevere il numero da visualizzare all’esterno del contenitore
di spedizione.

ITALIANO I 7
Tutte le restituzioni devono essere accompagnate da
una dichiarazione scritta indicante il nome, l’indirizzo e un
numero di telefono del proprietario, assieme a una breve
descrizione del difetto reclamato. Le parti del prodotto
per cui si effettua la sostituzione diventano proprietà di
Celestron.
Il cliente sarà responsabile di tutti i costi per trasporto
e assicurazione a/dalla fabbrica Celestron e dovrà farsi
carico di tali costi.
Celestron farà del suo meglio per riparare o sostituire
qualsiasi prodotto coperto da garanzia entro trenta giorni
dalla ricezione. In caso la riparazione o la sostituzione
richieda più di trenta giorni, Celestron notificherà il cliente
di conseguenza. Celestron si riserva il diritto di sostituire
qualsiasi prodotto di cui sia stata interrotta la produzione
con un prodotto nuovo di valore e funzione simile.
La presente garanzia sarà annullata e non sarà più in
vigore o efficace nel caso in cui un prodotto coperto da
garanzia sia stato modificato nel design o nelle funzioni,
o si sospetti l’abuso, l’uso improprio, cattiva gestione o
riparazioni non autorizzate. Inoltre, il malfunzionamento o il
deterioramento del prodotto dovuti alla normale usura del
prodotto non sono coperti dalla garanzia.
CELESTRON DECLINA QUALSIASI GARANZIA,
ESPRESSA O IMPLICITA, SIA DI COMMERCIABILITÀ
SIA DI ADEGUATEZZA PER UN DETERMINATO
SCOPO, ECCETTO NEI CASI ESPRESSAMENTE
QUI INDICATI. IL SOLO OBBLIGO DI CELESTRON
RELATIVO A QUESTA GARANZIA LIMITATA È QUELLO
DI RIPARARE O SOSTITUIRE IL PRODOTTO COPERTO
DALLA GARANZIA SECONDO I TERMINI QUI INDICATI.
CELESTRON DECLINA QUALSIASI GARANZIA
PER PERDITE DI PROFITTI O DANNI GENERALI,
SPECIALI, INDIRETTI O CONSEGUENTI DERIVATI
DALLA VIOLAZIONE DELLA GARANZIA, O DALL'USO
O L'INCAPACITÀ DI UTILIZZO DI QUALSIVOGLIA
PRODOTTO CELESTRON. LE GARANZIE IMPLICITE
E CHE NON POSSONO ESSERE DECLINATE SONO
LIMITATE NELLA DURATA A UN TERMINE DI DUE
ANNI DALLA DATA D'ACQUISTO.
Alcuni Stati non consentono l'esclusione o la limitazione di
danni accidentali o conseguenti, o limitazioni sulla durata
di una garanzia implicita, per cui le limitazioni ed esclusioni
sopra indicate potrebbero non essere applicabili.

8 I ITALIANO
La presente garanzia dà all'utente specifici diritti legali,
oltre ad altri diritti che possono variare da Stato a Stato.
Celestron si riserva il diritto di modificare o sospendere la
produzione, senza previa notifica, di qualsivoglia modello
o stile del prodotto. Nel caso in cui sorgano problemi
di garanzia o se si necessita di assistenza per l’uso
del prodotto, visita il centro di supporto tecnico online di
Celestron all’indirizzo https://www.celestron.com/pages/
technical-support.
NOTA: La presente garanzia è valida per i clienti di Stati
Uniti e Canada che hanno acquistato questo prodotto da
un rivenditore Celestron autorizzato negli Stati Uniti o in
Canada. La garanzia al di fuori di Stati Uniti e Canada è
valida esclusivamente per i clienti che hanno effettuato
l’acquisto da un distributore internazionale Celestron o da
un rivenditore autorizzato Celestron nello specifico Paese.
Contattare tali rivenditori per qualsiasi tipo di assistenza
relativamente alla garanzia.
NOTA FCC
La presenta apparecchiatura è stata testata e risulta
conforme ai limiti per un dispositivo digitale di Classe
B, in conformità alla parte 15 dei Regolamenti FCC. Tali
limiti sono ideati per fornire una protezione ragionevole
contro le interferenze dannose presenti nelle abitazioni
residenziali. La presente apparecchiatura genera, utilizza
e può irradiare energia in radio frequenza e, se non
installata e utilizzata conformemente alle istruzioni, può
causare interferenze dannose alle radiocomunicazioni.
Tuttavia, non esiste alcuna garanzia che l’interferenza
non si verifichi in una particolare installazione. Nel caso
in cui la presente apparecchiatura causi interferenze
dannose alla ricezione radio o televisiva, il che potrebbe
essere determinato dall'accensione e dallo spegnimento
dell'apparecchiatura, l'utente è incoraggiato a tentare di
correggere l'interferenza mediante una o più delle misure
seguenti:
• Riorientare o riposizionare l’antenna di ricezione.
• Aumentare la distanza tra l’apparecchiatura e il ricevitore.
• Collegare l'apparecchiatura su un'uscita o su un circuito
diversi da quelli a cui è collegato il ricevitore.
• Consultare il rivenditore o un tecnico specializzato per
ricevere assistenza.
© 2022 Celestron • Tutti i diritti riservati. • celestron.com/pages/technical-support
2835 Columbia Street • Torrance, CA 90503 Stati Uniti.
(I prodotti o le istruzioni possono essere modificati senza previa notifica od obbligo.)
Questo dispositivo non è destinato all’uso da parte di minori di 14 anni.
09-22

Alimentación Recargable
MANUAL DE INSTRUCCIONES #18768
ESPAÑOL

2 I ESPAÑOL
Índice
Características y Contenido de PowerTank Lithium Pro . . . . . . . . . . . . . . . . . . . . . . . . 3
Uso de PowerTank Lithium Pro . . . . . . . . . . . . . . . . . . . . . . . . . . . . . . . . . . . . . . . 4
Cargar la batería . . . . . . . . . . . . . . . . . . . . . . . . . . . . . . . . . . . . . . . . 4
Comprobar la carga de batería restante . . . . . . . . . . . . . . . . . . . . . . . . . . . . . 4
Cargar dispositivos USB . . . . . . . . . . . . . . . . . . . . . . . . . . . . . . . . . . . . . . . 4
Alimentación de un telescopio . . . . . . . . . . . . . . . . . . . . . . . . . . . . . . . . . . . 5
Puerto de batería de coche . . . . . . . . . . . . . . . . . . . . . . . . . . . . . . . . . . . . 5
Iluminación . . . . . . . . . . . . . . . . . . . . . . . . . . . . . . . . . . . . . . . . . . . . . . . . 5
Conexión del PowerTank Lithium Pro a su Telescopio . . . . . . . . . . . . . . . . . . . . . . 5
Datos técnicos . . . . . . . . . . . . . . . . . . . . . . . . . . . . . . . . . . . . . . . . . . . 6
Eliminación . . . . . . . . . . . . . . . . . . . . . . . . . . . . . . . . . . . . . . . . . . . . . 6
Advertencia . . . . . . . . . . . . . . . . . . . . . . . . . . . . . . . . . . . . . . . . . . . . . 6
Garantía limitada por dos años de Celestron . . . . . . . . . . . . . . . . . . . . . . . . . . . 6
Nota FCC . . . . . . . . . . . . . . . . . . . . . . . . . . . . . . . . . . . . . . . . . . . . . . 8

ESPAÑOL I 3
1. Indicador de estado de carga
2. Botón de encendido
3. Puerto de carga USB
Testigo LED (rojo)
4. Puertos para carga
Dispositivos USB
5. Botón de control de
iluminación
6. Puerto de carga /
12VCC Puerto de salida
7. Soporte para pata de trípode
9
8. Panel de luces LED
9. Telescopio Celestron cable de
alimentación (6,5’ de longitud)
10. Cargador CA 100-240V
(16VCC – 2 A)
11. Correa para pata de trípode
12. Adaptador internacional
Conectores (x4)
12
10
Características y contenido de PowerTank Lithium Pro
11
7
6
8
1
2
3
4
5
3

4 I ESPAÑOL
USO DE POWERTANK LITHIUM PRO
Cargar la batería
1. Determine el adaptador de toma CA que necesite para
su ubicación y deslícelo en posición sobre el chasis
del cargador. Asegúrese de que esté totalmente
asentado y encaje en posición.
2. Saque la tapa de goma del puerto de carga en el
Lateral del PowerTank Lithium Pro y conecte el cable
del cargador.
3. Conecte el cargador a la toma de corriente. El
adaptador puede aceptar una entrada de 100 a
240V a 50/60Hz.
4. Los testigos de batería parpadearán durante
la carga. Cuando termine la carga, todas las luces
permanecerán encendidas.
NOTA: Si realiza viajes internacionales con el dispositivo,
puede que tenga que cambiar a un adaptador de enchufe
distinto. Presione el botón de bloqueo del cargador
(situado inmediatamente debajo del enchufe), saque el
adaptador y ponga el adaptador que precise.
Advertencia: El cargador tiene una salida de
16 voltios CC. No intente usar el cargador para
alimentar directamente un telescopio, podría
dañarlo gravemente.
Comprobar la carga de la batería
Pulse una vez el botón de encendido y se iluminarán los
testigos de batería, mostrando la energía restante en la
batería. Las cuatro luces indican que la batería está llena,
3 luces que está al 75%, 2 luces que está al 50%, y 1
luz que está al 25%.
Cargar dispositivos USB
Levante el cierre de goma de la superficie superior del
PowerTank Lithium Pro para mostrar el panel de control.
Conecte un extremo del cable de carga USB incluido con
el dispositivo que desee cargar a uno de los dos puertos
USB del PowerTank Lithium Pro. Conecte el otro extremo
del cable al dispositivo. Pulse el botón de encendido en el
panel de control una vez para iniciar la carga. Se mostrará
un testigo rojo al lado del puerto USB, indicando que
circula energía. El cargador se apagará automáticamente
cuando la carga descienda de 100mA durante 1 hora.
Si desea finalizar la sesión de carga anticipadamente
solamente tiene que desconectar el cable del dispositivo
de la alimentación. Para apagar la batería, mantenga
presionado el botón de encendido durante dos segundos.
Algunos dispositivos, como teléfonos y tabletas, disponen
de tecnología de carga rápida. El PowerTank Lithium Pro
tiene un puerto USB que soporta dispositivos con carga
rápida. Asegúrese de conectar un dispositivo compatible
a este puerto para aprovechar la velocidad adicional.

ESPAÑOL I 5
Alimentación de un telescopio
Retire la cubierta de goma del puerto de carga/alimentación
en el lateral del PowerTank Lithium Pro y conecte el cable
de alimentación del telescopio. Un lado del cable tiene
un conector roscado para conectarlo a su telescopio.
El extremo suave se adapta a la batería. Pulse el botón
de encendido en el panel de control dos veces para activar
la alimentación.
Puerto de batería de coche
El PowerTank Lithium Pro incluye un puerto adaptador
de batería de coche que proporciona alimentación 12V
CC (10 amperios) para alimentar otros accesorios
externos. Levante la tapa que cubre el puerto e
introduzca el adaptador de batería de coche en el puerto.
Presione el botón de encendido en el panel de control
una vez para activar la energía. Las luces indicadoras
de la batería se encenderán para mostrar que el poder
está fluyendo.
Iluminación
El panel de luces LED puede usarse con luz roja o blanca.
La luz roja le permitirá ver en la oscuridad protegiendo su
visión nocturna. La luz blanca puede usarse cuando no
sea importante proteger su visión nocturna.
Para activar los LED rojos pulse una vez el botón de
control de iluminación. Para aumentar el brillo, pulse el
botón por segunda vez. Para apagar la luz, púlselo por
tercera vez.
Para activar los LED blancos, presione y mantenga el
botón de control de iluminación durante dos segundos.
Para aumentar el brillo, pulse el botón de nuevo. Para
apagar la luz, presione y mantenga el botón durante
dos segundos.
CONEXIÓN DEL POWERTANK LITHIUM PRO A SU
TELESCOPIO
El PowerTank Lithium puede instalarse en la bandeja
de accesorios de un telescopio con orientación
horizontal o vertical. También puede fijarse a una pata
del trípode con el gancho de 2,5 pulgadas y la correa.
Pase la correa por las dos ranuras del soporte de la
pata del trípode. Comience enrollando la correa a la
pata del trípode, y pase el extremo de la correa por
la hebilla. Tire de la correa y asegure el gancho y la
correa con la tensión deseada.

6 I ESPAÑOL
DATOS TÉCNICOS
Química de la batería: Fosfato de hierro litio (LiFePO4)
Capacidad de batería: 158,74 Wh
Entrada: CC 16V, 2.000mA
Tiempo de carga: 6 horas
Corriente de salida para telescopio: 12V CC 5A
Corriente de salida para puerto de batería de coche:
12V CC 10A
ELIMINACIÓN
Siga la normativa local cuando deseche este producto. Si
no está seguro del modo de eliminación de este producto,
contacte con su ayuntamiento.
ADVERTENCIA
Las conversiones y/o modificaciones del dispositivo no
autorizadas son inadmisibles por motivos de seguridad.
Cualquier uso de este dispositivo distinto a los descritos
anteriormente puede dañar el producto y provocar
riesgos relacionados, como cortocircuito, incendio,
electrocución, etc. Lea las instrucciones de uso por
completo y consérvelas como referencia en el futuro.
No asumimos ninguna responsabilidad por daños
materiales o personales si el producto ha recibido
abusos de cualquier tipo o se ha dañado por un uso
inadecuado o el incumplimiento de estas instrucciones
de uso.
Este producto no es un juguete y debe mantenerse
fuera del alcance de niños y mascotas.
GARANTÍA LIMITADA POR DOS AÑOS DE CELESTRON
A. Celestron garantiza que su producto está libre de
defectos de material y mano de obra durante dos años.
Celestron reparará o sustituirá dicho producto o pieza si, al
ser inspeccionado por Celestron, se determina defectuoso
por materiales o mano de obra. Como condición de la
obligación de Celestron de reparar o sustituir dicho
producto, el producto debe ser devuelto a Celestron junto
con una prueba de compra adecuada para Celestron.
B. Debe obtener un número de autorización de devolución
adecuado de Celestron antes de la devolución. Envíe su
solicitud al centro de soporte técnico en línea de Celestron
en https://www.celestron.com/pages/technical-support
para recibir el número que se mostrará en el exterior de su
contenedor de envío.

ESPAÑOL I 7
Cualquier devolución debe ir acompañada de una
declaración por escrito en la que conste el nombre,
dirección y número de teléfono de contacto durante el
día del propietario, junto con una breve descripción de
cualquier defecto reclamado. Las piezas o productos
sustituidos pasarán a ser propiedad de Celestron.
El cliente será responsable de los costes de transporte
y seguro, tanto a como desde la fábrica de Celestron, y
deberá pagar anticipadamente dichos costes.
Celestron realizará todos los esfuerzos razonables
para reparar o sustituir cualquier producto cubierto por
esta garantía en los treinta días siguientes a su recepción.
En caso de que la reparación o sustitución precise de
más de treinta días, Celestron se lo notificará al cliente.
Celestron se reserve el derecho de sustituir cualquier
producto que haya sido dejado de fabricar por un nuevo
producto de valor y función comparables.
Esta garantía no tendrá validez ni efecto en caso de que
un producto cubierto se haya modificado en su diseño
o función, o se haya sometido a abuso, mal uso, mala
manipulación o reparación no autorizada. Además, las
averías o deterioro del producto por desgaste normal no
están cubiertos por esta garantía.
CELESTRON RECHAZA TODA RESPONSABILIDAD
POR GARANTÍAS, EXPLÍCITAS O IMPLÍCITAS,
SEAN DE ADECUACIÓN COMERCIAL PARA UN
USO ESPECÍFICO, SALVO LAS EXPLÍCITAMENTE
AQUÍ DECLARADAS. LA ÚNICA OBLIGACIÓN
DE CELESTRON EN ESTA GARANTÍA LIMITADA
SERÁ REPARAR O SUSTITUIR EL PRODUCTO
CUBIERTO, DE ACUERDO CON LOS TÉRMINOS
AQUÍ ESTABLECIDOS. CELESTRON RECHAZA
EXPLÍCITAMENTE CUALQUIER PÉRDIDA DE
BENEFICIOS, DAÑOS GENERALES, ESPECIALES,
INDIRECTOS O CONSIGUIENTES QUE PUEDAN
RESULTAR DE LA VULNERACIÓN DE CUALQUIER
GARANTÍA, O SURJAN DEL USO O INCAPACIDAD
PARA USAR CUALQUIER PRODUCTO CELESTRON.
CUALQUIER GARANTÍA IMPLÍCITA QUE NO PUEDA
REHUSARSE SERÁ LIMITADA EN SU DURACIÓN
A UN TÉRMINO DE DOS AÑOS DESDE LA FECHA DE
COMPRA ORIGINAL.
Algunos estados no permiten la exclusión o limitación
de daños incidentales o consiguientes, ni permiten
limitar el tiempo que dura una garantía implícita, por lo
que las limitaciones indicadas o exclusiones pueden no
serle aplicables.

8 I ESPAÑOL
Esta garantía le ofrece derechos legales específicos, y
puede tener otros derechos, que varían según el estado.
Celestron se reserva el derecho de modificar o cesar, sin
previo aviso, cualquier modelo o estilo de producto. Si
surgen problemas de garantía o necesita asistencia al
usar su producto, visite el centro de soporte técnico
en línea de Celestron en https://www.celestron.com/
pages/technical-support.
NOTA: Esta garantía tiene validez para clientes de EE.UU.
y Canadá que hayan adquirido este producto en un
vendedor autorizado de Celestron en EE.UU. y Canadá. La
garantía fuera de EE.UU. y Canadá solamente tiene
validez para clientes que hayan comprado en un
distribuidor internacional de Celestron o un vendedor de
Celestron autorizado en el país específico. Contacte con
ellos para obtener servicio de garantía.
NOTA FCC
Este equipo ha sido comprobado y cumple con
los límites de un dispositivo digital de Clase B, según el
apartado 15 de las Normas FCC Estos límites han sido
diseñados para proporcionar una protección razonable
contra interferencias perjudiciales en una instalación
residencial. Este equipo genera, usa e irradia energía
de radiofrecuencia y, si no se instala y utiliza de acuerdo
con las instrucciones, puede provocar interferencias
dañinas en comunicaciones por radio. Sin embargo, no se
garantiza que no existan interferencias en una instalación
en particular. Si este equipo causa interferencias dañinas
en la recepción de radio o televisión, lo que puede
determinarse apagando y encendiendo el equipo, se
recomienda al usuario intentar corregir las interferencias
con una o varias de las medidas siguientes:
• Reorientar o recolocar la antena receptora.
• Aumentar la separación entre el equipo y el receptor.
• Conectar el equipo a una toma de un circuito distinto al
que tiene el receptor conectado.
• Consultar al vendedor o aun técnico experimentado de
radio/TV para obtener ayuda.
© 2022 Celestron • Todos los derechos reservados • celestron.com/pages/
technical-support • 2835 Columbia Street • Torrance, CA 90503 EE.UU.
(Los productos o instrucciones pueden modificarse sin previo aviso u obligación).
Diseñado y pretendido para personas de 14 o más años de edad.
09-22
-
 1
1
-
 2
2
-
 3
3
-
 4
4
-
 5
5
-
 6
6
-
 7
7
-
 8
8
-
 9
9
-
 10
10
-
 11
11
-
 12
12
-
 13
13
-
 14
14
-
 15
15
-
 16
16
-
 17
17
-
 18
18
-
 19
19
-
 20
20
-
 21
21
-
 22
22
-
 23
23
-
 24
24
-
 25
25
-
 26
26
-
 27
27
-
 28
28
-
 29
29
-
 30
30
-
 31
31
-
 32
32
-
 33
33
-
 34
34
-
 35
35
-
 36
36
-
 37
37
-
 38
38
-
 39
39
-
 40
40


Celestron 18768 Pro Manual de usuario
- Categoría
- Cargadores de bateria
- Tipo
- Manual de usuario
en otros idiomas
- français: Celestron 18768 Pro Manuel utilisateur
- italiano: Celestron 18768 Pro Manuale utente
- English: Celestron 18768 Pro User manual
- Deutsch: Celestron 18768 Pro Benutzerhandbuch
- português: Celestron 18768 Pro Manual do usuário
Artículos relacionados
-
Celestron 18768 Instrucciones de operación
-
Celestron PowerTank Lithium El manual del propietario
-
Celestron 18763 Manual de usuario
-
-
Celestron Cosmos 90GT WiFi Telescope Manual de usuario
-
-
Celestron 81038 Instrucciones de operación
-
-
Celestron 21063 Instrucciones de operación
-
Celestron 48029 Manual de usuario