Dash 10″ Carbon Steel Fry Pan FDCSP100 Manual de usuario
- Tipo
- Manual de usuario

CARBON STEEL
FRY PAN, 10"
# FDCSP100

Text
Using Your Compact Cold Pressed Juicer
PAGE TITLE
HECK
YEAH!
Are you ready to get cookin’? I started the Fit Cook
Community to inspire people to stay t with
healthy—never boring!—recipes. Teaming up with Dash,
I’m excited to help you eat happy and be well with healthful
products that make a difference in your kitchen.
Let’s dig in!
@tmencook

About Your Carbon Steel Fry Pan .........................................4
Care & Use ..............................................................................5
Recipe Guide .................................................................... 7-23
Customer Support ...............................................................24
Warranty ................................................................................25
Notes................................................................................ 26-27
CARBON STEEL
FRY PAN, 10"

Using Your Compact Cold Pressed Juicer
PAGE TITLE
∙ 4 ∙
Your Carbon Steel Fry Pan is oven- and stovetop-safe up to 500°F.
When preheating your pan, start with low to medium heat. Carbon steel retains heat
and performs better when heated at a lower and slower rate. Cooking over high heat for
prolonged periods may cause food to burn or stick, or could damage your pan's enamel
coating over time.
Do not use metal brushes or utensils when cooking with the Carbon Steel Fry Pan.
These may scratch the finish of your pan.
When handling the Carbon Steel Fry Pan, keep in mind that the stainless steel handle
may become hot while cooking.
Your Carbon Steel Fry Pan comes with an enamel coating that provides a slick cooking
surface naturally, without the added chemicals of a nonstick coating. Because of this,
it is not necessary to use as much butter or oil when cooking as you would normally.
The enamel coating of the pan keeps the surface from rusting and does not require
seasoning. This means less maintenance and the same browning as raw carbon steel.
∙ 4 ∙
Using Your Compact Cold Pressed Juicer
ABOUT YOUR CARBON STEEL FRY PAN
∙ 4 ∙

PAGE TITLE
∙ 5 ∙
CARE & USE
Hand wash only with warm, soapy water. To remove tough residue,
use baking soda and gently scrub. The Carbon Steel Fry Pan is NOT
dishwasher safe.
Do not clean your Carbon Steel Fry Pan with metal scouring pads or
other harsh cleaners, as this may scratch or wear away the finish.
While your Carbon Steel Fry Pan is durable, use caution when moving
and storing it, as the enamel surface may crack or chip if dropped.
HOLD UP!

∙ 6 ∙
Using Your Compact Cold Pressed Juicer
PAGE TITLE

RECIPE
GUIDE
Show us your The Fit Cook x Dash goods in action
and tag #tinadash for a chance to be featured on
@bydash and @tmencook!

8oz brown rice (or low carb
cauliower “rice”)
15oz can no-salt black beans
1¼ lb raw jumbo shrimp
(or chicken, tofu, or beef)
Olive oil spray
2 tsp chili powder
1 tsp cumin
Pinch of sea salt and pepper
1 small white onion, chopped
1 green bell pepper, chopped
1 red bell pepper, chopped
(or another green bell pepper
since they are cheaper)
Juice from 1 lime
¾ cup frozen corn, thawed
Garnish (optional):
Avocado, mashed
Cilantro, chopped
1 lime wedge
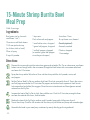
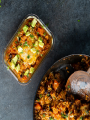
Ingredients:
15-Minute Shrimp Burrito Bowl
Meal Prep
Directions:
Yield: 3 servings
1
2
3
4
Prepare the rice according to the instructions given and set aside. (Pro Tip: as a time-saver, use frozen
brown rice and simply heat in the microwave.) Empty the black beans into a microwave-safe bowl
and warm for 2-3 minutes.
Spray the shrimp with a little olive oil, then rub the shrimp with the chili powder, cumin, salt
and pepper.
Set the Carbon Steel Fry Pan on medium-high heat. Once hot, spray with olive oil. Toss in the onions
and bell peppers and sear for 3-5 minutes. As peppers and onions cook, squeeze in fresh lime to
help caramelize (and soften) the veggies. Once the onion is translucent and the edges are seared,
remove from the Fry Pan.
Increase the heat of the Fry Pan to high, then add the corn. Cook for 2-3 minutes, enough to thaw
and sear the outside of the corn, then set aside.
Reduce the heat of the Fry Pan to medium, and if needed, spray with a little more olive oil.
Toss in the shrimp. Cook for 6-8 minutes until the shrimp is pink/white and plump with seared edges.
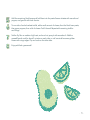
Assemble the bowl in your meal prep containers by evenly dividing up the ingredients!
∙ 8 ∙
6
5

∙ 9 ∙

Avocado oil spray
1 green bell pepper, sliced
1 red bell pepper, sliced
Juice from 1 lime
1 tbsp avocado oil (or olive oil)
1 tbsp garlic, minced
½ cup onion, diced
1½ cans (638g) no-salt black
beans, drained (1 can=425g,
½ can=213g)
1 tsp smoked paprika
2 tsp cumin
1 cup water (or more as needed)
Sea salt and pepper, to taste
4 low carb wheat tortillas
1½ cups Mexican cheese blend
Garnish:
Cilantro, chopped
Guacamole
Ingredients:
Quick Refried Black Bean
Quesadillas
Directions:
Yield: 4 quesadillas
1
2
3
4
Set the Carbon Steel Fry Pan on medium-high heat. Once hot, spray with a little avocado oil, then add
the sliced peppers. Allow them to cook in the Fry Pan without stirring for about 2 minutes, or until you
smell and see the peppers begin to sear. Then immediately begin stirring the bell peppers in the
Fry Pan. Squeeze in lime as they sear to help with softening. Remove from the Fry Pan.
Place the Fry Pan back on the heat and reduce it to medium. Once the Fry Pan has cooled down,
add the oil, garlic and onions. Caramelize the onions with the garlic for about 2-3 minutes, or
until the onions have turned brown and translucent.
Add just 1 can of black beans—save the remaining portion—and stir it up. Add in the paprika and
cumin, then begin to mash the beans using the spatula. Continue stirring and mashing until all of the
beans have been mashed up to create a fragrant black bean paste. Reduce the heat in the Fry Pan
if needed.
SLOWLY pour in a few tablespoons of the water, then continue stirring. Continue adding water as
needed until you create a smooth black bean paste.
∙ 10 ∙

6
7
8
∙ 11 ∙
Add the remaining black beans and fold them into the paste. Season to taste with sea salt and
pepper, and garnish with fresh cilantro.
To one side of a whole wheat tortilla, add a small amount of cheese, then the black bean paste,
then some peppers, then a bit of cheese. Fold it closed. Repeat with remaining tortillas
and llings.
Set the Fry Pan on medium-high heat, and once hot, spray it with avocado oil. Add the
quesadilla and cook for about 3 minutes on each side, or until one side becomes golden
brown with crispy edges. Flip and cook on the other side.
Enjoy with fresh guacamole!
5

∙ 12 ∙

1lb (454g) raw Brussels sprouts,
quartered or halved and washed
Pinch of sea salt and pepper
2 tbsp avocado oil (or olive oil)
½ onion, sliced
4 garlic cloves, minced
1½ cups (portobello) mushrooms,
chopped
½ red bell pepper, thinly sliced
and chopped
1½ cups brown rice, cooked
(or low carb cauliower “rice”)
1½ tbsp fresh ginger (or more/
less, to taste)
cup (~2.7oz) low sodium
teriyaki sauce (store-bought or
homemade)
Garnish:
Cilantro, chopped
Optional Protein:
15oz (three 5oz) salmon llets,
center-cut (or chicken)
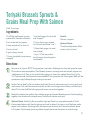
Ingredients:
Teriyaki Brussels Sprouts &
Grains Meal Prep With Salmon
Directions:
Yield: 3 servings
1
2
3
4
Set oven or air fryer to 420°F. (If using salmon, marinate in 4 tablespoons of teriyaki sauce for about
20 minutes at room temperature.) Toss Brussels sprouts in a mixing bowl with sea salt, pepper and
1 tablespoon of oil. Place on a (nonstick) baking tray or in the air fryer basket. Roast (or air fry) for
10-12 minutes until outer leaves become seared BUT the sprouts are still vibrant green. Wait until the
sprouts are nearly halfway through cooking to proceed.
Set the Carbon Steel Fry Pan on medium-high heat. Once hot, add remaining oil, onions, garlic and
mushrooms. Cook until the mushrooms shrink and the onions begin to turn brown and translucent,
about 3-5 minutes. Add the bell pepper and brown rice and mix together.
Reduce the heat to low-medium, then add the ginger and roasted Brussels sprouts. Fold everything
together, then drizzle on the teriyaki sauce. Garnish with cilantro and enjoy!
Optional Protein: Set the Fry Pan on medium-high heat. Once hot, spray with avocado oil. Add
the marinated salmon with the skin side up and cook for about 2 minutes, or until dark sear marks
appear on the salmon. Use tongs to ip the salmon over and cook until desired readiness, about
6-9 minutes. Continuously spoon any leftover teriyaki sauce over the salmon to cook through.
1
/
3
∙ 13 ∙

∙ 14 ∙

1lb fresh crab meat
2 eggs, lightly beaten
2 tbsp low calorie mayo
(I use olive oil mayo.)
1 tbsp mustard (Dijon
mustard if you’re fancy)
2 scallions (green onions),
chopped
1 tbsp The Fit Cook Everyday
blend (or 2 tsp granulated garlic
and 2 tsp onion powder)
1 tbsp The Fit Cook Sea blend
(or 1 tbsp lemon zest)
1 cup (~2oz) baked potato chips
(or kettle chips), crushed
Pinch of sea salt and pepper
3 tbsp avocado oil (or grapeseed
oil or coconut oil)
Sauce:
½ cup low calorie olive oil mayo
(or reduced fat mayo)
3 tbsp Sriracha
Garnish:
Flake sea salt
Ingredients:
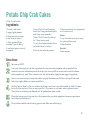
Potato Chip Crab Cakes
Directions:
Yield: 9 crab cakes
1
2
3
4
Set oven to 300°F.
In a bowl, thoroughly mix all the ingredients for the crab cakes together with a spatula. If the
mixture is too wet, add tablespoons of oat (or your choice of) our one at a time until the batter
sticks together by itself. If the mixture is too dry, add another lightly beaten egg or egg white.
Use an ice cream scoop to keep the patties roughly the same size. Roll them into golf-ball sized
balls, then lightly atten to create medallions.
Set the Carbon Steel Fry Pan on medium-high heat, and once hot, add avocado oil. Add 2-3 cakes
to the Fry Pan at a time. Cook on each side for 2-3 minutes, or until each side is golden brown.
Then place on a baking tray. Repeat until all patties have been made.
Place the baking tray in the oven for 6-8 minutes while you whisk together the sauce ingredients
(and clean up the kitchen!).
Once nished with the nal baking, garnish with ake sea salt & enjoy!
∙ 15 ∙
6
5

Creamy Keto Mediterranean
Chicken & Tomato
∙ 16 ∙
1½ lb chicken thighs, fat trimmed
Sea salt and pepper, to taste
1½ tbsp olive oil
1 tbsp garlic, minced
2 tsp dried thyme
1 tsp rosemary
½ cup chicken broth
cup sun-dried tomatoes in oil,
chopped
1 cup heavy cream (or full fat
coconut milk or skim milk)
½ cup grated Parmesan
Garnish:
Parsley, chopped
Ingredients:
Directions:
Yield: 5 servings
1
2
3
4
Set oven to 350°F. Set the Carbon Steel Fry Pan on medium-high heat. Season chicken thighs with
sea salt and pepper.
Once the Fry Pan is hot, add 1 tablespoon oil and chicken thighs. Cook for 3-4 minutes, or until
the edges are seared. Remove from the Fry Pan EVEN IF the chicken has not nished cooking.
Place the Fry Pan back on the heat and reduce the heat to medium. Add the remaining oil, then add
garlic and the dried herbs. Bloom the spices together for 1 minute. Pour in chicken broth, then add
chopped sun-dried tomatoes, and nally the heavy cream.
Stir, then fold in the Parmesan.
Bring to a light simmer. Add the chicken back to the Fry Pan, then bake in the oven for 15 minutes
uncovered.
Allow to slightly cool, and let the sauce thicken before enjoying. Garnish with parsley, and season to
taste with sea salt and pepper. Enjoy!
6
5
1
/
3

∙ 17 ∙

∙ 18 ∙

1½ cups brown rice, uncooked
1½ lb chicken breast, cut into
1-inch chunks
1 tbsp smoked paprika
2 tsp cumin
2 tsp dried oregano
1 tbsp olive oil
1 tbsp garlic
cup onion, chopped
1 green bell pepper, diced
7.5oz (~213g) canned no-salt
black beans, drained
1 large beefsteak tomato, diced
(or 1 can diced tomatoes)
2 cups red enchilada sauce
1 cup water
Sea salt and pepper, to taste
¾ cup shredded cheese (I used a
Mexican cheese blend of cheddar,
Monterey Jack and asadero.)
Garnish:
Cilantro, chopped
Avocado (Remember the
fat calories!)
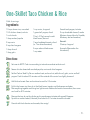
One-Skillet Taco Chicken & Rice
∙ 19 ∙
Ingredients:
Directions:
Yield: 6 servings
1
2
3
4
Set oven to 400°F. Cook rice according to instructions and set aside to cool.
Season chicken breast with smoked paprika, cumin and dried oregano.
Set the Carbon Steel Fry Pan on medium heat, and once hot, add olive oil, garlic, onion and bell
pepper. Cook for about 2-3 minutes until the outside of the onion has slightly browned.
Add chicken breast. Sear and continue to cook for 3-5 minutes.
Fold in the brown rice, then stir in the black beans, tomato, enchilada sauce and water.
Mix everything together and bring to a light simmer. Reduce the heat to low-medium, then cover
and cook for 8-10 minutes.
Remove the top, stir up the chicken and rice and season to taste with sea salt & pepper.
Sprinkle on some cheese (if desired), then bake for 5-7 minutes to melt the cheese.
Garnish with fresh cilantro and avocado, then enjoy!
6
5
1
/
3
7

~3 cups wheat orzo
(or wheat pasta or brown rice)
1 large zucchini,
chopped into 1-inch pieces
1 large yellow squash,
chopped into 1-inch pieces
Olive oil spray
2 tsp Italian seasoning
Sea salt and pepper, to taste
1 tbsp olive oil
1 tbsp garlic, minced
1 cup bell peppers, diced
cup onion, diced
cup Kalamata olives,
chopped (optional)
3 cups marinara sauce (optional)
Garnish:
Parsley, chopped
Parmesan, shredded (a pinch
on each serving; optional)
∙ 20 ∙
1
/
3
1
/
3
Ingredients:
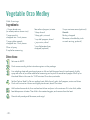
Vegetable Orzo Medley
Directions:
Yield: 5 servings
1
2
3
4
Set oven to 420°F.
Cook orzo according to the instructions given on the package.
Line a baking sheet with parchment paper or foil and add chopped zucchini and squash. Lightly
spray with olive oil, and then add Italian seasoning and a pinch of sea salt and pepper. Mix it up on
the sheet. Bake in the oven for 15-20 minutes. Once done, set aside.
Set the Carbon Steel Fry Pan on medium heat. Add olive oil, garlic, bell peppers, onion and olives.
Cook until onions turn brown and slightly translucent, about 3 minutes.
Add cooked orzo and stir, then reduce heat to low and pour in the marinara. If it is too thick, add a
few tablespoons of water. Then fold in the roasted veggies, and remove from the heat.
Garnish with parsley and Parmesan, and enjoy!
6
5

∙ 21 ∙

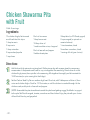
Chicken Shawarma Pita
with Fruit
∙ 22 ∙
1lb chicken thighs, fat trimmed
and sliced into thin strips
1 tbsp turmeric
2 tsp cumin
1 tbsp coriander
2 tsp smoked paprika
1 tsp cloves
Pinch of cinnamon
1 tbsp lemon zest
1½ tbsp olive oil
1 medium white onion, chopped
Pinch of sea salt and pepper
3 whole wheat pitas
3 tbsp tahini (or 2% Greek yogurt)
2 cups arugula (or spinach or
romaine lettuce)
1 vine tomatoes, sliced
½ medium cucumber, sliced
1 serving of fruit (your choice)
Ingredients:
Directions:
Yield: 5 servings
1
2
3
Add chicken thigh pieces to a mixing bowl. Pat the pieces dry with a paper towel to remove any
excess water. In a separate small bowl or cup, mix together the seasoning. Drizzle olive oil on the
chicken thigh pieces, then sprinkle in the seasoning. Mix together thoroughly and let marinate for
10-20 minutes (or up to overnight in the fridge).
Set the Carbon Steel Fry Pan on medium-high heat. Once hot, add 1 tablespoon of olive oil, then
onion and chicken thighs. Cook for 12-15 minutes, or until the chicken is cooked through. As the
chicken cooks, add a pinch of sea salt and pepper.
(NOTE: Assemble the pita at mealtime to avoid the pita bread getting soggy.) Add tahini or yogurt
to the pita. Stuff it with arugula, tomato, cucumber and the chicken. Enjoy the pita with your choice
of fresh fruit like ruby red grapefruit.

∙ 23 ∙

∙ 24 ∙
Using Your Compact Cold Pressed Juicer
CUSTOMER SUPPORT
6am –
6pm 7am –
7pm 8am –
8pm
9am –
9pm
Dash values quality and workmanship and stands behind this
product with our Feel Good Guarantee™. To learn more about
our commitment to quality, visit bydash.com/feelgood.
Hey Hawaii! You can reach our customer service team from 3AM to 3PM.
And also, Alaska, feel free to reach out from 5AM to 5PM.
FEEL GOOD
GUARANTEE™
Our customer support teams in the US and Canada are at your
service Monday - Friday during the times below.
Contact us at 1 (800) 898-6970 or suppor[email protected]

STOREBOUND, LLC – 1 YEAR LIMITED WARRANTY
Your StoreBound product is warranted to be free from defects in material and workmanship for a period of
one (1) year from the date of the original purchase when utilized for normal and intended household use.
Should any defect covered by the terms of the limited warranty be discovered within one (1) year, StoreBound,
LLC will repair or replace the defective part. To process a warranty claim, contact Customer Support at
1-800-898-6970 for further assistance and instruction. A Customer Support agent will assist you by
troubleshooting minor problems. If troubleshooting fails to x the problem, a return authorization will be
issued. Proof of purchase indicating the date and place of purchase is required and should accompany the
return. You must also include your full name, shipping address, and telephone number. We are unable to
ship returns to a PO box. StoreBound will not be responsible for delays or unprocessed claims resulting from
a purchaser’s failure to provide any or all of the necessary information. Freight costs must be prepaid by
the purchaser.
Send all inquiries to [email protected].
There are no express warranties except as listed above.
REPAIR OR REPLACEMENT AS PROVIDED UNDER THIS WARRANTY IS THE EXCLUSIVE REMEDY OF
THE CUSTOMER. STOREBOUND SHALL NOT BE LIABLE FOR ANY INCIDENTAL OR CONSEQUENTIAL
DAMAGES OR FOR BREACH OF ANY EXPRESS OR IMPLIED WARRANTY ON THIS PRODUCT EXCEPT
TO THE EXTENT REQUIRED BY APPLICABLE LAW. ANY IMPLIED WARRANTY OF MERCHANTABILITY OR
FITNESS FOR A PARTICULAR PURPOSE ON THIS PRODUCT IS LIMITED IN DURATION TO THE DURATION
OF THIS WARRANTY.
Some states do not allow the exclusion or limitation of incidental or consequential damages, or limitations
on how long an implied warranty lasts. Therefore, the above exclusions or limitations may not apply to you.
This warranty gives you specic legal rights and you may also have other rights, which vary from state to state.
REPAIRS
Do not attempt to repair the appliance yourself under any circumstances.
Contact Customer Support regarding repairs to the appliance.
TECHNICAL SPECIFICATIONS
Stock#: FDCSP100_20210615_V3
Made in China
∙ 25 ∙
WARRANTY

NOTESNOTES

NOTAS

GARANTÍA LIMITADA DE 1 AÑO - STOREBOUND, LLC
Se garantiza que su producto StoreBound está libre de defectos de materiales y mano de obra por un
período de un (1) año a partir de la fecha de la compra original cuando se utiliza para el uso doméstico
normal y previsto. Si se descubre algún defecto cubierto por los términos de la garantía limitada dentro
de un (1) año, StoreBound, LLC reparará o reemplazará la pieza defectuosa. Para procesar un reclamo de
garantía, comuníquese con Atención al Cliente al 1-800-898-6970 para obtener más ayuda e instrucciones.
Un agente de Atención al Cliente lo ayudará a solucionar problemas menores. Si la solución de problemas
no soluciona el problema, se emitirá una autorización de devolución. Se requiere que adjunte un
comprobante de compra que indique la fecha y el lugar de compra junto con la devolución. También debe
incluir su nombre completo, dirección de envío y número de teléfono. No podemos enviar devoluciones
a un apartado de correos. "StoreBound" no será responsable por retrasos o reclamos no procesados que
resulten de la falta la información necesaria provista por el comprador. Los costos de envío deben ser
pagados por adelantado por el comprador.
Envíe todas las consultas a [email protected].
No existen garantías expresas excepto las enumeradas anteriormente.
LA REPARACIÓN O REEMPLAZO SEGÚN SE INDICA EN ESTA GARANTÍA ES DE USO EXCLUSIVO DEL
CLIENTE. STOREBOUND NO SERÁ RESPONSABLE DE NINGÚN DAÑO INCIDENTAL O CONSECUENTE
O DEL INCUMPLIMIENTO DE CUALQUIER GARANTÍA EXPRESA O IMPLÍCITA DE ESTE PRODUCTO
EXCEPTO EN LA MEDIDA QUE LA LEY LO REQUIERA. CUALQUIER GARANTÍA IMPLÍCITA DE
COMERCIABILIDAD O APTITUD PARA UN PROPÓSITO PARTICULAR DE ESTE PRODUCTO TIENE UNA
DURACIÓN LIMITADA A LA DURACIÓN DE ESTA GARANTÍA.
Algunos estados no permiten la exclusión o limitación de daños incidentales o consecuentes, o limitaciones
sobre la duración de una garantía implícita. Por lo tanto, es posible que las exclusiones o limitaciones
anteriores no se apliquen en su caso. Esta garantía le otorga derechos legales especícos y también puede
tener otros derechos, que varían de un Estado a otro.
REPARACIÓN
Bajo ninguna circunstancia intente reparar este artefacto por sí mismo.
Comuníquese con el servicio de atención al cliente con respecto a reparaciones para este artefacto.
ESPECIFICACIONES TÉCNICAS
N.º de inventario: FDCSP100_20210615_V3
Hecho en China
∙ 25 ∙
GARANTÍA

∙ 24 ∙
Using Your Compact Cold Pressed Juicer
ATENCIÓN AL CLIENTE
6am –
6pm 7am –
7pm 8am –
8pm
9am –
9pm
En Dash, valoramos la calidad y la mano de obra y respaldamos
este producto con nuestra garantía Feel Good Guarantee™ .
Para obtener más información acerca de nuestro compromiso
con la calidad, visite bydash.com/feelgood.
¡Hola Hawái! Puede comunicarse con nuestro equipo de servicio al cliente de 3a.m. a 3p.m.
Y además, Alaska, no dude en comunicarse con nosotros de 5a.m. a 5p.m.
FEEL GOOD
GUARANTEE™
Nuestros equipos de servicio de atención al cliente en EE.UU. y Canadá están
disponibles de lunes a viernes en los siguientes horarios.

∙ 30 ∙

Shawarma de pollo en pita
con fruta
∙ 22 ∙
454g (1lb) de muslo de pollo
sin grasa y cortado en tiras nas
1 cucharada de cúrcuma
2 cucharaditas de comino
1 cucharada de cilantro
deshidratado
2 cucharaditas de pimentón
Paprika en polvo
1 cucharadita de clavo de olor
1 pizca de canela
1 cucharada de cáscara de
limón rallada
1½ cucharada de aceite de oliva
1 cebolla blanca mediana picada
1 pizca de sal de mar y pimienta
3 panes de pitas integrales
3 cucharadas de tahini
(o yogur griego con 2% de grasa)
2 tazas de rúcula (o espinaca o
lechuga romana)
1 paquete de tomates en
rama rebanados
½ pepino mediano rebanado
Una porción de fruta a elección
Ingredientes:
Instrucciones:
Rinde: 5 porciones
1
2
3
Agregue las tiras de pollo en un recipiente para mezclar. Seque las tiras de pollo con una toalla
de papel para eliminar el exceso de agua. En otro recipiente pequeño o taza, mezcle todos los
condimentos. Rocíe aceite de oliva sobre las tiras de pollo y, luego, espolvoree los condimentos.
Mezcle bien y deje marinar durante 10 a 20 minutos (o hasta el otro día en el refrigerador).
Caliente el sartén de acero al carbono a temperatura media-alta. Cuando esté caliente, agregue el
aceite de oliva, luego la cebolla y los muslos de pollo. Cocine por 12 a 15 minutos o hasta que el
pollo esté bien cocido. Mientras se cocina el pollo, añada una pizca de sal de mar y pimienta.
(Prepare la pita a la hora de comer para evitar que el pan de pita se ponga blando.) Agregue tahini
o yogur al pan de pita. Rellene con rúcula, tomate, pepino y el pollo. Disfrute del pan de pita con
su elección de fruta fresca, por ejemplo, pomelo rosa y rojo.

∙ 32 ∙

~3 tazas de pasta Orzo
(trigo) cocida Sustituto: pasta de
trigo, arroz integral
1 zapallo italiano, picado en
cubos de 2,5cm (1pulgada)
1 calabacín amarillo grande, picado
en cubos de 2,5cm (1pulgada)
Aceite de oliva en spray
2 cucharaditas de aliño italiano
Sal de mar y pimienta a gusto
1 cucharada de aceite de oliva
1 taza de pimientos en cubitos
1 cucharada de ajo fresco picado
de taza de cebolla en cubitos
de taza de aceitunas kalamatas
picadas (opcional)
3 tazas de salsa Marinara (opcional)
Guarnición:
Perejil fresco picado
Queso parmesano rallado
(una pizca en cada porción,
opcional)
1
/
3
1
/
3
Ingredientes:
Popurrí de verduras
y pasta Orzo
Instrucciones:
Rinde: 5 porciones
1
2
3
4
Encienda el horno a 216°C (420°F).
Cocine la pasta Orzo según las instrucciones en el paquete.
Coloque las verduras en cubo sobre una bandeja para horno cubierta con papel pergamino o
aluminio. Rocíe un poco de aceite de oliva y agregue el aliño italiano y una pizca de sal de mar
y pimienta. Mezcle todo sobre la bandeja. Hornee durante 15 a 20 minutos. Cuando estén listas,
reserve.
Caliente el sartén de acero al carbono a temperatura media y agregue el aceite de oliva, el ajo,
los pimientos, las aceitunas y la cebolla. Cocine hasta que la cebolla se vea dorada y ligeramente
traslúcida, 3 minutos aproximadamente.
Agregue la pasta Orzo cocida y mezcle, disminuya el calor a temperatura baja y vierta la salsa
Marinara. Si es muy espesa, agregue unas cucharadas de agua. Luego agregue las verduras
asadas. Retire del calor.
Decore y a disfrutar.
6
5
∙ 20 ∙

Un taco de pollo y arroz al sartén
∙ 19 ∙
1 ½ taza de arroz integral crudo
680g (1 ½lb) de pechuga de
pollo picada en cubos de 2,5cm
(1pulgada)
1 cucharada de pimentón
Paprika en polvo
2 cucharaditas de comino
2 cucharaditas de orégano
deshidratado
1 cucharada de aceite de oliva
1 cucharada de ajo
de taza de cebolla picada
1 pimentón verde en cubitos
213g (~7.5oz) frijoles negros
enlatados y sin sal, escurridos
1 tomate Costoluto Fiorentino
(tipo beefsteak) grande en cubitos
(o 1 lata de tomates en cubitos)
2 tazas de salsa para
enchiladas roja
1 taza de agua
Sal de mar y pimienta a gusto
¾ de taza de queso rallado
(yo usé una mezcla de queso
mexicano con queso cheddar,
Monterey Jack y asadero)
Guarnición:
Cilantro fresco picado
Aguacate (recuerde las calorías
de las grasas)
Ingredientes:
Instrucciones:
Rinde: 6 porciones
1
2
3
4
Encienda el horno a 200°C (400°F). Cocine el arroz según las instrucciones y reserve hasta enfriar.
Condimente la pechuga de pollo con pimentón Paprika en polvo, comino y orégano deshidratado.
Caliente el sartén de acero al carbono a temperatura media y, cuando esté caliente, agregue el
aceite de oliva, el ajo, la cebolla y el pimentón. Cocine por 2 a 3 minutos aproximadamente hasta
dorar ligeramente el exterior de la cebolla.
Agregue la pechuga de pollo, selle y cocine por 3 a 5 minutos aproximadamente.
Agregue el arroz integral cocido y, luego, mezcle los frijoles negros, los tomates, la salsa para
enchiladas y el agua. Mezcle todo bien y cocine hasta hervir a fuego lento. Disminuya la temperatura
a media-baja, coloque la tapa y cocine por 8 a 10 minutos.
Retire la tapa, revuelva el pollo y el arroz y condimente con sal de mar y pimienta a gusto.
Agregue queso (si desea) y luego hornee por 5 a 7 minutos hasta derretir el queso.
Decore con cilantro y aguacate fresco y a disfrutar.
6
5
1
/
3
7

∙ 35 ∙

∙ 36 ∙

680g (1 ½lb) de muslo de pollo
sin grasa
Sal de mar y pimienta a gusto
1½ cucharada de aceite de oliva
1 cucharada de ajo picado
2 cucharaditas de tomillo
deshidratado
1 cucharadita de romero
½ taza de caldo de pollo
de taza de tomates
deshidratados al sol en aceite,
picados
1 taza de crema espesa (o
leche de coco entera o leche
descremada)
½ taza de queso
parmesano rallado
Guarnición
Perejil picado
Pollo y tomate cremoso estilo
mediterráneo versión keto
∙ 16 ∙
Ingredientes:
Instrucciones:
Rinde: 5 porciones
1
2
3
4
Encienda el horno a 177°C (350°F). Caliente el sartén de acero al carbono a temperatura
media-alta. Condimente los muslos de pollo con sal de mar y pimienta.
Cuando el sartén esté caliente, agregue 1 cucharada de aceite y los muslos de pollo.
Cocine por 3 a 4 minutos o hasta sellar los bordes. Retire del sartén incluso si el pollo no se
ha terminado de cocinar.
Vuelva a colocar el sartén sobre el fuego y caliente a temperatura media. Agregue el resto del aceite,
agregue el ajo y las hierbas deshidratadas. Mezcle las especias por 1 minuto. Agregue el caldo de
pollo, luego los tomates deshidratados al sol picados y, nalmente, la crema espesa.
Revuelva y luego agregue el queso parmesano.
Cocine hasta hervir a fuego lento. Vuelva a agregar el pollo al sartén, coloque el sartén sin tapa en
el horno y cocine por 15 minutos.
Permita que se enfríe ligeramente y que la salsa se espese antes de comer. Decore y condimente
a gusto con sal de mar y pimienta. ¡Y a disfrutar!
6
5
1
/
3

454g (1lb) de carne
de cangrejo fresca
2 huevos, ligeramente batidos
2 cucharadas de mayonesa
baja en calorías (yo usé mayonesa
de aceite de oliva)
1 cucharada de mostaza (o Dijon si
es sosticado)
2 cebollines (cebolletas) picados
1 cucharada de condimento
Everyday de The Fit Cook
(sustituto: 2 cucharaditas
de ajo granulado + 2 cucharaditas
de cebolla en polvo)
1 cucharada de condimento Sea
de The Fit Cook (sustituto:
1 cucharada de cáscara de
limón rallada)
1 taza (~57g [2oz]) de patatas
fritas o patatas fritas Kettle
horneadas molidas
1 pizca de sal de mar y pimienta
3 cucharada de aceite de
aguacate (o aceite de pepita
de uva o aceite de coco)
Salsa:
½ taza de mayonesa de aceite
de oliva baja en calorías o
mayonesa reducida en grasas
3 cucharadas de Sriracha
Guarnición:
Sal y pimienta molidas
Ingredientes:
Pasteles de cangrejo con patatas fritas
Instrucciones:
Rinde: 9 pasteles de cangrejo
1
2
3
4
Encienda el horno a 150°C (300°F).
En un recipiente, mezcle bien todos los ingredientes del pastel de cangrejo usando una espátula.
Si la mezcla es muy húmeda, agregue una cucharada de harina de avena (o la que sea de su
preferencia) a la vez hasta que la mezcla se mantenga unida por sí misma. Si la mezcla es muy seca,
agregue un huevo o una clara de huevo ligeramente batido.
Use una cuchara para servir helado para que los pasteles tengan un tamaño similar. Forme una bola
del tamaño de una pelota de golf y aplástela ligeramente para crear un medallón.
Coloque el sartén de acero al carbono a temperatura media-alta, cuando esté caliente, añada aceite
de aguacate. Coloque 2 o 3 pasteles en el sartén. Cocine por 2 a 3 minutos en cada lado o hasta dorar
por ambos lados. Luego colóquelos en una bandeja para horno. Repita hasta que haya cocinado
todos los pasteles.
Coloque la bandeja para horno dentro del horno de 6 a 8 minutos mientras preparar la salsa (y limpia
la cocina).
Cuando haya terminado el horneado nal, decore con sal de mar molida y disfrute.
∙ 15 ∙
6
5

∙ 39 ∙

454g (1lb) de repollitos de
Bruselas lavados, crudos y
divididos en mitades o cuartos
1 pizca de sal de mar y pimienta
2 cucharada de aceite de
aguacate o de oliva
½ cebolla en rodajas
4 dientes de ajo molidos
1 ½ taza de hongos Portobello
picados en cubos
½ pimentón rojo, picado en
rodajas nas
1 ½ taza de arroz integral cocido
(o arroz de colior para dietas
bajas en calorías)
1 ½ cucharada de jengibre fresco
(puede agregar más o menos
a gusto)
de taza (~76g [2.7oz]) de
salsa teriyaki reducida en socio,
comprada o casera
Cilantro fresco picado
Proteína opcional:
425g (15oz) de lete de salmón o
tres letes de 140g (5oz), cortado
en el centro (o pollo)
Ingredientes:
Rinde: 3 porciones
1
/
3
Repollitos de Bruselas
y cereales con teriyaki y salmón
Instrucciones:
1
2
3
4
Encienda el horno o la freidora de aire a 216°C (420°F). Agregue los repollitos de Bruselas en
un recipiente para mezclar con sal de mar, pimienta y aceite. Coloque en una bandeja para horno
antiadherente o en la canasta de la freidora de aire. Deje asar (o freír al aire) durante 10 a 12 minutos
hasta que las hojas externas se vean selladas pero los repollitos mantienen un color verde vívido.
Espere a que los repollitos estén a casi la mitad de la cocción para continuar.
Caliente el sartén de acero al carbono a temperatura media-alta. Cuando esté caliente, agregue
el aceite, el ajo, las cebollas y los hongos. Cocinar hasta que los hongos se reduzcan y las cebollas
comiencen a dorarse y volverse translúcidas, unos 3 a 5 minutos. Agregue los pimientos y el arroz
integral cocido y mezcle todo.
Reduzca la temperatura a media-baja y añada el jengibre fresco y las coles de Bruselas asadas.
Mezcle todo junto y rocíe la salsa teriyaki. Decore con cilantro y a disfrutar.
Proteína opcional: Deje marinar el salmón en salsa teriyaki (4 cucharadas) unos 20 minutos a
temperatura ambiente. Caliente el sartén a media-alta temperatura. Cuando esté caliente, rocíe
aceite de aguacate. Añada el salmón con la piel hacia arriba al sartén y cocine durante unos
2 minutos, o hasta que aparezcan marcas oscuras en el salmón. Utilice pinzas para dar voltear el
salmón y cocine durante el tiempo restante, hasta el punto deseado, unos 6 a 9 minutos. Vierta
continuamente la salsa teriyaki sobrante sobre el salmón para que se cocine bien. ∙ 13 ∙

∙ 41 ∙

6
7
8
4
∙ 11 ∙
Lentamente agregue un par de cucharadas de agua y siga revolviendo. Continúe este proceso
según sea necesario hasta crear una pasta suave de frijoles negros.
Agregue los frijoles negros restantes e incorpore en la pasta. Agregue sal y pimienta a gusto
y decore con cilantro fresco.
Arme su quesadilla. En un lado de la tortilla de trigo integral, agregue una pequeña cantidad
de queso, luego los frijoles negros fritos, un poco de pimentones y un poco de queso.
Doble para cerrar. Repita el proceso.
Coloque el sartén a temperatura media-alta, cuando esté caliente, rocíe aceite de aguacate.
Agregue la quesadilla y cocine por 3 minutos aproximadamente en cada lado o hasta que un
lado se vea dorado y con bordes crujientes. Voltéela y cocine el otro lado.
Disfrute con guacamole fresco.
5

Aceite de aguacate en spray
1 pimentón verde en rodajas
1 pimentón rojo en rodajas
Jugo de 1 lima
1 cucharada de aceite de
aguacate (o aceite de oliva)
1 cucharada de ajo picado
½ taza de cebolla en
cubitos pequeños
1 ½ lata (638g) de frijoles negros
sin sal añadida, escurridos
(1 lata = 425g, 1/2 lata = 213g)
1 cucharadita de pimentón
Paprika en polvo
2 cucharaditas de comino
1 taza de agua (o más de
ser necesario)
Sal de mar a gusto
4 tortillas de trigo bajas
en calorías
1 ½ taza de mezcla
de queso mexicano
Ingredientes:
Quesadillas rápidas con frijoles
negros fritos
Instrucciones:
Rinde: 4 quesadillas
1
2
3
Caliente el sartén de acero al carbono a temperatura media-alta. Cuando esté caliente, rocíe un poco
de aceite de aguacate y agregue los pimentones en rodajas. Permita que se calienten en el sartén
sin revolver por 2 minutos aproximadamente o hasta que pueda oler y ver que los pimentones están
comenzando a sellarse. Comience a revolver inmediatamente los pimentones en el sartén.
Agregue el jugo exprimido de una lima mientras se sellan para suavizarlos. Retire del sartén.
Vuelva a colocar el sartén sobre el fuego y caliente a temperatura media. Cuando se haya reducido
la temperatura del sartén, agregue el aceite, el ajo y la cebolla. Caramelice la cebolla y el ajo por 2 a
3 minutos aproximadamente o hasta que la cebolla se vea tostada y traslúcida. Cocine las verduras.
Luego agregue solo 1 lata de frijoles negros, reserve el resto, y revuelva. Agregue los condimentos
y luego muela los frijoles negros con una espátula. Continúe hasta que haya molido todos
los frijoles negros para crear una pasta de frijoles negros aromática. Disminuya la temperatura
del sartén de ser necesario.
∙ 10 ∙

∙ 44 ∙

227g (8oz) de arroz integral (o
“arroz” de colior)
425g (15oz) de frijoles negros
enlatados sin sal añadida
567g (1 lb) de camarones jumbo
crudos (sustituto: pollo, tofu, carne
de vacuno)
Aceite de oliva en spray
2 cucharaditas de chile rojo
en polvo
1 cucharadita de comino
1 pizca de sal de mar y pimienta
1 cebolla blanca pequeña picada
1 pimentón verde picado
1 pimentón rojo picado (o compre
2 pimentones verdes, ya que son
más baratos)
Jugo de 1 lima
¾ de taza de maíz congelado
descongelado
Guarnición (opcional):
Aguacate molido fresco
Cilantro picado
Rodaja de lima
Ingredientes:
Burritos con camarones al plato en
15 minutos Preparación
Instrucciones:
Rinde: 3 porciones
1
2
3
4
Cocine o prepare el arroz integral según las instrucciones en el paquete y reserve.
(Consejo: para ahorrar tiempo, use arroz integral congelado, solo debe calentarlo en el microondas.)
Vierta los frijoles negros en un recipiente apto para microondas y caliente de 2 a 3 minutos.
Rocíe los camarones con un poco de aceite de oliva y, luego, condimente los camarones.
Caliente el sartén de acero al carbono a temperatura media-alta. Cuando esté caliente, rocíe aceite de
oliva. Vierta los pimientos frescos y las cebollas y cocine hasta sellar por 3 a 5 minutos. Mientras se
cocina, exprima y agregue el jugo de lima fresca para caramelizar (y suavizar) las verduras. Cuando la
cebolla se vea traslúcida y los bordes sellados, retire del sartén.
Caliente el sartén a temperatura alta, luego agregue el maíz. Cocine de 2 a 3 minutos, suciente para
descongelar y sellar el exterior del maíz, reserve.
Baje la temperatura del sartén a media y rocíe un poco más de aceite de oliva de ser necesario, luego
agregue los camarones. Cocine de 6 a 8 minutos, hasta que los camarones tengan un color rosa y
blanco, se vean gordos y con bordes sellados.
Arme su plato en recipientes para almacenar comida y distribuya los ingredientes de manera uniforme.
∙ 8 ∙
6
5

Using Your Compact Cold Pressed Juicer
PAGE TITLE
GUÍA DE
RECETAS
Muéstrenos sus productos de The Fit Cook x Dash
en acción y use la etiqueta #tinadash para
obtener una oportunidad de aparecer en
@bydash and @tmencook!

∙ 47 ∙

CUIDADO Y USO
Solo lavar a mano con agua tibia y jabón. Para elimnar los residuos más
difíciles, use bicarbonato de sodio y limpie suavemente. El sartén de
acero al carbono NO es apto para lavavajillas.
No limpie el sartén de acero al carbono con esponjas metálicas u otros
limpiadores fuertes, ya que esto puede rayar o desgastar el acabado.
Aunque el sartén de acero al carbono es duradero, tenga cuidado cuando
lo mueva y guarde, ya que la supercie de esmalte se podría agrietar o
desportillar si se deja caer.
∙ 5 ∙
¡ESPERE!

Using Your Compact Cold Pressed Juicer
PAGE TITLE
Su sartén de acero al carbono es apto para horno y cocina hasta 260°C (500°F).
Cuando precaliente el sartén, comience con calor bajo a medio. El acero al carbono
retiene el calor y funciona mejor cuando se calienta a una temperatura más baja y a
menor velocidad. Cocinar con calor alto por períodos prolongados puede causar que
los alimentos se peguen o se quemen, o podría dañar el revestimiento de esmalte de su
sartén con el tiempo.
No use cepillos ni utensilios de metal cuando cocine con el sartén de acero al carbono.
Estos pueden rayar el acabado de su sartén.
Cuando manipule el sartén de acero al carbono, tenga en cuenta que el mango de
acero inoxidable se puede calentar cuando cocine.
Su sartén de acero al carbono tiene un recubrimiento esmaltado que proporciona una
superficie de cocción naturalmente lisa, sin los químicos adicionales de una cobertura
antiadherente. Gracias a esto, no necesita la misma cantidad de mantequilla o aceite
que normalmente usa al cocinar.
El recubrimiento esmaltado del sartén evita que la superficie se oxide y no necesita
curado. Esto quiere decir que necesita menos cuidados y logra el mismo dorado que
el acero al carbono en bruto.
Using Your Compact Cold Pressed Juicer
ACERCA DE SU SARTÉN DE ACERO AL CARBONO
∙ 4 ∙

Using Your Compact Cold Pressed Juicer
PAGE TITLE
Acerca de su sartén de acero al carbono ...........................4
Cuidado y uso ........................................................................5
Guía de recetas ................................................................ 7-23
Atención al Cliente ..............................................................24
Garantía .................................................................................25
Notas.. .............................................................................. 26-27
SARTÉN DE ACERO AL
CARBONO, 25CM (10")

Text HECK
YEAH!
¿Está listo para cocinar? Comencé la Comunidad Fit Cook
para inspirar a las personas a mantenerse en forma con
recetas saludables, y nunca aburridas. En conjunto con
Dash, me emociona ayudarlo a comer bien y sentirse feliz,
con la ayuda de productos saludables que marquen la
diferencia en su cocina.
¡Veamos!
@tmencook

SARTÉN DE ACERO
AL CARBONO, 25CM (10")
# FDCSP100
-
 1
1
-
 2
2
-
 3
3
-
 4
4
-
 5
5
-
 6
6
-
 7
7
-
 8
8
-
 9
9
-
 10
10
-
 11
11
-
 12
12
-
 13
13
-
 14
14
-
 15
15
-
 16
16
-
 17
17
-
 18
18
-
 19
19
-
 20
20
-
 21
21
-
 22
22
-
 23
23
-
 24
24
-
 25
25
-
 26
26
-
 27
27
-
 28
28
-
 29
29
-
 30
30
-
 31
31
-
 32
32
-
 33
33
-
 34
34
-
 35
35
-
 36
36
-
 37
37
-
 38
38
-
 39
39
-
 40
40
-
 41
41
-
 42
42
-
 43
43
-
 44
44
-
 45
45
-
 46
46
-
 47
47
-
 48
48
-
 49
49
-
 50
50
-
 51
51
-
 52
52


Dash 10″ Carbon Steel Fry Pan FDCSP100 Manual de usuario
- Tipo
- Manual de usuario
en otros idiomas
Artículos relacionados
Otros documentos
-
NuWave PIC TITANIUM El manual del propietario
-
Philips HD9654/99 El manual del propietario
-
Philips HR2357/05 Recipe Booklet
-
-
Revere PC6-14 Instrucciones de operación
-
-
Nostalgia Electrics TSM100 Guía del usuario
-
BLACK+DECKER RC514 El manual del propietario