
ESPAÑOL
ENGLISH
P/N : MMBB0121127
ISSUE 1.0
PRINTED IN KOREA
MODELO: L1100
T•E•L•É•F•O•N•O•G•P•R•S•&•M•M•S
Teléfono GPRS & MMS
MANUAL DE USUARIO
MODELO: L1100
Lea este manual atentamente antes
de hacer funcionar su equipo.
Guárdelo para consultarlo en el futuro.
MANUAL DE USUARIO

ESPAÑOL
Teléfono GPRS & MMS
MANUAL DE USUARIO
MODELO: L1100
Lea este manual atentamente antes
de hacer funcionar su equipo.
Guárdelo para consultarlo en el futuro.

Esta guía del usuario contiene información importante sobre el
uso y el funcionamiento de este teléfono. Lea toda la información
atentamente para conseguir un rendimiento óptimo y evitar
daños o usos inapropiados del teléfono. Cualquier cambio o
modificación que no se apruebe explícitamente en esta guía del
usuario puede anular la garantía de este equipo.
Introducción
Felicidades por la adquisición del avanzado y compacto teléfono
móvil L1100, diseñado para funcionar con la tecnología de
comunicación móvil digital más innovadora.

3
Lea estas sencillas directrices. Infringir las normas puede ser
peligroso o ilegal. En este manual encontrará más información
detallada.
Exposición a energía de radiofrecuencia
Información sobre exposición a ondas de radio y SAR
(Specific Absorption Rate, Tasa específica de absorción)
El teléfono móvil modelo L1100 ha sido diseñado para cumplir la
normativa de seguridad válida en relación con la exposición a las
ondas de radio. Esta normativa se basa en directrices científicas
que incluyen márgenes de seguridad diseñados para garantizar la
seguridad de todo tipo de personas, independientemente de su
edad y estado de salud.
• Las directrices de exposición a ondas de radio utilizan una
unidad de medición conocida como Tasa Específica de
Absorción o SAR. Las pruebas de SAR se llevan a cabo
utilizando un método estandarizado con el teléfono transmitiendo
al nivel más alto de potencia certificado en todas las bandas de
frecuencia utilizadas.
• Aunque puede haber diferencias entre los niveles de SAR de los
diferentes modelos de teléfonos LG, todos han sido diseñados
para ajustarse a las directrices relevantes de exposición a ondas
de radio.
• El límite de SAR recomendado por la ICNIRP (International
Commission on Non-Ionizing Radiation Protection, Comisión
Internacional de Protección contra Radiaciones No Ionizantes),
es de 2 W/kg medido sobre diez (10) gramos de tejido.
• El valor de SAR más alto para este modelo de teléfono evaluado
por DASY4 para uso auditivo es de 0,691 W/kg (10g).
• Información de datos de SAR para residentes en países/regiones
que han adoptado el límite SAR recomendado por el IEEE
(Institute of Electrical and Electronics Engineers, Instituto de
Ingenieros Eléctricos y Electrónicos), que es 1,6 W/kg sobre un
(1) gramo de tejido.
Directrices para un uso seguro y eficaz

4
Cuidado y mantenimiento del producto
Advertencia: utilice sólo baterías, cargadores y accesorios
aprobados para su utilización con este modelo de teléfono
concreto. De lo contrario, puede quedar invalidada cualquier
aprobación o garantía válida para el teléfono, lo que puede
resultar peligroso.
• No desmonte esta unidad. Si es necesario repararla, llévela a un
técnico de servicio cualificado.
• Manténgala alejada de electrodomésticos como la TV, la radio o
el ordenador.
• La unidad debe alejarse de fuentes de calor como radiadores u
hornos.
• No la deje caer.
• No exponga esta unidad a vibraciones mecánicas o golpes.
• El revestimiento del teléfono puede estropearse si se tapa con
cubiertas de vinilo o envoltorios.
• Utilice un paño seco para limpiar el exterior de la unidad. (No
utilice disolventes como el benceno, los diluyentes o el alcohol).
• No exponga esta unidad a humo o polvo excesivo.
• No coloque el teléfono cerca de tarjetas de crédito o billetes de
transporte, podría afectar a la información de las bandas
magnéticas.
• No golpee la pantalla con un objeto punzante, puede estropear el
teléfono.
• No exponga el teléfono a líquidos o humedad.
• Utilice con cuidado los accesorios (p. ej. los auriculares).
No toque la antena si no es necesario.
Directrices para un uso seguro y eficaz

Funcionamiento eficaz del teléfono
Para disfrutar de un rendimiento óptimo con un consumo de
energía mínimo:
• Sostenga el teléfono como lo hace cuando habla con cualquier
otro aparato telefónico. Mientras habla directamente en dirección
al micrófono, incline la antena hacia arriba por encima del
hombro.
• Procure no tocar la antena mientras utiliza el teléfono. Si lo hace,
puede verse afectada la calidad de la llamada e incluso puede
provocar que el teléfono consuma una cantidad de energía
superior a la necesaria y se reduzca la duración de los tiempos
de conversación y espera.
• Si su teléfono móvil admite la opción de infrarrojos, no dirija
nunca el rayo de infrarrojos hacia los ojos de nadie.
Dispositivos electrónicos
Todos los teléfonos móviles pueden generar interferencias que
afectarían a otros dispositivos electrónicos.
• No utilice su teléfono móvil cerca de aparatos médicos sin
solicitar permiso. Evite colocar el teléfono sobre el marcapasos,
es decir no se lo coloque en el bolsillo de la camisa.
• Algunos audífonos pueden verse afectados por teléfonos
móviles.
• También pueden generar pequeñas interferencias en televisores,
radios, ordenadores, etc.
5

Seguridad vial
Compruebe las leyes y normativas locales de utilización de
teléfonos móviles durante la conducción.
• No coja el teléfono móvil para hablar mientras conduzca.
• Dedique toda su atención a la conducción.
• Utilice un kit de manos libres, si lo tiene.
•
Salga de la carretera y aparque antes de hacer llamadas o
responderlas si las condiciones de la conducción así lo requieren.
• La energía de radiofrecuencia puede afectar a algunos sistemas
electrónicos de su vehículo, como la radio del coche o el equipo
de seguridad.
• Si el vehículo dispone de un airbag, no lo obstruya con equipos
inalámbricos portátiles o instalados. Puede causar lesiones
graves debido a un mal funcionamiento.
Derribos
No utilice el teléfono mientras se realizan trabajos de voladura de
explosivos. Respete las restricciones y siga las normativas
vigentes.
Entornos potencialmente explosivos
• No utilice el teléfono en gasolineras. No lo utilice cerca de
productos químicos o combustibles.
• No transporte o almacene explosivos, líquidos o gases
inflamables en el compartimento de su vehículo donde tenga el
teléfono móvil y los accesorios.
En aviones
Los teléfonos móviles pueden provocar interferencias en aviones.
• Apague el teléfono móvil antes de embarcar.
• No lo utilice en tierra sin el permiso de la tripulación.
6
Directrices para un uso seguro y eficaz

Niños
Deje el teléfono en un lugar seguro fuera del alcance de los niños.
Incluye piezas pequeñas que pueden causar asfixia si son
ingeridas.
Llamadas de emergencia
Puede que las llamadas de emergencia no estén disponibles en
todas las redes celulares. Por lo tanto, nunca debe depender
únicamente del teléfono para realizar llamadas de emergencia.
Pregunte a su proveedor de servicios local.
Información y mantenimiento de la batería
• No es necesario descargar por completo la batería antes de
volver a cargarla. A diferencia de otras tecnologías de
almacenamiento, no existe efecto de la memoria que pueda
afectar al rendimiento de la batería.
• Utilice sólo las baterías y cargadores de LG. Los cargadores de
LG han sido diseñados para maximizar la vida de la batería.
• No desmonte o cortocircuite la batería.
• Mantenga limpios los contactos metálicos de la batería.
• Sustituya la batería cuando deje de funcionar correctamente. La
batería puede recargarse centenares de veces antes de que deba
sustituirse.
• Recargue la batería si no se ha utilizado durante mucho tiempo
para maximizar su funcionalidad.
• No exponga el cargador de la batería a la luz directa del sol y no
lo utilice en entornos muy húmedos, como el cuarto de baño.
• No deje la batería en lugares fríos o calientes, podría deteriorar
su rendimiento.
7

8
Su teléfono
...............................................................................
12
• Componentes del teléfono
.....................................................
12
• Características del teléfono
...................................................
13
• Teclas laterales
......................................................................
14
• Información de la pantalla
......................................................
14
Inicio
.........................................................................................
16
• Instalación de la tarjeta SIM y la batería del teléfono
............
16
• Carga de la batería
................................................................
17
• Desconexión del adaptador
...................................................
18
• Encendido y apagado del teléfono
........................................
19
• Códigos de acceso
................................................................
20
Funciones generales
..............................................................
22
• Realización y contestación de llamadas
...............................
22
• Introducción de texto
............................................................
24
• Agenda
.................................................................................
28
• Menú de llamadas entrantes
.................................................
28
• Llamadas múltiples o conferencias
.......................................
30
Árbol de menús
.......................................................................
32
Selección de funciones y opciones
......................................
34
Perfiles [Menú 1]
.....................................................................
35
• Sólo vibración [Menú 1-1]
.....................................................
35
• Silencio [Menú 1-2]
...............................................................
35
• General [Menú 1-3]
...............................................................
35
• Fuerte [Menú 1-4]
.................................................................
35
• Auriculares [Menú 1-5]
..........................................................
35
• Coche [Menú 1-6]
.................................................................
35
índice

9
Registro de llamadas [Menú 2]
..............................................
37
• Llam. perdidas [Menú 2-1]
....................................................
37
• Llam. recibidas [Menú 2-2]
....................................................
38
• Llam. enviadas [Menú 2-3]
....................................................
39
• Borrar llamadas [Menú 2-4]
..................................................
39
• Duración de llamada [Menú 2-5]
...........................................
40
• Coste llamadas [Menú 2-6]
...................................................
40
• Límite del coste de llamadas [Menú 2-7]
..............................
41
• Info GPRS [Menú 2-8]
...........................................................
41
Utilidades [Menú 3]
.................................................................
43
• Alarma [Menú 3-1]
................................................................
43
• Calculadora [Menú 3-2]
.........................................................
43
• Mi carpeta [Menú 3-3]
...........................................................
44
• Conversor de unidad [Menú 3-4]
..........................................
45
• Reloj mundial [Menú 3-5]
......................................................
45
• Grabador de voz [Menú 3-6]
.................................................
46
• Infrarrojos [Menú 3-7]
............................................................
47
Planificador [Menú 4]
..............................................................
48
• Plan [Menú 4-1]
.....................................................................
48
• Nota [Menú 4-2]
....................................................................
49
• Agenda [Menú 4-3]
...............................................................
50
Mensajes [Menú 5]
..................................................................
57
• Mensajes de texto [Menú 5-1]
................................................
57
• Mensajes Multimedia [Menú 5-2]
..........................................
62
• Mensajes de voz [Menú 5-3]
.................................................
68
• Servicios de información [Menú 5-4]
.....................................
68

10
• Plantillas [Menú 5-5]
.............................................................
70
• Estado de memoria [Menú 5-6]
.............................................
72
Cámara [Menú 6]
.....................................................................
73
• Realizar foto [Menú 6-1]
........................................................
73
• Galeria [Menú 6-2]
................................................................
75
Java [Menú 7]
..........................................................................
76
• Juegos [Menú 7-1]
................................................................
77
• Aplicaciones [Menú 7-2]
........................................................
77
• Descargar [Menú 7-3]
...........................................................
78
• Ver información [Menú 7-4]
...................................................
79
Internet [Menú 8]
.....................................................................
80
• Inicio [Menú 8-1]
...................................................................
81
• Favoritos [Menú 8-2]
.............................................................
81
• Mensajes push [Menú 8-3]
....................................................
82
• Perfiles [Menú 8-4]
.................................................................
82
• Ir a URL [Menú 8-5]
..............................................................
83
• Confg. caché [Menú 8-6]
.......................................................
83
• Certificados de seguridad [Menú 8-7]
...................................
84
• Reiniciar perfiles [Menú 8-8]
.................................................
84
• Info WAP [Menú 8-9]
.............................................................
84
Ajustes [Menú 9]
.....................................................................
85
• Fecha y hora [Menú 9-1]
.......................................................
85
• Conf. teléfono [Menú 9-2]
.....................................................
85
• Conf. llamadas [Menú 9-3]
....................................................
87
• Conf. seguridad [Menú 9-4]
..................................................
91
índice

11
• Conf. red [Menú 9-5]
.............................................................
95
• Config. GPRS [Menú 9-6]
.....................................................
96
• Reiniciar config. [Menú 9-7]
..................................................
97
Preguntas y respuestas
.........................................................
98
Accesorios
..............................................................................
101
Datos Técnicos
.....................................................................
102

Componentes del teléfono
Auricular
Pantalla LCD
Tecla de función
izquierda
Tecla de
planificación
Tecla de envío
Tecla Asterisco
Micrófono
Tecla de función
derecha
Tecla de cámara
Tecla de encendido/
apagado
Tecla de borrado
Teclas alfanuméricas
Tecla Almohadilla
Tecla de confirmación
Teclas de navegación
12
Su teléfono

13
Características del teléfono
Tecla Descripción
Teclas de función izquierda/derecha
Cada una de estas teclas realiza la función indicada por
el texto que aparece en la pantalla justo encima de ellas.
Teclas de navegación
Utilícelas para acceder rápidamente a las funciones del
teléfono.
• Tecla de navegación arriba
Si pulsa esta tecla en modo de espera, puede buscar
en la agenda por nombres.
• Tecla de navegación abajo
Permite acceder directamente al menú de grabación de
voz. Si mantiene pulsada esta tecla se activa
automáticamente la grabación de voz.
• Tecla de navegación izquierda
Tecla de acceso rápido al menú Perfil.
• Tecla de navegación derecha
Tecla de acceso directo al menú de mensajes.
Tecla de confirmación
Permite seleccionar opciones de menú y confirmar acciones.
Tecla de envío
Permite confirmar la marcación de un número y aceptar
las llamadas entrantes. También puede acceder
rápidamente a las últimas llamadas entrantes, salientes y
perdidas pulsando esta tecla en modo de espera.
Teclas alfanuméricas
Permiten especificar números, letras y algunos
caracteres especiales.
Tecla de encendido/apagado
Se utiliza para finalizar o rechazar una llamada y para
volver al modo de espera. Manténgala pulsada para
encender/apagar el teléfono.
0
9
< >
S
E
~

14
Teclas laterales
Tecla Descripción
Tecla de borrado
Cada vez que se pulsa, se borra un carácter.
Manténgala pulsada para borrar toda la información.
También se utiliza para volver a la pantalla anterior.
Tecla de cámara
Pulse esta tecla para utilizar la función de cámara.
Permite acceder directamente al modo de cámara.
Tecla de planificación
Tecla que permite acceder directamente al
Organizador.
Tecla Descripción
Teclas laterales
• Controla el volumen del auricular durante una
llamada telefónica.
• Con el teclado cerrado, al pulsar una de estas
teclas aparecen la hora y fecha actuales
alternativamente.
• Controla el volumen del tono de la tecla en modo
de espera con la tapa abierta.
Información de la pantalla
La siguiente tabla describe varios indicadores o iconos que
aparecen en la pantalla del teléfono.
Iconos de la pantalla
Icono Descripción
Indica la intensidad de la señal de red.
Indica que hay una llamada en curso.
Su teléfono
C
Q
T

15
Icono Descripción
Indica que está disponible el servicio de GPRS
(General Packet Radio Service, Servicios Generales
de Radio por Paquetes).
Indica que está utilizando los servicios de otra red
(itinerancia).
Indica que la alarma está activada.
Indica el estado de carga de la batería.
Indica que se ha recibido un mensaje de texto.
Indica que se ha recibido un mensaje de voz.
Indica que ha recibido un mensaje MMS.
Indica que se ha activado el vibrador.
Indica que se ha recibido un mensaje de correo electrónico.
Indica que se ha activado el perfil Fuerte.
Indica que se ha activado el perfil Silencio.
Indica que se ha activado el perfil Auriculares.
Indica que se ha activado el perfil Coche.
Indica que se ha activado el perfil General.
Indica que puede utilizar el servicio de mensajes
push.
Indica que tiene una cita para el día seleccionado en
el Organizador.
Indica que el teléfono está accediendo a WAP.
Indica que está utilizando GPRS.
Indica que está entrando en una página segura.

16
Instalación de la tarjeta SIM y la batería del teléfono
1. Antes de extraer la batería, asegúrese que el teléfono esté
apagado. Pulse la pestaña de liberación de la batería y extraiga
la batería del teléfono en un ángulo de 45 grados.
2. Introduzca la tarjeta SIM en el soporte. Deslice la tarjeta SIM
hacia el interior del soporte de la tarjeta. Asegúrese que la
tarjeta SIM está bien colocada y que el área de contacto dorada
de la tarjeta queda boca abajo. Para extraer la tarjeta SIM,
deslícela en dirección a la zona superior del teléfono y sáquela
del soporte.
Nota
• Si extrae la batería del teléfono mientras está encendido,
puede verse afectado el funcionamiento del mismo.
Nota
• El contacto metálico de la tarjeta SIM se puede dañar
fácilmente si se raya. Manipule con cuidado la tarjeta
SIM. Siga las instrucciones proporcionadas con la
tarjeta SIM.
Para insertar la tarjeta SIM Para extraer la tarjeta SIM
Inicio

17
3. Coloque las lengüetas de la parte inferior de la batería en el
soporte de sujeción. A continuación, presione sobre la mitad
superior de la batería hasta que quede bien colocada (se oirá un
clic).
Carga de la batería
Utilice sólo el cargador suministrado con el teléfono.
1. Con la batería colocada en el teléfono, introduzca el conector del
cargador en la parte inferior del teléfono. Asegúrese que la
flecha del conector apunta hacia la cara frontal del teléfono.
2. Conecte el otro extremo del cargador a la toma de corriente.
Precaución
• El uso de accesorios no autorizados podría dañar el
teléfono e invalidar la garantía.
• No fuerce el conector, podría resultar dañado el
teléfono o el cargador.

18
Desconexión del adaptador
1. Una vez cargado el teléfono, las barras en movimiento del icono
de batería se detienen y aparece “Completo” en pantalla.
2. Desenchufe el cargador y desconecte el cargador del teléfono,
para ello presione las lengüetas grises que hay a ambos lados
del conector y extráigalo.
Nota
• Asegúrese que la batería suministrada está
completamente cargada antes de utilizar el teléfono por
primera vez.
• No extraiga la batería ni la tarjeta SIM mientras está
cargando el teléfono.
• Si la batería no está bien cargada, apague el teléfono,
vuelva a encenderlo con la tecla de encendido y, a
continuación, cargue de nuevo la batería. Intente
recargar la batería después de extraerla y volver a
insertarla.
Inicio
Nota
•
Tras conectar el adaptador de viaje aparecerá el
mensaje “Cargando batería”. Sólo si la batería está
totalmente vacía, la luz del indicador de llamadas se
encenderá y no mostrará el mensaje “Cargando batería”.

19
Encendido y apagado del teléfono
Encendido del teléfono
1. Instale una batería cargada en su
teléfono, si la que tiene no lo está,
instálela en su teléfono y conéctelo a
una fuente de alimentación externa
(cargador de viaje, cargador de
mechero o un kit de manos libres
para el coche).
2. Pulse E durante unos segundos
hasta que se encienda la pantalla
LCD.
3. Según el estado de la opción
Solicitud PIN, al encenderlo podría
pedirle su código PIN.
Apagado del teléfono
1. Pulse E durante unos segundos hasta que se apague la
pantalla LCD.
Nota
• Al igual que sucede con cualquier otro dispositivo de
radio, debe evitar contactos innecesarios con la antena
mientras el teléfono esté encendido.

20
Códigos de acceso
Puede utilizar los códigos de acceso para evitar el uso no
autorizado del teléfono. Estos códigos (excepto los códigos PUK y
PUK2) se pueden cambiar utilizando la función Cambiar código
del [Menú 9-4-5].
Código PIN (4-8 dígitos)
El código PIN (número de identificación personal) protege la tarjeta
SIM del uso no autorizado. El código PIN se proporciona
normalmente con la tarjeta SIM. Si el valor Código PIN se ha
establecido como Activado, el teléfono solicitará este código cada
vez que se encienda. Si por el contrario Código PIN se ha
establecido como Desactivado, el teléfono se conectará
directamente a la red sin solicitar el código PIN.
Código PIN2 (4-8 dígitos)
El código PIN2 que se proporciona con algunas tarjetas SIM, se
necesita acceder a algunas funciones como la Información sobre el
Coste de Llamadas o los Números de Marcación fija. Estas
funciones sólo están disponibles si la tarjeta SIM las soporta.
Código PUK (4-8 dígitos)
El código PUK (clave de desbloqueo del código PIN) es necesario
para cambiar un código PIN bloqueado. El código PUK se puede
proporcionar con la tarjeta SIM. Si no ha sido suministrado o lo ha
perdido, póngase en contacto con el proveedor local del servicio
para solicitarlo.
Código PUK2 (4-8 dígitos)
El código PUK2, proporcionado con algunas tarjetas SIM, es
necesario para cambiar un código PIN2 bloqueado. Si pierde el
código, póngase en contacto con el proveedor del servicio.
Inicio

21
Código de seguridad (4 a 8 dígitos)
El código de seguridad protege al teléfono de usos no autorizados.
Por defecto, su valor es ‘0000’, y se necesita para borrar todas las
entradas del teléfono o para activar la reinicialización de ajustes del
menú. Además, es necesario para habilitar o deshabilitar el bloqueo
del teléfono del mismo a personas no autorizadas. Su valor por
defecto puede ser modificado desde el menú Conf. seguridad.
Contraseña restricción
Cuando se utiliza la función de restricción de llamadas se necesita
una contraseña de restricción. Su operador de red le proporcionará
la contraseña necesaria al contratar este servicio. En la página 92
encontrará más información.

Funciones generales
22
Realización y contestación de llamadas
Realización de una llamada
1. Asegúrese de que el teléfono está encendido.
2. Escriba el número de teléfono con el prefijo local. Para desplazar
el cursor a la posición deseada pulse las teclas de navegación
derecha/ izquierda o pulse la tecla de borrado (C) para borrar
los dígitos de uno en uno.
Mantenga pulsada la tecla de borrado (C) para borrar todo
el número.
3. Pulse la tecla de envío (S) para llamar al número.
4. Para finalizar la llamada, pulse la tecla de finalización (E) o la
tecla de función derecha. También puede finalizar la llamada
cerrando la tapa.
Realización de una llamada con la tecla de envío
1. En el modo de espera, pulse la tecla de envío (S), y
aparecerán los números de teléfono correspondientes a las
últimas llamadas entrantes, salientes y perdidas.
2. Seleccione el número deseado utilizando la tecla de navegación
arriba/abajo.
3. Pulse S.
Realización de llamadas internacionales
1. Mantenga pulsada la tecla 0 para introducir el prefijo
internacional. El carácter “+” selecciona automáticamente el
código de acceso internacional.code.
2. Introduzca el prefijo del país, el prefijo local y el número de
teléfono.
3. Pulse S.

23
Finalización de una llamada
Cuando haya finalizado la llamada, pulse la tecla (E).
Realización de una llamada con la agenda
Puede guardar los nombres y números de teléfono que utiliza con
más frecuencia en la tarjeta SIM y/o en la memoria del teléfono,
que funcionan como Agenda. En ese caso, podrá marcar cualquier
número buscando el nombre deseado en la Agenda. Para obtener
más información sobre la función de Agenda, consulte las páginas
50- 56.
Ajuste del volumen
Si desea ajustar el volumen del auricular durante una llamada,
utilice los teclas laterales ( ). Pulse el botón lateral superior para
subir el volumen y el botón lateral inferior para bajarlo.
Contestación de una llamada
Cuando reciba una llamada, el teléfono sonará y aparecerá en
pantalla el icono del teléfono parpadeando. Si es posible identificar
a la persona que llama, aparecerá su número de teléfono (el
nombre o foto, si está guardado en la agenda).
1. Para responder una llamada, abra la tapa del teléfono.
2. Para finalizar una llamada, cierre la tapa o presione la tecla E.
Nota
Puede responder una llamada mientras utiliza la
Agenda o cualquier otra opción de menú.

24
Modo T9
Este modo le permite introducir palabras con sólo una
pulsación por letra. Cada tecla del teclado tiene más de una
letra. El modo T9 compara automáticamente sus pulsaciones
con un diccionario interno para determinar cuál es la palabra
correcta y, por lo tanto, requiere menos pulsaciones que el
modo ABC tradicional. También se conoce como texto
predictivo.
Modo ABC
Este modo le permite introducir letras pulsando la tecla
rotulada con la letra pertinente. Deberá pulsar la misma tecla
una, dos, tres o cuatro veces hasta que aparezca en pantalla
la letra deseada.
Modo 123 (modo numérico)
Introduzca números utilizando una pulsación por número.
Para pasar al modo 123 en un campo de entrada de texto,
pulse la tecla # hasta que aparezca el modo 123.
Potencia de señal
Puede comprobar la potencia de la señal mediante el indicador de
señal ( ) que aparece en la pantalla LCD del teléfono. La
potencia de señal puede variar, especialmente en el interior de
edificios, si le ocurre esto, colóquese cerca de una ventana para ver
si mejora la potencia de señal.
Introducción de texto
Puede introducir caracteres alfanuméricos utilizando el teclado del
teléfono. Por ejemplo, para guardar nombres en la agenda, escribir
un mensaje, crear un saludo personal o planificar eventos en el
calendario es necesario introducir texto.
El teléfono dispone de los siguientes métodos de entrada de texto.
Funciones generales

25
Cambio del modo de entrada de texto
1. Cuando esté en un campo que permita introducir caracteres,
aparecerá el indicador de modo de entrada de texto en la
esquina inferior derecha de la pantalla LCD.
2. Cambie el modo de entrada de texto pulsando #. Puede
consultar en qué modo de entrada de texto se encuentra
actualmente en la esquina inferior derecha de la pantalla LCD.
Uso del modo T9
El modo de entrada de texto predictivo T9 le permite introducir
palabras fácilmente con un mínimo de pulsaciones. Al pulsar cada
tecla, el teléfono muestra los caracteres que cree que está
introduciendo basándose en el diccionario incorporado. También
puede añadir palabras nuevas al diccionario. A medida que se
añaden palabras nuevas, la palabra va cambiando para mostrar la
que más se acerque dentro de las palabras que hay en el
diccionario.
1. En el modo de entrada de texto predictivo T9, introduzca las
letras para formar palabras pulsando las teclas que hay de la
2 a la 9. Pulse una tecla por letra.
– La palabra cambia a medida que se introducen nuevas letras.
Ignore la palabra que aparece en pantalla hasta que esté
completa.
– Si la palabra sigue siendo incorrecta, pulse una o varias veces
la tecla de navegación para consultar el resto de opciones de
palabras.
Ejemplo
•
Pulse 2 2 6 7 6 7 para introducir Campos.
• Pulse 2 2 6 7 6 7 [tecla de navegación
abajo] para escribir Cansor.

26
– Si no encuentra la palabra deseada en la lista de opciones de
palabras, añádala utilizando el modo ABC.
– Puede seleccionar el idioma del modo T9. Pulse la tecla de
función izquierda [Opción] y, a continuación, seleccione
Idiomas T9. O pulse la tecla * para cambiar el idioma.
Seleccione el idioma deseado para el modo T9. También
puede desactivar el modo T9 seleccionando T9 desactivado.
La configuración activada por defecto en el teléfono es el
modo T9.
2. Introduzca toda la palabra antes de editar o borrar alguna
pulsación.
3. Complete cada palabra con un espacio pulsando la tecla 0.
Para borrar letras, pulse C. Mantenga pulsada la tecla C
para borrar palabras completas.
Uso del modo ABC
Utilice las teclas de la 2 a la 9 para introducir el texto
deseado.
1. Pulse la tecla rotulada con la letra deseada:
– Si pulsa una vez aparece la primera letra
– Si pulsa dos veces aparece la segunda letra
– Etc.
2. Para insertar un espacio, pulse una vez la tecla 0. Para
eliminar letras, pulse la tecla C Mantenga pulsada la tecla
C para borrar toda la pantalla.
Nota
• Para salir del modo de entrada de texto sin guardar el
texto introducido, pulse E. El teléfono vuelve al
modo de espera.
Funciones generales

27
Tecla
Caracteres en orden de visualización
Mayúscula Minúscula
1 . , - ¿ ? ¡ ! @ 1 . , - ¿ ? ¡ ! @ 1
2 A B C Á Ã Ç 2 a b c á ã ç 2
3 D E F É 3 d e f é 3
4 G H I Í 4 g h i í 4
5 J K L 5 j k l 5
6 M N O Ó Ñ 6 m n o ó ñ 6
7 P Q R S 7 p q r s 7
8 T U V Ú Ü 8 t u v ú ü 8
9 W X Y Z 9 w x y z 9
0 Espacio Espacio
Uso del modo 123 (modo numérico)
El modo 123 le permite introducir números en un mensaje de texto
(por ejemplo, un número de teléfono).
Aviso
• Consulte la siguiente tabla para obtener más
información sobre los caracteres disponibles utilizando
las teclas alfanuméricas.

Agenda
Puede guardar números de teléfono y los nombres
correspondientes en la memoria de la tarjeta SIM.
Además, puede guardar hasta 255 números y nombres en la
memoria del teléfono. La tarjeta SIM y el teléfono se utilizan del
mismo modo en el menú Agenda.
Menú de llamadas entrantes
El teléfono proporciona diversas funciones de control que puede
utilizar durante una llamada. Para acceder a estas funciones
durante una llamada, pulse la tecla de función izquierda [Opcs.].
Durante una llamada
El menú que se muestra en la pantalla del teléfono durante una
llamada es distinto al menú principal por defecto que aparece en el
modo de espera. Las opciones se describen a continuación.
Realización de una segunda llamada
Puede buscar un número de la agenda y marcarlo para realizar otra
llamada, pulse la tecla de función derecha y seleccione Buscar.
Para guardar el número marcado en la agenda durante una
llamada, pulse la tecla de función derecha y, a continuación,
seleccione Añadir nuevo.
Conmutación entre dos llamadas
Para conmutar entre dos llamadas, pulse la tecla de función
izquierda y seleccione Alternar llamada.
28
Funciones generales

Responder a una llamada
Para responder a una llamada cuando el teléfono suena, pulse la tecla
S.
Si recibe una llamada mientras está hablando en otra, sonará un pitido
en el auricular y la pantalla mostrará una indicación para informarle de
que hay una segunda llamada en espera. Esta función, denominada
llamada en espera, sólo está disponible si lo admite la red. Para
obtener información sobre cómo activar y desactivar esta función,
consulte Llamada en espera [Menú 9-3-4].
Si está activada la función Llamada en espera, puede retener la
primera llamada y responder a la segunda si pulsa S [Enviar] o
selecciona [Responder] y luego elige Descolgar y responder.
Puede finalizar la llamada actual y responder a la llamada en espera si
selecciona S [Menú] y luego selecciona Finalizar y responder.
Rechazo de una llamada entrante
Puede rechazar una llamada entrante sin responderla pulsando la
tecla E.
Si está en mitad de una llamada, puede rechazar una llamada
entrante pulsando la tecla de función izquierda [Menú] y
seleccionando Conferencia/Rechazar o pulsando la tecla E.
Silenciar el micrófono
Puede desactivar el micrófono durante una llamada presionando la
tecla [Menú] y Silencio desactivado. El micrófono puede ser
activado de nuevo seleccionando Silencio activado. Si tiene
activada la opción de silenciar el micrófono, la persona que le llama
no podrá oírle, pero usted a ella sí.
Activación de tonos DTMF durante una llamada
Los tonos DTMF permiten al teléfono utilizar una centralita
automatizada. Para activar los tonos DTMF durante una llamada,
pulse la tecla de función izquierda y seleccione Activar DTMF. Los
tonos DTMF se pueden desactivar del mismo modo.
29

Llamadas múltiples o conferencias
El servicio de llamadas múltiples o conferencias le permite
mantener una conversación con más de una persona de forma
simultánea si su operador de red admite esta función. Sólo se
puede establecer una llamada múltiple si hay una llamada activa y
una llamada en espera y se responde a las dos llamadas. Una vez
establecida la llamada, la persona que la ha establecido puede
añadir, desconectar o excluir (es decir, apartar una llamada de la
conferencia sin cortarla) llamadas. Encontrará todas estas opciones
en el menú de llamadas entrantes. El número máximo de personas
admitido en una llamada múltiple es cinco. Una vez iniciada la
llamada, usted tendrá el control y sólo usted podrá agregar más
personas.
Realización de una segunda llamada
Para realizar una segunda llamada mientras está ya en otra, entre
el segundo número y pulse la tecla S. Al establecer la segunda
llamada, la primera llamada se pone en espera automáticamente.
Para alternar entre dos llamadas, pulse la tecla de función izquierda
y seleccione Alternar llamada.
Establecimiento de una conferencia
Ponga en espera una llamada y, mientras la llamada activa esté en
curso, pulse la tecla de función izquierda y seleccione
Conferencia/Unir.
Retención de una conferencia
Pulse la tecla de función izquierda y, a continuación, seleccione
Conferencia/Llamada en espera.
Activación de una conferencia en espera
Pulse la tecla de función izquierda y, a continuación, seleccione
Conferencia/Unir.
30
Funciones generales

Adición de llamadas a la conferencia
Para añadir una llamada a una conferencia existente, pulse la tecla
de función izquierda y seleccione Conferencia/Unir.
Muestra de los números que componen una conferencia.
Para desplazarse por los números de los que realizan la llamada en
la pantalla del dispositivo, utilice las teclas de navegación hacia
arriba/abajo.
Realización de una llamada privada durante una
conferencia
Para tener una llamada privada con uno de los participantes de la
conferencia, muestre el número del participante con el que desea
hablar y pulse la tecla de función izquierda. Seleccione Conferencia
/Privada para poner en espera el resto de llamadas.
Finalización de una conferencia
Se puede desconectar de la conferencia al participante que se
muestra actualmente en pantalla pulsando la tecla E. Para
finalizar una conferencia, pulse la tecla de función izquierda y
seleccione Conferencia/Finalizar llamada múltiple. Para finalizar
todas las llamadas activas o en espera, pulse la tecla de función
izquierda y seleccione Conferencia/Finalizar todas.
31

1 Perfiles
1 Sólo vibración
2 Silencio
3 General
4 Fuerte
5 Auriculares
6 Coche
2 Registro de llamadas
1 Llam. perdidas
2 Llam. recibidas
3 Llam. enviadas
4 Borrar llamadas
5 Duración de llamada
6 Coste llamadas
7 Límite del coste de
llamadas
8 Info GPRS
3 Utilidades
1 Alarma
2 Calculadora
3 Mi carpeta
4 Conversor de unidad
5 Reloj mundial
6 Grabador de voz
7 Infrarrojos
4 Planificador
1 Plan
2 Nota
3 Agenda
5 Mensajes
1 Mensajes de texto
2 Mensajes Multimedia
(MMS)
3 Mensajes de voz
4 Servicios de información
5 Plantillas
6 Estado de memoria
32
Árbol de menús

33
6 Cámara
1 Realizar foto
2 Galeria
7 Java
1 Juegos
2 Aplicaciones
3 Descargar
4 Ver información
8 Internet
1 Inicio
2 Favoritos
3 Mensajes push
4 Perfiles
5 Ir a URL
6 Confg. caché
7 Certificados de seguridad
8 Reiniciar perfiles
9 Info WAP
9 Ajustes
1 Fecha y hora
2 Conf. teléfono
3 Conf. llamadas
4 Conf. seguridad
5 Conf. red
6 Config. GPRS
7 Reiniciar config.
0 Servicio SIM
Este menú depende de la
tarjeta SIM y de los servicios
de la red.

34
El teléfono ofrece un conjunto de funciones que le permiten
personalizar el teléfono. Estas funciones se disponen en menús y
submenús, a los que puede acceder a través de las dos teclas de
función < y >. Se pueden personalizar todos los perfiles
excepto Solo Vibración y Silencio.
Las funciones de las teclas de función varían según el contexto
actual; el rótulo que aparece en la línea inferior de la pantalla justo
encima de cada tecla indica su función actual.
Pulse la tecla de
función izquierda
para acceder al
menú disponible.
Pulse la tecla de
función derecha para
activar la acción
correspondiente.
Selección de funciones y opciones

35
Perfiles [Menú 1]
En el menú Perfiles puede ajustar y personalizar los tonos del
teléfono para diferentes situaciones, entornos o grupos de usuarios.
Existen seis perfiles preconfigurados: Sólo vibración, Silencio,
General, Fuerte, Auriculares y Coche. Se pueden personalizar
todos los perfiles excepto Solo Vibración y Silencio.
Pulse la tecla Menú (<) y seleccione Perfiles utilizando las teclas
de navegación.
Modificación del perfil [Menú 1-x-1]
1. Aparece un listado de perfiles.
2. Desplácese hasta el perfil que desea activar y pulse la tecla de
función izquierda [Selec.] o la tecla OK.
3. A continuación, seleccione Activar.
Personalización de perfiles – Personalizar [Menú 1-x-2]
Desplácese hasta el perfil deseado. Pulse la tecla OK o la tecla de
función izquierda y seleccione Personalizar. Se abrirá la opción de
configuración de perfil. Establezca la opción deseada.
Tipo de alerta para llamadas entrantes: permite seleccionar el
tipo de alerta (Timbre, Vibrador, etc) para las llamadas entrantes.
Tono del timbre de llamada: se utiliza para seleccionar un timbre
de llamada. Desplácese por la lista utilizando las teclas de
navegación arriba/abajo. Puede oír los distintos timbres antes de
seleccionarlos.
Volumen del timbre:
sirve para establecer el volumen del timbre de
llamada.
Tipo aviso mensajes:
establece el tipo de alerta para los mensajes.
Tono de mensaje: se utiliza para seleccionar el timbre de alerta de
los mensajes.

Tono teclado: selecciona el tono del teclado.
Volumen del sonido del teclado: establece el volumen del timbre
del teclado.
Tono de tapa: Defina el tono que sonará al abrir y cerrar la tapa.
Volumen efectos sonido: establece el volumen de los efectos de
sonido.
Activar/desactivar tono: establece el volumen del timbre de
llamada al encender/apagar el teléfono.
Responder auto.: (sólo en perfil Coche). Puede activar la función
de responder automáticamente. Seleccione la hora antes de
responder automáticamente.
Personalización de perfiles – Renombrar [Menú 1-x-3]
Puede cambiar el nombre de un perfil y asignarle el nombre que
desee (excepto para los perfiles Sólo vibración, Auriculares y
Coche).
1. Para cambiar el nombre de un perfil, desplácese hasta el perfil
deseado, pulse la tecla OK o la tecla de función izquierda y
seleccione Renombrar.
2. Introduzca el nombre deseado y pulse la tecla OK o la tecla de
función izquierda [Guard.].
36
Perfiles [Menú 1]

37
Registro de llamadas [Menú 2]
Puede consultar el registro de llamadas perdidas, recibidas y
enviadas sólo si la red admite la identificación de llamadas o CLI
(Calling Line Identification) en el área de servicio.
El número y el nombre (si está disponible) aparecen junto con la
fecha y la hora en la que se realizó la llamada. También puede ver
la duración y el coste de las llamadas.
Pulse la tecla Menú (<) y seleccione Registro de llamadas
utilizando las teclas de navegación.
Llam. perdidas [Menú 2-1]
Esta opción le permite ver las últimas 10 llamadas que no se han
respondido. Tras pulsar la tecla de función izquierda [Opcs.],
también puede:
•
Ver el número, si está disponible, y llamar o guardarlo en la agenda.
•
Introducir un nombre nuevo para el número y guardarlo en la agenda.
• Enviar un mensaje a este número.
• Eliminar la llamada de la lista.
• Puede editar los nombres guardados en la agenda.
Nota
• Puede eliminar todas las llamadas de la lista utilizando
el menú Borrar llamadas recientes.
Nota
• Sólo podrá editar un número por nombre. Con otro tipo
de números (p. ej., FDN, SDN) no se pueden editar
nombres.
(Depende del servicio de red)

Llam. recibidas [Menú 2-2]
Esta opción le permite ver las últimas 10 llamadas entrantes. Tras
pulsar la tecla de función izquierda [Opcs.], también puede:
• Ver el número, si está disponible, y llamar o guardarlo en la
agenda.
• Introducir un nombre nuevo para el número y guardarlo en la
agenda.
• Enviar un mensaje a este número.
• Eliminar la llamada de la lista.
• Puede editar los nombres guardados en la agenda.
38
Nota
• Puede eliminar todas las llamadas de la lista utilizando
el menú Borrar llamadas recientes.
Nota
• Sólo podrá editar un número por nombre. Con otro tipo
de números (p. ej., FDN, SDN) no se pueden editar
nombres.
Registro de llamadas [Menú 2]
(Depende del servicio de red)

Llam. enviadas [Menú 2-3]
Esta opción le permite ver las últimas 10 llamadas salientes
(llamadas o intentos de llamada). Con la tecla [Opcs.], también
puede:
• Ver el número, si está disponible, y llamar o guardarlo en la
agenda.
• Introducir un nombre nuevo para el número y guardarlo en la
agenda.
• Enviar un mensaje a este número.
• Eliminar la llamada de la lista.
• Puede editar los nombres guardados en la agenda.
Borrar llamadas [Menú 2-4]
Permite borrar la lista de llamadas perdidas, recibidas o efectuadas.
También puede borrar todas las listas de llamadas
simultáneamente seleccionando Todas las llamadas.
39
Nota
• Puede eliminar todas las llamadas de la lista utilizando
el menú Borrar llamadas.
Nota
• Si FDN está activado, no aparecerá el menú
[Editar nombre].

Duración de llamada [Menú 2-5]
Permite ver la duración de las llamadas entrantes y salientes.
Puede consultar la duración de cada llamada en la parte inferior de
la pantalla desplazándose con las teclas de navegación
arriba/abajo. La tecla [OK] o la tecla de función izquierda [Rest.]
reinicia el contador de llamadas de la llamada seleccionada. Para
evitar que se restablezca de forma accidental, se le solicitará que
introduzca el código PIN2.
• Última llamada: duración de la última llamada.
• Llam. recibidas: duración de las llamadas entrantes.
• Llam. enviadas: duración de las llamadas salientes.
• Todas las llamadas: duración total de todas las llamadas
realizadas o recibidas desde que se restableció por última vez el
contador.
Coste llamadas [Menú 2-6]
Este servicio de red le permite consultar el coste de la última
llamada y el coste total de las llamadas. El coste de la llamada
aparece en la parte inferior de la pantalla LCD. Para restablecer el
coste de las llamadas, pulse la tecla de función izquierda [Rest.] o
la tecla OK. Deberá introducir el código PIN2.
40
Aviso
•
El tiempo real que el proveedor del servicio factura por las
llamadas puede variar según las funciones de que
disponga la red, el redondeo aplicado en la facturación, etc.
Aviso
•
El coste real que el proveedor del servicio factura por las
llamadas puede variar según las funciones de que
disponga la red, el redondeo aplicado en la facturación, etc.
Registro de llamadas [Menú 2]
(Depende del servicio de red)

41
Límite del coste de llamadas [Menú 2-7]
• Límite consumo: permite limitar el coste de las llamadas al
número de unidades de gasto o unidades monetarias
seleccionadas. Puede realizar o recibir una llamada hasta el límite
de coste especificado. Puede cambiar el límite de coste de la
llamada tras introducir el código PIN2.
• Establecer tarifa: permite establecer el tipo de moneda y el
precio por unidad. Póngase en contacto con los proveedores de
servicios para obtener los precios por unidad. Para seleccionar la
moneda o unidad en este menú, debe introducir el código PIN2.
• Mostrar auto.: Este servicio de red le permite ver
automáticamente el coste de las últimas llamadas. Si está
establecido en Activar, puede ver el coste de la última llamada al
finalizar la llamada.
Info GPRS [Menú 2-8]
Puede comprobar el volumen de datos transferidos en la red a
través de GPRS. Además, puede ver la cantidad de tiempo que
está conectado. (GPRS son las siglas de General Packet Radio
Service, Servicios Generales de Radio por Paquetes.)
• Información WAP
Puede comprobar el volumen de datos y el tiempo transcurrido
utilizando WAP. En el menú seleccionado, pulse la tecla de
función izquierda [Rest.] o la tecla OK para reiniciar el contador.
Nota
•
Una vez utilizadas todas las unidades, no se pueden
realizar más llamadas, excepto de emergencia. Según el
tipo de tarjeta SIM que utilice, tendrá que introducir el
código PIN2 para establecer un límite de coste de las
llamadas.

42
• Dispositivo externo
GPRS con un dispositivo externo, como por ejemplo un PC.
• Datos totales
Puede comprobar el volumen total de datos intercambiados a
través de WAP y de un dispositivo externo.
Registro de llamadas [Menú 2]
(Depende del servicio de red)

43
Utilidades [Menú 3]
Pulse la tecla Menú (<) y seleccione Utilidades utilizando las
teclas de navegación.
Alarma [Menú 3-1]
Permite hacer que suene la alarma a una hora concreta. Tiene las
siguientes opciones disponibles:
Activado
Establezca la hora de la alarma.
1. Entre en el menú.
2. Seleccione [Activo] mediante la tecla de navegación
izquierda/derecha.
3. Introduzca la hora de la alarma mediante las teclas numéricas.
4. Con las teclas de navegación izquierda/derecha, seleccione una
de las opciones de alarma: Una vez, Diario, Semanal y
Mensual.
5. Sección de melodía de la alarma: seleccione la melodía deseada
para la alarma utilizando las teclas de navegación arriba/abajo.
Desactivado
Desactiva la alarma.
Calculadora [Menú 3-2]
Con esta función podrá utilizar el teléfono como calculadora. La
calculadora proporciona las funciones aritméticas básicas: suma,
resta, multiplicación y división. (Puede introducir números con un
máximo de dos decimales.)

44
Ajustes [Menú 3]
Utilización de la calculadora
1. Introduzca el primer número mediante las teclas numéricas.
2. Pulse la tecla de navegación correspondiente para seleccionar
una función matemática.
3. Para calcular el resultado, pulse la tecla de función izquierda
[Resul.] o la tecla OK.
4. Tras realizar el cálculo, pulse la tecla de función izquierda [Rest.]
para volver al estado inicial.
Mi carpeta [Menú 3-3]
Dentro de este menú hay 3 opciones: Imagen, Animación y Sonido.
Puede obtener imágenes, animaciones o sonidos del sitio WAP,
MMS o SMS. Una vez que haya visto el contenido recibido, puede
enviarlo (vía SMS o MMS) editarlo o eliminarlo. Puede definir una
en la carpeta animación como papel tapiz. Si se trata de sonidos,
puede establecer el sonido deseado como timbre de llamada.
Imagen [Menú 3-3-1]
Animación [Menú 3-3-2]
Sonido [Menú 3-3-3]
Estado de memoria [Menú 3-3-4]
Nota
• Para eliminar los errores y borrar la pantalla, pulse la
tecla C. Para introducir una coma decimal, pulse la
tecla *. Para introducir un signo negativo, pulse la
tecla
#
.

45
Conversor de unidad [Menú 3-4]
Permite convertir cualquier medida de una unidad a otra. Hay
cuatro tipo de medidas: Longitud, Superficie, Peso y Volumen.
1. Seleccione uno de estos cuatro tipos de unidades pulsando la
tecla de función izquierda [Unidad].
2. Desplácese hacia la unidad actual pulsando la tecla de
navegación abajo.
3. Seleccione la unidad que desea convertir utilizando las teclas de
navegación derecha/izquierda.
4. Desplácese hacia la sección de la unidad de conversión
pulsando la tecla de navegación abajo.
5. Seleccione la unidad a la que la desea convertir utilizando las
teclas de navegación derecha/izquierda.
6. Introduzca los números mediante las teclas numéricas. La
conversión se calcula automáticamente.
Reloj mundial [Menú 3-5]
Puede consultar la hora actual del huso horario GMT (Greenwich
Mean Time, Hora del meridiano de Greenwich) y las 59 ciudades
principales de todo el mundo, utilizando las teclas de navegación
izquierda/derecha.
En pantalla aparece el nombre de la ciudad, la fecha y la hora
actual.Para seleccionar la zona horaria en la que está ubicado,
proceda del siguiente modo:
1. Seleccione la ciudad correspondiente a su zona horaria
pulsando las teclas de navegación izquierda/derecha una o
varias veces. Aparecerán la fecha y hora locales.
Nota
•
Puede introducir un número decimal pulsando la tecla
*
.

46
2. Si desea cambiar la hora visualizada en modo de espera a la
hora seleccionada, pulse la tecla de función izquierda [Opcs.]. A
continuación, seleccione Ajustar.
Grabador de voz [Menú 3-6]
Permite grabar hasta 3 notas de voz de un máximo de 30 segundos
cada una. Con la tecla de función izquierda [Opción] podrá
reproducir o eliminar una nota grabada o grabar una nueva nota de
voz.
Grabar [Menú 3-6-1]
1. Mantenga pulsada la tecla en el modo de espera.
2. Una vez iniciada la grabación, se muestra el mensaje
“Grabando...” y el tiempo restante.
3. Cuando acabe de grabar, pulse la tecla de función izquierda
[Guard.].
• Reproducir: permite reproducir todas las notas grabadas,
empezando por la más reciente. En pantalla aparece la fecha y
la hora en que se grabó la nota.
• Eliminar: permite eliminar una nota concreta.
• Grabar nuevo: Permite grabar una nota nueva.
• Eliminar todo: permite eliminar todas las notas. Pulse la tecla
de función izquierda [Sí] para confirmar.
Ver lista [Menú 3-6-2]
El teléfono muestra el título de la nota que ha registrado pulsando
D en modo de espera. Puede reproducir o borrar la memoria de
voz grabada.
Ajustes [Menú 3]
Nota
•
El estado de la red puede afectar el ajuste de la zona
horaria de cada ciudad en el menú Reloj mundial.

47
Infrarrojos [Menú 3-7]
Esta opción le permite enviar o recibir datos/faxes a través del
puerto de infrarrojos. Para utilizar una conexión por infrarrojos:
1. Instale el controlador de módem para recibir o enviar los
datos/fax.
2. Instale el software de marcación de red proporcionado por su
proveedor de red o una aplicación de fax para recibir fax en el
ordenador.
3.
Configura y activa un Puerto infrarrojos compatible IrDA en tu Pc.
4. Active la opción de infrarrojos en el teléfono; el símbolo
aparece en el lateral derecho inferior de la pantalla.
5. Llame al número de servicio de red que le ha proporcionado el
proveedor de servicios.
Si no detecta ningún tipo de comunicación entre su teléfono y el
ordenador transcurridos 30 segundos tras la activación de la
función, se desactivará automáticamente.
Para obtener más información, póngase en contacto con su
proveedor de red.
Nota
•
En el modo de espera puede acceder directamente al menú
del grabador de voz pulsando la tecla de navegación abajo.
• Si todas las posiciones de notas están llenas, deberá
eliminar una nota anterior antes de guardar una nueva.
Nota
•
PC Sync es un programa para intercambiar datos entre el
ordenador y el teléfono mediante un cable de datos. Por lo
tanto, si desea utilizar esta función, deberá comprar el
correspondiente kit de accesorios. Para obtener más
información, puede usar el archivo de Ayuda de PC Sync que
está disponible en el CD.

48
Planificador [Menú 4]
Pulse la tecla Menú (<) y seleccione Planificador utilizando las
teclas de navegación.
Plan [Menú 4-1]
Al acceder a este menú aparece un calendario. En la fecha actual
aparecerá un cursor cuadrado. Puede desplazarse a cualquier otra
fecha con las teclas de navegación. Si aparece una fecha en un
color distinto, significa que se ha especificado un organizador o una
nota para esa fecha. Esta función le recuerda sus organizadores y
notas. El teléfono emitirá un tono de alarma si así se establece.
Ver [Menú 4-1-1]
Muestra la nota del día seleccionado. Pulse [Opcs.] para eliminar o
editar la nota seleccionada.
Editar [Menú 4-1-2]
Permite editar la nota.
Eliminar [Menú 4-1-3]
Permite eliminar la nota.
Añadir nueva [Menú 4-1-4]
Puede editar un máximo de 30 caracteres y crear hasta 20 notas.
Calendario [Menú 4-1-5]
Permite volver al calendario.
Planificar tono [Menú 4-1-6]
Al activar esta opción, el teléfono emitirá un tono de alarma al llegar
a la fecha y hora planificados.

Ver todo [Menú 4-1-7]
Muestra las notas que hay para todos los días. Utilice las teclas de
navegación arriba/abajo para desplazarse por el listado.
Ir a fecha [Menú 4-1-8]
Permite ir directamente a una fecha concreta. Introduzca la fecha
utilizando las teclas numéricas y las teclas de navegación
arriba/abajo.
Eliminar último [Menú 4-1-9]
Puede eliminar las notas pasadas que ya se hayan notificado.
Eliminar todo [Menú 4-1-10]
Permite eliminar todo. Deberá confirmar esta acción.
Nota [Menú 4-2]
Puede escribir, editar y eliminar la nota de una fecha concreta.
1. Desplácese hasta la opción Notas.
2. Pulse la tecla de función izquierda [Añadir].
3. Introduzca la nota y pulse la tecla de función izquierda [Opcs.].
Dispone de las siguientes opciones.
• Guardar: le permite guardar la nota.
• Idiomas T9: seleccione el idioma T9 que utilizará en la nota.
• Salir del editor: le permite salir del editor de notas.
Una vez que haya introducido una nota en el teléfono, puede
acceder al menú Opciones siguiendo los siguientes pasos:
1. Seleccione una nota.
2. Pulse la tecla de función izquierda [Selec.].
3. Pulse la tecla de función izquierda [Opcs.].
49

Las opciones disponibles son:
• Editar: puede editar la nota seleccionada.
• Eliminar: elimina la nota seleccionada.
• Añadir nueva: permite añadir una nota nueva.
• Eliminar todo: elimina todas las notas.
Agenda [Menú 4-3]
En la memoria de la tarjeta SIM puede guardar números de teléfono
y sus correspondientes nombres. Además, en la memoria del
teléfono puede almacenar hasta 255 números y nombres.
- Pulse la tecla de función izquierda [Menú] en el modo de espera y
seleccione Planificador ➝ Agenda.
- O bien, pulse la tecla de función derecha [Nombr.] en el modo de
espera.
Buscar [Menú 4-3-1]
1. Para buscar un nombre en la agenda tiene tres opciones:
seleccionar en el menú: Planificador ➝ Agenda y, a
continuación Buscar, o en modo de espera, pulsar la tecla
programable derecha [Nombr.] y Buscar o bien en modo de
espera, pulse la tecla de navegación hacia arriba. Se le pedirá
que introduzca el nombre que desea buscar y, conforme vaya
escribiendo, irán apareciendo los que coinciden.
2. Cuando haya encontrado el nombre deseado, puede llamar al
número correspondiente pulsando la tecla [enviar]. O bien, pulse
la tecla izquierda [Opcs.] para acceder a una de las siguientes
opciones.
• Ver detalle: permite ver los detalles del nombre seleccionado.
• Editar: edita el nombre, número, grupo, E-mail, nota y Fotos de
la agenda.
• Eliminar: elimina la entrada de la agenda.
• Nuevo SMS: Permite escribir un mensaje de texto para el
nombre seleccionado.
50
Planificador [Menú 4]

• Nuevo Multimedia: permite escribir un mensaje multimedia
para el nombre seleccionado.
• Copiar: permite copiar la entrada de la agenda de la tarjeta
SIM en la memoria del teléfono o viceversa.
• Voz: graba el nombre de la entrada de agenda seleccionada
para marcación por voz.
• Número principal: si se han guardado más de dos números,
muestra la lista completa de números.
Añadir nueva [Menú 4-3-2]
Puede añadir una entrada de agenda con esta función.
Existen dos memorias: la memoria del teléfono y la memoria SIM.
Para seleccionar la memoria, acceda a Config. memoria
[Menú 4-3-8-1].
La capacidad de memoria del teléfono es de 255 entradas y se
pueden introducir hasta 20 caracteres por nombre. La capacidad de
memoria de la tarjeta SIM depende del tipo de tarjeta.
1. En el menú de modo, seleccione Planificador ➝ Agenda, o en
modo de espera, pulse la tecla programable derecha [Nombr.].
2. Desplácese para resaltar Añadir nueva y pulse [Selec.].
3. Puede añadir nuevas entradas de agenda a la memoria SIM o a
la memoria del teléfono.
• Nuevas entradas a la memoria de la SIM.
Puede introducir un nombre y un número y seleccionar el
grupo requerido. (Depende de la tarjeta SIM.)
• Nuevas entradas a la memoria del teléfono.
Puede introducir un nombre, números, una dirección de correo
electrónica y una nota y seleccionar el grupo pertinente.
51
Nota
• Puede añadir una fotografía por contacto sólo si están
almacenados en la memoria del teléfono.

Marcación rápida [Menú 4-3-3]
Puede asignar cualquiera de las teclas de la 2 a la 9 a una
entrada de la lista de nombres. Podrá llamar a un número pulsando
la tecla [Enviar] de la lista de marcación rápida o pulsando la tecla
izquierda [Opcs.] y seleccionando Llamar Si pulsa la tecla asociada
durante 2 o 3 segundos podrá llamar directamente.
1. Seleccione Planificado ➝ Agenda, o en modo de espera, pulse
la tecla programable derecha [Nombr.].
2. Desplácese hasta Marcación rápida, y pulse la tecla [OK].
3. Para añadir un número de Marcación rápida, seleccione
<Vacío> y, a continuación pulse la tecla multifuncional izquierda
[Añadir]. Puedes buscar y seleccionar el nombre y presionar
[seleccionar] a través de la agenda.
4. Puede cambiar o borrar un número de Marcación rápida, hacer
una llamada, escribir un mensaje de texto, o un mensaje
multimedia simplemente presionando la tecla multifuncional
izquierda [Opciones]:
• Cambiar: Cambia la lista de miembros.
• Eliminar: Borra la lista de miembros.
• Llamar: Llama al número seleccionado.
• Nuevo SMS: Utilice esta opción para escribir un mensaje de
texto al nombre seleccionado.
• Nuevo Multimedia: Utilice esta opción para escribir un
mensaje multimedia al nombre seleccionado.
52
Planificador [Menú 4]

Lista de voz [Menú 4-3-4]
Puede asignar una etiqueta de voz a una contacto de tu agenda
para activar la marcación por voz.
Podrá llamar al número pulsando la tecla [Enviar] o la tecla
izquierda [Opcs.] y seleccionando Llamar.
1. En el menú de modo, seleccione Planificador ➝ Agenda o, en
modo de espera, pulse la tecla programable derecha [Nombr.].
2. Desplácese a la Lista de voz y pulse [OK].
3. Para agregar un número, pulse la tecla izquierda [Añadir]. Puede
buscar el nombre en la agenda y seleccionarlo pulsando
[Selec.]. Después de seleccionar el número, realice la grabación.
4. Podrá reproducir, cambiar o eliminar una grabación, realizar una
llamada, agregar nuevas listas de grabaciones o eliminarlas
todas pulsando la tecla programable izquierda [Opcs.].
Aparecerán los siguientes submenús.
• Reproducir: reproduce la etiqueta de voz asignada.
• Cambiar: cambia la etiqueta de voz asignada.
• Eliminar: elimina la etiqueta de voz asignada.
• Llamar: efectúa una llamada al número seleccionado.
• Añadir nueva: añade un número de teléfono nuevo para
marcación por voz.
•
Eliminar todo: elimina todos los números de marcación por voz.
53
Nota
• Puede introducir hasta 10 números de teléfono de
marcación por voz.

Grupos usuarios [Menú 4-3-5]
Existen 6 grupos predefinidos y un grupo adicional denominado
Otros.
1. En el menú de modo, seleccione Planificador ➝ Agenda o, en
modo de espera, pulse la tecla programable derecha [Nombr.].
2. Desplácese hasta Grupos de llamada, presione la tecla [OK], y
le aparecerán los grupos disponibles: Familia, VIP, Amigos,
Compañeros, Grupo 1, Grupo 2 y Otros.
3. Seleccione el nombre del grupo con el que desee trabajar
pulsando la tecla [Opción]. Aparecerá los siguientes submenús,
salvo para Otros.
• Lista miembros: muestra la lista de miembros del grupo.
• Tono de timbre de grupo: permite seleccionar el tono de
timbre que se utilizará cuando se reciba una llamada telefónica
de una persona del grupo.
• Icono de grupo: permite seleccionar el icono gráfico que se
visualizará cuando se reciba una llamada de una persona del
grupo.
• Añadir miembro: añade un miembro al grupo.
• Eliminar miembro: elimina un miembro del grupo.
• Renombrar: asigna un nombre nuevo al grupo.
Copiar todo [Menú 4-3-6]
Permite copiar/mover las entradas guardadas en la memoria de la
tarjeta SIM a la memoria del teléfono y viceversa.
• De SIM a teléfono : permite copiar las entradas de la tarjeta SIM
al teléfono.
• De teléfono a SIM : permite copiar las entradas del teléfono a la
tarjeta SIM.
54
Planificador [Menú 4]

55
Dispone de las siguientes opciones.
– Mantener original : al copiar se guardan los números de
marcación originales.
– Eliminar original : al copiar se borrarán los números de
marcación originales.
Eliminar todo [Menú 4-3-7]
Puede eliminar todas las entradas de la tarjeta SIM, del teléfono, y
de la lista de voz. Para todos ellos, salvo para la lista de voz, será
necesario introducir el código de seguridad.
Ajustes [Menú 4-3-8]
• Config. memoria
Puede elegir la memoria de la tarjeta SIM o del teléfono para la
función Agenda. Si selecciona Variable, cuando añada una
entrada, el teléfono le pedirá que indique en que memoria debe
guardarse.
• Mostrar fotos
Para definir la lista de fotografías, utilice las opciones Ver fotos o
Ver lista cuando busque en la agenda. Si selecciona Ver fotos, la
lista de búsqueda se mostrará con fotografías.

Información [Menú 4-3-9]
• N° marcación servicio (depende de la SIM)
Permite ver la lista de SDN (Service Dialing Numbers, Números
de Marcación de Servicio) asignados por el operador de la red (si
los admite la tarjeta SIM). Entre estos números se incluyen los de
emergencias, consultas telefónicas y buzón de voz.
1. Seleccione la opción N° marcación servicio.
2. Se mostrarán los nombres de los servicios disponibles.
3. Utilice las teclas de navegación arriba/abajo para seleccionar
un servicio.
• Estado de memoria
Puede comprobar el estado de la memoria de la tarjeta SIM y del
teléfono.
• Número propio (depende de la SIM)
Le permite visualizar el número de teléfono de su tarjeta SIM.
56
Planificador [Menú 4]

57
Mensajes [Menú 5]
Pulse la tecla Menú (
<
) y seleccione Mensajes utilizando las
teclas de navegación.
Mensajes de texto [Menú 5-1]
Su teléfono recibe mensajes de notificación de buzón de voz y
mensajes SMS (Short Message Service, Servicio de Mensajes Cortos).
Los mensajes del buzón de voz y los mensajes SMS son servicios
de red. Para obtener más información, póngase en contacto con su
operador de red.
Cuando aparece el icono , significa que tiene un mensaje en el
buzón de voz. Cuando aparece el icono, significa que ha
recibido un mensaje de texto. Cuando la memoria de mensajes está
llena, empieza a parpadear el icono y no permite recibir nuevos
mensajes. Utilice la opción Eliminar del menú Bandeja entrada para
eliminar mensajes. Podrá recibir los mensajes SMS que no le
hayan llegado cuando vuelva a tener espacio suficiente en la
memoria de mensajes.
Escribir [Menú 5-1-1]
Puede escribir y editar mensajes de texto.
1. Escriba el mensaje. Para obtener información sobre cómo
escribir el mensaje, consulte las páginas 24 a 27
(Introducción de texto).
2. Cuando acabe de escribir el mensaje, pulse la tecla de función
izquierda [Opcs.] para seleccionar la opción deseada entre las
siguientes:
• Enviar a número: Introduzca el número, selecciónelo de la
agenda o del listado de números recientes. Podrá enviar el
mensaje a un máximo de 5 números de teléfono a la vez. Pulse
la tecla de función izquierda [Opcs.] y aparecerán las
siguientes opciones:
– Enviar (sólo si se ha especificado un número de teléfono)
– Números recientes
– Buscar

58
Mensajes [Menú 5]
• Guardar como borrador: le permite guardar el mensaje para
poder enviarlo más tarde.
• Idiomas T9: le permite seleccionar el idioma del texto
predictivo T9.
• Borrar texto: le permite borrar todo el texto.
• Salir: le permite salir del menú Escribir.
3. También puede enviar datos adjuntos con el mensaje pulsando
la tecla de función derecha [Adjunt] mientras escribe el mensaje.
• Símbolo: le permite añadir caracteres especiales.
• Imagen: le permite enviar y recibir mensajes de texto que
contengan imágenes. El teléfono incluye varias imágenes
preconfiguradas que puede sustituir por otras recibidas de
otras fuentes.
• Animación: le permite incorporar animación a un mensaje
mediante el servicio EMS (Enhanced Messaging Service,
Servicio de Mensajes Mejorado). Puede seleccionar cualquiera
de las 15 animaciones del teléfono.
• Sonido: si están disponibles, puede añadir sonidos a un
mensaje corto.
• Plantilla de texto: le permite utilizar plantillas de texto ya
establecidas en el teléfono.
• Número de teléfono: puede añadir números de teléfono al
mensaje.
• Firma: le permite insertar su firma.
Bandeja entrada [Menú 5-1-2]
Le permitirá ver los mensajes de texto recibidos y sus contenido.
Los mensajes aparecerán ordenados por fecha.
Los mensajes recibidos se muestran ordenados por fecha.
Pulse la tecla menú y seleccione Mensajes ➞ Mensaje de texto ➞
Bandeja entrada.

59
Cada mensaje recibido tiene las siguientes opciones disponibles.
Pulse la tecla de función izquierda [Opcs.].
• Responder
Responde al mensaje recibido.
• Enviar
Reenvía un mensaje recibido a otros destinatarios.
• Devolver llamada
Llama al teléfono de la persona que ha enviado el mensaje.
Nota
• El teléfono distingue los mensajes SIM del resto de
mensajes, refiriéndose por mensajes SIM a aquellos
que se guardan en la memoria de la tarjeta SIM.
Icono Descripción
Mensaje SIM leído
Mensaje SIM no leído
Mensaje leído
Mensaje no leído
Informe de entrega leído
Informe de entrega no leído

60
Mensajes [Menú 5]
• Extraer
Extrae imágenes, sonidos, páginas Web de texto o direcciones de
correo electrónico del mensaje. Estos se guardarán en Mi carpeta,
en la Agenda o en Favoritos.
• Eliminar
Elimina el mensaje seleccionado de la bandeja de entrada.
• Ver información
Muestra información más detallada sobre el mensaje
seleccionado.
Bandeja salida [Menú 5-1-3]
Este menú le permite ver la lista y el contenido de los mensajes
enviados y verificar si la transmisión ha sido satisfactoria.
Dispone de las siguientes opciones.
• Enviar
Reenvía el mensaje actual a otros destinatarios.
• Eliminar
Elimina el mensaje seleccionado de la bandeja de salida.
• Ver información
Muestra información más detallada sobre el mensaje
seleccionado.
Icono Descripción
Mensaje SIM enviado
Mensaje enviado

61
Borrador [Menú 5-1-4]
En este menú puede ver la lista de mensajes guardados como
borrador. Desplácese por la lista utilizando las teclas de navegación
arriba/abajo. Una vez seleccionado un mensaje, tendrá las
opciones siguientes:
• Enviar
Envía el mensaje seleccionado a otros destinatarios.
• Eliminar
Elimina el mensaje seleccionado.
Ajustes [Menú 5-1-5]
Este menú le permite configurar la información de SMS por defecto.
• Tipos mensajes
Establece el tipo de mensaje por defecto (Texto o Voz). La red
puede convertir los mensajes en el formato seleccionado.
• Período validez
Define el tiempo durante el que se guardarán los mensajes de
texto en el centro SMS mientras se intenta enviarlos al
destinatario. Los valores posibles son: 1 hora, 12 horas, 1 día, 1
semana y el máximo autorizado por su operador de red.
• Acuse recibo
Activa o desactiva la función de informe. Si la función esta activada,
la red le comunicará si el mensaje ha sido entregado o no.
• Responder con mismo centro de servicios
Permite al destinatario de su mensaje SMS enviarle una
respuesta a través de su centro de mensajes (siempre que la red
ofrezca este servicio).
• Centro SMS
Guarda o cambia el número de su centro SMS cuando se envían
mensajes de texto. Debe obtener este número de su proveedor de
servicios.

62
Mensajes [Menú 5]
• Conf. portadora
Selecciona GPRS o GSM. Póngase en contacto con su operador
de red o proveedor de servicios para obtener información
relacionada con la definición de una portadora, la tarifa de precios
y la velocidad de conexión.
Eliminar todo [Menú 5-1-6]
Puede eliminar todos los mensajes de la memoria de mensajes o
sólo los mensajes que se hayan leído.
Mensajes Multimedia (MMS
*
) [Menú 5-2]
Un mensaje multimedia puede contener texto, imágenes y/o sonido.
Esta función sólo puede utilizarse si la admite su operador de red o
proveedor de servicios. Sólo pueden recibir y enviar mensajes
multimedia aquellos dispositivos que ofrecen funciones de correo
electrónico o mensajes multimedia compatibles.
Escribir [Menú 5-2-1]
1. Escriba el título del mensaje y, a continuación, pulse la tecla OK
o la tecla programable izquierda.
2. Escriba el mensaje de texto. Con la tecla de función derecha
puede introducir símbolos, números e iconos emotivos. O utilizar
el modo de entrada T9. Tras introducir el mensaje de texto,
pulse la tecla de función izquierda [Realizado].
3. Incorpore una imagen y/o sonido. Para pasar a la sección
siguiente utilice las teclas de navegación arriba/abajo.
4. Puede incorporar una diapositiva desplazando el cursor sobre
, pulsando la tecla OK o la tecla de función izquierda [Selec.].
También puede incorporar una diapositiva utilizando la tecla de
función derecha [Menú].
5. Pulse la tecla de función derecha [Menú] para acceder a las
siguientes opciones:
* La disponibilidad de los servicios dependen del operador local.

63
• Enviar: permite introducir varios números y direcciones de
correo electrónico.
• Vista previa: muestra el mensaje multimedia que desea
enviar.
• Guardar: guarda el mensaje multimedia como borrador o
plantilla.
• Eliminar: borra el mensaje MMS.
• Duración diapositiva: permite definir la duración de la
presentación.
• Formato diapositiva: alinea el contenido del mensaje a la
derecha, izquierda, arriba o abajo.
• Añadir diapositiva: le permite añadir una diapositiva antes o
después de la diapositiva actual.
•
Borrar diapositiva
: elimina la diapositiva seleccionada.
Bandeja entrada [Menú 5-2-2]
Recibirá una alerta cuando reciba un mensaje nuevo. Los mensajes
se almacenarán en la bandeja de entrada identificándolos mediante
iconos. Para obtener más información, consulte la siguiente
descripción de iconos:
Si aparece el mensaje “No hay espacio para mensajes”, puede
liberar espacio eliminando mensajes, fotos, sonidos o aplicaciones.
Icono Descripción
Mensajes multimedia leídos
Mensajes multimedia no leídos
Mensajes multimedia notificados como leídos
Mensajes multimedia notificados como no leídos

64
Mensajes [Menú 5]
• Detención contador
El menú de detención del contador aparece cuando se recibe un
mensaje que incluye varias imágenes. Normalmente, las
imágenes se muestran automáticamente por orden. Sin embargo,
si selecciona este menú, puede ver la siguiente imagen pulsando
manualmente la tecla de función izquierda [Sig.].
• Diapositiva anterior
Muestra la diapositiva anterior.
• Volver a reproducir
Vuelve a reproducir los mensajes multimedia.
• Borrar mensaje
Elimina el mensaje actual.
• Responder todos
Responde a todos los destinatarios.
• Reenviar
Reenvía el mensaje seleccionado a otros destinatarios.
• Guardar mensaje
Guarda un mensaje multimedia como borrador o plantilla.
• Guardar elementos
Extrae imágenes o sonidos. Se guardarán en Mi carpeta o en la
Agenda.
• Detalles
Muestra información sobre los mensajes recibidos, la dirección del
remitente, el asunto (sólo para mensajes multimedia), la fecha y
hora del mensaje, el tipo de mensaje y el tamaño del mensaje.

65
Bandeja salida [Menú 5-2-3]
Utilícela para ver los mensajes enviados así como el estado de la
entrega de cada uno de ellos.
• Detención contador
Normalmente, las imágenes aparecen en forma de presentación
automática de diapositivas. Sin embargo, si selecciona este menú,
puede ver la siguiente imagen pulsando manualmente la tecla de
función izquierda [Sig.].
• Diapositiva anterior
Muestra la diapositiva anterior.
• Volver a reproducir
Vuelve a reproducir el mensaje actual.
• Borrar mensaje
Elimina el mensaje actual.
• Reenviar
Reenvía el mensaje actual a otros destinatarios.
• Guardar mensaje
Guarda un mensaje multimedia como borrador o plantilla.
• Guardar elementos
Guarda elementos como imágenes, sonido y datos adjuntos a un
mensaje.
Icono Descripción
Enviado

66
Mensajes [Menú 5]
• Detalles
Muestra información sobre los mensajes de la bandeja de salida.
El asunto (sólo para mensajes multimedia), la fecha y hora del
mensaje, el tipo de mensaje y el tamaño del mensaje.
• Responder
Responde al mensaje actual.
• Responder a todos
Responde a todos los destinatarios del mensaje seleccionado.
Borrador [Menú 5-2-4]
Este menú le permite preconfigurar hasta cinco mensajes
multimedia que se utilizan con frecuencia. Este menú muestra la
lista de mensajes multimedia preconfigurados y ofrece las
siguientes opciones:
• Enviar
Permite escribir múltiples direcciones de correo electrónico y
miembros.
• Vista previa
Permite ver el mensaje multimedia en formato borrador.
• Guardar
Guarda mensajes multimedia como borrador o plantilla.
• Eliminar
Elimina el mensaje.
• Ajustes
Establece la duración de la presentación de diapositivas o alinea
el contenido del mensaje a la derecha, izquierda, arriba o abajo.

67
• Añadir diapositiva
Le permite añadir una diapositiva antes o después de la
diapositiva actual.
• Borrar diapositiva
Elimina la diapositiva seleccionada.
Ajustes [Menú 5-2-5]
Este menú le permite configurar la información por defecto de los
mensajes multimedia.
Dispone de las siguientes opciones:
• Duración diapositiva
Establece la duración de cada diapositiva.
• Alineación
Establece la alineación de los mensajes.
• Período de validez
Establece durante cuánto tiempo se guardarán los mensajes en el
servidor de red.
• Descarga automática
Activado: recibirá automáticamente mensajes multimedia.
Confirmar: Le pide confirmación para descargar los mensajes.
Desactivado: pospone la descarga de mensajes.
• De centro de mensajes
Sirve para introducir la dirección de un servidor MMS para utilizar
el servicio MMS.
• Perfiles
Consulte la página 82 para más información.

68
Mensajes [Menú 5]
Mensajes de voz [Menú 5-3]
Este menú le permite acceder rápidamente a su buzón de voz
(si existe en la red). Antes de utilizar esta función, debe introducir el
número del servidor de voz proporcionado por su operador de red.
Cuando llega un mensaje de voz nuevo, se muestra el símbolo
correspondiente en la pantalla. Compruebe los detalles del servicio
con su proveedor de servicios de red para configurar el teléfono
según corresponda.
Escuchar mensajes de voz [Menú 5-3-1]
Tras seleccionar esta opción, pulse la tecla de función izquierda
[OK] para escuchar los mensajes de voz. También puede mantener
pulsada la tecla 1 en modo de espera para escuchar los
mensajes de voz.
Centro de buzón voz [Menú 5-3-2]
Puede introducir y establecer el número del buzón de voz.
Servicios de información [Menú 5-4]
Los mensajes del servicio de información son mensajes de texto
que envía la red a los usuarios de teléfonos móviles. Proporcionan
información general sobre distintos temas, como por ejemplo,
previsión del tiempo, tráfico, taxis, farmacias y bolsa.
Cada tipo de información va asociada a un número que puede
proporcionarle el operador de red. Cuando reciba un mensaje del
servicio de información, un mensaje emergente indicará que se ha
recibido un mensaje nuevo, o aparecerá el mensaje del servicio de
información directamente.
En el modo de espera, se dispone de las siguientes opciones para
visualizar los mensajes del servicio de información.

69
Leer [Menú 5-4-1]
Puede ver la lista de mensajes de difusión recibidos, así como su
contenido.
Recibir [Menú 5-4-2]
Utilice esta opción para activar o desactivar la recepción de los
mensajes de difusión.
Alerta [Menú 5-4-3]
Active o desactive la alerta para un nuevo mensaje de difusión.
Mostrar auto. [Menú 5-4-4]
Si activa esta opción, todos los mensajes de difusión que reciba se
visualizarán automáticamente.
Idiomas [Menú 5-4-5]
(depende de la red y la suscripción)
Esta opción le permite seleccionar el idioma en el que se
visualizarán los mensajes de difusión que reciba su teléfono. Si
utiliza todos los idiomas que admite el teléfono, seleccione
Automático del final de la lista.
Asuntos [Menú 5-4-6]
(depende de la red y la suscripción)
Para crear temas nuevos, pulse la tecla de función izquierda
[Opción] y, a continuación, seleccione Añadir nuevo. Si ya existen
temas, puede desactivarlos, editarlos o borrarlos utilizando la tecla
de función izquierda [Opcs.].

70
Mensajes [Menú 5]
Plantillas [Menú 5-5]
En la lista existen mensajes predefinidos. Puede ver y editar los
mensajes de plantilla o crear mensajes nuevos. Existen tres tipos
de plantillas disponibles: Texto, Multimedia y Tarjetas de visita.
Texto [Menú 5-5-1]
• Editar
Utilice esta opción para escribir un mensaje nuevo o editar el
mensaje de plantilla seleccionado en la lista de plantillas de texto.
• Eliminar
Elimina el mensaje de plantilla seleccionado de la lista.
• Enviar SMS
Envía el mensaje de plantilla seleccionado por SMS.
• Enviar vía mensaje multimedia
Envía el mensaje de plantilla seleccionado por MMS.
• Añadir nueva
Crea una plantilla nueva.
Multimedia [Menú 5-5-2]
• Enviar
Envía la plantilla multimedia a distintos números y direcciones de
correo electrónico.
• Vista previa
Muestra el mensaje multimedia en formato borrador.

71
• Guardar
Guarda mensajes multimedia como borrador o plantilla.
• Eliminar
Elimina la plantilla multimedia.
• Duración diapositiva
Defina la duración de la presentación.
• Formato diapositiva
Alinee el contenido del mensaje a la derecha, izquierda, arriba o
abajo.
• Añadir diapositiva
Le permite añadir una diapositiva antes o después de la
diapositiva actual.
• Borrar diapositiva
Elimina la diapositiva seleccionada.
• Añadir imagen
Permite añadir una imagen antes o después de la imagen actual.
• Añadir melodía
Permite añadir melodía antes o después de la melodía actual.
Firma [Menú 5-5-3]
Esta opción le permite crear su propia Tarjeta de visita indicando el
nombre, el número de teléfono móvil, el número de la oficina, el
número de fax y la dirección de correo electrónico.
• Editar
Utilice esta opción para escribir un mensaje nuevo o editar la
tarjeta de visita seleccionada.

72
Mensajes [Menú 5]
• Eliminar
Utilice esta opción para eliminar la tarjeta de visita seleccionada.
• Enviar SMS
Envía la tarjeta de visita seleccionada por SMS.
• Enviar vía mensaje multimedia
Envía la tarjeta de visita seleccionada por MMS.
Estado de memoria [Menú 5-6]
Permite comprobar el estado actual de la memoria para SMS y
MMS.

73
Cámara [Menú 6]
El L1100 lleva una cámara incorporada que admite las funciones de
Zoom, Balance de blancos Color/Escalada de grises y Multiráfaga.
Realizar foto [Menú 6-1]
Para hacer una foto, pulse la tecla de menú (<) y seleccione
Cámara ➝ Realizar foto, o bien, pulse la tecla de cámara (Q) en
el modo de espera.
1. Centre el objeto que desea fotografiar y, a continuación, pulse la
tecla [OK] o la tecla de acceso directo de la cámara.
2. Aparecerá la palabra ‘Guardado’ en la parte superior izquierda
de la imagen. A continuación, se guarda automáticamente la
imagen capturada.
3. Pulse la tecla [OK] para seguir haciendo fotos, o presione la
tecla de borrado para descartar la imagen. Presione la tecla
multifuncional derecha para mandar un MMS con la foto,
utilizando la imagen capturada.
Nota
• La memoria que queda disponible se muestra en la
parte superior derecha de la imagen. Si no hay
suficiente memoria, el tamaño de la imagen se reduce
automáticamente. Si la memoria está llena, aparecerá
un mensaje indicándolo en la pantalla y no podrá
realizar más fotografías. Para ahorrar espacio, borre
alguna de las imágenes.
Nota
• En
el modo Vista previa puede acceder inmediatamente a
Mis fotos pulsando la tecla de función izquierda [Galería].

< Opciones antes de hacer una foto >
Pulse la tecla programable izquierda [Opcs.]
para definir las opciones en el modo de vista
previa. Seleccione la opción deseada con la
tecla [OK]. Y podrá ver el ajuste de la opción
actual en la parte superior de la pantalla de
vista previa.
A continuación, podrá modificar el valor deseado con las teclas de
navegación izquierda/derecha. Si pulsa la tecla [OK] o la tecla
programable izquierda [Realizado], se define el valor de opción
seleccionado y se vuelve al modo de vista previa.
Puede definir las siguientes opciones.
1. Tamaño de imagen: selecciona el tamaño de imagen deseado
para la imagen que se va a tomar. [640x480, 320x240, 160x120,
128x160, 48x80]
2. Brillo: selecciona el brillo deseado. [-2 ~ +2]
3. Balance de blancos: selecciona el balance de blanco deseado.
[Automática / Luz natural / Incandescente / Nublado / Fluorescente]
4. Zoom: selecciona el índice de ampliación [x1, x2, x4]
5. Efecto de color: selecciona el modo Color/Sepia/Mono mediante
las teclas de navegación izquierda/derecha.
6. Múltiples disparos: selecciona el número de imágenes que se van
a captar en modo de ráfaga.
7. Sonido disparo: selecciona el sonido del disparador [Sonido 1 /
Sonido 2 / Sonido 3 / Desactivado]
8. Ajustes de fábrica: restablece los valores predeterminados de
fábrica.
74
Cámara [Menú 6]
Nota
• Cuanto mayor sea el tamaño de la imagen, mejor será
la calidad de la misma.

75
Galeria [Menú 6-2]
Seleccione una de las siguientes categoría de imágenes:
[Todas las imágenes / Imágenes generales / Imágenes de la agenda]
Para ver, organizar y enviar las imágenes guardadas en el teléfono:
1. Utilice las teclas de navegación para seleccionar la foto que
desea ver en pantalla completa.
2. Pulse la tecla [OK]. El nombre de la imagen aparecerá en la
parte superior de la pantalla LCD.
3. Pulse la tecla de función izquierda [Opcs.] para acceder a los
siguientes submenús.
• Minimizar/Ampliar: puede ver la imagen seleccionada.
• Eliminar: elimina la imagen seleccionada.
• Enviar vía MMS: envía mensajes MMS con imágenes
utilizando la imagen seleccionada. Para obtener información
sobre cómo escribir mensajes MMS, consulte la página 62.
• Establecer como papel tapiz: establece la foto seleccionada
como papel tapiz.
• Modo diapositivas: reproduce las imágenes sucesivamente.
Para detener la reproducción de la presentación de
diapositivas, pulse la tecla
C.
• Renombrar: permite cambiar el título de la fotografía
seleccionada.
• Eliminar todo:
Elimina todas las imágenes de la categoría
seleccionada.
• Detalles: permite cambiar el título, el tamaño, la fecha y la hora
de la fotografía seleccionada.
4. Para volver al menú Cámara, pulse la tecla de función derecha
[Volver].
En el submenú [Estado de memoria], puede comprobar el estado
de la memoria del teléfono.
[Total / Usadas / Libres]

76
Java es una tecnología desarrollada por Sun Microsystems. Del
mismo modo que descargaría un subprograma Java utilizando los
navegadores estándar Netscape o MS Internet Explorer, el
programa MIDlet Java puede descargarse utilizando un teléfono
apto para WAP. Según el proveedor de servicios, pueden
descargarse y ejecutarse en un teléfono todo tipo de programas
basados en Java, como por ejemplo juegos. Tras descargarlos, el
programa Java puede visualizarse en el menú Aplicaciones, desde
el que puede seleccionarlo, ejecutarlo o borrarlo. Los archivos de
programa Java guardados en el teléfono tienen los formatos .JAD
y .JAR.
Nota
• El archivo JAR es un formato comprimido del programa
Java y el archivo JAD es un archivo descriptivo que
incluye toda la información detallada. Desde la red,
antes de la descarga, puede ver todas las descripciones
de archivo detalladas en el archivo JAD.
Advertencia
• Sólo los programas basados en J2ME (Java 2 Micro
Edition) se ejecutarán en un entorno telefónico. Los
programas basados en J2SE (Java 2 Standard Edition)
se ejecutarán sólo en un entorno informático.
Java
*
[Menú 7]
* La disponibilidad de los servicios dependen del operador local.

77
Juegos [Menú 7-1]
El teléfono dispone de varios juegos.
Aplicaciones [Menú 7-2]
El menú Aplicaciones muestra el listado de programas Java
descargados mediante WAP. El menú Aplicaciones permite
seleccionar, eliminar o ver en detalle todos los programas
previamente descargados. En la lista del menú Aplicaciones, puede
acceder a las siguientes opciones:
• Abrir: abre el programa seleccionado. La lista incluye todos los
programas Java instalados en el teléfono.
• Eliminar: elimina el programa seleccionado. Una vez eliminado,
no podrá restaurar el programa a menos que vuelva a descargarlo
mediante WAP.
• Detalles: muestra información detallada sobre el programa
seleccionado. Incluye el nombre del programa, el tamaño del
programa, la versión del programa, información sobre el
proveedor y la dirección del sitio Web o la URL.
Nota
• Las teclas de control son distintas para cada juego, y
cada uno tiene una introducción en la que se explican
las teclas de control principales. .
[Función común de teclas]
< :
Menú del juego
> :
Atrás

78
• Opción Conectar: puede que algunas aplicaciones Java
necesiten datos para cambiar de modo. Seleccione una de las
siguientes opciones.
1. Preguntar primero: se le pedirá una confirmación antes de
que la aplicación realice la conexión.
2. Permitida: la conexión se realiza en ese mismo momento, sin
necesidad de notificación.
3. No permitida: no se puede realizar ninguna conexión.
Descargar [Menú 7-3]
Cuando se descarga un nuevo programa Java mediante WAP, la
dirección desde la que tiene lugar la descarga se conoce como
marcador. El menú Java incluye una lista de marcadores para
descargar programas Java. Puede acceder a esta lista de
marcadores desde el menú Descargar y conectar, ver, editar, borrar
o añadir nuevos marcadores.
• Conectar: se utiliza la dirección seleccionada del marcador para
la conexión de datos. Tras conectarse, podrá descargar el
programa Java de la lista.
• Ver: permite ver la información necesaria para conectarse a
determinados sitios , como la dirección o el nombre del marcador.
• Editar: puede editarse el marcador seleccionado. La edición de
marcadores se efectúa en el orden de Dirección ➞ Titulo. Cuando
se crea un marcador nuevo, se sigue el mismo orden.
• Eliminar: se elimina el marcador seleccionado. Todos los
marcadores pueden eliminarse completamente de la pantalla de la
lista de marcadores. Tenga cuidado al eliminar los marcadores ya
que no es posible volver a restaurar un marcador eliminado.
• Añadir nueva: se añade un marcador nuevo. El mismo orden
utilizado durante la edición de marcadores es válido para la
adición de un marcador nuevo. Seleccione la opción Añadir nueva
en el menú de marcadores o, si no existe ningún marcador, puede
seleccionar Añadir nueva en la pantalla de la lista de marcadores.
Java
TM
[Menú 7]

79
Nota
• Tras seleccionar la función Conectar para acceder al
servidor del proveedor de programas MIDlet de Java,
puede escoger un programa Java para descargarlo e
instalarlo en el teléfono. Tras conectarse al servidor,
puede pulsar el botón Ir para ver la información JAD
sobre el programa deseado.
Seleccionando Obtener iniciará el proceso de descarga
e instalación. Este proceso se efectuará
simultáneamente por lo que, cuando acabe la descarga
podrá ejecutar el programa. Si desea ejecutarlo más
tarde, puede seleccionarlo desde el menú Aplicación.
Ver información [Menú 7-4]
Estado de memoria [Menú 7-4-1]
Muestra la memoria disponible para instalar aplicaciones y juegos.
También puede comprobar el estado de la memoria del dispositivo.

80
Pulse la tecla de menú < y seleccione Internet utilizando las
teclas de navegación.
Puede acceder a varios servicios WAP (Wireless Application Protocol,
Protocolo de aplicaciones inalámbricas), como la banca, las noticias,
partes meteorológicos e información de aeropuertos. Estos servicios
están diseñados especialmente para teléfonos móviles y el proveedor
de servicios WAP es el encargado de su actualización.
Compruebe la disponibilidad de estos servicios WAP, los precios y
las tarifas poniéndose en contacto con el operador de red y/o
proveedor de servicios cuyo servicio desea utilizar. Los
proveedores de servicios también le proporcionarán instrucciones
sobre cómo utilizar sus servicios.
Póngase en contacto con su operador de red para abrir su cuenta
de Internet. Para utilizar el navegador de Web, debe indicar su
número de teléfono mediante la opción de menú Número propio
(para más información, consulte página 56)
Para iniciar el navegador en modo de espera, mantenga pulsada la tecla.
Una vez conectado, aparece la página de inicio. El contenido depende
del proveedor de servicios. Puede acceder a cualquier página Web
introduciendo su dirección URL. Para salir del navegador, pulse la tecla
E
. El teléfono volverá al modo de espera.
Navegación con el buscador WAP
Puede navegar por Internet utilizando las teclas del teléfono o el
menú del buscador WAP.
Utilización de las teclas del teléfono
Cuando navega por Internet, la función de las teclas del teléfono es
distinta a la habitual en el modo teléfono.
Tecla Descripción
U D Permite desplazarse por las líneas hacia el área
de contenido
C
Vuelve a la página anterior
O Selecciona opciones y confirma acciones
Internet
*
[Menú 8]
* La disponibilidad de los servicios dependen del operador local.

81
Utilización del menú del buscador WAP
Existen varias opciones de menú disponibles cuando se navega por
la red móvil:
Inicio [Menú 8-1]
Le permite conectarse a una página de inicio. La página de inicio
será el sitio definido en el perfil activado. Si no lo ha definido en el
perfil que ha activado, lo definirá el proveedor de servicios.
Favoritos [Menú 8-2]
Indexe la página actual en sus favoritos o desplácese hacia una
página ya indexada. El teléfono podría incluir algunos favoritos
preinstalados de sitios no afiliados con LG. LG no garantiza o se
responsabiliza por el contenido de dichos sitios. Para acceder a los
mismos, debe utilizar las mismas precauciones de seguridad y
contenidos que con cualquier sitio.
Servidor e-mail [Menú 8-2-1]
• Conectar
Le permite conectar al servidor de correo electrónico configurado.
• Editar dirección
Edita la dirección de correo electrónico.
Eliminar todo [Menú 8-2-2]
Elimina el contenido de favoritos.
Nota
• Los menús del buscador WAP pueden variar según la
versión de navegador.

82
Mensajes push [Menú 8-3]
Bandeja entrada [Menú 8-3-1]
Puede solicitar mensajes push de proveedores de servicio WAP. Los
mensajes push son notificaciones, por ejemplo, de titulares de
noticias, y pueden contener un mensaje de texto o la dirección de un
servicio WAP. Para obtener más información sobre disponibilidad y
suscripción, póngase en contacto con el proveedor del servicio WAP.
Los proveedores de servicios pueden actualizar un mensaje push
existente a través de un nuevo mensaje push, aunque este se haya
archivado en otra carpeta. Cuando un mensaje push caduca, se
borrará automáticamente.
• Información
Muestra la información de los mensajes push recibidos.
• Cargar
Le permite conectar a un sitio específico con la información del
mensaje push recibido.
• Eliminar
Elimina el mensaje push seleccionado.
Recibir [Menú 8-3-2]
Puede optar por recibir mensajes push o no.
Perfiles [Menú 8-4]
Si desea obtener más información, póngase en contacto con el
operador de red.
Cada perfil tiene los siguientes submenús:
• Activar: activa el perfil seleccionado.
• Ajustes: Le permite editar y cambiar los ajustes WAP del perfil
seleccionado.
Internet [Menú 8]

83
• Cambiar nombre: Le permite cambiar el nombre del perfil.
• Eliminar: elimina el perfil seleccionado de la lista.
• Nuevo perfil: le permite añadir un nuevo perfil.
Ir a URL [Menú 8-5]
Puede conectarse directamente al sitio que desee. Para ello,
necesita entrar en una URL concreta.
Confg. caché [Menú 8-6]
La información o los servicios a los que ha accedido se guardan en
la memoria caché del teléfono.
Borrar caché [Menú 8-6-1]
Borra todo el contexto guardado en la memoria caché.
Comprobar caché [Menú 8-6-2]
Permite establecer si el intento de conexión se efectúa o no a
través de la memoria caché.
Nota
• Los cambios realizados con estas opciones pueden
afectar al funcionamiento de MMS.
Nota
• Una memoria caché es una memoria intermedia que se
utiliza para guardar datos temporalmente.

Certificados de seguridad [Menú 8-7]
Le permite mostrar una lista de los certificados disponibles.
Reiniciar perfiles [Menú 8-8]
Le permite restablecer los perfiles a los ajustes originales.
Info WAP [Menú 8-9]
Muestra la versión del explorador WAP.
84
Internet [Menú 8]

85
Ajustes [Menú 9]
Pulse la tecla Menú (<) y seleccione Ajustes con las teclas de
navegación.
Fecha y hora [Menú 9-1]
Esta opción le permite modificar la fecha y hora actuales
visualizadas. Dispone de las siguiente opciones:
Establecer fecha [Menú 9-1-1]
Permite introducir el día, el mes y el año deseado. Para cambiar el
formato de la fecha, lea el apartado Formato fecha.
Formato fecha [Menú 9-1-2]
Le permite establecer el formato de fecha, como DD/MM/AAAA,
MM/DD/AAAA y AAAA/MM/DD. (D: día; M: mes; A: año)
Establecer hora [Menú 9-1-3]
Para seleccionar el formato de hora lea la opción de menú Formato
hora.
Formato hora [Menú 9-1-4]
Le permite establecer funciones relacionadas con el téléfono.
Conf. teléfono [Menú 9-2]
Permite personalizar muchas opciones del teléfono según sus
preferencias:
Papel tapiz [Menú 9-2-1]
Permite configurar el fondo de la pantalla LCD en el modo de
espera.

Saludo [Menú 9-2-2]
Utilice esta opción para mostrar el saludo en la pantalla LCD interna
en modo de espera y en la LCD externa.
Color menú [Menú 9-2-3]
El teléfono le proporciona 4 opciones de color de menú. Establezca
el color del menú desplazándose y pulsando la tecla Seleccionar.
Idiomas [Menú 9-2-4]
Puede seleccionar el idioma de la pantalla. Si la opción de idioma
se establece en Automático, el idioma se selecciona
automáticamente según el idioma de la tarjeta SIM utilizada. Si el
teléfono no admite el idioma de la tarjeta SIM, se establecerá inglés
como idioma predeterminado.
Luz de fondo [Menú 9-2-5]
Permite seleccionar si el teléfono utiliza o no la luz de fondo. Si se
apaga la luz de fondo, el tiempo de inactividad/llamada será
ligeramente superior.
La opción de luz de fondo para el teclado en la posición
arriba/abajo se establece de forma independiente.
Indicador LED [Menú 9-2-6]
Utilice esta opción para activar/desactivar el parpadeo del indicador
LED, de forma que podrá saber si su teléfono está encendido.
Nombre de red [Menú 9-2-7]
Utilice esta opción para mostrar el nombre de la red que utiliza la
pantalla LCD en modo de espera.
86
Ajustes [Menú 9]

87
Conf. llamadas [Menú 9-3]
Permite cambiar los ajustes de desvío de llamadas.
Desv. llamada [Menú 9-3-1]
Si activa este servicio de red, podrá desviar las llamadas entrantes
a otro número, por ejemplo, al número de su buzón de voz. Para
obtener más información, póngase en contacto con el operador de
red. Seleccione una de las opciones de desvío, por ejemplo,
seleccione Si ocupado para desviar llamadas de voz cuando el
número esté ocupado o cuando rechace las llamadas entrantes.
Dispone de las siguientes opciones:
• Todas llamadas voz
Desvía automáticamente las llamadas de voz.
• Si ocupado
Desvía las llamadas de voz mientras se usa el teléfono.
• Si no responde
Desvía las llamadas de voz que no se responden.
• Si no localizable
Desvía las llamadas de voz si el teléfono está apagado o sin
cobertura.
• Todas llamadas datos
Desvía de forma incondicional las llamadas de datos a un número
con una conexión de PC.
• Todas llamadas fax
Desvía de forma incondicional las llamadas de fax a un número
con una conexión de fax.

Cada opción dispone de los siguientes menús:
- Activar
Activa el servicio correspondiente.
• A mensaje de voz
Reenvía la llamada al centro de mensajes. Esta función no
está disponible en los menús Todas llamadas datos y Todas
llamadas fax.
• A otro número
Permite introducir el número al que se desvía la llamada.
- Cancelar
Cancela el desvío de llamadas seleccionado.
- Ver estado
Permite comprobar el estado del servicio.
• Cancelar todo
Cancela el servicio de desvío de todas las llamadas.
Modo respuesta [Menú 9-3-2]
Seleccione el modo deseado para responder una llamada.
• Tapa abierta
Puede responder una llamada, simplemente abriendo la tapa del
teléfono.
• Cualquier tecla
Cuando el teléfono suene, puede responder pulsando cualquier
tecla excepto la tecla (>) y la tecla de función derecha.
• Sólo tecla enviar
Puede responder una llamada pulsando la tecla de envío.
88
Ajustes [Menú 9]

89
Enviar número propio [Menú 9-3-3]
Este servicio de red le permite decidir si la persona a la que llama
podrá ver (Activado) o no (Desactivado) su número de teléfono.
Seleccione Establecido por red para restablecer la configuración del
teléfono acordada con su proveedor de servicios.
Llamada en espera [Menú 9-3-4]
(servicio de red)
La red le indicará que existe una nueva llamada entrante mientras
tiene una llamada en curso. Seleccione Activar para solicitar a la red
que active la llamada en espera, Cancelar para que desactive esta
función o Ver estado para comprobar si la función está activa o no
Aviso minutos [Menú 9-3-5]
Si se activa, el teléfono emitirá un pitido cada minuto durante una
llamada saliente para indicarle la duración de la llamada.
Marcación por voz [Menú 9-3-6]
Podrá realizar una llamada simplemente diciendo en voz alta la
etiqueta grabada que haya agregado a la tarjeta de contactos.
Cualquier palabra se puede grabar como etiqueta de voz. Antes de
utilizar la marcación por voz, tenga en cuenta lo siguiente:
• Las órdenes verbales no dependen del idioma. Dependen de la
voz de la persona que emite la orden.
• Las órdenes verbales son sensibles al ruido ambiental.
Regístrelas y efectúe llamadas en entornos silenciosos.
• Cuando se registra una orden verbal o se efectúa una llamada
emitiendo una orden verbal, se utiliza el altavoz. Mantenga el
teléfono cerca de la boca y la cara, de forma que el sensor de
proximidad no apague el altavoz.
• No se aceptan palabras excesivamente cortas. Utilice palabras
con una longitud suficiente y evite utilizar nombres similares para
números diferentes.

- Automático
Permite entrar en el modo de marcación por voz cada vez que
se deslice el teclado hacia abajo.
- Manual
Permite entrar en el modo de marcación por voz manteniendo
pulsada la tecla asterisco [*/voice] *.
Rellamada automática [Menú 9-3-7]
Si se activa, el teléfono efectuará un máximo de cinco intentos de
conexión tras un intento fallido de llamada.
Grupo cerrado usuarios [Menú 9-3-8]
(servicio de red)
Es un servicio de red que especifica el grupo de personas a las que
puede llamar y quién puede llamarle a usted. Para obtener más
información, póngase en contacto con su operador de red o
proveedor de servicios. Si se especifica un índice de grupo, se
utilizará para todas las llamadas salientes. Si no se especifica
ningún índice de grupo, la red utilizará el índice preferente.
(En la red se guarda un índice específico)
• Preajuste : selecciónelo para activar el índice GCU anterior.
• Activar: puede editar los índices GCUy activarlos.
• Desactivar: desactiva esta función.
90
Ajustes [Menú 9]
Nota
• Debe pronunciar el nombre exactamente tal como lo
hizo en el momento de la grabación. Puede ser difícil,
por ejemplo, en un entorno ruidoso o durante una
emergencia, por lo tanto no es aconsejable depender
únicamente de la marcación por voz.

91
Conf. seguridad [Menú 9-4]
Para proteger determinadas funciones del teléfono se utilizan varias
contraseñas.
Solicitud PIN [Menú 9-4-1]
Si se activa la función Solicitud PIN, deberá introducir su PIN cada
vez que encienda el teléfono. Por lo tanto, cualquier persona que
no tenga su PIN no podrá utilizar el teléfono sin su permiso.
Dispone de las siguientes opciones:
• Activado
Deberá introducir el PIN cada vez que encienda el teléfono.
• Desactivado
El teléfono se conecta directamente a la red cuando se enciende.
Bloqueo teléfono [Menú 9-4-2]
Si se activa la función Bloqueo teléfono, el teléfono se bloquea y
es preciso introducir la contraseña del teléfono cada vez que se
enciende. La contraseña viene configurada de fábrica como 0000.
Para cambiar contraseña consulte la opción de menú Cambiar
código – Código seguridad [Menú 9-4-5-1]. Tras introducir la
contraseña correcta, podrá utilizar el teléfono hasta que lo apague.
Nota
• Para poder desactivar la función Solicitud PIN, debe
introducir su PIN.

Dispone de las siguientes opciones:
• Conectar
- Habilitar
Cuando encienda el teléfono, deberá introducir su contraseña.
- Deshabilitar
Cuando encienda el teléfono, no será necesario introducir su
contraseña.
- Si se cambia SIM
El teléfono solicitará el código de seguridad sólo si cambia la
tarjeta SIM.
• Inmediatamente
Tras introducir el código de seguridad correcto, el teléfono se
bloqueará tras entrar en el estado inactivo. Si desea desactivar el
bloqueo del teléfono, debe introducir el código de seguridad
correcto tras pulsar la tecla de función derecha. Si apaga el
teléfono con el teléfono bloqueado, el teléfono seguirá bloqueado
cuando vuelva a encenderlo.
Servicio restricción llamada [Menú 9-4-3]
(depende de la red)
La restricción de llamadas le permite restringir las llamadas que se
realizan y se reciben con el teléfono. Para ello necesita la
contraseña de restricción de llamadas, que puede proporcionarle su
proveedor de servicios.
Dispone de las siguientes opciones:
• Todas las llamadas salientes
No puede efectuarse ninguna llamada.
92
Ajustes [Menú 9]

93
• Llamadas salientes internacionales
No puede efectuarse ninguna llamada internacional.
• Llamadas sal. int. excepto al país de origen.
Desde el extranjero, sólo podrá llamar a números del país donde
se encuentre o de su país de procedencia.
• Todas las llamadas entrantes
No puede recibirse ninguna llamada.
• Llamadas entrantes en el extranjero
No podrá recibir llamadas cuando utilice el teléfono fuera de su
área de servicio nacional.
• Cancelar restricciones
Se desactivan todas las restricciones de llamadas; las llamadas
pueden efectuarse y recibirse normalmente.
• Cambiar contraseña
Esta opción permite establecer y modificar la contraseña de
restricción de llamadas proporcionada por el proveedor de
servicios. Antes de poder especificar una contraseña nueva,
deberá introducir la contraseña actual. Tras introducir una
contraseña nueva, deberá confirmar que es correcta volviendo a
introducirla.
Nota
• Para utilizar el servicio de restricción de llamadas,
debe introducir la contraseña de red. Aunque se hayan
restringido las llamadas, algunas redes permiten
realizar llamadas a determinados números de
emergencia.

N° marcación fija (FDN) [Menú 9-4-4]
(depende de la tarjeta SIM)
Puede restringir las llamadas salientes a los números de teléfono
seleccionados si es compatible con su tarjeta SIM. La capacidad de
FDN depende de la tarjeta SIM. Cuando introduzca el FDN, deberá
introducir el código PIN2.
Esta función activa los números parciales (p. ej., los códigos de
área) que se van a guardar.
Ejemplos:
Si se almacenan 3 números (0123, 123123, ?89012) en la lista
FDN, podrá marcar:
012345678..., 01236789..., 123123 sólo, 189012 y 289012.
(el símbolo ? representa cualquier número)
Si intenta realizar una llamada a un número no incluido en la lista
FDN, no podrá hacerlo y se mostrará el mensaje Compruebe FDN.
• Habilitar
Si FDN está activado, podrá realizar llamadas sólo a los números
de la lista. La función de agenda estará restringida en parte. No
podrá agregar entradas a la tarjeta SIM, sólo a la memoria del
teléfono.
Sólo podrá buscar las entradas de la agenda que se hayan
agregado a la memoria del teléfono.
• Deshabilitar
Si FDN está desactivado, puede utilizar la función de agenda.
• Lista de números
Puede ver la lista FDN. Puede agregar, editar y eliminar la lista
FDN pulsando la tecla programable izquierda [Opcs.].
94
Nota
• No todas las tarjetas SIM tienen un PIN2. Si su tarjeta
SIM no lo tiene, no aparecerá está opción de menú.
Ajustes [Menú 9]

95
Cambiar código [Menú 9-4-5]
La opción Cambiar código le permite cambiar su contraseña actual
por otra nueva. Antes de poder especificar una contraseña nueva,
deberá introducir la contraseña actual.
Permite cambiar los códigos de acceso: Código seguridad,
Código PIN y Código PIN2.
Conf. red [Menú 9-5]
La función Conf. red le permite indicar si la red utilizada para
itinerancia (fuera de su área nacional) se selecciona
automáticamente, manualmente o preferentemente.
Automático [Menú 9-5-1]
Se utiliza para que el teléfono busque y seleccione
automáticamente una de las redes celulares disponibles en su área.
El teléfono volverá a Automático por defecto si se apaga.
Manual [Menú 9-5-2]
Elíjala si desea seleccionar manualmente la red deseada en una
lista de redes. Si se pierde la conexión a la red seleccionada
manualmente, el teléfono emitirá un tono de error y le pedirá que
vuelva a seleccionar la red.
Nota
• PIN: Personal Identification Number (Número de
Identificación Personal).
Nota
• Puede seleccionar una red distinta a su red local sólo si
ha contratado el servicio de itinerancia válido con su
red local.

Preferido [Menú 9-5-3]
Puede establecer una lista de redes preferidas para que el teléfono
intente registrarle con éstas antes de intentarlo con otras. Esta lista
está establecida en la lista predefinida de redes conocidas del
teléfono.
Selección de banda [Menú 9-5-4]
Utilice esta opción para definir el ancho de banda. Hay dos
alternativas posibles: GSM 900/1800 o GSM1900.
Config. GPRS [Menú 9-6]
La tecnología GPRS (General Packet Radio Service, Servicios
Generales de Radio por Paquetes) permite utilizar teléfonos
móviles para enviar y recibir datos a través de la red de telefonía
móvil. GPRS es una portadora de datos que permite el acceso
inalámbrico a redes de datos, como Internet.
Para poder usar el servicio GPRS, es necesario:
• Suscribirse al servicio GPRS. Para obtener más información sobre
la disponibilidad y suscripción al servicio GPRS, póngase en
contacto con su operador de red o proveedor de servicios.
• Guardar los ajustes de GPRS para las aplicaciones utilizadas a
través de GPRS.
Adjuntar [Menú 9-6-1]
Si selecciona Conectar y se encuentra en una red que admite
GPRS, el teléfono se registra en la red de GPRS y el envío de
mensajes cortos se efectúa vía GPRS. Además, es más rápido
iniciar una conexión activa de datos empaquetados para, por
ejemplo, enviar y recibir correos electrónicos.
Si selecciona Cuando sea necesario, el teléfono utilizará una
conexión GPRS sólo si inicia una aplicación o acción que requiera
este servicio. La conexión GPRS se cierra cuando deja de ser
necesaria.
96
Ajustes [Menú 9]

97
Dispositivo externo [Menú 9-6-2]
Cuando se utiliza Internet via GPRS con un dispositivo externo
puede que haya que definir los siguientes seis parámetros:
Renombrar, APN, Dirección IP, DNS, Id. usuario y Contraseña.
Reiniciar config. [Menú 9-7]
Puede restablecer la configuración por defecto del teléfono.
Para ello, proceda del siguiente modo:
1. Seleccione la opción de menú Reiniciar config.
2. Introduzca el código de seguridad de 4 dígitos.
Nota
• Si no hay cobertura de GPRS y ha seleccionado
Automático, el teléfono intentará establecer una
conexión periódicamente.
Nota
• Por defecto, el código de seguridad es 0000.

Compruebe si aparece el problema que ha detectado en su teléfono
antes de llevarlo al servicio técnico o a un técnico especializado.
P ¿Cómo puedo ver la lista de llamadas salientes, llamadas
entrantes y llamadas perdidas?
R Pulse S.
P ¿Cómo puedo borrar todo el historial de llamadas?
R
Pulse la tecla de función izquierda y, a continuación
2 4 4
.
P ¿Cómo puedo ver todos los números guardados en la memoria?
R Pulse la tecla de función derecha y, a continuación 1.
P no desaparece de la pantalla.
R Compruebe si se encuentra en un área de servicio. Si continúa
viendo , apague el móvil y espere un par de minutos antes
de volver a encenderlo. Si sigue igual, cambie de zona y vuelva
a comprobarlo.
P La conexión es débil o no es audible en determinadas áreas.
R En algunas áreas, la potencia de la señal puede variar
enormemente. Intente cambiar de ubicación. Un tráfico de red
intenso puede influir en la capacidad de conexión o en la
estabilidad de la llamada.
P La conexión es débil incluso cuando logra establecerse.
R En algunas áreas, la potencia de la señal puede variar
enormemente. Intente cambiar de ubicación. Un tráfico de red
intenso puede influir en la capacidad de conexión o en la
estabilidad de la llamada.
98
Preguntas y respuestas

99
P La pantalla LCD no se enciende.
R Extraiga y sustituya la batería y encienda el móvil. Si el teléfono
sigue sin encenderse, cargue la batería y vuelva a intentarlo.
P Puede escucharse un eco durante la conexión con un teléfono
determinado en un área determinada.
R Se conoce como “Fenómeno eco”. Se produce cuando el
volumen es demasiado alto o bajo determinadas condiciones
(intercambio telefónico semi-electrónico) de la máquina del otro
extremo.
P El teléfono se calienta.
R
Durante llamadas largas, o cuando se utilizan durante mucho
tiempo juego/Internet, el teléfono puede calentarse. Es totalmente
normal y no afecta a la vida útil del producto ni a su rendimiento.
P El timbre no suena, o la luz o la pantalla LCD sólo parpadea.
R El teléfono está definido como “Vibración” o “Silencio” en el
menú Perfiles. Seleccione “General” o “Fuerte”.
P La duración del período de inactividad del teléfono es cada vez
menor.
R Las baterías tienen una vida limitada. La batería debe
sustituirse cuando dura la mitad de lo que duraba en el
momento de comprarla. Utilice sólo repuestos autorizados.
P El tiempo de utilización de la batería es más corto.
R Si la duración de la batería es demasiado breve, puede ser
debido al entorno del usuario, a un volumen elevado de
llamadas o a señales débiles.

100
P Cuando se selecciona una entrada de la agenda, no se marca
ningún número.
R Compruebe que los números se han guardado correctamente
utilizando la función de búsqueda de la agenda. Vuelva a
guardarlos si es necesario.
P No pueden contactar con usted.
R ¿Tiene el teléfono encendido (ha pulsado (E durante más de
tres segundos)? ¿Accede a la red celular correcta?
¿Ha establecido la opción de restricción de llamadas entrantes?
Preguntas y respuestas

101
Accesorios
Existen diversos accesorios disponibles para su teléfono móvil.
Puede seleccionarlos según sus necesidades personales de
comunicación. Consulte la disponibilidad con su proveedor local.
Adaptador proporcionado
Este adaptador le permite cargar mientras
se encuentra en casa o en la oficina.
Batería
Dispone de una batería estándar.
Auriculares
Permite el funcionamiento en modo de
manos libres. Incluye auricular y micrófono.
Kit de cable de datos
Permite conectar el teléfono a un
ordenador.
Nota
• Utilice siempre accesorios LG originales. Si no lo hace,
la garantía puede quedar invalidada.
• Los accesorios pueden variar según las regiones; por
favor, consulte con su compañía o agente local para
obtener más información.

102
Datos Técnicos
General
Nomber del Producto : L1100
Sistema : GSM 900/DCS 1800
Temperatura Ambiente
Máxima : +55
°C
Mínima : -10
°C

103
Memo

104
Memo

ENGLISH
GPRS Phone
USER’S MANUAL
MODEL: L1100
Please read this manual carefully
before operating your mobile phone.
Retain it for future reference.

This user’s guide contains important information on the use and
operation of this phone. Please read all the information carefully
for optimal performance and to prevent any damage to or misuse
of the phone. Any changes or modifications not expressly
approved in this user’s guide could void your warranty for this
equipment.
Introduction
Congratulations on your purchase of the advanced and
compact L1100 mobile phone, designed to operate with
the latest digital mobile communication technology.

3
Read these simple guidelines. Breaking the rules may be
dangerous or illegal. Further detailed information is given in this
manual.
Exposure to radio frequency energy
Radio wave exposure and Specific
Absorption Rate (SAR) information
This mobile phone model L1100 has been designed to comply with
applicable safety requirement for exposure to radio waves. This
requirement is based on scientific guidelines that include safety
margins designed to assure this safety of all persons, regardless of
age and health.
• The radio wave exposure guidelines employ a unit of
measurement known as the Specific Absorption Rate, or SAR.
Tests for SAR are conducted using standardized method with the
phone transmitting at its highest certified power level in all used
frequency bands.
• While there may be differences between the SAR levels of
various LG phone models, they are all designed to meet the
relevant guidelines for exposure to radio waves.
• The SAR limit recommended by the international Commission on
Non-Ionizing Radiation Protection (ICNIRP), which is 2W/kg
averaged over ten (10) gram of tissue.
• The highest SAR value for this model phone tested by DASY4 for
use at the ear is 0.691 W/kg (10g).
• SAR data information for residents in countries/regions that have
adopted the SAR limit recommended by the Institute of Electrical
and Electronics Engineers (IEEE), which is 1.6 W/kg averaged
over one (1) gram of tissue.
Guidelines for safe and efficient use

4
Product care and maintenance
Warning: Use only batteries, charger and accessories
approved for use with this particular phone model. The use of
any other types may invalidate any approval or warranty
applying to the phone, and may be dangerous.
• Do not disassemble this unit. Take it to a qualified service
technician when repair work is required.
• Keep away from electrical appliance such as a TV, radio or
personal computer.
• The unit should be kept away from heat sources such as
radiators or cookers.
• Do not drop.
• Do not subject this unit to mechanical vibration or shock.
• The coating of the phone may be damaged if covered with wrap
or vinyl wrapper.
• Use dry cloth to clean the exterior of the unit.
(Do not use solvent such as benzene, thinner or alcohol.)
• Do not subject this unit to excessive smoke or dust.
• Do not keep the phone next to credit cards or transport tickets;
it can affect the information on the magnetic strips.
• Do not tap the screen with a sharp object; otherwise, it may
damage the phone.
• Do not expose the phone to liquid or moisture.
• Use the accessories like an earphone cautiously.
Do not touch the antenna unnecessarily.
Guidelines for safe and efficient use

Efficient phone operation
To enjoy optimum performance with minimum power consumption
please:
• Hold the phone as you speak to any other telephone. While
speaking directly into the microphone, angle the antenna in a
direction up and over your shoulder. If the antenna is extendable/
retractable, it should be extended during a call.
• Do not hold the antenna when the phone is in use. If you hold it, it
can affect call quality, it also may cause the phone to operate as
a higher power level that needed and shorten talk and standby
times.
• If your mobile phone supports infrared, never direct the infrared
ray at anyone’s eye.
Electronics devices
All mobile phones may get interference, which could affect
performance.
• Do not use your mobile phone near medical equipment without
requesting permission. Avoid placing the phone over the
pacemaker, i.e. in your breast pocket.
• Some hearing aids might be disturbed by mobile phones.
• Minor interference may affect TVs, radios, PCs, etc.
5

Road safety
Check the laws and regulations on the use of mobile phones in the
areas when you drive.
• Do not use a hand-held phone while driving.
• Give full attention to driving.
• Use a hands-free kit, if available.
• Pull off the road and park before making or answering a call if
driving conditions so require.
• RF energy may affect some electronic systems in your motor
vehicle such as car stereo, safety equipment.
• When your vehicle is equipped with an air bag, do not obstruct
with installed or portable wireless equipment. It can cause
serious injury due to improper performance.
Blasting area
Do not use the phone where blasting is in progress. Observe
restrictions, and follow any regulations or rules.
Potentially explosive atmospheres
• Do not use the phone at a refueling point. Don’t use near fuel or
chemicals.
• Do not transport or store flammable gas, liquid, or explosives in
the compartment of your vehicle, which contains your mobile
phone and accessories.
In aircraft
Wireless devices can cause interference in aircraft.
• Turn off your mobile phone before boarding any aircraft.
• Do not use it on the ground without crew permission.
6
Guidelines for safe and efficient use

Children
Keep the phone in a safe place out of children’s reach. It includes
small parts which if detached may cause a choking hazard.
Emergency calls
Emergency calls may not be available under all cellular networks.
Therefore, you should never depend solely on the phone for
emergency calls. Check with your local service provider.
Battery information and care
• You do not need to completely discharge the battery before
recharging. Unlike other battery systems, there is no memory
effect that could compromise the battery’s performance.
• Use only LG batteries and chargers. LG chargers are designed to
maximize the battery life.
• Do not disassemble or short-circuit the battery pack.
• Keep the metal contacts of the battery pack clean.
• Replace the battery when it no longer provides acceptable
performance. The battery pack may be recharged hundreds of
times until it needs replacing.
• Recharge the battery if it has not been used for a long time to
maximize usability.
• Do not expose the battery charger to direct sunlight or use it in
high humidity, such as the bathroom.
• Do not leave the battery in hot or cold places, this may deteriorate
the battery performance.
7

8
Your phone
..............................................................................
12
• Phone components
...............................................................
12
• Your phone’s features
...........................................................
13
• Side of the Key
.....................................................................
14
• Display information
...............................................................
14
Getting started
........................................................................
16
• Installing the SIM card and the handset battery
...................
16
• Charging the battery
.............................................................
17
• Disconnecting the adapter
....................................................
18
• Turning your phone on and off
..............................................
19
• Access codes
........................................................................
20
General functions
...................................................................
22
• Making and answering calls
..................................................
22
• Entering text
..........................................................................
24
• Phonebook
...........................................................................
28
• In-call menu
..........................................................................
28
• Multiparty or conference calls
...............................................
30
Menu tree
.................................................................................
32
Selecting functions and options
...........................................
34
Profiles [Menu 1]
.....................................................................
35
• Vibrate only [Menu 1-1]
.........................................................
35
• Silent [Menu 1-2]
...................................................................
35
• General [Menu 1-3]
...............................................................
35
• Loud [Menu 1-4]
.....................................................................
35
• Headset [Menu 1-5]
..............................................................
35
• Car [Menu 1-6]
......................................................................
35
Contents

9
Call register [Menu 2]
.............................................................
37
• Missed calls [Menu 2-1]
........................................................
37
• Received calls [Menu 2-2]
.....................................................
38
• Dialled calls [Menu 2-3]
.........................................................
39
• Delete recent calls [Menu 2-4]
..............................................
39
• Call durations [Menu 2-5]
......................................................
40
• Call costs [Menu 2-6]
............................................................
40
• Cost settings [Menu 2-7]
.......................................................
41
• GPRS information [Menu 2-8]
...............................................
41
Fun & Tools [Menu 3]
.............................................................
43
• Alarm clock [Menu 3-1]
.........................................................
43
• Calculator [Menu 3-2]
............................................................
43
• My folder [Menu 3-3]
.............................................................
44
• Unit converter [Menu 3-4]
.....................................................
45
• World time [Menu 3-5]
...........................................................
45
• Voice recorder [Menu 3-6]
....................................................
46
• Infrared [Menu 3-7]
...............................................................
47
Organizer [Menu 4]
.................................................................
48
• Schedule [Menu 4-1]
.............................................................
48
• Memo [Menu 4-2]
..................................................................
49
• Phone book [Menu 4-3]
........................................................
50
Messages [Menu 5]
.................................................................
57
• Text messages [Menu 5-1]
....................................................
57
• Multimedia messages [Menu 5-2]
.........................................
62
• Voice messages [Menu 5-3]
.................................................
68
• Info services [Menu 5-4]
........................................................
68

10
• Templates [Menu 5-5]
...........................................................
70
• Memory status [Menu 5-6]
....................................................
72
Camera [Menu 6]
.....................................................................
73
• Take picture [Menu 6-1]
........................................................
73
• Gallery [Menu 6-2]
................................................................
75
Games & Apps [Menu 7]
.........................................................
76
• Games [Menu 7-1]
................................................................
77
• Applications [Menu 7-2]
........................................................
77
• Download [Menu 7-3]
............................................................
78
• Information [Menu 7-4]
..........................................................
79
Internet [Menu 8]
.....................................................................
80
• Home [Menu 8-1]
..................................................................
81
• Bookmarks [Menu 8-2]
..........................................................
81
• Push messages [Menu 8-3]
..................................................
82
• Profiles [Menu 8-4]
.................................................................
82
• Go to URL [Menu 8-5]
...........................................................
83
• Cache settings [Menu 8-6]
....................................................
83
• Security certificates [Menu 8-7]
.............................................
84
• Reset profiles [Menu 8-8]
......................................................
84
• WAP information [Menu 8-9]
.................................................
84
Settings [Menu 9]
....................................................................
85
• Date & Time [Menu 9-1]
........................................................
85
• Phone settings [Menu 9-2]
....................................................
85
• Call settings [Menu 9-3]
........................................................
87
• Security settings [Menu 9-4]
.................................................
91
Contents

11
• Network settings [Menu 9-5]
.................................................
95
• GPRS settings [Menu 9-6]
....................................................
96
• Reset settings [Menu 9-7]
.....................................................
97
Q&A
..........................................................................................
98
Accessories
...........................................................................
101
Technical Data
.......................................................................
102

Phone components
Earpiece
LCD Screen
Left soft Key
Scheduler key
Send Key
Star Key
Microphone
Right soft Key
Camera key
End/Power Key
Clear Key
Alphanumeric keys
Hash Key
Confirm key
Navigation keys
12
Your phone

13
Your phone’s features
Key Description
Left soft key / Right soft key
Each of these keys performs the function indicated
by the text on the screen immediately above it.
Navigation keys
Use for quick access to phone functions.
• Up navigation key
By pressing this key in standby mode, you can
search the phonebook by name.
•
Down navigation key
You can go directly to the voice recording menu.
Holding this key down directly starts voice
recording.
• Left navigation key
A shortcut key to the profile menu.
• Right navigation key
A shortcut key to the message inbox.
OK key (=Confirm key)
Selects menu options and confirms actions.
Send Key
Dials a phone number and answers incoming calls.
You can also quickly access the latest incoming,
outgoing and missed calls by pressing the key in
standby mode.
Alphanumeric keys
Enter numbers, letters and some special characters.
End/Power key
Used to end a call or reject a call and also to go back
to standby mode. Hold this key down to turn the
phone on/off.
~
0
9
< >
S
E

14
Side of the Key
Key Description
Clear key
Deletes a character by each press. Hold the key
down to clear all input all input. Also use this key to
go back to the previous screen.
Camera key
Press this key to use the camera feature. Directly
goes to the camera mode.
Scheduler key
A shortcut key to the scheduler menu.
Key Description
Side Key
• Controls the earpiece volume during a phone call.
• When a flip is closed, pressing one of these
displays the current time and date by turns.
• Controls the volume of the key tone in standby
mode with opening flip.
Display information
The table below describes various display indicators or icons that
appear on the phone’s display screen.
On-Screen Icons
Icon Description
Indicates the strength of the network signal.
Indicates a call is in progress.
Your phone
C
Q
T

15
Icon Description
Indicates that GPRS service is available.
Indicates that you are roaming on another network.
Indicates the alarm has been set and is on.
Indicates the status of the battery charge.
Indicates the receipt of a text message.
Indicates the receipt of a voice message.
Indicates the receipt of a MMS message.
Indicates that the vibration ringer has been set.
Indicates the receipt of an e-mail message.
Indicates the Loud profile is activated.
Indicates the Silent profile is activated.
Indicates the Headset profile is activated.
Indicates the Car profile is activated.
Indicates the General profile is activated.
Indicates that you can use the push message
service.
Indicates that you have a schedule for the selected
day in the schedule menu.
Indicates that the phone is accessing the WAP.
Indicates that you are using GPRS.
Indicates that you entered the security page.

16
Installing the SIM card and the handset battery
1. Make sure the power is off before you remove the battery.
Press the battery release latch up and remove the battery from
the phone at a 45 degree angle.
2. Insert the SIM card into the holder. Slide the SIM card into the
SIM card holder. Make sure that the SIM card is inserted
properly and that the gold contact area on the card is facing
downwards. To remove the SIM card, press down lightly and pull
it in the reverse direction.
Note
• Removing the battery from the phone when the power
is on may cause the phone to malfunction.
Note
• The metal contact of the SIM card can be easily
damaged by scratches. Pay special attention to the SIM
card while handling. Follow the instructions supplied
with the SIM card.
To insert the SIM card To remove the SIM card
Getting started

17
3. Position the lugs on the bottom of the battery into the retaining
holder. Then, push the top half of the battery into position until
the latch clicks
Charging the battery
Only use the mains adapter supplied with your phone.
1. With the battery in position on the phone, connect the lead from
the travel adapter to the bottom of the phone. Make sure that the
arrow on the lead connector is facing towards the front of the
phone.
2. Connect the other end of the adapter to the power outlet.
Caution
• Use of unauthorised accessories could damage your
phone and invalidate your warranty.
• Do not force the connector as this may damage the
phone and/or the mains adapter.

18
Disconnecting the adapter
1. When charging is finished, the moving bars of the battery icon
stop and ‘Full’ is displayed on the screen.
2. Unplug the adapter from the power outlet. Disconnect the
adapter from the phone by pressing the grey tabs on both sides
of the connector and pull the connector out.
Note
• Ensure the battery is fully charged before first using the
phone.
• Do not remove the battery or SIM card while charging.
• In the case the battery is not properly charged, please
turn the phone off and on using the power key, then
recharge the battery. After detaching and reattaching
the battery, please recharge the battery.
Getting started
Notice
• Battery Charging is displayed on the screen after
connecting the travel adapter. Only if the battery is
totally empty, Call indicator Light is on without
displaying Battery Charging .

19
Turning your phone on and off
Turning your phone ON
1. Install a battery to the handset and
connect the phone to an external
power source such as the travel
adapter, cigarette lighter adapter or
hands-free car kit. Or install a
charged battery pack to the handset.
2. Press E for a few seconds until the
LCD screen is turned on.
3. Depending on the status of the PIN
code request setting you may need
to enter your PIN code.
Turning your phone OFF
1. Press E for a few seconds until the LCD screen is turned off.
Note
• Like any other radio devices, avoid any unnecessary
contact with the antenna while your phone is on.

20
Getting started
Access codes
You can use the access codes described in this section to avoid
unauthorised use of your phone. The access codes (except PUK
and PUK2 codes) can be changed by using the Change codes
feature [Menu 9-4-5].
PIN code (4 to 8 digits)
The PIN (Personal Identification Number) code protects your SIM
card against unauthorised use. The PIN code is usually supplied
with the SIM card. When the PIN code request is set to On, your
phone will request the PIN code every time the phone is switched
on. When the PIN code request is set to Off, your phone connects
to the network directly without the PIN code.
PIN2 code (4 to 8 digits)
The PIN2 code, supplied with some SIM cards, is required to
access functions such as Advice of Call Charge and Fixed dial
number. These functions are only available if supported by your
SIM card. Check with your network for further information.
PUK code (4 to 8 digits)
The PUK (PIN Unblocking Key) code is required to change a
blocked PIN code. The PUK code may be supplied with the SIM
card. If not, contact your network operator for the code. If you lose
the code, also contact your network operator.
PUK2 code (4 to 8 digits)
The PUK2 code, supplied with some SIM cards, is required to
change a blocked PIN2 code. If you lose the code, also contact your
network operator.

21
Security code (4 to 8 digits)
The security code protects the unauthorised use of your phone.
The default security code is set to ‘0000’ and the security code is
required to delete all phone entries and to activate the Reset
settings menu. Also, the security code is required to enable or
disable the phone lock function to prevent unauthorised use of the
phone. The security code default setting can be modified from the
Security settings menu.
Barring password
The barring password is required when you use the Call barring
function. You obtain the password from your network operator when
you subscribe to this function. See page 92 for further details.

General functions
22
Making and answering calls
Making a call
1. Make sure your phone is switched on.
2. Enter a phone number, including the area code. To edit a
number on the LCD screen, press the right/left navigation keys to
move the cursor to the desired position or simply press the clear
key (C) to erase one digit at a time.
Press and hold the clear key (C) to erase the entire number.
3. Press the send key (S) to call the number.
4. To end the call, press the end key (E) or the right soft key.
You can also end the call by closing the flip.
Making a call using the send key
1. In standby mode, press the send key (S), and the latest
incoming, outgoing and missed phone numbers will be displayed.
2. Select the desired number by using the up/down navigation key.
3. Press S.
Making an international call
1. Press and hold the 0 key for the international prefix. The ‘+’
character automatically selects the international access code.
2. Enter the country code, area code, and the phone number.
3. Press S.
Ending a call
When you have finished your call, press the end key (E).

23
Making a call from the phonebook
You can save the names and phone numbers dialled regularly in the
SIM card and/or phone memory, which is phonebook. You can dial
a number by simply looking up the desired name in the phonebook.
For further details on the phonebook feature, please refer to page
50-56.
Adjusting the volume
If you want to adjust the earpiece volume during a call, use the side
keys ( ). Press the up side key to increase and down side key to
decrease the volume.
Answering a call
When you receive a call, the phone rings and the flashing phone
icon appears on the screen. If the caller can be identified, the
caller’s phone number (name or photo if saved in the Phonebook) is
displayed.
1. To answer an incoming call, open the flip.
2. To end the call, close the flip or press the E.
Note
You can answer a call while using the phonebook or
other menu features.

24
General functions
T9 mode
This mode lets you enter words with only one keystroke per
letter. Each key on the keypad has more than one letter. The
T9 mode automatically compares your keystrokes with an
internal dictionary to determine the correct word, thus requiring
far fewer keystrokes than the traditional ABC mode. This is
sometimes known as predictive text.
ABC mode
This mode lets you enter letters by pressing the key labelled
with the required letter once, twice, three or four times until the
letter is displayed.
123 mode (Number mode)
Type numbers using one keystroke per number. To change to
123 mode in a text entry field, press the # key until 123
mode is displayed.
Signal strength
You can check the strength of your signal by the signal indicator
( ) on the LCD screen of your phone. Signal strength can vary,
particularly inside buildings. Moving near to a window may improve
reception.
Entering text
You can enter alphanumeric characters by using the phone’s
keypad. For example, storing names in the Phonebook, writing a
message, creating a personal greeting or scheduling events in the
calendar all require entering text.
The following text input methods are available in the phone.

25
Changing the text input mode
1. When you are in a field that allows characters to be entered, you
will notice the text input mode indicator in the lower right corner
of the LCD screen.
2. Change the text input mode by pressing #. You can check the
current text input mode in the lower right corner of the LCD
screen.
Using the T9 mode
The T9 predictive text input mode lets you enter words easily with a
minimum number of key presses. As you press each key, the phone
begins to display the characters that it thinks you are typing based
on the built-in dictionary. You can also add new words in the
dictionary. As new words are added, the word changes to reflect the
most likely candidate from the dictionary.
1. When you are in the T9 predictive text input mode, start entering
a word by pressing keys 2 to 9. Press one key per letter.
– The word changes as letters are typed. Ignore what’s on the
screen until the word is typed completely.
– If the word is still incorrect after typing completely, press the
down navigation key once or more to cycle through the other
word options.
Example
• Press 4 6 6 3 to type Good.
• Press 4 6 6 3 [Down navigation key] to
type Home.

26
General functions
– If the desired word is missing from the word choice list, add it
using the ABC mode.
– You can select the language of the T9 mode. Press the left
soft key [Option], then select
T9 languages or press the “*”
key on your keypad to switch the language. Select the desired
language of T9 mode. You can also turn off the T9 mode by
selecting T9 off. The default setting on the phone is T9
enabled mode.
2. Enter the whole word before editing or deleting any keystrokes.
3. Complete each word with a space by pressing the 0 key.
To delete letters, press C. Press and hold down to erase C
entire words.
Using the ABC mode
Use the 2 to 9 keys to enter your text.
1. Press the key labelled with the required letter:
– Once for the first letter
– Twice for the second letter
– And so on
2. To insert a space, press the 0 key once. To delete letters,
press the C key. Press and hold down the C key to clear
the whole display.
Note
• To exit from the text input mode without saving your
input, press E. The phone goes back to standby
mode.

27
Key
Characters in the order display
Upper case Lower case
1 . , - ? ! ' @ : 1 . , - ? ! ' @ : 1
2 A B C 2 a b c 2
3 D E F 3 d e f 3
4 G H I 4 g h i 4
5 J K L 5 j k l 5
6 M N O 6 m n o 6
7 P Q R S 7 p q r s 7
8 T U V 8 t u v 8
9 W X Y Z 9 w x y z 9
0 Space key Space key
Using the 123 (Number) mode
The 123 mode enables you to enter numbers in a text message (a
telephone number, for example).
Press the keys corresponding to the required digits before manually
switching back to the appropriate text entry mode.
Note
• Refer to the table below for more information on the
characters available using the alphanumeric keys.

Phone book
You can store phone numbers and their corresponding names in the
memory of your SIM card.
In addition, you can store up to 255 numbers and names in the
phone memory.
The SIM card and phone are both used in the same way in the
Phonebook menu. (Refer to page 50-56 for details.)
In-call menu
Your phone provides a number of control functions that you can use
during a call. To access these functions during a call, press the left
soft key [Options].
During a call
The menu displayed on the handset screen during a call is different
to the default main menu displayed when in standby mode, and the
options are described below.
Making a second call
You can get a number you wish to dial from the phonebook to make
a second call. Press the right soft key then select Search. To save
the dialled number into the Phonebook during a call, press the right
soft key then select Add new.
Switching between two calls
To switch between two calls, press the left soft key then select
Swap.
28
General functions

Answering an incoming call
To answer an incoming call when the handset is ringing, simply
press the S key. The handset is also able to warn you of an
incoming call while you are already on a call. A tone sounds in the
earpiece, and the display will show that a second call is waiting.
This feature, known as
Call waiting, is only available if your
network supports it. For details of how to activate and deactivate it
see [Menu 9-3-4].
If Call waiting is activated, you can put the first call on hold and
answer the second, by pressing S or by selecting left soft key,
then Hold & Answer. You can end the current call and answer the
waiting call by selecting left soft key and then End & Answer.
Rejecting an incoming call
You can reject an incoming call without answering by simply
pressing the E key.
During a call, you can reject an incoming call by pressing the left
soft key [Menu] key and selecting the Conference / Reject or by
pressing the E.
Muting the microphone
You can mute the microphone during a call by pressing the [Menu]
key then selecting Mute on. The handset can be unmuted by
selecting Mute off. When the handset is muted, the caller cannot
hear you, but you can still hear them.
Switching DTMF tones on during a call
To turn DTMF tones on during a call, press the left soft key, and
then select DTMF on. DTMF tones can be turned off the same way.
DTMF tones allow your phone to make use of an automated
switchboard.
29

Multiparty or conference calls
The multiparty or conference service provides you with the ability to
have a simultaneous conversation with more than one caller, if your
network operator supports this feature. A multiparty call can only be
set up when you have one active call and one call on hold, both
calls having been answered. Once a multiparty call is set up, calls
can be added, disconnected or separated (that is, removed from the
multiparty call but still connected to you) by the person who set up
the multiparty call. These options are all available from the In-Call
menu. The maximum callers in a multiparty call are five. Once
started, you are in control of the multiparty call, and only you can
add callers to the multiparty call.
Making a second call
You can make a second call while currently on a call. Enter the
second number and press the S key. When the second call is
connected, the first call is automatically placed on hold. You can
swap between calls by pressing the left soft key then selecting
Swap.
Setting up a conference call
Place one call on hold and while the active call is on, press the left
soft key and then select the Conference / Join all.
Putting a conference call on hold
Press the left soft key, then select the Conference / Hold all.
Activate the conference call on hold
Press the left soft key, then select the Conference / Join all.
30
General functions

Adding calls to the conference call
To add a call to an existing conference call, press the left soft key,
then select the Conference / Join all.
Displaying callers in a conference call
To scroll through the numbers of the callers who make up a
conference call on the handset screen, use the up/down navigation
keys.
Taking a private call during a conference call
To have a private call with one caller from a conference call, display
the number of the caller you wish to talk to on the screen, then
press the left soft key. Select the Conference / Private to put all the
other callers on hold.
Ending a conference call
The currently displayed caller from a conference call can be
disconnected by pressing the E key. To end a conference call,
press the left soft key, then select the Conference / End
multiparty. After pressing the left soft key, selecting Conference /
End all will end all the active and on-hold calls.
31

1 Profiles
1 Vibrate only
2 Silent
3 General
4 Loud
5 Headset
6 Car
2 Call register
1 Missed calls
2 Received calls
3 Dialed calls
4 Delete recent calls
5 Call durations
6 Call costs
7 Cost settings
8 GPRS information
3 Fun & Tools
1 Alarm clock
2 Calculator
3 My folder
4 Unit converter
5 World time
6 Voice recorder
7 Infrared
4 Organizer
1 Schedule
2 Memo
3 Phone book
5 Messages
1 Text messages
2 Multimedia messages
3 Voice messages
4 Info services
5 Templates
6 Memory status
32
Menu tree

33
6 Camera
1 Take picture
2 Gallery
7 Games & Apps
1 Games
2 Applications
3 Download
4 Information
8 Internet
1 Home
2 Bookmarks
3 Push messages
4 Profiles
5 Go to URL
6 Cache settings
7 Security certificates
8 Reset profiles
9 WAP information
9 Settings
1 Date & Time
2 Phone settings
3 Call settings
4 Security settings
5 Network settings
6 GPRS settings
7 Reset settings
0 SIM Service
This menu depends on SIM
and the network services.

34
Your phone offers a set of functions that allow you to customise the
phone. These functions are arranged in menus and sub-menus,
accessed via the two soft keys marked
< and >. Each menu
and sub-menu lets you view and alter the settings of a particular
function.
The roles of the soft keys vary according to the current context; the
label on the bottom line of the screen just above each key indicates
its current role.
Menu Names
Press the left soft
key to access the
available menu.
Press the right soft
key to activate the
corresponding
action.
Selecting functions and options

35
Profiles [Menu 1]
In Profiles, you can adjust and customise the phone tones for
different events, environments, or caller groups.
There are six preset profiles: Vibrate only, Silent, General, Loud,
Headset and Car. Each profile can be personalised except Vibrate
only and Silent.
Press the Menu key (<) and select Profiles using navigation
keys.
Changing the profile [Menu 1-x-1]
1. A list of Profiles is displayed.
2. In the Profile list, scroll to the profile you want to activate and
press the left soft key [Select] or OK key.
3. Then, select Activate.
Customising profiles – Personalise [Menu 1-x-2]
Scroll to the desired profile in the Profile list. After pressing the OK
key or the left soft key, select Personalise. The profile setting
option opens. Set the option as required.
Incoming alert type: Set the alert type for incoming calls.
Ring tone: Select the desired ring tone from the list. Scroll
through the list using up/down navigation keys. You can hear the
desired tone prior to making a selection.
Ring volume: Set the volume of the ringing tone.
Message alert type: Set the alert type for messages.
Message tone: Select the alert tone for messages.
Key tone: Select the desired keypad tone.
Key volume: Set the volume of keypad tone.
Flip tone: Set the flip tone for flip open and close.
Effect tone volume: Set the volume of effect sound.
Power on/off volume: Set the volume of the ringing tone when
switching the phone on/off.

Automatic answer: (only in Car profile) You can activate the
automatic answer feature. Select the time before answering
automatically.
Customising profiles – Rename [Menu 1-x-3]
You can rename a profile and give it any name you want. Vibrate
only, Headset and Car profiles cannot be renamed.
1. To change the name of a profile, scroll to the profile in the profile
list and after pressing the OK key or the left soft key, select
Rename.
2. Key in the desired name and press the OK key or the left soft key
[Save].
36
Profiles [Menu 1]

37
Call register [Menu 2]
You can check the record of missed, received, and dialled calls only
if the network supports Calling Line Identification (CLI) within the
service area.
The number, the name (if available), and the picture (if available)
are displayed together with the date and time at which the call was
made. You can also view call times and costs.
Press the Menu key (<) and select Call register using navigation
keys.
Missed calls [Menu 2-1]
This option lets you view the last 10 unanswered calls. After
pressing the left soft key [Option], you can also:
• View the number if available and call it or save it in the phonebook.
• Enter a new name for the number and save in the phonebook.
• Send a message to this number.
• Delete the call from the list.
• Edit the name saved in the phonebook.
Note
• You can delete all the call records from the list using
the Delete recent calls menu.
Note
• It is possible for only a number in the Phonebook to edit
a name. Another numbers (e.g. FDN, SDN) can’t edit
names.

Received calls [Menu 2-2]
This option lets you view the last 10 incoming calls. After pressing
the left soft key [Option], you can also:
• View the number if available and call it or save it in the phonebook.
• Enter a new name for the number and save in the phonebook.
• Send a message to this number.
• Delete the call from the list.
• Edit the name saved in the phonebook.
38
Note
• You can delete all the call records from the list using
the Delete recent calls menu.
Note
• It is possible for only a number in the Phonebook to edit
a name. Another numbers (e.g. FDN, SDN) can’t edit
names.
Call register [Menu 2]

Dialed calls [Menu 2-3]
This option lets you view the last 10 outgoing calls (called or
attempted). Using the [Option] key, you can also:
• View the number if available and call it or save it in the phonebook.
• Enter a new name for the number and save in the phonebook.
• Send a message to this number.
• Delete the call from the list.
•
Edit the name saved in the phonebook.
Delete recent calls [Menu 2-4]
Use this to delete the missed call list, received call list, or dialled call
list. You can also delete all call lists at a time selecting All calls.
39
Note
• You can delete all the call records from the list using
the Delete recent calls menu.
Note
• If the FDN is enabled, the menu [Edit name] will not be
shown.

Call durations [Menu 2-5]
Use this to view the duration of your incoming and outgoing calls.
You can check each call duration at the bottom of screen while
scrolling using the up/down navigation keys. Pressing the [OK] key
or the left soft key [Reset] resets the call timer of selected call. To
prevent accidental reset, you are requested to enter the PIN2 code.
•
Last call: Length of the last call
• Received calls: Length of the incoming calls
• Dialed Calls: Length of the outgoing calls
• All calls: Total length of all calls made or received calls since the
timer was last reset.
Call costs [Menu 2-6]
This network service allows you to check the last call cost and the
total call cost. The call cost is displayed on the bottom of the LCD
screen. To reset the call cost, press the left soft key [Reset] or the
OK key. You are requested to enter the PIN2 code.
Call register [Menu 2]
40
Note
• The actual time invoiced for calls by your service
provide may vary, depending on network features,
rounding-off for billing, etc.
Note
• The actual cost invoiced for calls by your service
provider may vary, depending on network features,
rounding-off for billing, taxes, etc.

41
Cost settings [Menu 2-7]
• Call cost’s limit: This network service allows you to limit the cost
of your calls to the number of charging units or units of currency.
You can make or receive a call up to the specified cost limit.
You can change the call cost’s limit after entering the PIN2 code.
•
Set tariff: You can set the currency type and the unit price.
Contact your service providers to obtain charging unit prices.
To select the Currency or 1 Unit in this menu, you need the PIN2
code.
• Auto display: This network service allows you to see
automatically the cost of your last call. If you select On in Auto
display menu, you can see the cost of the last call when the call
is released.
GPRS information [Menu 2-8]
You can check the amount of data transferred over the network
through the GPRS information option. In addition, you can also
view how much time you are online.
(GPRS stands for General Packet Radio Service.)
• WAP information
You can check the data volume and the time spent using WAP.
On the selected menu, pressing the left soft key [Reset] or the OK
key clears the counter.
Note
• When all units have been used, no calls can be made
except emergency calls. Depending on the SIM card,
you need the PIN2 code to set a call cost limit.

42
Call register [Menu 2]
• External device
You can check the data volume and the time spent using GPRS
with an external device such as a serial port.
• Total data
You can check the total amount of data through WAP and the
external device.

43
Fun & Tools [Menu 3]
Press the Menu key (<) and select Fun & Tools using navigation
keys.
Alarm clock [Menu 3-1]
Set the alarm to ring at a specific time. In the Alarm Clock menu,
the following options are available.
On
Set the alarm time.
1. Enter the menu.
2. Select [On] by the left/right navigation key.
3. Enter the alarm time using the numeric keys.
4. Using the left/right navigation keys, select one of the alarm
options: Once, Daily, Weekly, and Monthly.
5. Alarm melody section: select the desired alarm melody using the
left/right navigation keys.
Off
Deactivates the alarm.
Calculator [Menu 3-2]
Using this feature, you can use the phone as a calculator. The
calculator provides the basic arithmetic functions: addition,
subtraction, multiplication and division. (You can enter numbers up
to the second decimal place.)

44
Fun & Tools [Menu 3]
Using the calculator
1. Enter the first number using the numeric keys.
2. Press the corresponding navigation key to select a mathematical
function.
3. To calculate the result, press the left soft key [Result] or OK key.
4. After calculation, press the left soft key [Reset] to return to the
initial state.
My folder [Menu 3-3]
My folder has 3 folders: Picture, Animation and Sound. You can
view, delete, or control downloaded contents. You can get pictures,
animation or sounds from WAP site, MMS or SMS. While you’re
checking each content, you can send it via SMS or MMS, edit or
delete it. You can set one in the Picture folder or Animation folder as
the wallpaper. For sounds, you can set the desired sound as the
ring tone.
Picture [Menu 3-3-1]
Animation [Menu 3-3-2]
Sound [Menu 3-3-3]
Memory status [Menu 3-3-4]
Note
• To erase any mistakes and clear the display, press the
C key. To include a decimal point, press the *
key. To include a minus sign, press the # key.

45
Unit converter [Menu 3-4]
This converts any measurement from one unit to another. There are
4 types that can be converted into units: Length, Surface, Weight
and Volume.
1. Select one of four unit types by pressing the left soft key [Unit].
2. Move to the current unit section by pressing the down navigation
key.
3. Select the unit you want to convert using the left/right navigation
keys.
4. Move to the Convert unit section by pressing the down
navigation key.
5. Select the unit you want to convert to, using the left/right
navigation keys.
6. Input numbers using the numeric keys. Conversion is calculated
automatically.
World time [Menu 3-5]
You can check the current time of Greenwich Mean Time (GMT)
and 59 major cities around the world, using the left/right navigation
keys.
The screen shows the city name, current date and time. To select
the time zone in which you are located, proceed as follows:
1. Select the city corresponding to your time zone by pressing the
left/right navigation keys one or more times. The local date and
time are displayed.
2. If you want to change the time display in standby mode to the
selected time, press the left soft key [Options]. And select Set.
Nota
• You can input a decimal number by pressing * key.

46
Fun & Tools [Menu 3]
Voice recorder [Menu 3-6]
You can record a memo. You can record up to 3 voice memos up to
a maximum of 30 seconds each. You can play or delete the
recorded memo or record new voice memo using the left soft key
[Option] key.
Record [Menu 3-6-1]
1. Press and hold down key in standby mode.
2. Once recording is started, the message ‘Recording...’ and the
remaining time is displayed.
3. When you finish recording, press left soft key [Save].
• Play: Allows you to play back all memos recorded, starting with
the most recent memo. The screen displays the Date and time
when the memo was recorded.
• Delete: Allows you to delete a specific memo.
•
Record new: Allows you to record a memo.
•
Delete all: Allows you to delete all memos. Press the left soft
key [Yes] to confirm.
View list [Menu 3-6-2]
The phone shows the voice memo title which you have recorded by
pressing D in standby mode. You can Play, or Delete the recorded
voice memo.
Note
• The time zone setting of each city in World time menu
may be affected by network condition.

47
Infrared [Menu 3-7]
This feature allows you to send or receive data/fax through the
infrared port. To use an infrared connection:
1. Install the modem driver for receiving or sending the data/fax.
2. Install the network dial-up software supplied by your network
provider or fax application program for a fax call on your PC.
3. Configure and activate an IrDA-compliant infrared port on your
PC.
4. Activate the infrared feature on the phone; the red IrDA symbol
appears on the right side at the bottom of the display.
5. Call the network service number given to you by the service
provider.
If there is no communication between your phone and the IrDA-
compliant device within 30 seconds of activation of the feature, it is
automatically deactivated.
For further details, contact your network provider.
Note
• In standby mode, you can go directly to the Voice
recorder menu by pressing the down navigation key.
• If all memo locations are full, you must delete an old
memo before recording a new one.
Note
• PC Sync is a program for data exchange between PC
and the phone by a data cable. For more information,
you can use the PC Sync Help file on the CD.

48
Organizer [Menu 4]
Press the Menu key (<) and select Organizer using navigation
keys.
Schedule [Menu 4-1]
When you enter this menu, a calendar appears. A square cursor is
located on the current date. You can move to another date using
navigation keys. If a date is shown in a different colour, it means
that there is a schedule or memo for that day. This function reminds
you of your schedule and memos. The phone will sound an alarm
tone if you set the phone to do so.
View [Menu 4-1-1]
Shows the note for the chosen day. Press [Options] to delete or edit
the note you selected.
Edit [Menu 4-1-2]
Use this to edit the schedule.
Delete [Menu 4-1-3]
Use this to delete the schedule.
Add new [Menu 4-1-4]
You can edit a maximum of 30 characters and take up to 20 notes.
Calendar [Menu 4-1-5]
Goes back to the calendar.
Scheduler tone [Menu 4-1-6]
The phone can sound an alarm tone when the scheduled date and
time for an event has been reached with this option.

View all schedules [Menu 4-1-7]
Shows the notes that are set for all days. Use the up/down
navigation keys to browse through the note lists.
Go to date [Menu 4-1-8]
Use this to jump to a specific date. Enter the date using the numeric
keys and the left/right navigation keys.
Delete past [Menu 4-1-9]
You can delete expired schedule notes that have already been
notified.
Delete all [Menu 4-1-10]
Use this to delete all schedules. You are asked to confirm this
action.
Memo [Menu 4-2]
You can write, edit and delete a memo on a specific date.
1. Scroll to highlight Memo.
2. Press the left soft key [Add].
3. Input the memo and then press the left soft key [Options].
The following options are available.
• Save: Allows you to save the memo.
• T9 languages: Select the desired language of T9 mode.
• Exit editor: Allows you to exit from the memo editor.
After a memo is already input in your phone,
1. Select a memo.
2. Press the left soft key [Select].
3. Press the left soft key [Options].
49

The following options are available.
• Edit: You can edit the selected memo.
• Delete: Deletes the selected memo.
•
Add new: You can add new memo.
• Delete all: Deletes all meno.
Phone book [Menu 4-3]
You can save phone numbers and their corresponding names in the
memory of your SIM card. In addition, you can save up to 255
numbers and names in the phone memory.
- Press the left soft key [Menu] in standby mode, then select
Organizer ➝ Phone book.
- Or, press right soft key [Names] in standby mode.
Search [Menu 4-3-1]
1. In menu mode, Select an Organizer ➝ Phone book, and select
Search. Or in standby mode, press right soft key [Names] and
select Search. Or in stanby mode, press the navigation up key.
You are asked to enter the start of the name that you wish to find
and then, you will find the name instantly.
2. After finding the desired name, you can make a call to the
number by pressing the [Send] key. Or press the left key
[Options] to use the following options.
• View detail: To view details of the selected name.
• Edit: Edits the name, number, the listing group, the e-mail, the
memo, and the phonebook photo.
• Delete: Deletes the Phonebook entry.
• Write text message: Use this to write a text message to the
name.
• Write multimedia message: Use this to write a multimedia
message to the name.
50
Organizer [Menu 4]

• Copy: Use this to copy the Phonebook entry from SIM to the
phone memory or vice versa.
• Voice: Records the name of the selected Phonebook entry for
voice-activated dialling.
• Main number: To show all number lists which are saved if
more than 2 numbers saved.
Add new [Menu 4-3-2]
You can add a Phonebook entry using this function.
There are 2 momories : Phone memory and SIM memory. To select
the memory type, go to Set memory [Menu 4-3-8-1].
The phone memory capacity is 255 entries. You can enter up to 20
characters in each name in the phone memory. The SIM card
memory capacity depends on the SIM card.
1. In menu mode, Select an Organizer ➝ Phone book, or in
standby mode, press right soft key [Names].
2. Scroll to highlight Add new, and press [OK].
3. You can add new Phonebook entries to SIM memory or the
phone memory.
• Adding new entries into SIM memory
You can enter a name, a number, and a required group.
(Depends on the SIM)
• Adding new entries into the phone memory
You can enter a name, numbers (mobile, home, office), e-mail
address, a required group, a memo, and a phonebook photo.
51
Note
•
A phonebook photo is able to be added only into the
phone memory.

Speed dials [Menu 4-3-3]
You can assign any of the keys 2 to 9 with a name list entry.
You can make a call to the number by pressing the [Send] key in
the Speed dial list, or press the left key [Options] and select Call.
Or, you can call directly by pressing the assigned key (2-9) for
2-3 seconds in standby mode.
1. In menu mode, select an Organizer ➝ Phonebook, or in
standby mode, press right soft key [Names].
2. Scroll to Speed dials, then press [OK].
3. To add a number to Speed dials, select <Empty> and then,
press the left soft key [Add]. You can search and select the name
to press [Select] through the phonebook.
4. You can change or delete a speed dial number, make a call,
write text message, or write multimedia message by pressing the
left soft key [Options]. You can see the following submenus.
• Change: Changes the member list.
• Delete: Deletes the member list.
• Call: Makes a call to the number.
• Write text message: Use this to write a text message to the
name.
• Write multimedia message: Use this to write a multimedia
message to the name.
52
Organizer [Menu 4]

Voice list [Menu 4-3-4]
You can assign a voice with a name list entry for voice-activated
dialling.
You can make a call to the number by pressing the [Send] key, or
press the left key [Options] and select
Call.
1. In menu mode, Select an Organizer ➝ Phonebook, or in
standby mode, press right soft key [Names].
2. Scroll to Voice list, then press [OK].
3. To add a number to Voice list, press the left soft key [Add].
You can search and select the name to press [Select] through
the phonebook. After selecting a number, record a voice.
4. You can play, change, or delete a voice, make a call, add new or
delete all voice lists by pressing the left soft key [Options]. You
can see the following submenus.
• Play: Plays back the voice tag assigned to the phone number.
• Change: Changes the voice tag assigned to the phone
number.
• Delete: Deletes the voice assigned to the phone number.
• Call: Makes a call to the selected number.
• Add new: Adds a new phone number for voice-activated
dialling.
• Delete all: Deletes all voice-activated dialling numbers.
53
Note
• You can enter up to 10 phone numbers for voice dial.

Caller groups [Menu 4-3-5]
There are 6 pre-defined groups, as well as one additional group
labelled Others, where you can create lists.
1. In menu mode, select an Organizer ➝ Phonebook, or in
standby mode, press right soft key [Names].
2. Scroll to Caller groups, then press [OK]. Every group list will be
displayed: Family, VIP, Friends, Colleague, Group 1, Group 2,
and Others.
3. Select the group name that you want to manage by pressing the
left soft key [Options]. The following options will be displayed
except for Others.
• Member list: Displays the member list in the group.
•
Group ring tone: Use this to select the ring tone to be used
when you receive a voice phone call from a person in the
group.
•
Group icon: Use this to select the graphic icon to be displayed
when you receive a call from a person in the group.
• Add member: Add a member to the group.
•
Delete member: Delete a member from the group.
•
Rename: Assigns a new name to the group.
Copy all [Menu 4-3-6]
You can copy/move entries from the SIM card memory to the phone
memory and vice versa.
• SIM to Phone : Use this to copy the entry from the SIM Card to
Phone memory.
• Phone to SIM : Use this to copy the entry from the Phone memory
to the SIM Card.
54
Organizer [Menu 4]

55
The following options are available.
– Keep original : When copying, the original dial numbers are kept.
– Delete original: When copying, the original dial numbers will be
erased.
Delete all [Menu 4-3-7]
You can delete all entries in SIM, Phone, and Voice list. Except for
Voice list, this function requires the security code.
Settings [Menu 4-3-8]
• Set memory
You can select the memory for the phonebook feature between
the SIM and the phone. If you select Variable, when adding entry,
the phone will ask where to save the number.
• Photo display
You can set the photo list by Photo view or List view, when you
search the phonebook. If you select Photo view, the search list
will be shown with photos.
Information [Menu 4-3-9]
• Service dial number (SIM dependent)
Use this to view the list of Service Dialling Numbers (SDN)
assigned by your network operator (if supported by the SIM card).
Such numbers include the emergency, directory enquiries and
voice mail numbers.
1. Select the Service dial number.
2. The names of the available services will be shown.
3. Use the up/down navigation keys to select a service.

• Memory status
You can check the current memory status of the SIM card and
phone memory.
• Own number (SIM dependent)
Use this to display your phone number in the SIM card.
56
Organizer [Menu 4]

57
Messages [Menu 5]
Press the Menu key (
<
) and select Messages using navigation
keys.
Text messages [Menu 5-1]
Your phone receives voice mail notification messages and Short
Message Service (SMS) messages.
Voice mail and SMS are network services. Please contact your
network operator for more information.
When the icon appears, you have received voice mail.
When the icon appears, you have received a new text message.
If the message memory is full, a message is displayed, the icon
flashes and you cannot receive any new messages. Use the
Delete
option in the Inbox menu to delete obsolete messages.
Once there is space in the message memory, any undelivered SMS
messages will be received (provided sufficient space is available).
Write message [Menu 5-1-1]
You can write and edit text messages.
1. Key in your message. For details on how to enter text, refer to
page 24 through 27 (Entering Text).
2. After you complete the message, to select the required option,
press the left soft key [Option].
The following options are available.
•
Send to number: Enter the number or select the number from
the Phonebook or the recent numbers. You can send a
message up to 5 phone numbers at a time. Press the left soft
key [Options]. The following options will be displayed.
– Send (It only shows after a phone number is entered)
– Recent numbers
– Search

58
Messages [Menu 5]
• Save to draft: Allows you to save the message so that it can
be sent later.
•
T9 languages: Select the desired language of T9 mode.
•
Clear text: Erases the whole text.
• Exit: Allows you to exit from the Write message menu.
3. You can also send attachments with the message by pressing
the right soft key [Attach], while you’re entering a message.
• Symbol: You can attach special characters.
•
Picture: You can send and receive text messages that contain
pictures, known as ‘picture messages’. Several preset pictures
are available in the phone and they can be replaced with new
ones received from other sources.
•
Animation: Attaching an animation in a message can be done
through EMS (Enhanced Messaging Service). You can select
any of 15 animations in the phone.
• Sound: If available, you can attach a sound available for a
short message.
•
Text template: You can use text templates already set in the
phone.
•
Phone number: You can add phone numbers in the message.
•
Signature: You can attach your singnature.
Inbox [Menu 5-1-2]
Received messages can be searched and the contents can be
viewed.
Received messages are displayed in date order.
Press the menu key and select Messages ➞ Text messages ➞
Inbox.

59
Each received message has the following options available.
Press the left soft key [Options].
• Reply
Replies to the received message.
• Forward
Forwards a received message to other recipients.
• Return call
Calls the sender’s phone.
Note
• SIM message refers the message saved in the SIM
memory. And the network distinguishes an incoming
message into the SIM message or just message.
Icon Description
Read SIM message
Unread SIM message
Read message
Unread message
Read delivery report
Unread delivery report

60
Messages [Menu 5]
• Extract
Extracts a picture, animation, sound, phone number, text web
page or email address from the message. These will be saved in
My folder, Phonebook, or bookmarks.
• Delete
Deletes the selected message from the Inbox.
• View information
Shows more detailed information about the selected message.
Outbox [Menu 5-1-3]
You can view the list and contents of sent messages in this menu
and can also verify if the transmission was successful.
The following options are available.
• Forward
Forwards the current message to other recipients.
• Delete
Deletes the selected message from the Outbox.
• View information
Shows more detailed information about the selected message.
Icon Description
Sent SIM message
Sent message

61
Draft [Menu 5-1-4]
In this menu, you can see the message list saved as draft. Scroll
through the list using the up/down navigation keys.
Each draft has the following options.
• Send
Sends the selected message to other recipients.
• Delete
Deletes the selected message.
Settings [Menu 5-1-5]
This menu lets you set up default SMS information.
• Message types
Sets the default message type between Text, Voice, Fax, Paging,
X.400, E-mail and ERMES. The network can convert the
messages into the selected format.
• Validity period
Sets the length of time for which your text messages will be saved
at the SMS center while attempts are made to deliver them to the
recipient. Possible values are 1 hour, 12 hours, 1 day, 1 week and
the maximum authorised by your network operator.
• Delivery reports
Activates or deactivates the report function. When this function is
activated, the network informs you whether or not your message
has been delivered.

62
Messages [Menu 5]
• Reply with same service centre
Allows the recipient of your SMS message to send you a reply via
your message centre, if the service is provided by the network.
• SMS centre
Saves or changes the number of your SMS centre when sending
text messages. You must obtain this number from your service
provider.
• Bearer setting
Selects GPRS or GSM. Contact your network operator or service
provider for information related to setting a selected bearer, pricing
and connection speed.
Delete all [Menu 5-1-6]
You can delete all messages in the message memory.
Multimedia messages [Menu 5-2]
A multimedia message can contain text, images, and/or sound clips.
This feature can be used only if it is supported by your network
operator or service provider. Only devices that offer compatible
Multimedia message or e-mail features can receive and send
multimedia messages.
Write [Menu 5-2-1]
1. Write message title, then press OK key or left soft key.
2. Key in the text message. Using the right soft key, you can input
symbols, numbers and emoticons, or use T9 input mode.
After the text message input, press the left soft key [Done].
3. Add an image and/or sound. You can move to the next section
using the up/down navigation.

63
4. You can add a slide by moving the cursor on , then pressing
the OK key or the left soft key [Select]. You can also add a slide
using the right soft key [Menu].
5. Press the right soft key [Menu]. The following options are
available.
• Send: Supports multiple numbers and email addresses.
•
Preview: Displays the multimedia message you wish to send.
•
Save: Saves the multimedia message in draft or as a template.
•
Delete: Deletes the MMS message.
• Slide duration: Set the slide show duration.
•
Slide format: Align the message contents right, left, top or
bottom.
•
Add Slide: Adds a slide before or after the current slide.
•
Remove Slide
: Deletes the selected slide.
Inbox [Menu 5-2-2]
You will be alerted when you have received messages. They will be
saved in the Inbox. You can identify each message by icons. For
details, see the icon description below.
If the phone has ‘No space for messages’, you can make space by
deleting messages, media and applications.
Icon Description
Read multimedia messages
Unread multimedia messages
Read notified multimedia messages
Unread notified multimedia messages

64
Messages [Menu 5]
• Timer stop
The Timer stop menu is displayed when you receive a message
including various pictures. Usually, the pictures are sequentially
displayed automatically. However, if you select this menu, you can
see the next picture by pressing the left soft key [Next] manually.
• Previous slide
Displays the previous page.
• Replay
Replays multimedia messages.
• Delete message
Deletes the current message.
• Reply all
Replies to all senders.
• Forward
Forwards the selected message to other recipients.
• Save message
Saves a multimedia message in draft form or as a template.
• Save item
Extracts pictures or sounds. They will be saved in My folder or
Phonebook.
• Detail
Displays information about received messages; Sender’s address,
Subject (only for Multimedia message), Message date & time,
Message type, Message size.

65
Outbox [Menu 5-2-3]
Use this to see sent messages. For each sent message, you can
see the delivery status.
• Timer stop
Usually, the pictures are in the form of an automatic slide show.
However, if you select this menu, you can see the next picture by
pressing the left soft key [Next] manually.
• Previous slide
Displays the previous page.
• Replay
Replays the current message.
• Delete message
Deletes the current message.
• Forward
Forwards the current message to other recipients.
• Save message
Saves a multimedia message in draft form or as a template.
• Save item
Saves items such as images, sound and attachments to a
message.
Icon Description
Sent

66
Messages [Menu 5]
• Detail
Displays information about the outbox messages:
Subject (only for Multimedia message), Message date & time,
Message type, Message size.
• Reply
Replies to the current message.
• Reply all
Replies to all recipients of the selected message.
Draft [Menu 5-2-4]
Using this menu, you can preset up to five multimedia messages
that you use most frequently. This menu shows the preset
multimedia message list.
The following options are available.
• Send
Supports multiple member and email addresses.
• Preview
To see the draft multimedia message.
• Save
Saves multimedia messages in draft form or as templates.
• Delete
Deletes the message.
• Settings
Select to set the slide duration or align the message contents to
the right, left, top or bottom.

67
• Add slide
Adds a slide before or after the current slide.
• Remove slide
Removes the highlighted slide.
Settings [Menu 5-2-5]
Via this menu, you can set up the default multimedia message
information.
The following options are available.
• Slide duration
Set the duration of each slide.
• Alignment
Set the alignment of messages.
• Validity period
Set the duration for keeping messages on the network server.
• Auto download
On: If you select this, messages are downloaded automatically on
receipt.
Confirm: Requires you to confirm you want to download the
message.
Off: Defers downloading messages.
• Message centre
Enter the address of an MMS server to use the MMS service.

68
Messages [Menu 5]
• Profiles
See page 82 for further information.
Voice messages [Menu 5-3]
This menu provides you with a quick way of accessing your voice
mailbox (if provided by your network). Before using this feature, you
must enter the voice server number obtained from your network
operator.
When new voice message is received, the ( ) symbol will be
displayed on the screen. Please check with your network provider
for details of their service in order to configure the handset correctly.
Listen to voice mail [Menu 5-3-1]
Once this option has been selected, simply press the left soft key
[OK] to listen to voice messages. You can also hold down the
1 key in standby mode to listen to voice messages.
Voice mail centre [Menu 5-3-2]
You can input and set the voice mailbox number.
Info services [Menu 5-4]
Info service messages are text messages sent by the network to
mobile phone users. They provide general information such as
weather reports, traffic news, taxis, pharmacies, and stock prices.
Each type of information is associated with a number, which can be
obtained from the network operator. When you receive an info
service message, a popup message will indicate a new message
receipt or the info service message will be displayed directly.
In standby mode, the following options are available when viewing
info service messages.

69
Read [Menu 5-4-1]
The list of received broadcast messages can be searched and the
contents viewed.
Receive [Menu 5-4-2]
Use this to enable or disable the reception of broadcast messages.
Alert [Menu 5-4-3]
Set alert on or off for a new broadcast message.
Auto display [Menu 5-4-4]
If you select this option On, all received broadcast messages will be
automatically displayed.
Languages [Menu 5-4-5]
(Dependent to network and subscription)
This option lets you select the preferred languages. Cell broadcast
messages will be displayed in the selected language. If you use all
languages supported by the phone, select Automatic at the end of
the list.
Topics [Menu 5-4-6]
(Dependent to network and subscription)
To create new topics, press the left soft key [Option] then select
Add new. If you already have topics, you can cancel, edit, or delete
them by using the left soft key [Options].

70
Messages [Menu 5]
Templates [Menu 5-5]
There are pre-defined messages in the list. You can view and edit
the template messages or create new messages. Three types of
templates are available: Text, Multimedia and Signature.
Text [Menu 5-5-1]
• Edit
Use this to write a new message or edit the selected template
message from the text template list.
• Delete
Deletes the selected template message from the text template list.
• Send text message
Use this to send the selected template message by SMS.
• Send multimedia message
Use this to send the selected template message by MMS.
• Add new
Use this to create new template.
Multimedia [Menu 5-5-2]
• Send
Sends the multimedia template. Supports multiple numbers and
email addresses.
• Preview
Displays the draft multimedia message.

71
• Save
Saves multimedia messages in draft form or as templates.
• Delete
Deletes the multimedia template.
• Slide duration
Set the slide show duration.
• Slide format
Align the message contents right, left, top or bottom.
• Add Slide
Adds a slide before or after the current slide.
• Remove Slide
Deletes the highlighted slide.
• Add Image
Use this to add an image before or after the current image.
• Add Sound
Adds a sound before or after the current sound.
Signature [Menu 5-5-3]
This option helps you to make your own Signature. Key in the
name, mobile phone number, office number, Fax number, and
E-mail address.
• Edit
Use this to write a new message or edit the selected Signature.
• Delete
Use this to delete the selected signature.

72
Messages [Menu 5]
• Send text message
Use this to send the selected signature by SMS.
• Send multimedia message
Sends the selected signature by MMS.
Memory status [Menu 5-6]
You can check the current memory status for SMS and MMS.

73
Camera [Menu 6]
The L1100 has a built-in camera. It supports Zoom, White balance,
Colour/Sepia/Grey settings, and Multi burst functions.
Take picture [Menu 6-1]
Press the Menu key (<) and select Camera ➝ Take picture.
Or, press the camera key (Q) in standby mode.
1. Focus on the subject to capture, then press the [OK] key or the
camera hot key.
2. ‘Saved’ is displayed in the top left of the captured image. The
captured image is then automatically saved.
3. Press the [OK] key to continue taking pictures. Or press the clear
key (C) to delete the image. Press the right soft key to send
MMS picture message using the captured image.
Note
• The remaining memory is shown in the top right of the
image. If there is insufficient memory, the image size is
automatically reduced. If the memory is full, ‘memory
full’ is displayed and you cannot take any more picture.
Create space by deleting old images.
Note
• In the preview mode, you can immediately go to Gallery
by pressing the right soft key [Gallery].

< Options before taking a picture >
Press the left soft key [Options] to set the
options in the preview mode. You can select the
desired option by pressing the [OK]. And you
will see the current option setting value in the
top of the preview screen.
Then you can modify the desired value by pressing the left/right
navigation keys. If you press the [OK] or left soft key [Done], the
selected option value is set and return to the preview mode.
You can set the following options.
1. Image size: Select the desired image size to be captured.
[640x480, 320x240, 160x120, 128x160, 48x80]
2. Brightness: Select the desired brightness. [-2 ~ +2]
3. White balance: Select the desired white balance.
[Auto/ Daylight/ Incandescent/ Cloudy/ Fluorescent]
4. Zoom: Select the zoom factor [x1, x2, x4]
5. Colour effect: Select Colour/Sepia/Mono mode by using the
left/right navigation keys.
6. Multi shot: Select the number of images to be captured in multi
burst mode.
7. Shutter sound: Select shutter sound [Sound1 / Sound2 /
Sound3 / Off]
8. Factory settings: Return to the default factory settings.
74
Camera [Menu 6]
OptionsOptions GallerGallery
Note
• The larger the image size, the better the image quality.
However, this will use more memory.

75
Gallery [Menu 6-2]
Then select image category.
[All pictures / General pictures / Phonebook pictures]
You can view, organise and send pictures saved in your phone.
1. Use the navigation keys to select the picture you want a full
screen view of.
2. Press the [OK] key. You will see the name of the image on top of
the LCD screen.
3. Press the left soft key [Options] to access the following
submenus.
• Thumbnail/Enlarge: You can view the selected image.
•
Delete: Deletes the selected image.
•
Send multimedia message: Sends MMS picture messages
using the selected image.
• Set as wallpaper: Set the selected image as wallpaper.
•
Slide show: Plays back every image in the selected category
in succession, in order. To stop the slide show playback, press
the C key.
•
Rename: You can change the title of the selected image.
•
Delete all:
Deletes all images in the selected category.
• Details: You can check the title, size, date and time of the
selected image.
4. To go back to the Camera menu, press the right soft key [Back].
In [Memory status] sub menu, you can check the memory status in
your phone.
[total size / used size / free size]

76
Java is a technology developed by Sun Microsystems. Similar to the
way you would download the Java Applet using the standard
Netscape or MS Internet Explorer browsers, Java MIDlet can be
downloaded using the WAP enabled phone. Depending on the
service provider, all Java based programs such as Java games can
be downloaded and run on a phone. Once downloaded, the Java
program can be viewed within the Applications menu where you can
select, execute, or delete. The Java program files saved in the
phone are in .JAD and .JAR formats.
Note
• The JAR file is a compressed format of the Java
program and the JAD file is a description file that
includes all detailed information. From the network, prior
to download, you can view all detailed file descriptions
from the JAD file.
Warning
• Only J2ME (Java 2 Micro Edition) based programs will
run in a phone environment. The J2SE (Java 2 Standard
Edition) based programs will only run in a PC
environment.
Games & Apps [Menu 7]

77
Games [Menu 7-1]
The phone offers you the games to play with.
Applications [Menu 7-2]
Application menu displays the list of Java programs downloaded
using the WAP. All previous downloaded programs can be selected,
deleted, or viewed in detail within the Application menu. From the
list within the Application menu, the following options are available:
• Open: Open the selected program. The list includes all Java
programs installed in the phone.
• Delete: Delete the selected program. Once deleted, you will not be
able to restore the program unless it is downloaded again using
the WAP.
• Details: Display detailed information on the selected program.
This includes the program name, program size, program version,
vendor information and the website address or the URL.
Note
• The control keys are different depending on a game.
However, each one has an introduction to explain the
main control keys.
[ Common key function ]
< : Game menu
> : Back

78
Games & Apps [Menu 7]
• Connect options: Some Java applications may require data
connection to be mode. Select one of the following options.
1. Ask first: You will be asked before the application makes the
connection.
2. Allowed: The connection is created immediately without a
notification.
3. Not allowed: No connection is allowed.
Download [Menu 7-3]
When a new Java program is downloaded using the WAP, the
address from which a download takes place is known as a
bookmark. The Java menu includes a bookmark list for downloading
Java programs and this bookmark list can be viewed from the
Download menu. You can connect, view, edit, delete, and add new
bookmarks.
•
Connect: Selected address in the bookmark is used for data
connection. After successful connection, desired Java program
can be downloaded from the list.
• View: Detailed information on a bookmark can be viewed such as
the address of bookmark and title of bookmark required for
connecting to certain sites.
• Edit: Selected bookmark can be edited. Editing a bookmark is
done in the order of Address ➞ Title. When creating a new
bookmark, same order is followed.
• Delete: Selected bookmark is deleted. All bookmarks can be
deleted completely from the bookmark list screen. Deleted
bookmark cannot be restored so caution is required when deleting
bookmarks.
• Add new: New bookmark is added. The same order used during
Edit bookmark applies to Add new bookmark. Select the Add new
option from the bookmark menu or when no bookmark exists, then
the Add new can be selected from the bookmark list screen.

79
Note
• After selecting the Connect function to access the Java
MIDlet Provider’s server, you may choose one of many
Java programs to download and install into your phone.
Once connected to the server, the Go button can be
pressed to view the JAD information on a desired
program. The Get button will begin the download and
install process. The download and install process will
take place simultaneously and once download is
complete you can immediately run the Java program.
The installed Java program can be selected to run at a
later time from the Application menu.
Information [Menu 7-4]
Memory status [Menu 7-4-1]
Shows the size of memory available for game and application
installations. You can also see the whole memory status of
Handset.

80
Press the Menu key < and select Internet using navigation keys.
You can access various WAP (Wireless Application Protocol)
services such as banking, news, weather reports and flight
information. These services are specially designed for mobile
phones and they are maintained by WAP service providers.
Check the availability of WAP services, pricing and tariffs with your
network operator and/or the service provider whose service you
wish to use. Service providers will also give you instructions on how
to use their services.
Please contact your network operator to open your Internet account.
To use the Web Browser, you must indicate your phone number via
the Own number menu option.
Once connected, the homepage is displayed. The content depends
on the service provider.
You can access any website page by entering its URL address. To
exit the browser at any time, press the
E key. The phone will
return to the standby mode.
Navigating with the WAP browser
You can surf the Internet using either the phone keys or the WAP
browser menu.
Using the phone keys
When surfing the Internet, the phone keys function differently to
phone mode.
Key Description
U D Scrolls each line of the content area
C Returns to the previous page
O Selects options and confirms actions
Internet
*
[Menu 8]
* Above features may not be supported by network provider.

81
Using the WAP browser menu
There are various menu options available when surfing the Wireless
Web.
Home [Menu 8-1]
Connect to a homepage. The homepage will be the site which is
defined in the activated profile. It will be defined by the service
provider if you have not defined it in the activated profile.
Bookmarks [Menu 8-2]
Set the current page as a new bookmark or move an established
bookmark. Your phone may have some pre-installed bookmarks for
sites not affiliated with LG. LG does not warrant or endorse these
sites. If you choose to access them, you should use the same
security or content precautions as you would with any site.
E-mail server [Menu 8-2-1]
• Connect
Connects to the E-mail server that you configured.
• Edit address
Edit the E-mail address.
Delete all [Menu 8-2-2]
Delete all bookmarks.
Note
• The WAP browser menus may vary, depending on your
browser version.

82
Push messages [Menu 8-3]
Inbox [Menu 8-3-1]
You can order Push messages from WAP service providers. Push
messages are notifications of, for example, news headlines and
they can contain a text message or the address of a WAP service.
For availability and subscription, contact your WAP service provider.
Service providers can update an existing Push message every time
a new Push message is received. Messages can be updated even if
you have moved them to another folder. When Push messages
expire, they are deleted automatically.
• Information
Shows the information of received push messages.
• Load
Connects to a specific site using the information in the received
push message.
• Delete
Deletes the selected push message.
Receive [Menu 8-3-2]
You can choose whether or not you wish to receive push messages.
Profiles [Menu 8-4]
For more information, consult your network operator.
Each profile has submenus as follows:
• Activate: Activates the selected profile.
• Settings: Use this to edit and change WAP settings for the
selected profile.
• Rename: You can change the selected profile’s name.
Internet [Menu 8]

83
• Delete: Deletes the selected profile from the list.
• New profile: You can add a new profile.
Go to URL [Menu 8-5]
You can connect directly to the site you want. To do this, you need
to enter a specific URL.
Cache settings [Menu 8-6]
The information or services you have accessed are saved in the
cache memory of the phone.
Clear cache [Menu 8-6-1]
Removes all context saved in cache.
Check cache [Menu 8-6-2]
Set a value whether a connection attempt is made through cache or
not.
Note
• The changes using these options may affect the MMS
function.
Note
• A cache is a buffer memory, which is used to save data
temporarily.

Security certificates [Menu 8-7]
A list of the available certificates is shown.
Reset profiles [Menu 8-8]
You can reset profiles to return to original settings.
WAP information [Menu 8-9]
The WAP browser version is displayed.
84
Internet [Menu 8]

85
Settings [Menu 9]
Press the Menu key (<) and select Settings using navigation
keys.
Date & Time [Menu 9-1]
This option lets you change the current time and date displayed.
The following options are available.
Set date [Menu 9-1-1]
Use this to enter the day, month and year. You can change the date
format via the Date format menu option.
Date format [Menu 9-1-2]
You can set the date format such as DD/MM/YYYY, MM/DD/YYYY,
YYYY/MM/DD. (D: Day, M: Month, Y: Year)
Set time [Menu 9-1-3]
Use this to enter the current time. You can choose the time format
via the Time format menu option.
Time format [Menu 9-1-4]
You can set the time format between 12 hours and 24 hours.
Phone settings [Menu 9-2]
Many features of your phone can be customised to suit your
preferences. All of these features are accessed via the Phone
settings menu.
Wallpaper [Menu 9-2-1]
Use this to set up the display on the LCD screen in the standby
mode.

Greeting note [Menu 9-2-2]
Use this to show the greeting note on the internal LCD screen in the
standby mode and external LCD.
Menu colour [Menu 9-2-3]
Your phone provides you with 4 menu colour themes. Set the menu
colour by scrolling and pressing the Select key.
Languages [Menu 9-2-4]
You can select the display language. When the language option is
set to Automatic, the language is automatically selected according
to the language of the SIM card used. English will be set if the
language on the SIM card is not supported by the phone.
Backlight [Menu 9-2-5]
Use this to select whether or not the phone uses the backlight.
A small increase in standby/talk time can be achieved by turning the
backlight off.
You set the backlight option for the keypad in the up/down position
independently.
LED Indication [Menu 9-2-6]
Use this to set LED Indication blinking on/off, which shows whether
your phone is power on.
Network name [Menu 9-2-7]
Use this to display network name you use on the LCD screen in the
standby mode.
86
Settings [Menu 9]

87
Call settings [Menu 9-3]
To change the settings for call diverting.
Call divert [Menu 9-3-1]
When this network service is activated, you can direct your
incoming calls to another number, for example, to your voice
mailbox number. For details, contact your network operator. Select
one of the divert options, for example, select If busy to divert voice
calls when your number is busy or when you reject incoming calls.
The following options are available.
• All voice calls
Diverts all voice calls unconditionally.
• If busy
Diverts voice calls when the phone is in use.
• If no reply
Diverts voice calls which you do not answer.
• If out of reach
Diverts voice calls when the phone is switched off or out of
coverage.
• All data calls
Diverts to a number with a PC connection unconditionally.
• All fax calls
Diverts to a number with a fax connection unconditionally.
Each option has the following menu:
- Activate
Activates the corresponding service.

• To voice mail
Forwards to message centre. This function does not apply to
All data calls and All fax calls menus.
• To other number
Input the number for call diverting.
- Cancel
Cancels the selected call divert.
- View status
You can check the status of the service.
• Cancel all
Cancels all call divert settings.
Answer mode [Menu 9-3-2]
Select the desired mode to answer a call.
• Flip open
You can receive a call simply by opening the flip.
• Any key
When the phone rings, you can answer a call by pressing any key
except the key and the right soft key (>).
• Only send key
You can answer a call only by pressing the send key.
Send my number [Menu 9-3-3]
This network service lets you decide whether your phone number is
displayed (On) or hidden (Off) from the person you are calling.
Select Set by network to reset the phone to the setting that you
have agreed upon with your service provider.
88
Settings [Menu 9]

89
Call waiting [Menu 9-3-4]
(Network Service)
The network will notify you of a new incoming call while you have a
call in progress. Select Activate to request the network to activate
call waiting, Cancel to request the network to deactivate call
waiting, or View status, to check if the function is active or not.
Minute minder [Menu 9-3-5]
When set to On, the phone will beep every minute during an
outgoing call to keep you informed of the length of the call.
Voice dial [Menu 9-3-6]
You can make a phone call by speaking a voice tag that has been
added to a contact card. Any spoken word(s) can be a voice tag.
Before using voice-activated dialling, note that:
• Voice tags are not language dependent. They are dependent on
the speaker’s voice.
• Voice tags are sensitive to background noise. Record them and
make calls in a quiet environment.
• When recording a voice tag or making a call by saying a voice
tag, the loudspeaker is in use. Hold the phone at a short distance
away from your mouth and face so that the proximity sensor does
not turn the loudspeaker off.
• Very short names are not accepted. Use long enough names and
avoid similar names for different numbers.
- Automatic
Use this to enter voice-activated dialling mode whenever you
slide the keypad down.
- Manual
Use this to enter voice-activated dialling mode by holding the
star [*/voice] key.

Auto redial [Menu 9-3-7]
Select On, and your phone will make a maximum of five attempts to
connect the call after an unsuccessful call attempt.
Closed user group [Menu 9-3-8]
(Network Service)
This is a network service that specifies the group of people who you
can call and who can call you. For more information, contact your
network operator or service provider. If a group index is specified, it
is used for all outgoing calls. If no group index is specified, the
network will use the preferential index. (A specific index is stored in
the network.)
• Preset : Sets the selected CUG index.
• On: You can edit the CUG index and activate it.
• Off: Deletes the selected CUG.
90
Settings [Menu 9]
Note
• You must say the name exactly as you said when you
recorded it. This may be difficult, for example, in a
noisy environment or during an emergency, so you
should not rely solely upon voice-activated dialling in
all circumstances.

91
Security settings [Menu 9-4]
Various passwords are used to protect certain features of your
phone.
PIN code request [Menu 9-4-1]
When the PIN code request feature is enabled, you must enter
your PIN each time you switch the phone on. Consequently, any
person who does not have your PIN cannot use your phone without
your approval.
The following options are available:
• On
You must enter the PIN each time the phone is switched on.
• Off
The phone connects directly to the network when you switch it on.
Phone lock [Menu 9-4-2]
When the Phone lock feature is enabled, the phone is locked and
you must enter the phone password each time the phone is
switched on. The password is factory set to 0000. To change the
phone password, refer to the Change codes – Security code
menu option [Menu 9-4-5-1]. Once the correct password has been
entered, you can use the phone until you switch it off.
Note
• Before disabling the PIN code request feature, you
must enter your PIN.

The following options are available:
• Power On
- Enable
You are required to enter the phone password when you switch
the phone on.
- Disable
You do not need to enter the phone password when you switch
the phone on.
- If SIM changed
Your phone will request security code only when you change
your SIM card.
• Immediately
After entering the correct security code, the phone will lock after
going into the idle state. If you want to disable this phone lock, you
should enter the right security code after pressing the right soft
key. If you power off in the phone lock state, when the phone is
next powered on, the phone is in the lock state.
Call barring service [Menu 9-4-3]
(Network dependent)
Call barring lets you restrict the making and receiving of calls with
your phone. For this function, you need the barring password, which
you can obtain from your service provider.
The following options are available:
• All outgoing
No call can be made.
92
Settings [Menu 9]

93
• Outgoing international
International calls cannot be made.
• Outgoing international except home country
When abroad, calls can be made only to numbers within the
current country and to your home country, No call can the country
where your home network provider is located.
• All incoming
No call can be received.
• Incoming when abroad
Calls cannot be received when you are using your phone outside
your home service area.
• Cancel all barrings
All call barring settings are deactivated; calls can be made and
received normally.
• Change password
Use this to set and change the call barring password obtained
from your service provider using this option. You must enter the
current password before you can specify a new one. Once you
have entered a new password, you are asked to confirm it by
entering it again.
Note
• To use Call barring service, you must input the
network password. When calls are barred, calls may be
possible to certain emergency numbers on some
networks.

Fixed dial number (FDN) [Menu 9-4-4]
(SIM dependent)
You can restrict outgoing calls to selected phone numbers if
supported by your SIM card. The FDN capacity to add depends on
the SIM card. When you enter the FDN, the PIN2 code is required.
This Function enables patial numbers (e.g. area codes) to save.
Examples:
If 3 numbers (0123, 123123, ?89012) are stored in the FDN list,
then you are allowed to dial:
012345678..., 01236789..., 123123 only, 189012, and 289012.
(“?” means any numbers )
If you try to make a call which is not added in the FDN list, you can’t
make a call and see a message “FDN Check”.
• Enable
If the FDN is enabled, you can make a call by only number on a
list. A phonebook function is restricted partially. You can’t add
entries into SIM, but can only add entries into the phone memory.
Also, you can search only phonebook entries which are added into
the phone memory.
• Disable
If the FDN is disabled, you can use a phonebook function.
• Number list
You can see the FDN list. You can add, edit and delete the FDN
by pressing the left soft key [Options].
94
Note
• Not all SIM cards have a PIN2. If your SIM card does
not, this menu option is not displayed.
Settings [Menu 9]

95
Change codes [Menu 9-4-5]
The Change codes feature lets you change your current password
to a new one. You must enter the current password before you can
specify a new one.
Use this to change the access codes:
Security code, PIN code,
PIN2 code
Network settings [Menu 9-5]
The Network settings feature enables you to indicate whether the
network used when roaming (outside your home area) is selected
automatically, manually or preferably.
Automatic [Menu 9-5-1]
Use this to set the phone to automatically search for and select one
of the cellular networks available in your area.
The phone will default back to Automatic if it is switched off.
Manual [Menu 9-5-2]
If you want to select the desired network manually from a list of
network. If the connection to the manually selected network is lost,
the phone will sound an error tone and ask you to select a network
again.
Note
• PIN: Personal Identification Number
Note
• You can select a network other than your home
network only if it has a valid roaming agreement with
your home network.

Preferred [Menu 9-5-3]
You can set a list of preferred networks the handset should attempt
to register with first, before attempting to register to any other
networks. This list is created from the handset’s predefined list of
known networks.
Band selection [Menu 9-5-4]
Use this to set the network band between two choices, GSM
900/1800 or GSM1900.
GPRS settings [Menu 9-6]
GPRS (General Packet Radio Service) is a technology that allows
mobile phones to be used for sending and receiving data over the
mobile network. GPRS is a data bearer that enables wireless
access to data network such as the Internet.
Before you can use GPRS technology;
• You need to subscribe to the GPRS service. For availability and
subscription to GPRS service, contact your network operator or
service provider.
• You need to save the GPRS settings for the applications used
over GPRS.
Attach [Menu 9-6-1]
If you select Power on and you are in a network that supports
GPRS, the phone registers to the GPRS network and sending short
messages will be done via GPRS. Also, starting an active packet
data connection, for example, to send and receive e-mail, is quicker.
If you select When needed, the phone will use a GPRS connection
only if you start an application or action that needs it. The GPRS
connection is closed after it is no longer required by any application.
96
Settings [Menu 9]

97
External device [Menu 9-6-2]
When you use Internet via GPRS by using external device, you can
set the following six profiles: Rename, APN, IP address, DNS,
User ID, and Password.
Reset settings [Menu 9-7]
You can reset your phone to its default configuration.
To do so, proceed, as follows.
1. Select the Reset settings menu option.
2. Enter the 4-digit security code.
Note
• If there is no GPRS coverage and you have chosen
Automatic, the phone will periodically try to establish a
connection.
Note
• The security code is preset to 0000.

Please check to see if any problem which you may have with your
phone is described here before taking it for service or calling a
service engineer.
Q How do I view the list of outgoing calls, incoming calls and
missed calls?
A Press S.
Q How do I clear all call history?
A Press the left soft key and then 2 4 4.
Q How do I view all numbers saved in the memory?
A Press the right soft key and then 1.
Q does not disappear from the screen.
A Check whether you are in a service area. If you continue to see
, turn off the power and wait for approximately 2 minutes
before turning it back on. If there is no change, relocate to
another area and check again.
Q Connection is poor or is not audible in certain areas.
A In certain areas, signal strength can vary dramatically. Try
moving to a different location. Heavy network traffic may affect
the ability to connect, or the stability of the call.
Q Connection is poor even when established.
A In certain areas, signal strength can vary dramatically. Try
moving to a different location. Heavy network traffic my affect
the ability to connect, or the stability of the call.
98
Q&A

99
Q LCD does not turn on.
A Remove and replace the battery and turn on the power. If the
phone still does not turn on, charge the battery and try again.
Q An echo can be heard during connection with a certain
telephone in a certain area.
A It is called ‘Echo Phenomenon’. It occurs if the volume is too
high or caused by special properties (semi electronic telephone
exchange) of the machine on the other end.
Q The phone gets warm.
A During long calls, or if games/Internet are used for a long time,
the phone may become hot. This is perfectly normal and has no
effect upon the life of the product or performance.
Q The bell does not ring, or lamp or LCD blinks only.
A The phone is set to ‘Vibrate’ or ‘Silent’ in the Profiles menu.
Please select ‘General’ or ‘Loud’
Q Standby duration of the phone gradually becomes shorter.
A Batteries have a limited life. When the battery lasts for half its
original time, it requires replacement. Only use authorised
replacement parts.
Q Usage time of battery becomes shorter.
A If the battery time is short, it may be due to the user
environment, or large volume of calls, or weak signals.

100
Q&A
Q No number is dialled when you recall a phonebook entry.
A Check that the numbers have been saved correctly, by using the
phonebook Search feature. Resave them, if necessary.
Q You cannot be contacted.
A Is your phone switched on (E pressed for more than three
seconds)? Are you accessing the right cellular network? Have
you set an incoming call barring option?

101
Accessories
There are a variety of accessories available for your mobile phone.
You can select these according to your personal communication
requirements. Consult your local dealer for availability.
Supplied adapter
This adapter lets you charge the while at
home or in the office.
Battery
Standard battery is available.
Headset
Allows hands-free operation. Includes
earpiece and microphone.
Data cable kit
Connects your phone to a PC.
Note
• Always use genuine LG accessories. Failure to do this
may invalidate your warranty.
• Accessories may be different in different regions;
please check with our regional service company or
agent for further enquiries.

102
Technical Data
General
Product name : L1100
System : GSM 900/DCS 1800
Ambient temperatures
Max : +55
°C
Min : -10
°C

103
Memo

104
Memo
-
 1
1
-
 2
2
-
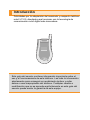 3
3
-
 4
4
-
 5
5
-
 6
6
-
 7
7
-
 8
8
-
 9
9
-
 10
10
-
 11
11
-
 12
12
-
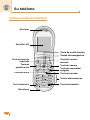 13
13
-
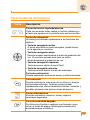 14
14
-
 15
15
-
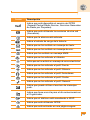 16
16
-
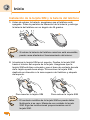 17
17
-
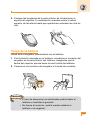 18
18
-
 19
19
-
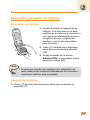 20
20
-
 21
21
-
 22
22
-
 23
23
-
 24
24
-
 25
25
-
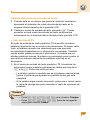 26
26
-
 27
27
-
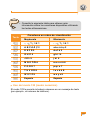 28
28
-
 29
29
-
 30
30
-
 31
31
-
 32
32
-
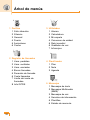 33
33
-
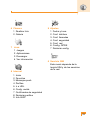 34
34
-
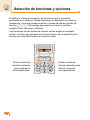 35
35
-
 36
36
-
 37
37
-
 38
38
-
 39
39
-
 40
40
-
 41
41
-
 42
42
-
 43
43
-
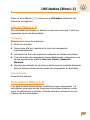 44
44
-
 45
45
-
 46
46
-
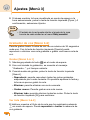 47
47
-
 48
48
-
 49
49
-
 50
50
-
 51
51
-
 52
52
-
 53
53
-
 54
54
-
 55
55
-
 56
56
-
 57
57
-
 58
58
-
 59
59
-
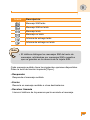 60
60
-
 61
61
-
 62
62
-
 63
63
-
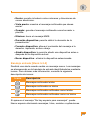 64
64
-
 65
65
-
 66
66
-
 67
67
-
 68
68
-
 69
69
-
 70
70
-
 71
71
-
 72
72
-
 73
73
-
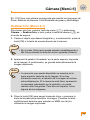 74
74
-
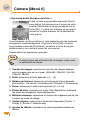 75
75
-
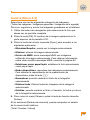 76
76
-
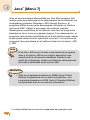 77
77
-
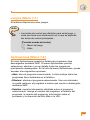 78
78
-
 79
79
-
 80
80
-
 81
81
-
 82
82
-
 83
83
-
 84
84
-
 85
85
-
 86
86
-
 87
87
-
 88
88
-
 89
89
-
 90
90
-
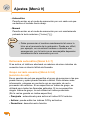 91
91
-
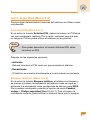 92
92
-
 93
93
-
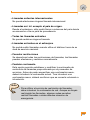 94
94
-
 95
95
-
 96
96
-
 97
97
-
 98
98
-
 99
99
-
 100
100
-
 101
101
-
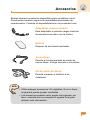 102
102
-
 103
103
-
 104
104
-
 105
105
-
 106
106
-
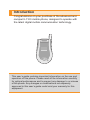 107
107
-
 108
108
-
 109
109
-
 110
110
-
 111
111
-
 112
112
-
 113
113
-
 114
114
-
 115
115
-
 116
116
-
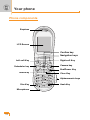 117
117
-
 118
118
-
 119
119
-
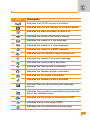 120
120
-
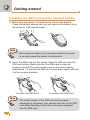 121
121
-
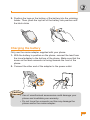 122
122
-
 123
123
-
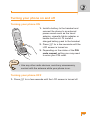 124
124
-
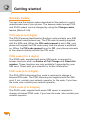 125
125
-
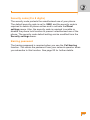 126
126
-
 127
127
-
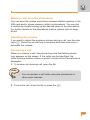 128
128
-
 129
129
-
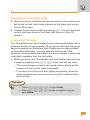 130
130
-
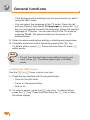 131
131
-
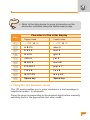 132
132
-
 133
133
-
 134
134
-
 135
135
-
 136
136
-
 137
137
-
 138
138
-
 139
139
-
 140
140
-
 141
141
-
 142
142
-
 143
143
-
 144
144
-
 145
145
-
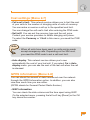 146
146
-
 147
147
-
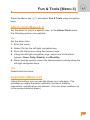 148
148
-
 149
149
-
 150
150
-
 151
151
-
 152
152
-
 153
153
-
 154
154
-
 155
155
-
 156
156
-
 157
157
-
 158
158
-
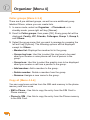 159
159
-
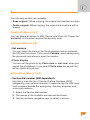 160
160
-
 161
161
-
 162
162
-
 163
163
-
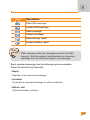 164
164
-
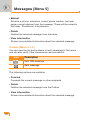 165
165
-
 166
166
-
 167
167
-
 168
168
-
 169
169
-
 170
170
-
 171
171
-
 172
172
-
 173
173
-
 174
174
-
 175
175
-
 176
176
-
 177
177
-
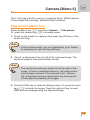 178
178
-
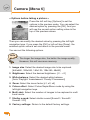 179
179
-
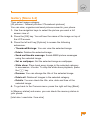 180
180
-
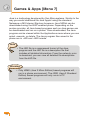 181
181
-
 182
182
-
 183
183
-
 184
184
-
 185
185
-
 186
186
-
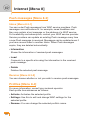 187
187
-
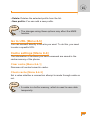 188
188
-
 189
189
-
 190
190
-
 191
191
-
 192
192
-
 193
193
-
 194
194
-
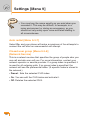 195
195
-
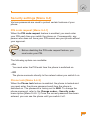 196
196
-
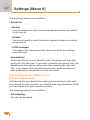 197
197
-
 198
198
-
 199
199
-
 200
200
-
 201
201
-
 202
202
-
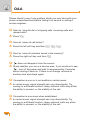 203
203
-
 204
204
-
 205
205
-
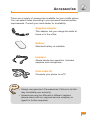 206
206
-
 207
207
-
 208
208
-
 209
209


en otros idiomas
- English: LG L1100 User manual
Artículos relacionados
-
LG C1100.NLDSV Manual de usuario
-
LG C3100 Manual de usuario
-
LG KP230.AVDSDB Manual de usuario
-
LG KE970.AROMTN Manual de usuario
-
LG Série F2400.ADEUBK Manual de usuario
-
-
LG Série W3000.THABL Manual de usuario
-
LG L3100.CZESV Manual de usuario
-
LG L341i Manual de usuario
-
LG G1500S El manual del propietario
Otros documentos
-
Doro 410gsm Ficha de datos
-
Sky F3P El manual del propietario
-
-
Samsung SGH-X400 Manual de usuario
-
Samsung SGH-X460 Manual de usuario
-
-
-
Microsoft 7390 Guía del usuario
-
ZTE Coral238 Manual de usuario
-
Jablocom JabloPhone GDP-04i Manual de usuario