RCA 42PA30RQ Manual de usuario

Categoría
Televisores LCD
Tipo
Manual de usuario

Este manual también es adecuado para

Part No.: RN0342H1904
English
Plasma HDTV
User s Manual
42PA30RQ
Model Number.
Español
English-1
Child Safety Guide
User Instructions
• Do not use the TV where the temperatures below 41°F (5°C)
• Do not display still image for several minutes.
Displaying still images from Video game and PC for longer than a certain period of time may produce
partial after images. To prevent this effect, reduce the ‘brightness’ and ‘contrast’ when display.
The still image for more than several minutes can cause screen image retention on the plasma
display. In other word, the image retention is called “screen burn”. To avoid such image retention,
please reduce the level of brightness and contrast of the screen when displaying a still image.
Watching TV in 4:3 format for a long, leaves trace on the left, right and center of the screen. It won’t
be covered by the warranty.
• Heat on the upper part of the product
After long periods of use, the top side of the product will be hot. It’s natural as heat dissipates from the
panel through the vent hole on the top of the TV. Please do not let children touch the upper part of the TV.
• Cell Defects
The Panel of PDP requires a highly sophisticated technique. However, the screen may have a few
dark or bright pixels. It won’t disturb the work of the product.
• Warranty
Below is not covered by Warranty.
1) Any damage caused by image retention. 2) Burn-in
Feature of PDP TV
• A cracking Noise
Temperature or Humidity can cause a cracking noise of the TV. Because the product can contracts or
expands according to surrounding environment.
English-
2
Child Safety Guide ........................................................................................................................................
Table of Contents
User Instructions
......................................................................................................................................... 2
1
Caution and Warning
..................................................................................................................................
....................................................................................................................................................
......................................................................................................................................
..................................................................................................................................
......................................................................................................................................
..................................................................................................................................
....................................................................................................................................
....................................................................................................................................
......................................................................................................................
5
FCC Notice 5
Preparation for Your New TV
Check Accessories
8
8
Setup TV Table Stand
8
Select TV Location
8
Connection and Using
8
TV Stand Installation
9
Safety Precautions 6,7
................................................................................................................................................
.................................................................................................................................................
.......................................................................................................................................
...............................................................................................................................................
..........................................................................................................................................
..................................................................................................................................................
.......................................................................................................................................
.................................................................................................................................
................................................................................................................................
............................................................................................................................
.................................................................................................................
.....................................................................................................................................
..............................................................................................................................
......................................................................................................................................
...............................................................................................................................
...................................................................................................................................
..........................................................................................................................................
..................................................................................................................................
.................................................................................................................................
............................................................................................................................
...................................................................................................................
...............................................................................................................
......................................................................................................................
........................................................................
..........................................................................
...............................................................................................
...............................................................................................
.................................................................................................................
.................................................................................................................
TV Signal Connection 10
Cable Connections 11
Back Panel Connections
TV Jacks Explanation
Side Keypad and Front Panel
12
12
13
14
15
15
16
17
Connecting AV Composite Video device (Good Video Quality)
Connecting YPbPr Component device (Better Video Quality)
Initial Setup 20
20
20
Menu Language
Signal Type
20
Auto Channel Search
Connecting HDMI device (Best Video Quality)
Connecting a Computer
How to Obtain Various Kinds of Input Sources
Basic Operations 21
21
21
21
21
22
Turning On and Off
Choosing TV Channel
Selecting Input Source
Adjusting TV Stand Angle
Channel Bar
22
22
Adjusting Volume
EPG (Electronic Program Guide)
17
17
Side Panel Buttons
Front Panel
Remote Control Instructions
18
18
18
Inserting Batteries in the Remote
Learning about Remote Control
19
19Remote Control Buttons
Remote Control Reception Angle
3
English-
Table of Contents
OSD Menu Operations
.............................................................................................................................
.............................................................................................................................
.........................................................................................................................................
..........................................................................................................................
................................................................................................................
................................................................................................................
....................................................................................................................
............................................................................................................................................
............................................................................................................................................
............................................................................................................................................
.....................................................................................................
..........................................................................................................................................
..........................................................................................................................................
................................................................................................................................................
23
23
23
25
26
27
31
33
34
35
37
Adjust the OSD Screen
Picture Menu
Sound Menu
Channel Menu
Parental Menu
Frequently Asked Questions (FAQs)
Troubleshooting
V-Chip Rating Explanations
37
37
38
............................................................................................................
Wall Mounting Unit Specification
39
................................................................................................................................
Product Specification
40
US V-Chip Rating System
Canadian English Rating System
Canadian French Rating System
Setup Menu
Others Menu
English-
4
43-84
..........................................................................................................................................
Warranty Card
41,42
42
End ................................................................................................................................................................
.........................................................................................................................
Spanish User’ Manual
WARNING: TO REDUCE THE RISK OF FIRE OR ELECTRIC SHOCK, DO NOT EXPOSE THIS APPLIANCE TO RAIN
OR MOISTURE.
CAUTION: CHANGES OR MODIFICATIONS NOT EXPRESSLY APPROVED BY THE PARTY RESPONSIBLE FOR
COMPLIANCE WITH THE FCC RULES COULD AVOID THE USERS AUTHORITY TO OPERATE THIS
EQUIPMENT.
Caution: To reduce the risk of electric shock, do not remove cover or back. No user-serviceable parts inside.
Refer servicing to qualified service personnel.
CAUTION
RISK OF ELECTRIC SHOCK
DO NOT OPEN
Caution and Warning
FCC Notice
The lightning flash with arrowhead
symbol, within an equilateral triangle
is intended to alert the user to the
presence of uninsulated dangerous
voltage within the product enclosure
that may be of sufficient magnitude to
consitute a risk of electric shock.
The exclamation point within an
equilateral triangle is intended to
alert the user to the presence of
important operating and maintenance
(servicing) instructions in the literature
accompanying the TV.
FCC Information
This equipment has been tested and found to comply with the limits for a Class B digital device, pursuant to Part 15 of the
FCC rules. These limits are designed to provide reasonable protection against harmful interference in a residential installation.
This equipment generates, uses and can radiate radio frequency energy and, if not installed and used in accordance with
the instructions, may cause harmful interference to radio Communications. However, there is no Guarantee that interference
will not occur in a particular installation. If this equipment does cause harmful interference to radio or television reception,
which can be determined by turning the equipment off and on, the user is encouraged to try to correct the interference by
one or more of the following measures:
- Reorient or relocate the receiving antenna.
- Increase the separation between the equipment and the receiver.
- Connect the equipment into an outlet on a circuit different from that to which the receiver is connected.
- Consult the dealer or an experienced radio/TV technician for help.
5
English-
1. Read these instructions.
2. Keep these instructions.
3. Heed all warnings.
4. Follow all instructions.
5. Do not use this apparatus near water. For example, do not use near a laundry tub, in a wet basement, or near a swimming
pool, and the like.
6. Clean only with dry cloth.
7. Do not block any ventilation openings. Install in accordance with the manufacturer’s instructions. Slots and openings in
the cabinet back or bottom are provided for ventilation, to ensure reliable operation of the TV and to protect it from
overheating. These openings must not be blocked or covered. The openings should never be blocked by placing the TV
on a bed, sofa, rug, or other similar surface.
8. Do not install near any heat sources such as radiators, heat registers, stoves, or other apparatus (including amplifiers) that
produce heat.
9. Do not defeat the safety purpose of the polarized or grounding-type plug. A polarized plug has two blades with on wider
than the other. A grounding-type plug has two blades and a third grounding prong. The wide blade or the third prong is
provided for your safety. If the provided plug does not fit into your outlet, consult an electrician for replacement of the
obsolete outlet.
10. Protect the power cord from being walked on or pinched particularly at plugs, convenience receptacles, and the point
where they exit from the apparatus.
11. Only use attachments/accessories specified by the manufacturer.
12. Use only with cart, stand, tripod, bracket, or table specified by the manufacturer, or sold with the
apparatus. When a cart is used, use caution when moving the cart/apparatus combination to
avoid injury from tip-over. A TV and cart combination should be moved with care. Quick stops,
excessive force, and uneven surfaces may cause the TV and cart combination to overturn.
13. Unplug this apparatus during lightning storms or when unused for long periods of time. For added protection for this TV
receiver during a lightning storm, or when it is left unused for long periods of time, unplug it from the wall outlet and
disconnect antenna or cable system. This will prevent damage to the TV due to lightning and power line surges.
14. Refer all servicing to qualified service personnel. Servicing is required when the apparatus has been damaged in any way,
such as power-supply cord or plug is damaged, liquid has been spilled or objects have fallen into the apparatus, the
appratus has been exposed to rain or moisture, does not operate normally, or has been dropped.
15. This TV should be operated only from the type of power supply indicated on the rating label. If customer is not sure the
type of power supply in your home, consult your appliance dealer or local power company. For TV remote control battery
power, refer to the operating instructions.
16. The TV set shall not be exposed to dripping or splashing. No objects filled with liquids, such as vases, shall be placed on
the TV set.
17. Never push objects of any kind into this TV through openings as they may touch dangerous voltage or other electrical
parts that could result in fire or electric shock. Never spill liquid of any kind into the TV.
18. Unplug the TV from the wall outlet before cleaning. Do not use liquid or aero cleaners. Use a damp cloth for cleaning.
19. This TV should never be placed near or over a radiator or heat resource. This TV should not be placed in a built-in
installation such as a bookcase or rack unless proper ventilation is provided or the manufacturer's instructions have been
adhered to.
20. Do not place this TV on an unstable cart, stand, tripod, bracket, or table. The TV may fall, causing serious injury to
someone, and serious damage to the appliance.
21. Do not attempt to service this TV by yourself because opening or removing covers may expose you to dangerous high
voltage or other hazards. Refer all servicing to qualified service personnel.
22. This device complies with Part 15 of the FCC Rules. Operation is subject to the following two conditions: (1) this device
may not cause harmful interference, and (2) this device must accept any interference received, including interference
that may cause undesired operation.
Safety Precautions
English-6
25. If an outside antenna or cable system is connected to the TV, be sure the antenna or cable system is grounded to provide
some protection against voltage surges and built-up static charges. Section 810 of the National Electrical Code,
ANSI/NFPA NO.70, provides information with respect to proper grounding of the mast and supporting structure,
grounding of the lead-in wire to an antenna discharge unit, size of grounding conductors, location of antenna discharge
unit, connection to grounding electrodes, and requirements for the grounding electrodes. (See Diagram Figure A.)
24. To reduce the risk of electric shock, the grounding of center pin of plug must be maintained.
Safety Strap
Caution: Pushing, pulling or climbing on the TV may cause the TV falling. Do not let chlidren climb or hang on the TV.
Always place the TV on a sturdy, level, sable surface that can hold the weight of TV. And if possible, secure the TV according
to the instruction below (Note: The fastening components such as screws are not supplied with TV).
Step one: Insert the M6 mounting screws into the upper two wall mounting screw holes and fasten them (Figure A).
Step two: Insert anchors to wall and connect the bolts and anchors with ropes or chains (Figure B).
Safety Precautions
ANTEN N A
LEAD I N
WIRE
GROUN D
CLAM P
GROUN D I N G C O N DU C T O RS
(NEC
SECT I O N 8 1 0 - 2 1)
GROUN D
CLAM P S
POWER S E R V IC E G R OU N D I
NG
ELECT R O D E
SYST EM
(NEC A R T 2 5 0 , PA R T H)
ELECT R I C S E R V IC
E
EQUIP M E
N T
ANTEN N
A
DISCH A R G E UN I
T
(NEC S E C TI O N 8 10 - 2 0 )
Diagram Figure A
Figure A Figure B
23. WARNING: To prevent injury, this apparatus must be securely attached to the floor/wall in accordance with the
installation instructions.
M6 Screws
Wall
7
English-
Note: Above accessories are subject to change without notice.
Before Turning On TV
Check Accessories
Check the accessories that are packed with your TV.
Select TV Location
Select a flat, stable table to locate your TV set. Please follow the Safety Instructions when locating the TV.
Setup TV Table Stand
Please refer to TV Stand Installation guide in next page to carry out stand installing.
Connection and Using
After placing your TV properly, you can connect the TV with power supply and cable components. For further information, see page
12 to page 15.
PART NO.: RE20QP80
REMOTE CONTROL DOCUMENTS
Preparation for Your New TV
AAA BATTERIES
AC POWER CORD
TV STAND SCREWS
MACHINE
SCREW
M4 x 12mm, 6pcs
Part# RS01TM412H
COVER
CH LI ST
.
PICTURE
SOUND
TV STAND
FERRITE CORE
USER’S GUIDE
REMOTE CONTROL GUIDE
QUICK START GUIDE
Quick Start Guide
Part No.:RN4142H190
Part No.: RN0342H1904
Eng lis h
Plasma TV
User s Manual
42PA30RQ
Model Number.
Remote Control Guide
Program Your Universal Cable
or Satellite Remote Cont
rol to
Operate
Your New RCA TV!
If you would like to program your other
household remote controls to your new RCA
television, please consult the User
’s Manual
supplied by your Cable or Satellite provide
r.
The Cable or Satellite providers’ User
’s Manuals
should include instructions on how to program
their remote to your television.
Below is a list of RCA codes for the most
common Cable and Satellite providers.
Use the RCA code that is associated with your
Cable or Satellite provider (if applicable).
DIRECTV.........................0178,10178
Time
Warner Cable..........0178,10178
Comc
ast..................................10178
Cox
Communications.................0178
Dish
Network.............................627
Fios Verizon.....0205,0057,0493,0775
If the RCA code associated with your Cable or
Satellite provider is not listed above, if the code
above does not work, or if you can not locate the
instructions for programming your household
remote to your television, call your local Cable or
Satellite provider
’s customer service center.
This is for U.S. customersThis is for U.S. customers
C
H
LIS
T
.
PICTURE
SOUND
English-8
Esp año l
installation according to the instructions below.
Step One
Place the TV faced down on a soft cloth or cushion to prevent the panel from being damaged.
Step Three
Insert the six M4 machine screws (which are totally the same) and tighten them.
Step Two
Take the stand. Please align the screw holes of the stand and TV.
Installation
Please refer to the picture given below:
RS01TM412H
Pedestal Screws Quantity Part #
6pcsM4 x 12mm
TV 42PA30RQ is packaged with the TV stand separated from the cabinet. To setup the TV table stand, please carry out the
TV Stand Installation
Easy to install the ferrite core: Open the ferrite core, slide the power supply cable into the slot, then get the core buckled.
In order to reduce the influence to the screen caused by the noise induced from the cable, please install the ferrite core.
Ferrite Core Installation
Note:
1. The panel is easy to scratch, so please choose an absolutely flat surface to place the TV, and use soft cloth or cushion to
protect the TV panel. Do not put TV on table directly
2. Always unplug the AC cord first when installing or removing the stand..
Black plastic enclosed ferrite core
(Picture may differ from actual product appearance.)
9
English-
The first step in connecting your TV is obtaining the signal. Your TV 42PA30RQ has a side panel, which allows you to receive analog
and/or digital television channels via ANT/CABLE jack.
Befo
re connecting your TV, determine using an antenna or a cable service to obtain the signal.
A. Antenna
Connect the antenna to TV via coaxial cable on ANT/CABLE jack of the side panel. You are ready to receive air local digital and
analog channels.
B. Cable TV service
Connect the cable TV wall jack to TV via coaxial cable on ANT/CABLE jack of the side panel. You are ready to receive off-air local
digital and analog channels.
C. Set-Top Box
If you use a set-top box, you may need to call your cable company or satellite service provider, which use a special connection,
please refer to the user’s guide of set-top box.
Note: Do not plug the AC cord until you have accomplished all the connections.
AC Power Cord
(Connect after all the other connections are done.)
AC
110V/60Hz
AntennaCable TV
Or
TV Signal Connection
WALL
OUTLET
ANT/
CABLE
English-10
Choose Your Connections
TV 42PA30RQ supports various of connecting ways from other devices (such as DVD, VCR, Set-top box, ect.). Please follow the
table sheet to choose the cables which adapt to your device.
HDMI cable
TM
Note:
HDMI, the HDMI logo, and High-Definition Multimedia Interface are trademarks or registered trademarks of HDMI Licensing LLC
Caution:
Unplug the AC cord when you connect other devices to TV.
Cable Connections
Jacks Cables Further Information
Audio Cable
VGA cable
COMPONENT video cable
Video/Audio cable
Go to page 12
Go to page 13
Go to page 14
Go to page 15
HDMI-DVI cable
Audio cable with 3.5mm terminal
R-AUDIO-L/AV, VIDEO In
COMPONENT 1 IN Y, Pb, Pr
COMPONENT 2 IN Y, Pb, Pr
R-AUDIO-L
R-AUDIO-L/AV
HDMI IN 1/DVI, 2, 3
PC INPUT
SOUND/DVI, VGA
11
English-
Audio
L R
Audio
L R YPbPr
Video
HDMI
Back Panel Connections
Connecting AV Composite device (Good Video Quality)
To connect an composite AV device, such as a DVD player, follow these steps:
1. Connect the Video In jack on the back of TV to the video output jacks of device via video cable (yellow).
2. Connect the R-AUDIO-L/AV jacks on the back of TV to the audio output jacks of device via audio cable.
Notice the left channel jack and plugs are white and the right channel jack and plugs are red.
Composite Video Connection
The picture below is an example of a connection using the composite video jack.
Note: AV signal belongs to composite video. This kind of video signal has regular good display quality.
The back of TV
The output panel of other device
English-12
Audio
L R
Audio
L R YPbPr
Video
HDMI
The output panel of other device
Back Panel Connections
Connecting YPbPr Component device (Better Video Quality)
To connect a component device, such as a DVD player, follow these steps:
1. Connect the COMPONENT IN 1,2 Y/Pb/Pr jack on the back of TV to the video output jacks of device via video cable (green,
blue and red).
2. Connect the COMPONENT IN 1,2 R-AUDIO-L jacks on the back of TV to the audio output jacks of device via audio
cable. Notice the left channel jack and plugs are white and the right channel jack and plugs are red.
Component Video Connection
The picture below is an example of a connection using the component video jack.
Note: Y/Pb/Pr jacks are component video. This kind of video signal has better display quality.
The back of TV
13
English-
Back Panel Connections
Connecting HDMI device (Best Video Quality)
HDMI Connection
The picture below is an example of a connection using the HDMI video jack.
The back of TV
To connect an HDMI device, such as a DVD player, please Connect the HDMI1/DVI, 2, or 3 jack on the back of TV to the
output jacks of device via HDMI cable.
Note: 1. HDMI (High-Definition Multimedia Interface) is a compact audio/video interface for transmitting uncompressed digital
data. It carries the audio and video signal via the same cable and has the best display quality.
2. HDMI-DVI cable transfers only video signal from DVI port of DVI device to HDMI jack of TV. For audio signal, please
connect audio output to SOUND/DVI jack on TV back panel.
To connect an DVI device, such as a computer via DVI port of PC and HDMI jack of TV:
1. Connect the HDMI1/DVI, 2, or 3 jack on the back of TV to the DVI port of PC via HDMI-DVI cable.
2. Connect the SOUND/DVI jack on the side of TV to the audio output jack of computer with audio cable (3.5mm stereo jack).
To connect an DVI device, other AV device via DVI port of device and HDMI jack of TV:
1. Connect the HDMI1/DVI, 2, or 3 jack on the back of TV to the DVI port of device via HDMI-DVI cable.
2. Connect the SOUND/DVI jack on the back of TV to the audio output jack of device with audio cable (dual-channel RCA
jacks to 3.5mm stereo jack).
Audio Out
L R
DVI
Speaker or
headphone
DVI
Audio
L R
Audio
L R YPbPr
Video
HDMI
The output panel of HDMI device The output panel of other AV devicePC
English-14
VGA
Speaker or
headphone
Back Panel Connections
Connecting a computer
To connect a computer, follow these steps:
1. Connect the PC INPUT VGA port on the back of TV to the VGA output jack of device via D-sub 15-pin cable.
2. Connect the PC INPUT SOUND/DVI jack on the back of TV to the audio output jack of computer with audio cable (3.5mm).
PC Connection
The picture below is an example of a connection using your TV as a PC monitor.
How to Obtain Various Kinds of Input Sources
After connection is done, press INPUT button on remote control or TV top panel to choose the input source you need.
See page 21, Basic Operation of TV.
Note: If you want to use your TV as a monitor, please notice that the maximum resolution for 42PA30RQ is 1024*768.
Please set the computer graphic correctly.
PC
The back of TV
15
English-
TV Jacks Explanation
ANT/CABLE: Connect to receive the signal from your antenna or cable via coaxial cable.
Head phone:
Connect a 3.5mm headphone for personal audio.
Digital Audio-out:
Connect a coaxial cable for digital audio output.
AUDIO OUTPUT L/R:
Connect double-channel coaxial cables for analog audio output.
R-AUDIO-L/AV, Video In: Connect an AV device that has composite video jacks, such as a VCR
AUDIO-L: Left audio channel connection. The left audio connector is usually white. For mono audio
sources, be sure to use the left AUDIO INPUT.
AUDIO-R: Right audio channel connection. The right audio connector is usually red.
COMPONENT 1,2 Y/Pb/Pr:
Connect a device that has component video jacks, such as a DVD player.
Y/Pb/Pr (Component Video): They provide good picture
quality because the video signal is separated into three components.
Use three video-grade or component video cables for the connection. When using Y/Pb/Pr, make sure you connect left and
right audio cables to the Audio L and Audio R jacks.
HDMI1/DVI, 2, 3: (High-Definition Multimedia Interface) It provides an uncompressed digital connection that carries both video
and audio data by way of an integrated mini-plug cable. Connect to HDMI/DVI devices, see page 14.
PC INPUT VGA: Connect your computer or other device with a VGA output to this jack using a 15-pin, D-sub cable.
SOUND/DVI: Use to obtain sound when a PC is connected to TV. Use 3.5mm stereo mini-pin cable to connect PC to TV.
SERVICE: For service use only. Do not connect any device.
AC-IN: AC power input.
or a DVD player. To access device connected to these jacks, press the INPUT button on your
remote; then press the up/down arrow to select AV. Press the ENTER button at last to confirm.
To access device connected to the Y/Pb/Pr jack, press the INPUT button on your remote; then press the up/down arrow to
select Component1 or Component2. Press the ENTER button at last to confirm.
Note:
The AV input (Video In), COMPONENT 1 input (Y, Pb, Pr) share the same audio input jacks R-AUDIO-L/AV.
Note:•
Digital Audio-out and AUDIO OUTPUT L/R are supposed to be connected to audio power
amplifer, which provides smoother and more powerful sound performance.
English-16
Side Keypad and Front Panel
Side Keypad Buttons
Front Panel
If you cannot locate your remote, you can use the side keypad buttons on your TV to operate many TV features.
INPUT:
MENU: Displays the TV Main Menu.
Displays the Source Select List.
VOL-: Decreases the volume. In the TV menu system, it acts like the left arrow on the remote control and can be used
to select menu options.
VOL+: Increases the volume. In the TV menu system, it acts like the right arrow on the remote control and can be used
to select menu options.
CH : Scans down through the channel list. In the TV menu system, it acts like the down arrow on the remote control
and can be used to select menu options.
CH : Scans up through the channel list. In the TV menu system, it acts like the up arrow on the remote control and
can be used to select menu options.
POWER ( ): Turns the TV on and off.
About remote control working distance and angle, see page 18.
Power/Standby Indicator: Blue and red dual-color LED. It shows red when the TV is turned off and blue when turned on.
Remote Control Sensor: Remote control IR sensor, which receives infrared ray sent by remote control.
Remote Control Sensor
Power/Standby Indicator
(blue/red)
17
English-
Inserting Batteries in the Remote
Remote Control Reception Angle
Remove the cover of battery cabin on the back of the remote control by lifting the cover.
Insert two AAA batteries, making sure the polarities (+ and -) are aligned correctly.
Place the cover back.
Are the polarities (+, -) correct?
Are the batteries worn out?
Is there an AC power failure?
Is the power cord plugged in?
Is there any interference or block near the remote
control sensor?
Use your remote control within the distance and angle range shown below.
If the remote control does not work, check these points:
Used batteries should be recycled.
Keep out of children’s reach.
DO NOT use new and old batteries together.
Change both the batteries at the same time.
When not using the remote control for a long time,
remove the batteries from the unit.
CAUTION:
Remote Control Instructions
7 meters
Universal Remote Control Code List
For Universal Remote Control brands listed below,
please use accompanying codes and refer to your
Universal Remote Control User Manual for basic
Instruction for changing TV code to operate the
TV model.
Codes for DIRECTV: 0178, 10178
Codes for Time Warner Cable: 0178, 10178
Codes for Cox Communications: 0178
Codes for Comcast: 10178
Codes for Dish Network: 627
Codes for Fios Verizon: 0205, 0057, 0493, 0775
English-18
Remote control part number RE20QP80
Remote Control Buttons
Numeric Buttons: Use these buttons to enter numbers.
CH.LIST: Displays the channel list.
To enter a digital channel with a sub-channel, enter the main channel; then, press this
button to enter the sub-channel and press ENTER.
PICTURE: Switches between the preset picture mode (see page 23).
SOUND: Switches between the preset sound mode (see page 25).
The keys not listed are for DVD control, they are not available for this TV model.
NOTE :
ENTER: Enter and confirm button.
EPG:
Shows Electronic Program Guide (see page 22).
INPUT: Accesses the available input channels (TV, AV, Component 1/2, HDMI 1/2/3, PC).
Use the arrows to highlight options, and press ENTER to select.
MENU: Accesses the Main Menu, or return to the upper level of a sub-menu.
EXIT: Exits the current menu or function.
“ ”:
ASPECT: Switches between the preset screen size mode (see page 24).
DISPLAY:
Displays the Channel Bar (see page 22).
CC:
Selects the closed caption.
MTS:
Selects the multi-channel television sound.
Freeze the current screen frame, press again to return to normal.FREEZE :
Scans up or down through the current favorite channel list.
FAV.: Adds the current channel to your favorite list, or erases the current channel from
FAV.+ or FAV.- :
your favorite list (if this channel is a favorite channel already).
SLEEP:
Selects the sleep timer, after which the TV will shut off automatically.
CH or CH : Scans up or down through the current channel list. Press once to change
the channel up or down; press and hold to continue changing channels.
VOL+ or VOL-: Increases or decreases the TV volume.
POWER ( ): Turns the TV on or off.
Arrows ( / / / ): Uses the four arrows to highlight different items in the TV menu or
change the value. The up/down arrow can also work as CH /CH
button, and the left/right arrow can also work as VOL-/VOL+ button.
Recall ( ):
Returns to the previous channel.
MUTE ( ): Reduces the TV volume to its minimum level. Press again to restore the volume.
Learning about Remote Control
CH L I S T
.
PICTURE
SOUND
19
English-
If it is the first time you turn on your TV, or you have done Clear Channel List option (see page 30), the initial setup menu appears
automatically.
Menu Language
To choose your menu language, press the left/right arrow until the language you need appears.
Available languages: English, French and Spanish.
To choose your TV tuner signal type, press the left/right arrow until Air or Cable appears.
Note: please select TV signal type according to the antenna or cable closed circuit TV you use.
Signal Type
To execute auto channel search, press the up/down arrow to highlight Auto Channel Search and press ENTER button.
What to notice:
1. The channel search access starts from the Analog TV channel searching and ends at Digital TV channel searching.
2. The channels that have been found will be stored automatically.
Auto Channel Search
Initial Setup
:Select Menu:Return
:Change Setting
Menu Language English
Air
Execute
Signal Type
Auto Channel Search
MENU
Initial Setup
AUTO CHANNEL SEARCH - Air
Analog Channels Found: 1
Digital Channels Found: 0
3%
Return
Now Searching... Please Wait...
:Stop Auto Channel Search
MENU
3. You can press MENU or EXIT button to skip analog/digital channel searching.
4. You can press MENU or EXIT repeatedly to end the channel searching.
English-20
Tuning To Analog Channels
An analog channel has a channel number beginning with “A”. Input the digital number with numeric buttons directly and press
ENTER button to confirm.
For example, to watch analog channel “A51”, press “5”, “1”, “ENTER” on remote control in sequence.
Adjusting TV Stand Angle
The TV cabinet can manually adjust to left or right for 15 degrees from the centre.
You can adjust the angle for the best viewing effect and comfort.
Tuning To Digital Channels
Note: Although there is no analog TV signal available in America, we reserve ATV functions for some expansible use.
A digital channel has a channel number beginning with “D”. Input the main digital number with numeric buttons directly, then press
“ ” button on remote control, and input the sub number at last.
For example, to watch analog channel “D31-1”, press “3”, “1”, “ ” button. “ENTER” on remote control in sequence.
You can use CH button to increase channel number and CH to decrease channel number. When no OSD (On Screen
Display) is used, the up/down arrows can also work as CH /CH buttons.
Press INPUT button on remote control to display Source Select list.
Use up/down arrows to highlight the source you need and press ENTER to confirm.
Changing Channels Directly
Basic Operations
Turning On and Off
Choosing TV Channel
Selecting Input Source
Connect the AC cord to power the TV. At this time the TV will enter standby mode and power indicator shows red.
Use Power button ( ) on the side panel of TV or on the remote control to turn on the TV. After switching off the TV for 5 seconds,
you can turn on TV again.
Source Select
TV
AV
Component 2
Component 1
HDMI 1
HDMI 2
HDMI 3
PC
21
English-
Channel Bar
Press the DISPLAY button on the remote control, the channel bar will appear on the right top of screen. It displays the current
channel’s information.
The following list describes the items on the channel bar.
Adjusting Volume
Press the VOL+/VOL- button on the remote control to adjust the volume. If you want to switch sound off, press MUTE ( ).
EPG (Electronic Program Guide)
Press EPG button on the remote control, the electronic program guide will appear in the center of screen.
The electronic program guide gives the TV program playing project. You can use left/right arrows to switch pages.
When OSD (On Screen Display) is not used, the arrows left/right can also work as VOL-/VOL+ butttons.
A2/D50-1
MTV/KOCE-HD
ATV DTV
If the channel is analog, A is displayed. If it’s a digital channel, D is displayed. For example, in the pictures
above, A2 is an analog channel, and D50-1 is a digital channel ( -1 is a sub-channel number).
Displays the channel label.
Mono/English Displays whether the current channel is being broadcast in stereo or mono. If the current channel is digital,
this space will be SAP (Second Audio Program) language.
480i/1080i Displays the signal resolution.
16:9/CC/TV-PG Displays the screen aspect ratio, closed caption and TV rating level of the current program or channel.
And these are only available for digital channels.
Oct-31 23:14 Mon Current date and time.
Mono
A2
480i
Oct-31 23.14 Mon
A2
English
KOCE-H
DMTV
D50 - 1
1080i
Oct-31 23:14 Mo
n
Basic Operations
D50 - 1
KOCE-HD
Smart Travels - Pacific Rim with Rudy Maxa
23 : 00 - 23 : 30
Stockholm & Sweden is a natural-born beauty, winning us over with
luxuriant landscapes and sleek Scandinavian style. We cruise through Stockholm’s
sun-dappled archipelago, visit a designer hotel and sip cocktails in the trendy Ice Bar
(a lounge...
:Page
:Return
MENU
English-22
"EKVTUUIF04%4DSFFO
5IF04%0O4DSFFO%JTQMBZNFOVFOBCMFTZPVUPBQQSPBDIUPUIF57GVODUJPOT
5PVTF04%NFOVTZTUFNQSFTT.&/6CVUUPOPOSFNPUFDPOUSPMUIFOVTFMFGUSJHIUBSSPXUPIJHIMJHIUBOPQUJPOGSPN1*$563&
406/%$)"//&-1"3&/5"-4&561PS05)&34BOEQSFTT&/5&3CVUUPO
1SFTTUIFVQBOEEPXOBSSPXUPNPWFUPBEJGGFSFOUPQUJPOXJUIJOFBDINFOV*GOFDFTTBSZQSFTT&/5&3PSSJHIUBSSPXUPEJTQMBZ
UIFDIPJDFTPGUIFPQUJPOZPVWFIJHIMJHIUFE*GBWBJMBCMFVTFUIFUFYUBUUIFCPUUPNPGFBDITDSFFOGPSIFMQ5PSFUVSOUPUIF
QSFWJPVTNFOVQSFTTUIF.&/6CVUUPO
5PFYJUUIF04%NFOV
t1SFTTUIF&9*5CVUUPO5IFNFOVXJMMDMFBSGSPNUIFTDSFFO
t1SFTTUIF.&/6CVUUPOSFQFBUFEMZVOUJMUIFNFOVTEJTBQQFBS
"MMPXTZPVUPTFMFDUPOFPGUIFQSFTFUQJDUVSFTFUUJOHT
SOUND CHANNEL PARENTAL SETUP OTHERS
1JDUVSF.FOV
1JDUVSF4FUUJOHT
5IF1JDUVSF.FOVDPOUBJOTNFOVTBOEDPOUSPMTUPDPOmHVSFUIFXBZUIFQJDUVSFBQQFBST5IF1JDUVSF.FOVPQUJPOTBQQMZUPUIF
WJEFPGPSUIFNBJO57BOE7*%&0*/165TFMFDUJPOT"MMQJDUVSFPQUJPOTDBOCFBQQMJFEUPFBDIJOQVU
1SFTT.&/6POUIFSFNPUF4FMFDU1JDUVSFGSPNUIF.BJONFOV1SFTTUIF&/5&3CVUUPOUPQSPDFFEUP1*$563&NFOV
1JDUVSF4FUUJOHT$IPPTFUIFQSFTFUWJTVBMNPEFPGZPVS57
6TFVQEPXOUPDIPPTFUIFGVODUJPOZPVOFFEQSFTT
&/5&3PSSJHIUBSSPXUPBEKVTUPSFOUFSBTVCNFOV5IF
TVCNFOVJNBHFBOEFYQMBOBUJPOBSFTIPXOCFMPX
4UBOEBSE.PWJF6TFS%ZOBNJD0OMZJO6TFSNPEFZPVDBO
BEKVTU#SJHIUOFTT$POUSBTU$PMPS5JOUBOE4IBSQOFTT
#SJHIUOFTT"EKVTUUIFCSJHIUOFTTPGQJDUVSF
$PMPS"EKVTUUIFSJDIOFTTPGDPMPS
5JOU"EKVTUUIFCBMBODFCFUXFFOSFEBOEHSFFOMFWFMPOMZ
BWBJMBCMFJO/54$TJHOBM
4IBSQOFTT"EKVTUUIFTIBSQOFTTMFWFMPGQJDUVSF
PICTURE
:Select Menu :Go to Next Menu
/
Screen Settings
PC Settings
Color Temperature Normal
Advanced Picture Settings
:Return
MENU
ENTER
Picture Settings
:Select Menu :Change Setting
Brightness
Contrast
Color
Tint
Sharpness
:Return
MENU
Picture Mode Standard
PICTURE SETTINGS
04%.FOV0QFSBUJPOT
PICTURE
23
English-
4DSFFO4FUUJOHT
1$4FUUJOHTPOMZBWBJMBCMFJO1$NPEF
"EWBODFE1JDUVSF4FUUJOHTOPUBWBJMBCMFJO1$NPEF
$PMPS5FNQFSBUVSF
4DSFFO4J[F4FMFDUBTDSFFOBTQFDUSBUJP
"WBJMBCMFSBUJP'VMM/PSNBM8BUFSHMBTTBOE$JOFNB
"VUP8JEF.BLFUIFTDSFFOTJ[FDPNQMJBOUXJUITJHOBMGPSNBU
BVUPNBUJDBMMZ
*GZPVUVSOPOUIJTGVODUJPOUIF4DSFFO4J[FTFUUJOHXJMMCFJHOPSFE
1MFBTFDIPPTFUIFSBUJPUIBUBQQMJFTUPZPVSWJEFPTJHOBMGPSNBUCFTU
"VUP"EKVTU"EKVTUUIF1$QJDUVSFEJTQMBZBVUPNBUJDBMMZ
5IJTPQUJPOBMMPXTZPVUPTFMFDUPOFPGUI
SFFBVUPNBUJDDPMPSBEKVTUNFOUT$PPMGPSBCMVFSQBMFUUFPGQJDUVSFDPMPST/PSNBMPS
8BSNGPSBSFEEFSQBMFUUFPGDPMPS
)PSJ[POUBM1PTJUJPO"EKVTUUIFIPSJ[POUBMQPTJUJPOPGQJDUVSF
1IBTF"EKVTUUIFQIBTFPGQJDUVSF
3FTFU3FTFUBMMUIF1$QJDUVSFTFUUJOHTUPGBDUPSZEFGBVMU
7FSUJDBM1PTJUJPO"EKVTUUIFWFSUJDBMQPTJUJPOPGQJDUVSF
$MPDL"EKVTUUIFDMPDLPGQJDUVSF
%ZOBNJD$POUSBTU4FUEZOBNJDDPOUSBTU)JHIUPGG-PX.FEJVN
'JMN.PEF4FUmMNNPEFPOPGG
/PJTF3FEVDUJPO4FUOPJTFSFEVDUJPOBT0GGMPX.FEJVN)JHI
.1&(/PJTF3FEVDUJPO4FU.&1(OPJTFSFEVDUJPOBT0GG-PX.FEJVN
PS)JHI
%JTQMBZ4IJGU4FU04%EJTQMBZTIJGUBT0GGTT
8IJUF1BOFM4FUXIJUFQBOFMBT0O0GG
/PUF/PJTFSFEVDUJPOIFMQTUPSFEVDFUIFQJDVUSFiTUBUJDwPSBOZUZQFPG
JOUFSGFSFODF5IJTGFBUV
SFJTFTQFDJBMMZVTFGVMGPSQSPWJEJOHBDMFBSFSQJDUVSF
JOXFBLBOBMPHTJHOBMDPOEJUJPOT5IF.&1(/PJTF3FEVDUJPOTQFDJmDBMMZ
XPSLTPOWJEFPTJHOBMXJUI.1&(DPEJOH
:Select Menu
:Change Setting
Auto Wide
:Return
MENU
Screen Size Full
SCREEN SETTINGS
:Select Menu :Press to Execute
Horizontal Position
Vertical Position
Clock
Phase
:Return
MENU
Auto Adjust Execute
Reset Execute
PC SETTINGS
:Select Menu :Change Setting
/
:Return
MENU
ENTER
Dynamic Contrast Off
Film Mode Off
Noise Reduction Low
MPEG Noise Reduction Off
Display Shift Off
White Panel Off
ADVANCED PICTURE SETTINGS
04%.FOV0QFSBUJPOT
English-24
Sound Menu
Sound Settings
Surround Mode
The Sound Menu lets you adjust audio output. To access the Sound Menu, press MENU on the remote, and then select SOUND
from the Main Menu. Press ENTER button to proceed to SOUND menu.
Creates a 3D sound surround from standard stereo material, with deep and rich enhancement.
Analog Sound
Select analog TV audio sound type: Stereo, Mono or SAP (only available in TV mode).
Digital Sound
Other Settings
Select digital TV audio language type: English, French or Spanish (only available for DTV channel).
:Select Menu :Go to Next Menu
/
Surround Mode
Analog Sound Stereo
English
Digital Sound
Other Settings
Equalizer Settings
:Return
MENU
ENTER
Sound Settings
SOUND
Use up/down to choose the function you need, press
ENTER or right arrow to adjust or enter a sub-menu. The
sub-menu image and explanation are shown below.
:Select Menu :Change Setting
Bass
Treble
Balance
:Return
MENU
Sound Mode Standard
SOUND SETTINGS
Sound Mode: Choose the preset sound mode of your TV:
Standard, Soft, User, Dynamic. Only in User mode you can
adjust Bass and Treble.
Bass: Adjust the bass component of TV sound.
Treble: Adjust the treble component of TV sound.
Balance: Adjust the balance between the left and right channel.
:Select Menu :Enable/Disable
Speaker
:Return
MENU
Auto Volume Off
On
Digital Audio Output Off
OTHER SETTINGS
Set Auto Volume on/off.
Set TV speakers on/off.
Set the audio output type as Off, PCM or Dolby Digital.
Please set this option according to your power amplifier.
OSD Menu Operations
25
English-
Equalizer Settings
Channel Menu
:Select Menu
:Change Setting
:Return
MENU
Mode POP
-2 -1 2 3 1 0 -1
100 250 1K500 2K 4K 10K
EQUALIZER SETTINGS
The seven-band graphic equalizer allows you to adjust the audio frequency
settings.
You can select one of the equalizer presets (OFF, POP, ROCK,
JAZZ) or c
reate your own personal preset (USER).
Press the left or right arrow to select the frequency (100Hz, 250Hz, 500Hz,
1KHz, 2KHz, 4KHz, 10KHz) you want to adjust. Use the up or down ar
row
to adjust.
The Channel Menu enables you to search, view and edit channels. It is available in TV mode only.
Press MENU and choose CHANNEL from the Main menu. Press the ENTER button to proceed to CHANNEL menu.
Channel List
Display a channel list. It shows the current channels.
Favorite List
Display a favorite channel list. It shows the current favorite channels.
Channel Settings
Go to channel setting sub-menu (as shown below).
CHANNEL
:Select Menu
:Go to Next Menu
/
Favorite List
Channel Setting
Signal Type Air
Auto Channel Search
:Return
MENU
ENTER
Channel List
Execute
Use up/down to choose the function you need, press
ENTER or right arrow to adjust or enter a sub-menu. The
sub-menu image and explanation are shown below.
Press left/right arrow to switch the channel you want to edit.
Set if the current channel is contained in channel list.
Enter a channel label to rename the current channel.
CHANNEL SETTING
:Select Menu :Select Channel
In Channel List
Channel Label
Favorite Channel
:Return
MENU
Channel Number 2
Set if the current channel is the favorite channel.
OSD Menu Operations
English-26
Signal Type
Select your TV signal type: Air or Cable.
Auto Channel Search
Execute an auto channel search (see page 20).
OSD Menu Operations
When the Parental Control Menu is accessed from the Main Menu, you need to enter password to unlock the menu function.
After unlocking, the items in parental control menu can be used. Use arrow up/down to highlight the function you need and
press ENTER or right arrow to use V-chip, Change Password, Front Panel Lock and Source Lock, Clear Channel List sub-menu.
Please enter your four-digit password with numeric keys 0~9.
Note: The original password is “0000”.
V-Chip
Lock Parental Control
The following graphic details where items locate within the V-Chip menu.
US V-Chip
Press ENTER or right arrow to enter US V-Chip ratings menu, which contains two sub-menus: Movie Rating and TV rating.
See next page for more details.
PARENTAL CONTROL
:Enter Password
V-Chip
Change Password
Front Panel Lock
Source Lock
Clear Channel List
:Return
MENU
DIGI TAL
Lock Parental Control
V-CHIP
Canada V-Chip
Block Unrated Show
Downloadable Rating
Clear Downloadable Data
US V-Chip
:Select Menu
:Go to Next Menu
/
:Return
MENU
ENTER
Parental Menu
The Setup Menu enables you to lock program with special content, panel key board and input source.
Press MENU and choose PARENTAL from the Main menu. Press the ENTER button to proceed to PARENTAL menu.
27
English-
Movie Rating
TV Rating
Use arrow keys to select the rating level you want to block,
press ENTER to lock/unlock the rating level. If you have
blocked a lower level rating, the higher ratings will be
blocked too.
For example , when PG-13 is blocked, R, NC-17 and X will
be blocked at the same time.
After adjusting, press MENU to return or press EXIT to exit the menu..
TV Rating Overview
Age-Based Ratings
TV-MA Mature Audience Only
TV-14 Parents Strongly Cautioned
TV-PG Parents Guidance Suggested
TV-G General Audience
TV-Y7 Directed to Children 7 Years and Older
TV-Y All Children
D Sexually Explicit Dialogue
L Adult Language
S Sexual Situations
V Violence
FV
For more rating explanation, see page 37.
Fantasy Violence
Content Themes
MOVIE RATING
PG
PG-13
R
NC-17
X
G
:Select
:Lock/Unlock
ENTER
TV RATING
TV-Y7
TV-G
TV-PG
TV-14
TV-MA
TV-Y
D
:Select :Lock/Unlock
ENTER
L S V FV
Similar with Movie Rating.
OSD Menu Operations
English-28
FRENCH RATING
8 ans+
13 ans+
16 ans+
18 ans+
G
:Select :Lock/Unlock
ENTER
:Return
MENU
Canada V-Chip
Press ENTER or right arrow to enter US V-Chip ratings menu, which contains two sub-menus: English Rating and French Rating.
English Rating
Press ENTER or right arrow to enter English rating menu.
French Rating
Press ENTER or right arrow to enter French rating menu.
Block Unrated Show
Block all the unrated program.
Downloadable Rating, Clear Downloadable Data
Activate or downloadable rating data. if available.
ENGLISH RATING
C8+
G
PG
14+
18+
C
:Select :Lock/Unlock
ENTER
:Return
MENU
Use arrow keys to select the rating level you want
to block, press ENTER to lock/unlock the rating
level. If you have blocked a lower level rating,
the higher ratings will be blocked too.
For example , when PG is blocked, 14+ and 18+
will be blocked at the same time.
Note: These ratings are
available only if the
broadcaster is sending
rating information.
Similar with English Rating.
OSD Menu Operations
29
English-
Front Panel Lock
Select this option to block or unblock the TV’s side panel buttons so that they can’t be used.
Source Lock
This option allows you to lock or unlock the input source. The source blocked can not be
chosen from input list unless you input the correct parental password.
Clear Channel List
This option allows you to execute Clear Channel List function.
This function will reset the whole TV system to factory default (not only reset OSD menu).
Source Lock
AV
Component 1
Component 2
HDMI 1
:Select :On/Off:Page
ENTER
:Return
MENU
HDMI 2
HDMI 3
TV
Page 1/2
Use up/down arrow
to select the source,
press ENTER to
lock or unlock it.
Change Password
Change the password of parental menu.
Input the old password.
Change Password
New PIN
Confirm
:Password
DIGI TAL
:Return
MENU
Old PIN
Input the new password.
Input the new password again to confirm.
OSD Menu Operations
English-30
OSD Menu Operations
Setup Menu
The Setup Menu lets you config the TV with your preferences.
Select SETUP from the Main Menu. Press ENTER button to proceed to SETUP menu.
Closed Caption
Closed Caption
Press left/right arrow to select closed caption display on or off.
Analog Caption Type
Press left/right arrow to select analog closed caption type: CC1, CC2, CC3, CC4, TEXT1, TEXT2, TEXT3, TEXT4.
Digital Caption Type
Press left/right arrow to select digital closed caption type: Service1, Service2, Service3, Service4, Service5, Service6.
Digital CC Preset
Press left/right arrow to select digital closed caption preset: Default, Custom.
Digital CC Style
Press left/right arrow to go to digital closed caption style sub-menu (see next page).
Only in custom mode you can adjust the digital closed caption style.
SETUP
:Select Menu :Go to Next Menu
/
Menu Language English
Clock
:Return
MENU
ENTER
Closed Caption
Use up/down to choose the function you need, press
ENTER or right arrow to adjust or enter a sub-menu. The
sub-menu image and explanation are shown below.
CLOSED CAPTION
:Select Menu :On/Off
Analog Caption Type CC1
Service1
Digital Caption Type
DefaultDigital CC Preset
Digital CC Style
:Return
MENU
Caption Display
Off
31
English-
DIGITAL CC STYLE
:Select Menu
:Change Setting
CC Font Default
Default
CC Opacity
Default
Default
Text Color
CC Background Opacity
Default
CC Background Color
:Return
MENU
CC Size
Default
CLOSE CAPTION
Digital CC Style
Clock
Time Zone
Select your time zone: Eastern, Central, Mountain, Pacific, Alaska, Hawaii, Samoa, Newfoundland, Atlantic.
Auto Clock
Select auto clock on/off. Auto clock helps you synchronize your TV time to standard time (from DTV signal).
Setup Time
Set your TV time manually (needs to turn off auto clock).
Day of Week
Display what day it is (can’t be adjust, display only).
Select the item you want to adjust in Digital CC Style menu
with up/down arrows.
After changing, you can preview the caption style here.
CLOCK
:Select Menu :Change Setting
Auto Clock ON
1980-01-06 18:49:24Setup Time
SunDay of Week
Time Zone Eastern
OSD Menu Operations
English-32
Others Menu
The Others Menu lets you config the TV with your preferences in other features.
Choose OTHERS from the Main Menu. Press ENTER button to proceed to SETUP menu.
Blue Background
Press ENTER button to select Blue Background on or off. If the Blue Background is turned on, the TV will display a
blue background when there is no signal input.
No Signal Power Off
Press ENTER button to select “No Signal Power Off” on or off. If it is turned on, the TV will shut off after 10-minute
no signal time. We suggest you turn on this function when Blue Back is turned on. Because it may hurt the panel
No Operation Power Off
Press ENTER button to select “No Operation Power Off” on or off. If it is turned on, the TV will shut off after a 3-hours
no operation time.
All Reset
Press ENTER button to execute reset to TV system. All the settings will be reset to factory default.
if the blue screen lasts too long.if the blue screen lasts too long.
Note: In PC mode, the monitor standby and power off settings depend on the No Signal Off time.
OTHERS
:Select Menu
:On/Off
No Signal Power Off
No Operation Power Off
All Reset
:Return
MENU
ENTER
Blue Background
Execute
Use up/down to choose the function you need, press
ENTER or right arrow to adjust or enter a sub-menu.
The sub-menu image and explanation are shown below.
OSD Menu Operations
33
English-
What’s the most convenient way to view High Definition (HD) video?
Connect an antenna to the TV Input jack to view free local digital channels. You may need to purchase an antenna. (See page 10
for mo
re information about antenna setup).
Visit
www.antennaweb.org for assistance in deciding what type of antenna to use to receive the local digital channels available
to you. After entering your location, this mapping p
rogram tells you which local analog and digital stations are available using a
certain antenna.
Are there other ways to view High Definition (HD) video?
Besides using an antenna as mentioned above, you can also use a set-top box to receive digital video. Contact your cable service
provider or satellite provider to purchase digital programming and have them connect the box to ensure you are viewing channels
in the best way.
How do I tell an analog channel from a digital channel?
Press the DISPLAY button to display the Channel Bar. Look at the top right corner of the screen. An “A” is displayed for an analog
channel. A “D” is displayed for a digital channel.
Note: Since the analog TV in America has been cut off, we reserve analog TV function only for some unexpected use.
Why are there bars on my screen, and can I get rid of them?
Most digital video is sent in a 16/9 format which fills your screen, but is sometimes sent in 4/3 which does not fill your screen. It
depends on how the station or device connected to your TV is formatting the video. If there are bars on the screen, press the
ASPECT button to try a different format that may eliminate the bars. Some bars can't be removed because of the way the format
is sent by the broadcaster. The format changes as you press the ASPECT button and the format type is displayed at the bottom
of the screen. For more information on screen formats, go to page 24.
Why does channel search find a lot of channels, but when I try to tune to them, there’s nothing there?
Some channels don’t carry programming, such as video On Demand. When channels are unavailable, your TV screen is blank or
appears like snow. You probably want to remove these channels from your channel list. Remove these in the Channel List Menu.
Go to page 26 for more information.
Why does it take a long time when I search the channels at first time?
If you have both analog and digital channels, the TV is looking for all available channels in the channel list. If you do have digital
channels, the TV is also searching for scrambled channels, non-scrambled channels, and each sub-channel of that digital channel.
Frequently Asked Questions (FAQs)
English-34
Identifying Problems
If there are any problems when using the product, please consult the list below. If the list does not solve the problem, call our
Customer Service Center immediately.
TV Problems
The TV can’t be turned on.
Make sure the AC cord is plugged in.
Check the wall outlet, make sure the AC output works normally and stably.
The side panel may be locked (disabled). Use the remote control to turn on the TV.
Select the Front Panel Lock function in the PARENTAL Menu and press ENTER to uncheck the locking status.
There is no picture or sound but the TV is on and there is a “No Signal” sign on screen.
• Are you trying to use an input source with no device connected to it? For using other video/audio device, make sure the external
device works normally first, then press INPUT and choose the right input source.
The Signal Type option may be set incorrectly. Go to page 20 for detailed instructions.
The channel may be blank. Try to search the channel again or change another channel.
The sound is fine, but the picture is poor.
If you can only get black and white pictures from external device that you've connected to your TV, maybe it is due to the video
cables is not connected well, or they are connected wrongly. Check the connection stability first, then check the correctness.
For AV input, the yellow video cable connects to the yellow Video In jack on the side of your TV. For Component input, the three
Y, Pb, Pr video cables (red, blue, and green) should be connect to the corresponding input jacks on the side of your TV.
Check the antenna connections. Make sure all of the cables are firmly connected to the TV jack on side of your TV.
• Try adjusting the color features to improve.
There is no sound, but the picture is fine.
The sound might be muted. Try pressing the MUTE button to restore sound.
For using AV or Component, remember to connect the device’s left and right audio output correctly. The left channel
cable is white and the right channel cable is red. Please match the cables and jacks accoding to there colors.
The sound settings may not be set correctly. Go to page 25 for more information.
If your audio source has only one jack or is a (mono) audio source, make sure you have plugged the connection into the
Audio In L jack (white) on the TV.
Troubleshooting
The buttons on the side panel don’t work.
Unplug the TV from the AC power for 10 minutes and then plug it back. Turn the TV on and try again.
The TV turns off unexpectedly.
The electronic protection circuit may have been activated because of a power surge. Wait 30 seconds and then turn the TV
on again. If this happens frequently, the voltage in your house may be abnormal. If the other electronic equipment in your home
can’t work normally, consult a qualified service personnel.
The side panel may be locked (disabled). Use the remote control to turn on the TV.
Select the Front Panel Lock function in the PARENTAL Menu and press ENTER to uncheck the locking status.
35
English-
The stereo sound performance is bad.
It may be a weak station. Use the SOUND Menu and set Analog Sound as Mono.
A black box appears on the screen.
Closed captioning might be on. Check Closed Caption in the SETUP menu. Go to page 32 for more instructions.
Problems with the HDMI Connection.
Make sure the HDMI device (DVD, video gamer, etc.) is turned on and the cables are firmly connected. If problems still occur, turn off
your device and reconnect it. Reset the power by unplugging the power cord and plugging it again.
If a No Signal message appears on screen , the HDMI device isn’t responding. Contact the manufacturer of the HDMI device for
further assistance.
If you have black bars on each side of your picture (which means the TV can not display a full-screen image), the device you connected
might have a switch or a menu option allowing you to change the picture quality output that will x this. Choose either 720p or 1080i.
Can’t select a certain channel.
The channel may be blocked or not approved in the PARENTAL Menu.
The channel may be skipped in channel list in CHANNEL Menu. Check the blocking and skipping status of channel.
Troubleshooting
The Remote control doesn’t work.
Something might be blocking between the remote control and the remote sensor on the front panel of the TV. Make sure
the
re is a clear path.
The remote may not be aimed directly at the TV.
The batteries in the remote may be weak, dead, or installed incorrectly. Put new batteries in the remote.
You are experiencing problems with V-Chip/Parental Controls.
If the rating limits don’t work, you must lock the settings. Go to the Main Menu (press MENU on your remote), select
PARENTAL to check the settings.
What else can I do?
If you’ve been through the Troubleshooting section and nothing has fixed your problem, try rebooting your TV. Note that after
a reboot, you may need to run your TV through the setup process again. To reboot, unplug the power cord from the wall
outlet or power strip. Keep your TV unplugged for about 5 minutes. Then plug in the TV and turn it on. See if the problem
is fixed. If the problem remains, then please visit the Customer Support Menu at www.rca.com or updated FAQs or contact
RCA Customer Support at the support number provided in your Warranty card.
English-36
US V-Chip Rating System
TV-MA (Mature Audience Only): Specifically designed to be viewed by adults and may be unsuitable for children under 17. It
contains one or mo
re of the following content themes: crude indecent language (L), explicit sexual activity (S), or graphic violence (V).
TV-14 (Parents Strongly Cautioned): Contains some material that many pa
rents would find unsuitable for children under 14.
Pa
rents are strongly urged to exercise greater care in monitoring this program and are cautioned against letting children under the
age of 14 watch unattended. This p
rogram contains one or more of the following content themes: intensely suggestive dialogue (D),
st
rong coarse language (L), intense sexual situations (S), or intense violence (V).
TV-PG (Parental Guidance Suggested) : Contains material that parents may find unsuitable for younger children. Many parents
may want to watch it with their younger children. The program contains one or more of the following content themes: some
suggestive dialogue (D), infrequent coarse language (L), some sexual situations (S), or moderate violence (V).
TV-G (Parental Audience): Most parents would find this program suitable for all ages. It contains little or no sexual dialogue (D)
or situations (S), no strong language (L), and little or no violence (V).
TV-Y7 (Directed to Children 7 years and older): Designed for children age of 7 and above. It may be more appropriate for children
who have acquired the developmental skills needed to distinguish between make believe and reality. Themes and elements in this
program may include mild fantasy violence (FV) or comedic violence, or may frighten children under the age of 7.
TV-Y (All Children): Themes and elements in this program are designed for a young audience, including children ages 2-6.
It is not expected to frighten younger children.
Canadian English V-Chip Rating System
18+ (Adult): Programming intended for adults 18 and older. It may contain elements of violence, language, and sexual content
which could make it unsuitable for viewers under 18. Violence Guidelines: May contain violence integral to the development of
the plot, character or theme, intended for adult audiences. Other Content Guidelines: May contain graphic language an d explicit
portrayals of nudity and/or sex.
14+ (Viewer 14 and over): Programming contains themes or contents which may not be suitable for viewers under the age of 14.
Parents are strongly cautioned to exercise discretion in permitting viewing by pre-teens and early teens. Violence Guidelines:
May contain intense scenes of violence. Could deal with mature themes and societal issues in a realistic fashion.
Other Content Guidelines: May contain scenes of nudity and/or sexual activity. There could be frequent use of profanity.
PG (Parental Guidance): Programming intended for a general audience but which may not be suitable for younger children
(under the age of 8). Parents may consider some content inappropriate for unsupervised viewing by children aged 8-13.
Violence Guidelines: Depictions of conflict and/or aggression will be limited and moderate; may include physical, fantasy, or
supernatural violence. Other Content Guidelines: May contain infrequent mild profanity, or mildly suggestive language.
Could also contain brief scenes of nudity.
G (General Audience): Programming considered acceptable for all ages groups. While not designed specifically for children,
it is understood younger viewers may be part of the audience. Violence Guidelines: Will contain very little violence, either physical or
verbal or emotional. Will be sensitive to themes which could frighten a younger child, will not depict realistic scenes of violence
which minimize or gloss over the effects of violent acts. Other Content Guidelines: There may be some inoffensive slang, no
profanity and no nudity.
V-Chip Rating Explanations
37
English-
V-Chip Rating Explanations
C8+ (Children 8 and older): Programming generally considered acceptable for children 8 years and over to watch on their own.
Violence Guidelines: Violence will not be portrayed as the preferred, acceptable, or only way to resolve conflict or encourage
child
ren to imitate dangerous acts which they may see on television. Any realistic depictions of violence will be infrequent,
disc
reet, of low intensity and will show the consequences of the acts. Other Content Guidelines: There will be no profanity,
nudity
or sexual content.
C (Children):
Programming intended for children under age of 8. Violence Guidelines: Careful attention is paid to themes which
could th
reaten children’s sense of security and well being. There will be no realistic scenes of violence. Depictions of aggressive
behavior will be inf
requent and limited to portrayals that are clearly imaginary, comedic or unrealistic in nature.
Other
Content Guidelines: There will be no offensive language, nudity or sexual content.
Canadian French V-Chip Rating System
18+ (Adult): Programming is for adults only. This program contains sustained violence or extremely violent scenes.
16+ (Viewer 16 and over):
Programming is not suitable for those under age 16. This program contains frequent scenes of
violence or intensely violent scenes.
13+ (Viewer 13 and over):
Programming may not be suitable for children under the age of 13. This program either contains
several violent scenes or one or mo
re scenes that are violent enough to affect them. Viewing in the company of an adult is
the
refore strongly recommended for children under the age of 13.
8+ (Viewer 8 and over): Not
recommended for young children. This program is suitable for most audiences, but it contains mild
or occasional violence that could upset young child
ren. Viewing in the company of an adult is therefore recommended for young
child
ren (under the age of 8) who do not distinguish between reality and imagination.
G (General Audience): This p
rogram is suitable for audiences of all ages. It contains no violence, or any violence that it does
contain
is either minimal or is presented in a humorous manner, as a caricature, or in an unrealistic way.
English-38
Note:
A. The wall mount is not contained in the accessories sold with television. We only provide the installing specifications but not the
wall mount itself. If you need the mount, please consult with the local dealer for a VESA wall mount.
B. We strongly suggest to set the wall mount with equipments of specification we ordered. If not, inappropriate installing may
cause damage to device or people.
Warnings:
1. Do not set up the wall mount by yourself. Please contact qualified professionals for installation.
2. The TV should not be mounted on walls or surfaces which have an angle more than 10 degrees with vertical direction.
Otherwise the TV set may fall.
3. The walls for mounting must have enough strength to hold the whole weight of TV set. For example, concrete wall and brickwork
are eligible. Do not place the mount on soft walls such as earth walls and plasterboard.
4. If spare parts of different specifications (such as screws) are used during mounting, consult with qualified professionals to make
sure these parts are safe and effective.
5. Before attaching the base to wall, ensure the holes for anchors are in keeping with the installing rules. Otherwise there may exist
some potential problems.
6. Do not place any heating source under your television. Or else, it can cause fire.
7. Do not place the TV near anything dripping. Transducers and high voltage wires should be kept far away from the apparatus too.
Or else, it may cause creepage, electric shock or bad resonance.
8. Do not place TV in a location where collision or vibration is liable to happen.
9. In order to avoid unexpected falling of the TV set, do not put any strong force on TV or wall mount after installing.
10. Be sure to unplug the TV before installing. Keep anything hard or sharp away from the screen panel to prevent the scuffing.
11. After installing, if there is any need to move the cabinet, please contact the qualified professionals.
Model Unit Dimension (unit:mm) Screw
42PA30RQ VESA 400 x 200
400 mm
200 mm
M6 screws, length 14mm
Wall Mounting Unit Specification
39
English-
Product Specification
Model
Diagonal Display Size
42PA30RQ
42 inches
Television System American TV standard ATSC/NTSC system
Resolution 1024 x 768
Component/HDMI mode 480i, 480p, 720p, 1080i
41.3”W x 28.6”H x 11.5”D
41.3”W x 26.8”H x 4.7”D
53.3”W x 29.9”H x 9.4”D
Power Supply
RF input
AC 110 V, 60Hz
Connection
Interface
Dimension
With stand
Without stand
With stand
Without stand
45.6LBS (20.5KGS)
41.6LBS (18.7KGS)
Package
52.6LBS (23.7KGS)
less than 205W
Weight
Power Consumption
Notice: Specifications are subject to change without notice.
Package
Cable/Antenna x 1
Audio output Headphone x 1, Digital Audio Out x 1, Analog Audio Out (L/R) x 1
Audio input
Component x 2
AV x 1
PC Audio In x 1
Video input
AV x 1
Component x 2
HDMI x 3
Graphic input
RGB 15pin x 1
Channel Coverage
VHF: 2~13 UHF: 14~69 CATV: 1~135
Digital Terrstrial Broadcast (8VSB): 2~69
Digital Cable (64/256QAM): 1~135
English-40
English-
41
English-42
Questa pagina è stata
lasciata intenzionalmente
vuota
.
Use una montura que se ha recomendado por el fabricante de monitor
y/
o listado por un laboratorio independiente (como UL, CSA, ETL).
Siga todas las instrucciones ofrecidas por el fabricante de monitor
y montaje de pared.
Seguridad de niños
Español-
43
Características PDP/ Advertencia
• Evite utilizar la TV a temperaturas por debajo de los 41° F (5° C)
• Mostrar una imagen fija durante mucho tiempo puede provocar daños permanentes en la
pantalla PDP
El uso del televisor de plasma en formato 4:3 durante un largo período de tiempo puede dejar rastros de
bordes en las partes izquierda, derecha y centro de la pantalla debido a las diferencias en la emisión de luz
en la pantalla. La reproducción de un DVD o una consola de juegos puede causar efectos similares a la pantalla.
Los daños causados por el efecto de arriba
Después de ver imágenes fijas de videojuegos y computadora en la TV durante un cierto período de tiempo,
puede producir imágenes parciales en la pantalla después de dejar de usarlos. Para evitar este efecto, reduzca
el brillo y el contraste al mostrar imágenes fijas durante mucho tiempo.
No deje una imagen fija (como en un video juego) en la pantalla de plasma por más de varios minutos, ya que
puede causar retención de imagen en la pantalla. La retención de la imagen también se conoce como
"quemado de pantalla". Para evitar la persistencia de la imagen, por favor, reduzca el grado de brillo y contraste
de la pantalla cuando se muestra una imagen fija.
• Calentamiento en la parte superior de la TV de plasma
La parte superior del producto puede calentarse después de largos períodos de uso ya que el calor se disipa
desde el panel a través del orificio de ventilación en la parte superior de la TV. Esto es normal y no indica ningún
defecto o falla en el funcionamiento de la TV. Sin embargo, los niños deben ser prevenidos de no tocar
la parte superior de la TV.
• Defectos de celdas
El PDP utiliza una pantalla compuesta por 2,360,000 (nivel-HD) a 6,221,000 (nivel-FHD) píxeles que requieren
una tecnología sofisticada para producir el video. Sin embargo, puede haber unos pocos píxeles brillantes u
oscuros enla pantalla. Estos píxeles no tendrá ningún impacto sobre el rendimiento de la TV.
• Garantía
La garantía no cubre los daños causados por la retención de imágenes.
Burn-in no está cubierto por la garantía.
• La TV está haciendo ruido (similar a una quebradura)
El ruido de “quebradura” se puede producir cuando los materiales de la TV se contraen o se expanden debido
a la temperatura y humedad que existe alrededor del aparato. Esto es normal y no es un defecto de la TV.
Español-
44
Español-
45
CONTENIDO
43
Seguridad de niños ...................................................................................................................................
44
Características PDP/ Advertencia ..........................................................................................................
47
47
50
50
50
50
50
51
48,49
52
53
54
54
55
56
57
57
58
59
62
62
62
62
63
63
63
63
63
64
64
64
59
59
60
60
60
61
61
Precauciones y Advertencias ..................................................................................................................
Notas FCC ..................................................................................................................................................
Preparacion para su nueva TV ................................................................................................................
Accessorios ..............................................................................................................................................
Ajuste de mesa de TV ................................................................................................................................
Seleccione lugar ........................................................................................................................................
Connexiones y Uso ....................................................................................................................................
Instalacion de base TV ..............................................................................................................................
Precauciones .........................................................................................................................................
Conexion de señal TV ...............................................................................................................................
Conexion de cable .....................................................................................................................................
Conexiones traseras .................................................................................................................................
Explicacion de entradas a TV ..................................................................................................................
Teclado lateral y panel Frontal ................................................................................................................
Conexion Audio Video Compuesto (Buena Calidad de Video) .......................................................................
Conexion de Componente YPbPr (Mejor Calidad de Video) .........................................................................
Iniciar Ajustes .............................................................................................................................................
Lenguaje del menu ....................................................................................................................................
Tipo de Señal ............................................................................................................................................
Auto busqueda Canales .............................................................................................................................
Conexion aparato HDMI (Mejor Calidad Video) ............................................................................................
Conexion Computadora ............................................................................................................................
Obtener varios tipos de entradas fuente .....................................................................................................
Operaciones Basicas .................................................................................................................................
Encender y Apagar ....................................................................................................................................
Eligiendo canal de TV ................................................................................................................................
Seleccion señal entrada .............................................................................................................................
Ajuste de angulo de base ..........................................................................................................................
Barra de Canales ......................................................................................................................................
Ajuste Volumen .........................................................................................................................................
EPG (Guia de Programa Electronico) ..........................................................................................................
Botones laterales ......................................................................................................................................
Panel fronta ..............................................................................................................................................
Instrucciones del control remoto ............................................................................................................
Colocando pilas en el Control ....................................................................................................................
Conociendo el Control Remoto ...............................................................................................................
Botones control remoto .............................................................................................................................
Angulo de recepcion del Control ................................................................................................................
Español-
46
CONTENIDO
................................................................................................................................
.........................................................................................................
65
65
65
67
68
69
73
75
76
77
79
79
79
80
Menu de Operaciones OSD .....................................................................................................................
Ajustar pantalla OSD .................................................................................................................................
Menu Imagen ...........................................................................................................................................
Menu Sonido ............................................................................................................................................
Menu Canales ..........................................................................................................................................
Menu Padres ............................................................................................................................................
Preguntas mas Frecuentes (FAQs)
Problemas de funcion
Explicando Rango V-Chip
........................................................................................................................
....................................................................................................................
81
.........................................................................................................................
82
Unidad de Montaje de pared
Especificacion de unidad
Chip V Rango Sistema EUA .......................................................................................................................
Rango Sistema Canadiense ingles ..............................................................................................................
Rango Sistema Candiense frances .............................................................................................................
Ajustar Menu ............................................................................................................................................
Otros Menus ............................................................................................................................................
.................................................................................................................................
83,84
Tarjeta de garantía
Español-
47
ADVERTENCIA: PARA REDUCIR EL RIESGO DE FUEGO O CHOQUES ELECTRICOS, NO EXPONER ESTE
APARATO A LA LLUVIA O HUMEDAD.
PRECAUCION: CAMBIOS O MODIFICACIONES NO AUTORIZADAS POR EL FABRICANTE Y ACORDE A
ESTANDARES INTERNACIONALES PUEDEN EVITAR AL USUARIO A OPERAR ESTE EQUIPO.
Precaucion: Para reducir el riesgo de choques electricos, no retire la cubierta o tapa. No contiene partes
reusables en el interior. Para cualquier servicio acuda a personal calificado.
PRECAUCION
RISK OF ELECTRIC SHOCK
DO NOT OPEN
Notas FCC
Precauciones y Advertencias
La luz en forma de flash con simbolo
de flecha, con un triangulo equilatero
es un alerta para el usuario la
presencia de voltaje aislado en el
producto es de suficiente magnitud
que puede constituir un riesgo de
choque electrico.
El signo de exclamacion dentro de
un an triangulo equilatero es una
alerta para el usuario de la presencia
de operaciones importantes y de
instrucciones de mantenimiento
(servicio) en el manual de esta TV.
Informacion FCC
Este equipo ha sido probado y cumple con los limites para un aparato digital de Clase B, enbase al apartado 15 de las
normas FCC. Limites diseñados para provee proteccion rasonable contra daños en instalaciones residenciales Este
equipo genera, usa e irradia radio frecuencias si no se instala y utiliza de acuerdo a las instrucciones y causara interferencias
a las radio Comunicaciones. Sin embargo, no hay Garantia de que la interferencia no ocurrira en una instalacion particular.
Si este equipo no causa interferencia a la recepcion de radio o television, que puede ser causado por encender
o apagar el equipo, el usuario debe de intentar corregir la interferencia siguiendo uno o mas de las siguientes pasos:
- Reoriente o mueva la antena de recepcion.
- Incremente la separacion entre el equipo y el receptor.
- Conecte el equipo a otro tomacorrientes u otro circuito diferente al que esta conectado.
- Consulte al distribuidor o un tecnico experimentado en radio/TV technician para ayuda.
1. Leer estas instrucciones.
2. Conserve las instrucciones.
3. Guarde sus precauciones.
4. Siga todas las instrucciones indicadas en este instructivo.
5. No use este aparato cerca del agua. Tampoco lo use, cerca de tuberias, en pisos mojados, o cerca de una alberca o
algo similar.
6. No bloquear ninguna ventilacion o apertura. Instalar de acuerdo a las instrucciones del fabricante. Ranuras y aperturas en
el gabinete trasero o abajo son para ventilacion, para asegurarse de una operacion optima de la TV y protegerlo de algun
sobrecalentamiento. Las aperturas no deben bloquearse o cubrirse. Ni tampoco ser bloqueadas al colocar la TV sobre
una cama, sofa, alfombra u otra superficie similar.
8. No instalar cerca de alguna fuente de calor tal como radiadores, registradores de calor, estufas, o algun otro aparato
(incluyendo amplificadores) que produzcan calor.
9. No deseche los aditamentos de seguridad de las clavijas polarizadas o con tierra. Una clavija polarizada tiene dos pernos
con uno mas ancho que el otro. Una clavija con tierra tiene dos pernos y un tercero a tierra. El perno ancho o el tercero
es provisto para su seguridad. Si la clavija no se enchufa en su tomacorrientes, consulte a un electricista para
reemplazarlo por uno nuevo.
10. Proteger el cable de areas transitadas o de ser pinchada particularmente la clavija, receptaculos
convenientes, y el punto desde el cual sale del aparat.
11. Use solo accessorios especificados por el manufacturero.
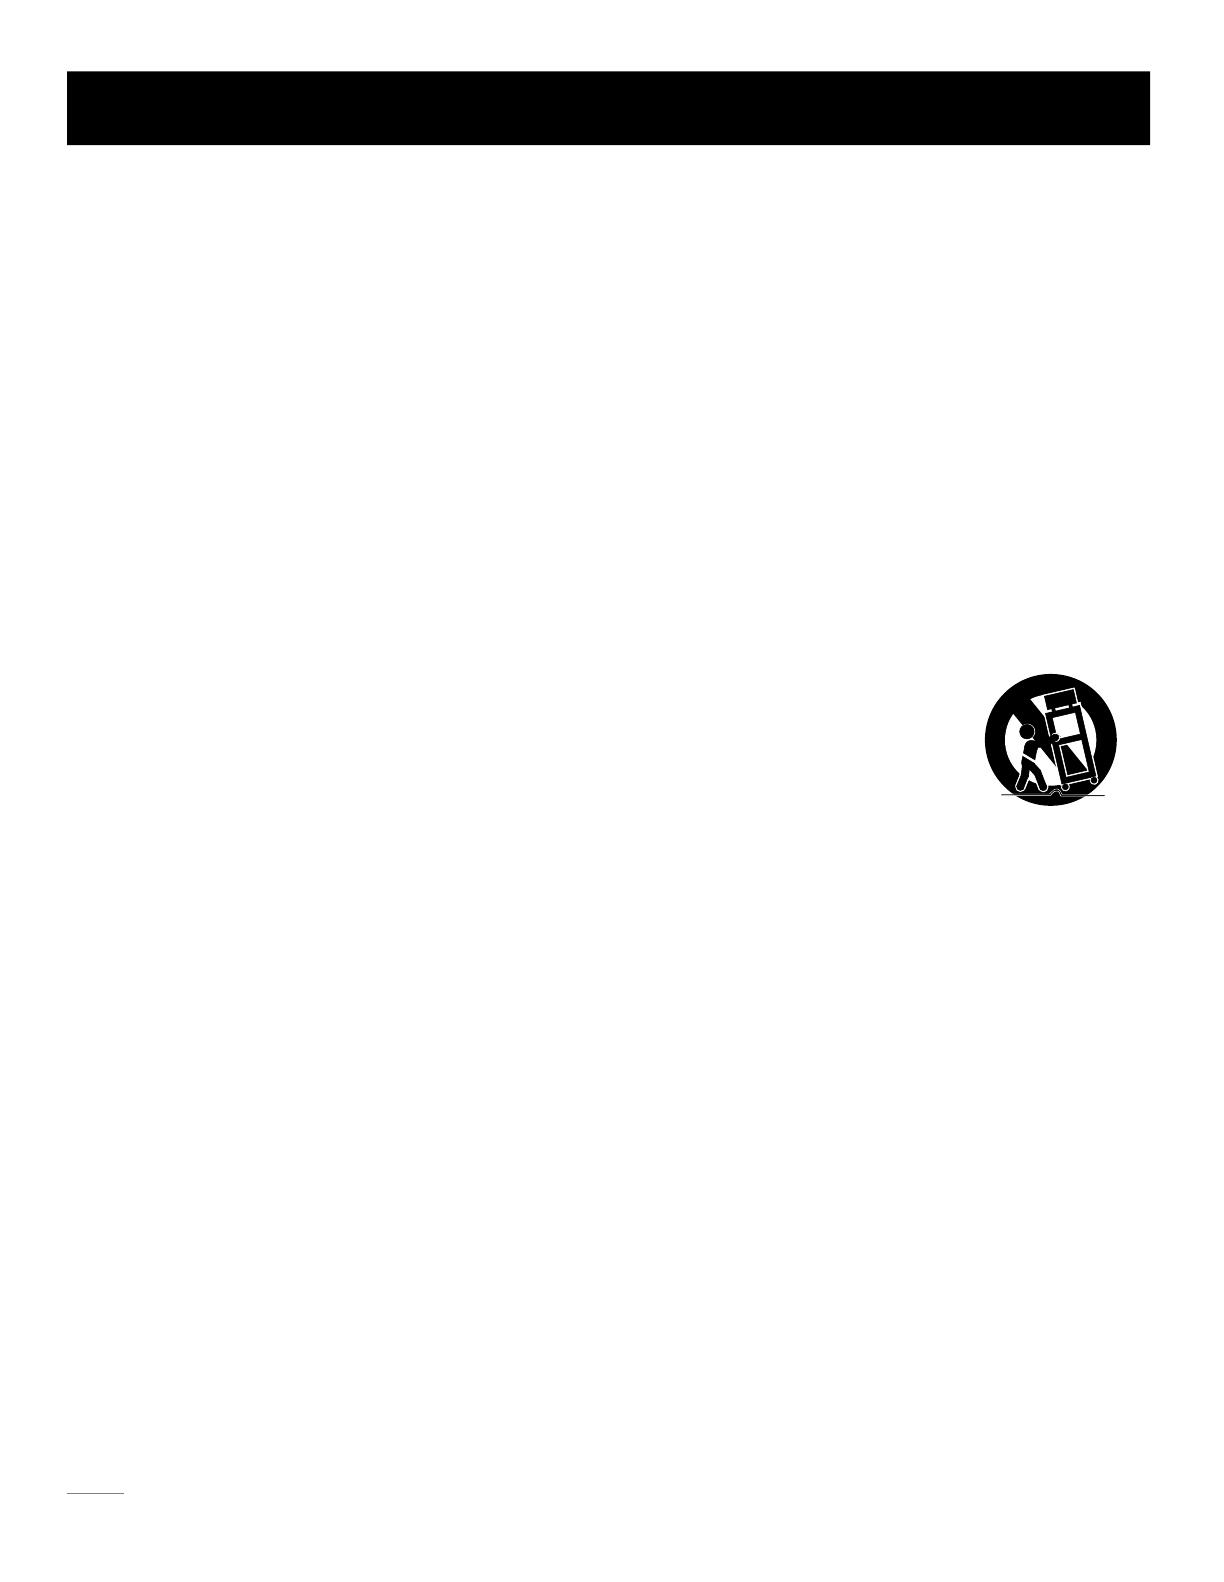
12. Usesolo con carro, base, tripies, repisas, o mesas especificadas por el manufacturero, o vendidos
con el aparato si se usa un carro, utilicelo con precaucion al moverlo para evitar algun daño al
rodarlo de un un lugar a oiro. Debe cuidar paradas rapidas, uso de fuerza excesiva y superficies
disparejas las cuales pueden ocasionar alguna caida de la TV y el carro.
13. Desconecte este aparato en tormentas electricas o cuando no se utilice por un periodo largo de tiempo. Para una mejor
proteccion de esta TV desconectela del tomacorrientes y desconecte tambien la antena y el sistema de cable. Esta
accion preveera daños a la TV debido a la tormenta electrica y a las lineas de corriente.
14. Para reparar acudir a un tecnico calificado. El Servicio se requerira cuando el aparato haya sido dañado,
ya sea por el cable o clavija dañados, liquido derramado u objetos tirados dentro del aparato, exposicion directa a la
lluvia o a la humedad, no opera normalmente, o haya sido tirado.
15. Esta TV debe operarse solo con el tipo de corriente indicada en la etiqueta. Si el usuario no esta seguro del tipo de
corriente del hogar, consulte a su distribuidor o la compañi de luz local. Para el contr ol remoto de la TV las pilas
correctas se indican en el instructivo.
16. El aparato de TV no debe exponerse a goteos o salpícaduras. Ningun objecto lleno con liquidos, tales como vasos,
deben de colocarse sobre el aparato de TV.
17. Nunca coloque objetos de ningun tipo sobre la TV por las aberturas ya que pueden tocar voltajes altos u otras partes
electricas que pueden ocasionar fiu go o choques electricos. Nunca derrame liquidos de ningun tipo en la TV.
18. Desconecte la TV del tomacorrientes antes de limpiarla. No use liquidos o aerosoles. Use un trapo para limpiar.
19. Esta TV nunca debe colocarse cerca o sobre un radiador o fuente de calor. Esta TV no debe de colocarse en una
instalacion prefabricada tal como libreros o racks a menos que exista buena ventilacion tal como lo recomienda el
fabricante.
20. No coloque esta TV sobre nu carro inestable, base, tripie, repisas, o mesas. La TV podria caer, causando se rios daños
a alguien, y algunos serios daños al aparato.
21. No intente reparar la TV por Ud. mismo porque al abrirlo o remover cubiertas puede exponerlo a altos volatajes muy
peligrosos o . Para cualquier servicio, acuda a personal calificado.
22. Este aparato cumple con las Reglas Part 15 de la FCC. Las Operacion esta sujeta a las siguientes condiciones:
(1) Este aparato puede no causar interferencia, y (2) este aparato puede aceptar cualquier interferencia en la recepcion,
incluyendo interferencia que puede causar su operacion.
Precauciones
Español-
48
Español-
49
Medidas de seguridad
Precaucion: Empujar, jalar o subirse a la TV puede causar su caida. No permita que los niños se suban o se cuelguen a la
TV.Coloque siempre la TV sobre una superficie rugosa, nivelada, estable que soporte el peso de la TV. Y de ser posible,
asegurela tal como lo indican las instrucciones abajo indicadas (Nota: Los accesorios de sujeccion, como los
tornillos no se incluyen).
Paso uno: Inserte una base de montaje y atornille firmemente a la parte alta de la pared (Figura A).
Paso dos: Inserte ganchos a la pared y conecte los tornillos y ganchos con cuerdas o cadenas (Figura B).
Precauciones
ANTENA
Cable d e
Tierra
Grapas p a r a T i e r ra
CONDU C T O RE S D E T I E RRA
(NEC S E C TI O N 81 0 - 2 1)
Grapas p a r a T i e r ra
Servic i o d e D e s c ar g a a Ti e r r a
Sistem a d e E l e c t ro d o s
(NEC A R T 2 50 , P A RT H )
EQUIP O D E S E R VI C I O
ELECT R I C O
ANTENA
Unidad d e De s c a r ga
(NEC S E C T I ON 8 1 0 -2 0 )
Diagrama Figura A
23. PRECAUCION: Para prevenir daños, este aparato debe ser asegurado al piso o pared siguiendo las instrucciones
de instalacion.
24. Para reducir el riesgo de choques electricos, el perno central de tierra debe mantenerse.
25. Si un sistema de antena o cable es conectado a la TV, asegurese que estos esten dotados con puesta a tierra
para proteger contra sobrecargas de volltaje y cargas de estatica. La Seccion 810 del Codigo Nacional Electrico,
ANSI/NFPA No.70, provee informacion con respecto a puesta a tierra desde una parte de la estructura de soporte,
la tierra se consigue con un cable de cobre de la antena, que descarga los conductores, para la colocacion de
este aditamento conecte electrodos a tierra tal y como lo indica el diagrama de la Figura A.
Figure A Figure B
M6 Tornillos
Pared
CH LI ST
.
PICTURE
SOUND
Nota: Los accessorios estan sujetos a cabio sin previo aviso.
Seleccionar lugar de TV
Seleccione superficie plana y estable para su TV. Favor seguir Instrucciones de seguridad al colocar la TV.
Colocacion de la base de mesa de la TV
Guia de instalacion para base de TV, ver pag. siguiente para mejor comprension.
Conexion y Uso
Despues de colocarla apropiadamente TV, conecte la TV a la corriente y componentes del cable. Para futuras
informacion ver de pag.54 a pag. 57.
Español-
50
Checar Accessorios
Verifique los accessorios empacados con su TV.
Antes de Encender la TV
PART NO.: RE20QP80
CONTROL REMOTO
Preparacion para su nueva TV
DOCUMENTOS
PILAS "AAA"
CABLE DE ALIMENTACION
TORNILLOS DE LA BASE
MAQUINA DEL
TORNILLO
M4 x 12mm, 6pcs
Part# RS01TM412H
Cubierta
BASE DE TV
Ferrita
INSTRUCTIVO
GUIA RAPIDA DE INICIO
GUIA RAPIDA DE COMIENZO
Part No.:RN4142H190
Part No.: RN0342H1904
Plasma TV
User s Manual
42PA30RQ
Model Number.
GUIA DE CONTROL RE-MOTO
Remote Control Guide
Program Your Universal Cable
or Satellite Remote Cont
rol to
Operate
Your New RCA TV!
If you would like to program your other
household remote controls to your new RCA
television, please consult the User
’s Manual
supplied by your Cable or Satellite provide
r.
The Cable or Satellite providers’ User
’s Manuals
should include instructions on how to program
their remote to your television.
Below is a list of RCA codes for the most
common Cable and Satellite providers.
Use the RCA code that is associated with your
Cable or Satellite provider (if applicable).
DIRECTV.........................0178,10178
Time
Warner Cable..........0178,10178
Comc
ast..................................10178
Cox
Communications.................0178
Dish
Network.............................627
Fios Verizon.....0205,0057,0493,0775
If the RCA code associated with your Cable or
Satellite provider is not listed above, if the code
above does not work, or if you can not locate the
instructions for programming your household
remote to your television, call your local Cable or
Satellite provider
’s customer service center.
This is for U.S. customersThis is for U.S. customers
C
H
LIS
T
.
PICTURE
SOUND
English
Cambia una vez mas la manera de entretenerse.
Esp año l
Español-
51
Instalacion
por favor llevar a cabo la instalación de acuerdo con las instrucciones de abajo.
Paso Uno
Coloque el televisor abajo sobre un paño suave o un cojín para evitar posibles daños
Paso Tes
Inserte los seis tornillos M4 de la máquina (que son totalmente iguales) y apriételos.
Paso Dos
Tome el soporte. Por favor, alinear los agujeros de los tornillos del soporte y la televisión.
Por favor, vea el dibujo a continuación:
RS01TM412H
Tornillo de pedestal Cantidad Parte#
6pcsM4 x 12mm
TV 42PA30RQ esta empaqueta con el soporte del televisor separado del gabinete. Para configurar el soporte de mesa del TV,
Pedestal de instalación
Instalacióncil de la ferrita: Abra la ferrita y coloque el cable dentro de la ranura, finalmente cierre la ferrita a presión y
asegúrese que haya quedado bien abrochada
La ferrita protege a los cables de la interferencia
.
Instalación de la ferrite
Nota:
1. El panel es fá cil de ser rascado, así que por favor, elija una superficie totalmente plana para colocar el televisor, y el uso
de un paño suave o un cojín para proteger el panel de la TV. No ponga la TV directament en la mesa.
2. Desconecte siempre primero el cable de AC al instalar o retirar el soporte.
Plástico negro que envuelve a la ferrita
(La imagen puede diferir de su apariencia real)
Español-
52
El primer paso al conectar su TV es obtener la señal. Su TV 42PA30RQ tiene un panel lateral, el cual le permite recibir canales de TV
analogos y/o digitales via entrada ANT/CABLE.
r
Antes de conectar su TV, determine el uso de antena o servicio de cable para obtener la señal.
A. Antena
Conecte la antena a la TV via cable coaxial en entrada ANT/CABLE del panel lateral. Y asi recibira TV de aire con canales digitales
y analogos.
B. Servicio TV por cable
Conecte el cable a la TV via cable coaxial a la entrada ANT/CABLE del panel lateral. Y estara listo para recibir canales locales
fuera del aire digitales y analogos.
C. Caja de Control
Si usa una caja de control, necesitara llamar a su compañia de cable o satelite, quien usara una conexion especial, favor
verificar la guia del usuario de la caja de control.
Nota: No conecte el cable de corriente sino hasta haber terminado todas las conexiones.
AC
110V/60Hz
AntenaCable TV
Or
Conexion de señal TV
Enchufe
ANT/
CABLE
Cable de corriente
(Conecte despues que las otras conexiones se hagan)
Español-
Elija sus Conexiones
La TV 42PA30RQ suporta varias formas de conexion desde otros aparatos (tal como DVD, VCR, cable, ect.). Favor
siga el listado para elegir los cables que pueden adaptarse a su aparato.
Nota:
El logo HDMI yel de High-Definition Multimedia Interface son marcas or registradas y/o licenciadas por HDMI Licencing.
Precaucion:
Desconectar el cable de corriente cuando conecte otros aparatos a la TV.
Conexion de cable
Jacks Cables Further Information
Entrada de Audio L y R, Video
Entrada audio L y R Cable
Componente 1 Y,Pb,Pr Cable
Componente 2 Y,Pb,Pr Cable
HDMI en 1/DVI, 2, 3
Cable Audio
Cable de audio con terminal 3,5mm
Cable VGA
Cable Componente Video
Cable Video/Audio
Ver pagina 54
Ver pagina 55
Ver pagina 56
Ver pagina 57
53
Entrada PC
Cable HDMI
TM
Cable HDMI-DVI
VGA, SOUND/DVI
Español-
54
Conexiones traseras
Conexion Aparato Compuesto AV (Buena Calidad de Video)
Para conectar un aparato compuesto AV, como un reproductor DVD, siga los siguientes pasos:
1. Conecte la entrada Video In al costado de la TV a la salida video del aparato via cable de video (amarillo).
2. Conecte las terminales AUDIO-IN L y R al costado de la TV a la salida audio del aparato via cable de audio.
Nota las salidas y entradas del canal izquierdo son blancos y del derecho son rojos.
Conexion de Video Compuesto
La imagen de abajo es un ejemplo de una conexion con el video compuesto.
Nota: señal AV es del video compuesto. Este tipo de señal de video tiene regular calidad de imagen.
Audio
L R
Audio
L R YPbPr
Video
HDMI
Reverso de TV
Panel de salida de otro aparato
Español-
55
Reverso de TV
Conectando aparato con salida YPbPr (Mejor Calidad de Video)
Para conectar un aparato componente, tal como un reproductor DVD, siga los pasos siguientes:
1. Conecte terminal COMPONENT 1,2 Y/Pb/Pr al costado de la TV a la salida de video del aparato via cable de video (verde,
azu y rojo).
2. Conecte terminales COMPONENT 1,2 AUDIO-IN L y R del costado de la TV a la salida de audio del aparato via cable de
audio. Nota la terminal y entrada de canal izquierdo son blancas y del derecho son rojos.
Conexion del Componente de Video
La imagen de abajo es un ejemplo de una conexion usando el componente de video.
Nota: terminales Y/Pb/Pr del componente de video. Esta señal de video tiene calidad de imagen.
Audio
L R
Audio
L R YPbPr
Video
HDMI
Panel de salida de otro aparato
Conexiones traseras
Reverso de TV
Conexiones traseras
Español-
56
Audio Out
L R
DVI
Speaker or
headphone
DVI
Audio
L R
Audio
L R YPbPr
Video
HDMI
Panel de salida de otro aparato
PC
Conexion HDMI
La imagen de abajo es ejemplo de una conexion usando terminal video HDMI.
Conexión HDMI dispositivo (Mejor Calidad de Video)
Para conectar un dispositivo HDMI a un reproductor de DVD, por favor conecte el HDMI1, 2, o 3 al enchufe del lado de la TV
a los conectores de salida del dispositivo mediante un cable HDMI.
Nota: 1. HDMI (High-Definition Multimedia Interface) es un compacto interface de audio / vídeo para transmitir audio
descomprimido. Se transporta la señal de audio y vídeo a través del mismo cable y tiene la mejor calidad de pantalla
2. Cable HDMI-DVI sólo transfiere la señal de vídeo desde el puerto DVI del dispositivo DVI a HDMI toma de TV. Para
el señal de audio, por favor conecte audio output a PC Audio-In en el panel posterior de televisión.
Para conectar un dispositivo DVI a un ordenador a través del puerto DVI del PC y el conector HDMI del televisor:
1. Conecte el HDMI1, 2, o 3 al enchufe del lado de la TV al puerto DVI del PC a través de DVI-HDMI.
2. Conecte PCaudio-In al enchufe del lado de la TV a la salida de audio de la computadora con el cable de audio ( enchufe
de estéreo 3,5 mm).
Para conectar un dispositivo DVI, a otros dispositivos AV a través del puerto DVI del dispositivo y toma HDMI del televisor:
1. Conecte el HDMI1, 2, o 3 al enchufe del lado de la TV al puerto DVI del dispositivo a través de DVI-HDMI.
2. Conecte PC Audio-In al enchufe de lado de la TV a la toma de salida de audio del dispositivo con el cable de audio
(dual-channel RCA a la toma estéreo de 3,5 mm).
Panel de salida de otro dispositivo AV
Español-
57
Como Obtener Varios tipos de fuentes de entrada
Despues que la conexion sea hecha, presione boton INPUT del control o el panel de la TV para elegir la fuente requerida.
Ver pag. 63, Operaciones basicas de la TV.
Conexiones traserasConexiones traseras
Conectando una computadora
Para conectar una computadora, siga estos pasos:
1. Conecte el puerto PC INPUT VGA al costado de la TV a la salida VGA del aparato via cable D-sub 15-pin.
2. Conecte terminal PC INPUT Audio In del costado de la TV a la salida de audio de computadora con cable de audio (3,5mm).
Conexion de PC
La imagen de abajo es ejemplo de una conexion usando su TV como monitor de PC.
Nota: Si desea usar su TV como un monitor, favor checar que la maxima resolucion para 42PA30RQ is 1024*768.
Favor ajustet la computadora grafica correctamente.
VGA
Speaker or
headphone
PC
Reverso de la TV
Solo para el uso de servicio. No conecte ningun aparato.
Español-
58
Explicacion de entradas a TV
AC-IN: AC power input.
ANT/CABLE: Conecte para recibir la señal desde su antena o cable via cable coaxial.
Head phone:
Conecte un audifono de 3,5mm para audio personal.
Digital Audio-out:
Conecte un cable coaxial para salida de audio digital.
AUDIO OUTPUT L/R:
Conecte cables coaxiales de doble canal para salida analoga de audio.
R-AUDIO-L/AV, Video In: Conecte un aparato AV que tenga terminales de video, como una VCR
AUDIO-IN L: conexion de canal audio izquierdo. El conector audio izquierdo es blanco. Para fuentes
de audio mono, asegurese de usar la entrada de AUDIO izquierda.
AUDIO-IN R: canal de conexion de audio derecho. El conector de audio derecho es rojo.
COMPONENT 1,2 Y/Pb/Pr
:
Conecte un aparato con entradas component video, como un reproductor DVD.
Y/Pb/Pr (Component Video): provee buena calidad de imagen porque la señal es separado en tres componentes como
un arbol de video-grade o cables componente video para la conexion. Cuando use Y/Pb/Pr, asegure de conectar los cables de
audio derecho e izquierdo.
HDMI1/DVI, 2, 3
: (Interfase Multimedio de Alta Definicion) Provee una conexion digital descompresada que lleva ambos datos
video y audio por medio de un cable mini-plug integrado.
PC INPUT VGA: Conecta su computadora u otro aparato con una salida VGA a esta entrada usando un cable 15-pin, D-sub.
SOUND/DVI: Use para tener sonidos cuando la PC se conecta a la TV. Use cable 3,5mm stereo mini-pin para conectar
PC a la TV.
SERVICE: Solo para el uso de servicio. No conecte ningun aparato.
o reproductor DVD. Para accesar aparatos conectados a esas terminales, presione INPUT en su control;
luego presione subir/bajar para seleccionar AV. Presione finalmente ENTER para confirmar.
Para accesar aparato conectado al Y/Pb/Pr, presione INPUT desde su control; luego presione la flecha subir/bajar para seleccionar
Component1 o Component2. Presione ENTER al mismo tiempo para confirmar.
Nota:
La entrada AV (Video In), y la de COMPONENT 1 (Y, Pb, Pr) comparten la misma entrada de audio -AUDIO-IN L/R.
Note:•
Salida Digital de Audio y AUDIO OUTPUT L/R deben de ser conectadas al amplificador de
poder de audio, el cual provee un desempeño de sonido mas armonico y poderoso.
Español-
59
Panel frontal
INPUT:
MENU: Despliega Menu principal de la TV.
Despliega la lista de Seleccion .
VOL-: Desciende el volumen. En el menu de la TV, se acciona con la flecha izquierda del control remoto y puede ser usado
para seleccionar el menu
VOL+: Incrementa el volumen. En el menu de la TV, se acciona con la flecha derecha del control remoto y puede ser
usada para seleccionar el menu.
CH : Desciende en la lista de canales. En el menu de la TV, se acciona con la flecha hacia abajo en el control remoto y
pue- de ser usado para opciones en el menu.
CH : Incrementa cambio en la lista de canales. En el menu de la TV, acciona la flecha para arriba en el control remoto
y puede ser usado en opciones de Menu.
POWER ( ): Enciende y apaga la TV.
Funcionamiento en distancia y angulo del control, ver pag. 60.
Indicador Power/Standby: LED dual color Azul-Rojo. Es rojo cuando la TV se apaga y azul cuando se enciende.
Sensor del Control Remoto: El sensor IR del control, recibe un rayo infrarrojo enviado por el control remotol.
Teclado lateral y panel Frontal
Botones Laterales
Si no localiza su control remoto, puede usar los botones laterales de su TV para operar varias funciones de la TV.
Sensor del Control Remoto
Indicador Power/Standby
(azul/rojo)
Instalando Baterias en el Control
Angulo de recepcion del Control remoto
Retire la tapa del compartimento de atras del control remoto levantando la tapa.
Inserte dos pilas "AAA", asegurese que la polaridad (+ y -) esten alineadas correctamente.
Coloque la tapa trasera.
Polaridades correctas (+, -)?
Las baterias estan inservibles?
Hay una falla de energia de corriente?
El cable de corriente esta conectado?
Hay alguna interferencia o algo bloquea el sensor del
control remoto?
Use su control remoto a un rango de distancia y angulos como se ilustra abajo.
Si el control remoto no funciona, verifique estos puntos:
Baterias usadas deben ser recicladas.
Mantener lejos del alcance de niños.
NO use baterias usadas y nuevas combinadas.
Cambie ambas baterias al mismo tiempo.
Cuando no use el control remoto por largo tiempo,
retire las baterias de la unidad.
Precaucion:
Instrucciones del control remoto
Español-
60
Universal Remote Control Code List
Para las marcas de Control Remoto Universal abajo listados,
favor usar los codigos y referencias de su Control Remoto
Universal indicados en el Manual para Instrucciones basicas de
operacion de su TV.
Codigos para DIRECTV: 0178, 10178
Codigos para Time Warner Cable: 0178, 10178
Codigos para Cox Communications: 0178
Codigos para Comcast: 10178
Codigos para Dish Network: 627
Codigos para Fios Verizon: 0205, 0057, 0493, 0775
7 meters
Español-
Control Remoto parte No. RE20QP80
Botones del Control Remoto
Numeric Buttons: Use estos botones para los numeros.
CH.LIST: Despliega la listade canales.
Para entrar a un canal digital con un sub-canal, entre al canal principal; y presione
este boton para entrar al sub-canal y presione ENTER.
PICTURE: Para modificar modo de imagen predeterminado (ver pag. 65).
SOUND: Para modificar modo de sonido predeterminado (ver pag. 67).
Los botones no listados son para el DVD, no estan disponibles para esta TV.
NOTA :
ENTER: Boton aceptar y confirmar.
EPG:
Muestra la Guia de Programa Electronico (ver pag. 64).
INPUT: Accesa los canales disponibles (TV, AV, Component 1/2, HDMI 1/2/3, PC).
Use las flechas para las opciones, y presione ENTER para selecionar.
MENU: Accesa al Menu principal, o retorna al nivel superior de un sub-menu.
EXIT: Para salir del menu o funcion actual.
“ ”:
ASPECT: Modifica el modo tamaño de pantalla predeterminado (ver pag. 66).
DISPLAY:
Despliega la barra de Canales (ver pag.64).
CC:
Selecciona modo "closed caption" .
MTS:
Selecciona sonido de TV multi-canal.
Congela escena en pantalla, presiona otra vez y retornara a normal.FREEZE :
Asciende/desciende por la actual lista de canales favoritos.
FAV.: Adiciona el canal actual a su lista de favoritos, o elimina el canal actual de la lista
de favoritos (si ya existia este canal en el listado de favoritos).
FAV.+ or FAV.- :
SLEEP:
Selecciona tiempo, despues del cual la TV se apagara automaticamente.
CH or CH : Ascender o descender por la lista de canales. Presione otra vez para cambiar
los canales arriba/abajo; mantener presion para continuar cambio de canal.
VOL+ or VOL-: Incrementa o reduce el volumen de la TV.
POWER ( ): Enciende y apaga laTV.
Arrows ( / / / ): Use las 4 flechas para elegir las diferentes opciones del menu de la
TV o cambie el valor. Las flechas arriba/abajo pueden funcionar con
CH /CH , y las flechas izquierda/derecha puede funcionar con
botones VOL-/VOL+.
Recall ( ):
Retorna al canal previo.
MUTE ( ): Reduce el volumen de la TV a su minimo nivel. Presione otra vez para restaurar
volumen
Conociendo el Control Remoto
61
CH L I S T
.
PICTURE
SOUND
Si es la primera vez que enciende su TV, o ha borrado la opcion eliminar canal (Clear Channel) (ver pag. 72), el ajuste inicial del
menu aparecera automaticamente.
Idioma
Para elegir su menu lenguaje, presione la flecha izquierda/derecha hasta que aparezca su lenguaje.
Lenguajes disponibles: Ingles, Frances y Español.
Para elegir su tipo de señal para sintonizar la TV, presione la flecha izq/der hasta ver Air o Cable.
Nota: favor seleccione tipo de señal de la TV en base a lo que use antena o cable de circuito cerrado.
Fuente Señal
Para ejecutar busqueda de canal, presionar flechas arriba/abajo hasta localizar Auto Canal y presione el boton ENTER.
Que entender:
1. El acceso a busqueda de canales inicia con la TV Analoga y termina con la localizacion de canales en la TV Digital.
2. Los canales que se hayan localizado se guardaran automaticamente.
3. Puede presionar el boton MENU o EXIT para buscar canales analogos/digitales.
4. Puede presionar MENU o EXIT repetidamente para terminar de buscar canales.
Auto-Busca
Configuracion inicial
:Menu selecto:Retorno
:Poniendo del Cambio
Idioma
Español
Antena
Execut
e
Fuente Señal
Auto-Busca
MENU
Iniciar Ajustes
Español-
62
AUTO CHANNEL SEARCH - Antena
Aanalogicos Cauces 1
Digitales Cauces
0
3%
Return
Buscando Por favor Espere....
:Stop Auto Channel Search
MENU
Español-
Para sintonizar canales Analogos
Un canal analogo muestra un numero comenzando con "A". Teclee el numero digital con los botones numericos y presione el
boton ENTER para confirmar.
Por ejemplo, para ver el canal analogo "A51", presione "5", "1", "ENTER" en el control remoto en secuencia.
Nota: Aunque no haya señal de TV analoga en America, reservamos funciones ATV para expandir su uso.
Ajustando angulo de base de TV
El gabinete de la TV puede ajustarse manualmente a izquierda o derecha hasta 15
grados del centro. Puede ajustarlo hasta conseguir la mejor vista y comfort.
Cambio a Canales Digitales
Un canal digital tendra al inicio una letra "D". Teclee el numero principal con los botones numericos, y presione el boton " "
del control remoto, y capture los sub-numeros al final.
Por ejemplo, para ver el canal analogo "D31-1", presionar "3", "1", " " y luego "ENTER" del control remoto en secuencia.
Puede usar el boton CH para incrementar el canal y CH para disminuir el numero del canal. Cuando no use OSD (On Screen
Display), las flechas subir/bajar pueden tambien funcionar con los botones CH /CH .
Presionar boton INPUT del control remoto para desplegar la lista Fuente a Seleccionar.
Use las flechas subir/bajar para elegir fuente deseada y presione ENTER para confirmar.
Cambio Directo de Canales
Apagar y Encender
Elegir canales en la TV
Elija fuente de entrada
Conecte el cable de corriente de su TV, esta entrara al modo "standby" y el indicador de encendido apareceraen rojo.Use el
boton de encendido ( ) del panel lateral de su TV o del control remoto para encenderla. Apaguela despues por 5 segundos, y
enciendala nuevamente.
Source Select
TV
AV
Component 2
Component 1
HDMI 1
HDMI 2
HDMI 3
PC
63
Operaciones Basicas
Barra de Canales
Presione el boton DISPLAY del control remoto, la barra de canales aparecera arriba a la derecha de la pantalla. Desplegando
la informacion de los canales actuales. La lista siguiente describe toda los items de la barra de canales.
r r
Ajuste de Volumen
Presione el boton VOL+/VOL- del control remoto para ajustar el volumen. Si desea quitar el sonido, presione MUTE ( ).
Cuando no use OSD (On Screen Display), las flechas izquierda/derecha pueden funcionar con VOL-/VOL+.
r r r
EPG (Electronic Program Guide)
Presione el boton EPG en el control remoto, la guia electronica de programas aparecera en el centro de la pantalla.
Esta guia electronica le dara la guia de la programacion de la TV. Puede usar las flechas izq/derecha para cambiar.
r r
A2/D50-1
MTV/KOCE-H
D
ATV DTV
Si el canal es analogo, A se desplegara. Si es un canal digital, D se desplegara. Por ejemplo, en las
imagenes de abajo, A2 es un canal analogo, y D50-1 es un canal digital ( -1 es un numero de sub-canal).
Muestra etiquetas de canal.
Mono/Ingles Despliega si el canal actual es recibido en estereo o mono. Si el canal actual es digital, este espacio
sera lenguaje SAP (Second Audio Program).
480i/1080
i Muestra resolucion de la señal.
16:9/CC/TV-PG Despliega el aspecto de la pantalla, closed caption y nivel de rating del programa o canal actuales.
Y solo estan disponibles para canales digitales.
Oct-31 23:14 Mon Fecha y hora actuales.
Mono
A2
480i
Oct-31 23.14 Mo
n
A2
Ingles
KOCE-
HDMTV
D50 - 1
1080i
Oct-31 23:14 M
on
Operaciones Basicas
D50 - 1
KOCE-HD
Smart Travels - Pacific Rim with Rudy Maxa
23 : 00 - 23 : 30
Stockholm & Sweden is a natural-born beaut
y, winning us over with
luxuriant landscapes and sleek Scandinavian style.
We cruise through Stockholm’s
sun-dappled archipelago, visit a designer hotel and sip cocktails in the trendy Ice Bar
(a lounge...
:Pagina
:Retorno
MENU
Español-
64
Español-
"KVTUBSMBQBOUBMMBB04%
&MNFOV04%0O4DSFFO%JTQMBZMFQFSNJUFBDDFTBSMBTGVODJPOFTEFMB57
6TPEFMNFOVEFMTJTUFNB04%QSFTJPOFFMCPUPO.&/6EFMDPOUSPMSFNPUPZVTFMBnFDIBJ[RVJFSEBEFSFDIBQBSBFMFHJSVOB
PQDJPO*."(&/40/*%0$"6$&1BESFT$POmHVSBDJPOV05304ZQSFTJPOFFMCPUPO&/5&3
1SFTJPOBSnFDIBTTVCJSZCBKBSQBSBNPWFSTFBEJGFSFOUFTPQDJPOFTEFDBEBNFOV4JFTOFDFTBSJPQSFTJPOF&/5&3PnFDIB
EFSFDIBQBSBEFTQMFHBSMBTPQDJPOFTEFTVFMFDDJPO4JFTUBEJTQPOJCMFVTFFMUFYUPEFMBQBSUFCBKBEFDBEBQBOUBMMBQBSBBZVEB
5PSFUPSOBSBMNFOVBOUFSJPSQSFTJPOBSFMCPUPO.&/6
1BSBTBMJSBMNFOV04%
t1SFTJPOFFCPUPOM&9*5&MNFOVTFCPSSBSBEFMBQBOUBMMB
t1SFTJPOFFMCPUPO.&/6WBSJBTWFDFTIBTUBRVFFTUF
EFTBQBSF[DB
"MMPXTZPVUPTFMFDUPOFPGUIFQSFTFUQJDUVSFTFUUJOHT
SONIDO CAUCE Padres Configuracion OTROS
.FOVEF*NBHFO
1POJFODPEFM$VBESP
&M.FOVEFJNBHFODPOUJFOFNFOVFTZDPOUSPMFTQBSBDPOmHVSBSMBGPSNBRVFBQBSF[DBMBJNBHFO-BTPQDJPOFTEF.FOVEF
JNBHFOFTBQMJDBBMWJEFPQBSBTFMFDDJPOBSQSJODJQBMNFOUFFOUSBEBTEF57Z7*%&05PEBTMBTPQDJPOFTEFJNBHFOBQMJDBOQBSB
DBEBPQDJPO
1SFTJPOF.&/6FOFMDPOUSPM4FMFDDJPOF1JDUVSFFO.FOVQSJODJQBM1SFTJPOFFMCPUPO&/5&3QBSBQSPDFEFSBMNFOV*."(&/
1POJFOEPEFM$VBESP&MJKBNPEPWJTVBMQSFEFUFSNJOBEPFOTV57
&TUBOEBS%JOBNJDP6TVBSJP1FMJDVMB4PMPFONPEP6TFS
QVFEFBKVTUBS#SJMMP$POUSBTUF$0-035JOUFZ/JUJEF[
#SJMMP"KVTUBMBCSJMMBOUFTEFJNBHFO
$0-03"KVTUBMBSJRVF[BEFMDPMPS
5JOUF"KVTUBFMCBMBODFFOUSFOJWFMFTSPKPZWFSEFEJTQPOJCMF
TPMBNFOUFFOTF×BM/54$
/JUJEF["KVTUBOJWFMEFTPNCSBTEFMBJNBHFO
6TFTVCJSCBKBSQBSBFMFHJSMBGVODJPOSFRVFSJEBQSFTJPOF
&/5&3PnFDIBEFSFDIBQBSBBKVTUBSPFOUSBSBTVCNFOV
-BJNBHFOEFTVCNFOVZFYQMJDBDJPOFTFTUBOBCBKP
IMAGEN
:Menu selecto :Siguiente Menu
/
Poniendo del Pantallo
Config de PC
La Temperatura colorida Neutro
Advanced Picture Settings
:Retorno
MENU
ENTER
Poniendo del Cuadroi
:Menu selecto :Poniendo del Cambio
Brillo
Contraste
COLOR
Tinte
Nitidez
:Retorno
MENU
Escena del cuadror Estandar
PONIENDO DEL CUADRO
.FOVEF0QFSBDJPOFT04%
65
IMAGEN
10/*&/%0%&-1"/5"--0
$POmHEF1$EJTQPOJCMFTPMPFONPEP1$
"KVTUFTEFJNBHFOBWBO[BEBOPEJTQPOJCMFFONPEP1$
-B5FNQFSBUVSPDPMPSJEB
5BNB×PEFMBQBOUBMMB4FMFDDJPOFVOSBOHPEFBTQFDUP
3BOHPT-*FOP/FVUSP8BUFSHMBTTZ$JOFNB
'BWPSFMFHJSFMSBEJPRVFBQMJDBBMBNFKPSTF×BMEFGPSNBUPEFWJEFP
&*BVUPNPWJM&YUFOTBNFOUF)BHBRVFFMUBNB×PEFMBQBOUBMMBDVNQMB
DPOFMGPSNBUPEFTF×BMBVUPNBUJDBNFOUF
4JDBNCJBBFTUBGVODJPOFMUBNB×PEFBKVTUFEF1BOUBMMBTFJHOPSBSB
&*BVUPNPWJM&YUFOTBNFOUF"KVTUFMBJNBHFOEFMB1$BVUPNBUJDBNFOUF
-B1PTJDJPOIPSJ[POUBM"KVTUFMBQPTJDJPOIPSJ[POUBMEFJNBHFO
-B1PTJUJPO7FSUJDBM"KVTUFMBQPTJDJPOWFSUJDBMEFJNBHFO
3FMPK"KVTUFFMSFMPKEFMBJNBHFO
'BTF"KVTUFMBGBTFEFMBJNBHFO
3FBKVTUF3FBKVTUFBMBTJNBHFOFTEF1$EFGBCSJDBPSJHFO

&TUBPQDJPOMFQFSNJUFTFMFDDJPOBSVOPEFMPTUSFTBKVTUFTBVUPNBUJDPTEFDPMPS'SJPQBSBGPOEPB[VMBEPFODPMPSFTEFJNBHFO
/PSNBMP$BMJFOUFQBSBGPOEPSPKJ[PFODPMPSFTEFJNBHFO
 
$POUSBTUF%JOBNJDP"KVTUFDPOUSBTUFDPO"QBHBEP#BKP.FEJPP"MUP
'JMN.PEF"KVTUFNPEPmMNBDJPO&ODFOE"QBHBEP
3FEVDDJPOEF3VJEP"KVTUFSFEVDDJPOEFSVJEPDPO
"QBHBEP#BKP.FEJPP"MUP
.1&(3FEVDDJPOEFSVJEP"KVTUF3FEVDDJPOEF3VJEPFO.&1(
DPO"QBHBEP#BKP.FEJPP"MUP
$BNCJPEFJNBHFO4FMFDDJPOFFOFMNFOÞEFDBNCJPEFJNBHFO
0GGTT
1BOUBMMBCMBODB4FMFDDJPOFFOFMNFOÞEFQBOUBMMBCMBODB0O0GG
/PUB3FEVDDJPOEFSVJEPBZVEBBSFEVDJSMBFTUBUJDBEFDVBMRVJFS
UJQPEFJOUFSGFSFODJB&TUBDBSBDUFSJTUJDBFTVUJMQBSBQSPWFFSVOBJNBHFO
NBTDMBSBFODPOEJDJPOFTEFTF×BMBOBMPHBEFCJM-B3FEVDDJPOEF
3VJEP.&1(FTQFDJmDBNFOUFUSBCBKBFOTF×BMEFWJEFPDPODPEJHP
.1&(
:Menu selecto
:Poniendo del Cambio
EI automovil Extensamente
:Retorno
MENU
Tamaño de la pantalla LIeno
PONIENDO DEL PANTALLO
:Menu selecto :Apriete para Ejecutar
La Posicion horizontal
La Posicion vertical
Reloj
Fase
:Retorno
MENU
EI automovil Extensamente Execute
Reajustar Execute
Config.de PC
:Menu selecto :Poniendo del Cambio
/
Film Mod
e
Reduccion de ruido
MPEG Reduccion de ruido
:Retorno
MENU
ENTER
Contraste dinamico Apagado
Apagado
Bajo
Apagado
Display Shift Apagado
White Panel Apagado
ADVANCED PICTURE SETTINGS
.FOVEF0QFSBDJPOFT04%
Español-
66
Español-
Menu de Sonido
SONIDO Poniendo
Modo de Surround
El menu de Sonido le permite ajustar las salidas de audio. Para accesarlo, presione MENU del control remoto, y luego elija SOUND
del Menu principal. Presione el boton ENTER para proceder al menu SOUND (Sonido).
Crea un sonido surround 3D con material estandard estereo, con gran profundidad y riqueza.
Sonido Analogico
Seleccione tipo de audio analogo de su TV: Esterer, Mono o SAP (solo para el modo TV).
Sonido Digital
Otras Escenas
Seleccione tipo de lenguaje de audio: Ingles, Frances o Español (disponible solo para canal DTV).
:Menu selecto :Siguiente Menu
/
Mode de Surround
Sonido Analogico Estereo
Ingles
Sonido Digital
Otras Escenas
Equalizer Setting
s
:Retorno
MENU
ENTER
SONIDO Poniendo
SONIDO
Use subir/bajar para la funcion que requiera, presione
ENTER o flecha derecha para ajustar o enter para
sub-menu. La imagen sub-menu se explica mas abajo.
:Menu selecto :Poniendo del Cambio
Graves
Agudos
Balanc
e
:Retorno
MENU
Modo de Sonido Normal
SONIDO Poniendo
Modo de Sonido: elija el modo predeterminado en su TV:
Normal, Soft, Usuario, Dinamico. Solo en modo User puede
ajustar Bajo y agudo.
Bajo: Ajuste el componente Bajos de sonido de la TV.
Agudo: Ajuste el componente de Agudos de sonido de la TV.
Balance: Ajuste el balance entre canal izquierdo y derecho.
:Menu selecto :Habilite\Desactive
Portavoz
:Retorno
MENU
Auto Volume De
En
Salida de audio digital Dolby Digital
OTRAS ESCENAS
Ajuste Auto Volume De/En.
Ajuste bocinas De/En.
Ajuste tipo de salida de audio con Off, PCM o Dolby Digital.
Ajustar esta opcion en base a potencia de amplificador.
Menu de Operaciones OSD
67
Equalizer Settings
Menu de canales
:Menu selecto
:Poniendo del Cambio
:Retorno
MENU
Mode POP
-2 -1 2 3 1 0 -1
100 250 1K500 2K 4K 10K
EQUALIZER SETTINGS
El ecualizador grafico de 7-bandas le permite ajustar la frecuencia de audio.
Puede seleccionar uno de los ajustes predeterminados (Apagado, PIEDRA,
POP JAZZ, Usuario) o crear su propio ajuste personal (USER).
Presione la flecha izquierda o derecha para seleccionar frecuencia
(100Hz,250Hz, 500 Hz,1KHz, 2KHz, 4KHz, 10KHz) que desee para
ajustes. Use la flecha subir o bajar para ajustar.
El menu de Canales permite buscar, ver y editar canales. Esta disponible solo en modo TV.
Presione MENU y elija CHANNEL del Menu principal. Presione el boton ENTER para accesar al menu CHANNEL.
Lista de Canales
Despliega lista de canales. Muestra canales actuales.
Lista preferida
Despliega lista de canales favoritos. Muestra canales favoritos actuales.
Ajuste de Canal
Para ajuste de canal sub-menu (como se ve abajo).
CAUCE
:Menu selecto
:Siguiente Men
u
/
Lista preferida
Ajuste de canal
Fuente Se
ñal Antena
Auto-Busca
:Retorno
MENU
ENTER
Lista de canales
Execute
Use subir/bajar para elegir funciones requeridas, presione
ENTER o flecha derecha para ajustar o entrar a sub-menu
La imagen del sub-menu y explicacion estan abajo.
Use la flecha izq/der para cambiar canal deseado para editar.
Ajuste si el canal actual esta contenido en la lista de canales.
Entrar a numero de canal para renombrar canales.
AJUSTE DE CANAL
:Menu selecto :Seleccione
En CH+/CH-
Etiqueta Del Cauce KOCE-SD
Ca Favorito
:Retorno
MENU
Numero Del Cauce 50-2
Ajuste si el canal actual es el canal favorito.
Menu de Operaciones OSD
Español-
68
Español-
Fuente Señal
Seleccione su tipo de señal: Antena o Cable.
Auto-Busca
Ejecute busqueda de auto canal (ver pag. 62).
Menu de Operaciones OSD
69
Cuando el Menu de control Parental es accesado desde el Menu principal, necesita dar su password para desbloquear.
Favor teclear su password de 4digitos con los numeros 0~9.
Despues de desbloquear, lel menu de control parental puede usarse. Use laflecha subir/bajar para elegir la funcion quenecesita
y presione ENTER o flecha derecha para V-chip, Cambio de Password, en Panel frontal localizar seguro, quitar Lista de sub-menu.
Nota: Password original es "0000".
V-Chip
Crear contrasena
La grafica siguiente detalla donde se localizan los items en el menu V-Chip.
US V-Chip
Presione ENTER o la flecha derecha para entrar a los rangos del menu US V-Chip, donde se encuentran dos
sub-menus: Valuacion pelicula, Valuacion television.
Ver siguiente pagina para mas detalles.
Control de Padres
:Introduzca la contraseña
V-CHIP
Cambiar contrasena
Blq.Pnl.Fr.
Cerradura de la fuente
Borrar lista de Canal
:Retorno
MENU
DIGI TAL
Crear contraseña
V-CHIP
Canada V-Chip
Bloq-sin clasif
Valuacion de Downloadable
Datos Downloadabe claros
US V-Chip
:Menu selecto
:Siguiente Menu
/
:Retorno
MENU
ENTER
Menu de Padres
El ajuste del Menu le permitira restringir programas con contenidos especiales, en los botones teclee fuente de entrada.
Presione MENU y elija PARENTAL del Menu principal. Presione el boton ENTER para proceder al menu PADRES.
Valuacion pelicula
Valuacion television
Use las flechas para seleccionar nivel de rango a
bloquear, presione ENTER para bloquear/desbloquear el
nivel. Si ha blo-queado un nivel inferior, el nivel mas
alto se bloqueara tambien.
Por ejemplo, cuando PG-13 es bloqueado, R, NC-17 y X
se bloquearan al mismo tiempo.
Despues de ajustar, presione MENU para regresar o EXIT para ir al menu.
Repaso de rangos TV
Rangos de Edades
TV-MA Solo para Adultos
TV-14 Precaucion Paterna alta
TV-PG Guia Paternal Sugerida
TV-G Todo Publico
TV-Y7 Dirigida a niños de 7 años y mayores
TV-Y Para niños
D Dialogo Sexual Explicito
L Languaje Adulto
S Situacion sexual
V Violencia
FV
Para mas rangos, ver pag. 79.
Fantasia Violenta
Contenidos
Valuacion pelicula
PG
PG-13
R
NC-17
X
G
:Seleccione
:Cerradura/Abra
ENTER
VALUACION TELEVISION
TV-Y7
TV-G
TV-PG
TV-14
TV-MA
TV-Y
D
:Seleccione :Cerradura/Abra
ENTER
L S V FV
Similar con Rango pelicula.
Menu de Operaciones OSD
Español-
70
Español-
VALUACION FRANCESA
8 ans+
13 ans+
16 ans+
18 ans+
G
:Seleccione :Cerradura/Abra
ENTER
:Retorno
MENU
V-Chip Canada
Presione ENTER o flecha derecha para el rango US V-Chip, el cual contiene 2 sub-menus: Rango Ingles y Rango Frances.
Valuacion Inglesa
Presione ENTER o flecha derecha para el menu en Ingles.
Valuacion Francesa
Presione ENTER o flecha derecha para el menu en Frances.
Bloq-sin clasif
Bloquea programas sin rango.
Valuacion de Downloadable, Datos Downloadabe claros
Activar o poner en memoria datos de rangos. si esta disponible.
VALUACION INGLESA
C8+
G
PG
14+
18+
C
:Seleccione :Cerradura/Abra
ENTER
:Retorno
MENU
Use las flechas para seleccionar el nivel que
desea bloquear, luego ENTER para
bloquear/desbloquear nivel. Si ha bloquedo
un nivel mas bajo,el nivel mas alto sera
bloquedo tambien.
Por ejemplo, cuando PG es bloqueado, 14+ y
18+ seran bloqueados al mismo tiempo.
Nota: Rangos disponi-bles
solo si el canal envia
la informacion de
rango.
Similar con rango en Ingles.
Menu de Operaciones OSD
71
Blq.Pnl.Fr
Elegir para bloquear o desbloquear botones del panel de la TV para que no puedan ser usados.
Cerraduta de la fuentre
Esta opcion le permite bloquear o desbloquear la fuente. La fuente bloqueada no puede elegirse
de la lista de entrada a menos que capture el password correcto.
Borrar lista de Canales
Esta opcion le permite ejecutar funcion de Borrado de Lista de Canales.
Esta funcion reajustara la TV al sistema inicial de fabrica (no aplica en menu OSD).
Cerradura de la fuente
AV
Component 1
Component 2
HDMI 1
:Seleccione :En/De:Pagina
ENTER
:Retorno
MENU
HDMI 2
HDMI 3
TV
Pagina 1/2
Use subir/bajar para seleccionar
la fuente, presione ENTER
para bloquear o desbloquear
Cambiar Contrasena
Cambiar password de menu paternal.
Teclee ultimo password.
Cambiar contrasena
Nuevo Contrasena
Confirm
:Contrasena
DIGI TAL
:Retorno
MENU
Viejo Contrasena
Teclee nuevo password.
Teclee de nuevo password para confirmar.
Menu de Operaciones OSD
Español-
72
Español-
Menu de Operaciones OSD
Configuracion
El Menu de ajuste le permite configurar la TV con sus preferencias.
Seleccione SETUP del Menu principal. Presione ENTER para accesar al menu SETUP.
Subtitulos
Subtitulos
Presione flecha izq/der para seleccionar closed caption Apagado u Encend.
Analog.Tipo
Presione flechas izq/der para seleccionar closed caption en TV analoga: CC1, CC2, CC3, CC4, Text1, Text2, Text3,
Text4.
Digital Tipo
Presionar flechas izq/der para elegir closed caption en TV Digital: Service1, Service2, Service3, Service4, Service5,
Service6.
Digital Prefije
Presione izq/der para elegir preajuste closed caption digital: Valor,Costumbre.
Digital CC Style
Presione izq/der para ir a closed caption digital estilo sub-menu (ver siguiente pagina).
Solo en modo custom puede ajustar el estilo closed caption digital.
Configuracion
:Menu selecto :Siguiente Menu
/
Idioma Espanol
Reloj
:Retorno
MENU
ENTER
Subtitulos
Use subir/bajar para elegir la funcion requerida, presione
Menu Language English Clock ENTER o flecha derecha
para ajustar o entrar a sub-menu. La imagen sub-menu y
explicacion se muestran abajo.
SUBTITULOS
:Menu selecto :En/De
Analog.Tipo CC
1
Service1
Digital Tipo
ValorDigital Prefije
Digital CC Styl
e
:Retorno
MENU
Mode
Apagado
73
DIGITAL CC STYLE
:Menu selecto
:Poniendo del Cambio
Fuente Valor
Valor
Opacidad
Valor
Valor
Color del Texto
La Opacidad de Fondo
Valor
EI Color De Fondo
:Retorno
MENU
Tamaño
Valor
CLOSE CAPTION
Digital CC Style
Reloj
Zona De Tiempo
Seleccione su horario zonal: Oriental, Central, Montañas, Pacifico, Alaska, Hawaii, Samoa, Terranova, Atlantico
EI Reloj Auto
Seleccione auto reloj on/off. Esto le ayudara a sincronizar la hora en la TV a tiempo estandar (desde señal DTV).
Tiempo instalacion
Ajuste manual de la hora (es necesario apagar auto reloj).
Day of Week
Despliega que dia es (no se puede ajustar, solo ver).
Seleccione el item deseado para ajuste en el menu el estilo
Digital CC con las flechas subir/bajar.
Despues del cambio, puede visualizar el estilo CC aqui.
RELOJ
:Menu selecto :Poniendo del Cambio
EI Reloj Auto
ON
1980-01-06 18:49:2
4Tiempo instalacion
Su
nDay of Week
Zona De Tiempo Oriental
Menu de Operaciones OSD
Español-
74
Español-
Otros Menus
Los Otros Menus le permite configurar la TV con sus preferencias en otras opciones.
Elija OTHERS del Menu principal. Presione el boton ENTER para proceder al menu SETUP.
Azule Atras
Presione el boton ENTER para poner o quitar el fondo azul. Si este se activa, la TV desplegara un fondo azul
cuando no se reciba señal de entrada.
Ningun Sig.P-FUERA
Presione el boton ENTER para poner o quitar "Ningun Sig.P-FUERA". Si es activado, la TV se apagara despues de
10-minutos que no haya señal. Sugerimos activar esta funcion cuando se active el fondo azul. Porque podria dañar el
panel Si la pantalla azul dura demasiado tiempo.
Ningun Ope.P-FUERA
Presione el boton ENTER para activar o desactivar "Todos Restablecieron". Si es activado, ña TV se apagara en
3-horas que permanezca sin operacion alguna.
Todos Restablecieron
Presione boton ENTER para ejecutar reajuste de la TV. Todos los ajustes retornaran a los de fabrica.
Nota: En el modo PC, el monitor en standby se apagara dependiendo del ajuste de Apagar sin Señal.
OTROS
:
Menu selecto
:En/De
Ningun Sig.P-FUERA
Ningun Ope.P-FUERA
Todos Restablecieron
:
Retorno
MENU
ENTER
Azule Atras
Execute
Use subir/bajar para elegir la funcion requerida, presione
ENTER o flecha derecha para ajustar o entrar a
sub-menu. La imagen de sub-menu y explicacion se ven
abajo.
Menu de Operaciones OSD
75
Cual es la forma mas conveniente para ver en video de Alta Definicion (HD) ?
Conecte una antena a la entrada de la TV para ver los canales digitales locales. Necesita comprar una antena.
(Ver pag. 52 para mayor informacion sobre ajustes de la antena).
Visite www.antennaweb.org para asistencia para decidir el tipo de antena a usar para recibir los canales locales digitales del area.
Despues de dar su localizacion, este programa de mapeo le dira las estaciones locales analogas y digitales disponibles usando
cierto tipo de antena.
Existen otras maneras de ver video de Alta Definicion (HD) ?
Ademas de utilizando una antena como se menciono arriba, puede usar tambien un controlador para recibir video digital.
Contacte su distribuidor de cable o satelite para comprar programaciondigital y conectelos a su controlador para
asegurarse de ver los canales de la mejor manera.
Como distinguir un canal analogo de un canal digital ?
Presione el boton DISPLAY para ver la barra de Canales. En la esquina superior derecha de la pantalla. Una "A" aparecera
para un canal analogo. Una "D" aparecera para un canal digital.
Nota: Como los canales analogos de TV se eliminaron en EUA, reservamos funciones de TV analogas solo por excepcion.
Porque hay barras en mi pantalla, y puedo eliminarlas ?
La mayoria de video digital se envia en formato 16/9 el cual llena su pantalla, pero aveces se envia en 4/3 el cual no la llena.
Depen- diendo de como la estacion o el aparato esten conectados a su TV es el formato de video. Si hay barras en pantalla,
presione el boton ASPECT para ver diferentes formatos que pueden eliminar las barras. Algunas no podran removerse por
ser parte del formato que envia el canal. El formato cambia al presionar el boton ASPECT y el tipo de formato aparece abajo
de la pantalla. Para mas informacion de formatos de pantalla, ver pag. 66.
Por que un canal desea encontrar varios canales, pero al intentar sintonizarlos, no hay nada ?
Algunos canales no tienen programacion, como canales por pre-pago. Cuando los canales noestan disponibles, la TV se vera
negra o aparecera como nieve. Probablemente desee eliminar esos canales de su lista de canales. Retirelos del Menu en la
lista de Canales. Ver pag. 68 para mayor informacion.
Por que toma mucho tiempo cuando busco unos canales la primera vez ?
Si tiene tanto canales analogos y digitales, la TV localizara todos los canales disponibles en el listado de canales. Si tiene
canales digitales, la TV buscara canales al revueltos, los canales no revueltos, y cada sub-canal de ese canal digital.
Preguntas mas Frecuentes (FAQs)
Español-
76
Español-
Identicar Problemas
Si hubiera problemas cuando use el producto, favor consultar la lista de abajo. Si esta lista no resuelve el problema, llame a nuestro
Centro de Servicio al Cliente de inmediato.
Problemas en TV
La TV no puede encender.
Asegurese que el cable de la corriente este conectado correctamente.
Verifique el tomacorrientes, asegurese de que la corriente trabaja normalmente y es estable..
El panel lateral puede estar inactivo (deshabilitado). Use el control remoto para encender la TV.
Seleccione del Panel Frontal la funcion Menu PARENTAL y presione ENTER para checar el seguro.
No hay imagen o sonido pero la TV esta encencendida y no aparece "No Signal" en pantalla.
• Esta tratando de usar un cable de corriente sin conectar a un aparato? Para usar otro aparato video/audio, asegurese que el
aparato externo trabaja normal, presione INPUT y elija el cable de alimentacion correcto.
La opcion Tipo de Señal puede ser incorrecta. Ver pag. 62 para instrucciones detalladas.
El canal puede ser blanco. Intente localizar el canal otra vez o cambie a otro canal.
El sonido esta bien, pero la imagen es pobre.
Si solo puede ver imagenes en blanco y negro desde un aparato externo que haya conectado a su TV, puede ser por el cable
de video no estan bien conectados, o se conectaron mal. Cheque que la conexion este estable, y que sea correcta.
Para entrada AV, conecte cable amarillo de video a la entrada amarilla de video del costado de su TV. Para entrada de
Componente, los tres cables de video Y, Pb, Pr (rojo, azul y verde) deben conectarse a las entradas correspondientes en el
costado de su TV.
Cheque las conexiones de entrada. Asgurese que todos los cables esten conectados firmemente al costado de su TV.
• Intente ajustar los aditamentos de color para mejorar imagen.
No hay sonido, pero la imagen es correcta.
El sonido puede estar en "mute". Intente presionando el boton MUTE para restaurar sonido.
Para usar AV o Componente, recuerde conect ar las salidas de audio izquierda y derecha correctamente. El cable del canal
izquierdo es blanco y el del derecho es rojo. Favor verifique que los cables y entradas sean acordes a esos colores.
Los ajustes de sonido pueden ser incorrectos. Ver pag. 67 para mayor informacion.
Si la fuente de audio tiene solo una entrada o es un monoaural, asegurese de tener conectada la terminal en el marcado con
Audio In L (blanco) en la TV.
Problemas de funcion
77
Los botones del panel lateral no funciona
Desconecte la TV de la corriente por 10 minutos y conecte nuevamente. Encienda la TV e intente otra vez.
La TV se apaga inesperadamente.
El circuito de proteccion electronica pudieron activarse por una falla electrica. Espere 30 segundos y encienda la TV
nuevamen-te. Si esto pasa frecuentemente, el voltaje en su casa puede ser anormal. Si el otro equipo electronico en
su casa no puede funcionar normalmente, consulte a una persona de servicio calificado.
El panel lateral puede estar cerrado (deshabilitado). Use el control remoto para encender la TV.
Seleccione la funcion del menu PARENTAL Lock en el panel frontal y presione ENTER para verificar el estatus.
El sonido estereo se escucha mal.
Por ser una estacion debil. En el Menu SOUND cambie Sonido Analogo a Mono.
Un cuadro negro aparecera en la pantalla.
• Closed caption podria estar activado. Cheque Closed Caption en el menu SETUP. Ver pag. 74 para mas instrucciones.
Problemas con la Conexion HDMI.
Asegurese que el aparatoHDMI (DVD, videojuego, etc.) esta encendido y los cables esten conectados.Si hay problemas
apague su aparato y reconectelo. Reajuste la energia desconecte el cable y conecte otra vez.
Si aparece mensaje "No Signal" en pantalla, el aparato HDMI no responde. Contacte al distribuidor del aparato HDMI
para futu- ra asistencia.
Si aparecen barras negras a los lados de laimagen (significa que la TV no la despliega completa), el aparato conectado
podria tener un switch o una opcion del menu que permite cambiar la calidad de salida de imagen que arreglara esto.
Elija ya sea 720p o 1080i.
No puede seleccionar un canal.
El canal puede estar bloqueado o no aprobado en el Menu PARENTAL.
El canal puede ser saltado en la lista de canales del Menu CHANNEL. Cheque el bloqueo y estatus de canal.
Problemas de funcion
El control Remoto no funciona.
Algo puede estar bloqueando entre el control remoto y el sensor remoto fronte al panel de la TV. Asegurese que este libre
de obstaculos.
El control remoto puede no estar apuntando directamente a la TV.
Las baterias del control pueden estar bajas, muertas o instaladas incorrectamente. Coloque baterias nuevas.
Experimenta problemas con los Controles V-Chip/Parental.
Si los limites de rango no funciona, debe ajustar elseguro. Ver el Menu Principal (presione MENU en el control), seleccione
PARENTAL para checar ajustes.
Que mas puede hacer?
Si ha repasado la seccion de problemas y nada resuelve el problema, intente resetear su TV. Note que despues de resetear,
puede necesitar correr el proceso de la TV nuevamente. Para resetear, desconecte el cable o cordon del tomacorrientes
Mantenga su TV desconectada por cerca de 5 minutos. Luego conecte y encienda la TV. Verifique si el problema se resolvio.
Si el problema persiste, favor visite el Menu de Soporte al Cliente en www.rca.com o vea seccion FAQ o contacte Soporte
a Clientes RCA en el numero de soporte proporcionado en su Garantia.
Español-
78
Español-
US V-Chip Rating System
TV-MA (Solo Adultos): V
Diseñado Especificamente para ser vista por adultos y puede ser no apta para menores de 17 años.
Contiene uno o mas de los siguientes contenidos: lenguaje indecente y soez (L), actividad sexual explicita (S), o violencia
grafica (V).
TV-14 (Precaucion Paternal Sugerida): Contiene algun material que varios padres podrian nominar como no apto para menores
de 14. Se recomienda a los Padres ejercer un mayor cuidado en el monitoreo de estos programas y precavidos para atender a
niños menores de 14 en lo que ven. Estos programas contienen uno o mas de los siguientes contenidos con temas: dialogos
sugerentes intensivos (D), lenguaje fuerte y rudo (L), situaciones sexuales intensas (S), o violencia intensa (V).
TV-PG (Guia Paternal Sugerida) : Contiene materiales que los padres pueden clasificar como inapropiado para jovencitos.
Algunos padres podrian ver el programa con sus hijos. El programa contiene uno o mas de los siguientes contenidos: algun
dialogo sugestivo (D), dialogo fuerte frecuente (L), algunas situaciones sexuales (S), o violencia moderada (V).
TV-G (Solo para Padres): Muchos padres pueden clasificar estos programas paratodo publico. Contiene un poco o no tiene
dialogos sexuales (D) o situaciones (S), sin lenguaje fuerte (L), y un poco o sin violencia (V).
TV-Y7 (Dirigido a niños de 7 años y menores): Diseñados para niños de 7 y menos años. Puede ser mas apropiado para niños
han adquirido el desarrollo necesario en habilidades para distinguir entre la ficcion y la realidad. Temas y elementos en este
programa puede incluir fantasia con un poco de violencia (FV) o violencia en comedia, o podria asustar a niños menores de 7 años.
TV-Y (Para Niños): Temas y elementos en este programa son diseñados para una audiencia juvenil, incluidos niños entre 2-6.
Sin escenas que asusten a niños mas pequeños.
Ingles Canadiense Rango de Sistema V-Chip
18+ (Solo Adultos): Programa dirigido a adultos mayores de 18 años. Puede contener elementos de violencia, lenguaje y sexual
los cuales podrian hacerlo no apto para audiencia menor a18. Violencia Guiada: Puede contener violencia integral en el desarrollo
de el guion, caracterizacion o tema, dirigido para adultos. Otros Contenidos Guiados: puede contener lenguaje grafico y escenas
de desnudos y/o sexo.
14+ (Audiencia mayor a 14): Programacion que contiene temas o contenidos que pueden no ser aptos para audiencia menor a
14. Se sugiere a los Padres a ejercitar discrecionalmente permiso para ver a los adolescentes y aun menores. Violencia Guiada:
Puede contener escenas intensas de violencia. Podria haber tratos con temas y escenas maduras en una realidad de moda.
Otros Contenidos Guiados: Puede contener escenas de desnudos y/o actividad sexual. Puede haber frecuente uso de blasfemia.
PG (Guia Paternal): Programacion dirigida para audiencia general pero que puede no ser apta para niños (menores a 8 años)
Los Padres pueden considerar algun contenido inapropiado para audiencia infantil entre 8-13 años.
Violencia Guiada: Tintes de conflicto y/o agresion sera limitado y moderado; puede incluir violencia fisica, fantasiosa o
supernatural. Otros Contenidos Guiados: puede contener frecuentes blasfemias o lenguaje sugestivo. Podria contener breves
escenas de desnudos.
G (Audiencia General): Programacion considerada aceptable para cualquier edad. Mientras no se dirija especificamente para
niños, se entiende que audiencia mas joven puede estar presente. Violencia Guiada: contendra un poco de violencia, ya sea
fisica o verbal o emocional. Escenas sensibles a temas que podrian asustar a niños, no incluira escenas realisticas de
violencia que minimicen.resaltan los efectos de efectos de violencia. Otros Contenidos Guiados: Puede haber algunos
dichos inofensivos, sin blasfemia ni desnudos.
Explicando Rango V-Chip
79
Explicando Rango V-Chip
C8+ (niños mayores de 8): Programacion generalmente considerada aceptable para niños mayores de 8 años.
Violencia Guiada: Violencia no sera mostrada como favorita, aceptable sino solo comoforma de resolver conflict os de coraje.
los niños imitan actos peligrosos que ven en television. Algunas escenas con violencia seran frecuentes, discretas y de baja
intensidad y consecuencias de los hechos. Otras Guias de Contenidos: no habra blasfemias, desnudos o contenidos sexuales.
C (Niños): Programa dirijido a niños menores de 8 años. Guia de Violencia: atencion especial prestada a los temas que puedan
herir los sentimientos infantiles de seguridad y buen comportamiento. Habra escenas no realisticas de violencia o agresividad
comportamientos infrecuentes y limitados a escenas que son claramente imaginarios, de comedia o no reales en naturaleza.
Otras Guias de Contenidos: No habra lenguaje ofensivo, desnudos o contenido sexual.
Frances Canadiense Sistema Rango V-Chip
18+ (Adultos): Programacion solo 16+ (Para mayores de 16): adultos. Este programa contiene violencia sustancial o extrema y
escenas violentas.
16+ (Para mayores de 16): Programacion no apta para menores de 16 años. Este programa contiene escenas frecuentes de
violencia o escenas de violencia intensiva.
13+ (Para mayores de 13): Programacion no apta para jovencitos menores de 13 años. Este programa contiene tanto algunas
escenas de violencia o una o mas escenas con suficiente violencia para afectarles. Televidentes acompañados de un adulto es
recomendado ampliamente para niños menores de 13 años.
8+ (Para mayores de 8): No recomendado para niños. Este program a ies recomendable para toda audiencia, pero contiene
un poco u ocasional violencia que podria perturbar a los niños. Ver en compañia de un adulto es recomendable para niños
pequeños (menores de 8 años) que do no distinguen entre realidad e imaginacion.
G (Audiencia General): Este programa es recomendable para cualquier audiencia. No contiene violencia, o violencia
minima presentada en forma humoristica, como un a caricatura, o de forma poco real.
Español-
80
Español-
81
Precaucion:
1. No coloque el montaje Ud. mismo. Favor contactar a un profesional en instalaciones.
2. La TV no debe ser montada en paredes o superficies con un angulo mayor a 10 grados en direccion vertical de.
otra forma la TV podria sufrir una caida.
3. Las paredes para el montaje deben ser lo suficiente fuertes para soportar el peso de la TV. Por ejemplo, las de concreto y
tabique son idoneas. No colocar sobre paredes suaves tales como de tierra, falsas o de tablarroca.
4. Para sustituir partes de diferentes e specificaciones (tornillos) en el montaje, consultar con un profesional calificado para
asegurarse que dichas partes son seguras y efectivas.
5. Antes de colocar la base a la pared, asegurese que los agujeros para sujeccion son acordes a la instalacion. De otra forma
podria haber algunos problemas potenciales.
6. No coloque alguna fuente de calor bajo su television. O algo similar, porque podria ser causa de fuego.
7. No coloque la TV cerca degoteras.Transductores y cables de alto voltaje deben mantenerse tambien alejados del aparato.
De otra forma, causaran sobre-imagenes, choques electricos o mala resonancia.
8. No coloque la TV en un lugar donde colisiones o vibraciones puedan suceder.
9. Para evitar caidas inesperadas del aparato, no ejerza mucha fuerza en la TV o montaje despues de instalar.
10. Asegurese de desconectar laTV antes de instalar. Mantener cosas duras o filosas lejos de la pantalla para prevenir rayones.
11. Despues de instalar, si se requiere mover el gabinete, favor contact arta un profesional calificado.
Nota:
A. El montaje no esta incluido en los accessorios de la television. Solo se incluyen las especificaciones de instalacion pero no el
montaje en si. Si necesita un montaje, favor consultar con su distribuidor para comprar una base VESA montable.
B. Sugerimos colocar el montaje de pared equipado con especificaciones recomendadas. Una instalacion inapropiada puede
causar daños al aparato o a las personas.
Modelo Dimensiones de la unidad (mm) Tornillos
42PA30RQ VESA 400 x 200 Tornillos M6,14mm largo
Unidad de Montaje de pared
400 mm
200 mm
Especificacion de unidad
Modelo
Tamaño de la Pantalla
42PA30RQ
42 pulgs
Sistema de Television Sistema Americano TV estandard ATSC/NTSC
Resolucion 1024 x 768
Componente/modo HDMI 480i, 480p, 720p, 1080i
104.9cmA x 72.7cm A x 29.2cm F
104.9cmA x 68cmA x 11.9cmF
135.5cmA x 76cmA x 24cmF
Alimentacion
Entrada RF
AC 110 V, 60Hz
Entrada RF
Interfase
Dimensiones
Con base
Sin base
Con base
Sin base
45.6LBS (20.5KGS)
41.6LBS (18.7KGS)
Empaque
52.6LBS (23,7KGS)
menos de 205W
Peso
Consumo de potencia
Aviso: Las especificaciones estan sujetas a cambio sin previo aviso.
Empaque
Cable/Antenna x 1
Salida Audio Audifonos x 1, Salida Audio Digital x 1, Salida Audio Analogo (L/R) x 1
Entrada Audio
Component x 2
AV x 1
PC Audio In x 1
Entrada Video
AV x 1
Component x 2
HDMI x 3
Entrada Grafica
RGB 15pin x 1
Cobertura de Canales
VHF: 2~13 UHF: 14~69 CATV: 1~135
Transmision Digital Terrestrie (8VSB): 2~69
Cable Digital (64/256QAM): 1~135
Español-
82
Español-
83
Español-
84
  • Page 1 1
  • Page 2 2
  • Page 3 3
  • Page 4 4
  • Page 5 5
  • Page 6 6
  • Page 7 7
  • Page 8 8
  • Page 9 9
  • Page 10 10
  • Page 11 11
  • Page 12 12
  • Page 13 13
  • Page 14 14
  • Page 15 15
  • Page 16 16
  • Page 17 17
  • Page 18 18
  • Page 19 19
  • Page 20 20
  • Page 21 21
  • Page 22 22
  • Page 23 23
  • Page 24 24
  • Page 25 25
  • Page 26 26
  • Page 27 27
  • Page 28 28
  • Page 29 29
  • Page 30 30
  • Page 31 31
  • Page 32 32
  • Page 33 33
  • Page 34 34
  • Page 35 35
  • Page 36 36
  • Page 37 37
  • Page 38 38
  • Page 39 39
  • Page 40 40
  • Page 41 41
  • Page 42 42
  • Page 43 43
  • Page 44 44
  • Page 45 45
  • Page 46 46
  • Page 47 47
  • Page 48 48
  • Page 49 49
  • Page 50 50
  • Page 51 51
  • Page 52 52
  • Page 53 53
  • Page 54 54
  • Page 55 55
  • Page 56 56
  • Page 57 57
  • Page 58 58
  • Page 59 59
  • Page 60 60
  • Page 61 61
  • Page 62 62
  • Page 63 63
  • Page 64 64
  • Page 65 65
  • Page 66 66
  • Page 67 67
  • Page 68 68
  • Page 69 69
  • Page 70 70
  • Page 71 71
  • Page 72 72
  • Page 73 73
  • Page 74 74
  • Page 75 75
  • Page 76 76
  • Page 77 77
  • Page 78 78
  • Page 79 79
  • Page 80 80
  • Page 81 81
  • Page 82 82
  • Page 83 83
  • Page 84 84
  • Page 85 85
  • Page 86 86
  • Page 87 87
  • Page 88 88

RCA 42PA30RQ Manual de usuario

Categoría
Televisores LCD
Tipo
Manual de usuario
Este manual también es adecuado para

En otros idiomas

Documentos relacionados