Profi Cook PC-AE 1156 El manual del propietario
- Categoría
- Fabricantes de jugo
- Tipo
- El manual del propietario

Bedienungsanleitung / Garantie
Gebruiksaanwijzing • Mode d’emploi • Manual de instrucciones • Istruzioni per l’uso
Instruction Manual • Instrukcja obsługi / Gwarancja • Használati utasítás
Руководство по эксплуатации •
PC-AE1156_IM 07.06.18
Automatik-Entsafter PC-AE 1156
Automatische sappers • Presse-fruits automatique • Exprimidor automático
Centrifuga automatica • Automatic juicer • Sokowirówka
Automatikus facsaró • Автоматическая соко-выжималка •

PC-AE1156_IM 07.06.18
Bedienungsanleitung .................................................................................Seite 4
Gebruiksaanwijzing ................................................................................ Pagina 11
Mode d’emploi .............................................................................................Page 17
Manual de instrucciones ........................................................................ Página 23
Istruzioni per l’uso .................................................................................. Pagina 29
Instruction Manual ......................................................................................Page 35
Instrukcja obsługi ....................................................................................Strona 40
Használati utasítás ..................................................................................... Oldal 46
Руководство по эксплуатации ................................................................ стр. 51
61 ..................................................................................................................
2

Übersicht der Bedienelemente
Overzicht van de bedieningselementen • Liste des différents éléments de commande
Indicación de los elementos de manejo • Elementi di comando • Overview of the Components
Przegląd elementów obsługi • A kezelőelemek áttekintése
Обзор деталей прибора •
PC-AE1156_IM 07.06.18
3

PC-AE1156_IM 07.06.18
4
Bedienungsanleitung
Vielen Dank, dass Sie sich für unser Produkt entschieden
haben. Wir wünschen Ihnen viel Freude mit dem Gerät.
Symbole in dieser Bedienungsanleitung
Wichtige Hinweise für Ihre Sicherheit sind besonders ge-
kennzeichnet. Beachten Sie diese Hinweise unbedingt, um
Unfälle und Schäden am Gerät zu vermeiden:
WARNUNG:
Warnt vor Gefahren für Ihre Gesundheit und zeigt mög-
liche Verletzungsrisiken auf.
ACHTUNG:
Weist auf mögliche Gefährdungen für das Gerät oder
andere Gegenstände hin.
HINWEIS:
Hebt Tipps und Informationen für Sie hervor.
Inhalt
Übersicht der Bedienelemente .............................................3
Allgemeine Hinweise.............................................................4
Spezielle Sicherheitshinweise für dieses Gerät ...................4
Bestimmungsgemäßer Gebrauch ........................................6
Auspacken des Gerätes .......................................................6
Lieferumfang .........................................................................6
Übersicht der Bedienelemente .............................................6
Aufbau des Gerätes .............................................................. 6
Elektrischer Anschluss .......................................................... 7
Bedienung ............................................................................. 7
Reinigung .............................................................................. 8
Aufbewahrung ....................................................................... 8
Störungsbehebung................................................................8
Technische Daten .................................................................9
Hinweis zur Richtlinienkonformität ........................................9
Garantie ................................................................................9
Entsorgung ..........................................................................10
Allgemeine Hinweise
Lesen Sie vor Inbetriebnahme dieses Gerätes die Bedie-
nungsanleitung sehr sorgfältig durch und bewahren Sie diese
inkl. Garantieschein, Kassenbon und nach Möglichkeit den
Karton mit Innenverpackung gut auf. Falls Sie das Gerät an
Dritte weitergeben, geben Sie auch die Bedienungsanleitung
mit.
• Benutzen Sie das Gerät ausschließlich für den privaten
und den dafür vorgesehenen Zweck. Dieses Gerät ist
nicht für den gewerblichen Gebrauch bestimmt.
• Benutzen Sie das Gerät nicht im Freien. Halten Sie es
vor Hitze, direkter Sonneneinstrahlung, Feuchtigkeit
(auf keinen Fall in Flüssigkeiten tauchen) und scharfen
Kanten fern. Benutzen Sie das Gerät nicht mit feuchten
Händen. Bei feucht oder nass gewordenem Gerät sofort
den Netzstecker ziehen.
• Schalten Sie das Gerät aus und ziehen Sie immer den
Stecker aus der Steckdose (ziehen Sie am Stecker, nicht
am Kabel), wenn Sie das Gerät nicht benutzen, Zubehör-
teile anbringen, zur Reinigung oder bei Störung.
• Das Gerät und das Netzkabel müssen regelmäßig auf
Zeichen von Beschädigungen untersucht werden. Wird
eine Beschädigung festgestellt, darf das Gerät nicht
mehr benutzt werden.
• Verwenden Sie nur Original-Zubehör.
• Zur Sicherheit Ihrer Kinder lassen Sie keine Verpackungs-
teile (Plastikbeutel, Karton, Styropor, etc.) erreichbar
liegen.
WARNUNG:
Lassen Sie kleine Kinder nicht mit Folie spielen.
Es besteht Erstickungsgefahr!
Spezielle Sicherheitshinweise für dieses Gerät
WARNUNG: Verletzungsgefahr!
• Schnittverletzungen! Das Zentrifugensieb ist scharf!
• Falls das drehende Sieb beschädigt ist, darf das Gerät nicht be-
trieben werden.
• Verwenden Sie immer den beiliegenden Stopfer. Halten Sie nie-
mals die Finger oder Werkzeuge in die Einfüllöffnung.

PC-AE1156_IM 07.06.18
5
WARNUNG: Verletzungsgefahr!
• Das Gerät ist bei nicht vorhandener Aufsicht und vor dem Zu-
sammenbau, dem Auseinandernehmen oder Reinigen stets vom
Netz zu trennen.
• Vor dem Auswechseln von Zubehör oder Zusatzteilen, die im
Betrieb bewegt werden, muss das Gerät ausgeschaltet und vom
Netz getrennt werden.
• Berühren Sie keine sich bewegenden Teile des Gerätes und
warten Sie immer den Stillstand ab.
• Reparieren Sie das Gerät nicht selbst, sondern suchen Sie ei-
nen autorisierten Fachmann auf. Wenn die Netzanschlussleitung
dieses Gerätes beschädigt wird, muss sie durch den Hersteller
oder seinen Kundendienst oder eine ähnlich qualizierte Person
ersetzt werden, um Gefährdungen zu vermeiden.
• Dieses Gerät darf nicht von Kindern benutzt werden.
• Das Gerät und seine Anschlussleitung sind von Kindern fernzu-
halten.
• Kinder dürfen nicht mit dem Gerät spielen.
• Geräte können von Personen mit reduzierten physischen, sen-
sorischen oder mentalen Fähigkeiten oder Mangel an Erfahrung
und / oder Wissen benutzt werden, wenn sie beaufsichtigt oder
bezüglich des sicheren Gebrauchs des Gerätes unterwiesen wur-
den und die daraus resultierenden Gefahren verstanden haben.
ACHTUNG:
Dieses Gerät ist nicht dazu bestimmt, bei der Reinigung in Wasser
eingetaucht zu werden. Beachten Sie die Anweisungen, die wir
Ihnen im Kapitel „Reinigung“ dazu geben.
• Manipulieren Sie keine Sicherheitsschalter.
• Entfernen Sie nicht den Deckel während des Betriebes.

PC-AE1156_IM 07.06.18
6
Bestimmungsgemäßer Gebrauch
Dieses Gerät dient zum Entsaften von frischem Obst und
Gemüse wie z. B. Ananas, Äpfel, rote Bete, Stangensellerie,
Gurken, Möhren und Tomaten.
Schalen können, sofern Sie mitgegessen werden, mitver-
arbeitet werden.
Stärkehaltige Lebensmittel wie z. B. Bananen, Papayas,
Avocados, Feigen und Mangos sowie besonders hartes
und faseriges Obst und Gemüse sollten mit dem Gerät nicht
verarbeitet werden.
HINWEIS:
Kleine Früchte, wie z. B. Beeren, lassen sich mit dem
Zentrifugenprinzip nur schwer entsaften. Nutzen Sie hier-
für gegebenenfalls eine geeignete Beerenpresse.
Das Gerät darf nur in der Art und Weise benutzt werden,
wie es in dieser Bedienungsanleitung beschrieben ist. Sie
dürfen es nicht für gewerbliche Zwecke einsetzen.
Jede andere Verwendung gilt als nicht bestimmungsgemäß
und kann zu Sachschäden oder sogar zu Personenschäden
führen.
Der Hersteller übernimmt keine Haftung für Schäden, die
durch nicht bestimmungsgemäßen Gebrauch entstehen.
Auspacken des Gerätes
1. Nehmen Sie das Gerät aus seiner Verpackung.
2. Entfernen Sie sämtliches Verpackungsmaterial, wie
Folien, Füllmaterial, Kabelhalter und Kartonverpackung.
3. Prüfen Sie den Lieferumfang auf Vollständigkeit.
4. Sollte der Verpackungsinhalt unvollständig oder Be-
schädigungen feststellbar sein, nehmen Sie das Gerät
nicht in Betrieb. Bringen Sie es umgehend zum Händler
zurück.
HINWEIS:
Am Gerät können sich noch Staub oder Produktionsreste
benden. Wir empfehlen Ihnen, das Gerät wie unter
„Reinigung“ beschrieben zu säubern.
Lieferumfang
1 Basisgerät mit Motor
1 Transparente Abdeckung
1 Stopfer
1 Zentrifugensieb
1 Zentrifugengehäuse
1 Tresterbehälter
1 Saftbehälter mit Schaumabstreifer und Deckel
Übersicht der Bedienelemente
1 Stopfer
2 Einfüllöffnung
3 Transparente Abdeckung
4 Zentrifugensieb
5 Zentrifugengehäuse
6 Höhenverstellbarer Ausguss
7 Verschlüsse
8 Saftbehälter
9 Basisgerät mit Motor
10 Bedienfeld
11 Tresterbehälter
12 Antriebsrad (nicht entnehmbar)
13 Riegel
Aufbau des Gerätes
Betrachten Sie für die Montage auch die Abbildungen auf
Seite 3.
1. Stellen Sie das Gerät so auf, dass das Bedienfeld zu
Ihnen zeigt.
2. Setzen Sie das Zentrifugengehäuse auf das Basis-
gehäuse auf. Im Basisgehäuse nden Sie eine Aus-
sparung. Dort muss sich der Ausguss des Zentrifugen-
gehäuses benden.
3. WARNUNG: vor Schnittverletzungen!
Das Zentrifugensieb ist scharf!
Setzen Sie das Zentrifugensieb auf das Antriebsrad.
Drücken Sie es nach unten. Es rastet am Antriebsrad
ein.
4. Kontrolle des Zentrifugensiebes!
Greifen Sie unter den Rand des Siebs. Es darf sich auf
leichten Zug nicht lösen.
5. Setzen Sie den Tresterbehälter an der linken Seite an.
Halten Sie ihn dazu leicht schräg, um die obere Kante in
den Kragen des Zentrifugengehäuses zu schieben.
6. Setzen Sie die transparente Abdeckung auf. Sie über-
ragt auch den Tresterbehälter.
7. HINWEIS:
Der vordere Verschluss und die transparente Ab-
deckung sind jeweils mit einem Sicherheitsschalter
versehen. Diese verhindern das unbeabsichtigte An-
laufen des Motors. Kontrollieren Sie den richtigen Sitz
der Bauteile, Zentrifugensieb, transparente Abdeckung
und Verschlüsse.
Befestigen Sie die transparente Abdeckung mit den bei-
den Verschlüssen. Führen Sie dafür die Aussparungen
der Verschlüsse in die Riegel auf dem Zentrifugenge-
häuse. Drücken Sie die Verschlüsse nach unten. Diese
müssen hörbar einrasten.
8. Stellen Sie den Saftbehälter (ohne Schaumabstreifer)
an den Ausguss.

PC-AE1156_IM 07.06.18
7
Elektrischer Anschluss
• Bevor Sie den Netzstecker in die Steckdose stecken,
prüfen Sie, ob die Netzspannung, die Sie benutzen
wollen, mit der des Gerätes übereinstimmt. Die Angaben
dazu nden Sie auf dem Typenschild.
• Schließen Sie das Gerät nur an eine vorschriftsmäßig
installierte Schutzkontakt-Steckdose an. Die Taste
leuchtet. Das Gerät ist betriebsbereit.
Bedienung
Vorbereitungen
• Waschen Sie die Früchte, die Sie entsaften möchten.
• Schneiden Sie große Früchte so zu, dass sie in die Ein-
füllöffnung passen.
• Entfernen Sie große Kerne und die Stiele.
Funktionstasten
Bei den Tasten am Gerät handelt es sich um Touch-Tasten.
Berühren Sie die Tasten leicht mit einem Finger, um die
Funktion auszuführen. Jeder Tastendruck wird mit einem
Signalton bestätigt.
Geschwindigkeitsstufen
Drücken Sie wiederholt die Taste , um die gewünschte
Geschwindigkeitsstufe auszuwählen:
Tomate, Melone
Sellerie, Zitrusfrüchte, Gurke
Apfel, Birne, Prsich
Karotte, Knoblauch, Rüben
Granatapfel, Kartoffel
HINWEIS:
Während des Betriebes kann die Geschwindigkeitsstufe
nicht verändert werden. Wenn Sie die Taste drücken,
schaltet sich der Motor automatisch aus.
Entsaften
HINWEIS:
• Das Gerät hat einen Kurzzeitbetrieb. Machen Sie nach
3 Minuten Betrieb eine Pause von 1 Minute.
• Mit der Taste Pulse erreichen Sie einen Pulsbetrieb.
Drücken Sie die Taste kurz und lassen Sie sie wieder
los.
WARNUNG:
Bevor Sie einschalten: Kontrollieren Sie nochmals, ob das
Zubehör fest sitzt.
1. Schalten Sie das Gerät mit der Taste ein. Das Display
und die Tasten leuchten auf. Die mittlere Geschwindig-
keitsstufe ( ) wird im Display angezeigt.
2. Wählen Sie mit der Taste die gewünschte Geschwin-
digkeitsstufe aus.
3. Starten Sie den Motor mit der Taste Start.
4. Stecken Sie die Früchte in die Einfüllöffnung und schie-
ben Sie mit dem Stopfer nach. Bitte beachten Sie! Der
Stopfer hat in der Einfüllöffnung eine Führung.
5. Der Saft ießt an der rechten Seite des Gehäuses aus.
Das Fruchteisch wird im Tresterbehälter gesammelt.
Kommt es zu stark erhöhtem Saftaustritt, wählen Sie
eine niedrigere Geschwindigkeitsstufe aus. Starten Sie
den Motor erneut mit der Taste Start. Üben Sie weniger
Druck mit dem Stopfer aus.
HINWEIS:
• Achten Sie auf Ihren Saftbehälter. Stoppen Sie den
Betrieb rechtzeitig, damit der Behälter nicht überläuft.
• Beeren- und Zitrusfrüchte (z. B. Stachelbeeren, Trau-
ben, Orangen) werden üblicherweise nicht entsaftet
sondern gepresst.
• Beim Entsaften von diesen besonders safthaltigen
Früchten kann es im Bereich des Tresterbehälters zum
Austreten von Saftspritzern kommen. In diesem Fall
empfehlen wir, den Tresterbehälter öfters zu leeren.
Betrieb beenden und Demontage
1. Drücken Sie die Taste Start, um den Motor auszu-
schalten.
2. Schalten Sie das Gerät anschließend mit der Taste in
den Standy-Betrieb.
3. Ziehen Sie den Netzstecker aus der Steckdose.
4. Stellen Sie den Saftbehälter zur Seite und öffnen Sie die
beiden Verschlüsse.
5. Nehmen Sie die transparente Abdeckung ab.
6. Entnehmen Sie den Tresterbehälter.
7. Entfernen Sie das Zentrifugensieb zusammen mit dem
Zentrifugengehäuse. Greifen Sie dafür unter den Kragen
des Zentrifugengehäuses und unter den Ausguss.
Bewegen Sie das Zentrifugengehäuse abwechselnd
an jeder Seite nach oben. Ziehen Sie es so stückweise
nach oben ab. Drücken Sie gegebenenfalls dabei das
Basisgerät mit den Ringngern und den kleinen Fingern
nach unten.
8. WARNUNG: vor Schnittverletzungen!
Das Zentrifugensieb besitzt scharfe Messer!
Heben Sie es nur am äußeren Rand an.
Heben Sie das Zentrifugensieb aus dem Zentrifugen-
gehäuse.
9. Setzen Sie den Schaumabstreifer in den Saftbehälter.
Achten Sie dabei auf die Führungen im Saftbehälter.
Während Sie den Saft ausgießen wird so verhindert,
dass der Schaum mit ausgeschüttet wird.

PC-AE1156_IM 07.06.18
8
Reinigung
WARNUNG:
• Ziehen Sie vor der Reinigung immer den Netzstecker.
• Tauchen Sie das Motorgehäuse auf keinen Fall in Wasser. Es
könnte zu einem elektrischen Schlag oder Brand führen.
• Das Zentrifugensieb ist scharf! Verletzungsgefahr!
ACHTUNG:
• Benutzen Sie keine Drahtbürste oder andere scheu-
ernde Gegenstände.
• Benutzen Sie keine scharfen oder scheuernden
Reinigungsmittel.
• Lassen Sie den Trester nicht auf dem Zentrifugensieb
eintrocknen. Die feinen Poren verstopfen und werden
dadurch unbrauchbar.
Zentrifugensieb
WARNUNG: vor Schnitt-
verletzungen!
Das Zentrifugensieb ist scharf!
Entfernen Sie Rückstände im
Zentrifugensieb sofort unter
ießendem Wasser. Helfen Sie
mit einer Spülbürste nach.
Stopfer, transparente Abdeckung, Zentrifugengehäuse,
Tresterbehälter, Saftbehälter mit Schaumabstreifer und
Deckel
• Reinigen Sie diese Bauteile in einem Spülbad.
• Spülen Sie mit klarem Wasser nach.
• Montieren Sie das Gerät erst, wenn alle Teile getrocknet
sind.
Basisgerät mit Motor
Wischen Sie das Basisgerät mit einem leicht feuchten Tuch
ab.
Aufbewahrung
• Reinigen Sie das Gerät wie beschrieben. Lassen Sie das
Zubehör vollständig trocknen.
• Wir empfehlen, das Gerät in der Original-Verpackung
aufzubewahren, wenn Sie es über einen längeren Zeit-
raum nicht benutzen möchten.
• Lagern Sie das Gerät immer außerhalb der Reichweite
von Kindern an einem gut belüfteten und trockenen Ort.
Störungsbehebung
Störung Mögliche Ursache Abhilfe
Das Gerät
ist ohne
Funktion.
Das Gerät hat keine
Stromversorgung.
Überprüfen Sie die
Steckdose mit einem
anderen Gerät.
Setzen Sie den Netz-
stecker richtig ein.
Kontrollieren Sie die
Haussicherung.
Die Verschlüsse
sind nicht richtig
geschlossen.
Schließen Sie die
Verschlüsse.
Das Gerät ist defekt. Wenden Sie sich an
unseren Service oder
an einen Fachmann.
Die Saft-
ausbeute
ist gering.
Falsche Obstsorte. Wählen Sie eine
Obstsorte, die mehr
Saft ergibt.
Kleine Beeren lassen
sich in der Zentrifuge
nicht entsaften.
Zu viele Rückstände
im Zentrifugensieb.
Reinigen Sie das
Zentrifugensieb.
Laute
Geräusche
oder Un-
wucht im
Betrieb.
Schlechte Montage. Kontrollieren Sie, ob
alle Bauteile richtig
montiert wurden.
Zu viele Rückstände
im Zentrifugensieb.
Reinigen Sie bei
größeren Mengen
zwischendurch das
Zentrifugensieb.

PC-AE1156_IM 07.06.18
9
Technische Daten
Modell: ................................................................. PC-AE 1156
Spannungsversorgung: .......................220 - 240 V~ 50 / 60 Hz
Leistungsaufnahme:......................................................800 W
Schutzklasse: .......................................................................
Nettogewicht: .........................................................ca. 3,86 kg
Technische und gestalterische Änderungen im Zuge stetiger
Produktentwicklungen vorbehalten.
Hinweis zur Richtlinienkonformität
Hiermit erklärt der Hersteller, dass sich das Gerät
PC-AE 1156 in Übereinstimmung mit den folgenden
Anforderungen bendet:
• Europäische Niederspannungsrichtlinie 2014 / 35 / EU
• EU-Richtlinie für elektromagnetische Verträglichkeit
2014 / 30 / EU
• Ökodesign Richtlinie 2009 / 125 / EG
• RoHS-Richtlinie 2011 / 65 / EU
Garantie
Garantiebedingungen
1. Gegenüber Verbrauchern gewähren wir bei privater
Nutzung des Geräts eine Garantie von 24 Monaten ab
Kaufdatum.
Ist das Gerät zur gewerblichen Nutzung geeignet, ge-
währen wir beim Kauf durch Unternehmer für das Gerät
eine Garantie von 12 Monaten.
Die Garantiezeit für Verbraucher reduziert sich auf
12 Monate, sofern sie ein zur gewerblichen Nutzung ge-
eignetes Gerät – auch teilweise – gewerblich nutzen.
2. Voraussetzung für unsere Garantieleistungen sind der
Kauf des Geräts in Deutschland bei einem unserer
Vertragshändler sowie die Übersendung einer Kopie des
Kaufbelegs und dieses Garantiescheins an uns.
Bendet sich das Gerät zum Zeitpunkt des Garantiefalls
im Ausland, muss es auf Kosten des Käufers uns zur
Erbringung der Garantieleistungen zur Verfügung ge-
stellt werden.
3. Mängel müssen innerhalb von 14 Tagen nach Erkenn-
barkeit uns gegenüber schriftlich angezeigt werden. Be-
steht der Garantieanspruch zu Recht, entscheiden wir,
auf welche Art der Schaden / Mangel behoben werden
soll, ob durch Reparatur oder durch Austausch eines
gleichwertigen Geräts.
4. Garantieleistungen werden nicht für Mängel erbracht,
die auf der Nichtbeachtung der Gebrauchsanweisung,
unsachgemäßer Behandlung oder normaler Abnutzung
des Geräts beruhen. Garantieansprüche sind ferner
ausgeschlossen für leicht zerbrechliche Teile, wie zum
Beispiel Glas oder Kunststoff. Schließlich sind Garantie-
ansprüche ausgeschlossen, wenn nicht von uns autori-
sierte Stellen Arbeiten an dem Gerät vornehmen.
5. Durch Garantieleistungen wird die Garantiezeit nicht
verlängert. Es besteht auch kein Anspruch auf neue
Garantieleistungen. Diese Garantieerklärung ist eine
freiwillige Leistung von uns als Hersteller des Geräts.
Die gesetzlichen Gewährleistungsrechte (Nacherfüllung,
Rücktritt, Schadensersatz und Minderung) werden durch
diese Garantie nicht berührt.
Stand 06 2012
Garantieabwicklung
24 Stunden am Tag, 7 Tage in der Woche
Sollte Ihr Gerät innerhalb der Garantiezeit einen Mangel
aufweisen, steht Ihnen die schnellste und komfortabelste
Möglichkeit der Reklamationsanmeldung über unser SLI -
Internet-Serviceportal zur Verfügung.
www.sli24.de
Bitte melden Sie direkt den Servicevorgang auf unserem
Online Serviceportal www.sli24.de an. Sie erhalten wenige
Sekunden nach Abschluss der Anmeldung ein kostenloses
Versandticket per E-Mail übermittelt. Zusätzlich erhalten Sie
weitere Informationen zur Abwicklung Ihrer Reklamation.
Mit Ihren persönlichen Zugangsdaten, die direkt nach Ihrer
Anmeldung per E-Mail an Sie übermittelt werden, können
Sie den Status Ihres Vorgangs auf unserem Serviceportal
www.sli24.de online verfolgen.
Sie brauchen das kostenlose Versandticket nur noch auf die
Verpackung Ihres gut verpackten Gerätes zu kleben und
das Paket bei der nächsten Annahmestelle der Deutschen
Post / DHL abzugeben. Der Versand erfolgt für Sie kostenlos
an unser Servicecenter bzw. Servicepartner.
So einfach kann Service sein!
1. Anmelden
2. Einpacken
3. Ab zur Post damit
Fertig, so einfach geht es!
Bitte vergessen Sie nicht, dem Gerät eine Kopie Ihres
Kaufbeleges (Kassenbon, Rechnung, Lieferschein) als Ga-
rantienachweis beizulegen, da wir sonst keine kostenlosen
Garantieleistungen erbringen können.
Unser Serviceportal www.sli24.de bietet Ihnen weitere
Leistungen an:
• Downloadbereich für Bedienungsanleitungen
• Downloadbereich für Firmwareupdates
• FAQ‘s, die Ihnen Problemlösungen anbieten
• Kontaktformular
• Zugang zu unseren Zubehör- und Ersatzteile-Web-
shops
Auch nach der Garantie sind wir für Sie da! – Kosten-
günstige Reparaturen zum Festpreis!

PC-AE1156_IM 07.06.18
10
Bitte nehmen Sie in keinem Fall eine unfreie Einsendung
Ihres Gerätes vor. Unfreie Lieferungen werden von uns
nicht angenommen. Es entstehen Ihnen damit erhebliche
Kosten.
Stand 06 2012
Entsorgung
Bedeutung des Symbols „Mülltonne“
Schonen Sie unsere Umwelt, Elektrogeräte ge-
hören nicht in den Hausmüll.
Nutzen Sie die für die Entsorgung von Elektro-
geräten vorgesehenen Sammelstellen und
geben dort Ihre Elektrogeräte ab die Sie nicht
mehr benutzen werden.
Sie helfen damit die potenziellen Auswirkungen, durch
falsche Entsorgung, auf die Umwelt und die menschliche
Gesundheit zu vermeiden.
Sie leisten damit Ihren Beitrag zur Wiederverwertung, zum
Recycling und zu anderen Formen der Verwertung von
Elektro- und Elektronik-Altgeräten.
Informationen, wo die Geräte zu entsorgen sind, erhalten
Sie über Ihre Kommunen oder die Gemeindeverwaltungen.

PC-AE1156_IM 07.06.18
11
Gebruiksaanwijzing
Bedankt voor het kopen van ons product. Wij wensen u veel
plezier met dit apparaat.
Symbolen in deze gebruiksaanwijzing
Belangrijke veiligheidsinformatie wordt expliciet aangege-
ven. Volg deze instructies nauwkeurig om letsel en schade
aan het apparaat te voorkomen:
WAARSCHUWING:
Waarschuwt voor gevaren voor de gezondheid en wijst op
mogelijke risico‘s op letsel.
LET OP:
Wijst op mogelijke schade aan het apparaat of aan
andere objecten.
OPMERKING: Duidt op tips en informatie voor u.
Inhoud
Overzicht van de bedieningselementen ...............................3
Algemene opmerkingen ...................................................... 11
Speciale veiligheidsaanwijzingen voor dit apparaat ........... 11
Beoogd gebruik ................................................................... 13
Het apparaat uitpakken .......................................................13
Omvang van de levering .....................................................13
Overzicht van de bedieningselementen .............................13
Het apparaat monteren ....................................................... 13
Elektrische aansluiting ........................................................13
Bediening ............................................................................14
Reiniging .............................................................................15
Opslaan ............................................................................... 15
Probleemoplossing .............................................................15
Technische gegevens .........................................................16
Verwijdering .........................................................................16
Algemene opmerkingen
Lees vóór de ingebruikname van dit apparaat de handlei-
ding uiterst zorgvuldig door en bewaar deze goed, samen
met het garantiebewijs, de kassabon en zo mogelijk de
doos met de binnenverpakking. Geef ook de handleiding
mee wanneer u de machine aan derden doorgeeft.
• Gebruik het apparaat uitsluitend privé en uitsluitend
voor de voorgeschreven toepassing. Dit apparaat is niet
geschikt voor commercieel gebruik.
• Gebruik het apparaat niet buiten. Bescherm het tegen
hitte, directe zonnestralen, vocht (in geen geval in
vloeistoffen dompelen) en scherpe randen. Gebruik
het apparaat niet met vochtige handen. Bij vochtig of
nat geworden apparaat onmiddellijk de stroomtoevoer
onderbreken.
• Schakel het apparaat uit en onderbreek altijd de stroom-
toevoer (trek aan de stekker, niet aan de kabel) wanneer
u het apparaat niet gebruikt, hulpstukken aanbrengt,
reinigt of wanneer storingen optreden.
• Het apparaat en de netkabel moeten regelmatig op zicht-
bare schade worden gecontroleerd. Wanneer u schade
vaststelt, mag het apparaat niet meer worden gebruikt.
• Gebruik alleen originele reserveonderdelen.
• Laat om veiligheidsredenen geen verpakkingsdelen
(plasticzak, doos, piepschuim, enz.) binnen het bereik
van uw kinderen liggen.
WAARSCHUWING:
Laat kleine kinderen niet met de folie spelen. Er be-
staat gevaar voor verstikking!
Speciale veiligheidsaanwijzingen voor dit apparaat
WAARSCHUWING: Verwondingsgevaar!
• Risico op snijwonden! De centrifugezeef is scherp!
• Als de roterende zeef beschadigd is, mag het apparaat niet wor-
den bediend.
• Gebruik altijd de meegeleverde stamper. Steek uw vingers of
instrumenten niet in de vulopening.
• Altijd de stekker uit het stopcontact verwijderen wanneer het ap-
paraat niet wordt gebruikt en wordt gemonteerd, gedemonteerd
of gereinigd.

PC-AE1156_IM 07.06.18
12
WAARSCHUWING: Verwondingsgevaar!
• Alvorens accessoires en opzetstukken die tijdens de werking
in beweging zijn gebracht te vervangen, dient het apparaat
uitgeschakeld te worden en losgekoppeld te worden van de
netstroom.
• Raak nooit bewegende delen van het apparaat aan en wacht
altijd tot deze stilstaan.
• Repareer het apparaat niet zelf. Neem altijd contact op met een
erkende monteur. Als de stroomkabel is beschadigd, moet deze
door de fabrikant, zijn dealer of vergelijkbare, erkende personen
vervangen worden om gevaar te vermijden.
• Dit apparaat mag niet worden gebruikt door kinderen.
• Het apparaat en het netsnoer altijd buiten bereik van kinderen
houden.
• Kinderen mogen niet met het apparaat spelen.
• Apparaten kunnen worden gebruikt door personen met ver-
minderde lichamelijke, zintuiglijke of geestelijke vermogens, of
gebrek aan ervaring en kennis als zij onder toezicht staan of
geïnstrueerd zijn voor het gebruik van het apparaat in een veilige
manier en als zij de gevaren begrijpen.
LET OP:
Dit apparaat dient niet ondergedompeld te worden in water.
Raadpleeg de instructies die zijn opgenomen in het hoofdstuk
“Reiniging”.
• Nooit iets aan de veiligheidsschakelaars veranderen.
• Nooit bij ingeschakeld apparaat het deksel verwijderen.

PC-AE1156_IM 07.06.18
13
Beoogd gebruik
Dit apparaat is ontworpen voor de extractie van sap van
verse groenten en fruit zoals ananas, appels, rode bieten,
selderij, komkommers, wortelen en tomaten.
Zolang de schillen eetbaar zijn, kunnen ze ook worden
verwerkt.
Levensmiddelen die zetmeel bevatten, zoals bananen,
papaja’s, avocado’s dient, vijgen en mango’s, evenals
bijzonder hard en vezelig groenten en fruit, mogen met het
apparaat niet worden verwerkt.
OPMERKING:
Sapextractie van klein fruit zoals bijvoorbeeld bessen met
de centrifugemethode is moeilijk. U moet een geschikte
bessenpers daarvoor gebruiken.
Het apparaat mag alleen worden gebruikt voor de toepas-
singen die in deze handleiding zijn beschreven. Gebruik
voor commerciële doeleinden is niet toegestaan.
Elk ander gebruik wordt als onbeoogd gebruik beschouwd
en kan tot materiële schade of zelfs persoonlijk letsel leiden.
De fabrikant is niet aansprakelijk voor schade veroorzaakt
door onbeoogd gebruik.
Het apparaat uitpakken
1. Verwijder het apparaat uit de verpakking.
2. Verwijder alle verpakkingsmaterialen, zoals folies, vul-
materialen, kabelbinders en kartonverpakking.
3. Controleer de omvang van de leveringen op compleet-
heid.
4. Indien er sprake is van ontbrekende onderdelen of
duidelijke schade, dient het apparaat niet te worden
gebruikt. Breng het apparaat onmiddellijk terug naar de
verkoper.
OPMERKING:
Er kan nog steeds stof of productieresten op het apparaat
aanwezig zijn. Wij raden u aan het apparaat schoon te
maken zoals beschreven onder “Reiniging”.
Omvang van de levering
1 Basistoestel met motor
1 Transparante deksel
1 Stamper
1 Centrifugezeef
1 Centrifugebehuizing
1 Pulpcontainer
1 Sapkan met afschuimer en deksel
Overzicht van de bedieningselementen
1 Stamper
2 Vulopening
3 Transparant deksel
4 Centrifugezeef
5 Centrifuge-omhulzing
6 In hoogte instelbare schenktuit
7 Sluitingen
8 Sapkan
9 Basistoestel met motor
10 Bedieningspaneel
11 Pulpcontainer
12 Aandrijfwiel (niet afneembaar)
13 Grendel
Het apparaat monteren
Voor de montage, zie ook de afbeeldingen op pagina 3.
1. Zet het apparaat op zo’n manier neer dat het bedie-
ningspaneel naar u toe gericht is.
2. Verbind de centrifuge-omhulzing bovenop het basistoe-
stel. Het basistoestel heeft een inkeping. Hier moet de
mond van de centrifuge-omhulzing geplaatst worden.
3. WAARSCHUWING: Gevaar op snijwonden!
De centrifugezeef is scherp!
Plaats de centrifugezeef op het aandrijfwiel. Druk naar
beneden. Het klikt vast op het aandrijfwiel.
4. Controleer de centrifugezeef!
Voel onder de rand van de zeef. Deze moet met enige
druk niet loskomen.
5. Plaats de pulpcontainer aan de linkerkant. Het apparaat
hiervoor iets zijwaarts houden en de bovenste rand in de
behuizing van de centrifuge drukken.
6. Plaats het transparante deksel. Het bedekt de pulpcon-
tainer volledig.
7. OPMERKING:
De voorste sluiting en het transparante deksel zijn
beide uitgerust met een veiligheidsschakelaar. Deze
voorkomen dat de motor per ongeluk start. Controleer
de correcte plaatsing van alle onderdelen, de centrifu-
gezeef, het transparante deksel en de sluitingen.
Bevestig het transparante deksel met de beide sluitin-
gen. Steek hiervoor de uitsparingen van de sluitingen in
de sloten van de centrifugebehuizing. Druk de sluitingen
naar beneden. Het moet hoorbaar vastklikken.
8. Plaats de sapkan (zonder afschuimer) onder de tuit.
Elektrische aansluiting
• Voordat u de stekker in het stopcontact steekt, controleer
of de te gebruiken netspanning overeenkomt met die
van het apparaat. U vindt de benodigde informatie op het
typeplaatje.

PC-AE1156_IM 07.06.18
14
• Sluit het apparaat alleen op een correct geïnstalleerd en
geaard stopcontact. De toets is verlicht. Het apparaat
is nu gereed voor gebruik.
Bediening
Voorbereidingen
• Was het fruit voor verwerking.
• Snij het fruit in stukjes zodat het door de vulopening past.
• Verwijder grotere pitten en steeltjes.
Functietoetsen
De toetsen op het apparaat zijn aanraaktoetsen. Raak de
toetsen licht aan met een vinger om de functie uit te voeren.
Wanneer een toets wordt ingedrukt, wordt dit bevestigd
door een pieptoon.
Snelheden
Druk meerdere malen op de toets om de gewenste
snelheid te kiezen:
Tomaat, Meloen
Selderij, Citrus vruchten, komkommer
Appel, Peer, Perzik
Wortel, Knoook, Biet
Granaatappel, Aardappelen
OPMERKING:
Tijdens gebruik, kan de snelheid niet gewijzigd worden.
Als u op de toets drukt, schakelt de motor automatisch
uit.
Sap maken
OPMERKING:
• Het apparaat is bedoeld voor kort gebruik. Stop het
apparaat gedurende 1 minuut nadat het 3 minuten
gewerkt heeft.
• U kunt de pulsmode starten door een druk op de Pulse
toets. Druk kort op de toets, en laat hem weer los.
WAARSCHUWING:
Controleer nogmaals of alle onderdelen juist geplaatst zijn
voor u het apparaat aanzet.
1. Schakel het apparaat in met behulp van de toets. Het
scherm en de toetsen lichten op. De middelste snelheid
( ) verschijnt op het scherm.
2. Selecteer de gewenste snelheid door op de toets te
drukken.
3. Start de motor door het indrukken van de Start toets.
4. Plaats de fruitstukken in de vulopening en druk ze naar
beneden met de stamper. Let op! De stamper past in
een sleuf in de vulopening.
5. Het sap komt uit de rechterkant van de omhulzing. De
pulp wordt verzameld in de pulpcontainer. Als de uitloop
van sap sterk verhoogd wordt, kies dan een lagere
snelheid. Start de motor weer door het indrukken van
de Start toets. Pas minder druk toe met de stamper.
OPMERKING:
• Let op de kan met sap. Stop voordat deze overstroomt.
• Bessen en citrusvruchten (zoals kruisbessen, druiven
en sinaasappels) worden doorgaans niet geperst,
maar uitgeperst.
• Bij het persen van fruitsoorten met een hoog sap-
gehalte, kan het voorkomen dat het sap buiten de
pulphouder spat. In dit geval raden wij aan om de
pulphouder vaker te legen.
Gebruik stoppen en uit elkaar halen
1. Druk op de Start toets om de motor uit te schakelen.
2. Zet dan het apparaat in de stand-by modus met de
toets.
3. Haal de stekker uit het stopcontact.
4. Zet de kan aan de kant en open beide sluitingen.
5. Verwijder het transparante deksel.
6. Verwijder het pulp van de container.
7. Verwijder de centrifugezeef met de centrifuge-om-
hulzing. U kunt dit doen door onder de ens van de
centrifugebehuizing en onder de tuit te voelen. Beweeg
de centrifugebehuizing afwisselend omhoog aan beide
kanten. Verwijder het door gelijdelijk omhoog te trekken.
Indien nodig drukt u de basis omlaag met de ringvinger
en de pink.
8. WAARSCHUWING: Gevaar voor snijwonden!
De centrifugezeef heft scherpe messen!
Alleen aan de buitenrand optillen.
Haal de centrifugezeef uit de centrifuge-omhulzing.
9. Plaats de afschuimer in de sapkan. Let op de geleiders
in de sapkan. Dit voorkomt morsen van het schuim als u
het sap inschenkt.

PC-AE1156_IM 07.06.18
15
Reiniging
WAARSCHUWING:
• Haal voor het schoonmaken altijd de stekker uit het stopcontact.
• Dompel de motorbehuizing nooit onder in water. Dit kan een
elektrische schok of brand veroorzaken.
• Het zeef van de centrifuge is zeer scherp! Verwondingsgevaar!
LET OP:
• Gebruik geen draadborstel of andere schurende
voorwerpen.
• Gebruik geen scherpe of schurende reinigingsmid-
delen.
• Laat de pulp niet opdrogen op de zeef. De kleine gaat-
jes raken dan verstopt en worden onbruikbaar.
Centrifugezeef
WAARSCHUWING: Ge-
vaar voor snijwonden!
De centrifugezeef is scherp!
Verwijder residu in de centrifu-
gezeef meteen onder stromend
water. Gebruik een afwasborstel.
Stamper, transparante deksel, centrifuge-omhulzing,
pulpcontainer, sapkan met afschuimer en deksel
• Reinig deze componenten in een spoelbad.
• Reinig met schoon water.
• Het apparaat alleen monteren als alle onderdelen droog
zijn.
Basistoestel met motor
Veeg de behuizing met een licht vochtige doek af.
Opslaan
• Reinig het apparaat zoals beschreven. Laat de accessoi-
res volledig drogen.
• Wij raden u aan het apparaat in de originele verpakking
te bewaren als het voor een langere periode niet wordt
gebruikt.
• Bewaar het apparaat op een goed geventileerde en
droge plaats buiten het bereik van kinderen.
Probleemoplossing
Storing Mogelijke oorzaak Oplossing
Het
apparaat
werkt niet.
Het apparaat is
niet voorzien van
stroom.
Controleer het stop-
contact met een ander
apparaat.
Steek de stekker cor-
rect in het stopcontact.
Controleer de zekering
in uw huis.
De sluitingen zijn
niet goed gesloten.
Vergrendel de slui-
tingen.
Het apparaat is
defect.
Neem contact op met
onze dienst of een
specialist.
De
hoeveel-
heid sap is
klein.
Verkeerde vruchts-
oort.
Selecteer een vruchts-
oort die meer sap
produceert.
Sap kan niet uit
kleine bessen in de
centrifuge worden
gewonnen.
Te veel residu in de
centrifugezeef.
Reinig de centrifu-
gezeef.
Veel
lawaai en
imbalans
tijdens
gebruik.
Slechte montage. Controleer of alle
onderdelen correct zijn
geïnstalleerd.
Te veel residu in de
centrifugezeef.
Maak de centrifu-
gezeef tussentijds
schoon als u grotere
hoeveelheden fruit
verwerkt.

PC-AE1156_IM 07.06.18
16
Technische gegevens
Model:..................................................................PC-AE 1156
Spanningstoevoer: .............................. 220 - 240 V~ 50 / 60 Hz
Opgenomen vermogen: ................................................ 800 W
Beschermingsklasse: ...........................................................
Nettogewicht: ...................................................... ong. 3,86 kg
Het recht om technische en ontwerpaanpassingen te ma-
ken in de loop van voortdurende productontwikkeling blijft
voorbehouden.
Dit apparaat voldoet aan alle huidige CE-richtlijnen,
zoals de richtlijn elektromagnetische compatibiliteit en de
laagspanningsrichtlijn, en is gefabriceerd volgens de meest
recente veiligheidsvoorschriften.
Verwijdering
Betekenis van het symbool “vuilnisemmer”
Bescherm ons milieu, elektrische apparaten
horen niet in het huisafval.
Maak voor het afvoeren van elektrische
apparaten gebruik van de voorgeschreven
verzamelpunten en geef daar de elektrische
apparaten af die u niet meer gebruikt.
Daardoor helpt u de potentiële effecten te voorkomen
die een verkeerde afvoer op het milieu en de menselijke
gezondheid kunnen hebben.
Op deze wijze levert u uw bijdrage aan het hergebruik, de
recycling en andere verwerkingsvormen voor oude elektro-
nische en elektrische apparaten.
Voor informatie over verzamelpunten voor uw apparaten
kunt u contact opnemen met uw gemeente of gemeentead-
ministratie.

PC-AE1156_IM 07.06.18
17
Mode d’emploi
Merci d’avoir acheté notre produit. Nous espérons que vous
en tirerez beaucoup de plaisir.
Symboles de ce mode d’emploi
Les informations de sécurité sont clairement indiquées.
Respectez ces instructions scrupuleusement pour éviter les
risques de blessures et de dommages :
AVERTISSEMENT :
Met en garde contre de possibles effets négatifs sur la
santé ainsi que de risques de blessure potentiels.
ATTENTION :
Indique les risques pour l’appareil ou tout autre appareil.
NOTE :
Attire votre attention sur des conseils et informations.
Sommaire
Liste des différents éléments de commande ........................3
Notes générales .................................................................. 17
Conseils de sécurité spéciques à cet appareil .................17
Utilisation conforme ............................................................18
Déballer l’appareil ...............................................................19
Contenu de la livraison .......................................................19
Liste des différents éléments de commande ......................19
Réglage de l’appareil ..........................................................19
Connexion électrique ..........................................................19
Fonctionnement ..................................................................19
Nettoyage ............................................................................ 20
Stockage .............................................................................21
Dépannage..........................................................................21
Données techniques ...........................................................21
Élimination ...........................................................................22
Notes générales
Lisez attentivement ce mode d’emploi avant de mettre l’ap-
pareil en marche pour la première fois. Conservez le mode
d’emploi ainsi que le bon de garantie, votre ticket de caisse
et si possible, le carton avec l’emballage se trouvant à
l’intérieur. Si vous remettez l’appareil à des tiers, veuillez-le
remettre avec son mode d’emploi.
• N’utilisez cet appareil que pour un usage privé et pour
les taches auxquelles il est destiné. Cet appareil n’est
pas prévu pour une utilisation professionnelle.
• Ne l’utilisez pas en plein air. Protégez-le de la chaleur,
des rayons directs du soleil, de l’humidité (ne le plongez
en aucun cas dans l’eau) et des objets tranchants.
N’utilisez pas cet appareil avec des mains humides. S’il
arrive que de l’humidité ou de l’eau atteignent l’appareil,
débranchez aussitôt le câble d’alimentation.
• Arrêtez l’appareil et débranchez toujours le câble d’ali-
mentation de la prise de courant (en tirant sur la che et
non pas sur le câble) si vous n’utilisez pas l’appareil, si
vous installez les accessoires, pour le nettoyage ou en
cas de panne.
• Il y a lieu d’inspecter l’appareil et le bloc d’alimentation
régulièrement en vue d’éventuels signes d’endom-
magements. Lorsqu’un endommagement est détecté,
l’appareil ne doit plus être utilisé.
• N’utilisez que les accessoires d’origine.
• Par mesure de sécurité vis-à-vis des enfants, ne
laissez pas les emballages (sac en plastique, carton,
polystyrène) à leur portée.
AVERTISSEMENT :
Ne pas laisser les jeunes enfants jouer avec le lm.
Il y a risque d’étouffement !
Conseils de sécurité spéciques à cet appareil
AVERTISSEMENT : Risque de blessure !
• Risque de coupures ! Le tamis de la centrifugeuse est coupant !
• Si le tamis rotatif est endommagé, il ne faut pas utiliser l’appareil.
• Utilisez toujours le poussoir fourni avec l’appareil. N’introduisez
jamais les doigts dans l’orice de remplissage.
• Débranchez toujours l’appareil de l’alimentation s’il est laissé
sans surveillance et avant de le monter, démonter ou nettoyer.

PC-AE1156_IM 07.06.18
18
AVERTISSEMENT : Risque de blessure !
• Avant de remplacer un accessoire mobile, arrêtez l’appareil et
débranchez le cordon d’alimentation.
• Ne touchez pas les éléments mobiles et attendez que l’appareil
soit à l’arrêt.
• Ne réparez pas vous-même l’appareil. Contactez toujours un
technicien agrée. Si le cordon d’alimentation est endommagé, il
doit être remplacé par le fabricant, son agent de service ou des
personnes ayant qualité semblable an d’éviter un risque.
• Cet appareil ne doit pas être utilisé par les enfants.
• Gardez l’appareil et son cordon hors de la portée des enfants.
• Les enfants ne doivent pas jouer avec l’appareil.
• Les appareils peuvent être utilisés par des personnes dont les
capacités physiques, sensorielles ou mentales sont réduites,
ou des personnes dénuées d’expérience ou de connaissance,
si elles bénécient d’une surveillance ou d’instructions concer-
nant l’utilisation de l’appareil en toute sécurité et qu’elles com-
prennent les risques encourus.
ATTENTION :
Cet appareil n’est pas conçu pour être immergé dans l’eau pendant
le nettoyage. Suivez les instructions du chapitre « Nettoyage ».
• Ne touchez à aucun interrupteur de sécurité !
• Ne retirez pas le couvercle pendant le fonctionnement.
Utilisation conforme
L’appareil est conçu pour extraire le jus de légumes et
de fruits frais comme l’ananas, la betterave, le céleri, le
concombre, la carotte et la tomate.
Tant que les épluches sont mangeables, elles peuvent être
prises par l’appareil.
Les aliments qui contiennent des amidons comme les ba-
nanes, les papayes, les avocats, les gues ou les mangues
ainsi que les fruits et légumes particulièrement durs et
breux ne doivent pas être introduits dans cet appareil.
NOTE :
L’extraction du jus des petits fruits, comme par exemple
les baies, peut s’avérer difcile avec la centrifugeuse. Pour
ces fruits, il est préférable d’utiliser un pressoir à baies.
L’appareil ne doit être utilisé que de la façon décrite dans ce
mode d’emploi. Ne l’utilisez pas dans un but commercial.

PC-AE1156_IM 07.06.18
19
Tout autre usage est considéré comme inadéquat et peut
causer des dommages matériels ou même des blessures
physiques.
Le fabriquant ne peut être tenu responsable des dommages
causés par une utilisation inadéquate.
Déballer l’appareil
1. Retirez l’appareil de son emballage.
2. Retirez tous les matériaux d’emballage comme le lm
plastique, le rembourrage, les attache-câbles et la boite.
3. Vériez que tout vous a bien été livré.
4. En cas de pièces manquantes ou de dégâts visibles,
n’utilisez pas l’appareil. Renvoyez-le immédiatement à
votre détaillant.
NOTE :
Il se peut de la poussière ou des résidus de fabrication
demeurent dans l’appareil. Nous vous recommandons
de nettoyer l’appareil comme il est décrit dans le chapitre
« Nettoyage ».
Contenu de la livraison
1 Appareil de base avec le moteur
1 Couvercle transparent
1 Poussoir
1 Tamis centrifuge
1 Boitier centrifuge
1 Récipient à grignons
1 Carafe à jus avec écumoire et couvercle
Liste des différents éléments
de commande
1 Poussoir
2 Orice de remplissage
3 Couvercle transparent
4 Tamis centrifuge
5 Boitier centrifuge
6 Bec-verseur à hauteur ajustable
7 Fermoirs
8 Carafe à jus
9 Appareil de base avec moteur
10 Panneau de commande
11 Récipient à grignons
12 Roue d’entrainement (non détachable)
13 Point d’attache
Réglage de l’appareil
Pour assembler l’appareil, consultez également les illustra-
tions de la page 3.
1. Positionnez l’appareil de manière à ce que le panneau
de commande soit en face de vous.
2. Fixez la base centrifuge sur le boitier centrifuge. Le boi-
tier centrifuge est muni d’un enfoncement. C’est là que
le bec verseur du boitier centrifuge doit être placé.
3. AVERTISSEMENT : Risques de coupures !
Le tamis centrifuge est coupant !
Placez le tamis centrifuge sur la roue d’entraînement.
Appuyez sur celui-ci. Il s’enclenche sur la roue d’entraî-
nement.
4. Vériez le tamis centrifuge !
Touchez le dessous du bord du tamis. Celui-ci ne doit
pas être desserré sous tension.
5. Fixez le réservoir à pulpe sur le côté gauche. Pour cela,
maintenez-le légèrement de côté pour enfoncer le bord
supérieur dans le boîtier de la centrifugeuse.
6. Fixez le couvercle transparent. Il recouvre aussi le
récipient à pulpe.
7. NOTE :
Le fermoir avant et le couvercle transparent sont tous
deux équipés d’un interrupteur de sécurité. Ces der-
niers empêchent le démarrage accidentel du moteur.
Vériez que tous les composants sont correctement
xés : le tamis centrifuge, le couvercle transparent et
les fermoirs.
Sécurisez le couvercle transparent à l’aide des deux
fermoirs. Pour faire cela, insérez les renfoncements des
fermoirs sur les points d’attache du boîtier de la centri-
fuge. Appuyez sur les fermoirs. Ils doivent s’emboîter en
faisant un bruit.
8. Positionnez la carafe à jus (sans l’écumoire) sur le
bec-verseur.
Connexion électrique
• Avant de brancher la prise dans la che, vériez que
la tension du secteur que vous utilisez correspond à la
tension de l’appareil. Vous trouverez l’information néces-
saire sur la plaque d’identication.
• Branchez l’appareil à une prise électrique de sécurité
correctement installé. Le bouton s’illumine. L’appareil
est maintenant prêt à l’emploi.
Fonctionnement
Préparatifs
• Lavez les fruits avant d’extraire leur jus.
• Coupez des morceaux de fruit sufsamment petits pour
passer dans l’orice de remplissage.
• Retirez les gros noyaux et les peaux.
Boutons fonction
Les boutons de l’appareil sont de boutons tactiles. Efeurez
les boutons du doigt pour exécuter la fonction. Chaque fois
qu’un bouton est pressé, il sera conrmé par un bip sonore.

PC-AE1156_IM 07.06.18
20
Niveaux de vitesse
Appuyez sur le bouton de manière répétée pour sélec-
tionner le niveau de vitesse désiré :
Tomates, Melons
Céleri, Agrumes, Concombres
Pommes, Poires, Pêches
Carottes, Ail, Betteraves
Grenades, Pommes de terre
NOTE :
Pendant le fonctionnement, le niveau de vitesse ne peut
être changé. Lorsque vous appuyez sur le bouton , le
moteur s’éteint automatiquement.
Extraire le jus
NOTE :
• Cet appareil est destiné à un usage à court terme. Ar-
rêtez l’appareil pendant 1 minute après une utilisation
de 3 minutes.
• Vous pouvez activer le mode de pulsion avec le
bouton Pulse. Appuyez brièvement sur le bouton puis
relâchez-le.
AVERTISSEMENT :
Vériez à nouveau que les accessoires sont correctement
installés avant d’allumer l’appareil.
1. Allumez l’appareil en appuyant sur le bouton . L’écran
et les boutons s’illuminent. Le niveau de vitesse moyen
( ) apparaît sur l’écran.
2. Sélectionnez le niveau de vitesse désiré en appuyant
sur le bouton .
3. Démarrez le moteur en appuyant sur le bouton Start.
4. Insérez les morceaux de fruit dans l’orice de rem-
plissage et poussez-les à l’aide du poussoir. Veuillez
remarquer que le poussoir est muni d’un guide qui
s’enclenche dans l’orice.
5. Le jus s’écoule sur le côté droit du boitier. La pulpe
s’accumule dans le récipient à pulpe. Si la vitesse de
production de jus est très grande, sélectionnez un
niveau de vitesse inférieur. Démarrez le moteur en
appuyant sur le bouton Start. Appuyez moins fortement
sur le poussoir.
NOTE :
• Observez la carafe à jus. Interrompez le fonctionne-
ment à temps pour empêcher les débordements.
• En général, les baies et les agrumes (comme les
groseilles à maquereau, le raisin, les oranges) sont
pressés pour extraire leur jus.
• Lorsque vous extrayez le contenu riche en jus de ces
fruits, le jus peut éclabousser depuis la surface du
récipient de marc. Dans ce cas, nous vous conseillons
de vider le récipient de marc plus souvent.
Interrompre le fonctionnement et démonter l’appareil
1. Appuyez sur le bouton Start pour éteindre le moteur.
2. Mettez l’appareil en mode veille en appuyant sur le
bouton .
3. Débranchez la che électrique.
4. Posez la carafe à jus sur le côté, et ouvrez les deux
fermoirs.
5. Retirez le couvercle transparent.
6. Retirez le réservoir à pulpe.
7. Retirez le tamis transparent et le boitier centrifuge. Vous
pouvez faire cela en passant les doigts sous la bride du
boîtier de la centrifuge et sous le bec-verseur. Soulevez
chaque côté du boîtier de la centrifuge alternativement.
Retirez-le en le tirant doucement vers le haut. Si né-
cessaire, appuyez sur la base de l’appareil à l’aide du
majeur et de l’annulaire.
8. ATTENTION : Risques de coupures !
Le tamis centrifuge est muni de lames coupantes !
Soulevez-le uniquement en utilisant le bord
extérieur.
Retirez le tamis centrifuge du boitier centrifuge.
9. Placez l’écumoire sur la carafe à jus. Faites attention
aux guides de la carafe à jus. Cela permet d’éviter de
renverser de la mousse pendant que vous versez le jus.
Nettoyage
AVERTISSEMENT :
• Débranchez toujours la prise électrique avant le nettoyage.
• N’immergez jamais le boitier moteur. Cela pourrait provoquer un
choc électrique ou un incendie.

PC-AE1156_IM 07.06.18
21
AVERTISSEMENT :
• La passoire de la centrifugeuse est très coupante ! Risque de
blessure !
ATTENTION :
• Ne pas utiliser de brosse en l de fer ou autres objets
abrasifs.
• Ne pas utiliser de détergents agressifs ou abrasifs.
• Ne laissez pas la pulpe sécher sur le tamis centrifuge.
Les pores se bloqueront et deviendront inutiles.
Tamis centrifuge
AVERTISSEMENT :
Risques de coupures !
Le tamis centrifuge est
coupant !
Retirez les résidus du tamis
centrifuge immédiatement après
usage, utilisez une brosse à
vaisselle.
Bouchon, couvercle transparent, boitier centrifuge,
récipient à grignons, carafe à jus avec écumoire et
couvercle
• Nettoyez ces composants dans une solution grinçante.
• Rincez à l’eau claire.
• Ne montez l’appareil que lorsque toutes les pièces ont
été séchées.
Appareil de base avec moteur
Essuyez le boîtier à l’aide d’un chiffon légèrement humide.
Stockage
• Nettoyez l’appareil comme il est décrit. Laissez complè-
tement sécher les accessoires.
• Nous vous recommandons de conserver l’appareil dans
son emballage d’origine s’il ne doit pas être utilisé pen-
dant de longues périodes.
• Conservez toujours l’appareil hors de portée des enfants
et dans un endroit sec et bien aéré.
Dépannage
Dysfonc-
tionnement Cause possible Solution
L’appareil ne
fonctionne
pas.
L’appareil ne
reçoit pas
d’alimentation
électrique.
Vériez la prise élec-
trique avec un autre
appareil.
Branchez correctement
la prise électrique.
Vériez le fusible.
Les fermoirs ne
sont pas correc-
tement fermés.
Fermez les fermoirs.
L’appareil est
défectueux.
Contactez nos services
ou un spécialiste.
Il n’y a
qu’une petite
quantité de
jus.
Mauvais type de
fruit.
Choisissez un fruit qui
produit plus de jus.
Le jus des baies ne
peut pas être extrait
dans la centrifugeuse.
Trop de résidus
dans le tamis
centrifuge.
Nettoyez le tamis
centrifuge.
L’appareil
est bruyant
et déséquili-
bré pendant
le fonction-
nement.
Mauvais
assemblage.
Vériez que tous les
composants ont été
correctement assem-
blés.
Trop de résidus
dans le tamis
centrifuge.
Lorsque vous tirez
de grandes quantités
de jus, nettoyez
régulièrement le tamis
centrifuge.
Données techniques
Modèle : ..............................................................PC-AE 1156
Alimentation : ......................................220 - 240 V~ 50 / 60 Hz
Consommation : ............................................................ 800 W
Classe de protection : ..........................................................
Poids net : ............................................................env. 3,86 kg
Nous nous réservons le droit d’apporter des modications
techniques ainsi que des modications de conception dans
le cadre du développement continu de nos produits.
Cet appareil est conforme à toutes les directives CE en
vigueur, telles que les directives sur la compatibilité électro-

PC-AE1156_IM 07.06.18
22
magnétique et les faibles tensions et a été fabriqué selon
les derniers règlements de sécurité.
Élimination
Signication du symbole « Poubelle »
Protégez votre environnement, ne jetez pas
vos appareils électriques avec les ordures mé-
nagères.
Utilisez, pour l’élimination de vos appareils
électriques, les bornes de collecte prévues à
cet effet où vous pouvez vous débarrasser des
appareils que vous n’utilisez plus.
Vous contribuez ainsi à éviter les impacts potentiels dans
l’environnement et sur la santé de chacun, causés par une
mauvaise élimination de ces déchets.
Vous contribuez aussi au recyclage sous toutes ses formes
des appareils électriques et électroniques usagés.
Vous trouverez toutes les informations sur les bornes
d’élimination des appareils auprès de votre commune ou de
l’administration de votre communauté.

PC-AE1156_IM 07.06.18
23
Manual de instrucciones
Gracias por comprar nuestro producto. Esperamos que
disfrute con el uso de este aparato.
Símbolos en este manual de instrucciones
La información importante de seguridad está indicada clara-
mente. Rogamos que siga estas advertencias con exactitud
para evitar accidentes y daños al aparato:
AVISO:
Se avisa de riesgos de salud y se indican posibles ries-
gos de lesiones.
ATENCIÓN:
Se indica posible daño al aparato o a otros objetos.
NOTA:
Indica recomendaciones e información para usted.
Índice
Indicación de los elementos de manejo ...............................3
Notas generales .................................................................. 23
Consejos de seguridad especiales para este aparato ....... 23
Uso para el que está destinado ..........................................24
Desembalaje del aparato ....................................................25
Contenido en la entrega .....................................................25
Indicación de los elementos de manejo .............................25
Instalar el aparato ...............................................................25
Conexión eléctrica ..............................................................25
Utilización ............................................................................ 25
Limpieza .............................................................................. 26
Almacenamiento .................................................................27
Resolución de problemas ...................................................27
Datos técnicos.....................................................................28
Eliminación .......................................................................... 28
Notas generales
Antes de la puesta en servicio de este aparato lea deteni-
damente el manual de instrucciones y guarde éste bien in-
cluido la garantía, el recibo de pago y si es posible también
el cartón de embalaje con el embalaje interior. En caso de
dejar el aparato a terceros, también entregue el manual de
instrucciones.
• Solamente utilice el aparato para el uso privado y para el
n previsto. Este aparato no está destinado para el uso
profesional.
• No lo utilice al aire libre. No lo exponga al calor, a la
entrada directa de rayos de sol, a la humedad (en
ningún caso sumerja el aparato en agua) y a los cantos
agudos. No utilice el aparato con las manos húmedas.
En caso de que el aparato esté húmedo o mojado retire
de momento la clavija de la caja de enchufe.
• Desconecte el aparato y siempre retire la clavija de la
caja de enchufe (por favor tire de la clavija y no del ca-
ble), cuando no quiera utilizar el aparato, montar piezas
o en caso de limpieza o defectos.
• El aparato y el cable de alimentación de red se deben
controlar regularmente para garantizar que no estén
dañados. En caso de que se comprobara un daño, no se
podrá seguir utilizando el aparato.
• Solamente utilice accesorios originales.
• Para la seguridad de sus niños no deje material de
embalaje (Bolsas de plástico, cartón, poliestireno etc.) a
su alcance.
AVISO:
No deje jugar a los niños con la lámina. ¡Existe peli-
gro de asxia!
Consejos de seguridad especiales para este aparato
AVISO: ¡Riesgo de heridas!
• ¡Riesgo de corte! ¡El tamiz del centrifugador está muy alado!
• No utilice el aparato si el tamiz giratorio está dañado.
• Utilice siempre el émbolo proporcionado. No introduzca los de-
dos ni ninguna otra herramienta por la apertura de llenado.
• Desconecte siempre el aparato de la alimentación si se le deja
sin atención y antes de montarlo, desmontarlo o limpiarlo.

PC-AE1156_IM 07.06.18
24
AVISO: ¡Riesgo de heridas!
• Previo al reemplazo de accesorios o piezas móviles durante el
funcionamiento, el aparato debe estar apagado y desconectado
de la toma de corriente.
• No toque las piezas móviles, y espere a que el aparato se de-
tenga.
• No repare usted mismo el aparato. Póngase en contacto con
un técnico autorizado. Si el cable de alimentación está dañado,
corresponde al fabricante, a su representante o persona de cua-
licación similar su reemplazo para evitar peligros.
• Este aparato no debe ser utilizado por los niños.
• Mantenga el aparato y su cable fuera del alcance de los niños.
• Los niños no deben jugar con el aparato.
• Los aparatos pueden ser utilizados por personas con discapaci-
dad física, psíquica o sensorial o con falta de experiencia y co-
nocimiento si están bajo supervisión o se les dan instrucciones
acerca del uso del aparato de una manera segura y si entienden
los riesgos implicados.
ATENCIÓN:
Este dispositivo no está diseñado para sumergirlo en agua du-
rante la limpieza. Por favor tenga presentes las instrucciones
incluidas en el capítulo “Limpieza”.
• No toque ningún botón de seguridad.
• No quite la tapa cuando funciona el aparato.
Uso para el que está destinado
Este aparato está diseñado para extraer zumo de frutas y
verduras frescas como piñas, manzanas, remolacha, apio,
pepinos, zanahorias y tomates.
También se puede procesar la piel, siempre que sea
comestible.
Este aparato no se debe utilizar para procesar alimentos
que contengan almidón, como plátanos, papayas, aguaca-
tes, higos y mangos, además de frutas y verduras que sean
particularmente duras y brosas.
NOTA:
La extracción de zumo de frutas pequeñas, como por
ejemplo bayas, con el principio del centrifugador es difícil.
Para ello deberá utilizar una prensa de bayas apropiada.

PC-AE1156_IM 07.06.18
25
El aparato solamente puede usarse del modo descrito en
este manual de instrucciones. No puede usarlo con nes
comerciales.
Cualquier otro uso se considerará no indicado y podrá oca-
sionar daños materiales o incluso lesiones personales.
El fabricante no será responsable de los daños causados
por este uso indebido.
Desembalaje del aparato
1. Extraiga el dispositivo de su embalaje.
2. Retire todos los materiales de embalaje, como papel de
aluminio, sujeta cables y envolturas de cartón.
3. Compruebe que todas las piezas estén presentes.
4. Si hay piezas faltantes o daños evidentes, no utilice el
dispositivo. Devuélvalo inmediatamente al vendedor.
NOTA:
Puede que el aparato todavía tenga algo de polvo o
residuos del proceso de fabricación. Recomendamos que
limpie el aparato tal y como se describe en el apartado
de “Limpieza”.
Contenido en la entrega
1 Aparato de base con motor
1 Tapa transparente
1 Émbolo
1 Tamiz del centrifugador
1 Carcasa del centrifugador
1 Recipiente para la pulpa
1 Jarra de zumo con ltro y tapa
Indicación de los elementos de manejo
1 Émbolo
2 Apertura para el ltro
3 Tapa transparente
4 Tamiz del centrifugador
5 Carcasa del centrifugador
6 Boquilla de altura ajustable
7 Cierres
8 Jarra de zumo
9 Aparato de base con motor
10 Panel de control
11 Recipiente para la pulpa
12 Rueda motriz (no desmontable)
13 Pestillo
Instalar el aparato
Consulte también la ilustración de la página 3 para el
montaje.
1. Coloque el aparato de forma que el panel de control
quede hacia usted.
2. Acople la carcasa del centrifugador sobre la carcasa de
la base. La carcasa de la base presenta una muesca.
Aquí es donde se debe colocar el pico de la carcasa del
centrifugador.
3. AVISO: ¡Riesgo de corte!
¡El tamiz centrifugador está alado!
Coloque el tamiz centrifugador sobre la rueda motriz.
Presiónelo hacia abajo. Se acoplará a presión sobre la
rueda motriz cuando escuche un clic.
4. ¡Compruebe el tamiz centrifugador!
Toque por debajo del borde del tamiz. Cuando se aplica
un poco de tensión no deberá estar demasiado suelto.
5. Fije el recipiente para pulpa en el lado izquierdo. Para
hacerlo, aguántelo ligeramente de lado para empujar el
borde superior en el espacio del chasis de centrifugado.
6. Acople la tapa transparente. Cubrirá también el reci-
piente para la pulpa.
7. NOTA:
El cierre frontal y la tapa transparente tienen un
interruptor de seguridad. Evitan que el motor arranque
de manera fortuita. Compruebe que todos los compo-
nentes, el tamiz centrifugador, la tapa transparente y
los cierres se han acoplado correctamente.
Asegure la tapa transparente con ambos cierres. Para
ello, inserte los huecos de los cierres en las cerraduras
de la carcasa del centrifugador. Empuje los cierres hacia
abajo. Deben encajar de forma audible.
8. Coloque la jarra de zumo (sin ltro) en la boquilla.
Conexión eléctrica
• Antes de introducir el enchufe en la toma de corriente,
compruebe que la tensión de la red de suministro que
se va a utilizar coincide con la del aparato. Encontrará la
información necesaria en la placa de identicación.
• Conecte el aparato solo a un enchufe de seguridad
correctamente instalado para. Se ilumina el botón . El
aparato está listo para usarse.
Utilización
Preparación
• Limpie la fruta antes de procesarla.
• Corte la fruta en pedazos que se puedan introducir por la
apertura de llenado.
• Quite las semillas y los tallos más grandes.
Botones de función
Los botones del dispositivo son táctiles. Toque suavemente
los botones con un dedo para ejecutar la función. Cada vez
que pulse un botón, se conrmará su elección con un pitido.

PC-AE1156_IM 07.06.18
26
Velocidades
Pulse el botón repetidamente para seleccionar el nivel de
velocidad deseada:
Tomate, melón
Apio, cítricos, pepino
Manzana, pera, melocotón
Zanahoria, ajo, remolacha
Granada, patata
NOTA:
Durante el funcionamiento, el nivel de velocidad no se
puede cambiar. Al pulsar el botón el motor se apagará
automáticamente.
Extracción del zumo
NOTA:
• El aparato se ha diseñado para su uso durante
periodos de tiempo cortos. Detenga la unidad durante
1 minuto después de utilizarla durante 3 minutos.
• Puede pasar a modo pulso pulsando el botón Pulse.
Pulse brevemente el botón y suéltelo.
AVISO:
Compruebe todos los accesorios de nuevo para asegu-
rarse de que se han acoplado correctamente antes de
encender el aparato.
1. Encienda el aparato con el botón . La pantalla y los
botones se iluminan. El nivel de velocidad media ( )
aparece en la pantalla.
2. Seleccione el nivel de velocidad deseado pulsando el
botón .
3. Ponga en marcha el motor pulsando el botón Start.
4. Introduzca los pedazos de fruta por la apertura de lle-
nado y empújelos hacia abajo con el émbolo. ¡Observe!
El émbolo tiene una guía de alineación en la apertura
de llenado.
5. El zumo saldrá por la parte derecha de la carcasa. La
pulpa se recogerá en el recipiente para la pulpa. Si se
vierte demasiada cantidad de zumo, seleccione un nivel
de velocidad más bajo. Ponga en marcha el motor de
nuevo pulsando el botón Start. Aplique menos presión
con el émbolo.
NOTA:
• Preste atención a la jarra para el zumo. Detenga el
funcionamiento a tiempo para que el zumo no rebose.
• Bayas y cítricos (como grosella, uva, naranjas) nor-
malmente no se muelen para sacar zumo, sino que se
exprimen con presión.
• Al exprimir estas frutas, con su elevado contenido
en zumo, pueden producirse salpicaduras de zumo
en la zona del recipiente para pulpa. En tal caso,
recomendamos que el recipiente para pulpa se vacíe
más a menudo.
Parada del funcionamiento y desmontaje
1. Pulse el botón Start para apagar el motor.
2. Luego, encienda el aparato en modo de espera con el
botón .
3. Desconecte el suministro de energía principal.
4. Deje la jarra de zumo a un lado y abra los dos cierres.
5. Extraiga la tapa transparente.
6. Saque el recipiente para pulpa.
7. Extraiga el tamiz centrifugador con la carcasa del
centrifugador. Para ello sujete por debajo del borde de
la carcasa del centrifugador y de la boquilla. Mueva la
carcasa del centrifugador hacia arriba y hacia la derecha
y la izquierda. Quítela tirando de ella suavemente hacia
arriba. Si es necesario, presione hacia abajo el aparato
de base con los dedos anulares y meñiques.
8. AVISO: ¡Riesgo de corte!
¡El tamiz centrifugador tiene cuchillas aladas!
Levántelo exclusivamente por el borde externo.
Extraiga el tamiz centrifugador levantándolo de la car-
casa del centrifugador.
9. Coloque el ltro en la jarra de zumo. Preste atención a
las guías en la jarra de zumo. Esto evita que la espuma
se derrame mientras vierte el zumo.
Limpieza
AVISO:
• Desconecte siempre de la toma de corriente antes de limpiar el
aparato.
• No sumerja nunca el chasis del motor en agua. Puede provocar
electrocución o incendio.

PC-AE1156_IM 07.06.18
27
AVISO:
• ¡La criba de centrifugar es muy cortante! ¡Riesgo de heridas!
ATENCIÓN:
• No utilice un cepillo de alambre u objetos abrasivos.
• No utilice detergentes agresivos o abrasivos.
• No deje que la pulpa se seque en el tamiz centri-
fugador. Los poros nos se atascarían y quedaría
inservible.
Tamiz del centrifugador
AVISO: ¡Riesgo de corte!
¡El tamiz del centrifugador
está muy alado!
Elimine los residuos del tamiz
centrifugador inmediatamente
con agua corriente. Utilice un
cepillo de fregar platos.
Émbolo, tapa transparente, carcasa del centrifugador,
recipiente para la pulpa, jarra de zumo con ltro y tapa
• Limpie estos componentes sumergiéndolos en agua.
• Aclare con agua limpia.
• Monte el dispositivo exclusivamente cuando todas las
piezas estén secas.
Aparato de base con motor
Limpie el aparato de base con un paño ligeramente
húmedo.
Almacenamiento
• Limpie el aparato tal y como se describe. Deje que los
accesorios de sequen completamente.
• Recomendamos que guarde el aparato en su embalaje
original cuando no vaya a utilizarlo durante un periodo
de tiempo largo.
• Guarde el aparato siempre en un lugar seco y con
buena ventilación, fuera del alcance de los niños.
Resolución de problemas
Problema Causas posibles Solución
El aparato no
funciona.
El aparato no
está recibiendo
corriente.
Compruebe la toma
de corriente con otro
aparato diferente.
Introduzca el enchufe
correctamente.
Compruebe el fusible
de su casa.
Los cierres están
mal cerrados.
Ajuste bien los
cierres.
El aparato tiene
defecto.
Póngase en contacto
con nuestro Servicio
o con un especialista.
La cantidad
de zumo es
pequeña.
Tipo de fruta
incorrect.
Seleccione un tipo de
fruta que produzca
más zumo.
No se puede extraer
zumo de bayas
pequeñas con el
centrifugador.
Se han acumu-
lado demasiados
residuos en el
tamiz del centrifu-
gador.
Limpie el tamiz del
centrifugador.
Ruido fuerte o
desequilibrio
durante el
funciona-
miento.
Montaje inco-
rrecto.
Compruebe que to-
dos los componentes
se han instalado
correctamente.
Se han acumu-
lado demasiados
residuos en el
tamiz del centrifu-
gador.
Cuando procese
grandes cantidades,
limpie el tamiz centri-
fugador varias veces
durante el proceso.

PC-AE1156_IM 07.06.18
28
Datos técnicos
Modelo: ...............................................................PC-AE 1156
Alimentación: .......................................220 - 240 V~ 50 / 60 Hz
Consumo de energía: ...................................................800 W
Clase de protección: ............................................................
Peso neto: ........................................................ aprox. 3,86 kg
El derecho de realizar modicaciones técnicas y de diseño
en el curso del desarrollo continuo del producto está
reservado.
Este dispositivo cumple con todas las directrices CE actua-
les, como la directriz de compatibilidad electromagnética y
de bajo voltaje, y está fabricada según las últimas normas
de seguridad.
Eliminación
Signicado del símbolo “Cubo de basura”
Proteja nuestro medio ambiente, aparatos
eléctricos no forman parte de la basura domés-
tica.
Haga uso de los centros de recogida previstos
para la eliminación de aparatos eléctricos y
entregue allí sus aparatos eléctricos que no
vaya a utilizar más.
Ayudará en evitar las potenciales consecuencias, a causa
de una errónea eliminación de desechos, para el medio
ambiente y la salud humana.
Con ello, contribuirá a la recuperación, al reciclado y a otras
formas de reutilización de los aparatos viejos eléctricos y
electrónicos.
La información cómo se debe eliminar los aparatos, se
obtiene en su ayuntamiento o su administración municipal.

PC-AE1156_IM 07.06.18
29
Istruzioni per l’uso
Grazie per aver acquistato il nostro prodotto. Le auguriamo
di divertirsi con l’apparecchio.
Simboli per questo manuale di istruzioni per l’uso
Le informazioni importanti sulla sicurezza sono espres-
samente contrassegnate. Seguire esattamente queste
istruzioni al fine di evitare lesioni e danni all’unità:
AVVISO:
Avverte di pericoli per la salute ed indica possibili rischi
di lesioni.
ATTENZIONE:
Indica possibili danni all’unità o ad altri oggetti.
NOTA: Sottolinea consigli e informazioni.
Indice
Elementi di comando ............................................................3
Note generali .......................................................................29
Avvertenze speciali di sicurezza per questo apparecchio ...
29
Utilizzo conforme alla destinazione ....................................31
Disimballaggio dell’apparecchio .........................................31
Nella fornitura ...................................................................... 31
Elementi di comando ..........................................................31
Impostazione del dispositivo ...............................................31
Collegamento elettrico ........................................................31
Funzionamento ...................................................................32
Pulizia .................................................................................. 33
Conservazione .................................................................... 33
Ricerca dei guasti ...............................................................33
Dati tecnici ...........................................................................34
Smaltimento ........................................................................34
Note generali
Prima di mettere in funzione questo apparecchio, leggere
molto attentamente le istruzioni per l’uso e conservarle con
cura unitamente al certificato di garanzia, allo scontrino
e, se possibile, alla scatola di cartone con la confezione
interna. Se passate l’apparecchio a terzi, consegnate anche
le istruzioni per l’uso.
• Utilizzare l’apparecchio esclusivamente per scopi privati
e conformemente al tipo di applicazione previsto. Questo
prodotto non è stato concepito ai fini di un impiego in
ambito industriale.
• Non utilizzarlo all’aperto. Proteggerlo dal calore, nonché
dall’esposizione diretta ai raggi solari e dall’umidità (non
immergerlo mai in sostanze liquide) e tenerlo a distanza
da oggetti con spigoli affilati. Non utilizzare l’apparecchio
con le mani umide. Nel caso in cui si bagni o si inumidi-
sca l’apparecchio, staccare immediatamente la spina.
• Disattivare l’apparecchio e staccare sempre la spina
dalla relativa presa (prendendo in mano la spina, non
tirando il cavo) allorché non si utilizza l’apparecchio,
quando si applicano degli accessori oppure nel caso in
cui lo si debba pulire o si siano manifestate anomalie.
• Controllare regolarmente che l’apparecchio e il cavo
non presentino tracce di danneggiamento. In tal caso
l’apparecchio non deve più essere utilizzato.
• Utilizzare esclusivamente accessori originali.
• Per sicurezza tenere l’imballaggio (sacchetto di plastica,
scatola, polistirolo, ecc,) fuori dalla portata dei bambini.
AVVISO:
Non lasciar giocare i bambini piccoli con la pellicola.
Pericolo di soffocamento!
Avvertenze speciali di sicurezza per questo apparecchio
AVVISO: Rischio di lesioni!
• Pericolo di taglio! Il setaccio centrifuga e affilato!
• Se il setaccio rotante e danneggiato, l’apparecchio non funziona.
• Utilizzare sempre il pestello in dotazione. Non inserire dita o
attrezzi nell’apertura di riempimento.
• Scollegare sempre l’apparecchio dall’alimentazione se esso
viene lasciato senza sorveglianza e prima di montaggio, smon-
taggio e pulizia.

PC-AE1156_IM 07.06.18
30
AVVISO: Rischio di lesioni!
• Prima di riporre gli accessori che sono stati spostati durante il
funzionamento, il dispositivo deve essere spento e scollegato
dalla rete elettrica.
• Non toccare mai le parti in movimento dell’apparecchio ed atten-
dere sempre l’arresto.
• Non riparare l’apparecchio da soli. Contattare sempre un tecnico
autorizzato. Se il cavo di alimentazione è danneggiato, farlo so-
stituire dal produttore, dall’agente addetto all’assistenza oppure
da personale qualificato per evitare situazioni pericolose.
• Non permettere ai bambini di utilizzare questo apparecchio.
• Tenere apparecchio e relativo cavo di alimentazione lontani dalla
portata dei bambini.
• Non consentire ai bambini di giocare con l’apparecchio.
• Gli apparecchi possono essere utilizzati da persone con ridotte
capacità fisiche, sensoriali o mentali e mancanza di esperienza e
conoscenza sotto la supervisione o grazie alle istruzioni sull’uso
dell’apparecchio in modo sicuro e quando essi capiscono i peri-
coli potenziali derivanti dall’utilizzo dell’apparecchio.
ATTENZIONE:
Questo dispositivo non è inteso per essere immerse in acqua
durante la pulizia. Osservare le istruzioni che abbiamo incluso nel
capitolo “Pulizia”.
• Non toccare i tasti di sicurezza!
• Non togliere il coperchio mentre in funzione.

PC-AE1156_IM 07.06.18
31
Utilizzo conforme alla destinazione
Questo dispositivo è destinato a produrre succo da verdure
e frutta fresche come ananas, mele, barbabietola rossa,
sedano, cetrioli, carote e pomodori.
Frutta e verdura con buccia commestibile possono essere
inserite nell’apparecchio senza essere sbucciate.
Alimenti contenenti amido, come banane, papaya, avocado,
fichi e mango e frutta e verdure particolarmente dure e
fibrose non devono essere inserite nell’apparecchio.
NOTA:
È difficile effettuare la spremitura di frutta piccola come
frutti di bosco con la centrifuga. Utilizzare uno spremia-
grumi adatto.
Il dispositivo può essere usato solo nel modo descritto in
questo manuale d’uso. Non è destinato ad uso commer-
ciale.
Gli altri usi non sono previsti e possono danneggiare l’appa-
recchio o provocare lesioni personali.
Il produttore non si assume alcuna responsabilita per danni
derivanti da uso improprio dell’apparecchio.
Disimballaggio dell’apparecchio
1. Estrarre l’apparecchio dall’imballaggio.
2. Rimuovere tutti i materiali di imballaggio come pellicole,
materiali di riempimento, supporti cavi e cartone.
3. Controllare che siano presenti tutte le parti.
4. In caso di parti mancanti o danni, on utilizzare l’apparec-
chio. Restituirlo immediatamente al rivenditore.
NOTA:
Possono essere presenti polvere o residui di lavorazione
sull’apparecchio. Pulire l’apparecchio come descritto nella
sezione “Pulizia”.
Nella fornitura
1 Base con motore
1 Coperchio trasparente
1 Pestello
1 Setaccio centrifuga
1 Alloggiamento centrifuga
1 Contenitore residui polpa
1 Caraffa raccogli-succo con schiumatore e coperchio
Elementi di comando
1 Pestello
2 Apertura di riempimento
3 Coperchio trasparente
4 Setaccio centrifuga
5 Alloggiamento centrifuga
6 Beccuccio erogatore regolabile in altezza
7 Chiusure
8 Caraffa raccogli-succo
9 Base con motore
10 Tastierino comandi
11 Contenitore residui polpa
12 Puleggia di azionamento (non amovibile)
13 Meccanismo di chiusura a scatto
Impostazione del dispositivo
Per il montaggio, fare riferimento anche alle figure a pag. 3.
1. Posizionare l’apparecchio in modo tale che il tastierino
comandi sia rivolto verso di sé.
2. Montare l’alloggiamento centrifuga sulla parte superiore
dell’alloggiamento base. L’alloggiamento base presenta
un’altra piccola parte, dove è possibile collocare l’allog-
giamento centrifuga.
3. AVVISO: Pericolo di tagli!
Il setaccio centrifuga è affilato!
Collocare il setaccio centrifuga sulla puleggia di azio-
namento. Premerlo finché non scatta in posizione sulla
puleggia di azionamento.
4. Controllare il setaccio centrifuga!
Controllare che il bordo del setaccio non si stacchi
quando viene applicata tensione.
5. Montare il contenitore di polpa sul lato sinistro. Per
effettuare ciò, tenerlo leggermente al lato per premere
il bordo superiore nell’apertura dell’alloggiamento della
centrifuga.
6. Fissare il coperchio trasparente al di sopra del conteni-
tore polpa.
7. NOTA:
La chiusura anteriore e il coperchio trasparente sono
forniti entrambi di sicura. In tal modo si evita l’accen-
sione accidentale del motore. Controllare che tutti i
componenti siano fissati correttamente; il setaccio
della centrifuga, il coperchio trasparente e le chiusure.
Assicurare il coperchio trasparente utilizzando entrambe
le chiusure. A tale scopo, inserire gli incavi delle
chiusure nei fermi dell’alloggiamento della centrifuga.
Spingere verso il basso le chiusure. Affinché le chiusure
si innestino correttamente negli incavi dell’alloggiamento
della centrifuga devono emettere un rumore udibile.
8. Posizionare la caraffa raccogli-succo (senza schiuma-
tore) in corrispondenza del beccuccio dell’erogatore.
Collegamento elettrico
• Prima di inserire la spina nella presa, controllare che la
tensione nominale corrisponda alla tensione dell’appa-
recchio. Le informazioni sono riportate sulla targhetta
dell’apparecchio.
• Collegare l’apparecchio soltanto a una presa corretta-
mente installata. Il tasto si illumina. Ora l’apparecchio
è pronto per l’uso.

PC-AE1156_IM 07.06.18
32
Funzionamento
Preparazioni
• Lavare la frutta da spremere.
• Tagliare la frutta a pezzi in modo che possa essere
inserita nell’apertura di riempimento.
• Rimuovere semi grandi e stami.
Tasti di funzione
I tasti presenti sull’apparecchio sono tasti touch. Toccare
delicatamente i tasti con un dito per eseguire il funziona-
mento. Ogni volta che si preme un tasto, questo viene
confermato da un segnale acustico.
Livelli di velocità
Premere ripetutamente il tasto per selezionare il livello di
velocità desiderato:
Pomodoro, Melone
Sedano, Agrumi, Cetriolo
Mela, Pera, Pesca
Carota, Aglio, Barbabietola
Melograno, Patata
NOTA:
Durante il funzionamento il livello di velocità non può es-
sere modificato. Premendo il tasto il motore si spegne
automaticamente.
Spremitura
NOTA:
• L’apparecchio deve essere utilizzato per brevi periodi.
Arrestare l’apparecchio per 1 minuto dopo un funziona-
mento prolungato di 3 minuti.
• E’ possibile passare alla modalità a impulsi premendo
il tasto Pulse. Premere per breve tempo il tasto, poi
rilasciare di nuovo.
AVVISO:
Controllare nuovamente che tutti gli accessori funzionino
correttamente prima di accendere l’apparecchio.
1. Accendere l’apparecchio utilizzando il tasto . Il display
e i tasti si accendono. Sul display appare il livello ( ) di
velocità media.
2. Selezionare il livello di velocità desiderata premendo il
tasto .
3. Avviare il motore premendo il tasto Start.
4. Inserire i pezzi di frutta nell’apertura di riempimento e
premerli con il pestello. Nota! Il pestello funge da guida
nell’apertura di riempimento.
5. Il succo scorre sul lato destro dell’alloggiamento. La
polpa viene raccolta nel contenitore polpa. Se l’eroga-
zione del succo aumenta notevolmente, selezionare un
livello di velocità inferiore. Avviare nuovamente il motore
premendo il tasto Start. Applicare una minore pressione
con il pressino.
NOTA:
• Osservare il contenitore succo di frutta. Spegnere l’ap-
parecchio in tempo per non superare il livello max.
• Bacche e agrumi (come uva spina, uva, arance) ven-
gono di solito pressati e non spremuti.
• Quando si spreme questo tipo di frutti particolarmente
succosi, parti di succo possono essere spruzzate fuori
dal contenitore. In questo caso si consiglia di vuotare il
contenitore più spesso.
Spegnimento e smontaggio
1. Premere il tasto Start per spegnere il motore.
2. Quindi impostare l’apparecchio in modalità standby
utilizzando il tasto .
3. Scollegare l’apparecchio dall’alimentazione.
4. Posizionare la caraffa raccogli-succo a parte e aprire
entrambe le chiusure.
5. Rimuovere il coperchio trasparente.
6. Togliere il contenitore di polpa.
7. Rimuovere il setaccio centrifuga con il relative allog-
giamento. Questa operazione consente di raggiungere
la parte inferiore della flangia dell’alloggiamento della
centrifuga e la parte inferiore del beccuccio di eroga-
zione. Spostare alternativamente su entrambi i lati
verso l’alto l’alloggiamento della centrifuga. Rimuovere
l’alloggiamento tirandolo gradualmente verso l’alto. Se
necessario, premere verso il basso la base del disposi-
tivo utilizzando l’anulare il mignolo e il pollice.
8. AVVISO: Pericolo di tagli!
Il setaccio centrifuga ha lame affiliate!
Sollevarlo solo sul bordo più esterno.
Estrarre il setaccio centrifuga dall’alloggiamento cen-
trifuga.
9. Posizionare lo schiumatore nella caraffa raccogli-succo.
Prestare attenzione alle guide presenti nella caraffa.
In questo modo si evita la fuoriuscita della schiuma
durante il versamento del succo.

PC-AE1156_IM 07.06.18
33
Pulizia
AVVISO:
• Prima di effettuare la pulizia, scollegare l’apparecchio dall’ali-
mentazione.
• Non immergere mai l’alloggiamento motore in acqua per non
provocare scosse elettriche o incendi.
• Il setaccio è estremamente affilato! Rischio di lesioni!
ATTENZIONE:
• Non usare pagliette o altri oggetti abrasivi.
• Per la pulizia non usare detersivi forti o abrasivi.
• Non lasciar seccare la polpa sul setaccio centrifuga. In
caso contrario, il setaccio potrebbe intasarsi.
Setaccio centrifuga
AVVISO: Pericolo di tagli!
Il setaccio centrifuga è
affilato!
Rimuovere i residui dalla
centrifuga subito dopo aver
utilizzato l’apparecchio. Utilizzare
una spazzola per il lavaggio di
stoviglie.
Pestello, coperchio trasparente, alloggiamento centri-
fuga, contenitore residui polpa, caraffa raccogli-succo
con schiumatore e coperchio
• Pulire i componenti mettendoli a mollo.
• Risciacquare con acqua pulita.
• Assemblare solo il dispositivo se tutte le parti sono state
asciugate.
Base con motore
Pulire la base del dispositivo con un panno leggermente
umido.
Conservazione
• Pulire l’apparecchio come indicato. Lasciar asciugare
completamente gli accessori.
• Si consiglia di conservare l’apparecchio nell’imballaggio
originale quando non lo si utilizza per periodi prolungati.
• Rimessare sempre l’apparecchio in un luogo asciutto e
ben ventilato al di fuori della portata dei bambini.
Ricerca dei guasti
Anomalia Possibile causa Rimedio
L’apparec-
chio non
funziona.
L’apparecchio non è
collegato all’alimen-
tazione.
Controllare la presa
inserendovi la spina
di un altro apparec-
chio.
Inserire la spina
correttamente.
Controllare il fusibile
domestico.
Le chiusure non
sono chiuse corret-
tamente.
Chiudere le chiusure.
L’apparecchio è
difettoso.
Contattare il centro
assistenza o una
tecnico qualificato.
Quantità di
succo in-
sufficiente.
Tipo errato di frutto. Selezionare un frutto
in grado di produrre
una quantità mag-
giore di succo.
Non è possibile
estrarre il frutto di
frutti di bosco piccoli
nella centrifuga.
Troppi residui nel
setaccio centrifuga.
Pulire il setaccio
centrifuga.
Rumore
forte e non
bilanciato
durante il
funziona-
mento.
Montaggio errato. Controllare che tutti i
componenti siano in-
stallati correttamente.
Troppi residui nel
setaccio centrifuga.
Quando si spremono
grandi quantità
di frutta, pulire il
setaccio centrifuga
tra un funzionamento
e l’altro.

PC-AE1156_IM 07.06.18
34
Dati tecnici
Modello: ...............................................................PC-AE 1156
Alimentazione:.....................................220 - 240 V~ 50 / 60 Hz
Consumo di energia: ..................................................... 800 W
Classe di protezione: ...........................................................
Peso netto: .............................................................ca. 3,86 kg
Si riserva il diritto di apportare modifiche tecniche e di
design nel corso dello sviluppo del prodotto.
Questo dispositivo risponde a tutte le direttive della CE,
come la direttiva sulla compatibilità elettromagnetica e
quella sul basso voltaggio ed è prodotto secondo le più
recenti norme di sicurezza.
Smaltimento
Significato del simbolo “Eliminazione”
Salvaguardare l’ambiente, gli elettrodomestici
non vanno eliminati come rifiuti domestici.
Per l’eliminazione degli elettrodomestici, fare
uso dei posti di raccolta previsti per questo tipo
e porre quegli elettrodomestici che non sono
più in uso.
Si contribuisce così ad evitare un effetto potenziale sull’am-
biente e sulla salute, dovuto magari ad una eliminazione
sbagliata.
Questo significa un contributo personale alla riutilizzazione,
al riciclaggio e altre forme di utilizzazione di elettrodomestici
ed apparecchi elettronici usati.
Si possono trovare le corrispondenti informazioni sugli ap-
positi luoghi di raccolta, nelle amministrazioni dei comuni.

PC-AE1156_IM 07.06.18
35
Instruction Manual
Thank you for choosing our product. We hope you will enjoy
using the appliance.
Symbols in these Instruction Manual
Important safety information is explicitly marked. Please
follow these instructions exactly in order to avoid injuries
and damages to the appliance:
WARNING:
Warns against health hazards and indicates possible risks
of injury.
CAUTION:
Indicates possible damage to the appliance or to other
objects.
NOTE: Highlights tips and information for you.
Contents
Overview of the Components ...............................................3
General Notes ..................................................................... 35
Special Safety Instructions for this Appliance .....................35
Designated Use ..................................................................36
Unpacking the Appliance ....................................................37
Scope of Delivery ................................................................ 37
Overview of the Components .............................................37
Setting Up of the Appliance ................................................37
Electric Connection ............................................................. 37
Operation ............................................................................37
Cleaning .............................................................................. 38
Storage ................................................................................39
Troubleshooting ..................................................................39
Technical Data.....................................................................39
Disposal...............................................................................39
General Notes
Read the operating instructions carefully before putting the
appliance into operation and keep the instructions including
the warranty, the receipt and, if possible, the box with the
internal packing. If you give this appliance to other people,
please also pass on the operating instructions.
• The appliance is designed exclusively for private use and
for the envisaged purpose. This appliance is not t for
commercial use.
• Do not use it outdoors. Keep it away from sources of
heat, direct sunlight, humidity (never dip it into any
liquid) and sharp edges. Do not use the appliance with
wet hands. If the appliance is humid or wet, unplug it
immediately.
• When cleaning or putting it away, switch off the appliance
and always pull out the plug from the socket (pull the
plug itself, not the lead) if the appliance is not being used
and remove the attached accessories.
• The appliance and the mains lead have to be checked
regularly for signs of damage. If damage is found the
appliance must not be used.
• Use only original spare parts.
• In order to ensure your children’s safety, please keep all
packaging (plastic bags, boxes, polystyrene etc.) out of
their reach.
WARNING:
Do not allow small children to play with the foil. There
is a danger of suffocation!
Special Safety Instructions for this Appliance
WARNING: Risk of Injury!
• Risk of cuts! The centrifuge sieve is sharp!
• If the rotating sieve is damaged, the appliance shall not be oper-
ated.
• Always use the supplied tamper. Do not insert your ngers or
tools into the ller opening.
• Always disconnect the appliance from the supply if it is left unat-
tended and before assembling, disassembling or cleaning.

PC-AE1156_IM 07.06.18
36
WARNING: Risk of Injury!
• Prior to replacing accessories or attachments that are moved
during operation, the appliance must be shut off and separated
from the mains.
• Do not touch any moving parts of the appliance and always wait
for it to stop.
• Do not repair the appliance by yourself. Always contact an
authorized technician. If the supply cord is damaged, it must be
replaced by the manufacturer, its service agent or similarly quali-
ed persons in order to avoid a hazard.
• This appliance shall not be used by children.
• Keep the appliance and its cord out of reach of children.
• Children shall not play with the appliance.
• Appliances can be used by persons with reduced physical, sen-
sory or mental capabilities or lack of experience and knowledge
if they have been given supervision or instruction concerning
use of the appliance in a safe way and if they understand the
hazards involved.
CAUTION:
This appliance is not intended to be immersed in water during
cleaning. Please observe the instructions that we have included in
the chapter “Cleaning”.
• Do not manipulate any of the safety switches.
• Do not remove the lid during operation.
Designated Use
This appliance is designed for the extraction of juice from
fresh vegetables and fruits such as pineapples, apples,
beetroot, celery, cucumbers, carrots and tomatoes.
As long as peelings are edible, they also can be processed.
Food containing starch, like bananas, papayas, avocados,
gs, and mangos, as well as especially hard and brous
fruit and vegetables, should not be processed with the
appliance.
NOTE:
Juice extraction from small fruit like for example berries
with the centrifuge principle is difcult. You should use a
suitable berry press for them.

PC-AE1156_IM 07.06.18
37
The appliance may only be used in the manner described
in this operating manual. You may not use it for commercial
purposes.
Any other use shall be considered as not intended use and
can lead to material damage or even personal injury.
The manufacturer shall not be liable for damages caused by
not intended use.
Unpacking the Appliance
1. Remove the appliance from its packaging.
2. Remove all packaging materials like foils, lling materi-
als, cable holders, and carton packaging.
3. Check the scope of deliveries for completeness.
4. If there are missing parts or obvious damage, do not use
the appliance. Return it to your retailer immediately.
NOTE:
There may still be dust or production remains on the
appliance. We recommend that you clean the appliance
as described under “Cleaning”.
Scope of Delivery
1 Base appliance with motor
1 Transparent cover
1 Tamper
1 Centrifuge sieve
1 Centrifuge housing
1 Pulp container
1 Juice jug with skimmer and lid
Overview of the Components
1 Tamper
2 Filler opening
3 Transparent cover
4 Centrifugal sieve
5 Centrifuge housing
6 Height-adjustable spout
7 Closures
8 Juice jug
9 Base appliance with motor
10 Control panel
11 Pulp container
12 Drive wheel (not detachable)
13 Latch
Setting Up of the Appliance
For assembly, also refer to the illustrations on page 3.
1. Place the appliance in such away that the control panel
is facing you.
2. Attach the centrifuge housing on top of the base hous-
ing. The base housing has a recess. Here the spout of
the centrifuge housing must be placed.
3. WARNING: Risk of Cuts!
The centrifugal sieve is sharp!
Place the centrifugal sieve on top of the drive wheel.
Press it down. It clicks in place on the drive wheel.
4. Check the centrifugal sieve!
Feel under the sieve edge. It should not loosen under
slight tension.
5. Attach the pulp container on the left side. To do so, hold
it slightly sideways to press the upper edge into the
shroud of the centrifuge housing.
6. Attach the transparent cover. It reaches all the way over
the pulp container.
7. NOTE:
The front closure and the transparent cover are each
provided with a safety switch. These prevent acci-
dental motor start. Check the correct attachment of
all components, the centrifugal sieve, the transparent
cover and the closures.
Secure the transparent cover using both of the closures.
To do this, insert the recesses of the closures into the
locks on the centrifuge housing. Push down the clo-
sures. They must audibly engage.
8. Place the juice jug (without skimmer) at the spout.
Electric Connection
• Before inserting the power plug into the outlet, check
that the mains voltage to be used matches that of the
appliance. You can nd the required information on the
nameplate.
• Connect the appliance only to a correctly installed safety
socket. The button is illuminated. The appliance is
ready for use.
Operation
Preparations
• Wash the fruit to be processed.
• Cut the fruit in pieces to t through the ller opening.
• Remove large pips and stems.
Function Buttons
The buttons on the appliance are touch keys. Gently touch
the buttons with a nger to execute the function. Whenever
a button is pressed, it will be conrmed by a beep sound.

PC-AE1156_IM 07.06.18
38
Speed Levels
Press the button repeatedly to select the desired speed
level:
Tomato, Melon
Celery, Citrus Fruits, Cucumber
Apple, Pear, Peach
Carrot, Garlic, Beet
Pomegranate, Potato
NOTE:
During operation, the speed level can not be changed.
When pressing the button the motor will switch off
automatically.
Extracting Juice
NOTE:
•
The appliance is intended for short-term use. Stop the
appliance for 1 minute after operating for 3 minutes.
•
You can enter a pulse mode by pressing the Pulse
button. Press the button shortly, then release it again.
WARNING:
Check all accessories again for proper attachment before
switching the appliance on.
1. Turn the appliance on by using the button. The
display and buttons light up. The middle speed level ( )
appears in the display.
2. Select the desired speed level by pressing the button.
3. Start the motor by pressing the Start button.
4. Insert the fruit pieces in the ller opening and push them
down with the tamper. Please note! The tamper has a
guide way in the ller opening.
5. The juice ows out at the right side of the housing. The
pulp is collected in the pulp container. If the discharge
of juice is greatly increased, select a lower speed level.
Start the motor again by pressing the Start button. Apply
less pressure with the tamper.
NOTE:
• Observe the juice jug. Stop operation in time to prevent
overowing.
• Berries and citrus fruits (such as gooseberries, grapes,
oranges) are usually not juiced but pressed.
• When juicing these fruits with their high juice content,
splashing of juice from the area of the pulp container
may occur. In this case, we recommend that the pulp
container is emptied more frequently.
Stop Operation and Disassembly
1. Press the Start button to switch off the motor.
2. Then switch the appliance into standby mode using the
button.
3. Disconnect from mains power supply.
4. Put the juice jug aside and open both of the closures.
5. Remove the transparent cover.
6. Remove the pulp container.
7. Remove the centrifugal sieve with the centrifuge
housing. You can do this by reaching under the ange of
the centrifugal housing and under the spout. Move the
centrifugal housing up alternately on each side. Remove
it by pulling it gradually upwards. If necessary, press
down the base appliance using the ring ngers and
small ngers.
8. WARNING: Risk of Cuts!
The centrifugal sieve has sharp knives!
Only lift it on its outer edge.
Lift the centrifugal sieve out of the centrifuge housing.
9. Place the skimmer into the juice jug. Pay attention to the
guides in the juice jug. This prevents spilling the foam
while pouring out the juice.
Cleaning
WARNING:
• Before cleaning always disconnect from mains power supply.
• Never immerse the motor housing in water. This can lead to
electric shock or re.
• The centrifuge sieve is very sharp! Risk of injury!

PC-AE1156_IM 07.06.18
39
CAUTION:
• Do not use a wire brush or any abrasive items.
• Do not use any acidic or abrasive detergents.
• Do not leave the pulp to dry on the centrifugal sieve.
The ne pores will clog and become useless.
Centrifuge Sieve
WARNING: Risk of Cuts!
The centrifuge sieve is
sharp!
Remove residues in the centrif-
ugal sieve immediately under
running water. Use a dishwash-
ing brush.
Tamper, Transparent Cover, Centrifuge Housing,
Pulp Container, Juice Jug with Skimmer and Lid
• Clean these components in a rinsing bath.
• Rinse with clean water.
• Only assemble the appliance when all parts have been
dried.
Base Appliance with Motor
Wipe the base appliance with a slightly damp cloth.
Storage
• Clean the appliance as described. Let the accessories
dry completely.
• We recommend that you store the appliance in its
original packaging when it is not to be used for a longer
period.
• Always store the appliance at a well ventilated and dry
place outside the reach of children.
Troubleshooting
Malfunction Possible Cause Remedy
The appli-
ance does
not function.
The appliance is
not supplied with
power.
Check the outlet with a
different appliance.
Insert the power plug
correctly.
Check your domestic
fuse.
The closures
are not properly
closed.
Close the closures.
The appliance is
defective.
Contact our service or a
specialist.
Malfunction Possible Cause Remedy
The juice
quantity is
small.
Wrong fruit type. Select a fruit type pro-
ducing more juice.
Juice cannot be ex-
tracted from small ber-
ries in the centrifuge.
Too much
residue in the
centrifuge sieve.
Clean the centrifuge
sieve.
Loud noise
and imbal-
ance during
operation.
Bad assembly. Check that all
components have been
installed correctly.
Too much
residue in the
centrifuge sieve.
When processing
larger quantities clean
the centrifugal sieve
in-between.
Technical Data
Model:..................................................................PC-AE 1156
Power supply:......................................220 - 240 V~ 50 / 60 Hz
Power consumption: .....................................................800 W
Protection class: ...................................................................
Net weight: ..................................................... approx. 3.86 kg
The right to make technical and design modications in
the course of continuous product development remains
reserved.
This appliance complies with all current CE directives,
such as electromagnetic compatibility and low voltage
directive and is manufactured according to the latest safety
regulations.
Disposal
Meaning of the “Dustbin” Symbol
Protect our environment: do not dispose of
electrical equipment in the domestic waste.
Please return any electrical equipment that
you will no longer use to the collection points
provided for their disposal.
This helps avoid the potential effects of incorrect disposal
on the environment and human health.
This will contribute to the recycling and other forms of re-uti-
lisation of electrical and electronic equipment.
Information concerning where the equipment can be dis-
posed of can be obtained from your local authority.

PC-AE1156_IM 07.06.18
40
Instrukcja obsługi
Dziękujemy za zakup naszego produktu. Życzymy zadowo-
lenia z użytkowania urządzenia.
Symbole użyte w tej instrukcji obsługi
Ważne informacje dotyczące bezpieczeństwa są wyraźnie
oznakowane. Należy postępować ściśle z tymi instrukcjami
w celu uniknięcia obrażeń ciała i uszkodzenia urządzenia:
OSTRZEŻENIE:
Słowo to ostrzega przed zagrożeniami dla zdrowia i wska-
zuje na istnienie ryzyka uszkodzenia ciała.
UWAGA:
Wskazuje na niebezpieczeństwo uszkodzenia urządzenia
lub innych przedmiotów.
WSKAZÓWKA:
Podświetlone wskazówki oraz informacje.
Spis treści
Przegląd elementów obsługi .................................................3
Ogólne uwagi ......................................................................40
Specjalne wskazówki bezpieczeństwa dla urządzenia ...... 40
Użytkowanie zgodnie z przeznaczeniem ...........................42
Wypakowanie urządzenia ................................................... 42
Zakres dostawy ................................................................... 42
Przegląd elementów obsługi ............................................... 42
Montaż urządzenia..............................................................42
Połączenie elektryczne .......................................................43
Obsługa ............................................................................... 43
Czyszczenie ........................................................................ 44
Przechowywanie ................................................................. 44
Rozwiązywanie problemów ................................................44
Dane techniczne .................................................................45
Warunki gwarancji ............................................................... 45
Usuwanie ............................................................................45
Ogólne uwagi
Przed uruchomieniem urządzenia proszę bardzo dokładnie
przeczytać instrukcję obsługi. Proszę zachować ją wraz
z kartą gwarancyjną, paragonem i w miarę możliwości rów-
nież kartonem z opakowaniem wewnętrznym. Przekazując
urządzenie innej osobie, oddaj jej także instrukcję obsługi.
• Proszę wykorzystywać urządzenie jedynie dla prywat-
nego celu, jaki został przewidziany dla urządzenia. Urzą-
dzenie to nie zostało przewidziane do użytku w ramach
działalności gospodarczej.
• Proszę nie korzystać z urządzenia na zewnątrz. Proszę
trzymać urządzenie z daleka od ciepła, bezpośredniego
promieniowania słonecznego, wilgoci (w żadnym
wypadku nie zanurzać w substancjach płynnych) oraz
ostrych krawędzi. Proszę nie obsługiwać urządzenia
wilgotnymi dłońmi. Jeżeli urządzenie jest wilgotne lub
mokre, proszę natychmiast wyciągnąć wtyczkę.
• Jeżeli nie korzystacie Państwo z urządzenia, jeżeli
chcecie Państwo zamontować jakieś akcesoria, w celu
wyczyszczenia lub w przypadku jakichkolwiek zakłóceń,
proszę zawsze wyłączyć urządzenie i wyjąć wtyczkę
z gniazdka (należy ciągnąć za wtyczkę, nie za przewód).
• Należy regularnie sprawdzać, czy urządzenie i kabel
sieciowy nie są uszkodzone. W razie uszkodzenia należy
przestać korzystać z urządzenia.
• Proszę stosować tylko oryginalne akcesoria.
• Dla bezpieczeństwa dzieci proszę nie zostawiać swo-
bodnie dostępnych części opakowania (torby plastikowe,
kartony, styropian itp.).
OSTRZEŻENIE:
Nie pozwalaj dzieciom bawić się folią. Niebezpieczeń-
stwo uduszenia!
Specjalne wskazówki bezpieczeństwa dla urządzenia
OSTRZEŻENIE: Ryzyko obrażeń!
• Ryzyko skaleczenia! Sitko wirujące jest ostre!
• Jeśli sitko wirujące jest uszkodzone, nie należy włączać urzą-
dzenia.
• Należy zawsze używać dostarczonego ubijaka. Do otworu do
napełniania nie należy wkładać palców ani innych przedmiotów.

PC-AE1156_IM 07.06.18
41
OSTRZEŻENIE: Ryzyko obrażeń!
• Zawsze odłączać urządzenie od zasilania, kiedy jest pozosta-
wione bez nadzoru i przed montażem, demontażem lub czysz-
czeniem.
• Przed wymianą akcesoriów lub końcówek, które przesunęły
się podczas pracy urządzenie należy wyłączyć i wyjąć wtyczkę
z gniazdka sieciowego.
• Nie dotykać części będących w ruchu; zaczekać, aż wszystkie
elementy przestaną się poruszać.
• Nie naprawiać urządzenia samodzielnie. Skontaktować się
z pracownikiem autoryzowanego serwisu. Jeśli przewód zasila-
nia jest uszkodzony, należy go wymienić u producenta, przed-
stawiciela serwisu lub podobnie wykwalikowanej osoby, aby
uniknąć zagrożenia.
• Dzieci nie mogą korzystać z urządzenia.
• Trzymać urządzenie i przewód poza zasięgiem dzieci.
• Dzieci nie mogą bawić się urządzeniem.
• Urządzenia mogą być użytkowane przez osoby z ograniczonymi
zdolnościami zycznymi, czuciowymi lub mentalnymi oraz bez
doświadczenia i wiedzy w zakresie użytkowania, jeśli znajdują
się pod nadzorem lub zostały poinstruowane odnośnie użytko-
wania urządzenia w bezpieczny sposób i rozumieją związane
z tym ryzyko.
UWAGA:
Tego urządzenia nie wolno zanurzać w wodzie podczas czysz-
czenia. Prosimy sprawdzić instrukcje znajdujące się w rozdziale
„Czyszczenie”.
• Prosimy nie manipulować przy wyłącznikach bezpieczeństwa!
• Prosimy nie zdejmować pokrywy w czasie pracy.

PC-AE1156_IM 07.06.18
42
Użytkowanie zgodnie z przeznaczeniem
Urządzenie to jest przeznaczone do wyciskania soku ze
świeżych warzyw i owoców, takich jak ananasy, jabłka,
buraki, seler, ogórki, marchewki i pomidory.
Przetwarzać można także nadające się do jedzenia obierki.
Za pomocą urządzenia nie należy przetwarzać produktów
zawierających skrobię, takich jak banany, papaja, awokado,
gi i mango, a także bardzo twardych i włóknistych owoców
oraz warzyw.
WSKAZÓWKA:
Wyciskanie soku metodą wirówkową z małych owoców,
takich jak jagody, jest trudne. W przypadku tego rodzaju
owoców należy użyć odpowiedniej wyciskarki do jagód.
Z urządzenia należy korzystać wyłącznie w sposób opisany
w niniejszej instrukcji obsługi. Nie należy go używać do
celów komercyjnych.
Wszelkie inne sposoby użytkowania nie są zamierzone
i mogą prowadzić do uszkodzenia mienia lub nawet obra-
żeń ciała.
Producent nie ponosi żadnej odpowiedzialności za
uszkodzenia spowodowane użytkowaniem niezgodnym
z przeznaczeniem.
Wypakowanie urządzenia
1. Wyjmij urządzenie z opakowania.
2. Usuń wszystkie elementy opakowania, takie jak folia,
materiał wypełniający, zaciski do kabli i karton.
3. Sprawdź, czy w dostarczonym opakowaniu znajdowały
się wszystkie elementy.
4. Jeśli brakuje części lub widoczne są uszkodzenia, nie
wolno używać urządzenia. Natychmiast zwrócić je do
sprzedawcy.
WSKAZÓWKA:
Na urządzeniu może występować osad produkcyjny lub
kurz. Zalecane jest wyczyszczenie urządzenia zgodnie
z rozdziałem „Czyszczenie”.
Zakres dostawy
1 urządzenie główne z silnikiem
1 przezroczysta osłona
1 ubijak
1 sitko wirujące
1 obudowa wirówki
1 pojemnik na miąższ
1 dzbanek na sok z łyżką i pokrywką
Przegląd elementów obsługi
1 Ubijak
2 Otwór do napełniania
3 Przezroczysta osłona
4 Sitko wirujące
5 Obudowa wirówki
6 Dziobek z regulowaną wysokością
7 Osłony
8 Dzbanek na sok
9 Urządzenie główne z silnikiem
10 Panel kontrolny
11 Pojemnik na miąższ
12 Koło napędowe (zamocowane na stałe)
13 Zatrzask
Montaż urządzenia
Podczas montażu należy także odnieść się do rysunku na
stronie 3.
1. Umieścić urządzenie w taki sposób, aby panel kontrolny
był skierowany do ciebie.
2. Zamocuj obudowę wirówki na górze urządzenia
głównego. W urządzeniu głównym znajduje się wnęka.
Należy w niej umieścić dziobek obudowy wirówki.
3. OSTRZEŻENIE: Ryzyko skaleczenia!
Sitko wirujące jest ostre!
Umieść sitko wirujące na górze koła napędowego. Wci-
śnij je. Dźwięk kliknięcia oznacza zabezpieczenie sitka
na kole napędowym.
4. Sprawdź sitko wirujące!
Dotknij krawędzi sitka. Sitko nie powinno się poluzować
pod niewielkim naciskiem.
5. Zamocuj pojemnik na miąższ z lewej strony. Aby to
zrobić, przechyl go nieco na bok, aby wsunąć górną
krawędź pod osłonę obudowy wirówki.
6. Zamocuj przezroczystą osłonę. Zasłania ona w całości
pojemnik na miąższ.
7. WSKAZÓWKA:
Przednia osłona oraz przezroczysta obudowa wyposa-
żone są w przełącznik bezpieczeństwa. Zapobiega to
przypadkowemu uruchomieniu silnika. Należy spraw-
dzić prawidłowe zamocowanie wszystkich części, sitka
wirującego, przezroczystej obudowy oraz osłon.
Zabezpiecz przezroczystą obudowę za pomocą obu
osłon. W tym celu włóż otwory osłon w zaciski na
obrotowej obudowie. Dociśnij osłony. Muszą zatrzasnąć
się słyszalnie.
8. Umieść dzbanek na sok (bez łyżki) na wylewie.

PC-AE1156_IM 07.06.18
43
Połączenie elektryczne
• Przed podłączeniem wtyczki zasilającej do gniazdka
sprawdź, czy napięcie sieci jest zgodne z napięciem
urządzenia. Wymagane informacje można znaleźć na
tabliczce znamionowej.
• Podłącz urządzenie wyłącznie do prawidłowo zainsta-
lowanego i zabezpieczonego gniazdka elektrycznego.
Przycisk podświetla się. Urządzenie jest gotowe do
użycia.
Obsługa
Przygotowanie
• Owoce, które będą przetwarzane, należy najpierw umyć.
• Owoce należy pokroić na kawałki pasujące do otworu do
napełniania.
• Należy usunąć większe pestki i szypułki.
Przyciski funkcji
Przyciski na urządzeniu to przyciski dotykowe. Należy lekko
palcem dotykać przyciski, aby uruchomić funkcję. Każde
naciśnięcie przycisku zostanie potwierdzone sygnałem
dźwiękowym.
Poziomy prędkości
Naciskaj przyciski kilkakrotnie w celu wyboru żądanego
poziomu prędkości:
Pomidor, Melon
Seler, Owoce cytrusowe, Ogórek
Jabłko, Gruszka, Brzoskwinia
Marchew, Czosnek, Burak
Granat, Ziemniak
WSKAZÓWKA:
Podczas pracy nie można zmienić poziomu prędkości.
Kiedy naciśniemy przycisk silnik wyłączy się automa-
tycznie.
Wyciskanie soku
WSKAZÓWKA:
• Urządzenie jest przeznaczone do krótkotrwałego
używania. Urządzenie zatrzymać na 1 minutę po
3 minutach jego pracy.
• Można uruchomić tryb impulsowy naciskając przycisk
Pulse. Naciśnij krótko przycisk, a następnie zwolnij go.
OSTRZEŻENIE:
Przed włączeniem urządzenia należy jeszcze raz spraw-
dzić prawidłowe zamocowanie wszystkich akcesoriów.
1. Włącz urządzenie za pomocą przycisku . Zaświeci się
ekran oraz przyciski. Środkowy poziom prędkości ( )
pojawi się na wyświetlaczu.
2. Wybierz żądany poziom prędkości naciskając przycisk
.
3. Uruchom silnik naciskając przycisk Start.
4. Włóż kawałki owoców do otworu do napełniania i wciśnij
je za pomocą ubijaka. Uwaga! W otworze do napełnia-
nia znajduje się prowadnica ubijaka.
5. Sok zacznie spływać z prawej strony obudowy. Miąższ
będzie się gromadził w pojemniku na miąższ. Jeśli
wylewa się za dużo płynu, wybierz niższą prędkość.
Uruchom silnik ponownie naciskając przycisk Start.
Mniej naciskaj ubijak.
WSKAZÓWKA:
• Należy patrzeć na dzbanek na sok. Urządzenie należy
wyłączyć w odpowiednim momencie, aby uniknąć
przelania.
• Jagody oraz owoce cytrusowe (jak agrest, winogrona,
pomarańcze) są najczęściej wyciskane w celu uzyska-
nia soku.
• Kiedy wciskamy sok z owoców o wysokiej zawartości
soku, istnieje możliwość rozpryskania go z pojemnika
na pozostałości. W tym przypadku zalecamy częstsze
opróżnianie pojemnika z pozostałościami.
Zatrzymanie działania i demontaż
1. Naciskaj przycisk Start w celu wyłączenia silnika.
2. Potem ustaw urządzenie w trybie czuwania za pomocą
przycisku .
3. Odłącz urządzenie od zasilania.
4. Umieść dzbanek na sok obok i otwórz obie osłony.
5. Zdejmij przezroczystą osłonę.
6. Wyjmij pojemnik na miąższ.
7. Zdejmij sitko wirujące z obudową wirówki. Można to
zrobić dochodząc do kołnierza obudowy obrotowej i od
dziobkiem urządzenia. Przesuń obudowę obrotową
naprzemiennie na każdej stronie. Wyjmij ją ciągnąc
stopniowo do góry. W razie potrzeby dociśnij bazowe
urządzenie za pomocą palca serdecznego oraz małego.
8. OSTRZEŻENIE: Ryzyko skaleczenia!
Sitko wirujące ma ostre ostrza!
Można wyjmować, trzymając wyłącznie za ze-
wnętrzną krawędź.
Zdejmij sitko wirujące z obudowy wirówki.
9. Umieścić łyżkę w dzbanku na sok. Zwróć uwagę na
prowadnice w dzbanku. Zapobiega to rozlewaniu piany
podczas wylewania soku.

PC-AE1156_IM 07.06.18
44
Czyszczenie
OSTRZEŻENIE:
• Przed rozpoczęciem czyszczenia urządzenie należy zawsze
odłączyć od zasilania.
• Obudowy silnika nie należy nigdy zanurzać w wodzie. Może to
prowadzić do porażenia prądem lub pożaru.
• Sitko wirówki jest bardzo ostre! Ryzyko obrażeń!
UWAGA:
• Nie używaj szczotki drucianej ani innych podobnych
przedmiotów.
• Nie używaj ostrych lub ściernych środków czyszczą-
cych.
• Nie należy dopuszczać do zaschnięcia miąższu na
sitku wirującym. Niewielkie otwory zostaną zabloko-
wane i staną się bezużyteczne.
Sitko wirujące
OSTRZEŻENIE: Ryzyko
skaleczenia!
Sitko wirujące jest ostre!
Resztki pozostałe na sitku wi-
rującym należy usuwać od razu
pod bieżącą wodą. Można użyć
szczotki do zmywania naczyń.
Ubijak, przezroczysta osłona, obudowa wirówki,
pojemnik na miąższ, dzbanek na sok z łyżką i pokrywką
• Części te należy czyścić w kąpieli płuczącej.
• Następnie należy je wypłukać w czystej wodzie.
• Urządzenie można składać wyłącznie po wyschnięciu
wszystkich jego części.
Urządzenie główne z silnikiem
Wytrzeć urządzenie bazowe delikatnie wilgotną szmatką.
Przechowywanie
• Urządzenie należy wyczyścić zgodnie z opisem. Akceso-
ria należy pozostawić do całkowitego wyschnięcia.
• W przypadku dłuższych okresów nieużywania zalecane
jest przechowywanie urządzenia w oryginalnym opako-
waniu.
• Urządzenie należy zawsze przechowywać w odpowied-
nio wentylowanym i suchym miejscu, poza zasięgiem
dzieci.
Rozwiązywanie problemów
Usterka Możliwa przyczyna Rozwiązanie
Urządzenie
nie działa.
Urządzenie nie
zostało podłączone
do zasilania.
Sprawdź działanie
gniazdka przy użyciu
innego urządzenia.
Włóż prawidłowo
wtyczkę zasilającą.
Sprawdź bezpieczniki
w instalacji domowej.
Osłony nie są odpo-
wiednio zamknięte.
Zamknąć osłony
Urządzenie jest
wadliwe.
Skontaktuj się z ser-
wisem lub specjalistą.
Wytwa-
rzana jest
mała ilość
soku.
Użyto nieodpo-
wiedniego rodzaju
owocu.
Wybierz rodzaj
owocu, z którego
można wycisnąć
więcej soku.
Za pomocą sokowi-
rówki nie należy wy-
ciskać soku z małych
jagód.
Na sitku wirującym
znajduje się zbyt
dużo osadu.
Wyczyść sitko
wirujące.
Głośny
hałas i brak
równomier-
nej pracy.
Nieprawidłowy
montaż.
Sprawdź, czy
wszystkie części
zostały prawidłowo
zamocowane.
byt dużo osadu na
sitku wirującym.
W przypadku prze-
twarzania większych
ilości należy w trakcie
pracy od czasu do
czasu wyczyścić
sitko wirujące.

PC-AE1156_IM 07.06.18
45
Dane techniczne
Model:..................................................................PC-AE 1156
Napięcie zasilające: ............................220 - 240 V~ 50 / 60 Hz
Pobór mocy: .................................................................. 800 W
Stopień ochrony: ..................................................................
Masa netto: ............................................................ok. 3,86 kg
Zastrzegamy sobie prawo wprowadzania zmian technicz-
nych i projektowych w trakcie ciągłego rozwoju produktu.
Urządzenie jest zgodne z aktualnymi dyrektywami CE,
dotyczącymi zgodności elektromagnetycznej czy niskiego
napięcia i produkowane jest zgodnie z najnowszymi przepi-
sami bezpieczeństwa.
Warunki gwarancji
Przyznajemy 24 miesiące gwarancji na produkt licząc od
daty zakupu.
W tym okresie będziemy bezpłatnie usuwać w terminie
14 dni od daty dostarczenia wadliwego sprzętu z kartą
gwarancyjną do miejsca zakupu wszystkie uszkodzenia
powstałe w tym urządzeniu na skutek wady materiałów
lub wadliwego wykonania, naprawiając oraz wymieniając
wadliwe części lub (jeśli uznamy za stosowne) wymieniając
całe urządzenie na nowe.
Sprzęt do naprawy powinien być dostarczony w komplecie
wraz z dowodem zakupu oraz z ważną kartą gwarancyjną
do sprzedawcy w miarę możliwości w oryginalnym opako-
waniu lub innym odpowiednim dla zabezpieczenia przed
uszkodzeniem. W razie braku kompletnego opakowania fa-
brycznego, ryzyko uszkodzenia sprzętu podczas transportu
do i z miejsca zakupu ponosi reklamujący.
Naprawa gwarancyjna nie dotyczy czynności przewidzia-
nych w instrukcji obsługi, do wykonania których zobowią-
zany jest użytkownik we własnym zakresie i na własny
koszt.
Gwarancja nie obejmuje:
• mechanicznych, termicznych, chemicznych uszkodzeń
sprzętu i wywołanych nimi wad,
• uszkodzeń powstałych w wyniku działania sił zewnętrz-
nych takich jak wyładowania atmosferyczne, zmiana
napięcia zasilania i innych zdarzeń losowych,
• nieprawidłowego ustawienia wartości napięcia elektrycz-
nego, zasilanie z nieodpowiedniego gniazda zasilania,
• sznurów połączeniowych, sieciowych, żarówek, baterii,
akumulatorów,
• uszkodzeń wyrobu powstałych w wyniku niewłaściwego
lub niezgodnego z instrukcją jego użytkowania, przecho-
wywania, konserwacji, samowolnego zrywania plomb
oraz wszelkich przeróbek i zmian konstrukcyjnych doko-
nanych przez użytkownika lub osoby niepowołane,
• roszczeń z tytułu parametrów technicznych wyrobu, o ile
są one zgodne z podanymi przez producenta,
• prawidłowego zużycia i uszkodzeń, które mają nieistotny
wpływ na wartość lub działanie tego urządzenia.
Karta gwarancyjna bez pieczątki sklepu, daty sprzedaży,
nie wypełniona, źle wypełniona, ze śladami poprawek,
nieczytelna wskutek zniszczenia, bez możliwości ustalenia
miejsca sprzedaży oraz dołączonego dowodu zakupu jest
nieważna.
Korzystanie z usług gwarancyjnych nie jest możliwe po
upływie daty ważności gwarancji. Gwarancja na części lub
całe urządzenie, które są wymieniane kończy się, wraz
z końcem gwarancji na to urządzenie.
Wszystkie inne roszczenia, wliczając w to odszkodowania
są wykluczone chyba, że prawo przewiduje inaczej. Rosz-
czenia wykraczające poza tą umowę nie są uwzględniane
przez tą gwarancję.
Gwarancja na sprzedany towar konsumpcyjny nie wyłącza,
nie ogranicza ani nie zawiesza uprawnień kupującego
wynikających z niezgodności towaru z umową.
Gwarancja oraz zawarte w niej warunki obowiązują na
terenie Rzeczpospolitej Polskiej.
Dystrybutor:
CTC Clatronic Sp. z o.o
Ul. Brzeska 1
45-960 Opole
Usuwanie
Znaczenie symbolu „Pojemnik na śmieci”
Proszę oszczędzać nasze środowisko, sprzęt
elektryczny nie należy do śmieci domowych.
Proszę korzystać z punktów zbiorczych,
przewidzianych do zdawania sprzętu elektrycz-
nego, i tam proszę oddawać sprzęt elektryczny,
którego już nie będą Państwo używać.
Tym sposobem pomagają Państwo unikać potencjalnych
następstw niewłaściwego usuwania odpadów, mających
wpływ na środowisko i zdrowie ludzi.
Tą drogą przyczyniają się Państwo do ponownego użycia,
do recyklingu i do innych form wykorzystania starego
sprzętu elektrycznego i elektronicznego.
Informacje, gdzie można zdać sprzęt, otrzymają Państwo
w swoich urzędach komunalnych lub w administracji gminy.

PC-AE1156_IM 07.06.18
46
Használati utasítás
Köszönjük, hogy megvásárolta a termékünket. Reméljük,
sok örömét leli a termék használatában.
A használati útmutatóban található jelzések
A fontos biztonsági információk kifejezetten meg vannak
különböztetve. Pontosan kövesse ezeket az utasításokat,
hogy elkerülje a sérüléseket és a készülék károsodását:
FIGYELMEZTETÉS:
Egészségét károsító veszélyekre gyelmeztet, és jelzi a
lehetséges sérülésveszélyt.
VIGYÁZAT:
A készülék vagy más tárgy lehetséges sérülésének
lehetőségét jelzi.
MEGJEGYZÉS: Javaslatokat, információt közöl.
Tartalom
A kezelőelemek áttekintése ..................................................3
Általános megjegyzések ..................................................... 46
Speciális biztonsági előírások a készülékhez ....................46
Rendeltetésszerű használat ...............................................47
A készülék kicsomagolása ..................................................48
Szállított elemek ..................................................................48
A kezelőelemek áttekintése ................................................48
A készülék beállítása ..........................................................48
Elektromos csatlakozás ......................................................48
Kezelés ...............................................................................48
Tisztítás ...............................................................................49
Tárolás ................................................................................50
Hibaelhárítás ....................................................................... 50
Műszaki adatok ...................................................................50
Selejtezés ............................................................................50
Általános megjegyzések
A készülék használatba vétele előtt gondosan olvassa végig
a használati utasítást, és őrizze meg a garancialevéllel, a
pénztári nyugtával és lehetőleg a csomagolókartonnal, ill. az
abban lévő bélésanyaggal együtt! Amennyiben a készüléket
harmadik személynek adja tovább, a használati útmutatót is
adja a készülékhez.
• Kizárólag személyi célra használja a készüléket, és
csupán arra, amire való! A készülék nem ipari jellegű
használatra készült.
• Ne használja a szabadban! Ne tegye ki erős hőhatásnak,
közvetlen napsugárzásnak és nedvességnek (semmi
esetre se mártsa folyadékba), és óvja az éles szélektől!
Ne használja a készüléket vizes kézzel! Ha a készülék
vizes vagy nedves lett, azonnal húzza ki a konnektorból.
• Kapcsolja ki a készüléket és mindig húzza ki a csatla-
kozót a dugaszoló aljzatból (a csatlakozót, ne pedig a
vezetéket húzza), ha nem használja a készüléket, tarto-
zékokat szerel fel rá, tisztítja vagy zavart észlel.
• A készüléket és a hálózati kábelt rendszeresen elle-
nőrizni kell, hogy nincs-e rajta sérülés jele. Ha sérülést
lát rajta, a készüléket nem szabad használni.
• Csak eredeti tartozékokat használjon.
• Gyermekei biztonsága érdekében ne hagyja általuk
elérhető helyen a csomagolóelemeket (műanyag zacskó,
karton, sztiropor stb.).
FIGYELMEZTETÉS:
Kisgyermekeket ne engedjen a fóliával játszani.
Fulladás veszélye állhat fenn!
Speciális biztonsági előírások a készülékhez
FIGYELMEZTETÉS: Sérülésveszély!
• Vágás veszélye! A centrifuga szűrője éles!
• Ha a forgó szűrő megsérül, a készülék nem használható tovább.
• Mindig a mellékelt tömőeszközt használja. Ne nyújtsa az ujjait a
töltőnyílásba.
• Mindig válassza le a készüléket az elektromos hálózatról, ha
felügyelet nélkül hagyja, valamint összeszerelés, szétszerelés
vagy tisztítás előtt.

PC-AE1156_IM 07.06.18
47
FIGYELMEZTETÉS: Sérülésveszély!
• Mielőtt lecserélné a működés közben mozgó alkatrészeket, vagy
kiegészítőket, a készüléket kapcsolja ki és húzza ki a konnektor-
ból.
• Ne érjen a mozgó alkatrészekhez, és várja meg, amíg a készü-
lék teljesen meg nem áll.
• Ne javítsa saját kezűleg a készüléket. Mindig lépjen kapcsolatba
szakképzett szerelővel. Ha a villanyvezeték megsérül, a gyár-
tónak, a szerviz ügynökségnek vagy más, hasonlóan képzett
személynek kell a javítást végeznie, a veszélyek elkerülése
érdekében.
• A készüléket gyerekek nem használhatják.
• Tartsa a készüléket és a kábelét gyerekektől távol.
• A gyerekek nem játszhatnak a készülékkel.
• A készülékeket csökkent zikai, érzékszervi vagy értelmi képes-
ségű személyek, illetve akiknek nincs meg a kellő tapasztalatuk
és tudásuk ehhez, csak akkor használhatják, ha felügyelet alatt
állnak vagy a készülék biztonságos használatára megtanították
őket és megértették a kapcsolódó veszélyeket.
VIGYÁZAT:
A készüléket ne merítse víz alá takarítás közben. Kérjük, olvassa
el a „Tisztítás” fejezetben leírt instrukciókat.
• Ne manipulálja a biztonsági kapcsolót!
• Működés közben ne távolítsa el a fedelet.
Rendeltetésszerű használat
A készülék friss gyümölcsök és zöldségek – például
ananász, alma, cékla, zeller, uborka, sárgarépa vagy para-
dicsom – levének kifacsarására alkalmas.
Ha a növény héja is ehető, az is feldolgozható.
Héjas gyümölcsöket, mint például banánt, papayát, avoká-
dót, fügét vagy mangót, vagy csonthéjas gyümölcsöket ne
dolgozzon fel a készülékben.
MEGJEGYZÉS:
Bogyós gyümölcsök levének kifacsarása a centrifugális
elv alapján működő készülékekben nagyon nehéz. Azok-
hoz használjon megfelelő prést.

PC-AE1156_IM 07.06.18
48
A készülék kizárólag az ebben a használati utasításban leírt
módon használható. Üzleti célra nem használható.
Ha a készüléket bármi másra használja, az nem megfelelő
használatnak minősül, mely anyagi károsodáshoz vagy
személyi sérüléshez vezethet.
A gyártó nem vállal felelősséget az ilyen nem megfelelő
használatból adódó károkért.
A készülék kicsomagolása
1. Vegye ki a készüléket a csomagolásból.
2. Távolítson el minden csomagoló-anyagot, mint a fólia,
töltőanyagok, kábeltartók és kartoncsomagolás.
3. Ellenőrizze, hogy minden alkatrész megvan-e.
4. Ha valamelyik alkatrész hiányzik vagy nyilvánvalóan
károsodott, ne használja a készüléket. Azonnal vigye
vissza a kereskedőnek.
MEGJEGYZÉS:
A készüléken maradhatott por vagy a gyártásból szár-
mazó szennyeződés. Az első használat előtt tisztítsa meg
a készüléket a „Tisztítás” fejezetben leírtak szerint.
Szállított elemek
1 Alsó rész motorral
1 Átlátszó fedél
1 Tömőeszköz
1 Centrifuga szűrő
1 Centrifuga ház
1 Héjtartó
1 Gyümölcslétartó edény fölözővel és fedéllel
A kezelőelemek áttekintése
1 Tömőeszköz
2 Töltőnyílás
3 Átlátszó fedő
4 Centrifuga szűrő
5 Centrifuga ház
6 Állítható magasságú kiöntő
7 Burkolatok
8 Gyümölcslétartó edény
9 Alsó rész motorral
10 Kezelőpanel
11 Héjtartó
12 Vezér kerék (nem vehető le)
13 Retesz
A készülék beállítása
Az összeszereléshez is forduljon a 3. oldalon látható
ábrázolásokhoz.
1. Úgy helyezze el a készüléket, hogy a kezelőpanel Ön
felé nézzen.
2. Állítsa a centrifuga házat az alsó részre. Az alsó résznek
van egy bemélyedése. A centrifuga háznak ide kell
kerülnie.
3. FIGYELMEZTETÉS: Vágási sérülésveszély!
A centrifuga szűrő éles!
Helyezze a centrifuga szűrőt a vezér kerékre. Nyomja le!
A keréken a helyére pattan.
4. Ellenőrizze a centrifuga szűrőt!
Nyúljon a széle alá. Kis nyomásra sem szabad megla-
zulnia.
5. Csatlakoztassa a gyümölcshústartályt a bal oldalra.
Ehhez tartsa kissé oldalra, hogy benyomja a felső szélét
a centrifuga burkolatába.
6. Tegye az átlátszó fedőt a készülékre. A héjtartót is lefedi.
7. MEGJEGYZÉS:
Az elülső burkolat és az átlátszó fedél is biztonsági
kapcsolóval van felszerelve. Ezek megakadályozzák
a motor véletlenszerű beindítását. Ellenőrizze, hogy
az összes alkatrész, a centrifuga szűrő és az átlátszó
fedél, és a burkolatok megfelelően a helyükön vannak.
Rögíztse az átlátszó fedelet a két burkolat segítségével.
Ehhez helyezze be a burkolatok mélyedését a centrifu-
gaház reteszeibe. Nyomja le a burkolatokat. A rögzülést
hanghatás kíséri.
8. Helyezze a gyümölcslétartó edényt (fölöző nélkül) a
kiöntőre.
Elektromos csatlakozás
• Mielőtt bedugná a csatlakozót a konnektorba, elle-
nőrizze, hogy a hálózati feszültség megegyezik-e
a készülék feszültségével. A keresett információt a
névtáblán találja.
• Csatlakoztassa a készüléket egy megfelelően földelt
csatlakozóba. A gomb világít. A készülék ezzel hasz-
nálatra kész.
Kezelés
Előkészületek
• Mossa meg a feldolgozandó gyümölcsöt.
• Vágja akkora darabokra, hogy azok beleférjenek a
töltőnyílásba.
• Vágja ki a nagyobb magvakat és szárakat.
Funkciógombok
A készüléken található gombok érintőgombok. Az ujjával
óvatosan érintse meg a gombokat az adott funkció végre-
hajtásához. A gombnyomásokat egy hangjelzés nyugtázza.

PC-AE1156_IM 07.06.18
49
Sebességfokozatok
Nyomja meg többször egymás után a gombot a kívánt
sebességfokozat kiválasztásához:
Paradicsom, dinnye
Zeller, citrusfélék, uborka
Alma, körte, őszibarack
Sárgarépa, fokhagyma, répa
Gránátalma, burgonya
MEGJEGYZÉS:
Működés közben a sebességfokozat nem módosítható.
A gomb megnyomásakor a motor automatikusan
kikapcsol.
Lé kifacsarása
MEGJEGYZÉS:
• A készülék rövid idejű használatra való. Állítsa le a
készüléket 1 percre minden 3 perc működés után.
• A Pulse gombbal aktiválhatja az impulzus üzemmódot.
Röviden nyomja meg, majd engedje fel a gombot.
FIGYELMEZTETÉS:
Ellenőrizzen újra minden alkatrészt mielőtt bekapcsolná
a készüléket.
1. Kapcsolja be a készüléket a gombbal. A kijelző és a
gombok világítani kezdenek. A középső sebességfoko-
zat ( ) jelenik meg a kijelzőn.
2. Válassza ki a kívánt sebességfokozatot a gomb
megnyomásával.
3. Indítsa be a motort a Start gomb megnyomásával.
4. Tegye a gyümölcsdarabokat a töltőnyílásba és nyomja
le őket a tömőeszközzel. Figyelje meg, hogy a tömőesz-
köznek van vájata a töltőnyílásban.
5. A lé a ház jobb oldalán át folyik ki. A héj a héjtartó
edényben gyűlik össze. Ha a lé túl nagy mennyiségben
készül, válasszon alacsonyabb sebességfokozatot.
Indítsa be újra a motort a Start gomb megnyomásával.
Alkalmazzon kisebb nyomást a tolóval.
MEGJEGYZÉS:
• Figyelje a lé-tartó edényt. Időben állítsa le a készülé-
ket, hogy ne folyjék túl.
• A bogyókat és citrusféléket (pl. egres, szőlő, narancs)
általában nem facsarják, nem préselik.
• Ha ezeket a magas létartalmú gyümölcsöket facsarják,
a gyümölcslé kifröccsenhet a gyümölcshús tartályból.
Ebben az esetben javasoljuk, hogy gyakrabban ürítse
a gyümölcshús tartályt.
Leállítás és szétszerelés
1. Nyomja meg a Start gombot a motor kikapcsolásához.
2. Ezután kapcsolja a készüléket készenléti módba a
gombbal.
3. Húzza ki a konnektorból.
4. Tegye oldalra a létartót edényt, és nyissa ki mindkét
burkolatot.
5. Vegye le az átlátszó fedőt.
6. Vegye le a gyümölcshústartályt.
7. Vegye ki a centrifuga szűrőt a centrifuga házzal együtt.
Ezt úgy teheti meg, hogy benyúl a centrifugburkolat
karimája és a kifolyó alá. Mindkét oldalán felváltva
mozgassa felfelé a centrifugaházat. Fokozatosan felfelé
húzva távolítsa el. Szükség esetén a gyűrűsujjai és a
kisujjai segítségével nyomja le az alapkészüléket.
8. FIGYELMEZTETÉS: Vágási sérülésveszély!
A centrifuga szűrő éles!
Csak a külső szélét fogva emelje fel.
Vegye ki a centrifuga szűrőt a centrifuga házból.
9. Helyezze a fölözőt a létartó edénybe. Ügyeljen a gyü-
mölcslétartó edény vezetőire. Ez a gyümölcslé kiöntése
közben megakadályozza a hab kifolyását.
Tisztítás
FIGYELMEZTETÉS:
• Tisztítás előtt midig húzza ki a készüléket a konnektorból.
• Soha ne merítse vízbe a motor foglalatot. Ez elektrosokkot vagy
tüzet okozhat.
• A centrifugaszűrő nagyon éles! Sérülésveszély!

PC-AE1156_IM 07.06.18
50
VIGYÁZAT:
• Ne használjon drótkefét vagy más súroló hatású
tárgyat.
• Ne használjon agresszív vagy súroló hatású tisztító-
szert.
• Ne hagyja, hogy a héj rászáradjon a centrifuga
szűrőre. A vékony pórusok eltömődhetnek és használ-
hatatlanná válhatnak.
Centrifuga szűrő
FIGYELMEZTETÉS:
Vágási sérülésveszély!
A centrifuga szűrője éles!
Folyó vízzel öblítse le a maradé-
kokat a centrifuga szűrőről rögtön
használat után. Használjon
edénymosó ecsetet.
Tömőeszköz, átlátszó fedő, centrifuga ház, héjtartó,
gyümölcslétartó edény fölözővel és fedéllel
• Öblítéssel tisztítsa ezeket az alkatrészeket.
• Öblítse le tiszta vízzel.
• Csak akkor szerelje össze a készüléket, ha minden
része megszáradt.
Alsó rész motorral
Egy enyhén nedves ruhával törölje át az alapkészüléket.
Tárolás
• Tisztítsa meg a készüléket a leírtak alapján. Hagyja,
hogy a tartozékok teljesen megszáradjanak.
• Javasoljuk, hogy a készüléket az eredeti csomagolá-
sában tárolja, ha hosszabb ideig használaton kívülre
helyezi.
• Mindig jól szellőző, száraz helységben, gyermekektől
távol tárolja a készüléket.
Hibaelhárítás
Hiba Lehetséges ok Megoldás
A készülék
nem mű-
ködik.
A készülék nem kap
áramot.
Ellenőrizze a kon-
nektort egy másik
készülékkel.
Helyesen dugja be a
csatlakozót.
Ellenőrizze a kon-
nektort.
A burkolatok nem
megfelelően zártak.
Zárja be a burkola-
tokat.
A készülék hibás. Vegye fel a kapcso-
latot a Szervizünkkel
vagy egy szakértővel.
Hiba Lehetséges ok Megoldás
Túl kevés
a lé.
Rossz fajtájú gyü-
mölcsöt választott.
Válasszon lédúsabb
gyümölcsöt.
A centrifugával apró
bogyós gyümölcsök
levét nem tudja kifa-
csarni.
Túl sok a maradék
a centrifugában.
Tisztítsa meg a centri-
fuga szűrőjét.
Nagy
zajjal jár,
vagy billeg
használat
közben.
Rosszul állította
össze.
Ellenőrizze, hogy
minden alkatrészt
helyesen csatlakoz-
tatott-e.
Túl sok a maradék
a centrifugában.
Nagyobb menynyiség
feldolgozása közben
alkalmasint tisztítsa
meg a centrifuga
szűrőt.
Műszaki adatok
Modell: ................................................................. PC-AE 1156
Feszültségellátás: ...............................220 - 240 V~ 50 / 60 Hz
Teljesítményfelvétel: ......................................................800 W
Védelmi osztály: ...................................................................
Nettó súly: ..............................................................kb. 3,86 kg
A műszaki és kivitelezési módosítások jogát a folyamatos
termékfejlesztés miatt fenntartjuk.
A készülék megfelel minden érvényes CE irányelvnek,
beleértve az elektromágneses megfelelőségről, és a kisfe-
szültségű berendezésekről szóló irányelveket, és a legújabb
biztonsági szabályozások gyelembe vételével készült.
Selejtezés
A „kuka” piktogram jelentése
Kímélje környezetünket, az elektromos készü-
lékek nem a háztartási szemétbe valók!
Használja az elektromos készülékek ártalmat-
lanítására kijelölt gyűjtőhelyeket, ott adja le
azokat az elektromos készülékeit, amelyeket
többé már nem kíván használni!
Ezzel segítséget nyújt ahhoz, hogy elkerülhetők legyenek
azok a hatások, amelyeket a helytelen „szemétre dobás“
gyakorolhat a környezetre és az emberi egészségre.
Ezzel hozzájárul az újrahasznosításhoz, a recyclinghoz és a
kiöregedett elektromos és elektronikus készülékek értékesí-
tésének egyéb formáihoz.
Az önkormányzatoknál vagy a polgármesteri hivatalokban
tájékoztatást kaphat arról, hogy hova viheti a kiselejtezett
készülékeket.

PC-AE1156_IM 07.06.18
51
Руководство по эксплуатации
Благодарим вас за выбор нашей продукции. Надеемся,
что вы получите максимум приятных впечатлений при
использовании данного прибора.
Символы в данном руководство по эксплуатации
Важная информация о безопасности обозначена
специальными знаками. Во избежание травмирования и
повреждения устройства строго следуйте инструкциям:
ПРЕДУПРЕЖДЕНИЕ:
Предупреждает об угрозе здоровью и возможном
риске получения травм.
ВНИМАНИЕ:
Предупреждает об опасности повреждения устрой-
ства или других предметов.
ПРИМЕЧАНИЯ: Дает советы и информацию.
Оглавление
Обзор деталей прибора .....................................................3
Общие замечания .............................................................51
Специальные указания по безопасности
для этого устройства ........................................................51
Назначение ........................................................................ 53
Распаковка устройства ..................................................... 53
Комплект поставки ............................................................53
Обзор деталей прибора ...................................................53
Подготовка прибора к работе ..........................................53
Подключение ..................................................................... 54
Работа ................................................................................54
Чистка ................................................................................. 55
Хранение ............................................................................ 55
Устранение неисправностей ............................................55
Технические данные ......................................................... 56
Утилизация ........................................................................56
Общие замечания
Перед началом эксплуатации прибора внимательно
прочитайте прилагаемую инструкцию по эксплуатации и
сохраните ее в надежном месте, вместе с гарантийным
талоном, кассовым чеком и, по возможности, картонной
коробкой с упаковочным материалом. Если даете ко-
му-либо попользоваться прибором, обязательно дайте
в придачу данную инструкцию по эксплуатации.
• Пользуйтесь прибором только частным образом и по
назначению. Прибор не предназначен для коммерче-
ского использования.
• Не пользуйтесь прибором под открытым небом. Пре-
дохраняйте прибор от жары, прямых солнечных лу-
чей, влажности (ни в коем случае не погружайте его
в воду) и ударов об острые углы. Не прикасайтесь к
прибору влажными руками. Если прибор увлажнился
или намок, тут же выньте вилку из розетки.
• После эксплуатации, монтаже принадлежностей,
чистке или поломке прибора всегда вынимайте вилку
из розетки (тяните за вилку, а не за кабель).
• Прибор и кабель сетевого питания необходимо
регулярно обследовать на наличие следов повреж-
дения. При обнаружении повреждения пользоваться
прибором запрещается.
• Используйте только оригинальные запчасти.
• Из соображений безопасности для детей не остав-
ляйте лежать упаковку (пластиковые мешки, картон,
пенопласт и т.д.) без присмотра.
ПРЕДУПРЕЖДЕНИЕ:
Не позволяйте детям играть с полиэтиленовой
пленкой. Опасность удушья!
Специальные указания по безопасности
для этого устройства
ПРЕДУПРЕЖДЕНИЕ: Опасность получения травмы!
• Опасность порезов! Сито центрифуги острое!
• Если вращающееся сито повреждено, устройство эксплуа-
тировать нельзя.
• Всегда используйте трамбовку, имеющуюся в комплекте. Не
вставляйте пальцы или инструменты в отверстие воронки.

PC-AE1156_IM 07.06.18
52
ПРЕДУПРЕЖДЕНИЕ: Опасность получения травмы!
• Всегда отключайте устройство из сети, когда с ним никто не
работает, а также перед началом разборки, сборки и чистки.
• Перед заменой вспомогательных приспособлений и на-
садок, которые вращаются во время работы необходимо
выключать прибор и выдергивать шнур из розетки.
• Не прикасайтесь к движучимся деталям устройства, всегда
ждите, пока они полностью не остановятся.
• Не пытайте отремонтировать устройство самостоятельно.
Обязательно свяжитесь с авторизованным мастером. При
повреждении сетевого шнура, во избежание опасности
поражения электрическим током, шнур следует заменить у
изготовителя, сервисного представителя или других квали-
фицированных лиц.
• Детям запрещается пользоваться данным устройством.
• Храните устройство и шнур подальше от детей.
• Запрещается детям играть с данным устройством.
• Устройства могут быть использованы людьми с ограничен-
ными физическими и умственными способностями, а также
не имеющие опыта работы, только под присмотром или
после получения инструктажа по безопасной эксплуатации
устройства, если эти люди осознают все риски, связанные с
данным прибором.
ВНИМАНИЕ:
Во время чистки запрещается погружать прибор в воду.
Просьба соблюдать инструкции, которые приводятся в раз-
деле «Чистка».
• Не манипулируйте выключателями безопасноти.
• Не снимайте крышку во время работы устройтсва.

PC-AE1156_IM 07.06.18
53
Назначение
Этот прибор предназначен для извлечения сока из све-
жих овощей и фруктов, например из ананасов, яблок,
свеклы, сельдерея, огурцов, моркови и помидоров.
Если кожура продукта съедобна, ее также можно обра-
батывать.
Пищевые продукты, содержащие крахмал, такие как
бананы, папайя, авокадо, инжир, манго, и особенно
жесткие и волокнистые фрукты и овощи, не должны
обрабатываться данным устройством.
ПРИМЕЧАНИЯ:
Выжимать сок из небольших плодов, таких как, напри-
мер, ягоды, используя принцип центрифуги, довольно
трудно. В таких случаях лучше использовать подходя-
щий пресс для ягод.
Прибор можно использовать только указанным в
данном руководстве способом. Применение в коммер-
ческих целях запрещено.
Любое другое применение устройства считается
использованием не по назначению, и может привести к
материальному ущербу или травме.
Производитель не несет ответственности за ущерб,
причиненный использованием устройства не по назна-
чению.
Распаковка устройства
1. Извлеките устройство из его упаковки.
2. Удалите все упаковочные материалы, такие как
полиэтиленовая пленка, материал наполнителя,
кабельные стяжки и коробки.
3. Убедитесь, что в коробке есть весь комплект
поставки.
4. В случае обнаружения повреждений или неполного
комплекта поставки, не используйте прибор. Немед-
ленно верните его дилеру.
ПРИМЕЧАНИЯ:
На устройстве все еще могут оставаться мелкие ча-
стицы и пыль, оставшиеся после производственного
процесса. Рекомендуется почистить устройство, как
описано в разделе «Чистка».
Комплект поставки
1 Корпус устройства с двигателем
1 Прозрачный колпак
1 Трамбовка
1 Сито центрифуги
1 Кожух центрифуги
1 Емкость для мякоти
1 Кувшин для сока с фильтром и крышкой
Обзор деталей прибора
1 Трамбовка
2 Отверстие воронки
3 Прозрачная крышка
4 Сито центрифуги
5 Корпус центрифуги
6 Регулируемый по высоте носик
7 Защелки
8 Кувшин для сока
9 Корпус устройства с двигателем
10 Панель управления
11 Емкость для мякоти
12 Приводное колесо (не съемное)
13 Фиксатор
Подготовка прибора к работе
Для сборки устройства см. иллюстрации на стр. 3.
1. Установите прибор так, чтобы панель управления
была направлена на вас.
2. Установите корпус центрифуги на основной корпус.
Основной корпус имеет выемку. В нее должен войти
желоб корпуса центрифуги.
3. ПРЕДУПРЕЖДЕНИЕ: Риск порезов!
Сито центрифуги имеет острые ножи!
Поместите сито центрифуги на приводное колесо.
Нажмите на него. Оно должно защелкнуться на
приводном колесе.
4. Проверьте установку сита!
Нажмите на край сита. Оно не должно перекаши-
ваться при небольшом давлении.
5. Прикрепите слева контейнер (емкость) для мякоти.
Для этого немного наклоните его в сторону, чтобы
вдвинуть верхний край в кожух корпуса центрифуги.
6. Установите прозрачную крышку. Она должна накры-
вать контейнер для мякоти.
7. ПРИМЕЧАНИЯ:
Передняя защелка и прозрачная крышка снаб-
жены предохранительным выключателем. Они
предотвращают случайное включение двигателя.
Проверьте правильность установки всех компо-
нентов, центробежного сита и прозрачной крышки
и защелок.
Закрепите прозрачную крышку с помощью обоих
защелок. Для этого вставьте углубление защелок
в отверстия на корпусе центрифуги. Нажмите на
защелки. Должен прозвучать щелчок.
8. Установите под носик кувшин для сока (без филь-
тра).

PC-AE1156_IM 07.06.18
54
Подключение
• Перед тем, как вставлять штепсель в розетку,
убедитесь, что напряжение сети соответствует
спецификации устройства. Требуемую информацию
можно найти на табличке.
• Подключайте устройство только к правильно уста-
новленной, исправной розетке. Кнопка подсвечи-
вается. Прибор готов к использованию.
Работа
Подготовка
• Помойте фрукты перед обработкой.
• Порежьте фрукты на кусочки, чтобы они входили в
отверстие заполнителя.
• Удалите крупные косточки и стебли.
Функциональные кнопки
Кнопки на устройстве сенсорные. Для выполнения
функций слегка касайтесь кнопок пальцем. Каждое
нажатие кнопки подтверждается звуковым сигналом.
Уровни скорости
Выберите требуемый уровень скорости с помощью
кнопки :
Томаты, дыня
Сельдерей, цитрусовые, огурец
Яблоко, груша, персик
Морковь, чеснок, свекла
Гранат, картофель
ПРИМЕЧАНИЯ:
Во время работы прибора невозможно изменить уро-
вень скорости. При нажатии кнопки автоматически
выключается двигатель.
Выжимка сока
ПРИМЕЧАНИЯ:
• Прибор предназначен только для кратковремен-
ного использования. После работы аппарата в
течение 3 минут останавливайте его на 1 минуты.
• Кнопка Pulse служит для переключения в импуль-
сный режим. Кратковременно нажмите кнопку, а
затем отпустите её.
ПРЕДУПРЕЖДЕНИЕ:
Перед включением прибора снова проверьте пра-
вильность установки всех компонентов.
1. Включите прибор с помощью кнопки . Включается
дисплей и подсветка кнопок. На дисплее отобража-
ется средний уровень скорости ( ).
2. Выберите требуемый уровень скорости с помощью
кнопки .
3. Чтобы включить двигатель, нажмите кнопку Start.
4. Поместите кусочки фруктов в отверстие заполнителя
и нажмите на них трамбовкой. Обратите внимание!
В отверстии заполнителя для трамбовки предусмо-
трена направляющая.
5. Сок вытекает с правой стороны корпуса. Мякоть со-
бирается в контейнер для мякоти. При избыточном
выпуске сока выберите меньший уровень скорости.
Снова включите двигатель с помощью кнопки Start.
Прикладывайте меньшее усилие к толкателю.
ПРИМЕЧАНИЯ:
• Следите за заполнением кувшина для сока.
Вовремя остановите работу для предотвращения
переполнения.
• Ягоды и цитрусовые (такие как крыжовник, вино-
град, апельсины) обычно не обрабатываются в
соковыжималке, а отжимаются.
• При выжимании таких фруктов с высоким содержа-
нием сока из зоны контейнера для выжимок может
наблюдаться расплескивание. В таких случаях
рекомендуется чаще освобождать контейнер для
выжимок.
Остановка работы и разборка
1. Нажмите кнопку Start, чтобы выключить двигатель.
2. Затем переключите прибор в режим ожидания с
помощью кнопки .
3. Отключите прибор от электросети.
4. Убедите кувшин для сока в сторону и откройте обе
защелки.
5. Снимите прозрачную крышку.
6. Снимите контейнер для мякоти.
7. Снимите сито центрифуги с корпуса центрифуги.
Для этого нужно ухватиться за фланец под фланцем
корпуса центрифуги и под носиком. Поочередно
перемещайте корпус центрифуги вверх с каждой
стороны. Снимите центрифугу, постепенно вытяги-
вая ее вверх. Если необходимо, придерживайте сам
прибор безымянными пальцами и мизинцами.
8. ПРЕДУПРЕЖДЕНИЕ: Риск порезов!
Сито центрифуги имеет острые ножи!
Поднимайте только за внешний край.
Выньте сито центрифуги из корпуса центрифуги.
9. Вставьте в кувшин для сока фильтр. Используйте
для этого направляющие в кувшине для сока.
Фильтр защищает от разбрызгивания пены при
разливании сока.

PC-AE1156_IM 07.06.18
55
Чистка
ПРЕДУПРЕЖДЕНИЕ:
• Перед чисткой всегда вынимайте сетевую вилку из розетки.
• Никогда не погружайте корпус двигателя в воду. Это может
привести к поражению электрическим током или пожару.
• Сито центрифуги очень острое! Опасность получения
травмы!
ВНИМАНИЕ:
• Не используйте проволочную щетку или другие
абразивные инструменты.
• Не используйте кислотные или абразивные мою-
щие средства.
• Не давайте мякоти засыхать на центробежном
сите. Мелкие поры засорятся и ими нельзя будет
пользоваться.
Сито центрифуги
ПРЕДУПРЕЖДЕНИЕ:
Риск порезов!
Сито центрифуги очень
острое!
Сразу же удалите остатки с
центробежного сита под струей
водой. Используйте щетку для
мытья посуды.
Трамбовка, прозрачная крышка, корпус центрифуги,
емкость для мякоти, кувшин для сока с фильтром
и крышкой
• Почистите эти компоненты в раковине.
• Ополосните чистой водой.
• Начинайте сборку прибора только после высыхания
всех его составных частей.
Корпус устройства с двигателем
Протрите корпус прибора слегка увлажненной тканью.
Хранение
• Почистите устройство в соответствии с описанием.
Дайте аксессуарам полностью высохнуть.
• Рекомендуется хранить устройство в его оригиналь-
ной упаковке, если оно не будет использоваться
длительное время.
• Всегда храните устройство в сухом, хорошо прове-
триваемом месте, недоступном для детей.
Устранение неисправностей
Неисправ-
ность
Возможная
причина Действия
Устройство
не функцио-
нирует.
К устройству
не подключено
электропитание.
Проверьте розетку
с помощью другого
устройства.
Вставьте штепсель
в розетку пра-
вильно.
Проверьте сетевой
предохранитель.
Защелки
закрыты непра-
вильно.
Закройте защелки.
Устройство
неисправно.
Обратитесь в наш
сервисный центр
или к специалисту.
Слишком
мало сока.
Не тот тип
фруктов.
Выберите фрукт
того типа, который
дает много сока.
В центрифуге
нельзя отжать сок из
небольших ягод.
Слишком много
мякоти на сите
центрифуги.
Почистите сито
центрифуги.
Сильный
шум и
разбалан-
сировка
во время
работы.
Плохая сборка. Убедитесь, что все
компоненты устрой-
ства установлены
правильно.
Слишком много
мякоти на сите
центрифуги.
При обработке
больших количеств
продуктов периоди-
чески чистите сито
центрифуги.

PC-AE1156_IM 07.06.18
56
Технические данные
Модель: ..............................................................PC-AE 1156
Электропитание: ...............................220 - 240 V~ 50 / 60 Hz
Потребляемая мощность: ..........................................800 W
Класс защиты: ....................................................................
Вес нетто: .......................................................прибл. 3,86 kg
Сохранено право на технические и конструкционные
изменения в рамках продолжающейся разработки
продукта.
Данное устройство соответствует всем текущим дирек-
тивам CE, таким как электромагнитная совместимость и
низкое напряжение; оно произведено в соответствии с
новейшими правилами техники безопасности.
Утилизация
Значение символа «корзина»
Защита окружающей среды: не допускается
утилизация электроприборов вместе с бы-
товыми отходами.
Утилизация устаревшей техники и неис-
правных электроприборов производится в
городских приёмных пунктах.
Не допускайте неправильной утилизации отходов. Это
наносит вред окружающей среде и оказывает негатив-
ное воздействие на здоровье людей.
Оказывайте содействие программе утилизации и дру-
гим формам переработки электронной и электрической
техники.
Информацию о пунктах утилизации бытовой техники
можно получить в местных органах власти.

PC-AE1156_IM 07.06.18
57
.
.
.
.
.
.
.
.
.
.
.
PC-AE 1156 ....................................................................................:
60/50 ,~ 240-220 ............................................ :
800 .................................................................................:
II ................................................................................................ :
3,86 ..........................................................................:
.
.
" "
:
.
.
.
.

PC-AE1156_IM 07.06.18
58
:
•
.
.
1 .. Start
2 ..
3 ..
4 ..
5 ..
6 ..
7 . .
.
.
.
.
! :8 .
.
!
.
9 . . .
.
:
•.
• .
.
•! !
: •. •. • .
.
! :
!
.
.
, , , ,
•.
•.
•.
.
•. .
•
.
•
.
.
.
.
.
.
.
.
. .

PC-AE1156_IM 07.06.18
59
1
2
3
4
5
6
7
8
9
10
11
( ) 12
13
.3 ,
1 ..
2 . .
.
.
! : 3 .
!
.
.
4 . !
. .
5 . .
.
6 .. .
: 7 .
.
.
.
.
. .
.
8 .. ( )
• ,
.
.
• . .
.
•.
•.
•.
.
. .
:
,
:
.
.
:
• .
. 3 • .Pulse
.
:
.
1 . . .
. ( )
2 ..
3 ..Start
4 . .
. !
5 . .
. .
.Start
.
:
• .
. • )
. (

PC-AE1156_IM 07.06.18
60
! :
• . .
.
•.
•.
•.
•
.
:
.
.""
•.
•.
.
. ,
, , , , ,
. ,
:
. .
.
.
.
.
1 ..
2 . , , ,
.
3 ..
4 . .
.
:
.
.""
1
1
1
1
1
1

PC-AE1156_IM 07.06.18
61
. .
.
:
:
.
. :
. :
3 ..............................................................................
61...........................................................................................
61..........................................................
60 ........................................................................................
60 ................................................................................................
60 ............................................................................................
59 ...........................................................................
59 ..............................................................................................
59 .........................................................................................
59 ....................................................................................................
58 ....................................................................................................
58 .....................................................................................................
58 ............................................................................................
57 ...........................................................................................
57 ....................................................................................
.
.
.
• .
.
• .
( )
. .
.
•
( )
.
•
. .
• .
• )
. (
:
!
! :
•! !
•. ,
•. ,
•
.
•
.
•.

PC-AE1156_IM 07.06.18
PC-AE 1156
Stand 05 / 2018
Internet: www.procook-germany.de
Made in P.R.C.
-
 1
1
-
 2
2
-
 3
3
-
 4
4
-
 5
5
-
 6
6
-
 7
7
-
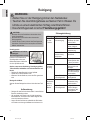 8
8
-
 9
9
-
 10
10
-
 11
11
-
 12
12
-
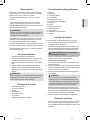 13
13
-
 14
14
-
 15
15
-
 16
16
-
 17
17
-
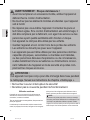 18
18
-
 19
19
-
 20
20
-
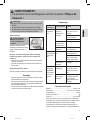 21
21
-
 22
22
-
 23
23
-
 24
24
-
 25
25
-
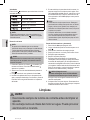 26
26
-
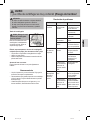 27
27
-
 28
28
-
 29
29
-
 30
30
-
 31
31
-
 32
32
-
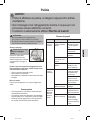 33
33
-
 34
34
-
 35
35
-
 36
36
-
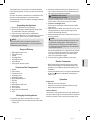 37
37
-
 38
38
-
 39
39
-
 40
40
-
 41
41
-
 42
42
-
 43
43
-
 44
44
-
 45
45
-
 46
46
-
 47
47
-
 48
48
-
 49
49
-
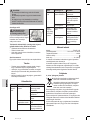 50
50
-
 51
51
-
 52
52
-
 53
53
-
 54
54
-
 55
55
-
 56
56
-
 57
57
-
 58
58
-
 59
59
-
 60
60
-
 61
61
-
 62
62


Profi Cook PC-AE 1156 El manual del propietario
- Categoría
- Fabricantes de jugo
- Tipo
- El manual del propietario
en otros idiomas
Artículos relacionados
Otros documentos
-
Clatronic AE 3532 Manual de usuario
-
BOMANN AE 1028 El manual del propietario
-
Clatronic AE 2895_PROFICOOK El manual del propietario
-
Clatronic AE 2758 El manual del propietario
-
-
OK. OPJ 4321 Manual de usuario
-
Unold 78220 Instrucciones de operación
-
Fakir FA El manual del propietario