Samsung LN-T4061F Owner's Instructions Manual
- Categoría
- Televisores LCD
- Tipo
- Owner's Instructions Manual
Este manual también es adecuado para

......_ Owner's
instructions
Register your product at www, samsung,comlgloballregister
Record your Model and Serial number here for future reference.
. Model . Serial No.

Important Warranty Information Regarding Television Format Viewing
Wide screen format LCD Displays (16:9, the aspect ratio of the screen width to height) are primarily designed to view wide
screen format full-motion video. The images displayed on them should primarily be in the wide screen 16:9 ratio format,
or expanded to fill the screen if your model offers this feature and the images are constantly moving. Displaying stationary
graphics and images on screen such as the dark side-bars on nonexpanded standard format television video and
programming, should be limited to no more than 5% of the total television viewing per week.
Additionally, viewing other stationary images and text such as stock market reports, video game displays, station Iogos,
web sites or computer graphics and patterns, should be limited as described above for all televisions. Displaying stationary
images that exceed the above guidelines can cause uneven aging of LCD Displays that leave subtle, but permanent
burned-in ghost images in the LCD picture. Toavoid this, vary the programming and images, and primarily display
full screen moving images, not stationary patterns or dark bars.
On LCD models that offer picture sizing features, use these controls to view different formats as a full screen picture.
Be careful in the selection and duration of television formats used for viewing. Uneven LCD aging as a result of format
selection and use, as wett as burned-in images, are not covered by your Samsung limited warranty.
U.S.A Only
The product unit accompanying this user manual is licensed under certain intellectual property rights of certain
third parties. In particular, this product is licensed under the following US patents: 5,991,715, 5,740,317, 4,972,484,
5,214,678, 5,323,396, 5,539,829, 5,606,618, 5,530,655, 5,777,992, 6,289,308, 5,610,985, 5,481,643, 5,544,247,
5,960,037, 6,023490, 5,878,080, and under US Published Patent Application No.2001-44713-A1.
This license is limited to private non-commercial use by end-user consumers for licensed contents. No rights are
granted for commercial use. The license does not cover any product unit other than this product unit and the license
does notextend to any unlicensed product unit or process conforming to ISO/IEC 11172-3or tSO/IEC 13818-3 used or
sold in combination with this product unit. The license only covers the use of this product unit to encode and/or decode
audio files conforming to the ISO/IEC 11172-3or tSO/tEC 13818-3. No rights are granted under this license for product
features or functions that do not conform to the tSO/tEC 11172-3or tSO/tEC 13818-3.
Other countries
The product unit accompanying this user manual is licensed under certain intellectual property rights of certain third
parties. This license is limited to private non-commercial use by end-user consumers for licensed contents. No rights
are granted for commercial use. The license does not cover any product unit other than this product unit and the license
does notextend to any unlicensed product unit or process conforming to ISO/IEC 11172-3or tSO/IEC 13818-3 used or
sold in combination with this product unit. The license only covers the use of this product unit to encode and/or decode
audio files conforming to the tSO/IEC 11172-3or tSO/tEC 13818-3. No rights are granted under this license for product
features or functions that do not conform to the tSO/tEC 11172-3or tSO/tEC 13818-3.
Precautions When Displaying a Still Image
A still image may cause permanent aamage to the TV screen
, Do no[ aJsptaya still image on the LCD uanet for more than 2 hours as it can cause screen image retention.
This image retention _salso Known as "screen burn"
To avo_asucn _mageretenuon, reduce the degree of brightness and contrast of the screen when displaying a Stilt_mage.
Watching the LCD TV in 4:3 format for a long period of time may leave traces of borders displayea on the
left, right and center of the screen caused by the _]ifferenceof light emission on me screen
Playing a DiD or a game console may cause a s_milareffect to the screen.
Damages caused bj the above effect are no[ covered by the Warranty.
, Disp;ay_ngstill images from Video games and PC for longer than a certain period of time may proauce partial after-images
To prevent this effecl reauce lhe 'brightness' and 'contrast' when d splaying still images.
Precauciones al mostrar en la pantaila una imagen fija
La _magenfija pueue causar daSos oermanen[es en ta eantaIIa dei televisor.
• '4oaeje una lmagen fija en ta pantatla LCD durante m_s ae ads noras ya que se podria proeucir una rmenc_onae _a_magenen
ta Dantatla.Este fen6meno de retencton ae _m._genestambien se deqomma uuemaaura ae oantat;a".
Saraevitar que se proauzca esa uersistencia de ta imagen reauzca el nlvet de lumtnostdad y de comraste de ta pantalla
cuanao muestre _magenesfijas.
Et usa det televisor LCD en formato 4:3 auran[e un t_empoprolongaao puede dejar ras[ros ae Doraesen las
DaResizuuierda, aerecna } central de la pamatta debido alas diferencias en ta emisi6n tuminica de ta oantalla.
La reeroducc_onde un D_i_ o eI usa de una consola de videojuegos DueaenDrovocar Jn efec[o similar en ta
Dantalla. Reproducir un DVDouna videoconsola pueae causar un efecto similar en la eantalla. La garantia no
cubre estos daSos.
•Vet imageries fijas de waeojLegos y PC durante m&s t_empooeI mdJcadoDueaeDroducir restos de im_genes parciales.
Data evitar es[e efecto, reduzca et 'brilto' yet 'contraste' cuando vea im_genes fijas
@2007 Samsung Electronics Co., Ltd.All rights reserved.

Contents
List of Features.................................................. 2 • Selecting me Antenna..................................................... 38
m Accessories ....................................................................... 2 • Clearing Scrambled Channels - Digl[a_........................... 38
m Viewing the Control Panel .....3 m Setting the Channel Lists.......................... 39
u Viewing the Connection Pane_ ........................................,_
m Remote Control 5
m ms[ailing Batteries in the Remote Control ......... 6
m Connecting VHF ane JHFAntennas .............. 6
Connecting Cable T'_ ........................7
m Connecting a VCR 8
To set-uc Your Favorite Channels .............. 4_
m Using the Channel Lists..................... 41
m Viewing the Channel Lists ....... ,_1
m Labeling Channels 42
LNA_Low NoiseAmetifier 42
FineTuning Analog Channels ............. ,!3
m Checking the Digita*-SignatStrength .............................. 43
m Connecting a Camcorder .....9
m Connecting a DVD Player/Set-To_Box. 9 • using YourTV asa Computer (PCI Display ...................44
Connecting a DVD Player/Set-Top Box via HDMI ...........10 m Display Modes ..................44
m Connecting a DVD Player/Set-Top Box via DVl ..............10 m Setting up theTV with your PC ,!5
m Connecting a Digital Audio System 11 m Setting the Home Theater PC ,!6
m Connecting anAmptifier/DVD HomeTheater .................. 1"
m Connecting a PC .................................... 1"
Tuminc the TV On and Off ........................................
m Ptug &-Play Feature.................. 12
m Changing Channels ...................13
m Adjusting the Volume............................ 14
m Viewing the Display. 1,_
m Viewing the Menus ....................15
m Memorizing the Channels...................................... 15
m Setting Up Your Remote Control .........17
R Remote Control Codes ................................................... 19
m To Select the Source ................ 22
m To Edit the input Source Name ...................................... 22
m Using Automatic Picture Settings ................ 23
m Adjusting the CotorTone .............................................. 24
m A(]jus[ing the Detailec Settings....................................... 25
m Changmc [ne Screen Size ........ 28
m Setting theActive Color. 29
m DNle (Digital Natural Image engine)....... 29
m Freezir _the Picture .30
m Setting the Fitm Mode ....30
m HDMt Black Level ............................................................ 30
Setting the Clock............................ 47
Selecting a Menu Language ....... 50
Setting the Btue Screen Mode 51
Using the Game Mode........................ 51
m Viewing Closed CaDtmons
On-ScreenText Messages) - Analog............................. 52
m Viewing Close(] Caebons
On-ScreenText Messages - Digm[aI 53
Menu Transparency Level 5a
m Using the Energy Saving Feature .54
m Setting the Function Het_ ..................................... 55
m Dig taI Noise Reduction 55
m Using the V-Chip............................................................. 56
m Setting the Light Effect
LN-T4065F / LN-T4665F / LN-T5265F 63
UpgraoJngthe Software ..........63
WISELINK ...................................................................... 64
Using the WtSELINK Function ................. 64
Using the WISELiNK MenL 65
m wewmg Picture-in-Picture ......................................... 31 m Using the PHOTO JPEG) List......... 66
Using the MP3 List 73
Using the Setue Menu. 75
m Customizing the Sound ............................ 33
m Using Automatic Sound Settings .................................. 33
m Setting theTruSurround XT............................................ !4
m Choosing a Multi-ChanneI Sound MTS) track - Digital ..34
B Choosing a Multi-Channe, Sound tMTS' track-Analog .35
m Automatic Volume Control......................... 35
B Selecting the Internal Mu_e 36
m Setting the On/Off Metod, .. 36
Listening to the Sound of the Sub PiP Picture..............37
m Reseatingthe Sound Settings to the Factor, Defaults..._37
Connecting Headehones ................................................ 37
What is Ar ,net+?......................................................... 77
Connecting Anynet+ Devices...................... 77
Setting dp Anyne_-_.......................................... 78
Scanning and Switching between An} net+ Devices........78
Recording 79
Listening through a Receiver Home theater ..................80
Check Points before Requesting Service ........................80
m
Symbol Press Imeor[an[ Note One-Touch
Button
Troubleshoobng ............................................................... 81
mstamng[ne Stand 83
Disconnecting the S[an(]............ 83
WaiI-Mount Adjustment (Sold separately ........................84
Wail Mount Kit Seecifications 'VESA 85
Using theAnti-Theff Kensington Lock 86
Seecifications .................................................................. 87

General information
List of Features
. Adjustable picture settings that can be stored in the TV's memory.
. Automatic timer to turn the TV on and off.
. A special sleep timer.
. Excellent Digital Interface & Networking :
With a built-in HD digital tuner, non-subscription HD broadcasts can be viewed with no Set-Top/Cable Box needed.
. Remote Control
The supplied remote can be used to operate the TV as well as most DVD players, Set-Top boxes,
Cable Boxes and VCRs.
. Excellent Picture Quality
- DNle technology provides life-like clear images.
SRS TruSurround XT
- SRS TruSurround XT provides a virtual Dolby surround system.
Accessories
Please make sure the following items are included with your LCD TV.
If any items are missing, contact your dealer.
RemoteControl& Batteries(AAAx 2) PowerCord CleaningCloth
(BN59-00599A) (3903-000144) (BN63-01798A)
Cover-Bottom
LN-T4061F: BN63-03031A Warranty Card / Registration
LN-T4065F: BN63-03298A Owner's Instructions Card / Safety Guide Manual
LN-T4661F :BN63-03148A (Not available in all locations)
LN-T4665F/ LN-T5265F : BN63-03308A
>The items color and shape may vary depending on the model,

Viewing the Control Panel
Buttons on the Lower-Right Part of the Panel
The buttons on the lower-right panel control your TV's basic features, including the on-screen menu.
To use the more advanced features, you must use the remote control.
<LN-T4061F / LN-T4661 F>
P
F--
<LN-T4065F / LN-T4665F / LN-T5265F> _ (_) ([_) _
snmsu_c
The product color andshape may vary depending on the model.
= ........................................................................................................ =
O SOURCE_ O <CH >
Toggles between all the available input sources Press to change channels.
(TV, AV1, AV2, S-Video1, S-Video2, Component1, In the on-screen menu, use the < CH > buttons as you
Component2, PC, HDMI1, HDMI2, HDMI3). would use the • and T butons on the remote control.
In the on-screen menu, use this button as you would
use the ENTER button on the remote control. O SPEAKERS
0 MENU _ 0 (POWER)
Press to see an on-screen menu of your TV's features. Press to turn the TV on and off.
-VOL +
Press to increase or decrease the volume.
In the on-screen menu, use the + VOL - buttons as you
would use the 4 and i_ buttons on the remote control.
O
POWER INDICATOR
Blinks and turns off when the power is on and
lights up in stand-by mode.
REMOTE CONTROL SENSOR
Aim the remote control towards this spot on the TV.

Viewing the Connection Panel
Rear PaneE Jacks
Use the rear panel jacks to connect A/V components that will be connected continuously, such as VCR or DVD players.
For more information on connecting equipment, see pages 6-11.
®
i ANT I IN ANT2IN
i /AIR) /CABLE)
[Side Panel Jacks]
Li
_AUi
23 _
O AUDIO OUT
Connects to the audio input jacks on your Amplified
Home theater.
O DIGITAL AUDIO OUT (OPTICAL)
Connects to a Digital Audio component.
PC IN
Connects to the video and audio output jacks on
your PC.
O HDMI IN 1,2,3/DVl IN(HDMI1) (AUDIO R/L)
Connects to the HDMt jack of a device with an HDMt output. _)
Use the HDMI IN 1jack for a DVI connection to an
external device.
You should use the DVl to HDMI cable or DVI-HDMI
adapter (DVl to HDMI) for a video connection,and the
DVl IN 'R-AUDIO-L' jack for audio.
- The HDMt tN 1jack does notsupport PCconnection
- No sound connectionis neededfor an HDMtto HDMt
connection
- When usingan HDMt/DVtcable connection,you must use
theHDMt tN 1jack.
O ANT 1 IN/ANT 2 IN
Connects to an antenna or cable TV system.
EX LINK
Connect this to the jack on the optional wall mount
bracket. This will allow you to adjust the TV viewing angle
using your remote control.
O COMPONENT IN 1,2
Connects Component video/audio.
AV IN 1 /AV IN 2
Video and audio inputs for external devices, such as a
camcorder or VCR.
S-VIDEO
Connects an S-Video signal from a camcorder or VCR.
POWER INPUT
Connects the supplied power cord
KENSINGTON LOCK
The Kensington lock (optional) is a device used to
physically fix the system when used in a public place.
If you want to use a locking device, contact the dealer
where you purchased the TV.
>-The place of the Kensington Lock may be different
depending on its model.
_) r_ HEADPHONE
Connects a set of external headphones for private
listening.
WISELINK
Connect this to the jack on the optional wall mount
bracket, This will allow you to adjust the TV viewing
angle using your remote control.

Remote Control
You can use the remote control up to a distance of about 23 feet from the TV. When using the remote, always point it directly at the
TV. You can also use your remote control to operate your VCR, Cable box, DVD player, or Set-Top Box.
O POWER !_) SOURCE
Turns the TV on and off. Press to display all of the available
video sources.
NUMERIC BUTTONS
Press to change the channel. _)
Press to select additional channels(digital _)
and analog) being broadcast by the same
station. For example, to select channel
"54-3", press "54", then press "-" and "3".
_]b CH LIST
@
Used to display Channel Lists on the
screen.
ANTENNA
Press to select "AI R" or "CABLE". _)
VCPJDVD Functions
- Rewind
- Stop
- Ray/Pause
- Fast/Forward _)
O VOL@VOL®
Press to increase or decrease the
VO}Ume.
_(MUTE)
Press to temporarily cut off the sound.
Q MENU
Displays the main on-screen menu. !_)
@ S,MODE
Press to se}ect the sound mode.
@
_! RETURN
Returns to the previous menu.
P.MODE
Press to select the picture mode.
_) CAPTION
Controls the caption decoder.
FAV.CH
Press to switch to your favorite channels, i_
SLEEP
Press to select a preset time interval
for automatic Shut off.
_) SRS
Selects SRS TruSurround XT mode.
@ SET
Sets the remote to control your
TV, VCR, Cable, DVD, or Set-Top Box
t_ TV, DVD, STB, CABLE, VCR
Press to operate your TV,DVD, STB,
CABLE (box), or VCR
(See pages I7-21 )
_) When pressing this button, a number
of buttons on the remote control (e.g.
TV, DVD, STB, CABLE, VCR,
VOL and CH buttons) light up for a few
seconds and then turn off to save
power. This function is convenient for
using the remote at night or when dark.
@
@
PRE-CH
Tunes to the previous channel.
WISEUNK
This Dnction enables you to view and
play photo (JPEG) and audio files
(MP3) from an external device.
(Refer to page 65)
REC
This remote can be used to control
recording on Samsung recorders.
(Refer to page 79)
CH(_ / CHQ
Press to change channels.
EXIT
Press to exit the menu.
UPS, / DOWNT / LEFT_ /
RIGHT_, / ENTER_
Use to select on-screen menu items
and change menu values.
INFO
Press to display information on the TV
screen.
Anynet+
Runs the Anynet+ functions and sets
up Anynet devices.
STILL
Press to stop the action during a
particular scene.
Press again to resume normal video.
P.SlZE
Picture size selection.
PIP
Picture-in Picture ON/OFF.
CH^/v
Displays the available channels in
sequence. (These buttons change
channels in the PIP window only.)
MTS
Press to choose stereo, mono or
Separate Audio Program
(SAP broadcast).
RESET
When your remote does not work,
change the batteries and press the
RESET button for 2-3 seconds before
use.
>This is a special remote control for the visually impaired, and has Braille
points on the Power, Channel, STOP, PLAY/PAUSE andVolume buttons.
> The performance of the remote control may be affected by bright light.

Installing Batteries in the Remote Control
1, Lift the cover at the back of the remote control upward as shown in the figure.
2, install two AAA size batteries.
_'-Make sure to match the "+" and "-" ends of the batteries with the diagram inside the compartment.
3, Replace the cover.
:_ Removethe batteriesandstore them in a cool dry placeif youwon't beusingthe remotecontrolfor a
long time.
The remote control can be used up to about 23 feet from the TV.
(Assuming typical TV usage, the batteries should last for about one year.)
>- If the remote control doesn't work, check the following:
1. Is the TV power on?
2.Are the plus and minus ends of the batteries reversed?
3.Are the batteries drained?
4. ts there a power outage, or is the power cord unplugged?
5. Is there a special fluorescent light or neon sign nearby?
Connecting VHF and UHF Antennas
tfyour antenna has a set of leads that took like the diagram to the right, see "Antennas with
300 O Fiat Twin Leads" below.
tfyour antenna has one lead that looks like the diagram to the right see "Antennas with 75
(_Round Leads".
tfyou have two antennas, see "Separate VHF and UHF Antennas".
Antennas with 300 Q Flat Twin Leads
tfyou are usingan off-air antenna (such as a roof antenna or "rabbit ears") that has 300 _ twin flat leads, follow thedirections
below.
1, Piece thewires from the twin leads under the screws on a 300-75 _ adapter
(not supplied).
Use a screwdriver to tighten the screws.
2, Plug the adaptor into theANT 2 tN (CABLE) terminal on the back of the TV.
Antennas with 75 Q Round Leads
1, Plug the antenna lead into the ANT 1 tN (AIR) terminal on the back of the TV.
Separate VHF and UHF Antennas
tfyou have two separate antennas for your TV (one VHF andone UHF), you must combine the two antenna signals before con-
nectingthe antennas to the TV.This procedure requires an optional combiner-adaptor (available at most electronics shops).
1, Connect both antenna leads to the combiner. --/ l_
2. Plug the combiner into theANT 1 iN (AIR) terminal on the bottom of the rear panel.

Connecting Cable TV
Toconnect to a cable TV system, follow the instructions below.
Cable without a Cable Box
1, Plug the incoming cable into theANT 2 tN (CABLE) terminal on the back of the TV.
:_*BecausethisTViscable-ready,youdonotneedacableboxtoviewunscrambledcablechannels.
Connectinq to a Cable Box that Descrambles All Channels
1, Find the cable that is connected to theANT OUT terminal on your cable box.
Thisterminalmightbelabeled"ANTOUT","VHFOUT"or simply,"OUT".
2. Connectthe otherendof thiscabletotheANT 2 tN (CABLE)terminalon thebackof theTV.
ANT IN ANT OUT_
t
Connectinq to a Cable Box that Descrambles Some Channels
if yourcable box descrambles only some channels (such as premium channels), foltow the instructions below. Youwill needa two-
way splitter, an RF (A/B) switch, and four lengths of RF cable. (These itemsare available at most electronics stores.)
1, Find and disconnect the cable that is
connected to theANT tN terminal on your
cable box.
Thisterminalmightbelabeled"ANTIN",
"VHFIN"or simply,"IN".
2. Connect this cable to a two-way splitter.
3, Connect an RF cable between the OUTPUT
terminal on the splitter and the tN terminal
on the cable box.
Incoming
cable
Splitter
incoming
cable
)
Cable Box
4, Connect an RF cable between the
ANT OUT terminal on the cable box and
the B-IN terminal on the RF(A/B) switch.
incoming i,J ,,i o
cable
Spgtter
Cable Box
Switch
5, Connect another cable between the other
OUT terminal on the splitter and the A-IN
terminal on the RF (A/B) switch.
Cable Box Switch
6, Connect the last RF cable between the
OUT terminal on the RF (A/B) switch and
the ANT tN terminal on the rear of the TV.
ANT IN
Splitter _ _ RF (AJB)
Cable Box Switch
After you have made this connection,set theA/B switchtothe "A" positionfor normal viewing.Set theA/B switch tothe "B" positionto
viewscrambled channels. (Whenyou set theA/B switchto"B", you willneedto tune your TVto the cablebox's output channel which is
usuallychannel 3 or4.)

Connecting a VCR
Video Connection
These instructions assume that you have already connected your TV to anantenna or a cable TV system (according tothe
instructions on pages 6-7). Skipstep 1if you have not yet connected to an antenna or a cable system.
1, Unplug the cable or antenna
from the back of the TV.
2. Connectthe cable or antenna
totheANT tN terminalon the
backof theVCR.
3, Connectan RF Cable between
theANT OUTterminalon the
VCR and theANT 1 IN (AIR)or
ANT 2 IN(CABLE) terminal on
theTV.
4, Connecta VideoCable
between the VIDEO OUT jack
on the VCR and theAV IN 1
(orAV tN 2) [VIDEO] jack on
the TV.
5, ConnectAudio Cables
between the AUDIO OUT
jacks on theVCR and the
AV IN 1 (orAV IN 2)
JR-AUDIO-L]jacks on the TV.
>- tf you have a "mono"
(non-stereo) VCR, use a
Y-connector (not supplied)
to hook up to the right
and left audio input jacks
of the TV tf your VCR
is stereo, you must
connect two cables.
VCR Rear Panel
TV Rear Panel
!4! Video Cable (Not supplied)
RF Cable {Not supplied)
Follow the instructions in "Viewing a VCR or Camcorder Tape" to view your VCR tape.
>- Each VCR has a different back panel configuration.
>- When connecting a VCR, match the color of the connection terminal to the cable.
S-Video Connection
Your Samsung TV can be connected to an S-Video signal from an VCR.
(This connection delivers a better picture as compared to a standard VCR.)
t. To begin, follow steps 1-3
in the previous section to
connect the antenna or
cable to your VCR and
your TV.
2. Connect an S-Video Cable
between the S-VIDEO OUT
jack on the VCR and the
AV IN1 [S-VIDEO] jack on
the TV.
3. ConnectAudio Cables
between theAUDIO OUT
jacks on the VCR and the
AV IN1 [R-AUDIO-L] jacks
on the TV.
TVRear Panel
An S-Videocablemay beincludedwith aVCR. (If not,check yourlocalelectronicsstore.)
> Each VCR has a different back panel configuration.
>When connecting a VCR, match the color of the connection terminal to the cable.

Connecting a Camcorder
The side panel jacks on your TV make iteasy to connect a camcorder to yourTV.
They aIiow you to view the camcorder tapes without usinga VCR
t. Connect a Video Cable
between the AV IN2
[VIDEO] jack on the
TV and the VIDEO OUT
jack on the camcorder.
2. ConnectAudio Cables
between the AV IN2
[R-AUDIO-L] jacks on the
TV and the AUDIO OUT
jacks on the camcorder.
TV Side Panel
Each Camcorder has a different back panel configuration.
When connecting a Camcorder, match the color of the connection terminal to the cable.
Connecting a DVD Player or Set-Top/Cable Box
The rear paneljacks on your TV make it easy to connect a DVD player or Set-Top/Cable box to your TV.
1, Connect a Component
Cable between the
COMPONENT IN(1 or 2)
[Y,PB,PR]jacks on the TV
and the COMPONENT
[Y.PB,PR] jacks on the
DVD player or Set-Top/Cable
Box.
2. ConnectAudio Cables
between the COMPONENT
IN(1 or 2) JR-AUDIO-L]
jacks on the TV and the
AUDIO OUTjacks on the
DVD player or Set-Top/Cable
Box.
TV Rear Panel
i_iI Component Cable (Not supplied)
>- Component video separates the video into Y (Luminance (brightness)), Pb (Blue) and
Pr (Red) for enhanced video quality.
Be sure to match the component video and audio connections.
For example, if connecting the video cable to COMPONENT IN, connect the audio cable
to COMPONENT tN aIso.
:_ Each DVD Piayer and Set-Top/Cable box has a different back panet configuration.
_ When conneding a DVD playeror Set-Top/Cablebox match thecolor of theconnedion
terminalto thecable.

Connecting a DVD Player or Set-Top/Cable Box via HDMI
This connection can only be made if there is an HDMt Output connector on the external device.
1, Connect an HDMI Cable
between the HDMt IN
(1,2 or 3)jack on the
TV and the HDMI jack
on the DVD player or Set-
Top/Cable Box.
DVD Player, Setmop/Cable Box Rear Panel
HDMI Cable (Not supplied)
TV Rear Panel
Side Panel Jacks
What is HDMI?
• HDMl(High-Definition Multimedia Interface), is an interface that
enables the transmission of digital audio and video signals using a single cable
• The difference between HDMI and DVl is that the HDMI device is smaller in size and
has the HDCP (High Bandwidth Digital Copy Protection) coding feature installed
>- Each DVD player and or Set-Top/Cable box has a different back panel configuration.
Connecting a DVD Player or Set-Top/Cable Box via DVI
This connection can only be made if there is a DVt Output connector on the externat device.
1, Connect a DVI to HDMt
Cable or DVt-HDMt Adapter
between the HDMI tN 1
jack on the TV and
the DVt jack on the
DVD player or Set-Top/Cable
Box.
2. ConnectAudio Cables
between the DVt IN (HDMt 1)
JR-AUDIO-L]jack on the
TV and the AUDIO OUT jacks
on the DVD player or
Set-Top/Cable Box.
TV Rear Panel
Audio Cable tNot supplied)
;11! DVI to HDMI Cable (Not supplied)
:_ Each DVD player and Set-Top/Cable Box has a different back panel configuration.
_--When connecting a DVD player or Set-Top/Cable Box, match the color of the connection terminal
to the cable.
When using an HDMI/DVl cable connection,you must use the HDMI IN1 jack.

Connecting a Digital Audio System
The rear panel jacks on your TV make iteasy to connect a Digital Audio System to your TV.
1, Connect an Optical Cable
between the "DIGITAL
AUDIO OUT (OPTICAL)"
jacks on the TV and the
Digital Audio Input jacks on
the Digital Audio System.
When a Digital Audio
System is connected to the
"DIGITALAUDIO OUT
(OPTICAL)" terminal:
Decrease the volume
of the TV, and adjust the
volume level with the
system's volume control.
Digital Audio System
Optical Cable (Not supplied)
TV Rear Panel
>" 5.1CH audio is possiblewhen theTV is connected to an external device supporting 5.1CH
> Each Digital Audio System has a different back panel configuration.
Connecting an Amplifier/DVD Home Theater
Connect Audio Cables
between theAUDIO OUT
[R-AUDIO-L] on the TV
andAUDIO IN [R-AUDIO-
L] on the Amplifier/DVD
Home Theater.
When an audio amplifier is
connected to the "AUDIO
OUT [L-AUDIO-R]"
terminals: Decrease the
volume of the TV, and adjust
the volume level with the
Amplifier's volume control.
Amplifier/DVD Home Theater
........
TV Rear Panel
@@
Audio Cable (Not supplied)
Connecting a PC
Using the D-Sub Cable
1, Connect a D-Sub
Cable between PC tN
[PC] connector on
the TV and the PC
output connector on
your computer.
2. Connect a PCAudio
Cable between PC IN
[AUDIO] jack on the
TV and theAudio Out
jack of the sound card
on your computer.
Using the HDMI/DVI Cable
1, Connect a HDMI/DVt
cable between the
HDMtl/DVt tN jack on
the TV and the PC output
jack on your computer.
2. Connect a 1Stereo/2RCA
cable between the DVI
tN [L-AUDIO-R] jack on
the TV and theAudio Out
jack of the sound card on
your computer.
>" Each Amplifier/DVD Home Theater has a different back panel configuration.
_When connecting anAmplifier/DVD Home Theater match the color of the connection
terminal to the cable.
Using the D-Sub Cable
PC
TV Rear Panel
Using the HDMI/DVI Cable
TV Rear Panel
PC
_i HDMI/DVI Cable (Not supplied)
>" Each PC has a different back panel configuration.
>-When connecting a PC, match the color of the connection terminat to the cable.
>-When using an HDMI/DVI cable connection,you must use the HDMI IN1 terminal.

Turning the TV On and Off
Press the POWERd) button on the remote control.
You can also use the (b button on the front of the panel.
Feature
When the TV is initially powered on, basic settings proceed automatically and subsequently:
1, Press the POWER button on the remote control.
The message "Menu language, Shop Mode, Channels and Time wilt be set." is
displayed.
Press the ENTER button, then "Select the language of the OSD" menu
is automatically displayed.
2, Press the A or T buttons to select language, then press the ENTER button.
The message "Select Home Mode when installing this TV at home." is displayed.
3, Press the 4 or 1_buttons to select "Shop" or "Home", then
press the ENTER button.
The message "Select the antennas to memorize." is displayed.
>We recommend setting the TV to Home modefor the best picture in your
home environment.
>Shop mode is only intended for use in retail environments.
> tf the unit is accidentally set to Shop modeand you want to return to Dynamic
(Home) mode, press any Volume button and then hold down the MENU button
for five seconds on the side panel of the TV.
4, Press the & or '_' buttons to memorize the channels of the selected connection.
Press the ENTER button to select "Start".
> tf the antenna is connected to ANT 1(AtR), select "Air" and if it is connected to
ANT 2 (CABLE) select "Cable".
> If both ANT 1 (AIR) and ANT 2 (CABLE) are connected, select the "Air + Cable".
> tn Cable mode, you can select the correct signal source among STD, HRC,
and IRC by pressing the A.or • button, then press the ENTER button.
Contact your local cable company to identify the type of cable system that
exists in your particular area.
5, The TV wilt begin memorizing all of the available channels.
After all the available channels are stored, the Auto program menu reappears.
Press the ENTER button when channel memorization is complete.
The message "Select the clock mode." is displayed.
>To stop the search before it has finished, press the ENTER button with stop
selected.
6, Press the ENTER button.
Press the A or T buttons to select "Manual" or "Auto", then Press the
ENTER button.
The message "Set to daylight savings time." is displayed.

7, Presstheh, or _' buttons to select "No" or "Yes",then press the ENTER button.
The message "Select the time zone in which you live." is displayed.
8,
Press the h. or T buttons to highlight the time zone for your local area
Press the ENTER button, tf you have received a digital signal, the time wilt be set
automatically.
if not, see page 48 to set the clock.
9, The message "Enjoy your watching." is displayed.
When you have finished, press the ENTER button.
If you want to reset this feature...
1, Press the MENU button to display the menu.
Press the A or _' buttons to select "Setup", then press the ENTER button.
2. Press the ENTER button again to select"Plug & Play".
3, The message "Menu language, Shop Mode, Channels and Time wilt be set."
is displayed.
Changing Channels
Us_ the Channel Buttons
1, Press the CHQ or CH@ button to change channels.
>-When you press the CHQ or CHC) button, the TV changes channels in
sequence.
You wilt see all the channels that the TV has memorized. (The TV must have
memorized at least three channels). You will not see channels that were either
erased or not memorized. See page 16 to memorize channels.
v v v v
Usinq the PRE-CH Button to select the Previous Channel
t. Press the PRE-CH button. F A_(__ __..
The TV will switch to the last channel viewed. ('_ ('_
>To quickly switch between two channels that are far apart, tune to one
channel, then use the number button to select the second channel. Then
use the PRE-CH button to quickly alternate between them. c A

Adjusting the Volume
1. Press the VOL ® or VOL® buttons to decrease or increase the volume. VOL'_ CH
o _ oOO
, / _ f( v
II!
Using Mute
At any time, you can cut off the sound using the MUTE button.
t. Press MUTE button and the sound cuts off.
The word .... will appear in the lower-left corner of the screen.
2. To turn mute off, press the MUTE button again, or simply press the
VOL® orVOL® buttons.
Viewing the Display
The display identifies the current channel and the status of certain audio-video settings.
1, Press the INFO button on the remote control.
The TV wilt display the channet the type of sound,
and the status of certain picture and sound settings.
Press the INFO button once more or wait approximately 10 seconds and the
display disappears automatically.
RETURN _0 _
P.SlZE

Viewing the Menus
1, With the power on, press the MENU button.
The main menu appears on the screen. The menu' s left side has five icons:
Picture, Sound, Channel, Setup, Input.
2. Use the A or T buttons to select one of the five icons.
Then press the ENTER button to access the icon's sub-menu.
3, Press the EXIT button to exit.
The on-screen menus disappear from the screen after about one minute.
ME_J EXlf
!
Memorizing the Channels
YourTV can memorize and store all of the available channels for both"off-air" (Air) and "Cable" channels. After the available
channels are memorized, use the CHG or CH(_ buttons to scan through the channels. This eliminates the needto change
channels by entering the channels digits. There are three steps for memorizing channels: selecting a broadcast source,
memorizing the channels (automatic) and adding or deleting channeis (Channel Lists).
Selectin theVideo Si nal-source
Before your television can begin memorizing the available channels, you must specify the
type of signal source that is connected to the TV (i.e. anAir or a Cable system).
1, Press the MENU button to display the menu.
Press the A or _' buttons to select "Channel", then press the ENTER button.
2. Press the ENTER button select "Antenna".
Press the h. or T buttons to select "Air" or "Cable", then press the ENTER button.
Press the EXIT button to exit.

StorincLChannels in Mernorv_Automatic Method)
1, Press the MENU button to display the menu.
Press the A or _' buttons to select "Channel", then press the ENTER button.
2, Press the A or _r buttons to select "Auto Program", then press the ENTERbutton.
3, Press the A or _r buttons to select the antenna connection, then press the
ENTER button.
>Air: "Air" antenna signal. / Cable: 'Cable" antenna signal. /
Air+Cable: "Air" and "Cable" antenna signals.
4, When selecting the Cable TV system : Press the ENTER button to start the auto
program. By default, the cable TV system is set to 'STD". tf you want to select
another type of cable system, press the h, or _r button to select
"STD", "HRC" or "tRC".
> STD, HRC and tRC identify various types of cable TV systems. Contact your
local cable company to identify the type of cable system that exists in your
particular area. At this point the signal source has beenselected.
Press the ENTER button to start the auto program.
>To stop the search before it has finished, press the ENTER button with stop
selected.
5, After all the available channels are stored, the "Auto Program" menu reappears.
Press the EXIT button to exit.

Setting Up Your Remote Control
After the television has been set up properly, your remote control can operate in five
different modes: TV, DVD, Cable, Set-Top Box, VCR. Pressing the corresponding button j
on the remote control allows you to switch between these modes, and control
whichever piece of equipment you choose.
>_The remote control might not be compatible with all DVD Players, VCRs, Cable boxes, and
Set-Top Boxes.
i
Setting Up the Remote to Operate Your VCR
1. Turn off yourVCR.
2. Press the VCR button on your TV's remote control.
3. Press the SET button on your TV's remote control.
4. Using the number buttons on your remote control, enter three digits of the VCR code
listed on page 19of this manual for your brand of VCR. Make sure you enter three digits [......
of the code, even ifthe first digit is a "0".
(If more than one code is listed, try the first one.) .......
5. Press the POWER® button on the remote control.
YourVCR should turn on if your remote is set up correctly.
If your VCR does notturn on after set up, repeat steps 2, 3, and 4, but try one of the
other codes listed for your brand of VCR.
tf no other codes are listed, try each VCR code, 000 through 080.
> Note on Using Remote Control Modes: VCR
When your remote control is in "VCR" mode, the volume buttons stitl control your
TV's volume.
_NA C_LIS_WlSELI_K eEC
____Q__©___O___®....
_oaE _ODE
c:s _ cz:s
OSEr O_B_
P
Setting Up the Remote to Operate Your Cable Box
1.
2.
3.
4.
[ ......
J
Turn off your cable box. !
Press the CABLE button on your TV's remote control. J
Press the SET button on your TV's remote control, iI
i
Using the number buttons on your remote control, enter three digits of the cable box codd
listed on page 20 of this manual for your brand of cable box. Make sure you enter three i
digits of the code, even if the first digit is a "0". (tf there is more than one code listed, try
the first one.)
Press the POWER{b button on the remote control.
Yourcable box should turn on if your remote is set up correctly.
If your cable box does not turn on after set up, repeat steps 2 3, and 4, but try one of the!
other codes listed for your brand of cable box. tf no other codes are listed, try each code, J
000 through 046. [......
.'_Note on Using Remote Control Modes: Cable Box
When your remote control is in "CABLE" mode, the volume buttons still control your
TV's volume.
....
P._3E S_CeE
_ _ _CSD
P

Setting Up the Remote to Operate Your DVD
1. Turn off your DVD.
2. Press the DVD button on your TV's remote control.
3. Press the SET button on your TV's remote control.
4. Using the number buttons on your remote control, enter three digits of the DVD code
listed on page 20~21 of this manual for your brand of DVD.
Make sure you enter three digits of the code, even if thefirst digit is a "0".
(if there is more than one code listed, try the first one.)
5. Press the POWERe button on the remote control.
Your DVD should turn on if your remote is set up correctly.
if your DVD does not turn on after set up, repeat steps 2 3, and4, but try one of the
other codes listed for your brand of DVD.
tf no other codes are list-ed, try each code, 000 through 141.
-_ Note on Using Remote Control Modes: DVD
When your remote control is in "DVD" mode, the volume buttons stilt control your
TV's volume.
_
p,
..........
p2,_JBE 8,MOBE
d2b_b ctb _
J
Setting Up the Remote to Operate Your STB
1. Turn offyourSTB
2. Press the STB button on your TV's remote control.
3. Press the SET button on your TV's remote control.
4. Using the number buttons on your remote control, enter three digits of the STB code
listed on page 21 of this manual for your brand of STB.
Make sure you enter three digits of the code, even if thefirst digit is a "0".
(if there is more than one code listed, try the first one.)
5. Press the POWER_b button on the remote control.
YourSTB should turn on if your remote is set up correctly.
tf your STB does not turn on after set-up repeat steps 2 3 and 4, but try one of the other
codes listed for your brand of STB........
(if noother codes are listed, try each code, 000 through 074.) .......
> Note on Using Remote Control Modes: STB
When your remote control is in "STB" mode, the volume buttons stitl control your
TV's volume.
A_',_ cftLISt _SEUNK REC
....©___O___©___®....
_ tZ3 _ EZl
¥

Remote Control Codes
> VCR
Brand Code Brand Code
SAMSUNG 0% 001 002 003 004 005 077 078 079 MONTGOMERYWARD 020
ADMIRAL 020 MTC 002 025
AKAI 004 027 032 NEC 007 008 018 026 037 062 064
AUDIODYNAMICS007026 OPTIMUS 020
......BE_HO'J%_.............0_ OR_ON
BRQKSON[C..............................022 PANASONIC 021 056 071 072
CANDLE 002 003 006 008 015 055 PENTAX 019 04I 075
CANON 021 056 PENTEXRESEARCH+ 008
CITIZEN 002 003 006 008 015 055 PHILCO 021 056 059
COLORTYME 007 PHILIPS 021 080
CRAIG 002 024 PIONEER 019 026 039 053
CURTISMATHES 002 007 008 017 021 025 056 064 066 PORTLAND 015 049 055
DAEWOO 003 010 011 012 013 014 015 016 PROSCAN 017
DB 007 026 QUARTZ 018
DIMENSIA 017 QUASAR 02I 056
DYNATECH 025 RADIO SHACK/ 006 018 020 021 024 025 029 034 048 056
ELECTROHOME 034 REALISTIC
EMERSON 001 003 006 021 022 025 030 032 034 040 RCA 002 017 019 021 035 041 043 057 068 076
047 050 052 060 063 065 066 067 069 073 SANSUI 026
FISHER 018 024 028 029 048 051 061 SANYO 018 024
FUNAI 025 SCOTT 003 047 052 067
GENERALELECTR]C 002 005 017 021 056 SEARS 006 018 019 024 028 029 041 048 05t
GOVIDEO 002 SHARP 020 034 045 015
HARMANKARDON 007 SHIMTOM 027 033 038 058
HITACHI 019 025 041 042 074 SIGNATURE 025
INSTANTREPLAY 021 SONY 027 033 044
JC PENNEY 002 007 018 019 021 026 037 041 054 056 SYLVANIA 021 025 056 059
JCL 007 008 018 021 026 037 SYMPHONIC 025
JVC 081 082 083 TANDY 018 025
KENWOOD 007 008 018 021 026 037 TASHIKA 006
......KIT_I 070 TATUNG 037
KONIA 036 TEAC , 025 037 068
LG(Goldstar) 006 007 008 009 010 TECHNICS 021
LLOYD 025
......LOG!K..............................................038
LXI 025
MARANTZ i 007 008 018 021 026 037 062
MARTA 006
MEI 021
TEKNIKA 006 021 025 031
TMK 066
TOSHIBA 003 019 029 051 052
TOTEVISION 002 006
UNITECH 002
VECTORRESEARCH I 007 026
VICTOR 026
MEMOREX 006 021 024 025 VIDEO CONCEPTS 007 026
MGA 034 VIDEOSONIC 002
MIDLAND 005 .....WARDS.................................... ..........
......N[NOgTA.........................................o!_o4!o7_..............................................................................................................YAMAHA........................................,0070080!8026037 .................................................................................
MITSUBISHI 019 034 041 046 ....................................ZENITH , 023 027 03

HAMLIN 00302403I
HITACHI 025030
JERROLD 038039
MACOM 025030
MAGNAVOX019023028
:_"CABLEBOX
Brand Code Brand • Code
SAMSUNG 000001002003004005006007 REGENCY 015023
GI 04I SA 042 043
SCENTIFIC ATLAN 042 043
SPRUCER 022
..... 036
SYLVANIA 016
TEXSCAN 016
OAK 026 TOCOM 032
...........................................................................................................................................................................................................................[J_i_E_s_..............................o33o34
PANASONIC 003 022 027 037 044
PHILIPS 019 021 023 028
PIONEER 004 018 020 044
RCA 014 022 040
SAMSUNG DVD
Product Code
DVD 000 001 002
DVDR 003 004
................................................................./...................................................................................................................................................
VIEWSTAR 019 021 023 028
......WA_NE_AMEX......................046
ZENITH 017 029 035 037 045
Product Code
HomeTheaterVCRCOMBO 014 015 016
HDDRecorder COMBO 017
BD Record 005 006 TWINTRAYCOMBO 018
VCR COMBO 007 008 009 010 011 STBDVDCOMBO 019
VCR Record 012 ..,DVD ,Re.ce!ver 020 ..........................................................................
DHRCOMBO 013 AV Receiver 021
DVD
Brand Code Brand Code
ANAM 030 INTEGRA 092
AUDIOVOX 075 JBL 091
AUDIOLOGIC 085 JVC 022 033 115 116
ANABA 072 JATON 073
APEX DIGITAL 070 071 074 086 083 084 088 111 112 KENWOOD 05I 108 109
AIWA I14 KISS 073
BROKSONIC 062 KONKA 059 I00 I06 107
BLAUPUNKT 074 KLH 074 075
......B_K !227_ LG!Go_ds!a,:!................................02_0_
CURTISMATHES 027 LOEWE 057
CYBER HOME 077 078 079 082 LASONIC 058
CLARION 080 125 MOBILEAUTHORITY 054
CIRRUS 081 MEMOREX 055
CYBER HOME 065 MALATA 056
CINEVlSION 095 MAGNAVOX 076 093
MINTEK O74 094
DENON I46 MONYKA 073
FARENHEIT 067 068 NORCENT 048 049 050
FISHER 090 NEXTBASE 052
GPX 060 NEC 053
GOVlDEO 061 089 133 135 NANTAUS 144
GE 069 074 NESA 074
GREENHILL 074 QPTOMED_AELECTRQN}CS105
HITACHI 064 I13 OPTIVlEW 072
HITEKER 07I ONKYO 076 092 I19
HOYO 073 PHILCO 044 045
................................................................1..................................................................
HARMAN/KARDON 091 110 PRINCETON 046 047
..........................IRT i 08 , PROSGAN 023

DVD
Brand Code Brand Code
PANASONIC 024 034 I24 I34 136 137 I38 THOMSON 145
PHILIPS 036 076
ROTEL 117 118
RIO 120
RCA 023 035 074 075 131 132
RAITE 073
ROWA 038
SAMPO 104
TOSHIBA 028 062 076
......_Eou_!cs.........................................................................................................................................................................................
TVIEW 072
TOKAI 073
TECHWOOD 097
TREDEX z 098 099 I01
SONY 026 029 I26 127 128 129 130 141 URBANCONCEPTS 076
SHERWOOD 039 041 VENTURER 075
SVA 042 VOCOPRO 102
SYLVANIA 043 093 YAMAHA 032 063
SHARP I40 YAMAKAWA 040 073
SANSUi 062 XWAVE 103
......_AN_........................................"_6_'_ _Nif_ ............................................................................................................................
SHINSONIC 094 ................................
SAMSUNG SET-TOP BOX
Product Code Product Code
Ground wave STB 001 002 SatelliteSTB HDDCOMBO Premium 010
SatelliteSTB 003 CABLE STB HDD COMBOStandard 011
CABLE STB 004 CABLE STB HDD COMBO Premium 012
STB DVD COMBO 008 Groundwave STB HDDCOMBO Standard 013
SET-TOP BOX
Brand Code Brand Code
ALPHASTAR 023 MAGNAVOX 016 021 036 038 039 040 041 042
ANAM 043 MEMOREX 016
CHANNELMASTER 018 034 MOTOROLA 064
CROSSDiGITAL 019 MACOM 018
CHAPARRAL 035 MiTSUBISHi 015
DiRECTTV 015 016 017 019 022 045 060 061 062 NEXTLEVEL 047 048 064
065 066 067 068
DAEWOO 074
DISHNETWORKSYSTEM 069 070
DiSHPRO 069
DRAKE 018 024 032
DXANTENNA 027
PHILIPS 015 016 017 021 033 036 038 039 040
041 042 067
PRIMESTAR 046 049 050 063
PANASONiC I 058 059 061 062
PAYSAT _ 016
PROSCAN 065 066
RCAECHOSTAR 025 069 070 071 05I 052 053 065 066
EXPRESSVU 069 RADiOSHACK 064
GOI 069 REALISTIC 057
GE 065 STARTRAK 026
GENERALINSTRUMENT046 047 048 063 064 STS 020 027
HTS 069 SKY 031
HOMECABLE 056 SKYLIFE 005 006 007
HITACHI 022 SNACK 064
HUGHESNETWORK 015 017 STARCHOICE 064
IQ 020 SONY 054 060
IQPRISM 020 TOSHIBA 015 017 028 029 030 072
JANEIL 059 ULTIMATETV 060 066
JERROID 063 UNIDEN 016 021 037 055 056 057
JVC 069 070 ZENITH 024 031 068
LG(Goldstar) 044 07

To Select the Source
Use to select TV or other external input sources connected to the TV.
Use to select the input source of your choice.
1. Press the MENU button to display the menu.
Press theA or • buttons to select "tnpul:',then press the ENTER button.
2. Press the ENTER button to select"Source List".
Pressthe A or _' buttonsto select signal source, then press the ENTER button.
:_ When you connect equipment to the LCD, you can choose between the
following sets ofjacks: TV,AV1, AV2, S-Video1, S-Video2, Component1,
Component2, PC, HDMI1, HDMI2, HDMI3 on the TV's rear panel.
HDMI1, HDMI2, HDMI3 input can only be setected when the external device is
turned on and connected via HDMt.
>- AV2/S-Video2/HDMt3 is located on the side of the TV.
You can choose only those external devices that are connected to the TV.
I-H
tel Press the SOURCE button on the remote control to view an external signal source. Q _URCE I] I
To Edit the input Source Name
Name the device connected to the input jacks to make your input source selection easier.
1. Press the MENU button to display the menu.
Press theA or T buttons to select "Input",then press the ENTER button.
Press the A or T buttons to setect "Edit Name", then press the ENTER button.
2. Press the A or T buttons to select "AVI", "AV2", "S-Video1", "S-Video2"
"Component1", "Component2", "PC", "HDMtl", "HDMt2", "HDMt3" input jack, then
press the ENTER button.
Press the A or T buttons to select "VCR", "DVD", "D-VHS", "Cable STB",
"HD STB", "Satellite STB", "PVR STB", "AV Receiver", "DVD Receiver",
"Game", "Camcorder", "DVD Combo", "PC", "VOD STB", "TV" input source, then
press the ENTER button.
Press the EXIT button to exit.

Picture Control
Using Automatic Picture Settings
Your TV has Three automatic picture settings ("Dynamic", "Standard", "Movie") that are preset at the factory.
You can activate either Dynamic, Standard, Movie by making a selection from the menu.
1. Press the MENU button to display the menu.
Press the ENTER button, to select "Picture".
2. Press the ENTER button to select"Mode".
Press the A or V buttons to select the "Dynamic", "Standard" "Movie" picture
setting. Press the ENTER button.
3,
ChooseStandardfor thestandardfactorysettings.
*ChooseMoviefora naturalImagewithoutpictureenhancements.
Press the A or _' buttons to select "Contrast", "Brightness", "Sharpness",
"Color", or "Tint(G/R)", then press the ENTER button.
4,
Press the 4 or _ buttons to decrease or increase the value of a particular item.
For example, if you select "Contrast", pressing the I,. button increases it.
Press the ENTER button.
Press the EXIT button to exit.
>- • When you make changes to Contrast, Brightness Sharpness, Color, Tint(G/R)
the OSD will be adjusted accordingly.
• When inPC mode, Tint Sharpness, and Color are not available.
{_: Press the P.MODE button on the remote control repeatedly to select the desired
picture mode.
- _ L2 L9
_MO3E SMODE STILL

Activating Backlight
You can adjust the screen brightness by adjusting the LCD backlight brightness. (0-10)
1, Press the MENU button to display the menu.
Press the ENTER button to select "Picture".
2. Press the A or _t' button to seiect"BackIight", then press the ENTER button.
3, Press the _ or _ button to decrease or increase the valueof the backlight
brightness.
Press the ENTER button.
Press the EXIT button to exit.
Adjusting the Color Tone
You can change the color of the entire screen according to your preference.
1, Press the MENU button to display the menu.
Press the ENTER button to select "Picture".
2. Pressthe A or V button to select "Color Tone",then pressthe ENTER button.
3, Press the A or _r button to select "Cool2", "Coot1", "Normal", "Warm1",
or "Warm2".
Press the ENTER button.
>'-When the picture mode is set to Dynamic or Standard, Warm1 and Warm2
cannot be selected. Movie mode is only available.
Resetting the Picture Settings to the Factory Defaults
1, Press the A. or V button to seiect"Reset", then press the ENTER button.
Press the h. or _' button to select "Cancel" or "OK" then press the ENTER button.
Press the EXIT button to exit.
>- Each mode can be reset.

iusting the Detailed Settings
You can set Detailed picture settings.
Activatin_ Detailed Settine_s
1, Press the MENU button to display the menu.
Press the ENTER button to select "Picture".
2. Press the ENTER button to select"Mode"
Press the A or _' button to select "Movie", then press the ENTER button.
3, Press the A or • button to select"Detailed settings", then press the
ENTER button.
_- Picture Mode is available in Standard or Movie mode.
:_ tf DNte is Off, the Detailed Settings cannot be selected when the Picture mode
is in Standard mode.
Activatin Black ad'ust
You can directly select the black level on the screen to adjust the screen depth.
4, Press the _t.or _' button to select"BIack adjust", then press the ENTER button.
5, Press the A or T button to select 'Off" 'Low" 'Medium" 'High".
Press the ENTER button.
_,Off: TurnsgffthebtackadjustmentDnction,
" Low: Setstheblackcolordepthtolow,
Medium:Setstheblackcoiordepthtomedium.
Nigh: Setstheblackcolordepthtohigh.
ActivatinchDyD namic Contrast
You can adjust the screen contrast so that the optimal contrast is provided.
6, Press the A or V button to seIect"Dynamic Contrast", then press the
ENTER button.
7, Press the A or _' button to select"Off""Low" 'Medium""High".
Press the ENTER button.
*Off; TurnsOffthedynamiccontrastadjustmentfunction.
_,Low:Setsthedynami¢contrasttotow,
Medium:Setsthedynamiccontrasttomedium.
*High:Setsthedynamiccontrasttohigh.

Activatin_Garnrna
You can adjust the middle brightness of pictures. (-3 ~ 3)
8, Press the A or T button to setect"Gamma", then press the ENTER button.
9, Press the 4 or _,.button to decrease or increase the value of a particular item.
Press the ENTER button.
ChangLng.the Color S;ace
Color space is a color matrix composed of red, green, and blue colors.
Select your favorite color space to experience the most natural color.
10, Press the A or _' button to select "Color Space", then press the ENTER button.
11, Press the _k or _' button to select "Auto" or "Wide".
Press the ENTER button.
Wide: WideColorSpaceoffersdeepandrichcolortone.
* Auto : AutoColorSpaceautomaticallyadjuststothe mostnaturalcolortonebasedon
programsources.
ActivatinAWhite Balance
You can adjust the color temperature for more naturaI picture colors.
12. Press the A or _t' button to select "White Balance", then press the ENTER
button.
13. Select the required option by pressing the A or • button,then press the
ENTER button.
14. Press the 4 or _- button to decrease or increase the value of a particular item.
Press the ENTER button.
* G Offsefc:Ad usts the green color darkness.
_B offset: Ad usts the blue Colordarkness.
_R gain: Adjusts the red cotor brightness.
'_G gain; Adjusts the green color brightness.
B gain: Adjusts the blue color brightness.
Reset: The previously adjusted white batance wili be reset to the factory defaults.
:_ Changing the adjustment value wilt refresh the adjusted screen.

Activatin_ CoLor Control
Thissetting can be adjusted to suit your personal preferences. When using the My Color
Control Feature, the current picture remains in movement.
15, Press the ENTER button to select 'My Color Control".
16, Press the A or T button to setect "Pink","Green',"Biue","White","Reser'.
Press the ENTER button.
17, Press the 4 or _,-button to decrease or increase the value of a particular item.
Press the ENTER button.
_"Greem Darkens o_"!ightens the green Ootor
_'BlUe: Darkens or lightens the btue Cotor
* White; Barkens or _ightensthe Whitecelor
Reset: The previousIy adjusted coiors wilt bereset to the factory defaults.
Changing the adjustment value wilt refresh the adjusted screen.
Activatinq Edqe Enhancement
You can emphasize object boundaries in the picture.
18, Press the A or _r button to select "Edge Enhancement", then press the
ENTER button.
19, Press the _k or _' button to select "Off" or "On".
Press the ENTER button.
Activatinq. xvYCC
The traditional TVs couldn't dearly implement sharp, solid, and texture images.This TV
can implement those effects using the xvYCC signals, which support extended color
space. The traditional TVs couldn't also implement part of colors for movie contents.
This TV can implement the same colors as in thefilms using the xvYCC signals.
Accordingly you can enjoy powerful color presentation of movies with your TV.
20, Press the A or _' button to select "xvYCC", then press the ENTER button.
2t, Press the A or T button to select 'Off" or "On".
Press the ENTER button.
Press the EXIT button to exit.

Changing the Screen Size
Occasionally,you maywantto changethe sizeof theimageonyourscreen. YourTV comeswith six screensizeoptions,each designedto
work bestwith specifictypesof videoinput. Yourcablebox or satellitereceivermayhaveits
ownsetof screensizesaswell.
1. Press the MENU button to display the menu.
Press the ENTER button to select "Picture".
2. Press the A or _r buttons to setect"Size", then press the ENTER button.
3. Press the & or T buttons to select the screen format you want.
Press the ENTER button.
Press the EXIT button to exit.
• 16:9 ! sets the picture tO !6:9 wide mode:
. Zoom1 : Magnifies the size of the picture on the screen.
. Zoom2 :Magnifies the size ot the pbture more than '_Zooml'[.
. Wide Fit : Enlarges the aspect ratio of the picture to fit the entire screen.
• 4:3 : Sets the picture to 4:3 normal mode.
• Just Scan : Use the function to see the full image without any cutoff I t._ CA_._ _
when HDMI 720p/1080i/!080p signals are input, aMo0E$_ODE STILL _,$1ZE
[_] Alternately, you can press the P.SIZE button on the remote control repeatedly to Iz_
change the picture size.
tfyou watch a still image or the 4:3 mode for a long time (over 2 hours), an image
may be burned onto thescreen. View the TV in 16:9 mode as much as possible.
>" HD (High Definition)
16:9- 1080i/1080p (1920xl 080), 720P (1280x720)
"oF"
16:9 Zoom!
Sets the oJctureto 16:9 wide moae. The screer size when Wide screen
is vertically enlargea
Zoom2
The screen s*zewhen the Zoom1
screen is vertically entargea.
Wide Fit 4::} Jus=tScan
Enlarges the aspect ratio of the Sets the picture [o 4:3 Use the fu]c[_on [o see the futtimage
oicture to fit the entire screen, normal mode w_[nou[an_ cutoff whet HDMI
720p/t O8Oi/1O8Op)or DTV (I080i
s_gna_sare mpuL
TI'- • tn TV,VIDEO, S-VIDEO, and all COMPONENT (480i, 480p) modes, all screen modes can be selected.
(16:9 • Zoom1 • Zoom2 • 4:3).
• You can select only the 16:9 4:3 and Wide Fit screen sizes in the DTV Component (720p, 1OSOi)or HDMt (720p, 1OSOi)mode.
• In PC modes, only 16:9 & 4:3 modes can be selected.
• You must select Zoom with P.Size button on the remote if you want to move the Zoom 1or 2 picture up or down.
• When watching a DTV's HD signal, you can use Wide Fit. Horizontal zoom (Wide Fit) sets the optical picture format by
expanding itboth horizontaliy and vertically. For example, you can reset the picture in 4:3 format to 16:9.Wide Fit does not
support all externai devices (DVD, VCR etc.).
• Some cable boxes and satellite receivers have their own set of screen sizes, which may differ from the ones above.

Setting the Active Color
tf you turn on this option, thecolors of the sky and grass wilt be stronger andclearer for a more vivid on-screen picture.
1, Press the MENU button to display the menu.
Press the ENTER button to select "Picture".
2. Press the A or T button to select "Active Color", then press the ENTER button.
3, Press the A or T button to setect "Off" or "On"
Press the ENTER button.
Press the EXIT button to exit.
>_ Picture Mode is available only in Dynamic mode.
DNle (Digital Natural Image engine)
This TV includes the the DNIefunction to provide high visual quality. If you set DNte to on, you can view the screen with the
DNIe feature activated. If you set the DNte to Demo, you can view the applied DNIe and normal pictures on the screen,
for demonstration purposes. Using this function, you can view the difference in the visual quality.
1, Press the MENU button to display the menu.
Press the ENTER button, to select "Picture".
2. Pressthe A or • buttons to select "DNie", then press the ENTER button.
Pressthe A or _' buttons to select "Off" "Demo" or "On", then press the
ENTER button.
• Off: Switches offthe DNle mode.
• Demo: The screen befare applying DNte appears on the taft screen.
The screen after applying DNle appears on the right.
, On: Switches on the DNle mode.
Press the EXIT button to exit.
DNIeTM (Digital Natural Image engine)_
This feature brings you a more detailed image with 3D noise reduction and
detailed, contrast and white enhancement.
>_ This function doesn't work when the Input Source is PC.
The DNie function is not supported in the Movie mode.

Freezing the Picture
1, Press the STILL button to freeze a moving picture.
>'- Normal sound witi stitt be heard. Press again to cancel.
While V-Chip is in operation, the Still function cannot be used.
P.IC_DE S.MODE 511LL P,SlZE
Setting the Film Mode
You can automatically sense and process film signats from all sources and adjust the picture for optimum quatity.
1, Press the MENU button to display the menu.
Press the h. or _r buttons to select "Setup", then press the ENTER button.
2. Pressthe h. or _' buttons to select "Fitm Mode", then press the ENTER button.
3, Pressthe h. or _' buttons to select "On" or "Off", then press the ENTER button.
Press the EXIT button to exit.
>- Film mode is supported in TV, VIDEO, S-ViDEO, and COMPONENT480i.
HDMI Black Level
You can select the black level on the screen to adjust the screen depth.
t. Press the MENU button to display the menu.
Press the A or _' buttons to select "Setup", then press the ENTER button.
2. Press the A or V' buttons to select"HDMI Black Level", then
press the ENTER button.
3. Press the A.or '_ button to select "Normal", "Low ",then press
the ENTER button.
" Norrna!: The screen gets brighter.
. Low: The screen gets darker.
>_ This function is active only when an external device
(DVD player, STB etc.) is connected to the TV via HDMI(RGB Signal).
Press the EXIT button to exit.

Viewing Picture-in-Picture
This product has one built-in tuner, which does notaltow PIP to function in the same mode. For example, you cannot watch one TV
channel in the main screen, and a different one in the PIP screen. Please see 'PIP Settings'below for detaiteds. You can use the
PtP feature tosimultaneously watch two video sources. (See page 38 to select the PtP picture sound.)
>" While V-Chip (See page 56) is in operation, the PiP function cannot be used.
>" While xvYCC (See page27) is inoperation, the PtP function cannot be used.
Activatincz Picture-in-Picture
1, Press the MENU button to display the menu.
Press the A. or • buttons to select "Setup", then press the ENTER button.
Press the A or _' buttons to select "PtP", then press the ENTER button.
2=
Press the ENTER button again.
Press the& or _' buttons to select "On", then press the ENTER button.
>" Ifyou turn the TV off while watching in PtP mode and turn it on again, the PtP
window wilt disappear.
>-You can view Analog TV broadcasts on the PIP screen (sub-picture) when the
main picture isfrom an external device connected to HDMtl,2,3,
Component1,2, or PC
Main picture Sub picture
Component 1,2
HDMt 1,2,3 Analog TV broadcasts only
PC
(_i Alternately, you can press the PIP button on the remote control repeatedly to activate or
deactivate the PIP.
FAV.C_ CAPTION p_
CZCJ
I II SLEP _, _ MT8 C_I
Chanc_the PiP Channel
3, Press the A. or T buttons to select "Channel", then press the ENTER button.
Press the & or _r buttons to select the desired channel inthe PtP window.
Press the ENTER buttons.
>" MAIN: PC / HDMt 1,2,3 / Component 1,2
PiP: TV(Analog)
>" The channet can be active when the sub picture is set to TV.
!_} Press the PIP Channel buttons on the remote control

Chan i_lL_qthe Position of the PiP Window
4, Press the _k or V' buttons to select "Position", then press the ENTER button.
Press the A or • buttons to select the desired channel in the PtP window.
Press the ENTER buttons.
>The Double ( [11 ), Double Wide ( r-T"l) mode cannot be selected in
Position mode.
Chan_the Size of the PiP Window
5, Press the A. or T buttons to select "Size", then press the ENTER button.
Press the _k or T buttons to setect the desired channel inthe PtP window.
Press the ENTER buttons.
Press the EXIT button to exit.
>_Ifthe main picture is in PC and HDMI 1 mode, Size is not available.
>*You may notice that the picture in the PIP window becomes slightly unnatural
when you use the main screen to view a game or karaoke.
>-You can adjust picture position only by using the _ size menu.

Sound Control
Customizing the Sound
The sound settings can be adjusted to suit your personal preference.
(Alternatively, you can use one of the "automatic" settings.)
1. Press the MENU button to display the menu.
Press the A or _' buttons to select "Sound", then press the ENTER button.
2. Press the A or _r buttons to select "Equalizer", then press the ENTER button.
3,
Press the .,I or _.-buttons to select a particular frequency to adjust.
Pressthe A or _r buttonsto increase or decreasethelevel of the particularfrequency.
Press the ENTER button.
Press the EXIT button to exit.
>_. L/R Sound Balance Adjustment :
Toadjust the sound balance of the L/R speakers.
• Bandwidth Adjustment (100Hz, 300Hz, 1K, 3K, 10K) :
: To adjust the level of different bandwidth frequencies.
Using Automatic Sound Settings
Your TV has automatic sound settings ("Standard", "Music", "Movie", "Speech", and "Custom") that are preset at the factory.
Or,you can select "Custom", which automatically recalls your personalized sound settings.
1. Press the MENU button to display the menu.
Press the A or _' buttons to select "Sound", then press the ENTER button.
2. Press the ENTER button to select "Mode".
Press the A or V buttons to select "Standard", "Music", "Movie", "Speech",
or "Custom" sound setting, then press the ENTER button.
Press the EXIT button to exit.
i ChQ0sestandard for the Standard fa#t0ry Settings.
, Choose Music when Watching rnusic _ide0s or concerts:
• Cheose Moviewhen watching movies
• Choose Speech when watching a show that iSmost!y dia!og (!:et, news)
• Cho0se Custom to fecal! your persona!!zed settings
(see!'Customizing the Sound").
Press the S.MODE button on the remote control repeatedly to select one of the sound
settings.
R=,erJE S.MO_ 9.S_
F ,,_M CAP_ION I1_

Setting the TruSurround XT
TruSurround XT is a patented SRS technology that solves the problem of playing 5.1 muitichannel content over two speakers.
TruSurround delivers a compelling, virtual surround sound experience through any two-speaker playback system, including internal
television speakers, tt is fulty compatible with alt multichannei formats.
1. Press the MENU button to display the menu.
Press the A or • buttons to select "Sound", then press the ENTER button.
2. Press the A or T buttons to select "SRS TruSurround XT", then press the
ENTER button.
3. Press the A or T buttons to select "On" or "Off", then press the ENTER button.
Press the EXIT button to exit.
TruSUrrOU,dXT, SRS and (_) Symbol are [_ I_J _ [2Z}
trademarks OfSRS Labs Inc. II sEB' SRS MTS c li
' CD_ EZ]
TruSurround XT technology is incorporated __'7_
under !icense from sRS Labs: _v '-'_'i o_i
The digitat-TV transmission system is capable of simultaneous transmission of many audio tracks (for example, simultaneous
translations of the program into foreign languages). The availability of these additional "multitracks" depends upon the program.
Preferred Lan_
2=
3,
Press the MENU button to display the menu.
Press the A or T buttons to select "Sound", then press the ENTER button.
Quick way to access the MTS menu: Just press the "MTS" button on the
remote control. You can listen ina language other than your chosen language
by pressing the MTS button.
Pressthe A or T buttons to setect""Multi-Track Options", then press the ENTER
button.
Pressthe ENTERbutton to select"PreferredLanguage".
Pressthe A or T buttonstochoose the language (English,Spanish or French)you
want, thenpress the ENTERbutton.
Pressthe EXIT button toexit.
You can listen in a language other than the favorite language by pressing
the MTS button on the remote control

Choosing a Multi-Channel Sound (MTS) track -Analog
Multi-Track Sound
1. Press the MENU button to display the menu.
Press the A or _' buttons to select "Sound", then press the ENTER button.
2. Press the A or • buttons to setect""Multi-Track Options", then press the
ENTER button.
3. Pressthe _k or T buttonsto select"Multi-Track Sound",then pressthe ENTER button.
Pressthe _k or _' buttonsto selecta setting you want, then press the ENTERbutton.
Pressthe EXIT button toexit.
t .......................................'1
• Choose Mon0 for channels that are broadcasting in mono, or if you are having
difficulty receiving a stereo signal.
Choose Stereo for phannets that are broadcasting
Choose SAP to listen to the Separate Audio Program, which is usually a
foreign-language translation.
[_JPress the MTS buttons on the remote control repeatedly to select "Mono",
"Stereo", or "SAP".
tll
Automatic Volume Control
Reduces the differences in volume levet among broadcasters.
1. Press the MENU button to display the menu.
Press the A or V buttons to select "Sound", then press the ENTER button.
2. Pressthe A or T buttonsto select "AutoVolume",then pressthe ENTER button.
3. Press the A or _' buttons to set Auto Volume "On" or "Off" then press the
ENTER button.
Press the EXIT button to exit.

Selecting the Internal Mute
Sound output from the TV speakers is muted.
1, Press the MENU button to display the menu.
Press the A or _' buttons to select "Sound", then press the ENTER button.
2. Pressthe A or _r buttonsto select"tnternat Mute",then pressthe ENTERbutton.
Press the A or _r buttons to select "On", then press the ENTER button.
Press the EXIT button to exit.
_,-When Internal Mute is set to "On", Sound menus except Multi-track Options
cannot be adjusted.
_The VOL®, VOL® and MUTE buttons do not operate when the tnternal Mute
is set to On.
w,s_.tem.Jspe.,ers .........................AUdiOO.t(optio,J,u. O"t)tOsou,,_Sy.tem
.F Av.s;v,deo .F / Av...,,ide c0m,0,0.,,P ,.0M,
Internal MuteOff Speaker Output Speaker Output Speaker Output Sound Output Sound Output Sound Output
Mute Mute
> When "Internal mute" is set to "On", Sound menus except "Multi-Track Options" cannot be adjusted.
Setting the On/Off melody
A melody sound can beset to come onwhen the TV is powered On or Off.
1, Press the MENU button to display the menu.
Press the A or _' buttons to select "Setup", then press the ENTER button.
2. Pressthe A or _r buttonsto select "Melody",then pressthe ENTER button.
3, Press the A or T buttons to select"Off" "Low" "Medium", "High" then press
the ENTER button.
;off:Turns effthe melody function.
• LOW :Sets the melody volume to tow.
, Medium : Sets the melody volume to medium.
• High : Sets the metody votume to high.
Press the EXIT button to exit.
OBF_-----7 Manufactured under license from DO!bYLaboraterories.
DIGITAL _ _
Dolby and the double-D symbol are trademarks of Dolby Laboratories.

Listening to the Sound of the Sub (PIP) Picture
When the PIP feature isactivated, you can listen to the sound of the sub (PtP) picture.
1. Press the MENU button to display the menu.
Press the A or _' buttons to select "Sound", then press the ENTER button.
2. Pressthe A or • buttonsto select"Sound Select_',then pressthe ENTERbutton.
Press the A or _r buttons to select "Main" or "Sub", then press the ENTER button.
Press the EXIT button to exit.
, Sub: Used to listen to the sound of the sub picture.
>_You can select this option when "PtP" is set to "On".
Resetting the Sound Settings to the Factory Defaults
tf Game Mode isOn, the Reset Sound function is activated. Selecting the Reset function resets the equalizer setting tothe factory
defaults.
1, Press the MENU button to display the menu.
Press the A or V button to select "Sound", then press the ENTER button.
2. Pressthe A or _r button to select"Resell', thenpress theENTER button.
Pressthe EXIT buttonto exit.
Connecting Headphones
You can connect a set of headphones to your set ifyou wish to watch a TV program without disturbing the other people in the
room.
>When you insert the head set jack into the corresponding port you can operate
only "Multi track option" in Sound menu.
>- Prolonged use of headphones at a high volume may damage your hearing.
> You will not receive sound from the speakers when you connect headphones
to the system.
:_ The headphone volume and TV volume are adjusted separately.

Channel Control
,_se!ec_,,n,_,'the Antenna
1, Press the MENU button to display the menu.
Press the A or T buttons to select "Channel", then press the ENTER button.
2= Press the ENTER button to select "Antenna".
Press the A or T buttons to select "Air" or "Cabte",then press the
ENTER button.
Press the EXIT button to exit.
[_1 Press the ANTENNA button on the remote control.
:_ Ifthe antenna is connected toANT 1 IN AiR
select Air" aria if it is connected to ANT 2 IN
tCABLEI, select "Cable".
I III
Clearing Scrambled Channels - Digital
The Clear Scrambled Channel function is used to filter out scrambled channels after Auto Program iscompleted.
tt removes the scrambled channels from the list by tuning thedigital cable channels. This process may take up to 20~30 minutes.
1, Press the MENU button to display the menu.
Press the A or _' buttons to select "Channel", then press the ENTER button.
2, Press the A or V' button to select"Clear Scrambled Channel", then press the
ENTER button.
tt searches scrambled channels, which are to be removed from the list.
To stop searching scrambled channels;
Press the • button to select Stop, then press the ENTER button.
Press the 4 button to select Yes, then press the ENTER button.
3, When the scrambled channel searching is completed, press the ENTER button.
Press the EXIT button to exit.

Setting the Channel Lists
You can add or delete a channel so only channels you want are displayed.
1, Press the MENU button to display the menu.
Press the A or T buttons to select "Channel", then press the ENTER button.
2. Press the A or _r buttons to setect "Channel List", then press the
ENTER button.
3, Press the ENTER button to select"AIl".
4,
Press the A or • buttons to select a channetto delete, then press the
ENTER button.
Press the A or T buttons to select "Delete", thenpress the ENTER button to
delete the channel.
The 0 mark wilt disappear.
5,
Press the A or _' buttons to select a channet to add,then press the
ENTER button.
Press the A or T buttons to select "Add", then press the ENTER button to
add the channel.
TheOmark wilt appearand the channel wilt beadded.
Press the EXIT button to exit.
All selected channels will be shown on "Added menu".
• P.MODE (Red) button: Press rePeatedlYtO select '!A!l'!,t'Addedi',Or
"FavoriW'.
• S.MODE (Green) button: Press to add all channels deleted.
• STILL (Yellow) button: Press to delete all channels memorized.
P,_IZ[
_d C221 C_ C2B 12_

To Set-Up Your Favorite Channels
You can set channels you watch frequently as favorites.
1, Press the MENU button to display the menu.
Press the A or _' buttons to select "Channel", then press the ENTER button.
2, Press the A or _t' buttons to select "Channel List", then press the
ENTER button
3, Press the A or _' buttons to select "Added", then pressthe ENTER button.
4,
Press the A or T buttons to select yourfavorite channels to watch amongthe
labeledchannels. Then pressthe ENTER button.
Press the A or T buttons to select "Favorite",then pressthe ENTER button.
The "_" symbol wilt behighlighted and the channel will be set as a Favorite.
Tocancel your Favoritechannel selection, pressthe ENTER button until the
"_" symbol is nolonger highlighted.
Press the EXIT button to exit.
Only memorized channels can be set as favorite channels.
>'All favorite channels will beshown in the "Favorite" menu.

Using the Channel Lists
Displays the channel list automatically when you press CH LIST button on the remote. (Choose All, Added, or Favorite)
1. Press the MENU button to display the menu.
Press the A or _' buttons to select "Channel", then press the ENTER button.
2. Press the A or • buttons to select "Channel List",then press the
ENTER button.
3_
Press the A or T buttons to select "Default ListMode" (the CH.List you want to
appearwhen you press CH.LIST) then press the ENTER button.
Press the A or V' buttons to select "All","Added", or "Favorite" then press the
ENTER button.
>'-The CHList you havechosen wilt now be set.
Pressthe EXITbutton to exit.
CHLIST WISELINK REC
_i A,ternateiy, press the CH LIST button on the remote centre, to bring up the Channel Lists. ,_e'51,,,_ ,,_
_ _,y_sE
,,,.,V,!ew[ngthe Channel Lists
You can display a list of all channels, added channels or your favorite channels.
1. Press the MENU button to display the menu.
Press the A or _' buttons to select "Channel", then press the ENTER button.
2. Press the A or _r buttons to setect "Channel List", then press the
ENTER button.
3. Press the A or _r buttons to select "All","Added" or "Favorite", then press the
ENTER button.
4_
Press the A or T buttons to select "Channel",then press the ENTER button.
Totoggle between your all channels,add channels or favorite channels
use the red (RMode) button on the remote control.
• P.MODE (Red} bUtton: Press repeatedly to seteCt"Att"; "Added'l, Or
"Favorite'!

Labeling Channels
Channels can be labeled so that their call letters appear whenever the channel is selected.
1. Press the MENU button to display the menu.
Press the A or v buttons to select "Channel", then press the ENTER button.
Press the & or _r buttons to select "Name", then press the ENTER button.
2=
Press the & or T buttons to select the channel to be assigned a new name,
then press the ENTER button.
Press the & or v buttons to select a letter, a number or a blank (Results inthis
sequence: A_.Z, 0._9, +, -, *,/, blank).
Press the i_ button to switch to the next field, which wilt be selected.
Select a second letter or digit by pressing the & or T buttons, as above.
Repeat the process to select the last three digits. When you have finished,
press the ENTER button to assign the new name.
To erase the assigned new name, select "Clear" by pressing the 4 or I,. button,
then press the ENTER button.
Press the EXIT button to exit.
>_The names of digital broadcasting channels are automatically assigned and
thus cannot be assigned by users.
LNA (Low Noise Amplifier)
tf theTV is operating in aweak-signal area sometimes the LNAfunction can improve the reception (a low-noise preamplifier
boosts the incoming signal).
1,
2.
3,
Press the MENU button to display the menu.
Press the & or T buttons to select "Channel", then press the ENTER button.
Press the & or T buttons to select "LNA", then press the ENTER
button.
Press the& or _r buttons to select "On", then press the ENTER button.
Press the EXIT button to exit.
> LNA functions when the antenna is set to Air or Cable. Settings will be stored
separately in each channel. (See "Selecting the antenna." on page 38)

Fine Tuning Analog Channels
Use fine tuning to manually adjust a particular channel for optimal reception.
1, Press the MENU button to display the menu.
Press the A or _' buttons to select "Channel", then press the ENTER button.
2, Press the A or V buttons to select "Fine Tune", then press the ENTER button.
3, Press the 4 or _- buttons to adjust the fine tuning.
To store the fine tuning setting in the TV's memory press the ENTER button.
:_ tfyou do not store the fine-tuned channel in memory, adjustments are not saved.
4, To reset the fine tuning setting, press the _' button to select "Reset",
then press the ENTER button.
Press the EXIT button to exit.
:_ %"wilt appear next to the name of fine-tuned channels.
Checking the Digital-Signal Strength
Unlike analog channels, which can vary in reception quality from "snowy" to clear, digital (HDTV) channels have either perfect
reception quality or you wifl not receive them at atk So, unlike analog channels, you cannot fine tune a digital channel. You can,
however, adjust your antenna to improve the reception of available digital channels.
2.
Press the MENU button to display the menu.
Press the h, or _' buttons to select "Channel", then press the ENTER button.
Press the A or _' buttons to select "Signal Strength", then press the ENTER
button.
tf the signal strength meter indicates that the signal is weak physically adjust your
antenna to increase the signal strength.
Continue to adjust the antenna until you find the best position with the strongest
signal.
Press the EXIT button to exit

Using Your TV as a Computer (PC) Display
Setting Up Your PCSoftware/Based on Windows XP}
The Windows display-settings for a typical computer are shown below. The actual screens on your PC will probably be different,
depending upon your particular version of Windows and your particular video card. However, even ifyour actual screens look
different, the same basic set-up information will apply in almost all cases. (if not contact your computer manufacturer or Samsung
Dealer.)
1, First, click on "Control Panel" on the Windows start menu.
2, When the control panel window appears click on "Appearance and Themes" and a
display dialog-box will appear.
3, When the control panel window appears, click on "Display" and a display dialog-box
will appear.
4, Navigate to the "Settings" tab on the display dialog-box.
The correct size setting (resolution)
Optimum: 1920 X 1080 pixels
tf a vertical-frequency option exists on your display settings dialog box,
the correct value is "60" or "60 Hz". Otherwise, just click "OK" and exit the dialog box.
Display Modes
if the signal from the system equals the standard signal mode, the screen is adjusted automatically, if the signat from the system
doesn't equal the standard signal mode, adjust the mode byreferring to your videocard user guide; otherwise there may be no
video. For the display modes listed below, the screen image has been optimized during manufacturing.
PiXel clock I sync Polarity
Frequency (MHZ)(H/V)
..............................................................................._...............................................................................................................................................i.......................................................................i
VESA
640 x 480
640 x 480
800 x 600
800 x 600
800 x 600
800 x 600
1024x 768
1024x 768
1024x 768
1280x 1024
1920x 1080
37.861 72.809
37.500 75.000
35.156 56.250
37.879 60.317
48.077 72.188
46.875 75.000
48.363 60.004
56.476 70.069
60.023 75.029
79.976 75.025
66.500 60.000
31.500 -/-
31.500 -/-
36.000 +/+
40.000 +/+
50.000 +/+
49.500 +/+
65.000 -/-
75.000 I/I
78.750 +/+
123.000 +/+
138.500 -/+
HDMI/DVI In ut
...........................vert Ca ............................ ...................
Mode Resolution FreqUenCY (kHZ)Frequency (HZ) pixel Clock Sync Polarity
Frequency (MHz) (H/V)
640 X 350 31.469 70.086 25.175 +/-
IBM 720 X 400 31.469 70.087 28.322 - / +
640 X 480 31.469 59.940 25.175 - / -
800 x 600 37.879 60.317 40.000 +/+
1024x 768 48.364 60.000 65.000 - / -
VESA 1280x 1024 63.981 60.020 108.000 +/+
1920x 1080 66.587 59.934 138.500 +/-

Setting up the TV with your PC
How to Auto Adjust
Use the Auto Adjust function to have the TV set automatically adjust the video signals the monitor receives.
The function also automatically fine-tunes the settings and adjusts the frequency values and positions.
> This function does not work in DVI-Digital mode.
1,
Press the MENU button to display the menu.
Press the & or _' buttons to select "Setup", then press the ENTER button.
Press the A or T buttons to select "PC", then press the ENTER button.
>Change to the PC mode first.
2. Pressthe A or _' buttonsto select "AutoAdjustment",then pressthe ENTER button.
Press the EXIT button to exit.
the Screen
The purpose of the picture quality adjustment is to remove or reduce picture noise, tf the noise is not removed by fine tuning
alone then do the frequency adjustments to the utmost and fine tune again(See page44). After the noise has been reduced,
re-adjust the picture so that it is aligned on the center of the screen.
1. Press the MENU button to display the menu.
Press the A. or T buttons to select "Setup", then press the ENTER button.
Press the A or T buttons to select "PC", then press the ENTER button.
> Change to the PC mode first.
2. Press the ENTER button to setect"tmage Lock".
3,
Pressthe _kor _' buttonsto select "Coarse"or "Fine",then pressthe ENTER button.
Press the 4 or _- buttons to adjust the screen quality.
>Vertical stripes may appear or the picture may be blurry.
Press the ENTER button.
Press the EXIT button to exit.

Chanqinq the Screen Position
1,
2.
3,
Press the MENU button to display the menu.
Press the A. or T button to select "Setup", then press the ENTER button.
Press the A or T button to select "PC", then press the ENTER button.
>- Changetothe PC modefirst.
Press the _k or _' button to select "Position", then press the ENTER button.
Press the A or T button to adjust the V-Position.
Press the 4 or 1_button to adjust the H-Position.
Press the ENTER button.
Press the EXIT button to exit.
Initializinq the Screen Position or Color Settinas
You can replace all image settings with the factory default values.
1, Press the MENU button to display the menu.
Press the A. or T button to select "Setup", then press the ENTER button.
Press the A or 'I' button to select "PC", then press the ENTER button.
Change to the PC mode first.
2, Press the h, or _r button to select"tmage Reset", then press the ENTER button.
Press the EXIT button to exit.
Setting the Home Theater PC
This function enables you to view higher quality pictures while in PC Mode.
After setting the Home Theater PC function to On, you can go into the Detailed Settings
menu and make adjustments without affecting settings in the regular TV mode.
t. Press the MENU button to display the menu.
Press the A or _' button to select "Setup", then press the ENTER button.
2. Press the h, or _' button to select "Home Theater PC", then press the ENTER
button.
3. Press the _i. or _' button to select "On" or "Off", then press the ENTER button.
Om Tarnson!hesett!ngsfo_screen:re!a!edfanct!O9s inF'Cinpat modeto provide more
dynamicscenes:
Press the EXIT button to exit.
> This function is available only in PC mode.

Setting the Clock
Setting the clock is necessary in order to use the various timerfeatures of the TV.
Also, you can check the time while watching the TV. (Just press the tNFO button.)
Oj_tion 1: Settinqthe Clock Manually
t. Press the MENU button to display the menu.
Press the _k or V buttons to select "Setup", then press the ENTER button.
Press the A or _' buttons to select "Time", then press the ENTER button.
2. Press the ENTER button to select "Clock".
3. Press the ENTER button to select "Clock Mode".
Press the A or _' buttons to select "Manual", then press the ENTER button,
4. Press the A or _' buttons to select "Clock Set", then press the ENTER button.
5.
Press the 4 or 1_buttons to move to "Month", "Day", "Year", "Hour", "Minute",
or "am/pm". Set the date and time you want by pressing the A or _' buttons,
then press the ENTER button.
Press the EXIT button to exit.
:_ The current time will appear every time you press the INFO button.
:_ You can set the month, day, year, hour, and minute directly by pressing the
number buttons on the remote control.

O_tion 2: Settinq the Clock Automatically
t. Press the MENU button to display the menu.
Press the A or T buttons to select "Setup", then press the ENTER button.
Press the A or _' buttons to select "Time", then press the ENTER button,
2. Press the ENTER button to select "Clock",
3. Press the ENTER button to select "Clock Mode".
Press the A or _' buttons to select "Auto", then press the ENTER button,
4. Press the A or _' buttons to select "Time Zone", then press the ENTER
button,
5. Press the A or 'I' buttons to highlight the time zone for your local area,
then press the ENTER button.
6.
Press the A or _' buttons to select "DST" (Daylight Saving Time), then press
the ENTER button.
Press the A or • buttons to select "On" or "Off", then press the ENTER button.
Press the EXIT button to exit.
> Depending on the broadcast station and signal, the auto time may not be
set correctly. If this occurs, set the time manually.
The Antenna or cable must be connected in order to set the time automatically.

Setting the Sleep Timer
The sleep timer automatically shuts off the TV after a preset time (from 30 to 180 minutes).
1, Press the MENU button to display the menu.
Press the A or • buttons to select "Setup", then press the ENTER button.
Press the A or _' buttons to select "Time", then press the ENTER button.
Quick way to access the sleep timer setting: Simply press the "SLEEP"
button on the remote control.
2. Press the A or _' buttons to select "Sleep Timer", then press the ENTER button.
3, Press the A or _' buttons to adjust"Minute".
4, Press the i_ button to select "Activation".
Press the A or '_ buttons to setect "On", then press the ENTER button.
Press the EXIT button to exit.
Simply press the SLEEP button on the
remote control for a Quick way to access the sleep timer setting.
SLEEP

Settinq the On/Off Timer
1. Press the MENU button to display the menu.
Press the A or _' buttons to select "Setup", then press the ENTER button.
Press the A or V buttons to select "Time", then press the ENTER button.
2. Press the A or T buttons to select "Timer 1,Timer 2,Timer 3 ", then press the
ENTER-button.
Press the A. or _' buttons to adjust "Hour", then press the i_ button to move to
the next step.
Set other items using the same method as above.
Activate or Inactivate Press the AorT button
Repeat Select Once, Everyday. Mon-Fri Men- Press the Aor_' button
Sat Sat-Sun
Volume Setect the required volume level. Press the Aor_' button
Contents When the On Timer is active, you can Press the Aor_' button
turn on a specific channel or play back
contents such as photo or audio files.
(Make sure that an USB device is
connected to your TV.)
>'When finished, press the RETURN button to return.
• The current time wilt appear every time you press the INFO button.
• You can set the hour, minute, and channel by pressing the number
buttons on the remote control.
Press the EXIT button to exit.
Function Description
Selecting a Menu Language
1. Press the MENU button to display the menu.
Press the A or '_ buttons to select "Setup", then press the ENTER button.
Press the A or _' buttons to select "Language", then press the ENTER button.
2. Press the A or _' buttons to select "English", "Espa_ot", or "Frangais".
Press the ENTER button.
Press the EXIT button to exit.

Setting the Blue Screen Mode
tf no signal is being received or the signal is very weak, a blue screen automatically replaces the noisy picture background.
tf you wish to continue viewing the poor picture, you must set the "Blue Screen" mode to "Off"
1, Press the MENU button to display the menu.
Press the A or _r buttons to select "Setup", then press the ENTER button.
2. Press the A or _r buttons to select "Blue Screen", then press the ENTER button.
3, Press the & or _r buttons to select "On" or "Off" then press the ENTER button.
Press the EXIT button to exit.
Pressing the A or _' buttons wilt alternate between "On" or "Off"
Using the Game Mode
TM TM
When connecting to a game console such as PiayStation or Xbox , you can enjoy a more realistic gaming experience by
selecting Game mode.
1, Press the MENU button to display the menu.
Press the A or T buttons to select "Setup", then press the ENTER button.
2. Press the A or _r buttons to select "Game Mode", then press the ENTER button.
3, Select "On" or "Off" by pressing the A or _' buttons then press the ENTER button.
4, Press the EXIT button to exit.
>- To disconnect the game consde and connect another external device, cancel game mode
in the Setup menu.
>- If you display the TV menu inGame mode, the screen shakes slightly.
_'- Game Mode is not available in TV mode.

Viewing Closed Captions (On-Screen Text Messages) -Analog
TheAnalog Caption function operates when watching regular analog channels or when you have an analog external component
(such as a VCR) connected.
1, Press the MENU button to display the menu.
Press the A or _' buttons to select "Setup", then press the ENTER button.
2, Press the A or _r buttons to select "Caption", then press the ENTER button.
3, Press the ENTER button to select"Caption".
Press the A or _' buttons to select "On", then press the ENTER button.
4_
Press the A or T buttons to select "Caption Mode", then press the ENTER button.
Press the A. or _' buttons to select submenu (Default CC1~CC4 or Textl~Text4)
you want, the press the ENTER button.
Press the EXIT button to exit.
• The default is "OCt",
• CCI: The Primary Synchronous Caption Service. These are captions in the
primary language mat must Dein sync Withthe sound, preferably
ma[cnea [o a specific frame.
o CC2: The Soeciat Non-S_nchronous Use Captions
This channel carries data that is intended to augment information camec
m the program.
, C03: Secondary Sl nchronous Caption Service.
Alternate program-reIated capt{on data, typ_caIl, secona language
:.aptions.
, CC4: Soeciat Non-Synciqronous Use Captions. Simitar to CC2.
, Text1: First Text Service. This may bevanous non-program related data.
- Te×t2: Second Text Service. Additional data. L_uatly not program retated.
• Te×t3/Text4: Third and Fourth Text Services.
These data channeIs should be used on., if Text1 and Text2 are
r _tsufficient.
>-The Caption feature doesn't work in COMPONENT, HDMt or PC modes.
>- The availability of captions depends on the program being broadcast.
Press the CAPTION button on the remote control to setect "On" or" Off".
III

Viewing Closed Captions (On-Screen Text Messages) - Digital
The DigitalCaptions function operates on digital channels.
1, Press the MENU button to display the menu.
Press the _k or _' buttons to select "Setup", then press the ENTER button.
2. Press the A or • buttons to select "Caption", then press the ENTER button.
3, Press the ENTER button to select"Caption".
Press the A or V buttons to select "On", then press the ENTER button.
4, Press the A or T buttons to select "Caption Mode", then press the ENTER button.
Press the A or T buttons to select submenu (Default Servicel~Service6,
CC1~CC4, or Textl~Text4) you want then press the ENTER button.
5,
6,
Press the _k or T buttons to select "Caption Options", then press the ENTER
button.
"Caption Options" are available only when "Servicel~Service6" can be
selected in"Caption Mode".
>_Service1~6 indigital caption mode may not be available depending on the
broadcast.
Press the A or T buttons to select "Size", then press the ENTER button.
Press the A or T buttons to select the desired Caption option, then press the
ENTER button.
Press the A or T button to select the desired sub-menu options
(see options below) then press ENTER.
Press the EXIT button to exit.
>-The availability of captions depends on the program being broadcast.
"Default" means tofollow the standard set by the broadcaster.
• Size: This option consists of "Default". "Small". "Standard". and 'Large". The
default is Standara
• Font Style: This op[ior sonsists of "Default", "Styte0 ~ Styt_ 7". You can
change the font you want. The defauI[ is "Style C
- Foreground Color: This option consists of "Default" 'White". "Black". "Red".
Green", "Blue", "Yellow", "Magenta". and "C/an". You can
change the cotorof the letter.The defauit is "White".
• Background Color: This oELionconsists of "Defauil "White". "Black". "Rec'
Green". "Blue". "Yellow". "Magenta". and "C/an. You can
change the background .*otorof the caption. The default _s
"Black'
• Foreground Opacity: This option consists of "Default. "Transparent
Translucent". "Solid". an(] "Flashing". You can cnange
me opacity of the tetter.
- Background Opacity: This option consists of "Default". "Transoarem.
"Translucent". "Solid" and "Flashing". You can chart9a
[ne backgroune opacity of the caption.
• Return to Default: This option sets each of"Size". 'Font Styie", "Foregrouna
Color" "Bakcgrouna coior, "Foreground Opacitl aria
'Backgrouna Opacity" to its default.
[5_Press the CAPTION button on the remote control to setect "On" or" Off".
P3_CDE S.MODE S11LL F.SIZE
tt5

Menu Transparency Level
Adjusts the transparency of the menu screen.
1. Press the MENU button to display the menu.
Press the A or _' buttons to select "Setup", then press the ENTER button.
2. Press the A or V buttons toselect"Menu Transparency",then pressthe ENTER
button.
3, Press the & or T buttonsto select level thenpress theENTER button.
Press theEXIT buttonto exit.
Using the Energy Saving Feature
This feature adjusts the brightness of the TV in order to reduce power consumption. When watching TV at night set the
"Energy Saving "mode option to "High" to reduce eye fatigue as wetl as power consumption.
1. Press the MENU button to display the menu.
Press the & or V buttons to select "Setup", then press the ENTER button.
2. Press the A or T buttonstoselect"Energy Saving",then pressthe ENTER button.
Select therequiredoption(Off, Low,Medium,High,Auto) bypressing the A or T button.
Press the ENTER button.
i Off: Turns off the energy saving function.
, Lowi sets the TM to tow energy Saving mode.
Medium: Sets the TV to medium energy Saving mode.
, High: Sets the TV te high energy saving mode.
• Auto: Automatically adjusts the brightness of the TV screen in accordance
with the scenes.
Press the EXIT button to exit.

Setting the Function Help
Displays help on the menu functions.
t. Press the MENU button to display the menu.
Press the A or _r buttons to select "Setup", then press the ENTER button.
2, Press the _kor _' buttons to select "Function Help", then press the ENTER button.
3, Press the A or T buttons to select "On", then press the ENTER button.
Press the EXIT button to exit.
_- The predetermined value of the function help is On.
Digital Noise Reduction
tf the broadcast signai received by your TV isweak you can activate the Digital Noise Reduction feature to help reduce any static
and ghosting that may appear on the screen.
1, Press the MENU button to display the menu.
Press the ENTER button to select "Picture".
2. Press the A or _' button to select "Digital NR", then press the ENTER button.
3, Press the A or V button to select "Off" "Low" "Medium", "High", "Auto".
Press the ENTER button.
'_Off: Turnsthescreennoisereductionfunetionoff.
_'Low:Reducesscreennoiseatatowlevel.
_'Medium:ReducesscreennoiseatamediumteveL
,'High; Reducesscreennoiseatahigh!eveL
*Auto: Automaticallyrecognizesand reducesscreennoise.
Press the EXIT button to exit.

Using the V-Chip
The V-Chip feature automatically locks out programs that are deemed inappropriate for children. The user must enter a PIN
(personal tD number) before any of the V-Chip restrictions are set up or changed.
>'-When the V-chip feature is activated, the PIP features do not function.
Settinq Up Your Personal ID Number (PIN}
t. Press the MENU button to display the menu.
Press the A or _' buttons to select "Setup", then press the ENTER button.
2. Press the A or _' buttons to select "V-Chip", then press the ENTER button.
The message "Enter PIN" willappear. Enter your 4 digit PIN number.
_The default PtN number of a new TV set is "0-0-0-0".
3,
The "V-Chip" screen will appear.
Press the A or T"buttons to select "Change PIN", then press the ENTER button.
The Change PIN screen wiii appear. Choose any 4 digits for your PtN and enter
them. As soon as the 4 digits are entered, the 'Confirm new PIN" screen appears.
Re-enter the same 4 digits. When the Confirm screen disappears your PIN has
been memorized.
Press the EXIT button to exit.
_'-If you forget the PIN, press the remote-controI buttons in thefollowing
sequence, which resets the pin to 0-0-0-0 : Power Off. Mute 8 2
4 Power On.
U.S.A Only
This product is covered by the foIiowing US.patents :US4,930,158,US4,930,160

How to EnablelDisable the V-Chi_
t. Press the MENU button to display the menu.
Press the A or T buttons to select "Setup", then press the ENTER button.
2. Press the A or _' buttons to select "V-Chip", then press the ENTER button.
The message "Enter PIN" will appear. Enter your 4 digit PIN number.
The "V-Chip" screen will appear.
To enable the V-Chip feature, press the ENTER button so that the "V-Chip Lock"
field is 'On". (Pressing the A or _' buttons wilt alternate between "On" and "Off".)
Press the ENTER button.
Press the EXIT button to exit.
How to Set up Restrictions Usine_the "TV Parental Guidelines"
First, set upa personaI identification number (PIN), and enable the V-Chip. (See previous section.)
Parental restrictions can be set up using either of two methods: The TV guidelines or the MPAA rating.
t. Press the MENU button to display the menu.
Press the & or T buttons to select "Setup", then press the ENTER button.
2, Press the A or _' buttons to select "V-Chip", then press the ENTER button.
The message "Enter PIN" will appean Enter your 4 digit PIN numben

3. The"V-Chip"screenwillappear.PresstheAor_'buttonstoselect"TVParental
Guidelines",thenpresstheENTERbutton.
4. The'%VParentalGuidelines"screenwillappear,
PresstheAorTbuttonstoselectoneofthesixagedbasedcategories:
TV-G:Generalaudience
•TV-PG:Parentatguidance
-TV-14:Viewers14andever
, TV-MA: Mature audience
At this point, one of the TV-Ratings is selected.
Press the ENTER button. Depending on your existing setup, the" _" symbol will
be selected. (Blank = Unblocked, = Blocked)
While "_" is selected, press the ENTER button to block or unblock the category.
To select a different TV-Rating, press the A or • buttons and then repeat the
process.
_Allow all: Press to unlock all TV ratings. / Block all: Press to lock all TV ratings.
>The TV-Y,TV-Y7, TV-G, TV-PG, TV-14 and TV-MA have additional options.
See the next step to change any of the following sub-ratings:
FV: Fantasy violence / D: Sexually Suggestive Dialog / L:Adult Language /
S: Sexual situation / V:Violence
>_The V-Chip wilt automatically block certain categories that are "more
restrictive". For example, if you block "TV-Y" category, then TV-Y7 wilt auto
maticalty be blocked. Similarly, if you block the TV-G category then all the cat
egories in the "young adult" group wilt be blocked (TV-G, TV-PG, TV-14, and
TV-MA). The sub-ratings (D, L S, V) work together similarly.
(See next section.)
How to set the FV,D, L,S andV sub-ratings.
First, select one of these TV-Ratings: TV-Y,TV-Y7, TV-G, TV-PG, TV-14, or TV-MA
(See Step 4, on previous page), and press the _,"button. The "_"symbol will be
displayed for each sub-rating.
While "_" is selected, press the ENTER button to go to a sub rating.
Press ENTER to block the sub rating.To select a different TV-Rating, press the
A or _' buttons and then repeat the process.
The V-chip wifi automatically block certain categories that are "More restrictive".
For example, if you block "L"sub-rating in TV-PG, then the "L" sub-ratings in
TV-14 and TV-MA will automatically be blocked.
Press the EXIT button to clear all the screens. (Or proceed to the next section,
and set up additional restrictions based on the MPAAcodes.)
>- These categories consist of two separate groups: TV-Y and TV-Y7 (young
children through age 7), and TV-G through TV-MA (everybody else).
The restrictions for these two groups work independently: tf a household
includes very young children as well as young adults, the TV guidelines must
be set up separately for each age group. (See next step.)

How to Set up Restrictions Usinq the MPAA Ratinqs: G, PG, PG-13, R, NC-17, X, NR
The MPAA rating system uses the Motion Picture Association ofAmerica (MPAA) system, and its main application is for movies.
When the V-Chip lock is on, the TV wilt automatically btock any programs that are coded with objectionable ratings
(either MPAAor TV-Ratings).
t. Press the MENU button to display the menu.
Press the & or T buttons to select "Setup", then press the ENTER button.
2. Press the A or _' buttons to select "V-Chip", then press the ENTER button.
The message "Enter PIN" will appear. Enter your 4 digit PIN number.
3. The "V-Chip" screen will appear. Press the A. or _' buttons to select
"MPAA Rating", then press the ENTER button.
The "MPAA Rating" screen will appear. Repeatedly press the A or _r buttons to
select a particular MPAAcategory. Pressing the A or T buttons will cycle through
the MPAA categories:
• G: General audience (no restriction
• PG: Parentat guidance suggested.
• PG-13: Parents strongly cautioned.
• R: Restricted. Children under 17 should be accompanied by an adult.
, NC.17: No chi!dren under age 17.
• X: Adults on!y.
, NR: Not rated.
>-AHow all: Press to unlock aIt TV ratings. / Block all: Press to lock all TV ratings.
>_While a particular category is selected, press the ENTER button to activate it.
The ' _" symbol will bedisplayed. Press the ENTER button to block or
unbtock the category.
,_ The V-Chip wilt automatically block any category that is "more restrictive".
For example, if you block the 'PG-13" category then "R", "NC-17" and "X" wilt
automatically be blocked also.
Press the EXIT button to exit.

How to Set up Restrictions UsJnq the 'Canadian Enqlish'
t. Press the MENU button to display the menu.
Press the A or T buttons to select "Setup", then press the ENTER button.
2. Press the A. or _r buttons to select "V-Chip", then press the ENTER button,
The message "Enter PIN" will appear, Enter your 4 digit PIN number,
3. The "V-Chip" screen will appear. Press the A or _' buttons to select
"Canadian English", then press the ENTER button.
Press the A or _r buttons to select a appropriate restriction.
Press the ENTER button to activate the restriction selected. The" _" symbol is
indicated.
Press the EXIT button to exit.
Altow all: Press to unlock all TV ratings. / Block all: Press to lock all TV ratings.
• C8÷: programming generally considered acceptable for children 8 yeats and
over to watch on their own.
, G: General programming, Suitable for at audiences
• PG: ParentaIGuidance.
• 14+; Programming contains themes or content which may not be suitable foe
Viewers under the age of !4.
• 18+: Adult programming.

How to Set up Restrictions Usinq the 'Canadian French'
t. Press the MENU button to display the menu.
Press the A or T buttons to select "Setup", then press the ENTER button.
2. Press the A. or _r buttons to select "V-Chip", then press the ENTER button,
The message "Enter PIN" will appear, Enter your 4 digit PIN number,
3, The "V-Chip" screen will appear. Press the A or '_ buttons to select
"Canadian French", then press the ENTER button.
Press the A or _r buttons to select an appropriate restriction.
Press the ENTER button to activate the restriction selected. The" _" symbol is
indicated.
Press the EXIT button to exit.
_Altow all: Press to unlock all TV ratings. / Block all: Press to tack all TV ratings.
• 8 arts+: programming generally considered acceptable fer children 8 years
and over to watch on their own.
• 13 arts+: Programming may not be suitable for Children under the age of 13
• 16 ans+: Programming is not suitable for children under the age of 16,
• 18 aria+: Programming restricted to adults.

Using the V-Chip for Diqital channels
Parental restriction information can be used while watching DTV channels.
t. Press the MENU button to display the menu.
Press the A or _' buttons to select "Setup", then press the ENTER button.
2. Press the A or _' buttons to select "V-Chip", then press the ENTER button.
The message "Enter PIN" will appean Enter your 4 digit PIN numben
The 'V-Chip" screen will appear. Press the A or 'V buttons to select
"Downloadable U.S. Rating",then press the ENTER button.
> tf information is not downloaded from the broadcasting station, the
Downloadabte U.S. rating menu is deactivated.
> Parental restriction information is automatically downloaded while watching
DTV channels, tt may take several seconds.
> The Downioadable U.S. rating menu is available for use after information is
downloaded from the broadcasting station. However depending on the infor
marion from the broadcasting station, it may not be available for use.
Press the A or • buttons to select a appropriate restriction.
Press the ENTER button to activate the restriction selected. The "_" symbol is
indicated.
Press the EXIT button to exit.
>Allow all: Press to unlock all TV ratings. / Block aIt:Press to tock all TV ratings.
> Parental restriction levels differ depending on the broadcasting station.
>The default menu name and Downloadable US rating changes depending on
the downloaded information.
>Even if you set the On-screen display to your desired language, the
"Downloadable U.S. Rating" menu will appear in English only.
> The rating will automatically block certain categories that are more restrictive.
> The rating titles(For example: Humor Level_etc) and TV ratings(For example:
DH,MH,H_etc) may differ depending on the broadcasting station.
The numberof
current _tlng
RAtingtlfle tlfle
The nimber of
all rating title

Setting the Light Effect (LN-T4065F / LN-T4665F I LN-T5265F)
You can turn on/off the blue LED on the front of TV.
1,
2.
3.
Press the MENU button to display the menu.
Press the A or '_ buttons to select "Setup", then press the ENTER button.
Press the _kor T buttons to select "Light Effect", then press the ENTER
button.
Press the A or T button to select "Off', "In Standby", "In Watching TV" or "Always",
then press the ENTER button.
, Off: LED witt n0t come 0n.
, In Standby: Turns the LED on in standby mode.
In Watching TV: "Turnsthe LED on while watching TV.
, Always: LED witi come on after you turn the TV off.
Press the EXIT button to exit.
Upgrading the Software
Samsung may offer upgrades for TV's firmware inthe future. Please contact the Samsung call center at 1-800-SAMSUNG
(726-7864) to receive information about downloading upgrades and using a USB drive. Upgrades wilt be possible by connecting a
USB drive to the USB port located on located on the side of your TV.
1, insert a USB drive containing the firmware upgrade into the WtSELtNK port on
the side of the TV.
2. Press the MENU button to display the menu.
Press the A or T button to select Setup, then press the ENTER button.
3, Press the h. or V button to select Software upgrade, then press the ENTER button.
4, Press the A or _' button to select USB Upgrade, then press the ENTER button.
The message Scanning for USB._ It may take up to 30 seconds, is displayed.
Please be careful to not disconnect the power or remove the USB drive while
upgrades are being applied. The TV wilt shut off and turn on automatically after
completing the firmware upgrade. Please check the firmware version after the
upgrades are complete.

WISELINK
Using the WISELINK Function
This function enables you to view and listen to photo (JPEG) and audio files (MP3) saved on a USB Mass Storage Class
(MSC) device.
TV Side Panel
Press the POWER button on the remote control or front
panel. Connect a USB device containing JPEG and/or Example
MP3 files to the WtSELtNK jack (USB jack) on the
side of the TV.
tf you enter the WISELtNK mode with no USB device connected the message "There is nodevice connected" wilt appear.
tn this case, insert the USB device, exit the screen by pressing the WtSE LINK button on the remote control and enter the
WtSELtNK screen again.
>_ Photo and audio files must be named in English, French, or Spanish. tf not the files can not be played. Change the fite
names to English, French,or Spanish if necessary.
>_ The file system only supports FAT16/32 (The NTFS file system is not supported)
:_ Certain types of USB devices may not becompatible with this TV.
:_ Wisetink only supports the USB Mass Storage Class device (MSC). MSC is a Mass Storage Class Bulk-Only Transport
device. Examples of MSC are Thumb drives and Flash Card Readers (Both USB HDD and HUB are not supported.)
Before connecting your device to the TV, please back up your files to prevent them from damage or Bossof data.
SAMSUNG is not responsible for any data file damage or data loss.
Recommended image resolution for Wiselink is 600 mega pixels.
Please connect directly to the USB port of your TV.tf you are using a separate cable connection, there may be a USB
Compatibility problem.
>* Only MP3 and JPEG tile formats are supported.
>_ We recommend the sequential jpeg format. Progressive jpeg uses a lot of memory and decoding may fail.
Do not disconnect the USB device while it is 'loading."
:_ Neither PTP (Picture Transfer Protocol) nor MTP (Media Transfer Pprotocol) is supported.
:_ The playing duration of an rap3 file may be displayed as '00:00:00' if its playing time information is notfound
at the start of thefile
:_ The higherthe resolution of the image, the longer it takes to display on the screen.
:_ tf the horizontal resolution of an image is higher than 5000, it cannot be decoded.
tf the vertical resolution of an image is higher than 4000, it cannot bedecoded.
Using the Remote Control Button in WISELINK Menu
Button Operations
C_<::_ Move the cursor and select an item
Select the currently selected item.
_LAY_A_SE
Play or pause the Slide Show or MP3 file.
Return to the previous menu
_0
Run various functions from the Photo and Music menus.
STOP
Stop the current slide show or MP3 file.
(_ O Page Up or Down (file list item)
B_
Stop the current function and return to the previous highdevei menu.

Using the WISELiNK Menu
t. Press the MENU button. Press the A or 'I' buttons to select "Input",
then press the ENTER button.
2, Press the A or 'V button to select "WlSELINK", then press the ENTER button.
3, Press the _t.or • button to select the corresponding USB Memory Device, then
press the ENTER button.
:_ The WISELINK menu differs depending on the USB Memory Device
connected to TV.
4, Press the 4 or I,. button to move to an icon then press the ENTER button.
:_ Toexit WtSELtNK mode, press theWlSELINK button on the remote control.
i_! Press the WISELINK button on the remote control to display a WtSELtNK menu.
AN1"ENNACHLIST WISELINK REC
P

Using the PHOTO (JPEG) List
This menu shows JPEG files and folders saved on an USB memory device.
t. Complete Steps 1 to 3 of "Using the WISELINK Menu". (Refer to page 65)
2, Press the 4 or _ button to move to "Photo", then press the ENTER button.
The saved file information is displayed as a folder or file.
3,
Press the A, v 4 and _ buttons to select a file, then press the ENTER button.
• Pressing the ENTER button over a photo icon shows the currently selected photo
in full screen.
• Pressing the ENTER button over a folder icon shows the JPEG files included in
the folder.
To exit WtSELtNK mode, press the WISELINK button on the remote control.
Moving to a photo may take afew seconds to load the file.
At this point the iconwill appear at the top left of the screen.
This menu only shows files whose file extension isjpg. Files of other formats
such as bmp or tiff wilt not be displayed.
The files are displayed on a page. 15thumbnail photos are displayed per
page.
The thumbnails are numbered from left to right and from top to bottom, from 1
to 15.
Certain types of USB Digital camera and audio devices may not be compatible
with this TV.
Folders are displayed first and they are followed byall JPEG flies inthe current
folder. The folders and JPEG files are sorted in alphabetical order.
tf the photo is displayed in fuit screen, you can zoom in and out or rotate the
photo on the screen.
tt takes time to show JPEG flies as Thumbnail images.
: Folder icon
: Photo icon
: Move to the previous
folder stage icon

Selecting a Photo and Slide Show
t. Complete Steps 1 to 3 of "Using the WISELINK Menu". (Refer to page 65)
2. Press the 4 or _- button to move to "Photo", then press the ENTER button.
The saved file information is displayed as a folder or file.
3, Press the INFO button to display "Slide Show" or "Cancel the Setected file".
4, Press the A or _' button to seiect"Slide Show", then press the ENTER button.
>_ During the slide show, files are displayed in order from the currently shown file.
> MP3 flies can be automatically played during the Slide Show if the Default
Background Music is set to On. To enable this function, MP3 flies and other
photo flies must be located in the same folder on the USB Memory Device.
Press the INFO button during "Slide Show" to set the option (Slide show Speed,
Background Music, Background Music Setting, List).
Press the A or T button to select the option, then press the ENTER button.
• After setting the option press the ENTER button to make a change.

Usinq the Menu durinq a Slide Show
Slide Show Speed:
Select to control the slide show speed.
You can select Slow, Normal, or Fast.
Background Music:
Select to choose whether you want to play an MP3 file during a slide show.
You can select Music "ON" or "OFF".
Background Music Setting:
While the slide show is in progress, MP3 files and folders under the same directory
are displayed.
Select a folder using the • or • buttons and press the ENTER button.
The selected folder will be highlighted.
Press the RETURN button again to return to the slide show screen.
The selected background music is played.
>* tf you turn Off the Background Music, even ifthe Background Music Settings have
been set up, the background music wilt not be played.
List:
The file information is displayed as a folder or JPEG file.
Toexit WtSELtNK mode, press theWISELINK button on the remote control.

Slideshow function information icon (Displayed at the top left of the screen).
Icon Current OSD Function
(Photo) SlideShow Photo SlideShow is in progress.
You are able to pause a SlideShow and Music by
pressing the PLAY/PAUSE HI button on the remote
control during a SlideShow.
Photo Pause
To resume the SlideShow, press the
PLAY/PAUSE _-IIIbutton on the remote control again.
Pressing the (right) direction button on the remote
Move to Next Photo control allows you to move to the next photo.
Pressing the (left) direction button on the remote
Move to Previous Photo control allows you to move to the previous photo
When selecting a photo file, the photofite information is displayed on the left side of theTV screen,
such as the resolution, the date modified and the order of the file in the current directory (e.g. 10th out of 15).
Such as the resolution
Date modified
current directory

Rotating.
t. Complete Steps 1 to 3 of "Using the WISELINK Menu". (Refer to page 65)
2. Press the 4 or _, button to move to "Photo", then press the ENTER button.
The saved file information is displayed as a folder or file.
3. Press the A., _', 4 and _ buttons to select a fie, then press the ENTER button.
Pressing the button over a photo thumbnail displays the photo in full screen.
4,
Press the INFO button to display the option(Slide Show, Rotate, Zoom List).
Press the A or _' button to select "Rotate", then press the ENTER button.
• The INFO button, the Rotate option and Enter must be pressed each time you
want to rotate the picture. For example, from 90 to 180 degrees.
To rotate a photo, press the INFO button to open the options window, select the
"Rotate" option and press the ENTER button.
Whenever you do this, the photo on the screen is rotated. (90°, 180°,270°, 0°)
To exit WtSELtNK mode, press theWISELINK button on the remote control.
>- The rotated file is not saved.
>- The Zoom/Slide Show option is disabled when the Rotate option is selected.
The Rotating function information icon (Displayed at the top left of the screen).
Icon Current OSD Function
Rotating (90°) This rotates a photo by 90 degrees
Rotating (180 °) This rotates a photo by 180 degrees
Rotating (270 °) This rotates a photo by 270 degrees
Rotating (0°) This rotates a photo to its original position

Zoomina-in
t. Complete Steps 1 to 3 of "Using the WISELINK Menu". (Refer to page 65)
2. Press the 4 or 1,,button to move to "Photo", then press the ENTER button.
The saved file information is displayed as a folder or file.
3, Press the A., _', 4 and t,_buttons to select a rite, then press the ENTER button.
Pressing the button over a photo thumbnail displays the photo in full screen.
4_
Press the INFO button to display the option(Slide Show, Rotate, Zoom List).
Press the A or _' button to select 'Zoom", then press the ENTER button.
The enlarged photo image appears on the screen.
To enlarge a displayed photo, press the INFO button to open the Options window,
select the 'Zoom" option and press the ENTER button.
Whenever you do this, the following zoom options are applied in sequence.
• The INFO button, the Rotate option and Enter must be pressed each time you
want to Zoom the picture. For example from x 2 to x 4.
• Zoom(x 2): Zoom-in to the photo x2.
• Zoom(x 4): Zoom-in to the photo x4.
• Zoom(x 1): Restore the photo to its original size.
To pan up/down/left/right, press the A, T 4 and I,- buttons.
>- Images with a resolution larger than 1280 X 720 are not supported.
Toexit WtSELtNK mode, press theWlSELINK button on the remote control.

Zoom function information icon (Displayed at the top left of the screen).
Icon Current OSD Function
Zoom (x 2) Zoom-in to a photo x2.
Zoom (x 4) Zoom-in to a photo x4.
Zoom (x 1) Restore a photo to its original size.
Pan Down Pan down to view the lower part of a zoomed-in
photo.
Pan Up Pan up to view the upper part of a zoomed-in
photo.
Pan Right Pan right to view the right side of a zoomed-in
photo.
Pan Left Pan left to view the left side of a zoomed-in photo.
Pan Down (END) Pan to the bottom of a zoomed-in photo.
Pan Up (END) Pan to the top of a zoomed-in photo.
Pan Right (END) Pan to the right-most part of a zoomed-in photo.
Pan Left (END) Pan to the left-most part of a zoomed-in photo.
>'- The Rotate/Slide show option is disabled when the Zoom option is selected.

Using the MP3 List
This menu shows MP3 files from among the files saved on a USB memory device.
t. Complete Steps 1 to 3 of "Using the WISELINK Menu". (Refer to page 65)
2. Press the 4 or _- button to move to "Photo", then press the ENTER button.
The saved file information is displayed as a folder or file.
3_
4_
Press the A or _' button to select a file, then press the ENTER button.
To select ali files or a file, press the INFO button to display the Music menus.
Press the ENTER button to select "Play", "Music Repeat", or "Cancel the selected
file".
• Pressing the ENTER button over a musical note icon immediately pIays the
music file.
• Pressing the ENTER button over a folder icon shows the music files included in
the folder.
To select a file on the next page, press the REW 4 4 or FF D,._ button to move
to the next page.
Press the PLAY/PAUSE_l! button while playing an MP3 file to pause the file.
Press the STOP button [] to exit Play mode.
To exit WtSELtNK mode, press the WlSELINK button on the remote control.
This menu only shows files with the MP3 file extension. Files with other file
extensions are not displayed,even if they are saved on the same USB device.
The selected fite is displayed on the top with its playing time.
> Toadjust the music volume, press the VOL+ or VOL- button on the remote
control. To mute the sound, press the MUTE button on the remote control.
FF D,.i_/REW 4 4 Key does not function during the play.
: Folder icon
: Photo icon
: Move to the previous
folder stage icon
Music function information icon (Displayed at the top left of the screen).
Icon Current OSD Function
(Music) All When all music files are being played.
(Music) One When a music file is being played.
(Music) Play/Pause
When pressing the PLAY/PAUSE _l! button on the
remote control while music is playing. The music
stops and the 'Play' text appears at the top of the
screen.
(Music) Stop When pressing the STOP [] button on the remote
control when music is stopped. The music resumes
and the 'Stop' text appears at the top of the screen.

Music Repeat
t. Complete Steps 1 to 3 of "Using the WISELINK Menu". (Refer to page 65)
2. Press the 4 or _. button to move to "Music", then press the ENTER button.
The saved file information is displayed as a folder or file.
3_
Press the A or _' button to select a file, then press the ENTER button.
To select all files or afile, press the INFO button to display the Music menus.
Press the ENTER button to select "Play", "Music Repeat", or "Cancet the selected
file".
4_
Press the ENTER button to select "Music Repeat".
:_ Select to repeatedly play MP3 flies in the current folder.
You can select On or Off
• On: Plays back a music file or all music files repeatedly
• Off: Doesn't play back the music flies repeatedly.
Toexit WtSELtNK mode, press theWISELINK button on the remote control.

Using the Setup Menu
Setup displays the user settings of the WtSELtNK menu.
t. Complete Steps 1 to 3 of "Using the WISELINK Menu". (Refer to page 65)
2. Press the 4 or D,.button to move to "Setup", then press the ENTER button.
3, Press the A or _r button to select a file, then press the ENTER button.
4. Press the A or _' button to select the option, then press the ENTER button.
continued...

SlideShowSpeed:
Selecttocontroltheslideshowspeed.YoucanselectSlow,NormalorFast.
BackgroundMusic :
Select to determine whether to play an MP3 file during a slide show.
You can select Music On or Music Off.
Background Music Setting:
You can select the background music to play during a slide show. You can also
select the background music while a slide show is playing by pressing the
INFO button and selecting the "Background Music Setting" menu.
Music Repeat:
Select to repeatedly play MP3 files in the current folder.
You can select "On" or "Off".
On: _(Music)All, _(Music) One
Off: _(Music) All, _(Music) One
Screen Saver:
Select to set the waiting time before the screen saver appears.
The screensaver will appear when no button is pressed for 1, 3 or 5 minutes.
To exit WISELINK mode, press the WISELINK button on the remote control.

What is Anynet+?
Anynet+ is anAV network system that enables you to control all connected SamsungAV devices with the TV's remote.
Connecting Anynet + Devices
TheAnynet+ system can be used onty with Samsung AV devices that have the Anynet+ feature.
To be sure your Samsung AV device has this feature, check ifthere is an Anynet+ mark on it.
To directly connect to TV
TV Anynet+ Device1 Anynet+ Device2 Anynet+ Device3
Connect the [HDMt 1],
[HDMI 2] or [HDMI 3]jack on
the TV and the HDMI OUT
jack of the corresponding
Anynet+ device using the
HDMt cable.
To connect to Home Theater
TV
Oplicat CaNe
DMI1.3CaNe
HomeTheater
Anynet+Device1 Anynet+ Device2
Anynet+Device3
HDMI1.3CaNe
Connect the [HDMt 1],
[HDMI 2] or [HDMI 3]
jack on the TV and the
HDMI OUTjack of the
corresponding Anynet+
device using the HDMt
cable.
Connect the HDMI iN jack
of the home theater and
the HDMI OUT jack of the
corresponding Anynet+
device using the HDMt
cable.
>- Connect the OpticaI cable between [Digital Audio Out (Optical)] on your TV and Digital Audio input on the Home Theater.
>- Connect only one Home Theater.
:_ You can listen to 5.1 channel sound through the home theater's speakers. Otherwise, you can only listen to 2 channel stereo
sound in other cases. Make sure to connect the Digital Audio iN (OpticaI) of the home theater and the TV correctly to listen
toTV sound through the home theater. However, you cannot listen to sound from the BD recorder that is sent to the home
theater via the TV in 5.1 channet sound because the TV outputs only 2 channet stereo sound. Please see the manuaI for the
home theater.
You can connect anAnynet+ device using the HDMI 1.3cable. Some HDMI cables may not support Anynet+ functions.
Anynet+ works when the AV device supporting Anynet+ is in the Standby or On status.
>'- Anynet+ supports up to 12AV devices in total.

Setting Up Anynet +
The following settings are to use Anynet+ functions.
To use the Anynet+ Function, HDMI Control must be set to On
1. Press the Anynet + button.
Press the _k or • button to select Setup, then press the ENTER button.
2. Press the ENTER button to setectAnynet+ (HDMt-CEC), then press the ENTER
button.
3, Press the A or T button to select On, then press the ENTER button.
:_ The Anynet+ (HDMI-CEC) function is enabled.
tf you select Off, Anynet+ (HDMt-CEC) is disabled.
Settin ane_An net+ Device to turn OffAutomaticalIv when the TV is Turned Off
2. Press the A or _' button to select Auto Turn Off, then press the ENTER button.
3. Press the A or _' button to select On then press the ENTER button.
:_ TheAuto turn off function is enabled.
>- tf you select Off, theAuto turn offfunction is canceled.
Press the EXIT button to exit.
>- The Select Device setting of the TV remote control is to be set to TV to use the
Anynet+ function.
>'- tfyou set Auto Turn Off to On, connected external devices are also turned off when the TV is turned off.
However, if the device is recording, it may not beturned off.
>- When the Anynet+ (HDMt-CEC) function is disabled, all the Anynet+ related operations are deactivated.
.....s ca_!n,,gandSwiotch_!,n_ _ between Anynet+ Devices
1. Press the Anynet + button.
> Anynet+ devices connected with the TV are listed.
2.
3.
Press the A or _' button to select to a particular device and press the ENTER button.
tt is switched to the selected device.
If you cannot find a device you want, press the h, or _r button to select Searching
Connections, then press the ENTER button.
The meassage Configuring Anynet+ connection.., is displayed.
When searching devices completes, the connected devices are listed in the Anynet+
menu.
Switching tothe selected devices may take up to 2 minutes. You cannot cancel the
operation during the switching operation.
The time required to scan for devices is determined by the number of connected
devices.
When the device scan is complete, the number of found devices is not displayed.
Although the TV automatically scans devices when it is turned on using the POWER button devices connected when the TV
is on or under a specific circumstance are not displayed in thedevice list. Therefore select Searching Connections menu to
search devices.
tfyou have selected external input mode by pressing the SOURCE +button, you cannot use theAnynet function. Make sure to
+ +
switch to anAnynet device by using theAnynet button.

Anvnet+ Menu
TheAnynet+ menu changes depending on the type and status of the Anynet+ devices connected to the TV.
Anynet + Menu Description
Watch TV Switches from Anynet+ to TV broadcast mode.
(Device_Name) Menu Shows the menu of the connected device.
Example. When a DVD Recorder is connected, the DVD Recorder's title menu appears.
(Device_Name) Operation Shows the play control menuof the connected device.
Example. When a DVD Recorder is connected, the play control menu of the DVD
Recorder appears.
Connected to (Device_Name) Your TV connects to the corresponding device.
Receiver Sound is output through the receiver.
Setup You can set the environment for using Anynet +.
TV Remote Control Buttons Available in An_met+ Mode
OperatingDevice
Type
Status
After switching to the device, when the menu of the
corresponding device is displayed on the screen.
Anynet + Device
After switching to the device, while playing a file
After switching to the device, when you are watching a TV
program
When Receiver is activated
When watching TV
Device with built-in Tuner
Audio Device
Anyview2
Available Buttons
Numeric buttons
A./_F/4/I_-/ENTER buttons
Color buttons
EXIT button
4 4 (Backward search)
D,._,(Forward search)
s (Stop)
D,H(Play/Pause)
CH A/T button
VOL +/- button
MUTE button
I_lJ(Play/Pause)
>- TheAnynet+ function only works when the remote control is set toTV.
:_ The REC button works only in Watch TV status.
on the side of theTV. You can control Anynet devices only using the
>- Youcannot controlAnynet" devices using the buttons +
TV remote control.
:_ The TV remote contro{ may not work under certain conditions. Inthis case, re-select the Anynet+ device.
TheAnynet+ functions do not work withother manufacturers' products.
>- tnAnynet+ mode, the color buttons may notwork properly.
Recording
You can make a recording of a TV program using a recorder.
Press the REC button.
Recording begins. (Only when theAnynet+ enabled recording device is connected.)
>_ The current TV program is recorded in the Watching TV status, tf you are watching
video from another device, the video from the device is recorded.

through a Receiver _(Home theater)
You can listen to sound through a receiver instead of the TV speaker.
1. Press the Anynet+ button.
Press the A or 'V button to select Receiver then press the ENTER button.
2. Press the 4 or _,-button to select to On, then press the ENTER button.
Now you can listen to sound through the receiver.
3. Press the EXIT button to exit.
When the receiver is set to On, you can listen to theTV sound through the2-channel receiver.
tf the receiver is exclusively for a home theater only (supporting audio only), itmay not appear in the
device fist.
Only when you have connected the optical jack of the TV and the receiver properly, does Receiver work.
tn case of a content with copyright problem, listening through the receiver may not properly operate.
Check Points before Requesting Service
Symptom Solution
Anynet+ does not work. m Check if the device is an Anynet+ device. The Anynet+ system supports Anynet+
devices only.
m Connect only one receiver (home theater).
m Check if theAnynet+ device power cord is properly connected.
m Check the Anynet+ device's Video/Audio/HDMt 1.3cable connections.
m Check whether the TV remote control is in TV mode.
m Check whether it isAnynet+ exclusive remote control.
m Anynet+ doesn't work at a certain condition. (Searching channels, Operating
WISELtNK)
I want to start Anynet+. m Check if theAnynet+ device is property connected to the TV and check ifthe Anynet+
(HDMI-CEC) is set to On in theAnynet+ Setup menu.
m Press the TV button on the TV remote control to switch to TV. Then press the
Anynet+ button to show the Anynet+ menu and select a menu you want.
I want to exit Anynet+. m Select Watch TV in Anynet+ menu.
m Press the SOURCE button on the TV remote control and select a device other than
Anynet+ devices.
m Press CH, CH LIST, PRE-CH, etc. to change to theTV mode. (Note that the channel
button operates only when a tuner-embedded Anynet+ device is not connected.)
m You cannot use the remote control when you are configuring Anynet+ or switching to a
view mode.
m Use the remote control when the Anynet+ setting or switching to view mode is
complete.
You cannot use the play function when an auto channel scan is in progress or in
WtSELtNK mode. Stop the currently running function.
m Check whether or not the device supports Anynet+ functions.
m Check whether or not the HDMi 1.3 cable is properly connected.
m Check whether HDMI Control is set to On in the Anynet+ setup menu.
m SearchAnynet+ devices again.
m You can connect an Anynet+ device using the HDMi 1.3 cable only. Some HDMi
cables may notsupport Anynet+ functions.
The Connecting to Anynet+
device.., message appears on the
screen.
The Anynet+ device does not play.
The connected device is not
displayed.

Troubleshooting
If the TV seems to have a problem, first try this list of possible problems and solutions.
If none of these troubleshooting tips apply, call your nearest Samsung service center.
Problem Possible Solution
Poor D_cture Try another channel.
Adjust the antenna.
Check all wire connections.
Poor sound quatit_ Try another channel.
Adjust the antenna.
No u_c[ureor souna. Try another channel.
Press the SOURCE button.
Make sure the TV is plugged in.
Check the antenna connections.
No sound or souna is too tow at First, check the volume of units connected to your TV (digital broadcasting receiver, DVD,
maximum volume, cable broadcasting receiver,VCR, etc.). Then, adjust the TV volume accordingly.
Picture rolls verhcatty Check eli wire connections.
The TV c 3era[es erratically. Unplug the TV for 30 seconds, then try operating it again.
The TV won't turn on. Make sure the wail outtet is working.
Remote con[roi malfunctions Replace the remote control batteries.
Clean the upper edge of the remote control (transmission window).
Check the battery terminals.
'Check signal cable" message. Ensure that the signal cable is firmly connected to the PC source.
'Not Suppor[ea Mode" message. Check the maximum resolution and the frequency of theVideo Adapter.
Compare these values with the data in the Display Modes.
Digital broadcasting screen Please check the digital signal strength and input antenna.
problem.
The image is too light or too dark. Adjust the Brightness and Contrast.
Adjust the Fine tuning.
Black bars onthe screen. Make sure the broadcast you're receiving is High Definition (HD).
HD channels sometimes broadcast Standard Definition (SD) programming, which can
cause black bars.
Set your cable/satellite box to stretch or widescreen mode to eliminate the bars.
Picture hasa Red/Green or Make sure the Cornponeni canes are connecied to ihe correcijacks
Pinktint.
Closed Captioning not working, tf you are using a Cable/Satellite box, you must set Closed Captioning on the box,
not your TV.
Your cable box may need afirmware upgrade. Please contact your Cable company.
Ghosting on picture This is sometimes caused bycompatibility issues with your cable box.
Try connecting Component cables instead.

ProbJem
HorJzonta_earsaBBeartoflicker
{tterorsh_mme[onthe_mage.
VerticalBarsappeartoflicker
jitterorshimmerontheimage.
AdjusttheCoarsetuningandthenadjusttheFinetuning.
AdjusttheCoarsetuningandthenadjusttheFinetuning.
Screenisblackanaoower Onyourcomputercheck:Power,SignalCable.
naJca[orHgntblinkssteadit/. TheTVisusingitspowermanagementsystem.
Movethecomputer'smouseorpressanykeyonthekeyboard.
_mageisnotstableariamay tfthesettingisnotcorrect,useyourcomputerutilityprogramtochangethedisplaysettings.
appeartovibratewhenyouhave >YourTVsupportsmultiscandisplayfunctionswithinthefollowingfrequencydomain:
acomputerconnec[ea[othePC ...................................................................................................i
Horizontalfrequency(kHz) 30~60
Input , i
ve )caiiiegi;iCiiHzi........io: ;........................i
PC Maximum refresh rate i
(at 60 Hz) 1920X 1080
image is no[ cen[erea on _ne Adjust the horizontaI and vertical position.
screen. The screen position must be adjusted on the output source (i.e. STB) with a digital signal.
f a stillimageisd,splayedfor When you need i0 ieave ifle nloniior Unused ior an exiended Pedod oii{me, adjustihe
anextendedperiodoftime,resiaual settings so that the monitor automatically goes into energy saving mode or activates the
irnagesor blU[[!Qgmay_appear.............. ..............................................................................................
The TFT LCD panel uses a panel consisting of sub pixels (3,147,264) which require sophisticated technology to produce. How-
ever, there may be few bright or dark pixels on the screen. These pixels will have no impact on the performance of the product.

Installing the Stand
....... 1-
<2> <3>
t, Place the TV face down on a soft cloth or cushion on a table.
2. Put the stand into the hole at the bottom of the TV.
3, Insert screw into the hole indicated and tighten.
Disconnecting the Stand
m
7-
<2> <3> <4>
t, Place the TV face down on a soft cloth or cushion on a table.
2. Remove four screws from the back of the TV.
3, Separate the stand from the TV.
4, Cover the bottom hole with a cap.

Wall-Mount Adjustment (Sold separately)
Tras instalar el montaje en la pared, puede ajustar facilmente la posicion del televisor.
TV Rear Panel Auto Wall-Mount
EX-LINK Cable (Not supplied)
Entering the menu
1. Press the MENU button to display the menu.
Press the A or _t' button to select "Setup", then press the ENTER button.
2. Press the A or _' buttons to select "Wail-Mount Adjustment",
then press the ENTER button.
3.Adjust to the desired position using the _.,T,4,1_. buttons.
4. Press the EXIT button to exit.
_- tf you press an arrow button when no OSD is displayed on the TV screen,
theAdjustment screen appears.
When you turn the power off, your TV moves to the initial instaliation position.
When you turn the power on, your TV moves to the last
remembered position you adjusted.
Using the Remote Control Buttons
Button Operations
(_<:_) Walt-mount angle
adjustment Tilt Up, Tilt Down, Move right, Move left
Reset Moves to the initial installation position
Remembering the Remembers 3 positions with the Red, Green and
position and moving Yellow buttons.
to the remembered Moves to the remembered position using these 3
position color buttons.
>- For installation, refer to the Installation Manual provided.
For product installation and the installation and moving of the wall mount make sure to consult a
specialized installation company.
> This installation manual is to be used when attaching the walt mount to awall
When attaching to other building materials, please contact your nearest dealer

Wall Mount Kit Specifications ( VESA )
When attaching to other building materials, please contact your nearest dealer.
C
D
>- We provided the standard dimensions for wall mount kits as shown in the table above.
When purchasing our wall mount kit, a detailed installation manual and all parts necessary for assembly are provided.
>" Do not use screws longer than the standard dimension, as they may cause damage to the inside of the TV set.
_-- Our 63" model does not comply with VESA Specifications. Therefore, you should use our dedicated wall mount kit
for this model.

Using the Anti-Theft Kensington Lock
The Kensington lock is a device used to physically fix the system when using it in a public place. The locking device has to be purchased
separately. The appearance and locking method may differ from the illustration depending on the manufacturer.
Please refer to the manual provided with the Kensington lock for proper use.
<Optional>
The place of the Kensington Lock may be different depending on its model
1. Insert the locking device into the Kensington slot on the LCD TV (Figure 1), and turn it in the locking direction (Figure 2).
2, Connect the Kensington lock cable.
3. Fix the Kensington lock to a desk or a heavy stationary object.

ecifications
265W
Body 38.2 X 3.4 X 24.7 inches 43.5 X 4.1 X 27.8 inches
971 x 87.2 x 628 mm (1106 x 104.2 x 706 mm)
W th stand 38.2 X 11.8 X 27 inches 43.5 X 12.8 X 30.2 inches
(971 x 300 x 687 mm) (1106 x 326 x 768 mm mm)
wW_t_lg;_and : 46.52,bs 21.1kg i 65.261bs(29.6kg)
Without stand 39.24 Ibs (17.8 kg) _ 53.35 tbs (24.2kg)
E,virO,meniai
Considerations
Operating Temperature 50 °F to 104 °F (10 °C to 40 °C) 50 °F to 104 °F (10 °C to 40 °C)
Operating Humidity 10% to 80%, non-condensing 10% to 80%, n,,on_condensjng
Storage Temperature -4 °F to 113 °F (-20 °C to 45 °C -4 °F to 113 °F (-2u °u to _e °_t
5% to 95%, r_or_-cor_densieg
Power Consumption 245 W 265 W 320 W
PC Resolution 1920 x 1080 @ 60 Hz 1920 x 1080 @ 60 Hz 1920 x 1080 @ 60 Hz
Sound
Output 10WX2 10WX2 10WX2
D rnens ons (WxDxH)
Body 40 9 X 3 8 X 24.2 inches 46.3 X 4.5 X 27.3 inches 52.2 X 4.8 X 31 inches
(1040.7 x 97 x 615.4 mm (1175.8 x 114 x 693.8 ram) (1327 x 122 x 787.4 ram)
W th stand 40.9 X 11.4 X 26 4 riches 46.3 X 12.6 X 30 inches 52.2 X 12.6 X 33.6 inches
1040.7 x 290 x 671 mm) (1175.8 x 320 x 761.4 ram) (1327 x 320 x 854 mm)
With Stand 47.62 Ibs (21.6kg) 67.90 Ibs (30.8kg) 81.79 tbs (37.1kg)
Without stand 39.24 Ibs (17.8kg) 56.21 Lbs (25.5kg) 70.10 lbs (31.8kg)
Environmental
considerations
Operating Temperature 50 °F to 104 °F (10 °C to 40 °C ) 50 °F t° 104 "F (10 °Ct° 40 °C) 50 °F t° 104 "F (10 °C t° 40 °C)
Operating Humidity 10% to 80%, non-condensing 10% to 80%, non-condensing 10% to 80%, non-condensing
Storage Temperature -4 °F to 113 _F (-20 °C to 45 °C) -4 "F to 113 °F (-20 °C to 45 °C) -4 °F to 113 °F (-20 °C to 45 °C}
Storage Humidity 5% to 95%, non-condensing 5% to 95%, non-condensing 5% to 95%, non-condensing
stand Swivel (Left / Right) :
-20 -20
:_ Design and specifications are subject to change without prior notice.
_This device is a Class B digital apparatus.
For the power supply, refer to the label attached to the product.

Contenido
m Lts[aao ae carac[erlst,cas
= Accesonos
= Aspec[ogenera_ae_pane_oecentre
= Aspec[ogeneraJaeJpaneJaeconexlones
m Manao a ais[ancla
I ins[alaelon ae las nllas en eJ reanao a alstaneia
_, Conex}ondeantenasdeVHFy UHF
= ConexbndeTV3arcaDia
! Coeexlonaeunreuroauctoraevlaeo
= 3onexi6ndeunavideocamara
ConexbndeunreuroductordeDVD.
Conexi6na unDVD/receptordeTVdigitala [raves
Jeun HeM
! Conexi6ndeunDVDo unDecodificadordigital
memanteDV
Conexi6ndeunsistemadeaudiodigim
E Conexbndeunamelificador/DVDDarecmeencase
i Conexbna unPC
2 = Selecci6ndela antena 38
.....2 = Suuremonaeloscanabscodificadosdtglmles 38
3 = Configuraclonaelasis[asaecanales 39
,_ = Pareconfigurarloscanabsfavontos 4[
5 = Manetodela ListadeCanale_ ,_1
-3 = Visualizaciondela listade:anales ,_1
= Etiauetaaoaecanapes 42
m LNA LowNoiseAmel_fier-Amelificadorderuidobajo 42
[] Sintonizacbnfinede as canalesanalogmos 43
6 R ComoroeactonaeJa_3tenciadela seBaldigl_a ,_3
7
)
-)
10
= UsadelTVcomapanmuaaeoraenaaor_PC ,_,_
= Moaosaewsuazaclon ,_,_
R Ajus[eae_teJewsorconeJoraenaoor ........ 45
Ill ConflguracbndelPCoaraHomeCinema 46
= ConfiguraciondelReloj aT
Encendidoc apagadodeITV.
= Funci6nPlug& Pie!.
= 3amelo ae canales
m Ajus[e ael VoJume_
m visualizaciondela ean[alla
Visualizacbndelosmenus
= Memonzactonaeloscanales.
SettingupyourremoteCentre
C6digoseelmanaoaammncia
! Pareselecclonarlafuente
B Edici6ndel Nombredela Fuentedeentrade
12
12
13
1,&
15
15
19
22
22
! Usedelosearametrosaetmagenau[omaeoo_ 23
m AjustedelColordelfondc 24
ActivaciondeIs conlguracionae[allaua .........................25
R Cambiodeltamai_odeJaeantalB 28
i Configuramc"_deColoracevo 29
DNle{Motordeimogenna[ura_aigi[a 29
Conge_aclonae_aimogen 30
= Atus[eaela TunclonFilmMode 30
Configuraciondel NiveaenegroHDMI........... 30
Visuallzaclonimogenenimogen........... 31
Personaltzactoneelsonlao............ 33
usadelosearame[rosaesonlaoautomaecos 33
ContlguraclondelTruSurroundXT SRSTSXT 34
Selecciondeunaets[adesonidomulticanaltMTS'-
Digs[el 34
= Seleccl6ndeunaetstaaesonlaomumcana_MTS/
- Analogo 35
Comro_au[omaecoaevo_umen 35
= Seieccionaelsllenctcinterne. 36
Ajus[eaela melodiadeencendiao/apagado. 36
= Escucharel sonidode _sueimogeneelPIP 37
= Reajustedevaloresdesonldoalosvaloresureaefinidos
defabrica 37
Cone_onae_osauncu_ares 37
Seecmonaella 3maaemenu 5[
AiustedelmodoPantallaAzu 51
Usadel ModoJuego 51
vmbndesubtitulo._mensajesaetex[oen3amalla
- Analogmo 52
Visiondesubtitulo_mensajesae[ex[oen 3amaHa-
Digl[a 53
NivelTransparenmaae_menu 54
= Usadela funcbndeahorroaeenergia 54
Ajustedela funcbnaeayua_ 55
= Reaucclona_g_[aleelrulao 55
UsadeV-Chi[ 56
Guiadeactualizacbnae software 63
u ConflguracbndeEfectoueluz
LN-T4065F/LN-T4665FLN-T5265F _3
= Usadela funcbnWISELNK 6,_
= UsaJelmenQWISELINK. 65
Usadela listaFaTe JPEG 6_
Usa_ela istaMP3 Z3
UsadelmenOdeconfiouractor 75
= LQu6 es An} "_et? 7T
= Conexbn de dispositivos Anynet+ 77
Configuracion de An_net Z8
Busqueaa _,eamelo ae atspositivos An_ "_et÷ 18
Grabaci6n. _9
Escucha a troves de unrecee[or 8[
Comeruebe estos euntos antes de solicitar servicio tecnico ........8[
m Identificaci6n de oroelemas 81
= mstalaclon eel souone 82
Desconemon eel sooor[e ...8_
= Aiustedemontajeenlaparee _evendeporseparaao] 84
Esuecificaciones del equipo de montaje en la pared (VESA 8_
= usa eel cerre anerroeo kensington 86
Esoecificaciones B7
Antes de usar el equlpo lea este manua para evitarfal-
las y guarde para futuras referencias,
SimboIo Pulse moortante Note Baton de una
putsacion

Informaci6n General
Listado de caracteristicas
, Valores ajustables de la imagen que se pueden almacenar en la memoria del televisor.
Temporizador autom_tico para encender o apagar el televisor.
Temporizador de desconexi6n especial.
Funci6n V-chip.
Excelente interfaz digital y capacidad de trabajo en red:
El sintonizador digital HD incorporado permite ver las emisiones HD que no exigen una suscripci6n sin que sea
necesario disponer de un receptor de televisi6n digital.
Mando a distancia
Con el mando a distancia suministrado se puede controlar el televisor, la mayoria de reproductores de DVD, los
receptores de televisi6n digital y de cable y los aparatos de video.
Calidad excelente de la imagen
- La tecnologia DNle proporciona im_genes completamente reales.
SRS TruSurround XT
- SRS TruSurround XT proporciona un sistema surround Dolby virtual.
Accesorios
Compruebe que las opciones siguientes se incluyen con su TV LCD.
Si falta alguna opci6n, p6ngase en contacto con el proveedor.
MandoA Distanciay Pitas (AAAx 2) Cablede atimentad6n Pa_o delimpieza
(BN59-00599A) (39034)00144) (BN634)1798A)
Cubierta inferior Tarjeta de garantia /
LN-T4061F: BN63-03031A ManuaIde Tarjetas de registro /
LN-T4065F: BN63-03298A tnstrucciones Guia de seguddad
LN-T4661F : BN634)3148A (no esta disponibte en todas {as
LN-T4665F/ LN-T5265F : BN63-03308A Iocatidades)
>_ El color y la forma de los etementos puede variar segQn et modeto.

Aspecto general del panel de control
Botonea de laparte inferior derecha del
Los botones del panel inferior derecho controlan las funciones b_sicas del televisor, incluido el ment_ en pantalla.
Para usar/as funclones, m._s avanzadasad ebe usar e.I mando=ad=istancia;............................................
<LN-T4061F / LN-T4661 F>
<LN-T4065F/LN-T4665F/LN-T5265F>
O SOURCE
Cambia entre todas las fuentes de entrada disponibles
(TV, AV1, AV2, S-Video1, S-Video2, Componente, PC,
HDMI1, HDMI2, HDMI3).
En el ment_ de la pantalla, utilice este bot6n del mismo
modo que el bot6n ENTER del mando a distancia.
O MENU
Pulse para ver en pantalla un menO con las
caracteristicas del TV.
_]_ + VOL -
Pulse para aumentar o reducir el volumen. En el ment_
de la pantalla, utilice los botones + VOL - del mismo
modo que los botones 4 y _ del mando a distancia.
O ,', CH v
Pulse para cambiar de canal.
En el ment_de la pantalla, utilice estos botones
^ CH v del mismo modo que los botones _, y _' del
mando a distancia.
ALTAVOCES
(_ (ENCENDIDO)
Pulse para encender o apagar el TV.
O INDICADOR DE ALIMENTAClON
Parpadea y se apaga cuando se enciende el aparato y
se ilumina en el modo en espera.
SENSOR DEL MANDO A DISTANClA
Dirija el mando a distancia hacia este punto del TV.

Aspecto general del panel de conexiones
Conectoresdel anel osterior
Se pueden usar para conectar componentes de A/V que estar_n conectados permanentemente, como reproductores de
video o de DVD. Si precisa informaci6n sobre la conexi6n de equipos, consulte las p&ginas 6 a 11.
®
i ANT I I'_ ANT 2I_
i /AIR) /CABLE)
[Tomas del
E
s-v
VID
_anel lateral]
}......@
.....@
O AUDIO OUT
Permite conectar las tomas de la entrada de audio del
amplificador/sistema de Home Cinema.
O DIGITAL AUDIO OUT (OPTICAL)
Se conecta al componente de audio digital.
PC IN
Permite conectar alas tomas de salida de audio y de
video de su PC.
0 HDMI IN 1,2,3/DVI IN(HDMI1) (AUDIO R/L)
Permiteconectara la toma HDMtde un dispositivoque tenga
satidaHDMt.
Use el terminal HDMI IN t para conectar el DVl a un
dispositivo externo. Debe usar el cable de DVl a HDMI
o el adaptador de DVI-HDMI (DVI a HDMI) para la
conexi6n del video, y el terminal "R-AUDIO-L" de DVI-IN
para el audio.
- No se necesita ninguna conexi6n de sonido para una
conexi6n de HDMI a HDMI.
O COMPONENT IN
Permite conectar el video/audio de componentes.
AV IN 1 /AV IN 2
Entradas de video y audio para dispositivos externos,
como una videoc&mara o un reproductor de video.
S-VIDEO
Permite conectar la seSal de S-Video de una c&mara o
de un video.
Q POWER INPUT
Permite conectar el cable de alimentaci6n suministrado.
@
KENSINGTON LOCK
El bloqueo Kensington (opcional) es un dispositivo que
se utiliza para fijar fisicamente el sistema cuando se
utiliza en un sitio p0blico.
Si desea usar un dispositivo de bloqueo, p6ngase en
contacto con el distribuidor donde adquiri6 el televisor.
_--La ubicaci6n del "Bloqueo Kensington" puede variar
seg0n el modelo.
- Cuando se usa una conexi6n de cable HDMt/DVt, se debe O _ HEADPHONE
conectar en el terminal HDMI IN 1.
- El modelo de 23, 26 pulgadas sdto admire HDMtl y HDMt2.
O ANT 1 IN/ANT 2 IN
Permite conectar a una antena o un sistema de TV por
cable.
O EX LINK
Conector para el ajuste de montaje en pared solamente.
(Consulte la pagina 80)
Permite conectar unos auriculares externos para
audiciones privadas.
_) WISELINK
Se usa para conectar un dispositivo de almacenamiento
masivo USB para ver archivos de fotos (JPEG) y
reproducir archivos de audio (MP3).

Mando a distancia
Puede usar el mando a distancia desde unadistancia m_xima de atrededor de 7 metros desde el TV. Cuando utilice el mando a
distancia, serial6 siempre directamente hacia etTV. Tambi6n puede utilizar el mando a distancia para hacer funcionar etaparato de
video, el decodificador, el reproductor de DVD o et receptor de TV digital.
0 POWER
Enciende o apaga et TV.
O NUMERIC BUTTONS
Pulsar para cambiar el canal..
0-
Pulse este bot6n para seteccio-
nar canales adicionates (digitates y
anatogices) emitides pot la misma
emisora. Pot e empto, para eteccio-
nat e cana "54-3" pu se "54", "-" y
"3".
@
@
0 CH LIST @
Muestra el "Gestor canales" en la
pantalta.
@
O ANTENNA
Pulse este bet6n para seleccionar
"AIRE" o "CABLE".
O Funciones del video/DVD
- Rebobinar
- Detener
- Reproducir/Pausa
- Avarice rapido t_
0 VOL(_/VOL_
Pulse para aumentar o reducir el
volumen. _)
O _((MUTE)
Pulse para desactivar
momentaneamente el sonido.
@
@
O MENU
Muestra el men0 de pantafla
principal.
@ S.MODE
Seleccion del mode de sonido.
_) RETURN
Vuetve at men0 anterior.
_) P.MODE
Seteccion de efectos de imagen.
@ CAPTION
Controta et decodificador de
subtitulos.
_) FAV.C H
Pulse este bot6n para sintonizar sus t_
canales favodtos.
SLEEP
Pulse este bot6n para seteccionar
un intervalo prefijado para la
desconexi6n autom&tica.
© SRS
Seiecciona et modo SRS
TruSurround XT.
@
_) SET
Permite configurar et mando a
distancia para controtar et televisor,
et aparato de video, el reproductor de
DVD y el receptor de televisi6n digital
o de cable.
TV, DVD, STB, CABLE, VCR
POtseto para controlar ei televisor,
et reproductor de DVD, et receptor
de television digital o de cable o el
aparato de video.
(Consulte las paginas 17 a 22)
Cuando se puisa este boron, atgunos
botones del mando a distancia (como
TV, DVD, STB, CABLE, VCR, VOL
y CH) se iluminan durante unos
segundos y se apagan para ahorrar
energia. Esta funcion es Otil cuando
se usa el mando a distancia de
noche o en una sala a oscuras.
SOURCE
Pulse para visuafizar todos las
fuentes de video.
PRE-CH
Sintoniza el canal anterior.
WISELINK
Esta funcion permite very reproducir
archivos de fotos (JPEG) y de audio
(MP3) desde un dispositivo extemo.
(Consutte la pagina 65)
REC
REC Graba emisiones en directo.
CH_ / CH(_
Permiten cambiar de canal.
EXIT
Puise et bot6n para salir.
ARRIBAA /ABAJO'V /
IZQUiERDA _ /
DERECHA_ / ENTERS,
Sirve para seieccionar los eiementos
del menO en pantalta y cambiar los
valores del men&
INFO
POtseto para mostrar informacion en
la pantalia de{ televisor.
STILL
Pulse para detener la accion durante
una escena concreta. Para reanudar
la reproducci6n normal, vuelva a
pulsaflo.
ESIZE
Setecci6n del tamafio de la imagen.
PIP
Imagen sebre imagen Encendido/
Apagado.
CH ^/v
Presenta secuencialmente los
canales disponibles. (Estos betones
s6to cambian los canates de la
ventana PIP).
MTS
Pulse para elegir esteree, meno
o pro grama de audio independiente
(emisi6n SAP).
RESET
Cuande no funcione el mande a dis-
tancia, cambie las baterias y pulse et
boron RESET (Reiniciar) durante 2 e
3 segundos antes de poder utilizarlo.
Es un mando a distancia especial para personas con discapacidades visuales;
presenta puntos Braille en los botones de encendido, de canales, volumen,
Stop y Play/Pause.
>_ El exceso d luz puede influir en el rendimiento det mando a distancia.

Instalaci6n de las pilas en el mando a distancia
1. Levante la tapa de la parte posterior dei mando a distancia como se muestra en la ilustracidn,
2. Coloque dos pilas de tama_o AAA,
_'-Compruebe que los extremos "+" y "-" de las pilas concuerdan con et diagrama dei interior det
compartimiento,
3. Vuelva a co{ocar la tap&
Si nova a usarel mando a distanciaduranteun largoperiodo de tiempo extraigatas pitasy gu_rdelasen
unlugar fresco y seco
Et mandose puede utitizarhasta unadistancia de unos 7 metrosdel televisor,
(Con un uso normal del TV,las pitasduran aIrededordeun a_o),
>Si el mando a distancia no funciona, haga estas comprobaciones:
1, _.Est_encendido etTV?
2, _.Est_ninvertidos los polos positivo y negativo de la bateria?
3, _.Sehan agotado las baterias?
4, &Ha habido un corte de luz o el cable esta desconectado?
5, &Hay cerca una luz fluorescente o un letrero de ne6n?
Conexiones
Cone×i6n de antenas de VHF _ UHF
Si su antena tiene un coniunto de cables con este aspecto, consulte "Antenas de par de cables
pianosde 300 _" a continuaci6n.
Si la antena tiene un cable como el que se muestra en etdiagrama de la derecha consulte
"Antenas con cables coaxiales de 75 ohmios",
Si dispone de dos antenas consulte "Antenas deVHF y UHF independientes".
Antenas depar de cables pianos de 300 Q
Si utiliza una antena externa (de techo o de "orejas de conejo") de par de cables pianos de300 _, siga las indicaciones siguientes.
1. Coioque los conductores del par de cables bajo los torniltos dei adaptador de 300-75
(no incluido),
Utilice undestorniliador para apretar los torniltos.
2. Conecte el adaptador en et terminal ANT 2 tN (CABLE) en la parte posterior det televisor.,
Antenas de cable coaxial de ?'5Q
1. Conecte el cable de la antena en el terminal ANT 1 tN (AIR) de la parte inferior det panel
posterior.
Antenas deVHF UHF inde endientes
Si dispone de dos antenas independientes para el TV (una deVHF y otra de UHF), debe combinar ambas seSales de la antena
antes de conectadas aITV. Este procedimiento precisa un adaptador-combinador especial (disponible en la mayoria de tiendas de
etectr6nica),
1. Conecteamboscabtesdeantenaalcombinador. / ;_
2. Conecte el combinador en et terminal ANT 1tN (AtR) de la parte inferior dei panet
posterior.

Conexi6n de TV por cable
Para conectar a unsistema de TV per cane, siga estas instrucciones.
_or cable sin decodificador
Conecte elcable de entrada en el terminal de la antena ANT 2 tN (CABLE) de la pade
posterior del TV.
DadoqueelTVestapreparadoparalatelevisbnporcable,nosenecesitaundecodifi_dorparaver
canalesdecane nocodificados.
Conexi6n al decodificador que decodifica todos los canales
1. Busque el cable conectado aI terminaI ANT OUT del decodificader.
>_Esteterminalpuedeestarindicadocored"ANTOUT","VHFOUT"o"OUT".
2. Conecteetotro extremodel cableen el terminalANT 2 tN (CABLE)de la parteposteriordel TV.
ANT IN ANT OUT _[_
t
Conexi6n a un decodificador clue decodifica alqunos canales
Si su decodificador s61odecodifica algunos canates (como los canales de pago), siga tas instrucciones siguientes. Necesitara
un divisor de dos vias, un conmutador de RF (A/B) y cuatro largos de cable RE Estas opciones se encuentran en la mayoda de
tiendas de electr6nica).
Busque y desconecte el cable que esta
conectado atterminat ANT tN (entrada de
antena) del decodificador.
Estetemlinalpuedeestarindicadocomo"ANT
IN","VHFIN"o "IN".
2. Conecte este cable al divisor de dos vias.
Cable
entran_
Divisor
Conecte el cable RF entre un terminal
OUTPUT(salida) del divisor y el terminal tN
(entrada) detdecodificador. Cable
entrante
J
Servicio de Cabte
Conecte el cable RF entre el terminal ANT
OUT del decodificador y el terminal BIN det
conmutador A/B.
Cabte i,J c,_l ou
entrante
Divisor
Servicio de Cabie
Conrnutador
Conecte otto cable RF entre el otro terminal
OUT del divisor y el terminal A.tN dei
conmutador de RF (A/B).
o°,r_.,o D'v's-_r° _ -J RF/_B"e"
Servicio de Cabte Conrnutador
6. Conecte el Oltimocable RF entre el terminal A,T_,
OUTdelconmutadorRF(A/B) yelterminat ___ -- --
ANT iN en ia parte posterior det televisor. ! ........i............................I..........................., _ _ @
Cabl Antena
Divisor _ _ RF A_B det I
Servicio de Cab,e C on in(u,a_)or Teievis°r I
Una vez hecha esta conexbn, coloque el conmutadorA/B en la posicbn "A"para ta visualizacbn normaI Co{oque el conmutadorA/B en
la posicbn "B"para ver los canales codiflcados. (Cuande sit_?eel conmutaderA/B en "B",deber_ sintenizar et W aI canaI de salida det
decodiflcader, que nermaimente es et canal 3 e 4).

Conexi6n de un reproductor de video
Cone×i6n de video
Estas instrucciones presuponen que ya ha conectado el TV a una antena o sistema de TV por cable (siguiendo las instrucciones
de las p_ginas 6 a 7). Si aQnno ha conectado et TV a una antena o un sistema de cable, s_Itese el paso 1.
1. Desconecte el cable o ta
antena de la parte posterior
del TV.
Conecteel cableo la antena
enel terminaIANT tN de la
parte posteriordetreproductor
devideo.
Conecteel cableRF entre el
terminalANT OUT (saIidade
antena)del reproductorde
videoy el terminatANT 1 tN
(AIR) cANT2 tN (CABLE) del
televisor.
Conecteun cablede video
entretatoma VIDEO OUT del
reproductordevideo y la toma
AV IN 1(oAV tN2) [VIDEO]
dei televisor.
Conecte unjuego de cables
de audio entre los conectores
AUDIO OUT dei reproductor
de VCR y los conectores
AV IN 1 (oAV IN 2)
[R-AUDIO-L] del TV.
Si tiene un reproductor
de video "mono" (sin
est@eo), use el conector
Y (no suministrado) para
conectar los conectores de
entrada de audio izquierdo
o derecho deI TV. Si el
video es est@eo, tendr_
que conectar dos cables.
Panel posterior del TV
Panel posterior del VCR
,4-' Cable de video (No incluido)
3 Cable RF (No incluido) _
Siga las instruccienes de "Visualizaci6n de una cinta de video o de c_mara de video" para
vet sus cintas.
>-Cada reproductor de video tiene una configuracidn distinta en el panel posterior.
>-Cuando conecte un reproductor de video, debe hacer coincidir los colores detterminal de
conexidn y det cable.
Conexidn de S-Video
Este televisor Samsung se puede conectar a una sepal S-Video procedente de un reproductor deVCR.
(Esta conexidn ofrece meier caIidad de imagen con retacidn a un reproductor de VCR normal).
1. Para empezar, siga los
pasos 1 a 3 del apartado
anterior para conectar la
antena o el sistema de
cable al reproductor de
VCR y al TV.
2. Conecte un cable de
S-Video entre la toma
de salida de S-Video del
reproductor y la toma de
entrada de S-Video del
televisor.
Conecte unjuego de
cables de audio entre los
conectores AUDIO OUT
del reproductor de VCR y
los conectores AV IN [R-
AUDIO-L] del TV.
Panel posterior del TV
Normalmentese incluyeuncableS-Videocon losreproductoresdevideo S-VHS.
(Encasecontrario,consulteen la tiendade electrdnica).
> Cada reproductor de video S-VHS tiene una configuracidn distinta en el panel posterior.
Cuando conecte un reproductor de S-VHS, debe hacer coincidir los coIores det terminal
de conexidn y dei cable.

Conexi6n de una videoc_mara
Las tomas del panel lateral del televisor facifitan la conexi6n de la videoc_mara.
Permiten ver las cintas de la videoc_mara sin utilizar un aparato de video.
Conecte un cable de audio
entre las tomas AV IN 2
[VIDEO] (o S-VIDEO) del
televisor y las tomas AUDIO
OUT (Salida de audio) de la
videocamara,
Conecte un cable de audio
entre las tomas AV IN 2
[R-AUDIO-L] del televisor
y las tomas AUDIO OUT
(Salida de audio) de la
videocamara.
TV(Tornas del panel lateral)
> Cada videocamara tiene una configuracidn distinta en el panel posterior.
Cuando conecte una videocamara debe hacer coincidir los colores det terminal de
conexidn y dei cable.
Conexi6n de un reproductor de DVD
Los conectores det panet posterior det TV facilitan la conexi6n de un reproductor de DVD atTV.
1. Conecte un cable de
componente entre las tomas
COMPONENT tN (1 o 2)
[Y,PB,PR]del televisor y las
tomas COMPONENT OUT
[Y,PB,PR]del reproductor de
DVD.
2. Conecte un cable de audio
entre las tomas
COMPONENT tN (1 o 2)
[R-AUDIO-L] del televisor
y las tomas AUD!O OUT
det reproductor de DVD.
i';I-i Cable de Component (No incluido)
iuiuiuiuiuiuiuiuiuiuiuiuiuiuiuiuiuiuiuiuiUiUl_
Panel posterior del TV
>- El video Componente separa el video enY (Luminancia (brillo), el Pb (azul) y el Pr (rojo)
para reaIzar la caIidad del video. Las conexiones de audio y de video componente deben
coincidir. Per ejemplo, si se conecta el cable de video a Component in, conecte tambi6n
el cable de audio a la misma entrada.
>_Cada reproductor de DVD tiene una conflguraci6n distinta en el panel posterior.
Cuando conecte un reproductor de DVD, debe hacer coincidir los coIores detterminal de
conexi6n y del cable.

Conexi6n a un DVD/receptor de TV digital a trav_s de un HDIVll
Solo es apticabte si hay un conector de salida de HDMt en el dispositivo externo.
1. Conecte un cable de HDMt Panel posterior del
entre el conector de reproductor de DVD
HDMI tN (1,2 o 3) del
televisor y el conector HDMt
del reproductor de DVD/
reproductor de teievisidn
digital.
Panel posterior del TV
_®®
Cable de HDMI (No incluido) !
Qu6 es HDMI?
HDMI, o interfaz multimedia de alta definici6n, es una interfaz de la siguiente
eneraci6n que permite la transmisi6n de sefiales digitales de audio y de video
mediante un cable simple sin compresi6n.
• La diferencia entre los dispositivos HDMI y DVl es que el HDMI es m&s pequefio y
tiene instalada la funci6n de codificaci6n HDCP (protecci6n alta de la copia digital del
ancho de banda).
_'-Cada reproductor de DVD tiene una configuraci6n distinta en el panel posterior.
Conexi6n de un DVD o un Decodificador digital mediante DVl
Solo es apiicable si hay un conector de salida de DVt en el dispositivo externo.
1. Conecte un cable de DVt
a HDMI o un adaptador
de DVI-HDMt entre el
conector de HDMI tN 1 del DVD/reproductor de
televisor y el conector de televisi6ndigital
DVt del reproductor de DVD/
reproductor de televisi6n
digitai.
2. Conecte un cable de audio
entre Ia toma de entrada de
DVI tN(HDMI 1) JR-AUDIO-
L] dei televisor y las tomas
AUDIO OUT del reproductor
de DVD/reproductor de
televisi6n digital
Panel posterior del TV
i2-' Cable deAudio (No incluido)
;11! Cable DVI a HDMI (No incluido)
:_ Cada reproductor de DVl tiene una configuraci6n distinta en el panel posterior.
>- Cuando conecte un reproductor de DVl, debe hacer coincidir los colores del terminal
de conexi6n y del cable.
> Cuando se usa una conexi6n de cable HDMt/DVt, se debe conectar en et terminal
HDMt tN 1.

Conexi6n de un sistema de audio digital
Las tomas del panel posterior del televisor facilitan la conexi6n de unsistema de audio digital al televisor.
Conecte un cable 6ptico entre
las tomas DtGITALAUDIO
OUT (OPTICAL) Salida de
audio digital, 6ptica) det
televisor ytas tomas Digital
Audio Input Entrada de audio
digital) del sistema de audio
digital.
Cuado un sistema de audio
digital se conecta a la
terminal "DIGITALAUDIO
OUT (OPTICAL)" terminal:
Reduzca ta ganancia
volumen) detTV, y ajuste el
volumen con el control dei
ampliflcador.
Sistema de audio digital
_] I__Panel posterior del@@TV
>_La emision en 5.1 canales es posiblesi esta conectado a un dispositivo externo queadmita
5.1 canates.
>_Cada dispositivo externo de fuente de entrada tiene unaconfiguraci6n diferente en el panel
posterior.
Conexi6n de un ampiificador/DVD para cine en casa
Conecte un cable de audio
entre las tomas AUDIO OUT
[R-AUDIO-L] del televisor
y las tomas AUDIO IN JR-
AUDIO-L] det ampiificador/
DVD para cine en casa.
Cuando unamplificador
de audio se conecta a los
terminales "AUDIO OUT
[L-AUDIO-R]" : Reduzca ta
ganancia (votumen) del TV,
y ajuste el volumen con el
control det amplificador.
Arn pfificador/DVD para
Cifle en casa
Panel posterior del TV
@@
Cable deAudio (No incluido)
:_ Cada Amplificador/DVD para cine en casa tiene unaconfiguraci6n distinta en el panel
posterior.
Cuando conecte unAmpiificador/DVD para cine en casa debe hacer coincidir los co{ores
dei terminal de conexi6n y det cable.
Conexi6n a un PC
1. Connect a D-Sub
Cable between PC tN
[PC] connector on
the TV and the PC
output connector on
your computer.
2. Connect a PCAudio
Cable between PC IN
[AUDIO] jack on the
TV and theAudio Out
jack of the sound card
on your computer.
Panel posterior del TV
:_ Cada PC tiene una configuraci6n distinta en el panel posterior.
>-Cuando conecte una PC, debe hacer coincidir los co{ores det terminal de conexi6n y dei
cable.
>_Cuando se usa una conexi6n de cable HDMt/DVt, se debe conectar en etterminal
HDMt tN 1.

Funcionamiento
Encendido o apagado del TV
Pulse el bot6n POWER (b del mando a distancia.
Tambi6n puede usar el bot6n O button on the front of the panel.
.......Funoc!6n p,!u, & Play
Cuando se enciende el televisor por primera vez, se configuran seguidos y autom&ticamente dos ajustes b&sicos del
usuario.
Pulse eI bot6n POWER en el mando a distancia.
Aparece el mensaje "'Menu language, Shop Mode, Channels and Time wilt be set".
Pulse el bot6n ENTER y aparecer_ autom_ticamente el menQ"Select the language
of the OSD".
Pulse los botones A o 'V para seleccionar el idioma; pulse despu6s et bot6n
ENTER.
Be muestra el mensaje "Seleccione el modo Domiciiio si instala el TV en casa/'
Pulse los botones 4 o P. para seleccionar "Comercio" o "Domicilio" despu6s,
pulse el bot6n ENTER.
Se muestra el mensaje "Seleccionar las antenas que desea memorizar.".
:_ Es recomendable configurar el televisor en el mode Domicitio para obtener la
mejor imagen en un entorno dom6stico.
:_ Et modo Comercio s61oes necesario en los entornos comerciales.
>-Si la unidad se ha configurado accidentalmente en el mode Comercio y se
desea volver al mode Din_mico, se debe pulsar el bot6n del volumen y, a
continuaci6n, mantener pulsado durante cinco segundos et bot6n MENU dei
lateral del televisor.
Pulse Ios botones A o • para memorizar los canales de ta conexi6n
seleccionada. Pulse el bot6n ENTER para seleccionar 'Iniciar".
Si la antena est_ conectada a ANT 2 (CABLE), seleccione "Cable"; si est_
conectada a ANT 1 (AIR), seleccione "Aire".
Si ANT 1 (AIR) yANT 2 (CABLE) est_n conectadas, seleccione "Aire+Cabte".
En el modo de cable, puede seleccionar el origen de seSai correcto entre STD,
HRC e IRC pulsando los botones A o _' a continuaci6n, pulse el bot6n ENTER.
P6ngase en contacto con su proveedor de cable para saber el ripe de sistema de
cable existente en su zona.
El televisor empezar_ a memorizar todos loscanales disponibles.
Una vez guardados todos los canales disponibles, votvera a aparecer el menQ
Prog.Auto. Pulse el bot6n ENTER cuando se complete la memodzaci6n de
canales. Aparece autom_ticamente el menQ"Seleccionar el modo de reloj".
>- Para detener la bOsquedaantes de que termine, pulse et bot6n ENTER con la
opci6n Detener seieccionada.
Pulse eI bot6n ENTER.
Pulse los botones A o 'V para seleccionar "Manual" o "Auto" despu6s, pulse el
bot6n ENTER.
Se muestra et mensaje "Seieccionar si no observa et horatio de verano.".

7. PulselosbotonesAo_'paraseleccionar'Si"o"No"despu6spulseelbot6n
ENTER.
Semuestraetmensaje"SeleccionelazonahorariaenlaqueseencuentraJ'.
8. Pulselosbotones• oVpararesaltarlazonahorariadel_realocal.
Pulseelbot6nENTER.Siharecibidounasepaldigital,seajustar_lahora
autom_ticamente.Encasonegativo,consultelap_gina48paraajustaretreioj.
9. Apareceelmensaje"Disfrutarsuvisi6nJ'
Cuandotermine,pulseelbot6nENTER.
Si desea reiniciar esta funci6n_.
1. Pulse el bot6n MENU para vet el men0.
Pulse los botones A o _' para seteccionar "Configuraci6n" despu6s, pulse el bot6n
ENTER.
2. Pulse de nuevo el bot6n ENTER para seleccionar "Plug & Play".
3. Aparece el mensaje "Se ajustar_n idioma men0, Comercio, canaIes y hora."
(Se ajustar_ idioma de menQs, canales y hora).
Cambio de canales
Mediante los botones de canal
Pulse los botones CH® o CH® para cambiar los canates.
>- Cuando pulse los botones CH_) o CHQ el TV cambiar_ los canales pot orden.
Ver_ todos los canales que ha memorizado el TV (El TV deber_ haber
memorizado como minimo tres canales). No ver_ los canaIes borrados o no
memorizados. Consulte las p_ginas 16 para la memorizaci6n de los canales.
v v v v
Utilizaci6n del bot6n PRE-CH para seleccionar el canal anterior
Pulse el bot6n PRE-CH. F A_(_) F--
El TV volvera al Oltimo canal visualizado. ('_ ('_
Para conmutar rapidamente entre dos canales bastante distantes, sintonice
un canal y use los botones num6ricos para seleccionar el segundo.
Despu6s use el bot6n PRE-CH para conmutar r_pidamente entre ellos, c A

Ajuste del volumen
1. Pulse los botones VOL® o VOL® para subir o bajar el volumen.
VOL'_ ¢H
I II_!oo__J
o _ oOO
I
' ' _ f( v
II!
Mediante Silencio
Puede interrumpir el sonido en cualquier momento pulsando el bot6n MUTE.
1. Pulse el bot6n MUTE y el sonido se desconectar&.
En la esquina inferior izquierda de la pantalla aparecer& la palabra
2. Para recuperar el sonido vuelva a pulsar MUTE o, simplemente, pulse los
botones VOL® oVOL®.
Visualizaci6n de la pantalla
La pantaIta identifica el canal actual y el estado de algunos ajustes de audio-video.
1. Pulse el bot6n INFO del mando a distancia.
El TV visualizar_ et canal, ettipo de sonido y et estado de determinados ajustes de
sonido e imagen.
Pulse el bot6n INFO otra vez o espere unos 10 segundos y desaparecer_
autom_ticamente.
[NFO

Visualizacion de los men s
2.
3.
Con eI aparato encendido, pulse el bot6n MENU.
En la pantalla aparece el men0 principal. En el lado izquierdo dei men0 hay cinco
iconos:
Pulse los botones A o v para seleccionar uno de los cinco iconos.
A continuaci6n, pulse ENTER para acceder aI submenQ dei icono.
Pulse et bot6n EXIT para saIir.
Pasado aproximadamente un minuto, los menQsde lapantaIla desaparecen de
6sta.
Memorizaci6n de los canales
El TV puede memorizar y almacenar todos los canales disponibles, tanto de "antena" como de cable. Una vez memorizados
los canales disponibtes, use los botones CH_) y CHQ para explorados. De este modo no es necesario cambiar los canates
introduciendo los digitos. La memorizaci6n de canales tiene tres pasos: seleccionar unaemisora de origen, memorizar los
canaIes (autom_tico) y agregar o borrar canales (manual).
Seleccion del oriecjende la sepal de video
Antes de empezar a memorizar los canales disponibtes, debe indicar el ripede origen de la se_aI conectada al TV
(es decir, antena o sistema de cable).
1. Pulse el bot6n MENU para visualizar el men&
Pulse los botones A o T para seteccionar "Canal" y despu6s, pulse el bot6n
ENTER.
Pulse el bot6n ENTER para seieccionar "Antena".
Pulse los botones h. o T para seteccionar "Aire" o "Cable" despu6s, pulse et
bot6n ENTER.
Pulse el bot6n EXIT para salir.

Almacenamiento de los canales en la memoria Lm_todo automatico_
Pulse el bot6n MENU para visuaIizar et menO.
Pulse los botones & o _r para seteccionar "Canal" y despu6s, pulse el botdn
ENTER.
Pulse los botones A o _r para seteccionar "Prog. Auto" y despu6s, pulse el bot6n
ENTER.
Pulse los botones h. o _r para seleccionar la conexi6n de la antena despu6s
pulse ENTER.
>*Aire.: serial de antena "Aire.". / Cable: serial de antena de "Cable"./Aire +
Cable: sefiales de antena "Aire." y de "Cable".
AI seleccionar el sistema de TV de cable: Pulse el bot6n ENTER para inlclar el
programa autom_tico.De forma predeterminada, el sistema de teievisi6n pot cable
est_ establecido en "STD". Si desea seleccionar otto tipo de sistema de cable,
pulse los botones A o _r para seleccionar las opciones 'STD", "HRC" o "IRC".
>* STD, HRC e IRC identifican los distintos tipos de sistemas de TV pot cable.
P6ngase en contacto con su proveedor de cable para averiguar et tipo de
sistema de cable existente en su zona.
En este momento ya se haseleccionado elorigen de la serial
Pulse ENTER para iniciar el programa autom_tico.
Para detener la b0squeda antes de que termine, pulse el bot6n ENTER con la
opci6n Detener seleccionada.
Una vez memorizados todos los canales disponibles, el men0 "Prog. Auto", volver_
a aparecer.
Pulse el bot6n EXIT para salir.

Setting up your remote Control
Una vez configurado correctamente, et mando a distancia puede funcionar en cinco
modes diferentes: TV, DVD, Cable (Decodificador), Set- Top Box (receptor TV digital), o
VCR (video). Pulsando el bot6n correspondiente del mando a distancia podr_ cambiar de
un modo a otto y controlar cualquiera de estos equipos.
El mando a distancia quiz_ no sea compatible con redes los reproductores de DVD,
videos, decodificadores y receptores de TV digital.
Configuracion del mando a distancia para controlar el video
1. Apague el video.
2. Pulse el bot6n VCR del mando a distancia det televisor.
3. Pulse el bot6n SET del mando a distancia del televisor.
4. Mediante los botones numericos del mando a distancia introduzca los ires digitos del
c6digo del video correspondientes a {a marca de su video, que aparece en la lista
de la p_gina 19 de este manual. AsegQrese de introducir los tres digitos del c6digo,
incluso aunque el primero sea un "0". (Si aparece m_s de un c6digo int6ntelo con et
primero.)
5. Pulse el bot6n POWER del mando a distancia.
El video deberia encenderse si el mando est_ correctamente configurado.
Si el video no se enciende, repitalos pasos 2, 3 y 4 pete pruebe con otto de
Iosc6digos indicados para ta marca de su video. Si no aparece ningQnotto c6digo,
pruebe con todos los c6digos de video, desde el 000 hasta et 080.
,'_Nora sobre el uso de los modos del mando a distancia: video Cuando el mando a
distancia est6 en eI modo "VCR', los botones de volumen seguir_n controlando et
votumen det televisor.
,t_NA C_[IS; _ISELI_K _EC
____Q__©___O___®....
6
E:::] _ cza
€:5 @ _:5 @
OSEr ©_B_
P
Configuracion del mando a distancia para controlar el decodificador de cable
1. Apague el decodificador del cable.
2. Pulse et bot6n CABLE dei mando a distancia del televisor.
3. Pulse el bot6n SET del mando a distancia del televisor.
Mediante los botones numericos del mando a distancia, introduzca los ires digitos del
c6digo de decodificador de cable correspondientes a ta marca de su decodificador,
que aparece en la lista de la pagina 20 de este manual AsegQrese de introducir los
tres digitos del c6digo, incluso aunque et primer digito sea un "0". (Si aparece m_s de
un c6digo, int6ntelo con el primero.)
Pulse el bot6n POWER (b dei mando a distancia.
El decodiflcador de cable deberia encenderse si el mando est_ correctamente
configurado.
Si el decodificador no se enciende, repita los pasos 2, 3 y 4 pero pruebe con otro de
los c6digos indicados para la marca de su decodificador. Si no aparece ningQnotro
c6digo, pruebe con todos los c6digos, desde et 000 at046.
>Nota sobre el uso de los modos dei mando a distancia: decodificador de cable Cuando
el mando a distancia est6 en el modo "CABLE", los botones de volumen seguir_n
controIando el volumen det televisor.
A_f_NA CaLISTWlS_K REC
____Q___Q___Q___®....
_ErUR_Q 6 0_'_
_AY_ C_qlC_
_ _ _CE3

ConfiguraciondelmandoadistanciaparacontrolarelDVD
1. ApagueelDVD.
2. Pulseelbot6nDVDdetmandoadistanciadeltelevisor.
3. Pulseelbot6nSETdelmandoadistanciadeltelevisor.
4. Mediantelosbotonesnumedcosdeimandoadistanciaintroduzcalostresdigitosdel
c6digodelDVDcorrespondientesatamarcadesuDVD,queapareceenlalistade
lap_gina20~21deestemanual.AsegOresedeintroducirlostresdigitosdelc6digo,
inclusoaunqueelprimerdigitoseaun"0."(Siaparecem_sdeunc6digo,int6ntelo
conelprimero.)
5. Pulseelbot6nPOWERdeImandoadistancia.
ElDVDdeberiaencendersesielmandoestacorrectamenteconfigurado.
SielDVDnoseenciende,repitalospasos2,3y4petepruebeconottodelos
c6digosindicadosparatamarcadesuDVD.SinoapareceningOnottoc6digo,
int6nteloconcadaunodeetlos,det000a1141.
-'_Norasobreelusedelosmodosdelmandoadistancia:DVD
Cuandoelmandoadistanciaest_enelmode"DVD",losbotonesdevolumenseguir_n
controlandoetvolumendeitelevisor.
_
V
..........
_,_ODE S,M0UE
d23_ d_ _
J
Configuracion del mando a distancia para controlar el STB
1. Apague et STB.
2. Pulse el bot6n STB det mando a distancia del televisor.
3.
4.
Pulse el bot6n SET del mando a distancia del televisor.
Mediante los botones numedcos dei mando a distancia, introduzca tos ires digitos del
cddigo dei STB correspondientes a ta marca de su STB, que aparece en la lista de la
pagina 21 de este manual. Aseg0rese de introducir los tres digitos del c6digo, inciuso
aunque el primer digito sea un "0." (Si aparece m_s de un c6digo, int6ntelo con el
primero.)
Pulse el bot6n POWER O del mando a distancia.
El STB deberia encenderse si el mando esta correctamente configurado.
Si el STB no se enciende, repita los pasos 2, 3 y 4 pero pruebe con otro de los
cddigos indicados para la marca de su STB. Si no aparece ning0n otto c6digo,
int6ntelo con cada uno de ellos, dei 000 aI 074.
>- Nora sobre el uso de los modos del mando a distancia: STB
Cuando el mando a distancia est6 en et modo "STB', los botones de volumen seguir_n
controlando el volumen det televisor.
A_re,_,A¢HLIST_I_ELINK REC
....©__©___©___®....
..... ....
f',vooE s,MrJBE
OS_ O_ESET
¥

C6digos del mando a distancia
C6digos de video
Marca !i Codigo Marca Codigo
SAMSUNG 000 001 002 003 004 005 077 078 079 MONTGONERYWARD 020
ADMIRAL 020 MTC 002 025
AKAI 004 027 032 NEC 007 008 018 026 037 062 064
AUDIO DYNAMICS 007 026 OPTIMUS 020
BRQKSON[C..............................022 PANASONIC 021 056 071 072
CANDLE 002 003 006 008 015 055 PENTAX 019 04I 075
CANON 021 056 PENTEXRESEARCH+ 008
CITIZEN 002 003 006 008 015 055 PHILCO 021 056 059
COLORTYME 007 PHILIPS 021 080
CRAIG 002 024 PIONEER 019 026 039 053
CURTISMATHES 002 007 008 017 021 025 056 064 066 PORTLAND 015 049 055
DAEWOO 003 010 011 012 013 014 015 016 PROSCAN 017
DB 007 026 QUARTZ 018
DIMENSIA 017 QUASAR 02I 056
DYNATECH 025 RADIO SHACK/ 006 018 020 021 024 025 029 034 048 056
ELECTROHOME 034 REALISTIC
EMERSON 001 003 006 021 022 025 030 032 034 040 RCA 002 017 019 021 035 041 043 057 068 076
047 050 052 060 063 065 066 067 069 073 SANSUI 026
FISHER 018 024 028 029 048 051 061 SANYO 018 024
FUNAI 025 SCOTT 003 047 052 067
GENERALELECTR]C 002 005 017 021 056 SEARS 006 018 019 024 028 029 041 048 05t
GOVIDEO 002 SHARP 020 034 045 015
HARMANKARDON 007 SHIMTOM 027 033 038 058
HITACHI 019 025 041 042 074 SIGNATURE 025
iNSTANTREPLAY 021 SONY 027 033 044
JC PENNEY 002 007 018 019 021 026 037 041 054 056 SYLVANIA 021 025 056 059
JCL 007 008 018 021 026 037 SYMPHONIC 025
JVC 081 082 083 TANDY 018 025
KENWOOD 007 008 018 021 026 037 TASHIKA 006
......KLH 07£ TATUNG 037
KONIA 036 TEAC , 025 037 068
LG(Goldstar) 006 007 008 009 010 TECHNICS 021
LLOYD 025
......LOG!K..............................................O38
LXI 025
MARANTZ i 007 008 018 021 026 037 062
MARTA 006
MEI 021
TEKNIKA 006 021 025 031
TMK 066
TOSHIBA 003 019 029 051 052
TOTEVISION 002 006
UNITECH 002
VECTORRESEARCH I 007 026
VICTOR 026
MEMOREX 006 021 024 025 VIDEO CONCEPTS 007 026
MGA 034 VIDEOSONIC 002
MIDLAND 005 .....WARDS.................................... ..........
......N[pgTA.........................................0!_04!07_..............................................................................................................YAMAHA........................................, O07 O08 0!8 026 O37.................................................................................
MITSUBISHI 019 034 041 046 ....................................ZENITH , 023 027 03

:_" C6digos de cable
Marca Codigo Marca Codigo
BAMSUNG 000 001 002 003 004 005 006 007 REGENCY 015 023
GI 04I
HAMLIN 003 024 03I
r
HITACHI 025 030
JERROLD 038 039
MACOM 025 030
MAGNAVOX 019 023 028
OAK 026
PANASONIC 003 022 027 037 044
SA 042 043
SQENTIFIC ATLAN 042 043
SPRUCER 022
STARGATE2000 036
SYLVANIA 016
TEXSCAN 0t6
TOCOM 032
UNIVERSAL 033 034
PHILIPS 019 021 023 028 VIEWSTAR 019 021 023 028
PIONEER 004 018 020 044
RCA 014 022 040
REGAL 003
SAMSUNG Codigos de DVD
Producto Codigo
DVD 000 001 002
DVDR 003 004
BD Record 005 006
Producto Codigo
HomeTheaterVCRCOMBO 014 015 016
HDDRecorder COMBO 017
TWINTRAYCOMBO 018
VCR COMBO 007 008 009 010 011 STBDVD COMBO 019
VCR Record 012 ,.DVDRece[ver .............................. 020
DHRCOMBO 013 AV Receiver 02
>'_ C6digos de DVD
......Marc_ cod!go M_c_ Cod!go
ANAM 030 INTEGRA 092
AUDIOVOX 075 JBL 091
AUDIOLOGIC 085 JVC 022 033 115 116
ANABA 072 JATON 073
APEX DIGITAL 070 071 074 086 083 084 088 111 112 KENWOOD 05I 108 109
AIWA I14 KISS 073
BROKSONIC 062 KONKA 059 I00 I06 107
BLAUPUNKT 074 KLH 074 075
CURTISMATHES 027 LOEWE 057
CYBER HOME 077 078 079 082 LASONIC 058
CLARION 080 125 MOBILEAUTHORITY 054
CIRRUS 081 MEMOREX 055
CYBER HOME 065 MALATA 056
QNEVISION 095 MAGNAVOX 076 093
MINTEK 074 094
DENON , I46 MONYKA 073
FARENHEIT 067 068 NORCENT 048 049 050
FISHER 090 NEXTBASE 052
GPX 060 NEC 053
GOVIDEO 061 089 133 135 NANTAUS 144
GE 069 074 NESA 074
GREENHILL 074 0PT0h£D_AELECTRONCS 105
HITACHI 064 I13 OPTIVIEW 072
HITEKER 07I ONKYO 076 092 I19
HOYO 073 PHILCO 044 045
HARMAN/KARDON 091 110 PRINCETON 046 047
................IRT i 08 , PROBCAN 023

C6digos de OVO
......Maria Cod!go M_a........................................Coq!go
PANASONiC 024 034 124 134 136 137 I38 THOMSON 145
PHILIPS 036 076 TOSHIBA 028 062 076
RIO 120 TVIEW 072
RCA 023 035 074 075 131 132 TOKAI 073
RAITE 073 .....TEAC 096
ROWA 038 TECHWOOD 097
SAMPO 104 TREDEX z 098 099 I01
SONY 026 029 126 127 128 129 130 14I URBANCONCEPTS 076
SHERWOOD 039 041 VENTURER 075
SVA 042 VOCOPRO 102
SYLVANIA 043 093 YAMAHA 032 063
SHARP 140 YAMAKAWA 040 073
SANSUi 062 XWAVE , 103
SANYO 062 090 ZENITH 076 121
SHINSONIC 094
SAMSUNG C6digos de STB
Producto *i Codigo Producto Codigo
Ground wave STB 001 002 SatelliteSTB HDDCOMBO Premium 010
SatelliteSTB 003 CABLE STB HDD COMBOStandard 011
CABLE STB 004 CABLE STB HDD COMBO Premium 012
STB DVD COMBO 008 Groundwave STB HDDCOMBO Standard 013
SatelliteSTB HDDCOMBO Standard 009 Groundwave STBHDDCOMBO Premium 014
C6digos de STB
Marca Codigo Marca Codigo
ALPHASTAR 023 MAGNAVOX 016 021 036 038 039 040 041 042
ANAM 043 MEMOREX 016
CHANNELMASTER 018 034 MOTOROLA 064
CROSSDiGITAL 019 MACOM 018
CHAPARRAL 035 NiTSUBISHi 015
DiRECTTV 015 016 017 019 022 045 060 061 062 NEXTLEVEL 047 048 064
065 066 067 068
DAEWOO 074
DiSHNETWORKSYSTEM 069 070
DiSHPRO 069
DRAKE 018 024 032
DXANTENNA 027
PHILIPS 015 016 017 021 033 036 038 039 040
041 042 067
PRiMESTAR 046 049 050 063
PANASONiC I 058 059 061 062
PAYSAT _ 016
PROSCAN 065 066
RCAECHOSTAR 025 069 070 071 05I 052 053 065 066
EXPRESSVU 069 RADiOSHACK 064
GOI 069 REALISTIC 057
GE 065 STARTRAK 026
GENERALINSTRUMENT046 047 048 063 064 STS 020 027
HTS 069 SKY 031
HOMECABLE 056 SKYLIFE 005 006 007
HITACHI 022 SNACK 064
HUGHESNETWORK 015 017 STARCHOICE 064
IQ 020 SONY 054 060
IQPRISM 020 TOSHIBA 015 017 028 029 030 072
JANEIL 059 ULTIMATETV 060 066
JERROID 063 UNIDEN 016 021 037 055 056 057
JVC 069 070 ZENITH 024 031 068
LG(Goldstar) 044 07

Para seleccionar la fuente
Siga este procedimiento para seleccionar el televisor u otra fuente externa de entrada
conectada al televisor. Se usa para seleccionar ia pantatiadeseada.
1. Pulse el bot6n MENU para ver el men0 en pantaIia.
Pulse los botones A o _r buttons to select "Entrada", then press the ENTER
button.
2. Pulse el bot6n ENTER para seleccionar 'Lista de Origen".
Pulse los botones A o v para seleccionar lafuente de la ser_aI despu6s pulse et
bot6n ENTER.
>'-Cuando conecte equipos a la pantalla LCD, podr_ elegir entre Dossiguientes
conjuntos de tomas: TV,AV1,AV2, S-Video1, S-Video2, Componentel,
Componente2, PC, HDMI1, HDMI2, o HDMt3 en el panel posterior deltelevisor.
>- Sd{ose puede seteccionar la entrada de HDMtl, HDMI2, o HDMI3 si el
dispositivo externo esta encendido y conectado a trav6s del HDMt.
>'-AV2/S-Video2/HDMI3 se encuentran en un lateral deI televisor.
>_ Puede eiegir solamente Dosdispositivos externos que est6n conectados al televisor.
(_: Pulse el bot6n SOURCE det mando a distancia para vet una fuente de sepal
externa.
Edici6n del Nombre de la Fuente de entrada
Nombre al dispositivo de entrada de informaci6n conectado con las tomas de entrada para facilitar la selecci6n de fuente
de entrada.
Pulse el bot6n MENU para vet el men0 en pantaIla.
Pulse los botones A o T buttons to select "Entrada", then press the ENTER
button.
Pulse los botones _, o _' para seleccionar "Editar Nombre" y pulse et bot6n
ENTER.
2. Pulse Dosbotones A.o T para seleccionar la toma de entrada "AVI", "AV2",
"S-Video1", "S-Video2", 'Componentel", "Componente2", "PC", "HDMtl", HDMt2" o
"HDMt3" y a continuaci6n pulse et bot6n ENTER.
Pulse los botones • o _' para seleccionar la fuente de entrada "Video", "DVD",
"D-VHS", "Cable STB", "HD STB", "Sat61iteSTB", "PVR STB", "Receptor AV",
"Receptor DVD" "Juego", "Filmadora", "DVD Combo", "PC", "STB VOD", o "TV" y.
a continuaci6n pulse el bot6n ENTER.
Pulse et bot6n EXIT para saIir.

Uso de los par metros de imagen autom ticos
El TV tiene cuatro valores de imagen autom_ticos ("Din_mico", "Normal", "Cine", y "Favorite") predeterminados de fabdca.
Puede activar etajuste Din_mico, Normal o Pelicula seleccion_ndoto en el menQ.
1. Pulse el bot6n MENU para vet el menOen pantaIta.
Pulse el bot6n ENTER para seteccionar "tmagen".
Pulse el bot6n ENTER para seleccionar "Modo".
Pulse de nuevo el bot6n ENTER.
Pulse los botones A o _' para seleccionar el ajuste de imagen "Din_mico",
"Normal", o "Cine". Pulseel bot6n ENTER.
, ElijaNormalpai'ayotvera la configuraciOnestandardefabrica.
• ElijaCineparaobteneruna imagennaturatsinmejoras.
Pulse los botones A o _' para seieccionar "Contraste", "Luminosidad",
"Definici6n", "Color", y "Tinte"despu6s, pulse el bot6n ENTER.
Pulse los botones 4 o i_ para aumentar o reducir el valor de una opci6n concreta.
Pot ejempio, si selecciona "Contraste", pulse I,. para incrementarlo.
Pulse el bot6n EXIT para satir.
• Cuando haga cambios en "Contraste", "Luminos.", "Color", o "Tinte", el color
del OSD tambi_n se ajustara.
• En et modo PC, las opciones Tinte, Deflnici6n y Color no est_n disponibtes.
[1_}Pulse repetidamente el bot6n P.MODE del mando a distancia para seleccionarUnmodode imagen. _'.,_P_Q O __S._0DE_LL _P'SlZE

Activaci6n de Aiuste del ne_
Puede ajustar el brilto de la pantalla mediante et ajuste del brilto de la luz de fondo del LCD. (0~10)
1, Pulse el bot6n MENU para vet el men0 en pantalla.
Pulse el bot6n ENTER para seleccionar 'Imagen".
2, Pulse los botones A o • para seieccionar "Luz de rondo" y despu6s, pulse el
bot6n ENTER.
3, Pulse los botones 4 o P. para reducir o aumentar el valor de un eiemento con-
creto.
Pulse el bot6n ENTER.
Pulse et bot6n EXIT para salir.
Ajuste del Color del rondo
Puede cambiar elcolor de toda la pantalta seg0n sus preferencias.
1.
2.
3.
Pulse el bot6n MENU para ver et men0 en pantalla.
Pulse el bot6n ENTER para seleccionar 'Imagen".
Pulse los botones A o _' para seieccionar"Tono Color" y despu6s, pulse el bot6n
ENTER.
Pulse los botones A o T para selecciona Trio 2", Trio 1", "Normal", "Tibiol", o
"Tibio2". Pulse el bot6n ENTER.
> Cuando el modo de imagen est_ ajustado en Din_mico o Normal, no se puede
seIeccionar Tibiol ni Tibio2. S6Io est_ disponibte et modo Peticula.
Reajuste de valores de la imagen a los valores predefinidos de fabrica
1. Pulse los botones J, o T para seleccionar "Reiniciar" y despu6s pulse et bot6n
ENTER.
Pulse los botones A o T para seieccionar "Canceiar", "Aceptar".
Press the ENTER button.
Pulse el bot6n EXIT para saiir.
:_ Se puede restaurar cada modo.

de,,,/ac£n uraci6n detallada
Puede reaIizar una configuracidn detaIlada de los vaIores de la imagen.
Activacion de laconfiquraci6n detallada
1. Pulse el bot6n MENU para vet el men&
Pulse el bot6n ENTER para seleccionar "tmagen"_
2. Pulse el bot6n ENTER para seieccionar 'Modo".
Pulse los botones & o T para seleccionar "Cine" y a continuaci6n, pulse el botdn
ENTER.
Pulse los botones & o T para seleccionar "Configuraci6n detallada" y pulse et
botdn ENTER.
>_El mode tmagen s61oest_ disponibte con el modo Normal o Pelicula.
>--Si DNIe est_ configurado como Apag, Configuraci6n detaliada no se puede
seleccionar si et mode tmagen est_ en el modo Est_ndar.
Activaci6n de Aiuste del necjro
Se puede seleccionar directamente el nivet de negro en la pantaIla para ajustar la
profundidad de 6sta.
4. Pulse los botones A o T para seteccionar "Ajuste dei negro" y, a continuaci6n,
pulse el bot6n ENTER.
5. Pulse los botones _, o T para seleccionar "Apagado", "Bajo", "Medio", "Alto".
Pulse el bot6n ENTER.
Apagado:Apaga{afunci6ndeajustede!negro.
,,Bajo: Estabtecela profundidaddelco{ornegroenunnivelbajo.
*Medio:Establecetaprofundidaddel cotornegro enunhiVe{rnedi0.
4Alto: Establecetaprofundidaddetcotornegroenunhive{alto.
Activaci6n de Contraste din&rnico
Se puede ajustar el contraste de la pantatla para conseguir un contraste 6ptimo.
6. Pulse los botones J, o 'f para seleccionar "Contraste Din_m." y a continuaci6n,
pulse el bot6n ENTER.
7. Pulse los botones A o _r para seleccionar "Apagado", "Bajo", "Medio", "Alto".
Press the ENTER button.
ApagadoiApagalafunci6ndeajustede{contrastedinamico.
Bajo: Estableceetcoatrastedin&micoenunnivelbajo.
Medio: Estableceelcontrastedinamicoenunnivetmedio.
*Alto: Estabieceetcontrastedin&micoenunnivetalto.

Activaci6n de Gamma
Se puede ajustar el brilto medio de las im_genes. (-3 ~ 3)
8. Pulse los botones & o T para seleccionar "Gamma" y pulse et bot6n ENTER.
9. Pulse los botones 4 o 1_3ara reducir o aumentar et valor de un etemento
concreto.
Pulse et bot6n ENTER.
Cambio de Espacio de color
El espacio de color es una matriz compuesta pot los co{ores rojo, verde y azuL
Seleccione su espacio de color favorite y disfrute de unos colores aut6nticamente
naturales.
10. Pulse tos botones A o T para seleccionar "Espacio de color" y a continuaci6n,
pulse el bot6n ENTER.
11. Pulse los botones A o _' para seleccionar "Ancho" o "Auto".
Pulse el bot6n ENTER.
* Ancho i Elespaciodecoloranchoproporcionatonosdecotorprofundosy dcos.
* Auto iEt espaciodecotorautomaticoajustae!tonodecolornatura!deacuerdocon!as
fuentesdetprograma.
Activaci6n de Balance de Blanco
Se puede ajustar la temperatura deIcolor para conseguir cotores m_s naturales.
12. Pulse los botones A o _' para seleccionar "Balance de Bianco" y, a continuacbn,
pulse el bot6n ENTER.
13. Seleccione la opcbn necesaria pulsando los botones A o _' y, a continuaci6n,
pulse el bot6n ENTER.
14. Pulse los botones 4 o D,.para reducir o aumentar el valor de un elemento
concreto.
Pulse el bot6n ENTER.
* Balance de Rejo: Ajusta ia tntensidad dei coior rojo.
* Balance de Verde: Ajus[8 ta lntensldad del color verae.
Balance de Azu]: Ajusta la lntens_dad deI color _zul
Ganancia de Rojo: Ajusta el brillo dei coior rojo
Ganancia de Verde: Ajusta el bnllo del color verae
Ganancia de Azol: Ajusta el bnllo del color azul
Reiniciar: Ei balance de bianco an[enormente a ustado se restablecers con los vatores
predefinidosdefabrica.
:_ El cambio dei valor de ajuste renovar_ la pantalia ajustada.

Activaci6n de Mi Ctrl de Color
Este valor puede ajustarse para que se adapte a sus preferencias personales.
Cuando se ejecuta {afuncidn Mi Ctr{de Color se captura la imagen actual como una
imagen fija antes de mostrarla en la pantatla.
15. Pulse el bot6n ENTER para seleccionar "Mi Ctd de Color".
16. Pulse los botones A o T para seteccionar "Rosa", "Verde", "Azul",
"Bianco","Reiniciar".
Pulse el bot6n ENTER.
17. Pulse los botones 4 o D,.para reducir o aumentar el valor de un elemento
concreto.
Pulse el bot6n ENTER.
Verde: Oscurece o actara e{ color verde.
',Azu]; Qscurece 0 aclai'ael color azuL
* Blanco: Oscurece o adara et cotor blanco.
* Reiniciar: Los cotores anter!ormente ajustadoa se reiniciaraa con los va!o_'es predefln!dos
de f&brica.
>- El cambio dei valor de ajuste renovar_ la pantalia ajustada.
Activaci6n de Me'ora de erfiles
Permite acentuar los bordes de los objetos en las imagenes.
18. Pulse tos botones A o T para seleccionar "Mejora de perfites" y
a continuaci6n, pulse el bot6n ENTER.
19. Pulse tos botones A o • para seleccionar "Apagado" o "Encendido".
Pulse el bot6n ENTER.
Pulse el bot6n EXIT para salir.
Activaci6n de xvYCC
Los televisores tradicionales no podian ofrecer im_genes nitidas, s61idasy con
textura. Este televisor puede imptementar estos efectos gracias a las seSales xvYCC
que son compatibles con un espacio de color ampiiado. Los televisores tradicionales
tampoco podian proporcionar aigunos de los colores de ias peliculas. Este televisor
puede ofrecer los mismos colores que las peliculas gracias alas seSales xvYCC.
En consecuencia ahora es posible disfrutar en et televisor de todos los colores que
ofrecen las peliculas.
:_La funci6n xvYCC s61oest_ disponibte en el modo Cine.
20. Pulse los botones A o _r para seleccionar "xvYCC" y. a continuaci6n, pulse et
bot6n ENTER.
21. Pulse tos botones _, o _' para seleccionar "Apagado" o "Encendido".
Pulse el bot6n ENTER.
Pulse el bot6n EXIT para safir.

Cambio del tamaho de la pantalla
Laselecci6nde/tamafio de}apantal{adependede}tipo de entradadevideo.
1. Pulse el bot6n MENU para ver el menOen pantaIia.
Pulse el bot6n ENTER para seleccionar 'Imagen".
2. Pulse los botones A o _' para seieccionar "Tamafio" y despu6s, pulse et bot6n
ENTER.
3. Pulse tos botones _ko T para seleccionar etformato de pantalla que desee.
Pulse el bot6n ENTER.
Pulse el bot6n EXIT para saiir.
1
!
16:9 Zoom1
Estabtece la imagen en modo Tamafio de uantatla suanao se
panor_mico 16:9.
Zoom2
Tamario de pamaita cuanoo
ampfia verticalmente el formato se amplia verhcaimente el
amotio formato Zoom1.
Wide Fit 4.'3
En _rges the aspect ratio Estabtece ta _magenen
d the picture to fit the moao normal 4:3.
entire screen.
I
Just Scan
Useestafunci6nparaverlaimagen
comuetasincortescuandolaentrada
dela serialseaHDMI 720D/1080i/1080D'
ODTV 108%.
>- • En Ios modes TV VIDEO, S-VIDEO, y COMPONENTE (480i 480p), pueden seleccionarse todos Ios modos de pantatla.
(16:9 • Zoom1 • Zoom2 • 4:3).
• Puede seleccionar Qnicamentelos tamafios de pantalla 16:9, 4:3 y Wide Fit (Ajuste de anchura) en los modos DTV,
Componente (720p, 1080i) o HDMI (720p, 1080i).
• Enel modo PC, s61opueden seieccionarse los modos 16:9 y 4:3.
• EnZoom1 y Zoom2,se puede ajustarettamafio por medio detos botones arribao abajo despuesde pulsar etbot6n RSIZE.
• Cuando se ve la serial de attadefinici6n de untelevisor digital, se puede usar la opcbn Wide Fit (Ajuste de anchura).
Laampliacbn horizontal (Wide Fit (Ajuste de anchura)) ajusta el formate 6ptico de {a imagen amptiando esta horizontal
y verticatmente. Per ejempto, puede restablecer {a imagen det formate 4:3 at formate 16:9. La opci6n Wide Fit (Ajuste de
anchura) no admite todos los dispositivos externos.

Configuracion de Color activo
Si activa esta opci6n los coIores del cielo y det c6sped seven m_s s61idosy claros y ia imagen de ia pantaIia aparece m_s vivida.
1. Pulse el bot6n MENU para ver el men&
Pulse el bot6n ENTER para seleccionar lmagen".
2. Pulse tos botones A o _r para seleccionar "Color activo" y. a continuaci6n, pulse el
bot6n ENTER.
3. Pulse los botones _. o I!' para seleccionar "Apagado" o "Encendido'.
Pulse el bot6n ENTER.
Pulse el bot6n EXIT para salir.
>Esta funci6n no est_ disponible en los modos Normal y Peticula.
DNle (Motor de imagen natural digital)
Este televisor incluye la funci6n DNle con et fin de conseguir una gran calidad visual. Si ajusta DNle en On, se puede vet la
pantaIla con la funci6n DNte activada. Si ajusta DNle en Demo, podra ver en la pantaita una imagen normal y con el modo DNte
ap%ado para realizar la demostraci6n. Mediante esta funci6n podr_ ver ia diferencia en ia calidad visual.
1,
2.
3.
Pulse el bot6n MENU para vet el menOen pantalla.
Pulse el bot6n ENTER para seIeccionar lmagen".
Pulse los botones A o T para seleccionar 'lmagen" y.despu6s, pulse et bot6n
ENTER.
Pulse los botones A o _r para seteccionar"Demo" y. despu6s, pulse et bot6n
ENTER.
• Apag. Desactiva el mode DNIe:
Den]o: La pantalIa aparece a la izquierda antes de aptica_ DNte y la de de[e-
cha tras aplicar DNte_
• Eric.: Activa et mode DNle.
Pulse el bot6n EXIT para salir.
>- DNleTM (DigitaI Natural Image engine, Motor de imagen digital natural)
Esta funci6n proporciona una imagen mas detaItada con reducci6n de
interferencias 3D, ampliaci6n de los detatles, mejora del contraste y de los
btancos.
> Esta funci6n no se activa si lafuente de entrada es un PC.
> La funci6n DNle no se admire en el modo Movie (Cine).

Congelaci6n de la imagen
1. Pulse el bot6n STILL para congelar una imagen en movimiento. _---,) U U
>_ El sonido normal se oir_ todavia. Pulse de nuevo el bot6n para cancetar. P._DE S._ _L_ P.SlZE
/
Cuando V-Chip est_ funcionando, no se puede utilizar la funci6n de imagen fija. _ F,I, r""'m
Ajuste de la funcion Film Mode
Puede autom_ticamente detectar y procesar las se_ales de las peticulas procedentes de todas las fuentes y ajustar la imagen
para conseguir una calidad 6prima.
2,
3.
Pulse el bot6n MENU para ver el men0 en pantatla.
Pulse los botones A o _' para seleccionar "Configuraci6n" y despu6s, pulse et
bot6n ENTER.
Pulse los botones A o _' paraseleccionar "Modo pelicula" y despu6s pulseet bot6n
ENTER.
Pulse los botoneso para seleccionar "Apagado" u "Enc." y a continuaci6n, pulse el
bot6nENTER.
Pulse el bot6n EXIT para satir.
> El Mode peiicula se admire en TV,VtDEO, S-ViDEO, y COMPONENTE 480i.
,,,.,cpnfigoUr,,,,,,,,,acj_6ndel,,,,_,.,,.,N_,,_,,!veld,,,,.,,,en,,._,.,e.groHDMI
Se puede seleccionar el nivet de negro en la pantatta para ajustar la profundidad de 6sta.
1. Pulse el bot6n MENU para vet el men0 en pantaIla.
Pulse los botones A o _r para seleccionar "Configuraci6n" y despu6s pulse el
bot6n ENTER.
2, Pulse los botones A o T para seteccionar"N. neg HDMt" y. a continuaci6n, pulseet
bot6nENTER.
3, Pulse los botones A o _' para seleccionar "Normal" o" Bajo"y. a continuaci6n pulse
el bot6n ENTER.
• Bajo: La panta!!a seoscurece
Estafunci6n s61oesta operativa cuando se ha conectado un dispositivo externo
(reproductor DVD decodificador etc.) at televisor a traves de HDMI (set,ales
RGB).
Pulse el bot6n EXIT para satir.

Visualizaci6n Imagen en imagen
Este producto Ileva un sintonizador incorporado. Por ejemplo, no es posibie mirar un canal de teievisi6n en la pantalla principal y
otto en la pantalla PIP. Para mirar dos fuentes simult_neamente, puedeutitizar la funci6n PtR (Veala pagina 38 para seteccionar
el sonido de la imagen PtR)
Mientras ta opci6n V-chip activada (Consuite la pagina 56), la funci6n de PtP no se puede usar.
Mientras la opci6n xvYCC activada (Consulte la pagina 27), iafunci6n de PtP nose puede usar.
Activaci6n de Ima en en ima en
Pulse el bot6n MENU para ver el menQen pantaIla.
Pulse los botones A o _' para seleccionar "Configuraci6n" y despu6s, pulse el
bot6n ENTER.
Pulse los botones _, o T para seteccionar "PtP" y, despu6s, pulse et bot6n
ENTER.
Pulse de nuevo el bot6n ENTER.
Pulse los botones A o v para seleccionar "Enc." y despu6s pulse el bot6n
ENTER.
>-Si mientras mira la teievisi6n en el modo PIP, apaga el televisor y vuetve a
encenderlo, la ventana PtP desaparecera.
:_ Puede vet emisiones de teievisi6n anal6gicas en la pantalla PtP
(imagen secundaria) cuando la imagen principal proviene de undispositivo
externo conectado a Ios modos HDMI 1,2, 3, Componente 1, 2 o PC
Componente 1,2
HDMt 1,23
PC
$6to emisiones de televisi6n
anaI6gicas
!_i Altemativo, pulse el bot6n PIP del mando a distancia de fO_Tnarepetida para activar o
desactivar PIP.
CAP]ION I#
I ll r, ,r-7
Cambio del canal PiP
3. Pulse los botones A o T para seleccionar "Canal de PtP" y. despu6s, pulse el
bot6n ENTER.
Pulse los botones A o T para seleccionar el canal deseado en ia ventana PtP.
Pulse el bot6n ENTER.
>* MAIN: PC / HDMI 1,23 / Component 1,2
PtP: TV(Anal6gico)
_ El canat puede estar active cuando la imagen secundaria est6 configurada
come TV.
_i Pulse el bot6n Canal de PIP del mando a distancia.
Contin0a..

Cambio de la posici6n de la ventana PiP
4. Pulse los botones _k o V"para seleccionar "Posici6n" y, despu6s, pulse et bot6n
ENTER.
Pulse los botones h. o V' para seieccionar la posici6n de la ventana PIP deseada.
Pulse el bot6n ENTER.
> Los modos Dobte ( r='l==l) y Dobte ancho ( i=T'=I) no se pueden seieccionar en
Posici6n.
Cambio del tamaho de la ventana PiP
Pulse los botones _k o T para seleccionar "TamaSo" y despu6s, pulse el bot6n
ENTER.
Pulse los botones A o V"para seleccionar et tamaSo deseado de la ventana PIP.
Pulse el bot6n ENTER.
Pulse el bot6n EXIT para salir.
Si la imagen principal est_ en modo PC, HDMt 1 la opci6n TamaSo no estar_
disponibte.
Puede notar que la imagen de la ventana PiP ilega a set ligeramente artificial
cuando utiliza ia pantalia principal para visuatizar juegos o Karaoke.
Puede ajustar la posici6n de la imagen s6Io usando el men0 de tamaSo [_i.

Control de Sonido
Personaiizaci6n del sonido
Es posible ajustar los par&metros del sonido segOn sus preferencias personales.
(Tambien puede utilizar alguno de los ajustes "autom&ticos". )
1. Pulse el bot6n MENU para vet el menOen pantalta.
Pulse los botones A o T para seleccionar "Sonido" y. despu6s, pulse el bot6n
ENTER.
2. Pulse los botones _, o _' para seieccionar "Ecualizador" y despu6s, pulse el bot6n
ENTER.
Pulse los botones A o • para seleccionar unafrecuencia determinada con el fin
de ajustaria.
Pulse los botones 4 o P.para aumentar o reducir el nivel de una frecuencia
concreta.
Pulse el bot6n ENTER.
Pulse el bot6n EXIT para safir.
:_. Ajuste de balance de sonido L/R:
Para ajustar el balance de sonido de los altavoces UR.
• Ajuste del ancho de banda (100Hz, 300Hz, 1KHz, 3KHz, 10KHz) :
Para ajustar et nivei de las diferentes frecuencias de ancho de banda.
Uso de los pararnetros de sonido autornaticos
El TV tiene cinco valores de sonido autom_ticos ("Normal", "M_sica", "Cine", "Dialogo", o "Favorito") predeterminados defabrica.
Tambi6n puede seieccionar "Favorito" que recupera autom_ticamente sus vatores de sonido personaIizados.
1. Pulse el bot6n MENU para ver el menO en pantalla.
Pulse los botones _, o T para seleccionar "Sonido" y, despu6s, pulse el bot6n
ENTER.
2. Pulse el bot6n ENTER para seleccionar "Modo".
Pulse los botones A o T para seleccionar el ajuste de sonido "Normal",
"MOsica", "Cine", "Dialogo", o "Favorito" y pulse el bot6n ENTER.
Pulse el bot6n EXIT para salir.
t EtijaNormal si desea user losajustes de fabfica.
• Etija MOsicacuando mire'videos musicales o conciertos.
• Etija Cine cuando mire pet!cu!as
• Etija Dialogo cuando est6 visuatizando contenidos de di_togos
(p. ej. noticieros).
• Elija Favorito para recuperar sus parAmetros pers0nalizados,
(Consulte ta secci6n !'Personalizaci6n det sonido'_)
_i Pulse el bot6n S.MODE del mando a distancia de forma repetida para seleccionar uno de
los ajustesde sonido estandar. _ _ _ _P_VX)DE 8,_3DE P.BIZE

Configuraci6n del TruSurround XT (SRS TS ×T)
TruSurround XT es una tecnologia SRS patentada que sotventa el problema de reproducir contenido multicanal 5.1 en dos attavo-
ces. Trusurround proporciona una experiencia de sonido virtual convincente a trav6s de cualquier sistema de reproducci6n con
dos altavoces. Es totalmente compatible con todos los formatos multicanaL
1. Pulse el bot6n MENU para vet el men0 en pantaIta.
Pulse los botones A o V para seleccionar "Sonido" y. despu6s, pulse et bot6n
ENTER.
2. Pulse los botones A o _r para seleccionar "Trusurround SRS XT" y despu6s,
pulse et bot6n ENTER.
3. Pulse los botones h. o T para seteccionar "Enc." o "Apag." y despu6s, pulse el
bot6n ENTER.
Pulse et bot6n EXIT para salir.
"r_usu_oundXT,SRSyelSimb01o_'_
son marcas comerciales de SRS Labs,
La tecno!ogia TruSurround XT esta os_ o_sEr
incorporada bajo licencia de SRS Labs,lnc _
Seleccion de una pista de sonido multicanal (MTS) - Digital
El sistema de transmisi6n deTV digital permite transmitir simult_neamente muchas pistas de audio (pot ejemplo, traducciones
simultaneas del programa enotros idiomas). La disponibilidad de estas "multipistas" adicionales depende del programa.
Idioma preferido
2.
3.
Pulse el bot6n MENU para vet el men0 en pantalla.
Pulse los botones A o _r para seieccionar "Sonido" y, despu6s, pulse el bot6n
ENTER.
> Forma r_pida de acceder al menOMTS: Pulse el bot6n "MTS" del mando a
distancia. Puede escuchar en un idioma distinto deietegido pulsando el bot6n
MTS.
Pulse los botones h. o T para seleccionar "Opc. Multi-track"y despu6s, pulse et
bot6n ENTER.
Pulse los botonesENTERpara seleccionar"tdioma preferido".
Pulse los botones A o _' paraeIegir el idioma que desee
(English,Espafio{,Franc6s)y pulseel bot6nENTER.
Pulse el bot6nEXIT parasalir.
[15} Pulseel bot6n MTS en el mando a distancia. Puede escuchar en un idioma
distinto del favorito puisando el bot6n MTS del mando a distancia.

Seleccion de una pista de sonido multicanal (MTS) -Analogo
Sonido muEti-track
Pulse el bot6n MENU para vet el men0 en pantalta.
Pulse los botones h. o _r para seleccionar "Sonido" y despu6s, pulse el bot6n
ENTER.
Pulse los botones A o _' para seleccionar "Opc. Multi-track" y despu6s, pulse et
bot6n ENTER.
3. Pulse los botones _ko _' para seleccionar "Sonido Multi-track" y despu6s, pulse
el bot6n ENTER.
Pulse los botones _ko _' para seleccionar una configuraci6n que desee; pulse
despu6s el bot6n ENTER.
Pulse el bot6n EXIT para salir.
• Elija Mono para Cana!esque emiten en monoaurat o si tiene diflcultades COnla
recepci6n de se_ates estereof6nicas
, Etija Estereo para Canalesque emiten en est6reol
" Eti a SAP Pa_'aescuchar et Programa de aud'0 independiente' que n°rmat- _] EZ] EZ] CZ] I_ _SLEEP SRS "S _X_
Pulse varias veces los botones MTS dei mando a distancia para seleccionar _I I" O_SEr
"Mono", "Est6reo" o "SAP".
Control automatico de volumen
Reduce las diferencias en el nivei de volumen entre las emisoras.
1. PuDe el bot6n MENU para ver et men0 en pantaIia.
Pulse los botones h. o _r para seleccionar "Sonido" y, despu6s, pulse el bot6n
ENTER.
2. Pulse los botones A o T para seleccionar "VoLAuto" y, despu6s, pulse el bot6n
ENTER.
3. Pulse los botones h. o T para seleccionar Enc." o "Apag." y despu6s, pulse el
bot6n ENTER.
Pulse el bot6n EXIT para saIir.

Seieccibn dei silencio interno
Sesilencia ta salida de sonido desde los altavoces del televisor.
1. Pulse el bot6n MENU para ver el men_ en pantaIta,
Pulse los botones A o _r para seleccionar "Sonido" y despu6s, pulse el bot6n
ENTER,
2. Pulse los botones A o _' para seleccionar "Silenc. tnt" y despu6s, pulse el bot6n
ENTER.
Pulse los botones A o T para seleccionar "Enc." y despu6s, pulse et bot6n
ENTER.
Pulse el bot6n EXIT para saIir.
:_ Cuando 'Silenc. Int" se ajusta en "Enc.", el Qnico menQde sonido que se
puede ajustar es "Opc. Multi-track".
:_ Los botones VOL +,VOL - y MUTE no funcionan si Sitenc. tnt est_ establecido
en Enc.
Silencio interne
Speaker Output Speaker Output Speaker Output Sound Output Sound Output Sound Output
desactivado
Silencio interne
Mute Mute Mute Sound Output Sound Output Sound Output
activado
Sin sehal del
Mute Mute Mute Mute Mute Mute
video
....................................................z z......................................................... }
> Cuando "Silenc. tnr' se ajusta en "Enc.", et Qnico menQde sonido que se puede ajustar es "Opc. Multi-track".
Ajuste de la melodia de encendido/apagado
Puede definirse un sonido de melodia para que suene cuando se encienda o se apague el TV.
1. Pulse el bot6n MENU para vet el menOen pantalla.
Pulse los botones A o T para seleccionar "Configuraci6n" y despu6s, pulse et
bot6n ENTER.
2. Pulse los botones A o _' para seieccionar "Metodia" y despu6s, pulse et bot6n
ENTER.
3. Pulse los botones A o • para seleccionar "Enc." o "Apag." y despu6s pulse el
bot6n ENTER.
_Bajo: Establece eI votumen de ia melodia en on nivel bajo.
Medie: Establece elvotumen de tamelodia en un niveI medio.
* Alto: Establece elvolumen de tamelodia en un nivel alto.
Pulse el bot6n EXIT para salir.
DDI'_-_"] Fabricado bajo licencia de Dolby Laboratories, !'Dolby" y el simbolo de la
_G=T,_L doble D son marcas registradas de Do!by Laboratories.

Escuchar eJsonido de la sub imagen del PiP
Cuando la opci6n PtP esta activada, usted puede escuchar et sonido de lasub imagen det PtP.
1. Pulse el bot6n MENU para vet el menOen pantaIta.
Pulse los botones h. o _r para seleccionar "Sonido" y despu6s, pulse el bot6n
ENTER.
2. Pulse los botones A o • para seleccionar "Sek Sonido" y despu6s, pulse el
bot6n ENTER.
Pulse los botones A o T para seIeccionar "Principal" o "Sub" y. despu6s pulse et
bot6n ENTER.
Pulse el bot6n EXIT para salir.
, Principal: Seusa papaescuchar et sonido de ta imagen principal.
• Sub: Se usa para escuchar et sonido de la imagen secundaria.
Puede seleccionar esta opci6n cuando "PtP" est_ ajustado come "Enc.".
Reajuste de valores de sonido a los valores predefinidos de f_brica
Si Modo Juego esta activado, la funci6n Reiniciar sonido se activa. Si, tras configurar el ecualizador, selecciona lafunci6n Reini-
ciar, se restauran los par_metros defabrica de ia configuraci6n detecuaIizador.
1. Pulse el bot6n MENU para vet el menOen pantaIta.
Pulse los botones h. o _r para seleccionar "Sonido" y despu6s, pulse el bot6n
ENTER.
2. Pulse los botones A o T para seIeccionar "Reinicio dei sonido" y, despu6s, pulse
et bot6n ENTER.
Pulse el bot6n EXIT para salir.
Conexi6n de los auriculares
Puede conectar unos auriculares aIequipo si desea ver un programa de televisi6n sin molestar alas personas queestan en la
misma habitaci6n.
:_ Cuando se inserta el conector detconjunto del cabezaI en el puerto
correspondiente, se puede trabajar s6Io con las opciones "Opciones multi-track" dei
menQSonido.
Et uso continQo de auricuiares a un volumen elevado puede da_ar ia capacidad
auditiva.
.-'_No recibir_ sonido de los aItavoces cuando conecte los auriculares ai sistema.
> El volumen de los auriculares yet dei televisor se ajustan de manera distinta.
Pulse el bot6n VOL del mando a distancia de forma repetida para seleccionar uno de los
ajustesde sonido estandar.

Control de los Canales
Selecci6n de la antena
1. Pulse el bot6n MENU para vet el menOen pantalia.
Pulse los botones A o T para seteccionar "Canal" y, despu6s, pulse el bot6n
ENTER.
Pulse el bot6n ENTER para seleccionar "Antena".
Pulse los botones h. o T para seteccionar "Aire" o "Cable" y.despu6s, pulse el
bot6n ENTER.
Pulse et bot6n EXIT para safir_
[_) Pulse e} bot6n ANTENNA del mando a distancia.
:_Si la antena est& conectada aANT 1 IN AtR
seIeccione "Aire" s_es[_ conectada aANT 2
kI(CABLE seteccJone"CabW'.
Si las dos tomas ANT 1 IN :AtR) y ANT 2 IN
_CABLEI est_n conectaaas, seiecclone la
emraaa ae amena aue aesee. Si no se seiecclona
a entrada de ameaa correc[ameme oueae
aparecer ruido en ia aantalta.
KJ ',._ ',-_J _
I _1 ANTENNA CHLIST WISELINK REC
Supresi6n de los canales codificados digitales
Lafunci6n Borrar canates codificados se usa para fiitrar los canales codificados despu_s de reatizar una b_squeda autom_tica.
Borra los canales codificados de la lista y sintoniza los canaIes digitales pot cable. Puede tardar de 20 a 30 minutos.
1. Pulse el bot6n MENU para vet el menO.
Pulse los botones A o T para seteccionar "Canal" y pulse el bot6n ENTER.
Pulse los botones A o _' para seleccionar "Clear Scrambled Channel" y pulse et
bot6n ENTER. Busca los canales codificados para borrados de la tista.
>_Para detener la bt_squeda de canales codificados:
Pulse el bot6n _' para seieccionar Detener y pulse el bot6n ENTER.
Pulse el bot6n 4 para seteccionar Siy a continuaci6n, pulse el bot6n
ENTER.
Una vez comptetada la bOsqueda de los canaIes codificados, pulse et bot6n
ENTER.
Pulse et bot6n EXIT para salir.

Configuracion de las listas de canales
Puede agregar o suprimir un canal para que se muestren s61o los canales que desee.
1. Pulse el bot6n MENU para vet el menOen pantaIta.
Pulse los botones A. o T para seleccionar "Canal" y despu6s,
pulse el bot6n ENTER.
2. Pulse los botones A o _' para seleccionar "Lista de canates" y despu6s,
pulse et bot6n ENTER.
3. Pulse los botones A o _' para seleccionar "Todos" y despu6s.
Pulse los botones A. o T para seleccionar el canal que desee suprimir y
pulse el bot6n ENTER.
Pulse tos botones A o _' para seieccionar "Borrar" y pulse et bot6n ENTER
para suprimir el canal.
Desaparecer_ la marca O.
Pulse los botones A o T para seleccionar et canal que desea agregar;
a continuaci6n pulse el bot6n ENTER.
Pulse los botones A o T para seleccionar "Agregar" y despu6s, pulse el
bot6n ENTER.
Aparece una marca @y el canal se a_ade.
Pulse et bot6n EXIT para saIir.
>"Todos los canales seleccionados se mostrar_n en "Agregados".
• Bot6n (P.MODE) rojo: POlseIoVariasVeceSpara seteccionar _!Todos"
'Agregados" o '_Favoritos:'.
• Bot6n (S.MODE) ve,*de: POlsetopara agregar todos !os canales
Suprimides.
Bot6n (STILL) amarillo: POiseio para borrar todos los canales
memorizados.

Para configurar los canales favoritos
Puede configurar como favoritos los canales que vea con m&s frecuencia.
1. Pulse el bot6n MENU para vet el menOen pantaIia.
Pulse los botones A o _' para seleccionar "Canal" y despu6s, pulse et bot6n
ENTER.
2. Pulse los botones _, o T para seteccionar "Lista de canales" y despu6s, pulse
el bot6n ENTER.
3. Pulse los botones _, o T para seteccionar "Agregados" y despu6s, pulse el
bot6n ENTER.
Pulse los botones A o _' para seteccionar los canaIes favoritos que desee
vet entre los canaIes etiquetados.
Pulse los botones A o _r para seleccionar "Favoritos" y. despu6s pulse el
bot6n ENTER.
Y el simbolo "_" se sobreindicara y el canal sera fijado como favorito.
Para cancelar su selecci6n de canales Favoritos, presione el bot6n ENTER
hasta que el simboIo "_" no este mas sobreindicado.
Pulse el bot6n EXIT para salir.
S61opueden seleccionarse como favoritos los canaIes memorizados.
>Todos los canales seteccionados se mostraran en "Favoritos".

Manejo de la Lista de Canales
Muestra la lista de canales automaticamente cuando pulse CH LIST del mando a distancia. (Seleccione entre "Todos",
"Agregados" o "Favoritos")
1. Pulse el bot6n MENU para vet el men0 en pantalta.
Pulse los botones h. o T para seleccionar "Canal" y despu6s pulse el bot6n
ENTER.
2, Pulse los botones A o _' para seleccionar "Lista de canaIes" y despu6s, pulse
el bot6n ENTER.
Pulse los botones A. o _' para seieccionar "Default List Mode" (Modo de lista
predeterminada), es decir, la tista de canales que desea que aparezca cuando
pulse el bot6n CHMGR; a continuaci6n, pulse el bot6n ENTER.
Pulse los botones A o _' para seleccionar "Todos', "Agregados" o "Favoritos" y.
despu6s pulse el bot6n ENTER.
La Iista de canaIes que haya eiegido se configurar_ ahora_
Pulse el bot6n EXIT para salir.
_ Altemativo, pulse el bot6n CH LIST del mando a distancia para mostrar }as }istas de
canales.
AItIENI¢_, CHLIST WISELINK REC
Visualizaci6n de la lista de canales
Puede mostrar una lista de todos los canales, de los agregados o favoritos.
Pulse el bot6n MENU para vet el men0 en pantalta.
Pulse los botones h. o T para seleccionar "Canal" y despu6s pulse el bot6n
ENTER.
Pulse los botones A o _' para seleccionar "Lista de canaIes" y despu6s, pulse
et bot6n ENTER.
3. Pulse tos botones A o _' para seleccionar "Todos", "Agregados" o "Favoritos" y.
despu6s, pulse et bot6n ENTER.
Pulse los botones A o T para seieccionar "Canal" y despu6s pulse el bot6n
ENTER..
Para aIternarentre redes los canabs, los agregados o losfavorites pulse el
bot6n (RMode) rojodel mando a distancia.
• Bot6n (EMode) rojo: Polseto varias veces para Sebccionar !ITodos";
!!Agregados'_o !'Favoritos",

Etiquetado de canales
Los canales se pueden etiquetar con el prop6sito de que cuando 6stos se seIeccionan se pueda ver su nombre.
Pulse el bot6n MENU para ver el men0 en pantaIta.
Pulse los botones h. o _r para seleccionar "Canal" y despu6s, pulse et bot6n
ENTER.
Pulse los botones A o _' para seieccionar "Nombre" y, despu6s, pulse et bot6n
ENTER.
Pulse los botones A o _' para seleccionar el canal aI que se va a asignar
un nuevo nombre y pulse el bot6n ENTER. Pulse los botones A. o _' para
seleccionar una tetra, un n0mero o un espacio. (Se produce esta secuencia:
A_.Z, 0._9, +, -, o,/, espacio).
Pulse el bot6n para pasar al siguiente campo, que quedar_ seieccionado.
Seleccione una segunda {etra o digito pulsando los botones A o T, como
antes.
Repita el proceso para seieccionar los tres t_itimosdigitos. Cuando haya
terminado, pulse el bot6n ENTER para asignar el nombre nuevo. Para borrar
el nuevo nombre asignado, seleccione "Supt." pulsando los botones y pulse et
bot6n ENTER.
Pulse el bot6n EXIT para satir.
Los nombres de los canales emitidos digitaImente est_n asignados
autom_ticamente y no pueden asignados los usuarios.
LNA (Low Noise Amplifier - Amplificador de ruido bajo)
Si el televisor esta funcionando en una zona con seSaId6bil la funci6n LNA puede mejorar la recepci6n (un amplificador previo de
bajo ruido refuerza la se_aI entrante).
2.
3.
Pulse el bot6n MENU para ver el menOen pantaIia.
Pulse los botones A o _' para seleccionar "Canal" y despu6s, pulse el bot6n
ENTER.
Pulse los botones _k o _r para seleccionar "LNA" y. despu6s, pulse el bot6n
ENTER.
Pulse los botones h. o T para seleccionar "Enc." y despu6s, pulse et bot6n
ENTER.
Pulse el bot6n EXIT para saIir.
LNAfunciona cuando {a antena seleccionada es Aire o Cable. Los ajustes se
aImacenan de manera independiente para cada canal. (Consulte "Seiecci6n de
la antena" en la p_gina 38).

Sintonizaci6n fina de los canales anal6gicos
Utitice la sintonizaci6n fina para ajustar manuaImente un determinado canal a fin de que la recepci6n sea 6ptima.
1. Pulse el bot6n MENU para ver el menOen pantaIta.
Pulse los botones A o _' para seleccionar "Canal" y despu6s, pulse et bot6n
ENTER.
2. Pulse los botones A o T para seteccionar "Sintonia Fina" y.despu6s, pulse et
bot6n ENTER.
Pulse los botones 4 o _,-para ajustar la sintonia con precisi6n.
Para memorizar la sintonia fina en la memoria del televisor, pulse el bot6n ENTER.
>_Si no aimacena en la memoria el canal que ha ajustado de manera precisa, los
ajustes nose guardan.
Para memorizar la sintonia fina en la memoria del televisor, pulse el bot6n ENTER.
Para reiniciar la sintonizaci6n fina pulse et bot6n <?> para seleccionar
"Reiniciar" y pulse et bot6n ENTER.
Pulse el bot6n EXIT para salir.
:_ El simboto .... aparecera junto aI nombre de los canales cuya sintonizacion se
haya ajustado.
Comprobacion de la potencia de la seSal digital
A diferencia de los canales anai6gicos, cuya calidad de recepci6n puede variar desde 'nebuloso" a ctaro, los canales digitales
(HDTV) tienen una calidad de recepci6n perfecta o no se reciben en absolute. Per tanto, a diferencia de los canales anaDgicos,
no puede sintonizar ningQncanal digital. Puede, no obstante, ajustar la antena para mejorar la recepci6n de los canales digitaIes
disponibies.
Pulse el bot6n MENU para vet el menOen pantalta.
Pulse los botones h, o T para seleccionar "Canal" y, despu6s, pulse el bot6n
ENTER.
Pulse los botones A o _r para seieccionar "tntensidad sepal" y. despu6s pulse el
bot6n ENTER.
Si el medidor de potencia de seSaI indica que ta seSal es d_bil, ajuste fisicamente
su antena para incrementar la potencia de {a seSaLContin0e ajustando la antena
hasta que encuentre la meier posici6n con la ser_aIm_s potente.
Pulse el bot6n EXIT para salir.

Pantalla de PC
Uso del TV como pantalla de ordenador (PC)
Instalacion del software en el equipo (seg_n Windows XP)
A continuaci6n se muestra una pantalia de configuraci6n normal en un ordenador con Windows. No obstante, las pantaiias reales
en su PC probablemente ser_n diferentes, enfunci6n de su versi6n concreta de Windows yde su tarjeta de video. Pero aunque
las pantaIias reales tengan un aspecto diferente, se apficar_n los mismos ajustes b_sicose informaci6n en la mayoda de los
casos. (Si noes asi, p6ngase en contacto con el fabricante del ordenador o con unconcesionario Samsung).
1. Pdmero, haga ciic en "Control Panel (Panel de control)" en el menQ Inicio de Windows.
2. Cuando aparezca ia pantaiia del Panel de control, haga ciic en "Appearance and
Themes (Apariencia y Temas)" y aparecer_ un cuadro de di_togo.
3. Cuando aparezca ia pantaila del Panel de control, haga clic en "Display (Pantalla)" y
aparecer_ un cuadro de di_Iogo.
4. Seieccione la ficha "Settings (Configuraci6n)" en et cuadro de di_logo.
La configuraci6n de tama_o correcto (resoIuci6n)
Modo 6primo: 1920 x 1080 pixels
Si existe una opci6n de frecuencia vertical en el cuadro de di_togo de configuraci6n de la
pantalla, el valor correcto es "60" o "60 Hz".
Si no, haga clic en "Aceptar" y saiga dei cuadro de di_Iogo.
Modos de visualizaci6n
if the signal from the system equals the standard signal mode, the screen is adjusted automatically, if the signal from the system
doesn't equal the standard signal mode, adjust the mode byreferring to your videocard user guide; otherwise there may be no
video. For the display modes listed below, the screen image has been optimized during manufacturing.
D-Sub Entrada
IBM
640 X 480 31.469
VESA
640x 480
640x 480
800 x 600
800 x 600
800 x 600
800 x 600
1024x 768
1024x 768
1024x 768
1280x 1024
1920x 1080
37.861
37.500
35.156
37.879
48.077
46.875
48.363
56.476
60.023
79.976
66.500
72.809
75.000
56.250
60.317
72.188
75.000
60.004
70.069
75.029
75.025
60.000
31.500
31.500
36.000
40.000
50.000
49.500
65.000
75.000
78.750
123.000
138.500
-/-
-/-
-/-
+/+
+/+
+/+
+/+
-/-
-/-
+/+
+/+
-/+
HDMI/DVI Entrada
640 X 350 31.469 70.086 25.175 + / -
IBM 720 X 400 31.469 70.087 28.322 - / +
640 X 480 31.469 59.940 25.175 - / -
800 x 600 37.879 60.317 40.000 +/+
1024x 768 48.364 60.000 65.000 - / -
VESA
1280x 1024 63.981 60.020 108.000 +/+
1920x 1080 66.587 59.934 138.500 + / -

Ajuste del televisor con el ordenador
C6mo realizar el A_uste automatico
Utilice la funci6n de Ajuste autom_tico para que el aparato de TV ajuste autom_ticamente las sefiales de video que
el monitor recibe. La funci6n tambi6n ajusta automAticamente con mAs configuraci6n y ajusta los valores y las
posiciones de la frecuencia.
Esta funci6n no est& disponible en el modo DVI-Digital.
Pulse el bot6n MENU para ver el men0 en pantaIla.
Pulse tos botones h. o V para seleccionar "Configuraci6n" y despu6s pulse el
bot6n ENTER.
Pulse los botones A o _' para seieccionar "PC" y. despu6s, pulse el bot6n
ENTER.
En primer lugar, cambie al modo PC.
2. Pulse Dosbotones h. o _r para seleccionar"AjusteAuto." y. despu6s, pulseetbot6n
ENTER.
Pulse et bot6n EXIT parasafir.
Aiuste de la calidad de laz0antalla
El prop6sito del ajuste de la calidad de imagen es eliminar o reducir el ruido de la imagen. Si el ruido no desaparece s6io con la
sintonizaci6n fina, reaiice los ajustes de frecuencia hasta ei maximo y vuelva a reaIizar la sintonizaci6n fina.
(consulte las p&ginas 45.) Despu6s de reducir el ruido, vueiva a ajustar la imagen para que quede aIineada en el centre de la
pantalla.
Pulse el bot6n MENU para ver el men0 en pantaIla.
Pulse tos botones A o _' para seleccionar "Configuraci6n" y despu6s, pulse el
bot6n ENTER.
Pulse los botones h. o _' para seieccionar "PC" y. despu6s, pulse el bot6n
ENTER.
> En primer lugar, cambie at modo PC.
2. Pulse los botones A o _r para seleccionar "Fijar la tmagen" y. despu6s, pulse el
bot6n ENTER.
3. Pulse los botones A o T para seleccionar "Grueso" o "Fino" y,despu6s, pulse et
bot6n ENTER.
Pulse Dosbotones 4 o _. para ajustar la calidad de la pantaIla.
_'-Pueden aparecer rayas verticaIes o la imagen tener poca definici6n.
Pulse el bot6n ENTER.
Pulse et bot6n EXIT para saIir.

Carnbio de la posici6n de la pantalla
2.
3.
Pulse el bot6n MENU para ver el menOen pantaIla.
Pulse los botones A o _r para seleccionar "Configuraci6n" y despu6s, pulse el
bot6n ENTER.
Pulse los betones A e T para seleccienar "PC" y. despu6s, pulse et bet6n
ENTER.
>- En primer lugar, cambie al modo PC.
Pulse los botones A o _r para seleccionar "Posici6n" y, despu6s, pulse el bot6n
ENTER.
Pulse los botones A o v para ajustar Posici6n V.
Pulse los botones 4 o 1_para ajustar Posici6n H.
Pulse el bot6n ENTER.
Pulse et bot6n EXIT para saIir.
Inicio de la conficluraci6n de Posici6n de la pantalla odel Color
Puede recuperar todos los ajustes de imagen predeterminados de f_brica.
1. Pulse el bot6n MENU para ver el men_ en pantaIla.
Pulse tos botones _k o V' para seleccionar "Configuraci6n" y, despu6s, pulse el
bot6n ENTER.
Pulse los botones h. o _r para seleccionar "PC" y. despu6s, pulse el bot6n
ENTER.
:_ En primer lugar, cambie al modo PC.
2. Pulse los botones A o _r para seieccionar "Reiniciar tmagen" y despu6s, pulse el
bot6n ENTER.
Pulse el bot6n EXIT para safir.
Configuraci6n del PC para Home Cinema
Se pueden ver las imagenes con mas calidad cuando se configuran los valores de la
pantaIia en el modo PC. Si se estabtece la funci6n PC para Home Cinema se pueden
configurar los vatores de DNIe yConfiguraci6n detatlada (cuando el mode tmagen est_
ajustado en Pelicula) come en el mode PC.
1.
2.
3.
Pulse el bot6n MENU para ver el menO.
Press the _k or V' buttons to select "Setup", then press the ENTER button.
Pulse los botones A o T para seleccionar "Configuraci6n" y, a continuaci6n, pulse
el bot6n ENTER.
Pulse tos botones _k o _r para seleccionar "Encendido" o "Apagado" y despu6s
pulse el bot6n ENTER.
* APagadoiDesactivalosvaloresdetasfuncionesrelaci0nadasconla panta!laenel modo
deentradadePC.
Ertcendtdo_Activalosvaloresdela_funcionesrelacionadasconIapanta!!aene!modode
entradadePCparaproporcionarescenasmasdin&micas.
Pulse el bot6n EXIT para salir.
>_Esta funci6n s6Io est_ disponibte en el mode PC.

Configuraci6n dei Reloj
Estabtecer el reloj es necesario para usar las distintas caracteristicas de temporizador det TV.Adem_s, puedecomprobar lahora
mientras est_ viendo el TV.(Simplemente pulse INFO),
_uste manual del reloj
I.
Pulse el bot6n MENU para ver el menO en pantalla.
Pulse los botones _, o T para seleccionar "Configuraci6n" y, despu6s, pulse
el bot6n ENTER.
Pulse los botones _, o T para seleccionar "Tiempo" y, despu6s, pulse el
bot6n ENTER.
2. Pulse el bot6n ENTER para seleccionar"Reloj"
3. Pulse el bot6n ENTER para seleccionar "Modo Reloj".
Pulse los botones _, o '_ para seleccionar "Manual" y, despu6s, pulse el
bot6n ENTER.
4. Pulse los botones _, o '_ para seleccionar "Config. Reloj" y, despu6s, pulse el
bot6n ENTER.
5.
Pulse los botones _1o I_ para desplazarse a "Mes", 'Dia", 'A_o", "Hora',
"Minuto", o "am/pm". Seleccione la fecha y la hora que desee pulsando los
botones _, o V, pulse despu6s el bot6n ENTER.
Pulse el bot6n EXIT para salir..
>- La hora actual aparecera siempre que se pulse el bot6n INFO.
Puede ajustar el mes, el dia, el afio, la hora y el minuto directamente pul-
sando los botones num6ricos del mando a distancia.

_uste autom_tico del reloi
Pulse el bot6n MENU para ver el men0 en pantalla.
Pulse los botones • o T para seleccionar "Configuraci6n" y, despu6s, pulse
el bot6n ENTER.
Pulse los botones A o 'I' para seleccionar "Tiempo" y, despu6s, pulse el
bot6n ENTER.
2. Pulse el bot6n ENTER para seleccionar"Reloj".
3. Pulse el bot6n ENTER para seleccionar "Modo Reloj".
Pulse los botones A o T para seleccionar "Auto" y,despu6s, pulse el bot6n
ENTER.
4. Pulse los botones A o 'I' para seleccionar "Zona Tiempo" y, despu6s, pulse el
bot6n ENTER.
5. Pulse los botones A o 'I' para resaltar la zona horaria del &rea local, despu6s
pulse el bot6n ENTER.
6.
Pulse los botones A o 'I' para seleccionar "Tiempo Verano"; despu6s pulse el
bot6n ENTER.
Pulse los botones A o T para seleccionar "Enc." o "Apag." y, despu6s, pulse
el bot6n ENTER.
Pulse el bot6n EXIT para salir.
:_ Seg0n la estaci6n emisora y la serial, puede que el ajuste autom&tico
de la hora no se realice correctamente. En este caso, ajuste la hora
manualmente.
>- La antena o el cable debe estar conectado para que se ajuste la hora
automaticamente.

Configuracion del Temporizador de sue5o
El temporizador de desconexi6n apaga autom_ticamente el televisor despu6s de un periodo prefijado
(entre 30 y 180 minutes).
Pulse el bot6n MENU para ver el menOen pantaIla.
Pulse los botones A o _r para seleccionar "Configuraci6n" y despu6s, pulse el
bot6n ENTER.
Pulse los botones h. o T para seleccionar "Tiempo" y, despu6s, pulse et bot6n
ENTER.
2. Pulse los botones A o _' para seleccionar "Temporizador" y despu6s, pulse et
bot6n ENTER.
3. Pulse los botones A o T para ajustar"Minuto".
Pulse el bot6n P para seleccionar "Activaci6n".
Pulse los botones h. o T para seteccionar "Enc." y despu6s, pulse et bot6n
ENTER.
Pulse et bot6n EXIT para saIir.
Basra con que pulse el bot6n SLEEP del mando a distancia para acceder
r_pidamente a la configuraci6n det temporizador.
CAP_0N _

Activaci6n M desactivaci6n del temporizador
Pulse el bot6n MENU para vet el men_ en pantalla.
Pulse los botones & o T para seleccionar "Configuraci6n" y despu6s pulse et
bot6n ENTER.
Pulse los betones _ke T para seleccienar "Tiempe" y,despu6s, pulse et bet6n
ENTER.
Pulse los botones A o 'f" para seleccionar "Temporizador 1,
Temporizador 2, Temporizador 3" y despu6s, pulse et bot6n ENTER.
Pulse los botones _ko T para ajustar "Hora" y pulse el bot6n _ para iral paso
siguiente.
Ajuste otras opciones utitizando et mismo m6todo que se indica anteriormente.
activar o inactivo Pulse los botones A o _r
Repetir Una vez, Cada dia Lun-Vie, Lun-S_b, Pulse los botones A o _'
S_b-Dom
Votumen Seleccione el nivel de votumen deseado Pulse los botones A o _r
Contenido Cuando la opci6n Hora de encendido Pulse los botones A o _r
esta activa, se puede encender un canal
determinado o reproducir contenidos
como archives defotos o de audio.
(Compruebe que haya un dispositivo
USB conectado attelevisor.)
_Cuando haya terminado, pulse el bot6n RETURN para volver.
• La hera actual aparecer_ siempre que se pulse el bot6n INFO.
• Puede ajustar la hora, los minutes, el canal y el canal directamente
puisando los botones num_ricos del mando a distancia.
Pulse et bot6n EXIT para saIir.
Selecci6n del idioma de men
Pulse el bot6n MENU para ver el menOen pantaIla.
Pulse los botones h. o _r para seleccionar "Configuraci6n" y despu6s pulse el
bot6n ENTER.
Pulse los botones A o _' para seieccionar "tdioma" y despu6s, pulse et bot6n
ENTER.
Pulse los botones ,l_ o _' para seleccionar et idioma apropiado:
"English", "EspaSol" o "Franc6s".
Pulse el bot6n ENTER.
Pulse el bot6n EXIT para safir.

Ajuste del modo Pantalla Azul
Si nose recibe ninguna serial o 6sta es muy d6bil una pantalla azul sustituye de forma autom_tica la imagen con interferencias.
Si desea continuar viendo la imagen deficiente, debe definir el mode "Pantalla Azul" en "Apag.".
1. Pulse el bot6n MENU para vet el men0 en pantalla.
Pulse los botones h. o T para seleccionar "Configuraci6n" y despu6s, pulse et
bot6n ENTER.
2. Pulse los botones A o _' para seleccionar "Pantalla Azul" y despu6s, pulse et
bot6n ENTER.
Pulse los botones h. o _r para seleccionar "Enc." o "Apag." y despu6s, pulse et
bot6n ENTER.
Pulse el bot6n EXIT para saIir.
>-Si se pulsan los botones A o • se alterna entre "Enc." y "Apag".
Si se conecta a una consoia de videojuegos come PlayStationTM o XboxTM, podr_ obtener sensaciones mas reaIistas,
seleccionando Modo juego.
1, Pulse el bot6n MENU para vet el men0 en pantaIta.
Pulse los botones A o V para seleccionar "ConfiguraciOn" y despues, pulse el
bot6n ENTER.
2, Pulse los botones A o T para seleccionar "Mode Juego" y despu6s, pulse et
bot6n ENTER.
3, Pulse los botones h. o T para seleccionar "Enc." o "Apag." y despu6s, pulse el
bot6n ENTER.
4. Pulse el bot6n EXIT para salir.
_'- Si deseadesconectarsedela consda devideojuegosyconectarseaottodispositivoexter
no,ajustelaopci6nMododeljuegocomoApagadoenel menOdeconfiguraci6n.
:_ Si velatdevisi6nenModojuego,lapantallatiemblaligeramente.
Modojuegonoestadisponibleenel mododeTV.

Vision de subtitulos (mensajes de te×to en pantalla) - Anal6gico
La funci6n subfitulo anal6gico funciona en un mode de canal RF anaI6gico o en mode de seriaI externa.
Pulse el bot6n MENU para ver el men0 en pantaIla.
Pulse los botones A o _' para seleccionar "Configuraci6n" y despu6s, pulse el
bot6n ENTER.
Pulse los botones A o T para seteccionar "Subfitulo" y. despu6s, pulse et bot6n
ENTER.
3. Pulse el bot6n ENTER para seieccionar "SubtkuIo". Pulse los botones A o _r para
seleccionar "Enc." y. despu6s, pulse et bot6n ENTER.
Pulse tos botones A o T para seleccionar "Modo de Subtftulo" y despu6s, pulse
el bot6n ENTER.
Pulse los botones J, o T para seleccionar el submen0 que desee (Programado,
CC1~CC4, o Textol~Texto4); pulse despu6s el bot6n ENTER.
Pulse el bot6n EXIT para satir.
• El valor predeterminado es "CC1"'.
• CCl: Etservicic onmano ae subtitulos _incronizados. Son subtitulos
en etidloma principal aue aebe es[ar stncron_zadocon el son_ao
oreferiblemente Odecoincida cot la secuencla esDecifica.
,, CC2: SubtituIos espec{aiesae uso no sincronizado. Este canal transoor_a
aa[os aue estAndestinados a amptiar ta informaci6n de_programa.
,, CC3: Servicio de subtitulos secundanos sinc-onizados_Datos aItematwos
ae subtitulos relacionados con et programa, tiuicamen[e subtitulos det
segunao taloma.
• CC4: Subtitulos esoectales ae uso no slncrontzac 3.Similar a CC2.
- Textol: Primer servtclo ae [ex[o. Se pueae [ra[ar ae vanos dates no
retaclonaaos car programa alguno.
,,Te×to2: Segunao servtcto ae [ex[o. Dates adicionales, normatmeme sin
relaci6n con programa aiguno.
• Texto3/Te×to4: Tercer y c_.ar[o serwcios de texto. Estos canales de datos solo
se deben usar si Textol y Texto2 no son suficientes.
La funci6n Subfitulo noest_ disponibte en los modos COMPONENTE, HDMt ni
PC.
La disponibilidad de los subfitulos depende del programa que se est6
emitiendo.
Pulse el bot6n CAPTION dei mando a distancia varias veces para seteccionar
"On"(encendido) u "Off"(apagado)
FAV.CH CAP,ON
III

Vision de subtituios (mensajes de texto en pantalla) - Digital
La funci6n Subfitulo digital funciona en canaIesdigitales.
1. Pulse el bot6n MENU para vet el men0 en pantalla.
Pulse tos botones A o T para seleccionar "Configuraci6n" y despu6s, pulse el
bot6n ENTER.
2. Pulse los botones A o •para seleccionar "Subtitulo" y. despu6s, pulse el bot6n
ENTER.
3. Pulse el bot6n ENTER para seieccionar"Subtitulo".
Pulse los botones A o T para seleccionar "Enc." y despu6s, pulse et bot6n
ENTER.
Pulse tos botones A o T para seleccionar "Mode de Subtitulo" y, despu6s pulse el
bot6n ENTER.
Pulse los botones A o T para seteccionar el submen0 (Programado,
Serviciol~Servicio6, CC1~CC4 o Textol~Textc4) que desee; pulse despu6s el
bot6n ENTER.
5. Pulse los botones A. o _' para seleccionar "Opciones - Subtitulos" y despu6s
pulse el bot6n ENTER.
>"La funci6n "Opciones - Subtitulos" s6to est_ disponible cuando puede seleccionarse
'Serviciol~Servicio6" en el mode 'Mode de Subtitulo".
Los modes de subtituiaci6n Servicio 1-6 pueden no estar disponibles segOnel tipo
de emisi6n.
Pulse los botones A o T para seleccionar "Tamafio" y despu6s, pulse et bot6n
ENTER.
Pulse los botones A o T para seleccionar la opci6n deseada para el Subtitulo;
despu_s pulse el bot6n ENTER.
Pulse tos botones A. o T para seleccionar Ias opciones de submenO que desee
(vea las opciones en la pagina siguiente) y pulse el bot6n ENTER.
Pulse el bot6n EXIT para safir.
>- La disponibilidad de los subtitulos depende del programa que se est6 emitiendo.
La opci6n "Programado" significa que se sigue el est_ndar establecido per el
emisor.
•TamaSo:Estaopci6nconstade"Programado"."Pequefio","Normal"y "Grande".Elvalor
predeterm_nadoes"Normal
• "_po deletra: Estaoocionconstade"Projramado Estito0-EstiloT'.Puedecampierel
[leode tetraque eesee.Eivalo_predeterminadoes "Estito0
• Colorprimer plane: Estaopc_onconstade"Programado"."Blanco' Negro","Rojo"
"Verde"."Azur Amarillo","Magenta",} 3inn".Puedecambiare_
colordeltexto.EIvotereredeterm_nadoes Blancc
• Color defondo: Estaoeci6nconstade"Programatic "Blanco". "Negro", "Rojo. -verde
'Azut Amarillo"."Magenta", y Cian".Puedecambiarelcoloreelrondo
ueiossueu[ulos.Elvalol ereee_erm_nadoes"Negro"
• Opacidadprim. plano:Estao€:i6n constade"Programado"."Transoareme
TrasDcidc S61ido"e"lntermitente".Puedecamoia[_aopacldad
oe ta _e[r8
• Opacidaddeifondo:Estac 3cionconstade"Programado"."Transearente'."TrastOcido
"S6iido"e"lntermitente".Puedecambtartaoeacidaddetrondode
lOS SUD[I[UiOS
• Regresar al predeter.: Esta opc_on reajusta as oc "Jones "TamaSo "T_oo de te_ra
Oeacidad det fondo" a sos vaiores oreae[erminaoos. FAV.C_ CAPa0_
_!Pulseelbot6nCAPTIONdelmandoadistanciavariasvecesparaseleccionar III © III
"On"(encendido) u "Off"(apagado)

Nivel Transparencia del menu
Ajusta la transparencia de la pantalla del men&
1. Pulse el bot6n MENU para vet el men_ en pantaIta.
Pulse tos botones & o _' para seleccionar "Configuraci6n" y despu6s, pulse el
bot6n ENTER.
2. Pulse tos botones A o _' para seleccionar"Transpar. Dei menQ"y. despu6s, pulse
et bot6n ENTER.
3. Pulse los botones h. o T para seleccionar et nivety pulse despu6s et bot6n
ENTER.
Pulse et bot6n EXIT para salir.
Uso de la funci6n de ahorro de energia
Esta funcbn ajusta el brilto del televisor, Io cual reduce el consumo de energia. Si desea ver {a televisi6n por ta noche, ajuste la
opci6n det mode "Ahorro energia" en "Alto"; sus ojos se Io agradecer_n y ademas, reducir_ elconsume de energia.
1. Pulse el botdn MENU para vet el men0 en pantaIla.
Pulse los botones h. o _' para seleccionar "Configuracidn" y despu6s, pulse et
bot6n ENTER.
2. Pulse los botones A o T para seieccionar"Ahorro energia"y. despu6s,pulseet bot6n
ENTER.
Seieccione {aopci6n deseada (Apag. Bajo Medio Alto Autom_tico) pulsandolos
botones A o _r. PulseeI bot6n ENTER.
_Apag.: Apaga tafunci6n de ahoriode energia. : : :
• Bajo: Conflgura et televisor en elmado de ahorro de energ!a bajo.
• Medio: Configura ette!evisor en et modo de ahorro de energ!a medio.
,A!to: Configura eltelevisor en et modo de ahorro de energia alto.
• Auto: Ajusta a_tom_ticamente et brillo de ta pantatta deI televisor segOnIas
escenas.
Pulse el bot6n EXITpara salir.

Ajuste de la funci6n de ayuda
Muestra ta ayuda sobre las funciones del men_.
1. Pulse el bot6n MENU para ver el ment_ en pantalla.
Pulse los botones A o T para seleccionar "Configuraci6n" y, despu6s, pulse
el bot6n ENTER.
2. Pulse los botones A o T para seleccionar"Funci6n de Ayuda" y, despu6s,
pulse el bot6n ENTER.
3. Pulse los botones _. o T para seleccionar"Enc." y, despu6s, pulse el bot6n
ENTER.
Pulse el bot6n EXIT para salir.
:_ El valor predeterminado de la Funci6n de Ayuda es Enc.
Reducci6n digital del ruido
Si la se_al de emisi6n que recibe el televisor es d6bil, puede activarse la funci6n de reducci6n digital det ruido (Digital Noise
Reduction) para reducir la est_tica y las im_genes superpuestas que pueden aparecer en la pantatla.
1. Pulse el bot6n MENU para vet el menOen pantaIla.
Pulse et bot6n ENTER para seteccionar "tmagen'.
2. Pulse los botones & o _r para seleccionar "Digital NR" y despu6s, pulse et bot6n
ENTER.
3. Pulse los botones A. o T para seleccionar "Desactivado" "Bajo" "Medio", "Alto",
"Autom_tico". y, despu6s, pulse el bot6n ENTER.
._Bajo: Reduceelruidodela pantallaa_nRivetbajo.
'_Medio:Reduceelruidodela pantallaa unnivelmedio.
,'Alto: Reduceelruidodela pantallaa unnivelalto.
, Automatico: Reconocey reduceelruidodela pantaltaautom&ticamente.
Pulse et bot6n EXIT para salir.

Uso de V-Chip
La funci6n V-Chip bloquea autom_ticamente la programaci6n que se considera inadecuada para los ni_os. El usuario debe intro-
ducir primero un c6digo PtN (nQmero de identificaci6n personal) antes de establecer o cambiar las restricciones de V-Chip.
>'-Si se ha activado la funci6n V-chip, las opciones de PtP nofuncionan.
Aiuste del n_lmero de identificacion personal (codiqo PIN}
1. Pulse el bot6n MENU para ver el men0 en pantalla.
Pulse los botones A o _' para seleccionar "Configuraci6n" y, despu6s, pulse
el bot6n ENTER.
2. Pulse los botones A o _' para seleccionar"V-Chip" y, despu6s, pulse el bot6n
ENTER.
Aparecera el mensaje 'lngresar C6digo". Escriba su c6digo PIN de 4 digitos.
>-El c6digo PIN predeterminado para un televisor nuevo es "0-0-0-0".
3. Aparecera la pantalla 'V-Chip".
Pulse los botones • o _' para seleccionar "Cambiar C6digo" y, despu6s,
pulse el bot6n ENTER.
Aparecera la pantalla Cambiar C6digo. Escriba un nuevo c6digo PIN de 4
digitos.
En cuanto introduzca los 4 digitos, aparece la pantalla "Confirmar Nuevo
C6digo".
Vuelva a escribir los 4 digitos. Cuando desaparezca la pantalla de confirma-
ci6n, el c6digo quedar& memorizado.
Pulse el bot6n EXIT para salir.
>Si olvida su c6digo, pulse los botones del mando a distancia siguiendo la
secuencia siguiente, que restablece etc6digo a 0-0-0-0: Power Off Mute
8 2 4 Power On.

C6rno activarldesactivar V-Chi_
1. Pulse el bot6n MENU para ver el menO en pantalla.
Pulse los botones A o '_ para seleccionar "Configuraci6n" y, despu6s, pulse
el bot6n ENTER.
2. Pulse los botones A o '_ para seleccionar "V-Chip" y, despu6s, pulse el bot6n
ENTER.
Aparecera el mensaje "lngresar C6digo". Escriba su c6digo PIN de 4 digitos.
Aparecera la pantalla "V-Chip". Para activar la funci6n V-Chip, pulse el
bot6n ENTER para que "Bloqueo V-Chip" se ajuste en "Enc.". (Si se pulsan
repetidamente los botones • o T se alterna entre "Enc." y "Apag.".
Pulse el bot6n ENTER.
Pulse el bot6n EXIT para salir.
Confiquraci6n de Restricciones usando la secci6n "Guias pater. TV"
Primero, establezca un n_mero de identificaci6n personal (PIN) y active V-Chip.
(Consulte la secci6n anterior). Las restricciones del bloqueo de programas se pueden
estabtecer mediante dos m6todos: Las guia de programas o la clasificaci6n MPAA.
1. Pulse el bot6n MENU para ver el men0 en pantalla.
Pulse los botones A o '_ para seleccionar "Configuraci6n" y, despu6s, pulse
el bot6n ENTER.
2. Pulse los botones A o '_ para seleccionar "V-Chip" y, despu6s, pulse el bot6n
ENTER.
Aparecera el mensaje "lngresar C6digo". Escriba su c6digo PIN de 4 digitos.

3. Apareceralapantalla"V-Chip".Pulselosbotones_,o_'paraseleccionar"Guias
pater.TV"y,despu6s,pulseelbot6nENTER.
4. Apareceralapantalla"Guiaspater.TV".
PulselosbotonesAo'_paraseleccionarunadelasseiscategoriasbasadasen
laedad:
•TV-G:TodeslospObticos
TV-PG:Acompafiadosdeunadutto
_TV-14:Mayoresde14.aSos
TV-MA:Paraaduttos
5. Enestepunto,yahaseseleccionadounadelasclasificaciones.
Pulseelbot6nENTER.SegOnlaconfiguraci6n,seselecdonar&unsimbolo_.
(Enblanco=Desbloqueada,_ =Bloqueada)
Mientrasseselecciona"_",pulseelbot6nENTERparabloquearodesbloquear
lacategoria.Paraseleccionarunaclasiflcaci6ndeTVdistinta,pulselosbotones
•,o_'y,despu6s,repitaelproceso.
;_ Perm. todo: Se pulsa para desbloquear todos los programas de televisi6n. /
Bloq. todo: Se pulsa para bloquear todos los programas de televisi6n.
>_TV-Y,TV-Y7, TV-G, TV-PG, TV-14 y TV-MA incluyen opciones adicionales.
Consulte el paso siguiente para cambiar las subclasificaciones:
FV: Fantasia y violencia / D: Dialogos con alusiones sexuales /
L: Lenguaje adulto / S: Situaciones sexuales / V: Violencia
>- La opci6n V-Chip bloquear_ automaticamente ciertas categorias que son "mas
restrictivas".
Por ejemplo, si bloquea la categoria "TV-Y", automaticamente se bloquear&
TV-Y7.
De manera similar, si bloquea lacategoria TV-G, todas las categorias en el
grupo _adolescente"quedaran bloqueadas (TV-G, TV-PG, TV-14, y TV-MA).
Las subdasificaciones (D, L, S, V) funcionan de manera similar. (Consulte la
secci6n siguiente).
6. C6mo establecer las subclasificaciones FV, D, L, S, y V.
Primero, seleccione una de las clasificaciones de TV: TV-Y,TV-Y7 TV-G, TV-PG,
TV-14, o TV-MA (consulte el paso 4, en la p&gina anterior) y pulse el bot6n _.
Por cada subdasificad6n aparecer& un simbolo "_ ".
Con el "_" selecdonado, pulse el bot6n ENTER para ira la subclasificaci6n.
Pulse ENTER para bloquear lasubclasificad6n.
Para seleccionar una clasiflcaci6n de TV distinta, pulse los botones _, o _',
despu6s, repita el proceso.
La opci6n V-chip bloqueara autom&ticamente ciertas categorias que son "m&s
restrictivas".
Por ejemplo, si bloquea la subdasificaci6n "L" en TV-PG, las subdasificadones
"L" en TV-14 y TV-MA se bloquear&n autom&ticamente.
7. Pulse el bot6n EXIT para borrar todas las pantallas. (O contin0e en la secci6n
siguiente yestablezca restricciones adicionales seg0n los c6digos MPAA.)
Estas categorias se dividen en dos grupos: TV-Y y TV-Y7 (nitros pequdios y
nitros a partir de 7 athos),y TV-G a TV-MA (todos losdem&s).
Las limitaciones para estos grupos funcionan de forma independiente.
Si en la familia hay nitros muy pequer'ios y adultos j6venes, la opci6n Guia de
programas debe configurarse por separado para grupo de edad. (Consulte el
siguiente paso.)

Configuraci6n de las restricciones mediante las clasificaciones MPAA: G, PG, PG-13, R, NC-17, X, NR
El sistema de clasificaci6n MPAA uti{iza el sistema de ta MPAA (Motion Picture Association of America, Asociaci6n americana
de cinemategrafia) que se aplica principaImente en las peliculas. Si el bloqueo de V-Chip esta activado, el televisor btequear5
automSticamente programas que est6n cedificades con clasificaciones rechazabtes (de la MPAAe de televisi6n).
1. Pulse el bot6n MENU para ver el menO en pantalla.
Pulse los botones A o 'I' para seleccionar "Configuraci6n" y, despu6s,
pulse el bot6n ENTER.
2. Pulse los botones ,t. o T para seleccionar "V-Chip" y, despu6s, pulse el bot6n
ENTER.
Aparecera el mensaje "lngresar C6digo". Escriba su c6digo PIN de 4 digitos.
3. Aparecer& la pantalla "V-Chip'.
Pulse los botones A o 'I' para seleccionar "Clas. MPAA", y, despu6s, pulse el
bot6n ENTER.
Aparecera la pantalla "Clas. MPAA".
Pulse varias veces los botones A o T para seleccionar una categoria concreta
de MPAA. Pulsando los botones A o T pasar& secuencialmente per todas las
categorias MPAA:
, G: Todos !os P0btic0s (sin iestriccbnes).
, PG: Se Sugiere !a c0mpafiia de Unadu!to.
• PG-t3: Menores ac0mpafiados de Unadutte.
, R: Restringido. Los niSosmenores de 17aries deben estar acompafiados per
un adulto.
' NC-17: Prohibida ta entrada a menores de i Z afios.
;x: s6to aduttosl
• NR: Sin ctasificacion.
>- Perm. rode: Se pulsa para desbloquear redes los programas de televisi6n.
Bloq. todo: Se pulsa para bloquear todos los programas de televisi6n.
>-Con una determinada categoria seleccionada pulse el bot6n ENTER para
activarla.
En la pantafla aparecer_ un simbolo ' _" seleccionado.
Pulse et bot6n ENTER para bloquear o desbloquear la categoria.
La opci6n V-chip btoquear_ autom_ticamente cualquier categoda que sea "mas
restrictiva".
Per ejempto, si bloquea la categoda "PG-13", tambi6n se bloquear_n
autom_ticamente "R", "NC-17"y "X".
Pulse el bot6n EXIT para salir.

C6mo confiqurar las restricciones en el idioma "lnqles Canadiense"
1. Pulse el bot6n MENU para ver el menO en pantalla.
Pulse los botones A o 'I' para seleccionar "Configuraci6n" y, despu6s, pulse
el bot6n ENTER.
2. Pulse los botones A o 'I' para seleccionar "V-Chip" y, despu6s, pulse el bot6n
ENTER.
Aparecer& el mensaje "lngresar C6digo". Escriba su c6digo PIN de 4 digitos.
3. Pulse los botones A o 'I' para seleccionar "lngl6s Canadiense" y,despu6s,
pulse el bot6n ENTER.
Pulse los botones A o _' para seleccionar la restricci6n apropiada.
Pulse el bot6n ENTER para activar la restricci6n seleccionada.
Est& resaltada la "_ ".
Pulse el bot6n EXIT para salir.
Perm. todo: Se pulsa para desbloquear todos los programas de televisi6n.
Bloq. todo: Se pulsa para bloquear todos los programas de televisi6n.
, CS+:Programaci6n generatmente considerada aceptabte para ni_os mayores
de 8 a_os sin acompa_amiento de aduItos.
• G: Programaci6n general, ideal para todas las audiencias.
• PG: Supervisi6n paterna.
• t4÷: La programaci6n contiene temas y cantenidos que puede que no sean
adecuados para menores de 14 ar'ios.
• 18+: Programaci6n para aduitos.

Como confiqurar las restricciones en el idioma 'Frances Canadiense'
1. Pulse el bot6n MENU para ver el menO en pantalla.
Pulse los botones A o 'I' para seleccionar "Configuraci6n" y, despu6s, pulse
el bot6n ENTER.
2. Pulse los botones A o 'I' para seleccionar "V-Chip" y, despu6s, pulse el bot6n
ENTER.
Aparecer& el mensaje "lngresar C6digo". Escriba su c6digo PIN de 4 digitos.
3. Pulse los botones A o 'I' para seleccionar "Franc6s Canadiense" y,despu6s,
pulse el bot6n ENTER.
Pulse los botones A o Y para seleccionar la restricci6n apropiada.
Pulse el bot6n ENTER para activar la restricci6n seleccionada.
Est& resaltada la "_ ".
Pulse el bot6n EXIT para salir.
> Perm. todo: Se pulsa para desbloquear todos los programas de televisi6n.
Bloq. todo: Se pulsa para bloquear todos los programas de televisi6n.
,8 arts+: No recomendada para nithospequeSos,
• 13 ans÷:Es posible que !aprogramaci6n no sea adecuada para niSos meno_
res de 13asos.
• 16ans+: Es posibte que taprogramaci6n no sea adecuada para niSos meno-
res de 16amos.
,18 artS+: Programaci6n restringida para adultos.

Uso de V-Chip (V-Chip) con los canales digitales
La informaci6n de la restricci6n de bloqueo se puede usar mientras se yen los canales DTV (DTV).
1. Pulse el bot6n MENU para ver el menO en pantalla.
Pulse los botones A o '_ para seleccionar "Configuraci6n" y, despu6s, pulse
el bot6n ENTER.
2. Pulse los botones A o '_ para seleccionar "V-Chip" y, despu6s, pulse el bot6n
ENTER.
Aparecera el mensaje "lngresar C6digo". Escriba su c6digo PIN de 4 digitos.
4,
Pulse los botones A o T para seleccionar "Clasificaci6n U.S. Descargable" y,
despu6s, pulse el bot6n ENTER.
:_Si la informaci6n no se descarga desde la emisora, el menO
"Clasificaci6n U.S. Descargable" est& desactivado.
La informaci6n de la restricci6n de bloqueo se puede descargar autom&ti-
camente mientras seven los canales DTV. Esto puede tardar algunos seg-
undos.
El men0 "Clasificaci6n U.S. Descargable" est_ disponible despu6s de que
la informaci6n se haya descargado desde la emisora. Sin embargo, seg0n
el tipo de informaci6n de la emisora, el men0 podria no estar disponible
para su uso.
Pulse los botones A o Y para seleccionar la restricci6n apropiada.
Pulse el bot6n ENTER para activar la restricci6n seleccionada.
Est_ resaltada la "_ ".
Pulse el bot6n EXIT para salir.
_'-AIIow All (Perm. Todo): Se pulsa para desbloquear todos los programas de
televisi6n.
Block All (Bloq. Todo): Se pulsa para bloquear todos los programas de tel-
evisi6n.
_" Los niveles de restricci6n de bloqueo difieren seg0n la emisora.
El nombre de men0 predeterminado y 'Clasificaci6n U.S. Descargable"
cambian seg0n la informaci6n descargada.
_Aunque configure la visualizaci6n en pantalla en su propio idioma, el men0
"Clasificaci6n U.S. Descargable" siempre Io ver_ en ingles.
La clasificaci6n bloquear_ autom_ticamente ciertas categorias que son
"m_s restrictivas'.
_'-Los titulos de clasificaci6n (por ejemplo, Humor Level (Nivel humor), etc) y
las clasificaciones de televisi6n (por ejemplo, DH,MH,H, etc) pueden diferir
seg0n la emisora.
E] n¢,mero del ttulo
de clasificac16n
T_,lo de clasificaci6n actual
[] n_me_ de
tudos los ttdos
de dasificau6n

Configuraci6n de Efecto de luz (LN-T4065F / LN-T4665F I LN-T5265F)
Se puede apagar o encender el LED azul det frontal del televisor.
2.
3.
Pulse el bot6n MENU para ver el menQ.
Pulse los botones A o T para seleccionar "Configuraci6n" y despu6s pulse el
bot6n ENTER.
Pulse los botones A o 'I' para seleccionar "Efecto de luz" y, a continuaci6n, pulse
el bot6n ENTER.
Pulse los botones A o '_ para seleccionar "Apagado', "En m. espera",
"Viendo la TV" o "Siempre" y, despu6s, pulse el bot6n ENTER.
• Apagado_ El LED no se activar&.
• Enm. espera: Enciende et LED en modo de espera.
, Viendo !a TV: Enciende etLED cuando se mira ta TV.
, Siempre: El LED se encender& una vez se haya apagado el televisor.
Pulse el bot6n EXIT para salir.
Guia de actualizaci6n del software
Samsung puede ofrecer actuaIizaciones para el firmware del televisor en el future. P6ngase en contacto con el centre de llama-
das de Samsung en 1-800-SAMSUNG(7267864) para recibir informaci6n acerca de {adescarga de ias actuaIizaciones y dei use
de un controtador USB. Las actuaIizaciones se pueden reatizarconectando una unidad USB at puerto USB situado en la parte
posterior del televisor.
1. Inserte una unidad USB que contenga las actualizaciones de firmware en las
conexiones WISELINK de la parte posterior del televisor.
TV(Tornas del panel lateral)
2. Pulse el bot6n MENU para ver el men0. Pulse los botones A. o V para
Unidad USB
seleccionar Configuraci6n y despu6s pulse el bot6n ENTER.
3. Pulse los botones A o T para seleccionar Software upgrade
(Actual. software) y despu6s pulse ENTER.
4. Pulse los botones A o T para seleccionar la actualizaci6n por
USB y despu6s pulse ENTER. Aparece el mensaje Scanning for USB...
It may take up to 30 seconds (Buscando USB... Puede tardar 30 segundos).
No desconecte la alimentaci6n ni retire la unidad USB mientras se aplican las
actualizaciones. El televisor se apagar& y se encender& autom&ticamente
despu6s de completar la actualizaci6n de firmware. Despu6s de realizar la
actualizaci6n compruebe la versi6n del firmware.

WiSELiNK
Uso de la funcion WiSELiNK
Esta funci6n permite ver archivos de fotos (JPEG) y escuchar archives de audio (MP3) guardados en un dispositivo de ctase de
almacenamiento masivo (MSC) USB. Panel lateral dei TV
Pulse el POWER bot6n de encendido del mando a distancia o
del panel frontal.
En primer lugar, conecte un dispositivo USB que contenga
archivos JPEG o MP3 a la toma WlSELINK (conector USB)
que se encuentra en el lateral dei televisor.
Ejemplo
:_ Si entra en el modo WISELINK sin ningOndispositivo conectado, aparece el mensaje "There is no device connected"
("No hay ningOn dispositivo conectado").En este caso, inserte el dispositivo USB, saIga de la pantaIla pulsando el
bot6n WISELINK del mando a distancia y vuelva a entrar en la pantaItaWISELINK.
Los archivos de fetes yde audio deben Itevarun nombre en ingl6s, franc_s o espa_ol. De Becontrario, los archives no se
pueden reproducir. Si es necesario, p6ngales un nombre ingl6s, franc6s o espa_oL
:_ El sistema de archives s6{oadmire el FAT16/32. (No se admire el sistema de archivo NTFS.)
>* Algunos tipos de dispositivos de audio y c_maras digitales USB pueden no set compatibles con este televisor.
>- Wiselink s61oadmire el dispositivo de clase de atmacenamiento masivo (MSC) USB. MSC es un dispositivo de clase de
aImacenamiento masivo de transporte s6lo de gran capacidad. Ejemptos de MSC son las unidades de aImacenamiento en
miniatura y los lectores de tarjetas Flash. (No se admire ni el HUB niel disco duro USB.)
>_ Antes de conectar el dispositivo al televisor, haga una copia de seguridad de sus archivos para evitar da_os o p6rdidas de
datos. SAMSUNG no se hace responsabte del da_o o p6rdida de datos que pueda sufrir archivo alguno.
>- La resotuci6n de imagen recomendada para Wiselink es 600 megapixeles.
>_ Conecte directamente aI puerto USB det aparato. Si utiliza una conexi6n con un cable independiente, puede haber
problemas de compatibilidad con el USB.
S61ose admiten los formatos de archive rap3 y jpeg.
>- Se recomienda etformato jpeg secuenciat. Etformato jpeg progresivo utiliza una gran cantidad de memoria y puede faliar la
decodificaci6n.
_'- No desconecte el dispositivo USB mientras est6 "cargando".
>- No se admire PTP (Protocoto de transferencia de imagenes) ni MTP (Protocoto de transferencia de medios).
> La duraci6n de la reproducci6n de un archivo rap3 puede visualizarse como '00:00:00' si la informaci6n dei tiempo de
reproducci6n no se encuentra en et inicio del archive.
:_ Cuanto mayor sea la resoluci6n de la imagen, m_s tiempo tardar_ en visualizarse en la pantaIla.
>- Si la resotuci6n horizontal de una imagen es superior a 5000, no se puede descodificar.
:_ Si la resoluci6n vertical de una imagen es superior a4000, no se puede descodificar.
Uso de los botones del mando a distancia con el menu WISELINK
Bot6n Funci6n
Mover el cursor y seteccionar unaopci6n
Seleccionar la opcidn marcada.
P_YfPAUS_
(_ Reproducir o interrumpir et archivo de visionado autom_tico o MP3.
R_TURN
Q Velvet aI menOanterior
O Ejecutar diversas funciones desde los men_s de fotos y m_sica.
STOp
Detener et archive de visionado autom_tico o MP3.
Q Q Avanzar o retroceder p_gina (elemento de una lista de archives)
Detener la funcidn actual y volver al men_ de nivei superior anterior.

Uso del men_ WISELINK
1. Pulse el bot6n MENU. Pulse los botones • o _' para seleccionar "Input" y
pulse el bot6n ENTER.
2. Pulse los botones A o _' para seleccionar"WISELINK" y pulse el bot6n
ENTER.
3. Pulse los botones A o _' para seleccionar el dispositivo de memoria MSC
correspondiente y pulse el bot6n ENTER.
>*El men0WISELINK puede variar segQn et dispositivo de memoria USB conectado
al televisor.
4. Pulse los botones ,9 o I_-para desptazarse a un icono y pulse el bot6n ENTER,
Para salir det mode WtSELtNK pulse el bot6n WISELINK det mando a
distancia,
Pulse el bot6n WISELINK dei mando a distancia para visuafizar un men0
WtSELtNK,
AN_NNA CHLIST WISELINK REC
E

Uso de la lista FOTO (JPEG)
Este men_ muestra carpetas y archives JPEG guardados en un dispositivo de memoria MSC.
1. Complete Steps 1 to 3 of"Uso del ment_ WISELINK".
(Consulte la p_gina 65)
2. Pulse los botones _ o i_ para desplazarse a "Photo" y pulse el bot6n
ENTER. La informaci6n del archivo guardado se muestra como una carpeta o
un archivo.
3.
Pulse los botones A, T, 4 y i_ para seleccionar un archivo y pulse el bot6n
ENTER.
• Si se pulsa et bot6n ENTER sobre eI icono de una rote ta rote seIeccionada se
muestra en pantatla completa.
• Si se pulsa el bot6n ENTER sobre el icono de una carpeta, se muestran Ios
archivos JPEG incluidos en dicha carpeta.
Para saIir det mode WtSELtNK pulse el botdn WISELINK det mando a distancia.
El desplazamiento a una fete puede tardar unos segundos necesarios para
cargar et archivo. Durante este tiempo, aparecer_ el icono en la
parte superior izquierda de la pantalla.
Este men0 s61omuestra tos archivos con extensi6n jpg. Los archives con otto
formato como bmp o tiff nose muestran.
Los archivos se visuatizan en una p_gina. Encada p_gina se muestran 15
fetes en miniatura.
Las miniaturas se numeran de 1 a 15,de izquierda a derecha y de arriba a
abajo.
Ciertos tipos de c_mera digital USB ydispositivos de audio quiz_s no sean
compatibles con este televisor.
En primer lugar se muestran las carpetas y, a continuaci6n, todos los archives
JPEG de cada carpeta. Las carpetas y los archives JPEG se clasifican en
orden alfab6tico.
Si la fore se visualiza en pantaIla completa se puede ampliar, reducir o girar la
fete en la pantalla.
La visualizaci6n de archives JPEG come im_genes en miniatura tarda alg0n
tiempo.
: Icono de carpeta
: Icono de foto
: Icono de desplazarse
a la carpeta anterior

Seleccion de una foto_t un visionado automatico
1. Complete Steps 1 to 3 of"Uso del menO WISELINK". (Consulte la p&gina 65)
2. Pulse los botones 4 o !_ para desplazarse a 'Photo" y pulse el bot6n ENTER.
La informaci6n del archivo guardado se muestra como una carpeta o un archivo.
3. Pulse et bot6n INFO para visuaIizar "Secuencia" o "Canceta archivos setecc.".
4. Pulse los botones _. o _' para desplazarse a "Secuencia" y pulse el bot6n
ENTER.
:_ En la operacidn de visionado autom_tico, los archivos se muestran ordenada-
mente a partir del archivo que se muestra en este momento.
Los archivos MP3 se pueden reproducir automaticamente durante el visionado
autom_tico si MQsicade fondo predeterminada est_ en Encendido. Para que
esta funci6n sea posible, los archivos MP3 y otros archivos de fetes deben
estar en la misma carpeta del dispositivo de memoria MSC.
Pulse el botdn INFO durante "Secuencia" para establecer laopci6n (Veiocidad de
secuencia, MQsicade rondo, Config. mOsica fondo, Lista).
Pulse los botones A o _r para seteccionar {a opci6n y pulse el botdn ENTER.
• Despues de configurada la opci6n pulse et bot6n ENTER para realizar el cambio

Uso del men=3durante el visionado automatico
Velocidad de secuencia:
Permite seleccionar la velocidad de presentaci6n del visionado autom&tico.
Puede seleccionar Lenta, Normal o R&pida.
Meaica de fondo:
Permite reproducir un archivo MP3 durante el visionado automatico.
Puede elegir que Music (MOsica) est6 "Enc." o en "Apag."
Config. mesica fondo:
La informaci6n del archivo guardado se muestra como una carpeta o un archivo
MP3.
• Seleccione Config. m0sica rondo y pulse el bot6n ENTER,
Seleccione una carpeta para la m0sica de rondo mediante los botones A o V'
y pulse el bot6n ENTER. La carpeta seleccionada aparecer_ marcada con _.
• Pulse de nuevo el bot6n MENU para volver a la pantalla Secuencia.
Se reproduce la m0sica de rondo seleccionada.
_Si M_sica de fondo est_ en Apagado, aunque haya estabtecido Config. m_sica
rondo, 6sta no se reproducir_.
Lista:
La informaci6n del archivo guardado se muestra como una carpeta o un archivo
JPEG.
Para salir del modo WISELINK, pulse el bot6n WISELINK del mando a distancia.

Icono de informacion de la funcion Visionado automatico A arece en la arte su erior iz uierda
Icono OSD actual Funcion
(Foto) Secuencia Visionado automatico de fotos en curso.
Se puede hacer una pausa en la presentaci6n yen
la reproducci6n de mQsica pulsando el
bot6n PLAY/PAUSE _|1 del mando a distancia
Foto Pausa durante la presentaci6n,
Para reanudar el visionado automatico, pulse de
nuevo el bot6n PLAY/PAUSE_|! del distancia.
Con el bot6n de direcci6n (derecha) del mando a
Ira la foto siguiente distancia se puede desplazar a la foto siguiente.
Con el bot6n de direcci6n (izquierda) del mando a
Ira la foto anterior distancia se puede desplazar a la foto anterior.
>_ Cuando se seiecciona un archivo de fotos, la informaci6n de 6ste aparece en la parte izquierda de la pantalia del televisor,
asi como la resoluci6n, la fecha de modificaci6n yet orden det archivo en este directorio (pot ejemplo, 10de 15).
resoluci6n
fecha de modificaci6n
este directodo

Gir=....._o
1. Complete Steps 1 to 3 of"Uso del menO WISELINK".
(Consulte la pagina 65)
2. Pulse los botones 4 o !_ para desplazarse a 'Photo" y pulse el bot6n ENTER.
La informaci6n del archivo guardado se muestra como una carpeta o un archivo.
Pulse los botones A, T, 4 y 1_para seleccionar un archivo y pulse el bot6n
ENTER.
Si se pulsa et bot6n sobre la miniatura de una foto, 6sta se muestra en pantalla
completa.
4. Pulse el bot6n INFO para ver las opciones (Secuencia, Girar, Zoom, Lista).
Pulse los botones A o T para seleccionar "Girar" y pulse el bot6n ENTER.
• El bot6n INFO, la opci6n Girar y Enter se deben pulsar cada vez que desee girar
la imagen. Pot ejempio, de 90 a 180 grados.
Para girar unafete, pulse el bot6n INFO para abrir la ventana de opciones, seieccione
la opci6n "Girar" y pulse el bot6n ENTER.
Siempre que haga esto, la foto de la pantalla girard. (90°, 180°, 270°, 0°)
Para saIir det mode WtSELtNK pulse el bot6n WISELINK det mando a distancia.
El archivo girado nose guarda.
>- La opci6n Zoom/Secuencia est_ desactivada si se ha seleccionado la opci6n Girar.
>- Las imagenes mayores que 1280 X720 no se admiten.
Icono de informaci6n de la funci6n Giro (Aparece en la parte superior izquierda
de la pantalla).
Icon OSD actual
Girar (90°)
Girar (180 °)
Girar (270 °)
Girar (0°)
Funcion
Asi gira una foto 90 grados
Asi gira una foto 180 grados
Asi gira una foto 270 grados
Asi gira una foto a su estado original

Am.pliacion de imaaen
1. Completa los pasos 1 al 3 de "Uso del menO WISELINK". (Consulte la pagina
65)
2. Pulse los botones -,_o I_-para desplazarse a "Photo" y pulse el bot6n ENTER.
La informaci6n del archivo guardado se muestra como una carpeta o un archivo.
Pulse los botones A, I', 4 y 1_para seleccionar un archivo y pulse el bot6n
ENTER.
Si se pulsa et bot6n sobre la miniatura de una foto, 6sta se muestra en pantalia
completa.
Pulse el bot6n INFO para ver las opciones (Secuencia, Girar, Zoom, List).
Pulse tos botones A o v para seteccionar "Zoom" y,a continuaci6n, pulse el
bot6n ENTER.
La imagen de la foto aumentada aparece en la pantaila.
Para aumentar la foto en pantaIia pulse el bot6n INFO para abrir la ventana
Opciones, seleccione laopci6n 'Zoom" y pulse el bot6n ENTER.
Siempre que haga esto, tas siguientes opciones de zoom se apiicar_n
secuenciaImente.
• Etbot6n INFO, la opci6n Girar y Enter se deben pulsar cada vez que desee
ampliar ia imagen.
Per ejempio, de x 2 a x4s.
• Zoom(x 2): Aumenta dos veces la fete.
• Zoom(x 4): Aumenta cuatro veces la fete.
• Zoom(x 1): RestabIece la foto a su tamale original.
Para despiazarse a pan panor_mica arriba/abajo/derecha/izquierda pulse los
botones A, _', 4 y _,.
>- Las im_genes con una resoiuci6n superior a 1280 X 720 no se admiten.
Para saIir det mode WtSELtNK, pulse el bot6n WISELINK det mando a distancia.

IconodeinformaciondelafuncionZoom_A areceenla artesu erioriz uierdadela antalla.
Icono OSD actual Funcion
Zoom (x 2) Aumenta dos veces la foto.
Zoom (x 4) Aumenta cuatro veces la foto.
Zoom (x 1) Restablece una foto a su tama_o original.
Panoramica abajo Desplaza el encuadre hacia abajo para ver la parte
inferior de una foto ampliada.
Panoramica arriba Desplaza el encuadre hacia arriba para ver la parte
superior de una foto ampliada.
Panoramica derecha Desplaza el encuadre hacia la derecha para ver la
parte derecha de una foto ampliada.
Panoramica izquierda Desplaza el encuadre hacia la izquierda para ver la
parte izquierda de una foto ampliada.
Panoramica abajo Desplaza el encuadre a la parte inferior de una foto
(FINAL) ampliada.
Panoramica arriba Desplaza el encuadre a la parte superior de una
(FINAL) foto ampliada.
Panoramica derecha Desplaza el encuadre a la parte mas a la derecha
(FINAL) de una foto ampliada.
Panoramica izquierda Desplaza el encuadre a la parte mas a la izquierda
(FINAL) de una foto ampliada.
> La opci6n Girar/Secuencia est_ desactivada si se ha seleccionado la opci6n Zoom.

Uso de la lista MP3
El men_ muestra tosarchivos MP3 que se encuentran entre los achivos guardados en un dispositivo de memoria MSC.
1. Completa los pasos 1 al 3 de "Uso del menO WISELINK".
(Consulte la p&gina 65)
2. Pulse los botones 4 o i_ para desplazarse a "Music" y pulse el bot6n ENTER.
La informad6n del archivo guardado se muestra como una carpeta o un archivo.
3.
4.
Pulse los botones h. o T para seteccionar un archivo y pulse el bot6n ENTER
button.
Para seleccionar uno o todos los archivos pulse el bot6n INFO para visualizar
los menOsde MQsica. Pulse el bot6n ENTER para seIeccionar "Reprod", "Music
Repeat", o "Cancel the selected file".
• Si se pulsa et bot6n ENTER sobre un icono de nota musical, inmediatamente se
reproduce el archivo de mOsica.
• Si desea vet los archivos que contiene una carpeta pulse el bot6n ENTER sobre
el icono de la carpeta.
Para seleccionar un archivo en la p_gina siguiente, pulse los botones
REW44 o FFi_i_ para desplazarse a ia p_gina siguiente.
Para detener un archivo MP3 durante la reproducci6n, pulse el bot6n
PLAY/PAUSE_H. Pulse et bot6n STOP para salir del modo Reproducir.
Para salir dei modo WtSELtNK pulse et bot6n WlSELINK dei mando a distancia.
:_ Este menQs61omuestra archivos con la extensi6n .rap3. Los archivos con
otras extensiones no se muestran, aunque se hayan guardado en el mismo
dispositivo USB.
>- El archivo seleccionado se visuatiza en ia parte superior con su tiempo de
reproducci6n.
:_ Para ajustar el voiumen de la mOsica, pulse los botones VOL+ oVOL- dei
mando a distancia. Para silenciar el sonido, pulse et bot6n MUTE det mando a
distancia.
La tecta FFi_i_ / REW,94 nofunciona durante ia reproducci6n.
Icono de carpeta
Musical note icon
Icono de desplazarse a
la carpeta anterior
Icono de informacion de la funcion M_sica (Aparece en la parte superior
izquierda de la pantalla).
Icono OSD actual Funcion
(M_sica) Todos Cuando se reproducen todos los archivos de
mQsica.
(MQsica) Uno Cuando se reproduce un archivo de mOsica.
(MtJsica) Reproducir/ Cuando se pulsa el bot6n PLAY/PAUSE_'-Ul del
Pausa mando a distancia mientras se reproduce la
mQsica. La mQsica se detiene y aparece la palabra
'Reproducir' en la parte superior de la pantalla.
(M_sica) Detener Cuando se pulsa el bot6n STOPm del mando a
distancia cuando se ha detenido la mt3sica. La
mQsica se reanuda y aparece la palabra 'Detener'
en la parte superior de la pantalla.

Repeticion de rnQsica
1. Completa los pasos 1 al 3 de "Uso del menO WISELINK" (Consulte la p&gina
65).
2. Pulse los botones 4 o 1_para desplazarse a 'MOsica" y pulse el bot6n ENTER.
La informaci6n del archivo guardado se muestra como una carpeta o un archivo.
Pulse tos botones _t.o T para seleccionar unarchivo y pulse el bot6n ENTER.
Para seleccionar todos los archives o uno solo, pulse et bot6n INFO para vet los
men0s de M0sica.
Pulse el bot6n ENTER para seieccionar "Reproducir", "Repetici6n de m0sica", o
"Cancel the selected file".
Pulse el bot6n ENTER para seleccionar "Music Repeat".
SeIeccione para reproducir repetidamente todos los archivos MP3 de la
carpeta actual.
Puede seleccionar Activado o Desactivado.
• Enc.(Encendido): Reproduce un archivo de m0sica (o todos) repetidamente.
• Apag.(Apagado): Canceta la reproducci6n repetitiva de archives de m0sica.
Para salir det modo WtSELtNK pulse el bot6n WISELINK en et mando a
distancia.

Uso dei men_ de configuracion
Configuraci6n muestra at usuario ia configuraci6n del men_ WtSELtNK.
1. Completa los pasos 1 al 3 de "Uso del men0 WISELINK".
(Consulte la p&gina 68)
2. Pulse los botones 4 o _ para desplazarse a "Setup" y, a continuad6n, pulse el
bot6n ENTER.
3. Pulse los botones A o _r para seleccionar un archivo y pulse et bot6n ENTER.
4. Pulse los botones A o _r para seteccionar la opci6n y pulse el bot6n ENTER.
ContinQa...

VeJocidad de secuencia:
Permite seleccionar la velocidad de presentaci6n del visionado autom_tico.
Puede seleccionar Lenta, Normal o Rapida.
M_sica de rondo:
Se selecciona para determinar si se desea reproducir un archivo MP3 durante el
visionado autom_tico.
Puede seleccionar MOsica eric. o MOsica apag..
Config. mesica rondo:
Puede seleccionar mOsica de rondo para reproducir durante un visionado
autom&tico. Tambi6n puede seleccionar la mOsica de rondo mientras hay un
visionado automatico en ejecuci6n si pulsa el bot6n INFO y selecciona el menO
"Configuraci6n de la mOsica de rondo".
Repetir M_sica:
Seleccione para reproducir repetidamente todos los archivos MP3 de la carpeta
actual.
Puede seleccionar Encendido o Apagado.
Encendido: _ (MOsica) Todos, _ (MOsica) Uno
Apagado: _ (MOsica) Todos, _ (MOsica) Uno
Salvapantallas:
Seleccione para configurar el tiempo de espera necesario para que se ejecute el
salvapantallas. El salvapantallas aparecera si no se pulsa ningOn
bot6n durante 1, 3 o 5 minutos.
Para salir del modo WISELINK, pulse el bot6n WISELINK del mando a distancia.

i_Qu_ es Anynet?
Anynet+ es un sistema de red deAV que proporciona a los usuarios una senciila interfazAV mediante el control de los
dispositivos de AV conectados a trav6s det menQAnynet+ cuando se hanconectado dispositivos de AV de Samsung Electronics.
Conexion de dispositivos Anynet +
El sistema Anynet+ s61oadmire dispositivos de AV compatibles con Anynet+.
Compruebe si el dispositivo de AV que va a conectar aItelevisor Itevala marca Anynet+.
Para conectar directamente al televisor
Panel lateral del televisor Dispositivo
............................ Anynet + 1
Dispositivo Dispositivo
Anynet + 2 Anynet + 3
Conecte las tomas HDMI
1], [HDMI 2] o [HDMI 3] del
televisor y la toma HDMI
OUT del dispositivo Anynet+
correspondiente mediante el
cable HDMt.
To connect to Home Theater
Panel lateral del televisor
Cable 6price
Dispositivo Dispositivo
Anynet + 1 Anynet + 2
¢
_able HDMI1.3
Dispositivo
Cine en casa Anynet+ 3
CableHDMI1.3
1. Conecte las tomas [HDMt
1], [HDMI 2] o [HDMt 3]
del televisor y la toma
HDMI OUT del dispositivo
Anynet+ correspondiente
mediante el cable HDMt.
using the HDMt cable.
2. Conecte la toma HDMI
INdel sistema cine en
casa y ta toma HDMI OUT
det dispositivo Anynet+
correspondiente mediante
el cable HDMt.
:_ Conecte s61oel cable 6ptico entre la toma [Digital Audio Out (Optical)] dettelevisor y la toma Digital Audio input del receptor.
:_ Conecte s61oun receptor.
> Puede escuchar el sonido de5.1 canales a trav6s de tos aitavoces del sistema cine en casa. De Iocontrario, s61opodra
escuchar sonido est6reo de 2 canales. Debe conectar correctamente la toma Digital Audio tN (Optical) detsistema de cine
en casa y el televisor para escuchar elsonido del televisor a trav6s dei sistema de cine en casa. Sin embargo, no se puede
escuchar el sonido de]grabador BD que se envia aI sistema de cine en casa a trav6s dettelevisor en sonido de 5.1 canales
ya queet televisor s61ocuenta con una salida de sonido est6reo de 2 canates. Consulte et manual det sistema de cine en
casa.
>- Puede conectar un dispositivo Anynet+ mediante et cable HDMt 1.3.Algunos cables HDMt pueden no admitir las funciones
Anynet+.
> Anynet+ funciona cuando el dispositivo de AV que admite Anynet+ se encuentra en estado de espera o de encendido.
Anynet+ admire hasta 12dispositivos deAV en total.

Configuracion de Anynet +
Par_metros para usar las funciones Anynet+.
Uso de la funcion Anynet+
1. Pulse ei bot6n Anynet+.
Pulse los botones A o V para seleccionar Configuraci6n y a continuaci6n,
pulse el bot6n ENTER.
2. Pulse el bot6n ENTER para seteccionar Control HDMt y a continuaci6n, pulse et
bot6n ENTER..
3_ Pulse Dosbotones A o _r para seleccionar Activado y a continuaci6n, pulse et bot6n
ENTER.
Lafunci6n Control HDMI est_ activada.
Si setecciona Desactivado, Control HDMt se desactiva.
A a ado automatico de un dis_vnet+ cuando el televisor esta aa_3gadodo
2. Pulse los botones A o T para seieccionar Desact. auto.; a continuaci6n pulse et
bot6n ENTER.
3. Pulse los botones A o _' para seleccionar Siy a continuaci6n el bot6n ENTER.
>- La funci6n Desact. auto. se activa.
>- Si seiecciona No se canceta la funci6n de apagado autom_tico.
Pulse el bot6n EXIT para satir.
>* Para usar la funci6n Anynet+, el valor Seleccionar dispositivo del mando a distancia
debe ajustarse en TV.
_-- Si estabiece Auto Turn Off (Desact. auto) en Si, los dispositivos externos conectados tambi6n se desactivan cuando se apaga
el televisor. Sin embargo, si el dispositivo est_ grabando es posible que nose apague.
>- Cuando la funci6n Anynet+ (HDMt-CEC) est_ desactivada, todas las operaciones retacionadas con Anynet+ se desactivan.
B squeda,, cambio de dispositivos Anynet +
1. Pulse el bot6n Anynet+.
>- Se muestran todos los dispositivos Anynet+ conectados altelevisor.
2,
3.
Pulse los botones h, o T para seieccionar el dispositivo que desee y pulse el bot6n
ENTER.
Se cambia at dispositivo seieccionado.
Si noencuentra el dispositivo que desea, pulse los botones A o _r para seleccionar
Searching Connections (Buscando conexiones) y pulse el bot6n ENTER.
Aparece el mensaje Configuring Anynet+ connection... (Configurando conexi6n
Anynet+_.). Cuando finatiza ta bQsquedade dispositivos, los dispositivos conectados
aparecen en el menQAnynet+.
El cambio a los dispositivos seleccionados puede tardar unos 2 minutos. No se puede
canceiar la operaci6n de cambio de dispositivo mientras 6sta se esta efectuando.
El tiempo necesario para la bi_squedade dispositivos depende de la cantidad de
dispositivos conectados.
Cuando finaliza {a b0squeda de dispositivos no se muestra el nQmerode dispositivos
encontrados.
Aunque el televisor explora autom_ticamente los dispositivos cuando se enciende con el bot6n POWER, los dispositivos
conectados cuando el televisor est_ encendido o en algunas circunstancias determinadas no aparecen en la lista de
dispositivos. Pot consiguiente, debeseleccionar eI menQBuscar conexiones para buscar los dispositivos.
Si ha seleccionado el modo de entrada externa pulsando el bot6n SOURCE, no podr_ usar la funci6n Anynet+. AsegOresede
cambiar al dispositivo Anynet+ mediante et bot6n Anynet+.

Men_ An net+
El menOAnynet+ cambia segOnel tipo y el estado de los dispositivos Anynet+ conectados aI televisor.
Men_lAnynet + Descripci6n
Ver TV Cambia de Anynet+ aI modo de emisi6n de TV.
Men_ (Nombre_dispositivo) Muestra el menOdei dispositivo conectado.
Ejemplo: Cuando hay un grabador de DVD conectado, aparece el menQde titulos det
grabador de DVD.
Funcionamiento Muestra el menOde control de reproducci6n del dispositivo conectado.
(Nombre_dispositivo) Ejemplo: Cuando hay un grabador de DVD conectado, aparece et menQde control de
reproducci6n dei grabador de DVD.
Conectar (Nombre_dispositivo) El televisor est_ conectado al dispositivo correspondiente.
Receptor LasaIida de sonido se efectOaa trav6s dei receptor.
Configuracion Permite ajustar el entorno de use de Anynet+.
Botones del mando a distancia del televisor disponibles en el modo
Tipo de dispositivo ..............
Dispositivo Anynet +
Estado de funcionamiento
Despu_s de cambiar al dispositivo, cuando et men_ de 6ste
aparece en la pantaIla.
Despu6s de cambiar al dispositivo, mientras se reproduce
un archive
Botones disponibles
Botones num6ricos
A./T/4/_/ENTER
Botones de colores
Bot6n EXtT
4 _ (BOsqueda atr_s)
1__ (Bt_squedaadelante)
s (Parar)
l_la(Reproducir/Pausa)
Dispositivo con sintonizador Despu6s de cambiar al dispositivo, mientras se ve un Botone CH A/_'
incorporado programa de TV
Botones VOL+NOL-
Dispositivo de audio Cuando Receptor est_ activado
Bot6n MUTE
Anyview2 Cuando se vela TV l_la(Reproducir/Pausa)
:_ Lafunci6n Anynet+ s6to funciona cuando el mando a distancia est_ ajustado en TV.
El bot6n REC s6Io funciona en el estado Watch TV (Vet TV).
Los dispositivos Anynet+ no se pueden controtar con los botones del lateraI del TV.
Los dispositivos Anynet+ s61ose pueden controtar mediante el mando a distancia del televisor.
:_ El mando a distancia del televisor puede no funcionar en determinadas circunstancias. En ese case, vuetva a seteccionar el
dispositivo Anynet+.
:_ Las funciones deAnynet+ nofuncionan entos productos de otros fabricantes.
Enet mode Anynet+, los botones de coIores puede que nofuncionen correctamente.
Grabacion
El grabador permite efectuar una grabaci6n de un programa de televisi6n.
Pulse el bot6n REC.
Comienza la grabaci6n. (S61ocuando est_ conectado el dispositivo de grabaci6n Anynet+ activado.)
>- El programa de TV actual se graba en et estado Vet TV. Si est_ viendo un video desde otto dispositivo, se graba el video de
6ste.

Escucha a trav_s de un receptor
Se puede escuchar sonido a trav6s de un receptor en lugar de hacerlo mediante el attavoz dei TV.
1. Pulse el bot6n Anynet+.
Pulse los botones A o _' para seleccionar Receptor y, a continuaci6n pulse el bot6n ENTER.
2. Pulse los botones A.o T para seleccionar Activado y a continuaci6n, pulse el bot6n ENTER.
Ahora podr_ escuchar el sonido a trav6s det receptor.
3. Pulse et bot6n EXIT para salir.
:>- Cuando et receptor esta estabtecido enActivado, es posible escuchar elsonido dei TV a trav6s dei
receptor de 2 canales.
>- Si el receptor es exclusicamente para elsistema de cine en casa (que s6to admite audio), puede que no aparezca en la lista
de dispositivos.
>- El receptor s6to funciona una vez se han conectado adecuadamente las tomas 6pticas del TV y el receptor.
:_ En case de que el contenido presente aIgQnprobtema de copyright es posibte que no se escuche correctamente a trav6s del
receptor.
Compruebe estos puntos antes de solicitar servicio t cnico
Sintoma Soluci6n
Anynet+ no funciona. • Compruebe si el dispositivo es undispositivo Anynet+. El sistema Anynet+ s61o
admite dispositivos Anynet+.
m Conecte s6to un receptor.
m Compruebe si el cable de alimentaci6n deAnynet+ est_ debidamente conectado.
m Compruebe ias conexiones de los cables de Video/Audio/HDMt 1.3 dei dispositivo
Anynet+.
m Compruebe si el mando a distancia dettelevisor esta en modo TV.
m Compruebe si es un mando a distancia exclusivo paraAnynet+.
m Anynet+ nofunciona en algunas situaciones (bQsquedade canales)
Deseo iniciar Anynet +. m Compruebe si el dispositivo Anynet+ est_ debidamente conectado aITV y si la
opci6n Controt HDMt del menOConfiguraci6n esta estabtecida enActivado.
m Pulse et bot6n TV del mando adistancia del televisor para cambiar a TV.A
continuaci6n pulse el + menOAnynet+ y seteccionarbot6n Anynet para visuaIizar el
et menOque desee.
Deseo salir de Anynet +. m Seieccione Ver TV enel menOAnynet+.
m Pulse el bot6n SOURCE del mando a distancia del televisor y seieccione un
dispositivo que no seaAnynet+.
m Pulse CH, CH LIST, PRE-CH o FAV.CHpara cambiar aI modo TV.(Tenga en cuenta
que el bot6n de canal s6to funciona cuando no hay ningQndispositivo Anynet+ con
sintonizador incorporado conectado.)
En la pantalla aparece el mensaje m Et mando a distancia no se puedeutilizar cuando se est_ configurando Anynet+ o
Conectando a un dispositivo cambiando a un mode de visuaIizaci6n.
Anynet +.... m Utilice el mando a distancia cuando haya terminado la configuraci6n deAnynet+ o el
cambio aI mode de visualizaci6n.
El dispositivo Anynet + no funciona. No se puede usar la funci6n de reproducci6n mientras se efectOa una bOsqueda
automatica de canales.
El dispositivo conectado no se m Compruebe si el dispositivo admite tasfunciones Anynet+.
muestra, m Compruebe si el cable HDMt 1.3est_ debidamente conectado.
El dispositivo conectado no se m Compruebe si <Anynet+ (HDMt-CEC)> est_ estabtecido en <Act.> en etmenOde
muestra, configuraci6n deAnynet+.
m Vuelva a efectuar una bOsquedade dispositivos Anynet+.
m S6Io + el cable HDMt 1.3.Aigunospuede conectar un dispositivo Anynet mediante
cables HDMt pueden no admitir las funciones Anynet+.

Identificaci6n de problemas
Si parece qua el TV no funciona correctamente, en primer lugar compruebe esta lista de posibles problemas y soluciones.
Si no funciona ninguno de estos consejos, llama al centre de servicio mas cercano.
Imagen deficiente, tntente sintonizar otto canal.
Ajuste la antena.
Catidad de sonido deficientel tntente sintonizar otto canal.
Ajuste la antena.
No hay imagen 0 s0nidol tntente sintonizar otto canal.
Pulse el bot6n SOURCE.
Compruebe qua el TV est6 conectado.
No Sepercibe ningOn sonid0, Primate, compruebe el volumen de los aparatos conectados aI TV (perejemplo, un
o muy bajo. con eI votumen at receptor digital, DTV, DVD, receptor de cable, VCR, etc.). Acontinuacidn, ajuste el
maxtmo, votumen del TV segQnsea m_s conveniente.
ha iraagen rueda raft!ca!manta. Compruebe fades {as conexiones de cable.
E!TVfunciona de forma ir_-_gu!a_- Desconecte el TV durante 30 segundos y, despu6s, intente qua funcione otra vez.
Anomalias dei mando a Remptace Ins piles del mando a distancia.
Limpie el borde superior del mando a distancia (ventana de transmisi6n).
Compruebe los terminales de la pile.
Measaje _'Verificarcable se_a!". Compruebe qua el cable de se_at est6 conectado firmemente con Ins fuentes dei PC.
Mensaje 'Mode no compatibW'. Compruebe la resotuci6n m_xima y la frecuencia det adaptador de video.
Probtema en pantalta con ta Compruebe la potencia de la se_at digital y la antena de entrada.
emisi6n digitat.
La imagen es demasiade c!ara O i Aiusie Lum[nos Y €onirasie ......................................................................................................................................................................................................................................
demasiado oscura. Ajuste la funci6n Fine.
Barras negras en Ia pantatla. Compruebe qua la emisi6n qua se est_ recibiendo es de alia definici6n (HD).
Los canaIas .D an ocasiones am,ten una programaci6n an SD (definici6n est_ndar)qua
Pare eliminar tas barras configure el decodificador de cable o sat61iteen los modes
puade dar lugar ala aparicidn de barras negras.
Las im_genes tienen untone Compruebe qua los cables de los componentes est6n conectados en los terminates
rojo-verde o rosa. correctos.
Los Subtitulos pare sordos no Cuando se usa un decodificador de cable o sat61ite,la opci6n de los subtitulos pare
funcionan, sordos se debe configurar en el decodificador, no en el televisor.
Quiz_s se necesite actuatizar el firmware. Pdngase en contacto con el proveedor de
cable.
.........................................................: ........................ ** t
Se van im_genes superpuestas Quiz_s haya problemas de compatibifidad con el decodificador de cable.
Intente conectarse a trav_s de los cables de los componentes.

Problema
Unas barras honzontales
3arDaaean.[lemelan u oscitan en
a imagen.
Unas barras vertlcales
3arpaaean, [_embtanu oscitan en
a _rnagen.
LaoantaIla esta negra y
el indicador tuminoso ae
allmentacion parpaaea
cons[amememe.
La_magenno es estable y
3arece vibrar cuando se conec[a
et oraenaaor en ta en[raaa ae
PC.
Laimagea no es[a cen[raaa en
a oantatta,
Si se muestra una _magen
nmov auran[e un periodo de
t{err3o protongado, pueaen
aparecer lmagenes residuales c
_orrosas.
Ajuste la funci6n Grueso y despu6s ajuste la funci6n Fino.
Ajuste la funci6n Grueso y despu6s ajuste la funci6n Fino.
Compruebe to siguiente en el equipo: Alimentaci6n, Cable de seSat.
El TV utiliza su sistema de gesti6n de energia.
Mueva el rat6n del equipo o pulse una tecla del teclado.
Si el ajuste no es correcto use la utitidad del ordenador para cambiar los ajustes de
pantalla.
>* El televisor admire fanciones de visualizaci6n multiscan dentro del siguiente range de
frecuencias:
Frecuencia horizontal (kHz) 30~60
Frecuencia vertical (Hz) 60~75
indice de barddo maximo (60 Hz) 1920 x 1080
Ajuste la posici6n horizontal y vertical.
La posici6n de la pantalla se debe ajustar respecto a ta fuente de salida (porejemplo, STB)
con una seSaI digital.
Cuando tenga que dejar el monitor sin utilizar pot un periodo de tiempo prolongado, ajuste
la configuraci6n de mode que el monitor entre automaticamente en modo de ahorro de
energia o active el protector de pantalla para visuaIizar im_genes m6viles.
El panel LCD TFT utiliza un panel que consta de muchos pixeles de infimo tama_o (3,147,264) que requieren de una tec-
nologia altamente sofisticada para su fabricaci6n. Sin embargo, pueden haber unos pocos pixeles poco iluminados u oscuros
en pantalla. Estos pixeles no suponen una anomalia en el funcionamiento del producto.

Instalaci6n del soporte
....... 1-
<2> <3>
1. Coloque hacia abajo el TV sobre un paso suave o un almohad6n sobre una mesa.
2. Coloque el soporte en el orificio de la parte inferior del televisor.
3. Inserte el tornillo en el orificio indicado y apri6telo.
Desconexi6n del soporte
<2> <3> <4>
1. Coloque hacia abajo el TV sobre un paso suave o un almohad6n sobre una mesa.
2. Desmonte los 4 tornillos de la parte posterior del TV.
3. Separe el soporte del TV.
4. Cubra con una tapa el orificio inferior.

Ajuste de montaje en la pared (se vende pot separado)
Tras instalar el montaje en la pared, puede ajustar facilrnente la posici6n del televi-
sor.
Acceso aI men_
1. Pulse el bot6n MENU para vet el menO.
Pulse los botones A o v para seleccionar "Configuraci6n" y a continuaci6n,
pulse el bot6n ENTER.
2. Pulse los botones A o _' para seieccionar "Ajuste dei montaje mural" y.
a continuaci6n, pulse el bot6n ENTER.
3.Ajuste la posici6n deseada mediante los botones h.,_r,4 o I,..
4. Pulse el bot6n EXIT para salir.
>- pulsa un bot6n de flecha sin que haya aparecido un OSD en la pantatia det televisor,
aparece la pantaIta de ajuste.
> Si desconecta la alimentaci6n, el televisor vuetve a la posici6n de instalaci6n inicial.
Cuando conecta la alimentaci6n, el televisor vueive a la Qltimaposici6n ajustada
Uso del bot6n del mando a distancia
Boton Funci6n
(_<::_) Ajuste del _ngulo del Hacia arriba hacia abajo, a la derecha a la
montaje en la pared izquierda
(_ Restablecer Vuetve la inicial de instataci6n
a posici6n
Memoriza 3 posiciones con los botones rojo, verde
Memorizaci6n de ta y amarillo.
_ _ posici6n y movimiento a
la posici6n memorizada Vuelve a {a posici6n memorizada mediante estos 3
botones de color.
>- Para la instalaci6n consulte el manual de instalaci6n proporcionado.
Para la instalaci6n del producto, asi como la instalaci6n y movimiento del montaje en la pared,
consulte a una empresa especializada en instalaciones.
>_ Esta instaIaci6n se debe usar at colocar el equipo de montaje en una pared.
Para co{ocarto en otros materiaIes de construcci6n, p6ngase en contacto con et distribuidor
m_s cercano.

Especificaciones dei equipo de montaje en la pared (VESA)
AI colocarlo en otros materiales de construcci6n, p6ngase en contacto con el distribuidor m_s cercano.
Familia de pro- p ] : i Especif Caciones VESA .....................
...........................................................................ug"""S............!AB ..............................................
23-26 200.100 M4.uo 4
Televisor LCD ................................................................................
46 ~ 52 600 *400
57 700 *400 M8 * L15 4
42 ~ 50 600 *400
Televisor PDP ..............................................................
63 No VESA M8 6
Se ofrecen las dimensiones est_ndar para los equipos de montaje en la pared, como se muestra en ta tabla anterior.
:_ Al adquirir eI equipo de montaje en la pared, tambi6n se distribuye un manual de instaIaci6n detaIlado ytodas tas piezas
necesarias para el montaje.
:_ No use tornilios con un tama_o superior at est_ndar, ya que pueden causar da_os en el interior del televisor.
El modelo de 63" no es compatible con las especificaciones VESA. Per ello, debe usar un equipo de montaje en la pared
exclusive para este modeio.

Uso del cierre antirrobo kensington
El bloqueo Kensington es un dispositivo que se usa para fijar fisicamente el sistema cuando se usa en un lugar pQblico.
El dispositivo de bloqueo debe adquidrse pot separado. La apadencia y el metodo de bloqueo pueden difedr de la ilustracidn segQn los
fabricantes. Consulte el manual proporcionado con el bloqueo Kensington para usado correctamente.
<Opcional>
La ubicaci6n del "Bloqueo Kensington" puede variar segQn el modelo
1. Inserte el dispositivo de bloqueo en la ranura Kensington del TV LCD (Figura 1) y girelo en el sentido del bloqueo (Figura 2).
2. Conecte el cable del bloqueo Kensington.
3. Fije el bloqueo Kensington a un mueble o a un objeto pesado que no se mueva.

Especificaciones
Nombre del Modelo
TarnaSodepantalia(Diagonal)
Consume de energia
PC ResoJuci6n
Sonido
Satida
Dimensiones(Anx Prx All
Cuerpo enncmat
Con sopor[e
Peso
Con eIsopor_e
Despu6ssw plegarlabase
Factoresmedioambientales
TemDeraturadefunc_onam_emo
Humedadde_unc_onamiemo
Tempera[t,-aaeafmacenamiemo
Humedaddeaimacenamlento
Nombre del Modelo
TamaSodepantalla(Diagonal)
Consume de energia
PC Resoluci6n
40 pulg,
245 W
1920 x 1080 @ 60 Hz
IOWX 2
971 x 67.2 x 626 turn
38.2 X 3.4 X 24.7 putgadas
971 x 300 x 687 mm
38.2 X 11.8 X 27 pulgadas
21.1kg (46,52 Ibs)
17.8 kg (39.24 Ibs)
Entre 10 °C y 40 °C (50 °F a 104 °F)
Del 10% at 80 %, sin condensaci6n
Entre -20 °C y 45 °C (-4 °F a 113°F)
Del 5 % aI 95 %, sin condensaci6n
46 pulg.
265 W
1920 x 1080 @ 60 Hz
lOW X 2
1106 x 104.2 x 706 mm
43.5 X 4.1 X 27.8 putgadas
1106 x 326 x 768 mm mm
43.5 X 12.8 X 30.2 putgadas
29.6kg (65.26 ibs)
24.2kg (53.35 tbs)
Entre 10°C y40 °C (50 °F a 104 °F)
De110 % at80 %, sin condensaci6n
Entre -20 °C y 45 °C (-4 °F a 113 °F)
Del 5 % aI 95 %, sin condensaci6n
LN-T4065F , LN-T4665F LN-T5265F
40 pulg. 46 pulg. 52 pulg.
245W 265W 320W
1920 x 1080@60 Hz 1920x 1080@60 Hz 1920x 1080@60 Hz
......................................................................................................................+.............................................................................................................,...........................................................................................................
Sonido
Satida lOW X 2 lOW X 2 lOW X 2
DimenSiones(AnXPrXA])
Cuerpo principal 1040.7 x 97 x 615.4 mm 1175.8 x 114x 693.8 mm 1327 x 122 x 787.4 mm
40.9 X 3.8 X 24.2 putgadas 46.3 X 4.5 X 27.3pulgadas 52.2 X4.8 X 31 pulgadas
1040.7 x 290 x 671 mm 1175.8x 320 x 761.4 mm 1327 x 320 x 854 mm
40.9 X 11.4 X26.4 puigadas 46.3 X 12.6X 30 pulgadas 52.2 X 12.6 X 33.6 puigadas
Con etSOPorte 21.6kg (47,62 Ibs) 3O.8kg (67.90 Ibs) 37.1kg (81,79 tbs)
Despu6sswptegartabase 17.8kg (39.241bs) 25.5kg (56.211bs) 31.8kg (70.1Olbs)
Factores medioambientales
Temperaturadefuncionamiento Entre10°Cy40°C(50°Fa104°F) Entre10°Cy40°C(50°Fa104°F) Entre10°Cy40°C(50°Fa 104°F)
Humedaddefuncionamiento De110_oa180_o,sincondensaci6n De110%a180%,sincondensaci6n De110_oa180_o,sincondensaci6n
Temperaturadealmacenamiento Entre-20°Cy45°C(-4°Fa 113°F) Entre-20°Cy45°C(4 °Fa113°F) Entre-20°Cy45°C(-4°Fa113°F)
Humedaddealmacenamiento Del5%el95%,sincondensed6n Del5Yoel95Yo,sincondensaci6n Del5 Yoel95Yo,sincondensaci6n
Giro del soPorte .......
-20 ~ 20
> El dise_o y las especiflcaciones est&n sujetos a cambios sin previo aviso.
>- Este dispositivo es un aparato digital de la Clase B.
Para la fuente de alimentaci6n, consulte la etiqueta pegada al producto.

Contact SAMSUNG WORLD-WIDE
If you have any questions or comments relating to Samsung products, please contact the SAMSUNG
customer care center.
Contacte con SAMSUNG WORLD-WIDE
Si tlene alguna pregunta o comentario referente a nuestros productos, pot favor contacte con nuestro Servicio de
Atencion al Cliente.
Country Customer Care Center_ Web Site Address
Samsung Electronics Canada Inc, Customer
Service 55 Standish Court Mississauga,
Ontario L5R 4B2 Canada
CANADA 1-860-SAMSUNG (7267864) www samsung.com/ca
Samsung Electronique Canada Inc.,
Service a la Cfientele 55 Standish Cour_
Mississauga, Ontario L5R 4B2 Canada
Samsung Electronics America, Inc.
USA 1-866-SAMSUNG (7267864) www.samsung.com 105 Challenger Road
Ridgefield Park, NJ 07660-0511
BN68-01178A-00
-
 1
1
-
 2
2
-
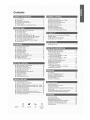 3
3
-
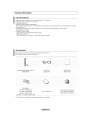 4
4
-
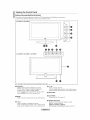 5
5
-
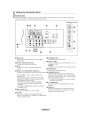 6
6
-
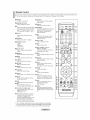 7
7
-
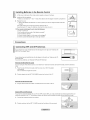 8
8
-
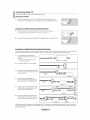 9
9
-
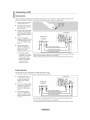 10
10
-
 11
11
-
 12
12
-
 13
13
-
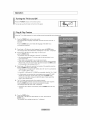 14
14
-
 15
15
-
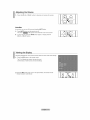 16
16
-
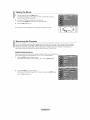 17
17
-
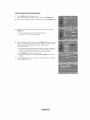 18
18
-
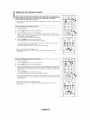 19
19
-
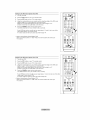 20
20
-
 21
21
-
 22
22
-
 23
23
-
 24
24
-
 25
25
-
 26
26
-
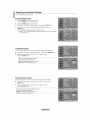 27
27
-
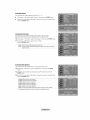 28
28
-
 29
29
-
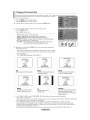 30
30
-
 31
31
-
 32
32
-
 33
33
-
 34
34
-
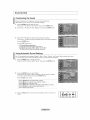 35
35
-
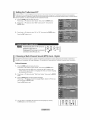 36
36
-
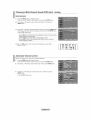 37
37
-
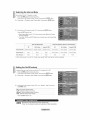 38
38
-
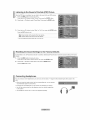 39
39
-
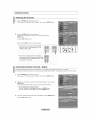 40
40
-
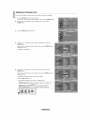 41
41
-
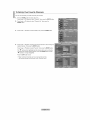 42
42
-
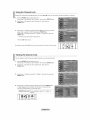 43
43
-
 44
44
-
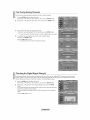 45
45
-
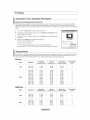 46
46
-
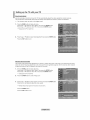 47
47
-
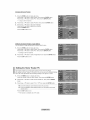 48
48
-
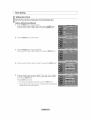 49
49
-
 50
50
-
 51
51
-
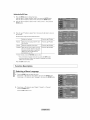 52
52
-
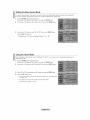 53
53
-
 54
54
-
 55
55
-
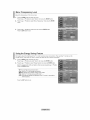 56
56
-
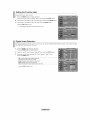 57
57
-
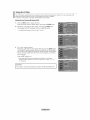 58
58
-
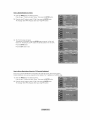 59
59
-
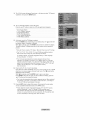 60
60
-
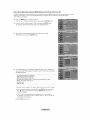 61
61
-
 62
62
-
 63
63
-
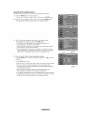 64
64
-
 65
65
-
 66
66
-
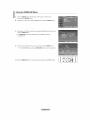 67
67
-
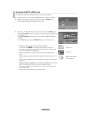 68
68
-
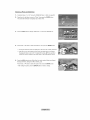 69
69
-
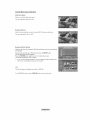 70
70
-
 71
71
-
 72
72
-
 73
73
-
 74
74
-
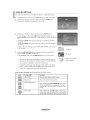 75
75
-
 76
76
-
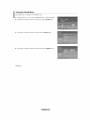 77
77
-
 78
78
-
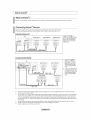 79
79
-
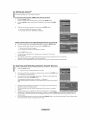 80
80
-
 81
81
-
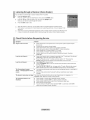 82
82
-
 83
83
-
 84
84
-
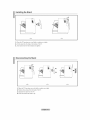 85
85
-
 86
86
-
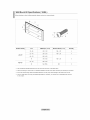 87
87
-
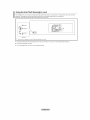 88
88
-
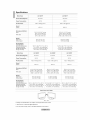 89
89
-
 90
90
-
 91
91
-
 92
92
-
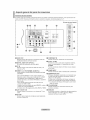 93
93
-
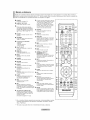 94
94
-
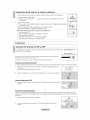 95
95
-
 96
96
-
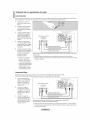 97
97
-
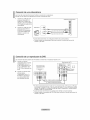 98
98
-
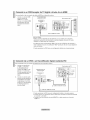 99
99
-
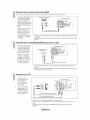 100
100
-
 101
101
-
 102
102
-
 103
103
-
 104
104
-
 105
105
-
 106
106
-
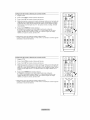 107
107
-
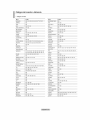 108
108
-
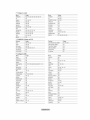 109
109
-
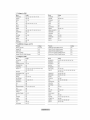 110
110
-
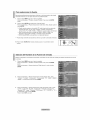 111
111
-
 112
112
-
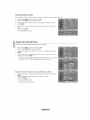 113
113
-
 114
114
-
 115
115
-
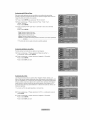 116
116
-
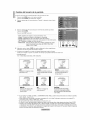 117
117
-
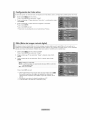 118
118
-
 119
119
-
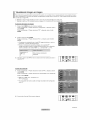 120
120
-
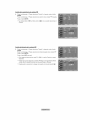 121
121
-
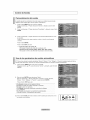 122
122
-
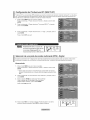 123
123
-
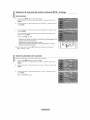 124
124
-
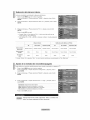 125
125
-
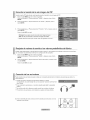 126
126
-
 127
127
-
 128
128
-
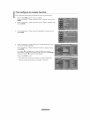 129
129
-
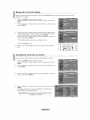 130
130
-
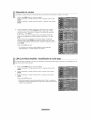 131
131
-
 132
132
-
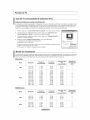 133
133
-
 134
134
-
 135
135
-
 136
136
-
 137
137
-
 138
138
-
 139
139
-
 140
140
-
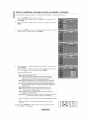 141
141
-
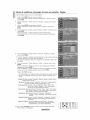 142
142
-
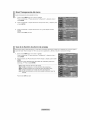 143
143
-
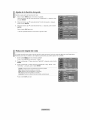 144
144
-
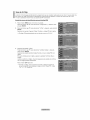 145
145
-
 146
146
-
 147
147
-
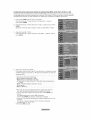 148
148
-
 149
149
-
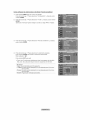 150
150
-
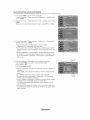 151
151
-
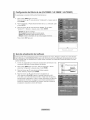 152
152
-
 153
153
-
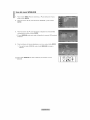 154
154
-
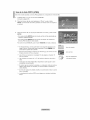 155
155
-
 156
156
-
 157
157
-
 158
158
-
 159
159
-
 160
160
-
 161
161
-
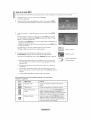 162
162
-
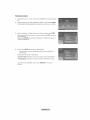 163
163
-
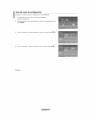 164
164
-
 165
165
-
 166
166
-
 167
167
-
 168
168
-
 169
169
-
 170
170
-
 171
171
-
 172
172
-
 173
173
-
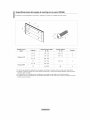 174
174
-
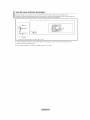 175
175
-
 176
176
-
 177
177


Samsung LN-T4061F Owner's Instructions Manual
- Categoría
- Televisores LCD
- Tipo
- Owner's Instructions Manual
- Este manual también es adecuado para
en otros idiomas
- English: Samsung LN-T4061F
Artículos relacionados
-
Samsung LN-T1954H Owner's Instructions Manual
-
-
-
-
-
-
-
-
-