Hitachi CM 4SB2 Handling Instructions Manual
- Categoría
- Herramientas eléctricas
- Tipo
- Handling Instructions Manual
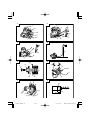
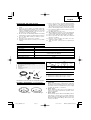
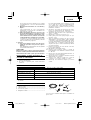
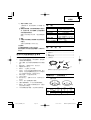
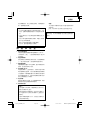
El Hitachi CM 4SB2 es una cortadora eléctrica diseñada para cortar y marcar concreto, varios tipos de piedras y azulejos. Con una potencia de entrada de 1320 W y una velocidad sin carga de 11500 rpm, puede realizar cortes de hasta 34 mm de profundidad con una rueda de diamante de 110 mm de diámetro externo y 1 mm de espesor. Incluye accesorios estándar como un tapón de agua, llave de tubo, llave inglesa, conector de goma y manguera de vinilo. También se pueden adquirir por separado ruedas de diamante de tipo A (secas) y tipo B (húmedas) de 106 mm y 110 mm de diámetro respectivamente.
El Hitachi CM 4SB2 es una cortadora eléctrica diseñada para cortar y marcar concreto, varios tipos de piedras y azulejos. Con una potencia de entrada de 1320 W y una velocidad sin carga de 11500 rpm, puede realizar cortes de hasta 34 mm de profundidad con una rueda de diamante de 110 mm de diámetro externo y 1 mm de espesor. Incluye accesorios estándar como un tapón de agua, llave de tubo, llave inglesa, conector de goma y manguera de vinilo. También se pueden adquirir por separado ruedas de diamante de tipo A (secas) y tipo B (húmedas) de 106 mm y 110 mm de diámetro respectivamente.


-
 1
1
-
 2
2
-
 3
3
-
 4
4
-
 5
5
-
 6
6
-
 7
7
-
 8
8
-
 9
9
-
 10
10
-
 11
11
-
 12
12
-
 13
13
-
 14
14
-
 15
15
-
 16
16
-
 17
17
-
 18
18
-
 19
19
-
 20
20


Hitachi CM 4SB2 Handling Instructions Manual
- Categoría
- Herramientas eléctricas
- Tipo
- Handling Instructions Manual
El Hitachi CM 4SB2 es una cortadora eléctrica diseñada para cortar y marcar concreto, varios tipos de piedras y azulejos. Con una potencia de entrada de 1320 W y una velocidad sin carga de 11500 rpm, puede realizar cortes de hasta 34 mm de profundidad con una rueda de diamante de 110 mm de diámetro externo y 1 mm de espesor. Incluye accesorios estándar como un tapón de agua, llave de tubo, llave inglesa, conector de goma y manguera de vinilo. También se pueden adquirir por separado ruedas de diamante de tipo A (secas) y tipo B (húmedas) de 106 mm y 110 mm de diámetro respectivamente.
en otros idiomas
- English: Hitachi CM 4SB2
Artículos relacionados
-
Hikoki CM4SB2 Manual de usuario
-
Hitachi CM4SB2 - 11.6 Amp Dry-Cut Masonry Circular Saw Manual de usuario
-
Hitachi CM5SB Manual de usuario
-
Hikoki H90SB Manual de usuario
-
Hitachi Koki CM 12Y Handling Instructions Manual
-
-
Hitachi CJ 110M Handling Instructions Manual
-
-