LG G Pad 8.0 4G Orange Guía del usuario
- Categoría
- Tabletas
- Tipo
- Guía del usuario
Este manual también es adecuado para


Manual de usuario
ESPAÑOL
• Laspantallasylasilustracionespuedenser
distintasalasqueveaenlatabletareal.
• Partedelcontenidodeestaguíapuede
noseraplicablealatableta,dependedel
softwareydelproveedordeservicios.Toda
lainformacióndeestedocumentopuede
cambiarsinprevioaviso.
• Estedispositivonoesadecuadopara
personasciegas,yaquecuentaconun
tecladodepantallatáctil.
• Copyright©2015LGElectronics,Inc.
Reservadostodoslosderechos.LGyel
logotipodeLGsonmarcascomerciales
registradasdeLGGroupylasentidades
relacionadas.Lasdemásmarcas
comercialessonpropiedaddesus
respectivospropietarios.
• Google™,GoogleMaps™,Gmail™,
YouTube™,Hangouts™yGooglePlay™son
marcascomercialesdeGoogle,Inc.

2
Acerca de este manual de usuario ................. 5
Acerca de este manual de usuario ....................5
Marcas comerciales .............................................6
DivX HD.................................................................6
Directrices para un uso seguro y eficaz ........ 8
Aviso importante .............................................19
Familiarizarse con el dispositivo ...................23
Descripción de la tableta ................................. 23
Cómo cargar su tableta .................................... 26
Optimización de la duración de la batería ..... 27
Para aumentar la duración de su batería........27
Para ver el nivel de carga de la batería ........... 28
Para supervisar y controlar qué está
haciendo uso de la batería...................................28
Instalación de la tarjeta SIM ............................ 28
Inserción de la tarjeta microSD .......................29
Extracción de la tarjeta microSD ....................30
Formateo de la tarjeta microSD ....................... 31
Bloqueo y desbloqueo de la pantalla ..............31
Encendido de la pantalla con la función
KnockON ..................................................................... 32
Desbloquear la pantalla con la función
Knock Code ............................................................... 33
Pantalla de inicio ............................................34
Sugerencias sobre la pantalla táctil ................ 34
Pulsar o tocar .............................................................34
Mantener pulsado .................................................... 34
Arrastrar .......................................................................34
Deslizamiento o desplazamiento ....................... 35
Doble pulsación ........................................................ 35
Juntar y separar los dedos para ajustar el
tamaño de la imagen .............................................35
Girar la pantalla ......................................................... 35
Pantalla de inicio ............................................... 35
Personalización de la pantalla de inicio ...........37
Apertura, cambio y detención de
aplicaciones ........................................................37
Utilización de Ventana doble ........................... 38
Personalización de los iconos de
aplicaciones en la pantalla de inicio ............... 39
Acceso rápido ....................................................40
Notificaciones ..................................................... 41
Cómo acceder a las notificaciones .................. 42
Ajustes rápidos en el panel de
notificaciones ............................................................. 42
Para reorganizar las opciones de Ajustes
rápidos en el panel de notificaciones .............. 43
Aplicaciones QSlide en el panel de
notificaciones ............................................................. 43
Uso de las aplicaciones QSlide ..........................43
Iconos de notificación de la barra de
estado ........................................................................... 43
Varios usuarios .................................................. 45
QSlide ................................................................. 47
Cómo realizar una captura de pantalla .......... 49
Utilización de QuickMemo+ para realizar
una captura de pantalla ........................................ 49
Utilización de Capture plus para realizar
una captura de pantalla ........................................ 49
Métodos de introducción de texto ..................50
Introduce la palabra sugerida utilizando el
control de gestos......................................................50
Introducción de caracteres especiales ............. 51
Contenido

3
Cómo usar la función Portapapeles .................52
Configuración de la cuenta de Google ........53
Conexión a redes y dispositivos....................54
Wi-Fi ................................................................... 54
Conexión a redes Wi-Fi ......................................... 54
Activación de la conexión Wi-Fi y conexión
a una red Wi-Fi .........................................................54
Bluetooth............................................................55
Activación del Bluetooth y asociación de la
tableta con un dispositivo Bluetooth ................ 55
Envío de datos mediante la funcionalidad
Bluetooth .....................................................................56
Recepción de datos mediante la
funcionalidad Bluetooth .........................................57
SmartShare ........................................................ 57
Reproducir contenido a través de varios
dispositivos ...................................................................57
Reproducción/Envío ................................................57
Reproducir contenido de dispositivos
cercanos ............................................................. 58
Conexión de dispositivos ......................................58
Búsqueda de otros dispositivos ..........................58
Uso del contenido de la Nube .........................58
Uso de la Nube ......................................................... 58
QPair................................................................... 59
Conexión a un PC mediante un cable USB ... 61
Transferencia de música, fotos y vídeos con
el modo Dispositivo de medios (MTP) ............. 61
Sincronización con el Reproductor de
Windows Media.........................................................62
Conexión a un ordenador con un cable USB
para usuarios de Mac OS X ................................63
Contactos ........................................................64
Buscar un contacto ...........................................64
Agregar un contacto nuevo ............................. 64
Contactos favoritos ........................................... 64
Crear un grupo .................................................. 65
Mensajería ....................................................... 66
Vista de conversación .......................................66
Enviar un mensaje ............................................. 66
Uso de emoticonos ............................................67
Modificación de los ajustes de mensajes .......67
E-mail ..............................................................68
Administración de una cuenta de correo
electrónico .........................................................68
Trabajo con las carpetas de cuenta ................ 69
Redacción y envío de correo electrónico ....... 69
Recepción de correos electrónicos ................. 70
Ocio...................................................................71
Cámara ................................................................ 71
Conocer el visor ..........................................................71
Utilizar la configuración avanzada .....................72
Hacer una foto ...........................................................73
Para ampliar o reducir la imagen .......................73
Gesture shot ................................................................73
Después de realizar una fotografía ....................74
Ver las fotos guardadas ..........................................75
Grabar un vídeo .........................................................75
Ver los vídeos guardados ....................................... 76
Galería .................................................................76
Visualización de imágenes ....................................77
Reproducción de vídeos ........................................ 77
Eliminación de imágenes y vídeos .....................78
Establecer como fondo de pantalla ..................78
Modo presentación ........................................... 79
Vídeo................................................................... 79

4
Reproducción de un vídeo ....................................79
Música ................................................................. 81
Transferencia de música con el modo
Dispositivo de medios (MTP) ................................ 81
Reproducir una canción ......................................... 81
Herramientas ..................................................84
QuickMemo+ ..................................................... 84
QuickRemote ..................................................... 86
Alarmas .............................................................. 88
Calculadora ........................................................88
Calendario .......................................................... 89
Tareas .................................................................90
Gestor archivos ................................................... 91
Grabadora .......................................................... 92
POLARIS Office 5 ............................................ 93
Google+ .............................................................. 94
LG SmartWorld ................................................. 94
La web..............................................................96
Internet ............................................................... 96
Apertura de una página .........................................97
Favoritos ........................................................................97
Historial ..........................................................................97
Utilización del modo lectura .................................97
Utilización de QSlide ................................................97
Descarga de archivos ............................................. 98
Chrome............................................................... 98
Visualización de páginas web .............................98
Apertura de una página ........................................ 98
Búsqueda por voz en la web ............................... 98
Sincronización con otros dispositivos ..............99
Añadir y ver marcadores ....................................... 99
Menú Opciones de Chrome ................................99
Ajustes ............................................................101
Acceso al menú Ajustes ...................................101
REDES INALÁMBRICAS .................................101
DISPOSITIVO .................................................. 104
PERSONAL ...................................................... 110
SISTEMA ...........................................................113
LG Backup ...................................................... 117
Acerca de la copia de seguridad y
restauración de los datos del dispositivo .......117
Copia de seguridad de los datos de su
tableta.................................................................118
Restaurar los datos de la tableta ....................118
Actualización de software de la tableta ....120
Actualización de software de la tableta ........120
Actualización inalámbrica del software de
tabletas LG ........................................................120
Accesorios ..................................................... 122
Resolución de problemas ............................ 123

5
Acerca de este manual de usuario
•Antesdeutilizarsudispositivo,leadetenidamenteestemanual.Deesta
forma,seasegurarádeutilizareldispositivocorrectamenteydeforma
segura.
•Algunasdelasimágenesycapturasdepantallaindicadasenestaguía
puedendiferirconrespectoasutableta.
•Sucontenidopuedediferirdelproductofinalodelsoftwareproporcionado
porsusoperadoresdetelefoníaoproveedoresdeservicios.Estecontenido
estásujetoacambiossinprevioaviso.Paraaccederalaúltimaversiónde
estemanual,visiteelsitioWebdeLGenwww.lg.com.
•Lasaplicacionesyfuncionesdesudispositivopuedenvariarenfunción
desupaís,suregiónosusespecificacionesdehardware.LGnosehace
responsabledeningúnproblemaderendimientoresultantedelusode
aplicacionesdesarrolladasporproveedoresdistintosdeLG.
•LGnosehaceresponsabledeningúnproblemaderendimientoo
incompatibilidadresultantedelaedicióndelosajustesdelregistroode
lamodificacióndelsoftwaredelsistemaoperativo.Cualquierintentode
modificacióndelsistemaoperativopuedeproducirunfuncionamiento
inesperadodeldispositivoodesusaplicaciones.
•Lalicenciadelsoftware,audio,fondodepantalla,imágenesydemás
mediossuministradosconsudispositivoesdeusolimitado.Siextrae
yutilizaestosmaterialesparausocomercialodecualquierotrotipo,
esposiblequeestéincurriendoenunainfraccióndelosderechosdel
copyright.Comousuario,eselúnicoresponsabledelusoilícitodelmaterial
multimedia.
Acerca de este manual de usuario

6
•Esposiblequeseapliquencargosadicionalesporlosserviciosdedatos,
comomensajería,cargaydescarga,sincronizaciónautomáticaolos
serviciosdeubicación.Paraevitarelcobrodedichoscargos,seleccioneun
plandedatosadecuadoasusnecesidades.Póngaseencontactoconsu
proveedordeserviciosparaobtenermásinformación.
Marcas comerciales
•LGyellogotipodeLGsonmarcascomercialesregistradasdeLG
Electronics.
•Lasdemásmarcascomercialesycopyrightsonpropiedaddesus
respectivospropietarios.
DivX HD
ACERCA DE DIVX VIDEO: DivX®esunformatodevídeodigitalcreadopor
DivX,LLC,unaempresasubsidiariadeRoviCorporation.Estedispositivo
cuentaconlacertificaciónoficialDivXCertified®,queobtienensolo
dispositivosquesuperanlasrigurosaspruebasdereproduccióndevídeo
DivX.Visitedivx.comparaobtenermásinformaciónyherramientasde
softwareparaconvertirsusarchivosavídeoDivX.
ACERCA DE DIVX VIDEO-ON-DEMAND:EstedispositivoDivXCertified®
deberáregistrarseparapoderreproducirpelículasDivXVideo-on-Demand
(VOD)quehayacomprado.Paraobtenerelcódigoderegistro,localicela
secciónDivXVODenelmenúdeconfiguracióndeldispositivo.
Visitevod.divx.comparaobtenermásinformaciónsobrecómocompletarel
registro.

7
Con DivX Certified® puede reproducir vídeo DivX® hasta HD 720p, incluido
el contenido premium.
DivX®, DivX Certified® y los logotipos asociados son marcas comerciales de
Rovi Corporation o sus empresas subsidiarias y se utilizan con licencia.
Información del aviso de software de código abierto
ParaobtenerelcódigofuentecorrespondienteGPL,LGPL,MPLyotras
licenciasdecódigoabiertoquecontieneesteproducto,visitehttp://
opensource.lge.com.
Ademásdelcódigofuente,podrádescargarlascondicionesdelas
licencias,exenciónderesponsabilidaddelagarantíayavisosdecopyright.
LGElectronicstambiénleproporcionarácódigoabiertoenCD-ROMpor
unimportequecubrelosgastosdesudistribución(comoelsoporte,
elenvíoylamanipulación)previasolicitudporcorreoelectrónicoa
opensource@lge.com.Estaofertaesválidadurantetres(3)añosapartir
delafechadeadquisicióndelproducto.

8
Leaestassencillasinstrucciones.Sudesconocimientopuedeserpeligroso
oilegal.
Enelcasodequeseprodujeraalgúnfallo,sudispositivointegrauna
herramientadesoftwarequerecopilaelregistrodefallos.Estaherramienta
recopilaúnicamentedatosespecíficosdelfallo,comosonlaintensidaddela
señalylasaplicacionescargadas.Elregistrosoloseutilizaparadeterminar
lacausadelfallo.Estosregistrosestánencriptadosysolouncentrode
reparacionesdeLGautorizadopuedeaccederaellos.Deberáenviarsu
dispositivoareparar.
Exposición a energía de radiofrecuencia
InformaciónsobreexposiciónaondasderadioySAR(SpecificAbsorption
Rate,Tasaespecíficadeabsorción).
EldiseñodelatabletaLG-V490cumplelanormativadeseguridadvigente
enmateriadeexposiciónalasondasderadio.Estanormativasebasaen
directricescientíficasqueincluyenmárgenesdeseguridaddiseñadospara
garantizarlaseguridaddetodotipodepersonas,independientementedesu
edadyestadodesalud.
•Lasdirectricesdeexposiciónaondasderadioutilizanunaunidadde
mediciónconocidacomoTasaespecíficadeabsorción(SAR).Laspruebas
deSARsellevanacaboutilizandométodosestandarizadosconlatableta
mediantelatransmisiónalnivelmásaltodepotenciacertificadoentodas
lasbandasdefrecuenciautilizadas.
Directrices para un uso seguro y eficaz

9
•AunquepuedehaberdiferenciasentrelosnivelesdeSARdelosdiferentes
modelosdedispositivosLG,todoshansidodiseñadosparaajustarsealas
directricesrelevantesdeexposiciónaondasderadio.
•EllímitedeSARrecomendadoporlaICNIRP(InternationalCommission
onNon-IonizingRadiationProtection,Comisióninternacionaldeprotección
contraradiacionesnoionizantes)esde2W/kgmedidosobrediez(10)
gramosdetejido.
•ElvalordeSARmásaltodeestedispositivocuandosetransportajuntoal
cuerpo,talycomosedescribeenestaguíadeusuario,esde1,420W/kg.
•Estedispositivocumplelasdirectricesdeexposiciónaradiofrecuencia
cuandoseutilizaenposiciónnormaljuntoaloídoocuandosesitúaauna
distanciadealmenos0,00cmdelcuerpo.Cuandoseutilizaunafunda
detransporte,unclipdecinturónounsoporteparaelcuerpo,estosno
puedencontenerpartesmetálicasydebencolocarseaunadistanciadeal
menos0,00cmdelcuerpo.
Parapodertransmitirarchivosdedatosomensajes,estedispositivo
requiereunaconexiónadecuadaalared.Enalgunoscasos,puedeque
latransmisióndearchivosdedatosomensajessufraretrasoshastaque
dichaconexiónestédisponible.Compruebequesiguelasinstrucciones
dedistanciadeseparaciónmencionadasanteriormentehastaquesehaya
completadolatransmisión.
Directrices para un uso seguro y eficaz

10
Cuidado y mantenimiento del producto
ADVERTENCIA
Utilicesolobaterías,cargadoresyaccesoriosaprobadosparasuutilización
conestemodelodetabletaconcreto.Delocontrario,puedequedar
anuladacualquieraprobaciónogarantíaparalatableta,ypuederesultar
peligroso.
•Nodesmonteestaunidad.Siesnecesariorepararla,llévelaauntécnicode
serviciocualificado.
•Lasreparacionesqueserealicenbajogarantía,alaenteradiscreción
deLG,puedenincluirpiezasoplacasderepuestonuevasoreparadas,
siemprequemantenganlafuncionalidaddelaspiezassustituidas.
•Manténgalaalejadadeaparatoseléctricoscomotelevisores,radiosy
ordenadorespersonales.
•Launidaddebealejarsedefuentesdecalorcomoradiadoresuhornos.
•Noladejecaer.
•Noexpongaestaunidadavibracionesmecánicasogolpes.
•Apagueeldispositivoencualquierzonaenlaqueasíloexijannormativas
especiales.Porejemplo,noloutiliceenhospitales,yaquepodríanverse
afectadosequiposmédicosdelicados.
•Nomanipuleeldispositivoconlasmanosmojadasmientrasseestá
cargando.Podríasufrirunadescargaeléctricaydañargravementeel
dispositivo.
•Nocarguelatabletacercadematerialinflamable,yaquepodríacalentarse
yprovocarunincendio.
•Utiliceunpañosecoparalimpiarelexteriordelaunidad(noutilice
disolventescomobenceno,diluyentesoalcohol).
•Nocarguelatabletasobresuperficiesacolchadas.

11
•Latabletasedebecargarenunazonaconlaventilaciónadecuada.
•Noexpongaestaunidadahumoopolvoexcesivo.
•Nocoloqueeldispositivocercadetarjetasdecréditoobilletesde
transporte,podríaafectaralainformacióndelasbandasmagnéticas.
•Nogolpeelapantallaconunobjetopunzante,yaquepuedeestropearla
tableta.
•Noexpongaeldispositivoalíquidosnihumedad.
•Utiliceconcuidadolosaccesorios(porejemplo,losauriculares).
•Noutilice,toqueniintenteretirarnirepararelcristalagrietadosiestá
astilladoopresentaesquirlas.Lagarantíanocubrelosdañosenlapantalla
causadosporelusoincorrectodeldispositivo.
•Latabletaesundispositivoelectrónicoquegeneracalorenmodonormal
defuncionamiento.Sisehautilizadodeformaprolongada,elcontacto
directoconlapielsinlaventilaciónadecuadapuedesermolestoo
provocarquemaduras.Tengacuidadocuandomanipulelatabletadurante
sufuncionamientoodespuésdeeste.
•Silatabletasemoja,desenchúfeloinmediatamenteydéjelosecarpor
completo.Nointenteacelerarelprocesodesecadoconunafuentede
calorexterna,comounhorno,unmicroondasounsecadordepelo.
•Almojarseeldispositivo,ellíquidoprovocaráquecambieelcolordela
etiquetadelproductodelinteriordeldispositivo.Lagarantíanocubrelos
dañosproducidosensudispositivocomoconsecuenciadelaexposición
alíquidos.
•Utilicelatabletaatemperaturasentre0ºCy40ºC,siesposible.Exponer
latabletaatemperaturasextremadamentebajasoaltaspodríaproducir
daños,unfuncionamientoincorrectooinclusounaexplosión.

12
Funcionamiento eficaz del dispositivo
Dispositivos electrónicos
Todoslostabletaspuedenrecibirinterferenciasquepuedenafectaral
rendimiento.
•Noutilicesutabletascercadeaparatosmédicossinsolicitarpermiso.
Evitecolocarlatabletasobremarcapasos(esdecir,noselocoloqueenel
bolsillodelacamisa).
•Algunosaudífonospuedenverseafectadosporlostabletas.
•Tambiénpuedengenerarpequeñasinterferenciasentelevisores,radios,
ordenadores,etc.
Seguridad vial
Compruebelasleyesynormativaslocalessobreelusodetabletasdurante
laconducción.
•Noutilicedispositivosportátilesmientrasconduzca.
•Dediquetodasuatenciónalaconducción.
•Laenergíaderadiofrecuenciapuedeafectaraalgunossistemas
electrónicosdesuvehículo,comolaradiodelcocheoelequipode
seguridad.
•Sisuvehículodisponedeunairbag,noloobstruyaconequipos
inalámbricosportátilesofijos.Podríanprovocarunfallodelairbagy
ocasionarlegravesheridasdebidoaunfuncionamientoindebido.
•Siescuchamúsicamientrasestáenlacalle,asegúresedequeelvolumen
tengaunaintensidadrazonabledeformaquepuedaserconscientedelo
quesucedeensuentorno.Estoesimportantesobretodocercadelasvías
detráfico.

13
Lesiones auditivas
NOTA:Unnivelexcesivodesonidoenlosauricularespuedeprovocar
pérdidadeaudición.
Paraevitarlasposibleslesionesauditivas,noseexpongaaaltos
nivelesdevolumendurantelargosperíodosdetiempo.
•Esposiblequeeloídosufradañoscuandoseveexpuestoasonidosde
altovolumendurantelargosperíodos.Porlotanto,lerecomendamosque
noenciendaniapaguelatabletacercadelosoídos.Lerecomendamos
igualmentequeelvolumendelamúsicaseestablezcaenunnivel
razonable.
•Siutilizaauriculares,bajeelvolumensinopuedeescucharalaspersonas
quelehablandecercaosilapersonasentadaasuladopuedeescuchar
loqueustedestáescuchando.
Piezas de cristal
Algunaspiezasdesutabletaestánfabricadasconcristal.Estecristalpuede
rompersesieldispositivocaesobreunasuperficieduraorecibeunimpacto
fuerte.Sielcristalserompe,nolotoqueniintenteretirarlo.Noutilicesu
dispositivohastaqueunproveedordeservicioautorizadosustituyaelcristal.
Derribos
Noutilicelatabletamientrasserealizanderribos.Respetelasrestriccionesy
sigalasnormativas.

14
Entornos potencialmente explosivos
•Noutilicesutabletaengasolineras.
•Noloutilicecercadeproductosquímicosocombustibles.
•Notransporteoalmaceneexplosivos,líquidosogasesinflamablesenel
compartimentodesuvehículodondetengalatabletaolosaccesorios.
En aviones
Losdispositivosinalámbricospuedenprovocarinterferenciasenlosaviones.
•Apaguelatabletaantesdeembarcar.
•Noloutiliceentierrasinelpermisodelatripulación.
Niños
Dejeeldispositivoenunlugarsegurofueradelalcancedeniñospequeños.
Incluyepiezaspequeñasque,sisetragan,puedencausarasfixia.Este
dispositivotambiéncontieneunabateríainternaquepuedeserpeligrosasi
eldispositivonoseutilizaomantienecorrectamente.

15
Información y mantenimiento de la batería
•Noesnecesariodescargarporcompletolabateríaantesdevolvera
cargarla.Adiferenciadeotrossistemasdebaterías,noexisteningún
efectodememoriaquepuedaafectaralrendimientodelabatería.
•UtilicesololasbateríasycargadoresdeLG.LoscargadoresdeLGhan
sidodiseñadosparamaximizarlavidadelabatería.
•Nodesmonteniprovoquecortocircuitosenlabatería.
•Recarguelabateríasinosehautilizadodurantemuchotiempopara
maximizarsufuncionalidad.
•Noexpongaelcargadordelabateríaalaluzdirectadelsolynoloutilice
enentornosmuyhúmedos,comoenelcuartodebaño.
Nodejelabateríaenlugaresfríosocalientes,yaquesepodríadeteriorar
surendimiento.
•Existeriesgodeexplosiónsilabateríasesustituyeporotradeuntipo
incorrecto.
•Deshágasedelasbateríassegúnlasinstruccionesdelfabricante.Porfavor,
recíclelassiemprequeseaposible.Nolastirealabasuradoméstica.
•Desenchufesiempreelcargadordelatomadecorrienteunavezquela
tabletahayaterminadodecargarse,paraevitarasíunconsumodeenergía
innecesariodelcargador.
•Laduraciónrealdelabateríadependerádelaconfiguracióndered,
losajustesdelproducto,lospatronesdeuso,eltipodebateríaylas
condicionesambientales.
•Asegúresedequeningúnelementoconbordesafilados,comodienteso
uñasdeanimales,tocalabatería.Podríaprovocarunincendio.

16
ADVERTENCIA
Aviso de sustitución de la batería
•Labateríadeionesdelitioesuncomponentepeligrosoquepodría
provocardaños.
•Sipersonalnocualificadosustituyelabatería,eldispositivopodría
resultardañado.
•Nointentesustituirustedlabatería.Labateríapodríasufrirdañosque
podríanproducirsobrecalentamientoylesiones.Elproveedorautorizado
debesustituirlabatería.Labateríadebereciclarseporseparadodela
basuradoméstica.
•Encasodequeesteproductocontengaunabateríaincorporadaque
losusuariosfinalesnopuedaretirarfácilmente,LGrecomiendaquesólo
profesionalescualificadosretirenlabatería,yaseaparasusustitución
queparareciclarlabateríaalfinaldelavidaútildelproducto.Para
evitardañosenelproducto,yporsupropiaseguridad,elusuariono
debeintentarretirarlabatería,debeponerseencontactoconlaLínea
deAyudadeServiciosdeLG,oconotrosproveedoresdeservicios
independientesparasuasesoramiento.
•Laeliminacióndelabateríaimplicarádesmontarlacarcasadel
producto,ladesconexióndeloscables/contactoseléctricos,yuna
cuidadosaextraccióndelacéluladelabateríautilizandoherramientas
especializadas.Sinecesitainstruccionesdeprofesionalescualificados
sobrecómoretirarlabateríademanerasegura,porfavorvisitehttp://
www.lge.com/global/sustainability/environment/take-back-recycling

17
Cómo actualizar su tableta
Accedaaloslanzamientosdefirmwaremásrecientes,anuevasfunciones
desoftware,asícomoamejoras.
•ActualicelatabletasinnecesidaddePC:seleccioneActualizar SW
> Actualización de SW>Compruebe si existe nuevo SW.
•ActualicesutabletaconectándolaaunPC.
Paraobtenermásinformaciónsobreelusodeestafunción,visite
http://www.lg.com/common/index.jspyseleccioneelpaísyelidioma.
DECLARACIÓN DE CONFORMIDAD
Porlapresente,LG ElectronicsdeclaraqueelproductoLG-V490cumple
losrequisitosimprescindiblesycualquierotradisposiciónrelevantede
ladirectiva1999/5/EC.PuedeconsultarunacopiadelaDeclaraciónde
conformidadenhttp://www.lg.com/global/declaration
Información de contacto de la oficina para el cumplimiento de este
producto
LGElectronicsInc.
EURepresentative,Krijgsman1,
1186DMAmstelveen,TheNetherlands
NOTA: De acuerdo con la EN 60950-1 (§ 1.7.2)
Paraprevenirunconsumoinnecesariodeenergia,desconecteel
dispositivounavezestétotalmentecargado.Utilizesiempreunabasede
tomadecorrientecercadelequipoyfácilmenteaccesible.

18
Cómo desechar aparatos eléctricos y electrónicos obsoletos
1 Todoslosaparatoseléctricosoelectrónicossedebendesechar
apartedelserviciomunicipalderecogidadebasuras,através
delospuntosderecogidadesignadosporelgobiernoolas
autoridadeslocales.
2 Lacorrectarecogidaytratamientodelosdispositivosinservibles
contribuyeaevitarriesgospotencialesparaelmedioambienteyla
saludpública.
3 Paraobtenermásinformaciónsobrecómodesecharlosaparatos
obsoletos,póngaseencontactoconsuayuntamiento,elservicio
derecogidadebasuraoelestablecimientodondeadquirióel
producto.
Cómo desechar las baterías y los acumuladores gastados
1 Silabateríacontienemásdel0,0005%demercurio(Hg);
0,002%decadmio(Cd)o0,004%deplomo(Pb),estesímbolo
puedeaparecerjuntoalossímbolosquímicosdelmercurio,
cadmiooplomo.
2 Todaslasbaterías/acumuladoressedebendesecharapartedel
serviciomunicipalderecogidadebasuras,atravésdelospuntos
derecogidadesignadosporelgobiernoolasautoridadeslocales.
3 Laeliminacióncorrectadebateríasyacumuladorescontribuyea
evitarposiblesriesgosparaelmedioambiente,losanimalesyla
saludpública.
4 Paraobtenermásinformaciónsobrecómodesecharlas
bateríasyacumuladoresinservibles,póngaseencontacto
conelayuntamiento,elservicioderecogidadebasuraoel
establecimientodondehayaadquiridoelproducto.

19
Lea esta información antes de comenzar a usar su
tableta.
Antesdellamaralserviciodeatenciónalclienteollevarlatabletaalservicio
técnico,compruebesilosproblemasdesudispositivosedescribenenesta
sección.
1. Memoria de la tableta
Esnecesariocomprobarlamemoriadelatabletayeliminaralgunosdatos,
comoaplicaciones,paradisponerdemásespacioenlamemoria.
Para desinstalar aplicaciones:
1 Pulse > >fichaAplicaciones>Ajustes >Aplicaciones.
2 Cuandoaparezcantodaslasaplicaciones,seleccionelaaplicaciónque
deseedesinstalar.
3 PulseDesinstalary,acontinuación,Aceptarparaconfirmar.
2. Antes de instalar una aplicación o un sistema
operativo (SO) de código abierto
ADVERTENCIA
Siinstalayutilizaunsistemaoperativodiferentealproporcionadopor
elfabricante,latabletapodríanofuncionarcorrectamente.Además,la
garantíadesutabletaseanulará.
Aviso importante

20
ADVERTENCIA
Paraprotegerlatabletaysusdatospersonales,descargueúnicamente
aplicacionesqueprocedandefuentesseguras,comoGooglePlay.Sise
haninstaladoaplicacionesdeformaincorrectaensutableta,esposible
queestenofuncionenormalmenteoqueseproduzcaunerrorgrave.
Debedesinstalardelatabletadichasaplicacionesytodossusdatosy
ajustes.
3. Utilización de un bloqueo de pantalla
Permiteestablecerunbloqueodepantallaparaprotegerlatableta.Pulse
> >fichaAplicaciones>Ajustes >Pantalla>Bloqueo de
pantalla>Tipo de bloqueoyelijaelbloqueoquedeseeentreDeslizamiento,
Knock Code,Patrón,PINyContraseña.Comomedidadeseguridadporsi
olvidasupatróndedesbloqueo,puedecrearunPINdeseguridad.
Precaución:creeoiniciesesiónenunacuentadeGoogleantesde
establecerunbloqueodepantalla,yrecuerdeelPINdeseguridadquecreó
durantelacreacióndesubloqueodepantalla.
ADVERTENCIA
Precauciones que debe tomar al usar el bloqueo de pantalla.
Esmuyimportantequerecuerdeelbloqueodepantallaqueha
establecido.Nopodráaccederalatabletasiutilizaundesbloqueode
pantallaincorrecto5veces.Tiene5oportunidadesparaintroducirel
patróndedesbloqueo,elPINolacontraseña.Sihaagotadolascinco
oportunidades,puedevolveraintentarlotras30segundos.

21
Si no puede recordar el patrón, el PIN o la contraseña:
< Si ha olvidado el patrón >
SihainiciadosesiónensucuentadeGoogledesdelatabletaperoha
cometidocincoerroresalintroducirelpatrón,pulseelbotón¿Has olvidado
el patrón?delaparteinferiordelapantalla.Acontinuación,selesolicitará
queiniciesesiónensucuentadeGoogleoqueescribaelPINdeseguridad
queintrodujoalcrearelpatróndebloqueo.
SinohacreadounacuentadeGoogleenlatabletaohaolvidadoelPINde
seguridad,tendráquerealizarunrestablecimientocompleto.
< Si ha olvidado el PIN o la contraseña >
SiolvidasuPINocontraseña,deberáhacerunrestablecimientocompleto.
Precaución: sihaceunrestablecimientocompleto,seeliminarántodaslas
aplicacionesylosdatosdeusuario.
NOTA:SinohainiciadosesiónensucuentadeGoogleyhaolvidadoel
patrón,deberáintroducirsuPINdeseguridad.
4. Uso del restablecimiento completo
(restablecimiento a los ajustes de fábrica)
Silatabletanovuelveasusajustesoriginales,realiceunrestablecimiento
completo(restablecimientoalosajustesdefábrica)parainicializarlo.
1 Apaguelatableta.
2 Mantengapulsadaprimerolatecla Bajar volumen y,acontinuación,
mantengapulsadalatecla de encendido/bloqueo dellateralderechode
latabletahastaquesemuestreellogotipodeLG.

22
3 SueltetodaslasteclascuandosemuestreellogotipodeLG.
4 Mantengapulsadainmediatamentelasteclasdeencendido/bloqueo +
Bajar volumen almismotiempo.
5 SueltetodaslasteclascuandosemuestrelapantallaRestablecimiento
completoalosajustesdefábrica.
6 Pulseunadelasteclas de volumen paramoverelcursoraSíy,a
continuación,pulselatecla de encendido/bloqueo paracontinuar.
7 Pulseunadelasteclas de volumen paramoverelcursoraSíotravez
y,acontinuación,pulselatecla de encendido/bloqueo paraconfirmar.
8 Eldispositivorealizaráunrestablecimientocompleto.
ADVERTENCIA
Sirealizaunrestablecimientocompleto,seeliminarántodaslas
aplicacionesylosdatosdelusuario,asícomolalicenciaDRM.Recuerde
realizarunacopiadeseguridaddetodoslosdatosimportantesantesde
realizarunrestablecimientocompleto.
5. Cuando la pantalla se bloquea
Si la pantalla se bloquea o la tableta no responde al intentar utilizarla:
mantengapulsadalatecla de encendido/bloqueo durantemásde8
segundoshastaquesemuestreellogotipodeLGparareiniciarlatableta.Si
siguesinfuncionar,póngaseencontactoconelcentrodeservicio.

23
Familiarizarse con el dispositivo
Descripción de la tableta
Teclas de volumen
Cámara trasera
Altavoces
Cámara delantera
Tecla de encendido/bloqueo
Conector del auricular
Ranura para la tarjeta
SIM/tarjeta microSD
LED de infrarrojos (IR)
Cargador/puerto USB
Micrófono
NOTA:Latabletaestádiseñadaparaque
presentedosaperturasdealtavozenla
partetrasera,pormotivosestéticos.Sin
embargo,enrealidadelsonidosolose
emiteatravésdeunaltavoz.Tengaen
cuentaqueestonosuponeundefecto
delproducto.

24
NOTA:Durantelagrabacióndeunvídeoodeunclipdeaudio,asegúrese
dequeelmicrófononoseencuentrebloqueado.
Cámara delantera
Utilícelaparatomarimágenesygrabarvídeos
deustedmismo.Tambiénpuedeutilizarla
paramantenerchatsdevídeo.Manténgala
limpiaparaconseguirunrendimientoóptimo.
Tecla de encendido/
bloqueo
Púlselaparabloquear/desbloquearlapantalla.
Manténgalapulsadaparaencenderyapagar
latableta,reiniciarla,activarydesactivarel
modoaviónycambiarlaconfiguraciónde
sonido.
Teclas de volumen
Lepermitenajustarelvolumendelcontenido
multimedia.Mantengapulsadasambasteclas
almismotiempoparaaccederalafunción
QuickMemo+.
Conector del auricular
Lepermiteconectarunkitmanoslibres
opcionalparamantenerconversacionesen
elprácticomododemanoslibres.También
puedeconectarunosauricularespara
escucharmúsica.
LED de infrarrojos (IR)
Seutilizacomosensorparalaaplicación
QuickRemote.
Ranura para la tarjeta
SIM/tarjeta microSD
LepermiteinsertarsutarjetaSIMyunatarjeta
microSD.

25
Micrófono
Grabasuvozypermiteusarfuncionescon
activaciónporvoz.
Cargador/puerto USB
LepermiteconectarlatabletayelcableUSB
parautilizarlosconeladaptadordelcargador,
conelordenadoroconotrosaccesorios
compatibles.
Cámara trasera
Utilícelaparatomarfotografíasygrabar
vídeos.Manténgalalimpiaparaconseguirun
rendimientoóptimo.
Altavoces
Seusaparaescucharelaudiodelafunción
seleccionada(p.ej.,música,vídeos,clipsde
sonido,etc.).
ADVERTENCIA
Sicolocaunobjetopesadosobrelatabletaosesientasobreella,puede
dañarlapantallaLCDylasfuncionesdelapantallatáctil.Nocubrael
sensordeluzambientaldelapantallaLCDconpelículadeprotección.
Estopodríahacerqueelsensornofuncionaracorrectamente.
SUGERENCIA:
•Pulselaicono Menú
siemprequeabraunaaplicaciónpara
comprobarlasopcionesdisponibles.
•Sieldispositivoestábloqueadoynoresponde,mantengapulsada
latecla de encendido/bloqueo
durante8segundoshastaquese
muestreellogotipodeLGparareiniciarlatableta.

26
Cómo cargar su tableta
Paracargarla,seusaunadaptadorUSBincluidoconlatableta.Antes
deusarlatabletaporprimeravez,asegúresedequelabateríaestá
completamentecargada.
NOTA:Eldispositivotieneunabateríainternarecargable.Porsu
seguridad,noextraigalabateríaincorporadaenelproducto.
ADVERTENCIA!Silapantallatáctilnofuncionamientraslatabletaestá
enprocesodecarga,puededeberseaunsuministroeléctricoinestable.
Siestosucede,desconecteelcableUSBdeldispositivoodesconecteel
adaptadorUSBdelatomadecorriente.
1 ConecteeladaptadorUSByelcableUSB.
2 ConecteelcableUSB(talycomosemuestraacontinuación)enelPuerto
decarga/USBdelatableta.
3 Enchufeelcargadorenunatomadecorrienteeléctrica.

27
NOTA:Deberealizarseunaprimeracargacompletaparamejorarlavida
útildelabatería.
Optimización de la duración de la batería
Puedeaumentarladuracióndelabateríaentrecargasmediantela
desactivacióndeaquellasfuncionesquenonecesitaejecutardeforma
constanteensegundoplano.Tambiénpuedesupervisarcómolas
aplicacionesyrecursosdelsistemaconsumenlaenergíadelabatería.
Para aumentar la duración de su batería
•Desactivelascomunicacionesporradioquenoestéutilizando,como
Wi-Fi,BluetoothoGPS.
•Reduzcaelbrillodelapantallayestablezcauntiempodeesperade
pantallamásbreve.
•DesactivelasincronizaciónautomáticadeGmail™,Calendario,Contactosy
otrasaplicaciones.
•Algunasaplicacionesdescargadaspuedenprovocarlareduccióndela
cargadelabatería.
•Compruebeelniveldecargadelabateríamientrasutilizaaplicaciones
descargadas.

28
Para ver el nivel de carga de la batería
1 Desdelapantalladeinicio,pulseAplicaciones >Ajustes >Acerca
de la tableta>Batería.
2 Elestado(encargaoendescarga)yelniveldelabateríasemuestranen
elmenúsuperiordelapantalla.
Para supervisar y controlar qué está haciendo uso de la batería
1 Desdelapantalladeinicio,pulseAplicaciones >Ajustes >Acerca
de la tableta>Batería>Uso de la Batería.
2 Lapantallamuestraeltiempodeusodelabateríaytambiénindicalas
aplicacionesoserviciosqueusanenergíadelabateríademayoramenor
consumo.
Instalación de la tarjeta SIM
1 ParainstalarlatarjetaSIM,localiceyabralacubiertadelaranura.
2 Coloquelauñaenlaranurayextraigaconsuavidadlabandejadela
tarjetaSIM.
NOTA:Bajolacubiertahaydosranuras(laotraranuraestádestinadaa
unatarjetamicroSD).
NOTA:SicambialatarjetaSIM,despuésdeinsertarlatarjetaSIMtendrá
quereiniciarlatableta.

29
3 InsertelatarjetaSIMenlabandejaconloscontactosdoradosorientados
haciaabajo.Deslicelabandejaparainsertarladenuevoenlaranura,hasta
queseescucheunclicyencajeensulugar,ycierrelacubierta.
Ranuradela
tarjetaSIM
Ranuraparatarjetas
microSD
Inserción de la tarjeta microSD
EldispositivoescompatibleconelusodelastarjetasdememoriamicroSD
concapacidaddehasta128GB.Elcontenidomultimediasepuedeguardar
enlatarjetamicroSD.
1 Coloquelauñaenlamuesca,ytiresuavementedelatapadelaranura
delatarjetadememoriaparaextraerla.

30
2 Insertelatarjetadememoriaenlaranuraconeláreadecontactodorada
haciaarriba.Empujeconcuidadolatapadelaranuradelatarjetadela
memoriaenlatabletaparacerrarla.
Extracción de la tarjeta microSD
ParaquitarconseguridadlatarjetamicroSDdelatableta,primerodebe
desactivarla.
1 Desdelapantalladeinicio,pulseAplicaciones >Ajustes >
Almacenamiento>Desactivar tarjeta SD.
2 AbralabandejadelatarjetamicroSDyempujelatarjetaparaliberarla.
3 TiresuavementedelatarjetamicroSDparaextraerladelaranura.

31
ADVERTENCIA!NoquitelatarjetamicroSDsinantesdesactivarla.Delo
contrario,podríadañarselatarjetamicroSDasícomolatableta,además
dedañarselosdatosalmacenadosenlatarjetamicroSD.
Formateo de la tarjeta microSD
ADVERTENCIA!AlformatearlatarjetamicroSD,seborrantodoslos
archivosqueestacontenga.
1 Desdelapantalladeinicio,pulseAplicaciones >Ajustes >
Almacenamiento.
2 PulseBorrar tarjeta SD(dosveces).
3 Sihaestablecidounpatróndedesbloqueo,introdúzcaloypulseBorrar
todo.Latarjetaseformatearáyestarálistaparasuuso.
NOTA: SiyahaycontenidoenlatarjetamicroSD,laestructuradecarpetas
puedeserdistintadespuésdelformateo,yaquetodoslosarchivosse
habráneliminado.
Bloqueo y desbloqueo de la pantalla
Sinoutilizalatabletaduranteuntiempo,lapantallaseapagaysebloquea
automáticamente.Estocontribuyeaevitarpulsacionesaccidentalesyahorra
energíadelabatería.Sinoestáutilizandolatableta,pulselatecla de
encendido/bloqueo parabloquearlo.

32
Sihayalgúnprogramaejecutándosecuandosebloquealapantalla,es
posiblequesigaejecutándoseenelmododebloqueo.Serecomiendasalir
detodoslosprogramasantesdeentrarenelmododebloqueo,paraevitar
cargasinnecesarias(p.ej.,accesoawebs,comunicacionesdedatos).
Paraactivardenuevolatableta,pulselatecla de encendido/bloqueo .
Aparecerálapantalladebloqueo.Pulselapantalladebloqueoydeslice
eldedoencualquierdirecciónparadesbloquearlapantalladeinicio.
Aparecerálaúltimapantallaqueteníaabierta.
Encendido de la pantalla con la función KnockON
LafunciónKnockONpermiterealizarunadoblepulsaciónsobrelapantalla
paraencenderlaoapagarlafácilmente.
•Realiceunadoblepulsaciónrápidaenelcentro
delapantallaparaencenderla.
•Realiceunadoblepulsaciónrápidaenlabarra
deestado,enunáreavacíadelapantallade
iniciooenlapantalladebloqueoparaapagar
lapantalla.

33
Desbloquear la pantalla con la función Knock Code
LafunciónKnockCodelepermitecrearsupropiocódigodedesbloqueo
utilizandounacombinacióndegolpes(opulsaciones)enlapantalla.
•Mientraslapantallaseencuentreapagada,pulselamismasecuenciaque
establecióencualquierpartedelapantalla.Seaccederádirectamenteala
pantalladeinicio.
Para activar la función de Knock Code
1 Enlapantalladeinicio,pulseAplicaciones >Ajustes >Pantalla>
Bloqueo de pantalla>Tipo de bloqueo>Knock Code.
2 Seabriráunapantallaqueleguiaráparaseleccionarlasecuenciade
desbloqueo.Comomedidadeseguridadporsiolvidasusecuenciade
desbloqueo,creeunPINdeseguridad.

34
Sugerencias sobre la pantalla táctil
Acontinuación,lepresentamosalgunassugerenciassobrecómonavegar
porlatableta.
NOTA:
•Paraseleccionarunelemento,pulselapartecentraldelicono.
•Noejerzaunapresiónexcesiva.Lapantallatáctileslosuficientemente
sensiblecomoparadetectarunapulsaciónligeraperofirme.
•Utilicelapuntadeldedoparatocarlaopciónquedesee.Intenteno
tocarningunaotratecla.
Pulsar o tocar
Pulsesoloconundedoparaseleccionarelementos,enlaces,accesos
directosyletraseneltecladoenpantalla.
Mantener pulsado
Mantengaunelementopulsadoenlapantallasinlevantareldedohastaque
seproduzcaunaacción.Porejemplo,paraabrirlasopcionesdisponiblesde
uncontacto,mantengapulsadoelcontactoenlalistaContactoshastaque
seabraelmenúcontextual.
Arrastrar
Paraarrastrarunelemento,manténgalopulsadounmomentoy,a
continuación,muevaeldedoporlapantallasinlevantarlohastaquellegue
alaposicióndedestino.Puedearrastrarelementosenlapantalladeinicio
pararecolocarlos.
Pantalla de inicio

35
Deslizamiento o desplazamiento
Paradeslizarodesplazarse,muevarápidamenteeldedosobrelasuperficie
delapantallasindetenersedesdeelmomentoenquehatocadolapantalla
(paranoarrastrarelelemento).Porejemplo,puededeslizareldedosobrela
pantallahaciaarribaohaciaabajoparadesplazarseporunalista,onavegar
porlosdiferenteslienzosdeiniciodeslizandoeldedodeizquierdaaderecha
(yviceversa).
Doble pulsación
Realiceunadoblepulsaciónparaampliarunapáginawebounmapa.Por
ejemplo,pulsedosvecesrápidamenteunazonadelapáginawebpara
ajustarlaalanchodelapantalla.Tambiénpuedepulsardosvecespara
acercaryalejarunaimagenalvisualizarlaylosmapas.Pulsedosvecesuna
palabrapararesaltarla.Ladoblepulsacióntambiénpuedeactivarlafunción
KnockON,paraencenderoapagarlapantallatáctil.
Juntar y separar los dedos para ajustar el tamaño de la imagen
Utilicelosdedosíndiceypulgarjuntándolosyseparándolosparaacercaro
alejarlaimagencuandoutiliceelnavegador,Mapasoexaminefotografías.
Girar la pantalla
Enmuchasaplicacionesymenús,laorientacióndelapantallaseajustaala
orientaciónfísicadeldispositivo.
Pantalla de inicio
Desliceeldedohacialaizquierdaoladerechaparaverlospaneles.Puede
personalizarcadapanelconaplicaciones,descargas,widgetsyfondosde
pantalla.

36
Lasteclasrápidasestándisponiblesenlaparteinferiordelapantallade
inicio,yofrecenaccesosencilloydeunsolotoquealasfuncionesquemás
usa.
Barra de estado: muestrainformaciónsobreelestadodel
dispositivo,incluidoslahora,potenciadelaseñalWi-Fi,
estadodelabateríaeiconosdenotificación.
Tecla Atrás: vuelvealapantallaanterior.Tambiéncierra
elementosemergentes,comoporejemplomenús,
cuadrosdediálogoyeltecladoenpantalla.Manténgala
pulsadaparaaccederalaDualWindow.
Tecla de aplicaciones recientes: pulseestateclaparaver
lasaplicacionesutilizadasrecientemente.Tambiénpuede
mantenerlapulsadaparamostrarlasopcionesdeMenú
enaplicaciones.
Iconos de aplicaciones: pulseunicono(aplicación,widget,
carpeta,etc.)paraabrirloyutilizarlo.
Teclas rápidas: permitenaccederfácilmentealas
funcionesmáshabitualesconunasolapulsación.
Tecla Inicio: permitevolveralapantalladeinicio(ovuelve
allienzodelapantalladeiniciopredeterminadodesde
cualquieradeloslienzosdeextensióndelapantallade
inicio).ManténgalapulsadaparaaccederaGoogleNow.
Tecla Ventana doble:pulseestateclaparacambiaralmodo
deDualWindow.Lepermitegestionardosaplicaciones
diferentessimultáneamentedividiendolapantallaendos.

37
Personalización de la pantalla de inicio
Puedeeditarlapantalladeiniciomediantelaincorporacióndeaplicaciones,
descargas,widgetsofondosdepantalla.Parautilizarlatabletadeunaforma
máscómoda,añadasusaplicacionesywidgetsfavoritosalapantallade
inicio.
Para añadir elementos a la pantalla de inicio:
1 Mantengapulsadalapartevacíadelapantalladeinicio.
2 PulselafichaAplicacionesoWidgets.
3 Arrastreelelementoquedeseealaubicaciónelegidaylevanteeldedo.
Para eliminar un elemento de la pantalla de inicio:
Mantengapulsadoeliconoquedeseeeliminar,arrástreloa ylevanteel
dedo.
SUGERENCIA: Paraañadireliconodeunaaplicaciónalapantallade
iniciodesdelapantalladeAplicaciones,mantengapulsadalaaplicación
quedeseeañadiryarrástrelaalaubicacióndeseada.
SUGERENCIA: Puedeañadirvariosiconosdeaplicacionesaunacarpeta.
Coloqueeliconodeunaaplicaciónencimadeotroenlapantalladeinicio
paracrearunacarpeta.
Apertura, cambio y detención de aplicaciones
Pulse paramostrarlasaplicacionesutilizadasrecientemente.Puede
mantenervariasaplicacionesenfuncionamientosimultáneamente,ycambiar
entrevariasaplicacionesabiertas.Tambiénpuededetenermanualmenteel
funcionamientodeaplicaciones.

38
Utilización de Ventana doble
LafunciónDualwindowdividelapantallaparapermitirlamultitarea,
interaccionesmediantearrastrarycolocar,vinculaciónautomáticay
aplicacionesutilizadasrecientemente.
1 Pulse paradividirlapantalla,omantengapulsado hastaquese
muestrelalistadeaplicaciones.
2 Pulseoarrastreuniconodeaplicaciónhastaelespacioquedesee.
3 Pulse paravisualizarlassiguientesopciones.Tambiénpuedearrastrar
lasfichasparacambiareltamañodelasventanas.
Cambiarentredospantallas.
Cambiarlalistadeaplicaciones.
Vistaapantallacompleta.
Cerrarlasaplicaciones.
Para deshabilitar la función Dual window
1 Pulse >Aplicaciones >Ajustes >Ventana doble.
2 PulseelbotónDualwindowparacambiarloaDESACTIVADO.
SUGERENCIA:PuedeiniciardosaplicacionesInternetsimultáneamente.

39
Personalización de los iconos de aplicaciones en la
pantalla de inicio
Puedepersonalizareliconodecadaaplicaciónconlasimágenesdela
Galería.
1 Pulsedemaneracontinuauniconodeaplicaciónhastadesbloquearlode
laposiciónenlaqueseencuentra.Acontinuación,suélteloenlapantalla.
Semostraráeliconodeedición enlaesquinasuperiorderechadela
aplicación.
2 Vuelvaapresionareliconodelaaplicación,seleccionesudiseñoy
presioneAceptar.Obien,presioneAñadir,ajusteeltamañodeliconoy
seleccioneunaimagendesugalería.

40
Para ver otros paneles de la pantalla de inicio
•Deslice(odesplace)eldedoaladerechaoala
izquierdaporlapantalladeinicio.
•Pellizquelapantalladeinicioparamostrarla
vistadelminipanely,acontinuación,pulseel
paneldepantalladeinicioquedeseevisualizar.
Acceso rápido
Paraverloselementosdeaccesorápido,pulse
cualquierpuntodeláreadeteclasfrontales
yarrastrehaciaarriba.Estándisponibleslas
siguientesopciones:GoogleNow.

41
Notificaciones
Lasnotificacionesleavisandelallegadadenuevosmensajes,eventosde
calendariooalarmas,asícomodeeventosqueseesténrealizandoenese
momentocomo,porejemplo,descargas.
Enelpaneldenotificacionespuedeverelestadoactualdelatabletaylas
notificacionespendientes.Cuandoserecibeunanotificación,semuestra
eliconocorrespondienteenlapartesuperiordelapantalla.Losiconos
denotificacionespendientessemuestranalaizquierda,mientrasquelos
iconosdelsistema,quemuestranaspectostalescomolaintensidaddela
bateríaodelaredWi-Fi,semuestranaladerecha.
Notificaciones pendientes Notificaciones del sistema

42
Cómo acceder a las notificaciones
Deslicehaciaabajolabarradeestadoparaabrirelpaneldenotificaciones
yaccederalasmismas.Paracerrarelpaneldenotificaciones,deslicehacia
arribalabarraqueseencuentraenlaparteinferiordelapantalla.
Deslicehacialaizquierdayhacialaderechapara
ajustarelbrillodelapantallayelvolumen.
Barra Ajustes rápidos:deslicehacialaderecha
ohacialaizquierdaparadesplazarseporlalista.
Pulseuniconoparaactivarodesactivarlafunción
encuestión.
Aplicaciones QSlide:pulseunaaplicación
QSlideparaabrirlaenunaventanapequeñaen
lapantalla.Presione
paraeliminar,añadiro
reordenaraplicacionesdeQSlide.
Botón Borrar:pulseaquíparaborrarlalistade
notificacionesbasadaseneventos.
Pulseunanotificaciónparaabrirla.
Ajustes rápidos en el panel de notificaciones
UtiliceAjustesrápidosparaactivarydesactivarfácilmentelaconfiguración
defuncionescomo,porejemplo,laconexiónWi-Fi.Ajustesrápidosse
encuentraenlapartesuperiordelpaneldenotificaciones.
NOTA: Mantengapulsadouniconodelabarradeajustesrápidosparaver
elmenúdeconfiguracióndelafunción.

43
Para reorganizar las opciones de Ajustes rápidos en el panel de
notificaciones
Abraelpaneldenotificaciones,desliceAjustesrápidoshacialaizquierda,
ypulse .Parareorganizarloselementos,arrastre hastalaubicación
quedesee.Sideseaañadirmásiconos,activelasfuncionesquedesee.
Aplicaciones QSlide en el panel de notificaciones
LasaplicacionesQSlidesemuestranenunabarradelpanelde
notificaciones,bajolabarraAjustesrápidos.Estosiconosofrecenunaforma
rápidayprácticaderealizarvariastareasenlamismapantalla(deunaforma
similarlafuncióndeimagendentrodeimagendeuntelevisor).QSlide
muestraunapequeñaventanadeaplicaciónenlapantalla,quepuede
moverse,modificarsutamañooconvertirentransparente.
NOTA:PuedesuprimirlabarradeaplicacionesQSlidetocandoelicono
QSlidedelabarradeAjustesrápidos.
Uso de las aplicaciones QSlide
PulsecualquieradelasaplicacionesQSlidedelabarraparaactivarla.
Cuandoseactiva,lafunciónQSlideabrelaaplicaciónenunaventanaen
primerplano,permitiéndoleaccederaotrasaplicacionesquepermanecen
ensegundoplano.PodráabrirhastadosventanasdeQSlidealavez.
Iconos de notificación de la barra de estado
Enlatablasiguientesemuestranalgunosdelosiconosmáshabituales.
Icono Descripción
Modoavión

44
ConectadoaunaredWi-Fi
Auricularesdecableconectados
Bluetoothestáactivado
Advertenciadelsistema
Mododevibraciónactivado
Modosilenciosoactivado
Bateríacargadaporcompleto
Bateríaencarga
Elusocompartidodecontenidoestáhabilitado
Descargandodatos
Cargandodatos
Alarmaestablecida
GPSactivado
Losdatosseestánsincronizando
NuevomensajedeGmail
NuevomensajedeHangouts

45
Seestáreproduciendounacanciónactualmente
LatabletaestáconectadaalordenadormedianteuncableUSB
Elmododeahorrodebateríaestáactivado
ElpuntodeaccesoWi-Fiestáactivo
Varios usuarios
Solopuedecrearseunidentificadordepropietariodetableta,peroes
posibleañadirvariosidentificadoresdeusuarioparaqueotraspersonas
puedaniniciarsesiónyusarlatabletadeformaindependiente.Cadausuario
puedeconfigurarsuspropiosajustesdelatableta,utilizarsupropioespacio
dealmacenamientoydisponerdesuspropiosprivilegiosdeactualizaciónde
aplicaciones.
Privilegios del propietario de la tableta
•Soloelidentificadordelpropietariodelatabletapuedeañadirun
identificadordeiniciodesesiónnuevoyeliminaridentificadoresdeusuario.
Limitaciones en el caso de varios usuarios de la tableta
•Todoslosusuarioscompartenlamismabatería,memoriainternaydatos
deusoconelrestodeusuarios.
•Laconfiguracióndeidiomadefinidaporunusuarioseaplicaalrestode
usuarios.
•Cadausuariosolopuedeconfiguraryusarsupropiocontenidoydatos
(porejemplo,ajustesdelapantalladeinicio,ajustesdesonido,etc.).
•Cualquierusuariopuedeaceptarpermisosdeaplicacionesactualizadosen
nombredelrestodeusuarios.

46
•Losmensajesyloseventosdecalendarioprogramadosseenviaránpara
informarúnicamentealidentificadordeusuarioespecificado.
•EncuantounusuariocomienceaimprimirundocumentoconImpresión
móvil,eltrabajodeimpresióncontinuaráinclusosisecambiade
identificadordeusuario.
•Lastransferenciasdedatos,lasdescargas,lareproducciónmultimediay
losserviciosdecomunicaciónsedetendránsisemodificaelidentificador
deusuario.Noobstante,latransferenciadedatosmediantePlayStore
puedecontinuaraunquesecambieelIDdeusuario.
Para añadir un nuevo usuario a la tableta
1 Enlapantalladeinicio,pulseAplicaciones >Ajustes >Usuario>
Añadir usuario.
2 Seleccioneeltipodeusuarioquedeseeañadir.
• Usuario:losusuariostienensuspropiasaplicacionesysucontenido.
• Usuario Restringido:puederestringirelaccesoaaplicacionesy
contenidodesdesucuenta.
3 Elasistentedeconfiguraciónseabreparaayudarleaañadirunnuevo
usuario.PulseConfigurar ahora.
• Trascrearunnuevousuario,dichapersonadeberáefectuarelproceso
deconfiguracióntrasiniciarsesiónporprimeravez.
Para cambiar de usuario
1 Desplieguelabarradeestadoenlapartesuperiordelapantalla.
2 Toqueeliconodeusuario paramostrarelpaneldecambiode
usuario.
3 Toqueunodelosiconosdeusuariodelapantalla.Elijaentreelnombre
depropietarioocualquierotronombredeusuarioquehayacreado.

47
QSlide
LafunciónQSlidehabilitaunaventanasuperpuestaenlapantalladela
tabletaparafacilitarlelasfuncionesmultitarea.LasventanasdeQSlide
puedenabrirsedesdelabarradeAPLICACIONES QSLIDE delpanelde
notificaciones,odirectamentedesdeaquellasaplicacionescompatiblescon
lafunciónQSlide.
Abraelpaneldenotificacionesypulse
laaplicaciónquedeseeenlasección
APLICACIONES QSLIDE.
O
Mientrasusaunaaplicación
compatibleconQSlide,pulse .
Lafunciónsemostrarádeforma
continuaenunapequeñaventanaen
lapantalla.

48
Utilización de QSlide
LafunciónQSlideabrelaaplicaciónasociadaenunaventanaenprimer
plano,permitiéndoleaccederaotrasaplicacionesquepermanecenen
segundoplano.Semuestraenlapantalladeformacontinuahastaquela
cierra.
PulseparaejecutarQSlide.
PulseparasalirdeQSlideyvolveral
mododeventanaatamañocompleto.
Pulseparaajustarlatransparencia.
PulseparasalirdeQSlide.
Presioneparaajustareltamaño.
NOTA:LafunciónQSlideadmitehastadosventanasalavez.QSlidesolo
escompatibleconlassiguientesaplicaciones:Vídeo,Internet,Calendario,
E-mail,GestorarchivosyCalculadora.

49
Cómo realizar una captura de pantalla
MantengapulsadaslasteclasVolumentecla abajo ytecla de encendido/
bloqueo simultáneamentedurantedossegundospararealizarunacaptura
delapantallaactual.
Paraverlaimagencapturada,diríjaseaAplicaciones >Galería >
carpetaScreenshots.
Utilización de QuickMemo+ para realizar una captura de pantalla
Enlapantallaquedeseecapturar,arrastrelabarradeestadohaciaabajoy
seleccioneQuickMemo+ .
O
Mantengapulsadaslasdosteclas de volumen almismotiempo.
Utilización de Capture plus para realizar una captura de pantalla
Estafunciónlepermitecapturarunapartedelapantallaenelnavegadorde
Internetpredeterminado.
1 AbralaaplicaciónInternetydesplácesealapáginadelaquedesee
realizarunacapturadepantalla.
2 Pulselaicono Menú >Capture plus.
3 Ajusteelrecuadroazulaltamañoquedeseey,acontinuación,pulse
Guardar.EláreaseleccionadaseguardaenlacarpetaCapture plusdela
Galería.

50
Métodos de introducción de texto
Eltecladoenpantallaapareceautomáticamenteenlapantallacuando
necesitaintroducirtexto.Paramostrarmanualmenteeltecladoenpantalla,
solotienequepresionarelcampodetextoenelquedeseaintroducirtexto.
Pulseesteiconopara
introducirunespacio.
Presioneesteicono
paraseleccionarel
idiomadelteclado.
Pulseparaaccederalosajustesdel
tecladoLG.Mantengapulsadopara
accederaPortapapeles.
Pulseesteicono
paraeliminarel
carácteranterior.
Muestralapalabraqueha
introducido.
Sugerenciasdepalabra Sugerenciasdepalabra
Pulseesteicono
unavezparaescribir
enmayúsculasla
próximaletraquese
introduzca.Pulsedos
vecesparaescribir
siempreenmayúscula.
Pulseesteicono
paracrearunanueva
líneaenelcampode
mensaje.
Pulseesteicono
parapasaralteclado
numéricoyde
símbolos.
Presioneparaseleccionar
unodelostiposdeteclado
deseados.
Introduce la palabra sugerida utilizando el control de gestos
Introduzcatextoeneltecladoyapareceránlassugerenciasrelacionadascon
lapalabra.Pulseodeslicehaciaarribaenellateralizquierdodeltecladopara
seleccionarlasugerenciadelaizquierda.Pulseodeslicehaciaarribaenel
lateralderechodeltecladoparaseleccionarlasugerenciadeladerecha.

51
Dividir teclado mediante gesto
Lafuncióndetecladodivididopermiteutilizarambasmanosparaescribir.
Cadamitaddeltecladosedesplazaalaizquierdayladerechadelapantalla.
Para cambiar la altura del teclado
Ajustelaalturadeltecladoparamostrarmáspantallaycontrolarelteclado
conmayorfacilidad.
•Pulse >Altura y diseño del teclado>Altura del teclado en vertical>
Pulseyarrastreelicono paraajustarlaalturadelteclado.
Para cambiar las teclas de la fila inferior
•Pulse >Altura y diseño del teclado>Diseño QWERTY>Pulsey
arrastreparaañadiroeliminarteclasocambiarelorden.
NOTA:SolopuedenpersonalizarselostecladosQWERTY,QWERTZ,
AZERTY.Estafunciónnoescompatibleconalgunosidiomas.
Introducción de caracteres especiales
Eltecladoenpantallapermiteintroducircaracteresespeciales(p.ej.,"á").
Mantengapulsadalatecladeseada(porejemplo,latecla"a").Despuésde
queaparezcaelcarácterdeseado,desliceeldedoporencimaylevántelo
paraintroducirlo.
NOTA:Laaparicióndeunsímboloenlaesquinasuperiorderechadeuna
teclaindicaquehaycaracteresadicionalesdisponibles.

52
Cómo usar la función Portapapeles
AccedafácilmentealcontenidoalmacenadoenPortapapelescuando
quieraydondequiera.Puedecopiarimágenesotextosyguárdelosen
Portapapeles.Después,puedepegarloscuandoquieraydondequiera.
1 Mantengapulsadotextoeimágenesmientraslosveoloseditay,a
continuación,toquePortapapeles.
2 Mantengapulsadoelcampodeentradadetextoyseleccione
Portapapeles.TambiénpuedeaccederaPortapapelesmanteniendo
pulsado > .
NOTA:
•Puedeguardarhasta10elementosenPortapapeles.
•AccedaaPortapapelesypulse
,seleccioneloselementosquedesee
eliminary,acontinuación,pulseHecho.
•Estafunciónpodríanosercompatibleconlasaplicacionesdescargadas.

53
Alencenderlatabletaporprimeravez,podráactivarlared,accederasu
cuentadeGoogleyconfigurarlamaneraenquedeseautilizaralgunos
serviciosdeGoogle.
Cómo configurar la cuenta de Google
•IniciesesiónenunacuentadeGoogledesdelapantalladeconfiguración
queaparece.
O
•Desdelapantalladeinicio,pulseAplicaciones >fichaAplicaciones>
Ajustes >Cuentas y sincronización>Añadir cuenta>Google.
SiyatieneunacuentadeGoogle,introduzcaladireccióndecorreo
electrónicoypresioneSIGUIENTE.TambiénpuedepulsarO CREA UNA
NUEVA CUENTAeintroducirlainformaciónnecesariaparacrearunanueva
cuentadeGoogle.
UnavezquehaconfiguradosucuentadeGoogleenlatableta,estase
sincronizaráautomáticamenteconsucuentadeGoogledelaweb.
Suscontactos,mensajesdeGmail,eventosdecalendarioyotrainformación
deestasaplicacionesyserviciosdelawebsesincronizanconsutableta
(estodependerádesusajustesdesincronización).
Traseliniciodesesión,puedeutilizarGmail™ylosserviciosdeGoogle
incluidosenlatableta.
Configuración de la cuenta de Google

54
Wi-Fi
ConlaconexiónWi-FipuedeutilizarelaccesoaInternetdealtavelocidad
dentrodelacoberturadelpuntodeaccesoinalámbrico.DisfrutedeInternet
sincablesutilizandounaredWi-Fi,sincargosadicionales.
Conexión a redes Wi-Fi
ParautilizarlaconexiónWi-Fidelatabletasedebeaccederaunpunto
deaccesoinalámbricoo"zonaWi-Fi".Algunospuntosdeaccesoestán
abiertosybastaconconectarseaellos.Otrosestánocultosoutilizan
funcionesdeseguridad,porloqueesnecesarioconfigurarlatabletapara
poderconectarseaellos.DesconectelaconexiónWi-Ficuandonolaesté
utilizandoparaaumentarladuracióndelabatería.
Activación de la conexión Wi-Fi y conexión a una red Wi-Fi
1 Enlapantalladeinicio,pulseAplicaciones >fichaAplicaciones>
Ajustes >Wi-Fi.
2 Pulse paraactivarestafunciónycomenzarabuscarredesWi-Fi
disponibles.
3 PulseBuscarparaverunalistadelasredesWi-Fiactivasquese
encuentrandentrodelradiodealcance.
• Lasredessegurassemuestranconuniconodecandado.
4 Pulseunaredparaconectarsealamisma.
• Silaredestáprotegida,selesolicitaráqueintroduzcalacontraseñau
otrascredenciales(Solicitealadministradordelaredlosdetalles).
5 Enlabarradeestadosemuestraniconosqueindicanelestadodela
conexiónWi-Fi.
Conexión a redes y dispositivos

55
Bluetooth
PuedeutilizarlatecnologíaBluetoothparaenviardatosejecutandola
aplicacióncorrespondiente,peronodesdeelmenúBluetooth,comoenla
mayoríadelosdemásteléfonosmóvilesytabletas.
NOTA:
•LGnosehaceresponsabledelapérdida,interceptaciónouso
indebidodelosdatosenviadosorecibidosatravésdelafuncionalidad
inalámbricaBluetooth.
•Asegúresesiempredequelosdispositivosconlosquecomparte
información,odelosquerecibedatos,seanfiablesyseguros.Sihay
obstáculosentrelosdispositivos,ladistanciadefuncionamientopuede
reducirse.
•Algunosdispositivos,especialmentelosquenocuentanconla
certificacióndeBluetoothSIG,puedenserincompatiblesconsu
dispositivo.
Activación del Bluetooth y asociación de la tableta con un
dispositivo Bluetooth
Debevincularlosdispositivosparapoderconectarse.
1 Enlapantalladeinicio,pulseAplicaciones >fichaAplicaciones>
Ajustes >Bluetooth.
2 PulseelselectorBluetooth paraactivarlo.
3 Pulselacasilladeverificaciónqueaparecejuntoalnombredesutableta
paraqueotrosdispositivosBluetoothpuedandetectarsutableta.

56
NOTA:Paraseleccionareltiempoduranteelqueestarávisibleel
dispositivo,pulselaicono Menú
>Tiempo visible.
4 Semostraráunalistadelosdispositivosdisponibles.Pulseenlalistael
dispositivoconelquedeseaasociarse.
NOTA:Enfuncióndeltipodedispositivo,puedequetengaqueintroducir
códigosiguales,confirmarcódigosigualesolosdispositivosseasociarán
automáticamente.
5 Cuandocompletelaasociación,sutabletaseconectaráalotrodispositivo.
NOTA:SutabletanoescompatibleconelPerfilmanoslibres.Porello,el
usodefuncionesdellamadaconalgunosaccesorios,comoporejemplo
kitsmanoslibresBluetoothodispositivosconBluetooth,podríanoestar
disponibleenestedispositivo.
Envío de datos mediante la funcionalidad Bluetooth
1 Abraelelementoypulse .
O
MantengapulsadoelelementoyseleccioneCompartir.
O
Abraelelementoypulselaicono Menú >Compartir.
2 PulseBluetoothparacompartirvíaBluetooth.
NOTA: Elmétodoparaseleccionarunaopcióndependerádeltipode
dato.
3 BuscaryvincularseaundispositivoBluetooth.

57
Recepción de datos mediante la funcionalidad Bluetooth
1 ConsulteelmanualdeusuariodeldispositivoBluetoothparaenviarun
archivoalatableta.Losdosdispositivosdeberánestarvinculados,yla
conexiónBluetoothdebeestaractiva.
2 VinculelosdispositivosypulseAceptarcuandorecibaunaSolicitudde
autorizaciónBluetoothparaaceptarlosarchivos.
SmartShare
PuedeusarlafunciónSmartShareconfacilidadenlasaplicacionesGalería,
Música,etc.
Reproducir contenido a través de varios dispositivos
Puedecompartirelcontenidodelatabletacondiferentesdispositivos.
Presione o >SmartShare paracompartirelcontenidodelas
aplicacionesGalería,MúsicayPOLARIS Office 5.
Reproducción/Envío
Play:puedereproducirelcontenidoenuntelevisor,altavocesBluetooth,etc.
Beam:puedeenviarelcontenidoaldispositivoBluetoothySmartShare
Beamcompatible.
•SmartShare Beam:estopermitetransferirelcontenidorápidamentea
travésdeWi-FiDirect.
< Play > < Beam >

58
Reproducir contenido de dispositivos cercanos
Puededisfrutardelcontenidodedispositivoscercanos(PC,NAS,móvil)en
lasaplicacionesGalería,Música.
Conexión de dispositivos
ConecteeldispositivoyotrosdispositivoscompatiblesconDLNAenla
mismaredWi-Fi.
Búsqueda de otros dispositivos
PulseDispositivos cercanosypodráverlosdispositivoscompatiblescon
DLNA.
Conéctesealdispositivoparaverelcontenido.
Uso del contenido de la Nube
Puedeusarcontenidodelanube(porejemplo,Dropbox)enlasaplicaciones
Galería,Música.
Uso de la Nube
NOTA:Lasfuncionescompatiblespuedenvariarenfuncióndelservicio
enlanube.Larecuperacióndedatospuedetardaralgúntiempo,en
funcióndelservicioenlanube.
1 SeleccioneNubeenlasaplicacionesGalería,Música.
2 Seleccioneelservicioenlanubequedeseautilizareiniciesesión.
3 Podráusarelcontenidodelanubedespuésdeiniciarsesión.
4 EstablezcalosajustesdeCloudparaqueseleccionenlaaplicaciónque
usaráelservicioenlanube.

59
QPair
AlconectarsutabletaysuteléfonomóvilmedianteQPairpodrásincronizar
lasllamadasentrantes,losmensajesylasnotificacionesderedessociales
entresutabletaysuteléfonomóvil.
1 EjecuteQPair ypulseConfiguración inicial>Inicioenlatableta
primeroy,acontinuación,ejecutelosmismospasosenelteléfono.
SUGERENCIA:EsposiblequelaaplicaciónQPairnoseencuentre
preinstaladaenlatableta.DiríjaseaGooglePlay,busqueQPaireinstálela.
NOTA:
•QPairfuncionaconteléfonosconAndroid4.1yversionesposteriores.En
algunosmodelosdeteléfonociertasfuncionespodríanestarlimitadas.
•DadoqueQPairutilizalafunciónBluetooth,esposiblequenofuncione
connormalidadsicambialosajustesdeBluetoothmientrasQPairestá
enuso.

60
2 LaconexiónBluetoothseactivarádeformaautomática.
Funciones de QPair
Notificación de llamada:envíaalatabletaunanotificacióncuandoel
teléfonorecibeunallamada.Lanotificaciónmuestraelnúmerodela
personaquelellama,ylepermiteresponderyrechazarlallamada.También
puedecambiarlosajustesdellamadas,comoeltonodellamada,el
volumendeltonodellamada,eltonodellamadaconvibraciónoenviarun
mensajealrechazarunallamada.
NOTA:Solosepuedenrecibirllamadascompatiblesconlatecnología
Bluetooth.Noesposiblerealizarllamadasdesdelatabletamediantela
funciónQPair.
Notificaciones de mensaje:envíaalatabletaunanotificacióncuando
elteléfonorecibeunmensaje.Tambiénpuedecambiarlosajustesde
mensajes,comolaaparicióndeunmensajeemergente,previsualizacióndel
mensaje,sonidodenotificaciónyvibracióndenotificación.
Notificación SNS:muestraunnotificaciónderedessocialesenlabarrade
estadodelatabletacuandoestallegaalteléfono.
NOTA:Parahabilitarestafunción,activelaopciónNotificaciones de redes
sociales de QPairenelteléfono(Ajustes>Accesibilidad>Notificaciones
de redes sociales de QPair).Estaopciónlepermiterecibirnotificaciones
deredessocialesensutableta.
QuickMemo+ Transferencia:guardalaQuickMemo+actualenlaGalería
delatableta,yacontinuaciónsincronizaestaGaleríaconlaGaleríadesu
teléfono.

61
Internet mediante teléfono:conectaautomáticamenteeltabletaInterneta
travésdelteléfonomóvil(comosisetrataradeunazonaWi-Fi).Elusode
estafunciónpodríaconllevarcargospordatos.Paraahorrarelusodedatos
delteléfono,esteseconectaráautomáticamenteacualquierzonaWi-Fide
confianzaqueseencuentredentrodesualcance.
Conexión a un PC mediante un cable USB
PuedeconectarlatabletaalPCparacargarla,transferirelementosalPC
desdelatabletayviceversa.
Transferencia de música, fotos y vídeos con el modo Dispositivo
de medios (MTP)
1 ConectelatabletaalPCpormediodeuncableUSB.
2 SinohainstaladoelcontroladordelaplataformaAndroiddeLGen
elPC,tendráquecambiarlosajustesmanualmente.Paracambiarlos
ajustes,deslicelabarradeestadohaciaabajoypresioneelmodode
conexiónUSBactual>Dispositivo de medios (MTP).
3 AhorapuedeverelcontenidodeldispositivodemediosenelPCy
transferirlosarchivos.
NOTA:SideseacambiarlosajustesdeconexiónaPC,deslicelabarra
deestadohaciaabajoyseleccionelaopcióndemododeconexiónUSB.
Esteajustesoloesvisibleenlabarradeestadocuandoseconectaun
cableUSBalatableta.

62
Sincronización con el Reproductor de Windows Media
AsegúresedequeelReproductordeWindowsMediaestéinstaladoensu
PC.
1 UtiliceelcableUSBparaconectarlatabletaaunPCquetengainstalado
elReproductordeWindowsMedia.
2 SeleccionelaopciónDispositivo de medios (MTP).
3 Unavezconectado,apareceráunaventanaemergenteenelPC.
SeleccionelaopciónReproductordeWindowsMediaparasincronizarlos
archivosdemúsica.
4 Editeointroduzcaelnombredeldispositivoenlaventanaemergente(si
fueranecesario).
5 Seleccioneyarrastrelosarchivosdemúsicaalalistadesincronización.
6 Comiencelasincronización.
•ParalasincronizaciónconelReproductordeWindowsMediadeben
cumplirselossiguientesrequisitos.
Elementos Requisito
SO
MicrosoftWindowsXPSP2,Vistao
superior
VersióndelReproductorde
WindowsMedia
ReproductordeWindowsMedia10o
superior
•SilaversióninstaladadelReproductordeWindowsMediaesanteriorala
10,instalelaversión10osuperior.

63
Conexión a un ordenador con un cable USB para usuarios de
Mac OS X
PuedetransferircontenidosmultimediaasuordenadorMacOSXdesdela
tabletayviceversasiinstalaelprogramaAndroidFileTransfer.
1 DescargueeinstaleelprogramaAndroidFileTransferdesdeelsitioweb
android.comparausuariosdeMac(http://www.android.com/filetransfer/).
2 ConectelatabletaasuordenadoryhagadobleclicenlaaplicaciónAFT
(AndroidFileTransfer)parainiciarla.
3 Puedeverloscontenidosmultimediayarrastrarysoltarelarchivo
multimediaenydesdelatableta(oelordenador).

64
Puedeañadircontactosalatabletaysincronizarlosconloscontactos
delacuentadeGoogleuotrascuentasqueseancompatiblesconla
sincronizacióndecontactos.
Buscar un contacto
1 Enlapantalladeinicio,pulseContactos paraabrirlalistade
contactos.
2 PulseelcuadroBuscar contactosyescribaelnombredelcontacto.
Tambiénpuedetocarunaletraenellateralizquierdodelapantallapara
accederalosnombresquecomiencenporlaletraelegida.
Agregar un contacto nuevo
1 Enlapantalladeinicio,pulseContactos .
2 PulseNuevo Contacto .Seleccionelacuentaquedesee(siprocede).
3 Sideseaagregarunaimagenalnuevocontacto,pulse .Elijaentre
Hacer una fotoparacapturarunaimagenconlacámaraoSeleccionar de
galería.Acontinuaciónbusqueunaimagenyselecciónela.
4 Pulse paraintroducirinformaciónmásespecíficadelnombre.
5 Introduzcalosdetallessobreelcontacto.
6 PulseGuardar.
Contactos favoritos
Puedeclasificarloscontactosalosquellamaconfrecuenciacomofavoritos.
Contactos

65
Para añadir un contacto a la lista de favoritos
1 Enlapantalladeinicio,pulseContactos paraaccederaloscontactos.
2 Pulseuncontactoparaverlosdetalles.
3 Pulselaestrella situadaaladerechadelnombredelcontacto.La
estrellasevuelvedoradayelcontactoseañadealosfavoritos.
Para eliminar un contacto de la lista de favoritos
1 Enlapantalladeinicio,pulseContactos paraaccederaloscontactos.
2 PulselafichaFavoritosparaversuscontactosfavoritos.
3 Pulseuncontactoparaverlosdetalles.
4 Pulselaestrelladoradasituadaaladerechadelnombredelcontacto.La
estrellasevuelvegrisyelcontactoseeliminadelosfavoritos.
Crear un grupo
1 Enlapantalladeinicio,pulseContactos paraaccederaloscontactos.
2 PulselafichaGruposy,acontinuación,pulse .
3 Introduzcaunnombreparaelnuevogrupo.
• PulseAñadir miembrosparaañadirentradasdecontactoalnuevo
grupo.
• PulseelcampoCUENTAparacambiarlascuentasenlasquedesea
guardarelnuevogrupo.
4 PulseGuardarparaguardarelgrupo.
NOTA:Sieliminaungrupo,noseborranloscontactosasignadosaese
grupo.Continuaránalmacenadosenlalistadecontactos.

66
Latabletacombinamensajesdetextoymultimediaenunúnicomenú
intuitivoyfácildeusar.
Vista de conversación
Losmensajesqueintercambieconotrapersonaaparecenenorden
cronológicoycadenasdemensajes,paraquepuedavercómodamenteuna
visióngeneraldetodassusconversaciones.
Enviar un mensaje
1 Enlapantallainicio,toqueMensajería y,acontinuación,toque
Redactar paracrearunmensajenuevo.
2 Introduzcaelnombredeuncontactoounnúmerodeteléfonoen
elcampoPara.Alintroducirelnombredelcontacto,apareceránlos
mensajescoincidentes.Puedepresionarundestinatariosugerido.Se
puedenañadirvariosmensajes.
3 Toqueelcampodetextoparacomenzaraintroducirelmensaje.
4 Toqueelicono Menú paraabrirelmenúdeopciones.Elijaentrelas
distintasopcionesdisponibles.
5 Toque paraenviarelmensaje.
Mensajería

67
ADVERTENCIA! Ellímitede160caracterespuedevariardeunpaísaotro
enfuncióndelaformaenlaqueelmensajedetextoestécodificadoy
delidiomaenelqueestéescritoelmensaje.
Siañadeunarchivodeimagen,vídeooaudioaunmensajedetexto,éste
seconvertiráautomáticamenteenunmensajemultimediaysuplande
serviciosdisminuiráenconsecuencia.
NOTA:Seemitiráunanotificaciónacústicacuandorecibaunmensajede
textoduranteunallamada.
Uso de emoticonos
Alegresusmensajesconemoticonos.
Mientrasescribeunmensajenuevo,pulse yseleccioneunacategoría
enlabarradeherramientassituadaenlaparteinferiordelteclado.También
puedepulsareliconoMenú >Insertaremoticono.
Modificación de los ajustes de mensajes
Losajustesdemensajesdelatabletaestánpredefinidos,demodoque
desdeelprincipiosepuedenenviarmensajes.Puedecambiarlosajustes
conformeasuspreferencias.
•Enlapantalladeinicio,toqueMensajería >iconoMenú >Ajustes.

68
PuedeutilizarlaaplicaciónCorreoelectrónicoparaleerelcorreoelectrónico
deservicioscomoYahoo!,MSNyAOL.LaaplicaciónCorreoelectrónico
admitelossiguientestiposdecuenta:POP3,IMAPyExchange.
Suproveedordeserviciosoadministradordelsistemapuedeproporcionarle
losajustesdecuentaquenecesite.
Administración de una cuenta de correo electrónico
PulselaopciónE-mail enlapantalladeinicio.Laprimeravezqueabra
laaplicaciónCorreoelectrónicoseabriráunasistentedeconfiguraciónpara
ayudarleaconfigurarlacuentadecorreo.
Traslaconfiguracióninicial,semuestraelcontenidodelabandejade
entrada.Sihaañadidomásdeunacuenta,puedecambiardecuenta.
Para añadir otra cuenta de correo electrónico:
•AbralaaplicaciónE-mailypulseelicono Menú >Ajustes >Añadir
cuenta.
Para cambiar de cuenta:
Sihaañadidomásdeunacuentapuedecambiardecuentafácilmente.
Desdecualquiercarpetadecorreoelectrónico,pulselacuentaactual(en
lapartesuperiordelapantalla)y,acontinuación,pulselacuentaalaque
deseeacceder.
Cambio de los ajustes generales de correo electrónico:
AbralaaplicaciónE-mailypulseelicono Menú >Ajustes > Ajustes
generalparaconfigurarlosajustesqueseapliquenatodaslascuentas.
Pulseunacuentaconcretaparaconfigurarúnicamentelosajustesdeesa
cuentaconcreta.
E-mail

69
Para eliminar una cuenta de correo electrónico:
•AbralaaplicaciónE-mailypulseelicono Menú >Ajustes > icono Menú
>Borrar cuenta>pulselacuentaquedeseeeliminar>Eliminar>Sí.
Trabajo con las carpetas de cuenta
AbralaaplicaciónE-mailypulseelicono Menú yseleccioneCarpetas.
Cadacuentatienelassiguientescarpetas:Recibidos,Enviando,Enviados
yBorradores.Enfuncióndelasfuncionesqueadmitaelproveedorde
serviciosdelacuenta,puedecontarconcarpetasadicionales.
Redacción y envío de correo electrónico
1 MientrasseencuentreenlaaplicaciónE-mail,pulseRedactar .
2 Introduzcaladireccióndeldestinatariodelmensaje.Amedidaque
introduzcaeltexto,apareceránlasdireccionesdesuscontactosque
coincidan.Separelasdistintasdireccionesconpuntoycoma.
3 PulseAdjuntar paraadjuntararchivos,sinecesitahacerlo.
4 Escribirelasuntoyelmensaje
5 PulseEnviar paraenviarelmensaje.
Sinoestáconectadoaunared,porejemplo,siestátrabajandoenmodo
avión,losmensajesqueenvíeseguardaránenlacarpetadelabandeja
desalidahastaquevuelvaaestarconectadoalared.Sicontienealgún
mensajependiente,lacarpetaSalidasemostraráenlapantallaCuentas.

70
Recepción de correos electrónicos
Cuandorecibaunnuevocorreoelectrónicoensubandejadeentrada,sele
informarádeellomedianteunsonidoounavibración(segúnlosajustesde
sonidoydevibración),yaparecerásuiconodenotificaciónenlabarrade
estado.

71
Ocio
Cámara
ParaabrirlaaplicaciónCámara,pulseCámara enlapantalladeinicio.
Conocer el visor
Vista Limpia:presioneesteiconoparamostraruocultarlosmenúsenel
visor.
Cambiar cámara:cambieentrelalentedelacámaratraseraylalente
delacámaradelantera.Tambiénpuedecambiarlacámaradeslizandola
pantalla.
Modo:lepermiteestablecerelmododecapturaenAutomáticoo
Panorama.
Ajustes:pulseesteiconoparaabrirelmenúdeajustes.
Galería:pulseestaopciónparaverlaúltimafotoquehacapturado.Esto
lepermiteaccederasugaleríayverlasfotosguardadasmientrasestáen
elmododecámara.
Modo vídeo:pulseparacomenzaragrabarunvídeo.

72
Captura:realizaunafoto.
Salir:pulseparasalirdelacámara.
NOTA:Antesdetomarunafotografía,asegúresedequelalentedela
cámaraestálimpia.
Utilizar la configuración avanzada
Enelvisor,pulse paraabrirlasopcionesavanzadas.
Seleccionalaresolucióndelafoto.Sieligealtaresolución,
eltamañodelarchivoaumentará,loquesignificaquepodrá
almacenarmenosfotosenlamemoria.
Realizarfotografíasmediantecomandosdevoz.
Estableceelretrasoqueseaplicadespuésdepulsarelbotónde
captura.Resultamuycómodoparapodersalirunomismoenla
fotografía.
Muestralíneasdecuadrículaenlapantallaparaayudarleaalinear
lasfotos.
Abreunaguíadeayudaenlaqueseexplicanlasfunciones.
SUGERENCIA: Cuandosalgadelacámara,algunosajustesvolveránasus
valorespredeterminados,comoeltemporizador.Compruébelosantesde
realizarlasiguientefotografía.

73
Hacer una foto
1 AbralaaplicaciónCámara.
2 Apunteconelobjetivoalsujetoquedeseefotografiar.
3 Toque paracapturarlafotografía.Tambiénpuedecapturarlafoto
tocandoencualquierpartedelapantallaenmodoVista Limpia.
Para ampliar o reducir la imagen
Alahoradetomarunaimagenograbarunvídeo,coloquedosdedosen
cualquierpuntodelapantallaysepárelosparaampliarlaimagen.Para
reducirlaimagen,únalos.
Gesture shot
LafunciónDisparocongestopermitehacerunafotografíaconlacámara
delanteraconunmovimientodelamano.Parahacerlafotografía,levante
lamanoconlapalmaabiertahastaquelacámaradelanteraladetectey
aparezcauncuadroenlapantalla.Acontinuación,cierrelamanoenun
puñoyseiniciaráuntemporizadorparaquetengatiempoparaprepararse.

74
Después de realizar una fotografía
1 Pulselavistapreviadelaimagenconelbotóndecapturaparaverla
últimafotografíacapturada.
2 PulseGaleríay,acontinuación,pulseAceptar.
Pulseparaeditarlafotografía.
Pulseesteiconoparahacerotrafotografíainmediatamente.
Pulseparaenviarsunotaaotrosoparacompartirlaatravésdelos
serviciosderedessociales.
Pulseparaborrarlafotografía.
Pulseparaaccederamásopciones.
Pulseparaañadirlaimagenasusfavoritos.
SUGERENCIA:Sidisponedeunacuentadeunaredsocialylaconfigura
enlatableta,puedecompartirsusfotosconlacomunidaddedichared
social.
PulseeliconoMenú paraabrirlassiguientesopciones.
SmartShare:pulseparacompartirsufotopormediodelafunción
SmartShare.
Usar imagen como:pulseestaopciónparausarlafotografíacomoFondo de
pantalla, Foto de contacto, Fondo de bloqueooFondo de pantalla.
Mover:pulseparamoverlafotografíaaotroálbum.
Copiar:pulseparacopiarlafotoseleccionadayguardarlaenotroálbum.
Copiar a Clip tray:pulseestaopciónparacopiarlafotoyguardarlaen
Portapapeles.

75
Modo presentación:lemuestraautomáticamentelasimágenesdelacarpeta
actualdeformaconsecutiva.
Girar a la izquierda/derecha:presioneestaopciónparagirarlaimagenala
izquierdaoaladerecha.
Recortar:permiterecortarlafoto.Desplaceeldedoporlapantallapara
seleccionareláreaquedeseerecortar.
Añadir ubicación:añadeinformacióndeubicación.
Renombrar:pulseestaopciónparaeditarelnombredelafotoseleccionada.
Imprimir:permiteimprimirlaimagen.
Detalles:muestramásinformaciónsobrelaimagen.
Ver las fotos guardadas
Puedeaccederalasfotosguardadasenelmododecámara.Tansolopulse
lavistapreviadelaimagenconelbotóndecapturaysemostrarálaGalería.
1 Elijalaaplicaciónquedeseeusarparaveryeditarsusfotografías.Pulse
Galería oFotos .
2 PulseAceptar.
• Paravermásfotos,desplácesehacialaizquierdaohacialaderecha.
• Paraampliaroreducirlaimagen,puedepulsardosveceslapantalla
condosdedosyjuntarlososepararlos,respectivamente.
Grabar un vídeo
1 AbralaaplicaciónCámara.
2 Orientelalentehaciaelobjetoosujetoquedeseegrabarenvídeo.
3 Pulseeliconodelmododevídeo paracomenzarlagrabación.
4 Apareceráuntemporizadorenelquesemostraráladuracióndelvídeo.
5 Pulse enlapantallaparadetenerlagrabación.

76
SUGERENCIA:
•Pulse
parapausarlagrabación.
•Pulse
parahacerunacapturadepantallamientrasseestágrabando
unvídeo.
Ver los vídeos guardados
Accedaalosvídeosguardadosdesdeelmododecámaradevídeo
pulsandolavistapreviadelaimagenrealizadaconelbotóndecaptura.
1 Enelvisor,pulselavistapreviadelaimagenrealizadaconelbotónde
captura.
2 AparecerálaGaleríaenlapantalla,mostrándoseelúltimovídeograbado.
Desliceeldedohacialaizquierdaparadesplazarsealrestodevídeos.
3 PulseeliconoReproducir sobreunvídeoparareproducirlo
automáticamente.
NOTA:PuedeverlosvídeosenlasaplicacionesGaleríayFotos.
NOTA: Noejerzaunapresiónexcesiva.Lapantallaeslosuficientemente
sensiblecomoparadetectarunapulsaciónligeraperofirme.
Galería
Puedealmacenararchivosmultimediaenunamemoriainternaparaacceder
fácilmenteatodossusarchivosmultimedia.Utiliceestaaplicaciónparaver
archivosmultimediacomofotografíasyvídeos.
Enlapantalladeinicio,pulseAplicaciones >fichaAplicaciones>Galería
.

77
DesdeGaleríapodrágestionarycompartirtodossusarchivosdeimageny
devídeo.
NOTA:
•Enfuncióndelsoftwarequesehayainstaladoeneldispositivo,algunos
formatosdearchivonosoncompatibles.
•Enfuncióndesucodificación,puedequealgunosarchivosnose
muestrencorrectamente.
•Sieltamañodearchivoessuperioralacapacidaddememoria
disponible,puedeproducirseunerroralabrirlosarchivos.
Visualización de imágenes
AlabrirlaaplicaciónGalería semuestrantodaslascarpetasdisponibles.
Cuandodesdeotraaplicación,comoCorreoelectrónico,seguardauna
fotografía,secreaautomáticamentelacarpetaDescargas,enlaquese
guardarálafotografía.Delmismomodo,alrealizarseunacapturade
pantalla,secrealacarpetaCapturasdepantalla.Pulselacarpetaquedesee
abrir.
Lasimágenessemuestranenorden,porfechadecreación.Seleccioneuna
fotografíaparaverlaenpantallacompleta.Desplácesealaderechaoala
izquierdaparaverlaimagenanteriorosiguiente.
Reproducción de vídeos
AbralaaplicaciónGalería yseleccioneunálbum.EliconoReproducir
semuestraenlosarchivosdevídeo.Pulseunaimagenpara
seleccionarla.Seleccionelaaplicaciónconlaquedeseereproducirla(pulse
laaplicaciónFotos olaaplicaciónVídeo )y,acontinuación,pulse
Aceptarycomenzarálareproduccióndelvídeo.

78
NOTA:
•MientrasseusalaaplicaciónVídeosparareproducirunvídeo,desliceel
lateralizquierdodelapantallahaciaarribayhaciaabajoparaajustarel
brillo.Desliceellateralderechodelapantallahaciaarribayhaciaabajo
paraajustarelvolumen.
•MientrasseusalaaplicaciónVídeosparareproducirunvídeo,deslicela
pantallahacialaderechaohacialaizquierdapararetrocederoavanzar
rápidamente.
Eliminación de imágenes y vídeos
Utiliceunodelosmétodossiguientes:
•Enunacarpeta,pulse yseleccionelasfotografíasylosvídeosque
deseeeliminar.Acontinuación,pulseBorraryluegoSíparaconfirmar.
•Mientrasvisualizaunafotografíaounvídeo,pulse y,acontinuación,Sí
paraconfirmar.
Establecer como fondo de pantalla
Mientrasvisualizaunafoto,pulseeliconoMenú >Usar imagen comoy
seleccioneFondo de pantalla, Fondo de bloqueooFondo de pantalla.

79
Modo presentación
Puedeversusfotografíasenunapresentacióndediapositivasporálbumo
alseleccionartodaslasfotografías.Enlapantalladeinicio,pulseGalería .
•Pulseelálbumquecontienelasfotosquedeseavery,acontinuación,
pulseeliconoMenú >Modo presentación>elijalasimágenesque
deseever>Siguiente>verifiquelaconfiguracióndelapresentaciónde
diapositivas>Inicio.
Presioneelcentrodelapantallaparadetenerlareproduccióndela
presentación.
Vídeo
LaGaleríacuentaconunreproductordevídeointegradoparaquepueda
reproducirsusvídeosfavoritos.
Reproducción de un vídeo
1 Enlapantalladeinicio,pulseAplicaciones >fichaAplicaciones>
Galería >Vídeo.
2 Seleccioneelvídeoquedeseareproducir.

80
Pulseparaañadirelvídeoasusfavoritos.
PulseparaaccederaQSlideymostrarelvídeoenunaventana
pequeña.
Pulseparacompartirsuvídeopormediodelafunción
SmartShare.
Pulseparaaccederamásopciones.
Pulseparacontrolarelvolumendelvídeo.
Mantengapulsadoesteiconopararebobinarenincrementosde
3segundos.Pulseunavezpararebobinar10segundos.
Pulseparapausarlareproduccióndevídeo.
Mantengapulsadoesteiconoparaavanzarrápidamenteen
incrementosde3segundos.Pulseunavezparaavanzar
rápidamente10segundos.
Pulseparabloquear/desbloquearunapantalladevídeo.
Paracambiarelvolumenmientrasestáviendounvídeo,pulselasteclasde
volumenenelladoderechodelatableta.
PresioneGalería> (enlaesquinasuperiorizquierdadelabarradetítulo)
>Vídeoy,acontinuación,mantengapresionadounvídeodelalistapara
accederalassiguientesopciones:Compartir,Borrar,Recortar,Renombrar
yDetalles.

81
SUGERENCIA:Mientrasvisualizaunvídeo,deslicehaciaarribayhacia
abajoporellateralizquierdodelapantallaparaajustarelbrillodela
pantalla.Deslicehaciaarribayhaciaabajoporellateralderechodela
pantallaparaajustarelvolumen.
Música
Latabletacuentaconunreproductordemúsicaparaquepuedaescuchar
todassuscancionesfavoritas.Paraaccederalreproductordemúsica,enla
pantalladeiniciopulseAplicaciones >fichaAplicaciones>Música .
Transferencia de música con el modo Dispositivo de medios
(MTP)
1 ConectelatabletaalPCmedianteelcableUSB.
2 SeleccionelaopciónDispositivo de medios (MTP).Sutabletaaparecerá
comootrodiscoduroenelordenador.Hagaclicenlaunidadparaverla.
CopielosarchivosdesuPCalacarpetadelaunidad.
Reproducir una canción
1 Enlapantalladeinicio,pulseAplicaciones >fichaAplicaciones>
Música .
2 PulselafichaCanciones.
3 Seleccionelacanciónquedeseareproducir.

82
Pulseparacompartirlamúsicapormediodelafunción
SmartShare.
Pulseparaestablecerlacanciónactualcomofavorita
Pulseparaverlalistadereproducciónactual.
Pulseparaaccederamásopciones.
Pulseparaajustarelmododealeatorio.
Pulseparaajustarelmododerepetición.
Pulseparacontrolarelvolumendelamúsica.
Pulseparavolveralprincipiodelacanción.Pulsedosvecespara
volveralacanciónanterior.Mantengapulsadoesteiconopara
rebobinar3segundos.

83
Pulseparaponerlareproducciónenpausa.
Pulseparapasaralasiguientepistadelálbumodelalista
dereproducción.Mantengapulsadoesteiconoparaavanzar
rápidamente3segundos.
Pulseparaestablecerelefectodeaudio.
Paracambiarelvolumenmientrasestáescuchandomúsica,pulselasteclas
devolumenenelladoderechodelatableta.
Mantengapulsadacualquiercancióndelalistaparaaccederalassiguientes
opciones:Reproducir,Añadir a lista de reproducción,Borrar, Compartir,
DetallesyBuscar.
NOTA:
•Algunosformatosdearchivonosoncompatiblesenfuncióndel
softwareinstaladoeneldispositivo.
•Sieltamañodearchivoessuperioralacapacidaddememoria
disponible,puedeproducirseunerroralabrirlosarchivos.
•Elcopyrightdelosarchivosdemúsicapuedeestarprotegidopor
tratadosinternacionalesyleyesnacionalesdederechosdeautor.Por
tanto,puedequeseanecesarioobtenerpermisoounalicenciapara
reproducirocopiarmúsica.Enalgunospaíses,lasleyesnacionales
prohíbenlarealizacióndecopiasdematerialprotegidoconcopyright.
Antesdedescargarocopiarelarchivo,infórmesesobrelalegislación
relativaaestetipodematerialenelpaíscorrespondiente.

84
QuickMemo+
LafunciónQuickMemo+lepermitetomarnotasyhacercapturasde
pantalla.Podrácapturarpantallas,dibujarenlasmismasycompartirlascon
familiaresyamigosconlafunciónQuickMemo+.
Creación de una nota
1 Enlapantalladeinicio,pulseQuickMemo+ y,acontinuación,pulse
paracrearunanotanueva.
2 Puedeeditareltextoescribiendolaspalabrasdirectamente,oseleccionar
eltipodelápizycolorquedeseeusareintroducireltextomediante
escrituraamano.
3 Añadaunrecordatoriopulsando paradefinirlanotificaciónde
recordatoriodelevento.
4 Sihayunareddedatosdisponible,puedeañadirinformación
climatológicaydeubicaciónalanota.
Uso de las opciones de QuickMemo+
Lassiguientesopcionesestándisponiblesenlabarradeherramientas
QuickMemo+delapartesuperiordelapantalla.
PulseparaabrirlanotaenQSlide.
Lepermitedeshaceryrehaceraccionesanteriores.
Lepermiteeditareltexto,sucolorysualineación.
Lepermiteintroducirtextomedianteescrituraamano.
Puedeseleccionareltipodelápizquedeseausarysu
grosor,transparenciaycolor.
Herramientas

85
Borralasedicionesefectuadasenlanota.
GuardalanotaenQuickMemo+.
Pulseparaaccederamásopciones.
Lepermiteestablecerunanotificaciónderecordatoriodeun
evento.
Lepermiteinsertarinformaciónclimatológicaenlanota.
Lepermiteañadirinformacióndeubicaciónutilizandoel
GPS.
Captura de pantalla para la QuickMemo+
1 ParaaccederalafunciónQuickMemo+,deslicelabarradeestadohacia
abajoypulse .
O
Pulselasdosteclas de volumenalmismotiempoduranteunsegundo.
2 Seleccionelaopcióndemenúquedeseeenlabarradeherramientasy
creeunanota.
3 Pulse paraguardarlanota.ParasalirdeQuickMemo+encualquier
momento,pulselatecla Atrás .

86
NOTA:UselapuntadeldedoparautilizarlafunciónQuickMemo+,nola
uña.
QuickRemote
QuickRemoteconviertesutabletaenunmandouniversalparacontrolarsu
televisor,Blu-rayoDVD.
NOTA: EsposiblequeQuickRemotenoestédisponibleparaalgunos
dispositivosyáreas.
Para abrir y configurar QuickRemote
1 Enlapantalladeinicio,pulseAplicaciones >fichaAplicaciones>
QuickRemote .
TambiénpuederealizarlaconfiguracióninicialdelQuickRemotedesdeel
paneldenotificaciones.Deslicelabarradeestadohaciaabajo,pulseel
iconodeQuickRemote ,ypulseAÑADIR MANDO A DISTANCIA.
2 Pulse paraseleccionaruntipodesalaypulse para
añadireldispositivo.
3 Seleccioneeltipoylamarcadeldispositivo,acontinuaciónsigalas
instruccionesenpantallaparaconfigurareldispositivo.
NOTA:QuickRemote(Controlremoto)funcionacomounmandoa
distancianormalconseñalesinfrarrojas(IR)desuregiónopaís.Tenga
cuidadodenocubrirelsensordeinfrarrojosdelapartesuperiordela
tabletacuandouselafunciónQuickRemote(Controlremoto).Esposible
quenoseadmitaestafuncióndependiendodelmodelo,elfabricanteyla
empresaqueofreceelservicio.

87
Utilización de QuickRemote
1 AbraQuickRemote yelijalasalaenlaqueconfiguróelmandoa
distancia.
2 Seleccioneelmandoadistanciaquedeseepulsandosutipo/nombreen
labarradeQuickRemotealolargodelladoizquierdodelapantalla.
3 Pulselosbotonesdelmandoadistanciamostrado.
NOTA:Alañadirunmandoadistanciadetelevisor,QuickRemotepuede
usarelbotónEntradaENTRADAparaconfigurarelmandoadistancia
adecuado.Lafuentedeentradadetelevisiónsepuedecambiaral
configurarelbotónENTRADA.Pararestablecerlafuentedeentradade
sutelevisor,pulseelbotónENTRADAdeQuickRemotevariasveces(en
funcióndelnúmerodedispositivosconectadosaltelevisor).
Opciones de QuickRemote
ParaaccederalmenúdeopcionesdeQuickRemote,pulseeliconoMenú
paraseleccionarlaopciónquedesee.
NOTA: SipulsaunbotóndelQuickRemotedurantelareproducciónde
músicaensegundoplano,sesilenciaráduranteunsegundo.

88
Alarmas
Definir una alarma
1 Enlapantalladeinicio,pulseAplicaciones >fichaAplicaciones>
Alarmas > .
2 Establezcalahoradelaalarmaquedesee.
3 EstablezcaRepetir,Repetición de alarmas,Vibrar cuando suene la
alarma,Tono de alarma,Volumen de alarma,Inicio automático de aplic.,
Desbloqueo Inteligente yNota.
4 PulseGuardar.
NOTA:Paracambiarlosajustesdelaalarmaenlapantallaquecontiene
lalistadealarmas,pulseeliconoMenú
yseleccioneAjustes.
Calculadora
Uso de la calculadora
1 Enlapantalladeinicio,pulseAplicaciones >fichaAplicaciones>
Calculadora .
2 Pulselasteclasnuméricasparaintroducirnúmeros.
3 Pararealizarcálculossencillos,pulselafunciónquedeseerealizar
( , , o )seguidade .

89
NOTA:
•Pararealizarcálculosmáscomplejos,pulseeliconoMenú
,
seleccionelaCalculadora científicay,acontinuación,elijalafunciónque
desee.
•Paraverelhistorialdecálculos,pulseeliconoMenú
>Historial de
cálculo.
Calendario
EnelCalendariosemuestranloseventosdetodaslascuentasqueha
añadidoalatabletayhaconfiguradoparasincronizarcalendarios.
Adición de eventos al calendario
1 Enlapantalladeinicio,pulseAplicaciones >fichaAplicaciones>
Calendario .
2 Pulseelmenúdelaesquinasuperiorizquierdaparacambiarlavistadel
calendario(Día(s),Semana,Mes,Año,Agenda).
3 Pulselafechaalaquedeseaagregaruneventoypulse .
4 PulseNombre del eventoyescribaelnombredelevento.
5 PulseelcampoUbicacióneintroduzcalaubicación.Compruebelafecha
eindiquelahoraalaquedeseaqueempieceyfinaliceelevento.
6 Sideseaañadirunanotaalevento,pulseelcampoDescripciónyescriba
losdetalles.
7 Sidesearepetirlaalarma,seleccioneREPETICIÓNyestablezca
RECORDATORIOSsiesnecesario.
8 PulseGuardarparaguardareleventoenelcalendario.

90
NOTA: Mantengapulsadounpuntodelcalendarioparaguardar
rápidamenteuneventodecalendarioendichafecha.Solotendráque
introducirelnombreylahoradeleventoytocarGuardar.Puedetocar
Detalleseintroducirmásinformación,oactualizareleventocondetalles
adicionalesmásadelante.
Para cambiar la vista del calendario
EstédondeestéenlaaplicaciónCalendario,puedecambiarfácilmentede
vistasdecalendario.Bastaconquepulse enlaesquinasuperiorizquierda
delabarradetítulo,oconquedesliceeldedodeizquierdaaderecha
porelladoizquierdodelapantallaparamostrarunmenúdelasvistasdel
calendario.PulseDía(s),Semana,Mes,AñooAgenda.
Tareas
LaaplicaciónTareaspuedesincronizarseconsucuentadeMSExchange.
Puedecrearygestionarsustareasconsutableta,odesdeMSOutlooko
MSOfficeOutlookWebAccess.
1 Enlapantalladeinicio,pulseAplicaciones >Tareas .
2 PulseeliconoAñadir Tareas (delaesquinasuperiorderechadela
pantalla).
3 EspecifiquelosvaloresdeAsunto,FECHA DE INICIO, VENCIMIENTO,
DESCRIPCIÓN, REPETICIÓNyAVISO,segúndesee.
4 PulseGuardar.

91
Gestor archivos
LaaplicaciónAdministradordearchivoslepermiteadministrararchivosen
sualmacenamientointerno/externo.
ElAdministradordearchivosfacilitalatareadevisualizaciónygestión
dearchivos.Bastaconquepulseuntipodearchivo(Todoslosarchivos,
Archivosdemúsica,Archivosdeimagen,Archivosdevídeo,Archivosde
documentooArchivosdelanube)y,acontinuación,pulselascarpetas
necesariasparaencontrarlosarchivos.
Para abrir la aplicación Administrador de archivos
•Enlapantalladeinicio,pulseAplicaciones >fichaAplicaciones>
Gestor archivos .
Opciones de Administrador de archivos
AbralaaplicaciónGestor archivos>Todos los archivos>Almacenamiento
internoparaaccederalassiguientesopciones(enlapartesuperiordela
pantalla):
LepermiteabrirelAdministradordearchivosenunaventanade
QSlide.
Lepermitebuscararchivosoinformación.
Lepermitecrearunanuevacarpeta.
Lepermitemoverarchivosycarpetasaotraubicación.
Lepermitecopiararchivosycarpetasaotraubicación.
Lepermiteborrararchivosycarpetas.
Lepermiteaccederamásopciones.

92
Grabadora
Utilicelagrabadoradevozparagrabarnotasdevozuotrosarchivosde
audio.
Grabadora
•Enlapantalladeinicio,pulseAplicaciones >fichaAplicaciones>
Grabadora .
Pulseparaempezarla
grabación.
Pulseparaverunalistade
susgrabaciones.
Pulseparaseleccionar
dóndedeseaguardarla
grabación.
Pulseparafinalizarla
grabación.
NOTA:Eltiempodegrabacióndisponiblepuedediferirdeltiempode
grabaciónreal.
Gestión de las notas de voz
DesdelapantalladelalistadelaGrabadoradevoz:
•PulseeliconoCompartir paracompartirlanotadevozutilizandolas
opcionesdisponibles.

93
•PulseeliconoBorrar paraseleccionarlasnotasdevozquedesee
eliminar.
•Mantengapulsadaunanotadevozparaabrirunmenúcontextualy
seleccionarCompartir,Borrar,Renombrar,RecortaroDetalles.
POLARIS Office 5
POLARISOffice5esunasoluciónprofesionaldeMobileOfficeque
permitealosusuariosvisualizarcómodamentevariostiposdedocumentos
deOffice,incluidosarchivosdeWord,ExcelyPowerPoint,encualquier
momentoylugarmediantesudispositivomóvil.
Para crear un nuevo documento
1 Enlapantalladeinicio,pulseAplicaciones >fichaAplicaciones>
POLARIS Office 5 .
2 RegistresudireccióndecorreoelectrónicoenlapáginaRegistro.
NOTA:PuedepulsarSaltarparaignorarlainformaciónderegistro.
3 Pulse paracrearunnuevodocumento.
4 Pulseunodelostiposdedocumentodelalistadesplegable,ya
continuaciónelijaunaplantilla.
5 Introduzcaelcontenidoeneldocumentoconlasherramientasdelaparte
superiordelapantallayconeltecladoenpantalla.
6 Cuandohayaterminadodetrabajareneldocumento,pulse (enla
esquinasuperiorizquierdadelapantalla)y,acontinuación,pulseGuardar
(oGuardar comoparaintroducirunnuevonombrededocumento)para
guardar.
7 IntroduzcaelnombredeldocumentoypulseGuardar.

94
Ver y editar un documento en el dispositivo
Ahorapodrávisualizaryeditarfácilmenteunaampliavariedaddetiposde
archivo,incluyendodocumentosdeMicrosoftOfficeyAdobePDF,desdesu
dispositivo.
1 AbraPOLARIS Office 5ybusqueundocumento.
2 Pulseeldocumentoquedeseeveroeditar.
AlvisualizardocumentosconPOLARISOffice5,losobjetosyeldiseño
permanecenigualesqueenlosdocumentosoriginales.
3 Paraeditareldocumento,pulse .
Google+
UtilicelaaplicaciónGoogle+paramantenerelcontactoconlagenteatravés
delservicioderedessocialesdeGoogle.
Enlapantalladeinicio,pulseAplicaciones >fichaAplicaciones>Google
>Google+ .
NOTA:Enfuncióndesuregiónydesuproveedordeservicios,esposible
queestaaplicaciónnoestédisponible.
LG SmartWorld
LGSmartWorldofrececontenidoemocionanteyvariadocomofuentes,
temas,juegosoaplicaciones.
Cómo acceder a LG SmartWorld desde la tableta
1 Presione >Aplicaciones >fichaAplicaciones>presioneelicono
paraaccederaLGSmartWorld.

95
2 PresioneAccedereintroduzcaelIDylacontraseñadeLGSmartWorld.
Sitodavíanoseharegistrado,presioneRegistrarparaaccederaLG
SmartWorld.
3 Descargueelcontenidoquedesee.
•EsposiblequeLGSmartWorldnoestédisponibleparatodoslos
operadoresoentodoslospaíses.
NOTA: ¿qué pasa si no hay ningún icono ?
1 AccedaaLGSmartWorld(www.lgworld.com)atravésdeunnavegador
webparamóvilesyseleccionesupaís.
2 DescarguelaaplicaciónLGSmartWorld.
3 Ejecuteeinstaleelarchivodescargado.
4 AccedaaLGSmartWorldtocandoelicono
.
Beneficio especial disponible únicamente en LG SmartWorld
1 Decoresusmartphoneconsuestilopersonalizándoloconlostemas
deinicio,lostecladosylasfuentesproporcionadosenLGSmartWorld.
(Tengaencuentaqueesteserviciosoloestádisponibleparaciertos
dispositivos.CompruebeladisponibilidadenelsitiowebdeLG
SmartWorld).
2 DisfrutedelservicioespecialdeLGSmartWorldalunirsealas
promocionesofrecidas.

96
Internet
UtiliceestaaplicaciónparanavegarporInternet.Graciasalnavegadorpodrá
accederrápidamentedesdesutabletaaunmundoatodocolordejuegos,
música,noticias,deporte,entretenimientoymuchomás,encualquierlugary
sobrecualquiertema.
Enlapantalladeinicio,pulseAplicaciones >fichaAplicaciones>
Internet .
PulseparaejecutarQSlide.
Pulseesteiconopararetrocederunapágina.
Pulseesteiconoparairalasiguientepáginaalaquesehaya
conectadodespuésdelapáginaactual.Estoeslocontrariodelo
queocurrecuandopulsalatecla Atrás ,queledevuelveala
páginaanterior.
Pulseparaactualizarodetenerlapáginaactual.
Pulseesteiconoparaaccederalapáginadeinicio.
Pulseesteiconoparaaccederalosfavoritos.
Pulseparaaccederamásopciones.
La web

97
Apertura de una página
•Paraabrirunapáginanueva,pulse enlapartesuperiordelnavegador.
•Parairaotrapáginaweb,pulseunadelasfichasdelapartesuperiordela
pantallaparaverlapáginaencuestión.
Favoritos
Paraabrirunapáginawebquehaañadidoamarcadores,pulse enla
barradeherramientasdelnavegadoryseleccioneuna.
Historial
Pulse enlabarradeherramientasdelnavegadoryseleccionelaficha
Historialparaabrirunapáginawebdelalistadepáginaswebvisitadas
recientemente.Paraborrarelhistorial,pulse paraborrartodoelhistorial.
Utilización del modo lectura
Latabletamuestralaspáginaswebdeunaformasimplificadaparafacilitar
lalectura.
Veanoticiasopublicacionesenblogsyotrosartículosfácilmente,sin
distracciones.Conelmodolecturapuedeleerunapáginafácilmente,sin
obstrucciones.
Pulsa enlabarradeherramientasdelnavegador.
Utilización de QSlide
UtiliceestafunciónparaaccederaInternetsincerrarlaaplicaciónactual.
Mientrasvisualizaelcontenidoenelnavegador,pulse .Acontinuación,
puedebuscarotrainformaciónenlatableta.Paraverelnavegadoren
pantallacompleta,pulse .

98
Descarga de archivos
UtilicelaaplicaciónDescargasparaverlosarchivosquehadescargado.
Enlapantalladeinicio,pulseAplicaciones >fichaAplicaciones>
Descargas .
Chrome
UtiliceChromeparabuscarinformaciónynavegarporpáginasweb.
Enlapantalladeinicio,pulseAplicaciones >fichaAplicaciones>
Chrome .
NOTA:Enfuncióndesuregiónysuproveedordeservicios,esposible
queestaaplicaciónnoestédisponible.
Visualización de páginas web
Pulseelcampodedirección(enlapartesuperiordelapantalla),escribauna
direcciónwebocriteriosdebúsqueda,ypulse enelteclado.
Apertura de una página
•Parairaunapáginanueva,pulse enlapartesuperiordelnavegador.
•Parairaotrapáginaweb,pulseunadelasfichasdelapartesuperiordela
pantallaparaseleccionarlapágina.
Búsqueda por voz en la web
Pulseelcampodedirección,pulse ,digaunapalabraclaveyseleccione
unadelasqueselesugieren.

99
NOTA:Enfuncióndesuregiónydesuproveedordeservicios,esposible
queestafunciónnoestédisponible.
Sincronización con otros dispositivos
SincronicelasfichasabiertasylosfavoritosparautilizarlosconChromeen
otrodispositivodespuésdehaberiniciadosesiónenlamismacuentade
Google.
Paraverlasfichasabiertasenotrosdispositivos,pulseeliconoMenú >
Pestañas recientes.PuedeiniciarsesiónenlamismacuentadeGoogleen
todoslosdispositivos.Seleccionelapáginawebquedeseeabrir.
Añadir y ver marcadores
Paraañadirmarcadores,pulse enlabarradeURL.
ParaabrirunapáginawebquehaañadidoaMarcadores,pulseelicono
Menú >Marcadoresyseleccionelapáginaquedesee.
Menú Opciones de Chrome
PulseeliconoMenú paraaccederalassiguientesopciones.
•Nueva pestaña:pulseestaopciónparaabrirunanuevapestañadepágina
web.
•Nueva pestaña incógnito:pulseestaopciónparaabrirunanuevapestaña
denavegacióndeincógnito.
•Marcadores:muestralaspáginaswebquesehanañadidoamarcadores.
•Pestañas recientes:muestralaspáginaswebabiertasenotrosdispositivos.
•Historial:muestralosdatosdenavegación(páginaswebquehavisitado).
•Compartir...:lepermitecompartirlapáginaweb.

100
•Imprimir...: pulseestaopciónparaimprimirlapáginaweb.Seleccione
estaopciónparabuscarautomáticamenteunaimpresoraenlared,o
introduzcamanualmentelaquedeseeusar.
•Buscar en la página:lepermitebuscartextoenlapáginawebactual.
•Añadir a pantalla inicio:lepermiteañadirunaccesodirectoalapágina
actualenlapantalladeinicio.
•Ver como ordenador:marqueestaopciónparaaccederalsitiowebpara
ordenadoresalverpáginaswebdesdelatableta.
•Ajustes:lepermitemodificarlosajustesespecíficosdelaaplicación
Chrome.
•Ayuda y opiniones:muestrainformaciónsobreelusodelaaplicación
Chromeenlatableta,ylepermiteenviarsuscomentariosalos
desarrolladoresdeChrome.

101
Acceso al menú Ajustes
1 Enlapantalladeinicio,pulseAplicaciones >fichaAplicaciones>
Ajustes .
O
Enlapantalladeinicio,mantengapulsadalatecla Aplicaciones recientes
>Ajustes del sistema.
2 Seleccioneunacategoríadeajusteyconfigurelaopciónquedesee.
REDES INALÁMBRICAS
Wi-Fi
Wi-Fi:conestaopciónseactivalafunciónWi-Fiparaconectarsealasredes
Wi-Fidisponibles.
SemostraráunalistadetodaslasredesWi-Fidisponibles.Pulseunade
ellasparaconectarse.
NOTA:PulseBuscarparabuscarlasredesWi-Fidisponibles.
PulseeliconoMenú enelmenúWi-Fiparaaccederalassiguientes
opciones.
Agregar Wi-Fi.:lepermiteintroducirunaredWi-Finuevamanualmente.
Wi-Fi guardado.:PermiteborrarunaredWi-Figuardada.
Wi-Fi avanzado:accedealosajustesdeWi-Fiavanzados.
Tutorial interactivo:muestratutorialesútilessobrelafunciónWi-Fi.
Ajustes

102
SUGERENCIA: Cómo obtener la dirección MAC
Paraconfigurarunaconexiónenalgunasredesinalámbricasconfiltro
MAC,tendráqueintroducirladirecciónMACdelatabletaenelrouter.
PuedeencontrarladirecciónMACenlasiguienteinterfazdeusuario:en
lapantalladeinicioAplicaciones
>Ajustes >Wi-Fi>iconoMenú
>Wi-Fi avanzado>Dirección MAC.
Bluetooth
ActiveydesactivelafuncionalidadinalámbricaBluetooth.Laactivacióndel
Bluetoothlepermiteasociaryconectarsudispositivoaotrosdispositivos
Bluetooth.
PulseeliconoMenú enelmenúBluetoothparaaccederalassiguientes
opciones.
Editar nombre de la tableta:permitecambiarelnombredelatabletapara
facilitarsuidentificaciónalasociaryconectar.Escribaelnuevonombrede
sutabletay,acontinuación,pulseGuardar.
Tiempo visible:estableceelperiododetiempoduranteelqueotros
dispositivosBluetoothpuedenversutabletaparaasociarseyconectarse.
Elijaentre2 minutos,5 minutos,1 horaoNunca agotar el tiempo.
Se han recibido archivos.:muestraunalistadelosarchivosqueharecibido
atravésdelaconexiónBluetooth.
Tutorial interactivo:muestratutorialesútilessobrelasfuncionesdela
conexiónBluetooth.

103
Datos móviles
Muestraelusodedatosdurantelosperiodosdetiempoelegidos.Pulseuna
delasaplicacionesdelalistaparaverelusodedatosdelaaplicación.
Compartir y conectar
Lepermiteconfigurardiversasopcionesparacompartirdatosyconectarsea
otrosdispositivos.
SmartShare Beam:lepermiterecibircontenidomultimediaprocedentede
teléfonosotabletasLG.
NOTA:DebeactivarlaconexiónWi-FiparaactivarSmartShareBeam.
Servidor multimedia:permitecompartircontenidosmultimediacon
dispositivoscercanosatravésdeDLNA.
Miracast:puedereflejarlapantallayelsonidodelteléfonoenlallaveLG
Miracastoeneltelevisordeformainalámbrica.
NOTA: ParainiciarrápidamentelafunciónMiracast,toqueelicono
Miracastenelpaneldenotificaciones.Mientrasuselafuncióndereflejo,
nosepuedeusarsimultáneamenteelPuntodeaccesomóvil.
LG PC Suite:lepermiteusarLGPCSuiteparatransferirmúsicaeimágenes
entreunordenadorysuteléfono.
Conexión a Redes
LepermiteconectarotrosdispositivosalatabletaparausarInternetodefinir
losajustesderedes.
Módem USB:lepermiteactivarlafuncióndemódemUSB,yconectarotros
dispositivosparacompartirsusdatos.

104
Punto de acceso Wi-Fi:lepermiteactivarelpuntodeaccesoWi-Fiy
conectarotrosdispositivosalteléfonoatravésdelWi-Fi.
Conexión a Internet mediante Bluetooth:lepermiteactivarlafunciónde
módemBluetooth,yconectarotrosdispositivosalatabletaatravésdel
Bluetooth.
Ayuda:lepermiteconocerlainformacióndelmódemUSB,delpuntode
accesoWi-FiydelmódemBluetooth.
Modo avión:lepermitedesactivartodaslasconexionesinalámbricas,como
sonelWi-FiyelBluetooth.
Redes móviles:lepermitedefinirsideseahabilitarodeshabilitarelaccesoa
datosensutableta.
VPN:lepermiteconfiguraryadministrarlasredesprivadasvirtuales(VPN).
DISPOSITIVO
Sonido
Perfil de sonido:lepermiteestablecerelperfildesonidoentreSonido,
VibraciónoNo molestar.
Volumen:permitegestionarelvolumendeNotificaciones,Táctil y sistema,y
Multimedia.
Fuerza de vibración:permitedefinirlaintensidaddelavibraciónparalas
llamadas,notificacionesylasrespuestasaltacto.
Notificaciones:lepermiteajustareltonodenotificaciónpredeterminado.
No molestar:Permiteestablecerunaprogramaciónenfuncióndela
cualevitarlasinterrupcionesdelasnotificaciones.Puedeestablecerque
determinadascaracterísticasinterrumpancuandosehaconfiguradola
opciónSoloprioridad.

105
Bloqueo de pantalla:Permiteescogersideseamostraruocultarlas
notificacionesenlapantalladebloqueo.
Aplicaciones:Permiteevitarquelasaplicacionesmuestrennotificacioneso
configurarlasaplicacionesparamostrarnotificacionesconprioridadcuando
laopciónNomolestarsehaestablecidoenSoloprioridad.
Sonido del teclado:permiteconfigurarelteléfonoparaquereproduzcaun
sonidocuandopulselosbotones,iconosuotroselementosenpantallaque
reaccionanalapulsación.
Sonido bloqueo pantalla:lepermiteconfigurarlatabletaparaque
reproduzcaunsonidoalbloquearydesbloquearlapantalla.
Vibrar al tocar:lepermiteestablecerrespuestadevibraciónalas
pulsacionesdelapantalladelatableta.
Pantalla
Pantalla de inicio
Tema:estableceeltemadelapantalladesudispositivo.
Fondo de pantalla:estableceelfondodepantallaqueseusaráensu
pantalladeinicio.
Efecto de pantalla:estableceelefectocuandodesliceparacambiar
pantallas.
Desplazar pantalla de inicio circularmente:activeestaopciónpara
establecerlaspantallasdeinicioendesplazamientocontinuosintener
quedesplazarhacialadirecciónopuestacuandolleguealfinal.
Copia de seguridad y restaurar:lepermiterealizarunacopiadeseguridad
yrestaurarlasconfiguracionesytemasdeaplicacionesywidgets.
Ayuda:muestrainformaciónsobreelfuncionamientodelapantallade
inicio.

106
Bloqueo de pantalla
Tipo de bloqueo:estableceuntipodebloqueodepantallaparaproteger
latableta.
NOTA:TrasactualizaralsistemaoperativoLollipop,esposibleque
elbloqueodepantallanoestédisponible,exceptolasopcionesde
Patrón,PINyContraseña.
Enesecaso,vayaaAplicaciones
>Ajustes >Seguridad>
Borrar certificados paraeliminarloscertificadosdeseguridady,a
continuación,establezcaunbloqueodepantalla.
Tengacuidadoalborrarloscertificados,yaqueseeliminarántodoslos
certificadosdeseguridadquehayainstalado.
Smart Lock: establezcaestaopciónparaquelatabletapermanezca
desbloqueadacuandotieneundispositivoBluetoothseguroconectadoa
ella,cuandoseencuentraenunaubicaciónconocida(comosucasaola
oficina),ocuandoreconocesucara.
Efecto de pantalla:establecelasopcionesdeefectodepantalla.
Fondo de pantalla:estableceelfondodepantalladelapantallade
bloqueo.SelecciónelodesdeGaleríaoGalería de fondos de pantalla.
Accesos directos:lepermitecambiarlosaccesosdirectosenlapantalla
debloqueodedeslizamiento.
Mensaje personal:lepermiteintroducirinformacióndecontactoparaque
semuestreenlapantalladebloqueoencasodeperderlatableta.
Temporizador de bloqueo:estableceeltiempoquetranscurriráhastaque
lapantallasebloqueeautomáticamenteunavezseexcedaeltiempode
espera.

107
Botón de encendido para bloquear:activeestaopciónparabloquearla
pantallaalinstantecuandosepulselatecladeencendido/bloqueo.Este
ajusteanulaelajusteTemp.bloqueosegur.
Brillo:permiteajustarelbrillodelapantalla.PulseBrillo nocturnoparaque
elbrilloseajustea0%automáticamenteentrelas00:00ylas06:00.
Tiempo espera pantalla:permiteajustareltiempoquepasaráhastaquela
pantallaseapagueautomáticamente.
Efecto apagar pantalla:permitedefinirelefectodeapagadodelapantalla
empleadocuandoseapagalapantalla.
Pantalla giratoria:establezcaestaopciónparacambiarlaorientación
automáticamentecuandogiraelteléfono.
Protector de pantalla:pulseelinterruptorDaydream paracambiar
laopciónaActivadooDesactivado.Activadopermitequeelprotector
depantallaajustadosemuestremientraslatabletaestáenmodode
suspensióncuandoestácolocadaeneldockocargando.ElijaentreAlarmas
yGoogle Fotos.
NOTA:Lacargapuederalentizarsemientraselsalvapantallasestá
activado.
Tipo de fuente:cambiaeltipodefuentedelapantalla.
Tamaño de fuente:cambiaeltamañodelostiposdeletra.
Pantalla inteligente:mantienelapantallaencendidamientraseldispositivo
detectaquesusojosestánmirandolapantalla.
Botones táctiles de Inicio:lepermitedefinirlosbotonestáctilesdeinicioque
semuestran,asícomosuposiciónenlabarra.Tambiénpuedeseleccionarel
coloryelfondo.
Calibración del sensor de movimiento:lepermitemejorarlaprecisióndela
inclinaciónylavelocidaddelsensor.

108
Almacenamiento
ALMACENAMIENTO INTERNO:muestralacantidadtotaldeespacioenla
memoriadeldispositivoyenumeraquétipodedatosestánusandoespacio.
TARJETA SD:muestralacantidadtotaldeespacioenlamemoriaenla
tarjetamicroSD.
Activar/Desactivar tarjeta SD:activaydesactivalatarjetamicroSDde
sutabletaparaquepuedaaccederalosdatosalmacenadosenella,
formatearlatarjetaoquitarladeformasegura.Esteajusteaparece
atenuadosinohayningunatarjetamicroSDinstalada,siyalaha
desactivadoosihaactivadolatarjetamicroSDensutableta.
Borrar tarjeta SD:estaopciónborrapermanentementetodoelcontenido
delatarjetamicroSDylapreparaparausarlaconlatableta.
Batería
INFORMACIÓN SOBRE LA BATERÍA:Consultecuántaalimentaciónde
labateríaseusaparalasactividadesdeldispositivo.Elniveldebatería
semuestracomounporcentaje.Tambiénsemuestraeltiempodeuso
restante.
Uso de la Batería:muestraelusodelabatería.
Barra de estado del porcentaje de la batería:muestraelporcentajedela
bateríaenlabarradeestado.
Ahorro de Energía:permitegestionarlabateríacondeterminadoselementos
deahorrodeenergía.Pulseelbotón paraactivarestafunción.Pulse
Ahorro de Energíaparaaccederalassiguientesopciones.
• ACTIVAR AHORRO DE ENERGÍA:permiteajustarelniveldebatería
enelquedeseaqueelahorrodebateríaseactive.Elijaentre
Inmediatamente,5%bateríay15%batería.
Ayuda:pulseestaopciónparaconsultarconsejossobreelahorrodeenergía.

109
Smart cleaning
Puedegestionarlasaplicacionesnoutilizadas,losarchivosguardadosolos
archivostemporalesdeInternet.
Aplicaciones
Muestralalistadeaplicaciones,entreellas,lasqueseencuentranen
ejecuciónosehandescargado.
Desliceaizquierdayderechaparaseleccionarunadelastresfichasdela
partesuperiordelapantallayverinformacióndetalladadelasaplicaciones
DESCARGADAS,EN TARJETA SD,EN EJECUCIÓNyTODAS.
Pulseunaentradaparavermásinformación,pulseForzar detención
(oDetener)y,acontinuación,Aceptarparaquedejedeejecutarse.
Aplicación de mensaje predeterminada
Permiteelegirlaaplicacióndemensajespredeterminada.
Ventana doble
Dividir vista:permitequeeldispositivoabraautomáticamenteunaDual
Windowalpulsarunvínculoenlapantallacompletaounarchivoadjuntoa
uncorreoelectrónico(sololasimágenes).
Ayuda:muestrainformaciónútilsobreelusodelafunciónDualWindow.

110
PERSONAL
Nube
PulseAñadir cuentaparaañadirunacuentadenube.Desdeestemenú
puedeaccederasuscuentasdenube.PulseeliconoMenú paracargar
archivos.
Usuario
Enestemenúsemuestranlosusuariosactualesquehacreado.
Agregar usuarios cuando la tableta está bloqueada.: permiteañadirun
nuevousuariocuandolatabletaestábloqueada.
Añadir usuario:lepermiteañadirunanuevacuentaalatabletayutilizarla
funciónmultiusuario.
Ubicación
Modo
• Alta precisión (GPS y redes):utilizaelGPS,Wi-Fiylasredesmóviles
paracalcularsuubicación.
• Ahorro de energía (Solo redes): utilizalasredesmóvilesyWi-Fipara
calcularsuubicación.
• Solamente sensores del dispositivo (Sólo GPS):utilizaelGPSpara
detectarsuubicación.
SOLICITUD DE UBICACIÓN RECIENTE:muestralasaplicacionesque
recientementehansolicitadoinformaciónsobresuubicación.
Cámara:permitealdispositivoetiquetarlasfotosylosvídeosconsus
ubicaciones.
Informes de Ubicación de Google:lepermiteverlosajustesdelocalización
deGoogle.

111
Seguridad
Encriptar tableta:lepermiteencriptarlosdatosdelatabletaaefectosde
seguridad.SelesolicitaráqueintroduzcaunPINocontraseñaparadescifrar
sutabletacadavezqueloencienda.
Encriptar almacenamiento de tarjeta SD:lepermiteencriptarlosdatosque
contengalatarjetaMicroSDaefectosdeseguridad.
Bloqueo de tarjeta SIM:lepermiteconfigurarunPINo,siyaestuviera
determinado,lepermitecambiarelPIN.
Escritura de contraseña visible:muestraelúltimocarácterdelacontraseña
ocultaamedidaquelaescribe.
Administradores de dispositivos:permitevisualizarodesactivarlos
administradoresdelatableta.
Orígenes desconocidos:permitelainstalacióndeaplicacionesqueno
procedandeGooglePlay.
Verificar aplicaciones:nopermitiroadvertirantesdelainstalacióndeaplic.
quepuedancausardaño.
Tipo de almacenamiento:muestraeltipodealmacenamientode
certificados.
Credenciales de confianza:muestracertificadosdeentidadesemisorasde
certificadosdeconfianza.
Instalar desde memoria:permiteinstalarcertificadosencriptados.
Borrar certificados:eliminatodosloscertificados.
Trust agents:permiteverodesactivarlostrustagents.
Anclaje de pantalla:estacaracterísticapermitebloqueareldispositivode
formaqueelusuarioactualsolopuedaaccederalaaplicaciónanclada.Es
muyútilparausuariosquetenganhijos.
Aplicaciones con acceso de uso: permiteverinformacióndeusodelas
aplicaciones.

112
Cuentas y sincronización
Permitequelasaplicacionessincronicendatosenunsegundoplano,tanto
siestátrabajandoconellascomosino.LadesactivacióndeSincronización
automáticapuedepermitirleahorrarcargadelabateríayreducir(perono
eliminar)elusodedatos.
Idioma y teclado
UtilicelosajustesdeIdiomaytecladoparaseleccionarelidiomaylaregión
deltextodelatabletayparaconfigurareltecladoenpantalla,incluidaslas
palabrasquehaañadidoaldiccionario.
Copia de seguridad y reinicio
Copia de seguridad de datos:establezcaestevalorparahacerunacopiade
seguridaddesusajustesydatosdeaplicacionesenelservidordeGoogle.
Cuenta copia seguridad:establezcalacuentaenlaquedesearealizarla
copiadeseguridaddelosdatos.
Restauración automática:definaestaopciónpararestaurarsusajustes
ydatosdeaplicación,cuandotengaquereinstalarlasaplicacionesenel
dispositivo.
Servicio LG Backup:realizaunacopiadeseguridaddetodalainformación
deldispositivoylarestauraencasodequesepierdanosesustituyanlos
datos.
• Copiar y Recibir datos –permitetransferirdatoscomocontactos,fotos
ymúsicaentredispositivos.
• Copia de seguridad y restauración –permitemantenerlosdatos
seguros.

113
Restaurar datos de fábrica:restablecelosajustesconlosvaloresdefábrica
yeliminatodossusdatos.Sirestablecelatabletadeestaforma,sele
solicitaráquevuelvaaintroducirlamismainformaciónquelaprimeravez
queinicióAndroid.
SISTEMA
Tecla de acceso directo
Permiteactivarydesactivarlasteclasdeaccesorápido.
Fecha y hora
UtilicelosajustesdeFechayhoraparaestablecercómosemostraránlas
fechas.Tambiénpuedeutilizarestosajustesparaestablecersupropiahoray
zonahorariaenvezdeobtenerlahoraactualdelaredmóvil.
Accesibilidad
UtilicelosajustesdeAccesibilidadparaconfigurarcualquiercomplemento
deaccesibilidadquehayainstaladoenlatableta.
NOTA:Requierecomplementosadicionalesparapoderseleccionarlo.
TalkBack:lepermiteconfigurarlafunciónTalkBack,queayudaalas
personascondeficienciavisualmediantelaproporcióndeinstrucciones
devoz.PulseelconmutadorTalkBack situadoenlaesquinasuperior
derechadelapantallaparaactivarla.PulseAjustesenlaparteinferiordela
pantallaparaajustarlaconfiguracióndeTalkBack.
Tamaño de fuente:marqueestaopciónparaaumentareltamañodeltexto.
Invertir color:marqueestaopciónparainvertirloscoloresdelapantallay
delcontenido.

114
Ajuste de color:establecelavisualizacióndelapantallaconmayorcontraste
decolor.Pulseelselector paraactivarlo.Acontinuación,pulsela
pantallayarrastreencualquierdirecciónhastaqueveaelcontrastedecolor
quedeseaemplear.
Zoom táctil:lepermitenampliaryreducirlaimagenpulsandolapantalla
contresdedos.
Protectores de pantalla:atenúalaretroiluminacióndelapantalla.
Acceso directo de accesibilidad:activeestafunciónparahabilitar
rápidamentelasfuncionesdeaccesibilidadendospasos.
Salida de Texto a voz:permiteconfigurarelmotordetextoavoz
preferido,asícomoelajustedevelocidaddevoz.Además,reproduceuna
demostraciónbrevedelasíntesisdevoz.Tambiénsemuestraelestadodel
idiomapredeterminado.
Tipo Audio:estableceeltipodeaudio.ElijaMonooEstéreo.
Balance de sonido:establecelarutadeaudio.Muevaelreguladorporla
barradedeslizamientoparaajustarelvalor.
Apagar todos los sonidos:desactivatodoslossonidos.
Subtítulo:permitepersonalizarlosajustesdesubtítulosparaadaptarlosa
laspersonascondiscapacidadauditiva.Pulseelbotón paraactivar
estafunción.Ajustelasopcionesdeidioma,tamañodeltextoyestilode
subtítulossegúndesee.
Tiempo de realimentación táctil:permiteajustareltiempoylasrespuestas
altacto.ElijaentreCorto,MedioyLargo.
Touch assistant:proporcionaunpaneltáctilfácildeusarparabotones
generalesogestosparaaccederrápidamente.
Tiempo espera pantalla:estableceeltiempoantesdequeseapaguela
pantalla.

115
Áreas de control táctil:toqueelselector paraactivarestafunción.Le
permitelimitarelcontroltáctilaáreasseleccionadasdelapantalla.Pulsela
tecla Bajar volumen ylatecla Inicio almismotiempoparaactivary
desactivarlafunción.
Pantalla giratoria:activeestaopciónparapermitirqueeldispositivogirela
pantallasegúnlaorientacióndeldispositivo(horizontalovertical).
Voz de conformación de la contraseñas:activeestaopciónpararecibiruna
confirmaciónverbalalintroducircontraseñas.
Acceso directo a ajustes de accesibilidad:defineaccesorápidoysencilloa
funcionesseleccionadasaltocartresveceslateclaInicio.
Entrada de un toque:cadapulsacióndeldedointroduceunaletraocarácter
eneltecladoLG.
Accesibilidad mejorada:lepermiteinteractuarconsudispositivomediante
unoomásbotonesquefuncionancomoteclasdelteclado.Estemenú
puedeserútilparausuariosconmovilidadreducidaquelesimpide
interactuardirectamenteconeldispositivo.
Quick Cover
Activeestemenúparaencenderoapagarlapantallaautomáticamenteal
usarlaQuickCover.
Impresión
Lepermiteimprimirelcontenidodedeterminadaspantallas(comopáginas
webmostradasenChrome)enunaimpresoraconectadaalamismared
Wi-FiquesudispositivoAndroid.

116
Acerca de la tableta
Estemenúlepermitegestionarsusactualizacionesdesoftwareyverdiversa
informaciónrelacionadaconsutableta.
Nombre de la tableta:lepermitedefinirelnombredelatableta.
Actualizar SW:lepermitebuscaractualizacionesdeaplicacionesyde
software.
Red:lepermiteverlainformacióndereddelatableta.
Estado:lepermiteverelnúmerodeteléfono,elIMEIyelIMEISVdela
tableta.
Batería:lepermiteverelestadodelabatería,elniveldelabateríayla
informacióndeusodelabatería.
Información de hardware:lepermiteverelnúmerodemodelo,ladirección
IP,eltiempodeencendido,elCSN,ladirecciónMACdelaWi-Fiyla
direccióndeBluetooth.
Información de Software:lepermiteverlaversióndeAndroid,laversiónde
kernel,elnúmerodecompilaciónylaversióndesoftware.
Información legal:lepermiteverdocumentoslegalesdelsoftwareLG,las
licenciasdecódigoabiertoeinformaciónlegaldeGoogle.

117
Acerca de la copia de seguridad y restauración de los
datos del dispositivo
Serecomiendacrearyguardarregularmenteunarchivodecopiade
seguridadenelmediodealmacenamientointerno,especialmenteantesde
actualizarcualquiersoftware.Elmantenimientodeunarchivodecopiade
seguridadactualizadoenlamemoriadealmacenamientopuedepermitir
recuperarlosdatosdeldispositivosilopierde,selorobanoresultadañado
porunproblemaimprevisto.
LaaplicaciónLGCopiadeseguridadescompatibleentresmartphonesy
tabletasdeLG,otrosoftwareoversionesdiferentesdesistemaoperativo.Por
ello,alcomprarlosnuevossmartphonesytabletasdeLG,puederestaurar
unacopiadeseguridaddelosdatosquetengaensuteléfonoantiguoenel
nuevo.
SitieneprecargadalaaplicaciónLGCopiadeseguridadensus
smartphonesytabletas,podrárealizarunacopiadeseguridadyrestaurarla
mayoríadesusdatos,incluidaslasaplicacionespreinstaladasydescargadas,
marcadores,entradasdelcalendario,contactos,ajustesdelapantallade
inicioyajustesdelsistema.Tambiénpuede:
•RealizarunaCopiadeseguridadmanualdesudispositivo.
•Restaurarlosdatosdeldispositivo.
ADVERTENCIA! Paraevitarqueseapagueeldispositivodeforma
inesperadaporfaltadeenergíadurantelasoperacionesdecopia
deseguridadorestauración,asegúresedequelabateríaesté
completamentecargada.
LG Backup

118
Copia de seguridad de los datos de su tableta
1 Enlapantalladeinicio,pulseAplicaciones >Ajustes >Copia
de seguridad y reinicio>Servicio LG Backup>Copia de seguridad y
restauración>Copia de seguridad.
2 EnlapantallaUbicacióndelacopiadeseguridad,pulseAlmacenamiento
internooTarjeta SDy,acontinuación,pulseSiguiente.
3 Activelacasilladeverificaciónsituadajuntoaloselementosdelos
quedeseerealizarlacopiadeseguridad,y,acontinuación,seleccione
Siguiente.
4 LealainformaciónquesemuestraenlapantallaypulseInicio.
5 Cuandohayafinalizadolacopiadeseguridaddelosarchivos
seleccionados,semostraráelmensajeCopia de seguridad finalizada.
Restaurar los datos de la tableta
NOTA:Todoslosarchivosqueesténalmacenadosenlatabletase
borraránantesdequeserestaureelarchivodecopiadeseguridad.
Asegúresedecopiarelarchivodecopiadeseguridadenotraubicación.
1 Enlapantalladeinicio,pulseAplicaciones >Ajustes >Copia
de seguridad y reinicio>Servicio LG Backup>
Copia de seguridad y
restauración>
Restauración y gestión de archivo.
2 EnlapantallaRestaurar,seleccioneelarchivodecopiadeseguridadque
contengalosdatosquedesearestaurar.
3 Activelacasilladeverificaciónqueestájuntoalelementoquedeseerestaurar
y,acontinuación,seleccioneSiguientepararestaurarloenlatableta.

119
NOTA:Tengaencuentaquelosdatosdelatabletasesobrescribiráncon
elcontenidodelacopiadeseguridad.
4 Sielarchivodecopiadeseguridadestáencriptado,escribalacontraseñaque
creóparaencriptarlo.
5 Cuandohayafinalizadolarestauracióndelosarchivosseleccionados,latableta
sereiniciaráautomáticamente.
NOTA:PuedeestablecerlaopciónBloquear los archivos de copia de
seguridadalcrearcopiasdeseguridadparacifrarlosarchivosdecopiade
seguridadcomoprotecciónadicional.
EnlapantallaprincipaldeLGCopiadeseguridad,pulselaicono Menú >
Establecer contraseña,eintroduzcaunacontraseñaysugerenciaencasode
quelaolvide.Unavezconfiguradaunacontraseña,tendráqueintroducirla
cadavezquedeseecrearunacopiadeseguridad/restaurar.

120
Actualización de software de la tableta
Estaopciónlepermiteactualizarcómodamenteelfirmwaredelatabletacon
laúltimaversióndesdeInternetsinnecesidaddevisitarningúncentrode
servicio.Paraobtenermásinformaciónsobrecómousarestafunción,visite:
http://www.lg.com
Elprogramadeactualizacióndelfirmwaredelatabletarequierelaatención
delusuariodurantetodoelprocesodeactualización.Antesderealizar
algunaacción,asegúresedeentendertodaslasinstruccionesynotasde
cadapaso.SiextraeelcableUSBolabateríadurantelaactualizaciónpuede
causardañosenlatableta.
Actualización inalámbrica del software de tabletas LG
Estafunciónlepermiteactualizarcómodamenteelsoftwaredelatableta
aunanuevaversióndeformainalámbricasintenerqueconectaruncable
dedatosUSB.EstafunciónsoloestádisponiblecuandoLGponelaversión
másrecientedelfirmwareadisposicióndesudispositivo.Enprimerlugar
debecomprobarlaversióndesoftwaredelatableta:
Enlapantalladeinicio,pulseAplicaciones >Ajustes >Acerca de la
tableta>Información de Software.
Pararealizarlaactualizacióndelsoftwaredelatableta,enlapantallainicio,
pulseAplicaciones >Ajustes >Acerca de la tableta>Actualizar SW
>Actualización de SW>Compruebe si existe nuevo SW.
Actualización de software de la tableta

121
NOTA:LGsereservaelderechodeofreceractualizacionesdefirmware
únicamenteparamodelosseleccionadossegúnloestimeoportuno,yno
garantizaladisponibilidaddeunaversiónactualizadadelfirmwarepara
todoslosmodelosdetableta.
NOTA:Losdatospersonales,incluidalainformaciónsobrelacuentade
Googleycualquierotracuenta,losdatosyajustesdelsistemaydelas
aplicaciones,cualquieraplicacióndescargadaylalicenciaDRMpodrían
eliminarseenelprocesodeactualizacióndelsoftwaredeldispositivo.
Porello,LGlerecomiendaquerealiceunacopiadeseguridaddesus
datospersonalesantesdeactualizarelsoftwaredelatableta.LGnose
responsabilizadelasposiblespérdidasdedatospersonales.

122
Estosaccesoriosestándisponiblesparausarseconestatableta.(Los
elementos que se describen a continuación pueden ser opcionales.)
Adaptador de viaje Cable USB
Guía de inicio
rápido
NOTA:
•UtilicesiempreaccesoriosLGoriginales.Sinolohace,lagarantíapuede
quedaranulada.
•Losaccesoriospuedenvariarenlasdistintasregiones.
Accesorios

123
Enestecapítulosedescribenalgunosproblemasquesepuedenproducir
cuandouselatableta.Parasolucionaralgunosdeellos,deberállamarasu
proveedordeservicios,aunquelamayoríadeproblemaspodrásolucionarlos
ustedmismo.
Mensaje Causas posibles Soluciones posibles
Nosepueden
establecer
aplicaciones.
Elproveedorde
serviciosnoadmite
lafunciónorequiere
registrarse.
Póngaseencontactocon
suproveedordeservicios.
Erroralcargar
Labateríanoestá
cargada.
Carguelabatería.
Latemperaturaexterior
esdemasiadoaltao
baja.
Asegúresedequela
tabletaseestácargandoa
temperaturanormal.
Problemadecontacto
Compruebelaconexióndel
cargadoralatableta.
Nohaytensión
Enchufeelcargadorenuna
tomadistinta.
Cargadordefectuoso Cambieelcargador.
Cargadorerróneo
Utilicesoloaccesoriosde
LGoriginales.
Resolución de problemas

124
Mensaje Causas posibles Soluciones posibles
Nosepueden
recibir/enviar
fotos
Memoriallena
Borrealgunasimágenesde
latableta.
Losarchivos
noseabren
Formatodearchivono
compatible
Compruebelosformatos
dearchivoadmitidos.
Sinsonido Mododevibración
Compruebeelestadode
configuracióndelmenú
desonidoparaasegurarse
dequenoestáenmodo
silencioodevibración.

User Guide
ENGLISH
• Screendisplaysandillustrationsmaydiffer
fromthoseyouseeonactualdevice.
• Someofthecontentsofthisguidemay
notapplytoyourdevice,dependingon
thesoftwareandyourserviceprovider.All
informationinthisdocumentissubjectto
changewithoutnotice.
• Thisdeviceisnotsuitableforpeoplewho
haveavisualimpairmentduetothetouch
screenkeyboard.
• Copyright©2015LGElectronics,Inc.All
rightsreserved.LGandtheLGlogoare
registeredtrademarksofLGGroupandits
relatedentities.Allothertrademarksare
thepropertyoftheirrespectiveowners.
• Google™,GoogleMaps™,Gmail™,
YouTube™,Hangouts™andGooglePlay™
aretrademarksofGoogle,Inc.

2
About this user guide .............................5
About this user guide ............................... 5
Trademarks ................................................. 6
DivX HD ...................................................... 6
Guidelines for safe and efficient use ....7
Important notice ....................................17
Getting to know your device ................ 21
Tablet Overview.........................................21
Charging your tablet ...............................23
Optimizing Battery Life ..........................24
To extend the life of your battery ............ 24
To view the battery charge level .............. 25
To monitor and control what uses the
battery ............................................................... 25
Installing the SIM card ............................25
Inserting a microSD card........................26
Removing the microSD card .................. 27
Formatting the microSD card ................28
Locking and unlocking the screen ........28
Turning the screen on using the
KnockON feature .......................................... 29
Unlocking your screen using the Knock
Code feature ................................................... 29
Your Home screen ................................ 30
Touch screen tips .....................................30
Tap or touch ....................................................30
Touch and hold ..............................................30
Drag....................................................................30
Swipe or slide ...................................................31
Double-tap ........................................................31
Pinch-to-Zoom ................................................31
Rotate the screen ...........................................31
Home screen ............................................. 31
Customizing the Home screen ............... 33
Opening, switching, and stopping
apps ...........................................................33
Using Dual window .................................. 34
Customizing app icons on the Home
screen ........................................................35
Quick access ............................................36
Notifications ............................................. 36
Accessing notifications ................................37
Quick Settings on the Notifications
Panel ...................................................................37
To rearrange Quick Setting options on
the Notification Panel .................................. 38
QSlide apps on the Notifications
Panel .................................................................. 38
Using the QSlide apps ............................... 38
Notification icons on the Status Bar ......38
Multiple Users .......................................... 40
QSlide ........................................................41
Capturing a Screenshot ..........................43
Using QuickMemo+ to capture a
screenshot ....................................................... 43
Using Capture plus to capture a
screenshot of the browser ......................... 43
Text Input Methods ................................. 44
Enter suggested word using gesture
control ...............................................................44
Entering special characters ......................45
Table of contents

3
Using Clip Tray ............................................... 46
Google account setup ...........................47
Connecting to Networks and Devices 48
Wi-Fi .........................................................48
Connecting to Wi-Fi networks ................. 48
Turning Wi-Fi on and connecting to a
Wi-Fi network..................................................48
Bluetooth .................................................. 49
Turning on Bluetooth and pairing up
your tablet with a Bluetooth device ....... 49
Send data using the Bluetooth
feature ............................................................... 50
Receive data using the Bluetooth
feature ............................................................... 50
SmartShare ...............................................51
Enjoying the content via a variety of
devices ................................................................51
Playing/Sending ..............................................51
Enjoying the content from Nearby
devices .......................................................51
Connecting devices .......................................51
Searching other devices ............................ 52
Using the content from the Cloud ........ 52
Using the Cloud ............................................ 52
QPair ......................................................... 52
PC connections with a USB cable .........55
Transferring music, photos and videos
using the Media device (MTP) mode ... 55
Synchronize with Windows Media
Player ................................................................. 55
PC connections with a USB cable for
Mac OS X users ............................................ 56
Contacts .................................................57
Searching for a contact .......................... 57
Adding a new contact ............................. 57
Favorite Contacts ..................................... 57
Creating a group......................................58
Messaging ..............................................59
Conversation view .................................... 59
Sending a message .................................59
Using smilies ............................................ 60
Changing your message settings ..........60
E-mail ..................................................... 61
Managing an email account ....................61
Working with account folders ................62
Composing and sending email .............. 62
Receiving emails ......................................62
Entertainment....................................... 63
Camera .....................................................63
Getting to know the viewfinder ................ 63
Using the advanced settings ................... 64
Taking a photo ...............................................64
To zoom in or out .......................................... 65
Gesture shot....................................................65
Once you've taken a photo ....................... 65
Viewing your saved photos ........................67
Recording a video .........................................67
Watching your saved videos......................67
Gallery ....................................................... 68
Viewing pictures ............................................68
Playing videos ................................................. 69
Deleting images and videos ..................... 69
Setting as wallpaper..................................... 69

4
Slideshow..................................................69
Video ......................................................... 70
Playing a video ................................................ 70
Music .......................................................... 71
Transfer music using Media device (MTP)
mode ...................................................................71
Playing a song .................................................72
Tools ........................................................74
QuickMemo+ ............................................ 74
QuickRemote ........................................... 76
Clock ......................................................... 77
Calculator ................................................. 78
Calendar ................................................... 78
Tasks.......................................................... 79
File Manager ............................................80
Voice Recorder ..........................................81
POLARIS Office 5 ..................................82
Google+ ....................................................83
LG SmartWorld ........................................83
The Web ................................................ 85
Internet .....................................................85
Opening a page ............................................ 85
Bookmarks ....................................................... 86
History ............................................................... 86
Using Reader mode .................................... 86
Using QSlide ................................................... 86
Download files ................................................ 86
Chrome ..................................................... 86
Viewing web pages .......................................87
Opening a page ............................................. 87
Searching the web by voice ......................87
Syncing with other devices ........................87
Adding and viewing bookmarks .............88
Chrome Options menu .............................. 88
Settings ................................................. 89
Access the Settings menu .....................89
WIRELESS NETWORKS ........................89
DEVICE ..................................................... 92
PERSONAL .............................................. 96
SYSTEM....................................................99
LG Backup ............................................ 103
About backing up and restoring device
data ......................................................... 103
Backup your tablet data........................ 104
Restoring tablet data ............................ 104
Tablet software update .......................106
Tablet software update ......................... 106
LG tablet software update via
Over-the-Air (OTA) ............................... 106
Accessories ..........................................108
Troubleshooting ................................... 109

5
About this user guide
• Beforeusingyourdevice,pleasecarefullyreadthismanual.Thiswillensurethat
youuseyourdevicesafelyandcorrectly.
• Someoftheimagesandscreenshotsprovidedinthisguidemayappear
differentlyonyourtablet.
• Yourcontentmaydifferfromthefinalproduct,orfromsoftwaresuppliedby
serviceprovidersorcarriers,Thiscontentmaybesubjecttochangewithout
priornotice.Forthelatestversionofthismanual,pleasevisittheLGwebsiteat
www.lg.com.
• Yourdevice'sapplicationsandtheirfunctionsmayvarybycountry,region,or
hardwarespecifications.LGcannotbeheldliableforanyperformanceissues
resultingfromtheuseofapplicationsdevelopedbyprovidersotherthanLG.
• LGcannotbeheldliableforperformanceorincompatibilityissuesresulting
fromeditedregistrysettingsbeingeditedoroperatingsystemsoftwarebeing
modified.Anyattempttocustomizeyouroperatingsystemmaycausethe
deviceoritsapplicationstonotworkastheyshould.
• Software,audio,wallpaper,images,andothermediasuppliedwithyour
devicearelicensedforlimiteduse.Ifyouextractandusethesematerialsfor
commercialorotherpurposesis,youmaybeinfringingcopyrightlaws.Asa
user,youarefullyareentirelyresponsiblefortheillegaluseofmedia.
• Additionalchargesmaybeappliedfordataservices,suchasmessaging,
uploadinganddownloading,auto-syncing,orusinglocationservices.Toavoid
additionalcharges,selectadataplantoissuitableforyourneeds.Contactyour
serviceprovidertoobtainadditionaldetails.
Trademarks
• LGandtheLGlogoareregisteredtrademarksofLGElectronics.
• Allothertrademarksandcopyrightsarethepropertyoftheirrespectiveowners.
About this user guide

6
DivX HD
ABOUT DIVX VIDEO:DivX®isadigitalvideoformatcreatedbyDivX,LLC,a
subsidiaryofRoviCorporation.ThisisanofficialDivXCertified®devicethat
haspassedrigoroustestingtoverifythatitplaysDivXvideo.Visitdivx.com
formoreinformationandsoftwaretoolstoconvertyourfilesintoDivXvideos.
ABOUT DIVX VIDEO-ON-DEMAND:ThisDivXCertified®devicemustbe
registeredinordertoplaypurchasedDivXVideo-on-Demand(VOD)movies.
Toobtainyourregistrationcode,locatetheDivXVODsectioninyourdevice
setupmenu.Gotovod.divx.comformoreinformationonhowtocomplete
yourregistration.
DivX Certified® to play DivX® video up to HD 720p, including premium
content.
DivX®, DivX Certified® and associated logos are trademarks of Rovi
Corporation or its subsidiaries and are used under license.
OPEN SOURCE SOFTWARE NOTICE INFORMATION
ToobtainthesourcecodeunderGPL,LGPL,MPL,andother
opensourcelicenses,thatiscontainedinthisproduct,pleasevisit
http://opensource.lge.com.
Inadditiontothesourcecode,allreferredlicenseterms,warranty
disclaimersandcopyrightnoticesareavailablefordownload.
LGElectronicswillalsoprovideopensourcecodetoyouonCD-ROM
forachargecoveringthecostofperformingsuchdistribution(such
asthecostofmedia,shipping,andhandling)uponemailrequestto
opensource@lge.com.Thisofferisvalidforthree(3)yearsfromthedate
onwhichyoupurchasedtheproduct.

7
Pleasereadthesesimpleguidelines.Notfollowingtheseguidelinesmaybe
dangerousorillegal.
Shouldafaultoccur,asoftwaretoolisbuiltintoyourdevicethatwillgather
afaultlog.Thistoolgathersonlydataspecifictothefault,suchassignal
strengthandapplicationsloaded.Thelogisusedonlytohelpdeterminethe
causeofthefault.Theselogsareencryptedandcanonlybeaccessedbyan
authorizedLGRepaircentreshouldyouneedtoreturnyourdeviceforrepair.
Exposure to radio frequency energy
RadiowaveexposureandSpecificAbsorptionRate(SAR)information.
ThistabletdevicemodelLG-V490hasbeendesignedtocomplywith
applicablesafetyrequirementsforexposuretoradiowaves.These
requirementsarebasedonscientificguidelinesthatincludesafetymargins
designedtoassurethesafetyofallpersons,regardlessofageandhealth.
•Theradiowaveexposureguidelinesemployaunitofmeasurementknown
astheSpecificAbsorptionRate(SAR).TestsforSARareconductedusing
standardisedmethodswiththedevicetransmittingatitshighestcertified
powerlevelinallusedfrequencybands.
•WhiletheremaybedifferencesbetweentheSARlevelsofvarious
LGdevicemodels,theyarealldesignedtomeettherelevantguidelinesfor
exposuretoradiowaves.
•TheSARlimitrecommendedbytheInternationalCommissiononNon-
IonizingRadiationProtection(ICNIRP)is2W/kgaveragedover10gof
tissue.
Guidelines for safe and efficient use

8
•ThehighestSARvalueforthisdevicewhenwornonthebody,asdescribed
inthisuserguide,is1.420W/kg.
•ThisdevicemeetsRFexposureguidelineswhenusedeitherinthenormal
usepositionagainsttheearorwhenpositionedatleast0.00cmaway
fromthebody.Whenacarrycase,beltcliporholderisusedforbody-worn
operation,itshouldnotcontainmetalandshouldpositiontheproductat
least0.00cmawayfromyourbody.
Inordertotransmitdatafilesormessages,thisdevicerequiresaquality
connectiontothenetwork.Insomecases,transmissionofdatafilesor
messagesmaybedelayeduntilsuchaconnectionisavailable.Ensurethe
aboveseparationdistanceinstructionsarefolloweduntilthetransmissionis
completed.
Product care and maintenance
WARNING
Onlyusebatteries,chargersandaccessoriesapprovedforusewiththis
particulardevicemodel.Theuseofanyothertypesmayinvalidateany
approvalorwarrantyapplyingtothedeviceandmaybedangerous.
•Donotdisassemblethisunit.Takeittoaqualifiedservicetechnicianwhen
repairworkisrequired.
•Repairsunderwarranty,atLG'sdiscretion,mayincludereplacementparts
orboardsthatareeitherneworreconditioned,providedthattheyhave
functionalityequaltothatofthepartsbeingreplaced.
•KeepawayfromelectricalappliancessuchasTVs,radiosandpersonal
computers.
•Theunitshouldbekeptawayfromheatsourcessuchasradiatorsor
cookers.

9
•Donotdrop.
•Donotsubjectthisunittomechanicalvibrationorshock.
•Switchoffthedeviceinanyareawhereyouarerequiredtobyspecial
regulations.Forexample,donotuseyourdeviceinhospitalsasitmay
affectsensitivemedicalequipment.
•Donothandlethedevicewithwethandswhileitisbeingcharged.Itmay
causeanelectricshockandcanseriouslydamageyourdevice.
•Donotchargeadevicenearflammablematerialasthedevicecanbecome
hotandcreateafirehazard.
•Useadryclothtocleantheexterioroftheunit(donotusesolventssuch
asbenzene,thinneroralcohol).
•Donotchargethetabletwhenitisonsoftfurnishings.
•Thedeviceshouldbechargedinawellventilatedarea.
•Donotsubjectthisunittoexcessivesmokeordust.
•Donotkeepthedevicenexttocreditcardsortransporttickets;itcan
affecttheinformationonthemagneticstrips.
•Donottapthescreenwithasharpobjectasitmaydamagethetablet.
•Donotexposethedevicetoliquidormoisture.
•Useaccessorieslikeearphonescautiously.
•Donotuse,touchorattempttoremoveorfixbroken,chippedorcracked
glass.Damagetotheglassdisplayduetoabuseormisuseisnotcovered
underthewarranty.
•Yourtabletisanelectronicdevicethatgeneratesheatduringnormal
operation.Extremelyprolonged,directskincontactintheabsenceof
adequateventilationmayresultindiscomfortorminorburns.Therefore,
usecarewhenhandlingyourdeviceduringorimmediatelyafteroperation.

10
•Ifyourdevicegetswet,immediatelyunplugittodryoffcompletely.Donot
attempttoacceleratethedryingprocesswithanexternalheatingsource,
suchasanoven,microwaveorhairdryer.
•Theliquidinyourwetdevice,changesthecoloroftheproductlabelinside
yourdevice.Damagetoyourdeviceasaresultofexposuretoliquidisnot
coveredunderyourwarranty.
•Useyourtabletintemperaturesbetween0ºCand40ºC,ifpossible.
Exposingyourdevicetoextremelyloworhightemperaturesmayresultin
damage,malfunction,orevenexplosion.
Efficient device operation
Electronics devices
Alltabletdevicemayreceiveinterference,whichcouldaffectperformance.
•Donotuseyourtabletdevicenearmedicalequipmentwithoutrequesting
permission.Avoidplacingthetabletoverpacemakers,forexample,inyour
breastpocket.
•Somehearingaidsmightbedisturbedbytabletdevice.
•MinorinterferencemayaffectTVs,radios,PCsetc.
Road safety
Checkthelawsandregulationsontheuseoftabletdeviceintheareawhen
youdrive.
•Donotuseahand-helddevicewhiledriving.
•Givefullattentiontodriving.
•RFenergymayaffectsomeelectronicsystemsinyourvehiclesuchascar
stereosandsafetyequipment.

11
•Whenyourvehicleisequippedwithanairbag,donotobstructwith
installedorportablewirelessequipment.Itcancausetheairbagtofailor
causeseriousinjuryduetoimproperperformance.
•Ifyouarelisteningtomusicwhilstoutandabout,pleaseensurethatthe
volumeisatareasonablelevelsothatyouareawareofyoursurroundings.
Thisisofparticularimportancewhennearroads.
Avoid damage to your hearing
NOTE:Excessivesoundpressurefromearphonesandheadphonescan
causehearingloss.
Topreventpossiblehearingdamage,donotlistenathighvolume
levelsforlongperiods
•Damagetoyourhearingcanoccurifyouareexposedtoloudsoundfor
longperiodsoftime.Wethereforerecommendthatyoudonotturnonor
offthetabletclosetoyourear.Wealsorecommendthatmusicvolumes
aresettoareasonablelevel.
•Whenusingheadphones,turnthevolumedownifyoucannothearthe
peoplespeakingnearyou,orifthepersonsittingnexttoyoucanhear
whatyouarelisteningto.
Glass Parts
Somepartsofyourtabletdevicearemadeofglass.Thisglasscouldbreak
ifyourdeviceisdroppedonahardsurfaceorreceivesasubstantialimpact.
Iftheglassbreaks,donottouchorattempttoremoveit.Stopusingyour
deviceuntiltheglassisreplacedbyanauthorisedserviceprovider.

12
Blasting area
Donotusethetabletwhereblastingisinprogress.Observerestrictionsand
followanyregulationsorrules.
Potentially explosive atmospheres
•Donotuseyourtabletatarefuelingpoint.
•Donotusenearfuelorchemicals.
•Donottransportorstoreflammablegas,liquidorexplosivesinthesame
compartmentofyourvehicleasyourtabletdeviceoraccessories.
In aircraft
Wirelessdevicescancauseinterferenceinaircraft.
•Turnyourtabletoffbeforeboardinganyaircraft.
•Donotuseitonthegroundwithoutpermissionfromthecrew.
Children
Keepthedeviceinasafeplaceoutofthereachofsmallchildren.Itincludes
smallpartswhichmaycauseachokinghazardifdetached.Thisdevicealso
containsaninternalbatterythatcanbehazardousifthedeviceisnotused
ormaintainedproperly.
Battery information and care
•Youdonotneedtocompletelydischargethebatterybeforerecharging.
Unlikeotherbatterysystems,thereisnomemoryeffectthatcould
compromisethebattery'sperformance.

13
•UseonlyLGbatteriesandchargers.LGchargersaredesignedtomaximise
thebatterylife.
•Donotdisassembleorshort-circuitthebattery.
•Rechargethebatteryifithasnotbeenusedforalongtimetomaximise
usability.
•Donotexposethebatterychargertodirectsunlightoruseitinhigh
humidity,suchasinthebathroom.
Donotleavethedeviceinhotorcoldplaces,asthismaydeteriorate
batteryperformance.
•Thereisriskofexplosionifthebatteryisreplacedwithanincorrecttype.
•Disposeofusedbatteriesaccordingtothemanufacturer'sinstructions.
Pleaserecyclewhenpossible.Donotdisposeashouseholdwaste.
•Alwaysunplugthechargerfromthewallsocketafterthetabletisfully
chargedtosaveunnecessarypowerconsumptionofthecharger.
•Actualbatterylifewilldependonnetworkconfiguration,productsettings,
usagepatterns,batteryandenvironmentalconditions.
•Makesurethatnosharp-edgeditemssuchasanimal’steethornails,
comeintocontactwiththebattery.Thiscouldcauseafire.

14
WARNING
Notice for Battery replacement
•Li-IonBatteryisahazardouscomponentwhichcancauseinjury.
•Batteryreplacementbynon-qualifiedprofessionalcancausedamageto
yourdevice.
•Donotreplacethebatterybyyourself.Thebatterycanbedamaged,
whichcancauseoverheatandinjury.Thebatterymustbereplaced
bytheauthorizedserviceprovider.Thebatteryshouldberecycledor
disposedseparatelyfromhouseholdwaste.
•Incasethisproductcontainsabatteryincorporatedwithintheproduct
whichcannotbereadilyremovedbyend-users,LGrecommendsthat
onlyqualifiedprofessionalsremovethebattery,eitherforreplacementor
forrecyclingattheendofthisproduct’sworkinglife.Topreventdamage
totheproduct,andfortheirownsafety,usersshouldnotattemptto
removethebatteryandshouldcontactLGServiceHelpline,orother
independentserviceprovidersforadvice.
•Removalofthebatterywillinvolvedismantlingoftheproductcase,
disconnectionoftheelectricalcables/contacts,andcarefulextraction
ofthebatterycellusingspecializedtools.Ifyouneedtheinstructions
forqualifiedprofessionalsonhowtoremovethebatterysafely,please
visithttp://www.lge.com/global/sustainability/environment/take-back-
recycling.

15
How to update your tablet
Accesstolatestfirmwarereleases,newsoftwarefunctionsand
improvements.
•UpdateyourtabletwithoutaPC:SelectUpdate Center
>Software
Update>Check now for update.
•UpdateyourtabletbyconnectingittoyourPC.
Formoreinformationaboutusingthisfunction,pleasevisit
http://www.lg.com/common/index.jspandselectthecountryand
language.
DECLARATION OF CONFORMITY
Hereby,LG ElectronicsdeclaresthatthisLG-V490productisin
compliancewiththeessentialrequirementsandotherrelevantprovisions
ofDirective1999/5/EC.AcopyoftheDeclarationofConformitycanbe
foundathttp://www.lg.com/global/declaration
Contact office for compliance of this product
LGElectronicsInc.
EURepresentative,Krijgsman1,
1186DMAmstelveen,TheNetherlands
NOTE: Pursuant EN 60950-1 (§ 1.7.2)
Inordertopreventunnecessaryenergyconsumption,disconnectthe
devicewhenfullycharged.Alwaysuseaneasilyaccessiblepower-outlet
forchargingyourdevice.

16
Disposal of your old appliance
1 Allelectricalandelectronicproductsshouldbedisposedof
separatelyfromthemunicipalwastestreamviadesignated
collectionfacilitiesappointedbythegovernmentorthelocal
authorities.
2 Thecorrectdisposalofyouroldappliancewillhelpprevent
potentialnegativeconsequencesfortheenvironmentandhuman
health.
3 Formoredetailedinformationaboutdisposalofyouroldappliance,
pleasecontactyourcityoffice,wastedisposalserviceortheshop
whereyoupurchasedtheproduct.
Disposal of waste batteries/accumulators
1 Thissymbolmaybecombinedwithchemicalsymbolsformercury
(Hg),cadmium(Cd)orlead(Pb)ifthebatterycontainsmorethan
0.0005%ofmercury,0.002%ofcadmiumor0.004%oflead.
2 Allbatteries/accumulatorsshouldbedisposedseparatelyfrom
themunicipalwastestreamviadesignatedcollectionfacilities
appointedbythegovernmentorthelocalauthorities.
3 Thecorrectdisposalofyouroldbatteries/accumulatorswillhelp
topreventpotentialnegativeconsequencesfortheenvironment,
animalandhumanhealth.
4 Formoredetailedinformationaboutdisposalofyouroldbatteries/
accumulators,pleasecontactyourcityoffice,wastedisposal
serviceortheshopwhereyoupurchasedtheproduct.

17
Please read this before you start using your tablet!
Pleasechecktoseewhetheranyproblemsyouencounteredwithyourtablet
aredescribedinthissectionbeforetakingthetabletinforserviceorcalling
aservicerepresentative.
1. Tablet Memory
Youneedtocheckyourtabletmemoryanddeletesomedata,suchas
applications,tomakemorememoryavailable.
To uninstall applications:
1 Tap > >Appstab>Settings >Apps.
2 Oncealloftheapplicationsappear,selecttheapplicationyouwantto
uninstall.
3 TapUninstallandOKtoconfirm.
2. Before installing an open source application and
operating system (OS)
WARNING
IfyouinstallanduseanOSotherthantheoneprovidedbythe
manufactureritmaycauseyourtablettomalfunction.Inaddition,your
tabletwillnolongerbecoveredbythewarranty.
Important notice

18
WARNING
Toprotectyourtabletandpersonaldata,onlydownloadapplications
fromtrustedsources,suchasPlayStore.Ifthereareimproperlyinstalled
applicationsonyourtablet,thetabletmaynotworknormallyoraserious
errormayoccur.Youmustuninstallthoseapplicationsandallassociated
dataandsettingsfromthetablet.
3. Using a Screen Lock
Setanscreenlocktosecureyourtablet.Tap > >Appstab>
Settings >Display>Lock screen>Select screen lockandselecta
desiredscreenlockfromSwipe,Knock Code,Pattern,PINandPassword.
YoucancreateaBackupPINasasafetymeasureincaseyouforgetyour
screenlock.
Caution:CreateorsignintoaGoogleaccountbeforesettingascreenlock
andremembertheBackupPINyoucreatedwhencreatingyourscreenlock.
WARNING
Precautions to take when using a screen lock.
Itisveryimportanttorememberthescreenlockyouset.Youwillnotbe
abletoaccessyourtabletifyouuseanincorrectscreenlock5times.You
have5opportunitiestoenteryourunlockpattern,PINorpassword.Ifyou
haveusedall5opportunities,youcantryagainafter30seconds.

19
When you can’t recall your Pattern, PIN or Password:
< If you have forgotten your pattern >
IfyouloggedintoyourGoogleaccountonthetabletbutfailedtoenterthe
correctpattern5times,taptheForgot pattern?buttonatthebottomofthe
screen.YouarethenrequiredtologinwithyourGoogleAccountoryouhave
toentertheBackupPINwhichyouenteredwhencreatingyourPatternLock.
IfyouhavenotcreatedaGoogleaccountonthetabletoryouforgotthe
BackupPIN,youhavetoperformahardreset.
< If you have forgotten your PIN or Password >
IfyouforgetyourPINorPassword,youwillneedtoperformahardreset.
Caution:Ifyouperformahardreset,alluserapplicationsanduserdatawill
bedeleted.
NOTE:IfyouhavenotloggedintoyourGoogleAccountandhave
forgottenyourPattern,youwillneedtoenteryourBackupPIN.
4. Using the Hard Reset (Factory Reset)
Ifyourtabletdoesnotrestoretoitsoriginalcondition,useaHardReset
(FactoryReset)toinitializeit.
1 Turnthetabletoff.
2 PressandholdtheVolume Down Key first,thenpressandholdthe
Power/Lock Key ontherightsideofthetabletuntiltheLGlogois
displayed.
3 ReleaseallofthekeyswhentheLGlogoisdisplayed.
4 ImmediatelypressandholdthePower/Lock Key + Volume Down Key
atthesametime.

20
5 ReleaseallkeyswhentheFactoryhardresetscreenisdisplayed.
6 PresseitheroftheVolume Keys tomovethecursortoYes,thenpress
thePower/Lock Key tocontinue.
7 PresseitheroftheVolume Keys tomovethecursortoYesonceagain,
thenpressthePower/Lock Key toconfirm.
8 Yourdevicewillperformahardreset.
WARNING
IfyouperformaHardReset,alluserapplications,userdataandDRM
licenseswillbedeleted.Pleaseremembertobackupanyimportantdata
beforeperformingaHardReset.
5. When the screen freezes
If the screen freezes or the tablet does not respond when you try to operate
it:PressandholdthePower/Lock Key forover8secondsuntiltheLGlogo
isdisplayedtorestartyourtablet.Ifitstilldoesnotwork,pleasecontactthe
servicecenter.

21
Getting to know your device
Tablet Overview
Volume keys
Rear-facing camera
Speakers
Front-facing camera
Power/Lock key
Earphone jack
SIM card/MicroSD card slot
IR LED
Charger/USB port
NOTE:Yourtabletisdesignedtohave
twospeakeropeningsonthebackside
foraestheticreasons.However,theactual
soundcomesfromonlyonespeaker.
Pleasenotethatit’snotaproductdefect.
Microphone
NOTE:Makesurethatthemicrophoneisnotblockedwhenrecordinga
videooraudioclip.

22
Front-facing
camera
Usetotakepicturesandrecordvideosofyourself.
Youcanalsousethisforvideochatting.Keepit
cleanforoptimalperformance.
Power/Lock key
Presstolock/unlockthescreen.Pressandholdto
turnthetableton/off,restartit,activate/deactivate
airplanemode,andchangethesoundsettings.
Volume keys
Allowyoutoadjustthemediavolumes.Pressand
holdbothkeysatthesametimetoaccessthe
QuickMemo+feature.
Earphone jack
Allowsyoutopluginanoptionalheadsetfor
convenient,hands-freeconversations.Youcanalso
pluginheadphonestolistentomusic.
Infrared (IR) LED UsedasasensorfortheQuickRemoteapp.
SIM card/MicroSD
card slot
AllowsyoutoinsertyourSIMcardandamicroSD
card.
Microphone
Recordsyourvoiceandallowsuseforvoice-
activatedfunctions.
Charger/USB port
AllowsyoutoconnectthetabletandtheUSBcable
forusewiththechargeradapter,yourPC,orother
compatibleaccessories.
Rear-facing
camera
Usetotakephotosandrecordvideos.Keepitclean
foroptimalperformance.
Speakers
Usetolistentotheaudiofromtheselectedfunction
(e.g.,music,videos,soundclips,etc.).

23
WARNING
PlacingaheavyobjectonthetabletorsittingonitcandamagetheLCD
andtouchscreenfunctions.
TIP!
•TaptheMenu icon
wheneveryouopenanapplicationtocheckwhat
optionsareavailable.
•Ifthedeviceislockedanddoesnotwork,pressandholdthePower/
Lock Key
forover8secondsuntilLGlogoisdisplayedtorestartyour
tablet.
Charging your tablet
AUSBadapter,whichisincludedwithyourtablet,isusedtochargethe
battery.Beforeusingyourtabletforthefirsttime,makesurethebatteryis
fullycharged.
NOTE:Yourdevicehasaninternalrechargeablebattery.Foryoursafety,do
notremovethebatteryincorporatedintheproduct.
WARNING!Ifthetouchscreendoesnotfunctionwhilethetablet’sinthe
processofcharging,thismaybeduetoanunstablepowersupply.Ifthis
occurs,disconnecttheUSBcablefromthedeviceorunplugtheUSB
adapterfromthepoweroutlet.

24
1 ConnecttheUSBadapterandUSBcable.
2 PlugtheUSBcable(asshownbelow)intothetablet’sCharger/USBport.
3 Plugthechargerintoanelectricalsocket.
NOTE:Thebatterymustbefullychargedinitiallytoimprovebattery
lifetime.
Optimizing Battery Life
Youcanextendyourbattery’slifebetweenchargesbyturningofffeatures
thatyoudon’tneedtorunconstantlyinthebackground.Youcanalso
monitorhowapplicationsandsystemresourcesconsumebatterypower.
To extend the life of your battery
•Turnoffradiocommunicationsthatyouaren’tusing,suchasWi-Fi,
Bluetooth,orGPS.
•Lowerscreenbrightnessandsetashorterscreentimeout.

25
•TurnoffautomaticsyncingforGmail™,Calendar,Contacts,andother
applications.
•Someapplicationsyouhavedownloadedmaycauseyourbatterypowerto
bereduced.
•Whileusingdownloadedapplications,checkthebatterychargedlevel.
To view the battery charge level
1 FromtheHomescreen,tapApps >Settings >About tablet>
Battery.
2 Thebatterystatus(chargingordischarging)andlevelaredisplayedonthe
topmenuofthescreen.
To monitor and control what uses the battery
1 FromtheHomescreen,tapApps >Settings >About tablet>
Battery>Battery usage.
2 Thescreendisplaysbatteryusagetimeandalsolistsapplicationsor
servicesusingbatterypowerfromgreatestamounttoleast.
Installing the SIM card
1 ToinstalltheSIMcard,locateandopenthecovertotheslot.
2 PlaceyourfingernailinthecutoutandgentlypullouttheSIMcardtray.
NOTE:Therearetwoslotsunderneaththecover(theotherslotisfora
microSDcard).
NOTE:IfyouswaptheSIMcard,afterinsertingtheSIMcardyouhaveto
restartyourtablet.

26
3 InserttheSIMcardintothetraywiththegoldencontactfacingdown.
Pushthetraybackintotheslotuntilit“clicks”intoplaceandclosethe
cover.
SIMcardslot
microSDcardslot
Inserting a microSD card
YourdevicesupportstheuseofmicroSDmemorycardsofupto128GB
capacity.MultimediacontentscanbesavedinthemicroSDcard.
1 Placeyourfingernailinthecutoutandgentlypullthememorycardslot
covertoremoveit.
2 Insertthememorycardintotheslotwiththegoldencontactsfacingup.
Carefullypushthememorycardslotcoverintothetablettocloseit.

27
Removing the microSD card
TosafelyremovethemicroSDcardfromyourtablet,firstyouneedto
unmountit.
1 FromtheHomescreen,tapApps >Settings >Storage>
Unmount SD card.
2 OpenthemicroSDcardtrayandpushthecardintoreleaseit.
3 GentlypullthemicroSDcardfromtheslot.
WARNING!DonotremovethemicroSDcardwithoutunmountingitfirst.
Otherwise,itmaydamagethemicroSDcardaswellasyourtablet,and
thedatastoredonthemicroSDcardmaybecorrupted.

28
Formatting the microSD card
WARNING!AllfilesstoredonyourmicroSDcardaredeletedwhenyou
formatthecard.
1 FromtheHomescreen,tapApps >Settings >Storage.
2 TapErase SD card(twice).
3 Ifyousetanunlockpattern,enteritandtapErase everything.Thecard
willthenbeformattedandreadytouse.
NOTE:IfthereiscontentonyourmicroSDcard,thefolderstructuremay
bedifferentafterformattingsinceallthefileswillhavebeendeleted.
Locking and unlocking the screen
Ifyoudonotusethetabletforawhile,thescreenwillbeautomatically
turnedoffandlocked.Thishelpstopreventaccidentaltouchesandsaves
batterypower.Whenyouarenotusingtheyourtablet,pressthePower/Lock
Key tolockyourtablet.
Ifthereareanyprogramsrunningwhenyoulockyourscreen,theymaybe
stillrunninginLockmode.Itisrecommendedthatyouexitallprograms
beforeenteringLockmodetoavoidunnecessarycharges(e.g.webaccess,
datacommunications).
Towakeupyourtablet,pressthePower/Lock Key .TheLockscreenwill
appear.TouchandslidetheLockscreeninanydirectiontounlockyour
Homescreen.Thelastscreenyouviewedwillopen.

29
Turning the screen on using the KnockON feature
TheKnockONfeatureallowsyoutodouble-tapthescreentoeasilyturnthe
screenonoroff.
•Quicklydouble-tapthecenterofthescreento
turnthescreenon.
•Quicklydouble-taptheStatusBar,anempty
areaontheHomescreen,ortheLockscreento
turnthescreenoff.
Unlocking your screen using the Knock Code feature
TheKnockCodefeatureallowsyoutocreateyourownunlockcodeusinga
combinationofknocks(ortaps)onthescreen.
•Whilethescreenisoff,tapthesamesequenceyouestablishedanywhere
onthescreen.TheHomescreenwillbeaccesseddirectly.
To activate Knock Code feature
1 FromtheHomescreen,tapApps >Settings >Display>Lock
screen>Select screen lock>Knock Code.
2 Thisopensascreenthatwillguideyouthroughhowtoselecttheunlock
sequence.YouhavetocreateabackupPINasasafetymeasureincase
youforgetyourunlocksequence.

30
Touch screen tips
Herearesometipsonhowtonavigateonyourtablet.
NOTE:
•Toselectanitem,touchthecenteroftheicon.
•Donotpresstoohard;thetouchscreenissensitiveenoughtopickupa
light,yetfirmtouch.
•Usethetipofyourfingertotouchtheoptionyouwant.Becarefulnotto
touchanyotherkeys.
Tap or touch
Asinglefingertapselectsitems,links,shortcutsandlettersonthe
on-screenkeyboard.
Touch and hold
Touchandholdanitemonthescreenbytouchingitandnotliftingyour
fingeruntilanactionoccurs.Forexample,toopenacontact'savailable
options,touchandholdthecontactintheContactslistuntilthecontext
menuopens.
Drag
Touchandholdanitemforamomentandthen,withoutliftingyourfinger,
moveyourfingeronthescreenuntilyoureachthetargetposition.Youcan
dragitemsontheHomescreentorepositionthem.
Your Home screen

31
Swipe or slide
Toswipeorslide,quicklymoveyourfingeracrossthesurfaceofthescreen,
withoutpausingwhenyoufirsttouchit(soyoudon’tdraganiteminstead).
Forexample,youcanslidethescreenupordowntoscrollthroughalist,or
browsethroughthedifferentHomescreencanvasesbyswipingfromleftto
right(andviceversa).
Double-tap
Double-taptozoomonawebpageoramap.Forexample,quicklydouble-
tapasectionofawebpagetoadjustthatsectiontofitthewidthofthe
screen.Youcanalsodouble-taptozoominandoutwhenviewingapicture
andwhenusingMaps.Double-tapawordtohighlightit.Double-tapcanalso
activatetheKnockONfeaturetoturnthetouchscreenonoroff.
Pinch-to-Zoom
Useyourindexfingerandthumbinapinchingorspreadingmotiontozoom
inoroutwhenusingthebrowser,Maps,orwhenbrowsingpictures.
Rotate the screen
Frommanyapplicationsandmenus,theorientationofthescreenadjuststo
thedevice'sphysicalorientation.
Home screen
Simplyswipeyourfingertotheleftorrighttoviewthepanels.Youcan
customizeeachpanelwithapps,downloads,widgetsandwallpapers.
TheQuickKeysareavailableatthebottompartoftheHomescreenand
provideeasy,one-touchaccesstothefunctionsyouusethemost.

32
Status Bar –Showsdevicestatusinformation,
includingthetime,Wi-Fisignalstrength,battery
status,andnotificationicons.
Back Key –Returnstothepreviousscreen.Also
closespop-upitemssuchasmenus,dialogboxes,
andtheon-screenkeyboard.Touchandholditto
accessDualwindow.
Recent Apps Key–Taptodisplayrecentlyused
applications.Youcanalsotouchandholditto
displaytheMenuoptionsinapplications.
Application icons –Tapanicon(application,widget,
folder,etc.)toopenanduseit.
Quick Keys –Provideeasy,one-touchaccesstothe
functionsusedmostoften.
Home Key –ReturnstotheHomescreen(or
returnstoyourdefaultHomescreencanvasfrom
anyoftheHomescreenextensioncanvases).Touch
andholdittoaccessGoogleNow.
Dual window Key–Taptochangetodualwindow
mode.Itallowsyoutomanagetwodifferentappsat
thesametimebysplittingthescreenintwo.

33
Customizing the Home screen
YoucancustomizeyourHomescreenbyaddingapps,downloads,widgets
orwallpapers.Formoreconvenienceusingyourtablet,addyourfavoriteapps
andwidgetstotheHomescreen.
To add items on your Home screen:
1 TouchandholdtheemptypartoftheHomescreen.
2 TaptheApps orWidgetstab.
3 Dragthedesireditemtothedesiredlocationandliftyourfinger.
To remove an item from the Home screen:
Touchandholdtheiconyouwanttoremove,dragitto ,andliftyour
finger.
TIP! ToaddanapplicationicontotheHomescreenfromtheApps
screen,touchandholdtheapplicationyouwanttoaddanddragittothe
desiredlocation.
TIP! Youcanaddseveralappiconsinafolder.Droponeappiconover
anotheroneonaHomescreen,andafolderwillbecreated.
Opening, switching, and stopping apps
Tap todisplayrecentlyusedapplications.Youcankeepmultipleapps
runningatthesametime,andswitchbetweenseveralopenapps.Youcan
alsomanuallystopappsfromrunning.

34
Using Dual window
TheDualwindowfeaturesplitsthescreentoenablemulti-tasking,dragand
dropinteraction,auto-linkingandrecentlyusedapps.
1 Touch tosplitthescreenortouchandholdthe untiltheapplist
isdisplayed.
2 Touchordraganappicontothedesiredspace.
3 Tap todisplaythefollowingoptions.Youcanalsodragthetabsto
changethesizeofthewindows.
Switchtwoscreens.
Changetheappslist.
Fullscreenview.
Closetheapps.
To disable the Dual window feature
1 Tap >Apps >Settings >Dual window.
2 TaptheDualwindowswitchtotoggleittoOFF.
TIP!YoucanlaunchtwoInternetappsatthesametime.

35
Customizing app icons on the Home screen
YoucancustomizeeachapplicationiconwithimagesfromyourGallery.
1 Touchandholdanapplicationiconuntilit’sunlockedfromitscurrent
position.Thendropitonthescreen.Theediting iconwillappearinthe
upperrightcorneroftheapplication.
2 Taptheapplicationiconagainandselectthedesiredicondesignandtap
OK.OrtapAdd newandadjusttheiconsizeandselectanimagefrom
yourGallery.
To view other Home screen panels
•Swipe(orflick)yourfingerleftorrightacrossthe
Homescreen.
•PinchinontheHomescreentodisplaythemini
panelview,thentaptheHomescreenpanelyou
wanttoview.

36
Quick access
Toviewthequickaccessitems,touchanywhere
inthefrontkeyareaanddragup.Thefollowing
optionsareavailable:GoogleNow.
Notifications
Notificationsalertyoutothearrivalofnewmessages,calendarevents,and
alarms,aswellastoongoingevents,suchasdownloads.
FromtheNotificationsPanel,youcanviewyourtablet’scurrentstatusand
pendingnotifications.Whenanotificationarrives,itsiconappearsatthetop
ofthescreen.Iconsforpendingnotificationsappearontheleft,andsystem
iconsshowingthingslikeWi-Fiorbatterystrengthontheright.
Pending notifications System notifications

37
Accessing notifications
SwipetheStatusBardowntoopentheNotificationsPanelandaccess
notifications.ToclosetheNotificationsPanel,swipethebarthatisatthe
bottomofthescreenupwards.
Quick Settings Bar–Swipetotherightorleft
toscrollthroughthelist.Tapanicontoactivate/
deactivatethefeature.
QSlide Apps–TapaQSlideapptoopenasa
smallwindowonyourscreen.Tap
toremove,
add,orrearrangeQSlideapps.
Slidetotheleftandrighttoadjustthescreen
brightnessandvolume.
Clear Button–Tapheretoclearyourlistofevent-
basednotifications.
Tapanotificationtoopenit.
Quick Settings on the Notifications Panel
UsetheQuickSettingstoeasilytogglefunctionsettingslikeWi-Fi.The
QuickSettingsarelocatedatthetopoftheNotificationsPanel.
NOTE:TouchandholdaniconintheQuickSettingsBartoviewthe
function'ssettingsmenu.

38
To rearrange Quick Setting options on the Notification Panel
OpentheNotificationsPanel,swipetheQuickSettingstotheleft,andtap
.Torearrangeitems,drag tothedesiredlocation.Toaddmoreicons,
checkmarkthedesiredfunctions.
QSlide apps on the Notifications Panel
QSlideappsaredisplayedinabarontheNotificationsPanelbelowthe
QuickSettingsBar.Theseiconsprovideaquick,convenientwaytomulti-task
onthesamescreen(similartopicture-in-pictureonaTV).QSlidedisplaysa
smallapplicationwindowonthescreenthatcanbemoved,resized,ormade
transparent.
NOTE:YoucanremovetheQSlideappsbarbytappingtheQSlideiconin
theQuickSettingsbar.
Using the QSlide apps
TapanyoftheQSlideappsinthebartoactivateit.Whenactivated,the
QSlidefeatureopenstheapplicationinawindowintheforeground,allowing
youtoaccessotherapplicationsinthebackground.Youcanopenuptotwo
QSlidewindowsatatime.
Notification icons on the Status Bar
Theiconslistedinthetablebelowaresomeofthemostcommonones.
Icon Description
Airplanemode
ConnectedtoaWi-Finetwork
Wiredheadsetconnected

39
Bluetoothison
Systemwarning
Vibratemodeison
Silentmodeison
Batteryfullycharged
Batteryischarging
Contentsharingison
Downloadingdata
Uploadingdata
Analarmisset
GPSison
Dataissyncing
NewGmailmessage
NewHangoutsmessage
Asongiscurrentlyplaying
TabletisconnectedtoPCviaUSBcable
Batterysavermodeison
Wi-Fihotspotisactive

40
Multiple Users
OnlyonetabletownerIDcanbecreated,butmultipleuserIDscanbe
addedsothatotherscanloginandusethetabletindependently.Eachuser
canconfiguretheirowntabletsettings,usetheirownstoragespace,and
havetheirownappupdateprivileges.
Tablet owner privileges
•OnlythetabletownerIDcanaddanewuserloginIDandremoveuser
IDs.
Multiple tablet user limitations
•Alluserssharethesamebattery,internalmemory,anddatausagewithall
oftheotherusers.
•Thelanguagesettingssetbyoneuserapplytoalloftheotherusers.
•Eachusercanconfigureanduseonlytheirowncontentanddata
(e.g.,Homescreensettings,Soundsettings,etc.).
•Anyusercanacceptupdatedapppermissionsonthebehalfofallofthe
otherusers.
•Messagesandscheduledcalendareventswillbesenttonotifythe
specifieduserIDonly.
•OnceauserstartsprintingadocumentusingMobilePrint,theprintjobwill
continueeveniftheuserIDischanged.
•Datatransfer,download,multimediaplay,andcommunicationserviceswill
stopiftheuserIDischanged.However,thedatatransferthroughPlay
StorecanbecontinuedeveniftheuserIDischanged.

41
To add a new user on your tablet
1 FromtheHomescreen,tapApps >Settings >Users>Add user.
2 Selectthetypeofuseryouwanttoadd.
• User:Usershavetheirownappsandcontent.
• Restricted user:Youcanrestrictaccesstoappsandcontentfromyour
account.
3 Thesetupwizardopenstohelpyouaddanewuser.TouchSet up now.
• Aftercreatinganewuser,thatpersonneedstogothroughthesetup
processupontheirfirstlogin.
To switch users
1 PulldowntheStatusbaratthetopofthescreen.
2 Touchtheusericon toshowuserswitchingpanel.
3 Touchoneoftheusericonsonthescreen.Choosefromtheownername
oranyotherusernamesyoucreated.
QSlide
TheQSlidefunctionenablesanoverlaywindowonyourtablet’sdisplayfor
easymulti-tasking.QSlidewindowscanbeopenedfromtheQSLIDE APPS
barontheNotificationspanel,ordirectlyfromtheapplicationsthatsupport
theQSlidefunction.
OpentheNotificationsPanelandtap
thedesiredappfromtheQSLIDE
APPSsection.

42
OR
Whileusinganapplicationthat
supportsQSlide,tap .Thefunction
willbedisplayedcontinuouslyasa
smallwindowonyourscreen.
Using QSlide
TheQSlidefunctionopenstheassociatedappinawindowinthe
foreground,allowingyoutoaccessotherappsinthebackground.It’s
displayedcontinuouslyonthescreenuntilyoucloseit.
TaptorunQSlide.
TaptoexitQSlideandreturntofull
window.
Taptoadjustthetransparency.
TaptocloseQSlide.
Taptoadjustthesize.

43
NOTE:TheQSlidefunctioncansupportuptotwowindowsatthesame
time.QSlideonlysupportsthefollowingapplications:Video,Internet,
Calendar,Email,FileManager,andCalculator.
Capturing a Screenshot
PressandholdtheVolumeDown Key andPower/Lock Key atthesame
timefor2secondstocaptureascreenshotofthecurrentscreen.
Toviewthecapturedimage,gotoApps >Gallery >Screenshots
folder.
Using QuickMemo+ to capture a screenshot
Onthescreenyouwanttocapture,dragtheStatusBardownwardandselect
QuickMemo+ .
OR
PressandholdbothVolume Keys atthesametime.
Using Capture plus to capture a screenshot of the browser
Thisfeatureallowsyoutocaptureaportionofthescreeninthedefault
Internetbrowser.
1 OpentheInternetappandnavigatetothepageyouwanttocapturea
screenshotof.
2 TaptheMenu icon >Capture plus.
3 Adjusttheblueboxtothedesiredsize,andthentapSave.Theselected
areaissavedtotheCapture plusfolderintheGallery.

44
Text Input Methods
Theon-screenkeyboarddisplaysautomaticallyonthescreenwhenyouneed
toentertext.Tomanuallydisplaytheon-screenkeyboard,simplytapatext
fieldwhereyouwanttoentertext.
Taptodeletethe
previouscharacter.
Displaysthewordyou've
entered.
Wordsuggestions
Wordsuggestions
Taponceto
capitalizethenext
letteryoutype.Double-
tapforallcaps.
Taptocreateanew
lineinthemessage
field.
Taptoswitchtothe
numbersandsymbols
keyboard.
Taptoenteraspace.
Taptoselectone
ofthedesiredkeyboard
types.
Taptoselectthe
keyboardlanguage.
TaptoaccesstheLGkeyboardsettings.
TouchandholdtoaccesstheClipTray.
Enter suggested word using gesture control
Entertextonthekeyboardandtherelatedwordsuggestionsappear.Tap
orflickupwardontheleftsideofthekeyboardtoselecttheleft-side
suggestion.Taporflickupwardontherightsideofthekeyboardtoselect
theright-sidesuggestion.

45
Split keyboard using gesture
Thesplitkeyboardfeatureallowsyoutousebothhandstotype.Eachhalfof
thekeyboardwithdrawstotheleftandrightofthescreen.
To change the keyboard height
Adjustheightofkeyboardtoshowmoreofthescreenandtocontrol
keyboardmoreeasily.
•Tap >Keyboard height and layout>Keyboard height in portrait>Tap
anddragtheicon toadjustthekeyboardheight.
To change the bottom row keys
•Tap >Keyboard height and layout>QWERTY keyboard layout>Tap
anddragtoaddordeletekeysorchangetheorder.
NOTE:OnlyQWERTY,QWERTZ,AZERTYkeyboardscanbecustomized.
Thisfunctiondosenotsupportsomelanguages.
Entering special characters
Theon-screenkeyboardallowsyoutoenterspecialcharacters(e.g."á").
Forexample,touchandholdthedesiredkey(forexample,the"a"key).After
thedesiredcharacterappears,slideyourfingeroveritandliftitofftoenter
it.
NOTE:Asymbolatthetoprightcornerofakeyindicatesthatadditional
charactersareavailable.

46
Using Clip Tray
EasilyaccessthecontentsyoustoredintheClipTraywheneverandwherever
youwant.YoucancopyimagesortextsandkeepthemintheClipTray.
Then,youcanpastethemwheneverandwhereveryouwant.
1 Touchandholdtextandimageswhileviewingoreditingthemandtap
ClipTray.
2 TouchandholdthetextinputfieldandselectClip Tray.Youcanalso
accesstheClip Traybytouchingandholding > .
NOTE:
•Youcansaveupto10itemsintheClipTray.
•AccessClipTrayandtap
,selecttheitemsyouwanttodelete,then
tapDone.
•Thisfunctionmaynotbesupportedindownloadedapps.

47
Whenyoufirstturnonyourtablet,youhavetheopportunitytoactivatethe
network,tosignintoyourGoogleAccountandselecthowyouwanttouse
certainGoogleservices.
To set up your Google account
•SignintoaGoogleAccountfromthepromptedsetupscreen.
OR
•FromtheHomescreen,tapApps >Appstab>Settings >
Accounts & sync>Add account>Google.
IfyoualreadyhaveaGoogleaccount,enteryouremailaddressandtap
NEXT.Otherwise,touchOR CREATE A NEW ACCOUNTandenterthe
necessaryinformationtocreateanewGoogleAccount.
OnceyouhavesetupyourGoogleaccountonyourtablet,yourtablet
automaticallysynchronizeswithyourGoogleaccountontheWeb.
Yourcontacts,Gmailmessages,Calendareventsandotherinformationfrom
theseapplicationsandservicesontheWebaresynchronizedwithyourtablet.
(Thiswilldependonyoursynchronizationsettings.)
Aftersigningin,youcanuseGmail™andtakeadvantageofGoogleservices
onyourtablet.
Google account setup

48
Wi-Fi
WithWi-Fi,youcanusehigh-speedInternetaccesswithinthecoverageof
thewirelessaccesspoint(AP).EnjoywirelessInternetusingWi-Fi,without
extracharges.
Connecting to Wi-Fi networks
TouseWi-Fionyourtablet,youneedtoaccessawirelessaccesspointor
‘hotspot’.Someaccesspointsareopenandyoucansimplyconnecttothem.
Othersarehiddenorusesecurityfeatures;youmustconfigureyourtabletto
beabletoconnecttothem.TurnoffWi-Fiwhenyou'renotusingittoextend
thelifeofyourbattery.
Turning Wi-Fi on and connecting to a Wi-Fi network
1 FromtheHomescreen,tapApps >Appstab>Settings >Wi-Fi.
2 Tap toturnWi-FionandstartscanningforavailableWi-Finetworks.
3 TapSearchtoseealistofactiveandin-rangeWi-Finetworks.
• Securednetworksareindicatedbyalockicon.
4 Touchanetworktoconnecttoit.
• Ifthenetworkissecured,youarepromptedtoenterapasswordor
othercredentials.(Askyournetworkadministratorfordetails)
5 TheStatusBardisplaysiconsthatindicateyourWi-Fistatus.
Connecting to Networks and Devices

49
Bluetooth
YoucanuseBluetoothtosenddatabyrunningacorrespondingapplication,
butnotfromtheBluetoothmenuasonmostothermobilephonesand
tablets.
NOTE:
•LGisnotresponsiblefortheloss,interceptionormisuseofdatasentor
receivedviatheBluetoothwirelessfeature.
•Alwaysensurethatyoushareandreceivedatawithdevicesthatare
trustedandproperlysecured.Ifthereareobstaclesbetweenthedevices,
theoperatingdistancemaybereduced.
•Somedevices,especiallythosethatarenottestedorapprovedby
BluetoothSIG,maybeincompatiblewithyourdevice.
Turning on Bluetooth and pairing up your tablet with a Bluetooth
device
Youmustpairyourdevicewithanotherdevicebeforeyouconnecttoit.
1 FromtheHomescreen,tapApps >Appstab>Settings >
Bluetooth.
2 TaptheBluetoothswitch toturniton.
3 Tapthecheckboxnexttoyourtablet'snametomakeyourtabletvisibleto
otherBluetoothdevices.
NOTE:Toselectthelengthoftimethatyourdevicewillbevisible,tapthe
Menu icon
>Visibility timeout.
4 Alistofavailabledeviceswillbedisplayed.Tapthedeviceyouwanttopair
withfromthelist.
Connecting to Networks and Devices

50
NOTE:Dependingonthetypeofdevice,youmayhavetoentermatching
codes,confirmmatchingcodes,orthedevicesmayautomaticallypair.
5 Oncepairingissuccessful,yourtabletwillconnecttotheotherdevice.
NOTE:Yourtabletdoesn'tsupportHandsfreeProfile.Therefore,theuse
ofcallfeatureswithsomeofaccessories,suchasBluetoothheadsetsor
Bluetooth-enableddevices,maynotbeavailableforthisdevice.
Send data using the Bluetooth feature
1 Opentheitemandtap .
OR
TouchandholdtheitemandselectShare.
OR
OpentheitemandtaptheMenu icon >Share.
2 TapBluetoothtoshareviaBluetooth.
NOTE:Themethodforselectinganoptionmayvarybydatatype.
3 SearchforandpairwithaBluetooth-enableddevice.
Receive data using the Bluetooth feature
1 RefertotheBluetoothdevice'suserguidetosendafiletoyourtablet.
BothdevicesmustbepairedandBluetoothmustbeon.
2 PairthedevicesandtapAcceptwhenyoureceiveaBluetooth
AuthorizationRequesttoacceptthefile(s).

51
SmartShare
YoucanusetheSmartSharefeatureeasilyintheGallery,Musicapps,and
others.
Enjoying the content via a variety of devices
Youcanshareyourtablet'scontentwithavarietydevices.Tap ortap
>SmartShare tosharethecontentintheGallery,Music,POLARIS Office 5
apps.
Playing/Sending
Play–YoucanplaythecontentviaaTV,aBluetoothspeakeroretc.
Beam–YoucansendthecontenttothedeviceofBluetoothand
SmartShareBeamsupported.
•SmartShare Beam–Thisallowstotransferthecontentfeaturefastvia
Wi-FiDirect.
< Play > < Beam >
Enjoying the content from Nearby devices
Youcanenjoythecontentfromnearbydevices(i.e.PC,NAS,Mobile)inthe
GalleryandMusicapps.
Connecting devices
ConnectyourdeviceandotherdevicessupportedbyDLNAinthesame
Wi-Finetwork.

52
Searching other devices
TapNearby devices,thenyoucanseetheDLNA-supporteddevices.
Connecttothedevicetoviewthecontent.
Using the content from the Cloud
Youcanusethecontentfromthecloud(i.e.,Dropbox)intheGalleryand
Musicapps.
Using the Cloud
NOTE:Thesupportedfeaturesmayvarydependingonthecloud.
Retrievingdatamaytakesometimedependingonthecloud.
1 SelectCloudintheGalleryandMusicapps.
2 Selectthecloudwhatyouwanttouseandlogin.
3 Youcanusethecontentofthecloudafterloggingin.
4 Setthecloudsettingstoselecttheapptousethecloud.
QPair
ByconnectingyourtabletandmobilephoneviaQPair,youcansync
incomingcalls,messages,andsocialnetworkingnotificationsbetweenyour
tabletandmobilephone.

53
1 RunQPair andtapGet started>Startonyourtabletfirstandthen
runthesamestepsonyourphone.
TIP!QPairmaynotbepre-installedonthephone.GototheGooglePlay
StoreandsearchforQPairandinstallit.
NOTE:
•QPairworkswithphonesrunningAndroid4.1orlater.Somefeatures
maybelimiteddependingonyourphonemodel.
•SinceQPairusestheBluetoothfunction,itmaynotworknormallyifyou
changetheBluetoothsettingswhileQPairisinuse.
2 Bluetoothconnectionwillbeturnedonautomatically.

54
QPair features
Call notifications–Sendsthetabletanotificationwhenthephonereceives
acall.Thenotificationdisplaysthecaller'snumberandallowsyoutoanswer
anddeclinethecall.Youcanalsochangecallsettings,suchasaringtone,
ringtonevolume,ringtonewithvibration,orsendadeclinemessagewhen
yougetacall.
NOTE:YoucanonlyreceiveacallsupportedbyBluetoothtechnology.
DialingacallfromthetabletusingtheQPairfeatureisnotpossible.
Message notifications–Sendsthetabletanotificationwhenthephone
receivesamessage.Youcanalsochangemessagesettings,suchas
messagepop-up,messagepreview,notificationsound,andnotification
vibration.
Social network notifications–Displaysasocialnetworkingnotificationon
yourtablet'sStatusBarwhenitarrivesonyourphone.
NOTE:Toenablethisfeature,turntheQPair social network notifications
optiononyourphone(Settings>Accessibility>QPair social network
notifications).Thisoptionallowsyoutobenotifiedofsocialnetworking
notificationsonyourtablet.
QuickMemo+ transfer–SavesyourcurrentQuickMemo+inthetablet's
Gallery,andthensyncsthetablet'sGallerywiththeGalleryonyourphone.
Internet via phone–AutomaticallyconnectsyourtablettotheInternet
throughyourmobilephone(asaWi-Fihotspot).Usingthisfeaturemayincur
datacharges.Tosavedatausageonthephone,thephoneautomatically
connectstoanytrustedWi-Fihotspotswithinrange.

55
PC connections with a USB cable
YoucanconnectyourtablettoyourPCtochargeit,transferitemstothePC
fromthetabletandviceversa.
Transferring music, photos and videos using the Media device
(MTP) mode
1 ConnectyourtablettoaPCusingaUSBcable.
2 Ifyouhaven'tinstalledtheLGAndroidPlatformDriveronyourPC,you
willneedtomanuallychangethesettings.Tochangethesettings,slide
theStatusBardownandtapthecurrentUSBconnectionmode>Media
device (MTP).
3 YoucannowviewtheMediadevicecontentonyourPCandtransferthe
files.
NOTE:IfyouwanttochangethePCconnectionsettings,slidetheStatus
BardownandselecttheUSBconnectionmodeoption.Thissettingis
visibleontheStatusBaronlywhenyouconnectaUSBcabletoyour
tablet.
Synchronize with Windows Media Player
EnsurethatWindowsMediaPlayerisinstalledonyourPC.
1 UsetheUSBcabletoconnectthetablettoaPConwhichWindows
MediaPlayerhasbeeninstalled.
2 SelecttheMedia device (MTP)option.
3 Whenconnected,apop-upwindowwillappearonthePC.Selectthe
WindowsMediaPlayeroptiontosynchronizemusicfiles.
4 Editorenteryourdevice’snameinthepop-upwindow(ifnecessary).
5 Selectanddragmusicfilestothesynclist.

56
6 Startsynchronization.
•ThefollowingrequirementsmustbesatisfiedtosynchronizewithWindows
MediaPlayer.
Items Requirement
OS
MicrosoftWindowsXPSP2,Vistaor
higher
WindowMediaPlayerversion WindowsMediaPlayer10orhigher
•IftheWindowsMediaPlayerversionisolderthan10,installversion10or
newer.
PC connections with a USB cable for Mac OS X users
YoucantransfermediacontentstoyourMacOSXPCfromthetabletand
viceversabysettinguptheAndroidFileTransferprogram.
1 DownloadandinstalltheAndroidFileTransferprogramfromandroid.com
websiteforMacUsers(http://www.android.com/filetransfer/).
2 Connectyourtablettoyourcomputer,anddoubleclicktheAFT(Android
FileTransferprogram)applicationtostartitup.
3 Youcanviewthemediacontents,draganddropthemediafiletoand
fromthetablet(orPC).

57
Youcanaddcontactsonyourtabletandsynchronizethemwiththecontacts
inyourGoogleAccountorotheraccountsthatsupportsyncingcontacts.
Searching for a contact
1 FromtheHomescreen,tapContacts toopenyourcontactlist.
2 TaptheSearch contactsboxandenterthecontact'sname.Youcanalso
tapaletteralongtheleftsideofthescreentoaccessnamesstartingwith
thechosenletter.
Adding a new contact
1 FromtheHomescreen,tapContacts .
2 TapNew contact .Selectthedesiredaccount(ifapplicable).
3 Ifyouwanttoaddapicturetothenewcontact,tap .Choosefrom
Take photototakeapictureusingthecameraorSelect from Gallery.
Thenbrowseforanimageandselectit.
4 Tap toentermorespecificnameinformation.
5 Enterthedetailsaboutyourcontact.
6 TapSave.
Favorite Contacts
Youcanclassifyfrequentlycalledcontactsasfavorites.
To add a contact to your favorites
1 FromtheHomescreen,tapContacts toopenyourcontacts.
2 Tapacontacttoviewitsdetails.
Contacts

58
3 Tapthestar totherightofthecontact’sname.Thestarturnsgold
andthecontactisaddedtoyourfavorites.
To remove a contact from your favorites list
1 FromtheHomescreen,tapContacts toopenyourcontacts.
2 TaptheFavoritestabtoviewyourfavoritecontacts.
3 Tapacontacttoviewitsdetails.
4 Tapthegoldstartotherightofthecontact’sname.Thestarturnsgrey
andthecontactisremovedfromyourfavorites.
Creating a group
1 FromtheHomescreen,tapContacts toopenyourcontacts.
2 TouchtheGroupstab,thentouch .
3 Enteranameforthenewgroup.
•TapAdd memberstoaddcontactentriestoyournewgroup.
•TaptheACCOUNTfieldtochangetheaccount(s)youwanttosavethe
newgroupto.
4 TouchSavetosavethegroup.
NOTE:Ifyoudeleteagroup,thecontactsassignedtothatgroupwillnot
belost.Theywillremaininyourcontacts.

59
Yourtabletcombinestextandmultimediamessagesintooneintuitive,easy-
to-usemenu.
Conversation view
Messagesexchangedwithanotherpartyaredisplayedinchronologicalorder
andmessagethreadssothatyoucanconvenientlyseeanoverviewofyour
conversations.
Sending a message
1 FromtheHomescreen,tapMessaging ,thentapCompose to
createanewmessage.
2 EnteracontactnameorphonenumberintheTofield.Asyouenter
thecontactname,matchingmessageappear.Youcantapasuggested
recipient.Youcanalsoaddmultiplemessage.
3 Tapthetextfieldtostartenteringyourmessage.
4 TaptheMenuicon toopentheoptionsmenu.Choosefromanyof
theavailableoptions.
5 Tap tosendyourmessage.
WARNING! The160-characterlimitmayvaryfromcountrytocountry
dependingonhowthetextmessageiscodedandthelanguageusedin
themessage.
Ifanimage,video,oraudiofileisaddedtoatextmessage,itwillbe
automaticallyconvertedintoamultimediamessageandyourserviceplan
willbedecrementedaccordingly.
Messaging

60
NOTE:Whenyougetatextmessageduringacall,therewillbean
audiblenotification.
Using smilies
Livenupyourmessagesusingsmilies.
Whenwritinganewmessage,tap andchooseacategoryonthe
toolbaratthebottomofthekeyboard.YoucanalsotaptheMenuicon >
Insertsmiley.
Changing your message settings
Yourtablet’smessagesettingsarepredefined,soyoucansendmessages
immediately.Youcanchangethesettingsbasedonyourpreferences.
•FromtheHomescreen,tapMessaging >Menuicon >Settings.

61
YoucanusetheEmailapplicationtoreademailsfromserviceslikeYahoo!,
MSN,andAOL.TheEmailapplicationsupportsthefollowingaccounttypes:
POP3,IMAPandExchange.
Yourserviceproviderorsystemadministratorcanprovideyouwiththe
accountsettingsyouneed.
Managing an email account
TaptheE-mail ontheHomescreen.ThefirsttimeyouopentheEmail
application,aset-upwizardopenstohelpyoutosetupanemailaccount.
Aftertheinitialsetup,thecontentsofyourinboxaredisplayed.Ifyouhave
addedmorethanoneaccount,youcanswitchamongaccounts.
To add another email account:
•OpentheE-mailapplicationandtaptheMenu icon >Settings >Add
account.
To switch between accounts:
Ifyou'veaddedmorethanoneaccount,youcaneasilyswitchbetweenthem.
Fromanyemailfolder,tapthecurrentaccount(atthetopofthescreen),
thentaptheaccountyouwanttoaccess.
To change an email general settings:
OpentheE-mailapplicationandtaptheMenu icon >Settings > General
settingstoconfiguresettingsthatapplytoallofyouraccounts.Tapan
individualaccounttoconfiguresettingsonlyforthatparticularaccount.
To delete an email account:
•OpentheE-mailapplicationandtaptheMenu icon >Settings >
Menu icon >Remove account>touchanaccountyouwanttodelete>
Remove>Yes.
E-mail

62
Working with account folders
OpentheE-mailapplicationandtaptheMenu icon andselectFolders.
EachaccounthasanInbox,Outbox,SentandDraftsfolder.Dependingon
thefeaturessupportedbyyouraccount’sserviceprovider,youmayhave
additionalfolders.
Composing and sending email
1 WhileintheE-mailapplication,tapCompose .
2 Enteranaddressforthemessage’sintendedrecipient.Asyouenter
text,matchingaddresseswillbeproposedfromyourContacts.Separate
multipleaddressesusingsemicolons.
3 TapAttach toattachfiles,ifrequired.
4 Enterthesubjectandyourmessage.
5 TapSend tosendthemessage.
Ifyouaren’tconnectedtoanetwork,forexample,ifyou’reworkingin
airplanemode,themessagesthatyousendwillbestoredinyourOutbox
folderuntilyouconnecttoanetworkagain.Ifitcontainsanypending
messages,theOutboxwillbedisplayedontheAccountsscreen.
Receiving emails
WhenanewemailarrivesinyourInbox,you'llbenotifiedbyasound
orvibration(dependingonyoursoundandvibrationsettings)andits
notificationiconappearsontheStatusBar.

63
Camera
ToopentheCameraapplication,tapCamera ontheHomescreen.
Getting to know the viewfinder
Clean view–Touchtoshoworhidemenusontheviewfinder.
Swap camera–Switchbetweentheback-facingcameralensandthe
front–facingcameralens.Youcanalsoswitchthecamerabyswipingthe
screen.
Mode–AllowstosettheshotmodetoAutoorPanorama.
Settings–Touchthisicontoopenthesettingsmenu.
Gallery–Touchtoviewthelastphotoyoucaptured.Thisenablesyouto
accessyourGalleryandviewsavedphotoswhileincameramode.
Video mode–Taptostartrecordingavideo.
Capture –Takesapicture.
Exit–Touchtoexitthecamera.
Entertainment

64
NOTE:Pleaseensurethecameralensiscleanbeforetakingpictures.
Using the advanced settings
Intheviewfinder,tap toopentheadvancedoptions.
Selectsphotoresolution.Ifyouchooseahighresolution,thefile
sizewillincrease,whichmeansyouwillbeabletostorefewer
photosinthememory.
Takephotosbyvoicecommand.
Setsadelayafterthecapturebuttonispressed.Thisisidealif
youwanttobeinthephoto.
Displaysgridlinesonthescreentohelpyoualignyourphotos.
Opensthehelpguidetoknowhowafunctionoperates.
TIP! Whenyouexitthecamera,somesettingsreturntotheirdefaults,
suchastimer.Checkthesebeforeyoutakeyournextphoto.
Taking a photo
1 OpentheCameraapplication.
2 Pointthelenstowardsthesubjectyouwanttophotograph.
3 Touch tocapturethephoto.Youcanalsocapturethephotoby
touchinganywhereonthescreenonClean viewmode.

65
To zoom in or out
Whentakingapictureorrecordingavideo,placetwofingersanywhereon
thescreenandspreadthemaparttozoomin.Tozoombackout,pinch
themtogether.
Gesture shot
TheGestureshotfeatureallowsyoutotakeapicturewithahandgesture
usingthefrontcamera.Totakephoto,raiseyourhand,withanopenpalm,
untilthefrontcameradetectsitandaboxappearsonthescreen.Then
closeyourhandintoafistandatimerwillstart,allowingyoutimetoget
ready.
Once you've taken a photo
1 Taptheimagepreviewbythecapturebuttontoviewthelastphotoyou
captured.
2 TapGallery,thentapOK.
Touchtoeditthephoto.
Touchtotakeanotherphotoimmediately.

66
Touchtosendyourmemotoothersorshareitviasocialnetworking
services.
Touchtodeletethephoto.
Touchtoaccessmoreoptions.
Touchtoaddthepicturetoyourfavorites.
TIP!Ifyouhaveasocialnetworkingaccountandsetituponyourtablet,
youcanshareyourphotowithyoursocialnetworkingcommunity.
TouchtheMenu icon toopenthefollowingoptions.
SmartShare–TouchtoshareyourphotousingtheSmartSharefunction.
Set image as–TouchtousethephotoasaContact photo,Home screen
wallpaper,Lock screen wallpaperorWallpaper.
Move–Touchtomovethephototoanotheralbum.
Copy–Touchtocopytheselectedphotoandsaveittoanotheralbum.
Copy to Clip Tray–TouchtocopythephotoandstoreintheClipTray.
Slideshow–Automaticallyshowsyoutheimagesinthecurrentfolderone
aftertheother.
Rotate left/right–Touchtorotatethepicturetotheleftorright.
Crop–Cropyourphoto.Moveyourfingeracrossthescreentoselectthe
areatobecropped.
Add location–Toaddthelocationinformation.
Rename–Touchtoeditthenameoftheselectedphoto.
Print–Allowsyoutoprintthepicture.
Details–Displaysmoreinformationaboutthepicture.

67
Viewing your saved photos
Youcanaccessyoursavedphotoswhenincameramode.Justtapthe
imagepreviewbythecapturebuttonandyourGallerywillbedisplayed.
1 Choosetheapptousetoviewand/oredityourphotos.TapGallery or
Photos .
2 TapOK.
• Toviewmorephotos,scrollleftorright.
• Tozoominorout,double-tapthescreenorplacetwofingersand
spreadthemapart(moveyourfingersclosertogethertozoomout).
Recording a video
1 OpentheCameraapplication.
2 Pointthelenstowardsthesubjectyouwishtocaptureinyourvideo.
3 TouchtheVideomodeicon tostartrecording.
4 Atimershowingthelengthofthevideowillappear.
5 Touch onthescreentostoprecording.
TIP!
•Tap
topausetherecording.
•Tap
totakeascreenshotwhilerecordingavideo.
Watching your saved videos
Accessyoursavedvideosfromvideocameramodebytappingtheimage
previewbythecapturebutton.
1 Intheviewfinder,taptheimagepreviewbythecapturebutton.
2 YourGallerywillappearonthescreenwithyourmostrecentrecorded
videodisplayed.Swipetothelefttoscrolltoyourothervideos.
3 TapthePlayicon onavideotoplayitautomatically.

68
NOTE:YoucanviewyourvideosintheGalleryandPhotosapps.
NOTE:Donottopresstoohard;thetouchscreenissensitiveenoughto
pickupalight,butfirmtouch.
Gallery
Youcanstoremultimediafilesininternalmemoryforeasyaccesstoallyour
multimediafiles.Usethisapplicationtoviewmultimediafileslikepictures
andvideos.
FromtheHomescreen,tapApps >Appstab>Gallery .
YoucanmanageandshareallyourimageandvideofileswiththeGallery.
NOTE:
•Somefileformatsarenotsupported,dependingonthesoftware
installedonthedevice.
•Somefilesmaynotplayproperly,dependingonhowtheyareencoded.
•Ifthefilesizeexceedstheavailablememory,anerrorcanoccurwhen
youopenfiles.
Viewing pictures
LaunchingtheGalleryapp displaysyouravailablefolders.When
anotherapplication,suchasEmail,savesapicture,theDownloadsfolderis
automaticallycreatedtocontainthepicture.Likewise,capturingascreenshot
automaticallycreatestheScreenshotsfolder.Tapafoldertoopenit.
Picturesaredisplayedinorderbycreationdate.Selectapicturetoviewitfull
screen.Scrollleftorrighttoviewthenextorpreviousimage.

69
Playing videos
OpentheGalleryapp andselectanalbum.ThePlayicon is
displayedonvideofiles.Tapanimagetoselectit.Selecttheapptoplayit
(tapthePhotosapp ortheVideoapp ),thentapOKandthevideo
beginsplayback.
NOTE:
•WhenusingtheVideosapptoplayavideo,slidetheleftsideofthe
screenupanddowntoadjustthescreenbrightness.Slidetherightside
ofthescreenupanddowntoadjustthevolume.
•WhenusingtheVideosapptoplayavideo,slidethescreenleftorright
torewindorfast-forward.
Deleting images and videos
Useoneofthefollowingmethods:
•Inafolder,tap andselectthephotosandvideosyouwanttodelete,
thentapDelete,theYestoconfirm.
•Whenviewingaphotoorvideo,tap ,thentapYestoconfirm.
Setting as wallpaper
Whenviewingaphoto,touchtheMenu icon >Set image asandselect
Home screen wallpaper,Lock screen wallpaperorWallpaper.
Slideshow
Youcanviewyourphotosinaslideshowbyalbumorbyselectingallofyour
photos.FromtheHomescreen,tapGallery .

70
•Tapthealbumwiththephotosyouwanttoview,thentaptheMenuicon
>Slideshow>choosetheimagesyouwanttoview>Next>verifythe
slideshowsettings>Start.
Tapthecenterofthescreentostopplayingtheslideshow.
Video
YourGalleryhasanintegratedvideoplayerthatletsyouplayallofyour
favoritevideos.
Playing a video
1 FromtheHomescreen,tapApps >Appstab>Gallery >Video.
2 Selectthevideoyouwanttoplay.
Touchtoaddthevideotoyourfavorites.
TouchaccessQSlideanddisplaythevideoinsmallwindow.
TouchtoshareyourvideoviatheSmartSharefunction.
Touchtoaccessmoreoptions.
Touchtomanagethevideovolume.

71
Touchandholdtorewindin3secondincrements.Taponceto
rewind10seconds.
Touchtopausevideoplayback.
Touchandholdtofast-forwardin3secondincrements.Tap
oncetofast-forward10seconds.
Touchtolock/unlockavideoscreen.
Tochangethevolumewhilewatchingavideo,presstheVolumeKeysonthe
rightsideofthetablet.
TapGallery> (intheupperleftcornerofthetitlebar)>Videos,
thentouchandholdavideointhelisttoaccessthefollowingoptions:
Share,Delete,Trim,RenameandDetails.
TIP!Whilewatchingavideo,slideupanddownalongtheleftsideofthe
screentoadjustthescreenbrightness.Slideupanddownalongtheright
sideofthescreentoadjustthevolume.
Music
Yourtablethasamusicplayerthatletsyouplayallyourfavoritetracks.To
accessthemusicplayer,fromtheHomescreen,tapApps >Appstab>
Music .
Transfer music using Media device (MTP) mode
1 ConnectthetablettoyourPCusingtheUSBcable.
2 SelecttheMedia device (MTP)option.Yourtabletwillappearasanother
harddriveonyourcomputer.Clickonthedrivetoviewit.Copythefiles
fromyourPCtothedrivefolder.

72
Playing a song
1 FromtheHomescreen,tapApps >Appstab>Music .
2 TouchtheSongstab.
3 Selectthesongyouwanttoplay.
TouchtoshareyourmusicviatheSmartSharefunction.
Touchtosetthecurrentsongasafavorite.
TouchtoseetheNowplayingplaylist.
Touchtoaccessmoreoptions.
Touchtosetshufflemode.
Touchtosetrepeatmode.

73
Touchtomanagethemusicvolume.
Touchtogobacktothebeginningofthesong.Touchtwiceto
returntotheprevioussong.Touchandholdtorewind3seconds.
Touchtopauseplayback.
Touchtoskiptothenexttrackonthealbumorintheplaylist.
Touchandholdtofast-forward3seconds.
Touchtosettheaudioeffect.
Tochangethevolumewhilelisteningtomusic,presstheVolumeKeyson
therightsideofthetablet.
Touchandholdanysonginthelisttoaccessthefollowingoptions:
Play,Add to playlist,Delete, Share,DetailsandSearch.
NOTE:
•Somefileformatsarenotsupported,dependingonthedevicesoftware.
•Ifthefilesizeexceedstheavailablememory,anerrorcanoccurwhen
youopenfiles.
•Musicfilecopyrightsmaybeprotectedbyinternationaltreatiesand
nationalcopyrightlaws.Therefore,itmaybenecessarytoobtain
permissionoralicencetoreproduceorcopymusic.Insomecountries,
nationallawsprohibitprivatecopyingofcopyrightedmaterial.Before
downloadingorcopyingthefile,checkthenationallawsoftherelevant
countryconcerningtheuseofsuchmaterial.

74
QuickMemo+
TheQuickMemo+featureallowsyoutocreatememosandcapturescreen
shots.Capturescreens,drawonthem,andsharethemwithfamilyand
friendswithQuickMemo+.
Creating a memo
1 FromtheHomescreen,tapQuickMemo+ ,thentap tocreatea
newmemo.
2 Youcanedittextsbytypingwordsdirectlyorselectthepentypeandcolor
youwanttouseandentertextbyhandwriting.
3 Addareminderbytouching tosettheremindernotificationforthe
event.
4 Addweatherandlocationinformationtoyourmemoifadatanetworkis
available.
Using the QuickMemo+ options
ThefollowingoptionsareavailableintheQuickMemo+toolbaratthetopof
thescreen.
TouchtoopenthememoinQSlide.
Allowsyoutoundoandredopreviousactions.
Allowsyoutoeditthetext,itscoloranditsalignment.
Allowsyoutoentertextbyhandwriting.Youcanselectthe
typeofpentouseanditsthickness,transparency,andcolor.
Eraseseditsyou'vemadetothememo.
Tools

75
SavesthememoinQuickMemo+.
Touchtoaccessmoreoptions.
Allowsyoutosetaremindernotificationforanevent.
Allowsyoutoinsertweatherinformationintothememo.
AllowsyoutoaddlocationinformationusingGPS.
Capturing a screen shot for your QuickMemo
1 ToaccesstheQuickMemo+feature,slidetheStatusBardownwardsand
touch .
OR
PressbothoftheVolume Keysatthesametimeforonesecond.
2 Selectthedesiredmenuoptionfromthetoolbarandcreateamemo.
3 Tap tosavethememo.ToexitQuickMemo+atanytime,tapthe
Back Key .
NOTE:PleaseuseafingertipwhileusingtheQuickMemo+.Donotuse
yourfingernail.

76
QuickRemote
QuickRemoteturnsyourtabletintoaUniversalRemoteforyourhomeTV,
Blu-rayorDVD.
NOTE:QuickRemotemaynotbeavailableforsomedevicesandareas.
To open and configure QuickRemote
1 FromtheHomescreen,taptheApps >Appstab>QuickRemote .
YoucanalsoperformtheinitialsetupofyourQuickRemotefromthe
NotificationsPanel.SwipetheStatusBardownward,taptheQuickRemote
icon ,thentapADD REMOTE.
2 Touch toselectaroomtypeandtouch toaddthe
device.
3 Selectthetypeandbrandofdevice,thenfollowtheon-screeninstructions
toconfigurethedevice(s).
NOTE:TheQuickRemoteoperatesthesamewayasanordinaryinfrared
(IR)remotecontrolinyourregionorcountry.Becarefulnottocoverthe
infraredsensoratthetopofthetabletwhenyouusetheQuickRemote
function.Thisfunctionmaynotbesupporteddependingonthemodel,
themanufacturerorservicecompany.
Using QuickRemote
1 OpenQuickRemote andchoosetheroomwhereyouconfiguredthe
remote.
2 Selecttheremoteyouwantbytappingitstype/nameontheQuickRemote
baralongtheleftsideofthescreen.

77
3 Tapthebuttonsonthedisplayedremote.
NOTE:WhenaddingtheTVremotecontrol,QuickRemotecanusethe
INPUTbuttontoconfigureappropriateremotecontrol.Whenconfiguring
theINPUTbutton,theTVinputsourcecanbechanged.Toresetthe
TVinputsource,taptheINPUTbuttononQuickRemoteseveraltimes
(dependingonthenumberofdevicesconnectedtotheTV).
QuickRemote options
ToaccesstheQuickRemoteoptionsmenu,taptheMenu icon toselect
thedesiredoption.
NOTE:Whileplayingmusicinthebackground,pressinganyQuickRemote
buttonwillmutethesoundforasecond.
Clock
Setting your alarm
1 FromtheHomescreen,tapApps >Appstab>Clock > .
2 Setthedesiredalarmtime.
3 SetRepeat,Snooze duration,Alarm with vibration,Alarm sound,Alarm
volume,Auto app starter,Puzzle lockandMemo.
4 TouchSave.
NOTE:Tochangealarmsettingsinthealarmlistscreen,touchtheMenu
icon
andselectSettings.

78
Calculator
Using your calculator
1 FromtheHomescreen,tapApps >Appstab>Calculator .
2 Tapthenumberkeystoenternumbers.
3 Forsimplecalculations,tapthefunctionyouwanttoperform
( , , or )followedby .
NOTE:
•Formorecomplexcalculations,touchtheMenu icon
,select
Scientific calculator,thenchoosethedesiredfunction.
•Toviewthecalculationhistory,tapMenu icon
>Calculation history.
Calendar
Eventsfromeachaccountyou’veaddedtoyourtabletandconfiguredto
synchronizecalendarsisdisplayedinyourCalendar.
Adding an event to your calendar
1 FromtheHomescreen,tapApps >Appstab>Calendar .
2 Tapthemenuatthetopleftcornertochangethecalendarview(Day,
Week,Month,Year,Agenda).
3 Tapthedateyouwishtoaddaneventtoandtap .
4 TouchtheEvent namefieldandentertheeventname.
5 TouchtheLocationfieldandenterthelocation.Checkthedateandenter
thetimeyouwishyoureventtostartandfinish.

79
6 Ifyouwishtoaddanotetoyourevent,touchtheDescriptionfieldand
enterthedetails.
7 Ifyouwishtorepeatthealarm,setREPEATandsetREMINDERS,if
necessary.
8 TouchSavetosavetheeventinthecalendar.
NOTE:Touchandholdaspotonthecalendartoquicklysaveacalendar
eventonthatdate.Simplyentertheeventnameandtime,thentapSave.
YoucantapDetailsandentermoreinformation,orupdatetheeventwith
additionaldetailslater.
To change your calendar view
Nomatterwhereyou’reintheCalendarapp,youcaneasilyswitchcalendar
views.Simplytap intheupperleftcornerofthetitlebar,orontheleft
sideofthescreenswipeyourfingerfromlefttorighttodisplayamenuof
calendarviews.TapDay,Week,Month,Year,orAgenda.
Tasks
TheTasksappcanbesynchronizedwithyourMSExchangeaccount.You
cancreateandmanageyourtasksusingyourtabletorfromMSOutlookor
MSOfficeOutlookWebAccess.
1 FromtheHomescreen,tapApps >Tasks .
2 TaptheAddtaskicon (intheupper-rightcornerofthescreen).
3 EntertheSubject,START DATE,DUE DATE,DESCRIPTION,REPEATand
REMINDERasnecessary.
4 TapSave.

80
File Manager
TheFileManagerapplicationallowsyoutomanagefilesinyourinternal/
externalstorage.
FileManagermakesiteasytoviewandmanageyourfiles.Simplytapafile
type(Allfiles,Musicfiles,Imagefiles,Videofiles,Documentfiles,orCloud
files),thentaponthenecessaryfolderstofindyourfiles.
To open the File Manager application
•FromtheHomescreen,tapApps >Appstab>File Manager .
File Manager Options
OpentheFile Managerapp>All files>Internal storagetoaccesstothe
followingoptions(atthetopofthescreen):
AllowsyoutoopenFileManagerinaQSlidewindow.
Allowsyoutosearchforyourfilesorinformation.
Allowsyoutocreateanewfolder.
Allowsyoutomovefilesandfolderstoanotherlocation.
Allowsyoutocopyfilesandfolderstoanotherlocation.
Allowsyoutodeletefilesandfolders.
Allowsyoutoaccessmoreoptions.

81
Voice Recorder
Usethevoicerecordertorecordvoicememosorotheraudiofiles.
Recording a sound or voice
•FromtheHomescreen,tapApps >Appstab>Voice Recorder .
Touchtobeginrecording.
Touchtoviewalistofyour
recordings.
Touchtoselectwhereto
saveyourrecording.
Touchtoendthe
recording.
NOTE:Theavailablerecordingtimemaydifferfromactualrecordingtime.
Managing your Voice memos
FromtheVoiceRecorderlistscreen:
•TaptheShareicon tosharethevoicememousingtheavailable
choices.
•TaptheDeleteicon toselectthevoicememo(s)youwanttodelete.
•TouchandholdavoicememotoopenacontextmemotoselectShare,
Delete,Rename,Trim,orDetails.

82
POLARIS Office 5
POLARISOffice5isaprofessionalmobileofficesolutionthatletsusers
convenientlyviewvarioustypesofofficedocuments,includingWord,Excel
andPowerPointfiles,anywhereoranytime,usingtheirmobiledevices.
To create a new document
1 FromtheHomescreen,tapApps >Appstab>POLARIS Office 5
.
2 RegisteryouremailaddressontheRegistrationpage.
NOTE:YoucantapSkiptoignoretheregistrationinformation.
3 Tap tostartanewdocument.
4 Tapadocumenttypefromthedrop-downlist,thenchooseatemplate.
5 Entercontentsinthedocumentusingthetoolsatthetopofthescreen
andtheon-screenkeyboard.
6 Whenyou'redoneworkingonthedocument,tap (inthetopleftcorner
ofthescreen),thentapSave(orSave astoenteranewdocumentname)
tosave.
7 EnterthedocumentnameandtouchSave.
To view and edit a document on your device
Youcannoweasilyviewandeditawidevarietyoffiletypes,including
MicrosoftOfficedocumentsandAdobePDF,rightontheirmobiledevices.
1 OpenPOLARIS Office 5andsearchforadocument.
2 Touchthedocumentthatyouwanttovieworedit.
WhenviewingdocumentsusingPOLARISOffice5,theobjectsandlayout
remainthesameasintheoriginaldocuments.
3 Toeditthedocument,tap .

83
Google+
UsetheGoogle+apptostayconnectedwithpeopleviaGoogle’ssocial
networkservice.
FromtheHomescreen,tapApps >Appstab>Google >Google+
.
NOTE:Thisapplicationmaynotbeavailabledependingontheregionor
serviceprovider.
LG SmartWorld
LGSmartWorldoffersanassortmentofexcitingcontent–fonts,themes,
games,applications.
How to Get to LG SmartWorld from Your Tablet
1 Tap >Apps >Appstab>tapthe icontoaccess
LGSmartWorld.
2 TapSign inandenterID/PWforLGSmartWorld.Ifyouhavenotsigned
upyet,tapRegistertoreceiveyourLGSmartWorldmembership.
3 Downloadthecontentyouwant.
•LGSmartWorldmaynotbeavailableforallcarriersorinallcountries.

84
NOTE: What if there is no icon?
1 UsingamobileWebbrowser,accessLGSmartWorld(www.lgworld.com)
andselectyourcountry.
2 DownloadtheLGSmartWorldApp.
3 Runandinstallthedownloadedfile.
4 AccessLGSmartWorldbytappingthe
icon.
Special benefit only in LG SmartWorld
1 DecorateyourownstyleonyourtabletbypersonalizingitwithHome
themes,keyboardthemes,andfontsprovidedonLGSmartWorld.
(However,thisserviceisavailableonlytospecificdevices.Pleasecheck
theLGSmartWorldwebsitetocheckavailability).
2 EnjoyLGSmartWorld'sspecialservicebyjoiningpromotionsthatare
consistentlyprovided.

85
Internet
UsethisapplicationtobrowsetheInternet.Browsergivesyouafast,full-color
worldofgames,music,news,sports,entertainmentandmuchmore,righton
yourtabletwhereveryouareandwhateveryouenjoy.
FromtheHomescreen,tapApps >Appstab>Internet .
TaptorunQSlide.
Taptogobackonepage.
Taptogoforwardonepage,tothepageyouconnectedtoafterthe
currentone.Thisistheoppositeofwhathappenswhenyoutouch
theBack Key ,whichtakesyoutothepreviouspage.
Taptorefreshorstopthecurrentpage.
TaptogototheHomepage.
Taptoaccessyourbookmarks.
Touchtoaccessmoreoptions.
Opening a page
•Toopenanewpage,tap atthetopofthebrowser.
•Togotoanotherwebpage,tapatabatthetopofthescreentoviewthe
page.
The Web

86
Bookmarks
Toopenabookmarkedwebpage,tap onthebrowsertoolbarandselect
one.
History
Tap onthebrowsertoolbarandselecttheHistorytabtoopenaweb
pagefromthelistofrecently-visitedwebpages.Toclearthehistory,tap
toclearallhistory.
Using Reader mode
Yourtabletcandisplaysimplifiedwebpagesforeasierreading.
Viewnewsorblogpostsandotherarticlepageseasilywithnodistractions–
withReadermode,youcanreadaclutter-freepage.
Tap ontheURLwebaddressbartoactivateReadermode.
Using QSlide
UsethisfeaturetoaccesstheInternetwithoutclosingthecurrent
application.
Whileviewingcontentonthebrowser,tap .Youcanthenbrowseother
informationonyourtablet.Toviewthebrowserinfullscreen,tap .
Download files
UsetheDownloadsapptoseewhatfileshavebeendownloaded.
FromtheHomescreen,tapApps >Appstab>Downloads .
Chrome
UseChrometosearchforinformationandbrowsewebpages.
FromtheHomescreen,tapApps >Appstab>Chrome .

87
NOTE:Thisapplicationmaynotbeavailable,dependingonyourregion
andserviceprovider.
Viewing web pages
Taptheaddressfield(atthetopofthescreen),enterawebaddressor
searchcriteria,andtap onthekeyboard.
Opening a page
•Togotoanewpage,tap atthetopofthebrowser.
•Togotoanotherwebpage,tapatabatthetopofthescreentoselectthe
page.
Searching the web by voice
Taptheaddressfield,tap ,speakakeywordandselectoneofthe
suggestedkeywordsthatappear.
NOTE:Thisfeaturemaynotbeavailabledependingontheregionor
serviceprovider.
Syncing with other devices
SyncopentabsandbookmarkstousewithChromeonanotherdevicewhen
youareloggedinwiththesameGoogleaccount.
Toviewopentabsonotherdevices,taptheMenu icon >Recent tabs.
YoumustbesignedintothesameGoogleaccountonalldevices.Selecta
webpagetoopen.

88
Adding and viewing bookmarks
Toaddbookmarks,tap intheURLbar.
Toopenabookmarkedwebpage,taptheMenu icon >Bookmarksand
selectthedesiredpage.
Chrome Options menu
TaptheMenu icon toaccessthefollowingoptions.
•New tab–Taptoopenanewwebpagetab.
•New incognito tab–Taptoopenanewincognitotab.
•Bookmarks–Displaysyourbookmarkedwebpages.
•Recent tabs–Displaysyouropenwebpagesonotherdevices.
•History–Displaysyourbrowsingdata(webpagesyou'vevisited).
•Share...–Allowsyoutosharethewebpage.
•Print...–Taptoprintthewebpage.Choosetoautomaticallyfindaprinter
onyournetwork,ormanuallyenteronetouse.
•Find in page–Allowsyoutosearchfortextonthecurrentwebpage.
•Add to home screen–Allowsyoutoaddashortcuttothecurrentpageon
yourHomescreen.
•Request desktop site–Checkmarktoaccessthedesktopsitewhenyou
viewwebpagesonyourtablet.
•Settings–AllowsyoutochangethesettingsspecifictotheChromeapp.
•Help & feedback–DisplaysinformationaboutusingtheChromeappon
yourtabletandallowsyoutoprovidefeedbacktoChromedevelopers.

89
Access the Settings menu
1 FromtheHomescreen,tapApps >Appstab>Settings .
OR
FromtheHomescreen,touchandholdtheRecent Apps Key >
System settings.
2 Selectasettingcategoryandsetthedesiredoption.
WIRELESS NETWORKS
Wi-Fi
Wi-Fi–TurnsonWi-FitoconnecttoavailableWi-Finetworks.
AlistofallavailableWi-Finetworkswillbedisplayed.Taponetoconnectto
it.
NOTE:TapSearchtoscanforavailableWi-Finetworks.
TaptheMenu icon intheWi-Fimenutoaccessthefollowingoptions.
Add Wi-Fi–AllowsyoutomanuallyenteranewWi-Finetwork.
Saved Wi-Fi–AllowsyoutoforgetsavedWi-Finetwork.
Advanced Wi-Fi–AccessestheadvancedWi-Fisettings.
Interactive tutorial–DisplayssomeusefultutorialsfortheWi-Fifunction.
Settings

90
TIP! How to obtain the MAC address
TosetupaconnectioninsomewirelessnetworkswithMACfilters,you
mayneedtoentertheMACaddressofyourtabletintherouter.
YoucanfindtheMACaddressinthefollowinguserinterface:Fromthe
Homescreen,tapApps
>Settings >Wi-Fi>Menu icon >
Advanced Wi-Fi>MAC address.
Bluetooth
TurntheBluetoothwirelessfeatureonorofftouseBluetooth.Turning
BluetoothonallowsyoutopairandconnecttootherBluetoothdevices.
TaptheMenu icon intheBluetoothmenutoaccessthefollowingoptions.
Edit tablet name–Changesyourtabletnameforeasyidentificationwhen
pairingandconnecting.Enteryournewtabletname,thentapSave.
Visibility timeout–SetstheamountoftimeotherBluetoothdevicescan
seeyourtabletforpairingandconnection.Choosefrom2min,5min,1h,
andNever time out.
Received files–DisplaysalistofyourBluetoothreceivedfiles.
Interactive tutorial–DisplayssomeusefultutorialsaboutBluetoothfeatures.
Mobile data
Displaysthedatausageduringthechosenperiodsoftime.Tapanappfrom
thelisttoviewtheapp'sdatausage.
Share & connect
Allowsyoutoconfigurevariousoptionsforsharingdataandconnectingwith
otherdevices.
SmartShare Beam–AllowsyoutoreceivemultimediacontentfromLG
phonesortablets.

91
NOTE:YoumustenableWi-FitoactivateSmartShareBeam.
Media server–SharemediacontentwithnearbydevicesviaDLNA.
Miracast–YoucanmirrorphonescreenandsoundontoLGMiracastdongle
orTVwirelessly.
NOTE:TostarttheMiracastfeaturequickly,taptheMiracasticonin
theNotificationPanel.Whilemirroring,MobileHotspotcannotbeused
simultaneously.
LG PC Suite–AllowsyoutouseLGPCSuitetotransfermusicandimages
betweenacomputerandyourtablet.
Tethering & networks
AllowsyoutoconnectotherdevicestotablettousetheInternetorsetthe
networkssettings.
USB tethering–AllowsyoutoturnonUSBtetheringandconnectother
devicestoshareyourdata.
Wi-Fi hotspot–AllowsyoutoturnonWi-Fihotspotandconnectother
devicestophoneviaWi-Fi.
Bluetooth tethering–AllowsyoutoturnonBluetoothtetheringandconnect
otherdevicestotabletviabluetooth.
Help–AllowsyoutoknowtheinformationsoftheUSBtethering,Wi-Fi
hotspotandBluetoothtethering.
Airplane mode–AllowsyoutoturnoffallwirelessconnectionssuchasWi-Fi
andBluetooth.
Mobile networks–Allowsyoutosetwhethertoenableordisabledata
accessonyourtablet.
VPN–AllowsyoutosetupandmanageVirtualPrivateNetworks(VPNs).

92
DEVICE
Sound
Sound profile–AllowsyoutosetthesoundprofiletoSound,Vibrate onlyor
Do not disturb.
Volume–ManagethevolumeforNotification sound,Touch feedback &
system,andMusic,video,games&other media.
Vibration strength–Allowsyoutosetthevibratestrengthforcalls,
notifications,andtouchfeedback.
Notification sound–Allowsyoutosetyourdefaultnotificationringtone.
Do not disturb–Allowsyoutosetaschedulewhentopreventinterruptions
fromnotifications.Youcansettoallowcertainfeaturestointerruptwhen
Priorityonlyisset.
Lock screen–Allowsyoutochooseifyouwanttoshoworhidenotifications
onthelockscreen.
Apps–Allowsyoutopreventappsfromdisplayingnotificationsorsetapps
toshownotificationswithprioritywhenDonotdisturbissettoPriorityonly.
Touch sound–Allowsyoutosetyourtablettoplayasoundwhenyoutouch
buttons,iconsandotheronscreenitemsthatreacttoyourtouch.
Screen lock sound–Allowsyoutosetyourtablettoplayasoundwhen
lockingandunlockingthescreen.
Vibrate on tap–Allowsyoutosetthevibrationfeedbackwhenthetablet
screenistouched.
Display
Home screen
Theme–Setsthescreenthemeforyourdevice.
Wallpaper–SetsthewallpapertouseonyourHomescreen.

93
Screen swipe effect–Setstheeffectwhenyouswipetochangescreens.
Allow Home screen looping–CheckmarktosettheHomescreensto
scrollcontinuously,eliminatingtheneedtoscrollbackintheopposite
directionwhenyoureachoneend.
Home backup & restore–Allowsyoutobackupandrestoreappand
widgetconfigurationsandthemes.
Help–DisplaysinformationabouttheHomescreen.
Lock screen
Select screen lock–Setascreenlocktypetosecureyourtablet.
NOTE:AfterupgradingtoLollipopOS,yourscreenlockmaynotbe
availableexceptforPattern,PINandPassword.
Inthiscase,gotoApps
>Settings >Security>Clear
credentialstodeletethesecuritycertificates,andthen,setupascreen
lock.
Becarefulwhenyouclearcredentialsbecauseallthesecurity
certificatesyouhaveinstalledwillbedeleted.
Smart Lock–Setstokeepyourtabletunlockedwhenyouhaveatrusted
Bluetoothdeviceconnectedtoit,whenit'sinafamiliarlocationlikeyour
homeorwork,orwhenitrecognizesyourface.
Screen swipe effect–Setsthescreenswipeeffectoptions.
Wallpaper–SetsyourLockscreenwallpaper.SelectitfromGalleryor
Wallpaper gallery.
Shortcuts–AllowsyoutochangetheshortcutsontheSwipeLockscreen.
Owner info–AllowsyoutoentercontactinfotobedisplayedontheLock
screenincasethetabletislost.
Lock timer–Setstheamountoftimebeforethescreenautomatically
locksafterthescreenhastimed-out.

94
Power button instantly locks–Checkmarktoinstantlylockthescreen
whenthePower/LockKeyispressed.ThissettingoverridestheSecurity
locktimersetting.
Brightness–Adjustthescreenbrightness.TouchNight brightnesstosetthe
brightnessto0%automaticallybetweenthehoursof12:00am-6:00am.
Screen timeout–Setthetimedelaybeforethescreenautomaticallyturns
off.
Screen-off effect–Setsthescreen-offeffectusedwhenthescreenturns
off.
Auto-rotate screen–Settoswitchorientationautomaticallywhenyourotate
thetablet.
Daydream–TaptheDaydreamswitch totoggleitOnorOff.Onallows
thesetscreensavertobedisplayedwhenthetabletissleepingwhiledocked
and/orcharging.ChoosefromClockandGoogle Photos.
NOTE:Chargingmightbeslowwhilethescreensaverison.
Font type–Changethetypeofdisplayfont.
Font size–Changethesizeofthedisplayfont.
Smart screen–Keepsthescreenonwhenthedevicedetectsyoureyes
lookingatthescreen.
Home touch buttons–AllowsyoutosetwhichHometouchbuttonsare
displayedandtheirpositiononthebar.Youcanalsoselectthecolorandthe
background.
Motion sensor calibration–Allowsyoutoimprovetheaccuracyofthetilt
andspeedofthesensor.

95
Storage
INTERNAL STORAGE–Displaysthetotalamountofspaceinthedevice’s
memoryandlistswhattypeofdataisusingupspace.
SD CARD–DisplaysthetotalamountofmemoryspaceonthemicroSD
card.
Mount/Unmount SD card–MountsandunmountsthemicroSDcard
fromyourtabletsothatyoucanaccessthedatastoredinit,formatthe
card,orsafelyremoveit.Thissettingisdimmedifthere’snomicroSD
cardinstalled,ifyou’vealreadyunmountedit,orifyou’vemountedthe
microSDcardonyourcomputer.
Erase SD card–PermanentlyeraseseverythingonthemicroSDcardand
preparesitforusewithyourtablet.
Battery
BATTERY INFORMATION–Seehowmuchbatterypowerisusedfordevice
activities.Thebatteryleveldisplaysinapercentage.Theremainingtimeof
useisalsodisplayed.
Battery usage–Displaysbatteryusage.
Battery percentage on status bar –Displaysthebatterypercentageonthe
StatusBar.
Battery saver–Managethebatteryforthepowersavingitems.Tapthe
switch toturnthisfeatureon.TapBattery saverforthefollowing
options.
• TURN BATTERY SAVER ON:Setthebatterylevelatwhichyouwant
Batterysavertoturnon.ChoosefromImmediately,5%batteryand15%
battery.
Help–TouchtoaccesssometipsforPowersaver.

96
Smart cleaning
Youcanmanagetheunusedapps,savedfilesortemporaryinternetfiles.
Apps
Displaythelistofapplicationssuchascurrentlyrunningordownloaded.
Swipeleftandrighttoviewoneofthethreetabsacrossthetopofthe
screentoviewdetailedinformationforDOWNLOADED,ON SD CARD,
RUNNING,andALLapplications.
Tapanentrytoviewmoreinformation,tapForce stop(orStop),thenOKto
stopitfromrunning.
Default message app
Youcanchoosethedefaultmessageapp.
Dual window
Split view–AllowsthedevicetoautomaticallyopenDualwindowwhenyou
tapalinkonthefullscreenortapane-mailattachment(imagesonly).
Help –DisplayshelpinformationaboutusingtheDualwindowfeature.
PERSONAL
Cloud
TapAdd accounttoaddacloudaccount.Youaccessyourcloudaccounts
fromthismenu.TaptheMenuicon touploadfiles.
Users
Thismenudisplaysthecurrentusersyou'vecreated.
Add users when tablet locked–Allowsyoutoaddanewuserwhenyour
tabletislocked.

97
Add user–AllowsyoutoaddnewaccountforthetabletandusetheMulti-
userfeature.
Location
Mode
• High accuracy (GPS and networks)–UseGPSandWi-Finetworksto
estimatelocation.
• Battery saving (Networks only)–UseWi-Finetworkstoestimate
location.
• Device sensors only (GPS only)–UseGPStopinpointyourlocation.
RECENT LOCATION REQUEST–Displaysappsthathaverecentlyrequested
yourlocationinformation.
Camera–Allowsthedevicetotagphotosandvideoswiththeirlocations.
Google Location Reporting–AllowsyoutoviewyourGooglelocation
settings.
Security
Encrypt tablet–Allowsyoutoencryptdataonthetabletforsecurity.Youwill
berequiredtoenteraPINorpasswordtodecryptyourtableteachtimeyou
poweriton.
Encrypt SD card storage–AllowsyoutoencryptdataontheMicroSDfor
security.
Set up SIM card lock–AllowsyoutosetifyouwanttorequireaPINtouse
or,ifset,allowsyoutochangethePIN.
Password typing visible–Showsthelastcharacterofthehiddenpassword
asyoutype.
Tablet administrators–Viewordeactivatetabletadministrators.
Unknown sources–Allowsinstallationofappsfromnon-PlayStore
applications.

98
Verify apps–Disalloworwarnbeforeinstallationofappsthatmaycause
harm.
Storage type–Displaysthestoragetypeforcertificates.
Trusted credentials–DisplaystrustedCAcertificates.
Install from storage–Choosetoinstallencryptedcertificates.
Clear credentials–Removeallcertificates.
Trust agents–ViewordeactivateTrustagents.
Screen pin–Thisfeatureallowsyoutolockyourdevicesothatthecurrent
usercanonlyaccessthepinnedapp.Thisisusefulforuserswithchildren.
App usage access–Allowstoviewusageinfoofapps.
Accounts & sync
Permitsapplicationstosynchronizedatainthebackground,whetheror
notyouareactivelyworkinginthem.DeactivatingAuto-sync datacansave
batterypowerandlower(butnoteliminate)datausage.
Language & input
UsetheLanguage&inputsettingstoselectthelanguageforthetexton
yourtabletandtoconfiguretheon-screenkeyboard,includingwordsyou've
addedtoitsdictionary.
Backup & reset
Back up my data–Settobackupyoursettingsandapplicationdatatothe
Googleserver.
Backup account–Settheaccounttowhichyouwanttobackupdatato.
Automatic restore–Settorestoreyoursettingsandapplicationdatawhen
theapplicationsarereinstalledonyourdevice.

99
LG Backup service–Backsupallinformationonthedeviceandrestoresitin
theeventofdatalossorreplacement.
• Copy & receive data –Allowsyoutotransferdatasuchascontacts,
photos,andmusicbetweendevices.
• Backup and restore –Allowsyoutomakekeepingdatasafe.
Factory data reset–Resetyoursettingstothefactorydefaultvaluesand
deleteallyourdata.Ifyouresetthetabletthisway,youarepromptedto
re-enterthesameinformationaswhenyoufirststartedAndroid.
SYSTEM
Shortcut key
AllowsyoutoturntheShortcutkeysonandoff.
Date & time
UseDate×ettingstosethowdateswillbedisplayed.Youcanalso
usethesesettingstosetyourowntimeandtimezoneratherthanobtaining
thecurrenttimefromthemobilenetwork.
Accessibility
UsetheAccessibilitysettingstoconfigureaccessibilityplug-insyouhave
installedonyourtablet.
NOTE:Requiresadditionalplug-instobecomeselectable.
TalkBack–AllowsyoutosetuptheTalkBackfunctionwhichassistspeople
withimpairedvisionbyprovidingverbalfeedback.TaptheTalkBackswitch
atthetoprightcornerofthescreentoturniton.TapSettingsatthe
bottomofthescreentoadjusttheTalkBacksettings.
Font size–Checkmarktoincreasethesizeofthetext.

100
Invert colors–Checkmarktoinvertthecolorsofthescreenandcontent.
Color adjustment–Setstoviewthescreenwithgreatercolorcontrast.Tap
theswitch toturniton.Thentapthescreenanddragacrossthe
screeninanydirectionuntilyouseethecolorcontrastyouwanttouse.
Touch zoom–Allowsyoutozoominandoutbytriple-tappingthescreen.
Screen shade–Dimsthescreen'sbacklight.
Accessibility shortcut–Activatethisfeaturetoallowyoutoquicklyenable
accessibilityfeaturesintwosteps.
Text-to-speech output–Setsthetext-to-speechpreferredengineand
speechratesetting.Alsoplaysashortdemonstrationofspeechsynthesis.
Thedefaultlanguagestatusisalsodisplayed.
Audio type–Setstheaudiotype.ChooseMonoorStereo.
Sound balance–Setstheaudioroute.Movethesliderontheslidebarto
setit.
Turn off all sounds–Turnsoffallsounds.
Captions–Allowstocustomizecaptionsettingsforthosewithhearing
impairments.Taptheswitch toturnthisfeatureon.Setthelanguage,
textsize,andcaptionstyleoptionsasdesired.
Touch feedback time–Setsthetouchandfeedbacktime.Choosefrom
Short,Medium,andLong.
Touch assistant–Showatouchboardwitheasyaccesstocommonactions.
Screen timeout–Setstheamountoftimebeforethescreenturnsoff.
Touch control areas–Taptheswitch toturnthisfeatureon.Allowsyou
tolimitthetouchcontroltoselectedareasofthescreen.PresstheVolume
Down Key andHome Key atthesametimetoactivateanddeactivate
thefeature.
Auto-rotate screen–Checkmarktoallowthedevicetorotatethescreen
dependingonthedeviceorientation(portraitorlandscape).

101
Password voice confirmation–Checkmarktohaveverbalconfirmationwhen
inputtingpasswords.
Accessibility settings shortcut–Setsquickandeasyaccesstoselected
featureswhenyoutriple-taptheHomeKey.
One-touch input–Eachfingertouchentersaletter/characterontheLG
keyboard.
Switch Access–Allowsyoutointeractwithyourdeviceusingoneormore
switchesthatworklikekeyboardkeys.Thismenucanbehelpfulforusers
withmobilitylimitationsthatpreventthemfrominteractingdirectlywiththe
yourdevice.
Quick Cover
Activatethismenutoturnthescreenonoroffautomaticallywhenusingthe
QuickCover.
Printing
Allowsyoutoprintthecontentofcertainscreens(suchaswebpages
displayedinChrome)toaprinterconnectedtothesameWi-Finetworkas
yourAndroiddevice.
About tablet
Thismenuallowsyoutomanageyoursoftwareupdatesandviewvarious
informationrelatingtoyourtablet.
Tablet name–Allowsyoutosetyourtabletname.
Update Center–Allowsyoutocheckforappandsoftwareupdates.
Network–Allowsyoutoviewyourtablet'snetworkinformations.
Status–Allowsyoutoviewyourtabletphonenumber,IMEIandIMEISV
informations.

102
Battery–Allowsyoutoviewbatterystatus,batterylevel,andbatteryuse
information.
Hardware info–Allowsyoutoviewthemodelnumber,IPaddress,uptime,
CSN,Wi-FiMACaddressandBluetoothaddress.
Software info–AllowsyoutoviewAndroidversion,kernelversion,build
number,andsoftwareversion.
Legal info–AllowsyoutoviewlegaldocumentsforLGsoftware,open
sourcelicensesandGooglelegalinformation.

103
About backing up and restoring device data
Itisrecommendedthatyouregularlycreateandsaveabackupfileonthe
internalstorage,especiallybeforeupdatinganysoftware.Maintaininga
currentbackupfileinstoragememorymayallowyoutorecoverdevicedata
ifyourdeviceislost,stolen,orcorruptedbyanunforeseenissue.
ThisLGBackupapplicationissupportedbetweenLGsmartphonesand
tablets,othersoftwareoroperatingsystemversions.Asaresult,whenyou
buythenewLGsmartphonesandtablets,youcanbackupthecurrentdevice
datatoyournewdevice.
IfyouhavetheLGBackupapplicationpreloadedonyoursmartphonesand
tablets,youcanbackupandrestoremostofyourdata,includingdownloaded
andpre-installedapplications,bookmarks,calendarentries,contacts,home
screensettings,andsystemsettings.Youmayalso:
•Performamanualbackupofyourdevice.
•Restoreyourdevicedata.
WARNING! Toprotectagainstanunexpectedpoweroffduringbackup
orrestoreoperations,duetoinsufficientbatterypower,youshouldalways
keepyourbatteryfullycharged.
LG Backup

104
Backup your tablet data
1 FromtheHomescreen,tapApps >Settings >Backup & reset>
LG Backup service>Backup and restore>Backup.
2 OntheBackupLocationscreen,touchInternal storageorSD card,then
tapNext.
3 SelectthecheckboxfortheitemsyouwanttobackupandselectNext.
4 Readtheinformationpresentedonthescreen,thentapStart.
5 Whenallselectedfileshavebeenbackedup,youwillseethemessage
Backup completed.
Restoring tablet data
NOTE:Allfilesthatarestoredonyourtabletaredeletedbeforethe
backupfileisrestored.Makesuretocopythebackupfiletoanother
location.
1 FromtheHomescreen,tapApps >Settings >Backup & reset>
LG Backup service>Backup and restore>File restore & management.
2 OntheRestorescreen,selectabackupfilethatcontainsthedatayou
wishtorestore.
3 SelectthecheckboxnexttotheitemyouwishtorestoreandselectNext
torestoreittoyourtablet.
NOTE:Pleasenotethatyourtabletdatawillbeoverwrittenwiththe
contentofyourbackup.
4 Ifthebackupfileisencrypted,typethepasswordthatyoucreatedto
encryptit.

105
5 Whenallselectedfileshavebeenrestored,thetabletwillautomaticallybe
restart.
NOTE:YoucansettheLock backup filesoptionwhencreatingabackup
toencryptyourbackupfilesforextraprotection.
OntheLGBackupmainscreen,touchtheMenu icon >Set password
andenterapasswordandhintincaseyouforgotyourpassword.Onceyou
havesetupapassword,youneedtoenteriteverytimeyouwanttodo
backup/restore.

106
Tablet software update
Thisfeatureallowsyoutoupdatethefirmwareofyourtablettothelatest
versionconvenientlyfromtheinternetwithouttheneedtovisitaservice
center.Formoreinformationonhowtousethisfunction,pleasevisit:
http://www.lg.com
Asthetabletfirmwareupdaterequirestheuser’sfullattentionforthe
durationoftheupdateprocess,pleasemakesuretocheckallinstructions
andnotesthatappearateachstepbeforeproceeding.Pleasenotethat
removingtheUSBcableorbatteryduringtheupgrademayseriously
damageyourtablet.
LG tablet software update via Over-the-Air (OTA)
Thisfeatureallowsyoutoupdatethefirmwareofyourtablettothenewer
versionconvenientlyviaOTAwithoutconnectingtheUSBdatacable.This
featureisonlyavailableifandwhenLGmakesthenewerversionofthe
firmwareavailableforyourdevice.First,youcancheckthesoftwareversion
onyourtablet:
FromtheHomescreen,tapApps >Settings >About tablet>
Software info.
Toperformthetabletsoftwareupdate,fromtheHomescreen,tapApps
>Settings >About tablet>Update Center>Software Update>Check
now for update.
NOTE:LGreservestherighttomakefirmwareupdatesavailableonly
forselectedmodelsatitsowndiscretionanddoesnotguaranteethe
availabilityofthenewerversionofthefirmwareforalltabletmodels.
Tablet software update

107
NOTE:Yourpersonaldata—includinginformationaboutyourGoogle
accountandanyotheraccounts,yoursystem/applicationdataand
settings,anydownloadedapplicationsandyourDRMlicence—might
belostintheprocessofupdatingyourdevice'ssoftware.Therefore,
LGrecommendsthatyoubackupyourpersonaldatabeforeupdating
yourtablet'ssoftware.LGdoesnottakeresponsibilityforanylossof
personaldata.

108
Theseaccessoriesareavailableforusewiththeyourtablet.(Items described
below may be optional.)
Travel adaptor USB cable
Quick Start Guide
NOTE:
•AlwaysusegenuineLGaccessories.Failuretodothismayvoidyour
warranty.
•Accessoriesmayvaryindifferentregions.
Accessories

109
Thischapterlistssomeproblemsyoumightencounterwhenusingyour
tablet.Someproblemsrequireyoutocallyourserviceprovider,butmostare
easytofixyourself.
Message Possible causes Possible corrective measures
No
applications
canbeset
Notsupportedbyservice
providerorregistration
required.
Contactyourserviceprovider.
Charging
error
Batteryisnotcharged. Chargebattery.
Outsidetemperatureis
toohotorcold.
Makesuretabletischargingat
anormaltemperature.
Contactproblem
Checkthechargerandits
connectiontothetablet.
Novoltage
Plugthechargerintoadifferent
socket.
Chargerdefective Replacethecharger.
Wrongcharger
UseonlyoriginalLG
accessories.
Impossibleto
receive/send
photos
Memoryfull
Deletesomeimagesfromyour
tablet.
Filesdonot
open
Unsupportedfileformat
Checkthesupportedfile
formats.
Nosound Vibrationmode
Checkthesettingsstatusin
thesoundmenutomakesure
youarenotinvibrationorsilent
mode.
Troubleshooting


TARJETA DE GARANTÍA
1.- Antes de poner en marcha el producto, lea detenidamente el
contenido de esta tarjeta de garantía. Asimismo, no ponga en
funcionamiento el producto antes de leer de manera detallada el
Manual de usuario.
2.- Guarde durante todo el período de garantía esta tarjeta
debidamente cumplimentada y sellada por el establecimiento
comercializador junto con la factura de compra.
3.- Cuando requiera cualquier servicio de reparación deberá mostrar
esta tarjeta de garantía.
4.- Para cualquier información que requiera sobre nuestros productos
o ante cualquier duda o consulta en relación a los mismos, puede
hacerlo a través de nuestra web o por medio de nuestra línea de
atención al cliente.
ESTAMOS A SU DISPOSICIÓN
Ante cualquier necesidad de asistencia,
puede ponerse en contacto con nosotros
mediante nuestra página Web, chat online,
correo electrónico o nuestro centro de
Atención al Cliente.
www.lg.com
www.lg.com/es/posventa
Atención al cliente
963 05 05 00

CERTIFICADO DE GARANTÍA
LG ELECTRONICS ESPAÑA S.A.U. (LGEES)
SE COMPROMETE A RESPETAR Y/O HACER CUMPLIR
LAS CONDICIONES DE COBERTURA DE LA PRESENTE GARANTÍA.
REQUISITOS PARA LA VALIDEZ DE LA GARANTÍA
(1) La presente garantía sólo ampara productos oficiales importados o comercializados por LG
dentro de la Unión Europea y para beneficiarse de la misma deberá:
(1.1) En el periodo pre-venta el establecimiento comercializador deberá reflejar el modelo del
dispositivo y número de IMEI o número de Serie (SN) del mismo.
(1.2) En el periodo de garantía será REQUISITO IMPRESCINDIBLE adjuntar, junto a la presente
garantía debidamente sellada por el establecimiento, el original del ticket o factura de
compra que identifique el dispositivo incluyendo modelo del terminal e IMEI o número de
Serie (SN) del mismo.
(2) Para que la garantía sea válida es IMPRESCINDIBLE que el cliente final o establecimiento
comercializador cumplimente, en el momento de efectuar la adquisición, los datos de todos los
apartados que en la misma se indican.
(3) Los beneficios de la presente garantía sólo serán validos si se utilizan los Servicios Técnicos
autorizados que LG Electronics España, S.A.U. tiene establecidos en su Red de Asistencia Técnica.
(4) El dispositivo debe ser utilizado de conformidad con las instrucciones que se detallan en el
manual de usuario.
PERIODO DE LA GARANTÍA
(1) La garantía se aplica a todos los dispositivos comercializados por LG dentro de la Unión Europea.
El periodo de garantía es el siguiente:
-Dispositivo: 2 años.
-Accesorios: 2 años.
- Medios o soporte de software (CD–ROM, tarjetas de memoria, USB, etc): 90 días.
(2) La aplicación de la garantía comienza a partir de la fecha de adquisición (fecha de factura)
y será de conformidad con lo establecido en la legislación que se encuentre vigente en el
momento de la fecha de la adquisición (fecha de factura compra).
(3) LG Electronics España, S.A.U. (LGEES) garantiza cualquier pieza o producto reparado por un
periodo de noventa (90) días a partir de su fecha de entrega, o hasta el final de la garantía,
aplicándose aquella cuya duración sea más larga. Eventualmente, en beneficio del propio cliente,
LGEES, solucionará la incidencia en el dispositivo sustituyendo el dispositivo por otro equipo
en perfectas condiciones de uso siendo equivalente en prestaciones y fiabilidad al original,
conservando el cliente todos los derechos y coberturas incluidos en la garantía. Todos aquellos
componentes de hardware sustituidos en garantía pasarán a ser propiedad de LGEES.

COBERTURAS DE LA GARANTÍA
NOTA IMPORTANTE
(1) La presente garantía comercial no afecta a los derechos que dispone el cliente final conforme
a las previsiones contenidas en el RDL 1/2007 de 16 de Noviembre de 2007 (BOE 287 de 30
de Noviembre de 2007), frente a la garantía por falta de conformidad del vendedor, que son
independientes y compatibles con la presente garantía.
(2) De acuerdo con lo previsto en el Título V, del RDL 1/2007, el cliente final tendrá derecho a exigir
al vendedor, y/o al productor en los casos determinados en la Ley, la reparación y sustitución del
producto, e incluso, en su caso, la rebaja en el precio o la resolución del contrato si ello no fuere
desproporcionado.
(3) El titular de la garantía disfrutará de los derechos y coberturas que se contienen en el presente
documento.
(4) Para reclamar los derechos y coberturas que se contienen en el presente documento el cliente
final dispondrá de la vía de comunicación con nuestro número de Atención al Cliente y/o por escrito
dirigiéndose a las Oficinas Centrales (Calle Chile, nº 1 28290 Las Rozas de Madrid) o a la Central de
Asistencia Técnica (Parque tecnológico de Paterna, C/Louis Pasteur, 1 Nave 2 C.P. 46980 Paterna –
Valencia), o bien por la vía de la jurisdicción ordinaria.
(5) Durante el tiempo que dure la reparación, no se abonarán los daños y perjuicios por el tiempo
que el aparato esté fuera de servicio.
(6)
Es responsabilidad del cliente guardar una copia de seguridad de los datos contenidos en el terminal
previo a su envío para reparación, realizar un borrado completo de la información contenida en el
dispositivo e inhabilitar todos los usuarios y contraseñas de acceso a sus cuentas en redes sociales y
demás Sites que contengan información confidencial (entidades financieras, correo electrónico, etc..).
En el transcurso del servicio, el contenido de los soportes de almacenamiento del producto podrá ser
borrado, reemplazado o reformateado. En consecuencia, LG Electronics España S.A.U. no garantiza ni
cubre las pérdidas financieras o de otra índole causadas por la pérdida de datos.
(7) LG Electronics España, S.A.U. no se hace responsable de los daños que un dispositivo pueda
causar a elementos externos.
PROTECCIÓN DE DATOS DE CARÁCTER PERSONAL
(1) De conformidad con la Ley Orgánica 15/1999 de 13 de Diciembre, de Protección de Datos de
Carácter Personal, le informamos que los datos personales solicitados, todos ellos obligatorios
para la prestación del servicio de Garantía, serán incorporados a un fichero/s debidamente
inscrito/s en el RGPD cuyo responsable es LG Electronics España S.A.U. con la finalidad de
prestarle el servicio, así como para mantenerle informado de productos o servicios similares.
Usted podrá ejercer sus derechos de acceso, rectificación, cancelación y oposición dirigiéndose
por escrito a la dirección: Calle Chile nº 1, 28029 Las Rozas de Madrid o bien remitiendo un
correo electrónico a la dirección: [email protected], acompañando su solicitud de una copia
de un documento oficial que acredite su identidad e indicando en la misma el derecho que desea
ejercitar.

EXCLUSIONES DE LA GARANTÍA
La garantía de su producto está sujeta a las siguientes exclusiones y
limitaciones:
(1) Incumplimiento de cualquiera de los requisitos citados anteriormente.
(2) Todo componente o accesorio interior o exterior del dispositivo, que no esté especificado e incluido en este
certificado de garantía o no forme parte del producto original.
(3) Puestas en marcha, configuraciones y demostraciones de funcionamiento al usuario.
(4) Si la avería es producida por incendio, inundación, agentes meteorológicos, humedad excesiva o corrosión, golpeo,
aplastamiento o aplicación de voltaje o energía inadecuada o mal conexionado.
(5) Los daños por el mal trato, incluso los de transportes, que deberán reclamarse en presencia del personal de la
compañía de transporte, por lo que conviene inspeccionar los paquetes antes de conformar los albaranes de
entrega correspondientes.
(6) Las averías producidas por rotura física, tales como carcasas, plásticos, pinturas, esmaltes, cristales,
embellecedores y similares.
(7) Los productos cuya avería se deba al mal uso y/o a no atender las instrucciones de funcionamiento y manejo que se
adjuntan con cada aparato.
(8) Por la utilización de accesorios o componentes electrónicos no adecuados.
(9) El uso inadecuado de elementos punzantes sobre las las pantallas táctiles.
(10) Los dispositivos que no llevan identificado número de IMEI y Nº de Serie o que éstos hayan sido alterados o
borrados o no coincidan con el número expresado en el certificado de garantía o factura de compra.
(11) Los problemas inherentes a la unión de IMEI-Número de Abonado para la activación en la Red.
(12) Si el dispositivo es reparado o manipulado por personal no autorizado por LG Electronics España S.A.U.
(13) Las averías producidas por el desgaste normal debido a su uso (incluido el de baterías, lentes de cámaras,
pantallas, auriculares o manos libres externos).
(14) Cuando la avería la produzca un componente o accesorio interno o externo al dispositivo no incluido o
especificado en este certificado de garantía o no forme parte del producto original.
(15) Los fallos de píxel que no excedan de la normativa vigente o la establecida por el fabricante (LG Electronics
España, S.A.U.).
(16) Cualquier tipo de pérdida de información en discos duros, discos en estado sólido o memorias. El cliente final es
responsable de realizar una copia de seguridad de sus datos previa a la cesión del dispositivo al servicio técnico
de conformidad con lo establecido en el punto (6) del apartado “Coberturas de la Garantía”.
(17) Cualquier tipo de soporte físico de información que estuviera en el equipo a la hora de cederlo al servicio oficial
para su reparación.
(18) Los sistemas operativos y/o programas no originales diferentes a los pre-cargados y/o su funcionamiento.
(19) Las actualizaciones o versiones posteriores de software, no homologadas ni soportadas oficialmente por el
fabricante (LG Electronics España, S.A.U.), cualquiera que sea su procedencia.
(20) Los daños y fallos del dispositivo ocasionados por virus u otro tipo de programas maliciosos.
(21) En los consumibles, como las baterías, pilas, etc, el periodo de garantía dependerá de la vida útil de aquéllos,
determinada por los ciclos de carga / descarga y modo de uso, si bien a modo de referencia será de 1 año
aproximadamente.
(22) LG Electronics España S.A.U puede instalar actualizaciones del software de sistema dentro del servicio de
garantía, lo que impedirá que el terminal vuelva a una versión anterior del software del sistema.

RELLENAR TODOS LOS DATOS DEL
CLIENTE Y DEL PRODUCTO EN EL
MOMENTO DE LA COMPRA
NOMBRE Y APELLIDOS:
MODELO: Nº DE IMEI:
Nº DE SERIE (SN):
FECHA DE COMPRA: SELLO DEL VENDEDOR:
ESTA TARJETA DE GARANTÍA ES
INTRANSFERIBLE Y APLICABLE SOLO AL
COMPRADOR ORIGINAL.
CUMPLIMENTE LOS DATOS REQUERIDOS
Y GUÁRDELA JUNTO CON LA FACTURA DE
COMPRA EN LUGAR SEGURO.
LG Electronics España- Central Asistencia
Técnica
Parque Tecnólogico de Paterna
C/ Louis Pasteur 1, Nave 2
(46980) Paterna (Valencia)


ThisequipmentmaybeoperatedinallEuropean
countries.
The5150-5350MHzbandisrestrictedtoindoor
useonly.
Wi-Fi (WLAN)
Esteequipopuedeutilizarseentodoslospaíses
europeos.
Labandade5150-5350MHzserestringe
únicamentealusoeninteriores.
Wi-Fi (WLAN)

Información general
<CentrodeinformaciónalclientedeLG>
963 05 05 00
*Asegúresedequeelnúmeroescorrectoantesde
realizarunallamada.
General Inquiries
<LGCustomerInformationCentre>
963 05 05 00
*Makesurethenumberiscorrectbeforemakingacall.
-
 1
1
-
 2
2
-
 3
3
-
 4
4
-
 5
5
-
 6
6
-
 7
7
-
 8
8
-
 9
9
-
 10
10
-
 11
11
-
 12
12
-
 13
13
-
 14
14
-
 15
15
-
 16
16
-
 17
17
-
 18
18
-
 19
19
-
 20
20
-
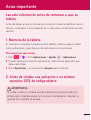 21
21
-
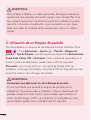 22
22
-
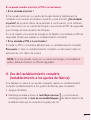 23
23
-
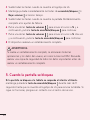 24
24
-
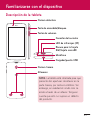 25
25
-
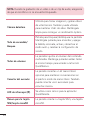 26
26
-
 27
27
-
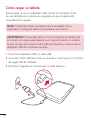 28
28
-
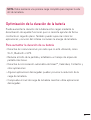 29
29
-
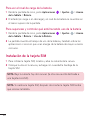 30
30
-
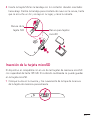 31
31
-
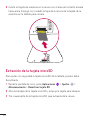 32
32
-
 33
33
-
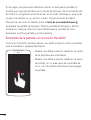 34
34
-
 35
35
-
 36
36
-
 37
37
-
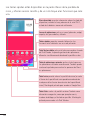 38
38
-
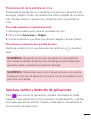 39
39
-
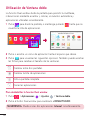 40
40
-
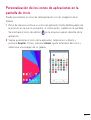 41
41
-
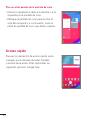 42
42
-
 43
43
-
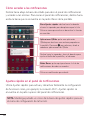 44
44
-
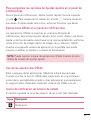 45
45
-
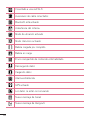 46
46
-
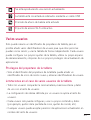 47
47
-
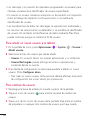 48
48
-
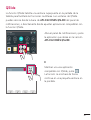 49
49
-
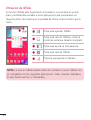 50
50
-
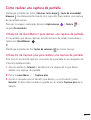 51
51
-
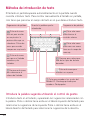 52
52
-
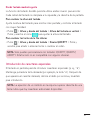 53
53
-
 54
54
-
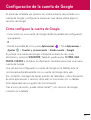 55
55
-
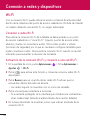 56
56
-
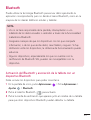 57
57
-
 58
58
-
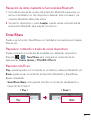 59
59
-
 60
60
-
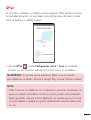 61
61
-
 62
62
-
 63
63
-
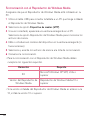 64
64
-
 65
65
-
 66
66
-
 67
67
-
 68
68
-
 69
69
-
 70
70
-
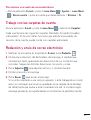 71
71
-
 72
72
-
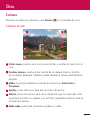 73
73
-
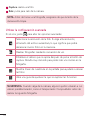 74
74
-
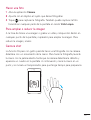 75
75
-
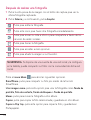 76
76
-
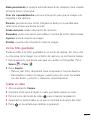 77
77
-
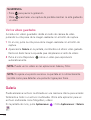 78
78
-
 79
79
-
 80
80
-
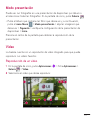 81
81
-
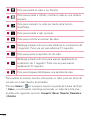 82
82
-
 83
83
-
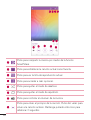 84
84
-
 85
85
-
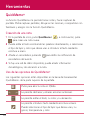 86
86
-
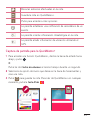 87
87
-
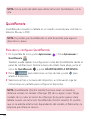 88
88
-
 89
89
-
 90
90
-
 91
91
-
 92
92
-
 93
93
-
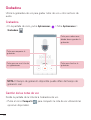 94
94
-
 95
95
-
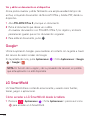 96
96
-
 97
97
-
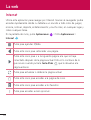 98
98
-
 99
99
-
 100
100
-
 101
101
-
 102
102
-
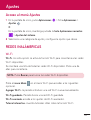 103
103
-
 104
104
-
 105
105
-
 106
106
-
 107
107
-
 108
108
-
 109
109
-
 110
110
-
 111
111
-
 112
112
-
 113
113
-
 114
114
-
 115
115
-
 116
116
-
 117
117
-
 118
118
-
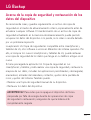 119
119
-
 120
120
-
 121
121
-
 122
122
-
 123
123
-
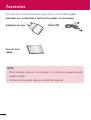 124
124
-
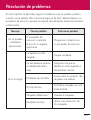 125
125
-
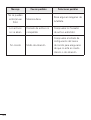 126
126
-
 127
127
-
 128
128
-
 129
129
-
 130
130
-
 131
131
-
 132
132
-
 133
133
-
 134
134
-
 135
135
-
 136
136
-
 137
137
-
 138
138
-
 139
139
-
 140
140
-
 141
141
-
 142
142
-
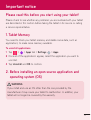 143
143
-
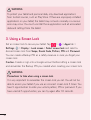 144
144
-
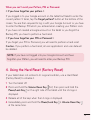 145
145
-
 146
146
-
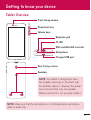 147
147
-
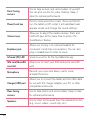 148
148
-
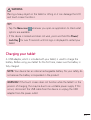 149
149
-
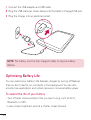 150
150
-
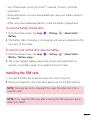 151
151
-
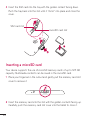 152
152
-
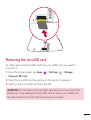 153
153
-
 154
154
-
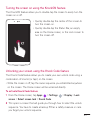 155
155
-
 156
156
-
 157
157
-
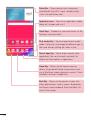 158
158
-
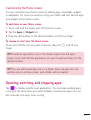 159
159
-
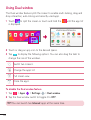 160
160
-
 161
161
-
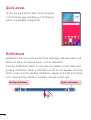 162
162
-
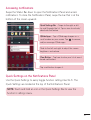 163
163
-
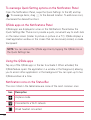 164
164
-
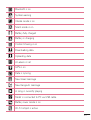 165
165
-
 166
166
-
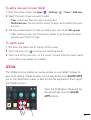 167
167
-
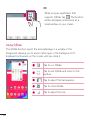 168
168
-
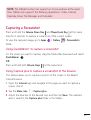 169
169
-
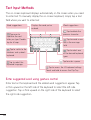 170
170
-
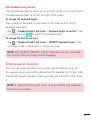 171
171
-
 172
172
-
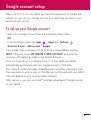 173
173
-
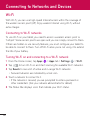 174
174
-
 175
175
-
 176
176
-
 177
177
-
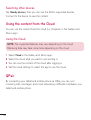 178
178
-
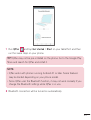 179
179
-
 180
180
-
 181
181
-
 182
182
-
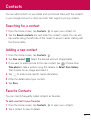 183
183
-
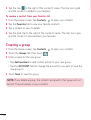 184
184
-
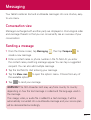 185
185
-
 186
186
-
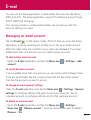 187
187
-
 188
188
-
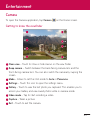 189
189
-
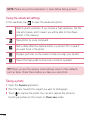 190
190
-
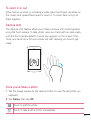 191
191
-
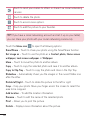 192
192
-
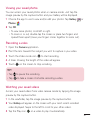 193
193
-
 194
194
-
 195
195
-
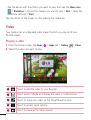 196
196
-
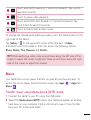 197
197
-
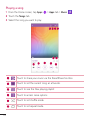 198
198
-
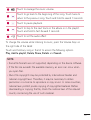 199
199
-
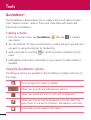 200
200
-
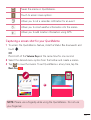 201
201
-
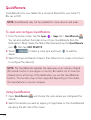 202
202
-
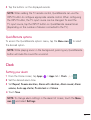 203
203
-
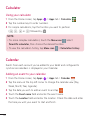 204
204
-
 205
205
-
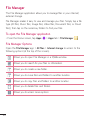 206
206
-
 207
207
-
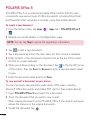 208
208
-
 209
209
-
 210
210
-
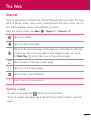 211
211
-
 212
212
-
 213
213
-
 214
214
-
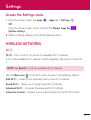 215
215
-
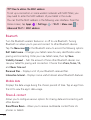 216
216
-
 217
217
-
 218
218
-
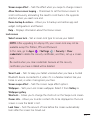 219
219
-
 220
220
-
 221
221
-
 222
222
-
 223
223
-
 224
224
-
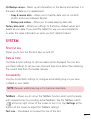 225
225
-
 226
226
-
 227
227
-
 228
228
-
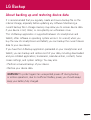 229
229
-
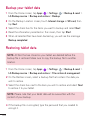 230
230
-
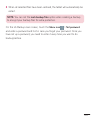 231
231
-
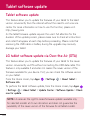 232
232
-
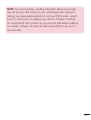 233
233
-
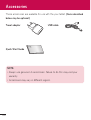 234
234
-
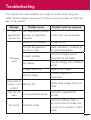 235
235
-
 236
236
-
 237
237
-
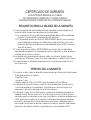 238
238
-
 239
239
-
 240
240
-
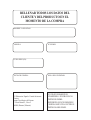 241
241
-
 242
242
-
 243
243
-
 244
244


LG G Pad 8.0 4G Orange Guía del usuario
- Categoría
- Tabletas
- Tipo
- Guía del usuario
- Este manual también es adecuado para
En otros idiomas
- English: LG G Pad 8.0 4G Orange User guide
Documentos relacionados
-
LG LGV400.AFRAWH Manual de usuario
-
LG G Pad 8.0 WiFi Manual de usuario
-
LG LGV700.AMIARD Manual de usuario
-
LG V500 G Pad 8.3 Manual de usuario
-
LG G Pad 8.3 Manual de usuario
-
-
LG V935 Manual de usuario
-
LG LGV500.AROMWH Manual de usuario
-
LG VK815 Verizon Wireless Manual de usuario
-
 Manual de Usuario LG G Pad 7.0 LTE Verizon Wireless Guía de inicio rápido

Otros documentos
-
Shenzhen YIDONG Technology LU7-RCT6103W Manual de usuario
-
 SKY DEVICES SKYPAD 8 Tablet Manual de usuario
-
 Vidao V7TAB8KB Manual de usuario
-
 XMOBILE X8 MAX Smartphone Manual de usuario
-
Sky Elite OctaPlus El manual del propietario
-
-
-
-
Primux Zonda 3 Manual de usuario
-


