Bosch HBL742AUC/02 El manual del propietario
- Tipo
- El manual del propietario

BOSCH 700 SERIES WALL OVENS
Useand Care Manual
BOSCH
YOUR LIFE. OUR INSPIRATION.
III"'
i_,,',i"_ •
........',',',7,','....
..................................,i..........
J

Table of Contents
Important Safety Instructions ..................................................................................... 1
Getting Started ............................................................................................................. 2
To Set the Clock ........................................................................................................................................ 2
To Usethe Oven Lights .............................................................................................................................. 2
Oven Parts and Accessories ........................................................................................................................ 3
Oven Control Panel.................................................................................................................................... 4
Command buttons ..................................................................................................................................... 4
Display ..................................................................................................................................................... 4
Other Features .......................................................................................................................................... 4
General Oven Tips ........................................................................................................ 5
Suggestions for Use................................................................................................................................... 5
About Convection Cooking ......................................................................................................................... 5
Oven Operation Overview .......................................................................................................................... 5
Preheating the Oven .................................................................................................................................. 5
Bakewa re ................................................................................................................................................. 5
Oven Racks...............................................................................................................................................
Selecting the Rack Position ........................................................................................................................
Using Multiple Racks..................................................................................................................................
Condensation ............................................................................................................................................
Temperature Sensor ..................................................................................................................................
High Altitude Baking ..................................................................................................................................
Food Serving Temperature Guidelines from FSIS..........................................................................................
Setting the Oven .......................................................................................................... 9
To Select Upper or Lower Oven .................................................................................................................. 9
To Set the Cooking Mode ........................................................................................................................... 9
To Set the Timer ....................................................................................................................................... 9
To Set the Cooking Mode .......................................................................................................................... 9
Timed Cooking Modes ............................................................................................................................... 9
Oven Modes .................................................................................................................. 10
Bake......................................................................................................................................................... 10
Warm ....................................................................................................................................................... 10
Convection Bake........................................................................................................................................ 11
Broil ......................................................................................................................................................... 12
Convection Broil ........................................................................................................................................ 13
Dehydrate ................................................................................................................................................. 14
Convection Roast ...................................................................................................................................... 15
The Probe................................................................................................................................................. 16
Care .............................................................................................................................. 17
Self-Cleaning ............................................................................................................................................. 17
Cleaning Oven Surfaces ............................................................................................................................ 19
Maintenance ................................................................................................................. 19
Replacing the Oven Light ........................................................................................................................... 19
Removing the Oven Door ........................................................................................................................... 20
Do-It-Yourself Procedures ........................................................................................... 21
To Lock Keys:............................................................................................................................................ 21
To Activate Sabbath Mode: ......................................................................................................................... 21
To Change Temperature Calibration ............................................................................................................ 21
To Change Display Language ...................................................................................................................... 21
To Change Temperature Format ................................................................................................................ 21
To Change Clock Format ............................................................................................................................ 22
To Change Beep Volume ............................................................................................................................ 22
To Hide Clock: ........................................................................................................................................... 22
To Change Back to Default Settings ............................................................................................................ 22
To Change Operating Voltage ..................................................................................................................... 22
Self Help - Baking ...................................................................................................................................... 23
Self Help - Operation ................................................................................................................................. 24
Service .......................................................................................................................... 24
Warranty .................................................................................................................................................. 25

Important Safety Instructions
Please read all instructions before using this appliance.
When properly cared for, your new Bosch oven
has been designed to be a safe, reliable appliance.
Read all instructions carefully before using this
oven. These precautions will reduce the risk of
burns, electric shock, fire and injury to persons.
When using kitchen appliances, basic safety
precautions must be followed, including the
following:
This appliance must be properly installed and
grounded by a qualified technician. Connect only to
properly grounded outlet. See electric preparation
and connection instructions in the Installation
Instructions.
• This appliance should be serviced only by a
qualified service technician. Contact the nearest
authorized service center for examination, repair or
adjustment.
• Do not repair or replace any part of the oven
unless specifically recommended. Refer service to
an authorized service center.
Do not operate this appliance if it is not working
properly or if it has been damaged, until an
authorized technician has examined it.
Install or locate this appliance only in accordance
with the Installation Instructions.
Use this oven only as intended by the
manufacturer. If you have any questions, contact
the manufacturer.
• Do not cover or block any openings on this
appliance.
• Use this appliance only for its intended use as
described in this manual. Do not use corrosive
chemicals, vapors, or nonfood products in this
appliance. This type of oven is specifically designed
to heat or cook. It is not designed for industrial or
laboratory use. The use of corrosive chemicals in
heating or cleaning will damage the appliance.
• In the event that personal clothing or hair catches
fire, DROPAND ROLL IMMEDIATELY to extinguish
flames.
This oven is intended for residential use only. It is
not approved for outdoor use.
REGARDING PET BIRDS
Birds have very sensitive respiratory systems. Keep
pet birds out of the kitchen or other rooms where
kitchen fumes could reach them. During Self-
Clean mode, fumes that may be harmful to birds
are released. Other kitchen fumes, such as from
overheating margarines and cooking oils, may also
be harmful.
• Do not allow children to use this appliance unless
closely supervised by an adult. Children and pets
should not be left alone or unattended in the area
where the appliance is in use. Never allow children
to sit or stand on any part of the oven.
• Do not store items of interest to children above the
oven. If children should climb onto the appliance to
reach these items, they could be seriously injured.
To reduce the risk of fire in the oven cavity:
1. Do not store flammable materials in or near the
oven.
2. Do not use water on a grease fire. Smother fire or
use a dry chemical or foam-type extinguisher.
3. Have a fire extinguisher readily available and highly
visible next to any cooking appliance. Be sure you
know how to use it.
4. Do not overcook food. Carefully attend oven if
paper, plastic or other combustible materials are
placed inside the oven.
5. Do not use the cavity for storage purposes. Do not
leave paper products, cooking utensils or food in
the cavity when not being used.
6. If materials inside the oven should ignite, keep
oven door closed. Turn oven off and disconnect the
circuit at the circuit breaker box.
.
8.
Do not block any vent openings.
Be sure the blower fan runs when the oven is in
operation. If the fan does not operate, do not use
the oven. Call an authorized service center.
9. Never use the oven to warm or heat a room. This
can damage the oven parts.
10. For personal safety, wear proper clothing. Loose
fitting garments or garments with hanging sleeves
should never be worn while using this appliance.
_k WARNING
The California Safe Drinking Water and Toxic
Enforcement Act requires businesses to warn
customers of potential exposure to substances
which are known by the State of California to
cause cancer or reproductive harm.
The elimination of soil during self-cleaning
generates some by-products which are on this list
of substances.
To minimize exposure to these substances, always
operate this oven according to the instructions in
this manual and provide good ventilation to the
room during and immediately after self-cleaning
the oven.
Continued on next page
English • 1

Important Safety Instructions
Please read all instructions before using this appliance.
SAFETY PRECAUTIONS
• Tie long hair so that it doesn't hang loose.
• The heating elements may be hot even though
they are dark in color. Interior surfaces of an oven
become hot enough to cause burns.
• During and after use, do not press or let clothing
or other flammable materials contact the heating
elements or the interior surfaces of the oven until
they have had sufficient time to cool.
• The trim on the top and sides of the oven door
may become hot enough to cause burns.
• Use care when opening the door. Open the door
slightly to let hot air or steam escape before
removing or replacing food.
• Do not heat unopened food containers. Buildup
of pressure may cause the container to burst and
result in injury.
• Always place oven racks in desired location while
oven is cool. If a rack must be moved while oven
is hot, do not let potholder contact the heating
elements.
Use only dry potholders. Moist or damp potholders
on hot surfaces may result in burns from steam. Do
not let potholders touch hot heating elements. Do
not use a towel or other bulky cloth.
SAFETY PRECAUTIONS WITH SELF-CLEANING
OVEN
Confirm that the door locks and will not open once
the door lock icon appears. If door does not lock,
press OVEN OFF and do not run Self-Clean. Phone
800-944-2904 for service.
• Note: During a normal Self-Clean and a Delayed
Self-Clean cycle, the door locks within 25 to 30
seconds after start is pressed.
° Do not clean the door gasket. It is essential for
a good seal. Care should be taken not to rub,
damage, move or remove the door gasket.
° Do not use commercial oven cleaners or oven liner
protective coatings of any kind in or around any
part of the oven.
° Clean only oven parts listed in this manual.
° Before self-cleaning the oven, remove the
broiler pan, all oven racks, other utensils and
excess soft spillage.
• Listen for fan. If no fan is heard, call for service.
To Set the Clock:
1. Press TIME. TIMER flashes in the display.
2. Turn knob to select CLOCK.
3. Press TIME.
4. Turn knob to set TIME.
Note: Clock advances in ten minute increments.
Turn knob back (counterclockwise) once to switch
to one minute increments.
5. Press START,
Getting Started
To Use the Oven Lights:
1. Press LIGHT to turn the oven lights on or off.
In double ovens, the lights in both ovens will turn
on or off together. To control the lights in one oven
only:
1. Press UPPER/LOWER to select the oven
2. Press LIGHT to turn lights on or off.
Oven lights turn on automatically when:
• the door is opened.
• the oven isturned on.
Oven lights will turn off automatically when:
• the oven is turned off.
• the oven mode is cancelled.
The lights do not operate in the Self-Clean mode.
2 • English

Getting Started
Figure 1: Oven Parts
Oven Parts and Accessories:
1 Control Panel
2 Door Handle
3 Oven Door Gasket (one per oven)
4 Window
5 Removable Oven Racks; 3-6 depending on oven
model
6 Broiler Pan and Grid
7 Rack Position Guides (4 in each oven)
8 Broil Element (one in each oven)
9 Data Plate
10 Oven Cooling Vents (both ovens)
11 Automatic Door Lock Latch (one per oven)
12 Halogen Oven Lights (2 in each oven)
13 Convection Fan and Cover
14 Door Hinge
15 Removable Oven Door
16. Literature Pack (not shown)
17. Probe Receptacle
18. Probe
19. Extendable Rack
English * 3

Oven Control Panel
Getting Started
Z Temperature
- 0
+
Fgure 2: Doube Ovens
/ OCooking Mode
8 TemperatUreslart
Fgure 3: Snge Ovens
Command buttons
1. CANCEL: Press to end current mode.
2. COOKING MODE: Press to select mode.
3. LIGHT: Press to turn oven lights on or off.
4. LOWER CANCEL (double ovens only): Press to
end mode in lower oven.
5. START: Press to begin mode.
6. TIME: Press to set time of day, timer.
7. UPPER CANCEL (double ovens only): Press to
end mode in upper oven
8. UPPER/LOWER (double ovens only): Press to
select upper or lower oven before setting lights,
etc.
9. TEMPERATURE: Press to set or change oven
temperature.
Display
BOX ICONS (double ovens only): Icons to right of
time. Show which oven is active.
14.
DISPLAY TEXT: Indicates active functions
(steady) and functions awaiting user input
(blinking).
LOCK ICONS: Display below box icons. Indicate
that door is locked.
TEMPERATURE: Digits in upper left corner of
display. Displays the chosen temperature for the
oven.
TIME: Digits in lower left corner of display.
Displays time of day and timer.
Other Features
15. BEEPS: One beep signals that the entry is
accepted, two beeps signals that the entry is
invalid.
16. DEFAULT TEMPERATURES: Each cooking mode
has a default temperature that appears when the
mode isselected. The default is the most common
temperature for the mode.
17. F NUMBER CODES: Appear in display when
the control detects a problem in the oven or its
electronics. See Self Help section, page 24, for
more information.
18.
SABBATH MODE: When activated, oven bakes
for 72 hours before shutting off automatically. The
mode is Sabbath compliant for religious faiths with
"no work" requirements on the Sabbath.
4 • English

General Oven Tips
Suggestions for Use
• Use the cooking charts as a guide.
• Do not set pans on an open oven door.
• Use the interior oven light to view the food through
the oven door window rather than opening the
door frequently.
• Place pans in center of oven.
Advantages of Convection Cooking
• Even baking.
° Juices and flavors are sealed in.
• Air-leavened foods such as cream puffs, souffles,
meringues and yeast breads are higher and lighter.
• Multiple rack cooking with no flavor transfer.
• No special bakeware required.
• Broiling thicker cuts of meat is possible with
convection broil.
• Saves time and energy.
About Convection Cooking
Standard cooking modes (bake, broil, etc.) use heat
radiated from one or more elements to cook food.
Convection modes use both heat from the elements
and a fan in the back of the oven to continuously
circulate the heated air throughout the oven.
The result is faster, more even cooking. Convection
modes seal in natural moisture and flavors and can also
save time and energy since most foods can be cooked
at lower temperatures and in less time (never reduce
temperature when cooking meat).
Cook time is also reduced because multiple racks can
be used at one time. Cook several sheets of cookies or
several different dishes at the same time.
The oven also uses convection to dehydrate. The low
heat from the elements is circulated through the oven
by the convection fan to slowly remove moisture.
Refer to "Oven Modes" in this manual for further
information on each convection mode.
Note: Convection features vary by model.
Preheating the Oven
• Preheat the oven when using the bake and
convection bake modes unless the recipe
recommends otherwise.
• Use fast preheat mode to shorten preheat time.
• Selecting a higher temperature does not shorten
the preheat time.
° Preheating is necessary for good results when
baking cakes, cookies, pastries and breads.
° Place oven racks in their proper position before
preheating.
° During preheat, the selected cooking temperature
is displayed.
° A beep will confirm that the oven is preheated and
PREHEATdisappears from display.
° When operating on 208 V, preheat time may be
slightly longer.
Ba kewa re
° Glass baking dishes absorb heat. Reduce oven
temperature 25° F when baking in glass.
° Use pans that give the desired browning. The type
of finish on the pan will help determine the amount
of browning that will occur.
° Shiny, smooth metal or light nonstick/anodized
pans reflect heat, resulting in lighter, more delicate
browning. Cakes and cookies require this type of
bakeware.
• Dark, rough or dull pans will absorb heat resulting
in a browner, crisper crust. Use this type for pies.
• For brown, crisp crusts, use dark nonstick/anodized
or dark, dull metal utensils or glass bakeware
• Insulated baking pans may increase the length of
cooking time.
• Do not cook with the empty broiler pan in the oven
as this could change cooking performance. Store
the broil pan outside of the oven.
• Use baking sheets that are 19"x14" or smaller for
best results.
Oven Operation Overview:
Operation of the oven is through multiple command
buttons and one knob.
Press the command button to select the function
(Cooking mode, time, etc).
Use the knob to set the mode, time or temperature.
See the Control Panel/Display and Oven Operation
sections for further details.
English • 5

General Oven Tips
Oven Racks
• The oven has rack guides at four levels.
Rack positions are numbered from the bottom rack
guide (#1) to the top (#4). (See graphic below).
• Check cooking charts for best rack positions to use
when cooking.
• Make sure that the racks are level once they are in
position.
• The racks are designed to stop when pulled
forward to their limit.
• CAUTION! Never use aluminum foil to cover the
oven racks or to line the oven. Heat trapped under
the foil can cause damage to the oven liner.
Back of Rack
Front of Rack
Figure 4: The Flat Rack
CAUTION: To avoid possible burns,
place oven racks in desired positions before turning
the oven on. Always use oven mitts when the oven is
warm.
The Flat Rack
Removing from oven:
Grasp rack firmly on both sides and pull rack toward you.
When the stop is reached, tilt rack up and pull the rest
of the way out.
Replacing in oven:
Grasp rack firmly on both sides. Tilt rack up to allow stop
into rack holder. Bring rack to a horizontal position and
push the rest of the way in. Rack should be straight and
fiat, not crooked.
Selecting the Rack Position
See graphic below.
Rack 4 - Highest position. Use for melting cheese
quickly.
Rack 3 - Use for broiling most meats and for toasting
bread.
Rack 2 - Use for pies, casseroles, breads, bundt or
pound cakes. Also use for broiling thicker cuts of meat.
Rack 1 - Lowest Position. Use for angel food cake,
large roasts, turkey and poultry.
Note: Always remove oven racks before self-cleaning
the oven. If racks are left in the oven during the self-
clean mode, they will lose their shiny finish and may
not glide smoothly. To improve glide, wipe the rack
edges with a small amount of vegetable oil, then wipe
off excess.
II
4 _
J
3 _
2
Figure 5: Rack Positions
6 • English

General Oven Tips
The Extendable Rack
The extendable rack allows for easier access to
cooking foods. It extends beyond the standard fiat rack
bringing the food closer to the user.
_i Caution: When the rack is outside of the oven,
slide arms do not lock. They could unexpectedly extend
if the rack is carried incorrectly. Extending slide arms
could cause injury. Rack should only be held or
carried by grasping the sides.
Note: Always remove the extendable rack before self-
cleaning the oven.
Pan Stop
Handle
Figure 6: The Extendable Rack
Bottom Frame
Stop
Slide Arm
Caution: To avoid burns, pull rack all the way out and
lift pan above handle when transferring food to and
from oven.
Placing in the oven:
1. Grasp rack firmly on both sides. Place rack
(including frame) above desired rack guide.
2. Push all the way in until the back of the rack drops
into place.
Figure 7: Place Rack Above Desired Rack Guide
Figure 8: Back of Rack Drops Into Place
Removing from oven:
1. Lift front of rack slightly and push in until the stop
releases.
Figure 10: Stop Released
2. Raise back of rack until frame and stop clear rack
guide.
Figure 11: Rack Guide Cleared
3. Pull both sections forward until stop activates. Rack 3. Pull rack down and out.
should be straight and fiat, not crooked.
Figure 9: Stop Activated
Figure 12: Pull Rack Down and Out
English • 7

General Oven Tips
Using Multiple Racks
2 Rack baking: Use positions 1 and 3.
3 rack baking: Use positions 2, 3 and 4.
When baking four cake layers at the same time,
stagger pans so that one pan is not directly above
another. For best results, place cakes on front of upper
rack and back of lower rack (See graphic at right).
Allow 1" -1 1/2" air space around pans.
Rack 3
Rack 1
Figure13: Multiple Rack Pan Placement
Condensation
The oven vent is located above the oven door. It is
normal to see steam escaping from the vent and
condensation may collect on areas above the vent such
as the display.
Temperature Sensor
Your new oven has an electronic temperature sensor
that accurately maintains the temperature selected.
Your previous oven may have had a mechanical
thermostat that drifted gradually to a higher
temperature. As a result, you may need to adjust your
favorite recipes when cooking in your new oven.
High Altitude Baking
When cooking at high altitude, recipes and cooking
time will vary from the standard. For accurate
information, write the Extension Service, Colorado
State University, Fort Collins, Colorado 80521. There
may be a charge for the bulletins.
Table 1: Food Temperature Guidelines
Food Serving Temperature Guidelines from FSIS
(USDA Food Safety & Inspection Service)
140° F (60 ° C)
° Ham, precooked (to reheat)
145° F (63 ° C)
° Fresh Beef, Veal, Lamb (medium rare)
160° F (71 ° C)
° Ground Meat & Meat Mixtures (Beef, Pork, Veal,
Lamb)
° Fresh Beef, Veal, Lamb (medium)
° Fresh Pork (medium)
° Fresh Ham (raw)
° Egg Dishes
165° F (74 ° C)
° Ground Meat & Meat Mixtures (Turkey, Chicken)
° Stuffing (cooked alone or in bird)
° Leftovers & Casseroles
170° F (77 ° C)
° Fresh Beef, Veal, Lamb (well done)
° Poultry breasts
° Fresh Pork (well done)
180° F (82 ° C)
° Chicken and Turkey, (whole)
° Poultry (thighs and wings)
° Duck and Goose
Note: Eggs (alone, not used in a recipe) - cook until yolk & white are firm.
8 • English

Setting the Oven
To Select Upper or Lower Oven:
The default oven is the upper oven. To select the
lower oven or to switch between the two, press
UPPER/LOWER.
To Set the Cooking Mode:
1. Press COOKING MODE.
2. Turn knob to select mode.
3. Press TEMPERATURE.
4. Turn knob to set temperature.
5. Press START.
Oven light and oven fan turn on and PREHEAT
appears in display. When the preheat temperature
is reached, the cooking mode appears in the
display and the oven beeps.
6. To end the mode, press CANCEL.
To Set the Timer:
1. Press TIME.
2. Turn knob to select timer.
3. Press TIME.
4. Turn knob to set time.
5. Press START.
Beeps sound and END appears in the display when
the time ends. Press CANCELto turn timer off.
To Change the Timer:
1. Press TIMER.
2. Turn knob to select change timer.
3. Press TIME.
4. Turn knob to set time.
5. Press START.
To Cancel the Timer:
1. Press TIMER.
2. Turn knob to select clear timer.
3. Press TIME.
To Set the Cooking Mode using Fast
Preheat:
1. Press COOKING MODE.
2. Turn knob to select FASTPREHEATBAKE or FAST
PREHEATCONV BAKE.
3. Press TEMPERATURE.
4. Turn knob to set temperature.
5. Press START.
When the preheat temperature is reached, the
oven beeps once and PREHEATdisappears from
the display.
Timed Cooking Modes
Use timed cook to turn the oven off automatically
after cooking. Delayed cook also turns the oven on
automatically.
• In double oven models, both ovens can be set to
operate on independent timed modes.
• The clock must be set to the correct time of day.
• The timed mode turns off the oven at the end of
the cook time.
To Set the Timed Mode:
1. Select the cooking mode and temperature.
2. Press TIME twice. COOKTIME appears in the
display.
3. Turn knob to set cooking time.
Note" Time required for the oven to reach
temperature must be included in the set cooking
time.
4. Press START.
At the end of the programmed cooking time, the
oven turns off and beeps. Press CANCEL.
To Set the Delayed Mode:
1. Follow steps 1through 3 above.
2. Press TIME again. STOPTIME appears in the
display.
3. Turn knob to enter the time of day for the oven
to stop cooking.
4. Press START.
The oven automatically calculates the time of day
to start.
At the end of the programmed cooking time, the oven
turns off and beeps. Press CANCEL
English • 9

Oven Modes
Bake
Baking is cooking with dry, heated air. Both the upper
and lower elements cycle to maintain the oven tem-
perature:
Warm
Warming uses the lower element to maintain a low
oven temperature to keep cooked food at serving tem-
perature:
Figure 14: Bake Figure 15: Warm
The bake mode can be used to prepare a variety of
food items, from pastries to casseroles. It can also be
used to roast meats.
For Best Results:
• When baking on two or more racks, use convection
bake instead.
Use the warm mode to keep cooked foods hot until you
are ready to serve them. The temperature range for
this mode is 100° F - 210° F.
For Best Results:
• Cover foods that need to be kept moist with a lid
or aluminum foil.
_, Caution
To maintain food safety, follow these guidelines:
• DO NOT use the warm mode to heat cold food
(exception: it is safe to use this mode to crisp
crackers, chips or dry cereal and to warm cold
plates).
• Be sure to maintain the proper food temperature.
The USDA recommends holding hot food at 140° F
or warmer.
• DO NOT warm food for longer than one hour.
10 • English

Oven Modes
Convection Bake
Convection baking is similar to baking. In this case,
heat comes from a third element behind the backwall.
The main difference in convection baking isthat the
heat iscirculated throughout the oven by the convec-
tion fan:
Figure 16: Convection Bake
The convection bake mode is well-suited for baking
large quantities of food on multiple racks. It can be
used to prepare cookies, pastries, breads, snack foods
and appetizers among other items. DO NOT use con-
vection bake for meats. Use convection roast instead.
The benefits of convection baking include:
• Slight decrease in cooking time
• Three rack cooking
• Higher volume (yeast items rise higher)
• More items cooked at once
Table 2: Convection Bake Chart
Temp*
i , ; . , Convection
RaCK _preneatea **
Food Item , , Bake T me
Position oven) -mn-
, (FO) )
Cake
Cupcakes
Bundt Cake
Angel Food
Pie
2 curst, fresh 9"
2 crust, frozen fruit 9"
Cookies
Sugar
Chocolate Chip
Brownies
Breads
Yeast bread, loaf, 9x5
Yeast rolls
Quick bread, loaf, 8x4
Biscuits
Muffins
Pizza
Frozen
Fresh
2
1
1
2
2
2
2
2
2
2
2
2
2
325
325
325
350- 400
350
325-350
325-350
325
350
350- 375
325-350
350- 375
4OO
17-19
37-43
35-39
45-55
68-78
6-11
8-13
29-36
18-22
12-15
45-55
11-15
15-19
2 375- 425 23-26
2 400- 425 12-15
For Best Results:
* Reduce recipe temperature by 25° F. Refer to the
convection baking chart for examples.
. Place food in low-sided, uncovered pans such as
cookie sheets without sides.
. Center baking pans side to side on the oven rack.
- Do not use convection bake for custards, quiches,
pumpkin pie, or cheesecakes. These items do not
benefit from the convection-heating process. Use
standard bake instead.
* The convection bake temperature is 25° F less than
recommended on packages or recipes. The temp-
erature in this chart has been reduced 25° F.
** This chart is a guide. Actual times depend on the
mixes or recipes baked. Follow recipe or package
directions and reduce temperature appropriately.
Note: When convection baking on two racks, use
positions one and three. When using three racks, use
positions two, three and four.
to convection bake
• Reduce recipe temperature by 25° F.
• Check food for doneness early:
If the recipe calls for i,, Check food :,,
1 - 15 rain. 3 rain. early
16 - 30 rain. 5 rain. early
31 rain. - 1 hr. 10 rain. early
English • 11

Oven Modes
Broil
Broiling uses intense heat radiated from the upper ele-
ment:
Figure 17: Broil
The broil mode is best suited to cooking thin, tender
cuts of meat (1" or less), poultry and fish. It can also
be used to brown breads and casseroles.
The benefits of Broiling include:
• Fast and efficient cooking.
• Cooking without the addition of fats or liquids.
• Browning as the food cooks.
For Best Results:
° Do not preheat oven.
• Steaks and chops should be at least 3/4" thick.
• Brush fish and poultry with butter or oil to prevent
sticking.
• Use the broil pan and grid included with your oven.
• Do not cover the broiler grid with foil. It is
designed to drain fats and oils away from the
cooking surface to prevent smoking and spattering.
• Turn meats once halfway through the recommended
cooking time (see broil chart for examples).
• When top browning casseroles, use only metal or
glass ceramic dishes such as Corningware®.
• Never use heat-proof glass (Pyrex®); it cannot
tolerate the high temperature.
ALWAYS BROIL WITH THE DOOR CLOSED
Table 3: Broil Chart
I _ interna
rooa and _{ack I BrOil ,
lemp
Th ckness Post on Settn g (OF)
Beef
Steak (3/4"- 1")
Medium Rare 3 5 145
Medium 3 5 160
Well 3 5 170
Hamburgers
(3/4" - 1")
Well 3 5 160
Poultry
Breast (bone-in 3 3 170
Thigh 3 3 180
Pork
Pork Chops (1") 3 5 160
Sausage - fresh 3 5 160
Ham Slice (1/2") 3 5 160
Seafood Cook until
Fish Filets, 1" 3 4 opaque and
Buttered flakes with
fork
Lamb
Chops (1")
Medium Rare
Medium
Well
Bread
Garlic Bread 1"
slices
3
3
3
5
5
5
145
160
170
Time Time
Side i Side 2
(min) (min)
5-7 4-6
6-8 5-7
8-10 7-9
7-9 5-7
14-16 14-16
14-16 11-13
7-9 5-7
5-7 3-5
3-5 4-6
10-14 DO not
turn
5-7 4-6
6-8 5-7
8-10 7-9
3 5 4-6
*Broiling times are approximate and may vary slightly.
12 • English

Oven Modes
Convection Broil
Convection broil is similar to broil. It combines the in- For
tense heat from the upper element with heat circulated •
by the convection fan: •
Figure 18: Convection Broil
The convection broil mode is well suited for cooking
thicker, tender cuts of meat, poultry and fish. Convec-
tion Broil is typically not recommended for browning
breads, casseroles and other foods.
The benefits of Convection Broiling, in addition to the
benefits of standard broiling, include:
• Faster cooking than standard Broiling.
Best Results:
Do not preheat oven.
Meats should be at least 1 1/2" thick.
Turn meats once halfway through the cooking time
(See Convection Broil Chart for examples).
Use the broil pan and grid included with your oven.
Do not cover the broiler grid with foil. It is
designed to drain fats and oils away from the
cooking surface to prevent smoking and spattering.
Salt after cooking.
ALWAYSCONVECTION BROIL WITH THE DOORCLOSED
Table 4: Convection Broil Chart
InternalI Time Time
Foodand Rack Broil Temp Side1 Side2
Thickness Position Setting oF
• , . ( ) . (rain)* (min)*
Beef
Steak (1-1/2" or more)
Medium Rare 2 450 145 12-14 11-13
Medium 2 450 160 15-17 13-15
Well 2 450 170 18-20 16-17
Hamburgers
(more than 1")
Well 3 550 160 11-13 8-10
Poultry
Chicken Quarters 3 450 180 13-15 10-12
(thigh)
Chicken Breasts 3 450 170 14-16 12-14
Pork
Pork Chops (1¼" or 2 450 160 12-14 13-15
more)
Sausage - fresh 3 450 160 4-6 3-5
*Broiling and convection broiling times are approximate and may vary slightly.
English • 13

Oven Modes
Dehydrate
Dehydrate dries foods with heat from a third element
behind the back wall of the oven. The heat is circulated
throughout the oven by the convection fan.
Fi ure 19: Dehydrate
Dehydrating is used to dry and/or preserve foods such
as fruits, vegetables and herbs. This mode holds an
optimum low temperature (120 ° F - 160° F) while cir-
culating the heated air to slowly remove moisture.
For Best Results:
Dry herbs at 120° F. Dry most fruits and vegetables
at 140° F.(Refer to the dehydrate chart for
examples).
Drying times vary depending on the moisture and
sugar content of the food, the size of the pieces,
the amount being dried and the humidity in the
air. Check food at the minimum drying time.
Multiple racks can be used simultaneously.
Treat fruits with antioxidants to avoid discoloration.
Consult a food preservation book, county
Cooperative Extension Office or library for
additional information.
Table 5: Dehydrate Chart
Food Preparation
Fruit
Apples
Bananas
Cherries
Orange Peels
and slices
Dipped in I/4cup
lemon juice and
2 cups water, I/4"
slices
Dipped in I/4cup
lemon juice and
2 cups water, I/4"
slices
Wash and towel dry
For fresh cherries,
remove pits
I/4" slices of orange,
orange part of skin
Pineapple
rings
thinly peeled from
oranges
Towel dried
Strawberries
Vegetables
Peppers
Mushrooms
Tomatoes
Herbs
Oregano,
sage, parsley
and thyme,
and fennel
Basil
Wash and towel dry
Sliced 1/2"thick,
skin (outside) down
on rack
Wash and towel dry
Remove membrane
of pepper, coarsely
chopped about 1"
pieces
Wash and towel dry
Cut off stem and
cut into 1/8"slices
Wash and towel dry
Cut thin slices, 1/8"
thick, drain well
Rinse and dry with
paper towel
Use basil leaves 3 to
4 inches from top
spray with water,
shake off moisture
and pat dry
Approximate Test foi
Drying Time
• . uoneness
[hours) •
11-15 Slightly pliable
ii-15
10-15
Peels: 2-4
Slices: 12-16
Canned: 9-13
Fresh: 8-12
12-17
16-20
7-12
16-23
Dry at 120°F
3-5 hrs
Dry at 120°F
3-5 hrs
Slightly pliable
Pliable,leathery,
chewy
Orange part dry
and brittle
Orange slices:
skinsare dry and
brittle, fruit is
slightly moist
soft and pliable
Dry,brittle
Leathery, with
no moisture
inside
Tough and
leathery, dry
Dry, brick red
color
Crisp and brittle
Crisp and brittle
Oven will stay on for 48 hours before shutting off automatically.
14 • English

Oven Modes
Convection Roast
Convection roast uses heat from the top and bottom
elements as well as heat circulated by the convection
fan:
Figure 20: Convection Roast
The convection roast mode is well suited to preparing
tender cuts of meat and poultry.
The benefits of convection roasting, include:
* As much as 25% faster cooking than standard
Roasting/Baking
* Rich, golden browning
For Best Results:
* Use the same temperature as indicated in the
recipe.
* Check doneness early as roasting time may
decrease by as much as 25%. Refer to convection
roast chart for examples.
* Do not cover meat or use cooking bags.
* Use the broil pan and grid provided with the oven
for roasting. A low-sided, uncovered pan can also
be used.
* Use a meat thermometer to determine the internal
temperature of the meat.
* If the meat is browned to your liking, but is not yet
done, a small strip of foil can be placed over the
meat to prevent overbrowning.
* Let meat stand covered with foil 10-15 minutes
after removing from the oven.
Table 6: Convection Roast Chart
Meats
Beef
Rib Roast
Weight oVen I Rack " '
%1:g ,oteroo,
(Ib) T(eoFPI Position ' o
( ) (rain per Ib) Temp (F)
4-6 325 1 24-30
27-33
Rib Eye Roast, 4-6 325 1 24-30
(boneless) 27-33
3-6 325 1 30-36
38-44
2-3 425 1 15-25
Rump, Eye,
Tip, Sirloin
(boneless)
5-8 350 2 20-30
Tenderloin
Roast
Pork
Loin Roast
(boneless or
bone-in)
Shoulder 3-6 350 2 25-35
Poultry 3-4 375 1 12-18
Chicken - whole
12-15 325 1 10-14
Turkey,
unstuffed**
16-20 325 1 9-11
Turkey,
unstuffed**
Turkey,
unstuffed**
21-25 325 1 6-10
3-8 325 1 15-20
Turkey Breast
1-11/2 350 2 45-75
Cornish Hen total
Lamb
3-4 325 1 25-30
Half Leg 30-35
6-8 325 1 25-30
Whole Leg 30-35
145(med mre)
160(medium)
145(med mre)
160(medium)
145(med mre)
160(medium)
145(med rare)
160 (medium)
160 (medium)
180
180
180
180
170
180
160 (medium)
170 (well)
160 (medium)
170 (well)
*Roasting times are approximate and may vary depending on the
shape of the meat. They are based on thawed meats,
**Stuffed turkey requires additional roasting time. The minimum safe
temperature for stuffing in poultry is 165° R
to convection roast
• DO NOT change recipe temperature.
• Use roasting times in chart at right.
English ° 15

Oven Modes
About the Probe
• The probe can be used to determine the internal
doneness or the "END" temperature of many foods,
especially meats and poultry.
• The temperature range for the probe is 130°F to
210°F (55°C to 100°C).
• Preheating the oven is not recommended when
using the probe. A hot oven will impair your ability
to easily connect the probe to the receptacle and
to insert it into the meat.
Inserting the Probe
Insert the probe tip into the food item.
• For meats, insert the probe tip into the thickest
part and do not touch bone, fat, or gristle.
• For large poultry products and turkeys, insert the
probe in the thickest part of the inner thigh.
• For other foods, such as a meatloaf, the probe tip
should be located in the center of the thickest part
of the food.
Using the Probe
1. Prepare meat and place in roasting pan (or on
rack in roasting pan as recipe specifies). Insert the
probe into the meat (See "Inserting the Probe",
above).
2. Make sure the probe is not touching gristle, fat,
bone, the roast rack or the pan.
3. Place roasting pan with meat in cold oven on
recommended oven rack.
4. Plug probe into the probe receptacle. The probe
symbol will appear in display.
Note: The probe temperature can only be set when the
probe is installed in the oven.
5. Press COOKING MODE.
6. Turn knob to select cooking mode.
7. Press Temperature and turn knob to change
oven temperature if necessary.
8. Press Temperature and turn knob to change
probe temperature if necessary.
9. Press START.
• The probe temperature is displayed. To view
the oven temperature, press TEMPERATURE
twice.
• The oven is preheated when the beep signals
once.
• When the set probe temperature is reached,
END appears in display and oven turns off.
Probe Use Tips
• The oven is well insulated and the retained heat
will continue to cook the meat after the oven has
shut off. For this reason, remove the meat from the
oven as soon as the control beeps.
• Since meat continues to cook after being removed
from the oven, set the internal (probe) temperature
5 - 10 degrees below the desired final internal
temperature (exception: poultry). Allow "standing
time" (10 -20 minutes) before carving the meat.
• Always use the handle of the probe for inserting
and removing. Use a potholder to remove since
the probe becomes hot.
• Remove the probe from the oven when it is not
being used.
• The probe cannot be used with frozen meats. For
best results, completely thaw meats before using
the probe.
Changing the Oven Temperature
1. Press TEMPERATUREtwice. Oven temperature will
flash in the display.
2. Turn the knob to desired temperature and press
START.
Changing the Probe Temperature
1. Press TEMPERATURE.The probe temperature will
flash.
2. Turn the knob to desired temperature and press
START.
CAUTION
Many factors affect c0oking performance:
ways cheik food doneness befoie seiv ng
NOTE: DO NOT connect to probe receptacle until probe
tip is properly inserted into meat.
16 • English

Self-Cleaning
During self-clean, the oven uses a very high
temperature to burn away food soil and grease.
• As a safety feature, the oven door locks during
self-clean to protect from very high temperatures.
Do not try to open the oven during self-clean
mode.
Only one oven can be self-cleaned at a time. The
second oven can be used while the other is self-
cleaning.
It is common to see smoke and/or an occasional
flame-up during the self-clean mode, depending
on the content and amount of soil remaining in
the oven. If a flame persists, turn off the oven and
allow it to cool before opening the door to wipe up
the excessive food soil.
• The oven light does not operate when the oven is
in the self-clean mode.
• Do not use commercial oven cleaners as they may
damage finish or parts.
• Heat and odors are normal during the self-clean
cycle. Keep the kitchen well ventilated.
NOTE: Due to the high temperatures used for
self-cleaning, fine lines or surface roughness may
develop in oven cavity. This is a common condition
and does not affect either the cooking or the
cleaning performance of the oven.
Before You Self-Clean
.
Hand clean the oven door edge, window, oven
front frame and oven cavity edges (see figures
below). They do not get hot enough during the
cleaning cycle for soil to burn away. Use a soapy
sponge, plastic scrubber or S.O.S.® pad. DO NOT
RUB THE GASKET.
2. Wipe up large overspills and grease with paper
towels.
3. Remove broiler pan, all utensils and bakeware.
4. Remove oven racks. If the oven racks are left
in the oven during a self-cleaning cycle, they will
lose their shiny finish and will not glide smoothly in
the rack guides. See "Cleaning Oven Surfaces for
proper care.
Note: The extendable rack MUST be removed
before self-cleaning,
5. Be sure the light is turned off on the control panel
and the bulb and glass cover are in place.
After Self-Clean
• The self-clean mode may produce ash which will
settle in the oven. If this happens, remove ash with
a damp cloth before using the oven.
• Wipe rack edges with cooking oil to allow for
proper glide. Wipe off excess.
IMPORTANT: Be sure to
let the inside window
glass in the oven door cool
completely before wiping up
any ash left from the clean
cycle.
Hand clean front frame
/
Figure 21: Before Self-Cleaning
Hand clean 1-1/2" from rack
/ support to front of oven cavity
/
/
/ DO NOT
hand clean gasket
Hand clean door and frame
English • 17

Self-Cleaning
To Set the Self-Clean Mode:
1. Press COOKING MODE.
2. Turn knob to select CLEAN.
3. Press START. Remove racksand close oven door.
4. Press START again.
CLEAN and TIME appear in the display.
The oven will clean for three hours. At the end of the
programmed cleaning time the oven will automatically
turn off.
I NOTE:
The self-clean cycle will not start until the door is
closed.
To Change the Clean Time
The preset clean time is three hours. For light soil, use
two hours, for heavy soil use four hours.
1. Press COOKING MODE.
2. Turn knob to select CLEAN
3. Press TIME twice.
4. Turn knob to change the number of hours.
5. Touch START. Remove racks and close oven door.
About the Door Lock:
Do not attempt to open the door while the door is
locking.
When the lock symbol is displayed, the door cannot be
opened.
_, Caution:
Check that the door has been locked and will not open
before starting self-clean mode.
If door does not lock, turn the mode knob to OFF
position and do not start self-clean; phone 800-944-
2904 for service.
TO CANCEL:
To cancel the self-clean, press CANCEL. The oven
door will remain locked until the oven has reached a
safe temperature.
6. Touch START.
To Delay the Start of the Clean
Note: The time of day must be accurate for the delay
function to work properly.
1. Press COOKING MODE.
2. Turn knob to select CLEAN
3. Set the time the oven will stop self-cleaning:
Press TIME twice.
Turn knob to change the cleaning time (if
necessary).
4. Press TIME.
Turn knob to select STOPTIME.
Press TIME.
Turn knob to set the stop time.
5. Press START. Remove racks and close oven door.
6. Press START again.
The oven door locks and DELAY appears in the
display.
When the delay time ends, self-clean starts.
At the end of the programmed cleaning time, the
oven will automatically turn off.
18 • English

Table 7: Oven Surface Cleaning
Surface
Racks
(Oven)
Fiberglass Knit
(Gasket)
Glass
Cleaning Oven Surfaces
Methods
Cleaning Method
Wash with hot sudsy water. Rinse thoroughly and dry, or gently rub with cleansing
powder or soap filled pads as directed. If racks are cleaned in the oven during the self-
clean mode, they will lose their shiny finish and may not glide smoothly. If this happens,
wipe the rack edges with a small amount of vegetable oil, then wipe off excess. DO NOT
self clean the extendable rack.
DO NOT HAND CLEAN GASKET.
Wash with soap and water or glass cleaner. Use Fantastik® or Formula 409® to remove
(Window, Display)
Painted
(Exterior)
Porcelain
(Interior)
Stainless Steel
(Exterior)
Plastic
(Knobs, Controls)
grease spatters and stubborn stains.
Clean with hot sudsy water or apply Fantastik® or Formula 409® to a clean sponge or
paper towel and wipe clean. Avoid using powdered cleansers, steel wool pads and oven
cleaners.
Immediately wipe up acid spills like fruit juice, milk and tomatoes with a dry towel. Do
not use a moistened sponge/towel on hot porcelain. When cool, clean with hot sudsy
water or apply Bon-Ami® or Soft Scrub® to a damp sponge. Rinse and dry. For stubborn
stains, gently use soap filled pads. It is normal for porcelain to craze (fine lines) with age
due to exposure from heat and food soil.
Always wipe or rub with grain. Clean with a soapy sponge then rinse and dry, or wipe
with Fantastik® or Formula 409® sprayed onto a paper towel. Protect and polish with
Stainless Steel Magic® and a soft cloth. Remove water spots with a cloth dampened with
white vinegar. Use Bar Keeper's Friend® to remove heat discoloration.
When cool, clean with soapy water, rinse and dry.
Replacing the Oven Light
• Each oven is equipped with two halogen lights located in the back wall of the oven.
• The lights are switched on when the door is opened or when the oven is in a cooking cycle.
• The oven lights do not operate during self-clean.
• Each light assembly consists of a removable lens, a light bulb and a light socket housing that is fixed in place
(see Figure 23, next page).
To replace a light bulb (see figure 23, next page)-'
1. Read WARNING on this page.
2. Turn off power at the main power supply (fuse or
breaker box).
3. Unscrew lens and remove.
4. Pull straight out on light bulb to remove from
socket.
_, WARNING
Make sure the oven and lights are cool and
power to the oven has been turned off before
replacing the light bulb(s). Failure to do so
could result in electrical shock or burns.
The lenses must be in place when using the
oven.
• The lenses serve to protect the light bulb from
breaking.
• The lenses are made of glass. Handle carefully
to avoid breaking. Broken glass could cause an
injury.
• Light socket is live when door is open.
.
Replace the bulb with a new one. Avoid pressing
the bulb with fingers (grasp with a tissue instead);
Oils from hands can damage the bulb when it
becomes hot
6. The bulb is halogen 12V - 20W.
7. Screw the lens back on.
8. Turn power back on at the main power supply
(fuse or breaker box).
English • 19

Removing the Oven Door
WARNING
Make sure oven is cool and power to the oven
has been turned off before removing the door.
Failure to do so could result in electrical shock
or burns.
• The oven door is heavy and fragile. Use both
hands to remove the oven door. The door front
is glass. Handle carefully to avoid breaking.
• Grasp only the sides of the oven door. Do not
grasp the handle as it may swing in your hand
and cause damage or injury.
• Failure to grasp the oven door firmly and
properly could result in personal injury or
product damage.
To Remove The Oven Door:
1. Be sure to read the above WARNING before
attempting to remove oven door.
2. Open door completely.
3. Close door slightly and lift hinge brackets (one on
each side) into slots (see Figure 22).
Note: Door should be closed far enough to hold
brackets in place.
4. Close door about halfway (until it stops).
5. Grasp firmly on both sides.
6. Pull out and up. Place door in a stable location.
To Reinstall the Oven Door:
.
WARNING
To avoid injury from hinge brackets snapping
closed, be sure that both levers are securely in
place before removing door. Also, do not force door
open or closed - the hinge could be damaged and
injury could result.
Holding door firmly on both sides, slide hinges into
hinge slots.
Note: Insert both sides at the same time.
Bracket
Figure 22: Door Hinge
2. Verify that notches drop into place. DO NOT insert
beyond notches (see Figure 22).
3. Open door completely so that hinge brackets (one
on each side) release (see Figure 22).
4. Open and close the door slowly and completely to
test the installation.
The door should close easily and be straight, not
crooked.
Figure 23: Oven Light
20 • English

Do-It-Yourself Procedures
The following features are changed through the special
features screen. To access the special features screen:
1. Press and hold COOKING MODE for 3 seconds
until clock time disappears.
The following four messages will appear, one
screen after another:
OVEN SE-i-FINGSHELPSCREENSPLEASE READ
TO EXIT AND LOSE CHANGESPRESSCANCEL
TO EXIT AND KEEPCHANGES PRESSSTART
TO BEGIN TURN KNOB THANK YOU
To Lock Keys:
Use the Lock Keys feature to lock the panel. The mode
cannot be changed while the feature is activated.
1. Access the special features screen as explained
above.
2. Turn knob to select LOCK KEYS.
3. Press COOKING MODE.
4. Press START.
The cooking mode is not cancelled when the panel
is locked. Press CANCEL to turn the mode off.
The timer is cancelled when the panel is locked.
5. Press and hold COOKING MODE to unlock
panel.
To Activate Sabbath Mode:
When selected, oven bakes continuously until the
mode is cancelled. The mode is Sabbath compliant for
religious faiths with "no work" requirements on the
Sabbath.
Before the feature can be selected, it must be set up in
the special features screen:
1. Access the special features screen as explained
above.
2. Turn knob to select SABBATH MODE.
3. Press COOKING MODE
4. Turn knob to select YES.
5. Press START.
Afterwards, the Sabbath feature can be selected from
the cooking mode menu:
6. Press COOKING MODE.
7. Turn knob to select SABBATH.
8. Press TEMPERATURE and turn knob to set
temperature.
9. Press START.
The oven does not beep during the Sabbath mode.
Only the CANCEL button will operate.
Press CANCEL to cancel the mode.
To Change Temperature Calibration:
The electronic thermostat has been carefully calibrated;
However, if the browning results are too light or too
dark for your preferences, you can raise or lower the
settin0.
1. Access the special features screen as explained
above.
2. Turn knob to select OVEN OFFSET 1 or OVEN
OFFSET 2 (OVEN OFFSET 1 changes the calibration
in the upper oven. OVEN OFFSET2 changes the
calibration in the lower oven).
3. Press COOKING MODE
4. Turn knob to increase or decrease the
temperature in 5° increments.
5. Press COOKING MODE.
6. Press START.
To Change Display Language:
The commands in the display can be shown in English,
French or Spanish. The default language isEnglish.
1. Access the special features screen as explained
above.
2. Turn knob to select LANGUAGE.
3. Press COOKING MODE
4. Turn knob to select EnG(English), ESP(Spanish)
or FrA (French).
5. Press COOKING MODE.
6. Press START.
To Change Temperature Format:
The oven has been preset to a Fahrenheit temperature
format; However, it can also use a Celsius temperature
format.
1. Access the special features screen as explained
above.
2. Turn knob to select SELECTUNITS.
3. Press COOKING MODE
4. Turn knob to select format (choose °C or °F).
5. Press COOKING MODE.
6. Press START.
English • 21

Do-It-Yourself Procedures
To Change Clock Format
The oven is preset with a 12-hour clock format;
However, it can also display a 24-hour clock.
1. Access the special features screen as explained
above.
2. Turn knob to select CLOCK FORMAT.
3. Press COOKING MODE
4. Turn knob to select format (choose 12 hr or 24
hr).
5. Press COOKING MODE.
6. Press START.
To Change Beep Volume:
The beep volume can be changed from 1 (low) to 3
(high). The default volume is 2 (medium).
1. Access the special features screen as explained
above.
2. Turn knob to select BEEPVOLUME.
3. Press COOKING MODE
4. Turn knob to select 1, 2, or 3.
5. Press COOKING MODE.
6. Press START.
To Change Back to Default Settings:
After changes have been made in the Special Features
screen, the settings can be set back to the default
settings.
1. Access the special features screen as explained
above.
2. Turn knob to select DEFAULTDATA.
3. Press COOKING MODE
4. Turn knob to select YES (default settings) or NO
(changed settings).
5. Press COOKING MODE.
6. Press START.
To Change Operating Voltage
The oven is preset for use with 240 VAC. If your
residence has 208 VAC, the oven voltage can be
changed.
208 V conversion must be done by a qualified
technician. Contact your local appliance dealer or Bosch
Service: 800-944-2904.
To Hide Clock:
The time-of-day clock in the display can be hidden.
The clock is displayed by default.
1. Access the special features screen as explained
above.
2. Turn knob to select VIEW CLOCK.
3. Press COOKING MODE
4. Turn knob to select YES (displayed) or NO
(hidden).
5. Press COOKING MODE.
6. Press START.
Note: The colon appears in the display even when the
clock is hidden.
22 • English

Self Help - Baking
Check the chart below for causes of the most common baking problems. Since the size, shape and material of
baking utensils directly affect the baking results, the best solution may be to replace old baking utensils that have
darkened and warped with age and use. Also check the convection baking chart on page 11, the rack position and
the baking time.
Table 8: Self Help - Baking
Baking Problem
Food browns unevenly
Food too brown on bottom
Food dry or shrinks excessively
Food bakes or roasts slower than expected
Pie crust does not brown or is soggy
Cake pale, fiat, not done inside
Cake high in middle, cracked on top
Pie crust edge too brown
Cause
• Oven not preheated
• Aluminum foil on oven rack or oven bottom
• Baking utensil too large for recipe
• Pans touching each other or oven walls
• Oven not preheated
• Using glass, dull metal or darkened metal pans
• Incorrect rack position
• Pans touching each other or oven walls
• Oven temperature too high
• Baking time too long
• Oven door opened frequently
• Pansize too large
• Oven temperature too low
• Oven not preheated
• Oven door opened frequently
• Food tightly sealed with aluminum foil
• Pansize too small
• Baking time not long enough
• Using shiny steel pans
• Incorrect rack position
• Oven temperature too low
• Oven temperature too low
• Incorrect baking time
• Cake tested too soon
• Oven door opened too frequently
• Pansize too large
• Oven temperature too high
• Baking time too long
• Pans touching each other or oven walls
• Incorrect rack position
• Pansize too small
• Oven temperature too high
• Crust edge too thin
English • 23

Self Help - Operation
Before calling for service, check the following •
Table 9: Self Help - Operation
Oven Problem
I
F03 or F04 Error appear in the A problem with the lock occured. Turn power off and turn it back on again after
display window, a few seconds. The oven should run a latch auto-test. If condition persists, note
the code number and call an authorized servicer.
Other F Error appears in the Turn power off and turn it back on again after a few seconds. If condition
display window, persists, note the code number and call an authorized servicer.
Cooling fan continues to run This is normal. The fan turns off automatically when the electronic components
after oven is turned off have cooled sufficiently.
Oven door is locked and will not Turn the oven off at the circuit breaker and wait a few seconds. Turn breaker
release, even after cooling back on. The oven should reset itself and will be operable.
Oven is not heating Make sure the oven temperature has been selected. Check the circuit breaker or
fuse box to your house. Make sure there is proper electrical power to the oven.
Oven is not cooking evenly Check oven calibration. Adjust calibration if necessary (see Oven Offset, Page
21). Refer to cooking charts for recommended rack position. Always reduce
recipe temperature by 25°F when baking with convention bake mode.
Oven temperature is too hot or The oven thermostat needs adjustment. See Calibrating Oven Temperature,
too cold Page 21.
Oven light is not working Replace or reinsert the light bulb if loose or defective. See Page 19. Touching
properly the bulb with fingers may cause the bulb to burn out.
Oven light stays on Oven light comes on automatically when oven begins heating. Press LIGHT to
turn oven light off. If oven is off, check for obstruction in oven door or check to
see if hinge is bent.
Cannot remove lens cover on There may be soil build-up around the lens cover. Wipe lens cover area with a
light clean dry towel prior to attempting to remove the lens cover.
Oven will not self-clean properly Allow the oven to cool before running self-clean. Always wipe out loose soil or
heavy spill-over before running self-clean. If oven is badly soiled, set oven for a
four-hour Self-Clean. See Self-Cleaning, Page 17.
Clock and timer are not working Make sure there is proper electrical power to the oven. See the Clock and Timer
properly sections on Pages 2 and 8.
Excessive moisture When using bake mode, preheat the oven first. Convection bake will eliminate
any moisture in oven (this is one of the advantages of convection).
Porcelain Chips When oven racks are removed and replaced, always tilt racks upward and do
not force them to avoid chipping the porcelain.
HOW TO OBTAIN SERVICE
For authorized service or parts information call 8001 944-2904.
We want you to remain a satisfied customer• If a problem occurs that is not resolved to your satisfaction,
write to Bosch Customer Support, 5551 McFadden Avenue, Huntington Beach CA, 92649 or phone 800-944-
2904.
Please include the Model Number, Serial Number and date of original purchase and installation.
24 • English

Warranty
Statement of Limited Warranty
The warranties provided by BSH Home Appliances ("Bosch") in this Statement of Limited Warranty apply only to
the Bosch Electric Built-In Ovens ("Built-In Oven") sold to you, the first using purchaser, provided that the Built-In
Oven was purchased (1) for your use and not for resale and (2) in the United States or Canada and is located in
the country of purchase. As used in this Statement of Limited Warranty, the term "Date of Installation" shall refer
to the earlier of the date the Built-In Oven is installed or ten (10) business days after the date the Built-In Oven is
sold to the first using purchaser. The warranties stated herein apply only to the first using purchaser and are not
transferable.
Standard Limited Warranty
Bosch warrants that its Built-In Oven is free from defects in materials and workmanship for a period of twelve
(12) months from the Date of installation. During the warranty period, Bosch or its authorized service center will
repair or replace, at its sole option, any Built-In Oven that proves to have been defective under conditions of
normal use without charge. All removed parts and components shall become the property of Bosch, at Bosch's
option. All replaced and/or repaired parts shall assume the identity of the original part for purposes of this
warranty and this warranty shall not be extended with respect to such parts.
Other Conditions of the Limited Warranties
The warranties provided in this Statement of Limited Warranty exclude defects or damage resulting from (1)
use of the Built-In Oven in other than its normal and customary manner (commercial use of the Built-In Oven
shall not be deemed normal or customary), (2) misuse, abuse, accidents or neglect, (3) improper operation,
maintenance, installation or unauthorized service, (4) adjustment or alteration or modification of any kind, (5) a
failure to comply with applicable state, local, city, and county electrical and/or building codes, (6) spills of food or
liquid, and (7) external forces such as floods, fires, acts of God or other circumstances beyond Bosch's control.
Also excluded from this warranty are scratches and damages on external surfaces and exposed parts or Built-In
Ovens on which the serial numbers have been altered, defaced or removed.
To the extent allowed by law, this warranty sets out your exclusive remedies with respect to products covered by
it, whether the claim arises in contract or tort (including strict liability, and negligence) or otherwise. Bosch will
not be liable for consequential or incidental damages, losses, or expenses.
THIS WARRANTY IS IN LIEU OF ALL OTHER EXPRESSWARRANTIES. ANY WARRANTY IMPLIED BY LAW,
WHETHER FOR MERCHANTABILITY OR FITNESS FOR A PARTICULAR PURPOSEOR OTHERWISE, SHALL BE
EFFECTIVE ONLY FOR THE PERIOD THAT THIS EXPRESSWARRANTY IS EFFECTIVE. No attempt to alter, modify
or amend this warranty shall be effective unless authorized in writing by an officer of BSH.
How to Obtain Warranty Service
To obtain warranty service for the Built-In Oven, you should contact the nearest Bosch authorized service center.
BSH Home Appliances • 5551 McFadden Avenue, Huntington Beach, CA 92649 • 800-944-2904.
Service Data Record
The location of the serial tag on the product can be seen when the oven door is opened. It is located on the left
side, centered vertically just inside the oven cavity. See page 3. Now is a good time to write this information in
the space provided below. Keep your invoice for warranty validation. To obtain service see page 24.
Model number:
Serial Number:
Date of Installation or Occupancy:
English • 25

Instrucciones Importantes de Seguridad
Por favor lea todas las instrucciones antes de usar este aparato.
Con el cuidado adecuado, su nuevo horno de Bosch
funcionar_ de manera segura y confiable.
Lea todas las instrucciones cuidadosarnente antes
de usar este horno. Estas precauciones ayudar_n a
reducir el riesgo de sufrir quemaduras, descargas
el_ctricas, fuego o lesiones. Cuando utiliza aparatos
de cocina, se deben observar precauciones b_sicas de
seguridad, incluyendo las siguientes:
Este aparato debe ser instalado y aterrizado
correctamente por un t_cnico calificado. Con_ctelo
s61oa una toma de corriente aterrizada. Consulte
las instrucciones de instalaci6n para la preparaci6n
el_ctrica e instrucciones de conexi6n.
• $61o un t_cnico autorizado debe dar el servicio. Contacte
al centro de servicio autorizado m_s cercano para checar,
reparar o ajustar el aparato.
• No repare o reemplace ninguna parte del horno a menos
que fue recomendado especfficamente. Consulte a un
centro de servicio autorizado.
• No opere este aparato si no funciona bien o si fue
da_ado hasta que un t_cnico de servicio autorizado Io
haya revisado.
• Instale y coloque este aparato solamente de acuerdo con
las instrucciones de instalaci6n.
Use este aparato s61o para el uso intencionado por
el fabricante. Si tiene alguna pregunta, contacte al
fabricante.
• No tape u obstruya ninguna abertura en este aparato.
• Use este aparato s61o para el uso intencionado como se
describe en este manual. No use qufmicos corrosivos,
vapores, inflamables o productos no alimenticios
en este aparato. Este tipo de homo est_ dise_ado
espec[ficamente para calentar o cocinar alimentos. No
est_ dise_ado para uso industrial o de laboratorio. El uso
de qufmicos corrosivos cuando calienta o limpia el homo
da_ar_ el aparato.
• En el caso de encenderse la ropa o el cabello, I_CHESE
AL PISO Y Dt_SEVUELTAS DE INMEDIATO para apagar
las llamas.
Este horno es para uso residencial. No Io debe utilizar en
exteriores.
CON RESPECTO A P._IAROS EN LA CASA
P_jaros tienen sistemas respiratorios muy sensibles.
Mantenga los p_jaros fuera de la cocina u otras
habitaciones donde los puedan alcanzar los vapores de
la cocina. Durante la autolimpieza, se liberan humos
que pueden ser nocivos para p_jaros. Otros vapores de
la cocina, como el sobrecalentar margarina y aceites
para cocinar pueden ser nocivos tambi_n.
• No permita que ni_os utilicen este aparato a menos que
est_n supervisados por un adulto. Nunca se deben dejar
solos a los ni_os y mascotas en el _rea donde se usa el
aparato. Nunca se les debe permitir sentarse o pararse
sobre ninguna parte del horno.
• No almacene cosas de interns para los ni_os arriba del
homo. Cuando los ni_os se suben al homo para alcanzar
estas cosas, pueden sufrir heridas serias.
Para reducir el riesgo de un fuego en la cavidad del horno:
1. No guarde materiales inflamables en o cerca del horno.
2. No use agua con un incendio de grasa. Sofoque las
llamas con un extinguidor qufmico de polvo o tipo
espuma.
3. Tenga un extinguidor de fuego a la mano en un lugar
de f_cil acceso cerca de cualquier aparato de cocina.
Aseg6rese de saber c6mo manejarlo.
4. No recueza los alimentos. Cuide el horno bien si coloca
papel, pl_stico u otros materiales inflamables adentro.
5. No use el homo para guardar cosas. Nunca deje
productos de papel, utensilios de cocina o alimentos
dentro de la cavidad cuando no se usa el homo.
6. En caso que se enciendan materiales dentro del homo,
mantenga cerrada la puerta del homo. Apague el homo
y desconecte el circuito en la caja del cortacircuito.
7. No obstruya los ductos de ventilaci6n del homo.
8. Aseg6rese que el ventilador funcione cuando se usa
el horno. Si no funciona el ventilador, no use el horno.
Llame a un centro de servicio autorizado.
9. Nunca use el horno para calentar una habitaci6n. I_sto
puede da_ar las partes del horno.
10. P6ngase ropa adecuada por cuestiones de seguridad
personal. Nunca debe ponerse ropa holgada o prendas
que cuelguen flojas como corbatas o mangas mientras
usa este aparato.
_ ADVERTENCIA
La Ley del Estado de California para Agua Potable
y T6xicos requiere que las empresas adviertan a
sus clientes de la posible exposici6n a sustancias
conocidas pot el Estado de California a causar
cancer o defectos de nacimiento.
La eliminaci6n de residuos durante la autolimpieza
genera algunos derivados que se incluyen en esta
lista de sustancias.
Para minimizar la exposici6n a estas substancias,
siempre opere este homo de acuerdo a las
instrucciones en este manual y proporcione
una buena ventilaci6n a la cocina durante e
inmediatamente despu_s de autolimpiar el homo.
Continua en la siguiente p_gina
Espa_ol • 1

Instrucciones Importantes de Seguridad
Por favor lea todas las instrucciones antes de usar este aparato.
PRECAUCIONES DE SEGURIDAD
• Recoja el cabello suelto.
• Los quemadores pueden estar calientes a pesar que
tengan un color oscuro. Las superficies internas de un
homo pueden calentarse suficientemente para causar
quemaduras.
• Durante y despu_s del uso, no permita que la ropa u
otros materiales infiamables tengan contacto con los
quemadores o con las superficies internas del homo
hasta que se hayan enfriado suficientemente.
• La moldura en la parte superior yen los ladosde la
puerta del homo pueden calentarse y causar quemaduras.
• Tenga cuidado cuando abre la puerta. Abra la puerta
ligeramente para dejar escapar el aire caliente o el vapor
antes de sacar o reemplazar alimentos.
• No caliente contenedores de alimentos cerrados.
La presi6n acumulada puede causar la ruptura del
contenedor y causar lesiones.
• Siempre coloque las rejillas del homo en el lucjar deseado
cuando el homo estc_frfo. Si se debe quitar una rejilla
mientras que el homo est_ caliente, no permita que las
agarraderas tencjan contacto con los quemadores.
• Siempre use agarraderas secas para las ollas. Las
agarraderas mojadas o h6medas colocadas encima de
superficies calientes pueden causar quemaduras por el
vapor. No permita que las agarraderas tencjan contacto
con los quemadores. No use una toalla u otro trapo
estorboso.
PRECAUCIONES DE SEGURIDAD CON EL MODO
DE AUTOLIMPIEZA DEL HORNO
• Confirme que se cierra la puerta y que no se abrir_ una
vez que aparezca el icono de la puerta cerrada. Si la
puerta no se cierra, oprima OVEN OFF (Apagar Horno) y
no use el modo de autolimpieza. Llame al 800-944-2904
para solicitar servicio.
• Nora: Durante un ciclo de autolimpieza normal y un ciclo
de autolimpieza retardado, la puerta se cierra dentro de
25 a 30 segundos tras oprimir Start (Inicio).
• No limpie el empaque de la puerta. Esesencial para un
sellado bueno. Debe tener cuidado de no frotar, da_ar,
mover o quitar el empaque de la puerta.
• No use detergentes comerciales para hornos o
recubrimientos de protecci6n de ning6n tipo en o
alrededor de alguna parte del horno.
• Limpie s61olas partes listadas en este manual.
• Quite la bandeja de asado, todas las rejillas
del horno, otros utensilios y limpie derrarnes
excesivos de alimentos antes de autolimpiar el homo.
• Escuche si se oye el ventilador. Si no oye el ventilador
Ilame a servicio.
Comenzar
Para poner el reloj'
1. Oprima TIME (Hora). TIMER (Cron6metro)
parpadea en la pantalla.
2. Gire la perilla para seleccionar CLOCK (Reloj).
3. Oprima TIME.
4. Gire la perilla para fijar la hora.
Nota: El reloj avanza en incrementos de diez
minutos. Gire la perilla una vez hacia atrc% (contra
el sentido del reloj) para cambiar a incrementos de
un minuto.
5. Oprima START (Inicio).
Para usar las luces del horno:
1. Oprima LIGHT (Luz) para prender o apagar las
luces del homo.
En los hornos dobles se prenden o apagan las luces
en ambos hornos juntos. Para controlar las luces
solamente en un homo:
1. Oprima UPPER/LOWER (Superior/Inferior)
para seleccionar el homo.
2. Oprima LIGHT para prender o apagar las luces.
Se prenden las luces del homo autom_ticamente cuando:
• se abre la puerta.
• se prende el homo.
Se apagan las luces del homo autom_ticamente cuando:
• se apaga el homo.
• se cancela el modo del homo.
Las luces no funcionan en el modo de autolimpieza.
2 • Espaffol

Comenzar
t
/
/
Figura 1: PaRes del horno
Partes del horno ¥ accesorios:
1 Panel de control
2 Agarradera de la puerta
3 Empaque de la puerta del horno (uno por horno)
4 Ventana
5 Rejillas removibles del horno; 3-6 dependiendo del
modelo
6 Bandeja y rejilla del asador
7 Gu_asde posici6n de rejillas (4 en cada horno)
8 Elemento para asar (uno en cada homo)
9 Placa con informaci6n
10 Aberturas de enfriamiento (ambos hornos)
11 Pestillo de cierre automcStico (uno por horno)
12 LcSmparasde hal6geno del homo (2 en cada homo)
13 Ventilador de convecci6n y tapa
14 Bisagra de la puerta
15 Puerta removible del homo
16. Juego de literatura (no se muestra)
17. ReceptcSculopara el term6metro
18. Term6metro (para came)
19. Rejilla extensible
Espa_ol • 3

Panel de control del horno
Comenzar
_1_ Cooking Mode
i TemperatureStart
+
Figtara 2: Hornos dob/es
_Cooking Mode 0
i_l Temperature
S_art
Figtara 3: Hornos send os
Botones de comandos
1. CANCEL (Cancelar): Optima para terminar un modo
actual.
2. COOKING MODE (Modo de Cocinar): Oprima para
seleccionar el modo de cocinar.
3. LIGHT (Luz): Optima para prender o apagar las luces
del homo.
4. LOWER CANCEL (Cancelar Inferior) (solamente
hornos dobles)" Optima para terminar el modo en el
homo inferior.
5. START (Tnicio): Oprima para iniciar el modo.
6. TIME (Hora): Optima para fijar la hora del dfa,
cron6metro.
7. UPPER CANCEL (Cancelar Superior) (solamente
hornos dobles): Optima para terminar el modo en el
homo superior.
8. UPPER/LOWER (Superio/Inferior) (solamente
hornos dobles): Optima para seleccionar el homo
superior o inferior antes de ajustar las luces, etc.
9. TEMPERATURE (Temperatura): Oprima para fijar o
cambiar latemperatura del homo.
Pantalla
10.
ICONOS DE CUADRO (solamente hornos dobles):
Iconos a la derecha de la hora. Indican cual horno est2
activo.
11. TEXTO EN PANTALLA: Indica funciones activas (fija)
y funciones que esperan que el usuario ingrese alguna
informaci6n (parpadea).
12. ICONOS DE BLOQUEO: Aparecen abajo de los iconos
de cuadro. Indican que se bloquea la puerta.
13. TEMPERATURA: Dfgitos en la esquina superior
izquierda de la pantalla. Indican la temperatura elegida
para el homo.
14. HORA: Dfgitos en la esquina inferior izquierda de la
pantalla. Indican la hora del dfa y el cron6metro.
Otras caracteristicas
15. PITIDOS: Un pitido se_ala que se acept6 la informaci6n
ingresada, dos pitidos se_alan una entrada invc_lida.
16. TEMPERATURAS POR DEFAULT" Cada modo de
cocinar tiene una temperatura por default que aparece
al seleccionar el modo. La temperatura por default es la
temperatura m_s com6n para el modo.
17. C6DIGOS DE NUMEROS F: Aparecen en la pantalla
cuando el control detecta un problema en el homo o sus
partes electr6nicas. Consulte la secci6n de autoayuda,
p_gina 24, para mc_sinformaci6n.
18. MODO SABATINO: Cuando se activa esLa opci6n,
el homo hornear_ por 72 horas antes de apagarse
automc_ticamente. Este modo es para religiones que no
permiten "trabajar" losS_bados (o Domingos).
4 • Espa_ol

Consejos generales para el horno
Sugerencias para el uso
• Use las tablas de cocinar como una guia.
• No ponga moldes en una puerta abierta del homo.
• Use la luz interna del homo para ver los alimentos
a trav_s de la ventana en la puerta del homo en
lugar de abrir la puerta frecuentemente.
• Coloque los moldes en el centro del homo.
Ventajas de cocinar por convecci6n
• Horneado uniforme.
° Se conservan los jugos y sabores.
° Alimentos con levadura se elevan m_s y son m_s
ligeros (bollos de crema, pan de levadura, etc.).
° Cocinar con mOltiples rejillas sin cambiar sabores.
° No se requieren moldes especiales para hornear.
° Puede asar cortes m_s gruesos de came con el
asado de convecci6n.
° Ahorra tiempoy energfa.
Acerca de cocinar por convecci6n
Los modos normales de cocinar (hornear, asar, etc.)
utilizan calor radiado de uno o m_s elementos para
cocer los alimentos. Los modos de convecci6n utilizan
tanto el calor generado por los elementos como un
ventilador en la parte trasera del horno para circular el
aire caliente continuamente a trav_s del homo.
El resultado es una cocci6n m_s r_pida y uniforme. Los
modos de convecci6n conservan los jugos y sabores
naturales y pueden adem_s ahorrar tiempo y energia
ya que se pueden cocer la mayor[a de alimentos a
temperaturas bajas yen menos tiempo (nunca debe
reducir la temperatura cuando prepara carne).
Se reduce tambi_n el tiempo de cocci6n porque puede
usar mOltiples rejillas a la vez. Puede hornear varias
capas de galletas o varios platillos diferentes al mismo
tiempo.
El homo usa tambi_n la convecci6n para deshidratar.
El bajo calor de los elementos es circulado a trav_s
del homo pot medio del ventilador de convecci6n para
eliminar lentamente la humedad.
Consulte los "Modos del Horno" en este manual para
m_s informaci6n sobre cada modo de convecci6n.
Nota: Las opciones de convecci6n varfan pot modelo.
Precalentar el horno
• Precaliente el horno cuando usa los modos de
horneado y horneado de convecci6n a menos que
la receta recomienda otra cosa.
• Use el modo de precalentado r_pido para acortar el
tiempo del precalentado.
• Seleccionar una temperatura m_s alta acorta el
tiempo del precalentado.
• Se debe precalentar el horno para obtener buenos
resultados con pasteles, galletas y panes, etc.
• Coloque las rejillas del horno en sus posiciones
correctas antes del precalentado.
• Durante el precalentado aparece la temperatura de
cocinar seleccionada.
• Un pitido confirma que el horno est_ precalentado
y PREHEAT(Precalentar) desaparece de la pantallao
• Cuando opera en 208V, el tiempo de precalentar
puede ser ligeramente m_s largo.
Moldes para hornear
• Los moldes de vidrio absorben el calor. Reduzca
la temperatura del homo 25°F cuando hornea en
moldes de vidrio.
• Use moldes que doran como usted desea. El tipo
de acabado del molde ayuda a determinar la
cantidad de doraci6n que se producir&
• Los moldes brillosos, suaves de metal o anodizado/
de tefl6n reflejan el calor, resultando un dorado
m_s ligero y m_s delicado. Pasteles y galletas
necesitan este tipo de molde.
• Los moldes oscuros, _speros o sin brillo absorben
el calor, produciendo una costra m_s dorada y
crujiente. Use este tipo de molde para pays.
• Use moldes oscuros anodizados/de tefl6n o moldes
oscuros met_licos sin brillo o de vidrio para Iograr
una costra dorada y crujiente.
• Los moldes aislados para hornear pueden aumentar
la duraci6n del tiempo recomendado de horneado.
• No hornee con la bandeja vacfa del asador en el
homo ya que _sto puede cambiar el desempe_o
del horneado. Guarde la bandeja fuera del homo.
• Use bandejas de hornear que miden 19"x14" (48.3
x 35.6 cm) o menos para mejores resultados.
Datos generales sobre la operacibn del horno:
Se opera el homo a trav_s de m_ltiples botones de Use la perilla para ajustar el modo, la hora o la
comandos y una perilla, temperatura.
Optima el bot6n de comando para seleccionar la Consulte las secciones de Panel de Control/Pantalla y
funci6n (modo de cocinar, hora, etc). de la Operaci6n del Homo para m_s detalles.
Espa_ol • 5

Consejos generales para el horno
Rejillas del horno
• El homo tiene gufas para rejillas en cuatro niveles.
Las posiciones de rejillas est_n numeradas desde la
gu[a inferior (#1) a la superior (#4). (Vea el dibujo
abajo).
• Consulte las tablas de cocinar para las mejores
posiciones de rejilla cuando cocina
• AsegOrese que las rejillas est_n niveladas una vez
que est_n en sus posiciones.
• Las rejillas est_n diseffadas a detenerse cuando se
jalan hasta su Ifmite.
• iCUIDADO! Nunca use papel de aluminio para
revestir las rejillas o el homo. El calor atrapado
debajo del papel de aluminio puede daffar el homo.
PRECAUCION: Para evitar posibles que-
maduras, coloque las rejillas del horno en las posi-
ciones deseadas antes de prender el homo. Siempre
use guantes cuando el homo est_ caliente.
La rejilla plana
Sacar la rejilla del horno:
Agarre la rejilla firmemente en ambos lados y j_lela hacia
Ud. AI Ilegar al tope, incline la rejilla hacia arriba y j_lela
completamente hasta que salga del homo.
Reemplazar la rejilla en el horno:
Agarre la rejilla firmemente en ambos lados. Incline la
rejilla hacia arriba para encajar el tope en el portarejilla.
Cambie la rejilla a una posici6n horizontal y emp0jela
completamente. La rejilla debe estar recta y plana, no
torcida.
Seleccionar la posici6n de la rejilla
Vea el dibujo abajo.
Rejilla 4 - Posici6n m_s alta. Se usa para derretir
queso r_pidamente.
Rejilla 3 - Se usa para asar carries y tostar panes.
Rejilla 2 - Se usa para pays, guisados, panes, pasteles
tipo bundt o pound. Se usa tambi_n para asar cortes
gruesos de carnes.
Rejilla I - Posici6n m_s baja. Se usa para pasteles
tipo bizcocho, tostados, pavo y aves.
Nora: Siempre deben sacar las rejillas del homo antes
de autolimpiar el homo. Si se dejan las rejillas en el
homo durante el modo de la autolimpieza, perder_n
su acabado brilloso permanentemente y dejar_n de
deslizarse suavemente. Para mejorar el deslizamiento,
limpie los bordes de las rejillas con una pequeffa
cantidad de aceite vegetal, luego limpie el exceso.
Fondo de la rejilla
Frente de la rejilla
Figura 4: La rejilla plana
4
3
2
1
Figura 5: Posiciones de las rejillas
6 • Espaffol

Consejos generales para el horno
La rejilla extensible
La rejilla extensible facilita el acceso a los alimentos en
el homo. Se extiende me%allc_de la rejilla plana normal
acercando los alimentos al usuario.
_i_ Precauci6n" Cuando la rejilla sale del homo
no se bloquean los brazos laterales de deslizamiento.
I_stos se podr_anextender inesperadamente si se
transporta la rejilla de modo incorrecto. Extender los
brazos de deslizamiento puede causar lesiones. Se
debe sostener o transportar la rejilla solamente
agarrando los lados.
Nora" Siempre saque la rejilla extensible antes de
autolimpiar el homo.
Tope para molde
Agarradera
Figura 6: La rejilla extensible
Marco inferior
Tope
Brazo de deslizamiento
Precaucibn" Para evitar quemaduras, jale la rejilla
completamente y levante el molde arriba de la
agarradera cuando transporta los alimentos al y del
horno.
Colocar la rejilla en el horno:
1. Agarre la rejilla firmemente en ambos lados.
Coloque la rejilla (incluyendo el marco) arriba de la
gu[a de rejilla deseada.
2. Empuje la rejilla completamente hasta que el rondo
de la rejilla caiga en su lugar.
Figura 7: Coloque la rejilla arriba de la gufa deseada
Figura 8: El rondo de la rejilla cae en su lugar
Sacarla del horno:
1. Levante el frente de la rejilla ligeramente y empuje
la rejilla hacia adentro hasta que se libera el tope.
Figura 10: Tope liberado
2. Levante el fondo de la rejilla hasta que el marco y
el tope queden libres de la gu_a.
3. Jale ambas secciones hacia adelante hasta que se
active el tope. La rejilla debe estar recta no torcida.
Figura 11: Gufa de rejilla liberada
3. Jale la rejilla hacia abajo y sciquela.
Figura 9: Tope activado
Figura 12: Jale la rejilla hacia abajo y s_quela
Espaffol • 7

Consejos generales para el horno
Utilizando mdltiples rejillas
Hornear con 2 rejillas: Use posiciones 1 y 3.
Hornear con 3 rejillas: Use posiciones 2, 3 y 4.
Cuando hornea cuatro capas de pasteles al mismo
tiempo, acomode los moldes de tal forma que ningOn
molde quede directamente arriba de otto. Para mejores
resultados, coloque los moldes en el frente de la
rejilla superior y en el fondo de la rejilla inferior (Vea
el dibujo a la derecha). Deje un espacio de 1"-1 1/2"
(15 - 4 cm) alrededor de los moldes
Condensaci6n
La abertura de ventilaci6n se encuentra arriba de la
puerta del homo Es normal que salga vapor de la
abertura y se puede formar condensaci6n en las c_reas
arriba de la abertura de ventilaci6n tal como en la
pantalla
Sensor de temperatura
Su nuevo homo viene con un sensor electr6nico de
temperatura que mantiene la temperatura seleccionada
con precisi6n Es probable que su homo anterior tuvo
un termostato mecc_nicoque cambiaba gradualmente
a una temperatura me%alta Como resultado, tal vez
ahora debe modificar sus recetas favoritas cuando
prepara los alimentos en su homo nuevo
Rejilia 3
Rejilla 1
II J
Figura 13: Colocaci6n de moldes en multiples rejillas
PRECAUCION'
Muchos factoresafectaneldesempe_o de lacoCci6n'
siempre reViseelt6rminode lOSalimentosantesde
servirosl
Hornear en grandes alturas
Cuando cocina en grandes alturas, las recetas y los
tiempos de cocinar vafian de la norma. Para obtener
informaci6n m_s precisa, escriba al Servicio de
Extensi6n, Colorado State University, Fort Collins,
Colorado 80521 Puede que los boletines cuestan
dinero
Tabla 1: Pautas para la temperatura de alimentos
Pautas para temperaturas de servir alimentos de FSIS
(Servicio de Inspecci6n y Seguridad Alimenticia USDA)
140° F (60 ° C)
• Jam6n, precocido (a recalentar)
145° F (63 ° C)
• Came fresca de res, ternera, cordero (vuelta y v)
160° F (71 ° C)
• Came molida y mezclas de came (res, puerco,
ternera, cordero)
• Came fresca de res, ternera, cordero (medio)
• Came fresca de puerco (medio)
• Jam6n fresco (crudo)
• Platillos preparados con huevos
165° F (74 ° C)
• Came molida y mezclas de came (pavo, polio)
• Relleno (cocido solo o en el ave)
• Sobras y guisados
170° F (77 ° C)
• Came fresca de res, ternera, cordero (bien coc)
• Pechugas de polio
• Came fresca de puerco (bien cocida)
180° F (82 ° C)
• Polio o pavo, (entero)
• Polio (came de ayes) (muslos y alas)
• Pato y ganso
Nora: Huevos (solos, no utilizados en una receta) - cocinar hasta que la yema y la clara queden firmes.
8 • Espa_ol

Ajustar el horno
Para seleccionar el horno superior o inferior:
El homo por default es el homo superior. Para
seleccionar el homo inferior o para cambiar entre
ambos, oprima UPPER/LOWER (Superior/
Inferior).
Para fijar el modo de cocinar:
1. Oprima COOKING MODE.
2. Gire la perilla para seleccionar el modo.
3. Oprima TEMPERATURE.
4. Gire la perilla para fijar la temperatura.
5. Oprima START.
Se prenden la luz del homo y el ventilador y
PREHEATaparece en la pantalla. Cuando se
alcanza la temperatura del precalentado, el modo
de cocinar aparece en la pantalla y el homo emite
pitidos.
6. Para terminar el modo, oprima CANCEL.
Para fijar el cron6metro:
1. Oprima TIME (Hora).
2. Gire la perilla para seleccionar el cron6metro.
3. Oprima TIME.
4. Gire la perilla para fijar el tiempo.
5. Oprima START.
Se oye un pitido y END (FIN) aparece en la pantalla
cuando termina el tiempo. Oprima CANCEL para
apagar el cron6metro.
Para cambiar el cron6metro:
1. Oprima TIMER (Cron6metro).
2. Gire la perilla para seleccionar cambiar el
cron6metro.
3. Oprima TIME.
4. Gire la perilla para fijar el tiempo.
5. Oprima START.
Para cancelar el cron6metro:
1. Oprima TIMER.
2. Gire la perilla para seleccionar cancelar el
cron6metro.
3. Oprima TIME.
Para fijar el modo de cocinar utilizando el
modo del precalentado r_pido:
1. Oprima COOKING MODE.
2. Gire la perilla para seleccionar FASTPREHEAT
BAKE (Precalentado Rc_pidopara Horneado) o FAST
PREHEATCONV BAKE (Precalentado Rc_pidopara
Horneado de Convecci6n).
3. Oprima TEMPERATURE.
4. Gire la perilla para fijar la temperatura.
5. Oprima START.
Cuando se alcanza la temperatura de precalentado
se oye un pitido y PREHEAT(Precalentar)
desaparece de la pantalla.
Modos cronometrados de cocinar
Use este modo para apagar el homo automc_ticamente
despu_s de cocinar. El modo retardado apaga tambi_n
el homo en forma automc_tica.
• En modelos con hornos dobles se pueden ajustar
ambos hornos a operar en modos cronometrados
independientes
• Se debe poner la hora correcta del dfa.
• El modo cronometrado apaga el homo al final del
tiempo de cocinar.
Para fijar el modo cronometrado:
1. Seleccione el modo de cocinar y la temperatura.
2. Oprima TIME dos veces. COOKTIME (Tiempo de
Cocinar) aparece en la pantalla.
3. Gire la perilla para fijar el tiempo de cocinar.
Nota" Se debe incluir el tiempo requerido para que
el homo alcance la temperatura en el tiempo de
cocinar determinado.
4. Oprima START.
AI final del tiempo programado de cocinar se apaga
el homo y se oye un pitido. Oprima CANCEL.
Para fijar el modo retardado:
1. Siga los pasos 1 hasta 3 de arriba.
2. Oprima TIME nuevamente. STOPTIME
(Tiempo de Detenci6n) aparece en la pantalla.
3. Gire la perilla para ingresar la hora de dfa para
que el homo deje de cocinar.
4. Oprima START.
El homo calculaautom_ticamente la hora del dfa
para comenzar.
AI final del tiempo programado de cocinar se apaga el
homo y se oye un pitido. Oprima CANCEL.
Espa_ol • 9

Modos del horno
Hornear
Hornear es cocinar con aire seco, caliente. Tanto el
elemento superior como el inferior se prenden en ciclos
para mantener la temperatura del homo:
Calentar
Calentar usa el elemento inferior para sostener una
temperatura baja para mantener los alimentos a una
temperatura de servir:
Figura 14: Hornear Figura 15: CaJentar
Se puede usar el modo de Hornear para preparar una
variedad de alimentos, desde pastelitos hasta guisados.
Tambien se puede usar para asar carnes.
Para Iograr mejores resultados:
• Cuando hornea en dos o mc_srejillas, use el modo
de horneado de convecci6n mejor.
Use este modo para mantener caliente los alimentos
cocidos hasta que usted los quiere servir. El rango de
temperaturas para este modo es 100° F - 210° F (38 °
C - 99° C).
Para Iograr mejores resultados:
• Tape los alimentos que se deben mantener
hOmedos con una tapa o con papel de aluminio.
_l_ Precauci6n
Para asegurar la seguridad de los alimentos, siga estos
lineamientos:
• NO use el modo de calentar para calentar
alimentos fr[os (excepci6n: se puede usar este
modo para dorar galletas, papas o cereal seco y
para calentar platillos fr[os).
• AsegOrese de mantener una temperatura adecuada
para los alimentos. USDA recomienda mantener
caliente los alimentos a una temperatura de 140° F
(60 ° C) o mc_scaliente.
• NO mantenga caliente alimentos por mc_sde una
hora.
10 • Espa_ol

Modos del horno
Hornear de convecci6n
Hornear de convecci6n es similar al horneado. En
este caso, el calor viene de un tercer elemento detr_s
de la pared trasera. La principal diferencia en el hor-
neado de convecci6n es que el calor recircula a trav_s
del homo pot el ventilador de convecci6n:
Figura 16: Hornear de convecci6n
El modo de horneado de convecci6n sirve muy bien
para hornear cantidades grandes de alimentos sobre
mOltiples rejillas. Se puede usar para preparar galletas,
pays, pastelitos, panes, y botanas entre otras cosas.
NO use este modo para carnes. Use mejor el modo de
tostado de convecci6n.
Los beneficios del horneado de convecci6n incluyen:
• Ligera disminuci6n del tiempo de hornear
• Hornear con 3 rejillas
• Mayor volumen (la levadura se eleva m_s)
• Hornear m_s alimentos a la vez
Tabla 2: Tabla del homeado de convecci6n
• Tiemp0 del
Posici6n (homo pre- Horneado de
de rejilla . calentad0)_ Convecci6n**
.... , (Fo) i (rain)
Pastel
Glaseado
Pastel Bundt
Bizcochos
Pay
2 cortezas, fresco, 9"
2 cortezas, fruta
congelada, 9"
Galletas
Az_car
Chocolate Chip
Brownies
Panes
Pan de levadura, 9x5
Rollos de levadura
Pan r_pido, 8x4
Bollo, panecillo
Molletes
Pizza
Congelada
Fresca
2
1
1
2
2
2
2
2
2
2
2
2
2
325
325
325
350 - 400
350
325- 350
325-350
325
350
350-375
325- 350
350-375
4OO
17-19
37-43
35-39
45-55
68-78
6-11
8-13
29-36
18-22
12-15
45-55
11-15
15-19
2 375- 425 23-26
2 400 -425 12-15
Para Iograr mejores resultados:
• Reduzca la temperatura de la receta por 25° F
Consulte la tabla de horneado de convecci6n para
ejemplos.
• Ponga los alimentos en moldes pianos, no tapados,
como bandejas para galletas sin costados.
• Centre los moldes lado a lado sobre la rejilla del
homo.
• No use el modo de horneado de convecci6n para
flan, quiche, pay de calabaza o pastel de queso.
Estos alimentos no se benefician por el proceso del
calentamiento pot convecci6n. Use mejor el modo
de horneado normal.
Nota: Cuando hornea con convecci6n en dos rejillas,
use las posiciones una y tres. Cuando usa tres rejillas,
use las posiciones dos, tres y cuatro.
* La temperatura del horneado de convecci6n es
25°F menos que la recomendada en los empaques
o recetas. La temperatura en esta tabla ha sido
reducida pot 25°F (4 ° C).
** Esta tabla es una gu[a. Los tiempos verdaderos
dependen de las mezclas y recetas horneadas. Siga
las direcciones de la receta o del empaque y
reduzca la temperatura de modo apropiado.
horneado de convecci6n
• Reduzca la temperatura 25° F.
• Revise si los alimentos ya se cocieron antes de
tiempo:
1 - 15 rain 3 rain antes
16 - 30 rain 5 rain antes
31 rain - 1 h 10 rain antes
Espa6ol • 11

Modos del horno
Asar
El asado usa el calor intenso radiado del elemento
superior:
Figura 17: Asar
El modo de asado sirve mejor para cocinar cortes del-
gados, suaves de came (12 o menos), polio y pescado.
Se puede usar tambi6n para calentar y dorar carnes,
guisados y otros alimentos.
Los beneficios del asado incluyen:
• Asado r_pido y eficiente.
° Cocinar sin agregar grasas o Ifquidos.
• Los alimentos se doran mientras se cocinan.
SIEMPRE ASE CON LA PUERTACERRADA
Para Iograr mejores resultados:
° No precaliente el homo.
• Los filetes y chuletas deben tener un grosor de al
menos 3/4".
• Aplique mantequilla o aceite al pescado o polio
para evitar que se pegue.
• Use la bandeja y rejilla de asar incluida con su
homo.
° No forre la rejilla del asador con papel de aluminio.
Est_ dise_ada para drenar las grasas y los aceites
de la superficie y evitar manchas y humos.
• Voltee la came una vez a mitad det tiempo
recomendado para cocinar (yea la tabta de asado
para ejemptos).
• AI dorar guisados, use s61oplatos de metal o vidrio
cer_mico como Corningware®.
• Nunca use vidrio refractario (Pyrex®); no puede
tolerar la temperatura alta.
Tabla 3: Tabla de asar
I
_.._ r._.._.._ Posici6n Ajuste del
de reJia asad0 - (QF)
Res
Filete (3/4"- 1")
Vuelta y vuelta 3
Medio 3
Bien cocido 3 5 170
Hamburguesas
(3/4" - 1")
Bien cocidas 3 5 160
Polio (Aves)
Pechuga (con hueso) 3
Muslo 3
Puerco
Chuletas (1") 3
Salchicha - fresca 3
Reban, jam6n (1/2") 3
Hariscos
Filetes de pescado, 1" 3
con mantequilla
Cordero
Chuletas (1")
Vuelta y vuelta 3 5
Medio 3 5
Bien cocido 3 5
Pan
Pan de ajo, rebanadas 3 5
de 1"
*Los tiempos de asado son aproximados y
t
Temp, Tiempo
intema Ladol
(min)*
5 145
5 160
3 170
3 180
5 160
5 160
5 160
Cocinar
4 hasta que
quede
opaco y se
desmenuce
con
facilidad
5-7
6-8
8-10
7-9
14-16
14-16
7-9
5-7
3-5
10-14
145 5-7
160 6-8
170 8-10
Tiemp0
Lado2
(min)_
4-6
5-7
7-9
5-7
14-16
11-13
5-7
3-5
4-6
No voltear
4-6
5-7
7-9
4-6
Dueden variar ligeramente.
12 • Espa_ol

Modos del horno
Asar de convecci6n
El asado de convecci6n es similar al asado. Combina el
calor intenso del elemento superior con el aire circu-
lado pot el ventilador de convecci6n:
Figura 18: Asar de convecci6n
El modo de asado de convecci6n sirve bien para coci-
nar cortes delgados, suaves de carne, polio y pescado.
Generalmente no se recomienda el asado de convec-
ci6n para dorar carnes, guisados y otros alimentos.
Para Iograr mejores resultados:
• No precaliente el homo.
• Las carnes deben tener un grosor de al menos
1 1/2".
• Voltee la came una vez a mitad del tiempo
recomendado para cocinar (yea la tabla de asado
de convecci6n para ejemplos).
• Use la bandeja y rejilla de asar incluida con su
homo.
° No forre la parrilla del asador con papel de
aluminio. Estc_dise_ada para drenar las grasas
y los aceites de la superficie y evitar manchas y
humos.
• Eche sal despu6s de cocinar.
Los beneficios del asado de convecci6n, ademc% de los
beneficios del asado normal, incluyen:
• Cocinado me%rc_pidoque el asado normal.
SIEMPREASE POR CONVECCION CON LA PUERTA
CERRADA
Tabla 4: Tabla del asado de convecci6n
I
Aliment0 y Gr0s0r P0sici6n
de rejiiia
Res
Filete (1-!/2" 0 m_s)
Vuelta y vuelta
Medio
Bien cocido
Hamburguesas
(m_s de 1")
Bien cocidas
Polio (Aves)
Cuartos de polio
Pechuga
Puerco
Chuletas (1%" o m_s)
Salchicha - fresca
2
2
2
3
3
2
3
t
, , , I Temp Tiempo Tiempo
Ajusteae
I interna I Lad0 1 Lad0 2
asaa0 (OF)(rain)* (rain)*
45O
450
450
145
160
170
160
180
(muslo)
170
160
160
12-14
15-17
18-20
11-13
13-15
14-16
12-14
4-6
55O
450
450
450
450
11-13
13-15
16-17
8-10
10-12
12-14
13-15
3-5
*Los tiempos del Asado y Asado de Convecci6n son aproximados y pueden variar
ligeramente.
Espaffol • 13

Deshidratar
Modos del horno
Tabla 5: Tabla de deshidratado
El deshidratado seca alimentos con calor de un tercer
elemento detr_s de la pared trasera del homo. El calor
circula a trav_s del homo pot el ventilador de convec-
ci6n.
Figura 19: Deshidratar
Se usa el deshidratado para secar y/o conservar ali-
mentos como frutas, verduras y especies. Este modo
mantiene una temperatura baja 6ptima (120 ° F - 160°
F) (49 ° C - 71° C) mientras circula el aire caliente para
eliminar lentamente la humedad.
Para Iograr mejores resultados:
• Seque especies a 120°F (49 ° C). Seque la mayorfa
de frutas y verduras a 140° F(60 ° C). (Consulte la
tabla de deshidratado para vet ejemplos).
• Los tiempos de secado varfan debido a la humedad
y el contenido de az0car en el alimento, el tama_o
de las piezas alimenticias, la cantidad de alimentos
que se est_n secando y la humedad en el aire.
Revise los alimentos cuando Ilegue al tiempo
mfnimo de secado.
• Se pueden usar m01tiples rejillas al mismo tiempo.
• Trate frutas con antioxidantes para evitar la
decoloraci6n.
• Consulte un libro de conservaci6n de alimentos, la
Oficina Cooperativa del condado o una librerfa para
obtener informaci6n adicional.
El homo se quedara prendido por 48 horas antes de apagarse en
forma automatica.
Aliment0 Prepaiaci6n secado Pruebadel
aproximado terminado
• (horas).
Fruta
Manzanas
Platanos
Cerezas
Cascara y
trozos de
naranja
Anillos de
pica
Fresas
Verduras
Chiles
Hongos
Jitomates
Especies
Oregano,
perejil verde,
tomillo e
hinojo
Atbahaca
Sumergido en 1/4
vaso con jugo de
lim6n y 2 vasos de
agua, rebanadas
de 1/4"
Sumergido en 1/4
vaso con jugo de
lim6n y 2 vasos de
agua, rebanadas
de 1/4"
Lavar y secar con
toalla. Para cerezas
frescas, sacar los
huesos
Trozos de naranja
de 1/4';la parte de
la cascara esta
ligeramente pelada
de la naranja
Secado con toalla
Lavar y secar con
toalla. Rebanadas
de 1/2'_t la piel
(exterior) sobre
la rejilla
Lavar y secar con
toalla. Quitar ta
membrana del
chile, cortados en
rebanadas grandes
de aprox. 1"
Lavar y secar con
toalla. Cortar el
tallo. Cortar en
rebanadas de 1/8,,
Lavar y secar con
toalla. Cortar en
rebanadas delg.,
grosor 1/8';drenar
Enjuagar y secar
con una toalta de
papel
Usar las hojas de
albahaca 3 a 4 pulg.
desde la punta.
Rociar con agua,
sacudir y secar a
golpecitos
11-15
11-15
10-15
Cascara: 2-4
Reb.: 12-16
Enlata. 9-13
Fresco 8-12
12-17
16-20
Ligeram. flexible
Ligerm. flexible
Flexible, duro,
masticable
C&cara de nar.:
secay fragil.
Trozosde nar.:
c_scarasest_n
secas yfragiles,
la fruta queda
poco hQmeda
Suavey flexible
Secoy ffagil
Duro sin tener
humedad en el
interior
7-12 Duro y seco
16-23
Seco, color de
ladrillo rojo
Crujiente y
fragil
Crujiente y
fragil
Secar a 120°F
3-5 horas
Secar a 120°F
3-5 horas
14 • Espaffol

Modos del horno
Tostar de convecci6n
Tostar de convecci6n usa el calor de los elementos
superiores e inferiores asi como el calor circulado por el
ventilador de convecci6n:
Figura 20: Tostar de convecci6n
El modo de tostado de convecci6n sirve muy bien para
preparar cortes suaves de came y polio.
Los beneficios del tostado de convecci6n incluyen:
• Hasta un 25% m_s r_pido para cocinar que el
tostado/horneado normal
• Un dorado uniforme
Para Iograr mejores resultados:
• Use la misma temperatura que se indica en la
receta.
• Revise el t6rmino de la carne oportunamente, ya
que se puede disminuir el tiempo de asado por un
25%. Consulte la tabla del asado de convecci6n
para ejemplos.
• No tape la came o use bolsas.
• Use la bandeja y rejilla de asado que viene incluida
con el homo. Tambi6n se puede usar una olla no
tapada y poco profunda.
• Use un term6metro para came para determinar la
temperatura interna de la came.
• Cuando la carne ya se dot6 como le gusta, pero
a0n no se coci6, puede colocar una peque_a tira
de papel de aluminio encima del pecho para evitar
que se dote demasiado.
• Despu6s de sacar la came del homo, c0brala con
papel de aluminio por 10 - 15 minutos.
Tabla 6: Tabla del tostado de convecci6n
I
.. Peso
_ames . Ib
( )
Res
Costillas 4-6 325 1
Rib Eye,
(sin hueso)
Rump, Eye,
Tip, Sirloin
(sin hueso)
4-6 325
3-6 325
Tem:o Posici6n Tiempo de
Temperatura
(F°) de la rejilla Asado*
(min!libra) intema (°F)
Lomo suave 2-3 425
Puerto
Lomo 5-8 350
(con o sin
hueso)
Hombro
24-30 145 (vueltay v)
27-33 160(medio)
24-30 145 (vuelta y v)
27-33 160 (medo)
30-36 145 (vuelta y v)
38-44 160 (medo)
1
2
15-25 145 (vuelta y v)
20-30 160 (medio)
3-6 350 2 25-35 160 (medio)
Polio (Aves) 3-4 375
Polio - entero
12-15 325
Pavo
sin relleno**
16-20 325
Pavo
sin relleno**
21-25 325
Pavo
sin relleno**
3-8 325
Pavo/Pechuga
1-11/2 350
Codorniz
1
1
1
2
12-18 180
10-14 180
9-11 180
6-10 180
15-20 170
45-75 180
to_l
Cordero
Media pierna 3-4 325 1 25-30 160 (medio)
30-35 170 (bien c)
Piernaentera
6-8 325 25-30 160 (medio)
30-35 170 (bien c)
*Los tiempos del tostado son aproximados y pueden variar dependi-
endo de la forma de la came y se basan en came descongelada.
**Pavo relleno requiere de un tiempo adicional de tostado. La
mfnima temperatura segura para el relleno en pavo es 165°F (74°C)
al tostado de convecci6n
• NO cambie la temperatura de la receta.
• Use los tiempos de tostado en la tabla a la
derecha.
Espaffol • 15

Modos del horno
Acerca del term6metro
• Se puede usar el term6metro para determinar el
terminado interno o la temperatura "FINAL" de
muchos alimentos, especialmente carnes y aves.
• El rango de temperatura para el term6metro es de
130°F a 210°F (55°C a 100°C).
• No se recomienda precalentar el homo cuando
usa el term6metro. Un homo caliente le impedir_
conectar el term6metro al recept_culo y de
insertarlo en la came.
Insertar el term6metro
Inserte la punta del term6metro en el alimento.
• Para carnes, inserte la punta del term6metro en
la parte m_s gruesa sin tocar huesos, grasa o
cartflagos.
• Para pollos grandes y pavos, inserte el term6metro
en la parte m_s gruesa del muslo interno.
• Para otros alimentos, como asado de carne molida,
la punta del term6metro debe quedar en el centro
de la parte m_s gruesa del alimento.
Utilizar el term6metro
1. Prepare la carney p6ngala en la olla para asar
(o sobre la rejilla como Io especifica la receta).
Inserte el term6metro en la came. (Vea "Insertar el
term6metro", arriba).
2. AsegQrese que el term6metro no toca cartflagos,
grasa, huesos, la rejilla o la olla.
3. Coloque la olla con la came en el homo frb sobre
la rejilla recomendada.
4. Ponga el term6metro en el recept_culo. El s[mbolo
del term6metro aparecer_ en la pantalla.
Nota: Se puede fijar la temperatura del term6metro
s61ocuando _ste est_ instalada en el homo.
5. Oprima COOKING MODE.
6. Gire la perilla para seleccionar el modo de
cocinar.
7. Oprima Temperature y gire la perilla para
cambiar la temperatura del homo si es necesario.
8. Oprima Temperature y gire la perilla para
cambiar la temperatura del term6metro si es
necesario.
9. Oprima START.
• Aparece la temperatura del term6metro.
Para ver la temperatura del homo, oprima
TEMPERATURE dos veces.
• El homo queda precalentado cuando se oye un
pitido.
• AI alcanzar la temperatura fijada de la sonda,
aparece END (Fin) en la pantalla y se apaga el
homo.
Consejos para usar el term6metro
• El horno est_ bien aislado y el calor retenido
seguir_ cocinando la carne despues de apagar el
horno. Por este motivo, saque la came del homo
en cuanto el control emite pitidos.
• Puesto que la came sigue cocin_ndose despu_s
de sacarla del homo, fije la temperatura interna
(sonda) 5-10 grados abajo de la temperatura
interna final deseada. Permita que la came se
enfr[e (10 - 20 minutos) antes de cortarla.
• Siempre use el mango del term6metro para
insertar y quitarlo. Use una agarradera para
quitarlo puesto que el term6metro se calienta.
• Quite el term6metro del horno cuando no se est_
usando.
• No se puede usar el term6metro con carnes
congeladas. Para Iograr mejores resultados,
descongele las carnes completamente antes de
usar el term6metro.
Cambiar la temperatura del horno
1. Oprima TEMPERATUREdos veces. La temperatura
del homo parpadea en la pantalla.
2. Gire la perilla a la temperatura deseada y oprima
START.
Cambiar la temperatura del term6metro
1. Oprima TEMPERATURE. Latemperatura del
term6metro parpadea.
2. Gire la perilla a la temperatura deseada y oprima
START.
NOTA: NO Io conecte al recept_culo hasta haber
insertado la punta del term6metro en la came.
16 • Espa_ol

Autolimpieza
Durante la autolimpieza, el horno usa una temperatura
muy alta para eliminar restos de comida y grasa.
• Como una caracterfstica de seguridad se bloquea
la puerta del homo durante la autolimpieza para
protegerlo contra las muy altas temperaturas.
No trate de abrir el homo durante el modo de la
autolimpieza.
• Se puede autolimpiar solamente un homo a la vez.
Se puede usar el segundo homo mientras que el
otro se estc5autolimpiando.
• Es algo normal vet humo y/o una llama ocasional
durante el ciclo de la autolimpieza, dependiendo
del contenido y de la cantidad de suciedad que
queda en el homo. Cuando persiste una llama,
apague el homo y permita que se enfrfe antes de
abrir la puerta para limpiar los restos de comida
con un trapo.
• La Ic_mparadel homo no funciona durante este
modo de autolimpieza.
• No use detergentes comerciales para hornos ya
que pueden da_ar el acabado o las partes.
• El calory malos olores son normales durante el
ciclo de la autolimpieza. Mantenga la cocina bien
ventilada.
NOTA: Debido alas altas temperaturas que se
utilizan para la autolimpieza, se pueden desarrollar
Ifneas finas o una superficie rugosa en la cavidad
del homo. Esta es una condici6n com0n y no
afecta el proceso de cocinar o el desempe_o de la
limpieza del homo.
Antes de la autolimpieza
1. Limpie el borde de la puerta del homo, la ventana,
el marco delantero del homo y los bordes de la
cavidad a mano (vea las figuras abajo). No se
calientan suficientemente durante la autolimpieza
para quemar todos los residuos. Use una esponja
jabonosa, un raspador de plc_sticoo una esponjilla
S.O.S.®. NO FROTE EL EMPAQUE.
2. Limpie derrames grandes y grasa con toallas de
papel.
3. Saque la bandeja de asar, todos los utensilios y
moldes.
,
Saque las rejillas del horno. Si se dejan las
rejillas en el homo durante la autolimpieza,
perdercSnsu acabado brilloso y dejarcSnde
deslizarse suavemente en las guias para rejillas.
Vea "Limpiar las superfcies del homo" para el
cuidado correcto.
,
Nota: Se debe sacar la rejilla extensible antes de
la autolimpieza.
Aseg0rese que las IcSmparasinteriores del homo
est_n apagadas y que los focos y las cubiertas de
lentes est_n en sus lugares.
Despu_s de la autolimpieza
• El modo de autolimpieza puede producir cenizas que se
asentarc_n dentro del homo. Cuando esto sucede, quite
las cenizas con un trapo hOmedo antes de usar el horno.
• Limpie los bordesde lasrejillas con aceite comestible
para permitir un deslizamientocorrecto. Limpie elexceso
del aceite.
IMPORTANTE: Aseg0rese de dejar
enfriar completamente la ventana
interior de la puerta del homo
antes de limpiar cualesquier
cenizas que se quedaron pot la
autolimpieza.
Limpie a mano el marco
delantero
_ _ /
/
Limpie a mano a una distancia
de 1-1/2" de las gufas de
/ rejillas hasta el frente de la
J cavidad del homo.
NO limpie el
empaque a mano
,_Limpie a mano la puerta y
el marco
Figura 21: Antes de la autolimpieza
Espa_ol • 17

Autolimpieza
Para configurar el modo de autolimpieza:
1. Oprima COOKING MODE.
2. Gire la perilla para seleccionar CLEAN
(Limpiar).
3. Oprima START. Quite las rejillas y cierre la puerta
del homo.
4. Oprima START nuevamente.
CLEAN y TIME aparecen en la pantalla.
El horno se limpiarc_durante tres horas. El horno se
apaga automc_ticamente al final del tiempo programado
de limpieza.
NOTA:
El ciclo de la autolimpieza no comenzarc_ hasta que
se cierra la puerta
Para cambiar el tiempo de limpieza
El tiempo de limpieza por default es tres horas. Para
residuos ligeros, use dos horas, para residuos muy
pegajosos use cuatro horas.
1. Oprima COOKING MODE.
2. Gire la perilla para seleccionar CLEAN (Limpiar)
3. Oprima TIME dos veces.
4. Gire la perilla para cambiar el nOmero de horas.
5. Oprima START. Quite las rejillas y cierre la puerta
del homo.
6. Oprima START.
Acerca del bloqueo de puerta:
No trate de abrir la puerta mientras que la puerta estc_
tratando de cerrarse.
Cuando aparece el s_mbolo de la puerta bloqueada no
se puede abrir la puerta.
_k Precauci6n:
Revise que se haya cerrado la puerta y que no se
abrir_ antes de iniciar el modo de la autolimpieza.
Cuando no se bloquea la puerta, gire la perilla del
modo a la posici6n OFF (Apagado) y no inicie el ciclo
de la autolimpieza; Ilame al 800-944-2904 para solicitar
servicio.
PARA CANCELAR:
Para cancelar la autolimpieza, oprima CANCEL. La
puerta del homo permanecerc_ cerrada hasta que el
horno haya alcanzado una temperatura segura.
Para retardar el inicio de la limpieza
Nota: La hora del dfa debe estar correcta para que
esta funci6n de retardo trabaje correctamente.
1. Oprima COOKING MODE.
2. Gire la perilla para seleccionar CLEAN (Limpiar)
3. Fije la hora cuando el homo termine la
autolimpieza:
Oprima TIME dos veces.
Gire la perilla para cambiar el tiempo de limpieza
(si se necesita).
4. Oprima Time.
Gire la perilla para seleccionar STOPTIME
(Tiempo de Detenci6n).
Oprima TIME.
Gire la perilla para fijar el tiempo de detenci6n.
5. Oprima START. Saque las rejillas y cierre la
puerta del homo.
6. Oprima START nuevamente.
Se bloquea la puerta del horno y DELAY
(Retardar) aparece en la pantalla.
Cuando termina el tiempo de retardo, empieza la
autolimpieza.
El horno se apaga automc_ticamente al final del
tiempo programado de limpieza.
18 • Espa_ol

Limpiar las superficies del horno
Tabla 7: M_todos de limpieza de la superficie del homo
Superficie
Rejillas
(Homo)
Fibra de vidrio
(Empaque)
Cristal
(Ventana, pantalla)
Pintura
(Exterior)
Porcelana
(Interior)
Acero Inoxidable
(Exterior)
Pl_stico
(Perillas, controles)
Mbtodo de limpieza
Lave con agua jabonosa caliente. Enjuague cuidadosamente y seque o suavemente frote con esponjillas
rellenas de jab6n o polvo limpiador seg6n instrucciones. Si se limpian las rejillas en el homo durante
el modo de autolimpieza, perderfin su acabado brilloso y tal vez dejen de deslizarse suavemente. Si
esto sucede, limpie los bordes de las rejillas con una cantidad peque_a de aceite vegetal, luego limpie
el exceso. NO limpie la rejilla extensible.
NO SE DEBE LIMPIAR EL EMPAQUE.
Lave con jab6n y agua o un limpiador para vidrio. Use Fantastik® o Formula 409® para quitar sal-
picaduras grasosas y manchas duras.
Limpie con agua jabonosa caliente o aplique Fantastik® o Formula 409® primero a una esponja limpia
o una toalla de papel y limpie. Evite el uso de limpiadores en polvo y esponjillas de fibra metfilica y
detergentes para hornos.
Limpie de inmediato derrames ficidos como jugos de fruta, leche y jitomate con una toalla seca. No
use una esponja/toalla h6meda sobre porcelana caliente. Cuando ya estfi frfo, limpie con agua ja-
bonosa caliente o aplique Bon-Ami® o Soft Scrub® a una esponja h6meda. Enjuague y seque. Para
manchas resistentes, use suavemente esponjillas con jab6n. Es normal que la porcelana se agriete
(Ifneas finas) con el tiempo debido a la exposici6n al calory residuos de comida.
Siempre limpie con el grano. Limpie con una esponja jabonosa luego enjuague y seque o limpie con
Fantastik® o Formula 409® aplicado a una toalla de papel. Proteja y pula con Stainless Steel Magic®
y un trapo suave. Quite las manchas de agua con un trapo humedecido con vinagre blanco. Use Bar
Keeper's Friend® para quitar la decoloraci6n t_rmica.
Cuando estfin frfos, limpie con agua jabonosa, enjuague y seque.
Reemplazar la Ifimpara en el horno
• Cada horno viene equipado con dos Ifimparas de hal6geno en la pared trasera del homo.
• Se prenden las Ifimparas al abrir la puerta o cuando el homo estfi en un modo de cocinar.
• Las Ifimparas del homo no funcionan durante la autolimpieza.
• Cada conjunto de Ifimpara consiste en un lente removible, un foco y un casquillo fijo (yea la Figura 23,
siguiente p_gina).
Para reemplazar un foco (vea laFigura23,
siguiente pfigina)-'
1. Lea la ADVERTENCTA en esta pfigina.
2. Apague la corriente en la principal fuente de
alimentaci6n (caja de fusibles o interruptor).
3. Desatornille el lente y sfiquelo.
4. Jale el foco de su casquillo.
5. Eeemplace el foco por uno nuevo. Evite tocar el
foco con los dedos (agfirrelo con un pafiuelo de
papel), La grasa de las manos puede dafiar el foco
cuando _ste se calienta
6. El foco es de hal6geno de 12V - 20W.
7. Vuelva a atornillar el lente.
8. Prenda la corriente en la principal fuente de
alimentaci6n (caja de fusibles o interruptor).
_, ADVERTENCIA
• AsegQrese que el horno y las Ifimparas est_n
frfos y de haber desconectado el horno antes
de reemplazar los focos. En caso contrario
puede sufrir una descarga el_ctrica o
quemaduras.
• Los lentes deben estar en su lugar cuando usa
el homo.
• Los lentes sirven de protecci6n para evitar que
se rompan los focos.
• Los lentes son de vidrio. Man_jelos con
cuidado para evitar que se rompan. Vidrio roto
puede causar lesiones.
° El casquillo tiene corriente cuando la puerta
estfi abierta.
Espa_ol • 19

Quitar la puerta
_k ADVERTENCIA
• Aseg0rese que el homo est_ fdo y que se haya
apagado la corriente antes de quitar la puerta.
De otro modo puede causar una descarga
el_ctrica o quemaduras.
• La puerta del homo est_ pesada y fr_gil. Use
ambas manos para quitar la puerta. El frente
de la puerta est_ hecho de vidrio, Tenga
cuidado de no romperla.
• Agarre s61olos costados de la puerta del
homo. No use la agarradera ya que puede girar
en su mano y causar da_os o lesiones.
• Si no agarra la puerta del homo firmemente
y de modo correcto, puede causar lesiones o
da_os al producto.
ADVERTENCIA
Para evitar lesiones debido al cierre repentino
de los soportes de las bisagras, asegOrese que
ambas palancas est_n en su lugar antes de quitar
la puerta. Adem_s, no fuerce la puerta abierta o
cerrada - la bisagra podrfa salir da_ada y usted
corre riesgo de sufrir una lesi6n.
Para quitar la puerta del horno:
1. Aseg_rese de leer la ADVERTENCIA arriba antes de
tratar de quitar la puerta.
2. Abra la puerta completamente.
3. Cierre la puerta ligeramente y levante los soportes
de las bisagras (una en cada lado) en las ranuras
(Figura 22).
Nota: Se debe cerrar la puerta suficientemente
para sostener los soportes en su lugar.
5. Cierre la puerta mitad (hasta que se detenga).
6. Agarre la puerta firmemente en ambos lados.
7. Saque la puerta hacia arriba. Col6quela en un lugar
estable.
Figura 22: Bisagra de la puerta
Para reinstalar la puerta del horno:
1. Sosteniendo la puerta firmemente en ambos lados,
deslice las bisagras alas ranuras.
Nota: Inserte ambos lados al mismo tiempo.
2. Verifique que las ranuras caigan en su lugar. NO las
inserte m_s all_ de las ranuras (vea Figura 22).
3. Abra la puerta completamente de modo que se
liberen los soportes de bisagras (uno en cada lado)
(Figura 22).
4. Abra y cierre la puerta lenta y completamente para "-_,,
probar la instalaci6n. "_
La puerta debe estar recta, no torcida o chueca.
Figura 23: L_mpara del horno
20 • Espaffol

Procedimientos hechos por usted mismo
Se pueden cambiar las siguientes opciones a traves de
la pantalla de caracterfsticas especiales. Para acceder a
la pantalla de caracterfsticas especiales:
1. Oprima y mantenga oprimido COOKING MODE
por 3 segundos hasta que desaparezca la hora del
reloj.
Los siguientes cuatro mensajes van a aparecer, una
pantalla tras la otra:
OVEN SE-FI-INGS HELP SCREENS PLEASE READ
(Pantallade ayuda para configuracionesdel horno favor de leer)
TO EXIT AND LOSE CHANGES PRESS CANCEL
(Parasaliry no guardar los cambios oprima cancelar)
TO EXIT AND KEEP CHANGES PRESS START
(Parasaliry guardar los cambios oprima inicio)
TO BEGIN TURN KNOB THANK YOU
(Pa_acomenza__{_e a pe_a {_acas}
Para bloquear las teclas:
Use la opciCn BIoquear Teclas para bloquear el panel.
No se puede cambiar el modo si la opciCn est_
activada.
1. Acceda a la pantalla de caracterfsticas especiales
como fue explicado arriba.
2. Gire la perilla para seleccionar LOCK KEYS (Bloquear
teclas).
3. Oprima COOKING MODE.
4. Oprima START.
No se cancela el modo de cocinar cuando el panel
est_ bloqueado. Oprima CANCELAR para apagar el
modo.
El cronCmetro queda cancelado si el panel est_
bloqueado.
5. Oprima y mantenga oprimido COOKING MODE
para desbloquear el panel.
Para activar el modo Sabatino:
Cuando se activa esta opciCn, el homo hornear_
continua-mente hasta cancelar el modo. Este modo es
para relicjiones que no permiten "trabajar" los S_bados
(o Domincjos).
Antes de poder seleccionar la opciCn, se debe
configurar en la pantalla de caracterfsticas especiales:
1. Acceda a la pantalla de caracterfsticas especiales
como fue explicado arriba.
2. Gire la perilla para seleccionar SABBATH MODE.
3. Oprima COOKING MODE
4. Gire la perilla para seleccionar YES (S0.
5. Oprima START.
Luego se puede seleccionar la opciCn Sabatina desde el
menu del modo de cocinar:
6. Oprima COOKING MODE.
7. Gire la perilla para seleccionar SABBATH.
8. Oprima TEMPERATURE y gire la perilla para fijar
la temperatura.
9. Oprima START,
El homo no emite pitidos durante el modo Sabatino.
Solamente el botCn CANCEL(AR) funcionar_.
Oprima CANCEL para cancelar el modo.
Para cambiar la calibraciCn de la temperatura:
El termostato electrCnico ha sido cuidadosamente
calibrado; Sin embargo, cuando los dorados resultan
muy claros o muy oscuros para sus preferencias, usted
puede subir o bajar la calibraciCn de la temperatura.
1. Acceda a la pantalla de caracterfsticas especiales
como fue explicado arriba.
2. Gire la perilla para seleccionar OVENOFFSET1
(CompensaciCn de Temperatura del Horno 1) o OVEN
OFFSET2 (OVENOFFSET1 cambia la calibraciCnde
la temperatura en el homo superior. OVEN OFFSET
2 cambia la calibraciCnde latemperatura en el homo
inferior).
3. Oprima COOKING MODE
4. Gire la perilla para aumentar o disminuir la
temperatura en incrementos de 5°.
5. Oprima COOKING MODE.
6. Oprima START.
Para cambiar el idioma en la pantalla:
Los comandos en la pantalla pueden aparecer en
incjl_s, franc_s o espa_ol. El idioma pot default es el
incjl_s.
1. Acceda a la pantalla de caracteristicas especiales
como fue explicado arriba.
2. Gire la perilla para seleccionar LANGUAGE(Idioma).
3. Oprima COOKING MODE
4. Gire la perilla para seleccionar EnG(ingles), ESP
(espa_ol) o FrA(franc_s).
5. Oprima COOKING MODE.
6. Oprima START.
Para cambiar el formato de la temperatura:
El horno ha sido preconfigurado a un formato de la
temperatura en grados Fahrenheit; Sin embargo,
tambi_n puede usar un formato de la temperatura en
cjrados Celsio.
1. Acceda a la pantalla de caracteristicas especiales
como fue explicado arriba.
2. Gire la perilla para seleccionar SELECT UNITS
(Seleccionar unidades).
3. Oprima COOKING MODE
4. Gire la perilla para seleccionar el formato (escoja °C
0 °F).
5. Oprima COOKING MODE.
6. Oprima START.
Espa_ol • 21

Procedimientos hechos por usted mismo
Para cambiar el formato del reloj
El horno estc_preconfigurado para indicar el tiempo en
un formato de 12 horas; Sin embargo, tambi_n puede
indicar el tiempo en un formato de 24 horas.
1. Acceda a la pantalla de caracter[sticas especiales
como rue explicado arriba.
2. Gire la perilla para seleccionar CLOCK FORMAT
(Formato del reloj).
3. Oprima COOKING MODE
4. Gire la perilla para seleccionar el formato (escoja
12 hr o 24 hr).
5. Oprima COOKING MODE.
6. Oprirna START.
Para cambiar el volumen del pitido:
Se puede cambiar el volumen del pitido desde 1 (bajo)
hasta 3 (alto). El volumen por default es 2 (medio).
1. Acceda a la pantalla de caractefisticas especiales
como rue explicado arriba.
2. Gire la perilla para seleccionar BEEPVOLUME
(Volumen del pitido).
3. Oprima COOKING MODE
4. Gire la perilla para seleccionar 1, 2, o 3.
5. Oprirna COOKING MODE.
6. Oprirna START.
Para ocultar el reloj:
Se puede ocultar el reloj con la hora del dfa en la
pantalla. El reloj aparece por default.
1. Acceda a la pantalla de caracterfsticas especiales
como rue explicado arriba.
2. Gire la perilla para seleccionar VIEW CLOCK (Ver
reloj).
3. Oprima COOKING MODE
4. Gire la perilla para seleccionar YES (S[) (aparece)
o NO (oculto).
5. Oprima COOKING MODE.
6. Oprirna START.
Nota: Los dos puntos aparecen en la pantalla sin
importar si se oculta el reloj.
Para regresar a las configuraciones de f_brica:
Despu_s de haber cambiado las configuraciones en
la pantalla de caractefisticas especiales, las puede
regresar alas configuracionesoriginales de f_brica.
1. Acceda a la pantalla de caractefisticas especiales
como rue explicado arriba.
2. Gire la perilla para seleccionar DEFAULT DATA
(Datos por default).
3. Oprirna COOKING MODE
4. Gire la perilla para seleccionar YES (Si)
(configuraciones por default) o NO (configuraciones
modificadas).
5. Oprima COOKING MODE.
6. Oprirna START.
Para cambiar el voltaje de operaci6n
El horno estc_preconfigurado para el uso con 240 VAC.
Si su residencia tiene 208 VAC, se puede cambiar el
voltaje de su horno.
Un t&nico calificado debe hacer la conversi6n a
208 V. Contacte a su distribuidor local de aparatos
electrodom_sticos o Ilame al servicio de Bosch ah 800-
944-2904.
22 • Espa_ol

Autoayuda- Hornear
Revise la tabla abajo para las causas de los problemas m_s comunes cuando hornea. Debido a que el tama_o, la
forma y el material de los utensilios para hornear afectan directamente los resultados, la mejor soluci6n podda
set reemplazar los utensilios viejos para hornear que se han oscurecido y que est_n deformados debido a su edad
y uso. Revise tambi_n la tabla del horneado de convecci6n en la p_gina 11, la posici6n de rejilla y el tiempo de
hornear.
Tabla 8: Autoayuda - Hornear
Problema al hornear
Los alimentos se doran de modo poco uniforme
Causa
• Homo no fue precalentado
• Papel de aluminio en rejilla o fondo del homo
• Moldes demasiado grandes para la receta
• Moldes tienen contacto uno con otro o tocan las
paredes del homo
• Homo no fue precalentado
• Se usan moldes de vidrio o met_licos oscuros sin
brillo
• Posici6n incorrecta de rejilla
• Moldes tienen contacto uno con otro o tocan las
paredes del homo
• Temperatura del homo muy alta
• Tiempo de horneado muy largo
° Se abri6 la puerta del homo frecuentemente
• Tama_o del molde muy grande
• Temperatura del homo muy baja
• Homo no fue precalentado
• Se abri6 la puerta del homo frecuentemente
• Alimento muy sellado con papel de aluminio
• Tama_o del molde muy peque_o
• Tiempo de horneado fue insuficiente
• Se usan moldes brillosos de acero
• Posici6n incorrecta de rejilla
• Temperatura del homo muy baja
• Temperatura del homo muy baja
• Tiempo de horneado fue insuficiente
• Se prob6 el pastel antes de tiempo
• Se abri6 la puerta del homo frecuentemente
• Tama_o del molde muy grande
• Temperatura del homo muy alta
• Tiempo de horneado muy largo
• Moldes tienen contacto uno con otro o tocan las
paredes del homo
• Posici6n incorrecta de rejilla
• Tama_o del molde muy peque_o
• Temperatura del homo muy alta
• Borde de la corteza muy delgado
Los alimentos se doran demasiado en la parte baja
Los alimentos se secan o encojen demasiado
Los alimentos se hornean o asan m_s lento de Io
esperado
La corteza de pays no se dora o queda empapada
Los pasteles quedan p_lidos, pianos, sin cocerse
adentro
Los pasteles se elevan en el centro, se abren en la
parte superior
El borde de la corteza de pays queda muy dorado
Espa_ol • 23

Autoayuda - Operaci6n
Antes de Ilamar y solicitar servicio, revise Io siguiente:
Tabla 9: Autoayuda - Operaci6n
La pantalla indica el error F03 o
F04.
Problema del horno Paso para resolver el problema
Ocurri6 un problema con el bloqueo. Apague la corriente y vuelva a prenderla
despu_s de algunos segundos. El homo debe realizar una autoprueba. Si la
condici6n contin6a, anote el c6digo de error y Ilame a un centro de servicio
autorizado.
Otro error F_ aparece en la Apague la corriente y vuelva a prenderla despu_s de algunos segundos. Si la
pantalla, condici6n contin6a, anote el c6digo de error y Ilame a un centro de servicio
autorizado.
El ventilador sigue operando Esto es normal. El ventilador se apaga autom_ticamente cuando se hayan
despu_s de apagar el homo. enfriado suficientemente los componentes electr6nicos.
La puerta del homo est_ Apague la corriente en el cortacircuitos y espere algunos segundos. Vuelva a
bloqueada y no se abre a6n conectar la corriente. El homo debe reiniciarse y estar preparado para funcionar.
despu_s de enfriarse el homo.
El horno no se calienta.
El horno no cocina de modo
uniforme.
Aseg6rese de haber seleccionado la temperatura del homo. Revise el
cortacircuito o la caja de fusibles en su casa. Aseg6rese que hay una
alimentaci6n el_ctrica correcta para el horno.
Revise la calibraci6n del horno. Ajuste la calibraci6n si es necesario (yea
Compensaci6n de la Temperatura del Homo, P_gina. 21). Consulte las tablas
de cocinar para las posiciones recomendadas de rejillas. Siempre reduzca la
temperatura de recetas por 25°F cuando hornea con el modo de horneado de
convecci6n.
La temperatura del horno est_ Se debe ajustar el termostato del homo. Vea Compensaci6n de la Temperatura
muy caliente o muy frfa. del Homo, P_gina 21.
La I_mpara del homo no Reemplace o reinserte el foco si est_ flojo o defectuoso. Vea la P_gina 19. El
funciona bien. foco se puede quemar si Io toca con los dedos.
La luz del homo se queda Cuando el horno comienza a calentarse, se prende la luz del horno
prendida, autom_ticamente. Oprima LIGHT (Luz) para apagar la luz del horno. Con el
homo apagado, revise si la puerta del homo est_ obstruida o si las bisagras
est_n dobladas.
No se puede quitar la cubierta Puede haber residuos s61idos acumulados alrededor de la cubierta. Limpie el
del lente. _rea del lente con una toalla seca y limpia antes de tratar de quitar la cubierta
del lente.
El horno no se autolimpia bien. Permita que el homo se enfrfe antes de ejecutar la autolimpieza. Siempre
elimine suciedades sueltas o derrames pesados antes de la autolimpieza. Si
el horno est_ muy sucio, configure una autolimpieza de cuatro horas. Vea
Autolimpieza, P_gina 17.
El reloj y cron6metro no Aseg6rese que haya corriente el_ctrica correcta para el homo. Vea las secciones
funcionan bien. sobre Reloj y Cron6metro, P_ginas 2 y 9.
Demasiada humedad. Cuando quiera usar el modo de hornear, debe precalentar el homo primero. El
horneado de convecci6n elimina cualquier humedad en el homo (esta es una de
las ventajas de la convecci6n).
Astillas de porcelana. AI quitar y reemplazar las rejillas del horno, siempre debe inclinarlas hacia arriba
y no forzarlas para evitar astillar la porcelana.
COMO OBTENER SERVICIO
Para recibir informaci6n sobre servicio autorizado o refacciones Ilame al 800/944-2904.
Queremos que usted siga siendo un cliente satisfecho. Si ocurre un problema que no se puede resolver a su
entera satisfacci0n, por favor escriba al Centro de Soporte al Cliente de Bosch (Bosch Customer Support),
5551 McFadden Avenue, Huntington Beach CA, 92649 o Ilame al 800-944-2904.
Favor de incluir el nQmero de modelo, nQmero de serie y la fecha de la compra o instalaci0n original.
24 • Espa_ol

Garantia
Declaratoria de Garantia Limitada
Las garantfas ofrecidas por BSH Home Appliances ("Bosch") en esta Declaratoria de Garantfa Limitada aplican s61o
a los Hornos El&tricos Empotrados ("Horno'_ de BSH que usted compr6, el primer usuario comprador, siempre
y cuando el Homo fue adquirido (1) para su uso y no para la reventa y (2) en los Estados Unidos o Canada y
que se encuentra en el pals de la compra. El t_rmino "Fecha de Instalaci6n" que se usa en esta Declaratoria
de Garantfa Limitada, se refiere a la fecha m_s temprana cuando se instala el Homo o diez (10) dfas laborales
despu_s de la fecha de compra del Homo pot el primer usuario comprador. Las garantfas declaradas aqu_ aplican
s61oal primer usuario comprador y no se pueden transferir.
Garantia Limitada Est_ndar
Bosch garantiza que su Homo est_ libre de defectos en materiales y mano de obra pot un pe6odo de doce
(12) meses a partir de la Fecha de Instalaci6n. Durante el pe6odo de garantfa, Bosch o su centro de servicio
autorizado va a reparar o reemplazar, a su discreci6n, cualquier Homo que resulte defectuoso bajo condiciones
de uso normal sin costo alguno. Todas las partes y componentes removidos se volver_n propiedad de Bosch, a
discreci6n de Bosch. Todas las partes reemplazadas y/o reparadas asumir_n la identidad de la parte original para
los prop6sitos de esta garantfa y esta garantfa no se puede extender con respecto a tales partes.
Otras Condiciones de las Garantias Limitadas
Las garantfas otorgadas en esta Declaratoria de Garantfa Limitada excluyen defectos o da_os que resultan de
(1) el uso del Homo en un modo diferente de su uso normal y usual (el uso comercial del Homo no se considera
normal o usual), (2) real uso, abuso, accidentes o negligencia, (3) operaci6n, mantenimiento, instalaci6n no
apropiada o servicio no autorizado, (4) ajustes o alteraciones o modificaciones de cualquier tipo, (5) el hecho
de no cumplir con los c6digos el&tricos y/o de construcci6n estatales, local y municipales que pueden aplicar,
(6) derrames de alimentos o Ifquidos, y (7) fuerzas externas como inundaciones, fuegos, casos fortuitos u otras
circunstancias m_s all_ del control de Bosch. Tambi_n se excluyen raspaduras y da_os en superficies externas y
partes expuestas u Hornos donde se alter6 o se quit6 el nOmero de serie.
AI grado permitido por la ley, esta garantfa establece sus remedios exclusivos con respecto a los productos
cubiertos pot _sta, sin importar si la reclamaci6n surge en contrato o agravio (incluyendo la responsabilidad
estricta, y negligencia), etc. Bosch no ser_ responsable de da_os, p_rdidas o gastos consecuenciales o
incidentales.
ESTAGARANTIA SUSTITUYE TODAS LAS OTRAS GARANTIAS EXPRESAS.CUALQUIER GARANTIA IMPLICADA
POR LA LEY,YA SEA DE COMERCIABILIDAD O APTITUD PARAALGUN PROPOSITO PARTICULAR, SERAEFECTIVA
SOLAMENTE POR EL PERIODO EFECTIVO EXPRESADO EN ESTAGARANTIA. Ning0n intento de alterar, modificar o
enmendar esta garantfa ser_ efectivo a menos que haya sido autorizado pot escrito pot un ejecutivo de BSH.
Cbmo obtener servicio de garantia
Para obtener el servicio de garant(a para su Horno, contacte al centro de servicio autorizado de BSH m_s cercano.
BSH Home Appliances • 5551 McFadden Avenue, Huntington Beach, CA 92649 • 800-944-2904.
Registro de datos para servicio
Cuando se abre la puerta del homo se puede vet la etiqueta con el n0mero de serie del producto. Se encuentra
en el lado izquierdo, centrado verticalmente justo adentro de la cavidad del homo. Vea la p_gina 3. Ahora es un
buen momento para anotar esta informaci6n en el espacio proporcionado abajo. Guarde su factura para validar la
garantfa. Para obtener servicio, yea la p_gina 24.
N0mero de modelo:
N0mero de serie:
Fecha de instalaci6n u ocupaci6n:
Espa_ol • 25

BSH reserves the right to change specifications or design without notice. Some models are certified for use in Canada. BSH is not responsible
for products which are transported from the United States for use in Canada. Check with your local Canadian distributor or dealer. BSH Home
Appliances, Corporation, 5551 McFadden Avenue, Huntington Beach, CA 92649.
For the most up to date critical installation dimensions by fax, use your fax handset and call 702-833-3600. Use code #8030.
YOUR LIFE, OUR INSPIRATION.
5551 McFadden Avenue, Huntington Beach, CA 92649 ° 800-944-2904
9000063346 (10003 Rev. A) ° 01/05 © BSH Home Appliances Corporation 2004 ° Litho U.S.A.
-
 1
1
-
 2
2
-
 3
3
-
 4
4
-
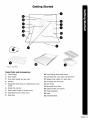 5
5
-
 6
6
-
 7
7
-
 8
8
-
 9
9
-
 10
10
-
 11
11
-
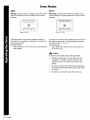 12
12
-
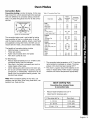 13
13
-
 14
14
-
 15
15
-
 16
16
-
 17
17
-
 18
18
-
 19
19
-
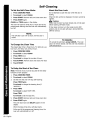 20
20
-
 21
21
-
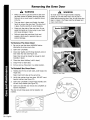 22
22
-
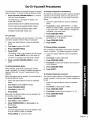 23
23
-
 24
24
-
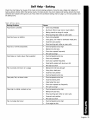 25
25
-
 26
26
-
 27
27
-
 28
28
-
 29
29
-
 30
30
-
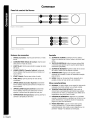 31
31
-
 32
32
-
 33
33
-
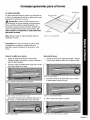 34
34
-
 35
35
-
 36
36
-
 37
37
-
 38
38
-
 39
39
-
 40
40
-
 41
41
-
 42
42
-
 43
43
-
 44
44
-
 45
45
-
 46
46
-
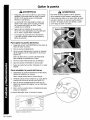 47
47
-
 48
48
-
 49
49
-
 50
50
-
 51
51
-
 52
52
-
 53
53


Bosch HBL742AUC/02 El manual del propietario
- Tipo
- El manual del propietario
En otros idiomas
- English: Bosch HBL742AUC/02 Owner's manual
Documentos relacionados
Otros documentos
-
Fulgor Milano F1SP30S1 Manual de usuario
-
-
Siemens HB30S50U/01 Manual de usuario
-
Fagor 5HA-780X Manual de usuario
-
-
-
Thermador SEC272 Manual de usuario
-
Verona VEBIG30NE Manual de usuario
-
-