Sony ICF-C390 Instrucciones de operación
- Categoría
- Relojes de alarma
- Tipo
- Instrucciones de operación
El Sony ICF-C390 es un radio reloj con alarma dual, pantalla de fecha y respaldo de energía total para mantener el reloj y la alarma funcionando durante un corte de energía. También cuenta con un temporizador de apagado que apaga la radio automáticamente después de un tiempo establecido. Otras características incluyen:
- Antena de alambre FM para mejorar la recepción
- Antena de barra de ferrita incorporada para recepción de AM
- Toma de auriculares para escuchar en privado
- Altavoz de almohada opcional para escuchar en la cama (solo para el modelo de España)
- Funciona con alimentación de CA o con una pila de 9 V (no incluida)

Transcripción de documentos
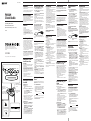
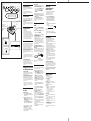
3-861-714-51 (1) WARNING Operating the Radio Precautions ADVERTENCIA To prevent fire or shock hazard, do not expose the unit to rain or moisture. 1 • Operate the unit on the power sources specified in “Specifications”. • The nameplate indicating operating voltage, etc. is located at the bottom of the unit. • To disconnect the power cord (mains lead), pull it out by the plug, not the cord. • The unit is not disconnected from AC power source (mains) as long as it is connected to the wall outlet even if the unit itself is turned off. • Do not place the unit on surfaces (rugs, blankets, etc.) or near materials (curtains, draperies) that block the ventilation holes. • Should anything fall into the unit, unplug the unit and have it checked by qualified personnel before operating it further. • To clean the casing, use a soft cloth dampened with a mild detergent solution. Para evitar incendios o el riesgo de electrocución, no exponga la unidad a la lluvia ni a la humedad. To avoid electrical shock, do not open the cabinet. Refer servicing to qualified personnel only. FM/AM Clock Radio Before You Begin Thank you for choosing the Sony Dream Machine! The Dream Machine will give you many hours of reliable service and listening pleasure. Before operating the Dream Machine, please read these instructions thoroughly and retain them for future reference. Operating Instructions Manual de instrucciones Manual de instruções (lado inverso) xxxx Features • Dual alarm • Date display • Forward/reverse time setting • Full power backup to keep the clock and the alarm (radio and buzzer) during a power interruption with a 6F22 battery (not supplied) installed. (For models other than the America model, the power backup is only for the clock.) Installing the Battery To keep good time, your Dream Machine needs one 6F22 battery (not supplied), in addition to house current. The battery keeps the clock operating in the event of a power interruption. Before setting the time on your Dream Machine, open the lid at the bottom of the unit, install the battery with correct polarity and then close the lid. Dream Machine is a trademark of Sony Corporation. Dream Machine es marca comercial de Sony Corporation. Dream Machine è un marchio registrato della Sony Corporation. xxxx xxxx Español English 2 • To turn off the radio, press RADIO OFF/ALARM RESET/OFF. • To improve radio reception FM: Extend the FM wire antenna fully to improve FM reception. AM: Rotate the unit horizontally for optimum reception. A ferrite bar antenna is built into the unit. • When the earphone is connected to the @ (earphone) jack, sound can not be heard from the speaker. How to Use the Pillow Speaker (for the Spain model only) When connecting a pillow speaker to the ICF-C 390, the radio or alarm (radio or buzzar)can be heard only from the pillow speaker. Adjust the volume with VOL on the unit. to @ jack Pillow speaker (DE-20) You can also connect an optional earphone to the @ jack. Setting the Alarm To set the radio alarm, first tune in a station and adjust the volume. 1 • After a power interruption, the displayed time may not be always correct (It may gain or lose about 10 minutes per hour). Knowing When To Replace the Battery ICF-C390 Sony Corporation © 1998 To check battery power, unplug the power cord from the wall outlet and plug it in again after a few minutes. If the displayed time is incorrect, replace the battery with a new one. Printed in Malaysia Adaptation to the Local Power Line (See Fig. A) CLOCK TIME SET ALARM A RADIO B BUZZER RESET/OFF ALARM OFF RADIO SLEEP ON • Hong Kong and US Military Market: 110-120V/220-230V AC, 50/60 Hz • Other countries 110-120V AC, 60 Hz/220-230V AC, 50/60 Hz Setting the Clock and the Date @ (earphone) jack (Supplied with models for Spain only) Toma de auricular (@) (Sólo en los modelos destinodos a España) AC power cord Cable de alimentación de CA FM wire antenna Antena monofilar de FM Setting the Clock Plug in the unit. The display will flash “AM 12:00” or “0:00”. 2 While holding down CLOCK, press either + or – under TIME SET till the correct time appears in the display. When you release CLOCK, the clock begins to operate. 1 • The clock system varies depending on the model you own. 12-hour system: “AM 12:00” = midnight 24-hour system: “0:00” = midnight • To set the current time rapidly, keep pressing the + or – button while holding down CLOCK. VOLTAGE SELECTOR 1 220-230V TUNING FREQUENCY 60Hz AM FM BAND VOL • To display the date, press SNOOZE/DATE/SLEEP OFF. The display returns to the current time when you release SNOOZE/DATE/SLEEP OFF. When SNOOZE/DATE/SLEEP OFF is pressed while the SNOOZE function is operating, the year and date will not appear in the display. • If you set ALARM A and ALARM B at the same desired time, only ALARM A will work. • To shut off the alarm, press RADIO OFF/ALARM RESET/OFF. The alarm will come on at the preset time the next day. • To cancel either alarm, while holding down the ALARM A or B button, press RADIO OFF/ALARM RESET/OFF. • To doze for a few more minutes, press SNOOZE/ DATE/SLEEP OFF. The alarm will shut off, but will come on again after about 6 minutes. You can repeat this process as many times as you like. • To adjust the radio alarm volume, turn the VOL. • To check the preset time, press ALARM A or B. Enjoy falling asleep to the radio using the built-in sleep timer that shuts off the radio automatically at a preset time. Press RADIO ON/SLEEP. The radio turns on. It will go off after the preset time has passed. You can set the sleep timer of 90, 60, 45, 30 or 15 minutes. Every push changes the display as follows. Current time n On n 90 n 60 15 N 30 N 45 If you have any questions or problems concerning your unit please consult your nearest Sony dealer. Specifications Time display: America: 12-hour system Other countries: 24-hour system Frequency range: FM: 87.5-108 MHz AM: 530-1,605 kHz Speaker: Approx. 6.6 cm ( 2 5/8 inches) dia. 8 ohms Power output: 100 mW (at 10% harmonic distortion) Output: @ jack (minijack) Power requirements: • Hong Kong and US Military Market: 110-120V/220-230V AC, 50/60 Hz • Europe: 220-230V AC, 50 Hz • Other countries: 110-120V AC, 60 Hz/220-230V AC, 50/60 Hz For power backup: 9V DC, one 6F22 battery Battery life: Approx. 35 hours using the S-006P (U) battery Dimensions: Approx.220 x 47.5 x 153 mm (w/h/d) (8 3/4 x 1 7/8 x 6 1/8 inches) incl. projecting parts and controls Mass: UK model: Approx. 610g (1 Ib 6 oz) not incl. battery Other model: Approx. 540g (1 lb 3 oz) not incl. battery Recommended accessory: Pillow Speaker (DE-20). (for the Spain model only) Design and specifications are subject to change without notice. N The radio will play for the time you set, then shut off. • To turn off the radio before the preset time, press SNOOZE/DATE/SLEEP OFF. 1 2 Antes de comenzar ¡Gracias por haber elegido un Dream Machine Sony! Este Dream Machine le ofrecerá muchas horas de servicio fiable y placer de escucha. Antes de utilizar el Dream Machine, lea detenidamente estas instrucciones y consérvelas para futura referencia. Características • Alarma doble • Visualización de la fecha • Ajuste de la hora en sentido progresivo/ regresivo • Alimentación de reserva propia para mantener en funcionamiento el reloj y el despertador (radio y zumbador) durante un corte del suministro eléctrico con una pila 6F22 (no suministrada). (Para los modelos que no sean para América del norte, la alimentación de protección es solamente para el reloj.) • Después de un corte del suministro eléctrico, es posible que la visualización de la hora no sea siempre correcta (puede haberse adelantado o atrasado 10 minutos por hora). • Para desconectar la alimentación de la radio, presione RADIO OFF/ALARM RESET/OFF. • Para mejorar la radiorrecepción FM: Extienda completamente la antena monofilar de FM para mejorar la recepción. AM: Gire horizontalmente la unidad para la óptima recepción. En la unidad está incorporada una antena de barra de ferrita. • Cuando conecte el auricular a la toma para el mismo (@), no podrá oír el sonido a través del altavoz. Forma de utilizar el altavoz de almohada (Modelo para España solamente) Si conecta el altavoz de almohada a la ICF-C390, la radio o el despertador (radio o zumbador) se oirá sólo a través de dicho altavoz. Ajuste el volumen con el VOL en la unidad. a la toma @ Altavoz de almohada (DE-20) También podrá conectarse un auricular opcional a la toma @. Ajuste del despertador Para ajustar el despertador con la radio, primero sintonice una emisora y ajuste el volumen. 1 Cuándo reemplazar la pila Para comprobar el estado de la pila, desenchufe el cable de alimentación de la toma de la red y vuelva a enchufarlo después de unos minutos. Si la visualización de la hora es incorrecta, reemplace la pila por otra nueva. Adaptación a la red local (Consulte la Fig. A) Esta unidad posee un selector de tensión y otro de frecuencia. (los modelos para Europa no los poseen) Antes de conectar la unidad a una toma de la red, asegúrese de que el selector de tensión y el de frecuencia que se encuentran en la base de la unidad estén correctamente ajustados a la tensión y frecuencia de la red local. Si es necesario, vuelva a ajustar los selectores con un objeto puntiagudo como un destornillador. Ajuste del reloj y la fecha Puesta en hora del reloj Enchufe la unidad. En el visualizador parpadeará “AM 12:00” o “0:00”. 2 Manteniendo presionada CLOCK, pulse + o – debajo de TIME SET hasta que en el visualizador aparezca la hora correcta. Cuando suelte CLOCK, el reloj comenzará a funcionar. 1 • El sistema del reloj varía según el modelo. Sistema de 12 horas: “AM 12:00” = medianoche Sistema de 24 horas: “0:00” = medianoche • Para ajustar rápidamente la hora actual, mantenga presionada la tecla + o – mientras tenga pulsada CLOCK. Ajuste de la fecha Manteniendo presionada SNOOZE/ DATE/SLEEP OFF, pulse + o – debajo de TIME SET hasta que en el visualizador aparezca la fecha correcta. Después, suelte SNOOZE/DATE/SLEEP OFF. 1 • Para visualizar la fecha, presione SNOOZE/DATE/ SLEEP OFF. La visualización volverá a la hora actual cuando suelte SNOOZE/DATE/SLEEP OFF. Si presiona SNOOZE/DATE/SLEEP OFF mientras esté activada la función de alarma repetida, en el visualizador no aparecerán el año ni la fecha. Precauciones Presione RADIO ON/SLEEP para conectar la alimentación de la radio y ajuste VOL (volumen). Seleccione FM o AM, y sintonice una emisora con el dial TUNING. Colocación de la pila Para mantener en hora el reloj, el Dream Machine necesita una pila 6F22 (no suministrada), además de la corriente de la red. La pila mantendrá el reloj en funcionamiento en el caso de producirse un corte del suministro eléctrico. Antes de ajustar la hora del Dream Machine, abra la tapa de la base de la unidad, coloque la pila con la polaridad correcta y después cierre la tapa. • Hong Kong y mercado militar de EE. UU.: 110-120 V/220-230 V 50/60 Hz • Otras países 110-120V CA, 60 Hz/220-230 V CA, 50/60 Hz Setting the Sleep Timer 1 Battery Warning When the unit will be left unplugged for a long time, remove the battery to avoid undue battery discharge and damage to the unit from battery leakage. Para evitar descargas eléctricas, no abra la unidad. En caso de avería solicite solamente los servicios de personal cualificado. Operación de la radio Manteniendo presionada ALARM A RADIO (para la radio ) o B BUZZER (para el zumbador), pulse + o – debajo de TIME SET hasta que en el visualizador aparezca la hora deseada. Cuando suelte ALARM A o B, el indicador ALARM A o B dejará de parpadear y permanecerá encendido, y en el visualizador aparecerá la hora actual. El despertador se activará automáticamente a la hora programada y se desactivará de igual forma después de 59 minutos. • Si ajusta ALARM A y ALARM B a la misma hora, solamente se activará ALARM A. • Para parar el despertador, presione RADIO OFF/ ALARM RESET/OFF. El despertador se activará a la hora programada del día siguiente. • Para cancelar el despertador, pulse RADIO OFF/ ALARM RESET/OFF mientras mantenga presionada la tecla ALARM A o ALARM B. • Para dormitar unos minutos más, presione SNOOZE/DATE/SLEEP OFF. El despertador se parará, pero volverá a sonar después de unos 6 minutos. Usted podrá repetir este proceso las veces que desee. • Para ajustar el volumen del despertador con la radio, gire VOL. • Para comprobar la hora programada, presione ALARM A o B. Ajuste del cronodesconectador Con el cronodesconectador incorporado que desconecta automáticamente la alimentación de la radio a la hora programada, usted podrá dormirse escuchando la radio. 1 Presione RADIO ON/SLEEP. La alimentación de la radio se conectará, pero se desconectará después de la hora programada. Usted podrá ajustar el cronodesconectador a unos 90, 60, 45, 30 o 15 minutos. Cada vez que presione la tecla, la visualización cambiará de la forma siguiente. Hora actual n On n 90 n 60 N Setting the Date While holding down SNOOZE/DATE/ SLEEP OFF, press either + or – under TIME SET till the correct date appears in the display. Then, release SNOOZE/ DATE/SLEEP OFF. 110-120V While holding down ALARM A RADIO (for the radio) or B BUZZER (for the buzzer), press either + or – under TIME SET till the desired time appears in the display. When you release ALARM A or B, the ALARM A or B indicator stops flashing and lights up, and the current time appears in the display. The alarm will come on at the preset time and automatically turn itself off after 59 minutes. N , , , ,,,, ,,,, ,, SNOOZE / DATE / SLEEP OFF 50Hz The voltage selector and the frequency selector are provided with this unit. (not provied with the models for Europe) Before connecting the unit to a wall outlet, be sure that the voltage selector located at the bottom of the unit, and the frequency selector located on the bottom are correctly set to your local power line. If necessary, reset the selectors with a thin point thing such as a screwdriver. Press RADIO ON/SLEEP to turn on the radio and adjust VOL (volume). Select FM or AM, and tune in a station using the TUNING dial. 15 N 30 N 45 N La radio permanecerá conectada durante el tiempo programado, y después se desconectará. • Para desconectar la radio antes del tiempo programado, presione SNOOZE/DATE/SLEEP OFF. • Alimente la unidad con las fuentes indicadas en “Especificaciones”. •La placa de características que indica la tensión de alimentación, etc. se encuentra en la base de la unidad. • Para desconectar el cable de alimentación, tire del enchufe, no del propio cable. • La unidad no se desconectará de la fuente de alimentación de CA (red) mientras esté conectada a una toma de la misma aunque desconecte su alimentación. • No coloque la unidad sobre superficies (alfombras, mantas, etc.) ni cerca de materiales (cortinas, tapices, etc.) que puedan bloquear los orificios de ventilación. • Si dentro de la unidad cae algo, desconecte el cable de alimentación, y haga que sea revisada por personal cualificado antes de utilizarla. • Para limpiar el exterior, utilice con un paño suave humedecido en una solución poco concentrada de detergente. Advertencia sobre la pila Cuando vaya a dejar desenchufada la unidad durante mucho tiempo, extraiga la pila para evitar su descarga y el daño que podría ocasionar el derrame del electrólito de la misma. Si tiene alguna pregunta o problema en relación con esta unidad, póngase en contacto con su proveedor Sony. Especificaciones Visualización de la hora: América: sistema de 12 horas Otras países: sistema de 24 horas Gama de frecuencias: FM: 87,5-108 MHz, AM: 530-1.605 kHz Altavoz: Aprox. 6,6 cm de diá. 8 ohmios Salida de potencia: 100 mW (al 10% de distorsión armónica) Salida: Toma @ (minitoma) Alimentación: • Hong Kong y mercado militar de EE. UU.: 110-120 V/220-230 V 50/60 Hz • Europa: 220-230V CA, 50 Hz • Otras páises: 110-120 V CA, 60 Hz, 220-230 V CA, 50/60 Hz Para la alimentación de reserva: 9V CC, una pila 6F22 Duración de la pila: Aprox. 35 horas utilizando una pila S- 006P (U) Dimensiones: Aprox. 220 x 47,5 x 153 mm (an/al/ prf) incluyendo partes y controles salientes Masa: Modelo para el Reino Unido: Aprox. 610 g, excluyendo la pila Otros modelos: Aprox. 540 g, excluyendo la pila Accesorio recomendado: Altavoz de almohada (DE-20) (Modelo para España solamente) Diseño y especificaciones sujetos a cambio sin previo aviso.-
 1
1
-
 2
2


Sony ICF-C390 Instrucciones de operación
- Categoría
- Relojes de alarma
- Tipo
- Instrucciones de operación
El Sony ICF-C390 es un radio reloj con alarma dual, pantalla de fecha y respaldo de energía total para mantener el reloj y la alarma funcionando durante un corte de energía. También cuenta con un temporizador de apagado que apaga la radio automáticamente después de un tiempo establecido. Otras características incluyen:
- Antena de alambre FM para mejorar la recepción
- Antena de barra de ferrita incorporada para recepción de AM
- Toma de auriculares para escuchar en privado
- Altavoz de almohada opcional para escuchar en la cama (solo para el modelo de España)
- Funciona con alimentación de CA o con una pila de 9 V (no incluida)
en otros idiomas
- English: Sony ICF-C390 Operating instructions
- português: Sony ICF-C390 Instruções de operação
Artículos relacionados
-
Sony ICF-C470MK2 Manual de usuario
-
-
Sony ICF-C211 Instrucciones de operación
-
-
-
-
-
-
-
