Homax 2297-10 Instrucciones de operación
- Categoría
- Lijadoras eléctricas
- Tipo
- Instrucciones de operación

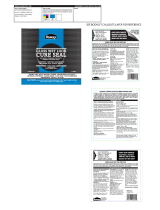
CORNERS OR CURVES
ESQUINA O CURVAS
AROUND PIPES
ALREDEDOR DE LOS TUBOS
PLASTER
YESO
ELECTRICAL OUTLETS
ENCHUFES ELÉCTRICOS
HEAVY TEXTURE
TEXTURA PESADA
SMOOTH WALL
PARED LISA
2297_31326_0312
A Premier Brand of The Homax Group, Inc.
Bellingham, WA 98227 www.homaxproducts.com
800-729-9029 Made in China
©2012 The Homax Group, Inc.
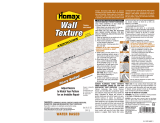
Para Paredes y Techos con Textura: Utilice Homax
®
cáscara de naranja, la precipitación y palomitas de maíz texturas de techo en aerosol para mezclar en su reparación con la superficie circundante.
PRECAUCIÓN: IRRITA LA PIEL, LOS OJOS Y LAS VÍAS RESPIRATORIAS. Contiene sulfato de calcio. Úselo con ventilación adecuada durante la aplicación. Evite la inhalación del polvo al lijar. Si se lo
utiliza correctamente, un respirador puede proporcionar protección adicional. Siga las instrucciones de uso establecidas por el fabricante del respirador. Evite el contacto con la piel y los ojos. Use
guantes y gafas o anteojos protectores. Lávese las manos después de usar el producto.
PRIMEROS AUXILIOS: En caso de contacto con los ojos, lávelos inmediatamente con abundante agua durante 15 minutos. Llame a un médico. En caso de contacto con la piel, lávela bien con agua
y jabón. En caso de dificultad para respirar, salga al aire libre y llame a un médico.
MANTENGA ESTE PRODUCTO FUERA DEL ALCANCE DE LOS NIÑOS
ADVERTENCIA: Este producto contiene una sustancia química considerada cancerígena según el estado de California.
CORRECTOR Y ACABADO:
8. Deje secar el remiendo durante 30 minutos.
9. Con la espátula de 3-6", aplique una capa fina de
corrector o mezcla para juntas sobre el remiendo y
extienda los bordes hacia afuera.
10. Deje secar completamente antes de lijarlo para que
quede liso. Aplique una segunda mano de ser
necesario.
ACTIVE EL YESO:
5. Comience desde los bordes externos y active el
yeso de todo el remiendo frotando delicadamente
con las yemas de los dedos o la esponja.
6. Alise suavemente los bordes externos del
remiendo.
7. NO empuje el remiendo dentro de un orificio o un
área dañada.
PRIMERO APLIQUE, LUEGO HUMEDEZCA:
1. Elimine el polvo y la suciedad del área que desea reparar. Seque bien el área.
2. Corte el remiendo a la medida o recórtelo para que cubra las obstrucciones
si es necesario. (Deje 1” de sobra por fuera del área dañada).
3. Quite la hoja protectora y aplique el remiendo autoadhesivo en el lugar
desea reparar.
4. Humedezca el remiendo con agua (utilice el rociador o una esponja
húmeda). NO humedezca el remiendo antes de colocarlo sobre la superficie.
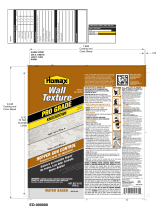
Herramientas Requeridas: Tijeras • Papel de lija • Rociador con agua o esponja húmeda • Mezcla correctora o para juntas • Espátula de 3-6” • Guantes • Máscara antipolvo
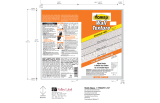
INSTRUCCIONES:
Resanador para Paredes - Malla con Yeso
Homax
®
yeso de la pared parche de malla que permite reparar una amplia variedad de superficies que incluyen: paneles de yeso, yeso y estuco. Recubiertos con yeso de fraguado rápido, el parche
se activa con agua y se endurece en cuestión de minutos. Los formularios de perfil delgado parche a la superficie y es fácil de terminar. Simplemente la manera más fácil de proporcionar una
reparación de larga duración sobre los agujeros, grietas y otras imperfecciones superficiales.
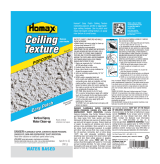
For Textured Walls & Ceilings: Use Homax
®
Orange Peel, Knockdown and Popcorn Ceiling aerosol spray textures to blend in your repair with the surrounding surface.
CAUTION: CAUSES EYE, SKIN AND RESPIRATORY TRACT IRRITATION. Contains Calcium Sulfate. Use with adequate ventilation during application. Avoid
breathing dust when sanding. If properly used, a dust respirator may offer additional protection. Follow respirator manufacturer’s directions for proper use. Avoid
contact with eyes and skin. Wear safety glasses or goggles and gloves. Wash hands after using.
FIRST AID: In case of eye contact, immediately flush eyes with water for 15 minutes. Get medical attention. If on skin, wash thoroughly with soap and
water. In case of respiratory difficulty, move to fresh air and get medical attention. KEEP OUT OF REACH OF CHILDREN
WARNING: This product contains a chemical known to the State of California to cause cancer.
SPACKLE & FINISH:
8. Allow patch to dry for 30 minutes.
9. Using a 3-6" drywall knife, apply thin layer
of spackle or joint compound over patch,
feathering edges outward.
10. Allow to dry completely before sanding
smooth. Apply a second coat if needed.
ACTIVATE PLASTER:
5. Once wet, starting with outside edges, activate
plaster on the entire patch by lightly rubbing with
fingertips or sponge.
6. Starting at center of patch, gently smooth outer
edges of patch.
7. DO NOT depress patch into hole or damaged area.
APPLY FIRST, THEN WET:
1. Clean repair area of dust and dirt. Dry area well.
2. Cut patch to size, or trim to fit around obstructions if
necessary. (Overlap 1” around damaged area.)
3. Peel off release paper & apply self-adhesive patch.
4. Using a spray bottle or damp sponge wet patch with water.
DO NOT wet patch before applying to surface.
Materials Required:
• Scissors • Sandpaper • Spray bottle with water or damp sponge • Spackling or joint compound • 3-6” Drywall Knife • Gloves • Dust mask
INSTRUCTIONS:
Wall Patch
Plastered Mesh
Homax
®
Plastered Mesh Wall Patch allows you to repair a wide
variety of surfaces including: drywall, plaster and stucco. Coated
with fast setting plaster, the patch is activated with water and
hardens in minutes. The thin profile patch forms to the surface
and is easy to finish. Simply the easiest way to provide a long-lasting repair over holes, cracks and other surface imperfections.
Cortar y doblar
para caber
TRIM & BEND TO FIT
Apply Spackling & Finish
Aplique revoque y acabado
Apply Spackling & Finish
Aplique revoque y acabado
Apply Spackling & Finish
Aplique revoque y acabado
Apply Spackling & Finish
Aplique revoque y acabado
Activate Plaster
Active el yeso
Activate Plaster
Active el yeso
Activate Plaster
Active el yeso
Activate Plaster
Active el yeso
Apply, Then Wet
Aplique, luego humedezca
Apply, Then Wet
Aplique, luego humedezca
Apply, Then Wet
Aplique, luego humedezca
Apply, Then Wet
Aplique, luego humedezca
CAUTION: CAUSES EYE, SKIN AND
RESPIRATORY TRACT IRRITATION.
Read other cautions on back panel.
PRECAUCIÓN: IRRITA LA PIEL, LOS OJOS Y LAS VÍAS
RESPIRATORIAS. Lea las demás advertencias en la parte posterior.
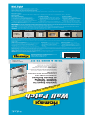
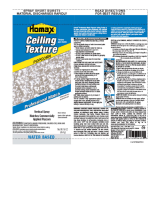
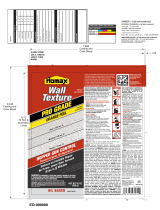
Self-Adhesive Flexible Patch
Fast Setting Plaster Forms to Surface
Easy to Trim
Invisible Repair for
Corners, Curves,
Smooth, Textured
or Uneven Surfaces
Reparación Invisible para las esquinas, curvas, lisas,
textura y superficies irregulares
Autoadhesivo y flexible
parche, Rápido formas marco yeso a la superficie, Fácil de cortar
Malla de preenyesado
PLASTERED MESH
Resanador para paredes
Wall PatchWall PatchWall Patch
15 cm x 15 cm
2 - 6" x 6"
-
 1
1

Homax 2297-10 Instrucciones de operación
- Categoría
- Lijadoras eléctricas
- Tipo
- Instrucciones de operación
en otros idiomas
- English: Homax 2297-10 Operating instructions
Artículos relacionados
-
 Homax 5563 Instrucciones de operación
-
 Homax 4067-06 Instrucciones de operación
-
 Homax 0613 Manual de usuario
-
 Homax 4094 Manual de usuario
-
 Homax 4070-06 Instrucciones de operación
-
 Homax 4092-06 Manual de usuario
-
 Homax 4565 Manual de usuario
-
 Homax 4065-06 Manual de usuario
-
 Homax 4065-06 Manual de usuario
-
 Homax 4555 Guía del usuario


