Kenmore 91147712200 El manual del propietario
- Categoría
- Hornos
- Tipo
- El manual del propietario
Este manual también es adecuado para

30" Self-Cleaning Single
Electric Built-In Wall Oven
Horno de Pared Empotrado
EI6ctrico
de una unidad de 30"
con Autolimpieza
Models, Modelos 911o47712, 47714, 47719
m
z
¢)
i=,
m
I e
229C4020P307-2
(SRd 0496-2)
Sears, Roebuck and Co.,
Hoffman Estates, IL 60t 79 U.S,,A. www.sears.com
20P307-2 ENv01 1 2/14103, 3:34 PM

30" SELF-CLEANINGOVEN
TABLEOFCONTENTS
Oven Safety .... 3-4
Features of Your Oven .......... 5
Removal of Packaging Tape .... 5
Oven Control, Clock, Timer .... 6
Control Display ........ 7
Clock .............. 8
Kitchen Timer .............. 8
Control Lockout ............. 8
Tones .................... 9
F Code .................... 9
Oven Cooking Tips 10-t2
Baking ............ 13-I4
Broiling .................. 15
Setting Special Features 16-20
Self-Cleaning Cycle ...... 21, 22
Control Panel .............. 23
Oven Interior ........... 23
Broiler Pan and Grid ......... 23
Oven Light Bulb .......... 23
Oven Racks ................ 24
Oven Door ............... 25
Before Calling for
Service ................ 26-28
Temperature Adjustment .... 29
Warranty ................. 32
Service Numbers ......... 64
For your convenience and future reference, please write down your' model
and serial numbers in the space provided, They are located on the front
frame behind the oven door,
MODEL NUMBER:
SERIAL NUMBER:
© Sears, Roebuck and Co
2
20P307-2 ENv0t 2./141(}3 3:34 PM

IMPORTANT
SAFETYINSTRUCTIONS
SAVE THESE INSTRUCTIONS
Read all instructions before using this appliance, When using gas or
electrical appliances, basic safety precautions should be followed,
including the following:
To insure safety for yourself, family
and home, please read your Owner's
Manual carefully, Keep it handy for
reference Pay close attention lo
Safety Sections. BE SURE your
appliance is installed and grounded
by a qualified technician
• DO NOT leave children alone or
unattended near an appliance in
use
,, TEACH CHILDREN not to play
with controls or any part of the
appliance, and not to sit, ciimb or
o
stand on the door, or any part of
the appliance
,, CAUTION; NEVER STORE items
of interest to children in cabinets
above the appliance Children
climbing on an appliance could
be seriously injured °
• KEEP THIS book for later use
• NEVER TRY to repair or replace
any part of the appliance unless
instructions are given in this °
manual All other work should be
done by a qualified technician °
• NEVER USE your appliance for
warming or heating the room
° ALWAYS KEEP combustible walt
coverings, curtains, dishcloths,
towels, potholders and other linens
a safe distance from the appliance
NEVER USE a towel or other bulky
cloth as a potholder. Make sure the
potholder is dry Moist potholders
could cause steam burns DO NOT
let pothotders touch hot surfaces
ALWAYS KEEP the oven area free
from things that will burn Food,
wooden utensils, grease buildup,
gasoline and other flammable
vapors or liquids could catch fire
Plastic utensils could melt, and
canned foods could explode Your
appliance should never be used as
a storage area
ALWAYS KEEP your appliance
clear of things that will burn
(gasoline and other flammable
vapors or liquids)
NEVER HEAT unopened food
containers. Pressure buildup can
cause the container to burst and
cause injury
NEVER LEAVE containers of fat or
drippings in your oven
NEVER TRY lo clean a hot surface
Some cleaners produce noxious
fumes, and wet cloths or sponges
could cause steam burns
NEVER WEAR loose-fitting clothing
when using your appIiance
BE SURE the oven issecurely
installed in a cabinet that is firmly
attached to the house structure
LARGE SCRATCHES OR
IMPACTS to glass doors can lead
to broken or shattered glass
3
2114/03, 3:34 PM

IMPORTANTSAFETY
INSTRUCTIONS
DO NOTtouch heating elements,
surfaces nearthem, orinterioroven
surfaces These maybe hot enough to
cause burns eventhoughthey are dark
in color Duringand after use, do not
touch or letclothing or flammable
rnateriatcontact theelements or hot
surfaces until theyhave had time to
cool Other surfacesnear theoven vent
openings, oven door and windowmay
alsobe hot enoughto cause burns
• PLACEOVEN RACKS in thedesired
positionwhile theoven iscool. Ifracks
mustbe moved whileovenis hot, do not
letpotholdercontact the hot oven
etement
• AFTER BROILING.atwaystakethe
broiler pan and gridout of theoven
and clean them Leftovergrease in the
broiler pan could catchfire thenext time
you useyour oven
,,ALWAYSUSEcarewhen opening
the ovendoor Let hot air andsteam
escape before movingfoods,
,,NEVERUSE aluminumfoit totine
theoven bottom Improper useof foil
could startafire, or electrical shock
could resuft
• NEVERBLOCK theoven vent opening
• CLEAN ONLYthe parts listedin this
manual Followallcleaning instructions.
• NEVERRUB, move,clean or damage
thedoor gasketon serf-cleaningovens
Itis essentialfor agood seal
• NEVERTRY to c(eanutensils,
cookware,removable partsor broiler
SAVE THESE
pan and grid in the self-cleancycle
• DO NOT USEoven cleaners- No
commercial ovencleaner or protective
coating of anykind should be used in or
around anypart ofthe oven
• IF THE SELF-CLEANINGmode
malfunctions,turn theoven off and
disconnect thepower supply, Have it
serviced bya qualified technician
IMPORTANT SAFETY NOTICE!
The California Safe Drinking Water and
Toxic EnforcementAct requiresthe
governorof Californiato publishafist
of substancesknowntothe stateto
causebirth defectsor other
reproductiveharm and requires
businessesto warntheir customers
ofpotential exposureto such
substances,The fiberglassinsulation
In aself-cleaningovenwill give off a
verysmallamountof carbonmonoxide
duringthe cleaningcycle. Exposure
canbe minimized byventing with an
opendooror windowor using a
ventilationfan or hood_
IMPORTANT: The healthof some
birdsis extremelysensitive to the
fumes given off duringthe self-cleaning
cycle ofany oven. Movebirds to
another well-ventilatedroom.
READ AND UNDERSTAND
THIS INFORMATION NOW!
Be sureeveryone in yourhome knows
whatto do in case of fire. Never use
wateron agrease fire; itwill only
spreadthe flames,
OVENFIRE:
Donot try tomove the pan!
1. Close theovendoor and turn
controlsoff
2, It fire continues,carefully open
the door,throwbaking soda on the
fire,or usea dry chemical, foam or
halon-[ypeextinguisher
INSTRUCTIONS
4
20P307_2 ENvO1 4 2114/03, 3:34 PM

OPERATION
FEATURESOF YOUROVEN
Self-Clean
Oven Control
I
Bake Element
To remove the adhesive left from packaging tape, use household dishwashing
liquid, mineral oil or cooking oil With a soft cloth, rub into the area and allow to
soak. Rinse and dry well, Repeat procedure using an appliance polish to insure
no damage is done This should be clone before the oven is turned on for
the first time, The tape cannot be removed once the oven has heated.
Packaging tape may be found in the following areas: door handle, control
panel area, door trim and oven area
5
20P307_2 ENv0I 2/14103, 3:34 PM

OPERATION
OvenControl, Clock and Timer
® ®® ®@@
Your new touch pad oven control will allowyou to setvarious functions with ease
Below are the different types of functions and a description of each
BAKE - Cooks foods in the traditional
oven with a temperature range of
170°F to 550°F.
BROIL - Cooks foods at 550°F H!
broil or 450°F LO broil from the direct
heat of the upper element Broiling
should be done with the door opened
to the broil stop position
SELECT CLEAN - Cleans the inside
area of the oven for you at one of three
levels: 3 hours Lo, 4 hours Std and 5
hours Hi When the cycle is finished,
the oven will turn off automatically
NOTE:The ovendoor willautomatically
latch andwitf onlyunlatch once theoven
hascooled down
@
®
Set the amount of time you
want foods to cook or the
oven to clean The oven
turns off automatically at
the end of this time
Set the time of day you
want the oven to turn on
The oven will turn on
automatically at the time
you have set. When
DELAY START TIME is
used withOVEN COOKING
TIME, the oven willalso turn
off automatically, at the end
of the cooking time.
O O The HOUR/MIN UP and/or
DOWN arrow pads set the
time of day, length of
......... cooking time, length of
...... cleaning time, the delayed
start time and the time set
on the Kitchen Time_
O The TEMP UP and/or
_ DOWN arrow pads set
O the temperature used
for cooking
<_ The START pad must be
pressed to activate any
oven function
@
@
The CLEAR/OFF pad is
used to cancel any oven
function and the end of
cycle tone It will not
cancel the Clock or
Kitchen Timer,
The KITCHEN TIMER
pad is used to turn the
Kitchen Timer on or off It
wi!! not control any of the
other oven functions
The CLOCK pad is used
to set the time of day.
Turns oven light on or off
20P307_2 ENvOl 2/14103 3:34 PM

OPERATION
ControlDisplay
Oven Temperature
Indicator "On" indicator
Set Indica
Indicator
Oven Function
Indicator
The Control Display is an easy
reference for using your oven control
Below are descriptions of how the
Control Display works
OVEN TEMPERATURE INDICATOR -
This indicator has a multiple purpose
• Displays the temperature
° Displays error code "ERR" - If the
oven temperature indicator flashes
"ERR", then you have set an invalid
timeor temperature
• Displays Oven Problems - Ifyour
controi flashes "F" and a number
or letter, you have experienced an
oven problem. Please read the
section on F-CODES in your
manual
"ON" INDICATOR - Will light when
the oven turns on
Oven Function
Indicator
SET INDICATOR -The set indicator
will flash in combination with an oven
function or timed function to let you
know you need to set a time or
temperature Example: "SET" and
"BAKE" will flash to tet you know you
need to set the bake temperature.
TIMED INDICATOR - Displays the
time of day, cooking time, delay start
time, cleaning time or the time set on
the kitchen timer,
• Displays reminder code "PUSH
START" - Ifthe time indicator
flashes the words "PUSH START,"
then you need to press the START
pad to activate your setting
OVEN FUNCTION INDICATORS -
Display which oven function has been
set, when the oven doer locks and if
the function is delayed
7
20P307-2 ENv0t 2/14_'03, 3:34 PM

OPERATION
Clock, Timerand
ControlLockout
The clock must be set for the correct
time of day before a delayed oven
function can work properly The time
of day cannot be changed during a
timed oven function., but can be
changed during a bake or broil
function
HOW TO SET THE CLOCK
®®
t. Press the CLOCK pad
2_ Press the HOUR/MIN UP and/or
DOWN arrow pads to set the time
3o Press the START pad
RECALL THE CLOCK
While using your oven for cooking,
press the CLOCK pad if you wish to
check the time of day The current
time of day will show in the display
POWER FAILURE
Ifyou have experienced a power
failure, the time wilt flash in the display
and will be incorrect Reset your clock
Any oven cooking function that was in
process will need to be reset
The Kitchen Timer is used to time
cooking processes or other
household activities It does not
control the oven tt can be set lot up
to 9 hours and 59 minutes Itwill
count down in minutes until the LAST
60 SECONDS is reached, then the
control will beep once. When the
countdown reaches ZERO, the
8
control will beep 3 times followed by
one beep every 6 seconds until the
KITCHEN TIMER pad is pressed The
6 second beep can be removed for
future cycles if desired For directions
on removing this continuous beep,
see Tones on the following page
HOW TO SET THE TIMER
QQ
1_ Press the KITCHEN TIMER pad,
2, Press the HOUPJMIN UP and/or
DOWN arrow pads to set time
3, Press the START pad
4_ When the countdown has reached
zero, press the KITCHEN TIMER
pad to turn off the beep
To cancel the timer during the
countdown, press the KITCHEN
TIMER pad TWICE
Your control will allow yeu to lock the
touchpads so they cannot be activated
when pressed If you're worried about
leaving the oven unsupervised, activate
this feature
t. Press and hold, at the same time,
the HOUPJMIN DOWN arrow pads
for3 seconds, until the display
shows "LOC ON"
2. To unlock the control, press
and hold, at the same time, the
HOUR/MIN DOWN arrow pads
for3 seconds, until the display
shows "LOC OFF"
This feature can only be set when the
oven is not in use.
When this feature ison no touch
pads will work The display will show
"LOC ON" if a touch pad is pressed
The adjustment will be retained in
memory after a power failure,
20P307-2 EN',t01 2/14103 3:34 PM

OPERATION
OvenControl, Clock and Timer
Your new control has a series of tones
that wilt sound at different times
These tones may sound while you set
the control for an oven function, or at
the end of the oven function It will also
alert you that there may be a problem
with the functions Below are the types
of tones and a brief description of
each.
TONES WHILE SETTING THE
CONTROL- When you press a touch
pad you will hear a beep This beep
will let you know you have placed
enough pressure on the pad to activate
it. (The arrow pads do not beep )
END OF TIMED CYCLE TONE - At the
end of atimed cooking function, you
will hear 3 short beeps followed by I
beep every 6 seconds This 6 second
beep wil! continue to sound until the
CLEAR!OFF pad is pressed or you
may select the special feature to cancel
this 6 second beep from sounding at
the end of future cycles
TO CANCEL THE 6 SECOND BEEP
1. Press and hold the BAKE and
BROIL pads, at the same time for
3 seconds, until the display shows
"SF"
2. Press the KITCHEN TIMER pad
The display wit! show "CON
DEEP" (continuous beep),
3. Press the KITCHEN TIMER pad
again. The display will show
"DEEP" (beep canceled),
4. Press the START pad to cancel
the 6second beep and leave the
special feature mode
Ifyou would like to relurn the 6 second
beep, repeat steps above until the
display shows your choice and press
the START pad
ATTENTION TONE - This tone will
sound if you make an error or an
oversight is made while setting an
oven function,
Examples would be:
a. Setting a clean cycle and the oven
door is not properly closed
b. Setting a function and not pressing
theSTART pad
c. Pressing an additional function pad
without first setting a temperature
or time
Any of these can be quickly identified
by watching the display
PREHEAT TONE - When you
select a cooking mode, set an oven
temperature and press the START
pad, the oven starts to heat=When the
temperature inside the ovenreaches
the temperatureyou have set, a tonewill
sound to letyou know the oven is ready
for baking
Ifyou set an oven function and the
control beeps while the display is
flashing "F" and a number or letter
such as "F-4" or "Ft," theremay be
a problem with the control or oven.
Simply press the CLEAR/OFF pad
and wait about an hour. Try setting
the function again, Ifthe code repeats.
write down the flashing code and cal!
for service. Tell the technician what
code was flashing
9
20P307-2 ENv01 2./14J03. 3:34 PM

OPERATION
OvenCookingTips
It isnormalto havesomeodor when
using youroven for the first time To help
eliminatethis odor, ventilate the room
by opening a window or using a vent
hood
IMPORTANT:Never cover the oven
bottom or oven rackwith aluminumfoil
Improper use can cause poor heat flow,
poor baking results and may damage
the oven finish To prevent staining from
spillovers, you may place apiece of
aluminumfoil or a cookie sheet below
foods which may spiltover
Preheatingisbringing the oven
temperature up to the temperature
you witlbe using during baking Let the
oven preheatwhen recipes call for
preheating
Toprolong the tifeof youroven
light bulbs, follow this helpful tip:
Alwaysturn the lightsoff when
the ovenis not inuse or during a clean
cycle ifyour ovenlightsare lefton for an
extended period oftime, the oven will be
warmwhen the door is opened due tothe
heatgenerated from the oveniightbulbs
Inthe back of the ovenyou wiltnotice a
srna+ltube,This is aheat sensorthat
maintains thetemperatureof the oven,
Nevermoveor bend this tube,
_._. Oven
_-_,_ Temperature
.........Sensor
Theovenvent is located underthe control
panel, Thisarea could become hotduring
ovenuse It is normalfor steam tocome
out of thevent and/or coliect moisture
underneathwhen theoven is in use.The
vent is importantforproper air circulation
Never block this vent.
Oven Vent
L J
_ Location
Opening the door oftento check foods wiii
cause heatloss andpoor baking results
Thelow temperaturezoneof youroven
(between !70 ° and200°F) is availableto
keep hotcooked foodswarm However,
foods shouldnot be kept at these
temperatureslonger than 2 hours
Whenusing yourconvenient Delay
Startoperation,foods suchas dairy
products, fish, poultry, etc., should
never sit more than 1hour before
cooking Roomtemperature and the heat
from theoven light promotebacterial
growth
10
20P307-2 ENvOl 2114/03, 3:34 PM

OPERATION
OvenCooking Tips
Most recipes for baking have been
developed using high-fat products
such as butter or margarine (80% fat
by weight--the federal requirement
for products labeled "margarine")
You will gel poor resuIts if cakes, pies,
pastries, cookies or candies are made
with low-fat spreads. Low4at spreads
contain _essfat and more water The
high moisture content of these
spreads affects the texture and flavor
of favorite baked recipes The _ower
the fat content of a spread product.
the more noticeable these differences
become To ensure best results, use
margarine, butter or stick spreads
containing at least 70% vegetabIe oil
The Oven Temperature Sensor at the
back of the oven continuously senses
and controls the temperature inside
the oven To keep a constant set
temperature, the elements will cycle
(turn on and off during cooking)
Baking results will be better if baking
pans are centered in the oven as
much as possible If baking with more
than one pan. place the pans so each
has at least 1 to 11/2"of air space
around it. Stagger pans on the rack
so one is not directly above the other
FLAT COOKIE SHEETS, without
sides, allow air to circulate all around
the cookies for even browning
IFi l
SHINY PANS reflect heat, and are
perfect for cakes and quick breads
that need a light brown crust
GLASS, DARK NON-STICK OR
DARKENED BY AGE BAKEWARE
absorbs heat, and can be used for
yeast breads, pie crust or foods
that need a brown crust The oven
temperature, when using these pans,
should be reduced by 25°F
11
20P307-2 ENv01 2./14103 3:34 PM

OPERATION
OvenCookingTips(cont.)
The oven racks are designed with
stops, a convenience as well as a
safety precaution. The guides have a
bump to prevent the racks from tilting
when racks are pulled out of the oven
This design allows the racks to be
inserted in onty one way
Your oven has seven (7) rack
positions The top position is only a
guide. It cannot be used as a rack
position
Gutde
Always place oven racks in the
proper position while oven is coolo
CAUTION: When you are using the
rack in the lowest position (t), you will
need to use caution when pulling the
rack out We recommend thatyou putt
the rack out several inches and then,
using two potholders, pull the rack
out by hotding the sides of it The
rack islow and you could be burned
if you place your hand in the middie
of the rack and puleall the way out,
Be very careful not to burn your hand
on the door when using a rack in the
lowest position (1)
You may feet thatyour new oven
cooks differently than the oven it
replaced We recommend that you
use your new oven a few weeks
to become more familiar with it,
following the times given in your
recipes as a guide If you feel
your' oven istoo hot or too cool
for your cooking preference,
see Do-tt-Yourself Temperature
Adjustment in the back of this
manual to make the adjustment
12
20P307_2 ENv01 2114t'03 3:34 PM

OPERATION
Baking & Roasting
(_) 1. PresstheBAKE pad
(_ 2. PressTEMP UP and/or
DOWNarrowpads toset
_wP the oventemperatureyou
preler touse
<_ 3. Pressthe STARTpad
BAKING SHELF POSITION CHART
TYPE OF FOOD SHELF POSITION
Frozen pies {on 3 or 4
cookie sheet)
Angel food cake, 3 or 4
bundt or pound
cakes
Biscuits, muffins. 3 or 4
brownies, cookies.
cupcakes, layer
€,_kes, pies
Casseroles 3 or 4
Turkey or Roast 1
To set the oven to cook for a specific
time and turn off automatically.
(_ 1o Press the BAKE pad
(_) 2. Press TEMP UP
and/or DOWN arrow
TEMp pads to set the oven
temperature you prefer
touse
3.,PresstheOVEN
COOKING TIME pad
@ @ 4. Press HOUR/tVltNUP
and/or DOWN a[row
pads to set the amount
of time you prefer your
_"','f'_,,_°_' foods to cook
<_ 5. Press the START pad
To set the oven to turnon at a later
time of day, cook for a specific
amount of time and turn off
automatica!ly
(_ 1. Press the
BAKE pad
(_ 2. Press the TEMP UP
and/or DOWN arrow
'lrEMP
pads to set the oven
temperature you
prefer to use
3, Press the OVENCOOKING
TIME pad
@ @ 4, Pressthe
HOUPdMIN UP and/
or DOWN arrow
pads to set the
_,,.,.,,L_;_,,_ amount of time you
prefer your foods
to cook
5. Press the DELAY
START TIME pad
(_ (_ 6o Press the
HOUR/MIN UP and/
HOUR MIN
or DOWN arrow
pads to set the time
" ,,_,._. of day you prefer the
oven to turn on
<_ 7o Press the
START pad
The oven will turn off at the end
of the cooking time unless the
Cook and Hold feature has been
activated°
13
20P307-2 ENv01 2Jt4/03 3;35 PM

OPERATION
Baking
Your new control has a cook and
hoId feature for timed cooking oniy
that wifl keep hot cooked foods warm
up to 3 hours after the timed cooking
is finished To activate this feature:
1, Press and hold, at the same time,
the BAKE and BROIL pads for 3
seconds, until the display shows
"SF"
2_(a) Press the OVEN COOKING
TIME pad. The display witi show
"HLd OFF "
(b) Press the OVEN COOKING
TIME pad again to activate the
feature, The display will show
"HLd ON ."
3, Press the START pad.
14
20P307-2 ENv0'_ 2/14103, 3:35 PM

OPERATION
Broiling
Broiling is cooking by direct heat
from the upper element The oven
door should remain open to the broil
stop position during broiling,
it is not necessary to preheat the
oven when broiling Use the broiler
pan and grid that came with your
oven. Both are designed for proper
drainage of fat and liquids.
lllll i i i
If foil is used it must be
molded tightly to the
grid and slits cut into
the foil to match those
of the grid. This allows fats and
liquids to drain into the broiler
pan, preventing fire and
excessive smoke,
Always remove the pan and grid
from the oven, Storing or
forgetting a soiled
broiler pan in the oven
is a potential smoke or
fire hazard,
The U S Department of Agriculture
recommends to cook meat and
poultry thoroughly--meat to at least
an INTERNAL temperature of 160°F
and poultry to at least an INTERNAL
temperature of 180°F Cooking to
these temperatures usually protects
against food-borne illness
The closer you place foods to the
broil element, the faster foods brown
on the outside, yet remain red to pink
in the center
Moving meats away from the element
will allow the meat to cook to the
center while browning on the outside
Cook side t at least 2 minutes longer
than side 2 If your oven is connected
to 208 volts, you may want to use a
higher rack position and!or broil
foods longer
The size, weight, thickness, starting
temperature and your preference of
the doneness of the meat will affect
broiling This chart is based on meats
at refrigerator temperature
FOOD RACK
POSITION
Steak1" thick i 3
Ground beef i
i
Pork Chops -
1t2" thick 3 ..............
Fish (fillets) 3
Chicken (pieces) l 2
TOTAL
lrlME (MIN.)
9-11
16-18
27-29
11-13
45-'55
la. Press the BROIL pad. (This wilt
automatically set Hi Broil .)
lb. While the set indicator is flashing
in the display, press the BROIL
pad again if you prefer to use Lo
Broil. Use Lo Broil to cook foods
such as poultry or thick cuts
of meat thoroughly without
over-browning them
2. Press the START pad
3. When broiling is finished, press
the CLEAR/OFF pad
15
20P307-2 ENv01 2/t4t(}3. 3:35 PM

OPERATION
Setting Special Features
Yournewtouch pad control has
additional featuresthat you may choose
touse After makingyour selection,if you
want tochange the setting, followthe
steps untilthe display shows yourchoice
The control isautomatically set to turn
off the oven after 12 hours baking or
3 hours broiling shoutd you forget
and Ieave the oven on Jfyou want
to removethis feature:
1o Press and hold, at the same time,
the BAKE and BROIL pads for
3 seconds, until the display
shows "SF"
2o Press the DELAY START TIME
pad The disptay shows "12Shdn"
(t2 hour shut-off)
Press the DELAY START TIME
pad again. The display witl show
"no shdn" (no shut-off)
3. Press the START pad
Yourovencontrol is set forthe Fahrenheit
temperature selections.Mostrecipes are
given using theFahrenheitscale You can
change this touse the Celsiusselection
I. Press and hold, at the same time,
the BAKE and BROIL pads for
3 seconds, until the display
shows "SF"
2.
3_
(a) Press the BROIL and OVEN
COOKING TIME pads at the
same time The controI display
wi!t show the degrees sign and
(b) Press the BROIL and OVEN
COOKING TIME pads at the
same time again This will
change "F" (Fahrenheit) to "C"
(Celsius)
Press the START pad
Your control is set to use the 12-hour
clock if you prefer to use the 24-hour
Military Time clock or blackout the
display:
1. Press and hold, at the same
time, the BAKE and BROIL pads
for3 seconds, until the display
shows "SF"
2o (a) Press the CLOCK pad.
The display shows "12hr." _f
this is your choice press the
START pad
or
(b) Press the CLOCK pad
again The display wilt show
"24hr" Example: 5:00 on the
12-hour clock will show 17:00
hours on the mititary clock If
this is your choice press the
START pad
or
(c) Press the CLOCK pad again.
The display will show "OFF." if
this is your choice press START
The display will not show time
(The Delay Start Time feature will
not operate.)
16
20P307-2 ENv01 2/14103 3:35 PM

OPERATION
SettingSpecialFeatures
This special feature will allow you to
change the speed; #t means speed
of change is slow up to #5 which
means speed of change is fast To
set lhe speed you prefer, follow
these steps:
1, Press and hold, at the same
time, the BAKE and BROIL pads
for 3 seconds, until the display
shows "SF."
2o Press any UP arrow pad. The
display wilt show lhe current set
speed
3. Press any UP arrow to increase
the speed up to the number 5
or
Press any DOWN arrow pad to
decrease the speed down to the
number 1
4. Press the START pad
17
20P307_2 ENv01 2/1410& 3:35 PM

OPERATION
Setting Special Features
(Designed for use on the Jewish
Sabbath and Holidays.)
The Sabbath feature can be used
for baking/roasting only. It cannot
be used for broiling., self-cleaning
or Delay Start cooking
NOTE: The oven light comes on
automatically (on some models)
when the door is opened and goes
off when the door is closed. The bulb
may be removed: See the Oven Light
Replacement section On models with
an OVEN LIGHT pad, the oven light
may be turned on and left on,
HOW TO SET FOR REGULAR
BAKING/ROASTING
NOTE: To understand how the oven
control works, practice using regular
baking (non-Sabbath) before entering
the Sabbath mode
Make sure the clock shows the
correct time of day and the oven
is off
(_ 1. Touch and hold both
the BAKE and BROIL
(_ pads, at the same
time, until the display
shows "SF"
2, Tap the DELAY START
TIME pad until "SAb
bAtH" appears in the
display
3, Touch the START padand D will appear in the
display
(_) 4, Touch the BAKE pad.No signal will be given
5o The preset starting
temperature witl
_MP automatically be set to
350°F, Tap the UP or
DOWN arrow pads to
increase or decrease
the temperature in
5° increments The
temperature can be set
between 170°F and
550°F No signal or
temperature will be given.
<_6o Touch the START pad
7, After a random delay
period of approximately
30 seconds to 1 minute,
D c will appear in the
display indicating that the
oven is baking/roasting.
IfD c does not appear in
the display, start again at
Step 4
To adjust the oven temperature,
touch the BAKE pad and lap the
UP or DOWN arrow pads to increase
or decrease the temperature in 5°
increments Touch the START pad
NOTES:
° When the display shows D the
oven is set in Sabbath When the
display shows D c the oven is
baking/roasting.
° The CLEAR/OFF and OVEN
COOKING TIME pads are active
during the Sabbath feature
18
20P307-2 ENv0t 2414103, 3:35 PM

OPERATION
Setting Special Features
HOW TO SET FOR TIMED BAKING/
ROASTING-IMMEDIATE START
AND AUTOMATIC STOP
NOTE: To understand how the oven
control works, practice using regular
(non-Sabbath) Immediate Start and
Automatic Stop before entering the
Sabbath mode
Make sure the clock shows the
correct time of day and the oven
is off
(_ 1. Touch and hold both
the BAKE and BROIL
(_) pads, at the same
time, until the display
shows "SF"
3.
@@5.
HOUR MtN
Tap the DELAY START
TIME pad untif "SAb
bAtH" appears in the
display
Touch the START pad
and D will appear in the
display
Touch the OVEN
COOKING TIME pad.
No signal will be given
Touch the UP or DOWN
arrow pads to set the
desired length of
cooking time between
1minute and 9 hours
and 59 minutes The
cooking time that
you entered will
be displayed
TEMP
@
Touch the START pad
Touch the BAKE pad
No signal will be given
The preset starting
temperature will
automatically be set
to 350° Tap the UP or
DOWN arrow pads to
increase or decrease
the temperature in
5" increments The
temperature can be set
between 170°Fand
550°F No signal or
temperature will be given
Touch the START pad
After a random delay
period of approximately
30 seconds to 1minute,
::::3c: will appear in the
display indicating that the
oven is baking!roasting
If D a does not appear in
the display, start again at
Step 7
To adjust the oven temperature,
touchthe BAKE pad and tap the UP
or DOWN arrow pads to increase or
decrease the temperature in 5°
increments Press the START pad
NOTES:
,J When the display shows D the
oven is set in Sabbath When the
display shows D a the oven is
baking!roasting
,, When cooking is finished, the
display will change from D c to D
and 8,00 will appear, indicating
that the oven has turned OFF but
is still set in Sabbath Remove the
cooked [ood
19
20P307-2 ENv01 2/14/03 3:35 PM

OPERATION
SettingSpecialFeatures
HOW TO EXIT THE SABBATH
FEATURE
®
2_
Touch the CLEAR/OFF
pad.
Ifthe oven is cooking,
wait for a random delay
period of approximately
30 seconds to 1 minute,
until only _ is in the
display
Touch and hold both
the BAKE and BROIL
pads, at the same
time, until the display
shows "SF"
Tap the DELAY START
TIME pad until "12
shdn" or "no shdn"
appears in the display
"12 shdn" indicates
that the oven will
automatically turn
off after' 12 hours. "no
shdn" indicates that
the oven will not
automatically turn off
Touch the START pad
NOTE: If a power outage occurred
while the oven was in Sabbath mode,
the oven will automatically turn off and
the oven control must be reset
20
20P307-2 ENv(}'_ 2/14103 3:35 PM

CAREANDCLEANING
Self-Cleaning Cycle
I.
Remove the broiler pan and grid,
utensils and any foil thal may be in
the oven.
2. The gray porcelain-coated oven
racks may stay in the oven during
the self-clean cycle
& Soil on the front frame and outside
the gasket on the door liner will
need to be cleaned by hand
Front Frame
b _
DoorGasket
F "_ --__ Door Liner
\
Clean these areas with hot water,
soap4illed pads or cleansers such as
Soft Scrub_ to remove any soil Rinse
well with clean water and dry
Do not use oven cleaners -
No commercial oven cleaner or
protective coating of any kind
should be used in or around
any part of the oven
4. Wipe up any heavy spillovers on
the oven bottom
5_
Do not clean the door gasket Tl_e
fiberglass material of the oven
door gasket cannot withstand
abrasion It is essential for the
gasket to remain intact Ifyou
notice it becoming worn or frayed,
it should be replaced
The door gasket is designed to have
an 10" gap at the bottom of the door
This allows for proper air circulation
Door Panel Gasket
Door Linear P-IO"-H
It is normal for your oven door to give
the appearance of not having a good
seal against the oven This is due to
the gasket The location of the gasket
on the door maintains a good seal and
prevents any heat loss
UlIJJJUlJJJJJJJJlll/
Utensils should never be
left in the oven during a
self-clean cycle.
Gray porcelain-coated oven racks
may safely be cleaned in the oven
during a self-clean cycle. It will be
necessary to grease the edges of
the oven rack with aitght coating
of vegetable oil after a clean
cycle. This will help maintain the
ease of sliding the racks In and
out of the oven.
For the first clean cycle, vent the
room with an opened window or
hood vent. This will reduce the
odor when heating new parts.
='- luuuluuJ =u== i/
21
20P307-2 ENv01 2114/03, 3;35 PM

CAREANDCLEANING
Self-Cleaning Cycle
The Clean Cycle, including cooldown
time offers preset options of 3.4 or 5
hours, but you may change this to any
time between 3 and 5 hours
1o For 3 hours: Press theSELECT CLEAN pad 3
hours and "Lo" wil! show
in the display This setting
is recommended for small
contained spills Go to
step 3 and press the
START pad.
For 4 hours: Press
the SELECT CLEAN pad
two times. 4 hours and
"Std" will show in the
display This setting is
recommended for a
normally soiled oven
Go to step 3 and press
the START pad
For 5 hours: Press the
SELECT CLEAN pad
three times 5 hours and
"Hi" willshow in the
display This setting is
recommended for heavily
soiled ovens Go to step 3
and press the START pad.
If you want to change the
length of clean time, press
the HOUR!MIN UP and/or
DOWN arrow pad
<_3_ Press the START pad.
Simply pressthe CLEAR/OFFpad You
will need towait for the oven temperature
todrop below the lock temperature
(approx 1hour) before attempting to
open the door
After the cycle, you may notice some
white ash in the oven Just wipe it up
with a damp cloth or sponge
If white spots remain, scrub them
with a soap-filled steel wool pad Be
sure to rinse thoroughly These are
usually deposits of salt that cannot
be removed during the cycle.
If your oven is equipped with
porcelain oven racks, it will be
necessary to grease the edges with a
light coating of vegetable oil after the
clean cycle This will help maintain
the ease of sliding the racks in and
out of the oven
If for any reason you are not
satisfied with the cleaning results,
just repeat the cycle.
1, PresstheSELECTCLEAN pad and
choose the clean level
of either Lo (3hours),
Std(4 hours)or Hi(5
hours).Ifone of these
isyourchoice, go to
step 3and set the
delay starttime
(_ (_ 2. Ifyouwant to change
the length of clean_lt3
time,press theHOUR/
.... MIN UP and/orDOWN
arrow pads,
3. Press theDELAYSTART TIME pad
C) (_ 4. PresstheHOUPJMIN
UP and/or DOWN
arrow pads toset the
......._r,'__ timeyou preferthe
clean cycle tostart,
Pressthe START pad.
22
20P307-2 ENv01 2..t14_'033:35 PM

CAREANDCLEANING
CLEANING MATERIALS
• Dishwashing detergent
• Warm water
• Soft cloth
Do not use abrasive cleaners,
industrial cleaners or bleach.
Clean only as touch-up between
clean cycles Use dishwashing liquid,
warm water or a soap-filled pad
Rinse welt after cleaning and dry
NEVER USE OVEN CLEANERS IN
OR AROUND ANY PART OF THE
OVEN.
When cleaning, be sure not to bend
or displace the temperature sensor
located on the back wall of the oven
Oven
Temperature
Sensor
CLEANING MATERIALS
• Dishwashing detergent
° Warm water
• Soap-titled scouring pad
,, Commercial oven cleaner
TO CLEAN
Allow the pan 1osoak. Sprinkle the
grid with dishwashing detergent and
cover with a damp cloth or paper
towel Scour as needed Rinse and
dry well. You may also place both the
pan and grid in the dishwasher
--'_ AUTION= Disconnect
electrical power to the
oven at the main circuit
breaker or fuse box before
attempting to replace the oven
light bulb. Do not touch a hot
light bulb with wet hands or a
wet cloth° Wait until the bulb
has cooled and use a dry cloth.
L ....
Glass
Retatner
Bulb _ Live Collar
GlassCover "_
TO REMOVE THE COVER
1, Disconnect e_ectdcal power to the
oven at the main circuit breaker or
fuse box
2. Grasp the glass cover and turn
1/4 turn counterclockwise until the
tabs of the glass cover clear lhe
grooves of the glass retainer
REPLACE THE LIGHT BULB
Unscrew the light bulb and replace it
with a 40-watt appliance bulb
TO REPLACE COVER
1_ Place the tabs of theglass cover
intothe grooves of the glass
retainer
2. Turn the glass cover 1/4 turn in the
clockwise direction
3, Reconnect the electrical power to
the oven
For improved lighting inside the oven,
clean the glass cover frequently using
a wet cloth Caution: This should
only be done when the oven is
completely cool,
23
20P307-2 ENv01 2J14/03, 3:35 PM

CAREANDCLEANING
CLEANING MATERIALS
• Dishwashing detergent
,,Warm water
• Scouring pad or soap-filled pad
TO REMOVE
1, Pull the racks out to the stop lock
position
2o Pull up the front of the rack and
slide under the bump of the rack
guide
TO CLEAN
Clean with warm water and
detergent. For hard to remove stains,
gently scrub with a scouring pad
or a soap-filled pad Rinse well
Gray porcelain-coated oven racks
may also be cleaned in the oven
during the self-clean cycle It is
necessary to wipe the edges of gray
porcelain-coated oven racks with a
light coating of vegetable oil after
cleaning This wilt help maintain the
ease of sliding the racks in and out
of the oven
TO REPLACE
1, Place the raised back of the rack
onto the rack guides.
2, Lift the front of the rack until the
raised back slides under the
bump of the rack guides
3, Slide the rack all the way back
24
20P307-2 ENv01 2,/14103, 3135 PM

CAREANDCLEANING
RemovableParts
The door isveryheavy.Be careful when
removingand lifting the door.Do not llft
thedoor by the handle.
TO REMOVE
1, Fullyopenthe door
2, Pullthe hinge rocks _\ _._Slot
down toward thedoor I\lt.-r,_ J--__
frame,to theun!ocked
position This may
require aflat-blade
screwdriver
Hinge Lock
Pullhinge locks
down tounlock
3. Firmtygrasp both __.
sidesofthedoor at __l_"-__
the top
door removal
posilion,whichis
halfwaybetween _,,t_
the broilstop and
fully closed
RemovalPosition
5. Liftdoor up
TO
1.
2_
andout until the hinge
armis clearof the slot
REPLACE
Firmlygrasp both
sidesof the door
at the top
Withthedoor at
the sameangle
as theremoval
position,seatthe
indentationof the
hingearm into
the bottom edge of
111t/.,°.o
Arm
Indentation
thehingeslot Thenotch
in the hingearm must be
fully seated intothe
bottomofthe sbt
Removable Oven Door (cont°)
3o Hinge Arm
Fullyopen the
door. I1thedoor
will not fullyopen,
the indentationis
not seated
correctly in the
bottomedgeof
the slot
4. Push thehinge
locks up against
the front frameof
the ovencavity, to
the locked
position
5. Close theoven
door
Hinge Lock
Push hinge locks
up to lock
TO CLEAN OUTSIDEOF DOOR
• Use soapand waterto thoroughlyclean
the top,sidesand front oI the ovendoor
Rinsewell You mayalso use aglass
cleaner to clean the gtasson the outside
of the door Do not letwaterdrip intothe
ventopenings.
• Spillage ofmarinades,fruit
juices, tomatosauces and basting
materialscontaining acids may cause
discolorationand shouldbe wiped up
immediately When surfaceis cool,
clean andrinse
• Do notuseovencleaners,cleaning
powders or harsh abrasiveson the
outsideof the door
• If anystainon the door vent trim
is persistent,use asoft abrasive cleaner
and asponge scrubber forbest results
TO CLEAN INSIDEOF DOOR
• Because thearea insidethe gasket is
cleaned during the seiFcleancycle, you
do not needto clean thisby hand
° The areaoutside the gasketand
the door linercan be cleaned with
asoap-fi_ledpad, hot water and
detergent Rinseweltwith avinegar
andwatersolution
25
20P307-2 ENv01 2_./141{]3_3:35 PM

BEFORECALLINGFORSERVICE
To save you time and money, before making a service call check the list below
for any problem you may feel you have with the performance of your oven if
the problem is something you cannot fix, use the Consumer Service Numbers
located at the back of this guide When making any calls, have the Model
No., Serial No., Repair Parts List, Use and Care Guide and the Date of
Purchase available°
PROBLEM POSSIBLE CAUSE
The display of your Qven malfunction.
control is flashing
"F" followed by a
number or letter.
Oven and oven a. No power to oven
control will not
work.
b. The clock is in the
black-out mode
Oven temperature Oven control calibration
seems inaccurate.
Oven will not Clean cycle is not
unlock, finished Oven is too hot
Oven light will a, Light switch in off
not work, position
b. Oven light bulb b.
loose or burned out
Oven did not a. Controls were not set a.
clean or results properly
were poor, b_ Oven was soiled b.
heavily
c° Clean cycle was
interrupted,
,,,,,,,,,,,,,,,,,,,,,,,,,,,,,,,,,,,,,,,,,,,,,
Fan noise. A cooling fan may
automatically turnon
POSSIBLE SOLUTION
'"'"" '"'"'"'"' "' " "' ' ''7
Press the CLEAR/OFF pad
Let the oven cool for 1 hour
and enter an oven or cleaning
operation, If code repeats, call
for service
ill==JJlJJlJ==JJlJJlJJJlJJllJJJlJJ=J =Ji
a, Check the circuit breaker or
fuse Make sure the power
cord is plugged in
b. See the "Setting Special
Features" section of this
manual,
See the temperature adjust-
ment instructions following this
section.
Oven temperature must drop
below the lock temperature
before the door will unlock
a. Check oven light switch on
the control panel
Check the oven light bulb
C_
Check theself-cleaning section
of this manual
Heavy spitlovers should be
removed before thecycle is set.
Use the longest cycle, Hi, for the
heavily soiled oven
Thestandard clean cycle is 4
hours, a Lo clean cycle is 3
hours and a Hi clean cycle is5
hours
This is normal,The cooling fan will
turn on to cooI internalparts It may
runfor up to 1!/2 hours after the
ovenis turned OFF
26
20P307-2 ENv01 2/14103, 3:35 PM

BEFORECALLINGFORSERVICE
PROBLEM POSSIBLE CAUSE POSSIBLE SOLUTION
Oven rack does not
slide easily.
Oven smokes,
Foods do not bake
Racks were left in
the oven during a
self-clean cycle.
a, Dirty oven
b, improper use of
aluminum foil
c, Broiler pan containing
grease left in the oven
Wipe the rack edges
with a small amount of
vegetable oil
,,,,, ,,, , ,, , .....................
ao Check for heavy
spiltover.
b, Use of foil not
recommended.
e, Clean pan and grid
after each use
ao Oven was not preheated amBe sure to p'r'ehe'at'until
properly.
b, improper rack or pan
placement
c, Oven vent blocked or
covered
d, Improper use of foil
eo Improper temperature
setting for utensil used
f, Oven temperature needs
adjustment
g. Oven and oven rack not
level
h. Oven controls
improperly set
the tone sounds, when
recipe calls for it
b,, Maintain uniform air
space around pans
and utensils See Oven
Cooking Tips section
c, Keep vent clear
d. Racks should not be
covered during baking
e. Reduce temperature
25 degrees for glass or
dull/darkened pans
fo Check the temperature
adjustment following
this section
g. Check the installation
instructions for
leveling
h. See the baking section
27
20P307-2 ENv01 2/14183_ 3:35 PM

BEFORECALLINGFORSERVICE
PROBLEM
POSSIBLE CAUSE POSSIBLE SOLUTION
Foods do not broil
properly_
a, Improper rack position.
b, Oven preheated
c, Improper use of foil
d. Oven door closed
during broiling
e, Low voltage
(208 Volts)
fo Improper broiling time
g, Oven controls
improperly set
a, Check broil pan
placement; see broiling
section
boDo not preheat when
broiling
c. Check broiling section
d, Open door to broil stop
e. Use higher rack
position and/or longer
cooking time
f, Check broiling chart in
broiling section
g. See the broiling
section
28
20P307=2 ENv01 2/14t03. 3:35 PM

"DOIT YOURSELF"
TEMPERATURE
ADJUSTMENT
You may feel that your new oven
cooks differently than the oven it
replaced We recommend that you
use your new oven a few weeks to
become more familiar with it.
following the times given in your
recipes as a guide
tf you think your new oven is too hot
(burning foods) or not hot enough
(foods are undercooked), you can
adjust the temperature yourself The
appearance and texture of foods is a
better indicator of oven accuracy than
an oven thermometer These
thermometers can vary by
20-40 degrees (from the true
temperature of the oven) in addition.
the oven door must be opened to
read these thermometers Opening
the door will change the temperature
of the oven
To decide how much to change
the temperature, set the oven
temperature 25 degrees higher
(if foods are undercooked) or
25 degrees lower (if foods are
burning) than the temperature in your
recipe, then bake The results of this
"test" should give you an idea of how
much the temperature should be
changed
(_) 1, Press and hold down
both the BAKE and
BROIL pads for 3
+ seconds, untilthe
(_) display shows "SF."
(_ 2o Press the BAKE
pad A factory set
2 digit number will
show in the display,
usually "00"
If you think the oven
is not hot enough,
3a, Press theTEMP UP
arrow pad to increase
_MP (+) the temperature up
to +35aF
If you think the oven
is too hot,
3b, Press the TEMP
DOWN arrow pad to
decrease (-) the
temperature down to
-35°F
_ 4, Press the
START pad
This increased or decreased
temperature setting will remain in
memory until the above steps are
repeated A power failure will not
affect this setting
The broil and self-clean temperatures
will not be affected
29
20P307-2 ENv01 2/14103 3:35 PM

NOTES
3O
20P307_2 ENv01 _14/03, 3:35 PM

NOTES
31
20P307-2 EN'..'O1 2/14_'03, 3:35 PM

BUILT-IN
WALLOVENWARRANTY
FULL ONE-YEAR WARRANTY ON ALL PARTS
if, withinone year from the date of installation, any part fails to function
properly due to a defect in material or workmanship, Sears will repair or
replace it, at our option, free of charge
If this product is subjected to other than private family use, the above
warranty is effective for'only 90 days
WARRANTY SERVICE IS AVAILABLE BY CALLING SEARS SERVICE AT
t -800-4-MY-HOME ®.
This warranty gives you specific legal rights, and you may also have other
rights which vary from state to state
Sears Roebuck and Co
MasterProtectionAgreements
Congratulationsonmakinga smart
purchase "(ournewKenmoreeappliance
isdesigned and manufacturedforyearsof
dependable operation But like ati
products, it mayrequire preventive
maintenanceor repairfromtime to time
That'swhen having a MasterProtection
Agreement can saveyou money and
aggravation
Purchasea Master Protection
Agreement now andprotectyoursefffrom
une,_'pectedhassle ande_pbnse
The MasterProtectionAgreement
also helps extend thelifeof your new
appliance Here'swhat's included
in theAgreement:
v' Expert service by our t2.000
professionalrepair specialists
v' Unlimitedservice and no chargefor
parts andlabor on all coveredrepairs
v' "No-lemon" guarantee - replacement
ofyourcovered product if morethan
three product failuresoccur within
twelvemonths
v"Product replacement if your covered
product can't be fixed
v' Annual Preventive Maintenance
Check atyour request- no extra
charge
Dept, 817 WA Hoffman Estates, tL 60179
v' Fast help by phone- non-technical
and instructionalassistanceon
products repaired in yourhome, plus
convenientrepair scheduling
v' Power surge protection against
eIectdca!damage due topower
fluctuations
v' Rental reimbursement if repairofyour
coveredproduct takes longerthan
promised
Once you purchase the Agreement, a
simple phonecall is all thatit takesfor you
to schedule service Youcan call anytime
day or night, or schedule a service
appointment on-line
Searshas over 12,000professional repair
specialists, who haveaccess toover 45
millionquality partsand accessories
That'sthe kindot professionalismyou can
counton tohelp prolongthe lifeof your
newpurchase for yearsto come
PurchaseyourMaster Protection
Agreement today!
Somelimitations and exclusionsapply.
For pricesand additionalinformation,
call 1-800-827-6655,
Sears Installation Service
For Searsguaranteedprofessional
installationofhome appliances and items
like garage door openers andwater
heaters,call 1-SOg-4-MY-HOME®
32
20P307-2 ENv01 2.t14103, 3:35 PM

HORNODE30" CONAUTOLIMPIEZA
Indice
Seguridad en el uso
del homo 34-35
Caracteristicas de su homo 36
C6mo sacar la cinla
de empaque . . 36
Control de homo. refoj,
cronSmetro 37
Panel de controi 38
Reloj . 39
Cron6met_o de ia cocina 39
Control de cierre 39
Tonos .. 40
C6digo F 40
Consejos para cocinar en el
homo 341--43
C6mo homear ,. 44-45
C6mo asar a la parrifla, 46
C6mo seleccionar funciones
especiates del control 47-5t
E! ciclo de autolimpieza 52-53
Panel de conlrol 54
Interior del homo
con autolimpieza 54
Cacerola y parrilta para asar a la
parri!_a . . 54
Foco de la luz cle! homo 54
Parrillas det homo 55
Puerta det homo 56
Antes de llamar para
un servicio , 57-59
Ajustes a la temperatura 60
Garanlta , 62
NQmeros para servicio 64
Para su convenlencta y referencia futura, por favor escriba el nt_mero de modelo y
serie en el espacto que se provee. Estdn ubtcados en el marco frontal detr&s de la
puertao
Ndmero de modelo:
N_mero de serie:
© Sea_s, Roebuck and Co
33
20P307-2 SPy02 2/14t03, 3:37 PM

INSTRUCCIONES
DESEGURIDADIMPORTANTES
GUARDE ESTAS INSTRUCCIONES
Lea todas las tnstrucciones antes de usar este aparato. Cuando use
aparatos a gas o eldctricos, se deberfan seguir precauciones de seguridad,
incluyendo Io siguiente:
IMPORTANTE: Pai'agaranlizar su seguddad,
Iade su familiay la de su hogar, per favorlea
suManuWdel Consumidorcuidadesamente
Mant_ngaloa la mane para referencias Ponga
mucha atenci6n alas secciones de seguridad
ASEGURESE qua su horno sea instaiadaper
unt6cnicoespecializado y qua haga tieri'a
adecuadamente
• NO DEJEa los nifios sin vigilancia cerca de
un homo qua se esle usando
,, ENSEt',tEA LOS NIt_OSA no iugar con los
controles o cualquier parle del homo, no
sentarse, subirse o pararse sobre la puerta
del homo
• PREOAUCION: NUNCA GUARDE arllcWos
que sean de interns para tos niSosen el
panel lrasero o en losgabinetes sobre et
homo Los niSosque se suban sobre el
horno podrian resuttar gravemente heridos
" GUARDE ESTE libro para un use fuluro
,, NUNCA TRATE de reparar o reemplazar
unaparte del homo a manes qua las
insttucciones se den en este manual Todo
otro lrabajo deberta set hecho per un
t_cnico especializado
. NUNCA USE suhomo para entibiar o
catenta_"una habitaci6n
• SIEMPRE MANTENGA losrevestimienlos
combustibles de las parades, cortinas y
olros pa_os a unadislancia prudente del
homo
° NUNCA USE unatoallau otto patio abullado
come agarradera AsegOreseque la
agarradera esl_ seca. Lasagarraderas
hOmedaspodrtancausar quemadutas per
vapor NO PERMtTAqua las agarraderas
toquenlas superlicies para cocinar calientes
• SIEMPREMANTENGA el _rea de la estufa
despejada de cosas qua se podrlan
quemar Los alimenlos, los utensilios de
madera, la acumulaciSn de grasa la
gasolina y otros vaporeso liquidos
inflamables so poddan incendiar Los
ulensilios de plastico se podrian derretir y
lascomidas en consei'vas poddan explotar
Su homo nunca de deberia usar para
almacenar cosas
* StEMPRE MANTENGA el homo despejado
de cosas que se poddan quemar (gasolina
y otros vapores o liquidos inflamables)
, NUNCA CALIENTE contenedores de
alimentos cerrados El aument.ode la
presi6n puede causar qua el contenedor
expfote y cause heridas
• NUNCA DEJE conlenedores con grasa o
goteaduras dentro o cerca del homo
° NUNCA TRATE de timpiar unacubierta
calierte Algunos limpiadores producen
vapores t6xicos, y los pa_os o esponjas
moiadas podrian causar quemaduras per
vapor
. NUNCA USE ropa suella cuando use el
homo
° ASEGORESEqua el homo este inslalado
ffrmementeen un gabinete que est_ bien
pegado a taestrucfura de la casa
* RASGUNOS GRANDES O IMPACTOS
sobre las superficies de vidrio de las
puertas podrian romper o agdetar el vidri
,,,NOTOQUE las superficies para
calentar,las superficiescerca de eliaso las
superficies interieres Estas podrianeslar
suficientementecalientes paraquemar
aunquese veande color oscuro Durantey
despu_s del use no toque opermila que la
ropa o matedales inftamableshagan contacto
34
20P307-2 SPvO2 2/14103.3:31 PM

INSTRUCCIONES
DESEGURIDAD
IMPORTANTES
con las supedicies calientesbasraque hayan
tenidotiempode enffiarrse Las arras
supdicies cerca de las venlanillas de
venti_aci6ndei homo.puertas, ventanas
lambi_n podrtanestar suficientemente
calienles paracausar quemaduras
• COLOQUE I.AS PARRILLASDEL HORNO
en la posiciSndeseada mientrasel homo est#
frb Si lasparrilias se deben mover mientras
el homo est_ caiiente,no permita que la
agarradera hagacontac{ocon el quemador
calientedel homo.
• DESPUESDE ASAR A LA PARRILLA.
siempresaque]a cacerola y la parrilla para
asardei homoy timpielas Los sobrados de
grasa enla cacerela pare asarpod_1an
incendiarselapr6xima vezque usled use et
homo
, SIEMPRETENGA CUIDADO cuando abra la
puerta del homo Deje queel aire caIientey el
vapor escapen antes de moverlosalimonies
, NUNCAUSE papet deaIuminiopara forrar el
fends del homo Etuse inadecuado del papeI
de aluminiopodria resul{aren ungolpe de
corrienleoen anincendio
• NUNCAOBSTRUYAla aberlura de la
ventilaci6ndei homo
,, LIMPIE SOLAMENTElas patios quese
listan eneste manual Sige lodes las
inslrucciones parala limpieza
• NUNCA FRIEGUE mueva,limpie o daSe el
soils de la puertaen teahomes con
autolimpieza Esesencial para un buen
sellado
" NUNCATRATE de Iimpiat losutensilios
GUARDE ESTAS
o_as,partes removibleso }acacero_ay ta
parrilla paraasar en el ciclo de autolimpieza
NO USE limpiadorespara hornos- Nose
deberia usar ningunactase de limp[adorpare
homesdentro oalrededor decualquier parte
del homo
* SILA FUNCIONDEAUTOLIMPIEZA
falla,apague elhomo ydesconecle la
efeclricidad. H_galeun servicioper un
tecnicocalificado..
;ADVERTENCIA DE
SEGUR|DAD IMPORTANTE!
CaliforniaSafe DrinkingWater and Toxic
EnforcementAct requiereque el gobernador
de Californiapublique una ]ista de
substancias que el estado sopsque
producen defectosde nacimtentou otros
defies reproducttvosy requiere que los
hombres de negoclos advtettan asus
clfentesdet contactspotencial a tales
substancias, El alslantede flbra de vtdrlo en
el homo con autollmpieza emltird una muy
pequefiacantidadde mon6xido de carbons
duranteel ciclode autoltmpieza.El contacts
sepuedeminlmizar ventilandocon une
puerta o ventana ablertao usando un
ventiladoro unacampana de ventilaci6n,
IMPORTANTE: La salud de algunos
p_jarosesextremadamentesensitlvaa los
vapores productdosper el ciclode
autolimpieza de cualquierhorns. Ponga lea
p_jams en etrahabttaciSnque est_ bfen
ventilada.
;LEA Y COMPRENDA ESTA
INFORMACION AHORA!
Asegt_reseque todos en suhogar sepanqu_
hacer en case de incendiooNunca useague
sabreun Incendto de grasa, esto solamente
extender_las llamas.
FUEGOENEL HORNO:
iNs trate de moverla cacerola!
1_ Cierre ]apuefta del homo y apague tos
controles
2o Si elincendio continua, cuidadosamente
abra la puerta,ar_'ojesoda pare cocinar
sabre ef fuego_o use unextin_orde
quimico seco. espuma o "ha!on_
INSTRUCCIONES
35
20F_307-2 SPy02 2J14/03.3;37 PM

OPERACION
CARACTERISTICASDESUHORNO
Ventilac|6n del Cerrojo Control de la
automdtico estufa
Luz del para
Cacerola
y parrilla Elemento para
asar a la
para asar a
Parrtllas Sensor de
removibles del del
Interior de!
Ubicaci6n del homo con
ndmero de autoltmpleza
modelo y serte
(detrAs de Seilo de la
puerta para
Elemento
para hornear
Puerta
removibie del
homo
Para sacar el residuo del adhesivo de tacinta de empaque, use detergente liquido para
platos aceite mineral o aceite para cocinar Con un patio suave f_6telos sobre el _rea y
permita que se remoje Enjague y seque bien Esto se deberia hacer antes de encender
al homo por primera vezo La cinta no se puede sacar una vez que el homo se haya
calentadoo La cinta de empaque se puede encont_ar en las siguientes ,&tea: manilia de ta
puerta. Area del panel de control moldura de la puerta y _rea del homo
36
20P307-2 S_:_v02 2/14/03, 3:37 PM

OPERACION
ControlDel Homo, Reloj YCronSmetro
® ®® ®@@
Sunuevo control de homo abotches le permitir_ programar las vadas funciones con facilidad M_.s
abajo estan los di:lerentestipos de funcionesy ia descdpci6n decada uno
HORNEAR - CocinaIos alimentosen el homo
tradicionel auna temperaturaque vafla de
170°Fa 550°F
ASAR A LA PARRILLA - Asa losalimonies
en ALTO a 550°Fo en BAJO a450°Fa calor
directo del elementosuperior Elasado a ta
pardlla se debe hacer conla puer_aabierta
en la posici6n de tope para asara la parfilla
SELECCIONDE UMPIEZA(SELECTCLEAN)-
Limpiael &tea interiordel homo per usted a
unode Ios tresniveles:3 ho_'asLo,4 horasStd,
y 5 horas Hi Cuando el ciclo termin& et home
se apagar& autom&ticamente
NOTA"La puerta del homo se cerrar_ con
cerrojo autom_ticamentey el cerrojo se abrir_
sSlocuando er homose hayaenkiado.
@
@
Programata cantidad de tiempo
en que usled desea cocinet'los
alimentosoen que el homo se
limpie El homo se apaga
autom&ticementea_finalde
esta cantidad de tiempo
Seteccionela hera del dla en
}acual desea queet homo se
encienda El homo se encender_
autom_ticamentea la ho_'aque
usted haya seleccionado, Cuando
se use laHeRA DE COMIENZO
DEMORADO con el TIEMPO
PARACOCINAREN ELHORNO.
el homo tambi_n se apagar_
autom_,ticamenteal final de la
cantidad de liempo para cocinar
Q _ Los botches con lasfleehaspara
k.J
SUB|R o BAJAR las HORASI
@
T_MP
@
@
@
37
MINUTOS pregraman la hera del
die. la cantidad de _iempopara
cocinar, la cantidad de tiempo
para limpiar, la hera para un
comienzo demorado, y la hera del
cron6metro de la cocina
Los botches con }asIlechas
para SUBIR y/o BAJAR la
TEMPERATURA seIeccionan
la temperaturapara cocinar
Elboron START debe empujarse
para activar cualquier IunciSndel
homo
El bot6n CLEAR/OFFse usa para
cancelar cualquier funci6n del
homo y ettone de fin de ciclo
No cancelar_ el Relejo el
Cron6metrode laCoclnao
EIboK}nKITCHENTIMERse usa
para encender o apagar el
Cron6metrode la Cocina No
contielar& ninguna otra lunci6n
del homo
Elbel6n del RELOJ se usa para
porter tahera del die
Enciende y apaga la luz del
homo
20P307-2 SPY02 2/14103, 3;38 PM

OPERACION
Panel De Control
Ind_cador de
temperatura del lndicador de
homo encendldo
tndicador de _ !./_/t_.l/_.1°/_ L-'I t'_'_.I-) t____ Indicador de la
.....
Y
Indtcador de funcidn lndfcador de functdn
de! homo del homo
hora
El Dial de Control es una referencia f_cil
para utilizar el control del homo M_s
abajo est_n Ias descripciones para
indicar c6mo funciona eI Dial de Control
INDICADOR DE LA TEMPERATURA
DEL HORNO - Este indicador tiene un
prop6sito m01tiple
• Muestra la temperatura
• Muestra un c6digo de error "ERR"- Si
el indicador de temperatura del homo
pestaf_ea "ERR". entonces usted ha
programado un tiempo o una
temperatura incorrecta
• Muestra problemas el homo - Si el
control pestar_ea "F" y un nQmero o
letra usted est_ experimentando un
problema de! homo. Por favor lea la
secci6n CODIGOS-F en su manual
INDICADOR DE ENCENDIDO - Se
encender& cuando se programe una
funci6n det homo
INDICADOR DE PROGRAMA - El
indicador de programa pestaf_ear,_ en
combinacidn con una funci6n del homo o
una funcidn autom_tica para avisarle que
necesita programar un tiempo o una
temperatu_a Ejemplo: "SET" y "BAKE"
pestaSear_n para avisarle que necesita
programar ta temperatura del homo
INDICADOR DE LA HORA - Muestra la
hora del dia, la cantidad de liempo para
cocinaL la hora para comenzar una
funci6n demorada para cocinar, limpiar, o
la hora programada en e! c_on6metro de la
cocina
* Muestra un c6digo para recordar
"PUSH START*' - Si el indicador de la
hora dei homo pestar_ea las palabras
"PUSH START" entonces usled tiene
que empujar el bot6n START para
activar su prog_ama
INDICADORES BE LAS FUNCIONES
DEL HORNO - Muesttan que funci6n ha
sido programada, cuando ia puerta de!
homo est& enganchada, y si la funci6n es
demorada
38
20P307_2 SPy02 2/14/03 3:38 PM

OPERACION
Reloj, CronSmetroy
Controlde Cierre
El reIoi debe ponerse a la correcta hera
del dla antes que una funci6n demorada
del homo luncione correctamenle La hera
del dia no se puede cambiar durante una
tunci6n autom&tica del homo. pero se
puede comb!at durante una tunci6n para
homear o para asar a ia parril/a
COMe PONER EL RELOJ
®®
1. Empuje el bot6n CLOCK
2.. Empuje tos botones con !as
llechas para SUBIR y/o BAJAR las
HORASIMINUTOS para poner la
hera correela det dia
3._ Empuje el bol6n START
PARA VOLVER AL RELOJ
Mientras est6 usando el homo para cecinah
empuje el bot6n CLOCK, si desea vet ta
hera del dia La hera presenle del dia se
vera en el dial
CORTE DE CORR|ENTE
Si ha ocurrido un corle de corriente, Ia hera
pestaQeara en el dial y estar_ incorrecta.
Ponga nuevamente el reloj a la hera
CuaIquier funci6n para cocinar del homo
que eslaba en proceso lendr& que ser
reprogramada
E!cron6metro de la cocina se usa para
medir et tiempo de foe procesos para
cocinar u otras actividades deI hogar No
controia el homo Se puede programar
hasta 9 horas y 59 minutes Contara hacia
aires en minutes hasta que llegue a los
ULTIMOS 60 SEGUNDOS. entonces e]
control sonar#, una vez Cuando la cuenla
Ilegue a CERO. el control sonata 3 veces
seguido de un sonido cada 6 segundos
hasta que el bot6n KITCHEN TIMER se
empuje El son!do de cada 6 segundos se
puede eliminar para ciclos futures si se
desea Para los instrucciones de c6mo
el!minor estos sonidos continues, yea
TONES en la pagina siguiente
COMe PROGRAMAR EL CRON6METRO
@®
1,, Empuje el botch KITCHEN TIMER
2., Empuie los bolones con las [lechas
para SUBIR y/o BAJAR las HORAS/
MINUTES para poner la hera
3_ Empuje el bot6n START
4o Cuando la cuenta llegue a cero,
empuje el bot6n KITCHEN TIMER
para apagar e! tone
Para eanee/ar el cron6metro durante la
cuenta, empuje el bol6n KITCHEN TIMER
DOS VEGES
El control le permitira cerrar los botones
de manera que no se puedan aclivar
cuando los empuje Si se preocupa de
deiar e! homo sin supervisidn, active este
programa
1,, Toque y sostenga, al mtsmo tiempo,
los botones con las flechas para
BAJAR los HORAStMtNUTOS
(HOURJMIN) per Ires segundos, hasla
que el dia! muestre "LOG ON"
(bloquear)
2. Para desbloquear el control, toque y
sostenga_ al mlsmo tiempo, los
belches de las llechas para BAJAR
las HORAS/MINUTOS (HOUPJMIN)
per Ires segundos, basra que el dial
muestre "LEO OFF" (desbloquear)
Este programa se puede seleccionar
solamente cuando et horno no est_
en use,
Cuando este programa este activado,
estos botones no funcionaran E!dial
mos_,rarA"LOC ON" si se empuja un
bot6n El ajuste sera relenido en la
memoria inclusive deepu6s de una
inlerrupci6n el servicio energetico
39
20P307-2 SPy02 .?J14103. 3:38 PM

OPERACION
ControlDel Homo,
Reloj y CronGmetro
EI nuevo control tiene una serie de tones
que sonar&n a tiempos dfferentes Estos
tones pueden sonar mientras usted
programa una fund6n del homo. o al final
de una funci6n del homo Tambien _e
avisa_ si existe un probtema con una de
las funciones M,_s abajo est_n los tipos
de tones y una breve descfipci6n de
c.sd8 UriC
TONES MIENTRAS PROGRAMA EL
CONTROL - Cuando empuje un bot6n
usted escuchar,_ un tone Este tone le hart_
saber que aplic6 suliciente presid_nsobre
el bot6n para activario, (Los botches con
las flechas no suenan )
TONe AL FINAL, DE UN CICLO
AUTOMATICO - Despues de una funci6n
papa cocinar autom_tica, usted escuchar&
tres tonescod,os seguidos per un tone
cada 6 segundos El tone de cada
6 segundos seguir_ sonando hasta que
empuje el bot6n CLEAR/OFF ousted
decida seleccionar el programa especial
para canceIar y evitar que el tone de 6
segundos suene al finaI de un ciclo future
C(_MO CANCELAR EL TONe DE 6
SEGUNDOS
1_ Empuje y suie[e los botches
BAKE y BROIL. a la mtsma vez
po_ 3 segundos hasta que el dia_
muestte "SF"
2. Empuje el bot6n KITCHEN TIMER
El dia_mostrar,_ "CON BEEP" (tone
continue)
3. Empuje el bot6n KITCHEN TIMER
nuevamente El dial mostrara "BEEP"
(tone cancelado)
4, Empuje el bot6n START para
cancelar el tone y salir de este modulo
especial
Si desea regresar a (os tones de 6
segundos, repita los pasos de arriba hasta
que el dia! muestre su selecci6n y empuje
el bot6n para el comienzo (START)
TONe DE ATENCION - Este tone sonar_
si hace un error u omite algo mientras
ptograma una funci6n del homo
Unos eiemp_os sedan:
ao P_ogfama_ un ciclo de limpieza y la
puerta det homo no est_ bien cerrada
b. Programar una funci6n y no empuiar el
bot6n START
c_ Empuiar un botdm para una Iunci6n
adicional sin programar pdmero la
t.emperatura o e_tiempo
Cualquiera de estos se puede identificar
r&pidamen[e con mirar el diat
TONe DE PRECALENTAMIENTO-
Cuando usted seleccione un mode de
cocinado, ajuste la temperatura del homo.
y presione el bot6n para el comienzo
(START) para que el homo comience a
calentar Cuando la temperatura dentro
deI homo flega a la temperatura que usted
program6, sonar_ un tone para avisarte
que e! homo estA Iisto papa hornear
Si usted programa una funci6n det homo
y el contro_ suena mientras el dial hace
pestar_eaf una "F" y un n0mero o letfa [al
come "F-4" o "FI" es posible que exista
un problema con el controt o con el homo
Sirnplemenle empuje el bot6n CLEAR/
OFF y espere una hera Trate de
programar esa funci6n nuevarnenle
Si eI c6digo se repile escriba el c6digo
qL=epestafiea y _lame para un servicio
Digale al tecnico qu6 c6digo eslaba
pestaSeando
4O
20P307-2 SPy02 2,/14103, 3:38 PM

OPERACION
ConsejosPara Cocinar
En E1Homo
Es normal sentir un poco de olor cuando
use su homo pot pfimera vez Para ayudar
a eliminar este olor, ventlle la habitaci6n
abrtendo una ventana o usando una
campana de ventilaci6n
IMPORTANTE: Nunca
cubra et fondo del
homo o la parrilta del
homo con papel de
aiuminio El uso
inadecuado puede
causar una maia circulaci6n dei calor.
pobres resultados al hornear, y podrJa
daSar e] acabado del homo Para prevenir
manchas debido a derrames, usted
podda coiocar un pedazo de papel de
aluminio o una bandeja para galtetas
sobre la parril_a debajo de la comida que
se podrra derramar
La ventilaciOn del homo est& ubicada
debajo deI panel de control Esta area se
podria calentar mucho duranle eI uso del
homo Es normaf qua saiga vapor de la
ventitaci6n y/o qua se produzca humedad
debajo cuando el homo no est_ en uso La
ventilaci6n es importante para la correcta
circulacidn del aire Nunca obstruya la
venttlacl6n
Ventilacl6n
del homo
Si abre la puer_a frecueniemente para
mirar los alimentos, causar_ una perdida
de calory malos resultados cuando
homee
41
Ei precalentamiento es subir la homo
temperalura a ia temperatura que va a usar
cuando homee Permila que el homo se
precaliente cuando las recetas requieren
precaIentamiento
Paraprolongar la vida del toco de las
luces del homo,siga estos consejos:
Siempre apague las tuces cuando el
homo no est_ enuso 6 duranle un ciclode
timpieza Si laluz del homo se deja encendida
por un largo pedodo detiempo, el homo estar&
tibio cuando abta Iapuerta debido al calor
generado por el foco de las luces del homo
En la parle trasera de! homo usted notar_
un pequeSo tubo Esto es un sensor de
calor qua mantiene la temperalura del
homo Nunea mueva o doble este tubo
Sensor de
temperatura
del homo
L_I
La zona de temperalura baja de su
homo (entre 170° y 200_'F)est_ disponible
para manlener los alimentos _ibios Sin
embargo, los alimentos no se debedan
mantener a eslas bajas lempefaturas por
m&s de 2 horas
Cuando use su convenienle operaci6n de
Comienzo Demorado, los alimentos tales
eomo productos I_cteos, pescado_ aYes,
etc..,nunca se deber[an dejar expuestos
por m_s de una hora antes de ear
coctnados, La lemperatura ambiente y el
calor de la luz del homo promueven el
crecimiento de bacterias
20P307-2 SF_v02 2/14/03.3;38 PM

OPERACION
ConsejosPara Cocinar
EnE1Homo (cont.)
La mayoda de las recetas para hornea_
han side desarrolladas uti[izando
productos con on alto contenido de
manteca tales come mantequi[Ia y
margarina (80% de manteca per peso--el
requerimiento federal papa los productos
marcados "margafina") Usted obtendr_,
males resultados si los queques, pastetes.
tetras, galletas, o dulces son heehos con
mantequilla con bajo contenido de
manteca Las mantequiIlas y margadnas
con bajo contenido de aceite contienen
menos manteca y m,_sagua Et alto
contenido de agua de la mantequi[la o
margatina afecta la textura y el saber de
sus recetas para hornear favoritas
Mientras m_.s bajo sea et contenido de
manteca de la mantequilla o margarina_
m&s se notar_n estas d[rerencias Para
asegurar _os mejores resultados, use
margadna, mantequilfa u otras barras de
estos productos que contengan par Io
menos 70% de aceite vegetal
El Sensor de Temperatura del Homo en la
parte t_asera deI homo mide y controla
continuamente la temperatura dentro del
homo Para mantener una temperatuta
programada constante, los e[ementos
harsh un ciclo de encendido apagado
mientras e_homo cocina
Los resultados del homeado set& meier si
las cacerelas para homear est_n centradas
en el homo lo m_s posible Si est&
horneando con mAs de un utensilio
col6que_os de manera que cada uno tenga
per Io menos de 1' a 1Y2"de espacie de aire
a su atrededor, Cotoque los utensilios
de manera que ninguno quede directamente
encima de otro
BANDEJAS BAJAS PARA GALLETAS.
sin lades, permiten que el aire circule
atrededor de tas galBetas para que se
doren en forma pareja
LAS IBANDEJAS BRILLANTES refIejan el
calor, y son perfectas para los queques y
panecilIos r_pidos que deben quedar con
una corteza de color care clare
UTENSILtOS DE VIDR]O, OSOUROS
CONTRA PEGADURAS U OPACOS PeR
LA EDAD abso_ben el cater y pueden set
usados para panes con _evadura, cortezas
para pasteles o alimentos que tengan una
corteza care Cuando use estos utensilios,
la [emperatuta del homo se deberia
reducir en 25°F
42
20P307-2 SPy02 2/!4/03, 3:38 PM

OPERACION
Consejos Para Cocinar
En El Homo
Las parfillas del homo est_n diseSadas con
lopes, una conveniencia y lambif_n una
precauci6n de seguridad Cuando las
parfillas esta.ncoIocadas correctamente
en el homo, las gutas tienen un tope para
prevenir que tas parrillas se den vueila
cuando se £acan del homo EstediseP,o
permi[e que las parrillas puedan ser
insertadas de s6Io una manera
Tope en
Paral_aSsg_
Su homo tiene siete (7) posiciones La
posici6n de mas arfiba es solamente una
gufa La guia de mas arfiba no se puede
usar como una posici6n para ta parrilla
Gufas
Stempre coloque las parrillas del homo
en la posici6n correcta cuando el homo
est_ fr_o_
PRECAUCION: Cuando usted este usando
ta pardlIa en la posici6n m&s baja (I),
necesitar& lener cuidado cuando saque la
parrilla Recomendamos que tire la parrilta
varias pulgadas hacia afuera y enlonces.
usando dos agarraderas, tire la parfitla hacia
afuera sujeI&ndola de los lados La parfilla
esl_ baia y usted se podria quemar si coloca
la mano en eImedio de la parfilia y la saca
completamente hacia afuera>Tenga cuidado
de no quemarse Iamano en la puerta
cuando use una parfi!la en la posici6n m_s
baja (1)
Usted podria pensar que su homo
nuevo cocina diferentemenle al homo qua
reemplaz6 Le recomendamos que use su
homo nuevo por varias semanas para que
se familiarice m_s con el. siguiendo los
tiempos que se dan en la receta como
una gula Si cree que su homo est,.
funcionando demasiado calienle o file pare
su preferencia, yea Ajustes - Hagalos Usted
Mismo en la parle de arras de este manual
para hacer losajustes
43
20P307-2 SPy02 2/14t03 3138PM

OPERACION
CSmoHornear YAsar
(_) 1_ Empuje e_botSn BAKE
(_ 2. Empuje los botches con
las flechas para SUBIR yio
TIEMP BAJAR _aTEMPERATURA
para programar la temperatura
del homo que desea usar.
<_3. Ernpuje eI botSn START
TABLA PARA LA POSICION DE LAS
PARRILLAS PARA HORNEAR
TIPO DE COMIDA POSICIONDEPARRELA
Pastelescongelados (sobre 3o4
bandejas para galtetas)
Queque "angel food_.o 3o4
queques
PancitiSs panes dulces 3o4
"muffins" "brownies",
galietas quequitos tortas
pasteles
Cacerolas 3 o4
Pavoo Asado t
Para programar que el horao cocine pot un
tiempo determinado y se apague
autom#,ticamente:
(_ 1. Empuje el bolSn BAKE
(_ 2, Empuje los botones
Te_._p con las flechas para
SUBIR y/o BAJAR la
TEMPERATURA para
seleccionar la
temperatura del homo
que usted desea usar
3_ Empuje el bolSr_ OVEN
COOKING TIME
@ @ 4. Empujelosbotones
con las flechas para
Hou. MtN SUBIR y/o BAJAR ias
HORAStMINUTOS para
,,,,_=Lo=_o= seleccionar la cantidad
'*'"'"' de tiempo en que desea
que los alimentos se
COCJt-leR
5. Empuje el botSn
START
44
20P307-2 SPvO2 2,t14fO3, 3:38 PM

OPERACiON
CSmoHornear YAsar
Para programar que et homo se encienda
a una hera posterior del dia. cocine pot
una cantidad de tiempo espec_lica y se
apague aulom_ticamenle
(_ 1. Empuje el botdn BAKE
2,, Empuie los botones
con las flechas para
TEMP SUBIR y/o BAJAR _a
TEMPERATLIRA para
seleccionar la lemperatura
de] homo que prefiere
usar
3o Empuje el boron OVEN
COOKING TIME
@ @ 4_ Empuje los bolones con
tas fiechas para SUBIR
Houn MlrJ y/o BAJAR las HORAS/
_ MINUTOS para
. .. seleccionar la cantidad
de tiempo en que desea
cocinar tos alimentos
& Empuje el bot6n DELAY
START TIME
@ 6. Empuje los bolones con
las flechas para SUBIR y/
Houn M_N O BAJAR las HORASI
MINUTES para programar
t_,,,,,.,°_,._,._ _ahera del dla en _acuat
desea que el homo en
encienda
<_ 7,, Empuje el bot6n START
El homo se apagard al termlno del tiempo
para cocinar a menos que el programa
para mantencl6n de temperatura se haya
acttvado.
Su nuevo control tiene una funci6n para
cocinar y mantener la temperatura para
cocinar automaticamente solamente que
mantendr& fos alimenlos tibios hasta
3 horas despu6s que el cocinado
automatico haya terminado Para
activar esta funcidn:
1,, Empuje y sujete, al mismo tiempo,
tos botones BAKE y BROIL per
3 segundos, hasta que el dial
muestre "SF"
2. (a) Empuje el botdn OVEN COOKING
TIME Et diat mostrar_ "HLd OFF"
(b) Empuje el botbn OVEN COOKING
TIME nuevamente para activar esle
programa El dial mostrara "HLd ON"
3,, Empuje ei bolon START
45
20P307_2 SPY02 2t'_4tC,3,3:38 PM
I

OPERACION
CGmoAsarA LaParrilla
Asar es cocinar al calo_ directo dee
elemento superior La puerta de_homo
deber,_apermanece_ abierta en la posici6n
de tope para asar cuando ase a la parri_la
No es necesario precaIentar el homo
cuando ase a la parriIla Use la cacerola y
la parri!la para asa_ que viene con su
homo Ambas est_n diser_adas para
drenar adecuadamente _agrasa y Ios
it( Jidos
,n,,i,u,,,Jl,,/ll ,iiill ii,ill i i i i, u l i
_ uando use papel de "_
alumtnto, el pape! de
aluminto debe estar
moldeado flrmemente a la
parrltla y los cortes en el papel deben
cotncidir con los cortes de la parrtlla,
Esto permtte que la grasa y _os
l/qutdos ca_gan a la cacerola,
evitando que se produzca un incendlo
y humo exceslvo,_
Siempre saque la
para asar sucia en el
homo es un peligro para produc|r un
tncendio o humo.
El Departamento de Agricultura de los
Estados Unidos recomienda cocinar la
came y los ayes completamente--la came
a un calor INTERNO de per Io menos
160°F y las ayes a un calor tNTERNO de
per tomenos 180°F EI cocinar a estas
tempe_a[uras generatmente protege
contra enfermedades causadas per los
alimentos
Mientras mas cerca coloque los alimentos
det elemento para asar. m&s r_pido se
do_ar,_nper afuera_ pore quedando rojo o
rosado en el centre
Colocando las carnes lejos dei elemen[o
permitir_, quetas cames se cocinen en el
centre mient_as se doran per afuera.
Usando estas posiciones, cocine el tado
I per 1omenos 2 minutes rn&s que el
fade 2 Si su homo est,. conectado a 208
voltios, usted podria usar una posici6n de
parriila m_s alta yio cocinar los alimentos
per mAs tiempo
E!tamaSo, peso, grosor tempe_atura
inicial y su preferencia personal alectarA el
asado a la parrHia Esta tabla est,, basada
en comes a la temperatura del
reirigerador
ALIMENTO
tBIstoc 1" de grueso
Torlas
do came reel[d#, -
I _ de grueao
Chu[et_s do cerdo -
1/2" de grueso
Pescade (ffletos)
Polio (proses}
POSICION
DE
PARR1LLA
3
3
3
3
2
"REMPO TOTAL
(minutes)
9-I 1
16-18
27-29
11-13
46-55
la, Empuje e! bot6n BROIL (Esto
autom_tlcamente programa ASADO
en HI-ALTO_)
lb.. Mientras el indicador de programa
pestaSea en el dial, empuje
nuevamente e[ bot6n BROIL si
prefiere asar en Bajo (Lo) Ase en Lo
(Bajo) para cocinar bien alimonies
tales come ayes o cortes de came
gruesos sin que se doren demasiado
2, Empuje el botSn START'
3. Cuando termine de asar, empuje el
bot6n CLEAR/OFF
46
20P307-2 SPy02 2,t14t03, 3:38 PM

OPERACiON
C6moSeleccionar Programas
Especiales Del Control
Este Programa Especiat le permitir_.
cambiar Ia vetocidad; #1 significa que el
cambio de velocidad es lento hasta #5
que significa que el cambio de velocidad
es r_pido Para sereccionar la velocidad
que prefiere, siga estos pasos:
I. Empuje y sujete, a la rnlsma vez.
fos botones BAKE y BROIL por
3 segundos, basra que e! dial
mueslre "SF "
2. Empuje algun botdn con ta flecha
SUBIR El dial Ie mostrar6 una
posici6n de velocidad entre 1y 5
3, Empuje alguna f[echa SUBIR para
aumentar Iavelocidad hasta el
n0mero 5
Empuje algun bot6n con la 1_echa
BAJAR para disminuir la velocidad
hasta el n0mero 1
4o Empuje et bolon START
48
28P307-2 SPy02 2/14!03, 3:38_PM

OPERACION
CGmoSeleccionar Programas
Especiales Del Control
EInuevo control a botches tiene
programas adicionales que usted puede
selecciona_ Despu_s de hacer su
selecci6n, si desea cambiarla siga los
pesos haste que el dial muestre su nueva
setecci6n
2. (a) Empuje los botenes BROIL y OVEN
COOKING TIME al mlsmo ttempo El
diaI del control mostrara el signo pare
grade y "F"
(b) Empuje los botones BROIL y OVEN
COOKING TIME al mtsmo tiempo
nuevamente Esto cambiar_ "F"
(Fahrenheit) a "C" (Centigrade)
3,, Empuje el bot6n START
Etcontrot se programa automaticamente
pata apagarse despues de hornear per 12
horas o despu_s de asar ala parritla po_ 3
horas en case que se le ely!de y deje et
homo encendido Si desea eliminar este
programa:
1,. Empuje y sujete, al mtsmo tIempo, el
bot6n BAKE y BROIL per 3 segundos,
basra que el dial muestre "$F"
2, Empuje el bot6n DELAY START
TIME EI dial muestra "12Shdn"
(apagado en 12 hares)
Empuje el botch DELAY START TIME
nuevamente Ei diaI mostrar& "no
shdn" (no apagado)
3, Empuje el bot6n START
El control del homo esta programado
pare ta seleccion de iernperaturas en
Fahrenheit La mayoria de tas recetas se
dan usando la escala Fahrenheit Usted
puede cambiar esto y usat una selecci(_n
en Centigrades
t,, Empuje y suiete, al mlsmo tiempo,
los bOtChes BAKE y BROIL per
3 segundos, hasta que el clial
muestre "SF"
Su controI est_ p/ogramado pare user el
teio i en 12 bores Si usted prefiere user
Hera Miiitar de 24 horas oponer el dial en
blanco se hace asi:
I. Empuje y sujete, al mismo tiempo,
los botches BAKE y BROIL per 3
segundos, haste que ei dial
muestre "SF"
2, (a) Empuje el botdn CLOCK El dia!
mostrar,'_"12hr'" Si esta es su
selecci6n empuje el bot6n START
o
(b) Empuje el baton CLOCK
nuevamente El diet mostrat& "24hr"
Ejemplo: 5:00 en el reloj de 12 bores
teer_ 17:00 en el reloj de 24 horas
Empuje el bot6n START
O
(e) Empuje el botdn CLOCK
nuevamente El dial ahora mostrar_
"OFF." Si 6sta es su seIecci6n
empuje el bot6n START La hera no
se mostrarA en eI dial (La tunci6n
delay start no funcionarA )
47
20P307-2 SPy02 2/14103, 3;38, PM

OPERACION
CdmoSeleccionar Programas
Especiales Del Control(cont.)
(Dlsefiado para usar los Sdbados
Judfos y los dfas festivos,)
La caracteristica de los Sabados puede
ser usada solamente pare hornear/asar
No puede set usada para convecci6n.
asado ala parrilla, limpieza aulom&tica, o
cocci6n de Inicio Retrasado
NOTA: La luz det homo se enciende
autom_.ticamente (en algunos modelos)
cuando ta puetta es abierta y seapaga
cuando la puerta es cerrada, La bombilla
puede ser removida Vet la Secci6n sobre
C6mo cambiar la bombilla del homo En
los modelos con el bol6n de OVEN LIGHT
la Iuz del homo podrfa encenderse y
dejarse encendida
COMO AJUSTAR LA FUNCION
REGULAR DE HORNEADO/ASADO
NOTA; Pare entender c6mo trabaja el
control del homo, practique utilizando la
funci6n de horneado regular (no Sabado)
antes de usar la funci6n del Sabado
Cerci6rese de que el reloj muestra lahora
correcla det dfa y de que el homo est,.
apagado
(_ 1o Empuje y soslenga
empujados ambos
bolones. BAKE
(_ (Homeado) y BROIL(Asado). al mismo.
ttempo, haste que la
pantalta muesire "SF"
2o Toque el bot6n de DELAY
START TIME haste que
aperezca "SAb bAtH"
en la pantaila
<_3o Empuje el bot6n START
y :D aparecer_ en la
panialla
(_ 4. Toque eI bot6n BAKE. No
aparecer_ ninguna seSaI
@
I'EM_'
@
5,,
La temperatura inicial
preprogramada se ajustar,'_
automaticamente a 350"F
Toque los botones UP o
DOWN que se seriatan con
flechas pare aumentar a
disminuir ia temperatura en
incrementoss de 5° La
temperature se puede ajuslar
entre t70°F y 550=F No
aparecer& ninguna se,fial o
temperatura
Empuje eI botSn START
Despu_,s de un perfodo de
retraso at azar de
aproximadamente 30
segundos a t minuto_ tas
seCiales :3 C: aparecerzin en
la pantalla indicando que el
homo ha sido ajustado para
hornear/asar S} las se_fiates
:3 c no aparecen en la
pantaiia comience desde el
Paso 4
Pare ajustar la temperature del homo.
empuje et bot6n BAKE y toque Ios
bolones UP o DOWN que se seSalan con
flechas pare aumenlar o disminuir la
temperature en incrementos de 5° Empuje
eI bot6n START
NOTAS:
• Cuando la pantalla muestra :3. la
funci6n del S_bado est_ activada
Cuando la pantalla muestra _ C::, et
homo esl& en la funciSn de horneado/
asado
,, Los botones CLEAR!OFF y OVEN
COOKING TIME est&n activos durante
el uso de la lunci6n del Sabado
49
20P307-2 SPy02 2/14,03, 3',38 PM

OPERACION
CSmo Seleccionar Programas
Especiales Del Control
COMO SELECCIONAR EL
HORNEADO/ASADO POR TIEMPO -
INICIO INMEDIATO Y PARADA
AUTOMP,TICA
NOTA: Papa entender c6mo el contro+
de_homo trabaja+ practique utilizando las
funci6nes de lnicio Inmediato y Patada
regulares (no S_bado) antes de usar ta
funci6n del Sabado
Cerci6rese de que el reloj muestra la hora
correcta del dfa y de que el homo est_
apagado
(_ 1+ Empuje y sostenga
empujados ambos
botones BAKE
(_ (Horneado) y BROIL
(Asado). al mismo
tlempo hasta que +a
pantalta muestre "SF"
2. Toque el bot6n de DELAY
START TIME hasta que
aparezca "SAb bAtH" en
la pantalla
3, Empuje el bot6n START
y _ aparecer_, en la
pantalta
4,, Toque el bot6n OVEN
COOKING TIME No
aparece+'_ ninguna sepal
@ @5. EmpujelosbotonesUP
o DOWN que se seSalan
Hou. mtt,+ con flechas para entrar el
tiempo de cocciSn
_o.,,,.,_=.,,.o= deseado entre 1 minuto
'+'_'"_ y 9 horas y 59 minutos
EI tiempo de cocci6n
seleccionado aparecer&
en la pantalla
6+Empuje el bot6n START
@
3ti_Mp
7,. Toque et bot6n BAKE. No
apa_ecer_, ninguna seSa[
8,
10°
La temperatura inicial
preprogramada se
colocar_ au[omaticamente
en 350'_F.Toque los
botones UP o DOWN que
se se,fiatan con liechas
papa aumentar o disminuir
la temperatura en
incrementos de 5= La
temperatura se puede
ajustar entre 170=Fy 550°F
No apatecer& ninguna
se,fat o temperatuta
Empuje el bot6n START
Despues de un periodo de
retraso a! azar de
aproximadamente 30
segundos a t minuto, las
seBales :D c aparecer&n
en la pantalla indicando
que el homo ha sido
ajustado para homear/asar
Si las seSales _ C: no
aparecen en la pantalla,
comience desde e_Paso 7
Para ajustar ta Iemperatura del homo,
empuje el bot6n BAKE y toque los
botones UP o DOWN que se seF_alan
con fiechas para aumentar o disminui_
la ternperatura en incrementos de 5<'
Empuje el bot6n START
NOTAS;
* Cuando la panta!la muest_a ::b, la
funci6n del Sabado est_ activada
Cuando la pantalla muestra :::3c, e+
homo est,i en la funci6n de horneadoi
asado
o Cuando la cocci6n haya terminado la
visualizaci6n en la pantalta cambiara
de ::Dc a :D y "0_00" aparecer,t
indicando que el borno se ha apagado
(OFF), pero que todavta est& en al
funci6n del S&bado Remueva los
aiimentos cocinados
5O
20P307+2 SPy02 2/14/03, 3:39 PM

OPERACION
CSmoSeleccionar Programas
Especiales Del Control(cont.)
C(_MO SALIR DE LA FUNCION DEL
SABADO
3,,
Empuje el bot6n
CLEAR/OFF
Si el homo esta cocinando.
espere por un perfodo de
tiempo de retraso at azar
de aproximadamente
30 segundos a 1minulo.
basra que fas sefiales
aparezcan en la
pantalta
Empuje y soslenga
empujados ambos
botones. BAKE
(Horneado) y BROIL
(Asado). al mtsmo
ttempo, hasta que ta
pantalla mues_re "SF"
Toque el bot6n de DELAY
START TIME basra que
"12 Shdn" o "no Shdn"
aparezca en la pantalla
*'12 Shdn" indica que el
homo se apagar,_
eutom,_ticamente despues
de 12 horas "no Shdn"
indica que el homo no se
apagar_ aulom_ticamente
Empuje el bot6n START
NOTA: Si ocurriera una interrupci6n
dei suministro electrico mientras el homo
es!,_ en ia funcidn del Sabado. el homo
se apagara autom_licamente y
permanecer& apagado cuando la
energia sea restablecida, El control
del homo debe ser reiniciado
51
20P307-2 SPy02 2J14103, 3:39 PM

CUIDADOYLIMPIEZA
El Ciclo De Autolimpieza
I, Saque Is cscerola y la par_i]lapare asar
utensilios, y cualquier papa! de afuminio
qua podria quedar en el homo
2, Pardllas cubiertas de porcelana gris
mismas deben set removidas dutante el
cicto de Jimpiezaautomatica
3o La suciedad sobre el marco frontal
y afuera del sello del revestimiento de ]a
puerta necesitat& set limpiada a mano
Marco_ Frontal
D!
de la puerta
Limpie estas _reas con ague caliente Ianillas
con jab6n o Jimpiadorescomo Sof_Scrub®para
sacar cualquier suciedad Eniuaguebien cos
ague IEmpiayseque
No use limpiadoresde tlornos--ningOn
limpiador de hornos pare usoscomerciales o
revestimientode FotecciOn debe set usado en
el interior oat_'ededordel homo
4. Limpie cualquier derrame pesado del rondo
del homo
5, No Iimpieel sefiode la puerta de! homo. EI
malarial de fibre de viddo de la pueda del
homo nosoporta laabrasi,Sn Es esencfal
qua el se
CUIDADOYLIMPIEZA
E1Ciclo De Autolimpieza
El Cicto de limpieza, incluyendo el
tiempo de enfdamiento, ofrece opciones
preseleccionadas de 3.4t 6 5 horas, pero
usted puede cambiar escogiendo
cualquier tiempo entre 3 y5 horas
1. Para3 betas: Empuje el bot6n
deSELECTCLEAN
(SELECCI6N DE LIMPIEZA).
Mostrat_3 horas y "Lo" enel
dial EstafunciSnes
_'ecomendadapara darrames
pequenos contenidos. Paseal
paso 3 y presionaSTART
Para 4betas: P_esioneeibot6n
de SELECTCLEAN
(SELECCIONDE LIMPIEZA)
dos veces 4 horasy"Std"
aparecar_n enta pantalla.Esta
IunciSnes [ecomendadaparaun
homonormatmenlesucio, Paseal
paso 3y presioneSTART
Para5 horas: Presioneel bat6n
de SELECT CLEAN
(SELECCION DE LIMPfEZA)
Iresveces 5 horas y "Hi"
aparecer_n en tapantalla Esta
funciSnes _ecemendadapara
homos atlamentesucios. Pase
al paso3 y presione START
Empujelos batonascon las
flechas paraSUBIR y/o BAJAR
lax HORAS/MINUTOSpara la
Heray losMinutes para
seleccionar la cantidad de
Iiempoqua usted desee que
dupeel ciclo
Empujeel bol6n START
Simplemente empuje el bot6n CLEAR/OFF
Usted necesitar_ experara quala tamperalura
del homo baje m_s quala tamperalurade
enganche (aprox 1 hora)antes de tratar de
abfir la puerta
Daspuesdel ciclo usted podria noIar unpoco
de cenizas blancas enel homo Simplemenle
llmpielas con un paso o esponja humeda
Si atgunas manchaebtancaxpersislan.
fri_guelas con una laniflade acero con jab6n
Axeg_rese de eniuagar bien Estas son
generalmenle dep6xilos de sal qua no se
puedan sacar durante el ciclo
Si suhomo esla equipado con parrit]asde
po_'celana,se_'_necesariopara engraxa_"los
extremoscon una capa ligera de aceitevegetal
despues del cic]o de timpieza Esloayudar_,a
que se haga t_cil deslizar los estanteso rejillas
en el homo
SI pot alguna raz_,nustedno queda
satisfecho con los resuttadosde la llmpleza,
stmplemente repltael ciclo,
1, Presionesel bol6n de
SELECTCLEAN
(SELECCI6N DE
LIMPIEZA), yescoja el
nivel de_limpieza deseado
ya sea Lo(3 borax).Std
(4 horas),o Hi(5 horas)
Siuna deastas ex su
opei6n, paseal paso 3y
esceja el _iempode inicio
de demora
_ 2_ Si usted desea oambiar la
",L.Y
cantidad de tiempo para
limpiar, empujelos botones
con lasflechas para SUBIR
c,,,,........ y/o BAJAR lax NORASf
......,_ MINUTES
3, Empujael botOnDELAY
START TiME
_ 4, Empujelos botonescon las
tlechas para SUBIR y/o
_{ou,_ Mt_ BAJARlax HORAS!
MINUTES xelecciona,r
para
c_,,,_,._.v.,._ la hora del dlaen que
...... prefie_'eque el ciclo de
limpieza empiece
Empuje el bot6n START
53
20P307-2 SF'v02 ?J!4103, 3;39 PM

CUIDADOYLIMPIEZA
MATERtALES DE LIMPIEZA
• Detergente Iiquido para pIatos
• Agua tibia
• PaSo suave
No use limpiadores abraslvos,
ltmptadores lndustrtales, o
blanquedores (cloro),.
Limpie so_amente come un toque entre
ciclos de limpieza Use detergen[e Iiquido,
agua tibia, o lanilla con jab6n Enjuague
bien despu6s de limpiar y seque
NUNCA USE LIMPIADORES DE
HORNOS DENTRO O ALREDEDOR DE
CUALQUIER PARTE DEL HORNO.
Cuando limpie, aseg0rese de no doblar o
desplaza_ el sensor de tempe_atura
ubicado en ta pared trasera del homo
Sensor de
MATERIALES DE LIMPIEZA
,, Detergente tiquido para plates
• Agua tibia
. Lanitias de acero con jab6n
• Limpiador comerciaI para homes
come LIMP1AR
Permita que la cacerola se remoje Ponga
detergente para plates sobre la pardlla y
cubra con un paso o una toaita h0meda
per un rate. Ffiegue a medida que sea
necesado Lave. eniuague, y seque bien
Usted tambien podrfa poner la cacerola y
la parri_la en la lavadora de plates
r
(_ RECAUCION: Desconecte
el poder eldctrlco hacla el
homo en la caja del ctrcutto
principal o en la caia de los
fusibles antes de tratar de reemplazar
el foco de la luz del horno_ No toque
un foco de la luz caliente con las
manos mojadas o con un paso
h¢,medo. Espere a que el foco se
enfrie y use un paso seco..
Sujetador del
vidrio
Collar con
electricidad
Foco
Cubterta de
vidrlo
COMO SACAR LA CUBIERTA
1_ Desconecte el paso de Ia electficidad
al home en el intetrupto[ del circuito
pfincipat o en la caja de los fusibles
2. Tome la cubierta de vidrio y h&gala
girar t/4 de vueIta contra el re!oj hasta
que las aletittas de la cubierta de vidrio
pasen per sobre tas ranuras del
suietador del vidrio
come REIEMPLAZAR EL FOCO
DE LA LUZ
Desatomille el toco de la tuz y reempl,_celo
con un foco papa aparator electricos de 40
watts
PARA REEMPLAZAR LA CUBIERTA
1. Coloque las aietillas de la cubierta de
vidrio en la ranura del sujetado_ deI
vidrio
2, Haga girar la cubierta de vidrio 1/4 de
vuelta en direcci6n del te!oj
& Reconecte la electficidad al homo
Pata mejorat la Iuz dentro del homo, fimpie
la cubierta de vidrio trecuentemente con un
patio moiado Precaucl6n: Esto se
deberia hater solamente cuando el
homo estd completamente fr_o..
54
20P307-2 SPy02 2/14;03.3:3g PM

CUIDADOYLIMPIEZA
MATERIALES DE LIMPIEZA
• Detergente para pIatos
" Agua tibia
• Lanas para fregar o lanilta con jab6n
C0MOSACAR
14 Tire las perrillas hasta ia posicion de
tope
2, Levante el ltente de la parfilla y
deslfcela bajo et tope de ia guia para
las parfillas
PARA LIMPIAR
Limpie con agua tibia y detergente Para
sacar manchas duras, fdegue levemente
con lana para tregar o con una lanitla con
jab6n Enjuague bien
Las parri]ias cubiertas de porceiana gris
pueden set limpiadas con seguridad en
el interior deI homo durante el ciclo de
fimpieza autom_tica Set& neeesario para
engrasar los extremes de la parrilla del
homo con una capa ligera de aceite
vegetal despu_s de un ciclo de limpieza
Esto ayudar,_ a que se haga f_,cildeslizar
los estantes o rejillas en el homo
PARA COLOCAR NUEVAMENTE
1. Co!oque la parte levanlada de atr_s de
la parrilla sobre Ias guias
2. Levante el frente de la parrilla hasta
que la parle levantada de alr,_s se
deslice per debajo del lope de las
guias
3o Deslice la parrilla hasta atr&s
55
20P307-2 SPy02 2114t03 3:39 PM

CUIDADOYLIMPIEZA
Partes Removibles
La puertaes muy pesada.Tenga cutdado
cuando remuevay levante lapuert& No
levante la puerta por la mantja.
C{)MO SACAR
1o Abrala puerta
cempletamen_e
2. Ti{,elostopes deJas
bisag{,ashacia aba_e
hacia el marco de Ja
puerta, a la posici6n
Cerredurade
de abierto Esto blsagra
podfia requerir un Tire delos clerres
destomi!lador de de la btsagrahacta
cabeza plana abate paraabrir
,Salga
3. Tomefi{,memenle
toetados dela _
pueria de arriba
4o Cier{,ela puertaa la
pesicion de saque
lacua, seencuentra _/ _entre la posici6n
inlermedia y
totalmentece{,{.ada
5, Levante la puerta y
haga un movimiento Postcl6n
de extracci6nhasta de saque
que eI braze de la
bisag{,asalga
de la ranura
COMO PONERLANUEVAMENTE
1. Tome fi{,memente
los dos lades de
la puarta de arriba
2. Con ta puerl,aen el
mismo _ngulo de
ext{,acci6n coleque Ia
hendidu{,adel braze de
ta bisagra dentro deI
borde deJrondo de la
ranu{,ade la bisag{,a
La muesca en e!b{,azo
JI! fFtooo,a
btsag_a
lndenctdn
de la bisag{,adebe estar
totalmente asentadaen
eI rondode la ranura
Puerta removibte del homo (cont,.)
3. Ab{,a comptetamente la Braze de la blsagra
pue_ta Si [apuerta no _t I_
abre comptetamente, la
hendidura no est,.
asentada
correctamente enel
extreme inferiorde la
rar;ura
4. Empujelostopesde las
bisagras haciaar{,iba Cerradu_ade
cont{,aet marco frontal btsagra
de la cavidad del EmpuJedelos
homo, a la posici6n de eterresde ta
cie{,re blsagrahacla
arrtbapara
5. Cie{,re[apuerta cerrar
del homo
COMe LIMPIAR AFUERA
DE LA PUERTA
" Use jabSn y agua para limpiar bien la
supe{,ficie,ladesy frentede la puerla deJ
homo Enjuague bien Usted tambi_n podria
usa{-unlimpiador devidrio para limpiar el
vidrio exterior de la puerta No permita que el
agua gotee dentro de Ias aberturasde la
ventilaci6n.
• Los derrames desalsas para aJiSaLjugos
de frut.a,salsasde tomate ymateriales para
sasonarque contengan _eidos podrlan
cauear unadescoloraci6n y se deberian
Iimpiar inmediatamente Cuando$a
superlicie se entr[e Jimpieyenjuague
• No use limpiadores para homes pelves para
limpiaro abrasives dures en la parle exterior
de la pueda
",, Sicuatquie_mancha sobte la moldura de
laventilaciSn de {apuerta persiste, use un
limpiador abrasive suavey un fregador de
esponja pa{,amejo{,esresultad0s
C6MO LIMPIAR ADENTRO
DELA PUERTA
• Debido a queel _.teadentro dei setlose
timpia duranteel cicto de autelimpieza, usted
no necesita limpiar esto amano
• El area afueradel se!loyel {,evestimientode
la pueda se pueden iimpiar con unalanilta
llena con }ab6n,agua calienle y delergenl:e
Enjuague bien con unasoluci6n de vinagre
y ague
56
20P307_2 SPy02 2./t4t03 3:39 PM

ANTESDE LLAMAR PARAUNSERVICIO
Para ahorrar tiempo y dinero, antes de Ilamar para un servicio, revise Ia ]ista de m_s abajo
pare cualquier problema que usted crea que tiene con el funcionamiento de su homo, Si
el problema es algo que usted no puede reparar, use los Numeros de Servicio pare el
Consumidor que se encuentran al finaI de este manual. Cuando haga un Ilamado, tenga
dtsponlble el nt_mero de modelo, nt_mero de serle, Ilsta de pares para reparacfones,
manual de uso y cutdado y la fecha de compra,
PROBLEMA POSIBLE CAUSA
El dial del control pestaSea Mat luncionamienlo del
una "F" seguida por un homo
m3mero o letrao
El homo y los controles
del homo no funcionan.,
del homo
parece estar
inexact.a,
La puerta del
homo no se
desengancha.
La luz del homo
no funciona..
a. No pasa electricidad
al homo
b. El reloj est& en la
funci6 en blanco
Catibraci6n del
control del homo
El homo no se
ltmpl6 o los
resultados
fueron malos.,
POSIBLE SOLUCION
Empuje el boron CLEARtOFF
Permita que el homo se
enfrie por una hora y ponga
nuevamenle el homo en
luncionamiento Si el
problema se repite. Ilame
pare un servieio
aoRevise ta caja del circuito o
los fusibles AsegOrese que
el cordon de la corrienle
esl_ enchufado
boVea ta secci6n de 'C6mo
Programar Funciones
Especiales" en este
manual.
Yea las instrucciones para
ajustar tatemperatura que
siguen esta seccidn
E1Cicio de limpieza no ha
terminado E_homo esta_
demasiado caliente
a,, Interruptor de la luz
en posicidn de
apagado
b. Foco de la luz esta
suelto o quemado.
a. Los controles no se
pusieron bien
b,, El homo estaba
demasiado sucio
c,, E{ciclo de limpieza
(ue interrumpido
La temperatu';'a'"d'e'i''h'o;no
debe bajar a menos de la
temperature de enganche
antes que la puerla pueda
abdrse,
nu/n,,,,,,, ,,,,,,,,,,,,,,,, ,
e. Revise la posici6n del
interruptor de la luz del
homo
b. Revise el foco de la luz del
homo,
Ull IJ
a_ Lea la secciSn de
autolimpieza de esle
manual
b_ Los derrames grandes
deben ser removidos antes
de que e_ciclo de limpieza
inicie Use el ciclo m#,s
prolongado. Hi para los
homes mas sucios
co El ciclo de limpieza
est,_ndar es 4 horas, un
ciclo de iimpieza Lo es de
3 horas, y un cic!o de
limpieze Hi es 5 horas
57
20P307-2 SPy02 2.114/03. 3:39 PM

ANTES DELLAMARPARAUNSERVICIO
PROBLEMA
J
Rutdo de!
ventilador.
i i
La parrilla del
homo no se
desliza con
facilidad.
i
Homo humea_
POSIBLE CAUSA
,i ,ii,,,,,,,,,,,,,,,,,,,,,,,,,,,,,,,,,,,,,,,,,,,,,,,,,,,,,,,,,,,,,,, ,,,, , ,, ,,,,,,
Un ventilado_ de refrigeraci6n
se podria encender
automaticamente
POSIBLE SOLUCION
Estoes normal El ventitador de
refrigeraci6n se encenderg, para
refdgerar las partes in_emas El
ven_,iJadorpodda funcionar por
1 1/2 horas despu_s de que el
homo se haya apagado (OFF)
IIIIIIIIIIIIIIIIIIIIIIIIIIIIIIIII IIII IIII III IIIIIIIIII I IL III
Las parrilIas fueron Pase un trapo mojado con un
dejadas en el interior del poco de acei_e vegetal a {os
homo durante el proceso extremos de la parrilIa
de limpieza au_om&lica
ll,l,,,in,nlllll, lllllll ii ii i [
a. Homo sucio a,, Vea que no hayan derrames
b. Mal use de papel de
aluminto
c_ Cacerola pata asar con
grasa se dej6 en el homo
Los allmentos a_ El homo no se p/ecalent6 to
no se hornean suficienle
adecuadamente,,
bo Posici6n incorrecta de la
parrilta o la caceroia
b,, No se recomienda el uso del
papel de aluminio
c. Limpie [acacerola y la parrilla
despu_s de cada uso
a_ AsegOrese de precalentar
hasta que suene el tono,
cuando la receta Io requiera
b, Mantenga un espacio de aide
uniforme a_rededor de las ollas
y utensi{ios Vea la secci6n
papacocinar en el homo
Mantenga ta ventilacidn
despejada
No cubra tas parrillas cuando
homee
Reduzca ia temperatu{a en
25 grados papa utensilios de
vidrio, oscuros u opacos
f. Revise la seccion de ajus_es a
la temperatura que sigue esta
seccidn
g,. Vea tas instrucciones de
ins/a_aci6n para la nivelaci6n
h. Yea la secci6n para homear
c_ La ventilacidn del homo esta c.
obstruida o cubierta
d. Uso inco_recto del papel d.
de aluminio
e, Tempetatura incorrecta para e_
el utensilio usado
La lemperatura del homo
necesila ajus_e
g. El homo o fa par[ilia del
homo no est,_n niveladas
h.. Controles det homo real
pueslos
58
20P307-2 SPy02 2/14f03.3:39 PM

ANTESDELLAMARPARAUNSERVICIO
PROBLEMA POSIBLE CAUSA POSiBLE SOLUC|ON
Los alimentos ao Posici6n incorrecta de ta a, Revise ta posici6n de tas
no se asan
adecuadamenteo
parrilla cacerolas; yea la secci6n para
asar a ta pa_ri!la
b,, E{ homo se p_ecalent6 b, No precaliente cuando ase a
la pardlla
co Mal uso de papel de c,. Lea la secci6n para asar a la
aluminio parrilla
d,, La pueda de! homo se cerr6 d. Abra la puerta a la posici6n de
durante el asado a la tope para asar
parrilla
e,, Bajo voltage (208 Voltios) e,, Use una posicion de parrilta
mas alia y/o ase pot m_s
liempo
f,, Vea ta tabla para asar en la
seeci6n de como asar a la
parri!la
g,, Vea la secciSn para asar
Canlidad de liempo
incorrecta para asar
g,, Controtes del homo real
puestos
59
20P307-2 SPy02 2J14103, 3:39 PM

AJUSTESDE TEMPERATURA-
"HAGALOSUSTEDMISMO"
Usted podria pensat que su nuevo homo
cocina diferentemente al homo que
reemplaz6 Recomendamos que use su
homo nuevo unas pocas semanas para
que se familiarice con el, siguiendo los
tiempos que se dan en las recetas come
una guia
Si cree que su nuevo homo esta
funcionando demasiado caliente (quema
la cemida) o no calienta lo suficiente (la
comida no queda bien cocida) usted
rnlsmo puede ajustar ta temperatura La
apariencia y la textura de los a_imentos
son meiores indicado_es de la exactitud
de un homo que un tetm6metro Estos
term6metros pueden variat entre 20-40
grades de la verdare_ temperatura del
homo Adem,_s. ra puerta se tiene que
abdr para Jeerestos term6metros Abrir 18
pue_ta cambiara la temperatura del homo
Para decidir en cu_nto cambiar Ja
temperatura suba la temperatura det
homo en 25 grades (si los alimentos no
quedan bien cocidos) o baje ia
temperatura en 25 grades {si ia comida
se quema) de la temperatura de la receta,
tuego hornee Los resultados de esta
"prueba'- le deberian dar una idea de
cu_nto se deberfa cambiar ta temperatura
@
+
@
1.. Ernpuje y sujete tos
botones BAKE y BROIL per
3 segundos hasta que el
dial muest_e "SF"
Empuje el bot6n BAKE
Un nSmero puesto en
f_brica de dos digitos
aparecera en el dial,
generaJmente "OO"
St plensa que el home no
estd suflcientemente
calfente,
3a. Empuje el bot6n con la
flecha para SUBIR la
_Me TEMPERATURA para
aumentar (+) la
temperatura hasta +35°F
SI plensa que el homo
estr_ demaslade caliente,
3b. Empuje el bot6n con ta
flecha para BAJAR la
TEMPERATURA para
bajar (-) la temperatura
hasta -35°F
<_4., Empuje el bot6n START
Este aumento o disminuci6n en Ia posici6n
de la temperatura perrnanecer& en la
memoda hasf.a que tos pasos de arriba
sean repetidos Un corte de corriente no
afectar& esta posici6n
Las temperaturas para asar a Ia parfilla o
pafa la autofimpieza no ser_n atectadas
6O
20P307-2 SPv(32 2/14/03, 3:39 PM

NOT/IS
6I
20P307-2 SPy02 2/14103_ 3:39 PM

GARANTIADELHORNODE
PAREDEMPOTRADO
UN AklO COMPLETO DE GARANTIA PARA TODAS LAS PARTES
Si, dentro de un aSo de la fecha de instalaci0n, cualquier parte deja de
funcionar adecuadamente debido a un defecto en el material o la obra de
rnano, Sears la reparar_ o reemplazar_, a nuestra opci6n, sin costo.
Si este producto es sometido a un uso que no sea el familiar privado, la
garantia de arriba es efectiva por solamente 90 dlas
EL SERVICIO DE GARANTtA EST,,_DtSPONIBLE AL LLAMAR A SEARS
SERVICE AL 1-800-4-MY-HOME ®.
Esta garantta le brinda derechos legales especificos, y usted tambi_n
podria tener otros derechos que varian de estado a estado
Sears Roebuck and Co Dept 8t7 WA Hoffman Estates tL 60179
62
20P307-2 SPy02 2J14/03 3:39 PM

Contrato de protecci6n
maestra
Feficitaciones per su compra
inteligente Su nuevo aparato
Kenmore _est_ diseriado y fabricado
para touches aries de operaci6n
confiable Sin embargo, a)iguat que
lodes los productos, puede requerir
de mantenimiento o repaTacidn
preventivas en cualquier memento. Es
ahi cuando el contrato de protecci6n
maestra le puede ahorrar dinero y
molestias
Adquiera un Contrato de protecci6n
maestra ahora mismo y prot#jase
contra inconvenientes y gastos
inesperados
El Contrato de protecci6n maestra
tambi6n le ayuda a amptiar la vida de
su electrodomestico Lo siguiente es
lo que se incluye en el contrato:
v'Servicio experto per parte de
nuestros I2,000 especialistas
profesionales de reparaci6n
it' Servicio ilimitado sin costo per
partes y mane de obra en todas ias
reparaciones cubiertas
Garantia total - reposici6n de su
producto cubierto si ocurren m&s
de tres fa!las del produc/o dentro
de doce meses
Ii' Reposici6n del produeto si el
producto cubierto no se puede
reparar
V' Revisi6n anual de mantenimiento
preventive a su solicitud - sin
cargo adicionaI
v"Ayuda telef6nica r_pida -
asistencia no tecnica y de
instrucciones sobre Ios productos
reparados en su casa, adem_s
de una conveniente programaci6n
de reparaciones
Protecci6n contra descargas
el_ctricas para dafios debido a
fiuctuaciones el{_ctricas
Reembolso per alquiler si la
reparacirn del producto cubierto
toma m,_stiempo del prometido
Una vez adquiera el contrato, solo
necesita una llamada telef6nica para
programar el servicio Puede Ilamar a
cualquier hera dei dia o de la noche o
programar la citadel servicio per
lnternet
Sears cuenta con m_s de !2,000
especiaIistas profesionales de
reparaci6n, quienes tienen acceso a
m,_sde 4,5 miilones de partes y
accesorios de calidad Este es e! ripe
de profesionalismo en el que puede
contra para ayudar a prolongar la
vida de su nueva compra para los
aries venideros iAdqu{era eI Contrato
de protecci6n maestra hey mismo!
Aplican ciertas limitaciones y
exclusiones,
Para precios e informaci6n
adicional, Ilame al 1-800-827-665&
Servicto de instalaci6n de Sears
Para ia instalaci6n profesionat
garantizada de Sears de
electrodomc%ticos y art[cuios para e_
hogar come dispositivos para abrir
puertas de garaje y calentadores de
agua, en los EEUU, Ilame al
1-8004-MY-HOME ®
63
;Z.OP307-2 SPv[}2 2/14t03 3:39 PM

Get it fixed;at your home or ours!
Your' Home
For repair-in your home-of all major brand appliances,
lawn and garden equipment, or heating and cooling systems,
no matter who made it, no matter who sold itl
For the reptacement parts, accessories and
owner's manuals that you need to do-it-yourself
For Sears professional installation of home appliances
and items like garage door openers and water heaters
1-800-4_MY-HOME® (1-800-469_4663)
Call anytime, day or night {US A and Canada)
ItiWW. S e_rS.COPt_ WWW,,SeatS, Ca
Our Home
For repair of carry-in items like vacuums, lawn equipment,
and electronics, call or go on-line for the location of your nearest
Sears Parts & Repair Center.
1-800-488-1222
Call anytime, day or night (US A only)
WWW ,seat's,col13
To purchasea protection agreement (USA )
or maintenance agreement (Canada) on a product serviced by Sears:
1-800-827-6655 (u SA) 1-800-361-6665 (Canada)
Para pedir servicio de reparaci6n
a domiciflo, y para ordenar piezas:
1-888-SU-HOGAR _'_
{1-888-784-6427)
ALl Canada pour service en fran£:ais:
1-800-LE-FOYER _'=
(t -800o533-6937)
www sears ca
64
20P307-2 SPv02 2/14/03 3:39 PM
-
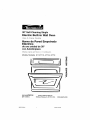 1
1
-
 2
2
-
 3
3
-
 4
4
-
 5
5
-
 6
6
-
 7
7
-
 8
8
-
 9
9
-
 10
10
-
 11
11
-
 12
12
-
 13
13
-
 14
14
-
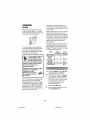 15
15
-
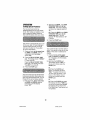 16
16
-
 17
17
-
 18
18
-
 19
19
-
 20
20
-
 21
21
-
 22
22
-
 23
23
-
 24
24
-
 25
25
-
 26
26
-
 27
27
-
 28
28
-
 29
29
-
 30
30
-
 31
31
-
 32
32
-
 33
33
-
 34
34
-
 35
35
-
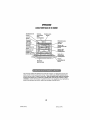 36
36
-
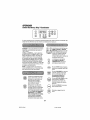 37
37
-
 38
38
-
 39
39
-
 40
40
-
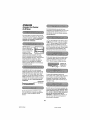 41
41
-
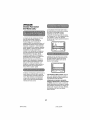 42
42
-
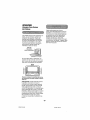 43
43
-
 44
44
-
 45
45
-
 46
46
-
 47
47
-
 48
48
-
 49
49
-
 50
50
-
 51
51
-
 52
52
-
 53
53
-
 54
54
-
 55
55
-
 56
56
-
 57
57
-
 58
58
-
 59
59
-
 60
60
-
 61
61
-
 62
62
-
 63
63
-
 64
64


Kenmore 91147712200 El manual del propietario
- Categoría
- Hornos
- Tipo
- El manual del propietario
- Este manual también es adecuado para
en otros idiomas
- English: Kenmore 91147712200 Owner's manual
Artículos relacionados
-
Kenmore 91147702201 El manual del propietario
-
Kenmore 91147793200 El manual del propietario
-
-
Kenmore 91147812200 El manual del propietario
-
-
-
Kenmore 911.41885 Series El manual del propietario
-
-
-