Kenmore 36362702200 El manual del propietario
- Categoría
- Microondas
- Tipo
- El manual del propietario
Este manual también es adecuado para

Microwave Hood Combination
Combinaci6n de Campana y
Homo Microondas
Models, Modelos 363.6270_
:_ = color number, n_mero de color
.s i
164D3370P304 Seam, Roebuck and Co.,
SR40374 253JR Hoffman Estates, IL 60179 U.S.A. www.sears.com

READ ALL SAFETY
INFORMATION BEFORE USING
A
PRECAUTIONS
TOAVOID
POSSIBLE
EXPOSURE
TOEXCESSIVE
MICROWAVE
ENERGY
For your safety the information in this manual
must be followed to minimize the risk of fire or
explosion or to prevent property damage,
personal injury or loss of life.
Do Not Attempt
to operate this oven
with the door open
since open-door
operation can result
in harmful exposure
to microwave energy.
It is important not to
defeat or tamper with
the safety interlocks.
Do Not Place
any object between
the oven front face
and the door or allow
soil or cleaner residue
to accumulate on
sealing surfaces.
Do Not Operate the
oven if it is damaged.
It is particularly
important that the oven
door close properly
and that there is no
damage to the:
1 door (bent),
2 hinges and latches
(broken or loosened),
3 door seals and
sealing surfaces.
The Oven Should
Not be adjusted or
repaired by anyone
except properly
qualified service
personnel
© Sears Roebuck and Co.
2

Safety Instructions
Precautions to Avoid Possible Exposure
to Excessive Microwave Energy ...2
Important Safety Instructions .... 4-7
Grounding Instructions .......... 8
Care and Maintenance
Cleaning the Microwave ...... 24
Light Bulb Replacement ...... 25
The Vent Fan and Grease Fitter . .26
Charcoal Filter ................ 27
Operation
Important Parts of
Your Microwave ................ 9
Quick Start--Controls ....... 1O,11
Operating Instructions ....... 12-22
Microwave Terms ............. 23
Troubleshooting Tips
Problems and Solutions ......... 28
Things That Are Normal ......... 29
Consumer Services
Model/Serial Number Location ..... 3
Warranty .................... 30
Master Protection Agreements .... 31
Consumer Services ............ 64
Repair Services ............... 64
En Espahol
tnstrucciones en espa_o] ........ 32
For your convenience and future
reference, please write down your
model and serial numbers in the space
provided. The model number and serial
number of your Microwave Oven can be
found on a label inside the oven.
MODEL NUMBER:
363.
SERIAL NUMBER:

WARNING
When using electrical appliances, basic safety precautions should be followed,
including the following:
• Read and follow the specific
"Precautions to Avoid Possible
Exposure to Excessive Microwave
Energy" on page 2.
• This appliance must be grounded.
Connect only to properly grounded
outlet. See Grounding Instructions
section on page 8.
• Do not mount this appliance over a sink.
• Install or locate this appliance only
in accordance with the provided
Installation Instructions.
• Do not immerse power cord or plug
in water.
•To reduce the risk of fire in the oven
cavity:
-- Do not overcook food. Carefully attend
appliance when paper, plastic or other
combustible materials are placed
inside the oven while cooking.
-- Remove wire twist-ties and metal
handles from paper or plastic
containers before placing them in
the oven.
• This microwave oven is UL listed for
installation over electric and gas ranges.
• This microwave oven is not approved or
tested for marine use.
• This microwave hood combination was
designed for use over ranges no wider
than 36". It may be installed over both
gas and electric cooking equipment.
• Do not operate this appliance if it has a
damaged power cord or plug, if it is not
working properly, or if it has been
damaged or dropped.
• Do not cover or block any openings on
the appliance.
• Use this appliance only for its intended
use as described in this manual. Do not
use corrosive chemicals or vapors in
this appliance. This microwave oven is
specifically designed to heat, dry or
cook food, and is not intended for
laboratory or industrial use.
• Do not store this appliance outdoors.
Do not use this product near water--
for example, in a wet basement, near a
swimming pool, near a sink or in similar
locations.
-- DO not use the oven for storage
purposes. DO not leave paper products,
cooking utensils or food in the oven
when not in use.
-- If materials inside oven ignite, keep the
oven door closed, turn the oven off and
disconnect the power cord, or shut off
power at the fuse or circuit breaker
panel. If the door is opened, the fire
may spread.
• See door surface cleaning instructions
in the Care and Cleaning section(s)
of this guide.
• This appliance must only be serviced
by qualified service personnel. Contact
nearest authorized service facility for
examination, repair or adjustment.
• As with any appliance, close supervision
is necessary when used by children.
• Do not store anything directly on top of
the microwave oven surface when the
microwave oven is in operation.
SAVE THESE
INSTRUCTIONS
• Keep power cord away from heated
surfaces.

SPECIAL NOTES ABOUT MICROWAVING
ARCING
If you see arcing, press the
STOP/CLEAR pad and correct
the problem.
Arcing is the microwave term for sparks
in the oven. Arcing is caused by:
• Metal or foil touching the side of the
even.
• Foil not molded to food (upturned edges
act like antennas).
• Metal, such as twist-ties, poultry pins, or
gold-rimmed dishes, in the microwave.
• Recycled paper towels containing
small metal pieces being used in the
microwave.
FOODS
• Do not pop popcorn in your microwave
oven unless in a special microwave
popcorn accessory or unless you
use popcorn labeled for use in
microwave ovens.
• Some products such as whole eggs and
sealed containers--for example, closed
jars--are able to explode and should
not be heated in this microwave oven.
Such use of the microwave oven could
result in injury.
• Do not boil eggs in a microwave oven.
Pressure will build up inside egg yolk
and will cause it to burst, possibly
resulting in injury.
• Operating the microwave with no food
inside for more than a minute or two
may cause damage to the oven and
could start a fire. It increases the heat
around the magnetren and can shorten
the life of the oven.
• Foods with unbroken outer "skin" such
as potatoes, hot dogs, sausages,
tomatoes, apples, chicken livers and
other giblets, and egg yolks should
be pierced to allow steam to escape
during cooking.
• Avoid heating baby food in glass jars,
even with the lid off. Make sure all infant
food is thoroughly cooked. Stir food to
distribute the heat evenly. Be careful to
prevent scalding when warming formula
or breast milk. The container may feel
cooler than the milk really is. Always test
the milk before feeding the baby.
SAFETY FACT
SUPERHEATED WATER
Liquids, such as water, coffee, or tea,
are able to be overheated beyond the
boiling point without appearing to be
boiling. Visible bubbling or boiling
when the container is removed from
the microwave oven is not always
present. THIS COULD RESULT IN
VERY HOT LIQUIDS SUDDENLY
BOILING OVER WHEN THE
CONTAINER IS DISTURBED OR
A SPOON OR OTHER UTENSIL
IS INSERTED INTO THE LIQUID.
To reduce the risk of injury to persons:
-- Do not overheat the liquid.
-- Stir the liquid both before and halfway
through heating it.
-- Do not use straight-sided containers with
narrow necks.
--After heating, allow the container to
stand in the microwave oven for a short
time before removing the container.
-- Use extreme care when inserting a
spoon or other utensil into the container.
• Don't defrost frozen beverages in narrow-
necked bottles (especially carbonated
beverages). Even if the container is
opened, pressure can build up. This can
cause the container to burst, possibly
resulting in injury.

SPECIAL NOTES ABOUT MICROWAVING
(continued)
FOODS (continued)
• Hot foods and steam can cause burns.
Be careful when opening any containers
of hot food, including popcorn bags,
cooking pouches and boxes. To prevent
possible injury, direct steam away from
hands and face.
• Do not overcook potatoes. They could
dehydrate and catch fire, causing damage
to your oven.
• Cook meat and poultry thoroughly--meat
to at least an INTERNAL temperature
of 160°F. and poultry to at least an
INTERNAL temperature of 180°F.
Cooking to these temperatures usually
protects against foodborne illness.
MICROWAVE-SAFE
COOKWARE
Make sure all cookware used in your
microwave oven is suitable for
microwaving. Most glass casseroles,
cooking dishes, measuring cups, custard
cups, pottery or china dinnerware which
does not have metallic trim or glaze with
a metallic sheen can be used. Some
cookware is labeled "suitable for
microwaving."
• Ifyou are not sure if a
dish is microwave-safe
use this test: Place in
the oven both the dish
you are testing and a
glass measuring cup
filled with 1 cup of
O
How to test for a
m_crowave*safe dish.
water--set the measuring cup either
in or next to the dish. Microwave
30-45 seconds at high. Ifthe dish heats,
it should not be used for microwaving.
Ifthe dish remains cool and only the
water in the cup heats, then the dish
is microwave-safe.
• Ifyou use a meat thermometer while
cooking, make sure it is safe for use
in microwave ovens.
• Do not use recycled paper products.
Recycled paper towels, napkins and
waxed paper can contain metal flecks
which may cause arcing or ignite.
Paper products containing nylon or
nylon filaments should be avoided,
as they may also ignite.
• Some Styrofoam trays (like those that
meat is packaged on) have a thin strip of
metal embedded inthe bottom. When
microwaved, the metal can bum the floor
of the oven or ignite a paper towel.
• Do not use the microwave to dry
newspapers.
• Not all plastic wrap is suitable for use in
microwave ovens. Check the package
for proper use.
• Paper towels, waxed paper and plastic
wrap can be used to cover dishes in order
to retain moisture and prevent spattering.
Be sure to vent plastic wrap so steam
can escape.
• Cookware may become hot because of
heat transferred from the heated food.
Pot holders may be needed to handle
the cookware.
• "Boilable" cooking pouches and tightly
closed plasticbags should be slit, pierced
or vented as directed by package. If they
are not, plastic could burst during or
immed-iately after cooking, possibly
resulting in injury. Also, plastic storage
containers should be at least partially
uncovered because they form a tight seal.
When cooking with containers tightly
covered with plastic wrap, remove
covering carefully and direct steam away
from hands and face.
• Use foil only as directed in this manual.
TV dinners may be microwaved in foil
trays less than 3/4" high; remove the top
foil cover and return the tray to the box.
When using foil in the microwave oven,
keep the foil at least 1" away from the
sides of the oven.

SPECIAL NOTES ABOUT MICROWAVING
(continued)
MICROWAVE-SAFE
COOKWARE (continued)
• Plastic cookware--Plastic cookware
designed for microwave cooking is
very useful, but should be used carefully.
Even microwave-safe plastic may not
be as tolerant of overcooking conditions
as are glass or ceramic materials and
may soften or char if subjected to
short periods of overcooking. In longer
exposures to overcooking, the food
and cookware could ignite.
Follow these guidelines:
1 Use microwave-safe plastics only
and use them in strict compliance
with the cookware manufacturer's
recommendations.
2 Do not microwave empty containers.
3 Do not permit children to use plastic
cookware without complete supervision.
THE VENT FAN
The fan will operate automatically under
certain conditions (see Automatic Fan
feature). Take care to prevent the starting
and spreading of accidental cooking fires
while the vent fan is in use.
• Clean the underside of the microwave
often. Do not allow grease to build up
on the microwave or the fan filters.
• In the event of a grease fire on the
surface units below the microwave oven,
smother a flaming pan on the surface
unit by covering the pan completely
with a lid, a cookie sheet or a flat tray.
• Use care when cleaning the vent fan
filters. Corrosive cleaning agents,
such as lye-based oven cleaners,
may damage the filters.
• When preparing flaming foods under
the microwave, turn the vent fan on.
• Never leave surface units beneath your
microwave oven unattended at high heat
settings. Believers cause smoking and
greasy spillovers that may ignite and
spread if the microwave vent fan is
operating. To minimize automatic fan
operation, use adequate sized cookware
and use high heat on surface units only
when necessary.

Grounding Instructions
WARNING
Improper use of the grounding plug
can result in a risk of electric shock.
Ensure proper ground
exists before use.
This appliance must be grounded.
In the event of an electrical short circuit,
grounding reduces the risk of electric
shock by providing an escape wire for
the electric current.
This appliance is equipped with a power
cord having a grounding wire with a
grounding plug. The plug must be
plugged into an outlet that is properly
installed and grounded.
Consult a qualified electrician or service
technician if the grounding instructions
are not completely understood, or if doubt
exists as to whether the appliance is
properly grounded.
If the outlet is a standard 2-prong wall
outlet, it is your personal responsibility
and obligation to have it replaced with
a properly grounded 3-prong wall outlet.
Do not under any circumstances cut or
remove the third (ground) prong from
the power cord.
Do not usean adapter plug with this
appliance.
Do not use an extension cord with this
appliance. If the power cord is too shorL
have a qualified electrician or service
technician install an outlet near the
appliance.
For best operation, plug this appliance
into its own electrical outlet to prevent
flickering of lights, blowing of fuse or
tripping of circuit breaker.

NOTE: Appearance and features will vary according to the model number.
950 Watts
1 Door Handle. Pull to open the door.
The door must be securely latched
for the microwave to operate.
2 Door Latches.
3 Window with Metal Shield.
Screen allows cooking to be viewed
while keeping microwaves confined
in the oven.
4 Touch Control Panel.
5 Cooktop Lights.
6 Grease Filters.
7 Removable Turntable. Turntable and
support must be in place when using
the oven. The turntable may be
removed for cleaning.
8 Convenience Guide.
NOTE: Rating plate, oven vent(s) and
oven light are located on the inside walls
of the microwave oven.

The Controls on Your Microwave Oven
(Throughout this manual, features and appearance may vary from your modeL)
You can /Add' Auto/Time
microwave by _0 S_. Defrost
time, temperature, minutecook1-6
or with the
,Ce:tVreen:ence _ Q @
®®®
®®®
eooi_, _o Power
rime
di ff
Time Features
Time Cooking
Press
COOK TIME I & II (Press once or twice)
AUTO/TIME DEFROST (Press twice)
MINUTE COOK
POWER
ADD 30 SEC
Enter
Amount of cooking time.
Amount of defrosting time.
Starts immediately for 1-6 pads only.
Power level 1-10.
Starts immediately!
10

GUIDE ON MICROWAVE
Before you begin, check the guide
located on the inside front of the oven
when you open the door.
GUIDES IN BOOK
• Cooking
• Time Defrost
• Auto Reheat
Popcom Beverage Reheat
Auto/_me
Defrost
Convenience Features
Press Enter Option
POPCORN Starts immediately! more/less time
serving size
BEVERAGE Starts immediately! serving size
AUTO REHEAT Food type 1-5 serving size
AUTO/TIME DEFROST Food weight
(Press once)
11

CHANGING POWER LEVELS
Variable power levels add flexibility to
microwave cooking. The power levels on
the microwave oven can be compared to
the surface units on a range. High (power
level 10) or full power is the fastest way
to cook and gives you 100% power. Each
power level gives you microwave energy
a certain percent of the time. Power level
7 is microwave energy 70% of the time.
Power level 3 is energy 30% of the time.
A high setting (10) will cook faster but
food may need more frequent stirring,
rotating or turning over. Most cooking will
be done on High (power level 10). A lower
setting will cook more evenly and need
less stirring or rotating of the food.
Some foods may have better flavor,
texture or appearance if one of the lower
settings is used. Use a lower power level
when cooking foods that have a tendency
to boil over, such as scalloped potatoes.
Rest periods (when the microwave
energy cycles off) give time for the food
to "equalize" or transfer heat to the inside
of the food. An example of this is shown
with power level 3---the defrost cycle.
If microwave energy did not cycle off,
the outside of the food would cook before
the inside was defrosted.
Here are some examples of uses for
various power levels:
/ "
@ ® ®
@ ® ®
® ® ®
"STAR'i"
How to Change the Power Level
The power level may be entered or
changed immediately after entering
the feature time for COOK TIME,
TIME DEFROST or MINUTE COOK.
The power level may also be
changed during time countdown.
1 Press COOK TIME or select
Time Defrost.
2 Enter cooking or defrosting
time.
3 Press POWER.
4 Select desired power level
1-10.
5 Press START.
Power Level Best Uses Medium 5 Slow cooking Warm 1 Keeping food
High 10 Fish, bacon, and tenderizing warm without
vegetables, such as stews overcooking;
boiling tiquids, and less tender softening
cuts of meat. butter.
Med-High 7 Gentle cooking
of meat and Low 2 or 3 Defrosting
poultry; baking without cooking;
casseroles simmering;
and reheating, delicate sauces.
12

TIME FEATURES
COOK TIME
Cook Time I
Allows you to microwave for any time up
to 99 minutes and 99 seconds.
Power level 10 (High) is automatically set,
but you may change it for more flexibility.
You may open the door during Cook Time
to check the food. Close the door and
press START to resume cooking.
1 Press COOK TIME.
2 Enter the cooking time.
3 Change the power level if you don't
want full power. (Press POWER.
Select a desired power level 1-10.)
4 Press START.
@
®
®
_rne
®
®
®
®
®
®
Cook Time II
Lets you change power levels
automatically during cooking.
Here's how to do it:
1 Press COOK TIME.
2 Enter the first cook time.
3 Change the power level if you don't
want full power. (Press POWER.
Select a desired power level 1-10.)
4 Press COOK TIME again.
5 Enter the second cook time.
6 Change the power level if you don't
want full power. (Press POWER.
Select a power level 1-10.)
7 Press START.
At the end of the first cook time, the
second cook time counts down.
13

Cooking Guide for Cook Time
NOTE: Use power level High (10) unless otherwise noted.
1lb. In 1V2-qt.oblong glass baking dish,
place 1/4 cup water.
1O-oz.package In 1-qt. casserole.
1lb. cut in half In l_/_<It,casserole, place 1/2cup water.
1O-oz.package In 1-qt. casserole, place 2 tablespoons
water.
1g-oz. package In 1-qt. casserole, place 1/4 cup water.
1bunch In2-qt. casserole, place 1/2 cup water.
bunch
(1V4to t Y2Ibs.)
bunch
(1V4to t _/2Ibs.)
1g-oz. package
1g-oz. package
1medium head
(about 2 Ibs.)
1lb.
1g-oz.package
medium head
1medium head
1g-oz. package
6to 9 min.,
Med-High(7)
5to 7 min.
9toll min.
6to 8 min.
6to 8 min.
17 to 21 min.
7to 10 min.
9to 13 min.
5to 7 min.
5to 7 min.
8to 11 rain.
7to 10 min.
7to 9 min.
5to 7 min.
9to 14 rain.
10 to 17 rain.
5to 7 rain.
In2-qt. casserole, place 1/2 cup water.
In2-qt. oblong glass bakingdish, place
1/4 cup water.
In 1-qt. casserole.
In 1-qt. casserole, place 3tablespoons
water.
In 1V2-or 2-qt. casserole, place 1/4 cup
water.
In2- or 3-qt. casserole, place 1/4 cup
water.
In 1Y2-qt.casserole, place t/4 cup water.
In 1-qt. casserole, place 2 tablespoons
water.
In2-qt. casserole, place 1/2 cup water.
In2-qt. casserole, place 1/2 cup water.
In 1-qt. casserole, place 2 tablespoons
water.
14

10-oz. package In 1-qt. casserole, place 2 tablespoons
water.
to 5 ears
ear
4 potatoes
(6to 8 oz,each)
6 to 8 oz.
i:ii_ _i 1 lb. sliced
1to2sqaash
(about1 lb.each)
5 to 7 min,
3 to 4 min,
_erear
5 to 6 min,
3 to 4 min,
_erear
5 to 7 min,
9 to 12min.
5 to 7 min,
9 to 12min.
3 to 4 rain,
5 to 7 min,
5 to 7 min,
5 to 7 min,
8 to 11 min,
In2-qt. oblong glass bakingdish, place
corn. If corn is in husk, use no water;
if corn has been husked, add 1/4 cup
water. Rearrange after half of time.
Place in 2-qt. oblong glass baking dish.
Cover with vented plastic wrap.
Rearrange after half of time.
In 1-qt. casserole, place 3tablespoons
water.
In 1-qt. casserole, place 1/4 cup water.
In 1-qt. casserole, place 2 tablespoons
water.
Peel and cut into 1 inch cubes. Place
in 2-qt. casserole with 1/2 cup water.
Stir after half of time.
Piercewith cooking fork. Place in
center of the oven. Let stand5 minutes.
In2<It. casserole,place washedspinach.
In 1-qt. casserole, place 3tablespoons
water.
In l_/_t, casserole, place 1/4cup water.
Cut in half and remove fibrous
membranes. In 2-qt. oblong glass
baking dish, place squash cut-side-
down. Turncut-side-upafter 4 minutes.
15

TIME FEATURES
TIME DEFROST
Allows you to defrost for the length of time
you select. See the Defrosting Guide for
suggested times.
Power level 3 is automatically set, but you
may change this for more flexibility. You may
defrost small items more quickly by raising
the power level after entering the time.
However, they will need more frequent
attention than usual.
Power level 7 cuts the total defrosting time in
about half; power level 10 cuts the total time
to approximately 1/3. Rotate or stir food
frequently.
At one half of selected defrosting time, the
oven signals TURN. At this time,turn food
over and break apart or rearrange pieces
for more even defrosting. Shield any warm
areas with small pieces of foil.
Adull thumping noise may be heard dudng
defrosting. This sound is normalwhen the
oven is not operating at High power.
Defrosting Tips
• Foods frozen in paper or plastic can be
defrosted inthe package. Tightly closed
packages should be slit, pierced or vented
AFTER food has partially defrosted. Plastic
storage containers should be at least
partially uncovered.
• Family-size, prepackaged frozen dinners
can be defrosted and microwaved+ Ifthe
food is in a foil container, transfer it to a
microwave-safe dish.
•Foods that spoil easily, such as milk, eggs,
fish, stuffings, poultry and pork, should not
be allowed to sit out for more than one
hour after defrosting. Room temperature
promotes the growth of harmful bacteria.
® ® ®
® ® ®
® ® ®
.@+
STARTi
1 Press AUTO/TIME DEFROST
twice.
2 Enter defrosting time.
3 Press START.
4 Turn food over when the
oven signals,
5 Press START.
(Auto Defrost explained
in the section on Convenience
Features.)
•For more even defrosting of larger foods,
such as beef, lamb and veal roasts, use
Auto Defrost.
• Be sure large meats are completely
defrosted before cooking.
• When defrosted, food should be cool but
softened in all areas. If still slightly icy,
return to the microwave very briefly, or
let it stand a few minutes.
16

Defrosting Guide
I min,
3 to 5 min,
6 to 8 min,
5 to 7 min, Place block in casserole. Turn over and
break up after half the time,
3 to 6 min,
_e++ + +
2 to 5 min,
iii!ii i ii! if!!ii i i!
to+m+n.
5 to 7 min,
+2tot6min.
per lb.
5 to 7 min.
per Ib+
15to 19 min.
+++++:
++7to21m+o.
7 to 13 min.
per Ib+
5 to 9 min.
per Ib+
Place unopened package in oven+
Let stand 5 minutes after defrosting.
Place unopened package in oven.
Microwave just until franks can be
separated+Let stand 5 minutes, if
necessary,to complete defrosting.
Turn meat over after half the time.
Use power level 1.
Place unwrapped meat in cooking dish.
Turn over after half the time and shield
warm areas with foil. When finished,
separate pieces and let stand to complete
defrosting.
Place wrapped chicken in dish. Unwrap
and turn over after half the time. When
finished, separate pieces and microwave
2 to 4 minutes more, if necessary.
Let stand to finish defrosting.
Place wrapped chicken in dish. After half
the time, unwrap and turn chicken over.
Shield warm areas with foil. Finish
defrosting. If necessary, run cold water in
the cavity until giblets can be removed.
Place unwrapped hen in the oven breast-
side-up. Turn over after half the time.
Run cool water in the cavity until giblets
can be removed.
Place unwrapped breast in dish breast-
side-down. After half the time, turn over
and shield warm areas with foil. Finish
defrosting. Let stand 1 to 2 hours in
refrigerator to complete defrosting.
17

TIME FEATURES
MINUTE COOK
This is a quick way to set cooking time
for 1-6 minutes.
rninu_ CGGk 14
® ® ®
® ® ®
Press one of the Minute Cook pads
(from 1 to 6) for 1 to 6 minutes of cooking
at power level 10. For example, press the
2 pad for 2 minutes of cooking time.
The power level can be changed as time
is counting down. Press POWER and
enter 1-10.
ADD 30 SECONDS
30Sec.
You can use this feature two ways:
• It will add 30 seconds to the time
counting down each time the pad is
pressed.
• It can be used as a quick way to set
30 seconds of cooking time.
CONVENIENCE FEATURES
POPCORN
/
PoPcorn
® ®
(less time) (more time)
Use only with prepackaged
microwave popcorn weighing
1.75to 3.5 ounces.
How to Use the Popcorn Feature
1 Follow package instructions, using
Cook Time if the package is less than
1.75 ounces or larger than 3.5 ounces.
Place the package of popcorn in the
center of the microwave.
2 Press POPCORN. The oven starts
immediately. Tap POPCORN to select
the bag size you are cooking.
How to Adjust the Popcorn Program to
Provide a Shorter or Longer Cook Time
If you find that the brand of popcorn you
use underpops or overcooks consistently,
you can add or subtract 20-30 seconds
to the automatic popping time.
To add time:
After pressing POPCORN, press 9
immediately after the oven starts for
an extra 20 seconds.
To subtract time:
After pressing POPCORN, press 1
immediately after the oven starts for
20 seconds less cooking time.
18

CONVENIENCE FEATURES
AUTO REHEAT
The Auto Reheat feature reheats servings
of many previously cooked foods.
1 Press AUTO REHEAT.
2 Select food type 1-(; for one serving
(see Auto Reheat Guide below). The
oven starts immediately.
3 Press 2 or 3 to change the serving size.
NOTE: The serving size may be
changed or added after the oven
starts. Press number pad 2 or 3.
The serving size for food type 6
cannot be changed.
Reheat
® ®
START
Auto Reheat Guide
Food Type
1 Pasta
2 Meats, casseroles, pizza
3 Fruits and vegetables
4 Beverage
(8-10 oz. serving)
5 Sauces and gravies
6 Plate of leftovers
(2 to 3 foods, 4 oz. each)
Comments
Cover with lid or vented plastic wrap.
Cover with lid or vented plastic wrap.
Cover with lid or vented plastic wrap.
Works best with wide mouth mug_de net cover.
Cover with lid or vented plastic wrap.
Cover with vented plastic wrap.
BEVERAGE
Beverage
The Beverage feature heats 4 ounce,
8 ounce or 12 ounce servings of any
beverage.
Press BEVERAGE. The oven starts
immediately.
The serving size is automatically set at
4 ounces, but can be changed by tapping
BEVERAGE to select 8 or 12 ounces.
Drinks heated with the Beverage
feature may be very hot. Remove
the container with care.
19

CONVENIENCE FEATURES
AUTO DEFROST
The Auto/Time Defrost feature gives you
two ways to defrost frozen foods. Press
AUTO/TIME DEFROST once for Auto
Defrost or twice for Time Defrost.
Use Auto Defrost for meat, poultry and
fish. Use Time Defrost for most other
frozen foods.
Auto Defrost automatically sets the
defrosting times and power levels to give
even defrosting results for meats, poultry
and fish weighing up to 6 pounds.
There is a handy guide located on the
inside front of the oven.
Guide
Defrosting Tips
• Remove meat from package and place
on microwave-safe dish.
• Twice during defrost, the oven signals
TURN. At each TURN signal, turn the
food over. Remove defrosted meat or
shield warm areas with small pieces
of foil.
• After defrosting, most meats need to
stand 5 minutes to complete defrosting.
Large roasts should stand for about
30 minutes.
J_utornme
_mst
® ® ®
® ® ®
® ® ®
1
2
Press AUTO/TIME DEFROST
once.
Using the Conversion Guide at
right, enter food weight. For
example, press pads 1 and 2 for
t.2 pounds (t pound, 3 ounces).
Press START,
(Time Defrostisexplainedin the
Time Featuressection.)
Conversion Guide
If the weight of food is stated in
pounds and ounces, the ounces
must be converted to tenths (.1)
of a pound.
Weight of Food Enter Food Weight
in Ounces "tenths of a pound)
1-2 .1
3 .2
4-5 .3
6-7 .4
8 .5
9-10 .6
11 .7
12-13 .8
14-15 .9
2O

OTHER FEATURES YOUR
MODEL MAY HAVE
COOKING COMPLETE
REMINDER
To remind you that you have food in the
oven, the oven will display "END" and
beep once a minute until you either open
the oven door or press STOP/CLEAR.
DISPLA Y ON/OFF
To turn the clock display off, press and
hold 0 for about three seconds.
To redisplay the clock, repeat.
CLOCK
Press to enter the time of day or to check
the time of day while microwaving.
Clock
® ® ®
® ® ®
® ® ®
_srAm-
1 Press CLOCK.
2 Enter time of day.
3 Press START or CLOCK.
KITCHEN TIMER
Kitchen Timer operates as a minute timer
and can be used at any time, even when
the oven is operating.
]]me,"
® ® ®
® @ ®
® ® ®
1 Press KITCHEN TIMER.
2 Enter time you want to count down.
3 Press KITCHEN TIMER to start.
When time is up, the oven will signal.
To turn off the timer signal, press
KITCHEN TIMER.
NOTE: The timer indicator will be lit while
the timer is operating.
21

OTHER FEATURES YOUR
MODEL MAY HAVE
START/PA USE
START
In addition to starting many functions,
START/PAUSE allows you to stop
cooking without opening the doer or
clearing the display.
CHILD LOCK-OUT
VENT FAN
®
The vent fan removes steam and other
vapors from surface cooking.
Press once for high fan speed, twice for
low fan speed or a third time to turn the
fan off.
SURFACE LIGHT
@
Press to turn the surface light on or off.
Press once for high, twice for low or
three times to turn the light off.
You may lock the control panel to prevent
the microwave from being accidentally
started or used by children.
To lock or unlock the controls, press
and hold STOP/CLEAR for about three
seconds. When the control panel is
locked, "LOC" will be displayed to the
extreme right.
AUTOMATIC FAN
An automatic fan feature protects the
microwave from too much heat rising from
the cooktop below it. It automatically turns
on if it senses too much heat.
If you have turned the fan on you may
find that you cannot turn it off. The fan
will automatically turn off when the
internal parts are cool. It may stay on
for 30 minutes or more after the cooktop
and microwave controls are turned off.
22

Term Definition
Arcing
Covering
Shielding
Standing Time
Venting
Arcing is the microwave term for sparks in the oven. Arcing is
caused by:
• metal or foil touching the side of the oven.
• foil that is not molded to food (upturned edges act like
antennas).
• metal such as twist ties, poultry pins, gold-rimmed dishes.
• recycled paper towels containing small metal pieces.
Covers hold in moisture, allow for more even heating and reduce
cooking time. Venting plastic wrap or covering with wax paper
allows excess steam to escape.
In a regular oven, you shield chicken breasts or baked foods to
prevent overbrowning. When microwaving, you use small strips of
foil to shield thin parts, such as the tips of wings and legs on
poultry, which would cook before larger parts.
When you cook with regular ovens, foods such as roasts or cakes
are allowed to stand to finish cooking or to set. Standing time is
especially important in microwave cooking. Note that a
microwaved cake is not placed on a cooling rack.
After covering a dish with plastic wrap, you vent the plastic wrap
by turning back one corner so excess steam can escape.
23

HELPFUL HINTS
An occasional
thorough wiping
with a solution of
baking soda and
water keeps the
inside fresh.
NOTE: Be certain the power is off
before cleaning any part of this oven.
HOW TO CLEAN THE OUTSIDE
We recommend against using
cleaners with ammonia or alcohol,
as they can damage the appearance
of the microwave oven. If you
choose to use a common
household cleaner, first apply the
cleaner directly to a clean cloth,
then wipe the soiled area.
HOW TO CLEAN THE INSIDE
Walls, Floor, Inside Window, Metal
and Plastic Parts on the Door
Some spatters can be removed with
a paper towel, others may require
a damp cloth. Remove greasy spatters
with a sudsy cloth, then rinse with a damp
cloth. Do not use abrasive cleaners or
sharp utensils on oven walls. Never use
a commercial oven cleaner on arty part
of your microwave.
Removable Turntable and
Turntable Support
To prevent breakage, do not place the
turntable into water just after cooking.
Wash it carefully in warm, sudsy water
or in the dishwasher. The turntable
and support can be broken if dropped.
Remember, do not operate the oven
without the turntable and support
in place.
Case
Clean the outside of the microwave with
a sudsy cloth. Rinse and then dry. Wipe
the window clean with a damp cloth.
Control Panel and Door
Wipe with a damp cloth. Dry thoroughly.
Do not use cleaning sprays, large
amounts of soap and water, abrasives or
sharp objects on the panel--they can
damage it. Some paper towels can also
scratch the control panel.
Door Seal
It's important to keep the area clean
where the door seals against the
microwave. Use only mild, non-abrasive
detergents applied with a clean sponge
or soft cloth. Rinse well.
BoSom
Clean off the grease and dust on the
bottom often. Use a solution of warm
water and detergent.
24

LIGHT BULB REPLACEMENT
Cooktop Light
Replace the burned-out bulb
with a 40-watt incandescent bulb
(WB36X10003), available from your
nearest Sears Parts & Repair Center.
Call 1-800-4-MY-HOME _.
1 To replace the bulb(s), first disconnect
the power at the main fuse or circuit
breaker panel or pull the plug.
LIGHT BULB REPLACEMENT
Oven Light
I
Replace the burned-out bulb I
with a 40-watt incandescent bulb
I
(WB36X10003), available from your
nearest Sears Parts & Repair Center.
Call 1-800-4-MY-HOME _,
1 To replace the oven light, first disconnect
the power at the main fuse or circuit
breaker panel or pull the plug.
2 Remove the top gdlle by taking out the
2 screws that hold it in place.
Remove Screws
2 Remove the screw from light cover and
lower the cover.
3 Be sure the bulb(s) to be replaced are
cool before removing. After breaking the
adhesive seal, remove the bulb by gently
turning.
4 Replace the screw. Connect electrical
power to the oven.
3 Next, remove the screw located above
the door near the center of the oven
that secures the light housing.
4 Replace the screw. Connect electrical
power to the oven.
25

THE VENT FAN
Charcoal Fiffer
(on some models)
Reusable Grease Filters
(on all mcdels)
The vent fan has 2 metal reusable
grease filters.
Models that recirculate air back into
the room also use a charcoal filter.
REUSABLE GREASE FILTERS
The meta] filters trap grease released by
foods on the cooktop. They also prevent
flames from foods on the cooktop from
damaging the inside of the microwave.
For this reason, the filters must ALWAYS
be in place when the hood is used. The
grease filters should be cleaned once
a month, or as needed.
REMOVING AND CLEANING
THE FILTER
To remove, slide it to the rear using the
tab. Pull it down and out.
To clean the grease filter, soak it and
then swish it around in hot water and
detergent. Don't use ammonia or
ammonia products because they will
darken the metal. Light brushing can
be used to remove embedded dirt.
Rinse, shake and let it dry before
replacing.
To replace, slide the filter in the frame
slot on the back of the opening. Pull up
and to the front to lock into place.
26

CHARCOAL FILTER
The charcoal filter cannot be
cleaned. It must be replaced, Order
Part No. WB2X9883 available from
your nearest Sears Parts & Repair
Center, Call 1-800-4-MY-HOME _.
If the model is not vented to the outside,
the air will be recirculated through a
disposable charcoal filter that helps
remove smoke and odors.
The charcoal filter should be replaced
when it is noticeably dirty or discolored
(usually after 6-12 months, depending
on hood usage).
To Install Charcoal Filter
To install a new filter, remove plastic and
other outer wrapping from the new filter.
Insert the filter into the top opening of the
oven as shown. It will rest at an angle on
2 side support tabs and in front of the right
rear tab. Replace the grille and 2 screws.
To Remove Charcoal Filter
To remove the charcoal filter, disconnect
power at the main fuse or circuit breaker
panel or pull the plug.
Remove 2 grille screws to
remove the grille.
Remove the top grille by removing the
2 screws that hold it in p]ace. Slide the
filter towards the front of the oven and
remove it.
27

PROBLEM
Microwave
will not start
CAUSED BY SOLUTION
•Replacefuse or reset circuit breaker.•A fuse in your
home may be
blown or the
circuit breaker
tripped.
• Power surge.
• Plug not fully
inserted into
wall outlet.
Floor of the •The cooktop light .This is normal.
oven is warm, is located below
even when the the oven floor.
oven has not When the light is
been used on, the heat it
produces may
make the oven
floor get warm.
"LOC" appears •The control has •Press and hold STOP/CLEAR for about
in the display been locked. 3 seconds to unlock the control.
•Unplug the microwave oven, then plug it
back in.
•Make sure the 3-prong plug on the oven
is fully inserted into wall outlet.
28

THINGS THAT ARE NORMAL
• Steamor vapor escaping from around
the door,
• Light reflection around door or
outer case.
• Dimming oven light and change in
the blower sound at power levels other
than high.
• Dullthumpingsound whileoven is
operating.
• TV-radio interference might be noticed
while using the microwave Similar to
the interference caused by other small
appliances, it does not indicate a problem
with the microwave. Plug the microwave
into a different electrical circuit, move
the radio or TV as far away from the
microwave as possible, or check the
position and signal of the TV/radio
antenna.
29

®
Microwave Hood
Combination
Warranty
FULL ONE YEAR WARRANTY ON MICROWAVE HOOD COMBINATION
For one year from the date of purchase, if this Kenmore Microwave Hood
Combination fails due to a defect in material or workmanship, Sears will repair
it free of charge.
FULL FIVE-YEAR WARRANTY ON THE MAGNETRON
For five years from the date of purchase, if the mangnetron in this Kenmore
Microwave Hood Combination should fail due to a defect in material or
workmanship, Sears will repair it free of charge.
The above warranty coverage applies only to Microwave Hood Combinations
which are used for private household purposes.
WARRANTY SERVICE IS AVAILABLE BY CONTACTING SEARS SERVICE
AT 1-800-4-MY-HOME ®.
This warranty applies only while this product is in use in the United States.
This warranty gives you specific legal rights, and you may also have other rights
which vary from state to state.
Sears Roebuck and Co. Dept. 817 WA Hoffman Estates, IL 60179
J
3O

Master Protection Agreements
Congratulations on making a smart
purchase. Your new Kenmore _product
is designed and manufactured for years
of dependable operation. But like all
products, it may require preventive
maintenance or repair from time to time.
That's when having a Master Protection
Agreement can save you money and
aggravation.
Purchase a Master Protection Agreement
now and protect yourself from unexpected
hassle and expense.
The Master Protection Agreement also
helps extend the life of your new product.
Here's what's included in the Agreement:
_' Expert service by our 12,000
professional repair specialists
_' Unlimited service and no charge for
parts and labor on all covered repairs
_' "No-lemon" guarantee--replacement
of your covered product if four or more
product failures occur within twelve
months
V' Product replacement if your covered
product can't be fixed
v' Annual Preventive Maintenance
Check at your request - no extra
charge
V' Fast help by phone--phone support
from a Sears technician on products
requiring in-home repair, plus
convenient repair scheduling
V' Power surge protection against
electrical damage due to power
fluctuations
_' Rental reimbursement if repair of
your covered product takes longer
than promised
Once you purchase the Agreement, a
simple phone call is all that it takes for
you to schedule service. You can call
anytime day or night, or schedule a
service appointment online.
Sears has over 12,000 professional
repair specialists, who have access
to over 4.5 million quality parts and
accessories. That's the kind of
professionalism you can count on
to help prolong the life of your new
purchase for years to come. Purchase
your Master Protection Agreement today!
Some limitations and exclusions
apply.
For prices and additional information,
call 1-800-827-6655.
Sears Installation Service
For Sears professional installation
of home appliances, garage door
openers, water heaters, and other
major home items, in the U.S.A. call
1-800-4-MY-HOME _,
31

LEA TODAS INSTRUCCIONES
DE SEGURIDAD ANTES DE
USAR ESTE APARATO.
A
PRECAUCIONES
PARAEVITAR
POSIBLE
EXPOSICIONA
UNAEXCESIVA
ENERG[ADE
MICROONDAS.
Por su seguridad, la informaciSn contenida
en este manual debe seguirse para
minimizar el riesgo de incendio, explosi6n o
para evitar daSos a la propiedad, lesiones
personales o p6rdida de vida.
No Intente operar
este homo con la
puerta abierta ya
que esto podria
resultar en una
exposiciSn a energia
microondas daSina.
Es importante no
cancelar ni manipular
de forma indebida
los dispositivos de
seguridad.
NO Sit_e ning_n
objeto entre la parte
frontal del homo y la
puerta ni permita que
se acumule suciedad
o residuos limpios en
las gomas de cierre
herm6tico.
No Use el homo
si ester daSado.
Es especialmente
importante que la
puerta del homo se
cierre correctamente
y que no se dahe:
1 la puerta (doblada),
2 bisagras y
pasadores (rotos
o sueltos),
3 sellos de la puerta
y gomas de cierre
herm_tico.
El homo no deberia
ajustarse ni repararse
por nadie que no sea
personal de servicio
adecuadamente
calificado.
© Sears Roebuck and Co.
32

Instruccionesdeseguridad
importantes
Precauciones para evitar posible
exposici6n a una excesiva energia
de microondas ............... 32
Instrucciones de seguridad
importantes ............... 34-38
Instrucciones de toma de tierra ...38
Cuidado y limpieza
Limpieza del homo microondas ...54
C6mo reemplazar las bombillas...55
El ventilador y los filtros de grasa .56
Filtro de carb6n vegetal ......... 57
Operaci6n
Partes impertantes de su
cembinaci6n de campana
y home microondas ............ 39
Inicie r&pide---controles ...... 40_ 41
Operaci6n ................ 42-52
Terminolegia de rnicreendas ...53
Problemas y soluciones comunes
del microondas
Problemas y seluciones ......... 58
Cosas nermales de su home
de rnicreendas ............... 59
Soporte al consumidor
Numero de modelo y de serie .... 33
Garantia .................... 62
Contrato de protecci6n maestra...63
Seperte al consumidor ......... 64
Servicios de reparaci6n ......... 64
Para su conveniencia y referencia
futura, por favor escriba los n_meros
de modelo y serie en el espacio que se
provee. Los encontrar_, en una etiqueta
al abrir la puerta.
NUMERO DE MODELO:
363.
NUMERO DE SERIE:
33

iADVERTENCIA!
Cuando use electrodomdsticos, debe seguir precauciones de seguridad bdsicas,
incluyendo las siguientes:
• Lea y obedezca las precauciones
especificas en la secciSn de
Precauci6nes para evitar posible
exposici6n a una energia excesiva
de microondas en la pAgina 32.
• Este electrodom_stico debe estar
conectado a tierra. Con6ctelo s61oa
una toma de corriente con toma de
tierra. Vea la secci6n de Instrucciones
de toma de tierra en la p&gina 38.
• No monte este electrodom_stico sobre
un fregadero.
• Instale o co]oque este electrodom_stico
siguiendo s61o las Instrucciones de
Instalaci6n provistas.
• Este homo de microondas est& ]istado
por UL para ser instalado sobre estufas
electricas y de gas.
• Este homo de microondas no ha sido
aceptado ni probado para uso marino.
• Este homo puede instalarse encima de
la cocina y estb.diseSado para su uso
sobre cocinas encimeras no m&s anchas
de 36". Puede instalarse sobre equipos
para cocinar de gas o el6ctricos.
• No usar este electrodom6stico si el cable
de corriente o el enchufe ban sufrido
alg6n dafio, si no funciona correctamente
o si ha resultado dafiado o se ha caido.
• No cubra ni bloquee ninguna apertura
de este electrodom6stico.
• Use este aparato s61o para los fines que
se describen en este manual. No use
productos quimicos ni vapores corrosivos
en este electrodom6stico. Este homo
microondas ester especificamente
dise_ado para calentar, secar o cocinar
comida y no para su uso industrial o
en laboratorio.
• Mantenga el cable de corriente alejado
de superficies calientes.
• No sumerja el cable de corriente ni el
enchufe en agua.
• Para reducir el riesgo de incendio en la
apertura del homo:
-- No cocine demasiado la comida. Preste
atenciSn cuidadosa al electrodom_stico
cuando se coloca papel, plb.stico u
otro material combustible en el homo
mientras se cocina.
-- Quite las cintas de cierre con metal y
las asas met&licas de los recipientes
de papel o pl&stico antes de
introducidos en el homo.
-- No almacene cosas en el horno. No
deje productos de papel, utensilios de
cocinar ni comida en el homo mientras
no Io est_ usando.
-- Si se incendiara algt3n material dentro,
mantenga ]a puerfa del homo cerrada,
apague el homo y desconecte el cable
de corriente el_ctrica, o apague la
corriente en el fusible o panel del
diferencial. Si se abre la puerta el
fuego podria expandirse.
• Revise las instrucciones de limpieza de
la superficie de la puerfa en la secci6n
Cuidado y limpieza del homo microondas
de este manual.
• No almacene este electrodom6stico al
aire libre. No use este producto cerca
delagua--porejemplo, enuns6tano GUARDE ESTAS
mojado, cerca de una alberca, cerca de INSTRUCCIONES
un fregadero o en lugares similares.
34
• Las reparaciones de este electrodom_stico
debefian ser realizadas sSIo per personal
cualificado. P6ngase en contacto con el
centro de servicio autorizado m_tscercano
para su revisi6n, reparaci6n 0 ajuste.
• El uso de cualquier electrodom_stico
por parfe de niSos deberia set
supervisado de cerca por un adulto.
• No aJmacene nada directamente encima
de la superficie del microondas cuando
est6 en operaciSn.

NOTAS ESPECIALES SOBRE EL USO
DEL MICROONDAS
FORMACION DE ARCO
ELECTRICO
Si ve que se forman arcos electricos,
presione el boton STOP/CLEAR y
resuelva el problema.
Arco el6ctrico es Io que, en la terminologia
de los microondas, describe las chispas
en el homo. El arco el6ctrico se produce
cuando:
• Hay un metal o papel de aluminio
tocando el lateral del homo.
• El papel de aluminio no estg. envolviendo
bien la comida (hay bordes doblados
hacia arriba que act6an como antenas).
• Hay alg6n metal, como cintas de cierre
con metal, pinchos de polio, o platos
con decoraci6n de oro dentro del
microondas.
• Se est& usando papel toalla reciciado
que contienen pequeSas porciones de
metal en el microondas.
COMIDAS
• No haga rosetas o palomitas de maiz
en el microondas a no ser que est6
usando un accesorio especial para
preparadas o que est6 empleando
rosetas o palomitas de maiz que
indiquen ser v&lidas para el uso de
homes microondas.
• Algunos productos como las yemas
de huevo y recipientes selladosIpor
ejemplo, jarras cerradasIpodrian
explotar y no deben calentarse en el
homo microondas. Si se usa de esa
forma el homo microondas pueden
causarse daSos personales.
• No hierva huevos dentro de un homo
microondas. Se generar& presi6n dentro
de la yema del huevo que causar& que
explote pudiendo, posiblemente, daSar
a alguien.
• Si se pone en marcha el microondas sin
tenet comida en su interior por m&s de
un minuto o dos podrfan causarse daSos
al homo y podria empezar un fuego.
Esto hace aumentar la temperatura
alrededor del magnetr6n y puede reducir
el periodo de vida 6til del horno.
• Deberfa cortarse la "piel" externa de
aquellos alimentos que no la tengan
rota como las papas, salchichas,
embutidos, tomates, manzanas, higados
de polio y demurs menudillos de aves y
yemas de huevos, para permitir la salida
de vapor mientras se cocinan.
HECHO DE SEGURIDAD
AGUASOBRECALENTADA
Liquidos, tales como agua, cafe, o te,
se podrian sobrecalentar mas alia del
punto de ebullicion sin parecer que
esten hirviendo. No siempre habra
burbujas o evidencia de que el liquido
esta hirviendo cuando se extrae el
envase con el liquido del microondas.
ESTO PODR[A RESULTAR EN
LJQUIDOS MUY CALIENTES DE
REPENTE COMENZANDO A HERVIR Y
A REBOSARSE CUANDO EL ENVASE
ES MOVIDO 0 SI UNA CUCHARA U
OTRO UTENSILIO SE LE INTRODUCE
AL L[QUIDO.
Para reducir el riesgo de lesiones
personales:
-- No sobrecaliente los liquidos.
-- Mueva el liquido tanto antes como a
mediados del tiempo de calentamiento.
-- No use envases de lados rectos con
cuellos estrechos.
-- Despu6s del calentamiento, permita
que el envase permanezca en el
microondas por un tiempo corto antes
de remover el envase.
-- Use cuidado extremo cuando inserte
una cuchara u otro utensilio en el
envase.
35

NOTAS ESPECIALES SOBRE EL use
DEL MICROONDAS (continuaci6n)
COMIDAS (continuacibn)
• No caliente la comida del beb_ enjarras
de cristal, incluso si est&ndestapadas.
AsegSrese de que los alimentos de los alSos
est_n bien cocinados. Remueva la comida
para distribuirel calor de forma pareja. Tenga
cuidado de que el also no se queme al
calentar la leche de fSrmula. Elcontenedor
puede parecer m&sfrio de Ioque realmente
est& laf6rmula. Pruebe siempre la fSrmula
antes de d_rsela al beb6.
• No descongele bebidas congeladas en
botellas de cuello estrecho (especialmente
bebidas carbonatadas). Incluso con el
contenedor abierto, podda generarse un
aumento de presiSn.Esto puede causar que
el contenedor explote, Iocual podda producir
daSos personales.
• Los alimentos ca]ientes y el vapor pueden
causar quemaduras. Tenga cuidado al abrir
cualquier contenedor con comida caliente,
incluso bolsas de rosetas o palomitas
de ma[z, bolsas o cajas de cocinar.
Para prevealrposibles daSos personales,
mantenga el vapor alejado de sus manes
y rostro.
• No cocine demasiado las papas. Poddan
deshidratarse e incendiarse, causando
daSos a su homo.
• Cocine la came y el polio percompleto--
la came hasta que alcance unatemperatura
minima INTERNA de 71°C (160°F), y el polio
hasta una temperatura INTERNA mfalma de
82°C (180°F). Cuando se cocinan a estas
temperaturas se evita la contracalSnde
enfermedades per intoxicaci6n.
UTENSILIOS DE COClNA
PARA MICROONDAS
AsegSrese de que tcdos los utensilios de
cocina que use en su homo sean aptos para
microondas. Pueden usarse la mayoria de las
cazuelas, platesparacocinar, tazas de medir,
tazas de flanes y botes de cristal, o las vajiIlas
de porcelana que no tienen decoraciones
met_licas o bamices con briIIo met&lice.
AIgunosutensilios tienen la siguiente
inscripciSn:"poede usarse en microondas."
• Si no est&seguro de que
un plato poeda usarse
en el microondas, haga
esta prueba: Coloque el
platoque est6 probando
y un vase de medir con
237 ml (1 taza) de agua
en el homo--ponga la
taza de medir dentro o
O
Cbmo revisar si un
recipiente es para
use en el microondas
al lade del plato. Ponga el microondas
en marcha, a m_lximapotencia, durante
30-45 segundos. Si el platose calienta,
no deberia usarse en el microondas.
Si el platose mantiene fdo y s61ose calienta
la taza, entonces el platopuede usarse de
forma segura en el microondas.
• Si usa un term6metro de came al cocinar,
asegSrese que sea uno seguro para usarse
en homes microondas.
• No use produc_osde papel reciclado. El
popaltoalla, las servilletas y el papel de cora
reciclados pueden contener motas met&licas
que podrian causar la formaci6n de arcos
el_c_ricoso incendiarse. Los productos de
popal que contengan nil6n o filamentos de
nil6n tampoco deberian usarse ya que se
podrian incendiarde igual mode.
• Algunas bandejas de pl_stico(come en las
que seempaqueta la came) tienen una
cinta fina de metal incrustada en el plato.
AIponerse en el microondas, el metal puede
quemar el suelo del homo o incendiar un
papaltoalla.
• No use su homo microondas para secar
peri6dicos.
36

NOTAS ESPECIALES SOBRE EL USO
DEL MICROONDAS (continuaci6n)
UTENSILIOS DE COCINA
PARA MICROONDAS
(continuaci6n)
• No todofilm p!_.sflcopuede usarse en homes
microandas. Revise el uso adecuado del
paquete.
• Pueden usarse papeltoella, papel encerado
y film pt&sticopera los recipientes de forma
que retengan la humedad y pare prevenir
salpicaduras. AsegSrese de proveer una
forma de ventilaciSnpara que el vapor pueda
escaper delfilm pl_stico.
• Podrian calentarse los utensilios per el calor
transferido por los alimentos calientes.
Puede necesitar usar menoplas de cocine
pare manejar los utensilios.
• Las bctsas de cocinar que puedan hervir
y cualquier bolsa de pl_s'ticofirmemente
cerreda, deberian cortarse, pincharse o
proveer cuelquier tipo de ventilaci6n que
indique el paquete. Encaso contrario, el
pl&sticopodda exploter mientras se cocina
o despu6s, pudiendo causar daSosfisicos.
AdemAs, los recipientes de pl_stico debedan
permanecer, almenos, perciaJmente
destapados yaque pueden sellarse
fuertemente. Cuando cocine con recipientes
firmemente cubier_oscon film pl_s'tico,retire
la cubier_acon cuidado y mantenge el vapor
a]ejado de sus manos y rostro.
• Use papelde aluminio s61ode la forma
detallada en este manuel. Las comidas
r&pidaspreparadas pueden meterse en el
microondas en bandejas de aJuminiode
menos de 3/4" de aJtura.Quite la cubierte
de aluminio y vu61valasa poner dentro de
la caja. Cuando use aluminio dentro de un
homo microandas, mantenga el aluminio,
a]menos, a una pulgada de distencia de
los latera]es del homo.
• Utensiliosde pl_stico_Los utensilios
de pt_tsticodiseSados para su uso en
microandas son muy pr_.cticos,pero deben
usarse con cuidado. Incluso equellos
utensiliosautorizados pare su uso en
microondes podrien no ser tan tolerantes
como el cristal o los materiaJesde cer&mice
en condicianes de sobrecelentamiento y
poddan eblandarse o carbonizerse al
someterlos a periodos cortos de
sobrecalentemiento. En exposiciones m&s
largas asobrecalentamiento, la comida y
los utensilios podrian incendiarse.
Siga estas normas:
1 Use solamente plAsticos aptos para
microondas y 5selos siguiendo
estrictamente las recomendaciones
del fabricante de los utensilios.
2 No introduzca en el microondas recipientes
vac[os.
3 NOpermitaque los niSos usen utensilios
de pl&sticosin compteta supervisi6n.
EL VENTILADOR EXTRACTOR
El ventilador se pondr&en funcionamiento de
forma autom&tica bajo ciertas circunstancias
(ver funci6n de VentiladorAutom_tico).
Prevenga el que empiece aJgt3nfuego al
cocinar y que se extienda mientras el
ventilador del respiradero est&en march&
• Umpie a menudo la parteinferiordel
microondas. No permita que se acumule
grasa en el microondas o en los filtros
delventilador.
• Si la grasa se incendiara en las unidades
de lacocina (foganes) bajo el homo
microondas, sofoque cualquier sart_n en
llamas de la unidad de cocina por completo
con una tap& una bandeja de ga]letas o
cualquierotra bandeja plan&
• Tengacuidado a] limpiarlos filtros del
ventilador extractor. Los productos de
limpiezacorrosivos, como los limpia-hornos
a base de lejia, pueden daSar los filtros.
• Ponga en marcha el extractor cuando est_
cocinando comidas con llama bajo el
microondas.
37

NOTAS ESPECIALES SOBRE EL USO
DEL MICROONDAS (continuaci6n)
EL VENTILADOR
EXTRACTOR (continuacibn)
• Nunca deje las unidades de la cocina
(fogones) bajo su microondas sin
atenci6n cuando se est6 trabajando a
altas temperaturas. Cuando la comida
entra en ebullici6n se generan humos
y se derraman grasas que pudieran
incendiarse y propagarse si el ventilador
del microondas est& funcionando. Para
minimizar el funcionamiento del extractor
autom_tico, use utensilios de cocina de
tamaSo adecuado y use el fuego r&pido
en las unidades de la cocina (fogones)
s61ocuando sea necesario.
INSTRUCClONES DE TOMA
DE TIERRA
.4,iADVERTENCIA!
El uso indebido del enchufe de tierra
puede resultar en riesgo de descarga
el_ctrica.
Aseg0rese de que exista una toma de
tierra adecuada antes de usarto
Este electrodom_stico debe estar
conectado a tierra. Si se produjera un
cortocircuito, la toma de tierra reduce el
riesgo de descarga el6ctrica al proveer
un cable de escape para la corriente
el_ctrica.
Este electrodom_stico est_ equipado con
un cable de corriente que dispone de un
hilo para toma de tierra con un enchufe
con toma de tierra. El enchufe debe estar
conectado a una toma de corriente que
est_ debidamente instalada y con salida
a tierra.
Consulte con un electricista cualificado o
un t_cnico de reparaciones si no entiende
completamente las instrucciones sobre la
toma de tierra, o si tuviese alguna duda
sobre si su aparato estA debidamente
conectado a tierra.
Si la toma de corriente es un modelo
est_mdar de dos clavijas, es su
responsabilidad personal y su obligaci6n
el reemplazarla por una toma adecuada
para tres clavijas con conexi6n a tierra.
Bajo ninguna circunstancia debe cortar o
quitar la tercera clavija (tierra) del cable
de corriente.
No use un enchufe adaptador con este
electrodom_stico.
No use un cable extensor de corriente
con este electrodom_stico. Si el cable de
corriente es demasiado corto, haga que
un electricista cualificado o un t6cnico de
reparaciones instalen una toma de
corriente cerca del electrodom6stico.
Para un mejor funcionamiento, enchufe
este electrodom_stico en una toma de
corriente exclusiva para evitar parpadeos
de luz, fusibles quemados o que salte el
diferenciaL
38

NOTA: El aspecto y las caracteristicas varian segdn el ndmero de modelo.
950 Watts
1 Mango de la puerta. Tire de ella para
abrir la puerta. La puerta debe estar
debidamente cerrada para que el
microondas funcione.
2 Enganches de la puerta.
3 Ventanilla con cobertura metdlica.
La pantalla permite que usted pueda
vet Io que cocina, al tiempo que
mantiene las microondas confinadas
en el homo.
4 Panel de visualizaci6n de control
de toque.
5 Luces de la estufa.
6 Filtros para grasa.
7 Plato movible. El plato giratorio y el
apoyo deben estar colocados en su
lugar cuando usted est_ usando el
homo. El plato giratorio puede ser
removido para limpiarlo.
8 Guia dtil.
NOTA: La placa de calificaciSn, los
conductos de ventilaciSn del homo
y la luz del homo se encuentran en las
paredes interiores del homo microondas.
39

Los controles del horno microondas
(En este manual, las caracterfsticas y el aspecto de su modelo pueden variar.)
Ueted puede cocinar
en el microondas por
tiempo, temperatura
o con las funciones
de conveniencia.
3_)Asdd_. Auto)Time
Defrost
minute cook 1-6
®®®
®®®
®®®
Cook Power
TimB j
di ff
Funciones del tiempo
Cocci6n por tiempo
Presione Entre
COOK TIME I & II (cocci6n portiempoI &II) Cantidad de tiempo de cocci6n.
(Presbne una o dos veces)
AUTO/TIME DEFROST Cantidad de tiempo
(descongelaci6nautomJdetiempo) de descongelaci6n.
(Presione dos veces)
MINUTE COOK (cocci6n alminuto) Comienza inmediatamente para
botones 1-6 solamente.
POWER (nivelde potencia) Nivel de potencia entre 1-10.
ADD 30 SEC (agregar30segundos) iComienza inmediatamente!
4O

GUIA EN EL DEL MICROONDAS
Antes de empezsr, revise la gufa que se
encuentra al interior del horno cuando
se abre la puerta,
GUiA EN EL LIBRO
• Cocci6n
• Tiempos para descongelar
• Recalentamiento autom_tico
Popcorn Beverage Auto
.... Reheat
Aut0/_me
Defrost
Funciones de conveniencia
Presione Entre Opcion
POPCORN (rosetasde maiz) iOomienza inmediatamente! M_s/menos tiempo
porcion
BEVERAGE (bebidas) iComienza inmediatamente! porcion
AUTO REHEAT Tipo de atimentos 1-6 porcion
(recslentarautem.)
AUTO/TIME DEFROST Peso del alimento
(descongelaci6nautomJdetiempo)
Presione una vez
41

Cambio el nivel de potencia
Losnivelesdepotenciavariablesampliansus
posibilidadesdecocci6nenelmicroondas.Los
nivelesdepotenciaenelhomodemicroondas
puedensercomparadosconlasunidadesde
superficieeeunrango.Alto(niveldepotencia
10)o acapacidadm_ximaeslaformam_isr@ida
decocinaryledaun 100%depotencia.Cada
niveldepotencialeproporcionaenergia
microondasunciertoporcentajedeltiempo.
Eleiveldepoteecia7esenergiamicroondas
70%deltiempo.Elniveldepotencia3 esenergia
microondas30%deltiempo.
Ueajustealto(10)cocinam_sr_pidamente,
peroquiz_ssualimentonecesitesermovidoo
giradom_sfrecuentemente.Lamayodadesus
coccionesser_nhechasenAlto(High),enelnivel
depotencia10.Losajustesm_isbajoscocinan
conmayoruniformidady elalimentononecesita
sermovidoo giradotanfrecuentemente.
AIgunosalimentosquiz_steeganunmejorsabor,
unamejortexturao unaaparienciam_isatractiva
siseusanajustesmenores.Useunnivelmenor
depotenciacuandococinealimentosquetienden
a hervir,comopapasalgrat_n.
Losperiodosdedescanso(cuandolosciclos
deenerg[adelmicroondasest_nsuspendidos)
dantiempoa losalimentosaquese"ecualicen"
o aquetransfierancalorhacialosalimentos
cercaeos.Unejemplodeestoesmostrado
conelniveldepotencia3--con elciclode
descongelaci6n.Silaenergiadelmicroondas
nodescans6,laparteexternadelosalimentos
secocinar_antesdequeelcentrosehaya
descongelado.
Acontinuaci6nlepresentamosalgunosejemplos
delaformaenqueseusanlosratiosnivelesde
potencia.
Power
@ ® ®
@ ® ®
® ® ®
Cbmo cambiar los niveles de
)otencia
Los niveles de potencia pueden
ser registrados o cambiados
inmediatamente despu_s de haber
registrade la funci6n de tiempo para
COOK TIME, TIME DEFROST o
MINUTE COOK. El nivel de potencia
tambi_n puede ser cambiado durante
el conteo regresivo del tiempo.
1 Presione COOK TIME (cocci6n
por tiempo) o seleccione el Time
Defrost (tiempo de descongelaci6n)
2 Registre el tiempo de cocci6n
o descongelaci6n.
3 Presione POWER (nive] de
potencia).
4 Seleccione el nivel de potencia
deseado de! 1 a! 10.
5 Presione START (inicio).
Nivel de Mejores usos
potencia
Alto10(High) Pescado,tocino,
vegetales,
liqaidos
hervidos,
Altomedio7 Cocci6n_evede
(Med*High) earneey ayes;g
oleosy alimentos
recalentados,
Medio 5 Cocci6n lentay
(Medium) suave, come
estofadoe
y alimentos
ligeros,
Bajo2-3 (Low) Descongelaci6n
sin cocci6n;
alimentos
hervidos afuego
lento, saisas
delicadas,
Tigio1(Warm) Paramantener
alimentoetibios
sin cocinarioe
demasiado;para
saavizaroderretir
mantequilla,
42

Las funciones de tiempo
COOK TIME (Cocci6npot tiempo)
Cook Time I (Cocci6n por tiempo I)
Le permite cocinar por cualquier lapso
hasta 99 minutos y 99 segundos.
El nivel de potencia 10 (Alto) est&
ajustado autom&ticamente, pero usted
puede cambiarlo si desea mayor
flexibilidad.
Usted puede abrir la puerta durante el
COOK TIME (cocci6n por tiempo) para
inspeccionar el alimento. Cierre la puerta
y presione START (inicio) para reiniciar
la cocci6n.
1 Presione COOK TIME (cocci6n por
tiempo).
2 Entre el tiempo de cocci6n.
3 Cambie el nivel de potencia si usted
no desea usar el nivel por defecto.
(Presione POWER [nivel de potencia].
Seleccione un nivel de potencia
deseado de 1 a 10).
4 Presione START (inicio).
Cook•_
_m _
@ ® ®
® ® ®
® ® ®
S-rAm ,
Cook Time II (Cocci6n por tiempo II)
Le permite cambiar los niveles de
potencia autom_ticamente durante la
cocci6n. A continuaci6n la forma en que
se hace:
1 Presione COOK TIME (cocci6n por
tiempo).
2 Entre el primer tiempo de cocci6n.
3 Cambie el nivel de potencia si usted
no desea usar el nivel por defecto.
(Presione POWER (nivel de potencia).
Seleccione un nivel de potencia
deseado de 1 a 10).
4 Presione COOK TIME (cocci6n por
tiempo) otra vez.
5 Entre el segundo tiempo de cocci6n.
6 Cambie el nivel de potencia si no desea
usar el m_ximo. (Presione POWER
(nivel de potencia). Seleccione un nivel
de potencia de 1 a 10).
7 Presione START (inicio).
AI final de primer tiempo de cocci6n, el
segundo tiempo de cocci6n comienza una
cuenta regresiva.
43

Guia por Cook Time (Coccidn por tiempo)
NOTA: Use el nivel de potencia maxima (High) (10) a no ser que se indique Io contrario.
Esp_rtagos
Paquote e
10 onzas
1 lb.,cortados
porla mitad
Paquetede
10 onzas
Paquetede
10 onzas
Enplatosdehomearoblongosde1Vzcuartos,
coloque1/4de unatazadeagua.
Cazuelasde1 cuarto.
Encazuelasde1_ cuartos,coloque1/2taza
deagua.
Encazuelasde1cuartodeJibras,coloque
2 cucharasdeagua.
Encazuelasde1cuartodeJibras,coloque
1/4tazadeagua.
1 manojo Encazuelasde2 cuartos,coloqae1/2taza
deagua.
1 manojo
(DeI_Aat1_ tbs
1 manojo
(DeI_Aat1_ tbs
Paquetede
10onzas
Paquetede
10 onzas
De6a9 min.
Med-Nto(7)
De5a7 min.
De9a11 min.
De6a8 min.
De6a8 min.
De17a
21 min.
De7a 10 rain.
De9a13 rain.
De5a7 min.
De5a7 min.
De8a11 rain.
De7a 10 rain.
De7a9 min.
De5a7 min.
De9a14 rain.
De10a
17rain.
De5a7 min.
Unacabeza
mediana
(2librasaprox.)
1 Jb.
Paquetede
10 onzas
Ueacabeza
mediana
Unacabeza
mediana
l O-oz.package
Encazaelasde2 cuartos,coloqae1/2taza
deagua.
Enplatosdehomearoblongosde2cuartos,
coloque1/4de unatazadeagaa.
Cazaelasde1 cuarto.
Encazuelasde1 cuarto,coloqae3cucharas
deagua.
Encazaelasde1_o 2 cuartos,coloqae1/4
deanatazadeagua,
Encazaelasde2o3 cuartos,coloqae1/4
deanatazadeagua,
Encazaelasde1_ cuarto%coloque1/4de
ariatazadeagua.
Encazuelasde1cuarto,coloqae2
cucharadasdeagua.
Encazuelasde2 cuartos,coloqae1/2taza
deagua.
Encazuelasde2 cuartos,coloqae1/2taza
deagua.
Encazuelasde1 cuarto,2 cucharadas
deagua.
44

/ffMz Paquetede
(_#_g__d_)I0 onzas
De1a5
mazorcas
Imazoroa
De2a6
mazorcas
Paquetede
I0 onzas
ii_/; b_iiii_ii:i!iii_i_ii!iill¸_
De5a 7 min. Encazuelasde1cuartodelibras,
coloque2 cucharadasdeagua.
De3a4 min,
pormazorca
De5a6 min,
De3a4 min,
pormazorca
De5a7 min,
Coloqueelmaizenunplatodehornear
oblongode2cuartos,Sielmaizest_en
mazorcasnouseagua,sihasido
desgranadoagregueI/4deagua.Cambie
deposici6ndespu6sdetranscurridolamitad
deltiempo.
Coloqueelmaizenunplatodehornear
oblongode2cuartos.
Cubraconunaenvolturapl&stica.Cambie
deposici6ndespu_sdetranscurridola
mitaddeltiempo,
Encazoelasde1cuarto,coloque3
cucharadasdeagoa,
2 Ibs.,ensos De9a 12min. Encazuelasde1cuarto,
vainas coloque1/4tazadeagua.
Paquetede De5a 7 min. Encazoelasde1cuarto,
10onzas coloque2 cucharadasdeagua.
De9a 12min.
4 papas
(de6 a8 oz.
cadauno)
I (de6a8 oz.)
De 10a16 oz.
Paquetede
10 onzas
De3a4 min.
De5a7 min.
De5a7 min.
De5a7 min.
De8a'il min.
IIb, coRada
entajadas
De1a2
calabazas
(cercadeIIb
cadauno)
Peley corteen cubitosde 1pulgada.
Encazuelasde2 cuartos,coloque1/2 taza
de agua.Muevadespu6sdetranscurddo
la mitaddeltiempo.
Perforecontenedorde cocina.Coloque
en elcentrodel horno.D6jelodescansar
)or 5 minutos.
Coloquela espinacalavadaen una cazuela
de 2cuartos.
Encazuelasde 1cuarto,coloque
_cucharadasdeagua.
Encazuelasde 1Vzcuartos, coloque1/4
tazadeagua.
Cortepor la mitady remuevamembranas
fibrosas. Enun platodehornearoblongo
de 2cuartos,coloquela calabazacon
la partecortadaorientadahaciaabajo.
Cambieposici6nde4 minutos.
45

Las funciones de tiempo
TIME DEFROST
(Tiempo de descongelaci4n)
Le permite descongelar por los lapsos
que usted seleccione Ver la Guia de
Descongelado para los lapsos sugeridos
El nivel de potencia 3 viene
preseleccienado, pero usted puede
cambiarlo para mayor flexibilidad Usted
puede descongelar articulos pequeSos
mAs r&pidamente aumentando el nivel de
potencia despu6s de seleccionar el tiempo
Sin embargo, 6stos necesitarAn mAs
atenci6n de le usual
El nivel de potencia 7 reduce el tiempo
de descongelamiento en la mitad; el nivel
de potencia 10 reduce el tiempo total en
aproximadamente 1/3 Rote y gire el
alimento frecuentemente
En la mitad del tiempo seleccionado para
descongelar, el homo le indica que debe
voltear (TURN) el alimento En este
memento, voltee y separe o reorganice
las piezas para una descongelaciSn m_s
uniforme Proteja cualquier Area caliente
con pedazos pequefios de aluminio
Es posible que usted escuche un
sonido sordo durante el proceso de
descongelamiento Este sonido es normal
cuando el homo no est_ operande a plena
capacidad
Ideas sobre el descongelamiento
• Los alimentos congelados en papel o
pl_stico pueden ser descongelades en el
interior de los mismos Los paquetes que
est_n herm6ticamente cerrados deben ser
perforados o ventilados DESPUt_S de que
hayan sido parcialmente descongelados
Los envases pl_sticos deben estar por Io
menes parcialmente abiertos
• Los alimentos empaquetados congelades
de tamaSo familiar pueden ser
descongelados y cocinados en el
microondas Si el alimento est_ envuelto
en papel de aluminio, transfi_rale a un
plato de microondas
A._ornn
® ® ®
® ® ®
® ® ®
( STAI_ )
1 Presione AUTO/TIME DEFROST
dos veces.
2 Entre el tiempo de
descongelaci6n,
3 Presione START (inicio),
4 Gire el alimento cuando el horno
sonore.
5 Presione START (inicie).
(Auto Defrost [descengelaci6n
automatical se explica en la
secci6n Funciones de
conveniencie.)
• No permita que alimentos que se dafian
f_cilmente, como leche, huevos, pescado,
rellenos, carnes de ayes y cerdo queden
a la intemperie por m_s de una hora
despu@sde haber sido descongelados.
La temperatura ambiental promueve el
crecimiento de bacteria nociva.
• Para Iograr un descongelamiento m&s
uniforme en caso de carnes, cordero y
ternero, use Auto Defrost (Descongelaci6n
autom&tica).
• Cerci6rese de que pedazos de came
grandes est_n totalmente descongelados
antes de cocinarlos.
• Cuando est_n descongelados, los
alimentos deben estar frios pero
uniformemente suaves. Si at3nest_n
ligeramente congelados, regr6selos al
microondas por un lapso corto, o d_jelos
a la intemperie por unos minutos.
46

Guia de descongelamiento
! min.
De3a5min.
De6a 8rain.
,5 a 7rain. Coloquelospedazosen unacacerola.Volteey
desmembredespots detranscurrido lamitad
del tiempo.
De3 a6 rain.
De2 a 5rain.
De2a5min.
De5 a 7rain.
De12a 16rain.
pot libra
,17 a 21 min.
De7a 13min.
porlibra
pot libra
Coloqueel paquetenoabierto enel homo.
D_jelodescongelarpor 5 minutos.
Coloqueel paquetenoabierto enel homo. Cocineen
el microondasbastaquese puedanseparar.D6jelos
reposarpot 5 minutos, si es necesario,paracompletar
la descongelaci6n.
Volt6eladespu6sde babertranscurridola mitad
del tiempo.
Useel nivelde potencia1.
Coloquelacame sin laenvoituraenel platode
cocci6n.Volt6eladespu6sdehabertranscurridola
mitad del tiempoy protejalas_reasc_lidascon una
envoitura.Cuandotermine, separelos pedazosy deje
quese descongeletotalmente.
Coloqueel polioenvueitoenun plato.Desenvoelva
y voltee despu6sdebabertranscurridola mitad
del tiempo.Coandohayaterminado,separelos
pedazosy cocineenel microondasde 2a4 minutos
adicionales,si es necesario.Ddjelohastaquetermine
dedescongelarse.
Coloqueel polioenvueltoenun plato.Despu6sde
habertranscurridola mitad del tiempo,desenvu61valo
y volt6elo. Protejalas _reas¢_lidascon unaenvoltura.
Terminededescongelar.Si es necesario,dejecaer
aguafda enlas cavidadeshastaque los menudillos
puedanserremovidos.
Coloquelagallina desenvueltaenel homocon por
libra lapechugahacia arriba.Despu6sde haber
transcurrido la mitaddel tiempo,volt_ela.Si es
necosario,dejecaeraguafrla enlascavidadesbasta
quelos menudillos puedanser removidos.
Coloquela pechugadesenvueltaenel platocon la
pechugahaciaabajo.Despu6sdehabertranscurrido
la mitaddel tiempo,volt_elay proteja las&teascdlidas
con unaenvoltora.Terminededescongelar.Dejepot
1 6 2 horasenel refrigeradorparacompletarla
descongelaci6n.
47

Las funciones de tiempo
MINUTE COOK (Cocci6n a/ minuto)
Esta es una forma rapida de ajustar el
coccion por tiempo de I a 6 minutos.
minute cook 1_
® ® ®
® ® ®
Presione uno de los botones de Minute
Cook (cocci6n al minuto) (de 1 a 6) para
un cocci6n por tiempo de 1 a 6 minutos
en el nivel de potencia 10. Por ejemplo,
presione el bot6n 2 para 2 minutos de
cocci6n por tiempo.
El nivel de potencia puede set cambiado
durante el conteo regresivo. Presione el
POWER (nivel de potencia) y entre un
valor entre 1 y 10.
ADD 30 SECONDS
(Ahada 30 segundos)
•Add•
30 sec.
Usted puede usar esta funcion de dos
formas diferentes:
• La misma agrega 30 segundos al
tiempo de conteo regresivo cada vez
que el bot6n es presionado.
• Esta funci6n puede set usado come
una forma r&pida de ajustar el cocci6n
por tiempo de 30 segundos.
Las funciones de
conveniencia
POPCORN (Rosetas de mafz)
POpcorn
® ®
(menostiempo) (mas tiempo)
Use solamente con rosetas de maiz para
microondasque han sido empaquetadas
previamente de 1,75 a3,5 onzas de peso.
Como usar la funcion de rosetas
de maiz
1 Siga las instrucciones en la
empaquetadura, usando Cook Time si
el paquete pesa menos de 1,75 onzas
o mayor de 3,5 onzas. Coloque el
paquete en el centro del microondas.
2 Presione POPCORN. El homo
comienza inmediatamente. Toque
POPCORN para seleccionar el
tamaSo de la bolsa que usted se
dispone a cocinar.
Como ajustar el Programa de Popcorn
(rosetas de maiz) para proporcionar un
coccion por tiempo mayor o menor
Si usted nota que la marca de las rosetas
de maiz que usted ha comprado estalla
o revienta m&s lenta o m&s rg.pidamente
que Io normal, usted puede agregar o
sustraer de 20 a 30 segundos con el
tiempo de reventado automg.tico.
Para agregar tiempo:
Despu6s de presionar POPCORN,
presione 9 dentro de los pfimeros 30
segundos despu6s de que el microondas
comience para 20 segundos adicionales.
Para sustraer tiempo:
Despu6s de presionar POPCORN,
presione 1 dentro de los pfimeros 30
segundos despu6s de que el microondas
comience para sustraer 20 segundos del
cocci6n por tiempo.
48

Las funciones de _uto
conveniencia Reheat
AUTO REHEAT (Recalentar autom.)
La funci6n de AUTO REHEAT (recalentar
autom_tica) recafienta de 1 a 3 porciones
de alimentos a servir que ya ban sido
cocinados.
1 PresioneAUTO REHEAT(recalentar
autom.).
2 Seleccione el tipo de alimento de 1 a 6
para una porci6n a servir (vet la Gala
de recalentado m&s adelante). El homo
comienza inmediatamente.
3 Presione 2 o 3 pot cambiar el tema5o
des porciones.
® ®
START
NOTA: El tama_o de la porcion puede
cambiar despues de que el homo
inicia. Presione los botones 2 6 3,
El tama_o de la porcion para los
alimentos tipo 6 no cambian.
Guia de recalentado
Tipo de alimento Comentarios
1 Pasta Cubracon unatapao con una envoltura pl_sticaventilada.
2 Alimentos, cacerolas, pizza Cubracon unatapao con una envoltura pl_sticaventilada.
3 Frutes y vegetates Cubracon una tapao con una envoltura pl_sticaventilada.
4 Bebidas Funciona mejor con tazas de boca ancha--no cubrir.
(Porci6n de 8-10 onzas)
5 Salsas y cubiertas Cubracon unatapao con una envoltura pl_sticaventilada.
6 Plato de sobra Cubracon unaenvoltura pl_sticaventilada.
(2 a 3 alimentos, 4 onzas cada uno)
BEVERAGE (Bebidas)
Beverage
La funci6n de BEVERAGE (bebida)
calienta de 4 a 12 onzas de cualquier
alimento.
Presione BEVERAGE. El homo comienza
inmediatamente.
El tamaSo de la porci6n se establece
autom_ticamente en 4 onzas, pero se puede
cambiar al tocar el bot6n BEVERAGE para
seleccionar 8 6 12 onzas.
Las bebidas calentadas con la funci6n
Beverage pueden estar muy calientes.
Retire el contertedor con cuidado.
49

Las funciones de
conveniencia
AUTO DEFROST
(Descongelaci6n Autombtica)
La funci6n Auto/Time Defrost
(descongelaci6n autom_tica/de tiempo)
le permite dos formas de descongelar
alimentos. Presione AUTO/TIME
DEFROST una vez para Auto Defrost
(descongelaci6n autom_tica) o dos
veces para Time Defrost (descongelaci6n
de tiempe).
Use Auto Defrost para carnes, aves y
pescados y Time Defrost para ]a mayoria
de los dem&s alimentos congelados.
La Auto Defrost (descongelaci6n
automb.tica) ajusta los tiempos de
descongelaci6n y los niveles de
potencia para proporcionar resultados
de descongelaci6n uniformes para
carnes, aves y pescados que pesen
hasta seis libras.
En la parte interior delantera del homo
se encuentra una guia 0tiL
1
2
u_.f,=st
® ® ®
® @ ®
® ® ®
( START
Presione AUTO/TIME DEFROST
(descongelaci6n autom&tica /
de tiempo) una vez.
Usando la Gufa de Conversi6n en
la tabla de la derecha, entre el peso
del alimento. Por ejemplo, presione
los botones 1 y 2 para 1,2 libras
(t libra, 3 onzas).
3 PresioneSTART(inicio).
(Time Defrost [descongelaci6n de
tiempo] se explica en la secci6n
Funciones de tiempo.)
Gula
Ideas sobre el descongelamiento
• Retire la came del empaque y col6quela
en un recipiente para uso en microondas.
• Dos veces durante la descongelaci6n,
el homo sefiala TURN (voltear). En
cada serial, voitee el alimento. Retire la
came descongelada o proteja las b.reas
calientes con pedazos pequeSos de
papel aIuminio.
• Despu6s de haber sido descongeladas,
la mayoda de las carnes necesitan
5 minutos para completar la
descongelaci6n. Los pedazos de came
para asar grandes deben quedarse
per 30 minutos aproximadamente.
Guia de conversibn
Si el pesodel alimento viene dado en
libras y onzas, las onzas deben ser
convertidas a d6cimos (0,1) de libras.
Pesodelalimento Entreelpesodel
enonzas alimento(d_cimos
de/ibras)
1-2 .1
3 .2
4-5 .3
6-7 .4
8 .5
9-10 .6
11 .7
12-13 .8
14-15 .9
5O

Otras funciones que su
modelo podria tener
Recordador de coccion
terminada
Para recordarle que usted tiene alimentos
en el homo, el homo mostrar& "END" y
har& un pitido una vez por minuto hasta que
usted abra la puer_adel homo opresione
STOP/CLEAR (apagar/borrar).
DISPLA Y ON/OFF
(Encendido/apagado de la pantalla)
Para apagar la pantalla del reloj, presione
y sostenga 0 por aproximadamente tres
segundos.
Para volver a visualizar el reloj, repita.
CLOCK (Reloj)
Presione CLOCK(reloj) para seleccionar
la hora del dia,
Clock
® ® ®
® ® ®
® ® ®
,.9_
1 Presione CLOCK (reloj).
2 Entre la hora del dia.
3 Presione START (inicio) o
CLOCK (reloj).
KITCHEN TIMER
(Sincronizador de la cocina)
El sincronizador de la cocina opera como
un sincronizador de minutos y puede ser
usado en cualquier momento, at_n cuando
el homo estb. en operaci6n.
_mer
® ® ®
® ® ®
® ® ®
,,_(_)_
1 Presione KITCHEN TIMER
(sincronizador de la cocina).
2 Entre el tiempo a que usted desea que
el conteo regresivo comience.
3 Presione KITCHEN TIMER
(sincronizador de la cocina) para
dar inicio.
Cuando el conteo termine, el homo
har_ una seSa. Para suspender la
sincronizaci6n, presione KITCHEN TIMER
(sincronizador de la cocina).
NOTA: El indicador del sincronizador
estar& encendido mientras el sincronizador
est& en operaci6n.
51

Otras funciones que su
modelo podria tener
START/PAUSE finicio/pausa)
START :
Ademg.s de iniciar muchas funciones,
START/PAUSE (inicio/pausa) le permite
detener la cocci6n sin operar la puerta
o sin borrar la visualizaci6n.
CHILD LOCK-OUT
(Cierre para nihos)
Usted puede cerrar las funciones del
panel de control para evitar que los
niSos puedan operar el microondas
accidentalmente.
Para cerrar o abrir los controles, presione
y sostenga presionado STOP/CLEAR
por tres segundos. Cuando el panel de
control est& cerrado, "LOC" aparecerb.
en la pantalla.
VENTILADOR
®
El ventilador absorbe el vapor y otros
humos provenientes de la superficie de
la estufa.
Presione una vez para velocidad alta
del ventilador, dos veces para velocidad
baja o una tercera vez para apagar el
ventilador.
LUZ DE SUPERFICIE
@
Presione para apagar o encender la luz.
Presione una vez para alto, dos veces
para bajo o tres veces para apagar la luz.
Ventilador automatico
(automatic fan)
Esta funci6n protege el microondas de
que demasiado calor se acumule debajo
de ]a estufa. El mismo se enciende
autom&ticamente si siente mucho calor.
Si ha encendido el ventilador quiz_s
usted note que no Io puede apagar.
El ventilador se apaga autom_ticamente
cuando las partes intemas estb.n frias.
Puede estar encendido pot 30 minutos
o m_tsdespu6s de que el microondas y
la estufa est6n apagados.
52

Tdrmino Definicibn
Arco electrico
El arco el_ctrico es Io que, en la terminologia de los microondas,
describe [as chispas en el homo. El arco ei_ctrico se produce
cuando:
• hay un metal o papel de aluminio tocando el lateral del homo.
• el papel de aluminio no est& envolviendo bien la comida
(hay bordes doblados hacia arriba que actt3an come
antenas).
• hay algt3n metal, come cintas de cierre con metal, pinches
de polio, o plates con decoraci6n de ore.
• hay papel toalia reciciado que contiene pequeSas piezas
de metal.
Cubierte Las cubiertas mantienen la humedad dentro, permitiendo un
calentamiento m&s parejo y reduciendo el tiempo de cocci6n.
Cuando se agujerea el envoltorio de pl&stico o se cubre con
papel de cera se permite la salida del vapor.
Resguardar En un homo convencional, se tapan o resguardan las pechugas
de polio o las comidas horneadas para que no se doren
demasiado. AI usar el microondas, use pequeSas cintas de papel
de aluminio para cubfir partes finas, come las puntas de las alas
en las aves, que podrian cocinarse antes que las partes mayores.
Tiempe de Cuando cocina en hornos regulares, las comidas come los
repose asados o pasteles se dejan reposar para que acaben de
cocinarse o se asienten. El tiempo de repose es especialmente
importante ai cocinar con microondas. Tenga en cuenta que un
pastel cocido en homo microondas no se coloca en un estante
de enfriamiento.
Abrir Una vez que haya cubierto un plato con film pl&stico, deber_ abrir
respiraderes un orificio desplegando una esquina para que pueda escapar
el vapor.
53

Consejos practicos
Para mantener el
interior fresco
p&sele un paso
con una soluci6n
de agua y
bicarbonato
s6dico de cuando
en cuando.
NOTA: Asegdrese de que est_ apagado
(en off) antes de limpiar cualquier
parte de este homo,
Como limpiar el interior
Paredes, suelo, ventana interior y
piezas de pldstico de la puerta
Algunas salpicaduras pueden limpiarse
con un papel toalla, otras pueden
necesitar un paso h6medo. Quite las
salpicaduras con un pa5o enjabonado
y aclare con un paso h6medo. No use
limpiadores abrasivos ni utensilios
afilados en las paredes del homo. Nunca
use un limpiader cemercial de herne
en ninguna parte del microondas.
Base giratoria extra_le y soporte
de base giratoria
Para que no se rompa, no ponga el
plato giratorio en agua justo despu6s de
cocinar. Limpiela con cuidado en agua
tibia con jab6n o en el lavavajillas.
El plato giratorio y el soporte pueden
romperse si se caen. Recuerde, no
ponga en marcha el homo sin que
el plato giratorio y el soporte est6n
encajadas en su lugar.
Como limpiar el exterior
No recomendamos el use de
limpiadores con amoniaco o
alcohol, ya que pueden dahar el
aspecto del homo microondas.
Si opta per usar un limpiador
casero, primero aplique el limpiador
directamente en un paho limpio,
luego limpie el drea sucia.
Caja
Limpie la parte externa del microondas
con un paso jabonoso. Acldrelo con un
pa5o h6medo y s6quelo. Pase un trapo
h6medo pot la ventana para limpiarla.
Panel de control y puerta
P&sele un paso hQmedo. S_quelo
completamente. No use pulverizadores
de limpieza, mucha cantidad de agua y
jab6n, abrasivos u objetos afilados en el
panel--podrian daSarlo. Algunas toallas
de papel tambi_n pueden rayar el panel
de control.
Sellante de la puerta
Es importante mantener el &tea donde
la puerta se sella contra el microondas
siempre limpia. Use s6lo detergentes
suaves, no abrasivos, y apliquelos con
una esponja limpia o un paso suave.
Acl&rela bien.
Parte inferior
Limpie la grasa y el polvode la parte
inferior a menudo Use una soluci6n de
agua templada y detergente.
54

C6mo reemplazar las bombillas
Luz de encimera
Reemptace la bombilla quemada
con una bombilla incandescente de
40 vatios (WB36X10003), disponible
de su Sears Parts & Repair Center
(Centre de las piezas y reparaci6n)
ceracano.
Llame al 1-800-4-MY-HOME%
1 Para cambiar la luz de encimera, primero
desconecte la fuente de energia hacia
el fusible principal o hacia el panel de
circuito de los interruptores o tire del
enchufe.
C6mo reemplazar las bombillas
Luz del horno
Reemplace la bombilla quemada
con una bombilla incandescente de
40 vatios (WB36X10003), disponible
de su Sears Parts & Repair Center
(Centro de las piezas y reparaci6n)
ceracano.
Llame al 1-800-4-MY-HOME ®.
Para reemplazar una luz de homo,
primero desconecte la fuente de energia
hacia el fusible principal o hacia el panel
de circuito de los interruptores o tire del
enchufe.
RetirelostorniiIos
2 Retire el tornillo de la cubierta de la luz
y baje la cubierta.
3 Aseg0rese que la bombilla est& fHa
antes de retirarla. Rompa el sello
adhesivo, desenroscando con cuidado
la bombilla.
4 Vuelva a poner el tornillo. Conecte el
homo a la corriente el6ctrica.
2 Remueva la parrilla superior extrayendo
los tornillos que la sostienen en su lugar.
3 A continuaci6n, remueva el tornillo
Iocalizado encima de la puerta, prSximo
al centro del homo que asegura el
alojamiento de la luz.
4 Reemplace la parrilla con los tornillos.
Conecte de nuevo la energia el6ctrica
al homo.
55

Ventilador extractor
Filtro de carb6n vegetal
(en aigunos modelos)
Filtros de extractor reutilizables
(ent_los losmc6elos)
La ventilador extractor tiene dos filtros de
metal reutilizables.
Los modelos que hacer recircular el aire
de nuevo a la habitaci6n usan un filtro de
carb6n vegetal.
Filtros de extractor reutilizables
Los filtros met&licos atrapan la grasa
liberada por la comida en la cocina
encimera. Tambi6n evitan que las llamas
de la cocina encimera puedan dar_ar en
interior del homo.
Por esta raz6n, los filtros deben estar
siempre en su lugar cuando se est6
usando la campana. Los filtros del
extractor deben limpiarse una vez al
mes o segL_nsea necesario.
Como quitar y limpiar los filtros
L'
Para quitarlos, usando las lengLietas,
deslfcelos hacia atr&s. Estire hacia abajo
y afuera.
Para limpiar los filtros del extractor,
emp_.pelos y p&selos de un lado a otro en
agua con detergente. No use amoniaco
ni productos que Io contengan ya que
oscurecerfan el metal. Se pueden cepillar
ligeramente para quitar suciedad pegada.
Acl_.re]os, sacL_daIos y dbjelos secar
antes de voiverlos a poner.
Para volver a colocarlos, desiice los
filtros en los marcos por ]a parte trasera
de cada apertura. Presione hacia arriba
y hacia la parte frontal para ajustarlos
en su lugar.
56

Filtro de carbon vegetal
El filtro de carb6n vegetal no puede
limpiarse. Debe cambiarse por otro.
Pida el recambio No. WB2X9883,
disponible de su Sears Parts &
Repair Center (Centro de las piezas
y reparaci6n) ceracano.
Llame al 1-800-4-MY-HOME ®.
Si el modelo no realiza la extracci6n al
exterior, el aire recircular& a trav6s de un
filtro de carb6n vegetal no reutilizable
que ayuda a quitar olores y humos.
El filtro de carb6n vegetal deberfa
cambiarse cuando est& visiblemente
sucio o descolorido (normalmente tras
6 6 12 meses, seg0n el uso).
C6mo quitar el filtro de
carb6n vegetal
Para quitar el filtro de carb6n vegetal,
primero desconecte la corriente del
fusible principal o del panel de diferencial
o estire del enchufe.
C6mo instalar el filtro de
carb6n vegetal
Para instalar un nuevo filtro de carb6n
vegetal, retire el pl&stico y cualquier otro
envoltorio del nuevo filtro.
Inserte el filtro en la apertura superior del
homo como se muestra. Descansar& en
un _ngulo detr&s de la rejilla pl&stica en
dos leng0etas laterales de soporte yen
frente de la lengeeta trasera derecha.
Vuelva a colocar la rejilla y los dos
tornillos en su lugar.
Retire ta parrilla supedor quitande
_estomillos que Iosujetan.
Retire la parrilla superior quitando los
tornillos que Io sujetan. Puede ser que
necesite abrir las puertas del armario
para quitar los dos tornillos. Deslice
el filtro hacia la parte frontal del homo
y s&quelo.
57

Problema
El homo no se
pone en mamha
Elsuelodel homo
est_templado,
inclusocuando
el homonose
hausado
Posibles causas Qu_ hacer
• Cambieelfusibleo reconecteeldiferenciaL
• Puedeque se haya
fundido un fusible
de su casa o que
hayasaltado el
diferenciaL
•Apag6n de corriente.
• Elenchufe no est_
completamente
insertado en ]a
toma de corriente
de la pared.
•Laluzdelaencimera
estdsituadabajoel
suelodelhomo.
Cuandolaluzestd
estdpuesta,el calor
queproducepuede
calentarelsuelo
delhomo.
•Desenchufeel homomicroondasdela corriente
yvu_lvaloaenchufar.
• AsegQresede que el enchufe de 3clavijas del
homo eetdcompletamente insertado en en la
toma de corriente de la pared.
• Esto es normal.
"LOC" (bloqueado) .El control ha sido .Presione y mantengaSTOP/CLEARdurante
apareceen la bloqueado. 3 segundos para desbloquear el control.
pantaila
58

Cosas normales de su homo
microondas
• Sale vapor de agua de alrededor de la
puerta.
• Se refleja una luz alrededor de la caja
exterior.
• A niveles de potencia que no sea el
mayor la luz interior pierde brillo y cambia
el sonido del ventilador,
• Ruido sordo de golpes mientras el homo
est& en funcionamiento,
• Pueden notarse interferencias en la
TV/radio cuando el microondas est&
en marcha. Esto es parecido alas
interferencias causadas por otros
electrodom_sticos pequeSos, no es
indicativo de ningt3n problema con el
microondas, Enchufe el microondas a
otro circuito el6ctrico, mueva la TV tan
alejada del microondas como sea posible
o revise ]a posiciSn y la seSal de la
antena de la radio o TV,
59

60

61

®
Garantfapara la
combinaciGnde campana
y homo microondas
GARANTiA COMPLETA POR UN Al_lO DE LA COMBINACI6N DE CAMPANA
Y HORNO MICROONDAS
Por un aSo a partir de la fecha de compra, siesta combinaci6n de campana y
homo microondas marca Kenmore falla debido a un defecto material o de mano
de obra, Sears Io repararg, sin costo.
GARANTiA COMPLETA DE CINCO Al_lOS POR EL MAGNETR6N
Por cinco aSos a partir de la fecha de compra, si el magnetr6n en esta
combinaci6n de campana y homo microondas marca Kenmore falla debido
a un defecto material o de mano de obra, Sears Io reparar& sin costo.
La anterior garantia aplica Qnicamente a combinaciones de hornos microonda
campana para fines privados en el hogar.
EL SERVICIO DE GARANTIA ESTA DISPONIBLE AL CONTACTAR EL
SERVICIO DE SEARS EN 1-800-4-MY-HOME ®.
Esta garantia aplica t3nicamente mientras el producto est6 en uso en los
Estados Unidos.
Esta garanfia le concede derechos legales especfficos, aunque quiz&s puede
tener otros derechos que varian de estado a estado.
Sears Roebuck and Co. Dept. 817 WA Hoffman Estates, IL 60179
J
62

Contrato de protecci6n
maestra
Felicitaciones per su compra inteligente.
Su nuevo producto Kenmore ester
disefiado y fabricado para muchos aSos
de operaci6n confiable. Sin embargo,
al igual que todos los productos, puede
requerir de mantenimiento o reparaci6n
preventivas en cualquier momento. Es
ahi cuando el contrato de protecciSn
maestra te puede ahorrar dinero y
motestias.
Adquiera un Contrato de protecci6n
maestra ahora mismo y prot6jase contra
inconvenientes y gastos inesperados.
El Contrato de protecci6n maestra
tambi_n le ayuda a ampliar la vida de
su nuevo producto. Lo siguiente es Io
que se incluye en el contrato:
Servicio experto per parte de
nuestros 12,000 especialistas
profesionales de reparaci6n
Servicio iUmitado sin costo por
partes y mane de obra en todas las
reparaciones cubiertas
v" Garantia total--reposici6n de su
producto cubierto si ocurren cuatro
o m&s de cuatro fallas del producto
dentro de doce meses
Reposici6n del producto si el
producto cub[erto no se puede reparar
Revisi6n anual de mantenimiento
preventive a su solicitud--sin cargo
adicional
Ayuda telef6nica rdpida--asistencia
telefSnica de parte de un t6cnico
de Sears sobre los productos que
requieren reparaciSn en casa, adem&s
de una conveniente programaciSn de
reparaciones
Protecci6n contra descargas
el_ctricas para dar_os debido a
fluctuaciones el_ctricas
Reembolso per alquiler si la
reparaciSn del producto cubierto
toma m&s tiempo del prometido
Una vez adquiera el contrato, solo
necesita una Ilamada telef6nica para
programar el servicio. Puede Ilamar a
cualquier hora del dia o de la noche o
programar la cita del servicio pot Internet.
Sears cuenta con m&s de 12.000
especialistas profesionales de reparaci6n,
quienes tienen acceso a m&s de 4,5
millones de partes y accesorios de calidad.
Este es el tipo de profesionalismo en el
que puede contar para ayudar a prolongar
la vida de su nueva compra para los aSos
venideros, iAdquiera el Contrato de
protecci6n maestra boy mismo!
ApUcan ciertas limitaciones y
exclusiones. Para precios e
informaci6n adicional, Ilame al
1-800-827-6655.
Servicio de instalaci6n de Sears
Para la instalaciSn profesional de Sears
de electrodom6sticos, dispositivos para
abrir puertas de garaje, calentadores de
agua y otros aparatos importantes para
el hogar, en los EE.UU. Ilame al
1-888-SU-HOGAR ®.
63

Your Home
For repair-in your home-of all majorbrand appliances,
lawn and garden equipment,or heatingand coolingsystems,
no matter who made It, no matter who sold It!
Forthe replacementparts,accessoriesand
owner's manualsthatyou need todo-it-yourself.
ForSears professionalinstallationof homeappliances ii
and itemslike garage dooropeners and waterheaters.
1-800-4-MY-HOME _ (1-800-4694663)
Callanytime,dayornight(U.S.A.andCanada)
www.seara.com www.$eara.c_l
Our Home
Forrepair ofcarry-initemslike vacuums,lawnequipment
and electronics,callor go on-linefor the locationof yournearest
® Registered Trademark / TM Trademark / SMService Mark of Sears, Roebuck and Co.
® Mama Registrada / TM Marca de FSbdca/ SMMama de Serviciode Sears, Roebuck and Co.
MCMarque de commerce / MDMarque d_posde de Sears, Roebuck and Co.
® Sears, Roebuck and Co.
Printed in Korea
-
 1
1
-
 2
2
-
 3
3
-
 4
4
-
 5
5
-
 6
6
-
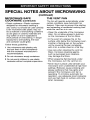 7
7
-
 8
8
-
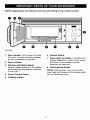 9
9
-
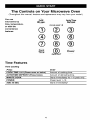 10
10
-
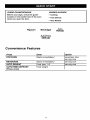 11
11
-
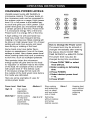 12
12
-
 13
13
-
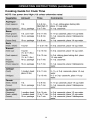 14
14
-
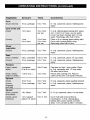 15
15
-
 16
16
-
 17
17
-
 18
18
-
 19
19
-
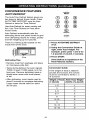 20
20
-
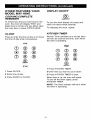 21
21
-
 22
22
-
 23
23
-
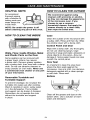 24
24
-
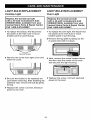 25
25
-
 26
26
-
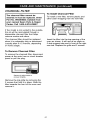 27
27
-
 28
28
-
 29
29
-
 30
30
-
 31
31
-
 32
32
-
 33
33
-
 34
34
-
 35
35
-
 36
36
-
 37
37
-
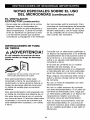 38
38
-
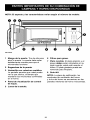 39
39
-
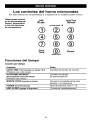 40
40
-
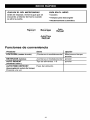 41
41
-
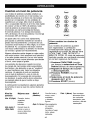 42
42
-
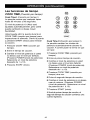 43
43
-
 44
44
-
 45
45
-
 46
46
-
 47
47
-
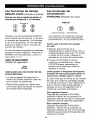 48
48
-
 49
49
-
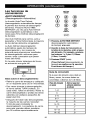 50
50
-
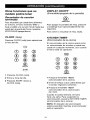 51
51
-
 52
52
-
 53
53
-
 54
54
-
 55
55
-
 56
56
-
 57
57
-
 58
58
-
 59
59
-
 60
60
-
 61
61
-
 62
62
-
 63
63
-
 64
64


Kenmore 36362702200 El manual del propietario
- Categoría
- Microondas
- Tipo
- El manual del propietario
- Este manual también es adecuado para
en otros idiomas
- English: Kenmore 36362702200 Owner's manual
Artículos relacionados
Otros documentos
-
GE WES1452 Manual de usuario
-
Hotpoint RVM1535 Manual de usuario
-
-
GE JVM1840CD Manual de usuario
-
GEAppliances JES1460DSWW El manual del propietario
-
-
GE Profile JVM3660CD Manual de usuario
-
GE JVM1851CF El manual del propietario
-
-