Kenmore 40180092010 El manual del propietario
- Categoría
- Microondas
- Tipo
- El manual del propietario
Este manual también es adecuado para

®
Microwave Hood Combination
Combinaci6n Microondas Compana
Gu_;ade u'so y ¢uidado
Models/Modelos 401. 80092
401. 80093
401. 80094
401. 80099
\
GO0
000
_0
GO0
000
PartNo. DE68-03143P Sears, Roebuck and Co., Roffrnan Estates, IL 60179
WWW.seaI'S,COm
USA'MHC5 D E68-03143PJndb 1
2007-06@8 7:43:08

Table of
Contents
Microwave Hood Combination Warranty ......... 2
Sears Service ................................ 3
Master Protection Agreements ................. 3
iMPORTANT SAFETY iNSTRUCTiONS ........... 4
Getting the Best cooking results ................ 8
Testing your dinnerware or ceokware ............ 8
Features .................................... 9
Oven Specifications ......................... 9
Features ................................. 11
Operating instructions ....................... 12
Learn about your microwave oven ............. 12
Clock .................................... 12
Kitchen Timer ............................. 12
Control Setup ............................. 12
Vent Fan ................................. 13
Delay Off ................................. 13
Child Lock ................................ 13
Add 30 Sec............................... 13
Light Timer ............................... 14
Light Hi/Lo/Off ............................. 14
More/Less ................................ 14
Custom Program ........................... 15
Cooking at high power levels ................. 15
Cooking at lower power levels ................ 15
Cooking with more than one cook cycle ......... 16
Cooking guide for power levels ................ 16
Sensor operating instructions ................. 17
Sensor cooking guide ....................... 17
Adding or subtracting cook time ............... 17
Pizza Slice ............................... 18
Popcorn ................................. 18
Baked Potato ............................. 18
Vegetable ................................ 18
Cook .................................... 19
Reheat .................................. 19
Hold Warm ............................... 19
Kids Meals ............................... 21
Soften/Melt ............................... 22
Snacks .................................. 23
Auto Defrost .............................. 24
1pound Defrost ........................... 25
Cooking guide ............................. 26
Cooking utensils ............................ 28
Microwave utensil guide ..................... 28
Care and Cleaning ........................... 29
Care and Cleaning ......................... 29
Cleaning the grease filter .................... 29
Charcoal Filter replacement .................. 30
Cooktop/Night Light replacement .............. 30
Oven Light replacement ..................... 31
Troubleshooting ............................ 32
Troubleshooting guide ...................... 32
icrowave cod
Combination
Warranty
One Year Limited Warranty
When installed, operated and maintained according to all
instructionssupplied with the product, ifthis appliance fails
due to a defect in materialor workmanship within one year
from the date of purchase, call 1-800-4-MY-HOME(®to
arrange for free repair.
If this appliance is used for other than private family
purposes, this warranty applied for only 90 days from the
date of purchase.
This warranty covers only defects in material and
workmanship. Sears will NOT pay for:
1. Expendable items that can wear out from normal use,
including but not limited to filters, belts, light bulb, and
bags.
2. A service technician to instruct the user in correct
product installation, operation or maintenance.
3. A service technician to clean or maintain this product.
4. Damage to or failure of this product if it is not
installed, operated or maintained according to all
instructions supplied with the product.
5. Damage to or failure of this product resulting from
accident, abuse, misuse or use for other than its
intended purpose.
6. Damage to or failure of this product caused by the
use of detergents, cleaners, chemicals or utensils
other than those recommended in all instructions
supplied with the product.
7. Damage to or failure of parts or systems resulting
from unauthorized modifications made to this product.
Disclaimer or implied warranties; limitations of
remedies
Customer's sole and exclusive remedy underthis limited
warranty shall be product repair asprovided herein. Implied
warranties, including warranties of merchantability or fitness
for a particular purpose, are limited to one year or the
shortest period allowed by law. Sears shall not be liable
for incidental or consequential damages. Some states and
provinces do not allowthe exclusion or limitationson the
duration of implied warranties of merchantability or fitness,
so these exclusions or limitations may not apply to you.
This warranty applied only while this appliance is used in
the United States.
This warranty gives you specific legal rights, and you may
also have other rights which vary from state to state.
Sears, Roebuck and Co., Dept. 817WA, Hoffman
Estates, IL 60179
USA=MHC5 D E68=O3143P.indb 2 2007-06-08 7:43:08

Sears Service
Master Protection Agreements
Congratulations on making a smart purchase.
Your new Kenmore® product is designed and manufactured for years of dependable operation.
But like all products, it may require preventive maintenance or repair from time to time.
That's when having a Master Protection Agreement can save you money and aggravation.
The Master Protection Agreement also helps extend the life of your new product. Here's what the Agreement*
includes:
[] Parts and labor needed to help keep products operating properly under normal use, not just defects. Our
coverage goes well beyond the product warranty. No deductibles, no functional failure excluded from
coverage-- real protection.
[] Expert service by a force of more than 10,000 authorized Sears service technicians, which means
someone you can trust will be working on your product.
[] Unlimited service calls and nationwide service, as often as you want us, whenever you want us.
[] "No-lemon" guarantee - replacement of your covered product if four or more product failures occur within
twelve months.
[] Product replacement if your covered product can't be fixed.
[] Annual Preventive Maintenance Check at your request - no extra charge.
[] Fast help by phone - we call it Rapid Resolution - phone support from a Sears representative on all
products. Think of us as a "talking owner's manual."
[] Power surge protection against electrical damage due to power fluctuations.
[] $250 Food Loss Protection annually for any food spoilage that is the result of mechanical failure of any
covered refrigerator or freezer.
[] Rental reimbursement if repair of your covered product takes longer than promised.
[] 10% discount off the regular price of any non-covered repair service and related installed parts.
Once you purchase the Agreement, a simple phone call is all that it takes for you to schedule service. You can
call anytime day or night, or schedule a service appointment online.
The Master Protection Agreement is a risk free purchase. If you cancel for any reason during the product
warranty period, we will provide a full refund. Or, a prorated refund anytime after the product warranty period
expires. Purchase your Master Protection Agreement today!
Some limitations and exclusions apply. For prices and additional information in the U.S.A. call 1-800-
827-8655.
* Coverage in Canada varies on some items. For full details call Sears Canada at 1-800-361-8665.
Sears installation Service
For Sears professional installation of home appliances, garage door openers, water heaters, and other major
home items, in the U.S.A. or Canada call 1-800-4-MY=HOME ®.
USA=MHC5 D E68=03143P.indb 3 2007-06-08 7:43:08

PORTANT SAFETY
iNSTRUCTiONS
WHAT YOU NEED TO
KNOW ABOUT SAFETY
iNSTRUCTiONS
Warning and ImportantSafety Instructions appearing
in this Use & Care Guide are not meant to cover all
possible conditions and situations that may occur.
Common sense, caution, and care must be exercised
when installing, maintaining, or operating microwave.
Always contact your dealer, distributor, service agent,
or manufacturer about problems or conditions you do
not understand.
RECOGNIZE SAFETY
SYMBOLS, WORDS,
LABELS
To avoid personal injury or property damage,
observe the following:
1. Do not deep fat fry in oven. Fat could verheat
and be hazardous to handle.
2. Do not cook or reheat eggs in shell or with
an unbroken yolk using microwave energy.
Pressure may build up and erupt. Pierce yolk
with fork or knife before cooking.
3 Pierceskin of potatoes, tomatoes, and similar
foods before cooking with microwave energy.
When skin is pierced, steam escapes evenly.
4 Do not operate oven without load or food n
ovencavity.
5 Use only popcorn in 3ackagesdesigned and
labeled for microwave use. Popping time varies
depending on oven wattage. Do not continue
to heat after popping has stopped. Popcorn wi
scorch or burn. Do not leave oven unattended.
Immediate hazards which WILL result insevere 6. Do not use regular cooking thermometers
personal injury or death, in oven. Most cooking thermometers contain
mercury and may cause an electrical arc.
malfunction, or damage to oven.
7 Do not use metal utensilsin oven.
Hazards or unsafe practices which COULD result in
severe personal injury or death. 8. Never use paper, plastic, or othercombustible
materials that are not qtendedfor cooking.
9. When cooking with paper, plastic, or other
combustibfe materials, follow manufacturer's
.............. recommendations on product use.
Hazaras or unsaTe pract ces wncn _UULU result n
minor personal injury. 10. Do not use paper towels which contain nylon
or other synthetic fibers. Heated synthetics
could melt and cause paper to ignite.
11. Do not heatsealec containers or plasticbags
in oven. Food or liquid could expand quickly
and cause container or bag to break. Pierceor
open container or bag before cooking.
12. To avoid pacemaker malfunction, consult
physician or pacemaker manufacturer about
effects of microwave energy on pacemaker.
USA=MHC5 DE68=03143P.indb 4 2007-06-08 7:43:08

To avoid risk of electrical shock or death, this oven
must be grounded and plug mustnot be altered.
GROUNDING
iNSTRUCTiONS
Oven MUST be grounded.
Grounding reduces risk of
electric shock by providing an
escape wire for the electric
current if an electrical short
occurs. This oven is equipped with a cord having a
grounding wire with a grounding plug. The plug must
be plugged into an outlet that is properly installed and
grounded. See Installation Instructions.
Consult a qualified electrician or servicer if grounding
instructions are not completely understood, or if doubt
exists as to whether the oven is properly grounded.
Do not use an extension cord. If the product power
cord is too short, have a qualified electrician install a
three-slot receptacle. This oven should be plugged
into a separate 60 hertz circuit with the electrical
rating as shown in specifications table. When the
oven is on a circuit with other equipment, an increase
in cooking times may be required and fuses can be
blown.
Microwave operates on standard household current,
110- 120V.
FEDERAL
COMMUNICATIONS
COMMiSSiON
RADIO FREQUENCY
INTERFERENCE
STATEMENT (U.S.A.
ONLY)
This equipment generates and uses ISM frequency
energy and if not installed and used properly, that
is in strict accordance with the manufacturer's
instructions, may cause interference to radio and
television reception. It has been type tested and
found to comply with limits for ISM Equipment
pursuant to part 18 of FCC Rules, which are designed
to provide reasonable protection against such
interference in a residential installation.
However, there is no guarantee that interference will
not occur in a particular installation. If this equipment
does cause interference to radio or television
reception, which can be determined by turning the
equipment off and on, the user is encouraged to
try to correct the interference by one or more of the
following:
,, Reorient the receiving antenna of the radio or
television.
= Relocate the microwave oven with respect to the
receiver.
,, Move the microwave oven away from the
receiver.
Plug the microwave oven into a different outlet so
that the microwave oven and the receiver are on
different branch circuits.
The manufacturer is not responsible for any radio
or television interference caused by unauthorized
modification to this microwave oven. It is the
responsibility of the user to correct such interference.
USA=MHC5 D E68=03143P.indb 5 2007-06-08 7:43:08

PRECAUTIONS TO
AVOID POSSIBLE
EXPOSURE TO
EXCESSIVE
MICROWAVE ENERGY
A. DO NOT attempt to operate this oven with the
door open since open door operation can result
in harmful exposure to microwave energy. It is
important not to defeat or tamper with the safety
interlocks.
B. DO NOT place any object between the oven front
face and the door or allow soil or cleaner residue
to accumulate on sealing surfaces.
C. DO NOT operate the oven if it is damaged. It
is particularly important that oven door close
properly and that there is no damage to:
1. door (bent),
2. hinges and latches (broken or loosened),
3. door seals and sealing surfaces.
D. Oven should not be adjusted or repaired
by anyone except properly qualified service
personnel.
Liquidssuch as water, coffee, or tea are able to
be overheated 3eyondthe boiling pointwithoul
appeanng to be boiling due to surface tension
of the liquid.Visible bubbling or boiling when the
container _sremoved from the m_crowaveoven
is not always present.THIS COULD RESULT
IN VERY HOT LIQUIDS SUDDENLY BOILING
OVER WHEN A SPOON OR OTHER UTENSIL IS
INSERTED INTOTHE LIQUID. To redJce the risk
of injuryto persons:
1. Do not overheat the liquid
2. Stir the liquid both before and halfway through
heating it.
3. Do not use straight-sided containers with
narrow necks.
4 After heating, allowthe container to stand in
the m_crowaveoven for a short time before
remowng _hecontainer.
5. Use extreme care when inserting a spoon or
other utensil into the container.
USA-MHC5 D E68-03143P.indb 6 2007-06-08 7:43:08

When using electrical appliances, basic safely
precautions should be followed to reducethe risk
of burns, electricshock, fire. or injuryto persons or
exposure tOexcessive microwave energy.
1. READ all instructions before using oven.
2. READ AND FOLLOW thespecific
"PRECAUTIONSTO AVOID POSSIBLE
EXPOSURETO EXCESSIVE MICROWAVE
ENERGY"on 3age 6
10. DO NOT heat baby bottles in oven.
11. DO NOT operate this oven if it has a damaged
cord or plug, if it isnot working properly, or ifit
has been damaged or dropped.
12. This oven. including power cord. must be
serviced ONLY by qualified service personnel.
Special tools are required to service oven.
Contact nearest authorized service facility for
examination, repair,or adjustment.
3. Installor locate this oven ONLY in accordance 13. DO NOT cover or block filter or other openings
with the installation instructions in this -nanua.
4. Some products such aswhole eggs and
sealed containers--for example, closed glass
jars are able to explode and SHOULD NOT
be HEATED in this oven
5. Use this oven ONLY for its intended use as
described in this manual. Do not usecorrosive
chemicals or vapors in this oven. This type ol
oven is specifically designed to heat. cook.
or dryfood. It is not designed for industrial or
laboratory use.
6. Aswith any appliance, CLOSE SUPERVISION
is necessary when used by CHILDREN or
INFIRM PERSONS.
7. See door cleaning instructions in the Care and
Cleaning section on page 29
8. Baby foodjars shall be open when heated and
contents stirred or shaken before consumption.
in order to avoid burns.
9. DO NOT usethis oven for commercial
on oven.
14. DO NOT store this oven outdoors. DO NOT
usethis product near water - for example,
near a kitchen sink. in a wet basement, near a
swimming pool or similar locations.
15. DO NOT immerse cord or plug in water.
16. Keep cord AWAY from HEATED surfaces.
17. DO NOT let cord hang over edge oftable or
counter.
18. Cleanthe ventilating hood frequently.
19. DO NOT allow grease to accumulate on the
hood or filters.
20. Use care when cleaning the ventilating hood
filter. Corrosive cleaning agents such as lye-
based oven cleaners may damage the filters.
21. When flaming foods under the hood.turn the
fan on.
22. Suitable for use above both gas and electric
cooking equipment 36 inches or less wide.
purposes. It is madefor household use only.
Toavoid risk offire in the oven Cavity; c. If materials inside the even ignite;keep oven
al Do NOT overcook food. carefully attend oven door CLOSED, turn oven off and disconnect
when a er, lastic, or other combustible the power cord, or shut off power at the fuse or
PP P
c rcut breaker pane
materials are placed insidethe 0Yento facilitate ! ! ,
Cooking. d. DO NOTusethe Cavityfor st0[age, DO NOT
b eove eave paper products, cook ng utens s, or food
R m WiretwisMies from paper 0r plastic ! "
bags before placing bag in ovenl in the cavity when not in use.
USA-MHC5DE68-O3143P.indb 7 2007-06-08 7:43:09 J

Getting the Best cookin
resu
Testing your dinnerware or cookware
Test dinnerware or cookware before using. To test a dish for safe use, put it into oven with a cup of water
beside it. Cook at 100% cook power for one minute, if the dish gets hot, do not use it.
Some dishes (melamine, some ceramic dinnerware, etc.) absorb microwave energy, becoming too hot
to handle and slwing cooking times. Cooking in metal containers not designed for microwave use could
damage the oven, as could containers with hidden metal (twist-ties, foil lining, staples, metallic glaze or trim).
To get the best results from your microwave oven, read and follow the guidelines below.
o Storage Temperature: Foods taken from the freezer or refrigerator take longer to cook than the same foods
at room temperature.
,, Size: Small pieces of food cook faster than large ones, pieces similar in size and shape cook more evenly.
For even cooking, reduce the power when cooking large pieces of food.
o Natural Moisture: Very moist foods cook more evenly because microwave energy is attracted to water
molecules.
o Stir foods such as casseroles and vegetables from the outside to the center to distribute the heat evenly
and speed cooking. Constant stirring is not necessary.
o Turn over foods like pork chops, baking potatoes, roasts, or whole cauliflower halfway through the cooking
time to expose all sides equally to microwave energy.
o Place delicate areas of foods, such as asparagus tips, toward the center of the dish.
, Arrange unevenly shaped foods, such as chicken pieces or salmon steaks, with the thicker, meatier parts
toward the outside of the dish.
o Shield, with small pieces of aluminum foil, parts of food that may cook quickly, such as wing tips and leg
ends of poultry.
o Let it Stand: After you remove the food from the microwave, cover food with foil or casserole lid and let it
stand to finish cooking in the center and avoid overcooking the outer edges. The length of standing time
depends on the density and surface area of the food.
o Wrapping in waxed paper or paper towel: Sandwiches and many other foods containing prebaked bread
should be wrapped prior to microwaving to prevent drying out.
USA=MHC5 D E68=03143P.indb 8 2007-06-08 7:43:09

Features
Door Handle Window with
Metal Shield
Cooking Guide Wire Rack
Glass Glide
Model and Serial
Door Safety Number Plate Oven Control
Lock System Panel
Oven Specifications
120 VACI 60 Hz
Input Power 1,700W
Cooking Power 1,100W IEC 60705 Standard
Frequency 2,450 MHz
Rated current i4.8A
Outer Dimensions 29 7/8(W)x 16 13/16(H)x 16 (D)
Cavity Volume 2.0 Cu. Ft.
Net Weight 52.9 Ibs.
The wire rack gives you extra space when cooking in more than one container at the same time.
To avoid risk of property damage: " Use the rackonly Whencooking food on rack
; Do not use rack to pop popcorn. P°si!ion:
,, Rack must be On the f0ur plastic supports when ,, Do not c00k with rack on floor of the ove n,
used.
1. Place rack securely in the four plastic supports.
,, Rack MUST NOT touch metal walls or back of microwave oven.
2. Place equal amounts of food both ABOVE AND BELOW rack.
= Amount of food must be approximately the same to balance out cooking energy.
IMPORTANT:
DO NOT store or use the wire rack in this oven unless more than one item is being cooked or a recipe calls for it.
,, Damage to the oven could occur
USA-MHC5 D E68-O3143P.indb 9 2007-06-08 7:43:09

0
0
@
0
10
USA-MHC5 D E68-03143P.indb 10 2007-06-08 7:43:09

Features
1. DISPLAY: The Display includes a clock and
indicators to tell you time of day, cooking time
settings and cooking functions selected.
2. POPCORN: Touch this pad when popping
popcorn in your microwave oven. The oven's
sensor will tell the oven how long to cook
depending on the amount of humidity it detects
from the popcorn.
3. COOK: Touch this pad tocook beverage, frozen
dinner, frozen breakfast, chicken breast. The
oven's sensor will tell the oven how long to cook
depending on the amount of humidity coming
from the food.
4. REHEAT: Touch this pad to reheat dinner plate,
casserole, and pasta. The oven's sensor will tell
the oven how long to cook depending on the
amount of humiditycoming from the food.
5. VEGETABLES: Touch this pad to cook fresh or
frozen vegetables. The oven's sensor will tell the
oven how long to cook depending on the amount
of humidity it detects from the vegetables.
6. BAKED POTATO: Touch this pad to cook
potatoes. The oven's sensorwill tell the oven
how long to cook depending on the amount of
humidity it detects from the potato.
7. PIZZA SLICE: Touch this pad to reheat pizza.
The oven's sensor will tell the oven how long
to cook depending on the amount of humidity it
detects.
8. KiDS MEALS, SOFTEN/MELT, SNACKS: Touch
these pads to cook specific food.
9. 1POUND DEFROST: Touch this pad to defrost
1.0 pound of frozen food.
10. AUTO DEFROST: Touch this pad to defrost food
by weight.
11 CUSTOM PROGRAM: Touch this pad to recall
one cooking instruction previously programmed
into memory.
12. LESS(l): Touch this pad to subtract the cooking
time.
13. MORE(9): Touch this pad to add more cooking
time.
14. NUMBER: Touch number pads to enter cooking
time, power level, quantities, or weights.
15. CONTROL SETUP: Touch this pad to change
the oven's default settings.
16. POWER LEVEL: Touch this pad to select a
cooking power level.
17. CLOCK: Touch this pad to enter the time of day.3
18. KITCHEN TIMER: Touch this pad to set the
kitchen timer.
19. ADD 30 SEC: Touch this pad to set and start
cooking quickly at 100% power level.
20. HOLD WARM: Touch this pad to keep hot,
cooked food warm in your microwave oven for up
to 99 minutes 99 seconds.
21. LIGHT TIMER: Touch this pad to set the light
timer.
22. LIGHT HI/LO/OFF: Touch this pad to turn on the
cooktop light.
23. VENT DELAY OFF: Touch this pad when setting
ventilation time (1,3, 5, 10,30 minutes).
24. VENT 5 SPEED: Touch this pad to choose one of
5 fan speeds.
25. VENT ON/OFF: Touch this pad to turn the fan
on/off.
26. ENTER/START: Touch this pad to start a
function. If you open the door after oven begins
to cook, close the door and touch ENTER/START
pad again.
27. STOP/CLEAR: Touch this pad to stop the oven
or to clear all entries.
11
USA-MHC5 D E68-O3143P.indb 11 2007-06-08 7:43:09

Operatin
instructions
Learn about your microwave
OVeR
This section introduces you to the basics you need to
know to operate your microwave oven. Please read
this information before use.
To avoid risk of personal injury or property
damage, do not run oven empty.
,' To avoid risk of personal injury or property
damage, do not usestoneware, aluminum foil,
metal utensils, or metal trimmed utensils in the
oven.
Clock
Example: To set 8:00 AM.
1 Touch CLOCK pad.
2 Enter the time by using the
number pads.
3 Touch ENTER/START pad.
4 Touch 1for AM.
5 Touch ENTER/START pad.
NOTE
Follow steps 1-3 above in the 24 hour clock mode.
Kitchen Timer
You can use your microwave oven as a timer. Use
the Kitchen Timer for timing up to 99 minutes, 99
seconds.
Example: To set for 8 minutes.
1. Touch KITCHEN TIMER pad.
2. Enter the time by using the
number pads.
3. Touch ENTER/START pad.
When the time is over, you will hear beeps and END
will display.
Control Setup
You can change the default values. See following
chart for more information.
1 Weight mode 1 Lbs.
selected 2 Kg.
1 Sound ON
2 Sound on/off control
2 Sound OFF
Clock display 1 12HR
3
control 2 24HR
1 Slow speed
4 Display 2 Normal speed
3 Fast speed
1 ON
5 Remind end signal 2 OFF
1 ON
6 Dome mode
2 OFF
7 Daylight 1 ON
Saving time 2 OFF
Example: To change weight mode (from Lbs. to Kg).
1. Touch CONTROL SETUP pad.
2. Touch number 1 pad.
3. Touch number 2 pad.
12
USA-MHC5 D E68-O3143P.indb 12 2007-06-08 7:43:10

Vent Fan
The VENT moves steam and other vapors from the
cooking surface.
Example: To set Level 4.
1. Touch ON/OFF pad. This shows
the last level until you select the
fan speed level.
2. Touch 5 SPEED pad until Level
4 appears in the display.
3 Touch ON/OFF pad to turn off
fan when desired.
NOTES:
If the temperature gets too hot around the microwave
oven, the fan in the vent hood will automatically turn
on at the LEVEL 2 setting to cool the oven. The fan
will automatically turn off when the internal parts are
cool. When this occurs, the vent cannot be turned off
manually.
Delay Off
Example: To turn off fan after 30 minutes for Level 4.
1. Touch ON/OFF pad.
2. Touch 5 SPEED pad until Level
4 appears in the display.
3. Touch DELAY OFF pad five
times. AFTER 30 MINUTES
scrolls in the display.
Child Lock
You may lock the control panel to prevent the
microwave from being accidentally started or used by
children.
The Child Lock feature is also useful when cleaning
the control panel. Child Lock prevents accidental
programming when wiping the control panel.
Example: To set the child lock.
Touch and hold ENTER/START
pad more than 3 seconds. CHILD
LOCK ON will appear in the display
window with two beeps.
Example: To cancel the child lock.
Touch and hold ENTER/START
pad more than 3 seconds.
LOCKED will disappear and you
will hear two beeps.
Add 30 Sec.
A time-saving pad, this simplified control lets you
quickly set and start microwave cooking without the
need to touch the ENTER/START pad.
Example: To set ADD 30 SEC. for 2 minutes.
Touch ADD 30 SEC. pad 4 times.
The oven begins cooking and
display shows time counting down.
13
USA=MHC5DE68=O3143P.indb 13 2007-06-08 7:43:10 I

¸iiii!iiii!!i!!iiiii! i!i!!!!!iiiiilill¸!i!!ii!iiiiiiiiiililiiiiiiiliiiiiiiiiiiiiiiiiiiiiiiiiiiiiiiiiiiii!il¸ !!ii!i i !i!i ! !i! i i :iiiiiiiiiiiiiiiiiiiiiiiiiiiiiiiiiiiiiiiiiiiiiiiiiiiiiiiiiiiiiiiiiiiiiiiiiiiiiiiiiiiiiiiiiiiiiiiiiiiiiiiiiiiiiiiiiiiiiiiiiiiiiiiiiiiiiiiiiiiiiiiiiiiiiiiiiiiiiiiiiiiiiiiiiiiiiiiiiiiiiiiiiiiiiiiiiiiiiiiiiiiiiiiiiiiiiiiiiiiiiiiiiiiii:
Light Timer
You can set the LIGHT to turn on and off
automatically at any time. The light comes on at the
same time every day until reset.
Example: Turn on 2:00 AM, turn off 7:00 PM.
1 Touch TIMER pad
2 Enter the time you want the
LIGHT to turn on
3 Touch ENTER/START pad
4 Touch 1for AM
5 Touch ENTER/START pad
6 Enter the time you want the
LIGHT to turn off
7 Touch ENTER/START pad
8 Touch 2 for PM
9 Touch ENTER/START pad
1. Touch TIMER pad.
2. Touch 0 pad.
NOTE"
if you want to cancel the LIGHT TIMER in operation,
touch the 0 pad
Light Hi/Lo/Off
Touch LIGHT HI/LO/OFF pad once
for bright light, twice for night light,
or three times to turn the light off.
More/Less
The More(9)/Less(1 ) pads allow you to adjust pre-set
cooking times.
They only work in the Sensor Reheat, Sensor
Cooking(except Beverage), Add 30 sec, Custom
Cook or Time Cook modes. Use the More(e)/Less(1)
pads only after you have already begun cooking with
one of these procedures.
Follow these instructions to add or reduce cooking
times for an automatic cooking procedure;
Touch the More(9) pad to add time.
24 hou clec k mode,
1. Touch TIMER pad.
Touch the Lees(l) pad to reduce
time.
2. Enter the time you want the
LIGHT to turn on.
3 Touch ENTER/START pad
4. Enter the time you want the
LIGHT to turn off.
5 Touch ENTER/START pad
14
USA-MHC5 D E68-03143P indb 14 2007-06-08 7:43:11

Custom Program
CUSTOM PROGRAM lets you recall one cooking
instruction previously placed in memory and begin
cooking immediately.
Example: To cook for 2 minutes at 70% power.
1. Touch CUSTOM PROGRAM
pad.
2. Enter the cook time.
3. Touch POWER LEVEL pad.
4. Enter the power level.
5. Touch ENTER/START pad.
Example: To recall the custom program.
1. Touch CUSTOM PROGRAM
pad.
2. Touch ENTER/START pad.
When the cook time is over, you will hear four beeps
and END will display.
Cooking at high power levels
Example: To cook food for 8 minutes 30 seconds at
100% power.
1. Enter the cook time.
2. Touch ENTER/START pad.
When the cook time is over, you will hear four beeps
and END will display.
Cooking at lower power
levels
HIGH power cooking does not always give you the
best results with foods that need slower cooking,
such as roasts, baked goods, or custards. Your oven
has 9 power settings in addition to HIGH.
Example: To cook food for 7 minutes 30 seconds at
70% power.
1. Enter the cook time.
2. Touch POWER LEVEL pad.
3. Enter the power level.
4. Touch ENTER/START pad.
When the cook time is over, you will hear four beeps
and END will display.
See cooking guide for power levels, page 16.
IMPORTANT:
* DONOTstore or usethewirerack inthis ovenunless
morethan one itemisbeingcookedor a recipecalls
for it.
,, Damageto theovencouldoccur.
15
USA=MHC5 D E68=O3143P.indb 15 2007-06-08 7:43:12

Cooking with more than one
cook cycle
For best results, some recipes call for one Power
Level for a certain length of time, and another Power
Level for another length of time.Your oven can be set
to change from one to another automatically, for up to
three cycles if the first cycle is defrost.
Example: To cook food for 3 minutes at 90% power
and then 70% power for 7 minutes 30 seconds.
1. Enter the cook time.
2. Touch POWER LEVEL pad.
3. Enter the power level.
4. Enter the second cook time.
5. Touch POWER LEVEL pad.
6. Enter the power level.
7. Touch ENTER/START pad.
When the cook time is over, you will hear four beeps
and END will display.
Cooking guide for power
levels
The power levels allow you to choose the best power
level for the food you are cooking. Below are listed all
the power levels, examples of foods best cooked at
each level, and the amount of microwave power you
are using.
10 High
100 %
9 9O %
8 80 %
7 70 %
6 60 %
5 50 %
4 40 %
3 30 %
2 20 %
1 10%
', Boil water.
* Cook ground beef or begin
cooking roasts.
,, Make candy.
,* Cook fresh fruits and
vegetables.
,, Preheat browning dish.
,, Reheat beverages.
,* Bacon slices.
,, Reheat meat slices quickly.
,* Saute onions, celery, and
green pepper.
,, All reheating.
,* Cook scrambled eggs.
,, Cook poultry or seafood.
,* Cook breads and cereal
products.
,* Cook cheese dishes, veal.
,* Cook cakes, muffins,
brownies, cupcakes.
,* Cook pasta.
,, Cook meats.
,* Cook custard.
,* Cook spare ribs, rib roast,
sirloin roast.
,* Cook less tender cuts of
meat.
,, Reheat frozen convenience
foods.
,, Thaw meat, poultry, and
seafood.
,* Cook small quantities of
food.
,, Finish cooking casserole,
stew, and some sauces.
,, Soften butter and cream
cheese.
,* Heat small amounts of food.
,, Soften ice cream.
,* Raise yeast dough.
16
USA-MHC5DE68-O3143P.indb 16 2007-06-08 7:43:12 I

Sensor operating instructions
Sensor Cook allows you to cook most of your
favorite foods without selecting cooking times and
power levels. The display will indicate the sensing
period by scrolling the name of the food. The oven
automatically determines required cooking time for
each food item. When the internal sensor detects
a certain amount of humidity coming from the food,
it will tell the oven how much longer to cook. The
display will show the remaining heating time.
For best results when cooking by Sensor, follow
these recommendations:
1. Food cooked with the sensor system should be at
normal storage temperature.
2. Glass turntable and outside of container should
be dry to assure best cooking results.
3. Most foods should always be covered loosely
with microwavable plastic wrap, waxed paper, or
a lid.
4. Do not open the door or touch the STOP/CLEAR
pad during the sensing time. When sensing
time is over, the oven beeps and the remaining
cooking time will appear in the display window.
At this time you can open the door to stir, turn, or
rearrange the food.
See sensing chart on page 20.
IMPORTANT:
When using sensor cook, the oven must cool for 5
minutes between uses or food will not cook properly.
Sensor cooking guide
Appropriate containers and coverings help assure
good Sensor cooking results.
1. Always use microwavable containers and cover
them with lids or vented plastic wrap.
2. Never use tight-sealing plastic covers. They can
prevent steam from escaping and cause food to
overcook.
3. Match the amount to the size of the container. Fill
containers at least half full for best results.
4. Be sure the outside of the cooking container and
the inside of the microwave oven are dry before
placing food in the oven. Beads of moisture
turning into steam can mislead the sensor.
NOTE"
If food is not thoroughly cooked or reheated when
using the sensor feature, complete using a power
level and cooking time. DO NOT continue using the
sensor pad.
Adding or subtracting cook
time
By using the More(9) or Less(1 ) pad all of the sensor
cook and time cook settings can be adjusted to cook
food for a longer or shorter time.
17
USA=MHC5DE68=03143P.indb 17 2007-06-08 7:43:12 I

Pizza Slice
The PIZZA SUCK pad lets you reheat one to four
slices of pizza without selecting cooking times and
power levels.
Example: To reheat 2 slices of pizza.
TouchP,ZZASL,CEpad
When the cook time is over, you will hear four beeps
and END will display.
,, Recommended amounts: 1-4 slices.
iiiiiiiiiiiiiiiiiiiiilililiiiii!!!!j!iiii
,, DO NOT leave microwave oven unattended
while popping corn.
,, When popping commercially packaged
popcorn, remove the rack from the oven;
Donot place the bag of microwave popcornon
the rack or under the rack.
Baked Potato
The BAKED POTATO pad lets you bake one to six
potatoes without selecting cooking times and power
levels.
NOTES:
,, Cooking time is based on a 6-8 oz. potato.
,, Use the More(9)/Less(1) pads if cooking larger or
smaller potatoes.
,, Before baking, pierce potato with fork several times.
,, If potatoes are not completely cooked, continue
cooking using cooking time.
DO NOT use the BAKED POTATO pad to complete
cooking.
,, After baking, let stand for 5 minutes.
Example: To cook 2 potatoes.
Touch BAKED POTATO pad.
When the cook time is over, you will hear four beeps
and END will display.
= Recommendedamounts: 1-6 potatoes, about 6-8
oz. each.
Vegetable
VEGETABLES pad has preset cooking times and power
levels power for 2 food categories: Fresh, Frozen.
Example: Tocook Frozen Vegetables.
,.TouchVEGETABLESpad.
2. Choose foodcategory.
Popcorn
POPCORN pad lets you pop commercially packaged
microwave popcorn. Pop only one package at a time.
For best results, use fresh bags of popcorn.
Example:Topop popcorn.
@ TouchPOPCO,,pad.
When the cook time is over, you will hear four beeps
and END will display.
= Recommended amounts: 3.0-3.5 ozs.
When the cook time is over, you will hear four beeps and
END will display.
Fresh 1
Frozen 2
18
USA=MHC5 D E68=03143P.indb 18 2007-06-08 7:43:13

Cook
Using COOK pad lets you heat common microwave-
prepared foods without needing to program cooking
times and power levels. COOK has 4 preset food
categories: Beverage, Frozen Dinner, Frozen
Breakfast and Chicken Breast.
Example: To cook Frozen Breakfast.
, TouchCOOKpad
2. Choose food category.
When the cook time is over, you will hear four beeps
and END will display.
Beverage 1
Frozen Dinner 2
Frozen Breakfast 3
Chicken Breast 4
Recommended amounts:
Beverage 8 ozs.
Frozen Dinner 8-14 ozs.
Frozen Breakfast 4-8 ozs.
Chicken Breast 8-24 ozs.
Reheat
REHEAT pad lets you heat foods without needing to
program cooking times and power levels. REHEAT
has 3 preset categories: Dinner Plate, Casserole
and Pasta.
Example: To reheat Casserole.
@ 1TouchREHEATpad
2. Choose food category.
When the cook time is over, you will hear four beeps
and END will display.
Dinner Plate 1
Casserole 2
Pasta 3
Recommended amounts:
Dinner Plate 1 serving
Casserole 1-4 servings
Pasta 1-4 servings
Hold Warm
You can keep cooked food warm in you microwave
oven for up to 99 minutes 99 seconds.
Example: To warm for 60 min.
1. Touch HOLD WARM pad.
2. Enter the cook time.
3. Touch ENTER/START pad.
NOTES:
,, HOLD WARM operates for up to 99 minutes 99
seconds.
Food cooked covered should be covered during
HOLD WARM
,, Pastry items (pies, turnovers, etc.) should be
uncovered during HOLD WARM.
* Complete meals kept warm on a dinner plate can be
covered during HOLD WARM.
Liquid 1-2 cups
Dry 5-10 oz.
19
USA=MHC5 D E68=O3143P.indb 19 2007-06-08 7:43:13

_i_iii_iii!_!!_i_iiiiiiii!iiiiiiiiiiiiiiiiiiiiiiiiii_i_iiiiiii_i_i_!_i;_iii_iiiii_iii_ii_!_i_!!ii!!i!iiiiii_iiiiiiiiiiii_i_i_i_i_i_i_!iiii_i_i_!i_iiiiiiiiii_ii!i!!i!i!iii_iii_ii_iiii_ii!01i_i_i_l_'i _i_!_!i!i!i!i!i!_;_;!_i_i_!_!_!_i_i_i_ii_i_i_iiii_i_i_i_i!i!i!i_i_iiiiiiiiiiiiiiiiiiiii_iiiiiiiiiiiiii_i_!_ii!!_i_i!!!i!ii!i_!!!_!!i!!i!!i!!i!!i!!i_i_!!!!_¸_!i_i_iiiiii_i_i_i_i_i_i_i_i_iiiiii_i_i_i_i_iiiiiii_iiiiii!_!iiii_i_i_!_!i_!!_!_!iiiii_iii!_!!iiiii_!_!i_ii_ii_ii_ii_ii_ii_ii_ii_ii_ii_ii_ii_ii:i_i_!_i_:_!iii!!!!!!!!!!!!_!i
Use only one microwave-only bag of popcorn at a time. Use caution when removing 3.0 to 3.5 oz.
Popcorn and opening the hot bag from oven. Let oven cool for at least 5 minutes before using 1 package
again.
Prick each potato several times with fork. Place on turntable in spoke-like fashion.
Potato Let stand 3-5 minutes. Let oven cool for at least 5 minutes before using again. Use 1 to 6 potatoes
More(9) pad when cooking larger potatoes.
Place fresh vegetables in microwave-safe ceramic, glass or plastic dish and add
03 Fresh 2-4 Tbs. water. Cover with lid or vented plastic wrap during cooking and stir before
Vegetables standing. Let oven cool for at least 5 minutes before using again. Use the More(9) 1 to 4 servings
co pad when cooking dense vegetables such as carrots or broccoli spears.
<_
i-
uJ Place frozen vegetables in microwave-safe ceramic, glass or plastic dish and add
Frozen 2-4 Tbs. water. Cover with lid or vented plastic wrap during cooking and stir before
> Vegetables standing. Let oven cool for at least 5 minutes before using again. Use the More(9) 1 to 4 servings
pad when cooking dense vegetables such as carrots or broccoli spears.
Put 1-4 slices of pizza on a microwave-safe plate with wide end of slice toward the
Pizza Slice outside edge of the plate. Do not let slices overlap. Do not cover. Let oven cool for at 1 to 4 Slices
least 5 minutes before using again. Use More(9) pad to increase reheat time for thick
crust pizza.
Use measuring cup or mug ; do not cover. Place the beverage in the oven. After
heating, stir well. Let oven cool for at least 5 minutes before using again.
Note. 8 oz.
Beverage ,, Reheat times based on an 8 ounce cup.
,, Beverage heated with the beverage feature may be very hot.
,, Remove container with care.
,..,. Frozen Remove food from outer wrapping and follow box instructions for covering and
8 to 14 oz.
O Dinner standing. Let oven cool for at least 5 minutes before using again.
© Follow package instructions for covering and standing. Use this pad for frozen
Frozen
Breakfast sandwich, breakfast entree, etc. Let oven cool for at least 5 minutes before using 4 to 8 oz.
again.
Place chicken breasts on a microwave-safe plate and cover with plastic wrap. Cook
Chicken to an internal temperature of 170 degrees F. Turn over during countdown time. Let
8 to 24 oz.
Breast stand 5 minutes. Use the More(9) pad to increase cooking time for larger or thicker
chicken breasts. Let oven cool for at least 5 minutes before using again.
Dinner Plate
Casserole
Pasta
Use only pre-cooked, refrigerated foods. Cover plate with vented plastic wrap or
waxed paper, tucked under plate. If food is not as hot as you prefer after heating with
REHEAT, continue heating using cooking time and power level. Do not continue
cooking using the Reheat pad.
Contents:
,, 3-4 oz. meat, poultry or fish (up to 6 oz. with bone)
,, 1/2 cup starch (potatoes, pasta, rice, etc.)
,, 1/2 cup vegetables (about 3-4 oz.)
Cover plate with lid or vented plastic wrap. If food is not as hot as you prefer after
heating with REHEAT, continue heating using time and power level. Do not continue
cooking using the Reheat pad. Stir foods once before serving.
Contents:
,, Casserole-refrigerated foods. (Examples: Lasagna and beef stew.)
,, Pasta-Canned spaghetti and ravioli, refrigerated foods.
1 serving
(1 plate)
1 to 4 servings.
2O
USA-MHC5 D E68-O3143P.indb 20 2007-06-08 7:43:13

Kids Meals
KiDS MEALS lets you heat 4 categories of food: Chicken Nuggets, Hot Dogs, French Fries and Frozen
Sandwiches.
Example: To cook frozen sandwiches.
1. Touch KiDS MEALS pad.
2. Choose food category(I-4).
3. Touch ENTER/START pad.
Chicken Nuggets 1
Hot Dogs 2
French Fries 3
Frozen Sandwiches 4
Frozen Chicken
Nuggets
1 serving (4-5 oz.)
2 servings (6-7 oz.)
2 EA
Hot Dogs 4 EA
1 serving (4-5 oz.)
French Fries 2 servings (6-7 oz.)
1 EA
Frozen Sandwiches
2 EA
o Put a paper towel on top of plate and arrange nuggets in spoke fashion on
paper towel.
o Do not cover. Let stand 1 minute.
Prick hot dogs, place on plate. When the oven beeps, add buns and re-start
the oven.
o Place 2 paper towels on plate and arrange french fries on towels, do not
overlap.
o Blot with additional paper towel after removal from oven.
Place frozen sandwich in susceptor "sleeve" (which is in package) and put
on plate.
21
USA-MHC5 D E68-O3143P.indb 21 2007-06-08 7:43:13

Soften/Melt
SOFTEN/MELT lets you soften or melt 3 categories of food: Melt Chocolate, Soften Cream Cheese and Melt
Butter.
Example: To melt chocolate.
1. Touch SOFTEN/MELT pad.
2. Choose food category(I-3).
3. Touch ENTER/START pad.
Melt Chocolate 1
Soften Cream Cheese 2
Melt Butter 3
Melt Chocolate
Soften Cream
Cheese
Melt Butter
2 squares or 1cup
chips
1 package (8 oz.)
1 stick (1/4 lb.)
2 sticks (1/2 lb.)
- Place chocolate chips or square in a microwave-safe dish.
,, Stir well at half time when the oven beeps, and re-start the oven.
- Unless stirred, the chocolate keeps its shape even when heating time is
over.
,, Unwrap cream cheese and place on microwave-safe dish.
- Let stand 1-2 minutes.
,, Remove wrapping and cut butter in half vertically.
- Place butter in dish, cover with wax paper.
- Stir well after finishing and let stand 1-2 minutes.
22
USA=MHC5 D E68=O3143P.indb 22 2007-06-08 7:43:14

Snacks
SNACKS lets you heat 4 categories of food: Nachos, Chicken Wings, Potato Skins, and Cheese Sticks.
Example: To cook chicken wings.
1. Touch SNACKS pad.
2. Choose food category(I-4).
3. Touch ENTER/START pad.
Nachos 1
Chicken Wings 2
Potato Skins 3
Cheese Sticks 4
Snacks chart
1 serving - Place tortilla chips on plate without overlapping.
Nachos ,, Sprinkle evenly with cheese.
Contents:- 2 cups tortilla chips
- 1/3 cup grated cheese
5-6 oz. ,, Use pre-cooked, refrigerated chicken wings.
Chicken Wings 7-8 oz. ,, Place chicken wings around plate in spoke fashion and cover with wax
paper.
1 cooked potato ,, Cut cooked potato into 4 even wedges. Scoop or cut out potato flesh,
2 cooked potatoes leaving about 1/4" of skin.
Potato Skins
- Place skins in spoke fashion around plate.
- Sprinkle with bacon, onions and cheese. Do not cover.
Cheese Sticks 5-6 pcs. ,, Place cheese sticks on plate in spoke fashion.
7-10 pcs. - Do not cover.
23
USA=MHC5 D E68=O3143P.indb 23 2007-06-08 7:43:14

Auto Defrost
Defrost choices are preset in the oven. The defrost feature provides you with the best defrosting method for
frozen foods, because the oven automatically sets the defrosting times according to the weight you
enter. For added convenience, the AUTO DEFROST beeps to remind you to check or turn over the food during
the defrost cycle.
After touching the AUTO DEFROST pad once, enter the food weight.
Available weight ranges are 0.1 to 6.0 Ibs.
Example: To defrost 1.2 Ibs of meat,
1. Touch AUTO DEFROST pad.
2. Enter the weight.
3. Touch ENTER/START pad.
NOTES:
,, After you touch ENTER/START pad, the display counts down the defrost time. The oven will beep twice during
the Defrost cycle. At this time, open the door and turn the food as needed. Remove any portions that have thawed
or separate please then return frozen portions to the oven and touch ENTER/START pad to resume the defrost
cycle.
The oven will not stop during the BEEP unless the door is opened.
Follow the instructions below when defrosting different types of food.
Roast Beef, Pork 2.5-6.0 Ibs. Start with the food placed fat side down. After each stage, turn the food over
and shield any warm portions with narrow strips of aluminum foil. Let stand,
covered, for 15 to 30 minutes.
Steaks, Chops, Fish 0.5-3.0 Ibs. After each stage, rearrange the food. If there are any warm or thawed portions
of food, shield them with narrow flat pieces of aluminum foil. Remove any
pieces of food that are nearly defrosted. Let stand, covered, for 5-10 minutes.
Ground Meat 0.5-3.0 Ibs. After each stage, remove any pieces of food that are nearly defrosted. Let
stand, covered with foil, for 5-10 minutes.
Whole Chicken 2.5-6.0 Ibs. Remove giblets before freezing poultry. Start defrosting with the breast side
down. After the first stage, turn the chicken over and shield any warm portions
with narrow strips of aluminum foil. After the second stage, again shield any
warm portions with narrow strips of aluminum foil. Let stand, covered for 30-60
minutes in the refrigerator.
Chicken Pieces 0.5-3.0 Ibs. After each stage, rearrange or remove any pieces of food that are nearly
defrosted. Let stand for 10-20 minutes.
24
USA=MHC5 D E68=O3143P.indb 24 2007-06-08 7:43:14

,, When using AUTO DEFROST, the weight to be entered is the net weight in pounds and tenths of pounds
(the weight of the food minus the container).
= Use AUTO DEFROST only for raw food. AUTO DEFROST gives best results when food to be thawed
is a minimum of 0°F (taken directly from a true freezer). If food has been stored in a refrigerator-freezer
that does not maintain a temperature of 5°F or below, always program a lower food weight (for a shorter
defrosting time) to prevent cooking the food.
If the food is stored outside the freezer for up to 20 minutes, enter a lower food weight.
,, The shape of the package alters the defrosting time. Shallow rectangular packets defrost more quickly than
a deep block.
Separate pieces as they begin to defrost. Separated pieces defrost more easily.
Shield areas of food with small pieces of foil if they start to become warm.
,, You can use small pieces of aluminum foil to shield foods like chicken wings, leg tips, and fish tails, but the
foil must not touch the side of the oven. Foil causes arcing, which can damage the oven lining.
1 pound Defrost
The 1 POUND DEFROST feature provides a rapid defrost for 1.0 pound frozen food. The oven automatically
sets the defrosting time.
Example: To defrost lib. ground beef.
1. Touch 1 POUND DEFROST pad.
2. Touch ENTER/START pad.
25
USA-MHC5DE68-03143P.indb 25 2007-06-08 7:43:14 I

Cooking guide
= Place meat on a microwave-safe roasting rack in a microwave-safe dish.
,, Start meat fat-side down. Use narrow strips of aluminum foil to shield any bone tips or thin meat areas.
= Check the temperature in several places before letting the meat stand the recommended time.
Roast Beef
Boneless
(Up to 4 Is.)
i_i!@i_!i_iiiii_ii_ii@ii_iiiii@_!__i_i¸!_!!i!_i!_i_!_!_!_!_!_!_!_!_!_!_!_!_!_!_!_!_!_!_!!_!!_!!_!!!!!i!!!!!_!_i!i
7-11 min./Ib, for 145 ° F
(Rare)
8-12 min./Ib, for 160 ° F
(Medium)
9-14 min./Ib, for 170 ° F
Well Done)
11-15 min./Ib, for 170° F
Well Done)
Pork Boneless or
bone-in
(Up to 4 Ibs.)
High(10) for first
5 minutes, then
medium(5)
High(lO) for first
5 minutes, then
medium(5)
Place roast fat-side down on roasting rack.
Cover with wax paper. Turn over half way
through cooking. Let stand 10 -15 minutes.
Place roast fat-side down on roasting rack.
Cover with wax paper. Turn over half way
through cooking. Let stand 10 -15 minutes.
The following temperatures are removal temperatures. The temperature of the food will rise during the
standing time.
Expect a 10°F rise in temperature during the standing time.
Pork
Poultry
Medium
Well Done
Medium
Well Done
Dark meat
Light meat
160 °F
150 °F
160 °F
170 °F
160 °F
170 °F
160 °F
170 °F
180 °F
170 °F
= Place poultry on a microwave-safe roasting rack in a microwave-safe dish.
,, Cover poultry with wax paper to prevent spattering.
,, Use aluminum foil to shield bone tips, thin meat areas, or areas that start to overcook.
Check the temperature in several places before letting the poultry stand the recommended time.
Whole Chicken
Up to 4 Ibs.
Cooking Time: 6-9 rain. / lb.
180°F dark meat
170°F light meat
Power Level: Medium High(7).
Cooking Time: 6-9 rain. / lb.
180°F dark meat
170°F light meat
Power Level: Medium High(7).
Chicken Pieces
Up to 2 Ibs.
Place chicken breast-side down on roasting rack. Cover with
wax paper. Turn over half way through cooking. Cook until
uices run clear and meat near the bone is no longer pink. Let
stand 5-10 minutes.
Place chicken bone-side down on dish, with the thickest
3ortions toward the outside of the dish. Cover with wax paper.
Turn over half way through cooking. Cook until juices run
clear and meat near the bone is no longer pink. Let stand 5-10
minutes.
26
USA=MHC5 D E68=O3143P.indb 26 2007-06-08 7:43:14

,, Cook fish until it flakes easily with a fork.
= Place fish on a microwave-safe roasting rack in a microwave-safe dish.
,, Use a tight cover to steam fish. A lighter cover of wax paper or paper towel provides less steaming.
,, Do not overcook fish; check it at minimum cooking time.
Arrange steaks on roasting rack with meaty portions towards
Steaks CookingTime: 6-10 rain./ lb. the outside of rack. Cover with wax paper. Turn over and
Up to 1.5 Ibs. Power Level: Medium-High(7). rearrangewhen cooking time is half up. Cook untilfish flakes
easily with afork. Let stand 3-5 minutes.
Arrange fillets in a baking dish, turning any thin pieces under.
Fillets CookingTime: 3-7 min. / Ib Cover with wax paper. Ifover _/2inch thick, turn over and
Up to 1.5 Ibs. Power Level:Medium-High(7). rearrangewhen cooking time is half up. Cook untilfish flakes
easily with afork. Let stand 2-3 minutes. []
Shrimp Cooking Time: 3-5 Y2min./ lb. Arrange shrimp in a baking dish without overlapping or
Up to 1.5 Ibs. Power Level: Medium-High(7). layering. Cover with wax paper. Cook untilfirm and opaque,
|
stirring 2 or 3 times.Let stand 5 minutes.
Never cook eggs in the shell, and never warm hard-cooked eggs in the shell; they can explode.
,, Always pierce whole eggs to keep them from bursting.
,, Cook eggs just until set; they become tough if overcooked.
,, Vegetables should be washed just before cooking. Often, no extra water is needed. If dense vegetables
such as potatoes, carrots and green beans are being cooked, add about ¼ cup water.
Small vegetables (sliced carrots, peas, lima beans, etc.) will cook faster than larger ones.
Whole vegetables, such as potatoes, acorn squash or corn on the cob, should be arranged in a circle on
the turntable before cooking. They will cook more evenly if turned over after half the cooking time has
passed.
Always place vegetables like asparagus and broccoli with the stem ends pointing towards the edge of the
dish and the tips toward the center.
,, When cooking cut vegetables, always cover the dish with a lid or vented microwavable plastic wrap.
,, Whole, unpeeled vegetables such as potatoes, squash, eggplant, etc., should have their skin pricked in
several spots before cooking to prevent them from bursting.
For more even cooking, stir or rearrange whole vegetables halfway through the cooking time.
,, Generally, the denser the food, the longer the standing time. (Standing time refers to the time necessary for
dense, large foods and vegetables to finish cooking after they come out of the oven.) A baked potato can
stand on the counter for five minutes, while a dish of peas can be served immediately.
27
USA=MHC5 D E68=O3143P.indb 27 2007-06-08 7:43:15

Cookin utensils
Microwave utensil guide
USE DO NOT USE
OVEN PROOF GLASS (treated for high
intensity heat):
Utility dishes, loaf dishes, pie plates, cake
plates, liquid measuring cups, casseroles
and bowls without metallic trim.
CHINA:
Bowls, cups, serving plates and platters
without metallic trim.
PLASTIC:
Plastic wrap (as a cover)-- lay the plastic
wrap loosely over the dish and press it to
the sides.
Vent plastic wrap by turning back one edge
slightly to allow excess steam to escape.
The dish should be deep enough so that
the plastic wrap will not touch the food. As
the food heats it may melt the plastic wrap
wherever the wrap touches the food.
Use plastic dishes, cups, semirigid freezer
containers and plastic bags only for short
cooking times.
Use these with care because the plastic
may soften from the heat of the food.
PAPER:
Papertowels, waxed paper, paper napkins,
and paper plates with no metallic trim or
design. Look for the manufacturer's label for
use inthe microwave oven.
METAL UTENSILS:
Metal shields the food from microwave energy and produces uneven
cooking. Also avoid metal skewers, thermometers or foil trays. Metal
utensils can cause arcing, which can damage your microwave oven.
METAL DECORATION:
Metal-trimmed or metal-banded dinnerware, casserole dishes, etc. The
metal trim interferes with normal cooking and may damage the oven.
ALUMINUM FOIL:
Avoid large sheets of aluminum foil because they hinder cooking and may
cause harmful arcing. Use small pieces of foil to shield poultry legs and
wings. Keep ALL aluminum foil at least 1 inch from the side walls and
door of the oven.
WOOD:
Wooden bowls and boards will dry out and may split or crack when you
use them in the microwave oven. Baskets react in the same way.
TIGHTLY COVERED UTENSILS:
Be sure to leave openings for steam to escape from covered utensils.
Pierce plastic pouches of vegetables or other food items before cooking.
Tightly closed pouches could explode.
BROWNPAPER:
Avoid using brown paper bags.
They absorb too much heat and could burn.
FLAWEDOR CHIPPEDUTENSILS:
Any utensil that is cracked, flawed, or chipped may break in the oven.
METAL TWIST TIES:
Remove metal twist ties from plastic or paper bags.
They become hot and could cause a fire.
28
USA=MHC5 D E68=03143P.indb 28 2007-06-08 7:43:15

CaFe an Cleanin
Care and Cleaning
For best performance and safety, keep the oven
clean inside and outside. Take special care to keep
the inner door panel and the oven front frame free
of food or grease build-up. Never use rough powder
or pads. Wipe the microwave oven inside and out,
including the hood bottom cover, with a soft cloth and
a warm (not hot) mild detergent solution. Then rinse
and wipe dry. Use a chrome cleaner and polish on
chrome, metal and aluminum surfaces. Wipe spatters
immediately with a wet paper towel, especially after
cooking chicken or bacon. Clean your oven weekly or
more often, if needed.
Follow these instructions to clean and care for your
oven.
• Keep the inside of the oven clean. Food particles
and spilled liquids can stick to the oven walls,
causing the oven to work less efficiently.
,, Wipe up spills immediately. Use a damp cloth
and mild soap. Do not use harsh detergents or
abrasives.
= To help loosen baked on food particles or liquids,
heat two cups of water (add the juice of one
lemon if you desire to keep the oven fresh) in a
four-cup measuring glass at High power for five
minutes or until boiling. Let stand in the oven for
one or two minutes.
• Remove the glass tray from the oven when
cleaning the oven or tray. To prevent the tray
from breaking, handle it carefully and do not
put it in water immediately after cooking. Wash
the tray carefully in warm sudsy water or in the
dishwasher.
• Clean the outside surface of the oven with soap
and a damp cloth. Dry with a soft cloth. To
prevent damage to the operating parts of the
oven, don't let water seep into the openings.
• Wash the door window with very mild soap
and water. Be sure to use a soft cloth to avoid
scratching.
• If steam accumulates inside or outside the
oven door, wipe with a soft cloth. Steam can
accumulate when operating the oven in high
humidity and in no way indicates microwave
leakage.
• Never operate the oven without food in it; this
can damage the magnetron tube or glass tray.
You may wish to leave a cup of water in the oven
when it is not in use to prevent damage if the
oven is accidentally turned on.
Cleaning the grease filter
The grease filter should be removed and cleaned
often, at least once a month.
To avo!d risk of personal injury Or property .....
damage , do not operate oven hood without
filters in place.
1. To remove grease filter, slide filter to the side.
Pull filter downward and push to the other side.
The filter will drop out.
2,
Soak grease filter in hotwater and a mild
detergent. Rinse well and shake to dry. Do not
useammonia or place in a dishwasher. The
aluminum will darken.
3. To reinstall the filter, slide it into the side slot,
then push up and toward oven center to lock.
/
29
USA-MHC5DE68-O3143P.indb 29 2007-06-08 7:43:15 I

iiiiiiiiiiiiiiiiiiiiiiiiiiiiiiiiii_iiiii!_i!_i!_!i_i!iiii_!i_!!_!i'!i_iii_iiiiii!i_!!:ii_!:iiii!i!iiiiill!!i'ii_il¸i!i!_i!i!_ii_!!_i!_i!_i!_i!_i!!_!_!!_!i__ili'il_iiii_i!_ii_i!iiiiliii_ii!ii:i_i!if:i:!_ii_ii_ii_i!_ii_ii!i!ii!ii!ii!il!!!iiiiii_i!_i!;ii_i!_i!iii!i!ii!:ilii!!!i!!!_!!_!i_!iillii!_i!_i!_ii'i!_i!ii!_!!_!!iii_iii!iliiiii!i_i!ii!_iiiiiiiiiii!i!i!i!illiilliif!iilil!iiiiiiiiiiiii_ii_i:i!!iiiii!!i_!_i!i!_ii!_!!_!!_!!_!!_!!_!!_!!_!!_!!_!!_!!_!!_!!_!!_!!_!!_!!_!!_!!_!!_!!_!!_!!_!!_!!_!!_!!_!!_!!_!!_!!_!!_!!_!!_!!_!!_!!_!!_!!_!!_!!_!!_!!_!!_!!_!!_!!_!!_!!_!!_!!_!!_!!_!!_!!_!!_!!_!!_!!_!!_!!_!!_!!_!!_!!_!!_!!_!!_!!_!!_!!_!!_!!_!!_!!_!!_!!_!!_!!_!!_!!_!!_!!_!!_!!_!!_!!_!!_!!_!!_!!_!!_!!_!!_!!_!!_!!_!!_!!_!!_!!_!!_!!_!!_!!_!!_!!_!!_!!_!!_!!_!!_!!_!!_!!_!!_!!_!!_!!_!!_!!_!!_!!_!!_!!_!!_!!_!!_!!_!!_!!_!!_!!_!!_!!_!!_!!_!!_!!_!!_!!_!!_!!_!!_!!_!!_!!_!!_!!_!!_!!_!!_!!_!!_!!_!!_!!_!!_!!_!!_!!_!!_!!_!!_!!_!!_!!_!!_!!_!!_!!_!!_!!_!!_!!_!!_!!_!!_!!_!!_!!_!!_!!_!!_!!_!!_!!_!!_!!_!!_!!_!!_!!_!!_!!_!!_!!_!!_!!_!!_!!_!!_!!_!!_!!_!!_!!_!!_!!_!!_!!_!!_!!_!!_!!_!!_!!_!!_!!_!!_!!_!!_!!_!!_!!_!!_!!_!!_!!_!!_!!_!!_!!_!!_!!_!!_!!_!!_!!_!!_!!_!!_!!_!!_!!_!!_!!_!!_!!_!!_!!_!!_!!_!!_!!_!!_!!_!!_!!_!!_!!_!!_!!_!!_!!_!!_!!_!!_!!_!!_!!_!i_i!!
Charcoal Filter replacement Cooktop/Night Light
If your oven is vented to the inside, the charcoal reD_c_[_er_t
filter should be replaced every 6 to 12 months, and
more often if necessary. The charcoal filter cannot be
cleaned. The charcoal filter is available from Sears by
calling
1-800-4-MY-HOME®or from sears.com.
1. Unplug oven or turn off power at the main power
supply.
2. Open the door.
3. Remove the two vent grille mounting screws. (2
middle screws)
4. Slide the grille to the left, then pull straight out.
To avoid personal injuryor proPertYdamage,
wear gloveswhen replacing light bulb.
1. Unplug the oven or turn off power at the main
power supply.
2. Remove the bulb cover mounting screws.
Remove old filter.
3. Replace bulb with 20 watt appliance bulb.
4. Replace bulb cover, and mounting screws.
5. Turn the power back on at the main power
supply.
6. Slide a new charcoal filter into place. The filter
should rest at the angle shown.
7. Replace the mounting screws and close the door.
Turn the power back on at the main power supply
and set the clock.
CHARCOAL FILTER PART NO.
Part No.: DE63=00367D
3O
USA=MHC5 D E68=O3143P.indb 30 2007-06-08 7:43:16

iiiiiiiiiiiiiiiiiiiiiiiiiiiiiiiiiiiiiiiiiiiiiiiiiiiiiiiiiiiiiiiiiiiiiiiiiiiiiiiiiiiiiiiiiiiiiiiiiiiiiiiiiiiiiiiiiiiiiiiiiiiiiiiiiiiiiiiiiiiiiiiiiiiiiiiiiiiiiiiiiiiiiiiiiiiiiiiiiiiiiiiiiiiiiiiiiiiiiiiiiiiiiiiiiiiiiiiiiiiiiiiiiiiiiiiiiiiiiiiiiiiiiiiiiiiiiiiiiiiiiiiiiiiiiiiiiiiiiiiiiiiiiiiiiiiiiiiiiiiiiiiiiiiiiiiiiiiiiiiiiiiiiiiiiiiiiiiiiiiiiiiiiiiiiiiiiiiiiiiiiiiiiiiiiiiiiiiiiiiiiiiiiiiiiiiiiiiiiiiiiiiiiiiiiiiiiiiiiiiiiiiiiiiiiiiiiiiiiiiiiiiiiiiiiiiiiiiiiiiiiiiiiiiiiiiiiiiiiiiiiiiiiiiiiiiiiiiiiiiiiiiiiiiiiiiiiiiiiiiiiiiiiiiiiiiiiiiiiiii ii ¸¸'¸¸'¸¸'
Oven Light replacement
1. Unplug oven or turn off power at the main power
supply.
2. Open the door.
3. Remove the vent cover mounting screws. (2
middle screws)
4. Slide the grille to the left, then pull straight out.
5. Remove the screw located above the door near
the center of the oven that secures the bulb
holder.
j JJ_
6. Remove bulb holder.
7. Replace bulb with a 40 watt appliance bulb.
8. Replace the bulb holder.
9. Replace the grille and 2 screws. Turn the power
back on at the main power supply.
31
USA=MHC5 D E68=O3143P.indb 31 2007-06-08 7:43:17

Troubleshooting
Troubleshooting guide
Before you call a repair person for your oven, check this list of possible problems and solutions.
= Properly insert the plug into a grounded outlet.
= If the outlet is controlled by a wall switch, make sure the wall switch is turned on.
,, Remove the plug from the outlet, wait ten seconds, then plug it in again.
,, Reset the circuit breaker or replace any blown fuse.
Plug another appliance into the outlet; if the other appliance doesn't work, have a qualified electrician repair
the outlet.
,, Plug the oven into a different outlet.
,, Make sure the door is closed securely.
Check to see if packing material or other material is stuck to the door seal.
,, Check for door damage.
,, Press STOP/CLEAR pad twice and re-enter all cooking instructions.
If there has not been a power outage, remove the plug from the outlet, wait ten seconds, then plug it in
again. If there was a power outage, the time indicator will display: PLEASE TOUCH CLOCK AND SET
TiME OF DAY. Reset the clock and any cooking instructions.
Reset the circuit breaker or replace any blown fuse.
Make sure the oven is on its own 20 amp circuit line. Operating another appliance on the same circuit can
cause a voltage drop. If necessary, move the oven to its own circuit.
= Remove any metallic utensils, cookware, or metal ties. If using foil, use only narrow strips and allow at least
one inch between the foil and interior oven walls.
Clean the turntable, roller ring and oven floor.
Make sure the turntable and roller ring are positioned correctly.
,, This is similar to the interference caused by other small appliances, such as hair dryers. Move your
microwave further away from other appliances, like your TV or radio.
NOTF"
If the oven is set to cook for more than 25 minutes, it will automatically adjust itself to 70 percent power after 25
minutes to avoid overcooking.
if none of these items are causing your problem,
call Sears service at 1-800=4=MY-HOME ®
32
USA=MHC5 D E68=O3143P.indb 32 2007-06-08 7:43:17

Contenidos Garantia en
[] f
Cornbinac=on
GarantiaenCombinaci6n....................... 33
Servicio Sears .............................. 34
Contratosmaestrosdeprotecci6n.................. 34
InstruccienesdeSeguridadImportantes............. 35
0btener losmejores resultadosde cocci6n........... 39
Pruebadela vajillao los utensilios.................. 39
Caracteristicas.............................. 40
Especificacionesdelhomo ........................ 40
Features(Caracteristiques)........................ 42
Manual de Instrucciones....................... 43
Conozcasu hornode microondas.................. 43
Clock(Reloj)................................... 43
KitchenTimer(TemporizadordeLaCocina)........... 43
ControlSetup(Configuraci6ndeControles)........... 43
VentFan(Ventilaci6n)............................ 44
DelayOff(RetrasoApagado)...................... 44
Child Lock(BloqueoparaNi_os) ................... 44
Add30 Sec(Agregar30 Seg.)..................... 44
LightTimer (Temporizadordela Luz)................ 45
Light HiLo/Off(LuzAlta/Baja/Apagada).............. 45
More/Less(M_.s/Menos)......................... 45
CustomProgram(ProgramaPersonalizado).......... 46
Cocinarconnivelesdepotenciaaltos................ 46
Cocinarconnivelesdepotenciam_.sbajos ........... 46
Cocinarconm_.sdeun ciclode cocci6n.............. 47
Guiade cocciOnparanivelesde potenciam_.sbajos .... 47
Instruccionesdelsensor.......................... 48
Guiade cocci6nconsensor ....................... 48
Agregaro restartiempode cocci6n ................. 48
PizzaSlice (Rebanadade Pizza).................... 49
Popcorn(PalomitasdeMaiz)...................... 49
BakedPotato(PapaalHomo)...................... 49
Vegetable(Verduras)............................ 49
Cook(CocciOn)................................. 50
Reheat(Recalentamiento)........................ 50
HoldWarm (MantenerCaliente).................... 50
KidsIVleals(ComidasparaNi_os)................... 52
Soften/Melt(Suavizar/Derretir)..................... 53
Snacks....................................... 54
AutoDefrost(DescongelamientoAutom_.tico)......... 55
1 poundDefrost(Descongelamientode1 Libra) ....... 56
Guiade cocciOn................................ 57
UtensiliosparaCocinar ........................ 59
Guiade utensiliospararnicroondas................. 59
Cuidaday Limpieza........................... 60
Cuidadoy limpieza.............................. 60
Limpiezadelfiltro degrasa........................ 60
Reemplazodelfiltro de carb6n..................... 61
Reemplazode laluz dela cubierta/luznocturna........ 61
Reemplazode laluz delhomo ..................... 62
Soluci6nde Problemas ........................ 63
Guiadesoluci6n de problernas..................... 63
Garantia limitada de un a_o
St, tras ser instalado, operadoy mantenido seg_n todas las
instrucciones incluidas con el producto, este electrodom_stico
sufriera averias debidas adefectos de material o mane deobra,
dentro del periodo de un a_odesde la fecha de compra, Ilameal
1-800-4-MY-HOME® para su reparaci6n gratuita.
Sieste electrodom_stico se utiliza con prop6sitos distintos a los
fines privados de unafamilia, esta garantia s61oserd aplicable
durante 90 dias desde la fecha de compra.
Estagarantia cubre_nicamente los defectes de material y
mane de ebra. Sears NOcubrir_:
1. Elementosconsumiblesquepuedengastarsedebidoal usa
normal,incluyendodefarina enunciativaperono limitativa,
losfiltros, correas,bombillasy balsasdela unidad.
2. Unt6cnicodeservicio paramostrar al usuariola instalaci6n,
funcionamientoo mantenimientocorrectosdelproducto.
3. Unt6cnicodeservicio pararealizarlaboresdelimpiezao
mantenimientodelproducto.
4. Da_oso averiasencasede noacatarlas instruccionesde
instalaci6n,funcionamientoo mantenimientoincluidascon
el producto.
5. Da_oso averiasencasede accidente,abuse,usa
inadecuadoo usacon prop6sitosdistintos alos fines para
los quaruedise_ado.
6. Da_oso averiasencasede utilizardetergentes,
limpiadores,sustanciasquimicasoutensilios distintosa
los recomendadosenlas instruccionesincluidasconel
producto.
7. Da_oso averiasenlaspiezaso sistemasprococadaspar
modificacionesdelproducto noautorizadas.
CI;_usulade exensi6n de repensahilidad o garantias
impiicitas;
limitaci6nderecursos.Elt_nicoy exclusiverecursodelclientebajo
estagarantialimitadaser_lareparaci6ndelproductocomase
hamencionado.Lasgarantiasimplicitas,incluyendogarantiasde
comerciabilidadoidoneidadparaunfin concrete,est9slimitadas
auna_ooelperiododetiemplm_sreducidopermitidoparlaley.
Searsnoser_reponsabledelosda_osincidentaleso derivados.
Ciertosestadosy provinciasnopermitenexclusionesolimitaciones
o limitacionesdeda_osincidentalesoderivados,o limitacionesen
relaci6naladuraci6ndelasgarantiasimplicitasdecomerciavilidad
o idoneidadm,detalfarinaqueestaslimitacioneso excepciones
puedennoserpertinentesparausted.
Estagarantiaser_aplicablet_nicamentemientraseste
elecrodom6sticoseautilizadodentrodelosEstadosUnidos.
Estagarantialeotorgaunosderechoslegalesespecificos,eincluso
puedeconferirleotrosderechos,distintosdependiendodelestado
enqueseencuentre.
Sears,Roebuckandco.,Dept.817WA,HettmanEstates,IL
6017g
33
USA-MHC5 D E68-O3143P.indb 33 2007-06-08 7:43:17

Servicio Sears
ContratosmaestrosdeprotecciOn
Felicitacionesperhaberrealizadeunacornprainteligente.
SunuevoproductoKenmore®hasidedise_adoyfabricadoparagarantizarariesdefuncionamientoconfiable.
Noobstante,al igualquetodoslosproductos,esposiblequerequieraunmantenimientopreventiveo reparaciOnenalgunas
ocasiones.
Enesosmementos,unContratomaestrodeprotecciOnpuedeahorrarledineroy evitarleinconvenientes.
ElContratomaestrodeprotecciOntambiOnIoayudaa extenderlavidaL_tildesunuevoproducto.AcontinuaciOn,
mencionamosIoqueincluyeelContrato*:
[] Piezasy manedeobranecesariaparaayudara quelosproductosfuncionencontinuamentedemaneraadecuadahaje
uausanormal,nosoloantedefectos.Nuestracoberturasubrepasalagarantiadelpruductu.Nosecobrandeducibles,
noseexcluyenfallasfuncionalesdela cobertura--prutecciOnreal.
[] Serviciuespecializaduper partedeungrupodem_.sdelO.OOOt_cuicusautorizadusdeSears,esdecirquealguien
confiableestar_,trabajandoensuproducto.
[] VisitasdeserviciutOcnicuiiirnitadasyserviciuentoduelpals,lasvecesquedesee,cuandoquieraquenosnecesite.
[] Garantiacuntradefectusdel_brica- reemplazodesuproductoaseguradosi seproducencuatrofallasdeproducto,o
mAs,dentrodelosprimerosdocemeses.
[] Reernplazudel pruductusi nopuederepararse.
[] ControldernanteuirnientopreventiveanualcuandoIodesee- sincargoadicional.
[] AsisteuciatelefOnicar;_pida- ladenominamosResolutiOnR;_pida- apoyotelefOnicoperpartede unrepresentantede
Searsparatodoslosproductos.Consid_renosun"manualdeusuarioquehabla".
[] PrutecciOnen casedesohretensiOncontradariusel_!ctricosacausadefluctuacionesdeenergia.
[] ProtectiOnde p_rdidadeaJirnentospar$250anualesdebidoacualquiertipodedesperdiciodealimentosacausade
fallasmec_nicasdecualquierrefrigeradorofreezercubierto.
[] Reernbulsodealquiler,si lareparaciOndesuproductotardam_.stiempodelprometido.
[] Descaentude110%delpreciodecualquierserviciodereparacionesnocubiertoy piezasinstaladasafines.
UnavezqueadquieraelContrato,solodeberealizarunaIlamadatelefOnicaparaprogramarelservicio.Puedeprogramarun
serviciot_cnicoenIineaencualquiermemento,las24horas.
ElContratomaestrodeprotecciOnrepresentaunaadquisiciOnsinriesgos.Siperalg[inmotive,Iocanceladuranteel periodo
degarantiadelproducto,proporcionaremosunreembolsototal.0 bien,unreembolsoprorrateadounavezquevenzael
periododegarantiadelproducto,iAdquierasuContratomaestrodeprotecciOnyamismo!
Seaplicanalgunasli|nitacionesyexclusiones.Pareobtenerpreciuse iniorrnaciOnadicionaldentrodelosEE.UU.,
cornuniqueseal 1-800-827-6655.
* LacuberturaenCanad_difiereenalggnuspuntos.PareubtenerinfurrnaciOndetallada,curnuniqueseconSears
Canad;_al 1-800-361-6665.
Serviciode lustalaciOudeSears
PareobtenerinstalaciOnprofesionaldeelectrodomOsticos,abridoresdepuertasdegarage,calentadoresdeaguay otros
articulosdelhogardeSearsenlosEE.UUo Caned&comuniqueseal1-800-4-MY-HOIVlE®.
34
USA=MHC5 D E68=O3143P.indb 34 2007-06-08 7:43:17

Instrucciones
Importantes
de
Loquenecesitasaber
sobrelasinstruccionesde
seguridad
Lasadvertenciaseinstruccionesimponan[essoure
seguridadqueaparecenenestaGuiadeusey culaaaono
estAndestinadasa cubrirtodaslasposiblescona_c_ones,
situacionesquepuedenocurrir.Debeactuarconsennao
corn[in,precauci6ny cuidadocuandoinstale,reauceel
mantenimientoo pongaenfuncionamientoelm_croondas.
Comuniquesesiempreconsuvendedor,distribuidor,agen[e
deservicioofabricantesisurgenproblemasosl[uaclones
queustednocomprende.
Reconozcalossimbolos,
advertenciasyetiquetasde
seguridad
PELIGRO- RiesgosinminentesqueCAUSARANlesiones
fisicasgraveso lamuerte.
ADVERTENCIA-Peligroso prdcticasinsegurasque
PODRJANcausarlesionesfisicasgravesola muene.
AI)VERTENCIA-Peligroso prdcticasinsegurasque
PODRJANcausarlesionesfisicasgravesola muene.
Seguridad
PRECAUClbe
Paraevita_]esionesfisicaso da_osmateria]es,cumpiaIo
siguiente:
1. Nofriaengrasaabundanteene]homo,Lagrasa
podriareca]entarsey sepeligrosademanipular.
2. Nococineni recalientehuevosconcascaraocon
yemaenterautflizanaoenergiademicroonaas
Podriaacumularpresi6nyestallar.Perforelayema
conuntenedoro cuchilloantesdela coco6n.
3. Perforela pieldelaspapas,tomatesy alimentos
slmularesantesdecocinarlosconenergiade
microondas.Cuandoseperforalapiel,elvaporsale
aemanerauniforme.
4. Nepongaenfuncionamientoel homosicargao
alimentosdentro.
5. Utilices61olaspalomltasdemafzquevienenen
paqJetesdise_adosy rotuladosparauseenel
microondas.Eltiempodecocci6nvar[aseg[_nel
vatiajedelhorno.Nesigacaentanaoaespu6sde
quelaspalomitasdemaizc,,jarondeestailar.DeIc
contrariosechamuscar_inoquemar_n.Nedescuide
elmicroondas
6. Neutihceterm6metrosdecocci6ncomunesenel
homo.La mayonadelosterm6metrodecocci6n
COmlenenmercurloy puedencausararcosel6ctricos.
realfuncionamientoo dahoalhomo
7. Neutfliceutensiliosde metalenelhorno.
8. Nuncautilicepapel,pl_sticou otromaterial
cc"nbustiblequenoestddestinadoalacoccion.
9. Cuandococineconpapel,pl_sticou otto material
,a
combustible,sigalasrecomendacionesd,Ifabricante
sobreel usedelproducto.
10. Neutilicetoallasdepapelquecomengannailon
uotrasfib"assintdticas.Lasfibrassintdticas
calentadaspodr[anderretirseyhacerqueel papelse
incendiara
11. Necalienterecl3ientesselladosnibolsasde pl#,stico
enel homo.Losalimentoso liquldospodrian
expanalrser@idamentey hacerqueel recipienteo
labolsaserompiera.Perforeoabrael recipienteo la
bolsaantesdelacocci6n
12. Paraevitarelma funcionamientodeunmarcapasos.
consulteconsumddicoo elfabric_ntedel
marcapasosacercadelosefectosdelaeneJ_'ade
microondasenelmarcapasos.
35
USA-MHC5DE68-O3143P.indb 35 2007-06-08 7:43:17 I

Pa(aevitarel riesgodedescargaelOctricao la muerte,
estehornodebe€onectarseatierray elenchufenodebe
alterarse:
lnstruccionesdeconexi6na
tierra
ElhornoDEBEestarconectadoa
tierra.LaconexiOnatierrareduce
elriesgodedescargaelOctricaya
queofreceuncabledeescapepara
lacorrienteel_!ctricaencasode
quehayauncortocircuito.Estehornoest,.equipadocon
uncablequetieneunconductoratierraconunenchufe
conconexiOnatierra.Elenchufedebeconectarsea un
tomacorrientequeest_correctamenteinstaladoy conectado
atierra.ConsultelasinstruccionesdeinstalaciOn.
Consultea unelectricistao centrodeserviciocalificadosi
nocomprendebienlasinstruccionesdeconexiOnatierra,o
sitienealgunadudarespectodesielhomoestAconectado
atierracorrectamenteNoutiliceuncableprolongador.Si
elcabledealimentaciOndelproductoesdemasiadocorto,
hagaqueunelectricistacalificadoinstaleuntomacorriente
detres ranuras.Estehornodebeenchufarseenuncircuito
de60HzseparadoconlosvaloreselOctricosnominales
mostradosenlatabladeespecificaciones.Cuandoel horno
comparteelcircuitoconotrosequipos,quizAsseanecesario
unaumentoenlostiemposdecocciOny puedensaltarlos
fusibles.
ElmicroondasfuncionaconlacorrientenormaldomOstica,
110-120V.
Declaraci6nde interferencia
deradiofrecuenciade
la Cornisi6nFederalde
Comunicaciones(EE.UU.
solarnente)
Esteequipogeneray utilizaenergiadefrecuenciaISM,y si
noseinstalay seutilizacorrectamente,esdeck,enestricto
cumplimientoconlasinstruccionesdelfabricante,puede
causarinterferenciaconla recepciOnderadioytelevision.
Sehacomprobadoyconfirmadoquecumpleconloslimites
estipuladosparaEquiposISM(Industriales,Cientfficos,
M_dicos)envirtuddelasecciOn18delosreglamentosde
laFCC,quehansidodisefiadosparaproveerprotecciOn
razonablecontratalinterferenciaenunainstalaciOn
residencial.
Sinembargo,nosegarantizaquenohabrAinterferencia
enalgunainstalaciOndeterminada.Siesteequipocausa
interferenciaconla recepciOnde radioo television,Ioque
puededeterminarseapagandoyencendiendoelequipo,se
recomiendaqueel usuariointentecorregirla interferencia
de unadelassiguientesmaneras:
* CambielaorientaciOndelaantenaderecepciOnde
radiootelevision.
* Ubiqueenotrolugarelhornodemicroondascon
respectoal receptor.
,, Alejeelhornodemicroondasdel receptor.
* Enchufeel hornodemicroondasenuntomacorriente
distintoparaqueel hornodemicroondasyel receptor
est_nencircuitosdiferentes.
Elfabricantenoesresponsablede ningunainterferenciade
radiootelevisioncausadaporlamodificaciOnnoautorizada
deestehornodemicroondas.Esresponsabilidaddel
usuariocorregirtalinterferencia.
36
USA-MHC5 D E68-O3143P.indb 36 2007-06-08 7:43:17

ii!i!i!i!i!i!i!i!i!i!i!i!i!i!i!i!i!i!i!i!i!i!i!i!i!i!i!i!i!i!i!i!i!i!i!i!i!i!i!i!i!i!i!i!i!i!i!i!i!i!i!i!i!i!i!i!i!i!i!i!i!i!i!i!i!i!i!i!i!i!i!i!i!i!i!i!i!i!i!i!i!i!i!i!i!i!iiiiiiii!i!i!iiiiiiiiiillilii!iiiiif!iii!!!i!iililill!!i!i!ii!ii!iiiililiii!ili!iiii!iiiiiii!ii!ii!ii!iiiiii!!i!ii!iiiii!!i!!i!ii!!iiiiiiiiiiilliiiiii!!i!iiili!i!iiiiliiiiiiilliii!!i!ii!i!ili!ii!iiiii!iiiiiiiliiiliiiiiiiii!i!iiii!!i!i!iliiiiiiiliiiiilliiiiiilli!i!illiii!iii!iiii!iiiii!ii!ii!ii!iiili!iilliiii!i!!if!fill!i!i!ii!ii!ii!ii!i!i!iiiiiliiiiiii!i:ii:iii!i!iiiiiiiiillililli!iiii!ilili!i!!i!ii!ii!illii!iiiiii!ii!iliiii!iiliilliiiiili!iilii!ii!!i!i!i;iiiiii!if!iiii!iiliii!i!!i!ili!iiliiiii!!i!!iilil!iiiiiiiii!i!iiililiiii!iil!iiiilii!iiiilliiiiiiliiiiiiiiiliilil!i!i!illiiiiiiii!!!iiiiiiii!iliiiii!:i!!i!ii!;iiiiiiiliiiili!!i!iliiiiiii!i!i!i!iiiii!iiiiiii!ii!ilii:i!ilii!i!i!i!iiiiilliiii!i!iiiiiiiiiiilliiiiilliiiiiiii:iiii!iliiiiii!iiiiiiiiiiii!i!iiiiiiiliilil!ili!i!i!ii!i!ili!iiiii!illiiililiiiiii!iii!i!i!iiiiiiiiliill!i!iiii!ii!iiiiiiiliiiiiii!i!i!iiiiiiii!ii!i!iiliiiii!iiiililiiiiiill!i!i!iililil!i!i!!iliii!ii!ii!iiiii!iii!i!iiilili!ii!ii!i!!i!ii!!i!!i!!i!!i!ii!ii!i.....
Precaucionesparaevitarla
posibleexposici6na energia
demicroondasexcesiva
A. NOintentehacerfuncionarestehornoconlapuerta
abiertapuessepuedeproducirunaexposiciOn
perjudiciala laenergiade microondae.Esimportante
noalterarni modificarlastrabasdeseguridad.
B. NOcoloqueningQnobjetoentrelapartedelanteradel
homoy lapuertanidejequeseacumulesuciedado
reeiduosdelimpiadoresenlassuperficiesdesellado.
C. NOpongaenfuncionamientoelhornosi est_da_ado.
Esparticularmenteimportantequelapuertadelhomo
cierrebieny quenoseocasionenda_osa:
1.lapuerta(doblada),
2.lasbisagrasy pestillos(rotoso sueltos),
3.laejuntasdelapuertay lassuperficiesdesellado.
D. Elhornonodebeset reguladoo reparadoporninguna
personaexceptoel personaldeserviciodebidamente
calificado.
Losliquidostalescomoel agua,caf6ot_ pueden
calentarsem_.sallddelpuntodeebullici6nsmque
parezcaqueest_nhirviendodebidoa latensi6n
superficialdelliquido.Nosiempresever_nlasburbujas
o el bervorcuandoseretirael recipientedelhomode
microondas.ESTOPUEDERACERQUELOSLIQUIDOS
IVIUYCALIENTESSEDERRAiVIENREPENTINAiVIENTE
CUANDOSEiNSERTAENELLJQUIDOUNACUCHARAU
OTROUTENSiUO.Parareducirelrlesgodelesi6na las
personas:
1. Nocalienteel liquidodemasiado
2. Revuelvaelliquidotantoantescomoa lamitaddel
procesodecalentamiento.
3. Noutilicereclpie_tesconladosrectosycuellos
estrechos.
4. Despu6sdecalentar,dejeel recip_enteenelhorno
demicroondasduranteuntiempobreveantesde
sacarlo.
5. Seamuycuidadosocuandoinserteunacucharau
otroutensilioenel recipiente.
37
USA-MHC5 D E68-03143P.indb 37 2007-06-08 7:43:18

ADVERTEHC|A
Cuandoseutilizanaparatoselectricos,sedeDenseguir 11.
instruccionesdeseguridadb_sicasparareeucirel
riesgodequemauuras,descargasel6ctricas,mcendios
o lesionesfisicaso exposici6naenergfademicroonuas
excesiva.
1. LEAtodaslasinstruccionesantesde utflizarel horno.
2. LEAY SIGAlas 'PRECAUCIONESPARAEVITARLA
POSIBLEEXPOSICIONAENERGiADEMICROONDAS
EXCESIVA"enla pD.gina37.
3. InstaleocoloqueestehomoSOLOaeacuerdocon
lasinstruccionesdeinstalsci6nueestemanua
4. AIgunosproductostalescomoloshuevosenteros
y losrecipientessellados,comopotejemplolos
fiascosdevidriocerrados,puedenexplotaryNO
DEBENCALENTARSEenestehomo.
NOpongaenfuncionamientoestehomositieneun
cableo enchufeda_ado,si nofuncionabien.o si
sufri6alg_ndahoo secay6.
12. Estehomo.incluyendoelcabledealimentaci6n,debe
serreparadoSOLAMENTEporpersonaldeserviclc
calificado.Serequlerenherramientasespeciales
pararepararel homo. Comunfqueseconel centro
deservicioautorizadomD.scercanoparaelexamen.
reparaci6no ajustedel homo.
13. NOcubrani bloqueeelfiltro uotrasabenurasdel
homo.
14. NOguardeeste_ornoa]alrelibre.NOutiliceeste
productocercadelagua- porejemplo,cercade_
fregaderodelacocma,en uns6tanohOmeao,cerca
ueunapiscmao enlugaressimilares.
5. UtiliceestehornoS6LOparaelprop6sitoparael 15. NOsumerjaeicableo elenchufeenagua.
quesedise_6comosedescribeenestemanual.No 16. MantengaelcableALEJAO0delassuperficies
utiliceproductosqufmicoscorrosivosnivaporesen CALIENTES
estehomo Estetipode homoest_especfficamente 17. NOdejequeelcablecuelguesobreel boraedela
disehadoparacalentar,cocmaro secaralm_ntos.No mesao lamesada.
estD.disefiaaoparauso ndustrialo delaboratono.
6. AIigua]qJeconcualquierelectrodom6stico,es
necesariaunaSUPERVISIONESTRICTAcuandoIo
utilizanNll_OSoPERSONASENFERMAS.
7. Consultelasinstruccionesdelimpiezadelapuenaen
lasecci6nCuidaooy Limpiezaenlapdgina60.
8. Losfiascos dealimentosdebeb6debenaonrsepara
calentarsey elcontenldodeberevolverseo sacudirse
antesdelconsumo,paraevitarduemaouras
9. NOutiliceestehornoparaprop6sitoscomercia_s.
Estdfabricadoparausodom6sticosolamente.
10
18. LimpielacampanadeventilaciOnconfrecuencia.
19. NOpermitaqueseacumulelagrasaenlacampanao
losfiltros.
20. TengacuidadocuandoIimpielosfiltrosdela
campanadeventilaci6n.Losagentesdelimpieza
corrosivostalescomoloslimpiadoresdehomoa
basedelejiapuedenda_arlosfiltros.
21. Cuandoflambeealimentosbajolacampana,encienda
elventilador.
22. Estehornopuedeutilizarsesobreestufasagaso
el6ctricasde36 pulgaoaso menosoeancho.
NOcalientebiberonesenelhomo.
Paraevitare riesgodeincendioen!aparteinteriordel C. Si losmaterialesdentrodelhomoseprendenfuego,
homo: mantengalapuertadelhomoCERRABA,apagueel
a. NOcocinedemasiadola comida.Presteatenci6nal homoydesconecteelcabledea!imentaci6n;o corte
homo cuando€oloqueenSuinteriorpapel,plD.stico lacorrienteene!fusible0 el paneldeÁdisYuntor.
u otrosmateria!escombustiblesparafaci!itarla d. NO uselaparteinternadelhomopara
cocci6n; almacenamientolNOdejeproductosdepape!,
b Retireiasata urasde bredeiasbOiSaSdeaei utensosdecocc6noamentosenapastenterna
• m pp
o pldsticoantesdecolocarla bolsaenelhomo. de] homocuandonose utiliza.
38
USA-MHC5 D E68-O3143P.indb 38 2007-06-08 7:43:18

Obtener Ins mejores resultados de
[] f
COCCIOn
PruebadelavajillaoInsutensilios
Prnebelavajillaninsntensiliosantesdensarlns.Paracomprobarqueun platoseaseguro,col6queloenel hornocon
unatazadeaguaallado.Pongaenfuncionamientoelhomoduranteunminutoa1100%dela potenciadecocci6n.Si el
platasecalienta,no inuse.
Algunosplatos(demelamina,decerAmica,etc.)absorbenlaenergiadelmicroondas,secalientandemasiadocomopara
sermanipuladosydemoraneltiempodecocci6n.Cocinaren recipientesdemetalnodise_adosparaserusadosen
hornosde microondaspodrianda_arel homo,IomismopodriasucederconInsrecipientesconmetaloculto(atadurasde
alambre,papeldealuminio,grapas,esmalteo ribetesdemetal).
ParaobtenerInsmejoresresultadosdesuhomodemicroondas,leay sigalaspautasacontieuaci6n.
• Temperaturadealmacenamiento-Losalimentosquesesacandelfreezero refrigeradortardanmAstiempoencocinarse
queInsmismosalimeetosatemperaturaambiente.
TamaM-Lostrozospeque_osdealimentossecocinanmAsrApidoqueInsdemayortama_o,Instrozosdetama_oy
formasimilaressecocinanenformamAspareja.Paraunacocci6nuniforme,reduzcalapotenciacuandococinatrozos
grandesdealimentos.
• Humedadnatural-Losalimentosmuyh[imedossecocinanenformamAsparejaporquelaenergiadelmicroondasseve
atraidapor lasmol6culasdeagua.
Revuelva-Insalimentostalescomoguisosy verdurasdesdeelexteriorhaciael centroparadistribuirel calorenforma
parejay acelerarlacocci6n.Noesnecesariorevolverconstantemente.
• D#vuelta-Insalimentostalescomolaschuletasdecerdo,laspapasalhomo,lascarnesasadaso lacoliflorenteraala
mitaddeltiempodecocci6nparaexponertodosInsladosporigualalaenergiademicroondas.
• ColoqaelasAreasdelicadasdeInsalimentos,talescomolaspuntasdeInsespArragos,haciael centrodelplato.
4comedeInsalimentosdeformasdesparejas,talescomolaspresasdepolioo Insfiletesdesalm6nconlaspartesmAs
gruesashaciala parteexternadelplato.
• Protejaconpedazospeque_osdepapeldealuminiolaspartesdeInsalimentosquepuedancocinarsemAsrApidamente,
talescomolaspuntasdelasalaso Insextremosdelaspatasdelasaves.
Oejerepesar-Despu_sderetirarelalimentodelmicroondas,ct3braloconpapeldealuminioo latapadelrecipientey
d_!jeloreposarparaqueseterminedecocinarenelceetroyparaevitarqueInsbordesexternossecocinendemasiado.
Lacantidaddeltiempodereposodependedela densidadyla superficiedelalimento.
• Envolverenpapeldeceraoen unatoalladepapal-Losemparedadosy muchosotrosalimentosquecontienenpan
horneadopreviamentedebenenvolverseantesdecalentarlosenel microondasparaevitarquesesequen.
39
USA=MHC5 D E68=O3143P.indb 39 2007-06-08 7:43:18

Caracteristicas
Manijadelapuerta Ventanaconescudo
met_lico
Guiadecocci@
Sistemadecierrede Placademodeloy Estantedealambre Paneldecontrol
seguridaddela puerta nOmerodeserie delhorno
Especificacionesdelhomo
Alimentaci6nel@trica t20 VCA,60 Hz
Potenciadeentrada 1700W
PotenciadeCocci@ 1100WNorma60105IEC
Frecuencia 2450MHz
Potencianominal 14;8A
Dimensionesexteriores(AnchoxAltox Profundidad) 758,8x 427x 406mm
Capacidadinterior 2,0piesc_bicos
Pesoneto 52.9Ibs.
Elestantedealambreleofreceespacioadicionalcuandococinaenm4sdeun recipienteala vez.
Paraevitarel riesgodeda_osmateriales: ,, Utiliceelestantes6!0Cuandococinealimentosen!a
,, maz posconde estante
Neuti!iceelestanteparaCacinarpalornitaSde ". '--
,, ElestantedebeapoyarseSobrelosCuatroSoportes 0 No€ocineCone!estanteenel PiSOdelhorno
pl_.sticoscuandoseUtilice.
Papautilizar
1. Coloqueelestantedemanerasegurasobreloscuatrosoportespl_sticos.
,, ElestanteNODEBEtocarlasparedesde metalni lapartetraseradelhomodemicroondas.
2. ColoquecantidadesequivalentesdealimentostantoARRIBACOMOABAJOdelestante.
,, Lacantidaddealimentosdebeseraproximadamentela mismaparacompensarla energiadecocciOn.
IMPORTANTE"
* NOalmaceneniutiliceelestantedealambreenestehornoamenosquesevayaacocinarm_.sdeunalimentoounarecetaIo
requiera.
. Podriacausarda_osenelhomo.
40
USA-MHC5 DE68-O3143P.indb 40 2007-06-08 7:43:18

0
0
®
@
@
41
USA-MHC5 DE68-03143P.indb 41 2007-06-08 7:43:18

Features(Caracteristiques)
1. DISPLAY(PANTALLA):Lapantallaineluyeun reloje
indicadoresquele muestranlahoradeldia,losajustes
detiempodecocciOny lasfuncionesdecocciOn
seleccionadas.
2. POPCORN(PALOMITASDEMAJZ):Oprimaestatecla
cuandopreparepalomitasdemaizensuhornode
microondas.Elsensorleindicar_,al hornocu_.nto
tiempococinardependiendodelacantidaddehumedad
quedetecteenlaspalomitasdemaiz.
3. COOK(CDCCI{DN):Optimaestateclaparacocinar
bebidas,comidascongeladas,desayunoscongelados,
pechugasdepolio.Elsensorle indicar_,al hornocu_.nto
tiempococinardependiendodelacantidaddehumedad
provenientedelacomida.
4. REHEAT(RECALENTAMIENTO):Oprimaestatecla
pararecalentarunplatodecomida,guisosypastas.
Elsensorleindicar_,al hornocu_.ntotiempococinar
dependiendodelacantidaddehumedadprovenientede
lacomida.
5. VEGETABLES(VERDURAS):Oprimaestateclapara
cocinarverdurasfrescaso congeladas.Elsensorle
indicar_al hornocu_ntotiempococinardependiendo
delacantidaddehumedadquedetecteenlasverduras.
6. BAKEDPOTATO(PAPAALHORNO):Oprimaestatecla
paracocinarpapas.Elsensorleindicar_,al horno
cu_ntotiempococinardependiendodelacantidadde
humedadquedetecteenlaspapas.
7. PIZZASLICE(REBANADADEPIZZA):Oprimaestatecla
pararecalentarlapizza.Elsensorle indicar_,al horno
cu_ntotiempococinardependiendodelacantidadde
humedadquedetecte.
8. KIDSMEALS,SNACKS,SOFTEN/MELT(COMIDAS
PABANINOS,SNACKS,ABLANDAR/DERBETIR):
Oprimaestasteclasparacocinarcomidasespecificas.
9. 1POUNDDEFROST(DESCONGELAMIENTO1LIBRA}:
EstateclaofreceundescongelamientoRAPIDOpara
1,0libradealimentoscongelados.
10. AUTODEFROST(DESCONGELAIVilENTO
AUTOMATICO}:Oprimaestateclaparadescongelar
alimentossegt_lnel peso.
11 CUSTOMPROGRAM(PROGRAIViAPERSONALIZADO):
OprimaestateclapararecuperarunainstrucciCnde
cocciOnpreviamenteprogramadaenlamemoria.
12. LESS(MENDS):Oprimaestateclapararestartiempo
decocciCn.
13. MORE(IVI,_S):Optimaestateclaparaagregarm_.s
tiempodecocciCn.
14. NI.)MERO:Oprimalasteclasnum_ricasparaingresarel
tiempodecocciOn,elniveldepotencia,lascantidades
o lospesos.
42
15. CONTROLSETUP(CONFIGURACHDNDECONTROLES):
Oprimaestateclaparamodificarlasconfiguraciones
predeterminadasdelhorno.
16. POWER LEVEL(NIVELDE POTENCIA):Oprimaesta
teclaparaseleccionarunniveldepotenciadecocciCn.
17. CLOCK(RELOJ):Oprimaestateclaparaingresarla
horadeldia.
18. KITCHENTIMER(TEMPORIZADORDELACOCINA):
Oprimaestateclaparaconfigurareltemporizadordela
cocina.
19. ADD30SEC(AOREGAR30SEG):Oprimaestatecla
paraajustary comenzarr_pidamenteenelnivelde
potenciade1100%.
20. HOLDWARM(MANTENERCALIENTE}:Toqueestepad
para"Mantenercaliente"lascomidascocinadasensu
hornohasta99 minutos99segundos.
21. LIGHTTIMER(TEMPORIZADORDELALUZ):Oprima
estateclaparaconfigurareltemporizadordelaluz.
22. LIGHTHI/LOIOFF(LUZALTA/BA,JA/APAGADA):Oprima
estateclaparaencenderlaluzdelacubierta.
23. VENTDELAYON/OFF(VENTILACDJNRETBASADA
ACTIVADA/DESACTIVADA):Oprimaestateclacuando
configureeltiempodeventilaciCn(1,3, 5,10,30
minutos).
24. VENT5 SPEED(VENTILACIONCON5 VELOCIDADES):
Oprimaestateclaparaelegirunadelas5 velocidades
delventilador.
25.VENTON/OFF(VENTILACI{)NACTIVADA/
DESACTIVADA}:Oprimaestateclaparaencendero
apagarelventilador.
26. ENTER/START(INGRESAR/COMENZAR):Oprima
estateclaparainiciarunafunciOn.Siabrelapuerta
despuesdequeel hornocomienzaacocinar,cierrela
puertay oprimalatecla ENTER/START(INGRESAR/
COIVlENZAR)nuevamente.
27.STOP/CLEAR(APAGAB/ANULAR):Oprimaestatecla
paraapagarelhorriDo anulartodaslasentradas.
USA-MHC5 DE68-O3143P.indb 42 2007-06-08 7:43:18

anual de In= rucciones
Conozcasuhomodernicroondas
Estasecci6nlosconocimientosb_.sicosquedebeconocer
paramanejarsuhornodemicroondas.Potfavorleaesta
intormaci6nantesdeutilizarlo.
. Paraevitarel riesgodelesionesfisicasoda_os
ControlSetup (Configuraci6nde
Controies)
Puedemodificarlosvalorespredeterminados.
Consultelasiguientetablaparaobtenerm_tsinformaci6n.
matefia!es,no pongaenfuncionamientoelhomo
vacio.
, Paraevitarel riesgodebsionesfisicasoda_os
mateda!esnouti!icerecipientesdebarrococido,
papeldealuminio,otensi!iosdemetalniconadornos
demetalenel homo.
Clock(Relej)
Ejemplo:Paraporterelreloja/as 8:00AM.
1. OprimalateclaCLOCK.
2. Ingreselahorautilizandoelteclado
num_rico.
3. OprimalateclaENTER/START.
4. OprimalparaAIVl.
5. OprimalateclaENTER/START.
NOTA
Sigalospasos1-3anterioresenelmododerelojde24
horas.
Mododepeso 1 Lbs.
1
seleccionado 2 Kg.
Controldesepal 1 SonidoON(activado)
2 sonoraON/OFF 2 SonidoOFF
(activada/desactivada) (desactivado)
Controldepantalla 1 12HR
3
dereloj 2 24HR
1 Velocidadlenta
4 Pantalla 2 Velocidadnormal
3 Velocidadr@ida
SePalderecordatorio 1 ON(activada)
5
definal 2 OFF(desactivada)
1 ON(activada)
6 IVlodoDemo
2 OFF(desactivada)
1 ON(activada)
7 Horadeverano
2 OFF(desactivada)
Ejemplo: Paracambiar elmododepeso(de Lbs.a Kg.).
1. Oprimalatecla CONTROLSETUP.
2. Optimalatecla num_rica1.
3. Oprimalatecla num6rica2.
Kitchen Timer(Ternporizadorde
LaCocina)
Puedeutilizarsuhornodemicroondascomotemporizador.
UtiliceelTemporizadorparaprogramarhasta99 minutos,
99segundoe.
Ejemplo:Paraprogramar8minutos.
1. OprimalateclaKITCHENTIMER.
2. Ingreselahorautilizandoelteclado
num_rico.
3. OprimalateclaENTER/START.
Cuandohayatranscurridoeltiempo,escuchar_se_ales
sonorasy aparecer_tlapalabraEND(FIN).
43
USA-MHC5 DE68-03143P.indb 43 2007-06-08 7:43:19 I

iiiiiiiiiiiiiiiiiiiiiiiiiiiiiiiiii_ii!_ii_!!'!!'ii:ii_iiiii!i!'!!'!ill¸ii_ii_ilii'i!'!i_ii_iiiiil;ii_ii_ii_!!iiiiiiiillii!!_!_!i_i!iiii_i!i!!!!!ii:ii_!iii_ii!i_!!_i!_iiiiii_!i!i_!i_!i_!i_ii_ii_ii_ii_ii_iiill!_!i!_i!i!iiii_i!_iii!_i!i!i!i!i!_i!_!!_!!_!!_!!i_iiiiiiii_i!iiii_ii_ii_i!_i!_iiiii!i!iiii_!ii_ii_ii_!!_!i_i!_ii_!_ii_iii_i!_ii_i!;i!iiiiiiiii!ii!ii!ii!iiiiii!!_!i_!i_i_i_!_!_!!_iiiiii_ii_iiiiii_ii_i!_i!_i!ii_i!_ii_ii_iiii_!!_i!_:!_ii_ii_!i_!i_illiiiili_ii_:i_i!_i!_i!_!!_!!_iiii_i!_!iiiiii_ii_i!_!i_iliii!iiiiiilliiiiiiiii_i_i_!_i_!iliiiii:!i_!i:!i:ii!i_ii_,_i_i_!i!!i!!i!!i!!i!!i!!i!!i!!i!!i!!i!!i!!i!!i!!i!!i!!i!!i!!i!!i!!i!!i!!i!!i!!i!!i!!i!!i!!i!!i!!i!!i!!i!!i!!i!!i!!i!!i!!i!!i!!i!!i!!i!!i!!i!!i!!i!!i!!i!!i!!i!!i!!i!!i!!i!!i!!i!!i!!i!!i!!i!!i!!i!!i!!i!!i!!i!!i!!i!!i!!i!!i!!i!!i!!i!!i!!i!!i!!i!!i!!i!!i!!i!!i!!i!!i!!i!!i!!i!!i!!i!!i!!i!!i!!i!!i!!i!!i!!i!!i!!i!!i!!i!!i!!i!!i!!i!!i!!i!!i!!i!!i!!i!!i!!i!!i!!i!!i!!i!!i!!i!!i!!i!!i!!i!!i!!i!!i!!i!!i!!i!!i!!i!!i!!i!!i!!i!!i!!i!!i!!i!!i!!i!!i!!i!!i!!i!!i!!i!!i!!i!!i!!i!!i!!i!!i!!i!!i!!i!!i!!i!!i!!i!!i!!i!!i!!i!!i!!i!!i!!i!!i!!i!!i!!i!!i!!i!!i!!i!!i!!i!!i!!i!!i!!i!!i!!i!!i!!i!!i!!i!!i!!i!!i!!i!!i!!i!!i!!i!!i!!i!!i!!i!!i!!i!!i!!i!!i!!i!!i!!i_i_i_;!_!!
VentFan(VentilaciCn)
LaventilaciCnquitaelvapordeaguay otrosvaporesdela
superficiedecocciCn.
Ejemplo:ParaselecclonarLevel4(Nivel4).
1. OprimalateclaON/OFF(encendido/
apagada).Estomuestraelt]ltimo
nivelhastaqueustedseleccioneel
niveldevelocidaddelventilador.
2. Oprimalatecla5SPEED(5
velocidades)hastaqueenla
pantallaaparezcaLevel4 (Nivel4).
30prima lateclaON/OFF(enceadido/
apagada)paraapagarelventilador
cuandoIodesee.
NOTA:
Silatemperaturasubedemasiadoalrededordelhornode
microondas,elventiladordelacampanadeventilaciCnse
encender_tautom_ticamenteenLEVEL2 (Nivel2) para
enfriarel horno.Elventiladorseapagar_autom_tticamente
cuandolaspartesinternasest_nfrias.Cuandoestosucede,
nosepuedeapagarlaventilaciCnenfarinamanual.
DelayOff(RetrasoApagado)
Ejemplo:Paraapagarel ventiladordespu#sde30minulos
parael Nivel4.
1. OprimalateclaON/OFF(encendide/
apagada).
2. Oprimalatecla5SPEED(5
velocidades)hastaqueenla
pantallaaparezcaLevel4 (Nivel4).
3. OprimalateclaDELAYON/OFF
(Retrasaactivada/desactivada)
cincoveces.
ChildLock(BIoqueoparaNi_os)
Puedebloquearelpaneldecontrolparaevitarqueel
microondasseinicieaccidentalmenteoseautilizadopar
ni_os.
LafunciCnChildLocktambi_nes[itil cuandoselimpiael
paneldecontrol.ChildLockevitala programaciOnaccidental
cuandoselimpiaelpaneldecontrol.
Ejemplo:Paraconfigurarel bloqueoparanifios.
Oprimay mantengaoprimidalatecla
ENTER/STARTdurantem_.sde3
segundos.Enlapantallaseleer_..
CHILDLOCi{ON(Blaqueoparanines
activado)yseescuchar_.ndosse_ales
sunoras.
Ejemplo:Paracancelarel Ifloqneoparanifios.
Oprimay mantengaoprimidalatecla
ENTER/STARTdurantem_.sde3
segundos.Desaparecer_.lapalabra
LOCi{EB(B!oqaeado)yseescuchar_n
dossefialessonoras.
Add30Sac(Agregar30 Sag.)
Estateclaahorratiempoy lepermiteconfigurarr_pidamente
y comenzarlacocciOnenel microondassinlanecesidadde
oprimirlateclaENTER/START.
E_em/flo:ParaprogramarAGREGAR30SEGparaafiadir2
minutes.
OprimalateclaADD30 SEC.4veces.El
hurnocomienzalacocciCny la pantalla
muestralacuentaregresivadeltiempo.
44
USA-MHC5 DE68-O3143P.indb 44 2007-06-08 7:43:19

iiiiiiiiiiiiiiiiiiiiiiiiiiiiiiiiiiiiiiiiiiiiiiiiiiiiiiiiiiiiiiiiiiiiiiiiiiiiiiiiiiiiiiiiiiiiiiiiiiiiiiiiiiiiiiiiiiiiiiiiiiiiiiiiiiiiiiiiiiiiiiiiiiiiiiiiiiiiiiiiiiiiiiiiiiiiiiiiiiiiiiiiiiiiiiiiiiiiiiiiiiiiiiiiiiiiiiiiiiiiiiiiiiiiiiiiiiiiiiiiiiiiiiiiiiiiiiiiiiiiiiiiiiiiiiiiiiiiiiiiiiiiiiiiiiiiiiiiiiiiiiiiiiiiiiiiiiiiiiiiiiiiiiiiiiiiiiiiiiiiiiiiiiiiiiiiiiiiiiiiiiiiiiiiiiiiiiiiiiiiiiiiiiiiiiiiiiiiiiiiiiiiiiiiiiiiiiiiiiiiiiiiiiiiiiiiiiiii_iilli;iilii_!!_i!iiiii_iiii_ii_i!;i!_ii_ii_,i_iiii!i:!!_ii_i!ifilli_ii_!i_iiiii!i!iiiii!_i!_i!_i!_ii_ii_ii(!_!i'ii_ii_il_i!iii'i!'!!_i!ii!iiiii!_!!i!_!!i!_i!_i!_i!_i!_i!_iiiiii;i_ii_i!_ii_il!ii!i!ii!i:_i!_ii_i!_i!_i!_i!_i!_i!_i!_i!_i!iiii¸i!¸ilili_iiiiii_ii'!i_!i¸iiiiillillif!!!_i!il_i!'!!_!i!!ii!ii!ili!_il_iiii_ililii:i!iiii¸i!i!'i!i!iii!_!i_ii_iiiii!_i!_i!_!_iiiii:fillillfillill!_ii_i!:ii_:iiii_ii_ii_ii_ilil_ii_ii_il_iiiiillii!!i¸iiiiiiiiilli_!i_ii_i!_i!_!iii!ii!_ii:ili¸ii:ill_ii¸!iiiii(i¸ilii!_iii!_i_i!_i!:i!iii_il_i!_i!_i!_i!_ii!i!!i!!i!!i!!i!!i!!i!!i!!i!!i!!i!!i!ii_!i!!!!!i!,_i__,
LightTimer(Temporizadordela
Luz)
PuedeprogramarlaLLIZparaqueseenciendayseapague
automAticamenteencualquiermomento.Laluzseenciende
ala mismahoracadadiahastaquesereinicia.
Ejemplo:$eenciendea las2:00ANI,seapa_laalas7:00AM.
2 horas,
1. Optimala teclaLIGHTTIMER.
2. Ingreselaheraala quedeseaquese
enciendala LUZ.
3. OprimalateclaENTER/START.
4. Oprimal paraAM.
5. OprimalateclaENTER/START.
6. Ingreselaheraalaquedeseaquese
apaguelaLUZ.
7. OprimalateclaENTER/START.
8. Oprima2 paraPM.
9. OprimalateclaENTER/START.
1. OprimalateclaLIGHTTIMER.
2. Ingreselaheraala quedeseaquese
enciendala LUZ.
3. OprimalateclaENTER/START.
Pourannuletle tighttimer(IVlinuteur
1. Oprimalatecla LIGHTTIMER.
2. Oprimalatecla 8.
NOTA:
Si deseacancelarel LIGHTTIMERenfuncionamiento,
oprimalateclaO.
LightHiLo/Off(LuzAlta/Baja/
Apagada)
OprimalateclaLIGHTHI/LO/OFFuna
vezparaluzbrillante, dosvecespara
luz nocturna,otres vecesparaapagar
la luz.
IVlore/Less(M_s/Menos)
LosbotonesMore/Lesslepermitenajustarlostiemposde
cocciOnpreconfigurados.SOlofuncionanenlosmodos
SensorReheat(recalentamientoconsensor),Sensor
cooking(cocciOnconsensor)(exceptoparaBebidas),
Add30sec.(agregar30seg),CustomCook(cocciOn
personalizada)o TimeCook(cocciOnportiempo).Utilice
el botOnMore/Lesssolodespu_sdehabercomenzadoa
cocinarconunodeestosprocedimientos.
ParaAGREGARrodstiempoaun
procedimientodecocci6nautom_ttico:
Oprirnael botGnMORE(9) (M_s).
ParaREDUCIRmAstiempo deun
procedimientode cocciGnautom_.tico:
Optimael botGnLESS(1)(Menes).
4. Ingreselahoraala quedeseaquese
apaguelaLUZ.
5. OprimalateclaENTER/START.
45
USA-MHC5 DE68-O3143P.indb 45 2007-06-08 7:43:20

iiiiiiiiiiiiiiiiiiiiiiiiiiiiiiiiii_::!_ii_!!'!!'ii:ii_iiiii!i!'!!'!ill¸ii_ii_ilii'i!'!i_ii_iiiiil;ii_ii_ii_!!iiiiiiiillii!!_!_!i_i!iiii_i!i!!!!!ii:ii_!iii_ii!i_!!_i!_iiiiii_!i!i_!i_!i_!i_ii_ii_ii_ii_ii_iiill!_!i!_i!i!iiii_i!_iii!_i!i!i!i!i!_i!_!!_!!_!!_!!i_iiiiiiii_i!iiii_ii_ii_i!_i!_iiiii!!iiii_!ii_ii_ii_!!_!i_i!_ii_!_ii_iii_i!_ii_i!;i!iiiiiiiii!ii!ii!ii!iiiiii!!_!i_!i_i:i_!_!_!!_iiiiii_ii_iiiiii_ii_i!_i!_i!ii_i!_ii_ii_iiii_!!_i!_:!_ii_ii_!i_!i_ii:iiiili_ii:i_i!_i!_i!_!!_!!_iiii_i!_!iiiiii_ii_i!_!i_iliii!iiiiiilliiiiiiiii_i_i_!_i_!iliiiii:!i_!i:!i:ii!i_ii_!i!!i!!i!!i!!i!!i!!i!!i!!i!!i!!i!!i!!i!!i!!i!!i!!i!!i!!i!!i!!i!!i!!i!!i!!i!!i!!i!!i!!i!!i!!i!!i!!i!!i!!i!!i!!i!!i!!i!!i!!i!!i!!i!!i!!i!!i!!i!!i!!i!!i!!i!!i!!i!!i!!i!!i!!i!!i!!i!!i!!i!!i!!i!!i!!i!!i!!i!!i!!i!!i!!i!!i!!i!!i!!i!!i!!i!!i!!i!!i!!i!!i!!i!!i!!i!!i!!i!!i!!i!!i!!i!!i!!i!!i!!i!!i!!i!!i!!i!!i!!i!!i!!i!!i!!i!!i!!i!!i!!i!!i!!i!!i!!i!!i!!i!!i!!i!!i!!i!!i!!i!!i!!i!!i!!i!!i!!i!!i!!i!!i!!i!!i!!i!!i!!i!!i!!i!!i!!i!!i!!i!!i!!i!!i!!i!!i!!i!!i!!i!!i!!i!!i!!i!!i!!i!!i!!i!!i!!i!!i!!i!!i!!i!!i!!i!!i!!i!!i!!i!!i!!i!!i!!i!!i!!i!!i!!i!!i!!i!!i!!i!!i!!i!!i!!i!!i!!i!!i!!i!!i!!i!!i!!i!!i!!i!!i!!i!!i!!i!!i!!i!!i!!i!!i!!i!!i!!i!!i!!i!!i!!i_!_!!
CustomProgram(Programa
Personalizado)
CUSTOMPROGRAMle permiterecuperarunainstrucci6n
decocci6npreviamenteincorporadaa lamemoriay
comenzara cocinarrApidamente.
Ejemplo:Paracocinardl/rante2minutosa unapotenciadel
70%.
1. OprimalateclaCUSTOMPROGRAM.
2. Ingreseeltiempodecocci6n.
3. OprimalateclaPOWERLEVEL.
4. Ingreseenniveldepotencia.
5. OprimalateclaENTER/START.
Ejemplo:Pararecuperarel programapersonalizado.
1. OprimalateclaCUSTOMPROGRAM.
2. OprimalateclaENTER/START.
CuandohayatranscurridoeltiempodecocciOn,escuchar_
cuatrose_alessonorasyaparecer_,la palabraEND.
Cocinarconniveiesdepotencia
altos
Ejemplo:Paracocinaralimentosdurante8 minutos30
segundosaunapotendade1100%.
1. Ingreseeltiempodecocci6n.
2. Oprimalatecla ENTER/START.
CuandohayatranscurridoeltiempodecocciOn,escuchar_
cuatrose_alessonorasyaparecer_lapalabraEND.
Cocinarconniveiesdepotencia
m_shalos
Lacocci_nconel niveldepotenciaHIGHnosiempre
lebrindalosmejoresresultadosconlosalimentosque
necesitanunacocci6nm_slenta,talescomolascarnes
asadas,losalimentoshorneadoso losflanes.Suhorno
tiene10ajustesdepotenciaadem_.sdeHIGH.
Ejemplo:Paracocinaralimentosdurante7minutos30
segundosaunapotenciade170%.
1. Ingreseel tiempo decocci6n.
2. Oprimalatecla POWERLEVEL.
3. Ingreseen nivelde potencia.
4. Oprimalatecla ENTER/START.
CuandohayatranscurridoeltiempodecocciOn,escuchar_
cuatrose_alessonorasyaparecer_lapalabraEND.
Paraconocerlosnivelesdepotenciaconsultelaguiade
cocciOnenlap_gina47.
IMPORTANTE:
. NOalmaceneniutiliceelestantedealambreenestehomo
amenosquesevayaacocinarm_sdeunalimentoo una
recetaIorequiera.
. Podriacausarda_osenelhorno.
46
USA-MHC5 DE68-O3143P.indb 46 2007-06-08 7:43:21

iiiiiiiiiiiiiiiiiiiiiiiiiiiiiiiiiiiiiiiiiiiiiiiiiiiiiiiiiiiiiiiiiiiiiiiiiiiiiiiiiiiiiiiiiiiiiiiiiiiiiiiiiiiiiiiiiiiiiiiiiiiiiiiiiiiiiiiiiiiiiiiiiiiiiiiiiiiiiiiiiiiiiiiiiiiiiiiiiiiiiiiiiiiiiiiiiiiiiiiiiiiiiiiiiiiiiiiiiiiiiiiiiiiiiiiiiiiiiiiiiiiiiiiiiiiiiiiiiiiiiiiiiiiiiiiiiiiiiiiiiiiiiiiiiiiiiiiiiiiiiiiiiiiiiiiiiiiiiiiiiiiiiiiiiiiiiiiiiiiiiiiiiiiiiiiiiiiiiiiiiiiiiiiiiiiiiiiiiiiiiiiiiiiiiiiiiiiiiiiiiiiiiiiiiiiiiiiiiiiiiiiiiiiiiiiiiiiii_i'illi;iilii_!!_i!iiiii_iiii_ii_i!;i!_ii_ii_,i_iiii!i:!!_ii_i!ifilli_ii_!i_iiiii!i!iiiii!_i!_i!_i!_ii_ii_ii_i!_!i'ii_ii_il_i!iii'i!'!!_i!ii!'iiiii!_!!i!_!!i!_i!_i!_i!_i!_i!_iiiiii;i_ii_i!_ii_il!ii!i!ii!i:_i!_ii_i!_i!_i!_i!_i!_i!_i!_i!_i!iiii¸i!¸(ili_iiiiii_ii,!i_!i¸iiiiillillif!!!_i!il_i!'!!_!i!!ii!i;!ili!_il_iiii_ilil¸ii:i!iiii¸i!i!'i!i!iii!_!i_ii_iiiii!_i!_i!_!(iii:fillillfillill!_ii_i!:ii_:iiii_ii_ii_ii_ilil_ii_ii_il_iiiiillii!!i¸iiiiiiiiii'ii_!i_ii_i!_i!_!iii!ii!_i(ii¸ii':ill_ii¸!iiiii_ii¸ilii!_iii!_i_i!_i!;i!iii_il_i!_i!_i!_i!_ii!i!!i!!i!!i!!i!!i!!i!!i!!i!!i!!i!!i!ii_!i!!!!!i!,_i__,
Cocinarconm_sdeunciclode
COCCiOI_
Paraobtenermejoresresultados,alounasrecetasrequieren
unniveldepotenciaduranteuntiempoy otronivelde
potenciaduranteotrotiempo.Suhornopuedeconfigurarse
parapasarde unoaotroautom_ticamente,durantetres
cicloscomom_.ximosielprimerciclodecalentamientoes
eldedescongelamiento.
Ejemplo:Paracocinaralimentosdurante3 minutosa una
potenciade/go%yluegoaunapotenciade170%durante7
minutos30segundos.
1. Ingreseelprimertiempodecocci_n.
2. OprimalateclaPOWERLEVEL.
3. Ingreseennivel depotencia.
4. Ingreseelsegundotiempode
cocci6n.
5. OprimalateclaPOWERLEVEL.
6. Ingreseennivel depotencia.
7. OprimalateclaENTER/START.
Cuandohayatranscurridoeltiempodecocci6n,escuchar_
cuatrose_alessonorasyaparecer_,la palabraEND.
Galadecocci_nparaniveiesde
potenciam_sbajos
Los9 nivelesdepotenciaadem_sdelHIGHlepermiten
elegirel niveldepotenciam_tsadecuadoparalosalimentos
quecocina.A continuaci6nseenumeranlos nivelesde
potencia,ejemplosdealimentosquesecocinanmejora
cadanively lapotenciadelmicrooedasqueutiliza.
10High
(alto)
IO0%
9 90%
8 80%
7 70%
* Hervir agua.
* Cocinar carne picada o
comenzar a cocinar carnes
asadas.
', Hacerdulces.
', Cocinar frutas y verduras
frescas.
', Precalentaruna bandeja
doradora.
', Recalentarbebidas.
', Rebanadasde tocino.
', Recalentarrebanadas decarne
r_pidamente.
', Saltear cebollas, apio y
pimiento verde.
', Todo tipo de recalentamiento.
', Cocinar huevos revueltos.
', Cocinar aveso rnariscos.
', Cocinar panesy productos a
basede cereales.
', Cocinar platos con queso,
ternera.
', Cocinar tortas, muffins,
brownies, magdalenas.
', Cocinar pasta.
', Cocinar carnes.
', Cocinar budines.
', Cocinar costillas, costillas
asadas, solomillo asado.
', Cocinar cortes de carne
menos tiernos.
', Recalentarcomidas rdpidas
congeladas.
', Descongelar carnede res, de
ave y mariscos.
', Cocinar peque_ascantidades
de alimentos.
', Terminar de cocinar guiso,
estofado y algunas salsas.
', Ablandar mantequilla y queso
crerna.
', Calentar peque_ascantidades
de alimentos.
', Ablandar helado.
', Leudar masacon levadura.
6 60 %
5 50%
4 40%
3 30%
2 20%
1 10%
47
USA-MHC5 DE68-O3143P.indb 47 2007-06-08 7:43:21

iiiiiiiiiiiiiiiiiiiiiiiiiiiiiiiiii_::!_ii_!!'!!'ii:ii_iiiii!i!'!!'!ill¸ii_ii_ilii'i!'!i_ii_iiiiil;ii_ii_ii_!!iiiiiiiillii!!_!_!i_i!iiii_i!i!!!!!ii:ii_!iii_ii!i_!!_i!_iiiiii_!i!i_!i_!i_!i_ii_ii_ii_ii_ii_iiill!_!i!_i!i!iiii_i!_iii!_i!i!i!i!i!_i!_!!_!!_!!_!!i_iiiiiiii_i!iiii_ii_ii_i!_i!_iiiii!!iiii_!ii_ii_ii_!!_!i_i!_ii_!_ii_iii_i!_ii_i!;i!iiiiiiiii!ii!ii!ii!iiiiii!!_!i_!i_i:i_!_!_!!_iiiiii_ii_iiiiii_ii_i!_i!_i!ii_i!_ii_ii_iiii_!!_i!_:!_ii_ii_!i_!i_ii:iiiili_ii:i_i!_i!_i!_!!_!!_iiii_i!_!iiiiii_ii_i!_!i_iliii!iiiiiilliiiiiiiii_i_i_!_i_!iliiiii:!i_!i:!i:ii!i_ii_!i!!i!!i!!i!!i!!i!!i!!i!!i!!i!!i!!i!!i!!i!!i!!i!!i!!i!!i!!i!!i!!i!!i!!i!!i!!i!!i!!i!!i!!i!!i!!i!!i!!i!!i!!i!!i!!i!!i!!i!!i!!i!!i!!i!!i!!i!!i!!i!!i!!i!!i!!i!!i!!i!!i!!i!!i!!i!!i!!i!!i!!i!!i!!i!!i!!i!!i!!i!!i!!i!!i!!i!!i!!i!!i!!i!!i!!i!!i!!i!!i!!i!!i!!i!!i!!i!!i!!i!!i!!i!!i!!i!!i!!i!!i!!i!!i!!i!!i!!i!!i!!i!!i!!i!!i!!i!!i!!i!!i!!i!!i!!i!!i!!i!!i!!i!!i!!i!!i!!i!!i!!i!!i!!i!!i!!i!!i!!i!!i!!i!!i!!i!!i!!i!!i!!i!!i!!i!!i!!i!!i!!i!!i!!i!!i!!i!!i!!i!!i!!i!!i!!i!!i!!i!!i!!i!!i!!i!!i!!i!!i!!i!!i!!i!!i!!i!!i!!i!!i!!i!!i!!i!!i!!i!!i!!i!!i!!i!!i!!i!!i!!i!!i!!i!!i!!i!!i!!i!!i!!i!!i!!i!!i!!i!!i!!i!!i!!i!!i!!i!!i!!i!!i!!i!!i!!i!!i!!i!!i!!i!!i_!_!!
Instruccionesdelsensor
LaCocci6nconSensorlepermitecocinarla mayoriade
susalimentosfavoritossinseleccionarlostiemposde
cocci6ny losnivelesdepotencia.Lapantallaindicate,el
periododedetecciOndesplazandoelnombredelalimento.
Elhomodeterminaautom_.ticamenteeltiempodecocciOn
paracadaalimento.Cuandoelsensorinternodetectauna
ciertacantidaddehumedadprovenientedelalimento,
Indicar_al homocu_ntom_.stiempococinar.Lapantalla
mostrar_eltiempodecalentamientorestante.Paraobtener
mejoresresultadosalcocinarconSensor,sigaestas
recomendaciones:
1. Losalimentoscocinadosconelsistemadesensor
debenestaratemperaturadealmacenamientonormal.
2. Elplatogiratoriodevidrioylaparteexternadel
recipientedebenestarsecosparaasegurarmejores
resultadosdecocciOn.
3. Lamayoriadelosalimentosdebencubrirsesiempre,
sinapretar,conunenvoltoriopl_.sticoparamicroondas,
papeldecerao unatapa.
4. NoabralapuertanitoquelateclaSTOP/CLEARdurante
eltiempodedetecci6n.Cuandohayatranscurridoel
tiempodedetecci6n,seescuchar_unasepalsonoray
aparecer_eltiempodecocciOnrestanteenlapantalla.
Enestemomentopuedeabrirlapuertapararevolver,
darvueltao reacomodarlacomida.
Consultelap_.gina51 paratabladesonsor.
IMPORTANTE"
AntesdevolverautilizarlacocciOnconsensor,sedebe
dejarenfriarelhornodurante5 minutosparaquelos
alimentossecocinencorrectamente.
Guiade cocci6nconsensor
Losrecipientesy lascubiertasadecuadasayudana
garantizarbuenosresultadosdecocciOnconSensor.
1. Siempreutilicerecipientesparamicroondasy c[ibralos
consustapaso conunenvoltoriopl_sticocon
ventilaciOn.
2. Nuncautilicecubiertasdepl_sticoherm_ticas.Pueden
evitarquesalgaelvaporyhacerquelacomidasepase.
3. Ajustelacantidadaltama_odel recipiente.Llene
losrecipientesal menoshastala mitadparaobtener
mejoresresultados.
4. AsegOresedequelaparteexternadelrecipientede
cocci6nyla parteinternadelmicroondasest_nsecas
antesdecolocarlacomidaenel homo.Lasgotasde
humedadqueseconviertenenvapordeaguapueden
enga_aral sensor.
NOTA:
Si lacomidanoest_biencocinadao recalentadacuando
seutilizalafunciOnsensor,utiliceelniveldepotenciayel
tiempodecocciOn.NOsigautilizandolateclasensor.
Agregar o restar tiernpode
cocci6n
UtilizandolasteclasIVlORE(9)o LESS(l)sepuedenajustar
todaslasconfiguracionesdecocciOnconsensory cocci6n
contemporizadorparaun mayoro menortiempo.
48
USA-MHC5 DE68-O3143P.indb 48 2007-06-08 7:43:22

iiiiiiiiiiiiiiiiiiiiiiiiiiiiiiiiiiiiiiiiiiiiiiiiiiiiiiiiiiiiiiiiiiiiiiiiiiiiiiiiiiiiiiiiiiiiiiiiiiiiiiiiiiiiiiiiiiiiiiiiiiiiiiiiiiiiiiiiiiiiiiiiiiiiiiiiiiiiiiiiiiiiiiiiiiiiiiiiiiiiiiiiiiiiiiiiiiiiiiiiiiiiiiiiiiiiiiiiiiiiiiiiiiiiiiiiiiiiiiiiiiiiiiiiiiiiiiiiiiiiiiiiiiiiiiiiiiiiiiiiiiiiiiiiiiiiiiiiiiiiiiiiiiiiiiiiiiiiiiiiiiiiiiiiiiiiiiiiiiiiiiiiiiiiiiiiiiiiiiiiiiiiiiiiiiiiiiiiiiiiiiiiiiiiiiiiiiiiiiiiiiiiiiiiiiiiiiiiiiiiiiiiiiiiiiiiiiiii_iilli;iilii_!!_i!iiiiiiiii_ii_i!;i!_ii_ii_,i_iiii!i:!!_ii_i!ifilli_ii_!i_iiiii!i!iiiii!_i!_i!_i!_ii_ii_ii_i!_!i'ii_ii_il_i!iii'i!'!!_i!ii!iiiii!_!!i!_!!i!_i!_i!_i!_i!_i!_iiiiii;i_ii_i!_ii_il!ii!i!ii!i:_i!_ii_i!_i!_i!_i!_i!_i!_i!_i!_i!iiii¸i!¸ililiiiiiii_ii'!i_!i¸iiiiillillif!!!_i!il_i!'!!_!i!!ii!ii!ili!_il_iiii_ililii:i!iiii¸i!i!'i!i!iii!_!i_ii_iiiii!_i!_i!_!_iiiii:fillillfillill!_ii_i!:ii_:iiii_ii_ii_ii_ilil_ii_ii_il_iiiiillii!!i¸iiiiiiiiilli_!i_ii_i!_i!_!iii!ii!_ii:ili¸ii:ill_ii¸!iiiii_ii¸ilii!_iii!_i_i!_i!:i!iii_il_i!_i!_i!_i!_ii!i!!i!!i!!i!!i!!i!!i!!i!!i!!i!!i!!i!ii_!i!!!!!i!,_i__,
PizzaSlice(Rebanadade Pizza)
RecalentarpizzaconlafunciGnPIZZASLICEle permite
recalentarunaovariasrebanadasdepizzasinseleccionar
lostiemposdecocciOnylosnivelesdepotencia.
Ejemplo:Pararecalentar2rebanadasdepizza.
Opr,_a_atee_aP_ZZASUCE
CuandohayatranscurridoeltiempodecocciOn,escuchar_
cuatrose_alessonorasyaparecer_,la palabraEND.
Cantidadesrecomendadas:1-4rebanadas.
o
o
NOdescuideelmicroondasmientrasprepara
palomitasdemaiz.
Cuandococinepalomitasdemalzenvasadas
comerc_almente,quiteelestantedelhome
Nocoloquelabolsadepalomitasdemaizpara
microondassobrelarejillao debajodelamisma.
Popcorn(PalomitasdeIVlaiz)
LateclaPOPCORNlepermiteprepararenel microondas
palomitasdemaizenvasadascomercialmente.Preparesolo
unpaquetea lavez.Paraobtenermejoresresultados,utilice
bolsasnuevasdepalomitasdemaiz.
Ejemplo:Paraprepara_palomitasdemaiz.
Opr,_alateelaPOPOORN
CuandohayatranscurridoeltiempodecocciOn,escuchar_
cuatrose_alessonorasyaparecer_,la palabraEND.
,, Cantidadesrecomendadas:3,0-3,5 ozs.
BakedPotato(Papaal Homo)
LateclaBAKEDPOTATOlepermitehornearunaovarias
papassinseleccionarlostiemposdecocciOnylosniveles
depotencia.
NOTA$:
o Eltiempo decocciGnest_basadoen unapapade8-10 oz.
o Utilicelatecla Mere (Mds)(g}/Less (Menes}(1) cuando
cocmepapasm_.sgrandeso m_speque_as.
. Antesdehornear,perfore lapapacon untenedorvarias
yeses.
o Si la papanoest,.cocinadacompletamente,utiliceCeeldng
Time(Tiempede cocsi_} y NOutilice la teclaBAKED
POTATO(PAPAAL HORNO}paracompletarla cocciGn.
. Despu_sdehornear,dejereposardurante5 minutes.
Ejemplo:Papacocina_2 papas.
OprimalateclaBAKEDPOTATO.
CuandohayatranscurridoeltiempodecocciOn,escuchar_
cuatrose_alessonorasyaparecer_lapalabraEND.
,, Cantidadesrecomendadas:1-6papas,
aproximadamente6-8 ozs.cadauna.
Vegetable(Verduras)
LatunciOnVEGETABLEStiene potenciasdecocci_n
predeterminadaspara2 categoriasdealimentos:Ftes_as,
Ce_geladas.
Ejemplo:Paracocinarverdurascon_eladas.
_Oprima,atee,aVEGETABLES
2. Elijala categoriadealimento.
Cuandohayatranscurridoel tiempo decocciOn,escuchar_.
cuatro se_alessonorasy aparecer_la palabraEND.
Fresca 1
Congelada 2
49
USA-MHC5 DE68-O3143P.indb 49 2007-06-08 7:43:22 I

iiiiiiiiiiiiiiiiiiiiiiiiiiiiiiiiii_::!_ii_!!'!!'ii:ii_iiiii!'i!'!!'!ill¸ii_ii_ilii'i!'!i_ii_ii'iiil;ii_ii_ii_!!iiiiiiiillii!!_!_!i_i!iiii_i!i!!!!!ii:ii_!iii_ii!i_!!_i!_iiiiii_!i!i_!i_!i_!i_ii_ii_ii_ii_ii_iiill!_!i!_i!i!iiii_i!_iii!_i!i!i!i!i!_i!_!!_!!_!!_!!i_iiiiiiii_i!iiii_ii_ii_i!_i!_iiiii!!iiii_!ii_ii_ii_!!_!i_i!_ii_!_ii_iii_i!_ii_i!;i!iiiiiiiii!ii!ii!ii!iiiiii!!_!i_!i_i:i_!_!_!!_iiiiii_ii_iiii'ii_ii_i!_i!_i!ii_i!_ii_ii_iiii_!!_i!_:!_ii_ii_!i_!i_ii:iiiili_ii_:i_i!_i!_i!_!!_!!_iiii_i!_!iiiiii_ii_i!_!i_iliii!iiiiiilliiiiiiiii_i_i_!_i_!iliiiii:!i_!i:!i:ii!i_ii_,_i_i_!i!!i!!i!!i!!i!!i!!i!!i!!i!!i!!i!!i!!i!!i!!i!!i!!i!!i!!i!!i!!i!!i!!i!!i!!i!!i!!i!!i!!i!!i!!i!!i!!i!!i!!i!!i!!i!!i!!i!!i!!i!!i!!i!!i!!i!!i!!i!!i!!i!!i!!i!!i!!i!!i!!i!!i!!i!!i!!i!!i!!i!!i!!i!!i!!i!!i!!i!!i!!i!!i!!i!!i!!i!!i!!i!!i!!i!!i!!i!!i!!i!!i!!i!!i!!i!!i!!i!!i!!i!!i!!i!!i!!i!!i!!i!!i!!i!!i!!i!!i!!i!!i!!i!!i!!i!!i!!i!!i!!i!!i!!i!!i!!i!!i!!i!!i!!i!!i!!i!!i!!i!!i!!i!!i!!i!!i!!i!!i!!i!!i!!i!!i!!i!!i!!i!!i!!i!!i!!i!!i!!i!!i!!i!!i!!i!!i!!i!!i!!i!!i!!i!!i!!i!!i!!i!!i!!i!!i!!i!!i!!i!!i!!i!!i!!i!!i!!i!!i!!i!!i!!i!!i!!i!!i!!i!!i!!i!!i!!i!!i!!i!!i!!i!!i!!i!!i!!i!!i!!i!!i!!i!!i!!i!!i!!i!!i!!i!!i!!i!!i!!i!!i!!i!!i!!i!!i!!i!!i!!i!!i!!i_i_i_!_!!
Cook(Cocci6n)
UsarlateclaCOOK(COCCIDH)le permitecalentarcomidas
comunespreparadasparamicroondassinnecesidadde
programartiemposdecocciOnni nivelesdepotencia.
COOK(COCCION)tiene4categoriasdealimentos
predeterminadas.:Bebidas,cemidascengeiadas,
desayunuscengeiadus,pechugasdepolio.
Ejemplo:Paracodnarundesay.nocongelado.
1Oprima,atoo,aCOOK
2. Elijalacategoriadealimento.
Cuandohayatranscurridoeltiempodecocci6n,escuchar_
cuatrose_alessonorasyaparecer_,la palabraEND.
Bebidas 1
Comidacongelada 2
Desayunocongelado 3
Pechugadepolio 4
Cantidadesrecomendadas
Bebidas 8ozs.
Comidacongelada 8-14ozs.
Desayunocongelado 4-8ozs.
Pechugadepolio 8-24ozs.
Reheat(Recalentamiento)
LateclaREHEAT(RECALENTAMIENTO)lepermitecalentar
alimentossinnecesidaddeprogramartiemposdecocciOn
ninivelesdepotencia.REHEAT(RECALENTAMIENTO)tiene
3 categoriaspredeterminadas:Platede cernida,guisey
pasta.
Ejemplo:Parareealentarunguise.
10pma_atec_aREHEAT
2. Elijalacategoriadealimento.
Cuandohayatranscurridoeltiempodecocci6n,escucharA
cuatroseffalessonorasyaparecerAlapalabraEND.
Plato de comida 1
Guise 2
pasta 3
Cantidadesrecomendadas
Platodecomida 1portion
Guise 194 portions
pasta 194 portions
HoldWarm(MantenerCaliente)
Pudedmantenercalientesy seguroslosalimentos
cocinados,calentadosensuhornodemicroondashasta99
minutes99segundos.
Ejem_/o:Paracalientedurante60min.tos
1. OptimalateclaHOLDWAHIVl
(MantenerCaliente}.
2. Ingreseel primertiempo decocci6n.
3. Oprimalatecla ENTER/START.
NOTAS:
. "lV]antenercaliente"operahastauntotalde99minutes99
segundos.
o Losalimentosyacocinadosdebensercubiertosdurante
"Mantenercaliente".
o Losplatesdepasteleria(pasteles,empanadas,etc.)deben
estarsincubiertadurantelafunciOn"Mantenercaliente".
o Lascomidascompletasquesedeseemantenercalientes
sobreunplato,debencubrirsedurantelafunci6n"Mantener
caliente".
5O
Liquido 1-2tazas
Seco 5-10onza.
USA-MHC5 D E68-O3143P.indb 50 2007-06-08 7:43:22

Palomitas de Utilice s61ouna bolsa para microondas de palomitas de maiz ala vez.Tengacuidado cuando saque y 3.0 a 3.5 oz.
maiz abra la bolsacaliente del horno. Deje enfriar el horno durante al menos 5 minutos antes de utilizarlo 1 paquete.
nuevarnente.
Pinche cada papavariasveces con un tenedor. Col6quelas enel plato giratorio al estilo de los rayos
de una rueda.
Papa D_jelas reposar 3-5 minutos. Deje enfriar el homo durante al menos 5 minutos antes de utilizarlo 1 a 6 papas
nuevamente. Utilice la tecla More(9) cuando cocine papas m_s grandes.
Coloque lasverduras frescas en unafuente de pl_stico, vidrio o cer_mica para microondas y
Verduras agregue 2-4 cucharadas deagua. Cubracon unatapao envoltorio pl_stico con ventilaci6n durante la
frescas cocci6n y revuelva antes de dejar reposar. Deje enfriar el homo durante al menos 5 minutos antes de 1 a 4 porciones
utilizarlo nuevamente. Utilice la tecla More(9) cuando cocine verduras densas tales como zanahorias
<:
cc o br6coli.
C:3
cc Coloque lasverduras congeladas en unafuente de pl_stico, vidrio o cer_mica para microondas y
Verduras agregue 2-4 cucharadas deagua. Cubracon unatapao envoltorio pl_stico con ventilaci6n durante la
congeladas cocci6n y revuelva antes de dejar reposar. Deje enfriar el homo durante al menos 5 minutos antes de 1 a 4 porciones
utilizarlo nuevamente. Utilice la tecla More(9) cuando cocine verduras densas tales como zanahorias
o br6coli.
Coloque 1-4 rebanadas de pizzaen un plato para microondas con el extremo ancho de la porci6n
Rebanadade hacia el borde exterior del plato. No permita que las rebanadasse superpongan. No lascubra. Deje
pizza enfriar el horno durante al menos 5 minutos antes de utilizarlo nuevamente. Utilice la tecla More(9) 1 a 4 porciones
)ara aumentar eltiempo de recalentamiento para la pizzacon masagruesa.
Utilice unataza o jarro para medir; no Iocubra. Coloque la bebida enel horno. Despu6s de calentar,
revuelva bien. Deje enfriar el horno durante al menos 5 minutos antes de utilizarlo nuevamente.
Nota:
Bebidas 8 oz.
_, Los tiempos de recalentamiento estdn basados en unataza de8 onzas.
_, Labebida recalentada con esta funci6n puede estar muy caliente.
_, Saqueel recipiente con cuidado.
z Comida Quite el envoltorio externo de lacomida y siga las instrucciones de lacaja para cubrirla y dejarla 8 a 14 oz.
,o congelada reposar. Dejeenfriar el homo durante al menos 5 minutos antes de utilizarlo nuevamente.
o Siga las instrucciones del envasepara cubrirlo y dejarlo reposar. Utilice esta tecla para emparedados
o° Desayuno
congelado congelados, el plato principal del desayuno, etc. Dejeenfriar el horno durante al menos 5 minutos 4 a 8 oz.
antes de utilizarlo nuevarnente.
Coloque laspechugas depolio en un plato para microondas y cQbralascon un envoltorio pldstico.
Cocine auna temperatura interna de 170 grades F.Gire durante el tiempo de la cuenta atr_s.
Pechugade Deje reposar durante 5 minutes. Utilice la tecla More(9) paraaumentar el tiempo de cocci6n para 8 a 24 oz.
)ollo
pechugas de polio rodsgrandes o m_s gruesas. Deje enfriar el horno durante al menos 5 minutos
antes de utilizarlo nuevarnente.
!a ia derecaien amient c sensor............................................................................................................................................................................................................................................................................................
Plato decomida
Guiso
Pasta
Utilice s61oalimentos precocidos refrigerados. Cubrael plato con un envoltorio pldstico con
ventilaci6n o papel de cera, metido debajo del plato. Si lacomida noestd tan caliente como la
deseadespu6s decalentarla con REHEAT(recalentarniento), contim]e calentdndola utilizando
tiempo y potencia. Nosiga cocinando utilizando la tecla Reheat(Recalentar).
Contenido:
', 3-4 oz. de came, ave o pescado (hasta 6 oz. con hueso)
', ½ taza dealmid6n (papas, pasta, arroz, etc.)
', ½ taza deverduras (alrededor de 3-4 oz.)
Cubrael plato con unatapa o un envoltorio pl_stico con ventilaci6n. Si la comida no est_
tan caliente como la desea despu6s de calentarla con REHEAT(recalentamiento), continQe
calent_ndola utilizando tiempo y potencia. No siga cocinando utilizando la tecla Reheat
(Recalentar).
Contenido:
', Guisos refrigerados. (Ejemplos: guiso, lasagna)
', Espaguetis y ravioles enlatados, alimentos refrigerados.
1portion
(1assiette)
194 portions
51
USA-MHC5 D E68-O3143P.indb 51 2007-06-08 7:43:23

iiiiiiiiiiiiiiiiiiiiiiiiiiiiiiiiii_::!_ii_!!'!!'ii:ii_iiiii!'i!'!!'!ill¸ii_ii_ilii'i!'!i_ii_ii'iiil;ii_ii_ii_!!iiiiiiiillii!!_!_!i_i!iiii_i!i!!!!!ii:ii_!iii_ii!i_!!_i!_iiiiii_!i!i_!i_!i_!i_ii_ii_ii_ii_ii_iiill!_!i!_i!i!iiii_i!_iii!_i!i!i!i!i!_i!_!!_!!_!!_!!i_iiiiiiii_i!iiii_ii_ii_i!_i!_iiiii!!iiii_!ii_ii_ii_!!_!i_i!_ii_!_ii_iii_i!_ii_i!;i!iiiiiiiii!ii!ii!ii!iiiiii!!_!i_!i_i:i_!_!_!!_iiiiii_ii_iiii'ii_ii_i!_i!_i!ii_i!_ii_ii_iiii_!!_i!_:!_ii_ii_!i_!i_ii:iiiili_ii_:i_i!_i!_i!_!!_!!_iiii_i!_!iiiiii_ii_i!_!i_iliii!iiiiiilliiiiiiiii_i_i_!_i_!iliiiii:!i_!i:!i:ii!i_ii_,_i_i_!i!!i!!i!!i!!i!!i!!i!!i!!i!!i!!i!!i!!i!!i!!i!!i!!i!!i!!i!!i!!i!!i!!i!!i!!i!!i!!i!!i!!i!!i!!i!!i!!i!!i!!i!!i!!i!!i!!i!!i!!i!!i!!i!!i!!i!!i!!i!!i!!i!!i!!i!!i!!i!!i!!i!!i!!i!!i!!i!!i!!i!!i!!i!!i!!i!!i!!i!!i!!i!!i!!i!!i!!i!!i!!i!!i!!i!!i!!i!!i!!i!!i!!i!!i!!i!!i!!i!!i!!i!!i!!i!!i!!i!!i!!i!!i!!i!!i!!i!!i!!i!!i!!i!!i!!i!!i!!i!!i!!i!!i!!i!!i!!i!!i!!i!!i!!i!!i!!i!!i!!i!!i!!i!!i!!i!!i!!i!!i!!i!!i!!i!!i!!i!!i!!i!!i!!i!!i!!i!!i!!i!!i!!i!!i!!i!!i!!i!!i!!i!!i!!i!!i!!i!!i!!i!!i!!i!!i!!i!!i!!i!!i!!i!!i!!i!!i!!i!!i!!i!!i!!i!!i!!i!!i!!i!!i!!i!!i!!i!!i!!i!!i!!i!!i!!i!!i!!i!!i!!i!!i!!i!!i!!i!!i!!i!!i!!i!!i!!i!!i!!i!!i!!i!!i!!i!!i!!i!!i!!i!!i!!i_i_i_!_!!
KidsIVleals(ComidasparaNifios)
KIDSMEALSlepermitecalentar4 categoriasdealimentos:Trodlosdepolio, Salchichas,Papasfriias y Emparodados
¢oogeiados.
Ejemplo:Paracocinaremparedadoscongelados.
1. Oprima la tecla KIDS MEALS
(COMIDASPARANINOS}.
2. Elijalacategoriadealimento (1-4).
3. OprimalateclaENTER/START
(INGRESAR/COMENZAR).
Croquetas de polio 1
Perros calientes 2
Papasa la francesa 3
Emparedadoscongelados 4
Croquetas de polio 1 porci6n (4-5 oz.) ', Coloque unatoalla de papel sobre el plato y acomode los trocitos al estilo de los
2 porciones (6-7 oz.) rayos de una ruedaen latoalla de papel.
', No los cubra. Deje reposar 1 minuto.
Perroscalientes 2 EA ', Pinche las salchichas, col6quelas en el plato. Cuando el homo emita la sepal
4 EA sonora, agreguelos panesy vuelva a iniciar el homo.
Papasa la francesa 1 porci6n (4-5 oz.) ', Coloque 2 toallas de papel sobre el plato y acomode las papas fritas sobre las
2 porciones (6-7 oz.) toallas, sin superponerlas.
', T_pelascon otra toalla de papeldespu6s desacarlas del horno.
Emparedados 1 EA • Coloque el emparedado congelado en el "manguito" susceptor (que esta en el
congelados 2 EA paquete)y p6ngalo enun plato.
52
USA-MHC5 D E68-O3143P.indb 52 2007-O6-08 7:43:23

iiiiiiiiiiiiiiiiiiiiiiiiiiiiiiiiiiiiiiiiiiiiiiiiiiiiiiiiiiiiiiiiiiiiiiiiiiiiiiiiiiiiiiiiiiiiiiiiiiiiiiiiiiiiiiiiiiiiiiiiiiiiiiiiiiiiiiiiiiiiiiiiiiiiiiiiiiiiiiiiiiiiiiiiiiiiiiiiiiiiiiiiiiiiiiiiiiiiiiiiiiiiiiiiiiiiiiiiiiiiiiiiiiiiiiiiiiiiiiiiiiiiiiiiiiiiiiiiiiiiiiiiiiiiiiiiiiiiiiiiiiiiiiiiiiiiiiiiiiiiiiiiiiiiiiiiiiiiiiiiiiiiiiiiiiiiiiiiiiiiiiiiiiiiiiiiiiiiiiiiiiiiiiiiiiiiiiiiiiiiiiiiiiiiiiiiiiiiiiiiiiiiiiiiiiiiiiiiiiiiiiiiiiiiiiiiiiiii_i'illi;iilii_!!_i!iiiii_iiii_ii_i!;i!_ii_ii_,i_iiii!i:!!_ii_i!i_filli_ii_!i_iiiii!i!iiiii!_i!_i!_i!_ii_ii_ii_i!_!i'ii_ii_il_i!iii'i!'!!_i!ii!'iiiii!_!!i!_!!i!_i!_i!_i!_i!_i!_iiiiii;i_ii_i!_ii_il!ii!i!ii!'i:_i!_ii_i!_i!_i!_i!_i!_i!_i!_i!_i!iiii¸i!¸ilili_iiiiii_ii'!i_!i¸iiiiillillif!!!_i!il_i!'!!_!i!!ii!ii!ili!_il_iiii_ililii:i!iiii¸i!i!'i!i!iii!_!i_ii_iiiii!_i!_i!_!_iiiii:fillillfillill!_ii_i!:ii_:iiii_ii_ii_ii_ilil_ii_ii_il_iiiiillii!!i¸iiiiiiiiii'ii_!i_ii_i!_i!_!iii!ii!_ii:ili¸ii':ill_ii¸!iiiii_ii¸ilii!_iii!_i_'i!_i!:i!iii_il_i!_i!_i!_i!_ii!i!!i!!i!!i!!i!!i!!i!!i!!i!!i!!i!!i!ii_!i!!!!!i!'_'__'
Soften/IVlelt(Suavizar/Derretir)
SOFTEN/MELTlepermiteablandaro derretir3categoriasdealimentos:[:lerretirchocolate,Abiandarqueso¢reraay[:lerretir
i[lan|eca.
Ejemplo:Paraderretirchocolate.
1. OprimalateclaSOFTEN/MELT
(SUAVEAR/DERRETIR).
2. Elijalacategoriadealirnento(1-3).
3. OprimalateclaENTER/START
(INGRESAR/CO_ENZAR),
Derretir chocolate 1
Suavizar queso crema 2
Derretir mantequilla 3
Derretirchocolate
Suavizarquesocrema
Derretirrnantequilla
2cuadradoso
1tazadepepitas
1paquete(8 oz.)
1barra(1/4lb.)
2barras(1/2lb.)
', Coloqueloscuadradoso laspepitasdechocolateenunrecipientepara
rnicroondas.
• Revuelvabienen lamitaddeltiempocuandoel hornoemiteunasepalsonora,y
vuelvaainiciarel horno.
', A menosqueserevuelva,elchocolatemantienesuformacuandoterminael
tiempodecalentamiento.
', Desenvuelvael quesocremaycolOqueloenunrecipienteparamicroondas.
Dejereposardurante1-2minutos.
', Quiteelenvoltorioy cortela mantecaalamitadenformavertical.
', Coloquelamantecaenel recipiente,ct_braloconpapeldecera.
Revuelvabiendespu6sdefinalizary dejereposar1-2minutos.
53
USA=MHC5 D E68=03143P.indb 53 2007-06-08 7:43:23

iiiiiiiiiiiiiiiiiiiiiiiiiiiiiiiiii_::!_ii_!!'!!'ii:ii_iiiii!'i!'!!'!ill¸ii_ii_ilii'i!'!i_ii_ii'iiil;ii_ii_ii_!!iiiiiiiillii!!_!_!i_i!iiii_i!i!!!!!ii:ii_!iii_ii!i_!!_i!_iiiiii_!i!i_!i_!i_!i_ii_ii_ii_ii_ii_iiill!_!i!_i!i!iiii_i!_iii!_i!i!i!i!i!_i!_!!_!!_!!_!!i_iiiiiiii_i!iiii_ii_ii_i!_i!_iiiii!!iiii_!ii_ii_ii_!!_!i_i!_ii_!_ii_iii_i!_ii_i!;i!iiiiiiiii!ii!ii!ii!iiiiii!!_!i_!i_i:i_!_!_!!_iiiiii_ii_iiii'ii_ii_i!_i!_i!ii_i!_ii_ii_iiii_!!_i!_!_ii_ii_!i_!i_ii:iiiili_ii_:i_i!_i!_i!_!!_!!_iiii_i!_!iiiiii_ii_i!_!i_iliii!iiiiiilliiiiiiiii_i_i_!_i_!iliiiii:!i_!i:!i_ii!i_ii_,_i_i_!i!!i!!i!!i!!i!!i!!i!!i!!i!!i!!i!!i!!i!!i!!i!!i!!i!!i!!i!!i!!i!!i!!i!!i!!i!!i!!i!!i!!i!!i!!i!!i!!i!!i!!i!!i!!i!!i!!i!!i!!i!!i!!i!!i!!i!!i!!i!!i!!i!!i!!i!!i!!i!!i!!i!!i!!i!!i!!i!!i!!i!!i!!i!!i!!i!!i!!i!!i!!i!!i!!i!!i!!i!!i!!i!!i!!i!!i!!i!!i!!i!!i!!i!!i!!i!!i!!i!!i!!i!!i!!i!!i!!i!!i!!i!!i!!i!!i!!i!!i!!i!!i!!i!!i!!i!!i!!i!!i!!i!!i!!i!!i!!i!!i!!i!!i!!i!!i!!i!!i!!i!!i!!i!!i!!i!!i!!i!!i!!i!!i!!i!!i!!i!!i!!i!!i!!i!!i!!i!!i!!i!!i!!i!!i!!i!!i!!i!!i!!i!!i!!i!!i!!i!!i!!i!!i!!i!!i!!i!!i!!i!!i!!i!!i!!i!!i!!i!!i!!i!!i!!i!!i!!i!!i!!i!!i!!i!!i!!i!!i!!i!!i!!i!!i!!i!!i!!i!!i!!i!!i!!i!!i!!i!!i!!i!!i!!i!!i!!i!!i!!i!!i!!i!!i!!i!!i!!i!!i!!i!!i!!i_i_i_;!_!!
Snacks
SNACKSlepermitecalentar4 categoriasdealimentos:Bathos,Aiitas depolio,Papasconpiel,y Baslonesdequeso.
Ejemplo:Paracocinaralitasdepolio.
1. Optima la tecla SNACKS.
2. Elijalacategoriadealimento(1-4),
3. Optimala teclaENTER/START
(INGRESAR/COMENZAR),
Nachos 1
Alasde polio 2
Conchas depapa 3
Palitos de queso 4
Tabiadesnacks
Nachos 1 porci6n o Coloque las tortillas de maizen elplato sin superponerlas.
o Rocielas con queso enforma pareja.
Contenido: 2 tazas detortillas de maiz
1/3 tazade queso rallado
Alasde polio 5-6 oz. o Utilice alitas de polio precocidas refrigeradas.
7-8 oz. o Coloque las alitas de polio alrededor del plato al estilo delos rayos de una rueday
c_bralas con papelde cera.
Conchasde papa 1 papa cocida o Corte la papa cocida en 4 rebanadas parejas. Quite la pulpa de la papadejando
2 papascocidas aproximadamente 1/4" de piel.
o Coloque las cascaras al estilo de los rayos de unarueda alrededor del plato.
o Espolvoree con tocino, cebollas y queso. No lascubra.
Palitos de queso 5-6 piezas o Coloque los bastones de queso en el plato al estilo de los rayos de unarueda.
7-10 piezas o No los cubra.
54
USA=MHC5 D E68=O3143P.indb 54 2007-06-08 7:43:23

iiiiiiiiiiiiiiiiiiiiiiiiiiiiiiiiiiiiiiiiiiiiiiiiiiiiiiiiiiiiiiiiiiiiiiiiiiiiiiiiiiiiiiiiiiiiiiiiiiiiiiiiiiiiiiiiiiiiiiiiiiiiiiiiiiiiiiiiiiiiiiiiiiiiiiiiiiiiiiiiiiiiiiiiiiiiiiiiiiiiiiiiiiiiiiiiiiiiiiiiiiiiiiiiiiiiiiiiiiiiiiiiiiiiiiiiiiiiiiiiiiiiiiiiiiiiiiiiiiiiiiiiiiiiiiiiiiiiiiiiiiiiiiiiiiiiiiiiiiiiiiiiiiiiiiiiiiiiiiiiiiiiiiiiiiiiiiiiiiiiiiiiiiiiiiiiiiiiiiiiiiiiiiiiiiiiiiiiiiiiiiiiiiiiiiiiiiiiiiiiiiiiiiiiiiiiiiiiiiiiiiiiiiiiiiiiiiiii_i'illi;iilii_!!_i!iiiii_iiii_ii_i!;i!_ii_ii_,i_iiii!i:!!_ii_i!ifilli_ii_!i_iiiii!i!iiiii!_i!_i!_i!_ii_ii_ii(!_!i'ii_ii_il_i!iii'i!'!!_i!ii!'iiiii!_!!i!_!!i!_i!_i!_i!_i!_i!_iiiiii;i_ii_i!_ii_il!ii!i!ii!i:_i!_ii_i!_i!_i!_i!_i!_i!_i!_i!_i!iiii¸i!¸ilili_iiiiii_ii'!i_!i¸iiiiillillif!!!_i!il_i!'!!_!i!!ii!ii!ili!_il_iiii_ililii:i!iiii¸i!i!'i!i!iii!_!i_ii_iiiii!_i!_i!_!_iiiii:fillillfillill!_ii_i!:ii_:iiii_ii_ii_ii_ilil_ii_ii_il_iiiiillii!!i¸iiiiiiiiii'ii_!i_ii_i!_i!_!iii!ii!_ii:ili¸ii':ill_ii¸!iiiii(i¸ilii!_iii!_i_i!_i!:i!iii_il_i!_i!_i!_i!_ii!i!!i!!i!!i!!i!!i!!i!!i!!i!!i!!i!!i!ii_!i!!!!!i!'_'__'
AutoDefrost(DescongeiamientoAutom;_tico)
Lasopcionesdedesconoelamientoest_.nprogramadasenelhomo=Lafunci6ndedescongelamientoleofreceelmejor
m_tododedescongelamientoparaalimentoscongelados,dadoqueelhornoconfiguraautom_ticamentelostiempos
dedescongelamientodeacuerdoconel pesoqueustedingresa.Paramayorcomodidad,lafunci6nAUTODEFROST
(DESCONGELAIVlIENTOAUTOIVlATICO)emitese_alessonorasquele recuerdancontrolaro darvueltalosalimentosdurante
elciclodedescongelamiento.
Despu_sdetocarlateclaAUTODEFROSTunavez,seleccioneelpesodelosalimentos.
Losrangosdepesodisponiblessonde0,1a 6,0Ibs.
Ejemplo:Paradescongelar1,2Ibsdecame.
1. Optimala teclaAUTODEFROST.
2. Ingreseel peso.
3. Optimala teclaENTER/START.
NOTAS:
* Despu_sde presionarENTER/START,lapantallacuentaeltiempo dedescongelamientoenforma regresiva.Elhomo emitir_,la
sepalsonoradosvecesduranteel ciclo dedescongelamiento.
Enesemomento,abrala puertay d6vuelta losalimentossegOnseanecesario.Saquelasporcionesquese hayandescongelado
luegocoloquelasporcionescongeladasen el homoy presioneENTER/STARTparareanudarel ciclo dedescongelamiento.
* Elho_nonosedetendr_du_antela SEi_ALSONORAa rnenosque seai_rala p_erta.
Sigaestasinstruccionescuandodescongelelosdistintostiposdealimentos.
Rosbif,cerdo 2.5-6.0Ibs.
_islecs,ch_lelas, 0.5-6.0Ibs.
pescado
Camepicada 0.5-6.0Ibs.
Polioentero 2.5-6.0Ibs.
Trozosde polle 0.5-6.0 Ibs.
Comience con el alimento con el lado de la grasa haciaabajo.
Despu_sdecada etapa, gire el alimento y cubra cualquier parte caliente con tiras finas de
papel dealuminio. D6jelos reposar, cubiertos, durante 15a 30 minutos.
Despu_sdecada etapa, reacomode el alimento. Si hay alguna parte caliente o
descongelada,c_brala con pedacitos finos de papel de aluminio. Saque cualquier
alimento que est_ casi descongelado.
Deje reposar, cubierto, durante 5-10 minutos.
Despu_sdecada etapa, saque cualquier parte del alimento queest6 casi descongelada.
Deje reposar lacame, cubierta con papel de aluminio, durante 5-10 minutos.
Quite los menudos antes de congelar ayes. Comiencea descongelar con la partede la
pechuga haciaabajo.
Despu_sde la primera etapa, gire el polio y cubra cualquier parte caliente con tiras finas
depapel de aluminio.
Despu_sde la segunda etapa, vuelva a cubrir cualquier parte caliente con tiras finas de
papel dealuminio.
Deje reposar, cubierto, durante 30-60 minutos en el refrigerador.
Despu_sdecada etapa, reacomode o saque cualquier parte del alimento que est6 casi
descongelada.
Deje reposar durante 10-20 minutos.
55
USA-MHC5 D E68-O3143P.indb 55 2007-06-08 7:43:23

- Cuandoutilizalafunci6nAUTODEFROST,el pesoquesedebeingresaresel pesonetoenlibrasyd_cimasdelibras(el
pesodelalimentomenoseldel recipiente).
,, UtiliceAUTODEFROSTsoloparaalimentoscrudos.AUTODEFROSTobtienemejoresresultadoscuandolosalimentos
quesedescongelar_nest_na un minimodeO°F(sacadosdirectamentedeunaut_nticofreezer).Sielalimentose
almacen6enun refrigeradorNeezerquenomantieneunatemperaturade5°Fo menos,siempreprogrameunpeso
inferiordelalimento(duranteuntiempodedescongelamientom_.sreducido)paraevitarcocinarelalimento.
,, Sielalimentoquedahasta20 minutosfueradelfreezer,ingreseun pesoinferiordelalimento.
,, Laformadelenvasealteraeltiempodedescongelamiento.Lospaquetesrectangulareschatossedescongelanm_s
r_pidamentequeunbloqueprofundo.
,, Separelospedazosamedidaquecomienzanadescongelarse.Lospedazosseparadossedescongelanconm_.s
facilidad.
,, Cubra_.reasdelosalimentosconpedacitospeque_osdepapeldealuminiosicomienzanacalentarse.
,, Puedeutilizarpeque_ospedazosdepapeldealuminioparaprotegeralimentoscomolasalasdepolio,losextremos
delaspatasy lascolasdepescado,peroelpapelno debetocarloslateralesdelhorno.Elpapeldealuminioproduce
chispas,Ioquepuededa_arelrevestimientodelhorno.
1 poundDefrost(Descongelamientode1 Libra)
Lafunci6n1POUNDDEFROSTofreceundescongelamientor_.pidoparaalimentoscongeladosde1,0libra.Elhorno
configuraautom_.ticamenteeltiempodedescongelamiento.
Ejemplo:Paradescongelar1lb.decamepicada.
1. Oprimalatecla1 POUNDDEFROST.
2. OprimalateclaENTER/START.
56
USA-MHC5 D E68-O3143P.indb 56 2007-06-08 7:43:24

Guiadecocci6n
7-11 min./Ib, para145° F(Jugoso)
Rosbif sin hueso
(hasta 4 Ibs.) 8-12 min./Ib, para160° F(A ponto}
9-14 min./Ib, para170° F(Bien cocido)
11-15 min./Ib, para170° F(Bien cocido)
Coloquelacarnesobreunaasaderaparamicroondasenunafuenteparamicroondas.
Comienceacocinarlacameconelladodela grasahaciaabajo.Utilicetirasfinasdepapeldealuminioparaproteger
cualquierpuntadehuesoo _.readecamedelgadas.
Controlelatemperaturaenvarioslugaresantesdedejarreposarlacarneeltiemporecomendado.
Cerdosinhuesoo
conhuesointerno
(hasta4 Ibs.)
* Lossiguientestemperaturassonlostemperaturasa los
aumentar_,duranteeltiempodereposo.
,, EspereunaumentodeIO°Fenlatemperaturaduranteel
Jugosa
A ponto
Bien cocida
A punto
8ien cocida
Came oscura
Came clara
135°F
150°F
160°F
150°F
160°F
170°F
160°F
Cargo de Vaca
Came de cerdo
Came de ave
Alta (10) durante los
primeros 5 minutos,
luego media (5)
Alta (10) durante los
primeros 5 minutos,
luego media (5)
Coloque el lado de lagrasa hacia abajo en la
asadera.
Cubra con papel de cera. Devuelta a la mitad
del ciclo de cocci6n. Dejereposar 10 minutos.
Coloque el lado de lagrasa hacia abajo en la
asadera.
Cubra con papel de cera. Devuelta a la mitad
del ciclo de cocci6n. Dejereposar 10 minutos.
uesesacanlosalimentos.Latemperaturadelalimento
tiempodereposo.
145°F
160°F
170°F
160°F
170°F
180°F
170°F
,, Coloquelacamedeavesobreunaasaderaparamicroondasenunafuenteparamicroondas.
,, Cubrala carnedeaveconpapeldeceraparaevitarsalpicaduras.
* Utilicepapeldealuminioparacubrirlaspuntasdeloshuesos,lasAreasdecarriedelgadao las_.reasquecomienzana
cocinarsedemasiado.
,, Controlelatemperaturaenvarioslugaresantesdedejarreposarlacarriedeaveeltiemporecomendado.
Polioenterobasra
4Ibs.
Pedacitosdepolio
basra2 Ibs.
Tiempo de cocci6n: 6-9 rain. / lb.
180°F came oscura
170°F came clara
Nivel de potencia: Medianaalta (7).
Tiempo de cocci6n: 6-9 min. / lb.
180°F came oscura
170°F came clara
Nivel de potencia: Medianaalta (7).
Coloque el lado de la pechuga del polio hacia abajo en la asadera.
Cubra con papel decera. D8vuelta a la mitad del ciclo de cocci6n.
Cocine hasta que los jugos sean claros y lacame cerca del huesoya
nosea rosada. Deje reposar 5-10 minutos.
Coloque el lado del hueso del polio hacia abajo en la fuente,con las
porciones m_s gruesas hacia laparte externa del plato. Cubracon
papelde cera. D8vuelta ala mitad del ciclo de cocci6n. Cocine hasta
que los jugos sean claros y la came cerca del hueso ya no sea rosada.
Dejereposar 5-10 minutos.
57
USA=MHC5 D E68=O3143P.indb 57 2007-06-08 7:43:24

Gu[a para cocinar pescadoym a cosen su microondas
,, CocineelpescadohastaquesepuedadesmenuzarfAcilmenteconuntenedor.
,, Coloqueelpescadosobreunaasaderaparamicroondasenunafuenteparamicroondas.
,, Utiliceunacubiertace_idaparacocinarelpescadoalvapor.UnacubiertamAslivianadepapeldecerao toalladepapel
generamenosvapor.
,, Nodejequeel pescadosepase,contr61eloeneltiem_odecocci6nminimo.
8istecs
Hasta1,5Ibs.
Filetes
Hasta1,5Ibs.
Tiempo decocci6n: 6-10 rain./lb.
Nivelde potencia: Mediana alta (7).
Tiempo decocci6n: 3-7 rain. / lb.
Nivelde potencia: Mediana alta (7).
Camarones Tiempo decocci6n: 3-5 Y2min. / lb.
Basra 1,5 Ibs. Nivelde potencia: Mediana alta (7).
Acomode los bistecs en laasaderacon las porciones m_s carnosas
hacia la parte exterior de la asadera. Cubra con papel de cera. D6vuelta y
reacomode el pescado cuando hayatranscurrido lamitad del tiempo de
cocci6n. Cocine el pescado hasta que se pueda desmenuzar fdcilmente
con untenedor. Deje reposar 3-5 minutos.
Acomode los filetes en unafuente para horno, dando vuelta cualquier
pedazofinito. Cubracon papel de cera. Si tiene rodsde ? pulgadasde
grosor, d_ vuelta y reacomode el pescadocuando haya transcurrido
la mitad del tiempo de cocci6n. Cocineel pescado hastaque sepueda
desmenuzar fdcilmente con un tenedor. Deje reposar 2-3 minutos.
Acomode los camarones en una fuente para horno sin superponerlos ni
formar capas. Cubracon papelde cera.Cocine hasta queest_n firrnes y
opacos, revolviendo 2 o3 veces. Deje reposar 5 rninutos.
,, Nuncacocinehuevosconcascaray nuncacalienteloshuevosdurosconlacascara;puedenexplotar.
Siempreperforeloshuevosenterosparaevitarqueestallen.
Cocineloshuevoshastaqueapenasseendurezcan;quedandurossi sepasan.
,, Lasverdurasdebenlavarseantesdecocinarlas.PorIogeneral,nosenecesitaaguaadicional.Sisecocinanverduras
densastalescomolaspapas,zanahoriasy habichuelas,agregueaproximadamente1Atazadeagua.
,, Lasverduraspequefias(zanahoriasrebanadas,arvejas,frijoles,etc.)secocinarAnmAsrApidoquelasverdurasmAs
grandes.
,, Lasverdurasenteras,talescomolaspapas,calabazaso mazorca,debenacomodarseencirculoenelplatogiratorio
antesdecocinarlas.SecocinarAnenformamAsparejasisedanvueltaunaveztranscurridalamitaddeltiempode
cocci6n.
,, SiemprecoloquelasverdurascomoeepArragosy br6coliconlosextremosdelostallosapuntandohaciaelbordedela
fuentey laspuntashaciaelcentro.
,, Cuandococineverdurascortadas,siemprecubralafuenteconunatapaoenvoltorioplAsticoparamicroondascon
ventilaci6n.
,, Lasverdurasenterassinpelartalescomolaspapas,calabaza,berenjenas,etc.,debenpincharseenvarioslugaresantes
decocinarlasparaevitarqueestallen.
,, Paraunacocci6nmAspareja,revuelvao reacomodelasverdurasenterasala mitaddeltiempodecocci6n.
,, PorIogenerar,cuantomAsdensaeslacomida,mayorserAeltiempodereposo.(Eltiempodereposohacereferenciaal
tiemponecesarioparaquelasverdurasy losalimentosdensosy grandesterminendecocinarseunavezquesalendel
homo).Unapapaalhornopuedereposarenel mostradordurantecincominutosantesdequesecompletelacocci6n,
mientrasqueunafuentedearvejaspuedeservirsedeinmediato.
58
USA-MHC5 D EeS-o3143P.indb 58 2007-06-08 7:43:24

Utensilios para Cocinar
Gufadeutensiiiosparamicroondas
UTILICE NOUTILICE
VIDRIORES/$TENTEAL HORNO(tratadopara
ca/orde alta densidad):
Plates de uso general, platos para pastel de
came, platos paratartas, platos paratortas, tazas
para medir liquidos, cacerolas y bols sin adornos
metal/cos.
LOZA:
Bols,tazas, platos de servir y bandejas sill
adornos metal/cos.
PLASnCO:
Envoltorio pl_tstico(como per ejemplo tapas)--
coloque el envoltorio pl_stico sin apretar sobre la
fuente y presi6nelo hacia los lades.
Ventile el envoltorio pl_istico dandovuelta un
borde ligeramente para permitir que salga
el exceso devapor. Lafuente debe ser Io
suficientemente profunda paraque el envoltorio
plAstico no toque los alimentos.
A medida que los alimentos se calientan el
envoltorio pl_isticopuede derretirse en las partes
donde toca los alimentos.
Utilice fuentes, tazasy recipientes para freezer
sere/rig/dos de pl_stico. Utilicelos con cuidado
dado que el pl_stico puedeablandarse per el
calor de la comida.
P.4PEL:
Toallasdepapel,papeldecera,servilletasde
papely platesdepapelsinadornoni dise_os
metAl/cos.
Observelasinstruccionesenlaetiqueta
delfabricanteparasuusoenel hornode
microondas.
UTEN$1LIOSDEMETAL:
El metal protege a los alimentos de la energia del microondas y produce una
cocci6n despareja. Tambi6nevite los pinchos de metal, los term6metros y las
bandejas dealuminio. Los utensilios de metal pueden producir chispas, Io que
puede da_ar su horno de microondas.
DECORAClONDEMETAL:
Lavajilla, las fuentes etc adornados con metal o con bordes de metal. Los adornos
demetal interfieren con la cocci6n normal y pueden da_ar al horno.
PAPELDEALIIIIqlNIO:
Evitelas hojas de papelde aluminio grandes porque dificultan la cocci6n y pueden
producir chispas da_inas. Utilice pedacitos peque_os depapel de aluminio para
proteger las patasy alas de polio. Mantenga TODOel papel dealuminio per Io
menos a 1 pulgada de las paredes laterales y la puerta del horno.
MADERA:
Los bols y tablas de madera se secar_ny pueden partirse o agrietarse cuando los
utiliza en elhorno de microondas. Las cestas reaccionan de la misma manera.
UTEN$1LIO$CONTAPASAPRETADAS:
Asegt_resededejar aberturas para que salgael vapor de los utensilios que est_n
tapados.
Perfore las bolsas depl_stico deverduras u otros alimentos antes de la cocci6n.
Las bolsas cerradas herm6ticamente podrian explotar.
PAPELMADERA:
Eviteutilizarbolsasdepapelmadera.
Absorbendemasiadocalory podrianquemarse.
UTENSILIOSDEFORM.4DOS0 PICADOS:
CualquJerutensJlJoqueest6 agrJetado,deformado o pJcadopuede romperse en el
horno.
C/ERRE$TRENZADOSDEMETAL:
Retireloscierrestrenzadosdemetaldelasbolsasdepl_sticoopapel.
Secalientandemasiadoy podriancausarun incendio.
59
USA=MHC5 D E68=03143P.indb 59 2007-06-08 7:43:24

Cui
o y Lirnpieza
Cuidadoy lirnpieza
Paraun mejordesempe_oy mayoseguridad,mantengael
hornolimpiopordentroy porfuera.
Presteespecialcuidadoparaqueelpanelinteriordela
puertay elmarcodelanterodelhornosemantenganlimpios
y sinacumulaciOnderestosdealimentoso grasa.Nunca
utilicepolvosabrasivoso esponjasduras.Limpieelinterior
y elexteriordelhornodemicroondas,incluyendolacubierta
inferiordela campana,conunpasosuavey unasoluciOn
condetergentesuavetibio (nocaliente).Luegoenjuaguey
seque.Utiliceunlimpiadordecromoy limpielassuperficies
decromo,metalyaluminio.Limpiedeinmediatolas
salpicadurasconunatoalladepapelh[imeda,especialmente
despu_sdecocinarpoliootocino.Limpiesuhorno
semanalmenteo m_.samenudosi esnecesario.
Sigaestasinstruccionesparalimpiary cuidarsuhorno.
,, IVlantengalimpialaparteinternadelhorno.Las
particulasdealimentosy losliquidosderramados
puedenadherirsealas paredesdelhomo,haciendoque
elhornofuncionemenoseficientemente.
,, Limpielosderramesdeinmediato.Utiliceunpaso
htimedoydetergentesuave.Nousedetergentesfuertes
ni abrasivos.
,, Paraayudara ablandarlasparticulasdealimentoso
liquidos,calientedostazasdeagua(agregueeljugo
deunlim6nsi deseamantenerel hornofresco)enun 2.
medidordecuatrotazasa potenciaAltadurantecinco
minutoso hastaquehierva.D_jeloenelhornodurante
unoodosminutos.
* Saquela bandejadevidriodelhornocuandolimpie
elhornoola bandeja.Paraevitarquelabandejase
rompa,manipt31elaconcuidadoy nolapongaenagua
inmediatamentedespu_sdecocinar.Lavela bandeja
concuidadoenaguajabonosatibiao elenlavavajillas.
* Limpielasuperficieexternadelhomocondetergente
y unpasoht3medo.S_!queloconunpasosuave.Para
evitarcausardafiosalas partesoperativasdelhomo,
nodejequeentreaguaenlasaberturas. 3.
* Limpielaventanadelapuertaconundetergentemuy
suavey agua.Asegeresedeutilizarunpasosuavepara
evitarrayarla.
,, Siseacumulavapordentroofueradelapuerta
delhomo,limpieloconunpasosuave.Sepuede
acumularvaporcuandoelhornofuncionaconmucha
humedadyestodeningunamaneraindicaunafugadel
microondas.
Nuncapongaenfuncionamientoelhornosinalimentos
dentro;estopuededa_areltubodemagnetrOno la
bandejadevidrio.Puededejarunvasodeaguaenel
hornocuandono seuseparaevitardafiosencasode
queelhornoseenciendaaccidentalmente.
Lirnpiezadelfiltro degrasa
Thegreasefilter shouldberemovedandcleanedoften,at
leastoncea month.
Paraevitarel riesgede!esioneslisicas0 da_es
materiaies,nepengaenfuncienamientelacampana
delhomesintenetcelecadeslosfiltres.
1. Parasacarelfiltro degrasa,desliceelfiltro haciaun
lado.Tiredelfiltro haciaabajoy empujehaciaelotro
lado.Elfiltro caer_..
Sumerjaelfiltro degrasaenaguacalientey detergente
suave.Enjuaguebieny sacudaparasecar.Noutilice
amoniaconiIocoloqueenunlavavajillas.Elaluminio
seoscurecer_..
Paravolvera instalarelfiltro,col6queloenla ranura
lateral,luegoempujehaciaarribay haciael centrodel
hornoparatrabarlo.
6O
USA=MHC5 D E68=O3143P.indb 60 2007-06-08 7:43:24

iiiiiiiiiiiiiiiiiiiiiiiiiiiiiiiiiiiiiiiiiiiiiiiiiiiiiiiiiiiiiiiiiiiiiiiiiiiiiiiiiiiiiiiiiiiiiiiiiiiiiiiiiiiiiiiiiiiiiiiiiiiiiiiiiiiiiiiiiiiiiiiiiiiiiiiiiiiiiiiiiiiiiiiiiiiiiiiiiiiiiiiiiiiiiiiiiiiiiiiiiiiiiiiiiiiiiiiiiiiiiiiiiiiiiiiiiiiiiiiiiiiiiiiiiiiiiiiiiiiiiiiiiiiiiiiiiiiiiiiiiiiiiiiiiiiiiiiiiiiiiiiiiiiiiiiiiiiiiiiiiiiiiiiiiiiiiiiiiiiiiiiiiiiiiiiiiiiiiiiiiiiiiiiiiiiiiiiiiiiiiiiiiiiiiiiiiiiiiiiiiiiiiiiiiiiiiiiiiiiiiiiiiiiiiiiiiiiiiiiiiiiiiiiiiiiiiiiiiiiiiiiiiiiiiiiiiiiiiiiiiiiiiiiiiiiiiiiiiiiiiiiiiiiiiiiiiiiiiiiiiiiiiiiiiiiiiiiiiiiiiiiiiiiiiiii ii ii ii !! ii ii i!i!iiiiiii!i!i:iii!! i! !i !!ii ii! i!¸i iii!i i ii! ! i! i! i!iiiii!i;i!'!i':i:iiiiii!ii i! !!¸ii il;!i;!ii!ii!ii!ii!ii!!iiiii!!!i!i! i!!i iiiii!ill¸il;ii!ii !! ii'iiiiiiii !iiiiii iii il ii i! iiiiiiili':iii!!i! !!ii !i !! il i! i!ii !ii ii i! i! ;! i! !i'iiiiiiiill !! i! ii ii ii ii ii ii ii ii ii ii ii i iii!i
Reernplazodelfiltro decarbon
Sisuhomotieneventilaci0nhaciaelinterior,elfiltro de
carbondebereemplazarsecada6 a12 meses,ym_.sa
menudosiesnecesario.Elfiltro decarbonnosepuede
limpiar.
Reemplazodela luzdela
cubierta/luznocturna
Papaevitarlesionesfisicaso da_s materiaJes,use
Elfiltro decarbonest,.disponibleenSearssillamaal 1.....
800-4-MY-HOME®ovisitasears.com.
1. Desenchufeelhornoo cortela energiael_!ctricadel
suministroprincipal.
2. Abralapuerta.
3. Retirelosdostornillosdemontajedela rejillade
ventilaciOn.(2tornillosdelmedio)
4. Corralarejillahaciala izquierday retireladirectamente.
guantescuafldereempJacela bombJJJade J[iz:
1. Desenchufeel hornoo cortelaenergiaelectricadel
suministroprincipal.
2. Retirelostornillosdemontajedelacubiertadela
bombilla.
5. Extraigaelfiltroviejo.
3. Reemplacelabombillaconunabombillapara
electrodom_sticosde20 watts.
4. Vuelvaacolocarlacubiertadela bombillay los
tornillosdemontaje.
5. Vuelvaaconectarla energiael_!ctricaenel suministro
principal.
6. Inserteunnuevofiltro decarbon.Elfiltro debequedar
instaladoenelAnguloquesemuestra.
7. Vuelvaa colocarlostornillosdemontajey cierrela
puerta.Conectelaenergiael_!ctricaenelsuministro
principaly ajusteel reloj.
PARTENRO.DELFILTRODECARBONDELENA
PartNo.:DE63-OO367D
61
USA-MHC5 D E68-O3143P.indb 61 2007-06-08 7:43:25

Reemplazodelaluzdelhomo
1. Desenchufeelhornoo cortela energiael_!ctricadel
suministroprincipal.
2. Abralapuerta.
3. Retirelostornillosdemontajedelacubiertadela
rejilla.(2tornillosdelmedio)
4. Corralarejillahaciala izquierday retireladirectamente.
5. Saqueeltornilloqueasegurael recept_culodela
bombilla;seencuentrasobrelapuertacercadelcentro
delhorno.
J
6. Extraigaelportabombilla.
7. Reemplacela bombillaconunabombillapara
electrodom_sticosde40watts.
8. Vuelvaa colocarelportabombilla.
9. Vuelvaa colocarla rejillay los2 tornillos.Vuelvaa
conectarlaenergiael_ctricaenelsuministroprincipal.
62
USA-MHC5 D E68-03143P.indb 62 2007-06-08 7:43:26

SoluciCn de Problemas
GuiadesoluciCndeproblernas
AntesdeIlamara unt_cnicoparasu homo,verifiqueestalistadeposiblesproblemasy soluciones,
,, Insertecorrectamenteelenchufeauntomacorrienteconectadoatierra.
,, SieltomacorrienteestAcontroladoporuninterruptordepared,asegQresedequeel interruptordeparedest_
encendido.
,, Retireel enchufedeltomacorriente,esperediezsegundosyvuelvaaenchufarlo.
,, Reinicieeldisyuntoro reemplacecualquierfusiblequemado.
,, Enchufeotroaparatoeneltomacorriente;si elotroaparatonofunciona,Ilamea unelectricistacalificadoparaque
repareeltomacorriente.
,, Enchufeelhornoenuntomacorrientediferente.
,, Aseg[iresedequela puertaest6biencerrada.
,, Controlesi qued6materialdeembalajeu otromaterialenlatrabadelapuerta.
,, Controlequela puertanoest_da_ada.
,, PresioneSTOP/CLEARdosvecesyvuelvaaingresarlasinstruccionesdecocci6n.
,, Sino hubouncortedeelectricidad,retireelenchufedeltomacorriente,esperediezsegundosyvuelvaa enchufarlo.Si
huboun cortedeelectricidad,aparecerAel indicadordelahora:
PLEASETOUCHCLOCKANDSETTIMEOFDAY.(PORFAVOROPRIIVlACLOCK(RELOJ)Y CONFIGURELAHORADEL
DiA.)Reinicieel relojy cualquierinstrucciCndecocciCn.
,, Reinicieeldisyuntoro reemplacecualquierfusiblequemado.
,, Assurez-vousquelefourestbranch_surunelignede20amperes.Ponerenfuncionamientootroelectrodom_sticoen
elmismocircuitopuedecausarunacaidadetensiCn.Siesnecesario,enchufeel hornoensupropiocircuito.
,, Saquecualquierutensiliomet_tlico,articulosdecocinao cierresdemetal.Siusapapeldealuminio,utilicesCIotiras
pequefiasy dejeal menosunapulgadaentreelpapeldealuminioylasparedesinterioresdelhorno.
,, Limpieelplatogiratorio,elanillogiratorioy elpisodelhorno.
,, Aseg[iresedequeel platoy elanillogiratorioest@colocadoscorrectamente.
us microonda causa etieren eradie ............................................................................................................
,, Estoessimilarala interferenciacausadapor otrosartefactospeque_os,comoporejemplolossecadores.Alejem_.ssu
microondasdeotroselectrodom_!sticos,comosuTVo radio.
Nota:
Sielhornoest_programadoparacocinardurantem_.sde25minutos,despuCsdelos25 minutosseajustar_.
automAticamentea unapotenciade170porcientoparaevitarquesepaselacomida.
Siningunedeestesarticuieseslacausadelprohiema,cemuniqueseconelserviciot_cnicedeSearsal 1-800-4-1VIY-
HOIVlE®.
63
USA=MHC5 D E68=O3143P.indb 63 2007-06-08 7:43:26

I
Your Home
For repair - in your home - of all major brand appliances,
lawn and garden equipment, or heating and cooling systems,
no matter who made it, no matter who sold it!
For the replacement parts, accessories and
owner's manuals that you need to do-it-yourself.
For Sears professional installation of home appliances
and items like garage door openers and water heaters.
1-800-4-MY-HOME ® (1-800-469-4663)
Call anytime, day or night(U.S.A.)
www.sears.com
For expert home solutions advice: www.managemyhome.com
Our Home
For repair of carry-in items like vacuums, lawn equipment,
and electronics, call or go on-line for the location of your nearest
Sears Parts & Repair Service Center
1-800-488-1222 (U.S.A.)
Call anytime, day or night
www.sears.com
To purchase a protection agreement on a product serviced by Sears:
1-800-827-6655 (U.S.A.)
Para pedir servicio de reparaci6n
a domicilio, y para ordenar piezas:
1-888-SU-HOGAR ®
(1-888-784-6427)
Se rs [i
TM SM
® Registered Trademark / Trademark / Service Mark of Sears Brands, LLC
TM SM
® Marca Registrada / Marca de Fabrica / Marca de Servicio de Sears Brands, LLC
MD
MCMarque de commerce / Marque deposee de Sears Brands, LLC ® Sears Brands, LLC
USA-MHC5 D E68-03143P.indb 64
÷
2007-06-08 7:43:26 I
-
 1
1
-
 2
2
-
 3
3
-
 4
4
-
 5
5
-
 6
6
-
 7
7
-
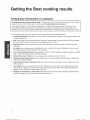 8
8
-
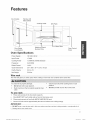 9
9
-
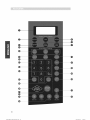 10
10
-
 11
11
-
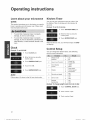 12
12
-
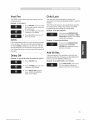 13
13
-
 14
14
-
 15
15
-
 16
16
-
 17
17
-
 18
18
-
 19
19
-
 20
20
-
 21
21
-
 22
22
-
 23
23
-
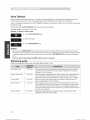 24
24
-
 25
25
-
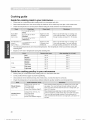 26
26
-
 27
27
-
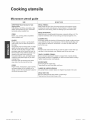 28
28
-
 29
29
-
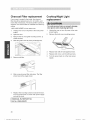 30
30
-
 31
31
-
 32
32
-
 33
33
-
 34
34
-
 35
35
-
 36
36
-
 37
37
-
 38
38
-
 39
39
-
 40
40
-
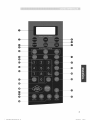 41
41
-
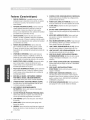 42
42
-
 43
43
-
 44
44
-
 45
45
-
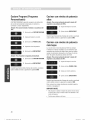 46
46
-
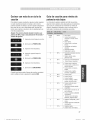 47
47
-
 48
48
-
 49
49
-
 50
50
-
 51
51
-
 52
52
-
 53
53
-
 54
54
-
 55
55
-
 56
56
-
 57
57
-
 58
58
-
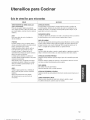 59
59
-
 60
60
-
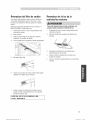 61
61
-
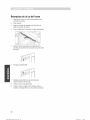 62
62
-
 63
63
-
 64
64


Kenmore 40180092010 El manual del propietario
- Categoría
- Microondas
- Tipo
- El manual del propietario
- Este manual también es adecuado para
en otros idiomas
- English: Kenmore 40180092010 Owner's manual
Artículos relacionados
-
Kenmore 721.64663 El manual del propietario
-
-
-
-
-
-
-
Kenmore MS-114YN Manual de usuario
-
Kenmore 721.63653 Manual de usuario
-
Otros documentos
-
Whirlpool AMC6158BCS10 El manual del propietario
-
Maytag UMV1152CAB16 El manual del propietario
-
Maytag MMV5207BAB El manual del propietario
-
Amana AMV5164BAB El manual del propietario
-
Jenn-Air JMC5200BAW El manual del propietario
-
-
-
-
-