Home Decorators Collection HDI-4015-BK Guía de instalación
- Tipo
- Guía de instalación
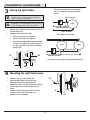
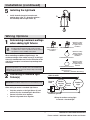
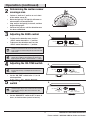
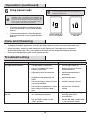
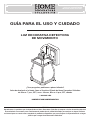
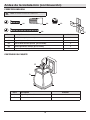
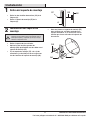
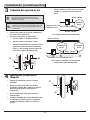
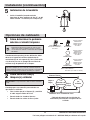
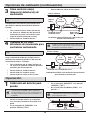
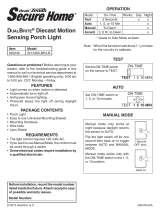
El Home Decorators Collection HDI-4015-BK es un foco decorativo con sensor de movimiento que ofrece hasta 30 pies de alcance y un ángulo de detección de hasta 180 grados. Puede soportar una carga eléctrica de hasta 60 vatios como máximo incandescente y requiere una fuente de alimentación de 120 V CA, 60 Hz. Con modos de funcionamiento de prueba, activación por movimiento y manual, también cuenta con un temporizador DualBrite con opciones de apagado, 3 horas, 6 horas y desde el anochecer hasta el amanecer.
El Home Decorators Collection HDI-4015-BK es un foco decorativo con sensor de movimiento que ofrece hasta 30 pies de alcance y un ángulo de detección de hasta 180 grados. Puede soportar una carga eléctrica de hasta 60 vatios como máximo incandescente y requiere una fuente de alimentación de 120 V CA, 60 Hz. Con modos de funcionamiento de prueba, activación por movimiento y manual, también cuenta con un temporizador DualBrite con opciones de apagado, 3 horas, 6 horas y desde el anochecer hasta el amanecer.


-
 1
1
-
 2
2
-
 3
3
-
 4
4
-
 5
5
-
 6
6
-
 7
7
-
 8
8
-
 9
9
-
 10
10
-
 11
11
-
 12
12
-
 13
13
-
 14
14
-
 15
15
-
 16
16
-
 17
17
-
 18
18
-
 19
19
-
 20
20
-
 21
21
-
 22
22
-
 23
23
-
 24
24


Home Decorators Collection HDI-4015-BK Guía de instalación
- Tipo
- Guía de instalación
El Home Decorators Collection HDI-4015-BK es un foco decorativo con sensor de movimiento que ofrece hasta 30 pies de alcance y un ángulo de detección de hasta 180 grados. Puede soportar una carga eléctrica de hasta 60 vatios como máximo incandescente y requiere una fuente de alimentación de 120 V CA, 60 Hz. Con modos de funcionamiento de prueba, activación por movimiento y manual, también cuenta con un temporizador DualBrite con opciones de apagado, 3 horas, 6 horas y desde el anochecer hasta el amanecer.
en otros idiomas
Artículos relacionados
-
Home Decorators Collection HDI-4018-BK Instrucciones de operación
-
-
-
-
-
-
Otros documentos
-
Filament Design CLI-JB545PHB-519P-BK Guía de instalación
-
-
Bel Air Lighting 20332 BK Instrucciones de operación
-
Heath Zenith PF-4300-BK Manual de usuario
-
-
-
 Secure Home SH-4300-BK-A Guía del usuario
-
-
Heath Zenith HZ-4168-AB Manual de usuario
-
