
MP4001-0908 Steam’N’Hold Steamer • Horno de Vapor Steam’N’Hold 1
Steam’N’Hold
™
Steamer
Owners Manual
Horno de Vapor
Steam’N’Hold
™
Manual de
Operación
IMPORTANT WARRANTY INFORMATION:
For product warranty activation, the Product
Registration Form must be submitted to AccuTemp
Products, Inc. after installation of the appliance.
INFORMACIÓN IMPORTANTE DE LA GARANTÍA:
Después de instalar el horno, el formato de registro
del producto debe ser mandado a AccuTemp
Products, Inc. para activar la garantía.
Product Registration Form Formato de Registro del
Producto
This document also available online at:
accutemp.net/product_manuals.htm
For schematic drawings, download at:
accutemp.net/schematics.htm
or call AccuTemp Technical Service at (800) 480-0415 or
+1 (260) 469-3040 and request items AT1T-3403 and AT1T-3452
Este documento tambien lo encontrara:
accutemp.net/product_manuals.htm
Para bajar el Esquemático:
accutemp.net/schematics.htm
o llame al Servicio Tecnico de AccuTemp al (800) 480-0415 o
+1 (260) 469-3040 y pida los documentos AT1T-3403 and AT1T-3452

MP4001-0908 Steam’N’Hold Steamer • Horno de Vapor Steam’N’Hold 2
Table of Contents ............................................................ 2
Document History ............................................................ 2
Safety Warnings .............................................................. 3
Installation ....................................................................4–6
Initial Start-Up ..............................................................7–9
Operation—Cooking ...............................................10–11
Daily & Weeklly Cleaning ............................................ 12
Service ............................................................................. 13
Basic Troubleshooting ...........................................14–15
Warranty ......................................................................... 16
Current revision: MP4001-0908 Prior revision: A
Date: 8/4/09 Date: 8/24/06
Changes
All Pages
Document Control Number Changed
Reformatted with Spanish Translation
Removed Schematics - Now included in Service
Manual for the Steam’N’Hold
Contenido ..........................................................................2
Historial de Este Documento ..........................................2
Precauciónes de Seguridad ..........................................3
Instalación .....................................................................4–6
Arranque Inicial ............................................................7–9
Manejo .......................................................................10–11
Limpieza Díaria y Semanal ...........................................12
Servicio .............................................................................13
Soluciones a Problemas Básicos .........................14–15
Garantía ...........................................................................16
Edición actual: MP4001-0908 Edición previa: A
Fecha: 8/4/09 Fecha: 8/24/06
Cambios
Todas las paginas
Numero de documento cambiado
Translacion en Español agregada
Esquemático ahora incluido en el manual de servicio
para el Steam’N’Hold
TABLE OF CONTENTS CONTENIDO
DOCUMENT HISTORY HISTORIAL DE ESTE DOCUMENTO

MP4001-0908 Steam’N’Hold Steamer • Horno de Vapor Steam’N’Hold 3
SAFETY WARNINGS PRECAUCIÓNES DE SEGURIDAD
DANGER
1
Only personnel qualified to work with electricity should
install this unit. Improper installation can cause personal
injury or damage to the equipment.
2
This appliance must be properly grounded. Failure to properly
ground the appliance could result in electrocution and/or
death.
PELIGRO
1
Esta unidad debe ser instalada solamente por personal
calificado para trabajar con electricidad. Al hacer una
instalación incorrecta, puede causar lastimaduras serias y/o
daño al equipo.
2
Este aparato debe hacer conexión a tierra. Al no conectar
este aparato a tierra, puede causar electrocucción y/o la
muerte.
WARNING
1
When using a stand that is equipped with casters, the floor
surface must be level and flat. Failure to do so can result in a
“tipping” situation and could result in serious injury.
2
Direct contact with steam can result in severe burns.
3
When accessing the cooking chamber, be sure to always stand
back while slowly opening the door, allowing the chamber to
vent its steam. Never look or reach into the cooking chamber
before it has completely vented its steam.
4
Never reach into the cooking chamber or handle hot items
without wearing proper hot gloves.
5
Never use wet or damp gloves, as moisture can conduct heat
quickly and could result in severe burns.
ADVERTENCIA
1
La superficie del piso debe ser plana y nivelada al usar una
base con ruedas. Al no tomar esta precaución, la vaporera
podría volcarse y esto puede causar lastimaduras serias.
2
Contacto directo con el vapor puede provocar quemaduras
severas.
3
Al utilizar la cámara de cocimiento, asegúrese de mantenerse
a distancia y abrir la puerta lentamente para permitir que salga
el vapor. Nunca se asome o introduzca la mano dentro de la
cámara de cocimiento antes de que salga todo el vapor.
4
Jamas introduzca su mano dentro del recipiente de agua ni
maneje objetos calientes sin usar guantes especiales de
protección.
5
Jamas use guantes mojados o húmedos porque la humedad
conduce el calor rápidamente y esto podría resultar en
quemaduras graves.
CAUTION
1
Be sure all operators read, understand and follow the
information contained in this manual, including caution
warnings, operating instructions, and safety instructions.
2
Use caution when operating the steamer. Direct contact with
steam can result in a severe burn.
3
Please use caution when emptying the drip pan. The pan’s
contents could cause severe burns.
4
Keep the floor in front of the equipment clean and dry. If spills
occur, clean immedíately to avoid the potential injuries.
5
Do not use pressurized water to clean steamer.
6
Use of any replacement parts other then those supplied by
AccuTemp can cause bodily injury to the operator, damage to
the equipment and will void all warranties.
7
This appliance is extremely heavy. For safe handling, the
installer should obtain help as needed or employ appropriate
material handling equipment to remove unit from its packaging
and move it into its final location.
8
Do not use the low water warning indicator or buzzer as a
substitute for checking the water level in the cooking chamber
periodically. Failure to properly maintain the water level may
result in improperly cooked product and over time, may result
in a premature service issue that may not be covered under
warranty.
PRECAUCIÓN
1
Asegurese que todo usuario de este aparato haya leido,
entendido y seguido la información contenida en este manual
incluyendo las precauciónes, instrucciones de operación y
las instrucciones de seguridad.
2
Tenga cuidado al operar el horno. Contacto directo con el
vapor puede resultar en quemaduras severas.
3
Tome suma precaución al vaciar el recipiente de desagüe. Su
contenido podría causar quemaduras serias.
4
Mantenga el piso enfrente del equipo seco y limpio. Limpie
de inmedíato cualquier derrame para evitar accidentes.
5
Jamás use jet de agua o agua a presión para lavar el horno.
6
El uso de partes de reemplazo no autorizadas por Accutemp
Products, Inc. podría causar lastimaduras corporales al
usuario y daño al aparato. El uso de partes no autorizadas
también anula la garantía del producto.
7
Esta unidad es extremadamente pesada. Para asegurar un
manejo seguro, contrate ayuda o maquinaria especial para
remover la plancha del empaque y colocarla en su lugar.
8
No se atenga a la luz de señalamiento de bajo nivel de agua
(“low water”) y alarma. Revise periódicamente los niveles
de agua de la cámara de cocimiento. El incumplimiento de
mantener los niveles adecuados de agua podría causar el
cocimiento insuficiente de comida y podría resultar en fallas
en la unidad que no esten cubiertas por la garantía.

MP4001-0908 Steam’N’Hold Steamer • Horno de Vapor Steam’N’Hold 4
INSTALLATION INSTALACIÓN
BUILDING CODES AND STANDARDS
The steamer must be installed in accordance with the
following building codes:
USA: National Electric Code, ANSI/NFPA-70, state and
local codes.
Canada: Canadían Electric Code, CSA C22.2 and local
codes.
UNPACKING
This steamer was inspected before shipment from the factory.
The shipping company accepts full responsibility for safe delivery.
Immediately after unpacking, check the steamer for possible
shipping damage. If damage is identied, save the packaging
material and contact the shipping carrier within 15 days.
LOCATION AND PLACEMENT
To insure maximum benet of your warranty; location,
placement and leveling are critical. The AccuTemp
Steam’N’Hold steamer is designed for installation on
either a commercial kitchen countertop or an AccuTemp
Steam’N’Hold stand. Your Steam’N’Hold steamer is equipped
with vents to allow the proper ventilation of air through the
electrical compartments. On current S6 & S3 Steam’N’Hold
models, the vents are located on the bottom and rear panels.
To ensure these vents work properly, a minimum 3 inch (77
mm) clearance from these vents must be allocated. It is also
recommended that the Steam’N’Hold not be placed under
other wet equipment or locations.
Note: For S6 models with a serial number lower than 22627, vents
are located on the rear face and left side panels. A minimum
spacing of 6 inches (152 mm) to the left side access panel is
required between heat sources such as, but not limited too, a
range, griddle or fryer. A minimum spacing of 3 inches (76 mm)
to the rear face, between any object such as a wall, barrier or
other piece of equipment, must be allocated as well.
LEVELING
The steamer must be installed in a level condition. An out-of-
level condition may cause improper operation and possible
damage. Damage caused by improper leveling is not covered
by warranty. Use a spirit level, resting on the top steamer
cabinet surface, to ensure it is level front-to-back and left-
to-right. If this is a counter-top installation, be sure to install
a rubber foot tip provided with your steamer onto the foot
adjuster of each of the steamer leg as shown. This will keep
the steamer from sliding on the counter-top under normal use.
Once the rubber foot tips have been installed, rotate the foot
adjusters up or down as needed to level the steamer.
CÓDIGOS Y ESTÁNDARES DE CONSTRUCCIÓN
El horno debe ser instalado de acuerdo a los siguientes
códigos de construcción:
USA: National Electric Code, ANSI/NFPA-70, códidgos
locales y del estado.
Canada: Canadían Electric Code, CSA C22.2 y códigos
locales.
DESEMPAQUE
Este Horno fue inspeccionado antes de salir de fábrica. La
compañía de envío acepta la responsabilidad total de que
llegue sin daño alguno. Después de desempacar, revise el
horno de inmedíato para vericar su entrega en buen estado.
Si llegase a sufrir algun daño, guarde el material de empaque
y comuníquese con la compañía de envío dentro de los 15
primeros días.
UBICACIÓN Y COLOCACIÓN
Para maximizar los benecios de su horno, es de suma
importancia que ponga atención a la ubicación, colocación
y nivelación de la unidad. El horno Steam’N’Hold está
diseñado para instalarse en una cocina industrial o en una
base especial de Accutemp. Su Steam’N’Hold cuenta con
aperturas o rejillas que permiten la ventilación adecuada
que require el compartimiento eléctrico. En los modelos S6
& S3 Steam’N’Hold actuales, las aperturas de ventilación
están localizadas en los páneles inferiores y posteriores. Se
requiere un espacio o despeje de por lo menos 3 pulgadas (77
mm) entre las aperturas y cualquier otro objeto para asegurar
la ventilación adecuada. También se recomienda que el Steam
‘n hold no sea colocado debajo de algún lugar o equipo que
produzca humedad.
Atención: En los modelos S6 con número de serie menos de
22627, las aperturas o rejillas de ventilación están localizadas
en el panel trasero y en el panel lateral izquierdo. Se requiere
un espacio mínimo de 6 pulgadas (152mm) entre el panel
lateral izquierdo y cualquier fuente de calor como una estufa,
plancha o freidora. También se requiere un espacio mínimo de
3 pulgadas (76mm) entre el panel posterior y cualquier objeto,
tales como una pared, barrera o maquinaria.
NIVELACIÓN
El horno debe ser nivelado al instalarse. Una unidad no nivelada
dará mal rendimiento y esto puede causar daños al horno. Los
daños debidos a la falta de nivelación no son cubiertos por la
garantía. Use un nivel de burbuja en la supercie del gabinete
superior de la vaporera para asegurarse que esté nivelada de
enfrente hacia atras y de lado a lado. Si va a instalar el horno
sobre cubierta de cocina, es importante instalar los tapones
de hule que vienen incluídos con su horno en cada pata de
la unidad. Esto previene que la vaporera se deslize sobre la
cubierta durante su uso normal. En cuanto haya instalado los
tapones, gire las patas ajustables hacia la derecha o izquierda
para nivelar la vaporera.

MP4001-0908 Steam’N’Hold Steamer • Horno de Vapor Steam’N’Hold 5
INSTALLATION (cont.) INSTALACIÓN (cont.)
SINGLE STEAMER STAND INSTALLATION
The AccuTemp SNH10 single stand is equipped with adjustable
height feet and the AccuTemp SNH11 single stand is equipped
with non-adjustable height casters. Both can be used with either
a one S6 or S3 model Steam’N’Hold steamer. Before mounting
a steamer on the SNH11 stand, engage the brakes on the two
front locking casters, pressing on the “ON” handle of the brake
mechanism. To mount the steamer, carefully lift and place it on
the horizontal mounting brackets, ensuring that the (4) mounting
holes on the underside of the Steam’N’Hold are lined up with
the mounting holes on the brackets. Then, using a 7/16” wrench,
fasten one pair of the ¼”-20 hex bolts and ¼” split lock washers
through the underside of each stand bracket mounting hole into
the Steam‘N’Hold and tighten securely. With the SNH10 stand,
level the steamer by adjusting the feet found at the ends of each
stand leg, either up or down as needed.
WARNING!
When using a stand that is equipped with casters, the floor
surface must be level and flat. Failure to do so can result in a
“tipping” situation that could result in serious injury.
DOUBLE STEAMER STAND INSTALLATION
The AccuTemp SNH20 double stand is equipped with
adjustable height feet and the AccuTemp SNH21 double stand
is equipped with non-adjustable height casters. Both stands
can accommodate either two S6 model Steam’N’Holds, two S3
Model Steam’N’Holds or a one of each steamer model.
When ordered as a steamer set, one of the two steamers will be
designated as a “bottom unit” on the outside of its packaging.
Before mounting a steamer on the SNH21 stand, engage
the brakes on the two front locking casters, pressing on the
“ON” handle of the brake mechanism. To mount the steamer,
carefully lift and place it on the horizontal mounting brackets,
ensuring that the (4) mounting holes on the underside of the
Steam’N’Hold are lined up with the mounting holes on the
brackets. Then, using a 7/16” wrench, fasten one pair of the ¼”-
20 hex bolts and ¼” split lock washers through the underside
of each stand bracket mounting hole into the Steam‘N’Hold
and tighten securely. Once the “bottom unit” has been
installed, carefully lift and place the “top unit” Steam’N’Hold
steamer on the horizontal mounting brackets, ensuring that
the (4) mounting holes on the underside of the Steam’N’Hold
are lined up with the mounting holes on the brackets. Then,
using a 7/16” wrench, fasten one pair of the ¼”-20 hex bolts
and ¼” split lock washers through the underside of each stand
bracket mountinghole and tighten securely. With the SNH20
stand, level the steamers by adjusting the feet found at the
ends of each stand leg, either up or down as needed.
INSTALACIÓN SOBRE BASE INDIVIDUAL
La base individual Accutemp SNH10 viene equipada con patas
que se pueden ajustar a la altura deseada mientras que la base
individual Accutemp SNH11 viene equipada con ruedas en patas
no ajustables. Ambas son compatibles con el horno Steam‘N’Hold
de modelos S6 o S3. Antes de montar el horno sobre la base SNH11,
presione la palanca que dice “on” localizada en el mecanismo de
frenos, para activar los frenos de seguridad en las dos ruedas del
frente. Para montar el horno, levantelo con cuidado y colóquelo
en las ménsulas horizontales de la base, asegurándose de que
los cuatro agujeros en la parte inferior de la vaporera esten
alineados con los agujeros de la base. Luego, inserte un par de
tornillos y arandelas de presión de un cuarto (¼”-20 hex bolts y
¼” split lock washers) a través del horno inferior de cada agujero
de la ménsula de la base y apriételos con una llave de 7 1/16”. Si
cuenta con la base SNH10, ajuste hacia arriba o hacia abajo las
patas de la base para nivelar el horno.
¡ADVERTENCIA!
Al usar una base con ruedas, asegurese que la superficie del
piso este plana y nivelada. Si no, la unidad podría volcarse y esto
podría causar lastimaduras serias.
INSTALACIÓN SOBRE BASE PARA DOBLE HORNO
La base Accutemp SNH20 para doble horno, viene equipada con
patas que pueden ser ajustadas a la altura deseada, mientras que
la base doble Accutemp SNH21 viene equipada con ruedas con
patas no ajustables. Ambas estan diseñadas para sostener dos
hornos Steam‘N’Hold de modelos S6 o S3, o una de cada una.
Cuando se ordenan los hornos en juego, uno de los dos hornos
se le designará como el horno inferior (bottom unit). Antes de
montar el horno en la base SNH21, aplique los frenos a las dos
ruedas del frente. Necesitará presiónar la palanca en cada
rueda marcadas “on.” Para empezar, monte el horno inferior
primero. Levántelo con cuidado y colóquelo en las ménsulas
horizontales de la base, asegurándose de que los cuatro
agujeros en la parte inferior del horno esten alineados con
los agujeros de la base. Luego, inserte un par de tornillos y
arandelas de presión de un cuarto (¼“-20 hex bolts y ¼“ split
lock washers) a través de la parte inferior de cada agujero de
la ménsula de la base y apriételos con una llave de 7 1/16”.
Una vez que “el horno inferior” esté instalado, levante con
cuidado “el horno superior” y colóquelo sobre las ménsulas
horizontales de la base, asegurándose de que los cuatro
agujeros en la parte inferior del horno, esten alineados con
los agujeros de la base. Luego, inserte un par de tornillos y
arandelas de presión de un cuarto (¼“- 20 hex bolts y ¼“ split
lock washers), a través de la parte inferior de cada agujero de
la ménsula de la base y apriételos con una llave de 7 1/16”. En
la base SNH20, ajuste hacia arriba o hacia abajo las patas de
la base para nivelar el horno.

MP4001-0908 Steam’N’Hold Steamer • Horno de Vapor Steam’N’Hold 6
INSTALLATION (cont.) INSTALACIÓN (cont.)
WARNING!
When using a stand that is equipped with casters, the floor
surface must be level and flat. Failure to do so can result in a
“tipping” situation that could result in serious injury.
ELECTRICAL SUPPLY
The AccuTemp Steam‘N’Hold steamer has been designed,
manufactured and tested to meet or exceed the Underwriters
Laboratories safety standards. To ensure safety is maintained
in your installation, it is important that the following paragraphs
are understood before attempting to apply power to your
Steam‘N’Hold. If there is any doubt as to whether your supply
receptacle is of the correct voltage, amperage, or is properly
grounded, consult a qualied electrician or serviceman.
POWER REQUIREMENTS
AC power requirements are listed on the data plate located on the
left side access panel on all steamers. Steamers should never be
connected to a circuit operating at more than 150 VAC to ground
and should always be connected to an individual branch circuit.
Make sure the voltage at the supply receptacle is within ±10%
of the voltage listed on the steamer’s data plate. Connection to
any other voltage may permanently damage your Steam‘N’Hold
or cause premature component failure. Damage of this type is
not covered under the product warranty. Each Steam‘N’Hold
steamer comes equipped with a connected 6 foot power cord
and plug, rated for the power requirements of each steamer.
Damage caused by removal or modication of factory standard
plug is not covered by product warranty.
GROUNDING
To reduce the risk of serious shock or death in the event of
an electrical short circuit, this appliance must be grounded.
The Steam‘N’Hold steamer is equipped with a cord having
a grounding wire and plug, which must be plugged into a
receptacle that is properly installed and grounded. Under no
circumstance should the grounding plug be cut or bent to t a
receptacle other than the one specied.
DRAIN CONNECTION
While there are no AccuTemp-supplied drain components,
some customers may desire to construct a drain connection.
Any drain connections must include an air gap between the
steamer and the drain to avoid creating a back siphon effect
into the steamer cooking compartment.
HOOD VENTILATION
Some local building codes may require the steamer to be located
under an exhaust hood. Please check local building code
requirements before completing installation of the steamer.
¡ADVERTENCIA!
Al usar una base con ruedas, asegúrese de que la superficie
del piso este plana y nivelada. Si no, la unidad podría volcarse
y esto podría resultar en lastimaduras serias.
FUENTE ELECTRICA
El horno Steam’N’Hold de Accutemp esta diseñado, probado
y fabricado para sobrepasar los estándares mas altos de
seguridad establecidos por Underwriters Laboratories. Para
mantenener estos estandares de seguridad durante el proceso
de instalación, es de suma importancia que comprenda el
contenido de los siguientes parrafos antes de encender el
horno. Si algo no comprende o tiene dudas sobre algún aspecto,
como por ejemplo, si tiene el voltage o amperaje correcto, o si
está haciendo tierra, por favor consulte con un electricista o un
técnico de servicio profesional, antes de seguir adelante.
REQUISITOS ELECTRICOS
Los requisitos de corriente alterna estan enlistados en la placa
de información localizada en el lado izquierdo de cada horno.
El horno jamás debe ser conectada a circuitos que operan con
mas de 150 VAC a tierra y debe ser conectada a un circuito de
rama individual. Asegúrese de que el voltage del suministro esté
entre un margen de ±10% del voltage enlistado en la placa de
información del horno. Conexión a otro voltage puede dañar el
horno de manera permanente o causar que ciertos componentes
empiezen a fallar de manera prematura. Daños de este tipo no
son cubiertos por la garantía. Cada horno Steam n’hold viene
equipado con un cordón eléctrico de seis pies que llena todos
los requisitos de su unidad. Daños causados por modicaciónes
o intercambio del cordón estandar de fábrica no estan cubiertos
por la garantía.
CONEXIÓN A TIERRA
Para reducir el riesgo de electrocución o muerte debido a un
corto circuito, este aparato debe descargar a tierra. El horno
Steam’N’Hold viene equipado con un cordón con conexión a
tierra y un enchufe a tierra que debe ser conectado a un contacto
debidamente instalado y conectado a tierra. El enchufe no debe
ser cortado, doblado, o alterado de ninguna manera para hacerlo
entrar a un contacto diferente al que está especicado.
DESAGÜE
AccuTemp no incluye ningun tipo de conexión para desagüe. Si
desea agregar su propia conexión de desagüe, asegurese de
mantener un espacio entre el horno y la conexión para evitar
que el sistema de desagüe succione hacia el compartimento
de cocimiento del horno.
VENTILACIÓN
Ciertos códigos locales de construcción requieren que el horno
sea colocado directamente debajo de la campana de un extractor.
Favor de revisar los requisitos delineados por los códigos locales
de construcción antes de instalar el horno.

MP4001-0908 Steam’N’Hold Steamer • Horno de Vapor Steam’N’Hold 7
INITIAL START-UP ARRANQUE INICIAL
INTRODUCTION
The AccuTemp Steam‘N’Hold steamer takes the time-proven
method of cooking with steam and adds the advantage of control.
This is accomplished by reducing the internal atmospheric
pressure of the Steam ‘N’ Hold cooking chamber, thereby
lowering the temperature at which the water begins to boil. This
allows the operator to control the temperature of the steam for
cooking. Controlling the steam temperature gives the operator
the ability to cook the food to the desired temperature without
over-cooking, resulting in a more tender, juicier, nutritious
product and with less shrinkage than was previously possible.
Once the cooking time expires, the steamer automatically
enters the “Hold” mode. In this mode, the thermostat regulates
the internal temperature, but vacuum is released, returning
the cooking chamber to normal atmospheric pressure. At this
time, steam is no longer generated and the cooking chamber
is held at the desired temperature at a relative humidity of
100%. This eliminates food from drying out by suppressing
the evaporation of the products’ natural moisture. As a result,
most food products can be held in a ready-to-serve state for
several hours after cooking, with no appreciable loss in taste,
appearance or consistency.
DAILY PREPARATION FOR USE
Preparing the Steam‘N’Hold for use each day requires very little
time and effort: simply ll the steamer with water and preheat.
CAUTION!
Before filling the cooking chamber with water, ensure that
the drain valve on the front of the Steam‘N’Hold is in the
closed position. Ensure that a full size steam table pan or a
1/1 gastronome pan with a minimum depth of 4 inches, has
been positioned on the pan rail brackets under the steamer.
At the beginning of each day, open the door of the Steam‘N’Hold
and pour 3 gallons (11 liters) of ordinary tap water into the
bottom of the cooking chamber. (Although the mineral content
of the water is not that important, the Steam‘N’Hold should
always be drained and cleaned at the end of each day to
prevent food or mineral buildup.)
INTRODUCCIÓN
El horno Steam’N’Hold usa vapor (uno de los métodos mas
ecientes para cocinar) y aparte tiene la ventaja de poder
controlar su temperatura. Esto es posible al reducir la presión
atmosférica interna (formando un vacío) de la cámara de
cocimiento del Steam’N’Hold. Esto hace que baje la temperatura
en la que el agua comienza a hervir, permitiendo al operador
controlar la temperatura del vapor para cocinar. Al tener control
sobre la temperatura del vapor, uno puede cocinar sus alimentos
a la temperatura ideal, dando como resultando comida mas
tierna, jugosa y nutritiva, sin correr el riesgo de que la comida
se reseque o pierda consistencia y volumen. Una vez que el
tiempo de cocimiento termina, el horno entra en un estado de
“hold” o mantenimiento. En éste estado, el termostato regula la
temperatura interna de la cámara de cocimiento, pero ésta pierde
el vacío y regresa a una presión atmosférica regular. En este
lapso de tiempo, el horno deja de generar vapor y la cámara se
mantiene a la temperatura deseada, a una humedad relativa del
100%. Esto evita que se reseque la comida al no permitir que se
evaporen sus jugos naturales. Como resultado, la mayoría de los
alimentos pueden mantenerse por varias horas en un estado listo
para servirse sin perder su sabor, apariencia, o consistencia.
PREPARACIÓN DÍARIA PARA USO
Preparar el Accutemp Steam’N’Hold para uso díario, requiere
muy poco tiempo y esfuerzo: simplemente llene el horno con
agua y pre-caliente.
¡PRECAUCIÓN!
Antes de llenar la cámara de cocimiento con agua, asegúrese
de que la válvula de drenaje en la parte frontal del Steam’N’Hold
esté en la posición “closed” o cerrada. También asegúrese de
colocar una cazuela de tamaño grande para vaporeras con 4
pulgadas de profundidad, o una cazuela tipo gastronome de
tamaño 1/1, en los rieles diseñados para ésta, localizados por
debajo del horno.
Al inicio de cada día, abra la puerta del Steam’N’Hold y vacíe
tres galones (11 litros) de agua de la llave en la parte baja de la
cámara de cocimiento. (A pesar de que el contenido mineral del
agua es de poca importancia, el horno Steam’N’Hold debe ser
drenado y limpiado al nal de cada día para prevenir acumulación
de minerales y restos de alimentos.)
Steamer Drain Open Steamer Drain Closed
Valvula de drenage abierta Valvula de drenage cerrada

MP4001-0908 Steam’N’Hold Steamer • Horno de Vapor Steam’N’Hold 8
INITIAL START-UP (cont.) ARRANQUE INICIAL (cont.)
Daily water usage will depend on several factors: cooking
temperature, the products being cooked and the length of time
the door is open. In most cases, 3 gallons (11 liters) of water
will last several hours or more. However, the level of the water
should be checked periodically to avoid running low and or out.
If the Steam‘N’Hold does run out of water, the “Low Water”
warning indicator light and buzzer will turn on. Should this occur,
simply turn the Steam‘N’Hold off, rell it with water and restart
the unit. If the shutdown occurred during cooking, the cycle will
resume at the point it stopped. However, a time adjustment may
be necessary, depending on the temperature of the water the
steamer was re-lled with.
CAUTION!
Do not use the low water warning indicator light and buzzer as
substitutes for checking the water level in the cooking chamber
periodically. Failure to properly maintain the water level may
result in improperly cooked product and over time may result
in a premature service issue that may not be covered under
warranty.
AUTO-FILL MODELS
The steamer must be connected to the facility water supply via
an appliance hose, preferably a stainless steel braided hose with
a ¾” garden hose type connection, from a water spigot or from a
nearby sink faucet.
First time ll (the steamer water reservoir is empty of water):
With the water supply turned on, press the “ON” button. The 1.
Steamer will power up with the pump operating.
Both water valves will be turned on.2.
A relay will bypass the low water level sensing to allow for 3.
rst time lling of the reservoir.
The thermostat will be turned off for the rst ll to prevent 4.
damage to the heater elements.
Water will rise to the low level probe and reset the low level 5.
circuit of the water control board.
The water will continue to rise until it contacts the High Level 6.
Probe.
A ve second delay is initiated when the water touches the 7.
High-level probe to allow for wave action inside the water
reservoir. Wave action would cause a lower than desired
amount of water to be injected in the reservoir by tripping
the control too soon if there were no sequence to ignore the
wave action inside the reservoir.
When the ve seconds has been satised the water level 8.
control board shuts off the water level control relay and the
by pass relay.
The heater is turned on and normal operation begins.9.
La cantidad díaria de uso de agua depende de diferentes
factores: la temperatura en la que cocina, el tipo de comida que
esta cocinando y el tiempo que permanezca abierta la puerta.
En la mayoría de los casos, 3 galones (11 litros) de agua son
sucientes para varias horas de uso o mas. Sin embargo, el nivel
del agua debe ser revisado periódicamente para evitar que éste
baje demasiado. Si así sucede, se prenderá una luz que dice
“low water” y sonará la alarma. En dado caso, apague el horno,
llénelo de agua y vuélvalo a encender. Al encenderlo, el ciclo
de cocimiento continuará en el mismo punto en el que se paró.
Sin embargo, dependiendo de la temperatura del agua nueva, un
pequeño ajuste de tiempo podría ser necesario.
¡ADVERTENCIA!
A pesar de que la unidad tiene una alarma y luz que indican el
nivel bajo de agua, es recomendable que el nivel no llegue a ese
punto. No se atenga a los indicadores; revise los niveles de agua
de la cámara de cocimiento periódicamente. El no mantener
los niveles adecuados de agua podría causar el cocimiento
insuficiente de los alimentos y causar fallas prematuras de la
unidad, que no serán cubiertas por la garantía.
MODELOS DE LLENADO AUTOMÁTICO
El horno debe ser conectado al suministro de agua de su local,
por medio de una manguera especial para electrodomesticos. De
preferencia, use una manguera corrugada de acero inoxidable con
conexión de ¾“ conectada a un grifo o a una llave de lavatrastes.
Llenado de primera vez (el recipiente de agua del horno esta
vacío):
Con el suministro de agua abierto, presione el botón de 1.
encendido (“on”). El horno se encenderá mientras la bomba
esta en operación.
Ambas válvulas estarán abiertas.2.
Un relé desactivará el sensor de nivel bajo de agua para 3.
permitir llenar el recipiente por primera vez.
Para evitar daño a los sistemas de calentamiento, el 4.
termostato estará apagado la primera vez que llene el horno.
El nivel del agua subirá hasta el sensor de nivel bajo y reiniciará 5.
el circuito de nivel bajo del panel de control de agua.
El nivel de agua seguirá subiendo hasta que haga contacto 6.
con el sensor de nivel alto.
Se iniciará un retraso de cinco segundos en cuanto el nivel 7.
del agua haga contacto con el sensor de nivel alto, para
tomar en cuenta la posibilidad de que se formen olas dentro
del recipiente de agua. Sin este lapso de tiempo, las olas
podrían activar el control de nivel demasiado temprano y
causar que el recipiente no reciba suciente agua.
Cuando hayan trasncurrido los cinco segundos, el panel de 8.
control de nivel de agua apaga el relé de control de nivel de
agua y el relé de doble paso (bypass)
El calentador se enciende y comienza la operación normal.9.

MP4001-0908 Steam’N’Hold Steamer • Horno de Vapor Steam’N’Hold 9
INITIAL START-UP (cont.) ARRANQUE INICIAL (cont.)
PREHEATING
To maximize efciency, while minimizing cook time, it is always
recommended to preheat the cooking chamber prior to cooking.
S6 Model: With the water reservoir full, close the door, set the
thermostat to the desired cooking temperature, position the
toggle switch to the “Thermostat” mode [160°F (71°C) – 200°F
(93°C)] or the “Fast Cook” mode (212°F/100°C), set timer to 15
minutes and press the “ON” button. When the pre-heat cycle
is complete, the steamer will automatically switch to the “Hold”
mode, at which time the Steam‘N’Hold is ready for use. Please
note, when steamer is in “Hold” mode, the thermostat setting will
regulate the cooking chamber temperature even if the steamer is
set in the “Fast Cook” mode.
S3 Model: With the water reservoir full, close the door, set the
thermostat to the desired cooking temperature, set timer to
15 minutes, turn the rotary selector switch to “ON” and then
select either “Cook” [160°F (71°C) – 200°F (93°C)] or “Fast
Cook” (212°F/100°C). When cycle is complete, the steamer
will automatically switch to “Hold” mode at which time the
Steam‘N’Hold is ready for use. Please note, when steamer is in
“Hold” mode, the thermostat setting will regulate the cooking
chamber temperature even if the steamer is set in the “Fast
Cook” mode.
PRE CALENTADO
Para maximizar la eciencia y a la vez minimizar el tiempo
de cocimiento, es recomendable que siempre pre caliente la
cámara de cocimiento antes de cocinar.
Modelo S6: Cuando el recipiente de agua esté lleno, cierre la
puerta y ponga el termostato a la temperatura deseada. Ahora
ponga el interruptor en la función de “thermostat” ([160°F
(71°C) – 200°F (93°C)] o en “Fast Cook” (212°F/100°C), ajuste el
temporizador a 15 minutos y presione el botón de encendido
que dice “on”. Cuando termine el ciclo de pre calentado, el
horno cambiará automáticamente a la función de “Hold.” El
horno Steam’N’Hold esta listo para usar. Note que cuando el
horno esta en función de “Hold,” la temperatura que marca
el termostato regulara la temperatura de la cámara de
cocimiento aunque el horno este en función de “Fast Cook”
(212°F/100°C).
Modelo S3: Cuando el recipiente de agua este lleno, cierre la
puerta, ponga el termostato a la temperatura deseada y ajuste
el temporizador a 15 minutos. Ahora gire el selector a posición
de “on” y seleccione la función “Cook” [160°F (71°C) – 200°F
(93°C)] o “Fast Cook” (212°F/100°C). Cuando termine el ciclo,
el horno cambiará automáticamente a función de “Hold” y
estará listo para usarse. Note que cuando el horno está en
función de “Hold,” la temperatura que marca el termostato
regulará la temperatura de la cámara de cocimiento aunque
el horno esté en función de “Fast Cook” (212°F/100°C).

MP4001-0908 Steam’N’Hold Steamer • Horno de Vapor Steam’N’Hold 10
OPERATION—COOKING MANEJO— COCIMIENTO
LOW TEMPERATURE COOKING [160°F (71°C) – 200°F (93°C)]
Did you know that with the AccuTemp Steam’N’Hold steamer,
you could cook and hold food all at the same time? With its
patented vacuum cooking technology, the Steam‘N’Hold
offers you the versatility of cooking and holding different
types of food product all at the same time when cooking with
low temperature steam.
S6 Model: To begin low temperature cooking, position the
toggle switch into “Thermostat” mode, set the thermostat to
the desired cooking temperature, set the timer to the desired
cooking time and press the “ON” button, if the steamer has to
be started.
CAUTION: Maximum recommended food load for the S6 model
is 100 lbs (45Kg).
S3 Model: To begin low temperature cooking, set the
thermostat to the desired cooking temperature, set the timer to
the desired cooking time and turn the selector switch to “ON”,
if the steamer has to be started, and then select “Cook”.
CAUTION: Maximum recommended food load for the S3 model
is 50 lbs (23Kg).
Try using perforated pans for the best results in cooking! By
allowing steam to penetrate from all directions, perforated
pans will maximize heat transfer and give you the shortest
cooking times.
HIGH TEMPERATURE COOKING (212°F/100°C)
S6 Model: To begin high temperature cooking, position the
toggle switch to “Fast Cook”, set the timer to the desired
cooking time and press the “ON” button, if the steamer has to
be started.
S3 Model: To begin high temperature cooking, set the timer to
desired cooking time, and turn the selector switch to “ON”, if
the steamer has to be started, and then select “Fast Cook”.
CONTINUOUS COOK
This feature gives you the exibility of cooking independently of
the cooking timer and can be utilized in either low temperature
or high temperature cooking.
S6 & S3 Model: Follow either low temperature or high
temperature cooking guidelines but instead of selecting a time
period, rotate the timer knob clockwise until the white indicator
on the timer knob lines up with the yellow “Continuous”
position.
Note: On S6 units with a serial number less than 22627, rotate
the timer knob clockwise until the timer knob rests against the
timer “stop pin.”
COCIMIENTO A TEMPERATURA BAJA 160°F (71°C)–200°F (93°C)]
¿Sabía usted que con el horno Steam’N’Hold, puede cocinar
y mantener comida al mismo tiempo? Con su tecnología
patentada al alto vacío, el horno Steam’N’Hold es muy versatil
y le da la oportunidad de cocinar y mantener diferentes tipos
de comida mientras cocina con vapor de baja temperatura.
Modelo S6: Para comenzar a cocinar con temperatura baja,
ponga el interruptor de palanca en función de “Thermostat,”
ajuste el termostato a la temperatura deseada y el temporizador
al tiempo deseado. Ahora presione el botón de encendidio
(“on”) para encender el horno.
ADVERTENCIA: el peso máximo de comida para el modelo S6
es de 100 lbs (45Kg).
Modelo S3: Para comenzar a cocinar con temperatura
baja ajuste el termostato a la temperatura deseada y el
temporizador al tiempo deseado. Presione el botón de
encendidio (“on”) para encender el horno y seleccione la
función “Cook.”
ADVERTENCIA: el peso máximo de comida para el modelo
S3 es de 50 lbs (23Kg).
Es recomendable usar cazuelas perforadas tipo colador
para obtener los mejores resultados al cocinar. Las cazuelas
perforadas tipo colador permiten que el vapor penetre la
comida por todos lados y esto maximiza la transferencia
de calor y mininimiza el tiempo de cocimiento.
COCIMIENTO A TEMPERATURAS ALTAS (212°F/100°C)
Modelo S6: Para comenzar a cocinar con temperaturas
altas, ponga el interruptor de palanca en función de “Fast
Cook,” ajuste el temporizador al tiempo deseado y presione
el botón de encendido (“on”) para encender el horno.
Modelo S3: Para comenzar a cocinar con temperaturas
altas, ajuste el temporizador al tiempo deseado, presione
el botón de encendidio (“on”) para encender el horno y
seleccione “Fast Cook.”
COCIMIENTO CONTINUO (CONTINUOUS COOK)
Esta función le da exibilidad de cocinar independiente
del temporizador y puede utilizarse para cocimiento a
temperaturas altas o bajas.
Modelo S6 y S3: Siga las reglas de cocinar a temperaturas bajas
o temperaturas altas pero en lugar de ajustar el temporizador
de tiempo, gire la perilla de reloj a la derecha hasta que el
indicador blanco en la perilla de reloj forme la con la posición
amarilla de “Continuous”.
Note: En unidades de modelos S6 con numeros de serie
menores que 22627, gire la perilla de reloj a la derecha hasta
que descanse sobre el aller de pared o “stop pin.”

MP4001-0908 Steam’N’Hold Steamer • Horno de Vapor Steam’N’Hold 11
OPERATION—COOKING (cont.) MANEJO— COCIMIENTO (cont.)
CHECKING FOOD WHILE COOKING
To maximize efciency, while minimizing cooking time, it is
always recommended to allow food to nish it’s cook cycle
before opening the cooking chamber door. However, if the
door is opened during a cooking cycle, a time adjustment
may be necessary, depending on how long and often the
chamber door was opened.
S6 Model: Press the “OFF” button, stand back while slowly
opening the door, allowing the cooking chamber to vent its
steam. Once steam has vented, carefully check the food, close
the door and press the “ON” button to continue cooking.
S3 Model: Press the “OFF” button, stand back while slowly
opening the door, allowing the cooking chamber to vent its
steam. Once steam has vented, carefully check the food,
close the door and turn the selector switch to “ON” and
“Cook” or “Fast Cook” to continue cooking.
HOLDING
The Steam‘N’Hold will automatically enter the “Hold” mode
once timer cooking time has expired, where the buzzer
will sound, alerting the operator that the food is ready. A
slight counterclockwise manual adjustment to the “Hold”
position on the timer knob is needed to turn off the buzzer.
The “Hold” temperature is determined by the thermostat
setting. It is recommended to preheat the cooking chamber
to the desired holding temperature if the cooking chamber
is in a cool state.
S6 Model: To hold food independently of cooking, rotate the
timer counter clockwise until the white indicator on the timer
knob lines up with the yellow “Hold” position. Select desired
the “Hold” temperature and press the “ON” button.
S3 Model: To hold food independently of cooking, rotate
the timer counter clockwise until the white indicator on the
timer knob lines up with the yellow “Hold” position. Select
desired the “Hold” temperature and turn the selector switch
to “ON” and “Cook” or “Fast Cook”.
Note: On S6 units with a serial number less than 22627,
rotate the timer knob clockwise until the timer knob rests
against the timer “stop pin”.
REVISIÓN DE COMIDA MIENTRAS COCINA
Para maximizar la eciencia y a la vez minimizar el tiempo de
cocimiento, es recommendable que permita que la comida
termine su ciclo de cocimiento antes de abrir la puerta de la
cámara de cocimiento. Si la puerta se abre durante el ciclo
de cocimiento, un ajuste de tiempo será necesario. Ese
ajuste dependerá de la cantidad de tiempo que se mantuvo
la puerta abierta.
Modelo S6: Presione el botón de apagado (“Off”), mantenga
su distancia mientras abre la puerta lentamente y permita
que salga el vapor. Una vez que salga todo el vapor, revise
la comida con cuidado, cierre la puerta y si nececita mas
tiempo, presione el botón de encendidio (“On”).
Modelo S3: Presione el botón de apagado (“Off”), mantenga
su distancia mientras abre la puerta lentamente y permita
que salga el vapor. Una vez que salga todo el vapor, revise
la comida con cuidado, cierre la puerta y si necesita mas
tiempo, ajuste el selector a “On” y “Cook” o “Fast Cook.”
MANTENIENDO LA COMIDA
Una vez terminado el ciclo de cocimiento, el Steam’N’Hold
automáticamente entra en la función de “hold,” o
mantenimiento y sonará la alarma avisando que la comida
está lista. Para apagar la alarma, necesita girar levemente el
temporizador hacia la izquierda y ponerlo en la posición de
“hold.” La temperatura de mantenimiento será determinada
por el termostato. Es recomendable que pre caliente la
cámara de cocimiento a la temperatura en que la quiere
mantener, si es que ésta se encuentra en un estado frio.
Modelo S6: Para mantener comida a una temperatura estable
sin cocinar, gire el temporizador hacia la derecha hasta que
el indicador blanco de la perilla esté alineado con la posición
amarilla que dice “Hold.” Seleccione la temperatura deseada
y presione el botón de encendido (“ON”).
Modelo S3: Para mantener comida a una temperatura
estable sin cocinar, gire el temporizador hacia la derecha
hasta que el indicador blanco de la perilla esté alineado
con la posición amarilla que dice “Hold.” Seleccione la
temperatura deseada y ajuste el interruptor a posición de
encendido (“ON”) y “ Cook” o “Fast Cook.”
Atención: En cada unidad S6 con número de serie menor
que 22627, tendrá que girar el temporizador hasta que la
perilla tope contra el pasador de paro del temporizador.

MP4001-0908 Steam’N’Hold Steamer • Horno de Vapor Steam’N’Hold 12
DAILY & WEEKLY CLEANING LIMPIEZA DÍARIA Y SEMANAL
DAILY CLEANING
At the end of each day, the Steam‘N’Hold should be drained
and cleaned.
Turn the steamer off.
Allow the cooking chamber water to cool. Ensure that 1.
a full size steam table pan or a 1/1 gastronome pan with
a minimum depth of 4 inches (101 mm) has been placed
beneath the Steam‘N’Hold.
Use caution while opening the drain valve. Empty the 2.
water into the drain pan and discard the water.
Dry the inside of the cooking chamber, including the 3.
two low water sensors, with a cloth. Failure to follow
this cleaning procedure can result in inefcient cooking
and false low water readings with the low water
sensors that will shut the steamer down even though
there may be plenty of water in the reservoir.
Do not use a water jet to clean steamer.4.
Leave the door open to allow the cooking chamber to 5.
dry overnight.
WEEKLY CLEANING
Once a week, the Steam‘N’Hold should be drained and
cleaned more thoroughly than the daily cleaning.
Fill the cooking chamber with 2 gallons (7.6 liters) of 1.
water and one cup (8 ounces or 0.24 liters) of white
vinegar.
Turn the Steamer on and operate for 30 minutes at 2.
the maximum temperature in the THERMOSTAT mode
(200ºF/93ºC) or set the Switch to the FAST COOK
position.
Allow the water and vinegar mixture to cool. Ensure that 3.
a full size steam table pan or a 1/1 gastronome pan with
a minimum depth of 4 inches (101 mm) has been placed
beneath the Steam‘N’Hold. Use caution while opening
the drain valve. Empty the water into the drain pan and
discard the water.
Rinse the cooking chamber thoroughly with water. 4.
Empty the water and vinegar mixture into the drain pan
and discard the mixture.
Remove the pan rails. Dry the inside of the cooking 5.
chamber, the two low water sensors and the pan rails
with a cloth. Failure to follow these cleaning procedures
can result in inefcient cooking and false low water
readings with the low water sensors that will shut the
steamer down even though there may be plenty of water
in the reservoir.
Leave the door open to allow the cooking chamber to 6.
dry overnight.
LIMPIEZA DIARIA
Al nal de cada día, el horno Steam’N’Hold debe ser drenada
y limpiada.
Apague el horno.
Permita que se enfríe el agua de la cámara de 1.
cocimiento. Asegúrese de colocar una cazuela de
tamaño completo o charola de tipo gastronome, tamaño
1/1 con profundidad mínima de 4 pulgadas (101 mm) por
debajo del horno.
Tenga cuidado al abrir la valvula de drenaje. Colecte el 2.
agua en la charola y descártela.
Seque la parte interior de la cámara de cocimiento 3.
incluyendo los dos sensores de nivel de agua, con un
trapo. Al no hacer esto corre el riesgo de que el horno
no cocine bien o que los sensores marquen niveles
falsos demasiado bajos que causarán que se apague el
horno aúnque los niveles sean los adecuados.
Jamás use un jet de agua o agua a presión 4.
para limpiar el horno.
Mantenga la puerte abierta por las noches para permitir 5.
que se seque bien la cámara de cocimiento.
LIMPIEZA SEMANAL
Una vez por semana, el horno Steam’N’Hold se debe drenar y
limpiar mas a fondo de como se hace en la limpieza díaria.
Llene la cámara de cocimiento con 2 galones (7.6 1.
litros) de agua y una taza (8 oz. o 0.24 litros) de vinagre
blanco.
Prenda el horno y úsela por 30 minutos a la temperatura 2.
máxima en función “THERMOSTAT” (200ºF/93ºC) o
ajuste el interruptor a la posición de “FAST COOK.”
Permita que la mezcla de agua y vinagre se enfríe. 3.
Coloque una cazuela de tamaño completo o una
cazuela de tipo gastronome, tamaño 1/1 de por
lo menos 4 pulgadas de profundidad (101mm) por
debajo del horno. Tenga cuidado al abrir la válvula de
drenaje. Vacíe el agua en la cazuela y descártela.
Enjuague bien la cámara de cocimiento con agua. 4.
Vacíe la mezcla de agua y vinagre en la charola y
descártela.
Remueva los rieles de la cazuela. Seque el interior 5.
de la cámara de cocimiento, los sensores de nivel de
agua y los rieles de la cazuela con un trapo. Al no
hacer ésto, corre el riesgo de que el horno no cocine
bien o que los sensores marquen niveles falsos
demasiado bajos que causarán que se apague el
horno aunque los niveles sean los adecuados.
Mantenga la puerta abierta durante la noche, para 6.
permitir que la cámara de cocimiento se seque por
completo.
Water Sensors Sensores de Agua

MP4001-0908 Steam’N’Hold Steamer • Horno de Vapor Steam’N’Hold 13
SERVICE SERVICIO
WARNING
Service must be performed only by AccuTemp
Products, Inc. authorized service personnel.
Service performed by unauthorized personnel will
void all warranties. Call AccuTemp Products, Inc.
Technical Service Hotline at 1-800-480-0415 or
+1-260-469-3040 for the nearest service agent.
Both high and low voltages are present inside this
equipment, even when turned off.
Remove the equipment from all power sources
prior to servicing.
To prevent electrical shock, do not open covers.
There are no user serviceable parts inside.
ADVERTENCIA
Todo tipo de servicio y mantenimiento debe
ser hecho solamente por personal de servicio
autorizados por Accutemp. Servicio hecho por
personas no autorizadas invalidarán las garantías
de Accutemp. Llame a la línea de servicio técnico
de Accutemp Products, Inc al 1-800-480-0415
o al +1-260-469-3040 para localizar un agente
autorizado de servicio en su área.
Esta unidad contiene voltages altos y bajos, aún
mientras esté apagada. Desconecte la unidad de
toda fuente de electricidad antes de darle servicio.
Esta unidad no contiene piezas reparables por
el usuario. Para prevenir descarga o choque
eléctrico, no intente abrir la unidad.
IMPORTANT SERVICE
INFORMATION
An AccuTemp Products technical and customer
support technician is available Monday thru
Sunday, 7:00am to 7:00pm EST.
email: [email protected]
(800) 480-0415
1 (260) 469-3040
INFORMACIÓN IMPORTANTE DE
SERVICIO
Empleados de soporte técnico y atención
al cliente de AccuTemp Products están
disponibles para ayudarle de Lunes a
Domingo, 7:00am a 7:00pm tiempo este.
email: [email protected]
(800) 480-0415
1 (260) 469-3040
GENERAL SERVICE INFORMATION
Conventional steamers require scheduled service (such as boiler
maintenance) at relatively frequent intervals. The Steam‘N’Hold
steamer however, requires no such processes/service due to its
unique design.
Because the Steam‘N’Hold has been engineered for the highest
reliability, most problems that arise can be attributed to minor
oversights, such an incorrect temperature or failure to close
door securely. These types of situations are addressed in the
following paragraphs.
To ensure continued safe and reliable operation of your
Steam‘N’Hold, only Factory Authorized Service Personal should
perform any component replacement or major repair. Please
contact the AccuTemp Technical Service Department for help at
800-480-0415 or +1 (260) 469-3040 or email [email protected]
if the measures described below fail to correct your problem.
INFORMACIÓN GENERAL DE SERVICIO
Les hornos convencionales requieren de servicio programado
(tal como el mantenimiento de la caldera) a intervalos
frecuentes. Sin embargo, el horno Steam’N’Hold no requiere
de estos requisistos debido a su diseño único.
Ya que ha sido diseñado para el máximo rendimiento, la mayoría
de los problemas que se presentan son atribuidos a errores
de manejo, tales como poner la temperatura incorrecta o no
cerrar la puerta debidamente. Este tipo de situaciones serán
abordadas en el siguiente párrafo
Para garantizar la operación segura y el mas alto rendimiento
de su Steam’N’Hold, solamente personal de servicio autorizado
por Accutemp debe remplazar o reparar la unidad. Favor de
contactar al departamente de servico técnico de AccuTemp
al número 800-480-0415 o +1 (260) 469-3040 o email service@
accutemp.net en caso de que las siguientes soluciones no
resuelvan su problema.

MP4001-0908 Steam’N’Hold Steamer • Horno de Vapor Steam’N’Hold 14
BASIC TROUBLESHOOTING SOLUCIONES A PROBLEMAS BÁSICOS
Steamer Will Not Turn On
Make sure the unit is plugged in and lled with water. •
Steamer will not operate without water.
Check the facility circuit breaker (or fuses) supplying •
the unit.
Call AccuTemp Products Technical Service Toll Free at •
1-800-480-0415 or at +1 (260) 469-3040.
Steamer Displays “Low-Water”
Check level of water in cooking chamber and add •
accordingly.
If cooking chamber is full (3 gallons/11 liters), water •
sensors may have a lm across them. Clean sensors
by draining unit of water and wiping sensors off with a
towel and mild detergent and then rinse thoroughly.
Call AccuTemp Products Technical Service Toll Free at •
1-800-480-0415 or at +1 (260) 469-3040.
Food Is Over Cooked
Check that the proper cook temperature is being used. •
(Excess time will cause over-cooking only when the
temperature setting is moderately higher than the
desired nal product temperature).
Call AccuTemp Products Technical Service Toll Free at •
1-800-480-0415 or at +1 (260) 469-3040.
Food Is Under Cooked
Make sure you are using adequate time and temperature •
settings. Extra time may be required if pans are covered
or if product is left in plastic bags or similar packaging.
Try distributing the product more evenly within the •
steamer and or pans, if possible.
Make sure the water drain valve on the front of the •
Steam‘N’Hold is tightly closed. The steamer may appear
to be cooking normally if the valve is slightly open but
efciency may be compromised.
Check the door seal for food debris. Food debris on the •
face of the door seal or under ap may cause steamer
to appear to be cooking normally but efciency may be
compromised. Nicks or cuts in the door seal may also
cause inefcient cooking.
Call AccuTemp Products Technical Service Toll Free at •
1-800-480-0415 or at +1 (260) 469-3040.
Low Vacuum Gauge Readings
The higher the temperature setting, the lower the •
vacuum gauge reading. When operating at 212° (Fast
Cook), the gauge will read near or at zero.
Verify that the door has been closed securely.•
Check to make sure there is no food debris on the face •
of the door seal or behind its ap. Also check the door
seal for damage such as nicks or cuts.
Call AccuTemp Products Technical Service Toll Free at •
1-800-480-0415 or at +1 (260) 469-3040.
El Horno No Prende
Asegúrese de que la unidad esté conectada y llena de agua. El •
horno no operara sin agua.
Revise el interruptor de corriente (o los fusibles) de su •
edicio.
Llame al departamente de servico técnico de AccuTemp al •
número 1-800-480-0415 o +1 (260) 469-3040.
El Horno Muestra Nivel Bajo de Agua o “Low- Water.”
Revise el nivel del agua de la cámara de cocimiento y •
agregue mas agua si ésta lo requiere.
Si la cámara de cocimiento está llena (3 galones/11 litros), •
los sensores probablemente están sucios. Drene el agua
y limpie los sensores con un trapo y detergente suave y
enjuague bien.
Llame al departamente de servico técnico de AccuTemp al •
número 1-800-480-0415 o +1 (260) 469-3040.
La Comida Sale Sobrecocida
Asegúrese que esté usando la temperatura adecuada. El •
exceso de tiempo puede ocasionar el sobrecocimiento
solamente cuando la temperatura haya sido ajustada
moderadamente mas elevada que la temperatura del
producto que se desea tener al nal.
Llame al departamente de servico técnico de AccuTemp al •
número 1-800-480-0415 o +1 (260) 469-3040.
La Comida Sale Cruda
Asegúrese que esté indicando la temperatura y el tiempo •
adecuado. Su comida requerirá mas tiempo si las cazuelas
están cubiertas o si la comida está empaquetada o dentro
de bolsas de plástico
Coloque la comida de manera que quede igualmente •
distribuída en las charolas dentro del horno.
Asegúrese que la válvula de drenaje colocada al frente del •
Steam’N’Hold esté completamente cerrada. El horno puede
aparentar estar funciónando bien con la válvula un poco
abierta. Pero la eciencia de cocimiento será perjudicada.
Revise que el sello de la puerta esté limpio y libre de •
restos de alimentos. Suciedad en la supercie del sello
de la puerta o en la parte posterior de la pestaña puede
disminuir la eciencia del horno, aunque aparente estar
funcionando bien. Grietas en el sello también pueden
disminuir la eciencia de su unidad.
Llame al departamente de servico técnico de AccuTemp al •
número 1-800-480-0415 o +1 (260) 469-3040.
El Nivel Del “Vaccum Gauge” o Medidor de Alto Vacio está
Bajo.
Entre mas alta la temperatura de cocimiento, mas bajo •
marcará el medidor del alto vacio. Cuando esté operando
en función “fast cook” a 212° Farenheit, el medidor de vacío
marcara 0 o cerca de 0.
Verique que la puerta esté bien cerrada.•
Verique que no haya restos de alimentos en la supercie •
anterior del sello de la puerta o en la parte posterior de la
pestaña del sello. También revise que el sello no tenga grietas.
Asegúrese que todas las charolas estén bien insertadas •
dentro de la vaporera.
Llame al departamente de servico técnico de AccuTemp al •
número 1-800-480-0415 o +1 (260) 469-3040.

MP4001-0908 Steam’N’Hold Steamer • Horno de Vapor Steam’N’Hold 15
Unit Will Not Turn Off
This symptom, which is extremely rare, indicates a •
serious control malfunction.
Turn off the steamer’s electrical supply at the source.•
Call AccuTemp Products Technical Service Toll Free at •
1-800-480-0415 or at +1 (260) 469-3040.
AUTO-FILL UNITS ONLY
Failure Events and Safety Control
The Steamer Does Not Turn On.
Check to ensure the steamer is plugged into the correct •
receptacle.
Check the branch circuit breaker to insure it is in the •
“ON” position.
The mechanical over ow level control has been •
removed. The steamer will not start up until the
mechanical level control is reinstalled.
Call AccuTemp Products Technical Service Toll Free at •
1-800-480-0415 or at +1 (260) 469-3040.
No/Low Water Pressure or No/Low Flow of Water into the
Reservoir.
Check the supply water pressure•
Check for dirty inlet screen.•
Check for dirty probes.•
Call AccuTemp Products Technical Service Toll Free at •
1-800-480-0415 or at +1 (260) 469-3040.
The Steamer Shuts Down During Operation.
Check conditions listed above for no/low water pressure •
or no/low ow of water into the reservoir.
If the water level control valve is stuck “on”, the •
mechanical overow level control will shut down the
whole Steamer and the water supply by turning off the
master water control valve.
If the water level sensing control board becomes faulty, •
the mechanical over ow level control will shut down
the Steamer.
Call AccuTemp Products Technical Service Toll Free at •
1-800-480-0415 or at +1 (260) 469-3040.
La Unidad No Se Apaga.
Este síntoma es extremadamente raro e indica un serio •
problema de control.
Corte el suministro de electictricidad desde su fuente. •
Llame al departamente de servico técnico de AccuTemp •
al número 1-800-480-0415 (gratis) o +1 (260) 469-3040.
MODELOS DE LLENADO AUTOMATICO
En Caso de Fallas y Control de Seguridad
El Horno No Prende.
Asegúrese de que el horno esté enchufado a un •
contacto adecuado.
Asegúrese que el interruptor electrico este en posicion •
de “on” o encendido.
El control mecánico contra derrames ha sido removido. •
El horno no prenderá hasta que el control mecánico
sea reinstalado.
Llame al departamente de servico técnico de AccuTemp •
al número 1-800-480-0415 (gratis) o +1 (260) 469-3040.
No Hay Suficiente Presión de Agua o No Hay Suficiente Flujo
de Agua Hacia el Receptáculo.
Revise la presión del suministro de agua. •
La malla o ltro de entrada podría estar sucia. •
Los sensosres podrían estar sucios.•
Llame al departamente de servico técnico de AccuTemp •
al número 1-800-480-0415 (gratis) o +1 (260) 469-3040.
El Horno Se Apaga Mientras está en Operación
Tome en cuenta las condiciones previamente •
mencionadas sobre la falta de presión de agua o falta
de ujo de agua hacia el receptáculo.
Si la válvula de control de nivel de agua está atorada •
en posición de encendido (“on”), el control mecanico
contra derrames apagará el horno y cerrará la válvula
maestra de control de agua para cortar el suministro
de agua.
Si el centro de control de nivel de agua está fallando, el •
control mecánico contra derrames apagara el horno.
Llame al departamente de servico técnico de AccuTemp •
al número 1-800-480-0415 (gratis) o +1 (260) 469-3040.
BASIC TROUBLESHOOTING (cont.) SOLUCIONES A PROBLEMAS BÁSICOS (cont.)
IMPORTANT
1
Never leave a de-liming agent in contact with the stainless
steel longer than 10 minutes before rinsing the cooking
chamber thoroughly with water. Longer contact can cause
corrosion.
2
Do not use abrasive materials, such as wire brushes, metal
scouring pads or scrapers to clean the cooking chamber
bottom.
3
Service must be performed only by AccuTemp Products,
Inc. authorized service personnel. Service performed by
authorized personnel will void all warranties.
4
Any in-field modification made without written authorization
from AccuTemp will void the warranty.
IMPORTANTE
1
Jamás deje agentes sarricidas en contacto con el acero
inoxidable por mas de 10 minutos antes de enjuagar bien
la cámara de cocimiento con agua. Contacto por mas de 10
minutos puede causar corrosion.
2
Jamas use materiales abrasivos como cepillos de alambre,
estropajos de fierro o raspadores ásperos, para limpiar la
parte inferior de la cámara de cocimiento.
3
El servicio a la unidad debe ser dado solamente por personal
autorizado por Accutmep Products, Inc. Servicio dado por
personas no autorizadas anularán la garantía.
4
Cualquier modificación hecha sin previa autorización escrita
de Accutemp anulará la garantía.

MP4001-0908 Steam’N’Hold Steamer • Horno de Vapor Steam’N’Hold 16
WARRANTY GARANTÍA
LIMITED WARRANTY
One Year - Parts & Labor - U.S. & Canada Only
AccuTemp Products, Inc. (AccuTemp) warrants that your
AccuTemp equipment will be free of defects in material and
workmanship under normal use for a period of twelve (12) months
from installation or fteen (15) months from date of shipment from
AccuTemp, whichever date rst occurs (the Warranty Period).
Registration of AccuTemp equipment is required at the time of
installation. Damage to AccuTemp equipment that occurs during
shipment must be reported to the carrier, and is not covered under
this warranty. The reporting of any damage during shipment is
the sole responsibility of the commercial purchaser/user of such
AccuTemp equipment.
AccuTemp provides an active service department, which
should be contacted and advised of service issues, regardless of the
warranty period. During the warranty period, AccuTemp agrees to
repair or replace, at its option, F.O.B. factory, any part which proves
to be defective due to defects in material or workmanship, provided
the equipment has not been altered in any way and has been
properly installed, maintained, and operated in accordance with the
instructions in the AccuTemp Owners Manual. During the warranty
period, AccuTemp also agrees to pay for any factory authorized
equipment service agency (within the continental United States and
Canada) for reasonable labor required to repair or replace, at our
option, F.O.B. factory, any part which proves to be defective due to
defects in materials or workmanship, provided the service agency
has received advance approval from AccuTemp factory service to
perform the repair or replacement. This warranty includes travel
time not to exceed two hours and mileage not to exceed 50 miles (100
miles round trip), but does not include post start-up assistance or
training, tightening of loose ttings or external electrical connections,
minor adjustments, maintenance, or cleaning. AccuTemp will not
reimburse the expense of labor required to replace parts after the
expiration of the warranty period.
Proper installation is the responsibility of the dealer, owner-user,
or installing contractor and is not covered by this warranty. Improper
installation can affect your warranty. Installation is the responsibility
of the Dealer, Owner/User or the Installation Contractor. See the
Installation section of the Owners Manual. While AccuTemp products
are built to comply with applicable standards for manufacturers,
including Underwriters Laboratories (UL) and National Sanitation
Foundation (NSF), it is the responsibility of the owner and the installer
to comply with any applicable local codes that may exist.
AccuTemp makes no other warranties or guarantees, whether
expressed or implied, including any warranties of performance,
merchantability, or tness for any particular purpose. AccuTemp’s
liability on any claim of any kind, including negligence, with respect to
the goods and services covered hereunder, shall in no case exceed
the price of the goods and services, or parts thereof, which gives
rise to the claim. In no event shall AccuTemp be liable for special,
incidental, or consequential damages, or damages in the nature of
penalties.
This constitutes the entire warranty, which supersedes and
excludes all other warranties, whether written, oral, or implied.
GARANTÍA LIMITADA
Un Año – Piezas y mano de obra Solamente E.E.U.U & Canada
AccuTemp Products, Inc. (AccuTemp) garantiza que su equipo
AccuTemp está libre de defectos tanto en su terminado como en los
materiales utilizados, bajo condiciones de uso normal de un período de
doce (12) meses a partir de la fecha de instalación o quince (15) meses
a partir de la fecha de envío de AccuTemp, cualquiera de las feches
que ocurra primero (el período de garantía). Se requiere registrar el
equipo de AccuTemp a la hora de realizare la instalacion. Daño al
equipo de AccuTemp que ocurra durante el envío debe ser reportado
a la compañía de envío y no está cubierto bajo esta garantía. Reportar
daños ocurridos durante el envío es la responsabilidad exclusiva del
cliente comercial/usuario de tal equipo de AccuTemp.
AccuTemp provee un departamento activo de servicio que
debe ser contactado y avisado de asuntos de servicio, sin importar
si el equipo esta bajo garantía o no. Durante el período de garantía,
AccuTemp se compromete a reparar o a nuestra opcion, (F.O.B
factory) remplazar cualquier pieza que demuestre estar defectuosa
debido a defectos materiales o de terminado/fábricación, en el
entendido de que el equipo no ha sido alterado/cambiado de ninguna
manera y ha sido instalado, mantenido y operado apropiadamente de
acuerdo con las instrucciones delineadas en el manual de usuario
de AccuTemp. Durante el período de garantía, Accutemp también
se compromete a pagar por servicios hechos por cualquier agencia
autorizada de servicio de equipo de fábrica (dentro de los EEUU
continentales y Canada) por cualquier trabajo razonable requerido
para reparar o a nuestra opción, reemplazar (F.O.B factory) cualquier
pieza que demuestre estar defectuosa debido a defectos materiales
o de terminado/fábricación, con el entendido de que la agencia de
servicio ha sido aprobada de antemano por AccuTemp Factory
Service para efectuar el remplazo o la reparación. Esta garantía
incluye gastos de tiempo de viaje sin exceder dos horas y millaje que
no exceda 50 millas (100 millas ida y vuelta), pero no incluye tiempo
de asistencia después de la reparación, para iniciar la maquinaria,
entrenamiento, ajustado de piezas sueltas o conexiones eléctricas
externas, ajustes menores, mantenimiento o limpieza. AccuTemp no
reembolsará gastos necesarios para reemplazar piezas fuera de la
fecha de vencimiento del período de la garantía.
La instalacion correcta es responsabilidad del distribuidor, dueño/
usuario o instalador contratista y no es cubierta por ésta garantía.
Una instalación inadecuada invalidará la garantía. La instalación es la
responibilidad del distribuidor, dueño/usuario o instalador contratista.
Lea la seccion de instalación en el manual de usuario. A pesar de que
todos los productos de AccuTemp están fábricados para cumplir con
los estándares correspondientes para fábricantes, como Underwriters
Laboratories (UL) y National Sanitation Foundation (NSF), sigue siendo
responsabilidad del dueño y del instalador, cumplir con qualquier
código local correspondiente que pueda existir.
AccuTemp no da ningun tipo de garantía ya sea explicita o
implicita, incluyendo garantías de rendimiento, comerciabilidad, o
adecuación para usos particulares. La responsabilidad de AccuTemp
sobre qualquier tipo de reclamación, incluyendo negligencia, con
respecto a los bienes y servicios cubiertos a continuación, no debe
en ningun caso exceder el precio de los bienes y servicios o piezas
de las mismas reclamadas. AccuTemp no se hace responsable bajo
ninguna circunstancia, por daños especiales, incidentales, o daños
indirectos o de naturaleza penal.
Esto constituye la garantía en su totalidad que reemplaza y anula
qualquier otra garantía sea escrita, expresa oral, o implícita.
Transcripción de documentos
Steam’N’Hold™ Steamer Owners Manual Horno de Vapor Steam’N’Hold™ Manual de Operación IMPORTANT WARRANTY INFORMATION: Información importante de la garantía: For product warranty activation, the Product Registration Form must be submitted to AccuTemp Products, Inc. after installation of the appliance. Después de instalar el horno, el formato de registro del producto debe ser mandado a AccuTemp Products, Inc. para activar la garantía. Product Registration Form This document also available online at: accutemp.net/product_manuals.htm For schematic drawings, download at: accutemp.net/schematics.htm or call AccuTemp Technical Service at (800) 480-0415 or +1 (260) 469-3040 and request items AT1T-3403 and AT1T-3452 MP4001-0908 Formato de Registro del Producto Este documento tambien lo encontrara: accutemp.net/product_manuals.htm Para bajar el Esquemático: accutemp.net/schematics.htm o llame al Servicio Tecnico de AccuTemp al (800) 480-0415 o +1 (260) 469-3040 y pida los documentos AT1T-3403 and AT1T-3452 Steam’N’Hold Steamer • Horno de Vapor Steam’N’Hold 1 TABLE OF CONTENTS CONTENIDO Table of Contents ............................................................. 2 Document History............................................................. 2 Safety Warnings .............................................................. 3 Installation .................................................................... 4–6 Initial Start-Up............................................................... 7–9 Operation—Cooking . .............................................. 10–11 Daily & Weeklly Cleaning ............................................. 12 Service.............................................................................. 13 Basic Troubleshooting ............................................ 14–15 Warranty ......................................................................... 16 DOCUMENT HISTORY Current revision: MP4001-0908 Date: 8/4/09 HISTORIAL DE ESTE DOCUMENTO Prior revision: A Date: 8/24/06 Changes All Pages Document Control Number Changed Reformatted with Spanish Translation Removed Schematics - Now included in Service Manual for the Steam’N’Hold MP4001-0908 Contenido ........................................................................... 2 Historial de Este Documento........................................... 2 Precauciónes de Seguridad ........................................... 3 Instalación .....................................................................4–6 Arranque Inicial ............................................................7–9 Manejo . ......................................................................10–11 Limpieza Díaria y Semanal ............................................ 12 Servicio.............................................................................. 13 Soluciones a Problemas Básicos ..........................14–15 Garantía ............................................................................ 16 Edición actual: MP4001-0908 Fecha: 8/4/09 Edición previa: A Fecha: 8/24/06 Cambios Todas las paginas Numero de documento cambiado Translacion en Español agregada Esquemático ahora incluido en el manual de servicio para el Steam’N’Hold Steam’N’Hold Steamer • Horno de Vapor Steam’N’Hold 2 SAFETY WARNINGS PRECAUCIÓNES DE SEGURIDAD DANGER 1 2 Only personnel qualified to work with electricity should install this unit. Improper installation can cause personal injury or damage to the equipment. This appliance must be properly grounded. Failure to properly ground the appliance could result in electrocution and/or death. PELIGRO 1 Esta unidad debe ser instalada solamente por personal calificado para trabajar con electricidad. Al hacer una instalación incorrecta, puede causar lastimaduras serias y/o daño al equipo. Este aparato debe hacer conexión a tierra. Al no conectar este aparato a tierra, puede causar electrocucción y/o la muerte. 2 WARNING 1 2 3 When using a stand that is equipped with casters, the floor surface must be level and flat. Failure to do so can result in a “tipping” situation and could result in serious injury. 4 5 Never reach into the cooking chamber or handle hot items without wearing proper hot gloves. Direct contact with steam can result in severe burns. When accessing the cooking chamber, be sure to always stand back while slowly opening the door, allowing the chamber to vent its steam. Never look or reach into the cooking chamber before it has completely vented its steam. Never use wet or damp gloves, as moisture can conduct heat quickly and could result in severe burns. ADVERTENCIA 1 2 3 La superficie del piso debe ser plana y nivelada al usar una base con ruedas. Al no tomar esta precaución, la vaporera podría volcarse y esto puede causar lastimaduras serias. Contacto directo con el vapor puede provocar quemaduras severas. Al utilizar la cámara de cocimiento, asegúrese de mantenerse a distancia y abrir la puerta lentamente para permitir que salga el vapor. Nunca se asome o introduzca la mano dentro de la cámara de cocimiento antes de que salga todo el vapor. Jamas introduzca su mano dentro del recipiente de agua ni maneje objetos calientes sin usar guantes especiales de protección. Jamas use guantes mojados o húmedos porque la humedad conduce el calor rápidamente y esto podría resultar en quemaduras graves. 4 5 CAUTION 1 2 3 4 5 6 7 Be sure all operators read, understand and follow the information contained in this manual, including caution warnings, operating instructions, and safety instructions. Use caution when operating the steamer. Direct contact with steam can result in a severe burn. Please use caution when emptying the drip pan. The pan’s contents could cause severe burns. Keep the floor in front of the equipment clean and dry. If spills occur, clean immedíately to avoid the potential injuries. Do not use pressurized water to clean steamer. Use of any replacement parts other then those supplied by AccuTemp can cause bodily injury to the operator, damage to the equipment and will void all warranties. This appliance is extremely heavy. For safe handling, the installer should obtain help as needed or employ appropriate material handling equipment to remove unit from its packaging and move it into its final location. 8 Do not use the low water warning indicator or buzzer as a substitute for checking the water level in the cooking chamber periodically. Failure to properly maintain the water level may result in improperly cooked product and over time, may result in a premature service issue that may not be covered under warranty. MP4001-0908 PRECAUCIÓN 1 Asegurese que todo usuario de este aparato haya leido, entendido y seguido la información contenida en este manual incluyendo las precauciónes, instrucciones de operación y las instrucciones de seguridad. Tenga cuidado al operar el horno. Contacto directo con el vapor puede resultar en quemaduras severas. Tome suma precaución al vaciar el recipiente de desagüe. Su contenido podría causar quemaduras serias. Mantenga el piso enfrente del equipo seco y limpio. Limpie de inmedíato cualquier derrame para evitar accidentes. Jamás use jet de agua o agua a presión para lavar el horno. 2 3 4 5 6 El uso de partes de reemplazo no autorizadas por Accutemp Products, Inc. podría causar lastimaduras corporales al usuario y daño al aparato. El uso de partes no autorizadas también anula la garantía del producto. Esta unidad es extremadamente pesada. Para asegurar un manejo seguro, contrate ayuda o maquinaria especial para remover la plancha del empaque y colocarla en su lugar. No se atenga a la luz de señalamiento de bajo nivel de agua (“low water”) y alarma. Revise periódicamente los niveles de agua de la cámara de cocimiento. El incumplimiento de mantener los niveles adecuados de agua podría causar el cocimiento insuficiente de comida y podría resultar en fallas en la unidad que no esten cubiertas por la garantía. 7 8 Steam’N’Hold Steamer • Horno de Vapor Steam’N’Hold 3 INSTALLATION INSTALACIÓN BUILDING CODES AND STANDARDS The steamer must be installed in accordance with the following building codes: USA: National Electric Code, ANSI/NFPA-70, state and local codes. Canada: Canadían Electric Code, CSA C22.2 and local codes. CÓDIGOS Y ESTÁNDARES DE CONSTRUCCIÓN El horno debe ser instalado de acuerdo a los siguientes códigos de construcción: USA: National Electric Code, ANSI/NFPA-70, códidgos locales y del estado. Canada: Canadían Electric Code, CSA C22.2 y códigos locales. UNPACKING This steamer was inspected before shipment from the factory. The shipping company accepts full responsibility for safe delivery. Immediately after unpacking, check the steamer for possible shipping damage. If damage is identified, save the packaging material and contact the shipping carrier within 15 days. DESEMPAQUE Este Horno fue inspeccionado antes de salir de fábrica. La compañía de envío acepta la responsabilidad total de que llegue sin daño alguno. Después de desempacar, revise el horno de inmedíato para verificar su entrega en buen estado. Si llegase a sufrir algun daño, guarde el material de empaque y comuníquese con la compañía de envío dentro de los 15 primeros días. LOCATION AND PLACEMENT To insure maximum benefit of your warranty; location, placement and leveling are critical. The AccuTemp Steam’N’Hold steamer is designed for installation on either a commercial kitchen countertop or an AccuTemp Steam’N’Hold stand. Your Steam’N’Hold steamer is equipped with vents to allow the proper ventilation of air through the electrical compartments. On current S6 & S3 Steam’N’Hold models, the vents are located on the bottom and rear panels. To ensure these vents work properly, a minimum 3 inch (77 mm) clearance from these vents must be allocated. It is also recommended that the Steam’N’Hold not be placed under other wet equipment or locations. Note: For S6 models with a serial number lower than 22627, vents are located on the rear face and left side panels. A minimum spacing of 6 inches (152 mm) to the left side access panel is required between heat sources such as, but not limited too, a range, griddle or fryer. A minimum spacing of 3 inches (76 mm) to the rear face, between any object such as a wall, barrier or other piece of equipment, must be allocated as well. LEVELING The steamer must be installed in a level condition. An out-oflevel condition may cause improper operation and possible damage. Damage caused by improper leveling is not covered by warranty. Use a spirit level, resting on the top steamer cabinet surface, to ensure it is level front-to-back and leftto-right. If this is a counter-top installation, be sure to install a rubber foot tip provided with your steamer onto the foot adjuster of each of the steamer leg as shown. This will keep the steamer from sliding on the counter-top under normal use. Once the rubber foot tips have been installed, rotate the foot adjusters up or down as needed to level the steamer. MP4001-0908 UBICACIÓN Y COLOCACIÓN Para maximizar los beneficios de su horno, es de suma importancia que ponga atención a la ubicación, colocación y nivelación de la unidad. El horno Steam’N’Hold está diseñado para instalarse en una cocina industrial o en una base especial de Accutemp. Su Steam’N’Hold cuenta con aperturas o rejillas que permiten la ventilación adecuada que require el compartimiento eléctrico. En los modelos S6 & S3 Steam’N’Hold actuales, las aperturas de ventilación están localizadas en los páneles inferiores y posteriores. Se requiere un espacio o despeje de por lo menos 3 pulgadas (77 mm) entre las aperturas y cualquier otro objeto para asegurar la ventilación adecuada. También se recomienda que el Steam ‘n hold no sea colocado debajo de algún lugar o equipo que produzca humedad. Atención: En los modelos S6 con número de serie menos de 22627, las aperturas o rejillas de ventilación están localizadas en el panel trasero y en el panel lateral izquierdo. Se requiere un espacio mínimo de 6 pulgadas (152mm) entre el panel lateral izquierdo y cualquier fuente de calor como una estufa, plancha o freidora. También se requiere un espacio mínimo de 3 pulgadas (76mm) entre el panel posterior y cualquier objeto, tales como una pared, barrera o maquinaria. NIVELACIÓN El horno debe ser nivelado al instalarse. Una unidad no nivelada dará mal rendimiento y esto puede causar daños al horno. Los daños debidos a la falta de nivelación no son cubiertos por la garantía. Use un nivel de burbuja en la superficie del gabinete superior de la vaporera para asegurarse que esté nivelada de enfrente hacia atras y de lado a lado. Si va a instalar el horno sobre cubierta de cocina, es importante instalar los tapones de hule que vienen incluídos con su horno en cada pata de la unidad. Esto previene que la vaporera se deslize sobre la cubierta durante su uso normal. En cuanto haya instalado los tapones, gire las patas ajustables hacia la derecha o izquierda para nivelar la vaporera. Steam’N’Hold Steamer • Horno de Vapor Steam’N’Hold 4 INSTALLATION (cont.) INSTALACIÓN (cont.) SINGLE STEAMER STAND INSTALLATION The AccuTemp SNH10 single stand is equipped with adjustable height feet and the AccuTemp SNH11 single stand is equipped with non-adjustable height casters. Both can be used with either a one S6 or S3 model Steam’N’Hold steamer. Before mounting a steamer on the SNH11 stand, engage the brakes on the two front locking casters, pressing on the “ON” handle of the brake mechanism. To mount the steamer, carefully lift and place it on the horizontal mounting brackets, ensuring that the (4) mounting holes on the underside of the Steam’N’Hold are lined up with the mounting holes on the brackets. Then, using a 7/16” wrench, fasten one pair of the ¼”-20 hex bolts and ¼” split lock washers through the underside of each stand bracket mounting hole into the Steam‘N’Hold and tighten securely. With the SNH10 stand, level the steamer by adjusting the feet found at the ends of each stand leg, either up or down as needed. WARNING! When using a stand that is equipped with casters, the floor surface must be level and flat. Failure to do so can result in a “tipping” situation that could result in serious injury. DOUBLE STEAMER STAND INSTALLATION The AccuTemp SNH20 double stand is equipped with adjustable height feet and the AccuTemp SNH21 double stand is equipped with non-adjustable height casters. Both stands can accommodate either two S6 model Steam’N’Holds, two S3 Model Steam’N’Holds or a one of each steamer model. When ordered as a steamer set, one of the two steamers will be designated as a “bottom unit” on the outside of its packaging. Before mounting a steamer on the SNH21 stand, engage the brakes on the two front locking casters, pressing on the “ON” handle of the brake mechanism. To mount the steamer, carefully lift and place it on the horizontal mounting brackets, ensuring that the (4) mounting holes on the underside of the Steam’N’Hold are lined up with the mounting holes on the brackets. Then, using a 7/16” wrench, fasten one pair of the ¼”20 hex bolts and ¼” split lock washers through the underside of each stand bracket mounting hole into the Steam‘N’Hold and tighten securely. Once the “bottom unit” has been installed, carefully lift and place the “top unit” Steam’N’Hold steamer on the horizontal mounting brackets, ensuring that the (4) mounting holes on the underside of the Steam’N’Hold are lined up with the mounting holes on the brackets. Then, using a 7/16” wrench, fasten one pair of the ¼”-20 hex bolts and ¼” split lock washers through the underside of each stand bracket mountinghole and tighten securely. With the SNH20 stand, level the steamers by adjusting the feet found at the ends of each stand leg, either up or down as needed. MP4001-0908 INSTALACIÓN SOBRE BASE INDIVIDUAL La base individual Accutemp SNH10 viene equipada con patas que se pueden ajustar a la altura deseada mientras que la base individual Accutemp SNH11 viene equipada con ruedas en patas no ajustables. Ambas son compatibles con el horno Steam‘N’Hold de modelos S6 o S3. Antes de montar el horno sobre la base SNH11, presione la palanca que dice “on” localizada en el mecanismo de frenos, para activar los frenos de seguridad en las dos ruedas del frente. Para montar el horno, levantelo con cuidado y colóquelo en las ménsulas horizontales de la base, asegurándose de que los cuatro agujeros en la parte inferior de la vaporera esten alineados con los agujeros de la base. Luego, inserte un par de tornillos y arandelas de presión de un cuarto (¼”-20 hex bolts y ¼” split lock washers) a través del horno inferior de cada agujero de la ménsula de la base y apriételos con una llave de 7 1/16”. Si cuenta con la base SNH10, ajuste hacia arriba o hacia abajo las patas de la base para nivelar el horno. ¡ADVERTENCIA! Al usar una base con ruedas, asegurese que la superficie del piso este plana y nivelada. Si no, la unidad podría volcarse y esto podría causar lastimaduras serias. INSTALACIÓN SOBRE BASE PARA DOBLE HORNO La base Accutemp SNH20 para doble horno, viene equipada con patas que pueden ser ajustadas a la altura deseada, mientras que la base doble Accutemp SNH21 viene equipada con ruedas con patas no ajustables. Ambas estan diseñadas para sostener dos hornos Steam‘N’Hold de modelos S6 o S3, o una de cada una. Cuando se ordenan los hornos en juego, uno de los dos hornos se le designará como el horno inferior (bottom unit). Antes de montar el horno en la base SNH21, aplique los frenos a las dos ruedas del frente. Necesitará presiónar la palanca en cada rueda marcadas “on.” Para empezar, monte el horno inferior primero. Levántelo con cuidado y colóquelo en las ménsulas horizontales de la base, asegurándose de que los cuatro agujeros en la parte inferior del horno esten alineados con los agujeros de la base. Luego, inserte un par de tornillos y arandelas de presión de un cuarto (¼“-20 hex bolts y ¼“ split lock washers) a través de la parte inferior de cada agujero de la ménsula de la base y apriételos con una llave de 7 1/16”. Una vez que “el horno inferior” esté instalado, levante con cuidado “el horno superior” y colóquelo sobre las ménsulas horizontales de la base, asegurándose de que los cuatro agujeros en la parte inferior del horno, esten alineados con los agujeros de la base. Luego, inserte un par de tornillos y arandelas de presión de un cuarto (¼“- 20 hex bolts y ¼“ split lock washers), a través de la parte inferior de cada agujero de la ménsula de la base y apriételos con una llave de 7 1/16”. En la base SNH20, ajuste hacia arriba o hacia abajo las patas de la base para nivelar el horno. Steam’N’Hold Steamer • Horno de Vapor Steam’N’Hold 5 INSTALLATION (cont.) INSTALACIÓN (cont.) WARNING! When using a stand that is equipped with casters, the floor surface must be level and flat. Failure to do so can result in a “tipping” situation that could result in serious injury. ¡ADVERTENCIA! Al usar una base con ruedas, asegúrese de que la superficie del piso este plana y nivelada. Si no, la unidad podría volcarse y esto podría resultar en lastimaduras serias. ELECTRICAL SUPPLY The AccuTemp Steam‘N’Hold steamer has been designed, manufactured and tested to meet or exceed the Underwriters Laboratories safety standards. To ensure safety is maintained in your installation, it is important that the following paragraphs are understood before attempting to apply power to your Steam‘N’Hold. If there is any doubt as to whether your supply receptacle is of the correct voltage, amperage, or is properly grounded, consult a qualified electrician or serviceman. FUENTE ELECTRICA El horno Steam’N’Hold de Accutemp esta diseñado, probado y fabricado para sobrepasar los estándares mas altos de seguridad establecidos por Underwriters Laboratories. Para mantenener estos estandares de seguridad durante el proceso de instalación, es de suma importancia que comprenda el contenido de los siguientes parrafos antes de encender el horno. Si algo no comprende o tiene dudas sobre algún aspecto, como por ejemplo, si tiene el voltage o amperaje correcto, o si está haciendo tierra, por favor consulte con un electricista o un técnico de servicio profesional, antes de seguir adelante. POWER REQUIREMENTS AC power requirements are listed on the data plate located on the left side access panel on all steamers. Steamers should never be connected to a circuit operating at more than 150 VAC to ground and should always be connected to an individual branch circuit. Make sure the voltage at the supply receptacle is within ±10% of the voltage listed on the steamer’s data plate. Connection to any other voltage may permanently damage your Steam‘N’Hold or cause premature component failure. Damage of this type is not covered under the product warranty. Each Steam‘N’Hold steamer comes equipped with a connected 6 foot power cord and plug, rated for the power requirements of each steamer. Damage caused by removal or modification of factory standard plug is not covered by product warranty. GROUNDING To reduce the risk of serious shock or death in the event of an electrical short circuit, this appliance must be grounded. The Steam‘N’Hold steamer is equipped with a cord having a grounding wire and plug, which must be plugged into a receptacle that is properly installed and grounded. Under no circumstance should the grounding plug be cut or bent to fit a receptacle other than the one specified. DRAIN CONNECTION While there are no AccuTemp-supplied drain components, some customers may desire to construct a drain connection. Any drain connections must include an air gap between the steamer and the drain to avoid creating a back siphon effect into the steamer cooking compartment. HOOD VENTILATION Some local building codes may require the steamer to be located under an exhaust hood. Please check local building code requirements before completing installation of the steamer. MP4001-0908 REQUISITOS ELECTRICOS Los requisitos de corriente alterna estan enlistados en la placa de información localizada en el lado izquierdo de cada horno. El horno jamás debe ser conectada a circuitos que operan con mas de 150 VAC a tierra y debe ser conectada a un circuito de rama individual. Asegúrese de que el voltage del suministro esté entre un margen de ±10% del voltage enlistado en la placa de información del horno. Conexión a otro voltage puede dañar el horno de manera permanente o causar que ciertos componentes empiezen a fallar de manera prematura. Daños de este tipo no son cubiertos por la garantía. Cada horno Steam n’hold viene equipado con un cordón eléctrico de seis pies que llena todos los requisitos de su unidad. Daños causados por modificaciónes o intercambio del cordón estandar de fábrica no estan cubiertos por la garantía. CONEXIÓN A TIERRA Para reducir el riesgo de electrocución o muerte debido a un corto circuito, este aparato debe descargar a tierra. El horno Steam’N’Hold viene equipado con un cordón con conexión a tierra y un enchufe a tierra que debe ser conectado a un contacto debidamente instalado y conectado a tierra. El enchufe no debe ser cortado, doblado, o alterado de ninguna manera para hacerlo entrar a un contacto diferente al que está especificado. DESAGÜE AccuTemp no incluye ningun tipo de conexión para desagüe. Si desea agregar su propia conexión de desagüe, asegurese de mantener un espacio entre el horno y la conexión para evitar que el sistema de desagüe succione hacia el compartimento de cocimiento del horno. VENTILACIÓN Ciertos códigos locales de construcción requieren que el horno sea colocado directamente debajo de la campana de un extractor. Favor de revisar los requisitos delineados por los códigos locales de construcción antes de instalar el horno. Steam’N’Hold Steamer • Horno de Vapor Steam’N’Hold 6 INITIAL START-UP ARRANQUE INICIAL INTRODUCTION The AccuTemp Steam‘N’Hold steamer takes the time-proven method of cooking with steam and adds the advantage of control. This is accomplished by reducing the internal atmospheric pressure of the Steam ‘N’ Hold cooking chamber, thereby lowering the temperature at which the water begins to boil. This allows the operator to control the temperature of the steam for cooking. Controlling the steam temperature gives the operator the ability to cook the food to the desired temperature without over-cooking, resulting in a more tender, juicier, nutritious product and with less shrinkage than was previously possible. Once the cooking time expires, the steamer automatically enters the “Hold” mode. In this mode, the thermostat regulates the internal temperature, but vacuum is released, returning the cooking chamber to normal atmospheric pressure. At this time, steam is no longer generated and the cooking chamber is held at the desired temperature at a relative humidity of 100%. This eliminates food from drying out by suppressing the evaporation of the products’ natural moisture. As a result, most food products can be held in a ready-to-serve state for several hours after cooking, with no appreciable loss in taste, appearance or consistency. DAILY PREPARATION FOR USE Preparing the Steam‘N’Hold for use each day requires very little time and effort: simply fill the steamer with water and preheat. CAUTION! Before filling the cooking chamber with water, ensure that the drain valve on the front of the Steam‘N’Hold is in the closed position. Ensure that a full size steam table pan or a 1/1 gastronome pan with a minimum depth of 4 inches, has been positioned on the pan rail brackets under the steamer. Steamer Drain Open Steamer Drain Closed At the beginning of each day, open the door of the Steam‘N’Hold and pour 3 gallons (11 liters) of ordinary tap water into the bottom of the cooking chamber. (Although the mineral content of the water is not that important, the Steam‘N’Hold should always be drained and cleaned at the end of each day to prevent food or mineral buildup.) MP4001-0908 INTRODUCCIÓN El horno Steam’N’Hold usa vapor (uno de los métodos mas eficientes para cocinar) y aparte tiene la ventaja de poder controlar su temperatura. Esto es posible al reducir la presión atmosférica interna (formando un vacío) de la cámara de cocimiento del Steam’N’Hold. Esto hace que baje la temperatura en la que el agua comienza a hervir, permitiendo al operador controlar la temperatura del vapor para cocinar. Al tener control sobre la temperatura del vapor, uno puede cocinar sus alimentos a la temperatura ideal, dando como resultando comida mas tierna, jugosa y nutritiva, sin correr el riesgo de que la comida se reseque o pierda consistencia y volumen. Una vez que el tiempo de cocimiento termina, el horno entra en un estado de “hold” o mantenimiento. En éste estado, el termostato regula la temperatura interna de la cámara de cocimiento, pero ésta pierde el vacío y regresa a una presión atmosférica regular. En este lapso de tiempo, el horno deja de generar vapor y la cámara se mantiene a la temperatura deseada, a una humedad relativa del 100%. Esto evita que se reseque la comida al no permitir que se evaporen sus jugos naturales. Como resultado, la mayoría de los alimentos pueden mantenerse por varias horas en un estado listo para servirse sin perder su sabor, apariencia, o consistencia. Preparación díaria para uso Preparar el Accutemp Steam’N’Hold para uso díario, requiere muy poco tiempo y esfuerzo: simplemente llene el horno con agua y pre-caliente. ¡Precaución! Antes de llenar la cámara de cocimiento con agua, asegúrese de que la válvula de drenaje en la parte frontal del Steam’N’Hold esté en la posición “closed” o cerrada. También asegúrese de colocar una cazuela de tamaño grande para vaporeras con 4 pulgadas de profundidad, o una cazuela tipo gastronome de tamaño 1/1, en los rieles diseñados para ésta, localizados por debajo del horno. Valvula de drenage abierta Valvula de drenage cerrada Al inicio de cada día, abra la puerta del Steam’N’Hold y vacíe tres galones (11 litros) de agua de la llave en la parte baja de la cámara de cocimiento. (A pesar de que el contenido mineral del agua es de poca importancia, el horno Steam’N’Hold debe ser drenado y limpiado al final de cada día para prevenir acumulación de minerales y restos de alimentos.) Steam’N’Hold Steamer • Horno de Vapor Steam’N’Hold 7 INITIAL START-UP (cont.) ARRANQUE INICIAL (cont.) Daily water usage will depend on several factors: cooking temperature, the products being cooked and the length of time the door is open. In most cases, 3 gallons (11 liters) of water will last several hours or more. However, the level of the water should be checked periodically to avoid running low and or out. If the Steam‘N’Hold does run out of water, the “Low Water” warning indicator light and buzzer will turn on. Should this occur, simply turn the Steam‘N’Hold off, refill it with water and restart the unit. If the shutdown occurred during cooking, the cycle will resume at the point it stopped. However, a time adjustment may be necessary, depending on the temperature of the water the steamer was re-filled with. La cantidad díaria de uso de agua depende de diferentes factores: la temperatura en la que cocina, el tipo de comida que esta cocinando y el tiempo que permanezca abierta la puerta. En la mayoría de los casos, 3 galones (11 litros) de agua son suficientes para varias horas de uso o mas. Sin embargo, el nivel del agua debe ser revisado periódicamente para evitar que éste baje demasiado. Si así sucede, se prenderá una luz que dice “low water” y sonará la alarma. En dado caso, apague el horno, llénelo de agua y vuélvalo a encender. Al encenderlo, el ciclo de cocimiento continuará en el mismo punto en el que se paró. Sin embargo, dependiendo de la temperatura del agua nueva, un pequeño ajuste de tiempo podría ser necesario. CAUTION! Do not use the low water warning indicator light and buzzer as substitutes for checking the water level in the cooking chamber periodically. Failure to properly maintain the water level may result in improperly cooked product and over time may result in a premature service issue that may not be covered under warranty. ¡ADVERTENCIA! A pesar de que la unidad tiene una alarma y luz que indican el nivel bajo de agua, es recomendable que el nivel no llegue a ese punto. No se atenga a los indicadores; revise los niveles de agua de la cámara de cocimiento periódicamente. El no mantener los niveles adecuados de agua podría causar el cocimiento insuficiente de los alimentos y causar fallas prematuras de la unidad, que no serán cubiertas por la garantía. AUTO-FILL MODELS The steamer must be connected to the facility water supply via an appliance hose, preferably a stainless steel braided hose with a ¾” garden hose type connection, from a water spigot or from a nearby sink faucet. First time fill (the steamer water reservoir is empty of water): 1. With the water supply turned on, press the “ON” button. The Steamer will power up with the pump operating. 2. Both water valves will be turned on. 3. A relay will bypass the low water level sensing to allow for first time filling of the reservoir. 4. The thermostat will be turned off for the first fill to prevent damage to the heater elements. 5. Water will rise to the low level probe and reset the low level circuit of the water control board. 6. The water will continue to rise until it contacts the High Level Probe. 7. A five second delay is initiated when the water touches the High-level probe to allow for wave action inside the water reservoir. Wave action would cause a lower than desired amount of water to be injected in the reservoir by tripping the control too soon if there were no sequence to ignore the wave action inside the reservoir. 8. When the five seconds has been satisfied the water level control board shuts off the water level control relay and the by pass relay. 9. The heater is turned on and normal operation begins. MODELOS DE LLENADO AUTOMÁTICO El horno debe ser conectado al suministro de agua de su local, por medio de una manguera especial para electrodomesticos. De preferencia, use una manguera corrugada de acero inoxidable con conexión de ¾“ conectada a un grifo o a una llave de lavatrastes. Llenado de primera vez (el recipiente de agua del horno esta vacío): 1. Con el suministro de agua abierto, presione el botón de encendido (“on”). El horno se encenderá mientras la bomba esta en operación. 2. Ambas válvulas estarán abiertas. 3. Un relé desactivará el sensor de nivel bajo de agua para permitir llenar el recipiente por primera vez. 4. Para evitar daño a los sistemas de calentamiento, el termostato estará apagado la primera vez que llene el horno. 5. El nivel del agua subirá hasta el sensor de nivel bajo y reiniciará el circuito de nivel bajo del panel de control de agua. 6. El nivel de agua seguirá subiendo hasta que haga contacto con el sensor de nivel alto. 7. Se iniciará un retraso de cinco segundos en cuanto el nivel del agua haga contacto con el sensor de nivel alto, para tomar en cuenta la posibilidad de que se formen olas dentro del recipiente de agua. Sin este lapso de tiempo, las olas podrían activar el control de nivel demasiado temprano y causar que el recipiente no reciba suficiente agua. 8. Cuando hayan trasncurrido los cinco segundos, el panel de control de nivel de agua apaga el relé de control de nivel de agua y el relé de doble paso (bypass) 9. El calentador se enciende y comienza la operación normal. MP4001-0908 Steam’N’Hold Steamer • Horno de Vapor Steam’N’Hold 8 INITIAL START-UP (cont.) ARRANQUE INICIAL (cont.) PREHEATING To maximize efficiency, while minimizing cook time, it is always recommended to preheat the cooking chamber prior to cooking. S6 Model: With the water reservoir full, close the door, set the thermostat to the desired cooking temperature, position the toggle switch to the “Thermostat” mode [160°F (71°C) – 200°F (93°C)] or the “Fast Cook” mode (212°F/100°C), set timer to 15 minutes and press the “ON” button. When the pre-heat cycle is complete, the steamer will automatically switch to the “Hold” mode, at which time the Steam‘N’Hold is ready for use. Please note, when steamer is in “Hold” mode, the thermostat setting will regulate the cooking chamber temperature even if the steamer is set in the “Fast Cook” mode. S3 Model: With the water reservoir full, close the door, set the thermostat to the desired cooking temperature, set timer to 15 minutes, turn the rotary selector switch to “ON” and then select either “Cook” [160°F (71°C) – 200°F (93°C)] or “Fast Cook” (212°F/100°C). When cycle is complete, the steamer will automatically switch to “Hold” mode at which time the Steam‘N’Hold is ready for use. Please note, when steamer is in “Hold” mode, the thermostat setting will regulate the cooking chamber temperature even if the steamer is set in the “Fast Cook” mode. MP4001-0908 Pre calentado Para maximizar la eficiencia y a la vez minimizar el tiempo de cocimiento, es recomendable que siempre pre caliente la cámara de cocimiento antes de cocinar. Modelo S6: Cuando el recipiente de agua esté lleno, cierre la puerta y ponga el termostato a la temperatura deseada. Ahora ponga el interruptor en la función de “thermostat” ([160°F (71°C) – 200°F (93°C)] o en “Fast Cook” (212°F/100°C), ajuste el temporizador a 15 minutos y presione el botón de encendido que dice “on”. Cuando termine el ciclo de pre calentado, el horno cambiará automáticamente a la función de “Hold.” El horno Steam’N’Hold esta listo para usar. Note que cuando el horno esta en función de “Hold,” la temperatura que marca el termostato regulara la temperatura de la cámara de cocimiento aunque el horno este en función de “Fast Cook” (212°F/100°C). Modelo S3: Cuando el recipiente de agua este lleno, cierre la puerta, ponga el termostato a la temperatura deseada y ajuste el temporizador a 15 minutos. Ahora gire el selector a posición de “on” y seleccione la función “Cook” [160°F (71°C) – 200°F (93°C)] o “Fast Cook” (212°F/100°C). Cuando termine el ciclo, el horno cambiará automáticamente a función de “Hold” y estará listo para usarse. Note que cuando el horno está en función de “Hold,” la temperatura que marca el termostato regulará la temperatura de la cámara de cocimiento aunque el horno esté en función de “Fast Cook” (212°F/100°C). Steam’N’Hold Steamer • Horno de Vapor Steam’N’Hold 9 OPERATION—COOKING MANEJO— COCIMIENTO Low Temperature Cooking [160°F (71°C) – 200°F (93°C)] Did you know that with the AccuTemp Steam’N’Hold steamer, you could cook and hold food all at the same time? With its patented vacuum cooking technology, the Steam‘N’Hold offers you the versatility of cooking and holding different types of food product all at the same time when cooking with low temperature steam. S6 Model: To begin low temperature cooking, position the toggle switch into “Thermostat” mode, set the thermostat to the desired cooking temperature, set the timer to the desired cooking time and press the “ON” button, if the steamer has to be started. CAUTION: Maximum recommended food load for the S6 model is 100 lbs (45Kg). S3 Model: To begin low temperature cooking, set the thermostat to the desired cooking temperature, set the timer to the desired cooking time and turn the selector switch to “ON”, if the steamer has to be started, and then select “Cook”. CAUTION: Maximum recommended food load for the S3 model is 50 lbs (23Kg). Try using perforated pans for the best results in cooking! By allowing steam to penetrate from all directions, perforated pans will maximize heat transfer and give you the shortest cooking times. High Temperature Cooking (212°F/100°C) S6 Model: To begin high temperature cooking, position the toggle switch to “Fast Cook”, set the timer to the desired cooking time and press the “ON” button, if the steamer has to be started. S3 Model: To begin high temperature cooking, set the timer to desired cooking time, and turn the selector switch to “ON”, if the steamer has to be started, and then select “Fast Cook”. Continuous Cook This feature gives you the flexibility of cooking independently of the cooking timer and can be utilized in either low temperature or high temperature cooking. S6 & S3 Model: Follow either low temperature or high temperature cooking guidelines but instead of selecting a time period, rotate the timer knob clockwise until the white indicator on the timer knob lines up with the yellow “Continuous” position. Note: On S6 units with a serial number less than 22627, rotate the timer knob clockwise until the timer knob rests against the timer “stop pin.” MP4001-0908 Cocimiento a temperatura baja 160°F (71°C)–200°F (93°C)] ¿Sabía usted que con el horno Steam’N’Hold, puede cocinar y mantener comida al mismo tiempo? Con su tecnología patentada al alto vacío, el horno Steam’N’Hold es muy versatil y le da la oportunidad de cocinar y mantener diferentes tipos de comida mientras cocina con vapor de baja temperatura. Modelo S6: Para comenzar a cocinar con temperatura baja, ponga el interruptor de palanca en función de “Thermostat,” ajuste el termostato a la temperatura deseada y el temporizador al tiempo deseado. Ahora presione el botón de encendidio (“on”) para encender el horno. Advertencia: el peso máximo de comida para el modelo S6 es de 100 lbs (45Kg). Modelo S3: Para comenzar a cocinar con temperatura baja ajuste el termostato a la temperatura deseada y el temporizador al tiempo deseado. Presione el botón de encendidio (“on”) para encender el horno y seleccione la función “Cook.” Advertencia: el peso máximo de comida para el modelo S3 es de 50 lbs (23Kg). Es recomendable usar cazuelas perforadas tipo colador para obtener los mejores resultados al cocinar. Las cazuelas perforadas tipo colador permiten que el vapor penetre la comida por todos lados y esto maximiza la transferencia de calor y mininimiza el tiempo de cocimiento. Cocimiento a temperaturas altas (212°F/100°C) Modelo S6: Para comenzar a cocinar con temperaturas altas, ponga el interruptor de palanca en función de “Fast Cook,” ajuste el temporizador al tiempo deseado y presione el botón de encendido (“on”) para encender el horno. Modelo S3: Para comenzar a cocinar con temperaturas altas, ajuste el temporizador al tiempo deseado, presione el botón de encendidio (“on”) para encender el horno y seleccione “Fast Cook.” COCIMIENTO CONTINUO (CONTINUOUS COOK) Esta función le da flexibilidad de cocinar independiente del temporizador y puede utilizarse para cocimiento a temperaturas altas o bajas. Modelo S6 y S3: Siga las reglas de cocinar a temperaturas bajas o temperaturas altas pero en lugar de ajustar el temporizador de tiempo, gire la perilla de reloj a la derecha hasta que el indicador blanco en la perilla de reloj forme fila con la posición amarilla de “Continuous”. Note: En unidades de modelos S6 con numeros de serie menores que 22627, gire la perilla de reloj a la derecha hasta que descanse sobre el alfiler de pared o “stop pin.” Steam’N’Hold Steamer • Horno de Vapor Steam’N’Hold 10 OPERATION—COOKING (cont.) Checking Food While Cooking To maximize efficiency, while minimizing cooking time, it is always recommended to allow food to finish it’s cook cycle before opening the cooking chamber door. However, if the door is opened during a cooking cycle, a time adjustment may be necessary, depending on how long and often the chamber door was opened. S6 Model: Press the “OFF” button, stand back while slowly opening the door, allowing the cooking chamber to vent its steam. Once steam has vented, carefully check the food, close the door and press the “ON” button to continue cooking. S3 Model: Press the “OFF” button, stand back while slowly opening the door, allowing the cooking chamber to vent its steam. Once steam has vented, carefully check the food, close the door and turn the selector switch to “ON” and “Cook” or “Fast Cook” to continue cooking. HOLDING The Steam‘N’Hold will automatically enter the “Hold” mode once timer cooking time has expired, where the buzzer will sound, alerting the operator that the food is ready. A slight counterclockwise manual adjustment to the “Hold” position on the timer knob is needed to turn off the buzzer. The “Hold” temperature is determined by the thermostat setting. It is recommended to preheat the cooking chamber to the desired holding temperature if the cooking chamber is in a cool state. S6 Model: To hold food independently of cooking, rotate the timer counter clockwise until the white indicator on the timer knob lines up with the yellow “Hold” position. Select desired the “Hold” temperature and press the “ON” button. S3 Model: To hold food independently of cooking, rotate the timer counter clockwise until the white indicator on the timer knob lines up with the yellow “Hold” position. Select desired the “Hold” temperature and turn the selector switch to “ON” and “Cook” or “Fast Cook”. Note: On S6 units with a serial number less than 22627, rotate the timer knob clockwise until the timer knob rests against the timer “stop pin”. MANEJO— COCIMIENTO (cont.) Revisión de comida mientras cocina Para maximizar la eficiencia y a la vez minimizar el tiempo de cocimiento, es recommendable que permita que la comida termine su ciclo de cocimiento antes de abrir la puerta de la cámara de cocimiento. Si la puerta se abre durante el ciclo de cocimiento, un ajuste de tiempo será necesario. Ese ajuste dependerá de la cantidad de tiempo que se mantuvo la puerta abierta. Modelo S6: Presione el botón de apagado (“Off”), mantenga su distancia mientras abre la puerta lentamente y permita que salga el vapor. Una vez que salga todo el vapor, revise la comida con cuidado, cierre la puerta y si nececita mas tiempo, presione el botón de encendidio (“On”). Modelo S3: Presione el botón de apagado (“Off”), mantenga su distancia mientras abre la puerta lentamente y permita que salga el vapor. Una vez que salga todo el vapor, revise la comida con cuidado, cierre la puerta y si necesita mas tiempo, ajuste el selector a “On” y “Cook” o “Fast Cook.” MANTENIENDO LA COMIDA Una vez terminado el ciclo de cocimiento, el Steam’N’Hold automáticamente entra en la función de “hold,” o mantenimiento y sonará la alarma avisando que la comida está lista. Para apagar la alarma, necesita girar levemente el temporizador hacia la izquierda y ponerlo en la posición de “hold.” La temperatura de mantenimiento será determinada por el termostato. Es recomendable que pre caliente la cámara de cocimiento a la temperatura en que la quiere mantener, si es que ésta se encuentra en un estado frio. Modelo S6: Para mantener comida a una temperatura estable sin cocinar, gire el temporizador hacia la derecha hasta que el indicador blanco de la perilla esté alineado con la posición amarilla que dice “Hold.” Seleccione la temperatura deseada y presione el botón de encendido (“ON”). Modelo S3: Para mantener comida a una temperatura estable sin cocinar, gire el temporizador hacia la derecha hasta que el indicador blanco de la perilla esté alineado con la posición amarilla que dice “Hold.” Seleccione la temperatura deseada y ajuste el interruptor a posición de encendido (“ON”) y “ Cook” o “Fast Cook.” Atención: En cada unidad S6 con número de serie menor que 22627, tendrá que girar el temporizador hasta que la perilla tope contra el pasador de paro del temporizador. MP4001-0908 Steam’N’Hold Steamer • Horno de Vapor Steam’N’Hold 11 DAILY & WEEKLY CLEANING LIMPIEZA DÍARIA Y SEMANAL DAILY CLEANING At the end of each day, the Steam‘N’Hold should be drained and cleaned. Turn the steamer off. 1. Allow the cooking chamber water to cool. Ensure that a full size steam table pan or a 1/1 gastronome pan with a minimum depth of 4 inches (101 mm) has been placed beneath the Steam‘N’Hold. 2. Use caution while opening the drain valve. Empty the water into the drain pan and discard the water. 3. Dry the inside of the cooking chamber, including the two low water sensors, with a cloth. Failure to follow this cleaning procedure can result in inefficient cooking and false low water readings with the low water sensors that will shut the steamer down even though there may be plenty of water in the reservoir. Water Sensors 4. Do not use a water jet to clean steamer. 5. Leave the door open to allow the cooking chamber to dry overnight. WEEKLY CLEANING Once a week, the Steam‘N’Hold should be drained and cleaned more thoroughly than the daily cleaning. 1. Fill the cooking chamber with 2 gallons (7.6 liters) of water and one cup (8 ounces or 0.24 liters) of white vinegar. 2. Turn the Steamer on and operate for 30 minutes at the maximum temperature in the THERMOSTAT mode (200ºF/93ºC) or set the Switch to the FAST COOK position. 3. Allow the water and vinegar mixture to cool. Ensure that a full size steam table pan or a 1/1 gastronome pan with a minimum depth of 4 inches (101 mm) has been placed beneath the Steam‘N’Hold. Use caution while opening the drain valve. Empty the water into the drain pan and discard the water. 4. Rinse the cooking chamber thoroughly with water. Empty the water and vinegar mixture into the drain pan and discard the mixture. 5. Remove the pan rails. Dry the inside of the cooking chamber, the two low water sensors and the pan rails with a cloth. Failure to follow these cleaning procedures can result in inefficient cooking and false low water readings with the low water sensors that will shut the steamer down even though there may be plenty of water in the reservoir. 6. Leave the door open to allow the cooking chamber to dry overnight. MP4001-0908 LIMPIEZA DIARIA Al final de cada día, el horno Steam’N’Hold debe ser drenada y limpiada. Apague el horno. 1. Permita que se enfríe el agua de la cámara de cocimiento. Asegúrese de colocar una cazuela de tamaño completo o charola de tipo gastronome, tamaño 1/1 con profundidad mínima de 4 pulgadas (101 mm) por debajo del horno. 2. Tenga cuidado al abrir la valvula de drenaje. Colecte el agua en la charola y descártela. 3. Seque la parte interior de la cámara de cocimiento incluyendo los dos sensores de nivel de agua, con un trapo. Al no hacer esto corre el riesgo de que el horno no cocine bien o que los sensores marquen niveles falsos demasiado bajos que causarán que se apague el horno aúnque los niveles sean los adecuados. Sensores de Agua 4. Jamás use un jet de agua o agua a presión para limpiar el horno. 5. Mantenga la puerte abierta por las noches para permitir que se seque bien la cámara de cocimiento. LIMPIEZA SEMANAL Una vez por semana, el horno Steam’N’Hold se debe drenar y limpiar mas a fondo de como se hace en la limpieza díaria. 1. Llene la cámara de cocimiento con 2 galones (7.6 litros) de agua y una taza (8 oz. o 0.24 litros) de vinagre blanco. 2. Prenda el horno y úsela por 30 minutos a la temperatura máxima en función “THERMOSTAT” (200ºF/93ºC) o ajuste el interruptor a la posición de “FAST COOK.” 3. Permita que la mezcla de agua y vinagre se enfríe. Coloque una cazuela de tamaño completo o una cazuela de tipo gastronome, tamaño 1/1 de por lo menos 4 pulgadas de profundidad (101mm) por debajo del horno. Tenga cuidado al abrir la válvula de drenaje. Vacíe el agua en la cazuela y descártela. 4. Enjuague bien la cámara de cocimiento con agua. Vacíe la mezcla de agua y vinagre en la charola y descártela. 5. Remueva los rieles de la cazuela. Seque el interior de la cámara de cocimiento, los sensores de nivel de agua y los rieles de la cazuela con un trapo. Al no hacer ésto, corre el riesgo de que el horno no cocine bien o que los sensores marquen niveles falsos demasiado bajos que causarán que se apague el horno aunque los niveles sean los adecuados. 6. Mantenga la puerta abierta durante la noche, para permitir que la cámara de cocimiento se seque por completo. Steam’N’Hold Steamer • Horno de Vapor Steam’N’Hold 12 SERVICE SERVICIO WARNING Service must be performed only by AccuTemp Products, Inc. authorized service personnel. Service performed by unauthorized personnel will void all warranties. Call AccuTemp Products, Inc. Technical Service Hotline at 1-800-480-0415 or +1-260-469-3040 for the nearest service agent. Both high and low voltages are present inside this equipment, even when turned off. Remove the equipment from all power sources prior to servicing. To prevent electrical shock, do not open covers. There are no user serviceable parts inside. IMPORTANT SERVICE INFORMATION An AccuTemp Products technical and customer support technician is available Monday thru Sunday, 7:00am to 7:00pm EST. email: [email protected] (800) 480-0415 1 (260) 469-3040 ADVERTENCIA Todo tipo de servicio y mantenimiento debe ser hecho solamente por personal de servicio autorizados por Accutemp. Servicio hecho por personas no autorizadas invalidarán las garantías de Accutemp. Llame a la línea de servicio técnico de Accutemp Products, Inc al 1-800-480-0415 o al +1-260-469-3040 para localizar un agente autorizado de servicio en su área. Esta unidad contiene voltages altos y bajos, aún mientras esté apagada. Desconecte la unidad de toda fuente de electricidad antes de darle servicio. Esta unidad no contiene piezas reparables por el usuario. Para prevenir descarga o choque eléctrico, no intente abrir la unidad. INFORMACIÓN IMPORTANTE DE SERVICIO Empleados de soporte técnico y atención al cliente de AccuTemp Products están disponibles para ayudarle de Lunes a Domingo, 7:00am a 7:00pm tiempo este. email: [email protected] (800) 480-0415 1 (260) 469-3040 GENERAL SERVICE INFORMATION INFORMACIÓN GENERAL DE SERVICIO Conventional steamers require scheduled service (such as boiler maintenance) at relatively frequent intervals. The Steam‘N’Hold steamer however, requires no such processes/service due to its unique design. Les hornos convencionales requieren de servicio programado (tal como el mantenimiento de la caldera) a intervalos frecuentes. Sin embargo, el horno Steam’N’Hold no requiere de estos requisistos debido a su diseño único. Because the Steam‘N’Hold has been engineered for the highest reliability, most problems that arise can be attributed to minor oversights, such an incorrect temperature or failure to close door securely. These types of situations are addressed in the following paragraphs. Ya que ha sido diseñado para el máximo rendimiento, la mayoría de los problemas que se presentan son atribuidos a errores de manejo, tales como poner la temperatura incorrecta o no cerrar la puerta debidamente. Este tipo de situaciones serán abordadas en el siguiente párrafo To ensure continued safe and reliable operation of your Steam‘N’Hold, only Factory Authorized Service Personal should perform any component replacement or major repair. Please contact the AccuTemp Technical Service Department for help at 800-480-0415 or +1 (260) 469-3040 or email [email protected] if the measures described below fail to correct your problem. MP4001-0908 Para garantizar la operación segura y el mas alto rendimiento de su Steam’N’Hold, solamente personal de servicio autorizado por Accutemp debe remplazar o reparar la unidad. Favor de contactar al departamente de servico técnico de AccuTemp al número 800-480-0415 o +1 (260) 469-3040 o email service@ accutemp.net en caso de que las siguientes soluciones no resuelvan su problema. Steam’N’Hold Steamer • Horno de Vapor Steam’N’Hold 13 BASIC TROUBLESHOOTING Steamer Will Not Turn On • Make sure the unit is plugged in and filled with water. Steamer will not operate without water. • Check the facility circuit breaker (or fuses) supplying the unit. • Call AccuTemp Products Technical Service Toll Free at 1-800-480-0415 or at +1 (260) 469-3040. Steamer Displays “Low-Water” • Check level of water in cooking chamber and add accordingly. • If cooking chamber is full (3 gallons/11 liters), water sensors may have a film across them. Clean sensors by draining unit of water and wiping sensors off with a towel and mild detergent and then rinse thoroughly. • Call AccuTemp Products Technical Service Toll Free at 1-800-480-0415 or at +1 (260) 469-3040. Food Is Over Cooked • Check that the proper cook temperature is being used. (Excess time will cause over-cooking only when the temperature setting is moderately higher than the desired final product temperature). • Call AccuTemp Products Technical Service Toll Free at 1-800-480-0415 or at +1 (260) 469-3040. Food Is Under Cooked • Make sure you are using adequate time and temperature settings. Extra time may be required if pans are covered or if product is left in plastic bags or similar packaging. • Try distributing the product more evenly within the steamer and or pans, if possible. • Make sure the water drain valve on the front of the Steam‘N’Hold is tightly closed. The steamer may appear to be cooking normally if the valve is slightly open but efficiency may be compromised. • Check the door seal for food debris. Food debris on the face of the door seal or under flap may cause steamer to appear to be cooking normally but efficiency may be compromised. Nicks or cuts in the door seal may also cause inefficient cooking. • Call AccuTemp Products Technical Service Toll Free at 1-800-480-0415 or at +1 (260) 469-3040. Low Vacuum Gauge Readings • The higher the temperature setting, the lower the vacuum gauge reading. When operating at 212° (Fast Cook), the gauge will read near or at zero. • Verify that the door has been closed securely. • Check to make sure there is no food debris on the face of the door seal or behind its flap. Also check the door seal for damage such as nicks or cuts. • Call AccuTemp Products Technical Service Toll Free at 1-800-480-0415 or at +1 (260) 469-3040. MP4001-0908 SOLUCIONES A PROBLEMAS BÁSICOS El Horno No Prende • Asegúrese de que la unidad esté conectada y llena de agua. El horno no operara sin agua. • Revise el interruptor de corriente (o los fusibles) de su edificio. • Llame al departamente de servico técnico de AccuTemp al número 1-800-480-0415 o +1 (260) 469-3040. El Horno Muestra Nivel Bajo de Agua o “Low- Water.” • Revise el nivel del agua de la cámara de cocimiento y agregue mas agua si ésta lo requiere. • Si la cámara de cocimiento está llena (3 galones/11 litros), los sensores probablemente están sucios. Drene el agua y limpie los sensores con un trapo y detergente suave y enjuague bien. • Llame al departamente de servico técnico de AccuTemp al número 1-800-480-0415 o +1 (260) 469-3040. La Comida Sale Sobrecocida • Asegúrese que esté usando la temperatura adecuada. El exceso de tiempo puede ocasionar el sobrecocimiento solamente cuando la temperatura haya sido ajustada moderadamente mas elevada que la temperatura del producto que se desea tener al final. • Llame al departamente de servico técnico de AccuTemp al número 1-800-480-0415 o +1 (260) 469-3040. La Comida Sale Cruda • Asegúrese que esté indicando la temperatura y el tiempo adecuado. Su comida requerirá mas tiempo si las cazuelas están cubiertas o si la comida está empaquetada o dentro de bolsas de plástico • Coloque la comida de manera que quede igualmente distribuída en las charolas dentro del horno. • Asegúrese que la válvula de drenaje colocada al frente del Steam’N’Hold esté completamente cerrada. El horno puede aparentar estar funciónando bien con la válvula un poco abierta. Pero la eficiencia de cocimiento será perjudicada. • Revise que el sello de la puerta esté limpio y libre de restos de alimentos. Suciedad en la superficie del sello de la puerta o en la parte posterior de la pestaña puede disminuir la eficiencia del horno, aunque aparente estar funcionando bien. Grietas en el sello también pueden disminuir la eficiencia de su unidad. • Llame al departamente de servico técnico de AccuTemp al número 1-800-480-0415 o +1 (260) 469-3040. El Nivel Del “Vaccum Gauge” o Medidor de Alto Vacio está Bajo. • Entre mas alta la temperatura de cocimiento, mas bajo marcará el medidor del alto vacio. Cuando esté operando en función “fast cook” a 212° Farenheit, el medidor de vacío marcara 0 o cerca de 0. • Verifique que la puerta esté bien cerrada. • Verifique que no haya restos de alimentos en la superficie anterior del sello de la puerta o en la parte posterior de la pestaña del sello. También revise que el sello no tenga grietas. • Asegúrese que todas las charolas estén bien insertadas dentro de la vaporera. • Llame al departamente de servico técnico de AccuTemp al número 1-800-480-0415 o +1 (260) 469-3040. Steam’N’Hold Steamer • Horno de Vapor Steam’N’Hold 14 BASIC TROUBLESHOOTING (cont.) SOLUCIONES A PROBLEMAS BÁSICOS (cont.) Unit Will Not Turn Off • This symptom, which is extremely rare, indicates a serious control malfunction. • Turn off the steamer’s electrical supply at the source. • Call AccuTemp Products Technical Service Toll Free at 1-800-480-0415 or at +1 (260) 469-3040. La Unidad No Se Apaga. • Este síntoma es extremadamente raro e indica un serio problema de control. • Corte el suministro de electictricidad desde su fuente. • Llame al departamente de servico técnico de AccuTemp al número 1-800-480-0415 (gratis) o +1 (260) 469-3040. AUTO-FILL UNITS ONLY Failure Events and Safety Control MODELOS DE LLENADO AUTOMATICO En Caso de Fallas y Control de Seguridad The Steamer Does Not Turn On. • Check to ensure the steamer is plugged into the correct receptacle. • Check the branch circuit breaker to insure it is in the “ON” position. • The mechanical over flow level control has been removed. The steamer will not start up until the mechanical level control is reinstalled. • Call AccuTemp Products Technical Service Toll Free at 1-800-480-0415 or at +1 (260) 469-3040. El Horno No Prende. • Asegúrese de que el horno esté enchufado a un contacto adecuado. • Asegúrese que el interruptor electrico este en posicion de “on” o encendido. • El control mecánico contra derrames ha sido removido. El horno no prenderá hasta que el control mecánico sea reinstalado. • Llame al departamente de servico técnico de AccuTemp al número 1-800-480-0415 (gratis) o +1 (260) 469-3040. No/Low Water Pressure or No/Low Flow of Water into the Reservoir. • Check the supply water pressure • Check for dirty inlet screen. • Check for dirty probes. • Call AccuTemp Products Technical Service Toll Free at 1-800-480-0415 or at +1 (260) 469-3040. No Hay Suficiente Presión de Agua o No Hay Suficiente Flujo de Agua Hacia el Receptáculo. • Revise la presión del suministro de agua. • La malla o filtro de entrada podría estar sucia. • Los sensosres podrían estar sucios. • Llame al departamente de servico técnico de AccuTemp al número 1-800-480-0415 (gratis) o +1 (260) 469-3040. The Steamer Shuts Down During Operation. • Check conditions listed above for no/low water pressure or no/low flow of water into the reservoir. • If the water level control valve is stuck “on”, the mechanical overflow level control will shut down the whole Steamer and the water supply by turning off the master water control valve. • If the water level sensing control board becomes faulty, the mechanical over flow level control will shut down the Steamer. • Call AccuTemp Products Technical Service Toll Free at 1-800-480-0415 or at +1 (260) 469-3040. El Horno Se Apaga Mientras está en Operación • Tome en cuenta las condiciones previamente mencionadas sobre la falta de presión de agua o falta de flujo de agua hacia el receptáculo. • Si la válvula de control de nivel de agua está atorada en posición de encendido (“on”), el control mecanico contra derrames apagará el horno y cerrará la válvula maestra de control de agua para cortar el suministro de agua. • Si el centro de control de nivel de agua está fallando, el control mecánico contra derrames apagara el horno. • Llame al departamente de servico técnico de AccuTemp al número 1-800-480-0415 (gratis) o +1 (260) 469-3040. 1 IMPORTANT Never leave a de-liming agent in contact with the stainless steel longer than 10 minutes before rinsing the cooking chamber thoroughly with water. Longer contact can cause corrosion. 1 Jamás deje agentes sarricidas en contacto con el acero inoxidable por mas de 10 minutos antes de enjuagar bien la cámara de cocimiento con agua. Contacto por mas de 10 minutos puede causar corrosion. 2 2 3 3 4 4 Do not use abrasive materials, such as wire brushes, metal scouring pads or scrapers to clean the cooking chamber bottom. Service must be performed only by AccuTemp Products, Inc. authorized service personnel. Service performed by authorized personnel will void all warranties. Any in-field modification made without written authorization from AccuTemp will void the warranty. MP4001-0908 IMPORTANTE Jamas use materiales abrasivos como cepillos de alambre, estropajos de fierro o raspadores ásperos, para limpiar la parte inferior de la cámara de cocimiento. El servicio a la unidad debe ser dado solamente por personal autorizado por Accutmep Products, Inc. Servicio dado por personas no autorizadas anularán la garantía. Cualquier modificación hecha sin previa autorización escrita de Accutemp anulará la garantía. Steam’N’Hold Steamer • Horno de Vapor Steam’N’Hold 15 WARRANTY GARANTÍA LIMITED WARRANTY One Year - Parts & Labor - U.S. & Canada Only GARANTÍA LIMITADA Un Año – Piezas y mano de obra Solamente E.E.U.U & Canada AccuTemp Products, Inc. (AccuTemp) warrants that your AccuTemp equipment will be free of defects in material and workmanship under normal use for a period of twelve (12) months from installation or fifteen (15) months from date of shipment from AccuTemp, whichever date first occurs (the Warranty Period). Registration of AccuTemp equipment is required at the time of installation. Damage to AccuTemp equipment that occurs during shipment must be reported to the carrier, and is not covered under this warranty. The reporting of any damage during shipment is the sole responsibility of the commercial purchaser/user of such AccuTemp equipment. AccuTemp provides an active service department, which should be contacted and advised of service issues, regardless of the warranty period. During the warranty period, AccuTemp agrees to repair or replace, at its option, F.O.B. factory, any part which proves to be defective due to defects in material or workmanship, provided the equipment has not been altered in any way and has been properly installed, maintained, and operated in accordance with the instructions in the AccuTemp Owners Manual. During the warranty period, AccuTemp also agrees to pay for any factory authorized equipment service agency (within the continental United States and Canada) for reasonable labor required to repair or replace, at our option, F.O.B. factory, any part which proves to be defective due to defects in materials or workmanship, provided the service agency has received advance approval from AccuTemp factory service to perform the repair or replacement. This warranty includes travel time not to exceed two hours and mileage not to exceed 50 miles (100 miles round trip), but does not include post start-up assistance or training, tightening of loose fittings or external electrical connections, minor adjustments, maintenance, or cleaning. AccuTemp will not reimburse the expense of labor required to replace parts after the expiration of the warranty period. Proper installation is the responsibility of the dealer, owner-user, or installing contractor and is not covered by this warranty. Improper installation can affect your warranty. Installation is the responsibility of the Dealer, Owner/User or the Installation Contractor. See the Installation section of the Owners Manual. While AccuTemp products are built to comply with applicable standards for manufacturers, including Underwriters Laboratories (UL) and National Sanitation Foundation (NSF), it is the responsibility of the owner and the installer to comply with any applicable local codes that may exist. AccuTemp makes no other warranties or guarantees, whether expressed or implied, including any warranties of performance, merchantability, or fitness for any particular purpose. AccuTemp’s liability on any claim of any kind, including negligence, with respect to the goods and services covered hereunder, shall in no case exceed the price of the goods and services, or parts thereof, which gives rise to the claim. In no event shall AccuTemp be liable for special, incidental, or consequential damages, or damages in the nature of penalties. This constitutes the entire warranty, which supersedes and excludes all other warranties, whether written, oral, or implied. AccuTemp Products, Inc. (AccuTemp) garantiza que su equipo AccuTemp está libre de defectos tanto en su terminado como en los materiales utilizados, bajo condiciones de uso normal de un período de doce (12) meses a partir de la fecha de instalación o quince (15) meses a partir de la fecha de envío de AccuTemp, cualquiera de las feches que ocurra primero (el período de garantía). Se requiere registrar el equipo de AccuTemp a la hora de realizare la instalacion. Daño al equipo de AccuTemp que ocurra durante el envío debe ser reportado a la compañía de envío y no está cubierto bajo esta garantía. Reportar daños ocurridos durante el envío es la responsabilidad exclusiva del cliente comercial/usuario de tal equipo de AccuTemp. AccuTemp provee un departamento activo de servicio que debe ser contactado y avisado de asuntos de servicio, sin importar si el equipo esta bajo garantía o no. Durante el período de garantía, AccuTemp se compromete a reparar o a nuestra opcion, (F.O.B factory) remplazar cualquier pieza que demuestre estar defectuosa debido a defectos materiales o de terminado/fábricación, en el entendido de que el equipo no ha sido alterado/cambiado de ninguna manera y ha sido instalado, mantenido y operado apropiadamente de acuerdo con las instrucciones delineadas en el manual de usuario de AccuTemp. Durante el período de garantía, Accutemp también se compromete a pagar por servicios hechos por cualquier agencia autorizada de servicio de equipo de fábrica (dentro de los EEUU continentales y Canada) por cualquier trabajo razonable requerido para reparar o a nuestra opción, reemplazar (F.O.B factory) cualquier pieza que demuestre estar defectuosa debido a defectos materiales o de terminado/fábricación, con el entendido de que la agencia de servicio ha sido aprobada de antemano por AccuTemp Factory Service para efectuar el remplazo o la reparación. Esta garantía incluye gastos de tiempo de viaje sin exceder dos horas y millaje que no exceda 50 millas (100 millas ida y vuelta), pero no incluye tiempo de asistencia después de la reparación, para iniciar la maquinaria, entrenamiento, ajustado de piezas sueltas o conexiones eléctricas externas, ajustes menores, mantenimiento o limpieza. AccuTemp no reembolsará gastos necesarios para reemplazar piezas fuera de la fecha de vencimiento del período de la garantía. La instalacion correcta es responsabilidad del distribuidor, dueño/ usuario o instalador contratista y no es cubierta por ésta garantía. Una instalación inadecuada invalidará la garantía. La instalación es la responibilidad del distribuidor, dueño/usuario o instalador contratista. Lea la seccion de instalación en el manual de usuario. A pesar de que todos los productos de AccuTemp están fábricados para cumplir con los estándares correspondientes para fábricantes, como Underwriters Laboratories (UL) y National Sanitation Foundation (NSF), sigue siendo responsabilidad del dueño y del instalador, cumplir con qualquier código local correspondiente que pueda existir. AccuTemp no da ningun tipo de garantía ya sea explicita o implicita, incluyendo garantías de rendimiento, comerciabilidad, o adecuación para usos particulares. La responsabilidad de AccuTemp sobre qualquier tipo de reclamación, incluyendo negligencia, con respecto a los bienes y servicios cubiertos a continuación, no debe en ningun caso exceder el precio de los bienes y servicios o piezas de las mismas reclamadas. AccuTemp no se hace responsable bajo ninguna circunstancia, por daños especiales, incidentales, o daños indirectos o de naturaleza penal. Esto constituye la garantía en su totalidad que reemplaza y anula qualquier otra garantía sea escrita, expresa oral, o implícita. MP4001-0908 Steam’N’Hold Steamer • Horno de Vapor Steam’N’Hold 16-
 1
1
-
 2
2
-
 3
3
-
 4
4
-
 5
5
-
 6
6
-
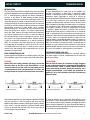 7
7
-
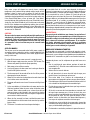 8
8
-
 9
9
-
 10
10
-
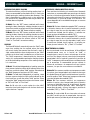 11
11
-
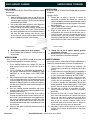 12
12
-
 13
13
-
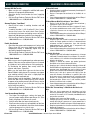 14
14
-
 15
15
-
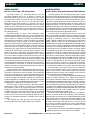 16
16


AccuTemp SNH20 Instrucciones de operación
- Categoría
- Cocinas
- Tipo
- Instrucciones de operación
en otros idiomas
Otros documentos
-
Hamilton Beach 37530A Guía del usuario
-
-
Ninja CS960 Manual de usuario
-
Centro 640-05057299-9 Guía del usuario
-
Oster 4711 Manual de usuario
-
Hamilton Beach 37537 Manual de usuario
-
Hamilton Beach 37536 Manual de usuario
-
-
Cuisinart STM-1000 Manual de usuario