
®
r//1,1,1
LLI a
LLI_
_m
__o_
X
0
N/
47A2, 17N4,
80R4 SERIES

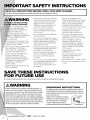
)RTANT SAFETY INSTRUCTIONS
READ ALL INSTRUCTIONS BEFORE USING YOUR DEEP CLEANER.
Whenusinganelectricalappliance,basicprecautionsshouldbeobserved,inchdingthefollowing:
OR INJURY:
t to aproperly grounded
grounding
Do not modify the
plug.
whenit is
fromoutlet when
in useandbeforeservicing.
indoors onl_
allowto beused asa toy.
:lose attention isnecessarywhen
or nearchildren.
Do not use for any purpose other
thandescribed in this User's
Guide.Use only manufacturer's
recommendedattachments.
Do not usewith damaged cord
or plug. If applianceisnot
working as it should,has been
dropped,damaged, leftoutdoors,
or dropped into water,haveit
repairedat anauthorized
servicecenter
Always installfloat beforeany wet
pick-upoperation.
>)Do not pullor carry by cord,use
cordas a handle,close adoor on
cord,or pull cord aroundsharp
edgesor corners. Do not run
applianceover cord. Keep cord
awayfrom heated surfaces.
>)Do not unplug by pulling on
cord.Tounplug,grasp the plug,
not the cord.
>)Do not handleplug or appliance
with wet hands.
>)Do not put any object into open-
ings.Do not usewith any opening
blocked;keep openings freeof
dust,lint, hair,andanything that
may reduceair flow.
>)Keephair,looseclothing, fingers,
andall partsof body away from
openingsand moving parts.
>)Turnoff all controls before plug-
ging or unplugging appliance.
_)Useextracare when cleaning
onstairs.
>)Do not useto pick up flammable
or combustible materials (lighter
fluid,gasoline,kerosine,etc.)
or use in areaswherethey may
bepresent.
>)Do not useappliancein an
enclosedspacefilled with vapors
givenoff by oil basepaint, paint
thinner,somemoth proofing
substances,flammable dust,
or other explosiveor toxic vapors.
>)Do not useto pick up toxic
material(chlorine bleach,
ammonia,draincleaner,etc.).
>)Do not pick up anything that
isburning or smoking,suchas
cigarettes,matches,or hot ashes.
>)Useonly BISSELLcleaning
products intended for use
with this appliance to prevent
internal component damage.
Seethe CleaningFluid section
of this guide.
>_Unplug beforeconnecting
TurboBrushTool.
>_Do not immerse.Useonly on
surfacesmoistened by the
cleaningprocess.
>_Keepapplianceon a levelsurface.
>_Do not carry the appliancewhile
in use.
SAVE THESE INSTRUCTIONS
FOR FUTURE USE
Thismodelisforhouseholduseonly.Commercialuseofthisunitvoidsthemanufacturer'swarranty.
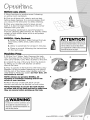
/ WARNING
Improperconnectionoftheequipment-groundingconductorcan
resultinariskofelectricalshock.Checkwithaqualifiedelectrician
orservicepersonifyouaren'tsureiftheoutletisproperlygrounded.
DONOTMODIFYTHEPLUG.Ifitwillnotfittheoutlet,haveaproper
outletinstalledbyaqualifiedelectrician.Thisapplianceisdesigned
foruseonanomina1120-voltcircuit,andhasagroundingattachment
plugthatlooksliketheplugintheillustration.Makecertainthatthe
applianceisconnectedtoanoutlethavingthesameconfigurationas
theplug.Noplugadaptershouldbeusedwiththisappliance.
ii_ !!!!!!!!!!!!!!!!! iiii
www BISSELL corn '_ _J_
_ i i _ 800.237.7691
GROUNDING INSTRUCTIONS
Thisappliancemustbeconnectedtoagroundedwiringsystem.Ifit
shouldmalfunctionorbreakdown,groundingprovidesasafepath
dleastresistanceforelectricalcurrent,reducingtheriskofelectrical
shock.Thecordforthis
appliancehasanequipment-grounding
conductorandagroundingplug.Itmust
onlybepluggedintoanoutletthatis
properlyinstalledandgroundedin
accordancewithalllocalcodesandordinances.
......._i_iiiii,!i:
Grounded

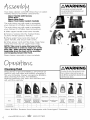
Assembl
2. Screw 2 screws into the marked holes
4, Wrap power cord to the left and flex hose
to the right of the upper hose rack
5. Attach tool to hose grip
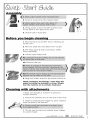
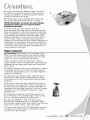
Before you begin cleaning
1. Move furniture to another area if cleaning an
entire room
2, Remove large dirt and debris from carpet
3, Pre-treat spots & stains and heavy traffic
areas (optional)
4, Fill the clean water tank
4b. Remove the top
5, Plug into outlet, and turn the power switch on
NOTE: Heatwave Technology _'helps keep hot
water hot while the machine is in use. Simply
turn the machine on to activate Heatwave.
Cleaning with attachments
1.Make sure handle of machine is locked in
upright position
2. Attach the cleaning tool to the end of the hose
3. Clean by pressing the trigger to spray solution
onto the area to be cleaned
5. Tilt the tool forward and release spray trigger
to suction liquid
www.BISSELL.com 800.237.7691
3

We're glad you purchased a BISSELL
deep cleaner. Everything we know
about floor care went into the design
and construction of this complete,
high-tech home cleaning system,
Your BISSELL deep cleaner is well
made, and we back it with a limited
three-year warranty. We also stand
behind it with a knowledgeable,
dedicated Consumer Care
department, so, should you ever
have a problem, you'll receive fast,
considerate assistance.
My great-grandfather invented
the floor sweeper in 1876. Today,
BISSELL is a global leader in the
design, manufacture, and service
of high quality homecare products
like your BISSELL deep cleaner.
Thanks again, from all of us
at BISSELL.
Mark J. Bissell
Chairman & CEO
Safety Instructions ........
Quick Start Guide ..........
Product View ...............
Assembly ...................
Operations ............... 6-12
Maintenance & Care ...... 1:3-15
Troubleshooting ............ 16
Replacement Parts ......... 17
Accessories ................ 18
Warranty ................... 19
Consumer Care ............. 19
Product Registration ....... 20
www.BISSELhcom _r 800.237.7691
4

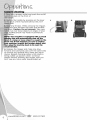
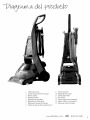
1 SprayTrigger
2 ExtraLongPowerCord
3 UpperHandle
4 FlexHose
5 PowerSwitch
6 EasyCarryHandle
7 TankCarryHandle
8 LargeCapacity2-inqWaterTank
9 SurroundSuction_
10EasyToRemoveNozzle
11EdgeSweep®Brushes
12LowerBase
15UpperHoseRack
14LowerHoseRack
15HandleReclinePedal
www.BISSELL.com 800.237.7691
5

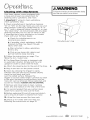
Your deep cleaner comes in three (four on select
models) easy-to-assemble components:
Upper Handle with Screws
Lower Base
Upper Hose Rack
Upper Tool Holder (select models)
The only thing you will need to assemble
your cleaner is a Phillips head screwdriver.
The only thing you will need to assemble
your cleaner is a Phillips head screwdriver.
1. Slide upper handle onto lower handle.
2. Screw 2 screws into the marked holes
(screws will be taped to handle).
3. Place upper hose rack onto back of
upper handle, and secure with screw.
4. Wrap power cord and flex hose. Snap hose
wand into hose clip on upper hose wrap.
NOTE: Take care to wrap the hose in the
right direction in order to make use of the
hose clip. Make sure the hose is wrapped
beginning from the back of the machine
and wrapping toward the front.
Deep cleaner assembly is now complete.
/ WARNING
Donotpluginyourdeepcleaneruntil
youarefamiliarwithallinstructionsand
operatingprocedures
4.
Cleanin_l fluid
Keep plenty of genuine BISSELL 2X formula on
hand so you can clean and protect whenever it
fits your schedule. Always use genuine BISSELL
deep cleaning formulas. Non-BISSELL
cleaning solutions may harm the machine and
will void the warranty.
/ WARNING
Toreducetheriskoffireandelectricshock
duetointernalcomponentdamage,use
onlyBISSELLcleaningfluidsintendedforuse
withthedeepcleaner
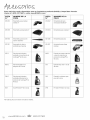
F_ofessional PetStain&Od0r DeepClean AllergenCleansing DeepCJean+Oxv HardFloorSoluti0ns PetStainPreTreat StainPreTreat
DeepCleaning &Protect
RetreattoIeb penetJate
Bestf0r aJl0tJer stainsar_Jcontains andprotects_orn removetoughpet
formuhs patentedodor fdtulestainswith ar_Jloosen
ldnovalted_1010gyS(otdlg_d"Rotc<br stainsar_Jodors roughstains
2XC0nc_ltrated X X X X X X
Scotchgard"Protection' X X X
*ONLY BISSELL Protects from future stains with Scotchgard T,_Protector
www.BISSELL.com _r 800.237.7691
6

Before you clean
1. Move furniture to another area if cleaning
an entire room (optional).
2. Pick up all loose dirt, debris, and pet hair
before deep cleaning. It is recommended that
you vacuum the area prior to deep cleaning.
3. Plan your cleaning route to leave an exit
path. It is best to begin cleaning in the corner
farthest from your exit.
4. Pretreating (optional) is recommended to
improve cleaning effectiveness for heavily soiled
carpet in high traffic areas such as entryways
and hallways.
BISSELL Stain Pretreat
a. Spray the BISSELL Stain Pretreat formula
onto heavy traffic areas, soiled areas, or
stains.
b. Allow to penetrate for at least 3 minutes.
c. Clean as normal following the instructions
on the next page.
Machine Prep
1. Fill the 2-in-1 Water Tank. Remove the tank
from the base of the machine by lifting up the
tank carry handle. Carry like a bucket to the sink.
2. Unlatch the top of the tank from the bottom
by lifting up on the tank latches on either
side of the tank.
3. Pour 5 ounces of formula into the heavy duty
bladder (fill the included measuring cup twice).
Fill the rest of the heavy duty bladder with hot
(140°F/60°C MAX) tap water. DO NOT BOIL OR
MICROWAVE WATER.
NOTE: Always use genuine BISSELL 2X
formulas to maximize cleaning and for the
safety of your machine.
4. Place the top of the tank back on the
bottom and secure the latches on both sides.
NOTE: Remember to secure the tank latches
on either side of the tank and test to make sure
they are secure before picking up the tank.
ATTENTION
SomeBerbercarpetshaveatendencytofuzz
withwear.Repeatedstrokesinthesamearea
withanordinaryvacuumordeepcleaner
mayaggravatethiscondition.PleaseseeStain
Removalinstructionsonpagelb
2.
3. 4.
/ WARNING
Toreducetheriskoffireandelectricshock
duetointernalcomponentdamage,use
onlyBISSELLcleaningfluidsintendedforuse
withthedeepcleaner.
www.BISSELL._

proper outlet and push the on/off
:ated on the front of
e,
the handle by pressing on the lever
_ck of the machine behind the 2-in-]
ink.
_ing Strokes. While pressing the trigger,
slow forward wet pass and another
_ck. Caution: Do not overwet. Take care
run over loose objects or edges of area
Stalling brush may result in premature
machine is equipped with a circuit
automatically shut off the
if a large or loose object is caught in the
roll. If that happens, be sure to unplug
machine, remove the foreign object, and
plug the machine back in to reset the
circuit breaker.
4. Release the trigger and make one slow
forward and backward pass over the same area
to remove any residual dirty water and aid in
drying. Repeat cleaning passes until solution
being pulled up appears clean. Continue
passes without pressing the trigger until you
can't see any more water being pulled up.
2,
iiii!i!!i!!i!!i!!i!!i!ii!ii!ii!i!i!....
i!ii__ _ii_i!i_i!i_iii_ii_ii_i_!i!!i!!i!!i!!i!!i!!i!!i!!i!!i!!i!!i!!i!!i!!i!!i!ii!!_!!i!ii_ii!ii!ii!i_!i_!_i!i_i_ii_ii_ii_ii_ii_i_.....
www.BISSELL corn _ r 800.237.7691

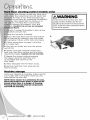
Cleanin_l with attachments
Your deep cleaner comes equipped with
a hose and at least one attachment for
cleaning stairs, upholstery, and more.
1. Important! If using to clean upholstery,
check upholstery tags.
1. Check manufacturer's tag before cleaning.
"W" or "WS" on the tag means you can use your
deep cleaner. If the tag is coded with an "X" or
an "S" (with a diagonal stripe through it), or says
"Dry Clean Only", do not proceed with any deep
cleaning machine. Do not use on velvet or silk.
If manufacturer's tag is missing or not coded,
check with your furniture dealer.
a. Check for colorfastness in an
inconspicuous place.
b. If possible, check upholstery stuffing.
Colored stuffing may bleed through
fabric when wet.
c. Plan activities to allow upholstery
time to dry.
d. Pick up any loose dirt, debris and
pet hair before deep cleaning.
2. Follow the instructions on page 7 for
filling the 2-inq water tank.
3. The DeepClean Premier is designed with
an automatic diverter. Simply lock the unit
upright in order to clean with the hose.
4. Attach the cleaning tool to the end of the hose.
5. Plug in and turn on the power switch.
6. Clean by pressing the trigger to spray
solution onto the area to be cleaned. Slowly
move the tool back and forth
over the soiled surface. Release the
trigger to suction soiled water. Continue to clean
in the area, working in small sections, until no
more dirt can be removed. Rinse (optional) and
suction as needed. Caution: Do not overwet.
7. Remove and rinse tools in clean, running
water. Dry and replace on the end of the hose.
8. It is recommended that you suction clean
water from a bowl to rinse out the hose.
9. Before replacing lift end of hose and stretch
out to ensure all water is cleared from hose.
10. Wrap flex hose around the hose rack.
11.Empty 2-in-1 water tank and rinse out,
following the instructions on page 10.
4.
9.
/ WARNING
Toreducetheriskofinjury,beextracarefulwhencleaning
stairs.Hakesuremachineissecureandlevel.
Manufacturer's tag
www.BISSELLcom 800,237.7691
9

Cleanin_l with the Stain Trapper tool (select models)
Your deep cleaner may have come with a
Stain Trapper tool. This tool is great for keeping
messes out of the machine's hose system.
1, Attach the Stain Trapper tool to the end
of the hose.
2. Gently scrape up any semi-solids with a spoon
or spatula. Do not use a knife or other utensil
with sharp edges because it could damage the
carpet or upholstery.
3, Follow instructions 3-6 on page 9 under
"Cleaning with attachments".
NOTE: Do not fill the Stain Trapper tank
above the FULL line.
4. To empty the Stain Trapper tool, rotate
the small tank on the bottom of the tool
to unlock it.
4.
NOTE: Be careful to keep the top of the tool
facing upward or soiled water will spill out of
the tank.
5. Dump dirty water into a sink or toilet and
rinse the tank out with clean water. Replace
the tank by lining up the "unlock" symbol with
the small arrow on the tank and turning it to
the "lock" symbol.
6, Clean the front of the tool by removing the
plate over the suction path. Pull down on the
bottom of the plate to remove. Run the tool
and the plate under clean water to rinse taking
care to remove all debris. Replace the front
plate by sliding it back into place.
Clean-up
1, Remove the tank from the base of the machine
by lifting up on the tank carry handle. Carry like
a bucket to a utility sink or outside where you
will dispose of the dirty water.
2, Unlatch the top of the tank from the bottom
by lifting up on the tank latches on either side
of the tank.
3. Remove the top of the tank by lifting up on
the handle.
2.
4. Lift the bottom portion of the tank; pour out
dirty water in the sink through the rectangular
shaped opening in the corner of the tank.
NOTE: You may notice hair & debris deposits
on the carpet or in the tank that were loosened
by the cleaning action. This debris should be
picked up and thrown away. Check the red lint
filter near the duct on the back of the machine
base for debris and remove before continuing.
3.
Filter
www.BISSELL.com _" 800.237.7691
10

5. Empty the Pet Hair Basket (select models)
by sliding it toward the front of the tank and
lifting up. Replace the Pet Hair Basket before
storing/continuing to clean.
6. Fill the heavy duty bladder with clean hot
tap water, following instructions on page Z
NOTE: Remember to secure the tank latches
and test to make sure it is secure before
picking up the tank.
7. Water rinse (recommended). Rinsing
is an optional step that can be done during the
cleaning process or after the carpeted area has
been completed. Empty the heavy-duty bladder
if necessary, and refill with hot tap water only.
Replace the tank on the machine. Take care to
do a forward (wet) stroke by depressing the
trigger, and a backward (wet) stroke, followed by
a forward and backward (dry) stroke, releasing
the trigger. Continue this until the water you see
coming up the nozzle is clear. (See page 13 for
more machine care tips.)
5,
Stain removal
Do Not Delay! Attending to an accident soon
after it occurs ensures the most optimal clean.
Leaving it for an extended period of time may
cause it to set and become permanent.
1. Blot up liquids with an absorbent cloth or
paper towels. White materials are recommended
because certain dyes may bleed and make the
stain worse.
2. Gently scrape up any semi-solids with a spoon
or spatula. Do not use a knife or other utensil
with sharp edges because it could damage the
carpet or upholstery.
3. If the area has already dried, separate and
remove from the carpet whatever semi-solids
and residue that can be accessed before deep
cleaning.
4. Be sure to test any spot removal formulas in
an inconspicuous area first. This is important as
some dyes and materials could be damaged or
discolored by cleaning solvents. If such a change
should occur, try a different solution or call a
professional.
5. If cleaning on Berber carpeting, gently run
your machine over a hidden area. If no fuzzing
occurs, continue cleaning in soiled area.
6. Using the BISSELL Stain Pretreat, spray
evenly over soiled area. Do not overwet. Wait
3-5 minutes. Gently work the solution by blotting
area with a clean, damp, color safe cloth.
7. Clean large areas with the DeepClean Premier
machine or use the hose to clean spots, stains
and hard-to-reach areas.
www.BISSELL._

cleanin 9 (select models only)
Premier model may have come
floor attachment and 2X Hard Floor
Formula. If not, these products are
for purchase by contacting the BISSELL
Care department by phone or at
isite. The hard floor tool provides
cleaning for linoleum, vinyl, and
)rs. Caution: Do not use on unsealed
floors.
]urn or sweep thoroughly to pick up any
debris and pet hair.
any furniture, if needed.
the hard floor tool onto the bottom
:he machine by hooking it into the nozzle
swinging it down until it clicks into place.
Follow instructions on page 7 to fill the
!-in-1 water tank.
5. Plug into an outlet and turn the power
switch ON.
6. Slowly move the machine forward and
back over hard floor surface one time while
depressing trigger. Caution: Do not overwet.
7. Repeat the motion without pressing
the trigger using the hard floor tool
to squeegee and suction up the
dirty water.
8. Allow adequate time for floors to dry.
9. Remove hard floor tool, rinse and dry
before storing.
/ WARNING
Toreducetheriskoffireandelectricshock-when
cleaningahardfloor,theBISSELLbarefl00rt001
160-0208mustbeusedanditmust0nlvbeusedwith
BISSELL2XHardFloorSolutionscleaningfluidintended
forusewiththisappliance.
Machine storage
Once your cleaning is complete, make sure the
2-in-1 water tank is emptied, rinsed out, and
dried before the next use.
NOTE: Store cleaner in a protected, dry area.
Since this product uses water, it must not be
stored where there is a danger of freezing.
Freezing will damage internal components
and void the warranty.

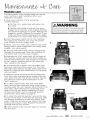
Machine care
For best results, a few simple steps can assure
your machine is well maintained after your
cleaning is complete.
1, Flush your machine of any remaining
residual solution.
a, Fill the 2-in-1 water tank with clean hot
tap water.
b, Recline the handle and press the spray
trigger for 15 seconds while making forward
and backward passes on carpet. Release the
trigger to suction. Repeat for another 15 sec-
onds. Continue without pressing the trigger
until there is no more water being suctioned,
2, Push the power button to turn the machine
off. Unplug the machine and wrap the power
cord. Empty the 2-in-1 water tank.
3, Rinse out 2-in-1 water tank with hot tap water,
taking care to clean underneath the heavy duty
bladder and all around it.
4, The top half of the tank can be rinsed clean
through the nozzle area. Clear the red filter of
any debris that may have accumulated.
5, Keeping the 2-in-1 water tank off the base of
the machine, simply remove the floor nozzle by
turning the locking keys (see image for location)
to the "unlock" position and lift up. Rinse the
floor nozzle at the faucet.
6, Any loose hair or debris can be pulled from
the brush rolls and thrown away. For the most
thorough clean before storage, follow directions
below for removal and replacement of the brush
rolls and belts.
7, Replace nozzle by lining up the locking keys
with their slots and placing the nozzle and end
caps back onto the foot of the machine. Secure
into place by turning the locking keys to the
"lock" position.
8, To clean attachments that may have been
used, remove from hose and rinse under clean,
running water. Dry and replace attachment in the
hose rack. Clean the hose by suctioning clean
water from the tap. Before replacing, lift end
of hose and stretch out to ensure all water is
cleared from hose. Refer to page 9.
9, To clean the suction diverter, remove the two
screws on the back of the diverter housing. Take
the diverter housing to a sink and rinse it with
water. Take care to remove any debris that may
build up and cause a clog. Replace the diverter
housing and the two screws.
10, After carpet is dry, vacuum again to remove
hair and fuzz.
4,
/ WARNING
Toreducetheriskofelectricshock,turnpowerswitch
offanddisconnectplugfromelectricaloutletbefore
performingmaintenanceortroubleshootingchecks.
Filter
6,
Diverter
www, BISSELL,com 800,237,7691
13

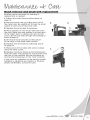
Drive belt removal & replacement
Occasional replacement of one or both belts
may become necessary. If that is needed, please
follow the instructions below.
1. Turn off the machine, and unplug it from
the outlet.
2. Remove the 2-in-1 water tank. Set aside.
3. Remove the nozzle and end caps by
following the instructions in Step 5 on
page 13.
4. Turn the machine on its side.
IHPORTANT: cord side up.
5. Remove 1silver screw from the pivot arm.
6. Remove pivot arm by gently lifting up.
7. Remove the drive belt and replace it by
first attaching it to the small drive wheel, then
attach it to the end of the inside brush.
Fluid Connection Point Filter Haintenance
Periodic cleaning of the fluid connection
point in the spray nozzle may be required.
1. To clean the fluid connection point,
remove the nozzle and turn it over.
2. Clean the filter on the end of the fluid
connection point with a small paperclip
and re-attach the nozzle to the machine.
www.BISSELL.com _r 8OO.237.7691
14

Brush removal and brush belt replacement
Brushes can be removed for cleaning or
replacement as needed.
1. Follow drive belt removal Instructions on
page 14.
2. Remove brush rolls by pulling them off of
the metal rods. Be careful not to lose the small
washer at each end of the brush rolls.
3. Replace the brush belt if necessary.
4. Place cleaned or new brush rolls back onto
the rods. Make sure one washer is on each end
of the rollers prior to sliding onto the rod. Be
sure to let the rod slide through the bushing to
insure proper fit.
5. Re-attach the brush belt on the bottom
to the cogs of the small roller brushes.
6. Replace the drive belt by following step 8
on page 14.
7. Place pivot arm in place and screw in place
using the silver screw.
8. Replace nozzle by lining up the locking keys
with their slots and placing the nozzle back onto
the foot of the machine. Secure into place by
turning the locking keys to the "lock" position.
If you have any questions or are having trouble
installing or replacing your belt(s) or brushes,
please call BISSELL Consumer Care.
2,
7.
www.BISSELL._

Possible causes Remedies
Water tank may be empty Fill heavy duty bladder with hot
tap water
d
Tank may not be seated Turn aower OFF. Remove and
or completel reseat tank
Pump may have lost prime. Turn power OFF and then back ON.
Wait one minute then depress trigger
The belt is off or broken Turn power OFF and unplug unit
from outlet. Follow instructions on
page 15
Circuit breaker on machine may Turn the machine OFF and unplug
have tripped from outlet. Check to see if foreign
object is caught in brush roll.
Remove object. Plug machine in to
reset circuit breaker
Tank may not be seated properly Pick up the 2-in-] water tank and
re-seat it so it sits snugly on the unit.
Cleaner
not picking
up solution
Tank may not be assembled
properly
-in-1 water tank is empty
2-in-1 water tank has picked up
maximum dirty water and red
float door has closed.
Red float "door" in the tank may
have closed as a result of bumping
object or moving machine back
and forth too quickly
Make sure the tank latches on both
sides of the tank are latched properly.
To make sure they are both latched
Check fluid levels in heavy-duty
bladder.
Empty 2-inq water tank. Refill heavy
duty bladder with clean hot tap water
and replace.
..............................................................................................................................................................................................I
Turn the machine OFF, allowing red
float door to release an into the open
position. Turn unit back ON to
continue cleaning. Be sure your
forward and backward strokes are
done at a slower pace.
Red lint screen near air duct Follow cleaning instructions in
is dirty Step 4 on Page 13.
......._i_iiiii,!i_:,,

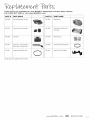
These items are available for your BISSELL DeepClean Premier deep cleaner.
Call 1-800-237-7691 or visit www.BISSELLcom
PART # PART NAME
160-0087 TankLid(BlackberryPurple)
160-0097 TankCap&InsertAssembly
203-6845 FloatDoor
PART NAME
TankBottom
FloorNozzlewithEndCap
Assembly
160-0209 Measuring(up
iii:oo i............
*Notallpartsareincludedwitheverymodel.
www, BlSSELLcom 800,237,7691
17

These items are available for your BISSELL DeepClean Premier deep cleaner.
Call 1-800-237-7691 or visit www.BISSELL.com
StainTrapperTool
2XPetStainandOdor
FormulawithScotchgardTM
Protection60oz
3156 Deep(lean+Oxy48oz
56L9 2XHardFloorSolutions
Formula16oz
40@ StainPreTreat22oz 0790 PetStainPreTreat22oz
*Notallpartsareincludedwitheverymodel
www.BISSELL.com _r 800.237.7691
18

Thiswarrantygivesyouspecificlegal_lts, andyoumayalso
haveotherrightswhichmayvaryfromstatetostate.Ifyouneed
additionalinstructionregardingthiswarrantyorhavequestions
regardingwhatitmaycover,pleasecontactBISSELLConsumer
CarebyE-mail,telephone,orregularmailasdescribedbelow.
Limited Three-Year Warranty
Subjecttothe*EXCEPTIONSANDEXCLUSIONSidentifiedbelow,upon
receiptoftheproductBISSELLwillrepairorreplace(withnewor
remanufacturedcomponentsorproducts),atBISSELL'soption,free
ofchargefromthedateofpurchasebytheoriginalpurchaser,for
threeyearsanydefectiveormalfunctioningpart.
Seeinformationbelowon"IfyourBISSELLproductshould
requireservice".
Thiswarrantyappliestoproductusedforpersonal,andnotcommercial
orrentalservice.Thiswarrantydoesnotapplytofansorroutine
maintenancecomponentssuchasfilters,belts,orbrushes,Damageor
malfunctioncausedbynegligence,abuse,neglect,unauthorizedrepair,
oranyotherusenotinaccordancewiththeUser'sGuideisnotcovered,
BISSELLISNOTLIABLEFORINCIDENTALORCONSEQUENTIALDAMAGES
OFANYNATUREASSOCIATEDWITHTHEUSEOFTHISPRODUCT,BISSELL'S
LIABILIffWILLNOTEXCEEDTHEPURCHASEPRICEOFTHEPRODUCT.
Somestatesdo not allow the exclusionor limitation
of incidentalor consequentialdamages,sothe
abovelimitation or exclusionmaynot apply to you.
*EXCEPTIONS AND EXCLUSIONS FROM
THE TERMS OF THE LIMITED WARRANTY
THISWARRANTYISEXCLUSIVEANDINLIEUOFANYOTHER
WARRANTIESEITHERORALORWRITTEN.ANYIMPLIEDWARRANTIES
WHICHMAYARISEBYOPERATIONOFLAW,INCLUDINGTHEIMPLIED
WARRANTIESOFMERCHANTABILITYANDFITNESSFORAPARTICULAR
PURPOSE,ARELIMITEDTOTHETHREEYEARDURATIONFROMTHE
DATEOFPURCHASEASDESCRIBEDABOVE.
Somestatesdonotallowlimitationsonhowlonganimplied
warrantylastsotheabovelimitationmaynotapplytoyou.
NOTE: Please keep your original sales
receipt. It provides proof of date of purchase
in the event of a warranty claim.
i!!i!!i!i!i!
If your BISSELL product sh ;[
require service:
ContactBISSELLConsumerCaretolocateaBISSELLAut
Centerinyourarea.
Ifyouneedinformationaboutrepairsorreplacementpa
havequestionsaboutyourwarranty,contactBISSELLCon_
Website or E-mail:
www.BISSELL.com
Or Call:
BISSELL Consumer Care
1-800-237-7691
Monday - Friday 8am - lOpm ET
Saturday 9am - 8pm ET
Sunday lOam - 7pm ET
Or Write:
BISSELL
PO Box 3606
Grand Rapids, HI 49501
ATTN: Consumer Care
i!ii!!iiii!ii!ii
www.BISSELL._

BISSELL Rewards Points
Automatically earn points for
discounts and free shipping on
future purchases.
Faster Service
Supplying your information now
saves you time should you need to
contact us with questions regarding
your product.
Product Support Reminders
and Alerts
We'll contact you with any
important product maintenance
reminders and alerts.
Special Promotions
Optional: Register your email
to receive notice of offers,
contests, cleaning tips and more!
For information about repairs or replacement parts, or questions about your warranty:
Call:
BISSELL Consumer Care
1-800-237-7691
Monday - Friday 8 am - 10 pm ET
Saturday 9 am - 8 pm ET
Sunday lOam - 7pm ET
Write:
BISSELL
PO Box 3606
Grand Rapids IVll 49501
ATTN: Consumer Care
Visit the BISSELL website: www.BISSELL.com
When contacting BISSELL, have model number of cleaner available.
Please record your Model Number:
Please record your Purchase Date:
NOTE: Please keep your original sales receipt. It provides proof of purchase
date in the event of a warranty claim, See Warranty on page 19 for details,
Rate this product and let us (and millions
of your closest friends) know what you think!
www.BISSELL.com
'c2014BISSELLHomecare,1no
GrandRapids,Michigan
Allrightsreserved.PrintedinChina
Pa_Number1603752Rev03/14
Visitourwebsiteat:www.Bl%EtL._om

i ®
Z
<_
III
O
SERIE 47A2, 17N4, 80R4

INSTRUCCl0NESIMPORTANTESDESEGURIDAD
LEA TODAS LAS INSTRUCClONES ANTES DE USAR SU LIMPIADORA
PROFUNDA.
(uandoseutilizaunelectrodomOsticoesnecesariotomarprecaucionesbasicas,queinchvenlassiguientes:
AADVERTENClA
PARAREDUCIRELRIESGODEINCENDIOS,
CHOQUEEL¢CTRICO0 LESIONES:
Enchufe solo en un tomacorriente
correctamente conectado a tierra.
Consulte las instrucciones para
la puesta a tierra. No modifique
el enchufe de 5 clavi]as con
conexion a tierra.
No deje el electrodomestico
desatendido cuando este
enchufado. Desenchufe de1
tomacorriente cuando no Io este
usando y antes de efectuar tareas
de servicio.
Use solo en interiores.
No permita que se use como un
]uguete. Se debe prestar atend0n
al usar cuando Io usan los niflos o
cuando se usa cerca de ellos.
_>No utilice para ning0n otto
proposito que no sean los
que se descdben en esta guia
del usuado. Solo utilice los
aditamentos que recomienda el
fabdcante.
_>No la use con un cordon o
un enchufe daflado. Si el
electrodomestico no funciona
como debiera, si se ha cafdo,
daflado, dejado al are libre, o
si se ha cafdo en el agua, haga
que Io reparen en un centro de
servicio autorizado.
_>Instale siempre el flotador antes
de iniciar las operadones de
aspiracion h0meda.
_>No arrastre ni cargue pot el
cordon electrico ni utilice el
cord6n como si fuera una manila.
No cierre la puerta sobre el
cord6n ni tire del mismo sobre
bordes ni esquinas filosas. No
pase el electrodomestico pot
arriba del cord6n. Mantenga el
cord6n ale]ado de superficies
calientes.
_>No desenchufe tirando del
cord6n. Desenchufe agarrando el
enchufe, no el cord6n.
_>No toque el electrodomestico
ni el enchufe con las manos
mojadas.
_>No coloque ning0n objeto en
las aberturas. No use con una
abertura bloqueada, mantenga las
aberturas fibres de polvo, pelusa,
pelo y todo Io que pueda reducir
el flujo.
_>Mantenga el pelo, la ropa suelta,
los dedos y cualquier parte del
cuerpo lejos de las aberturas y
piezas movibles.
_>Apague todos los controles antes
de enchufar o desenchufar el
electrodomestico.
_>Tenga mucho cuidado al limpiar
en escaleras.
_>No recoja matedales infiamables
ni matedales combustibles (fluido
para encendedores, gasofina,
queroseno, etc,) ni utilice donde
pueda haberlos,
_>No utilice el electrodomestico
en un espacio cerrado Ileno de
vapores de pintura al aceite,
disolventes de pintura, ciertas
sustancias antipolillas, polvos
infiamables u otros vapores
explosivos o t0xicos.
_>No recoja materiales t0xicos
(blanqueador con cloro, amon(aco,
limpiador de drena]es, etc.)
_>No recoja nada que este
quemando o emitiendo humo,
como cigarrillos, fOsforos o
cenizas calientes.
_>Utilice solamente los productos
de limpieza de BISSELL para
set usados en este artefacto y
evitar daflos a los componentes
internos. Consulte la secci6n
sobre liquidos de limpieza de este
manual,
_>Desenchufe antes de conectar la
herramienta TurboBrush,
_>No sumergir, Use solo en
superficies humedecidas pot el
proceso de limpieza,
_ Mantenga el electrodomestico
sobre una superficie nivelada.
_>No cargue el electrodomestico
mientras esta en uso.
GUARDE ESTAS INSTRUCClONES
PARA USARLAS EN EL FUTURO
EstemodeloestadisefladosoloparausodomOstico.Elusocomercialdeestaunidadanulalagarantiadelfabricante.
A ADVERTENClA
LaconexiOnincorrectadelconductordeconexiOnatierradel
equipopuederesultarenriesgodechoqueelOctrico.(ompruebe
conunelectricistaounapersonadeserviciocalificadosinoesta
segurosiestacorrectamenteconectadoatierra.NO%DIFIOUE
ELENCHUFE.Sinocabecorrectamenteeneltomacorriente,
hagaqueunelectricistacalificadoinstaleunocorrectamente.
EsteelectrodomOsticoestadisefladoparaserusadoenun
circuitode120voltiosnominales,Vtieneunenchdeconpuesta
atierrasimilaralenchdedeldibujo.Aseguresedequeel
electrodomOsticoest_conectadoauntomacorrientequetengala
mismaconfiguraciOndelenchde.Nosedebeusarunadaptador
paraenchdesconesteelectrodom_stico.
INSTRUCClONES PARA LA
CONEXI(_N A TIERRA
Esteartefactosedebeconectaraunsistemadecableadocon
conexiOnatierra.Sifallaosedescompone,laconexiOnatierra
proporcionaunaviasegurademenorresistenciaparalacorriente
elOctrica,reduciendoelriesgodechoqueelOctrico.Elcordonde
esteartefactotieneunconductorde
conexiOnatierradelequipoVun
enchufeconconexiOnatierra.
Sedebeenchufarsolamenteen
untomacorrientecorrectamente
instaladoVconconexiOnatierra
deacuerdocontodosloscOdigos (lavijadepuestaatierra
_/ordenanzaslocales.
www.BlSSELLcom _r 8OO.257.7691
2

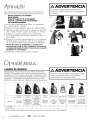
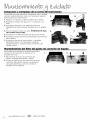
Armado
D o
I
2. Sujete con dos tornillos en los agujeros marcados.
4. Envuelva el cordon de alimentacion a la izquierda
y la manguera flexible del lado derecho del soporte
superior de la manguera.
5. Acople la herramienta en la empu_adura de
la manguera.
Antes de limpiar
1.Mueva los muebles a otro lugar siva limpiar todo
el cuarto.
2. Quite la suciedad y residuos de la alfombra.
3. Haga un tratamiento previo de manchas y areas
de mucho trafico (optativo).
4. Llene el tanque de agua limpia.
4b. Retire la parte superior.
5. Enchufe en un tomacorriente y coloque el
interruptor de encendido en ON.
NOTA: Heatwave Technology _ayuda a mantener
el agua caliente mientras la m,_quinaest_ en uso.
Ponga la m,_quina en funcionamiento para activar
Heatwave.
Limpieza con accesorios
1,AsegOrese de que el mango de la maquina esta
en la posicion vertical,
2. Acople la herramienta de limpieza en el extremo
de la manguera.
3. Limpie haciendo presion en el gatillo para rociar
la solucion sobre el area que va a limpiar,
5. Incline la herramienta hacia adelante y suelte el
gatillo de rociado para succionar el liquido.
www.BISSELL.com 800.237.7691
3

Nos comptace que haya comprado
una limpiadora profunda BISSELL.
Para dise_ar y construir este completo
sistema de atta tecnologia, utilizamos
todo nuestro conocimiento sobre el
cuidado de los pisos
Su limpiadora profunda BISSELL
esta bien fabricada y la respaldamos
con una garantia timitada de tres
a_os. Ademas, contamos con
un departamento de servicio
al consumidor dedicado y bien
informado, de manera que si usted
Ilegara a tener algQn probtema, recibira
asistencia rapida y considerada.
b4ibisabueto inventO la barredora de
pisos en 1876. Hoy, BISSELL es un [fder
mundiat en el diseMo, [a fabricaciOn
y el servicio tecnico de productos
de gran catidad para et cuidado del
hogar, como su [impiadora profunda.
Gracias de nuevo, en nombre de todo
et equipo de BISSELL.
Mark J. Bissell
Presidente y Director Ejecutivo
Instrucciones de seguridad ..... 2
Gufa de inicio r_pido ........... 5
Diagrama del producto ........ 5
Armado ....................... 6
Operaciones ................ 6-12
Mantenimiento y cuidado ...15-15
Solucion de problemas ........ 16
Piezas de repuesto ........... 17
Accesorios ................... 18
Garant[a ...................... 19
AtenciOn al cliente ............ 19
Registro del producto ........ 20
www, BISSELL,com _" 800,237,7691
4

1 Gatilloparaelrocio
2 CordOndealimentaciOnextralargo
5 Mangosuperior
4 Mangueraflexible
5 Interruptordeencendido
6 Manijaparafaciltransporte
7 Manijaparatransportareltanque
8 Tanquedeaguadegrancapacidad2en1
9 SurroundSuction_
10BoquillafScildeextraer
11CepillosEdgeSweep®
12Baseinferior
15Soportesuperiordelamanguera
14Soporteinferiordelamanguera
]SPedalparareclinarelmango
www,BlSSELL,com 800,237.7691
5

Su limpiadora profunda viene con tres (cuatro en
algunos modelos) componentes faciles de armar:
Mango superior con tornillos
Base inferior
Soporte superior de la manguera
Soporte superior para herramientas
(en algunos modelos)
Lo Qnico que necesitara para armar su limpiadora
es un destornillador Phillips.
1.Deslice el mango superior sobre el mango inferior.
2. Atornille los dos tornillos en los agujeros marcados
(los tornillos estaran sujetos al mango con cinta).
3. Coloque el soporte superior de la manguera
en la parte trasera del mango superior y sujete
con tornillo,
4. Envuelva el cordon de alimentacion y la manguera
flexible. Calce a presion el tubo de la manguera
en el soporte superior para envolver la manguera.
NOTA: Envuelva la manguera en la direccibn
correcta para usar el clip. Asegdrese de envolver
la manguera desde la parte trasera hacia la parte
delantera de la mdquina.
La limpiadora profunda ahora esta armada.
/k ADVERTENCIA
Noenchufesulimpiad0rapr0fundahastaquesehava
familiarizad0c0nt0daslasinstrucci0nesV10spr0cedimient0s
de0peraciOn.
3a. 3b.
4,
Liquido de limpieza
Mantenga a mano una buena cantidad de formula
BISSELL 2X autentica de manera que pueda limpiar y
proteger en el momento que le sea conveniente, Use
siempre formulas autenticas BISSELL para la limpieza
profunda, Los liquidos de limpieza que no son de
BISSELL pueden daflar la maquina y anular lagarantia.
/k ADVERTENClA
PararedudrelriesgodeincendioY(hoqueseled:ricosdebido
adanosde(omponentesinternos,usesololiquidosde
limpiezaBISSELLparalalimpiadoraprofunda.
2XConcentrated
S(0tchgard"Pr0ted]_]
bllb
Limpiezapr0fundaManchasvd0msdeLimpiapr0fund0y Limpiad0r(0n
pmfesi0nal rqas(otas p'otege al@gen0s
Haceunalimpieza
profi_rmlade
alfombrasyprotege
contlamanchas
Mulas®nel
pi0tect01Srotd]gald"
X X X X
X X X
DeepClean+Oxy SolucionesparapSOS
Tratamientopreviopara
man(hasrebeldes
PetStainReTreat
*SOLO BISSELL protege contra futuras manchas con el protector Scotchgard T"
www.BISSELLcom @r 800.237.7691
6

Antes de limpiar
1.Plueva los muebles a otra area siva limpiar todo el
cuarto (opcional),
2. Recoja toda la suciedad y residuos sueltos y pelo
de mascotas antes de hacer una limpieza profunda.
Se recomienda aspirar el area antes de hacer una
limpieza profunda,
3. Planee la limpieza de manera que deje una ruta de
salida, Lo mejor es comenzar a limpiar la esquina
mas alejada de su salida
4. Se recomienda hacer un tratamiento previo
(opcional) para mejorar la eficacia de la limpieza en
el caso de alfombras muy sucias en areas de alto
trafico como entradas y pasillos.
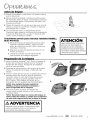
Tratamiento previo para manchas rebeldes BISSELL
Stain PreTreat ATENCION
a. Rode la formula de tratamiento previo para
manchas rebeldes BISSELL Stain PreTreat
sobre las areas con mucho trafico, areas con
manchas o manchas,
b. Deje que la solucion penetre durante por Io
menos 3 minutos,
¢. Limpie de manera normal siguiendo las
instrucciones de la pagina siguiente.
Algunasalf0mbrasBerbertiendenaf0rmar
pehsaconelus0.Elpasorepetid0de
unaaspirad0rac0mun0unalimpiad0ra
pdundaenlamismaareapuedeagravar
estac0ndkiOn.(0nsultelasinstrucci0nespara
eliminarmanchasenlapagina]].
preparaci6n de la m;iquina
1.Llene el tanque de agua 2 en 1,Quite el tanque de
la base de la maquina alzando por la manija de
transporte del tanque, Transporte al fregadero
como si fuera un balde,
2. Destrabe la parte superior del tanque de la parte
inferior levantando las trabas a cada lado del
tanque,
& Vierta 5 onzas de formula en la camara de servicio
pesado (llene dos veces la taza de medicion
incluida), Llene el resto de la bolsa de servicio
pesado con agua corriente caliente (140 °F/
60 °C MAX,), NO HIERVA EL AGUA NI LA
CALIENTE EN UN HORNO DE MICROONDAS.
NOTA: Use siempre fSrmulas aut_nticas
BISSELL 2X para maximizar la limpieza y
para la seguridad de su mdquina.
4. Coloque la parte superior del tanque de
nuevo sobre la parte inferior y fije los cierres
a ambos lados,
NOTA: Recuerde trabar los cierres del tanque en
ambos lados del tanque y pruebe para asegurarse
de que estdn seguros antes de levantar el tanque.
3.
2.
4.
A ADVERTENCIA
PararedudrelriesgodeincendioV(hoqueseled:rkosdebido
ada_osde(omponentesinternos,usesoloIfquidosde
limpiezaBISSELLparalalimpiadoraprofunda.
www.BlSSELLcom 8OO.237.7691
7

Limpieza de la alfombra
1. Enchufe en el tomacorriente correcto y presione
el boron de encendido y apagado en la parte
delantera del mango,
2. Recline el mango presionando en la palanca de la
parte trasera de la maquina arras del tanque de 2
en 1,
3. Movimientos de limpieza. Mientras presiona el
gatillo, haga una pasada lenta hacia adelante y
otra hacia arras, Precauci6n: Ne meje demasiade.
Tenga ¢uidado de no pasar sobre objetos sueltos
ni bordes de tapetes, Frenar los cepillos puede
resultar en la falla prematura de la correa,
NOTA: Su m_quina est_ equipada con un
disyuntor que apagard automdticamente el cepillo
si un objeto grande o suelto se engancha en el
rodillo del cepillo. Si este es el caso, asegL_rese
de desenchufar la mdquina, quitar el objeto y
luego enchufar de nuevo la mdquina y reponer el
disyuntor.
4. Suelte el gatillo del roc[o y haga una pasada lenta
hacia adelante y arras sobre la misma zona para
eliminar cualquier agua sucia residual, Repita las
pasadas de limpieza hasta que la solucion que se
extraiga este limpia, Siga pasando sin presionar el
gatillo hasta que ya no se aspire mas agua.
2,
www.BISSELLcom _" 800.237.7691
8

Limpieza con accesorios
Su limpiadora profunda viene equipada con una
manguera y por Io menos un accesorio para limpiar
escaleras, tapizado y mucho mas.
1.ilmportante! Si se usa para limpiar tapizados,
compruebe los rotulos de los tapizados.
1.Antes de limpiar compruebe primero el r6tulo del
fabricante. "W" o "WS" en el rotulo quiere decir que
puede usar su limpiadora profunda. Si el rotulo esta
codificado con una "X" o una "S" (con una barra
diagonal atravesada), o si dice "Dry Clean Only", no
limpie con ninguna maquina limpiadora profunda.
No la use en terciopelo ni seda. Si falta el r6tulo del
fabricante o si no esta codificado, compruebe con el
distribuidor de los muebles.
a. Compruebe si el color es firme en un sitio que
no Ilame la atenci6n.
b. Si es posible, inspeccione el relleno del
tapizado. Los rellenos de color mojados pueden
destefiir y manchar el tapizado.
c. Planee actividades para darle tiempo al
tapizado a que seque.
d. Recoja toda la suciedad y residuos sueltos y
pelo de mascotas antes de hacer una limpieza
profunda.
2. Siga las instrucciones de la pagina 7 para Ilenar el
tanque de agua 2 en 1.
3. La DeepClean Premier esta disefiada con un desvio
automatico. Simplemente bloquee la unidad vertical
para limpiar con la manguera.
4. Acople la herramienta de limpieza en el extremo de
la manguera.
5. Enchufe y encienda el interruptor de encendido.
6. Limpie haciendo presion en el gatillo para rociar
la soluci6n sobre el area que va a limpiar. Hueva
despacio la herramienta hacia adelante y hacia
atras sobre el area manchada. Suelte el gatillo
para aspirar agua sucia. Siga limpiando el area,
trabajando en secciones peque_as, hasta que no se
pueda extraer mas suciedad. Enjuague (opcional)
y aspire como sea necesario. Precauci6n: No moje
demasiado.
7. Extraiga las herramientas y enjuaguelas en agua
corriente limpia. Seque y vuelva a instalar en el
extremo de la manguera.
8. Se recomienda que aspire agua limpia de un tazon
para enjuagar la manguera.
9. Antes de reemplazar, levante la manguera y estfrela
para asegurarse de que se ha eliminado toda el
agua de la misma.
10. Envuelva la manguera alrededor de su soporte.
11.Vacie el tanque de agua 2 en 1y enjuaguelo,
siguiendo las instrucciones de la pagina 10.
Rotulo del fabricante
4,
9,
www, BISSELL,com 8OO,237,7691
9

Limpieza con la herramienta para atrapar manchas (algunos modelos)
Es posible que su limpiadora profunda haya venido con
una herramienta para atrapar manchas. Esta herramienta
es muy buena para mantener la suciedad fuera del
sistema de manguera de la maquina.
1.Conecte la herramienta para atrapar manchas en
el extremo de la manguera.
2. Recoja suavemente los semisolidos con una
cuchara o una espatula. No use un cuchillo ni
otro utensilio con bordes filosos porque puede
dafiar la alfombra o el tapizado.
3. Siga las instrucciones 3-6 de la pagina 9 bajo
"Limpieza con accesorios".
NOTA: No llene el tanque de la herramienta
para atrapar manchas arriba de la linea de
LLENO (FULL).
4. Para vaciar la herramienta para atrapar manchas,
gire el tanque pequefio en la parte inferior de la
herramienta para soltarlo.
NOTA: Tenga cuidado de mantener la parte
superior de la herramienta apuntando hacia
arriba o se derramar_ el agua sucia del tanque.
5. Vierta el agua sucia en un fregadero o en un
inodoro y enjuague el tanque con agua limpia.
Vuelva a instalar el tanque alineando el simbolo
"unlock: (desbloquear) con la peque_a flecha en el
tanque y girandolo al simbolo "lock" (bloquear).
6. Limpie la parte delantera de la herramienta
quitando la placa sobre la via de succion. Tire
de la parte inferior de la placa hacia abajo para
quitarla. Pase la herramienta y la placa abajo de
agua limpia para enjuagar teniendo cuidado para
eliminar toda la suciedad. Vuelva a instalar la
placa delantera deslizcindola de nuevo en su sitio.
4.
6.
Limpieza
1.Quite el tanque de la base de la maquina
alzando por la manija de transporte del tanque.
Transporte como si fuese un balde a un fregadero
o al exterior donde desechara el agua sucia.
2. Destrabe la parte superior del tanque de la
parte inferior levantando las trabas a cada lado
del tanque.
3. Extraiga la parte superior del tanque alzando
por la manija.
4. Levante la parte inferior del tanque; vierta
el agua sucia en el fregadero a traves de la
abertura con forma rectangular en la esquina
del tanque.
NOTA: Es posible que observe depbsitos
de pelos y suciedad en la alfombra o en el
tanque que se soltaron debido a la accibn de
la limpieza. Estos desechos sedeben recoger y
desechar. Inspeccione el filtro rojo de pelusa en
el conducto de la parte trasera de la base de la
m_quina para ver si hay desechos y extr,_igalos
antes de continuar.
3.
2.
Filtro
www.BISSELL.com _" 8OO.237.7691
10

5. Vacie lacanasta para pelo de mascotas (en algunos
modelos) deslizando hacia la parte delantera del
tanque y alzando. Vuelva a instalar la canasta
para pelo de mascotas antes de guardar o seguir
limpiando.
6. Llene labolsa de servicio pesado con agua
corriente caliente de acuerdo con las instrucciones
de la pagina 7.
NOTA: Recuerde trabar los cierres del tanque
y probar para asegurarse de que est6n seguros
antes de alzar el tanque.
Z Enjuague con agua (recomendado). El enjuagado
es un paso adicional que se puede hacer durante
el proceso de limpieza o despues que se haya
terminado el area con alfombra. Si es necesario,
vacie la bolsa de servicio pesado y vuelva a Ilenar
solo con agua corriente caliente. Vuelva a instalar
el tanque en la maquina. Tenga cuidado de hacer un
movimiento hacia adelante (mojado) presionando
el gatillo, y un movimiento hacia atras (mojado),
seguido por un movimiento hacia adelante y atras
(seco), soltando el gatillo. Siga hasta que vea que
el agua que sale de la boquilla es transparente.
(Consulte la pagina 13para ver mas consejos sobre
el cuidado de la maquina.)
5.
Extracci6n de manchas
iNo se demorel Atender un accidente poco tiempo
despues que haya ocurrido asegura lalimpieza optima.
Dejarlo por largo tiempo puede hacer que se fije y se
convierta en permanente.
1.Seque los liquidos con una tela absorbente o con
toallas de papel. Se recomienda el uso de materiales
blancos pues ciertas tinturas se pueden correr y
empeorar la mancha.
2. Recoja suavemente los semisolidos con una cuchara
o una espatula. No use un cuchillo ni otro utensilio
con bordes filosos porque puede da_ar la alfombra o
el tapizado.
3. Si ya se ha secado el area, separe y quite de la
alfombra los semisolidos y residuos que haya que se
puedan quitar antes de hacer la limpieza profunda.
4. No olvide probar cualquier formula para quitar
manchas en un area que no sea visible. Esto es
importante pues los solventes de limpieza podrfan
da_ar algunas tinturas y materiales o los podrfan
deste_ir. Si se produce un cambio de este tipo,
pruebe una solucion distinta o Ilame a un profesional.
5. Siesta limpiando alfombras Berber, haga funcionar la
maquina suavemente en un area oculta. Si no genera
pelusa, siga limpiando el area manchada.
6. Usando el tratamiento previo para manchas rebeldes
BISSELL Stain PreTreat, rocie de manera uniforme
sobre las areas manchadas. No moje demasiado.
Espere de 3 a 5 minutos. Suavemente trabaje
la solucion secando el area con una tela limpia,
h0meda, de colores firmes.
Z Limpie areas grandes con la maquina DeepClean
Premier o use la manguera para limpiar manchas y
areas de diffcil acceso.
www, BISSELL,com 8OO,237,7691
11

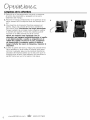
Limpieza de pisos (solo algunos modelos)
Es posible que su modelo DeepClean Premier haya
venido con un accesorio para pisos y 2X formula de
solucion para pisos, Si no es asi, estos productos estan
disponibles para la compra Ilamando al departamento
de atencion al cliente de BISSELL o en su sitio web,
La herramienta para pisos proporciona una limpieza
eficaz para pisos de linoleo, vinilo y baldosas,
Precaucibn: No use en pisos de madera sin sellar.
1.Aspire o barra bien para recoger suciedad suelta y
pelo de mascotas,
2. Hueva los muebles si es necesario,
& Instale la herramienta para pisos sobre la parte
inferior de la maquina enganchando en la boquilla y
desplazando hacia abajo hasta que calce en su sitio
emitiendo un chasquido,
4. Siga las instrucciones de la pagina 7 para Ilenar el
tanque de agua 2 en 1,
5. Enchufe en un tomacorriente y encienda el
interruptor.
6. Mueva la maquina lentamente hacia adelante
y atras sobre la superficie del piso una vez
mientras presiona el gatillo, Precauci6n: No moje
demasiado.
7. Repita el movimiento sin presionar el gatillo usando
la herramienta para pisos de madera para recoger y
aspirar el agua sucia.
8. Espere el tiempo suficiente para que seque el piso,
9. Extraiga la herramienta para pisos y seque antes de
guardar.
ADVERTENCIA
PararedudrelriesgodeincendiosVde(hoqueelectrko,
(uandoselimpianlospisossedebeusarlaherramienta
BISSELLparapisos(160-0208)Vs61oseladebeusarconel
IfquidodelimpiezadelassohdonesparapisosBISSELL2X
quesonparausarconesteelectrodomestko.
Almacenamiento de la mztquina
Una vez que haya terminado con la limpieza,
asegQrese de vaciar el tanque de agua 2 en 1,que se
Io enjuague y seque antes de usarlo nuevamente,
NOTA: Guardar la limpiadora vertical, en un z_rea
protegida y seca. Debido a que este producto usa
agua no se Io debe guardar donde corra riesgo de
congelarse. Si se congela da_arz_los componentes
internos y anularz_la garantia.
www.BISSELLcom @r 8OO.237.7691
12

Cuidado de la m_quina
Para obtener mejores resultados, unos pocos
pasos pueden asegurar que su maquina reciba
buen mantenimiento despu_s que ha terminado la
limpieza.
1.Enjuague la maquina para extraer la solucion
residual que haya quedado.
a. Llene el tanque de agua 2 en ] con agua
corriente caliente limpia.
b. Recline la manija y presione el gatillo de
roc[o durante 15segundos mientras hace
unas pasadas hacia adelante y atras sobre la
alfombra. Suelte el gatillo para aspirar. Repita
durante otros 15segundos. Siga sin presionar el
gatillo hasta que ya no se aspire mas agua.
2. Presione el boton de encendido para apagar la
maquina. Desenchufe la maquina y envuelva el
cordon. Llene el tanque de agua 2 en 1.
3. Enjuague el tanque de agua 2 en ] con agua
corriente caliente, teniendo cuidado de limpiar
abajo de la bolsa de servicio pesado y alrededor
de ella.
4. Se puede enjuagar la mitad superior del tanque
a traves del area de la boquilla. Limpie el filtro
rojo de la suciedad que se haya acumulado.
5. Manteniendo el tanque de agua 2 en ] afuera
de la base de la maquina, simplemente quite la
boquilla del piso girando las Ilaves de bloqueo
(consulte la ubicacion en la imagen) a la posicion
de "unlock" y levante. Enjuague la boquilla del
piso con agua corriente.
6. Todo pelo o suciedad suelta se puede quitar de
los rodillos de los cepillos y desechar. Para la
limpieza mas completa antes de guardar, siga las
instrucciones de abajo para quitar y reemplazar
los rodillos de cepillos y las correas.
7. Reemplace la boquilla alineando las trabas con
sus ranuras y colocando la boquilla y las tapas
de extremo de nuevo en la base de la maquina.
Asegure en su sitio girando las trabas a la
posicion de "lock" (cerrada).
8. Para limpiar los accesorios que se puedan haber
usado, quite de la manguera y enjuague bajo
agua corriente limpia. Seque y reemplace el
accesorio en el soporte para la manguera. Limpie
la manguera succionando agua corriente limpia.
Antes de reemplazar, levante la manguera y
est[rela para asegurarse de que se ha eliminado
toda el agua de la misma. Consulte la pagina 9.
9. Para limpiar el desv[o de la succion, quite los dos
tornillos de la parte posterior del alojamiento
del desv[o. Lleve el alojamiento del desv[o a un
fregadero y enjuague con agua. Tenga cuidado
de quitar cualquier suciedad que se pueda haber
acumulado y causar un taponamiento. Cambie el
alojamiento del desv[o y los dos tornillos.
10. Despues que se sequela alfombra, aspire de
nuevo para eliminar pelo y pelusa.
A ADVERTENCIA
4,
Parareducirelriesgodechoqueelectrico,apague(OFF)
elinterruptordeencendidoVdesconecteelenchufe
delt0mac0rrienteelectric0antesdeefectuartareasde
mantenimient00identificarfallas,
Filtro
Desviador
www, BlSSELLcom 8OO,237,7691
13

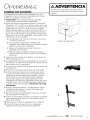
Es posible que sea necesario reemplazar una o ambas
correas ocasionalmente. Si eso es necesario, siga las 3.
instrucciones a continuacion.
1.Apague la maquina y desench0fela de la pared.
2. Extraiga el tanque de agua 2 en 1.Coloque a un
lado.
3. Extraiga la boquilla y las tapas de extremo
siguiendo las instrucciones del Paso 5 en la pagina
13.
4. Gire la maquina sobre un lado. IMPORTANTE: lado 5,
del cord6n hacia arriba.
5. Extraiga un tornillo plateado del brazo de pivote.
6. Extraiga el brazo de pivote levantando suavemente
hacia arriba.
7. Extraiga la correa de transmision y cambiela
fijandola primero en la pequefia rueda de
accionamiento y conecte luego al extremo del
cepillo interno.
Mantenimiento del filtro del punto de conexi6n de liquido
Es posible que requiera la limpieza periodica
del punto de conexion de I[quido en la 1.
boquilla de roc[o.
1.Para limpiar el punto de conexion de
I[quido, extraiga la boquilla y g[rela.
2. Limpie el filtro en el extremo del punto de
conexion del I[quido usando un pequefio
clip para papeles y vuelva a instalar la
boquilla en la maquina.
www, BISSELL,com _r 8OO,237,7691
14

"° p" y eemplazo d_la correa del cepillo
Los cepillos se pueden extraer para limpiar o se los
puede reemplazar en la medida que sea necesario.
1.Siga las instrucciones para extraer la correa de
transmision de la pagina 14.
2. Extraiga los rodillos del cepillo tirando de ellos para
sacarlos de las varillas metcilicas. Tenga cuidado de
no perder la pequefia arandela en cada extremo de
los rodillos de cepillo.
3. Cambie la correa del cepillo cuando sea necesario.
4. Vuelva a colocar los rodillos del cepillo limpios o
nuevos sobre las varillas. Aseg0rese de que haya
una arandela en cada extremo de los rodillos antes
de deslizarlos sobre la varilla. Aseg0rese de dejar
que la varilla se deslice a traves del buje para
asegurar un buen ajuste.
5. Vuelva a instalar la correa del cepillo en la parte
inferior alas ruedas dentadas de los cepillos
pequefios de rodillo.
6. Reemplace la correa de transmision siguiendo el
paso 8 de la pagina 14. 7.
7. Coloque el brazo de pivote en su sitio y atornillelo
usando el tornillo plateado.
8. Reemplace la boquilla alineando las trabas con
sus ranuras y colocando la boquilla de nuevo en la
base de la maquina. Asegure en su sitio girando las
trabas a la posicion de "lock" (cerrada).
Si tiene alguna pregunta o problema para instalar o
cambiar las correas o los cepillos, Ilame a Servicio al
cliente de BISSELL
2, 5,
www.BISSELL.com 8OO.237.7691
15

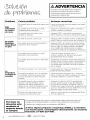
A ADVERTENCIA
Parareducirelriesgodechoqueelectrico,apague(OFF)
elinterruptordeencendidoVdesconecteelenchde
deltomacorrienteelectricoantesdeefectuartareasde
mantenimientooidentificarfallas.
Problema Causas posibles Acciones correctivas
vacio
Baja corriente caliente
intensidad Es posible que el tanque no este Apague la alimentacion (OFF). Extraiga y
de rocio o completamente asentado vuelva a asentar el tanque.
sin rocio ......................................................................................................................................................................................................................................................................................................................................................................................................
Es posible que la bomba haya Apague (OFF) y encienda nuevamente
,!,,,,P,e_rd!i,d,°,,,,e_Lcebad° ,i, (ON). Espere un minuto y presione el gatillo.
Se salio la correa, o esta rota Apague (OFF) y desenchufe la unidad de la
pared. Siga las instrucciones de la pagina 15
El ¢epillo
DirtLifter _' Es posible que se haya disparado el Apague (OFF) la maquina y desench0fela
PowerBrush disyuntor de la maquina del tomacorriente de la pared. Compruebe
no gira que no haya un objeto extra_o atrapado
en el rodillo del cepillo. Retire el objeto.
Enchufe la maquina y reponga el disyuntor.
Es posible que el tanque no este Tome el tanque de agua 2 en 1 y
asentado correctamente vuelva a asentar de manera que quepa
La
limpiadora
no aspira la
.o
Es posible que el tanque no este bien Aseg0rese de que los cierres del tanque en
armado ambos lados el mismo esten correctamente
cerrados. Para asegurarse de que estan
correctamente cerrados, levante el tanque
pot la manija
El tanque de agua 2 en 1 esta vacio Compruebe los niveles de liquido en la
bolsa de servicio pesado
El tanque de agua 2 en 1 ha extraido Vacie el tanque de agua 2 en 1.Vuelva a
la cantidad maxima de agua sucia Ilenar la bolsa de servicio pesado con agua
y se ha cerrado la puerta roja del corriente caliente y vuelva a instalar.
flotador.
Es posible que se haya cerrado la Apague la maquina (OFF), permitiendo
"puerta" roja del flotador como que se suelte la puerta roja del flotador a
resultado de haber golpeado un la posici6n de abierta. Encienda (ON) la
objeto o pot mover la maquina hacia unidad para seguir limpiando. Aseg0rese de
adelante y arras demasiado rapido que sus movimientos hacia adelante y hacia
arras se hagan a ritmo mas lento.
/
El filtro rojo para pelusa en el Siga las instrucciones de limpieza del Paso
conducto de aire esta sucio 4 en la pagina 13.
Por favor no
devuelva este
producto al
negocio donde
Io compr6.
Un representante de servic_o autorizado debe efectuar todo el
trabajo de mantenimiento o servicio no incluido en el manual.
Gracias pot seleccionar un producto BISSELL.
Si tiene alguna pregunta o inquietud, BISSELL Io atender_
con mucho gusto. Comuniquese directamente con nosotros
Ilamando al 1-800-237-7691.
www, BlSSELLcom _" 8OO,237,7691
16

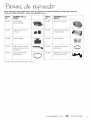
Estos articulos estan disponibles para su limpiadora profunda BISSELL DeepClean Premier.
Llame al 1-800-237-7691 o visite www.BISSELL.com
PIEZA NOMBRE DE LA PIEZA NOMBRE DELA
N.° PIEZA N.° PIEZA
160-0087 Tapadeltanque 160-0092 Parteinferiordeltanque
(Purpuraarandano)
160-0097 (onjuntodetapaeinserto 160-0098 Boquilladelpisocon(onjunto
deltanque _ detapadeextremo
203-6845 Puertadelflotador 160-0209 Tazademedid6n
160-0104 Rodillode(epillo- 6hileras _ 203-6688 (orreadel(eprllopequeno
(induyeI(epillo,eje,2brazos ...................................._ (ladoderecho)
basculantes)
PlanguerasuperiorVsoporte
160-0105 (orreadel(epillogrande 160-0079
dadoizquierdo) paraenvolverelcordon
"'- W
*Notodaslaspiezasseinduyencontodoslosmodelos.
www.BISSELLcom 8OO.237.7691
17

Estos articulos estan disponibles para su limpiadora profunda BISSELL DeepClean Premier.
Llame al 1-800-237-7691 o visite www.BISSELL.com
PlEZA NOMBRE DE LA
N.° PlEZA
203-6651 Herramientaparamanchas
rebeldes3"
203-6653 Herramientaparatapizados4"
203-7412
62E5-2
4001
Herramientapararodaren
espaciospequefios
HerramientadeaIcance
profundoparamascotas
FOrmulaparalalimpieza
profundaconlaprotectionde
S(otchgardTMde60onzas
F6rmulalimpiadoracon
alQrgenosde60onzas.
NOMBRE DE LA
PlEZA
F6rmulaparalalimpieza
profundaprofesionalconla
protecdOndeS(otchgardTM de
48onzas
TM
StainPreOeanerde22onzas
Herramientademano
motorizadaTurboBrush_
203-6654 Herramientaparaescaleras6"
160-0208 Herramientaparapisos
160-0057 Herramientaparaatrapar
man(has
99K5-2 FOrmulaparaextraermanchas
yoloresdemascotascon
protectionS(otchgard'Mde
60onzas.
F6rmulaDeep(lean+Oxvde
48onzas
56L9 FOrmuladesoludonespara
pisosde16onzas
0790..........................PetStainPreTreatde22onzas
*Notodaslaspiezasseinduyencontodoslosmodelos.
www.BlSSELLcom @r 800.237.7691
18

Estagarantfaleconcedederechoslegalesespecificos,Vesposible
quetengaotrosderechosquepuedenvariardeunestadoal
otro.Sinecesitainstrucdonesadidonalesconrespectoaesta
garantfa,ositienepreguntasconrespectoaIoquepuedecubrir,
(omunfqueseconBISSELLCustomer(arepor(orreoelectrOnico,
teldonoo(orreopostal(omosedescribeacontinuation.
Garantia limitada de tres a_os
Sujetoahs*EXCEKIONESYEXCLUSIONESidentifkadasa
continuation,unavezqueBISELLrecibaelproductoVasupropio
criterio,BISSELLrepararaoreemplazar_gratuitamente(con
componentesoproductosnuevosoremanufacturados)durante
tresahosapartirdelafechadecompradelcompradororiginal,
cuaiquierpiezadefectuosaofalhda.
Consultelainformationacontinuationsobre"Sisuproducto
BISSELLnecesitaservicio".
Estagarantiaseaplicaaproductosusadosparafinespemonales,
Vnoparaservicioscomerdalesodealquiler.Estagarantianose
aplicaalosventiladoresnialoscomponentesdemantenimiento
peri6dicocomofiltros,correasocepillos.Nocubrelosdahoso
fallascausadospornegligencia,abusoodescuido,reparaci6nno
autorizadaocualquierotrousoquenoest#deacuerdoconlagufa
delusuario.
BISSELLNOESRESPONSABLEDEDAi<IOSINCIDENTALES0
(ONSECUENTESDENINGUNANATURALEZARELACIONADOSCONEL
USODEESTEPRODUCTO.LARESPONSABILIDADDEBISSELLNOSER_,
MAYOROUEELPRE(IODE(OMPRADELPRODUCTO.
Algunosestadosnopermitenla ex¢lusi6nnila
limita¢i6ndedaBos¢onsecuentesoin¢identales,
de modoque lalimita¢i6noex¢lusi6narriba
men¢ionada puedeno corresponderle.
*EXCEPClONES Y EXCLUSIONES DE LOS
TI_RMINOS DE LA GARANTJA LIMITADA
ESTAGARANTiAESEXCLUSIVAYREEMPLAZACUALQUIEROTRA
GARANTiAORAL0ESCRITA.(UALQUIERGARANTiAIMPLiCITAQUE
PUEDASURGIRCONFORMEADERECHO,INCLUYENDOGARANTiAS
IMPLiCITASDEAPTITUDEIDONIEDADPARAUNPROPOSITOEN
PARTICULAR,SELIMITAALADURACIONDETRESANOSAPARTIRDE
LAFECHADECOMPRASEGUNSEDESCRIBEARRIBA.
Algunosestadosnopermitenlimitadonesencuantoala
durad6ndeunagarantiaimplidtademodoquelalimitad6no
exdusi6narribamendonadapuedenocorresponderle.
NOTA: Guarde el recibo original de
compra. Servir_ como comprobante
de la fecha de compra en caso de que
necesite hacer un reclamo de garantia.
Si su producto BISSELL requiere
servicio:
ComuniqueseconServidoalConsumidordeBISSELLparaubkar
uncentrodeservidoautorizadodeBISSELLensu8rea.
Sinecesitainformationsobrereparacionesorepuestos,ositiene
preguntassobresugarantia,comuniqueseconelServidoal
ConsumidordeBISSELL
Sitio web o correo electr6nico:
www.BISSELL.com
0 Ilame al:
Servicio al consumidor de BISSELL
1-800-237-7691
Lunes a viernes
8 am - 10 pm hora del este
Sabados 9 am - 8 pm hora del este
Domingos 10 am - 7 pm hora del este
0 escriba a:
BISSELL
PO Box 3606
Grand Rapids, MI 49501
ATENCION: Atencion al cliente
www.BISSELL.com 800.237.7691
19

Puntos de recompensa
de BISSELL
Gane puntos automaticamente
para descuentos y env[o gratis
de compras futuras.
Servicio mds r,_pido
Si suministra su informacJon ahora
ahorrara tiempo si debe comunlcarse
con nosotros con preguntas con
respecto a su producto.
Recordatorios y alertas de
apoyo para su producto
Nos comunicaremos con usted con
recordatorios y alertas importantes
sobre el mantenimiento del producto.
Promociones especiales
Optativo: iRegistre su correo
electronico y reciba avisos de ofertas,
concursos, sugerencias para la
limpieza y mucho mas!
¸
Para obtener informaci6n sobre reparaciones o piezas de repuesto, o en caso de
preguntas sobre la garantia:
Llame ah
Servicio al consumidor de BISSELL
1-800-237-7691
Lunes a viernes 8 am - 10 pm hora del este
Sabados 9 am - 8 pm hora del este
Domingos 10 am - 7 pm hora del este
Escriba a:
BISSELL
PO Box 3606
Grand Rapids MI49501
ATENCION: Atenci6n al cliente
Visite el sitio web de BISSELL: www.BISSELL.com
AI comunicarse con BISSELL, tenga a mano el nOmero de modelo de la limpiadora.
Anote su nOmero de modelo:
Anote la fecha de la compra:
NOTA: Guarde el recibo original de compra. Servird como comprobante de
la fecha de compra en caso de que necesite hacer un reclamo de garantia.
Consulte la Garantia en la pdgina 19 para ver los detalles.
Califique este producto y hcflganos saber su opinion
(a nosotros y a miles de sus amigos mas [ntimos).
www.BISSELL.com
'c2014BISSELLH0me®r_.1no
GratedRapids.Michigan
T0d0s10sderech0sr_servad0sImpr_s0enChina
Piezantimer01603752Rev03/14
Visitenuestr0siti0weben:vw_w.%SELb0m
-
 1
1
-
 2
2
-
 3
3
-
 4
4
-
 5
5
-
 6
6
-
 7
7
-
 8
8
-
 9
9
-
 10
10
-
 11
11
-
 12
12
-
 13
13
-
 14
14
-
 15
15
-
 16
16
-
 17
17
-
 18
18
-
 19
19
-
 20
20
-
 21
21
-
 22
22
-
 23
23
-
 24
24
-
 25
25
-
 26
26
-
 27
27
-
 28
28
-
 29
29
-
 30
30
-
 31
31
-
 32
32
-
 33
33
-
 34
34
-
 35
35
-
 36
36
-
 37
37
-
 38
38
-
 39
39
-
 40
40


Bissell 80R4 El manual del propietario
- Categoría
- Limpiadores a vapor
- Tipo
- El manual del propietario
En otros idiomas
- English: Bissell 80R4 Owner's manual
Documentos relacionados
-
Bissell 47A2, 17N4, 80R4 Series Heat 2X Premier Guía del usuario
-
-
-
-
Bissell 2513, 2694 Series Spotclean Little Green Vacuum Guía del usuario
-
Bissell 1846 SERIES Manual de usuario
-
-
-
-