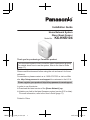
Panasonic KXHNS104 El manual del propietario
- Tipo
- El manual del propietario
Este manual también es adecuado para
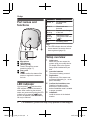
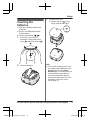
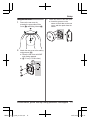
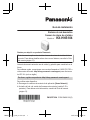
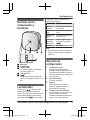
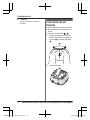
El Panasonic KXHNS104 es un sensor de rotura de vidrio diseñado para proporcionar una capa adicional de notificación en caso de rotura de vidrio. Se puede montar en la pared con o sin el adaptador de montaje en pared incluido. El sensor utiliza ondas de radio para comunicarse con el concentrador y otros dispositivos compatibles de Panasonic. Tiene un indicador LED que muestra el estado del sensor y se puede ajustar la sensibilidad del sensor.
El Panasonic KXHNS104 es un sensor de rotura de vidrio diseñado para proporcionar una capa adicional de notificación en caso de rotura de vidrio. Se puede montar en la pared con o sin el adaptador de montaje en pared incluido. El sensor utiliza ondas de radio para comunicarse con el concentrador y otros dispositivos compatibles de Panasonic. Tiene un indicador LED que muestra el estado del sensor y se puede ajustar la sensibilidad del sensor.


-
 1
1
-
 2
2
-
 3
3
-
 4
4
-
 5
5
-
 6
6
-
 7
7
-
 8
8
-
 9
9
-
 10
10
-
 11
11
-
 12
12
-
 13
13
-
 14
14
-
 15
15
-
 16
16
-
 17
17
-
 18
18
-
 19
19
-
 20
20
-
 21
21
-
 22
22
-
 23
23
-
 24
24
-
 25
25
-
 26
26
-
 27
27
-
 28
28
-
 29
29
-
 30
30
-
 31
31
-
 32
32
-
 33
33
-
 34
34
-
 35
35
-
 36
36
-
 37
37
-
 38
38
-
 39
39
-
 40
40


Panasonic KXHNS104 El manual del propietario
- Tipo
- El manual del propietario
- Este manual también es adecuado para
El Panasonic KXHNS104 es un sensor de rotura de vidrio diseñado para proporcionar una capa adicional de notificación en caso de rotura de vidrio. Se puede montar en la pared con o sin el adaptador de montaje en pared incluido. El sensor utiliza ondas de radio para comunicarse con el concentrador y otros dispositivos compatibles de Panasonic. Tiene un indicador LED que muestra el estado del sensor y se puede ajustar la sensibilidad del sensor.
en otros idiomas
- English: Panasonic KXHNS104 Owner's manual
Artículos relacionados
-
Panasonic KXHNS104 Instrucciones de operación
-
-
-
-
-
-
-
-
-
Panasonic KXHN6006SK Instrucciones de operación