Unold 28016 El manual del propietario
- Categoría
- Cafeteras
- Tipo
- El manual del propietario
Este manual también es adecuado para

Bedienungsanleitung
Modell 28016
Instructions for use - Notice d´utilisation
Gebruiksaanwijzing - Istruzioni per l’uso
Manual de instrucciones - Návod k obsluze
Kaffeeautomat
Onyx

Impressum:
Bedienungsanleitung Modell 28016
Stand: Juli 2011 /nd
Copyright ©
Mannheimer Straße 4
68766 Hockenheim
Telefon +49 (0) 62 05/94 18-0
Telefax +49 (0) 62 05/94 18-12
E-Mail [email protected]
Internet www.unold.de

3
Eierkocher Best-Nr. 8035 Toaster Big Best-Nr. 38815
Backmeister Best-Nr. 8695 Toaster Duplex Best-Nr. 38915
Blitzkocher Best-Nr. 18016 Multi 3 in 1 Best-Nr. 48356
Kaffeeautomat Best-Nr. 28016
Toaster Kompakt Best-Nr. 38015
Weitere Informationen erhalten Sie unter www.unold.de
UNOLD
®
Onyx-Serie

4
1
2
4
3
5
Deutsch English Français Nederlands Italiano Espanol Česky Polska
1 Dauerlter Permanent
lter
Filtre
permanent
Duurzaam
lter
Filtro per-
manente
Filtro
continuo
Trvalý ltr Filtr stały
2 Filterhalter Filter holder Porte ltre Filter-houder Portaltro Portador de
ltro
Držák ltru Wysuwana/
obrotowa
obudowa
ltra z
uchwytem
ltra
3 Wassertank Water tank Réservoir
d’eau
Water-
reservoir
Serbatoio
acqua
Tanque de
agua
Nádržka na
vodu
Zbiornik na
wodę
4 Glaskanne Glass carafe Verseuse Glazen kan Brocca in
vetro
Jarra de
agua
Skleněná
konvice
Dzbanek
szklany
5 Gerät Body Coprs Apparaat Corpo Aparato Přístroj Urządzenie
EINZELTEILE

5
Deutsch English Français Nederl. Italiano Espanol Česky Polska
1 Kontroll-
leuchte EIN
Control light
ON
Témoin
MARCHE
Controle-
lampje
EIN (aan)
Spia ON/
Accesso
Luz de control
ON
Kontrolka ZAP lampka
kontrolna
(urządzenie
włączone)
2 Kontroll leuchte
AUTO
Control light
AUTO
Témoin
AUTO
Controle-
lampje AUTO
Spia AUTO Luz de control
AUTO
Kontrolka
AUTO
lampka
kontrolna
(opcja auto)
3 Taste EIN/AUS
(EIN / AUTO /
AUS)
Button EIN/
AUS (ON/
AUTO/OFF)
Bouton EIN/
AUS
MARCHE/
AUTO/ARRET
Toets EIN/AUS
(AAN / AUTO
/ UIT)
Pulsante EIN/
AUTO/AUS
Acceso/Spento
Tecla EIN/AUS
(ON/AUTO/OFF
Tlačítko ZAP/
VYP (ZAP/
AUTO / VYP)
włączone/
automatyczne/
wyłączone
4 Taste PROG
(Progammie-
rung)
Button PROG
(Program)
Bouton PROG
(rogrammer)
Toets PROG
(Programme-
ren)
Pulsante
PROG
(Programmare)
Tecla PROG
(Programación)
Tlačítko PROG
(programování)
programo-
wanie
urządzenia
5 Taste STD
STUNDEN
Button STD
HOURS
Bouton
HEURES
Toets STD
UREN
Pulsante STD
Ore
Tecla HOUR
HORAS
Tlačítko HOD
HODINY
godziny
6 Taste MIN
MINUTEN
Button MIN
Minutes
Bouton
MINUTES
Toets MIN
MINUTEN
Pulsante MIN
Minuti
Tecla MIN
MINUTOS
Tlačítko MIN
MINUTY
minuty
1
2
3
4
5
6
BEDIENFELD

6
1. Bitte lesen Sie die folgenden Anweisungen und
bewahren Sie diese auf.
2. Dieses Gerät ist nicht dafür bestimmt, durch
Personen (einschließlich Kinder) mit einge-
schränkten physischen, sensorischen oder gei-
stigen Fähigkeiten oder mangels Erfahrung und/
oder mangels Wissen benutzt zu werden, es sei
denn, sie werden durch eine für ihre Sicherheit
zuständige Person beaufsichtigt oder erhielten
von ihr Anweisungen, wie das Gerät zu benut-
zen ist.
3. Kinder sollten beaufsichtigt werden, um sicher
zustellen, dass sie nicht mit dem Gerät spie-
len.
4. Das Gerät an einem für Kinder unzugänglichen
Ort aufbewahren.
5. Das Gerät nur an Wechselstrom mit
Spannung gemäß Typenschild anschließen.
6. Dieses Gerät darf nicht mit einer externen
Zeitschaltuhr oder einem Fernbedienungs-
system betrieben werden.
7. Tauchen Sie das Gerät oder die Zuleitung aus
Gründen der elektrischen Sicherheit keinesfalls
in Wasser oder andere Flüssigkeiten ein.
8. Reinigen Sie das Gerät aus Gründen der
elektrischen Sicherheit nicht in der Spül-
maschine.
9. Schalter und Kabel dürfen nicht mit Wasser
oder anderen Flüssigkeiten in Kontakt kom-
men. Falls dies doch einmal geschieht, müssen
vor erneuter Benutzung alle Teile vollkommen
trocken sein.
10. Das Gerät bzw. die Zuleitung niemals mit nas-
sen Händen berühren.
11. Das Gerät ist ausschließlich für den
Haushaltsgebrauch oder ähnliche Ver-
wendungszwecke bestimmt, z. B.
Leistung:
1.000 W, 230 V~, 50 Hz
Gehäuse / Deckel:
Edelstahl, gebürstet
Kunststoffteile schwarz, textiert
Wasserbehälter:
Kunststoff, halbtransparent, mit Wasserstandsanzeige
Kanne:
Glaskanne mit wärmeisolierten Kunststofffgriff
Volumen:
Ca. 1,5 l, 10 – 15 Tassen
Größe (B/T/H):
Ca. 29,0 x 23,5 x 35,5 cm
Gewicht:
Ca. 2,4 kg
Kabellänge:
Ca. 90 cm, fest montiert
Ausstattung:
Elektronisches Display mit
• Timerfunktion (24 Std. vorprogrammierbar)
• Zeitanzeige
Automatische Abschaltung nach 2 Stunden
Warmhalteplatte
Schwenklter mit entnehmbarem Filterhalter und Tropfstopp
Dauerlter
Zubehör:
Messlöffel
Bedienungsanleitung
Ersatzteile:
Glaskanne mit Deckel
Filterhalter mit Tropfstopp
Dauerlter
Art. Nr. 2801640
Art. Nr. 2801663
Art. Nr. 2801665
Technische Änderungen vorbehalten.
BEDIENUNGSANLEITUNG
TECHNISCHE DATEN MODELL 28016
SICHERHEITSHINWEISE

7
• Teeküchen in Geschäften, Büros oder
sonstigen Arbeitsstätten,
• landwirtschaftlichen Betrieben,
• zur Verwendung durch Gäste in Hotels,
Motels oder sonstigen Beherbergungs-
betrieben,
• in Privatpensionen oder Ferienhäusern.
12. Stellen Sie das Gerät aus Sicherheitsgründen
niemals auf heiße Oberächen, ein Metalltablett
oder auf einen nassen Untergrund.
13. Das Gerät oder die Zuleitung dürfen nicht in
der Nähe von Flammen betrieben werden.
14. Benutzen Sie den Kaffeeautomat stets auf
einer freien, ebenen und hitzebeständigen
Oberäche.
15. Das Gerät darf nur zur Zubereitung von Kaffee
verwendet werden, auf keinen Fall zum
Erhitzen/Warmhalten von Milch oder anderen
Flüssigkeiten.
16. Achten Sie darauf, dass die Zuleitung nicht
über den Rand der Arbeitsäche hängt, da dies
zu Unfällen führen kann, wenn z. B. Kleinkinder
daran ziehen.
17. Die Zuleitung muss so verlegt sein, dass ein
Ziehen oder darüber Stolpern verhindert wird.
18. Wickeln Sie die Zuleitung nicht um das Gerät
und vermeiden Sie Knicke in der Zuleitung, um
Schäden an der Zuleitung zu vermeiden.
19. Verwenden Sie den Kaffeeautomat nur in
Innenräumen.
20. Decken Sie das Gerät während des Betriebs
niemals ab, um eine Überhitzung des Gerätes
zu vermeiden.
21. Verwenden Sie zum Aufbrühen von Kaffee
frisches, klares Wasser und füllen Sie den
Wasserbehälter mindestens bis zur untersten
Markierung (2 Tassen) und höchstens bis zur
MAX-Markierung.
22. Schalten Sie das Gerät erst ein, nachdem Sie
Wasser in den Wassertank gefüllt haben.
23. Bei mehrmaligem Gebrauch lassen Sie das
Gerät bitte zwischendurch für mindestens
5 Minuten abkühlen.
24. Verwenden Sie die Kaffeekanne nie in der
Mikrowelle, da die Kanne hierfür nicht geeig-
net ist.
25. Verschieben Sie das Gerät nicht, solange es in
Betrieb ist, um Verletzungen zu vermeiden.
26. Stellen Sie sicher, dass allen Benutzern, ins-
besondere Kindern, die Gefahr durch aus-
tretenden Dampf und heiße Wasserspritzer
bekannt ist – Verbrennungsgefahr!
27. Das Gerät darf nicht mit Zubehör anderer
Hersteller oder Marken benutzt werden, um
Schäden zu vermeiden.
28. Nach Gebrauch sowie vor dem Reinigen den
Netzstecker aus der Steckdose ziehen. Das
Gerät niemals unbeaufsichtigt lassen, wenn der
Netzstecker eingesteckt ist.
29. Prüfen Sie regelmäßig das Gerät, den
Stecker und die Zuleitung auf Verschleiß
oder Beschädigungen. Bei Beschädigung
des Anschlusskabels oder anderer Teile sen-
den Sie das Gerät oder die Zuleitung bitte
zur Überprüfung und Reparatur an unseren
Kundendienst. Unsachgemäße Reparaturen
können zu erheblichen Gefahren für den
Benutzer führen und haben den Ausschluss der
Garantie zur Folge.
30. Wenn die Anschlussleitung dieses Gerätes be-
schädigt wird, muss sie durch den Hersteller
oder seinen Kundendienst oder eine ähn-
lich qualizierte Person ersetzt werden, um
Gefährdungen zu vermeiden.
1. Sorgen Sie dafür, dass Ihr Kaffeeauto mat
stets sauber und entkalkt ist. (siehe Abschnitt
Reinigen und Entkalken).
2. Bewahren Sie Kaffeebohnen und Pul ver kaffee
in einer gut verschlosse nen Dose kühl und dun-
kel auf, jedoch nicht im Kühlschrank.
3. Für optimalen Kaffeegenuss empfehlen wir,
Kaffeebohnen erst direkt vor der Ver wendung zu
mahlen. Verwenden Sie nur frisches Wasser.
4. Kaffee schmeckt frisch gebrüht am besten.
Wird Kaffee sehr lange warm gehalten, kann er
bitter werden.
5. Zum Ausgießen des Kaffees kann der Deckel
der Kanne geschlossen bleiben.
TIPPS FÜR EINEN UNGETRÜBTEN KAFFEEGENUSS
Der Hersteller übernimmt keine Haftung bei fehlerhafter Montage, bei unsachgemäßer oder fehlerhafter
Verwendung oder nach Durchführung von Reparaturen durch nicht autorisierte Dritte.

8
Dieser UNOLD-electro Kaffeeautomat bietet Ihnen die Möglichkeit, entweder manuell per Knopfdruck
Kaffee zu kochen oder das Gerät bis zu 24 Stunden im Voraus zu programmieren.
1. Entnehmen Sie den Wasserbehälter (Deckel öff-
nen und am integrierten Griff nach oben ziehen)
und füllen diesen bis zur gewünschten Füll-
menge mit kaltem Wasser. Die Markierung ent-
spricht der Anzahl von Tassen. Wasserbehälter
wieder ein setzen.
ACHTUNG:
Aus Sicherheitsgründen hat der Was ser behälter
auf der Rückseite eine Überlauföffnung.
Beachten Sie daher beim Füllen des Behälters
unbedingt die MAX-Markierung und vermeiden
Sie ein Überfüllen des Behälters.
2. Während des Brüh vorgangs kann ein geringer
Teil des Wassers ver dampfen, daher kann die
Menge des ge brühten Kaffees abweichen.
3. Zum Einfüllen des Kaffees die Schwenk-
vorrichtung öffnen. Setzen Sie den Filterhalter
ein. Achten Sie darauf, das die vorstehende
Leiste am Filterhalter in die entsprechende
Aus spa rung der Schwenk vorrichtung passt.
Bei falschem Einsetzen läßt sich die Schwenk-
vorrichtung nicht schließen.
4. Setzen Sie den mitgelieferten Dauer lter in den
Filterhalter ein.
5. Alternativ können Sie Papier ltertüten der
Größe 1x4 in den Filterhalter einsetzen
(Präge rand unten und seitlich um falten!). Die
Filtertüte darf nicht über den Rand des Filter-
halters hinaus ragen.
6. Die erforderliche Kaffeemenge ein fül len, nach
Geschmack pro Tasse 5-7 g (max. 1 Kaffeelöffel)
mittel fein gemah le ner Kaffee. Zu fein gemah-
lener Kaffee kann die Poren des Filters ver-
stopfen und zum Über laufen führen.
7. Den Schwenklter schließen, bis dieser einra-
stet.
8. Stellen Sie die Kanne mit korrekt geschlos-
senem Deckel auf die Warmhalteplatte. Nur bei
geschlossenem Deckel ist der Tropfstopp aktiv.
KAFFEEZUBEREITUNG OHNE TIMERFUNKTION
1. Sobald der Kaffeeautomat an das Stromnetz
angeschlossen ist, zeigt das Display 12:00 an.
2. Drücken Sie einmal die Taste PROG. Die
Displaybeleuchtung schaltet sich ein.
Im Display erscheint oben rechts CLOCK.
CLOCK
12:00
3. Drücken sie nun die Tasten STD und MIN so-
lange, bis die aktuelle Uhrzeit erreicht ist.
4. Nach etwa 10 Sekunden ohne Tasten betätigung
geht wieder das Gerät in die Grundstellung,
nach wenigen Sekunden schaltet sich auch die
Display be leuch tung wieder aus.
PROGRAMMIEREN DER UHRZEIT
1. Alle Ver packungs materialien entfer nen.
2. Prüfen Sie, ob alle aufgeführten Zube hör teile
vorhanden sind.
3. Die Glaskanne, den Deckel der Kanne, den
Wasserbehälter, den Filter halter und den
Dauerlter in heißem Wasser mit einem milden
Spülmittel spülen, mit klarem Was ser abspülen
und gut abtrock nen.
4. Das Gehäuse des Geräts mit einem feuchten
Tuch ab wischen und sorgfältig ab trocknen.
5. Wasserbehälter entnehmen und bis zur MAX-
Markierung mit kaltem Wasser füllen, Deckel
schließen und den Wasserbehälter wieder auf
den Automat aufsetzen.
6. Stecken Sie den Stecker in die Steck dose. Das
Gerät ist nun betriebsbereit.
7. Vor der ersten Benutzung, oder wenn das
Gerät längere Zeit nicht benutzt wurde, den
Wasserbehälter bis zur maxi malen Menge mit
klarem, kaltem Wasser füllen und ein bis zwei
Brüh vorgänge ohne Kaffeemehl durch führen.
INBETRIEBNAHME

9
1. Befolgen Sie die Schritte 1-8 des Abschnitts
Kaffeezubereitung ohne Timerfunktion.
2. Drücken Sie einmal die PROG-Taste und prü-
fen Sie, ob die Uhrzeit korrekt ein gestellt ist
(siehe Abschnitt Pro gram mieren der Uhrzeit).
3. Drücken Sie erneut die Taste PROG, um
den Brühbeginn einzustellen.
Im Display erscheint oben links TIMER.
TIMER
15:00
Drücken sie nun die Tasten STD und MIN so-
lange, bis die von Ihnen gewünschte Startzeit
für den Brüh vorgang eingestellt ist.
4. Drücken Sie danach zweimal die EIN/AUS-
Taste, um die Automatik-Funktion zu starten.
5. Die grüne Kontrollleuchte AUTO leuchtet auf
und bleibt eingeschaltet.
6. Wenn Sie die voreingestellte Zeit über prüfen
möchten, drücken Sie zweimal die PROG-
Taste. Im Display erscheint oben links TIMER
sowie die voreingestellte Zeit. Auf Wunsch kön-
nen Sie diese jetzt verändern.
7. Nach etwa 10 Sekunden ohne Betätigung
einer Taste geht das Display wieder in die
Grundstellung, danach schaltet sich die
Display beleuchtung wieder aus.
8. Sie können die AUTO-Funktion jederzeit ab-
brechen, indem Sie einmal die EIN/AUS-Taste
drücken.
9. Bei Erreichen der voreingestellten Zeit er-
lischt die grüne Kontrollleuchte, die rote
Kontrollleuchte schaltet sich ein und der
Brühvorgang beginnt.
10. Nach Beendigung des Brühvorgangs können
Sie das Gerät durch zwei maliges Drücken der
EIN/AUS-Taste ausschalten.
11. Wenn das Gerät nicht ausgeschaltet wird, bleibt
die Warmhalteplatte in Betrieb. Zwei Stunden
nach Brüh beginn schaltet sich das Gerät auto-
matisch ab.
12. Wenn sich das Gerät vorzeitig abschaltet,
könnte dieses verkalkt sein. Bitte befolgen Sie
die Anweisungen im Abschnitt Reinigung und
Entkalkung.
13. Die vorprogrammierte Zeit bleibt erhalten und
kann durch zweimaliges Drücken der EIN/AUS-
Taste wieder aktiviert werden.
14. Wenn Sie eine neue Zeit ein stellung eingeben
möchten, beginnen Sie erneut die Pro gram mie-
rung wie oben beschrieben.
KAFFEEZUBEREITUNG MIT TIMERFUNKTION
9. Drücken Sie die Taste EIN/AUS. Die rote
Kontrolleuchte EIN leuchtet auf und der
Brühvorgang beginnt.
10. Nach Beendigung des Brühvorgangs können
Sie das Gerät durch zwei maliges Drücken der
EIN/AUS-Taste ausschalten.
11. Wenn das Gerät nicht ausgeschaltet wird, bleibt
die Warmhalteplatte in Betrieb. Zwei Stunden
nach Brüh beginn schaltet sich das Gerät auto-
matisch ab.
12. Wenn sich das Gerät vorzeitig abschaltet,
könnte dieses verkalkt sein. Bitte befolgen Sie
die Anweisungen im Abschnitt Reinigung und
Entkalkung.

10
1. Regelmäßiges Entkalken erhält die
Leistungsfähigkeit Ihres Kaffeauto maten und
erhöht dessen Lebensdauer.
2. Wenn das Gerät sich vor Ablauf der Warm-
haltezeit abschaltet oder wenn beim Aufbrühen
des Kaffees Wasser im Wasser tank zurückbleibt,
sollte das Gerät dringend entkalkt werden.
3. Verwenden Sie hierzu einen handels üblichen
Entkalker entspre chend der Anweisung auf der
Verpackung.
4. Füllen Sie den Wassertank bis zur MAX-
Markierung mit der Entkalker lösung.
5. Alternativ können Sie auch Zitronen säure ver-
wenden. Geben Sie 25-50 g Zitronen säure auf
einen Liter Wasser.
6. Stellen Sie die Kaffeekanne auf die Warm-
halteplatte.
7. Drücken Sie nun die EIN/AUS-Taste und lassen
Sie ca. ein Drittel der Wasser menge durchlau-
fen.
8. Schalten Sie das Gerät aus und lassen die
Entkalkerlösung ca. 15-30 Min. einwirken. Bei
starker Verkalkung können Sie die Lösung auch
über Nacht einwirken lassen.
9. Danach erneut START drücken und die rest-
liche Entkalkerlösung durchlaufen lassen.
10. Gießen Sie die Entkalkerlösung weg und lassen
Sie 2-3 mal klares Wasser durch laufen.
ENTKALKEN
REINIGEN
1. Vor dem Reinigen den Stecker aus der
Steckdose ziehen und das Gerät vollständig ab-
kühlen lassen.
2. Das Gerät darf nicht in Wasser oder eine andere
Flüssigkeit eingetaucht werden.
3. Schwenklter öffnen und den Dauerlter
bzw. die Filtertüte mit Kaffee satz sowie den
Filterhalter entnehmen. Kaffeesatz bwz.
Papierlter mit Kaffeesatz entsorgen.
4. Oberhalb des Filters kann sich Kon dens wasser
bilden. Wischen Sie nach dem Kaffeekochen
die Unterseite des Deckels mit einem trockenen
Tuch ab.
5. Die abnehmbaren Teile wie Wasser behälter,
Kanne, Deckel und Filter halter können in war-
mem Wasser mit einem milden Spülmittel ge-
spült werden.
6. Zur einfachen Reinigung kann der Deckel der
Kaffeekanne geöffnet wer den, indem Sie auf
den Knopf am Handgriff drücken.
7. Wischen Sie das Gerät sowie die Warmhalte-
platte mit einem ausgedrück ten feuchten Tuch
ab.
8. Verwenden Sie keine schar fen oder scheu ern-
den Putz mittel.
9. Alle Teile müssen vollkommen trocken sein, be-
vor Sie das Gerät wieder benutzen.

11
1. Please read the following information and keep
it for future reference.
2. This appliance is not intended for use by per-
sons (including children) with limited physical,
sensory or mental abilities or with lack of ex-
perience or lack of knowledge, unless they are
supervised by a person who is responsible for
their safety or have been instructed on how to
use the appliance.
3. Children should be supervised in order to ensu-
re that they do not play with the appliance.
4. Keep the appliance out of the reach of child-
ren.
5. Connect appliance only to an AC power supply
with voltage corresponding to the voltage on the
rating plate.
6. Do not operate this appliance with an external
timer or remote control system.
7. For reasons of electrical safety, never immerse
the appliance or the power cord in water or
other liquids.
8. For reasons of electrical safety, do not clean the
appliance in the dishwasher.
9. The switch and power cord should never come
into contact with water or other liquids. In case
this ever happens, all parts must be completely
dry before operating the appliance again.
10. Never touch the appliance or power cord with
wet hands.
11. This appliance is intended to be used in
household and similar applications such as:
staff kitchen areas in shops, offices and
other working environments;
farm houses;
by client in hotels, motels and other working
environments;
bed and breakfast type environments.
Power Rating:
1.000 W, 230 V~, 50 Hz
Housing / Lid
Stainless steel, brushed,
Plastic parts black, textured
Water tank:
Plastic, semi-transparent, with water level indicator
Carafe:
Glass carafe with insulated plastic handle
Volume:
approx. 1,5 l, 10 – 15 cups
Dimensions W/D/H):
Approx. 29,0 x 23,5 x 35,5 cm
Weight:
Approx. 2,4 kg
Cable length:
Approx.
90 cm, rmly mounted
Features:
Electronic display with
• Timer function (24 hrs preset)
• Clock
Automatic disconnection after 2 hours
Warming plate
Swing-out folter with removable lter holder and drip stop
Permanent lter
Accessories:
Measuring spoon
Instructions
Spare parts:
Glass carafe with lid
Filter holder with drip stop
Permanent lter
Art. no. 2801640
Art. no. 2801663
Art. no. 2801665
INSTRUCTIONS FOR USE
TECHNICAL SPECIFICATION MODEL 28016
IMPORTANT SAFEGUARDS

12
12. For safety reasons, never place the app-liance
on hot surfaces, a metal tray or a wet surface.
13. Do not place the appliance or power cord near
open ames during operation.
14. Always use the coffeemaker on a level, unclut-
tered and heatresistant surface.
15. The appliance is approved for household use
only and may be used only for brewing cof-
fee, never for heating milk or other liquids or
keeping them warm.
16. Make sure that the power cord does not hang
over the edge of the countertop or table, since
this can cause accidents, for example if small
children pull on the cord.
17. Route the power cord so that there is no possi-
bility of the cord being pulled or tripped over.
18. Do not wrap the power cord around the appli-
ance and avoid kinking of the power cord to
prevent damage.
19. Use the coffeemaker only indoors.
20. When in use, never cover the coffeemaker,
since this could cause the appliance to over-
heat.
21. Only use fresh, cold water to brew coffee. Fill
the water container at least up to the lowest
marking (2 cups) and do not overll.
22. Do not switch on the appliance until after you
have lled the water tank with water.
23. In case of repeated use, allow the appliance to
cool off at least 5 minutes between use.
24. Never use the coffee pot in the microwave; it is
not suitable for such use.
25. Do not move the appliance as long as it is in
operation, to prevent injuries.
26. Make sure that all users, especially children,
are aware of the danger of injury from emerging
steam and hot splashing water – danger of
burns!
27. Do not use the appliance with accessories of
other manufacturers or brands, to prevent
damage.
28. Unplug the appliance from the power supply
after use and prior to cleaning. Never leave the
appliance unattended when it is plugged in to
the power supply.
29. Check the appliance, the plug and the power
cord regularly for wear or damage. In case of
damage to the power cord or other parts, please
send the appliance or the power cord for in-
spection and repair to our after sales service.
Unauthorized repairs can result in serious risks
to the user and void the warranty.
30. If the supply cord is damaged, it must be re-
placed by the manufacturer or its service agent
or a similarly qualied person in order to avoid
a hazard.
1. Keep your coffeemaker always clean and
free from calcium (see chapter Cleaning and
Descaling).
2. Keep coffee beans and powder in well closed
box and in a dark and fresh place, but not in
the refrigerator.
3. For optimum coffee taste we recommend to
grind the coffee beans immediately before use
and to use fresh water.
4. Freshly brewed coffee is best. If it is kept warm
for a certain time, coffee be comes bitter.
5. To pour out the coffee, the lid of the carafe
must not be opened.
1. Carefully unpack your coffee maker.
2. Check if all parts as per description are con-
tained.
3. Clean the carafe, the complete water tank, and
the lter cone in warm soapy water, rinse them
with clear water and dry them thoroughly.
4. Wipe the surface of the appliance with a damp
cloth and dry it.
5. Remove the water tank and ll it up to the MAX
marking with fresh cold water. Close the lid and
place the tank on the housing.
6. Put the plug into the socket.
7. Before using the appliance for the rst time or
after a longer period, ll the water container up
to the maximum with clear cold water and run
it two or three times with water only.
TIPS FOR A PERFECT COFFEE
BEFORE USING THE APPLIANCE
The manufacturer will not be liable in the event of incorrect assembly, improper or incorrect use or if
repairs are carried out by unauthorized third parties.

13
1. After connection the appliance witht the power
socket, the display shows 12:00 .
2. Press once the button PROG. The display gets
lighted.
3. In the upper right corner of the display CLOCK
is shown.
CLOCK
12:00
4. Press the buttons STD and MIN until the cor-
rect time is shown.
5. After approx. 10 seconds without operating any
key, the display returns into the basic dialogue,
the lighting is switched off.
PRESETTING OF THE CLOCK
The coffeemaker from allows to prepare coffee either manually or with the timer function which can be
preset 24 hours in advance.
1. Take out the water tank (open the lid and use
the integrated handle to pull it out) and ll it
with the desired volume of cold water. The mar-
king refers to the number of cups. Place the
water tank on the machine.
Attention:
For safety reasons, the water tank has an over-
ow opening at the back. Please observe the
MAX mark and do not overll the tank, as water
may ow out.
2. Please keep in mind that a certain portion of
the water may evaporate during brewing.
3. For lling in ground coffee, open the swing-
out lter. Insert the lter holder. Take care that
the projection of the lter holder ts into the
recesses of the swing out lter. If not placed
correctly, the lter cannot be closed.
4. Insert the permanent lter into the lter hol-
der.
5. Optionally you can also use lter paper (size
1x4, 0994) after having folded the edges. The
lter paper must not project over the lter hol-
der.
6. Add the desired amount of ground coffee, de-
pending on your taste 5-7 g (max. 1 measuring
spoon) of medium ground coffee. If the cof-
fee is ground too ne, the lter paper may be
clogged up and the coffee may overow.
7. Close the swing lter, until it clicks into place.
8. Place the carafe with lid on the warming plate.
9. Press the button EIN/AUS (On/OFF). The red
control light EIN (ON) will turn on and brewing
starts.
10. After the end of brewing you can switch off the
appliance pressing twice the button EIN/AUS
(On/OFF).
11. If the appliance is not switched off, the war-
ming plate keeps warm. Two hours after begin-
ning of the brewing, the appliance will switch
off automatically.
12. If the appliance is switched off earlier the
appliance can be scaled. In this case please
follow the instructions of the chapter Cleaning
and Descaling.
PREPARATION OF COFFEE WITHOUT TIMER FUNCTION
PREPARATION OF COFFEE WITH TIMER FUNCTION
1. Please follow steps 1-8 of the previous chapter
Preparation of coffee without timer function.
2. Then press the PROG button once and check,
if the clock has been set correctly (see chapter
Presetting of the clock).
3. Then press again the button PROG to preset the
brewing. The display shows TIMER in the upper
left corner.
CLOCK
12:00
Press the buttons STD and MIN until the re-
quired time is preset.

14
1. Unplug the coffeemaker before cleaning and
wait until it is completely cool.
2. Never immerse the appliance into water or any
other liquid.
3. Open the swing lter and take out the perma-
nent lter or the used paper lter and dispose
it.
4. If any condensation water has occurred above
the lter, just wipe it with a cloth.
5. The removable parts such as water tank, glass
carafe with lid, lter holder and permanent l-
ter can be cleaned in warm soapy water.
6. For easy cleaning the lid of the carafe can
be opened by pressing the key on top of the
handle.
7. Wipe the appliance and the warming plate with
a damp cloth.
8. Do not use strong detergents or abrasive cloths/
liquid, as this will damage the surface.
9. Ensure that all parts have been thoroughly
dried before using.
CLEANING
4. Then press twice the EIN/AUS button (on/off)
to activate the AUTO function.
5. The green control light AUTO turns on and
keeps on lighting.
6. To check the preset time, press the PROG but-
ton twice. The display shows TIMER and the
preset time. If necessary you can change the
time.
7. If not button is pressed, the display will return
to the actual settings after approx. 10 seconds
and the lighting turns out.
8. You can stop the AUTO-function at any time by
pressing the EIN/AUS button twice.
9. When reaching the preset time, the green con-
trol light turns out and the red one turns on,
brewing starts.
10. After the end of brewing you can switch off the
appliance pressing twice the button EIN/AUS
(On/OFF).
11. If the appliance is not switched off, the war-
ming plate keeps warm. Two hours after begin-
ning of the brewing, the appliance will switch
off automatically.
12. If the appliance is switched off earlier the
appliance can be scaled. In this case please
follow the instructions of the chapter Cleaning
and Descaling.
13. The preset time is kept and can be reactivated
by pressing the EIN/AUS button twice.
14. If you want to change the time presetting, just
restart as described above.
DESCALING
1. Regular descaling increases the lifetime and
the performance of your coffeemaker
2. If the appliance switches off before the end
of the keep-warm period of 2 hours or if water
stays in the water tank after brewing, the appli-
ance should be descaled.
3. We recommend to us a commercial descaler
according to the instructions of the respective
manufacturer.
4. Fill the water tank up to the MAX mark with the
descaler solution.
5. Optionally you can use citric acid. Use 25-50 g
per liter water.
6. Place the carafe on the warming plate.
7. Press the EIN/AUS button and let about 1/3 of
the solution ow through.
8. Then switch off the appliance and leave it for at
least 15-30 minutes. In case of strong calclim
deposits you can also leave it overnight.
9. Then press the EIN/AUS button again to empty
the water tank.
10. Pour away the descaler solution and rinse the
appliance two to three times with fresh cold wa-
ter.

15
1. Veuillez lire les indications suivantes et les con-
server.
2. Cet appareil ne convient pas aux personnes
(dont les enfants) ayant des facultés physiques,
sensorielles ou intellectuelles restreintes et il
ne doit pas être utilisé sans expérience et/ou
sans connaissance, sauf si ces personnees sont
surveillées par une personne responsable de
leur sécurité ou si elles reçoivent des consignes
de sa part sur le fonctionnement de l’appareil.
3. Les enfants doivent être surveillés an de
s’assurer qu’ils ne jouent pas avec l’appareil.
4. Conserver l’appareil hors de portée des enfants.
5. Raccorder exclusivement l’appareil au courant
alternatif à la tension se conformant au pan-
neau signalétique.
6. Cet appareil ne doit pas être utilisé avec un minuteur
externe ou un système de commande à distance.
7. Ne plongez en aucun cas l’appareil ou le câble
d‘alimentation dans de l’eau ou un autre liqui-
de, pour des raisons de sécurité électrique.
8. Ne nettoyez pas l’appareil dans le lave-vaissel-
le, pour des raisons de sécurité électrique.
9. L’interrupteur et le câble ne doivent pas entrer
en contact avec de l’eau ou d’autres liquides.
Si cela devait se produire, toutes les pièces
devront être totalement sèches avant toute nou-
velle utilisation.
10. Ne jamais manipuler l’appareil et/ou le câble
d’alimentation avec les mains humides.
11. L’appareil est prévu pour l’utilisation dans les
ménages ou des utilisation correspondantes:
cuisines dans les magasins, les bureaux ou
d’autres endroits de travail;
fermes;
par clients dans des hotels, motels et
d’autres institutions d’hébergements;
Puissance:
1.000 W, 230 V~, 50 Hz
Corps / couvercle :
Métal blanc piano / noir piano
Plastique noir, texturé
Réservoir d’eau :
Plastique, sémi-transparent, avec graduation
Verseuse:
Verseuse avec poignée isolée
Volume:
Environ 1,5 l, 10 – 15 tasses
Dimensions (L/P/H):
Environ 29,0 x 23,5 x 35,5 cm
Poids:
Environ 2,4 kg
Cordon:
Environ
90 cm, xé
Caractéristique:
Afchage électronique
• Minuteur (24 hrs préprogrammation)
• Cloche
Mise hors marche automatique après 2 heures
Plat de chauffe
Filtre pivotant avec arrêt-gouttes
Filtre permanent amovible
Accessoires:
Cuiller gradué
Mode d’emploi
Pièces détachées:
Verseuse
Porte-ltre avec arrêt-gouttes
Filtre permanent
n°. 2801640
n°. 2801663
n°. 2801665
NOTICE D‘UTILISATION
SPÉCIFICATION TECHNIQUE MODÈLE 28016
CONSIGNES DE SÉCURITÉ

16
hébergement comme bed and breakfast/
pensions.
12. Pour des raisons de sécurité, l’appareil ne doit
jamais être placé sur des surfaces chaudes,
une tablette métallique ou un support humide.
13. L’appareil ou le câble ne doivent pas être utili-
sés à proximité de ammes.
14. Utilisez toujours la cafetière électrique sur une
surface dégagée, plane et résistante à la chaleur.
15. L’appareil est exclusivement destiné à un usa-
ge ménager et doit exclusivement être utilisé
pour préparer du café; il ne doit en aucun cas
être utilisé pour faire chauffer ou maintenir au
chaud du lait ou d’autres liquides.
16. Veillez à ce que le câble ne pende pas par-
dessus le bord du plan de travail, cela pouvant
provoquer des accidents si un enfant tire des-
sus, par exemple.
17. Le câble d‘alimentation doit être disposé de
façon à ce qu‘il soit impossible de tirer dessus
ou de trébucher.
18. N’enroulez jamais le câble autour de l’appareil
et évitez tout pli du cordon an de ne pas
l’endommager.
19. Utilisez exclusivement la cafetière électrique
en intérieur.
20. Ne couvrez jamais l’appareil durant le fonc-
tionnement an d’éviter une surchauffe.
21. Prendre de l’eau fraîche et froide pour préparer
du café. Remplir le réservoir au moins jusqu’au
marquage inférieur (2 tasses) et ne pas dépas-
ser le marquage MAXIMUM.
22. Allumez l’appareil seulement une fois que vous
avez rempli le réservoir d’eau.
23. En cas d’utilisations répétées, laissez l’appa-
reil refroidir au moins 5 minutes entre deux
utilisations.
24. Ne placez jamais la verseuse à café dans le
micro-ondes car elle n’est pas prévue pour cela.
25. Ne déplacez pas l’appareil tant qu’il est en
marche, an d’éviter les blessures.
26. Assurez-vous que tous les utilisateurs, notam-
ment les enfants, ont connaissance des risques
que comporte la vapeur formée et les éclabous-
sures d’eau chaude: risque de brûlures !
27. L’appareil ne doit pas être utilisé avec des
accessoires d‘autres fabricants ou marques,
an d’éviter des détériorations.
28. Débrancher l’appareil du secteur après utili-
sation et avant le nettoyage. Ne jamais laisser
l’appareil sans surveillance lorsque la prise est
branchée.
29. Vérier régulièrement l’usure et la détériora
tion
de l’appareil, de la prise et du câble. En cas de
détérioration du câble d’alimentation ou d’autres
pièces, veuillez envoyer votre appareil ou le câble
pour con-trôle et réparation à notre service ser-
vice après-vente. Toute réparation irrégulière peut
provoquer d’importants dangers pour l’utilisateur
et entraîner l’exclusion de la garantie.
30. Si le cordon d’alimentation de cet appareil est
endommagé, faites-le remplacer par le fabri-
cant ou son service après-vente ou bien par une
personne qualiée, pour éviter des risques.
1. Assurez-vous que la machine à café se trouve
toujours dans un état propre et décalcié.
2. Conservez le café dans une boîte bien fermée
dans un endroit frais et sombre, mais jamais
dans le frigidaire.
3. Pour une dégustation optimale du café d´nous
recommandons de moudre le café directement
avant de le préparer.
4. Prenez toujours de l’eau fraîche et froide pour
faire du café.
5. Le café fraîchement fait est le mieux. Si le café
est tenu au chaud pour longtemps, il devient amer.
6. Pour verser le café il ne faut pas ouvrir le cou-
vercle de la verseuse.
1. Enlevez tous les matériaux d‘em ballage.
2. Contrôlez si la machine et les accessoires sont
complets.
3. Nettoyez la verseuse et son couvercle, le réci-
pient d’eau et le ltre dans l’eau chaude savon-
neuse, rincez-les avec de l’eau claire et bien les
sécher.
4. Essuyer l’extérieur de l’appareil avec un chiffon
humide et bien le sécher.
POUR UN BON CAFÉ
AVANT LA PREMIÈRE UTILISATION
Le fabricant n’est nullement responsable en cas de montage non conforme, d‘utilisation irrégulière ou non
conforme ou suite à l’exécution de réparations par des tiers non autorisés.

17
La machine à café vous permet de preparer du café soit manuellement soit dans la fonction AUTO.
1. Enlevez le réservoir d’eau et y versez de l’eau
froide jusqu’au marquage désiré dans le réser-
voir d‘eau. Les marquages corres pondent au
nombre de tasses.
ATTENTION :
Pour des raisons de sécurité, le réservoir dispo-
se d’une ouverture à l’envers. Donc ne jamais
passer le marquage MAX.
2. Une certaine portion de l’eau peut s’évaporer
pendant la cuisson, donc la quantité du café
peut différer légèrement.
3. Pour remplir le café ouvrir le ltre pivotant et
in sérer d’abord le porte-ltre. Faites attention,
que le porte-ltre est installé correctement.
Sinon on ne peut pas fermer le ltre.
4. Puis placez le ltre permanent.
5. En option vous pouvez aussi prendre un ltre en
papier de la taille 1x4/0994 (plier les bords)!).
Le ltre en papier ne doit pas dépasser le bord
du ltre.
6. Remplir la quantité nécessaire de café mou-
lu dans le ltre en papier, ce sont selon votre
goût 5-7 g par tasse (max. 1 cuillère graduée)
de café moyenne ment moulu. Le café moulu
trop n pourrait emboucher les pores du ltre
et causer le café de déborder du ltre.
7. Fermer le ltre pivotant jusqu’à ce qu’il
s’enclenche.
8. Placez la verseuse avec le couvercle fermé sur
le plat de chauffe.
9. Poussez la touche EIN/AUS une fois. La lampe
témoin rouge EIN (Marche) s’allume et la cuis-
son commence.
10. Après que le café est fait, vous pouvez mettre
l’appareil hors marche en poussant la touche
EIN/AUS deux fois.
11. Si vous ne mettez pas l’appareil hors marche le
temps de chauffe commence. Deux heurs après
la cuisson l’appareil est mis hors marche auto-
matiquement.
1. Suivez les pas 1-8 ci-avant.
2. Poussez la touche PROG pour vérier que le
temps de la cloche est correcte.
3. Poussez la touche PROG une deuxième fois
pour dénir le temps de cuisson.
L’afchage montre
TIMER
12:00
1. Aussitôt que la che est mise dans la prise de
courant, l’afchage montre 12 :00.
2. Poussez une fois la touche PROG. L’illuminage
de l’afchage est mise en marche.
Dans l’afchage apparaît
CLOCK
12:00
3. Poussez les touches STD et MIN jusqu’à ce que
le temps actuel est montré.
4. Après env. 10 secondes sans pressant une
touche, l’illumination de l’afchage et terminée
et le temps est conrmé.
PRÉPARER DU CAFÉ SANS FONCTION MINUTEUR
PRÉPARER DU CAFÉ DANS LE MODE AUTOMATIQUE AVEC FONCTION MINUTEUR
PROGRAMMER LA CLOCHE
5. Enlevez le récipient d’eau en tirant la poignée
cachée à l’intérieur. Remplissez le réservoir de
eau jusqu’au marquage MAX, fermez le couver-
cle et placez le récipient sur la machine.
6. Mettez le che dans la prise de courant.
7. Avant la première utilisation ou si l’appa reil n’a
pas été utilisé pour longtemps, remplir le ré-
servoir d’eau jusqu‘au maximum avec de l’eau
fraîche et faire passer un à deux cycles de cuis-
son avec de l’eau seule ment.

18
1. Avant de nettoyer la machine à café, tirer la
che de la prise et laisser refroidir l’appareil.
2. Ne pas plonger l’appareil dans l’eau ou dans un
autre liquide.
3. Ouvrir le ltre pivotant et enlever le permanent
ou bien ltre en papier.
4. Si de l’eau est condensé en haut du ltre, essu-
yez-la avec un chiffon.
5. Les accessoires amovibles comme le réservoir
d’eau, la verseuse et le ltre peuvent être net-
toyés dans l’eau chaude savon neuse.
6. Pour mieux la nettoyer, ouvrez le couvercle de
la verseuse en pressant la touche intégrée dans
la poignée.
7. Essuyez l’extérieur avec un chiffon humide.
8. Ne pas utiliser des détergents forts ou abrasifs
pour nettoyer l’appareil ou les acces soires, cela
pourrait égratigner la surface.
9. Sécher tous les éléments soigneuse ment.
NETTOYER ET DÉTARTRER
Poussez les touches STD et MIN pour dénir
le temps de cuisson désiré.
4. Poussez deux fois la touche EIN/AUS pour ac-
tiver le mode automatique.
5. La lampe témoin verte AUTO s’allume et reste
allumée.
6. Si vous voulez contrôlez le temps préprogram-
mé, poussez la touche EIN/AUS deux fois.
L’afchage montre TIMER et le temps prépro-
rammé. Si nécessaire vous pouvez corriger le
temps.
7. Après env. 10 secondes sans pressant une
touche, l’illumination de l’afchage et terminée
et le temps est conrmé.
8. Vous pouvez arrêter la fonction AUTO en pous-
sant la touche EIN/AUS deux fois.
9. Lorsque le temps prédéni est achevé, la
lampe témoin verte s’éteint et la lampe rouge
s’allume. La cuisson commence.
10. Après que le café est fait, vous pouvez mettre
l’appareil hors marche en poussant la touche
EIN/AUS deux fois.
11. Si vous ne mettez pas l’appareil hors marche le
temps de chauffe commence. Deux heurs après
la cuisson l’appareil est mis hors marche auto-
matiquement.
12. Si l’appareil se met hors marche avant que le
temps de chauffe est écoulé, l’appareil peut
être calcié. Dans ce cas suivez les instructions
du chapitre Nettoyage.
13. Le temps prédéni reste valide et peut être
activé de nouveau en poussant la touche EIN/
AUS deux fois.
14. Si vous voulez changer le temps prédéni, re-
commencez comme décrit ci-avant.
NETTOYER ET DÉTARTRER
1. Les dépôts de tarte affectent le bon goût du
café, résultent en une con som mation augmen-
tée de courant et peuvent endommager la ma-
chine.
2. Si l’appareil est mis hors marche avant que le
temps de chauffe est terminé ou si de l’eau
reste dans le réservoir, il faut décalcier la ma-
chine.
3. Utiliser un détartrant pour appareils de ména-
ge (Suivre les instructions du producteur!).
Répéter le dé tar trage, si nécessaire.
4. Remplissez le réservoir d’eau au maximum
avec la solutions décalciante.
5. En option en peut utiliser de l’acide citrique.
Prenez 25-50 g sur un litre d’eau.
6. Placez la verseuse sur le plat de chauffe.
7. Poussez la touche EIN/AUS et laissez transférer
un tiers de la solution.
8. Puis arrêter l’appareil et laisser agir la solution
au moins 15 à 30 minutes, ou bien pendant la
nuit.
9. Puis remettre la machine en marche et faire
transférer le reste de l’eau.
10. Après avoir détartré l’appareil, le laisser refroi-
dir et faire un à deux cycles de cuisson avec la
quantité maximale d’eau fraîche.

19
1. Lees a.u.b. de volgende instructies en bewaar deze.
2. Dit apparaat is niet bedoeld om te worden
gebruikt door personen (kinderen inbegrepen) met
een beperkt lichamelijk, sensorisch of geestelijk
vermogen of bij gebrek aan ervaring en/of kennis,
tenzij deze personen door een voor hun veiligheid
verantwoordelijke persoon onder toezicht gehouden
worden of door deze persoon geïnstrueerd zijn
over het gebruik van het apparaat.
3. Kinderen moeten onder toezicht gehouden
worden om ervoor te zorgen dat zij niet met het
apparaat spelen.
4. Bewaar het apparaat op een voor kinderen niet
toegankelijke plaats.
5. Sluit het apparaat alleen aan op wisselstroom
met spanning conform typeplaatje.
6. Dit apparaat mag niet met een externe
tijdschakelklok of een afstandsbedienings-
systeem worden gebruikt.
7. Dompel het apparaat of het snoer in geen geval
in water of andere vloeistoffen.
8. Reinig het apparaat om redenen van de
elektrische veiligheid niet in de vaatwasser.
9. Schakelaar en snoer mogen niet met water of
andere vloeistoffen in contact komen. Wanneer
dit toch gebeurt, moeten alle onderdelen voor
een volgend gebruik weer helemaal droog zijn.
10. Raak het apparaat resp. het snoer nooit met
natte handen aan.
11. Het apparaat is uitsluitend bestemd voor
huishoudelijk gebruik of voor soortgelijke
doeleinden, bijvoorbeeld
keukens in winkels, kantoren of andere
werkplaatsen,
in boerderijen,
voor gebruik door gasten in hotels, motels of
andere indiening inrichtingen,
in particuliere huizen of vakantiewoningen.
12. Plaats het apparaat om redenen van veiligheid
nooit op hete oppervlakken, op een metalen
dienblad of op een natte ondergrond.
Vermogen:
1.000 W, 230 V~, 50 Hz
Behuizing / deksel:
Rvs, geborsteld
Kunststof delen zwart, getextureerd
Waterreservoir:
Kunststof, semitransparant, met waterpeilindicator
Kan:
Glazen kan met thermisch geïsoleerd kunststof handvat
Volume:
Ca. 1,5 l, 10 – 15 koppen
Grootte (b/d/h):
Ca. 29,0 x 23,5 x 35,5 cm
Gewicht:
Ca. 2,4 kg
Kabellengte:
Ca.
90 cm, vast gemonteerd
Uitrusting:
Elektronische display met
timerfunctie (24-uur programmeerbaar)
• tijdindicator
Automatische uitschakeling na 2 uur
Warmhoudplaat
Zwenklter met uitneembare lterhouder en druppelstop
Duurzaam lter
Toebehoren:
Maatlepel
Gebruiksaanwijzing
Onderdelen:
Glazen kan met deksel
Filterhouder met druppelstop
Duurzaam lter
2801640
2801663
2801665
Technische wijzigingen voorbehouden.
GEBRUIKSAANWIJZING
TECHNISCHE SPECIFICATIE MODEL 28016
VEILIGHEIDSVOORSCHRIFTEN

20
13. Het apparaat of het snoer mogen niet in de
buurt van vlammen worden gebruikt.
14. Gebruik het kofezetapparaat steeds op een
vrij, vlak en hittebestendig oppervlak.
15. Het apparaat is uitsluitend toegestaan voor
huishoudelijke doeleinden en mag alleen voor
het bereiden van kofe worden gebruikt, in
geen geval voor het heet maken/warm houden
van melk of andere vloeistoffen.
16. Let erop dat het snoer niet over het werkvlak
heen hangt, omdat dit tot ongelukken kan lei-
den, bijv. als kleine kinderen er aan trekken.
17. Het snoer moet zo worden geplaatst dat eraan
trekken of erover struikelen voorkomen wordt.
18. Wikkel het snoer niet rond het apparaat en ver-
mijd knikken in het snoer om schade aan het
snoer te voorkomen.
19. Gebruik het kofezetapparaat in binnenruimten.
20. Dek het apparaat tijdens het gebruik nooit af om
een oververhitting van het apparaat te voorkomen.
21. Gebruik voor het zetten van kofe uitsluitend
vers, zuiver water en vul het waterreservoir min-
stens tot aan de londerste markering (2 kopjes)
en hoogstens tot aan de MAX-markering.
22. Schakel het apparaat pas in nadat u water in
het waterreservoir hebt gevuld.
23. Laat het apparaat bij herhaald gebruik tussen-
door minstens 5 minuten afkoelen.
24. Gebruik de kofekan nooit in de magnetron om-
dat de kan hiervoor niet is geschikt.
25. Beweeg het apparaat niet zolang dit in bedrijf is
om verwondingen te voorkomen.
26. Zorg ervoor dat alle gebruikers, met name kin-
deren, op de hoogte zijn van de gevaren, zoals
het naar buiten komen van stoom en spetters
heet water – gevaar voor verbranding!
27. Het apparaat mag niet met toebehoren van an-
dere fabrikanten of merken worden gebruikt om
schade te voorkomen.
28. Na gebruik en voor het reinigen de netstekker
uit het stopcontact trekken. Laat het apparaat
nooit zonder toezicht wanneer de netstekker
zich in het stopcontact bevindt.
29. Controleer het apparaat, de stekker en het snoer
regelmatig op slijtage en beschadigingen. Stuur
het apparaat of het snoer in geval van beschadi-
gingen van het snoer of andere onderdelen a.u.b.
voor controle en/of reparatie aan onze klanten-
service. Ondeskundig uitgevoerde reparaties
kunnen gevaren voor de gebruiker veroorzaken
en leiden tot het vervallen van de garantie.
30. Als de kabel van dit apparaat beschadigd
is, moet dit door de fabrikant of zijn
klantenservice of een vergelijkbaar gekwali-
ficeerde persoon worden vervangen om
gevaren te voorkomen.
1. Zorg ervoor dat uw kofezetapparaat altijd
schoon en ontkalkt is. (Zie paragraaf Reinigen
en ontkalken).
2. Bewaar kofebonen en oploskofe in een goed
gesloten doos op een koele en donkere plaats,
maar niet in de koelkast.
3. Voor een optimaal kofegenot adviseren wij om
kofebonen pas direct vóór het gebruik te malen.
4. Kofe smaakt ’t best als hij vers gezet wordt.
Als kofe lange tijd warm gehouden wordt, kan
hij een bittere smaak krijgen.
5. Om de kofe uit te gieten, kan het deksel van
de kan gesloten blijven.
1. Alle verpakkingsmaterialen verwijderen.
2. Controleer of alle genoemde toebehoren voor-
handen zijn.
3. De glazen kan, het deksel van de kan, het wa-
terreservoir en de lterhouder in heet water met
een mild afwasmiddel spoelen, met vers water
naspoelen en goed afdrogen.
4. De behuizing van het apparaat met een voch-
tige doek afwrijven en grondig afdrogen.
5.
Waterreservoir eruit nemen en tot aan de MAX-
markering met koud water vullen, deksel sluiten en
het waterreservoir weer in het apparaat plaatsen.
6. Steek de stekker in het stopcontact. Het ap-
paraat is nu klaar voor gebruik.
7. Vóór het eerste gebruik of indien het apparaat
lange tijd niet werd gebruikt, het waterreservoir
tot aan het maximum met vers, koud water
vullen en een tot twee kookprocessen zonder
kofe poeder uitvoeren.
TIPS VOOR EEN ONGESTROORD KOFFEIEGENOT
INGEBRUIKNAME
De fabrikant aanvaardt geen aansprakelijkheid bij foutieve montage, bij ondeskundig of foutief gebruik of
als reparaties door niet geautoriseerde personen worden uitgevoerd.

21
PROGRAMMEREN VAN DE TIJD
De UNOLD kofezetapparaat biedt u de mogelijkheid, om of direct per knopdruk kofe te zetten of het
apparaat tot 24 uur van tevoren te programmeren.
1. Neem het waterreservoir uit het apparaat (dek-
sel openen en aan de geïntegreerde handvat
naar boven trekken) en vul het reservoir tot aan
de gewenste hoeveelheid met koud water. De
markering stemt overeen met het aantal kop-
pen. Het waterreservoir weer in het apparaat
plaatsen.
2. Attentie:
3. Om veiligheidsredenen is het water reser voir
aan de achterkant voorzien van een overloopo-
pening. Let daarom bij het vullen van het re-
servoir beslist op de MAX-markering en vermijd
het overvol maken van het reservoir.
4. Omdat tijdens het kookproces het water gedeel-
telijk verdampt, kan de hoeveelheid kofe iets
ervan afwijken.
5. Voor het invullen van de kofe de zwenkin-
richting openen. Plaats de lterhouder erin. Let
erop dat de naar voren uitstekende lijst aan de
lterhouder in de overeenkomstige uitsparing
van de zwenkinrichting past. Als de lterhouder
niet correct wordt geplaatst, kan de zwenkin-
richting niet gesloten worden.
6. Plaats het meegeleverde duurzame lter in de
lterhouder.
7. Alternatief kunt u papieren lterzakjes maat
1x4 in de lterhouder inzetten (reliëfrand aan
de onderkant en de zijkant omvouwen!). Het
lterzakje mag niet boven de rand van de lter-
houder uitsteken.
8. De benodigde hoeveelheid kofe invullen, dit
zijn afhankelijk van de smaak per kop 5 à 7 g
(max. 1 kofelepel) middeljn gemalen kofe.
Te jn gemalen kofe kan de poriën van het
lter verstoppen en het overlopen van de kofe
tot gevolg hebben.
9. De zwenklter sluiten totdat deze inklikt.
10. Plaats de kan met deksel op de warmhoud-
plaat.
11. Druk op de toets EIN/AUS (aan/uit). Het rode
controlelampje EIN (aan) gaat branden en het
kookproces begint.
12. Nadat het kookproces afgesloten ist, kunt u
het apparaat uitschakelen door twee keer op de
EIN/AUS-toets (aan/uit) te drukken.
13. Als het apparaat niet uitgeschakeld wordt, blijft
de warmhoudplaat in bedrijf. Twee uur na het
begin van het kookproces schakelt het apparaat
automatisch uit.
1. Volg de stappen 1-8 van de paragraaf Kofe
zetten zonder timerfunctie.
2. Druk één keer op de PROG-toets en controleer
of de tijd correct ingesteld is (zie paragraaf Pro-
gram meren van de tijd).
3. Druk opnieuw op de toets PROG om het begin
van het kookproces in te stellen.
Op de display verschijnt boven links TIMER.
TIMER
15:00
1. Zodra het kofezetapparaat op het stroomnet
aangesloten is, verschijnt op de display 12:00.
2. Druk één keer op de toets PROG. De displayver-
lichting wordt ingeschakeld.
Op de display verschijnt boven rechts CLOCK.
CLOCK
12:00
3. Druk nu op de toetsen STD (uren) en MIN tot-
dat de actuele tijd bereikt is.
4. Nadat ongeveer 10 seconden geen toets werd
bediend, gaat het apparaat weer terug naar de
basisstand, na enkele seconden gaat ook de
displayverlichting weer uit.
KOFFIE ZETTEN ZONDER TIMER FUNCTIE
KOFFIE ZETTEN MET TIMER FUNCTIE

22
Druk nu op de toetsen STD (uren) en MIN tot-
dat de door u gewenste starttijd ingesteld is.
4. Druk dan twee keer op de EIN/AUS-toets (aan/uit)
om de functie Automatisch bedrijf te starten.
5. Het groene controlelampje AUTO gaat branden
en blijft ingeschakeld.
6. Om de vooraf ingestelde tijd te controleren,
druk twee keer op de PROG-toets. Op de dis-
play verschijnt boven links TIMER alsmede de
vooraf ingestelde tijd. Indien gewenst kunt u
deze nu wijzigen.
7. Nadat ongeveer 10 seconden geen toets werd
bediend, gaat de display weer terug naar de
basisstand, daarna gaat de displayverlichting
weer uit.
8. U kunt de AUTO-functie op elk moment afbre-
ken door één keer op de EIN/AUS-toets (aan/
uit) te drukken.
9. Als de vooraf ingestelde tijd bereikt wordt, gaat
het groene controlelampje uit, het rode controle-
lampje gaat branden en het kookproces begint.
10. Nadat het kookproces afgesloten ist, kunt u
het apparaat uitschakelen door twee keer op de
EIN/AUS-toets (aan/uit) te drukken.
11. Als het apparaat niet uitgeschakeld wordt, blijft
de warmhoudplaat in bedrijf. Twee uur na het
begin van het kookproces schakelt het apparaat
automatisch uit. Als het apparaat voortijdig
uitschakelt, kan de reden hiervoor verkalking
van het apparaat zijn. Volg dan a.u.b. de in-
structies in het paragraaf Reiniging en ontkal-
king.
12. De vooraf geprogrammeerde tijd blijft behouden
en kan opnieuw worden geactiveerd door twee
keer op de toets EIN/AUS (aan/uit) te drukken.
13. Als u een nieuwe tijdinstelling wilt invoeren,
begin dan opnieuw het programmeren zoals bo-
ven beschreven.
1. Vóór het reinigen de stekker uit het stopcontact
trekken en het apparaat volledig laten afkoelen.
2. Het apparaat mag in geen geval in water of een
andere vloeistof worden gedompeld.
3. Zwenklter openen en het duurzame lter resp.
het lterzakje met kofedik en de lterhouder
uitnemen, Kofedik resp. papieren lter met
kofedik afvoeren.
4. Boven het lter kan er condensatiewater ontsta-
an. Veeg na het kofe zetten de onderkant van
het deksel met een droge doek af.
5. De uitnembare componenten zoals waterreser-
voir, kan, deksel en lter houder kunnen in een
warm zeepsopje worden gespoeld.
6. Voor het makkelijke schoonmaken kan het dek-
sel van de kofekan geopend worden door op de
knop aan het handvat te drukken.
7. Veeg het apparaat en de warmhoudplaat met
een uitgewrongen vochtige doek af.
8. Geen scherpe of schurende poets middelen ge-
bruiken.
9. Alle onderdelen moeten helemaal droog zijn
voordat u het apparaat weer gebruikt.
REINIGUNG
ONTKALKING
1. Regelmatig ontkalken bewaart het functiever-
mogen van uw kofezetapparaat en verlengt
zijn levensduur.
2. Als het apparaat uitschakelt voordat de warm-
houdtijd afgelopen is of als bij het zetten van
de kofe water in het waterreservoir achterblijft,
moet het apparaat beslist ontkalkt worden.
3. Gebruik voor het ontkalken een in de handel
gebruikelijke ontkalker volgens de instructies
op de verpakking.
4. Vul het waterreservoir tot aan de MAX-markering
met de ontkalkeroplossing.
5. Alternatief kunt u ook citroenzuur gebruiken.
Geef 25 à 50 g citroenzuur op 1 liter water.
6. Zet de kofekan op de warmhoudplaat.
7. Druk nu op de START-toets en laat ca. 1/3 van
het water door het apparaat lopen.
8. Schakel het apparaat uit en laat de ontkalke-
roplossing ca. 15 à 30 minuten inwerken. Bij
sterke verkalking kunt u de oplossing ook tij-
dens de nacht laten inwerken.
9. Daarna opnieuw op START drukken en de ove-
rige ontkalkeroplossing door het apparaat laten
lopen.
10. Giet de ontkalkeroplossing weg en laat 2 à 3
keer schoon water door het apparaat lopen.

23
Potenza:
1.000 W, 230 V~, 50 Hz
Corpo / Coperchio:
Acciaio inox opaco
Parti in materiale plastico ruvido colore nero
Serbatoio:
Materiale plastico, semitrasparente, con indicatore di livello
Brocca:
Brocca in vetro con maniglia in plastica isolata termicamente
Volume:
Ca. 1,5 l, 10 – 15 tazze
Dimensioni (B/P/A):
Ca. 29,0 x 23,5 x 35,5 cm
Peso:
Ca. 2,2 kg
Lunghezza cavo:
Ca.
90 cm, ssato
Dotazione:
Display elettronico con
funzione timer (24 ore, programmabile)
indicazione ora
Spegnimento automatico dopo 2 ore
Piastra termica
Filtro girevole con portaltro estraibile e sistema antigoccia
Filtro
Accessori:
Misurino
Istruzioni per l’uso
Ricambi:
Brocca in vetro con coperchio, n.art. 2801640
Portaltro con sistema antigoccia, n.art. 2801663
Filtro, n.art. 2801665
1. Si prega di leggere con attenzione le seguenti
istruzioni per l‘uso e di conservarle.
2. Questo apparecchio non è adatto all‘utilizzo da
parte di persone (inclusi bambini) dalle limitate
capacità fisiche, sensoriali o mentali o prive di
esperienza e/o conoscenza, salvo che l‘utilizzo
non avvenga sotto stretta sorveglianza di una
persona adulta che risponda della loro sicurezza
o che questa abbia provveduto a fornire
all‘utilizzatore istruzioni sul funzionamento
dell‘apparecchio.
3. I bambini devono essere sorvegliati, onde
evitare che giochino con l’apparecchio.
4. Conservare l‘apparecchio in luogo non
accessibile ai bambini.
5. Collegare l’apparecchio solo a una presa di
corrente alternata con tensione corrispondente
a quella riportata sulla targhetta dati.
6. Questo apparecchio non deve essere usato
né con orologi programmabili esterni, né con
sistemi di comando a distanza.
7. Per ragioni di sicurezza, non immergere per
nessun motivo l’apparecchio o il cavo in acqua
o in altri liquidi.
8. Per ragioni di sicurezza, non lavare l’apparecchio
in lavastoviglie.
9. L’interruttore e il cavo non devono entrare in
contatto con l’acqua o con altri liquidi. Se
ciò dovesse succedere, prima di riutilizzare il
dispositivo accertarsi che tutte le parti siano
completamente asciutte.
10. Non toccare mai né l’apparecchio né il cavo
con le mani bagnate.
11. L‘apparecchio è destinato esclusivamente
all‘uso domestico o a finalità analoghe, p. es.
alla preparazione di tè in negozi, uffici o altri
posti di lavoro,
aziende agricole,
all’utilizzo da parte di ospiti negli hotel,
motel o altre strutture ricettive,
in pensioni o appartamenti di vacanza.
ISTRUZIONI PER L‘USO
DATI TECNICI MODELLO 28016
INFORMAZIONI SULLA SICUREZZA

24
12. Per ragioni di sicurezza, non posizionare per
nessun motivo l’apparecchio su superfici calde,
metalliche o bagnate.
13. L’apparecchio o il cavo di alimentazione non devono
essere utilizzati nelle vicinanze di fonti di calore.
14. Utilizzare la caffettiera sempre su una superficie
libera, piana e resistente alle alte temperature.
15. L’apparecchio deve essere utilizzato solo per
la preparazione di caffè e in nessun caso per
riscaldare/mantenere caldo latte o altri liquidi.
16. Accertarsi che il cavo di alimentazione non
penda dal bordo della superficie di lavoro in
quanto pericoloso, per esempio se i bambini
dovessero tirarlo.
17. Il cavo deve essere sistemato in modo tale da
non essere tirato o da inciamparci.
18. Non avvolgere il cavo attorno all’apparecchio ed
evitare di piegarlo onde prevenire danni al cavo
di alimentazione.
19. La caffettiera è destinata solo a un uso interno.
20. L’apparecchio non deve essere mai coperto,
onde evitare che l’apparecchio si surriscaldi.
21. Per preparare il caffè utilizzare acqua di rubi-netto
limpida e fresca e riempire il serbatoio dell’acqua
dal livello minimo contrassegnato (2 tazze) al
livello massimo contrassegnato con MAX.
22. Accendere l’apparecchio solo dopo aver versato
l’acqua nel recipiente.
23. Se si desidera utilizzare l’apparecchio più
volte consecutivamente, tra un utilizzo e l’altro
lasciarlo raffreddare per almeno 5 minuti.
24. Non utilizzare mai la caraffa per il caffè nel
microonde, poiché la caraffa non è adatta a
questo utilizzo.
25. Non spostare l’apparecchio mentre è in funzione
onde evitare ferimenti.
26. Accertarsi che tutte le persone che utilizzano
l’elettrodomestico, in particolare i bambini,
siano a conoscenza dei pericoli derivanti dal
vapore sprigionato o dagli spruzzi di acqua
bollente: pericolo di ustione!
27. L’apparecchio non deve essere utilizzato con
accessori di altre marche, onde evitare il
danneggiamento dello stesso.
28. Dopo l’uso e prima della pulizia ricordarsi sempre
di estrarre la spina dalla presa di corrente. Non
lasciare mai l’apparecchio incustodito quando
la spina è nella presa di corrente.
29. Vericare con regolarità che l’apparecchio, la
spina e il cavo non siano usurati o danneg-
giati. In caso di danneggiamento al cavo di
alimentazione o ad altri componenti, inviare
l’apparecchio o il cavo al nostro servizio clienti
per il controllo e/o la riparazione. Le riparazioni
effettuate da persone non competenti possono
esporre l‘utilizzatore a gravi pericoli e compor-
tano l’esclusione dalla garanzia.
30. Se il cavo di alimentazione dell’apparecchio è
danneggiato, deve essere sostituito dal produt-
tore, dal servizio clienti o da persona qualica-
ta, onde evitare pericoli.
1. Fare in modo che la caffettiera automatica
sia sempre pulita e decalcicata (cfr. capitolo
Pulizia e decalcicazione).
2. Conservare i chicchi di caffè e il caffè in pol-
vere in un barattolo ben sigillato in luogo fresco
e buio, ma non in frigorifero.
3. Per ottenere un ottimo caffè, consigliamo di maci-
nare i chicchi di caffè solo prima del loro utilizzo.
4. Il caffè appena preparato ha un gusto migliore.
Se il caffè viene tenuto caldo a lungo, può di-
ventare amaro.
5. Per versare il caffè il coperchio del bricco può
rimanere chiuso.
1. Asportare tutti i materiali di imballaggio.
2. Vericare che ci siano tutti gli accessori.
3. Lavare la brocca in vetro, il coperchio della broc-
ca, il serbatoio dell’acqua, il copriltro e il ltro
in acqua calda con un detersivo delicato, risciac-
quare con acqua limpida e asciugare bene.
4. Pulire il corpo dell’apparecchio con un panno
umido e asciugare con cura.
5. Rimuovere il serbatoio per l’acqua e riempirlo
no al livello MAX con acqua calda, chiudere il
MESSA IN FUNZIONE
CONSIGLI PER PREPARARE UN OTTIMO CAFFÈ
Il produttore non si assume alcuna responsabilità per un montaggio scorretto, un utilizzo inappropriato o
errato oppure in seguito a riparazioni effettuate da officine o persone non autorizzate.

25
La caffettiera automatica offre la possibilità di preparare il caffè manualmente premendo un semplice
pulsante oppure programmando l’apparecchio no a 24 ore di anticipo.
1. Rimuovere il serbatoio per l’acqua (aprire il
coperchio e tirare verso l’alto dalla maniglia in-
tegrata) e riempirlo di acqua fredda no al livel-
lo desiderato. Il livello corrisponde alla quantità
di tazze. Riposizionare il serbatoio.
2. Attenzione!
Per motivi di sicurezza il serbatoio è dotato di
un foro di scarico sul retro. Per questo motivo
si invita a rispettare il livello massimo, evitando
di riempire troppo il serbatoio.
3. Durante il programma di bollitura una picco-
la quantità di acqua può evaporare, quindi la
quantità di caffè risultante può essere legger-
mente diversa.
4. Per versare il caffè, aprire il dispositivo girevole.
Inserire il portaltro. Accertarsi che il bordino
del portaltro entri nella guida corrispondente
del dispositivo girevole. Se il portaltro viene
inserito scorrettamente, il dispositivo girevole
non si chiude.
5. Inserire il ltro in dotazione nel portaltro.
6. In alternativa è possibile inserire nel porta-
ltro dei ltri in carta della dimensione 1x4
(Spiegare il bordo dei ltri lateralmente e verso
il basso!). Il ltro in carta non deve fuoriuscire
dal bordo del portaltro.
7. Versare la quantità necessaria di caffè, a se-
conda dei gusti per tazza 5-7 g (max cucchiaio
di caffè) di caffè di media macinatura. Il caffè
macinato troppo nemente può intasare i pori
del ltro e provocare traboccamenti.
8. Chiudere il ltro girevole no a che si blocca.
9. Inserire la brocca con il coperchio sulla piastra
termica.
10. Premere il pulsante di ACCESO/SPENTO. La
spia rossa di ACCESO si illumina e il program-
ma di bollitura ha inizio.
11. Dopo aver concluso il programma di bollitura
è possibile spegnere l’apparecchio premendo
due volte il pulsante di ACCESO/SPENTO.
12. Se l’apparecchio non viene spento, la pias-
tra termica rimane in funzione. Due ore dopo
l’inizio della cottura l’apparecchio si spegne
automaticamente.
1.
Seguire le fasi descritte nei punti da 1 a 8 del ca-
pitolo Preparazione del caffè senza funzione timer.
2. Premere una volta il pulsante PROG e verica-
re che l’ora impostata sia corretta (cfr. capitolo
Programmazione dell’ora).
3. Premere nuovamente il pulsante PROG per im-
postare l’inizio della procedura di bollitura.
4. Sul display in alto a sinistra compare TIMER.
TIMER
15:00
PREPARAZIONE DEL CAFFÈ SENZA FUNZIONE TIMER
PREPARAZIONE DEL CAFFÈ CON FUNZIONE TIMER
PROGRAMMAZIONE DELL‘ORA
1. Quando la caffettiera viene collegata alla cor-
rente, sul display compare 12:00.
2. Premere una volta il pulsante PROG. Il display
si illumina.
Sul display in alto a destra compare CLOCK.
3. Premere i pulsanti STD e MIN no a che si rag-
giunge l’ora desiderata.
CLOCK
12:00
4. Dopo circa 10 secondi dalla selezione
l’apparecchio ritorna nell’impostazione di
base, dopo pochi secondi si spegne anche
l’illuminazione del display.
coperchio e riporre il serbatoio sulla caffettiera.
6. Inserire la spina nella presa di corrente.
L’apparecchio è ora pronto per l’uso.
7. Prima di mettere in funzione l’apparecchio per la
prima volta o se l’apparecchio non è stato utiliz-
zato per molto tempo, riempire il serbatoio no al
livello massimo con acqua limpida e fredda e pro-
cedere con il programma di cottura senza caffè.

26
5. Premere quindi il pulsante STD e MIN no a
che si raggiunge l’ora di inizio della cottura.
6. Premere quindi due volte il pulsante di
ACCESO/SPENTO per avviare la funzione auto-
matica.
7. La spia verde AUTO si accende e rimane attiva.
8. Se si desidera controllare l’ora preimposta-
ta, premere il pulsante PROG due volte. Sul
display in alto a sinistra compare la dicitura
TIMER con l’ora impostata. Se lo si desidera,
è possibile modicarla.
9. Dopo circa 10 secondi dalla selezione
l’apparecchio ritorna nell’impostazione di
base, dopo pochi secondi si spegne anche
l’illuminazione del display.
10. È possibile interrompere in qualsiasi momento
la funzione AUTO premendo una volta il pul-
sante di ACCESO/SPENTO.
11. Al raggiungimento dell’ora preimpostata la spia
verde di spegne, la spia rossa si accende e la
procedura di bollitura ha inizio.
12. Dopo aver concluso la procedura di bollitura
è possibile spegnere l’apparecchio premendo
due volte il pulsante di ACCESO/SPENTO.
13. Se l’apparecchio non viene spento, la pias-
tra termica rimane in funzione. Due ore dopo
l’inizio della cottura l’apparecchio si spegne
automaticamente. Se l’apparecchio si spegne
prima, è possibile che ci siano incrostazioni
calcaree. In tal caso seguire le indicazioni del
capitolo Pulizia e decalcicazione.
14. L’ora preimpostata rimane in memoria e può
essere riattivata premendo due volte il pulsante
di ACCESO/SPENTO.
15. Se si desidera impostare un’altra ora, seguire
nuovamente la procedura di programmazione
descritta precedente mente.
1. Prima di effettuare le operazioni di pulizia, to-
gliere la spina dalla presa di corrente e lasciar
raffreddare completamente l’apparecchio.
2. Non immergere l’apparecchio in acqua né in
altri liquidi.
3. Aprire il ltro girevole e rimuovere il ltro in do-
tazione o il ltro in carta con il fondo di caffè,
nonché il portaltro. Gettare il fondo di caffè o
il ltro di carta con il fondo di caffè.
4. È possibile che sopra al ltro si formi acqua di
condensa. Pulire la parte inferiore del coperchio
con un panno asciutto dopo la cottura.
5. Le parti rimovibili, quali serbatoio dell’acqua,
brocca, coperchio e portaltro possono essere
lavati in acqua calda con un detersivo delica-
to.
6. Per agevolare le operazioni di pulizia è possi-
bile aprire il coperchio della brocca di caffè
premendo il pulsante sulla maniglia.
7. Pulire l’apparecchio e la piastra termica con
un panno umido ben strizzato.
8. Non utilizzare detersivi forti o aggressivi.
9. Prima di riutilizzare l’apparecchio, tutte le parti
devono essere completamente asciutte.
PULIZIA
DACALCIFICAZIONE
1. Decalcicando regolarmente l’apparecchio è
possibile aumentare le prestazioni e la durata
di vita della caffettiera automatica.
2. Se l’apparecchio si spegne prima della ne del
tempo di riscaldamento o nel caso in cui du-
rante la cottura del caffè nel serbatoio rimanga
dell’acqua, l’apparecchio deve essere immedi-
atamente decalcicato.
3. Utilizzare un comune decalcicante e procede-
re seguendo le istruzioni sulla confezione.
4. Riempire il serbatoio di soluzione decalci-
cante no al raggiungimento del livello MAX.
5. In alternativa è possibile utilizzare anche acido
citrico. Versare 25-50 g di acido citrico in un
litro d‘acqua.
6. Posizionare la brocca di caffè nella piastra ter-
mica.
7. Premere il pulsante START e lasciar scorrere
circa un terzo dell’acqua.
8. Spegnere l’apparecchio e lasciar agire la solu-
zione decalcicante per circa 15-30 minuti. In
caso di forte calcicazione lasciar agire la solu-
zione per tutta la notte.
9. Quindi premere nuovamente START e lasciar
scorrere la soluzione decalcicante rimanente.
10. Gettare la soluzione decalcicante e lasciar
scorrere acqua per 2-3 volte.

27
Potencia:
1.000 W, 230 V~, 50 Hz
Carcasa / Tapa:
Acero no, mate suave
Piezas de plástico negro, con texto
Recipiente de agua:
Plástico, semitransparente, con indicación del nivel del agua
Jarra:
Jarra de vidrio con mango de plástico aislante del calor
Volumen:
Aprox. 1,5 l, 10 – 15 tazas
Tamaño (B/T/H):
Aprox.. 29,0 x 23,5 x 35,5 cm
Peso:
Aprox.. 2,4 kg
Longitud de cable:
Aprox.
90 cm, montado jo
Equipamiento:
Display electrónico con
• Función de programador de tiempo 24 horas
• Aviso de tiempo
Desconexión automática después de 2 horas
Plancha para mantener el calor
Filtro móvil con portador de ltro extraible y detención de goteo
Filtro continuo
Accesorios:
Cuchara de medición
Instrucciones de uso
Repuestos:
Jarra de vidrio con tapa, Art. Nro. 2801640
Portador de ltro con detención de goteo, Art. Nro. 2801663
Filtro continuo, Art. Nro. 2801665
Se reservan los cambios técnicos
1. Rogamos lea atentamente el manual de in-
strucciones y consérvelo.
2. No deben usar este equipo aquellas personas
(incluidos los niños) cuya capacidad física,
sensorial o mental esté limitada ni aquellas
personas que carecen de la experiencia y/o
los conocimientos necesarios, salvo bajo la
supervisión de la persona encargada de su
seguridad y que las instruya debidamente en
el uso del equipo.
3. Los niños deberían vigilarse para garantizar que
no jueguen con el equipo.
4. Guarde el equipo en un lugar inalcanzable para
los niños.
5. Conecte el equipo siempre a corriente alterna
de acuerdo con las indicaciones en la placa
indicadora.
6. Este equipo no debe operarse mediante tem-
porizador externo ni sistema de mando a
distancia.
7. Por razones de seguridad, no sumerja el equipo
o el cable de alimentación en agua u otros
líquidos bajo ningún concepto.
8. Por razones de seguridad eléctrica, no limpie el
equipo en el lavavajillas.
9. El interruptor y el cable no deben estar en
contacto con agua u otros líquidos. En caso
de que ocurriera, no obstante, todos los
componentes deberán estar secos previo a
utilizar nuevamente el equipo.
10. No toque el equipo ni el cable de alimentación
con las manos mojadas.
11. El equipo está diseñado exclusivamente para el
uso doméstico o usos similares como
cocinas en negocios, oficinas u otros lugares
de trabajo,
establecimientos rurales,
para el uso por huéspedes en hoteles, moteles
y establecimientos hoteleros similares,
en pensiones privadas o casas vacacionales.
INDICACIONES DE SEGURIDAD
INSTRUCCIONES DE USO
DATOS TECNICOS MODELO 28016

28
12. Por razones de seguridad, no coloque el equi-
po nunca en supercies calientes, una bandeja
metálica o una supercie húmeda.
13. Tanto el equipo como el cable de alimentación no
deben operarse nunca cerca de llamas abiertas.
14. Utilice la cafetera eléctrica siempre en una su-
percie despejada, plana y resistente al calor.
15. El equipo sólo debe utilizarse para la preparación
de café. No es admisible su utilización para ca-
lentar o mantener caliente leche u otros líquidos.
16. Observe que el cable no cuelgue sobre el canto
de la encimera.
17. El cable de alimentación debe tenderse de tal
forma que no sea posible tirar del mismo o que-
darse enganchado en él.
18. No guarde nunca el cable enrollándolo alrede-
dor del equipo y evite dobladuras, para evitar
daños en el cable de alimentación.
19. Utilice la cafetera eléctrica únicamente en el
interior.
20. Para evitar el sobrecalentamiento del equipo,
no lo cubra nunca durante el funcionamiento.
21. Utilice agua fresca y clara para la preparación
del café y rellene el depósito de agua como mí-
nimo hasta la marca inferior (2 tazas) y como
máximo hasta la marca MAX.
22. Conecte el equipo únicamente cuando se encu-
entre agua en el depósito de agua.
23. Al utilizar el equipo varias veces seguidas, deje
que se enfríe como mínimo unos 5 minutos.
24. No utilice la jarra en el microondas, ya que la
jarra no es apta para el uso en microondas.
25. Para evitar lesiones, no mueva el equipo mien-
tras esté funcionando.
26. Asegúrese de que todos los usuarios, especialmente
los niños, conozcan los peligros por vapor y salpica-
duras de agua caliente. ¡Peligro de quemaduras!
27. Para evitar daños, el equipo no debe utilizarse
con accesorios de otros fabricantes o marcas.
28. Desconecte el conector de red tanto después
de utilizar el equipo como antes de limpiarlo.
Nunca deje el equipo sin control si está conec-
tado a la toma de corriente.
29. Compruebe regularmente si el equipo, el co
nec-
tor o el cable de alimentación presentan señales
de desgaste o daños. Si detecta daños en el cable
de alimentación u otras piezas, envíe el equipo a
nuestro servicio técnico para su debida compro-
bación y reparación. Las reparaciones inapropia-
das pueden causar situaciones peligrosas para el
usuario y llevan a la extinción de la garantía.
30. Para evitar cualquier peligro, el cable de ali-
mentación dañado debe sustituirlo el fabri-
cante o su servicio técnico u otra persona
debidamente cualicada.
1. Cuide de que su máquina automática de hacer
café esté siempre limpia y sin cal (ver sección
Limpieza y descalcicación).
2. Guarde los granos de café en una lata bien
cerrada en lugar fresco y oscuro, sin embargo
no en la heladera.
3. Para un placer óptimo del café recomendamos
moler los granos de café recién directamente
antes de su utilización.
4. El café tiene mejor gusto recién hecho. Si el
café se mantiene durante mucho tiempo cali-
ente, puede volverse amargo.
5. Para verter el café la tapa de la jarra puede
quedar cerrada.
1. Retirar todos los materiales de embalaje.
2. Controlar si todas las piezas de repuesto en la
lista están a disposición.
3. La jarra de vidrio, la tapa de la jarra, el recipi-
ente de agua, el soporte del ltro y el ltro con-
tinuo deben enjuagarse en agua claiente con
un detergente suave y agua clara, secar bien.
4. Pasar un trapo húmedo a la carcasa del aparato
y secar bien.
5. Retirar el recipiente de agua y llenar con agua
fría hasta la marca MAX, colocar la tapa y volver
a colocar el recipiente de agua sobre la máquina.
6. Coloque el enchufe en la caja de enchufe.
Ahora el aparato está pronto para funcionar.
7. Antes del primer uso o cuando el aparato no
fue utilizado durante largo tiempo, llenar el re-
cipiente de agua hasta la cantidad máxima con
agua clara y fría, y realizar 1 a 2 pasadas de
café sin el café molido.
CONSEJOS PARA PLACER PERFECTO DEL CAFÈ
PUESTA EN MARCHA
El fabricante no asume ninguna responsabilidad en caso de montaje defectuoso, uso inapropiado o incor-
recto o después de reparaciones realizadas por terceros no autorizados.

29
La máquina automática de café le ofrece la posibilidad de hacer su café apretando el botón, o de progra-
mar el aparato hasta 24 horas de antemano.
1. Retire el recipiente de agua (abrir la tapa y tirar
del mango integrado hacia arriba) y llenarlo con
agua fría hasta la cantidad deseada. La marca
corresponde a la cantidad de tazas. Volver a co-
locar el recipiente de agua.
2. Atención:
3. Por motivos de seguridad el recipiente de agua
tiene una apertura para el caso de desborde
en la parte posterior. Por eso, al llenar el re-
cipiente considerar sin falta la marca MAX del
recipiente, y evite llenarlo de más.
4. Durante el período de calentamiento una parte
mínima del agua puede evaporarse, por eso la
cantidad de café producido puede ser algo dife-
rente.
5. Para llenar de café, abrir el dispositivo retráctil.
Coloque el portador de ltro. Cuide de que el li-
stón que sobresale en el soporte del ltro entre
en el espacio previsto del dispositivo retráctil.
En el caso de colocación indebida, no es posi-
ble cerrar el dispositivo retráctil.
6. Coloque el ltro continuo que viene con el apa-
rato en el portador de ltro.
7. Alternativamente puede colocar ltros de papel
de tamaño 1x4 en el portador de ltros (doblar
abajo y al costado el borde). El ltro de papel
no debe salir del borde del portador de ltro.
8. Llenar con la cantidad de café necesaria, a gu-
sto por taza 5 - 7 g (máx. 1 cuchara de café),
de café molido medio no. El café molido de-
masiado no puede tapar los poros del ltro y
causar desborde.
9. Cerrar el ltro móvil hasta que ajuste.
10. Coloque la jarra con tapa sobre la plancha de
mantenimiento caliente.
11. Apriete la tecla ON/OFF. La luz roja de control
ON se prenderá y comienza el proceso de ela-
boración del café.
12. Después de terminado el proceso de elabora-
ción, puede apagar el aparato apretando dos
veces la tecla ON/OFF.
13. 1Si el aparato no se apaga, la plancha de ca-
lentar se mantiene funcionando. Dos horas
después de comenzar a elaborar café, el apara-
to se apaga automáticamente.
1. Siga los pasos 1-8 de la sección Preparación
del café sin programador de tiempo.
2. Apriete una vez la tecla PROG y controle si
la hora está bien programada (ver sección
Programación de la hora).
3. Vuelva a apretar la tecla PROG, para ajustar el
inicio de la elaboración de café.
En el display aparece arriba a la izq.
PROGRAMADOR
TIMER
15:00
PREPARACIÒN DEL CAFÈ CON PROGRAMADOR DE TIEMPO
PREPARACIÒN DEL CAFÈ SIN PROGRAMADOR DE TIEMPO
1. En cuanto la máquina de café está conectada a
la red eléctrica, el display muestra 12:00 .
2. Apriete una vez la tecla PROG. La iluminación
del display se conecta.
3. En el display aparece arriba a la derecha
CLOCK.
CLOCK
12:00
4. Ahora apriete las teclas HOUR y MIN hasta que
la hora actual se haya alcanzado.
5. Después de aprox. 10 segundos sin accionar
las teclas, el aparato vuelve a su posición bá-
sica, después de algunos segundos también se
apaga nuevamente la iluminación del display.
PROGRAMCIÒN DE LA HORA

30
1. Antes de limpiar, sacar el enchufe de la caja de
enchufe y dejar enfriar el aparato totalmente.
2. El aparato no debe sumergirse en agua o en
ningún otro líquido.
3. Abrir el ltro móvil y retirar el ltro continuo
o la bolsa de ltro con el residuo del café, así
como el portador de ltro. Eliminar el residuo
de café o ltro de papel con residuo de café.
4. Por encima del ltro puede formarse agua con-
densada. Después de hacer café pase un tra-
po a la parte inferior de la tapa con un trapo
seco.
5. Las piezas extraibles como el recipiente de
agua, la jarra, la tapa y el recipiente de ltro
pueden enjuagarse en agua con un detergente
suave.
6. Para la limpieza simple, la tapa de la jarra de
café puede abrise apretando el botón en el
mango manual.
7. Pase un trapo húmedo bien escurrido tanto a la
plancha de calentar así como al aparato.
8. No utilice artículos de limpieza muy fuertes o
que rayen.
9. Todas las piezas tienen que estar totalmente
secas antes de volver a utilizar el aparato.
4. Apriete ahora las teclas STD y MIN hasta que
esté ajustada la hora de inicio deseada por
Usted para el proceso de elaboración del café.
5. A continuación apriete dos veces la tecla ON/
OFF para iniciar la función automática.
6. La luz verde de control AUTO se ilumina y per-
manece prendida.
7. Si quiere controlar la hora programada, apriete
dos veces la tecla PROG. En el display aparece
arriba a la izquierda PROGRAMADOR así como
la hora preajustada. Si lo desea puede modi-
carla ahora.
8. Después de aprox. 10 segundos sin apretar nin-
guna tecla, el display vuelve a su posición ini-
cial, después se apaga de nuevo la iluminación
del display.
9. Usted puede interrumpir la función AUTO en
cualquier momento, si aprieta una vez la tecla
ON/OFF.
10. Al obtener la hora preprogramada, se apaga la
luz de control verde, la roja se enciende y el
proceso de elaboración del café se inicia.
11. Después de terminar el proceso de elaboración,
Usted puede apagar el aparato apretando dos
veces la tecla ON/OFF.
12. Si el aparato no se apaga, la plancha de calentar
se mantiene funcionando. Dos horas después
de comenzar a elaborar el café el aparato se
apaga automáticamente. Si este se apaga antes
de tiempo, podría tener cal de más. Por favor
siga las instrucciones de la sección Limpieza
y descalcicación
13. La hora preprogramada se mantiene y puede
volver a activarse apretando nuevamente la tec-
la ON/OFF.
14. Si Usted desea introducir un nuevo ajuste de
hora, comience de nuevo la programación como
se describe arriba.
LIMPIEZA
DESCALCIFIACIÒN
1. La descalcicación regular mantiene la capaci-
dad de rendimiento de su máquina y hace que
dure más tiempo.
2. Si el aparato se desconecta antes de terminar
el tiempo de calentamiento, o si al hacer café
queda agua en el tanque de agua, el aparato
debería descalcicarse urgentemente.
3. Para eso utilice un descalcicador común
según las instrucciones de uso.
4. Llene el tanque de agua hasta la marca MAX
con la solución de descalcicación.
5. De forma alternativa puede utilizar también
ácido de limón. Ponga 25-50 g de ácido de
limón por un litro de agua.
6. Coloque la jarra de café en la plancha de
mantenimiento caliente.
7. Ahora apriete la tecla START y deje pasar casi
un tercio de la cantidad de agua.
8. Apague el aparato y deje actuar la solución de
descalcicación aprox. 15-30 min. En el caso
de calcicación fuerte puede dejar actuar la so-
lución también durante la noche.
9. Después volver a apretar START y dejar pasar el
resto de la solución de descalcicación.
10. Eche fuera la solución de descalcicación y
deje pasar 2-3 veces agua clara.

31
Výkon:
1.000 W, 230 V~, 50 Hz
Kryt / víko:
Leštěná ocel / plast, černý
Nádobka na vodu:
Plast, poloprůhledný, sukazatelem výšky hladiny
Konvice:
Skleněná konvice stepelně izolovanou plastovou rukojetí
Objem:
Cca 1,5 l, 10 – 15 šálků
Velikost (D/Š/V):
Cca 29,0 x 23,5 x 35,5 cm
Hmotnost:
Cca 2,4 kg
Délka kabelu:
Cca
90 cm, namontováno napevno
Vybavení:
Elektronický displej s
Funkcí nastavení času (24 hod. předprogramovatelný)
Ukazatelem času
Automatické odpojení po 2 hodinách
Plotýnka pro udržení teploty
Výklopný ltr s odnímatelným držákem a zamezením odkapávání
Trvalý ltr
Odměrka
Návod kpoužití
Náhradní díly:
Skleněná konvice Art. Nr. 2801640
Držák ltru Art. Nr. /2801663
Trvalý ltr Art. Nr. 2801665
1. Přečtěte si následující pokyny a pečlivě je
uschovejte.
2. Tento přístroj není určen k tomu, aby jej
používaly osoby (včetně dětí) s omezenými
fyzickými, senzorickými, nebo duševnímu
schopnostmi nebo s nedostatkem zkušeností
a/nebo s nedostatečnými znalostmi, ledaže
by byly pod dozorem osoby zodpovědné za
jejich bezpečnost, anebo od této osoby dostaly
pokyny, jak přístroj obsluhovat.
3. Děti musí být pod dohledem, aby se zajistilo, že
si nebudou hrát s přístrojem.
4. Přechovávejte na místě nepřístupném dětem.
5. Přístroj napojte pouze na střídavý proud s
napětím dle typového štítku.
6. Tento přístroj nesmí být provozován s exter-ními
spínacími hodinami nebo systémem dálkového
ovládání.
7. V žádném případě neponořujte přístroj nebo
jeho přívod z důvodů elektrické bezpečnosti do
vody či jiné kapaliny.
8. Přístroj z důvodů elektrické bezpečnosti nikdy
nečistěte v myčce nádobí.
9. Spínač a kabel nesmějí přijít do kontaktu s
vodou či jinými kapalinami. Pokud by k tomu
přece jen došlo, musí být při opětovném použití
přístroje všechny součásti dokonale suché.
10. Přístroje popř. jeho přívodu se nikdy nedo-
týkejte mokrýma rukama.
11. Tento přístroj je určený výhradně k domácímu
nebo podobnému použití např.
Čajové koutky v obchodech kancelářích a na
jiných pracovištích,
V zemědělských provozech,
k použití pro hosty v hotelích, motelech a
jiných ubytovacích zařízeních,v soukro-mých
penzionech nebo rekreačních chatách.
12. Přístroj z bezpečnostních důvodů nikdy
nestavějte na horké povrchy, na kovovou desku
nebo na mokrou podložku.
13. Přístroj nebo jeho přívody nesmí být provo-
zovány v blízkosti plamenů.
NÁVOD K OBSLUZE
TECKNICKÁ DATA
BEZPECNOSTNI POKYNY

32
1. Zajistěte, aby byl váš kávovar svždy čistý a
bez vodníko kamene. (viz odstavec Čištění a
odstranění vodního kamene).
2. Kávová zrna a mletou kávu skladujte v dobře
uzavřené dóze v chladu a ve tmě, ne však v
lednici.
3. Pro optimální požitek z kávy doporučujeme
umlít kávová zrna teprve těsně před použitím.
Používejte pouze čerstvou vodu.
4. Čerstvě spařená káva chutnmná nejlépe.
Pokud kávu udržujete příliš dlouho teplou,
může zhořknout.
5. Pro nalévání kávy může zůstat poklice konvice
uzavřena.
1. Odstraňte veškerý obalový materiál.
2. Zkontrolujte, zda je k dispozici kompletní uve-
dené příslušenství.
3. Skleněnou konvici, víko konvice, nádobku na
vodu, držák ltru a trvalý ltr omyjte v horké
vodě s jemným saponátem, opláchněte čistou
vodou a dobře osušte.
4. Kryt přístroje otřete vlhkým hadříkem a pečlivě
osušte.
5.
6. Nádobku na vodu naplňte studenou vodou až po
značku MAX, víko uzavřete a nádobku nasaďte
zpět do automatu.
7. Zástrčku zasuňte do zásuvky. Přístroj je nyní
připraven k provozu.
8. Před prvním použitím, nebo nebyl-li přístroj
delší dobu používán, naplňte nádobku po
značku MAX čistou, studenou vodou a proveďte
jeden až dva procesy spaření bez kávového
prášku.
14. Automat na kávu používejte vždy na volném,
rovném a žáruvzdorném povrchu.
15. Přístroj je schválen pouze pro využití v
domácnosti a smí být používán pouze k
přípravě kávy, v žádném případě k vaření /
ohřívání mléka nebo jiných tekutin.
16. Dbejte na to, aby přívod nevisel přes okraj
pracovní plochy, neboť to může vést k
nehodám, kdyby za něj náhodou potáhly
n
apř. malé děti.
17. Přívod musí být položen tak, aby nebylo možné
za něj potáhnout ani přes něj zakopnout.
18. Přívodní šňůru neomotávejte kolem přístroje
a zabraňte jejímu zalomení, aby se předešlo
poškození přívodu.
19. Automat na kávu používejte pouze ve vnitřních
prostorách.
20. Během provozu přístroj nikdy nezakrývejte,
abyste zamezili jeho přehřátí.
21. Pro vaření kávy použijte čerstvou, čistou
vodu a naplňte ji do nádobky minimálně po
nejspodnější značku (2 šálky) a maximálně po
značku MAX.
22. Přístroj zapněte až poté, co jste naplnili vodu
do zásobníku.
23. Při opakovaném používání přístroj mezitím
nechávejte cca 5 minut vychladnout.
24. Konvici na kávu nikdy nepoužívejte v mikrovlnné
troubě, protože k tomu není určena.
25. Nepohybujte přístrojem dokud je v provozu,
abyste zamezili poraněním.
26. Ujistěte se, že jsou všichni uživatelé, zvláště
děti, seznámeni s možnými nebezpečími
spojenými s unikající párou nebo stříkající
horkou vodou – nebezpečí opaření!.
27. Přístroj nesmí být používán s příslušenstvím
jiných výrobců nebo značek.
28. Po použití a opřed čištěním vytáhněte zástrčku
ze zásuvky. Přístroj nikdy nenechávejte bez
dozoru, pokud je zástrčka zapojena.
29. Pravidelně u přístroje, zástrčky a přívodu
kontrolujte opotřebení a poškození. Při pošk-
ození přívodního kabelu nebo jiných součástí
zašlete prosím přístroj ke kontrole a opravě
našemu zákaznickému servisu. Neodborné
opravy mohou vést k významnému ohrožení pro
uživatele a mají za následek ztrátu záruky.
30. Pokud je připojovací kabel z této jednotky
je poškozen, musí být výrobcem nebo
jeho zákaznického servisu nebo podobně
kvalifikovanou osobou, která má být
nahrazena, aby se předešlo nebezpečí.
UVEDENI DO PROVOZU
TIPY PRO NERUŠENY Z POITEK Z KÀVY

33
1. Odeberte nádobku na vodu (otevřete víko a
potáhněte za integrovanou rukojeť) a naplňte ji
požadovaným množstvím studené vody. Značení
odpovídá počtu šálků. Nádobku na vodu opět
nasaďte.
Pozor:
Z bezpečnostních důvodů má nádobka na
vodu na zadní straně otvor pro přetékání. Při
naplňování nádobky proto vždy dbejte na značku
naplnění MAX a zamezte přeplnění nádobky.
2. Během procesu vaření kávy se může malá
část vody odpařit a z tohoto důvodu se může
množství hotové kávy nepatrně lišit od množství
naplněné vody.
3. Pro naplnění kávou otevřete výkyvnou část.
Nasaďte držák ltru. Dbejte na to, aby
vyčnívající lišta na držáku ltru zapadla do
drážky výklopného zařízení. V případě chybného
nasazení nelze výklopné zařízení zavřít.
4. Do držáku ltru nasaďte dodaný trvalý ltr.
5. Alternativně můžete do držáku ltru použít
papírové ltry velikosti 1x4 (ražený okraj dole
a po straně přehněte!). Papírový ltr nesmí
přečnívat přes okraj držáku ltru.
6. Naplňte potřebné množství kávy. Dle chuti na
šálek 5-7 g (max. 1 kávovou lžičku) středně
jemně namleté kávy. Příliš jemně namletá káva
může ucpat póry ltru a vést tak s přetečení
vody.
7. Uzavřete výkyvný ltr, dokud nezaskočí.
8. Konvici s víkem postavte na plotýnku.
9. Stiskněte tlačítko ZAP/VYP. Kontrolka ZAP se
rozsvítí červeně a proces vaření kávy začíná.
10. Po ukončení procesu spařování můžete přístroj
vypnout dvojnásobným stisknutím tlačítka ZAP/
VYP.
11. Není-li přístroj vypnut, zůstává plotýnka v pro-
vozu. Dvě hodiny od počátku vaření se přístroj
automaticky vypne.
12. Pokud se přístroj vypne předčasně, může to
způsobovat vodní kámen. Postupujte prosím
dle pokynů uvedených v odstavci Čištění a
odstranění vodního kamene.
1. Proveďte kroky 1-8 z odstavce Příprava kávy
bez funkce časovače.
2. Stiskněte jednou tlačítko PROG a zkontrolu-
jte, zda je správně nastaven čas (viz odstavec
Programování hodin).
3. Znova stiskněte tlačítko PROG pro nastavení
začátku vaření kávy.
4. Na displeji vlevo nahoře se objeví TIMER.
TIMER
15:00
5. Nyní tiskněte tlačítko HOD a MIN tak dlouho,
než nastavíte vámi požadovaný čas spuštění pro
proces vaření.
6. Poté dvakrát stiskněte tlačítko ZAP/VYP, abyste
spustili funkci automatiky.
PIPRAVA KÀVY S FUNKCI ASOVAE
PIPRAVA KÀVY BEZ FUNKCI ASOVAE
PROGRAMOVÀNI HODIN
1. Jakmile je kávovar připojen k síti, ukazuje dis-
plej 12:00.
2. Stiskněte jednou tlačítko PROG. Rozsvítí se
osvětlení displeje.
3. Na displeji vpravo nahoře se objeví CLOCK.
CLOCK
12:00
4. Tiskněte nyní tlačítka HOD a MIN tak dlouho,
dokud nenastavíte aktuální čas.
5. Po asi 10 sekundách bez stisku tlačítka přejde
přístroj znova do základního nastavení, po
několika málo sekundách se osvětlení displeje
opět vypne.

34
1. Před čištěním vytáhněte zástrčku ze zásuvky a
přístroj nechte zcela vychladnout.
2. Přístroj nesmí být namáčen do vody či jiné ka-
paliny.
3. Výkyvný ltr otevřete a vyjměte trvalý ltr popř.
papírový ltr s kávovou sedlinou a držák ltru.
Kávovou sedlinu popř. papírový ltr se sedlinou
vyhoďte.
4. Nad ltrem se může srážet voda. Po uvaření
kávy otřete spodní stranu víka suchým
hadříkem.
5. Odnímatelné části jako nádobka na vodu, kon-
vice, víko a držák ltru mohou být myty v horké
vodě s jemným saponátem.
6. Pro jednoduché čištění může být víko kávové
konvice otevřeno tím, že stisknete tlačítko na
rukojeti.
7. Přístroj i plotýnku otřete dobře vymačkaným
vlhkým hadříkem.
8. Nepoužívejte žádné abrazivní prostředky k
čištění.
9. Dříve než přístroj znova použijete, musí být
všechny jeho součásti zcela suché.
7. Kontrolka ZAP/AUTO se rozsvítí a zůstává zap-
nuta.
8. Chcete-li si přednastavený čas zkontrolovat,
stiskněte dvakrát tlačítko PROG. Na displeji se
vlevo nahoře objeví TIMER a také přednastavený
čas. Pokud si to přejete, tak tento čas můžete
nyní změnit.
9. Po asi 10 sekundách bez stisku jakéhokoli
tlačítka se displej opět přepne do základního
stavu. Poté se osvětlení displeje opět vypne.
10. Funkci AUTO můžete kdykoli zrušit tím, že jed-
nou stiskněte tlačítko ZAP/VYP.
11. S dosažením přednastaveného času zhasne ze-
lená kontrolka, červená kontrolka se rozsvítí a
začne proces vaření.
12. Po ukončení procesu spařování můžete přístroj
vypnout dvojnásobným stisknutím tlačítka ZAP/
VYP.
13. Není-li přístroj vypnut, zůstává plotýnka v pro-
vozu. Dvě hodiny od počátku vaření se přístroj
automaticky vypne.
14. Pokud se přístroj vypne předčasně, může to
způsobovat vodní kámen. Postupujte prosím
dle pokynů uvedených v odstavci Čištění a
odstranění vodního kamene.
15. Předprogramovaný čas zůstává zachován a
může být znova aktivován dvojitým stisknutím
tlačítka ZAP/VYP.
16. Chcete-li navolit nové nastavení času, začněte
znova s programováním tak, jak je popsáno
výše.
1. Pravidelné odstraňování vodního kamene
udržuje výkonnost vašeho automatu na kávu a
prodlouží jeho životnost.
2. Pokud se přístroj vypne před ukončením pro-
cesu vaření kávy nebo pokud při spaření kávy
zůstává voda v nádržce, je nutné odstranit z
přístroje vodní kámen.
3. Za tímto účelem použijte běžně dostupný
odstraňovač vodního kamene dle pokynů na
jeho obalu.
4. Nádržku na vodu naplňte až po značku MAX
roztokem na odstranění vodního kamene.
5. Lternativně můžete také použít kselinu citróno-
vou. Dejte 25-50 g kyseliny citrónové na jeden
litr vody.
6. Konvici postavte na plotýnku.
7. Stiskněte tlačítko ZAP/VYP a nechte projít cca
jednu třetinu množství vody.
8. Přístroj vypněte a roztok nechte cca 15-30 min.
působit. V případě silného zanesení vodním ka-
menem můžete roztok nechat působit také přes
noc.
9. Poté znova stiskněte START a nechte přístrojem
projít zbytek roztoku.
10. Roztok proti vodnímu kameni vylijte a nechte .

35
Moc:
1.000 W, 230 V~, 50 Hz
Obudowa/ pokrywa:
Stal szlachetna jedwabisty mat
Elementy z tworzywa sztucznego, czarne
Zbiornik::
Tworzywo sztuczne, półprzeźroczyste, ze wskaźnikiem ilości wody
Dzbanek:
Dzbanek szklany w izolowanym uchwytem z tworzywa sztucznego
Ok. 1,5l. 10 - 15 liżanek
Wymiary::
szer./gł./wys. 25,0 x 23,0 x 35,5 cm
Waga:
Ok. 2,4 kg
Kabel:
Ok. 90cm, zamocowany na stałe
Wyświetlacz elektroniczny z
- funkcją timera (ustawienie do 24h w przód)
- funkcją zegarka
Automatyczne wyłączenie po 2h
Płyta utrzymująca ciepło
Wysuwana obudowa ltra z wyjmowanym uchwytem ltra i
Funkcją zatrzymania kapania
Filtr stały
Akcesoria:
Łyżeczka do odmierzania
Instrukcja obsługi
Dzbanek szklany z pokrywą, nr produkcji 2801640
- Uchwyt ltra z funkcją zatrzymania kapania, nr produkcji
2801663
- Filtr stały, nr produkcji 2801665
- Łyżeczka do odmierzania kawy, nr prod.2801651
1. Należy zapoznać się z następującymi ws-
kazówkami oraz przestrzegać ich podczas
użytkowania.
2. Urządzenia nie powinny używać dzieci i oso-
by ograniczone psychicznie, sensor-ycznie lub
umysłowo bądź posiadające niewystarczające
doświadczenie i wiedzę chyba, że będą pod
nadzorem opiekunów, którzy udzielą informacji
jak prawidłowo używać urządzenia.
3. Dzieci nie powinny używać tego urządzenia.
4. Urządzenie podłączać tylko do prądu zmienne-
go o napięciu podanym na tabliczce znamio-
nowej.
5. To urządzenie nie może być używane z
zewnętrznym włącznikiem czasowym lub z sy-
stemem zdalnego sterowania.
6. Nie zanurzać w żadnym wypadku urządzenia
w wodzie lub innych płynach. Urządzenia nie
można myć w zmywarce do naczyń.
7. Urządzenia można używać tylko do przygoto-
wania kawy, w żadnym wypadku do gotowania
innych płynów.
8. Urządzenie stawiać tylko na suchych, płaskich
i stabilnych powierzchniach, nigdy na gorących
powierzchniach.
9. Urządzenie jest przewidziane do użycia w po-
mieszczeniach i nie może być przykryte w cza-
sie pracy.
10. Proszę używać tylko akcesoriów zalecanych
przez producenta. Użycie obcych akcesoriów
może prowadzić do uszkodzenia urządzenia i
stanowić zagrożenie dla użytkownika.
DANE TECHNICZNE

36
-
1. Proszę zadbać o to, aby Państwa ekspres do
kawy był zawsze czysty i pozbawiony kamienia
(sprawdź rozdział ‚Czyszczenie i odkamienia-
nie‘).
2. Przechowywać ziarna kawy i kawę zmieloną
w dobrze zamkniętej puszcze w ciemnym i
chłodnym miejscu, jednakże nie w lodówce.
3. Proszę używać tylko świeżej zimnej wody.
Dla optymalnej przyjemności z kawy zalecamy
zmielenie kawy bezpośrednio przed użyciem.
4. Świeżo zaparzona kawa smakuje najlepiej.
Jeżeli kawa będzie długo podgrzewana, może
zrobić się gorzka.
1. Odpakować dokładnie urządzenie.
2. Proszę sprawdzić, czy dołączono wszystkie wy-
liczone akcesoria.
3. W gorącej wodzie z dodatkiem łagodnego
środka czyszczącego należy umyć: dzbanek sz-
klany, pokrywę dzbanka, zbiornik wody, uchwyt
ltra i ltr stały. Opłukać czystą wodą i dobrze
wysuszyć.
4. Obudowę urządzenia przetrzeć wilgotną
ściereczką i starannie wysuszyć.
Ściągnąć zbiornik wody i napełnić go do po-
ziomu MAX zimną wodą, zamknąć pokrywę
i umieścić zbiornik wody z powrotem w
urządzeniu.
5. Włożyć wtyczkę do gniazda. Urządzenie jest
teraz gotowe do użycia.
6. Przed pierwszym użyciem lub jeżeli urządzenie
nie było używane przez dłuższy czas, napełnić
zbiornik wody maksymalną ilością czystej, zim-
nej wody i przeprowadzić jedno lub dwa parze-
nia bez dodawania kawy.
URUCHOMIENIE
11. Urządzenie przeznaczone jest wyłącznie do
użytkowania w gospodarstwach domowych lub
innych do podobnego zastosowania, np.
wsklepach, biurach lub innych zakładach
pracy w kuchenkach podręcznych,
w zakładach rolniczych,
do używania przez gości w hotelach, motelach
lub innych gościńcach,
w pensjonatach prywatnych lub domach
letniskowych.
12. Kabel nie może mieć kontaktu z gorącymi
elementami urządzenia. Nie należy dotykać
gorących elementów.
13. Nie ciągnąć za kabel. Kabel nie może wystawać
poza blat roboczy. Nie owijać kabla wokół
gorącego urządzenia i unikać załamania kabla.
14. Do zaparzania kawy proszę używać świeżej,
czystej wody i napełniać zbiornik na wodę
maksymalnie do oznaczenia MAX.
15. Proszę włączać urządzenie po nalaniu wody.
16. Nigdy nie wysuwać obudowy filtra w trakcie
parzenia kawy.
17. Przy wielokrotnym użyciu proszę schłodzić
urządzenie pomiędzy użyciami (ok. 5 min).
18. Nigdy nie używać dzbanka w kuchence
mikrofalowej, na piecu lub płytach grzewczych
(poza własną płytą grzewczą urządzenia).
19. Po użyciu jak i przed czyszczeniem wyciągnąć
wtyczkę z gniazda i schłodzić urządzenie.
20. Sprawdzaj regularnie wtyczkę i kabel czy
nie ma śladów zużycia bądź uszkodzeń. Przy
uszkodzeniu kabla zasilającego lub innej
części proszę wysłać urządzenie do kontroli i/
lub naprawy do naszego biura obsługi klienta.
(Patrz adres podany w warunkach gwarancji).
21. Nieprawidłowe naprawy mogą prowadzić do
znaczących niebezpieczeństw dla użytkowników
i prowadzą do wygaśnięcia gwarancji.
22. Jeśli kabla łączącego z tego urządzenia jest
uszkodzony, musi być dostarczone przez
producenta lub jego usługi lub podobnie
wykwalifikowaną osobę zostać zastąpiony w
celu uniknięcia zagrożenia.

37
1. Zdjąć zbiornik wody (otworzyć pokrywę i
pociągnąć zintegrowany uchwyt w górę) i
napełnić go żądaną ilością zimnej wody.
Oznaczenia odpowiadają ilości liżanek.
Umieścić zbiornik ponownie w urządzeniu.
2. Uwaga:
3. Z powodów bezpieczeństwa zbiornik wody ma na
tylnej ścianie otwór przelewowy. Dlatego proszę
podczas napełniania koniecznie zwrócić uwagę
na oznaczenie MAX i unikać przepełnienia zbi-
ornika.
4. W trakcie parzenia kawy część wody może
zamienić się w parę wodną, dlatego ilość zapar-
zonej kawy może lekko odbiegać od żądanej.
5. Aby nasypać kawę, należy wysunąć obudowę l-
tra. Włożyć uchwyt ltra. Zwrócić uwagę na to,
aby wystająca listwa na uchwycie ltra pasowała
w odpowiednie miejsce w wysuwanej obudowie
ltra. Przy nieprawidłowym zamontowaniu wy-
suwana obudowa ltra nie da się zamknąć.
6. Włożyć dostarczony ltr stały w uchwyt ltra.
7. Alternatywnie do uchwytu ltra można włożyć
ltry papierowe o wielkości 1x4 (tłoczony brzeg
ltra ułożyć na dole i na boku!). Filtr papierowy
nie może wystawać poza brzeg uchwytu ltra.
8. Nasypać żądaną ilość kawy, wg smaku 5-7g
na liżankę (max 1 łyżeczka do kawy) średnio
zmielonej kawy. Zbyt drobno zmielona kawa
może zapchać pory w ltrze i doprowadzić do
przelania się wody.
9. Zamknąć wysuwaną obudowę ltra aż do
zatrzaśnięcia.
10. Dzbanek z pokrywą postawić na płycie grzew-
czej.
11. Nacisnąć przycisk EIN/AUS. Zapali się czerwo-
na lampka kontrolna EIN. Proces parzenia kawy
się rozpocznie.
12. Po zakończeniu procesu parzenia można
wyłączyć urządzenie, naciskając dwa razy przy-
cisk EIN/AUS.
13. Jeżeli urządzenie nie zostanie wyłączone, płyta
grzewcza będzie dalej działać. Dwie godziny po
rozpoczęciu procesu parzenia kawy urządzenie
wyłączy się automatycznie.
14. Jeżeli urządzenie wyłączy się przed czasem,
może to oznaczać, że jest zakamienione. Proszę
zastosować wskazówki z rozdziału ‚Czyszczenie
i odkamienianie‘.
1. Zastosować wskazówki z punktów 1-8 z
rozdziału ‚Przygotowanie kawy bez funkcji
timera‘.
2. Nacisnąć raz przycisk PROG i sprawdzić, czy
zegarek jest prawidłowo nastawiony (patrz
rozdział ‚Programowanie zegarka‘).
3. Ponownie naciśnij przycisk PROG, aby nastawić
początek parzenia kawy.
4. - na wyświetlaczu wyświetli się w lewym górnym
rogu napis TIMER
TIMER
15:00
5. - naciskać przyciski STD i MIN tak długo, aż
nastawi się żądany czas rozpoczęcia procesu
parzenia kawy.
PRZYGOTOWANIE KAWY BEZ FUNKCJI TIMERA
PROGRAMOWANIE ZEGARKA
1. Jak tylko ekspres do kawy zostanie podłączony
do prądu, na wyświetlaczu pojawi się 12:00.
2. Nacisnąć raz przycisk PROG. Uruchomi się
podświetlenie wyświetlacza.
3. Na wyświetlaczu pojawi się CLOCK w prawym
górnym rogu.
CLOCK
12:00
4. Następnie naciskać przycisk STD i MIN tak
długo, aż ustawi się aktualny czas.
5. Po ok. 10 sekundach bez dotykania przycisków
urządzenie przejdzie w ustawienie podstawowe,
po następnych kilku sekundach wyłączy się
również podświetlenie wyświetlacza.

38
1. Przed czyszczeniem wyciągnąć wtyczkę z gniaz-
dka i odczekać, aż urządzenie ostygnie.
2. Urządzenia nie należy zanurzać w wodzie i in-
nych płynach.
3. Wysunąć obudowę ltra i wyciągnąć ltr stały
lub papierowy z fusami kawy, jak również uch-
wyt do ltra. Wyrzucić fusy kawy względnie ltr
papierowy z fusami kawy.
4. Ponad ltrem może tworzyć się skondensowa-
na woda. Należy przetrzeć po zaparzeniu kawy
spód pokrywy suchą ściereczką.
5. Zdejmowane elementy, takie jak zbiornik wody,
dzbanek, pokrywę i uchwyt do ltra można
umyć w ciepłej wodzie z dodatkiem łagodnego
środka czyszczącego.
6. Dla zwykłego czyszczenia można otworzyć
pokrywę dzbanka, wciskając przycisk na uch-
wycie.
7. Przemyć urządzenie i płytę grzewczą wilgotną,
wyciśniętą ściereczką.
8. Nie używać ostrych lub rysujących środków
czyszczących.
9. Wszystkie części muszą być całkowicie suche,
zanim urządzenie będzie ponownie użyte.
CZYSZCZENIE
6. Nacisnąć następnie przycisk EIN/AUS dwa
razy, aby uruchomić funkcję automatyczną.
7. Zapali się zielona lampka kontrolna AUTO i po-
zostanie zapalona.
8. Aby sprawdzić ustawiony czas, nacisnąć dwa
razy przycisk PROG. Na wyświetlaczu pojawi się
w górnym lewym rogu napis TIMER oraz ustawi-
ony czas. Według życzenia można teraz zmienić
ustawiony czas.
9. Po około 10 sekundach bez naciskania przy-
cisków wyświetlacz przejdzie ponownie w
ustawienie podstawowe, następnie wyłączy się
oświetlenie wyświetlacza.
10. Funkcję AUTO można wyłączyć w każdej chwili,
naciskając raz przycisk EIN/AUS.
11. Przy upływie ustawionego czasu zgaśnie zie-
lona lampka kontrolna, a następnie zapali się
czerwona lampka kontrolna i zacznie się proces
parzenia kawy.
12. Po zakończeniu procesu parzenia kawy można
wyłączyć urządzenie poprzez dwukrotne
naciśnięcie przycisku EIN/AUS.
13. Jeżeli urządzenie nie zostanie wyłączone, płyta
grzewcza będzie dalej działać. Dwie godziny po
rozpoczęciu procesu parzenia kawy urządzenie
wyłączy się automatycznie. Jeżeli urządzenie
wyłączy się przed czasem, może to oznaczać,
że jest zakamienione. Proszę zastosować ws-
kazówki z rozdziału ‚Czyszczenie i odkamieni-
anie‘.
14. Zaprogramowany czas pozostanie zapamiętany
i może być ponownie aktywowany poprzez dwu-
krotne naciśnięcie przycisku EIN/AUS.
15. Jeżeli ma być ustawiony nowy czas, proszę
zacząć ponownie programowanie czasu jak opi-
sano powyżej.
ODKAMIENIANIE
1. Regularne pozbywanie się kamienia utrzymuje
wydajność ekspresu do kawy oraz przedłuża
jego żywotność.
2. Jeżeli urządzenie wyłączy się przed upływem cz-
asu podgrzewania lub w trakcie parzenia kawy,
pozostanie woda w zbiorniku. Z urządzenia
należy natychmiast usunąć kamień.
3. Proszę użyć dostępnego w handlu odkamieniac-
za zgodnie z instrukcją na opakowaniu.
4. Napełnić zbiornik do oznaczenia MAX roztwo-
rem odkamieniacza.
5. Alternatywnie można użyć kwasku cytrynowego
w ilości 25-50g kwasku cytrynowego na jeden
litr wody.
6. Postawić dzbanek do kawy na płycie grzew-
czej.
7. Nacisnąć teraz przycisk EIN/AUS i odczekać,
aż przeleje się ok. jednej trzeciej ilości wody.
8. Wyłączyć urządzenie i zostawić roztwór odka-
mieniacza w urządzeniu na ok. 15-30 minut.
Przy mocnym zakamienieniu można pozostawić
roztwór na noc.
9. Następnie ponownie nacisnąć START ( przycisk
EIN/AUS) i odczekać, aż przeleje się reszta ro-
ztworu odkamieniacza.
10. Wylać roztwór odkamieniacza i przeprowadzić
dwu- lub trzykrotne parzenie czystą wodą bez
dodawania kawy.

MENAGROS SA
Route der Servion
CH - 1083 Mezières
Telefon +41 (0) 21 9 03 01-15
Telefax +41 (0) 21 9 03 01-11
E-Mail [email protected]
Internet www.menagros.ch
SERVICE-ADRESSEN
DEUTSCHLAND
ÖSTERREICH
Mannheimer Straße 4
68766 Hockenheim
SCHWEIZ
POLEN
Kundendienst
Telefon +49 (0) 62 05/94 18-27
Telefax +49 (0) 62 05/94 18-22
E-Mail [email protected]
Internet www.unold.de
Reparaturabwicklung, Ersatzteile:
Reparatur-Annahme Österreich
ESC Electronic Service Center GmbH
Molitorgasse 15
A-1110 Wien
Telefon +43 (0) 1/9 71 70 59
Telefax +43 (0) 1/9 71 70 59
E-Mail [email protected]
„Quadra-net“ Sp. z o.o.
Skadowa 5
61-888 Poznan Skadowa 5
Internet www.quadra-net.pl

40
GARANTIEBESTIMMUNGEN
GUARANTEE CONDITIONS
CONDITIONS DE GARANTIE
GARANTIEVOORWAARDEN
Wir gewähren auf unsere Geräte eine Garantie von 24 Monaten, bei gewerblichem Gebrauch 12 Monate, ab dem Kaufda-
tum für Schäden, die bei bestimmungsgemäßem Gebrauch nachweislich auf Werksfehler zurückzuführen sind. Innerhalb
der Garantiezeit beheben wir Material- und Herstellungsfehler nach unserem Ermessen durch Reparatur oder Umtausch.
Unsere Garantieleistungen gelten ausschließlich für in Deutschland und Österreich verkaufte Geräte. Bei anderen Ländern
wenden Sie sich bitte an den zuständigen Importeur. Geräte, für die eine Mängelbeseitigung beansprucht wird, senden Sie
bitte zusammen mit einer Kopie des maschinell erstellten Kauf belegs, aus dem das Kaufdatum ersichtlich sein muss, sowie
einer Fehlerbeschreibung gut verpackt und freigemacht an unseren Kundendienst. Im Garantiefall werden dem Kunden ent-
standene Versandkosten zurückerstattet. Von der Garantie ausgeschlossen sind Schäden durch Verschleiß, unsachgemäße
Handhabung und Nichteinhaltung der Wartungs- und Pflegeanweisungen. Der Garantieanspruch erlischt, wenn Reparaturen
oder Eingriffe am Gerät von dritter Stelle vorgenommen werden.
Eventuelle Ansprüche des Endverbrauchers gegenüber dem Verkäufer oder Händler werden durch diese Garantie nicht ein-
geschränkt.
We grant a 24 months guarantee, and in case of commercial use a 12 months guarantee, starting from the date of purchase
for any damage demonstrably due to manufacturing defects and when the appliance has been used according to its intended
use. Within the warranty period we will remedy defective materials or workmanship through repair or replacement, at our
option.
Our warranty terms apply only to appliances sold in Germany and Austria. For other countries, please contact the responsible
importer. In the event of a claim for remedy of defects, please send the appliance to our after sales service, properly packaged
and postage paid, together with a copy of the automatically generated sales receipt, which must show the date of purchase,
and a description of the defect. If the defect is covered by the warranty, the customer will be reimbursed for the shipping
costs. The warranty does not cover damage from normal wear, improper handling and failure to comply with the maintenance
and care instructions. The warranty is void if repairs or modifications are made to the appliance by third parties.
Any claims of the end consumer vis-à-vis the retailer are not limited by this warranty.
En cas d’utilisation conforme et lors de dégâts manifestement dus à des défauts de fabrication, nos appareils sont garantis
24 mois, lors d’utilisation professionnelles 12 mois, à dater de l’achat. Notre garantie n’est valide que pour les appareils
vendus en Allemagne et en Autriche. Dans tout autre pays veuillez contacter l’importateur. Veuillez envoyer à notre adresse
les appareils, pour lesquels vous réclamez une suppression de défauts, avec le bon d’achat montrant la date d’achat, port
payé et proprement emballé. Les coûts de transport seront remboursés en cas de garantie en Allemagne et en Autriche. Les
défauts causés par usure, utilisation incorrecte ou non-respect des instructions de maintenance sont exclus. Notre obligation
de garantie cesse, si de réparations ou des interventions sont accomplies par des tiers. Cette garantie n’affecte pas les droits
du consommateur contre le commerçant.
Wij geven op onze apparaten een garantietermijn van 24 maanden (12 maanden bij commerciële gebruik), gerekend vanaf de
dag van aanschaf. Deze garantie geldt voor schade, die bij correct gebruik aantoonbaar is veroorzaakt door een fout in de pro-
ductie. Binnen de garantietermijn verhelpen wij materiaal- en productiefouten door herstelling of vervanging naar onze keuze.
Onze garantie is slechts geldig voor in Duitsland en Oostenrijk verkopte apparaten. In andere landen a.u.b. de importeur
aanspreken. Apparaaten, waarvoor garantie in aanspraak wordt genomen, moeten ons samen met een kopie van de machineel
gegenereerde kassabon waaruit de koopdatum duidelijk wordt, alsmede een beschrijving van de fout goed verpakt aan onze
klantenservice worden toegezonden, porto betaald. Als er sprake van garantie is, worden de verzendingskosten in Duitsland
en Oostenrijk aan de klant vergoed. De garantie dekt geen schade veroorzaakt door slijtage, onbehoorlijk gebruik/foutieve han-
delingen en niet-naleving van de onderhouds- en reinigingsaanwijzingen. Het recht op garantie vervalt, wanneer reparaties
of manipulaties aan het apparaat door derden worden doorgevoerd. Eventuele rechten van de eindgebruiker t.o.v. de verkoper
of distributeur worden door deze garantie niet aangetast.

41
CONDICIONES DE GARANTIA
La garantía para nuestros equipos es de 24 meses, y de 12 meses en el caso de uso comercial, a partir de la fecha de compra,
cubriendo los daños que con un uso acorde a lo prescrito pueden atribuirse fehacientemente a defectos de fabricación. Dentro
del período de garantía, solucionamos errores de material y de fabricación a consideración nuestra mediante reparación o
cambio. Nuestros servicios de garantía son válidos únicamente para los aparatos que han sido vendidos en Alemania y
Austria. Para todos los demás casos diríjase por favor al importador correspondiente. Aquellos aparatos que se presentan
para eliminar errores, por favor enviarlos junto a una copia del comprobante de compra extendido a máquina, del cual debe
desprenderse la fecha de compra, así como una breve descripción de las deficiencias, apropiadamente embalado y con los
sellos correspondientes a nuestro servicio al cliente.
En caso de garantía, los gastos de envío serán restituidos al cliente. Aquellos daños causados por desgaste están excluidos
de la garantía, así como manipulación incorrecta, e incumplimiento de las condiciones de mantenimiento y cuidado. El de-
recho a garantía expira si las reparaciones o mantenimiento son realizadas por terceros. Todo reclamo del consumidor final
ante el vendedor, comerciante no se ve afectado por esta garantía.
I nostri prodotti sono garantiti per 24 mesi, 12 mesi in caso di uso professionale, dalla data di acquisto per i guasti manife-
statisi durante un utilizzo conforme alle disposizioni e attribuibili in modo dimostrabile a difetti di fabbricazione. Nel periodo
di garanzia porremo rimedio ai difetti materiali e di produzione secondo la nostra valutazione, procedendo alla riparazione o
alla sostituzione dell’apparecchio.
Le nostre prestazioni di garanzia valgono esclusivamente per gli apparecchi venduti in Germania e Austria. In tutti gli altri
casi rivolgersi all‘importatore. Gli apparecchi per i quali si richiede la riparazione di guasti ci devono essere inviati con
spedizione affrancata e debitamente imballati, unitamente a una copia del documento di acquisto redatto a macchina dal
quale risulti la data di vendita, nonché la descrizione del guasto. In caso di garanzia al cliente verranno rimborsati i costi di
spedizione sostenuti. Sono esclusi dalla garanzia i guasti dovuti all’usura, all’uso inappropriato o al mancato rispetto delle
regole di manutenzione. Il diritto di garanzia decade qualora siano state effettuate riparazioni o interventi da parte di terzi.
Eventuali diritti del consumatore finale verso il venditore o negoziante non vengono limitati dalla presente garanzia.
Na naše přístroje poskytujeme záruku v trvání 24 měsíců (u průmyslového využití 12 měsíců) od data koupě výrobku, záruka
se vztahuje na poškození, která prokazatelne vznikla při správném použití v důsledku výrobních vad. Po dobu záruky budeme
odstraňovat materiální i výrobní vady opravou nebo výměnou podle našeho uvážení.
Poskytnutí záruky výhradně platí pro zařízení prodány v Německu i Rakousku. V jiných zemích se obrat’te prosím na kompe-
tentní dovozce. Přístroje, na které bylo uplatňováno odstranění vad, zašlete prosím smechanicky vyhotovenou kopií nákupního
dokladu, ze kterého musí být bezpodmínečně patrný datum nákupu i s popisem vad, přístroj musí být bezpečně zabalen a
nafrankován na náš záruční servis. V připadě opravněné záruky jsou kupujícím vraceny poštovní poplatky.
Tato záruka se nevztahuje na poškození způsobená opotřebením, nesprávným zacházením a nedodržováním návodů kúdržbě
a obsluze. Záruční doba zaniká, když opravy nebo manipulace s přístrojem byly provedeny třetí osobou.
Eventuální nároky zákazníka vůči prodejci/obchodníku nejsou touhle zárukou omezeny.
NORME DIE GARANZIA
WARUNKI GWARANCJI
Udzielamy na nasze produkty 24 miesięcznej gwarancji od daty zakupu (warunkiem jest zachowanie faktury zakupu lub para-
gonu) na szkody, które przy użytkowaniu zgodnym z przeznaczeniem wskazują na wadę fabryczną. W czasie trwania gwarancji
usuniemy wady materiałowe bądź fabryczne zgodnie z naszym osądem poprzez naprawę lub wymianę.
Gwarancja udzielana jest na produkty sprzedawane na terenie Polski, Niemiec i Austrii. W innych krajach proszę zwrócić się do
właściwego Importera. Urządzenia, w których wymagane jest usunięcie wady, proszę przesłać razem z kopią faktury zakupu,
na której musi być widoczna data zakupu, z załączonym opisem wady, w oryginalnym pudełku, dobrze zapakowane i na własny
koszt na adres serwisu.. Gwarancja nie obejmuje szkód wynikających ze zużycia, użytkowania niezgodnie z przeznaczeniem
i nieprzestrzegania wskazówek dotyczących konserwacji i pielęgnacji. Roszczenie gwarancji wygasa, jeżeli naprawa bądź
otwarcie przedmiotu będą przeprowadzone przez stronę trzecią. Ewentualne roszczenia użytkownika końcowego wobec sprze-
dawcy/dealera nie są ograniczone tą gwarancją.

42
ENTSORGUNG / UMWELTSCHUTZ
WASTE DISPOSAL / ENVIRONMENTAL PROTECTION
TRAITEMENT DES DÉCHETS / PROTECTION DE L’ENVIRONNEMENT
VERWIJDEREN VAN AFVAL / MILIEUBESCHERMING
Unsere Geräte werden auf hohem Qualitätsniveau für eine lange Nutzungsdauer
her ge stellt. Regelmäßige Wartung und fachge rechte Reparaturen durch unseren
Kunden dienst können die Nutzungsdauer des Gerätes verlängern. Wenn ein Gerät defekt
und nicht mehr zu reparieren ist, beachten Sie bitte:
Dieses Produkt darf nicht zusammen mit dem normalen Hausmüll entsorgt werden.
Sie müssen dieses Produkt an einer ausgewiesenen Sammelstelle zum Recycling
von elektrischen oder elektronischen Geräten ab liefern.
Durch das separate Sammeln und Recyceln von Abfallprodukten helfen Sie mit, die natürlichen Ressourcen zu schonen und
stellen sicher, dass das Produkt in gesundheits- und umweltverträglicher Weise entsorgt wird.
Our appliances are produced on a high quality level for a long lifetime. Regular maintenance and expert repairs by our after-
sales service can extend the useful life of the appliance. If an appliance is defective and repair is not possible we ask you to
follow the following instructions for disposal.
Do not dispose this appliance together with your standard household waste. Please bring this product to an approved collec-
tion point for recycling of electric and electronic products.
By separate collection and disposal of waste products you help to protect natural resources and ensure, that the product is
disposed in an adequate way to protect health and environment.
Nos appareils sont produits selon un standard élevé de qualité pour une longue durée d’utilisation. Un entretien régulier et
des réparations compétentes par notre service après-vente prolongent cette durée d’utilisation. Si néanmoins l’appareil est
endommagé et ne peut plus être réparé, veuillez suivre les instructions suivantes.
Ne jamais disposer ce produit avec les dégâts de ménage. Apportez ce produit à une station de collection pour récupération
de produits électriques et électroniques.
Par la collection séparée vous aidez à protéger les ressources naturelles et prenez soin, que le produit est démonté sans risque
pour la santé et l’environnement.
Onze apparaten zijn geproduceerd met een hoge qualiteit voor een lange gebruik. Regelmatige onderhoud en vakkundig
reparaties door onze klantenservice verlengt de gebruiksduur. Wanneer het apparat defekt is en kan niet meer gerepareerd
worden, let op de volgende instructies.
Dit product mag niet samen met het normale huishoudelijke afval worden afgevoerd. U dient dit product bij een voor het
recycleren van elektrische of elektronische apparaten aangewezen verzamelplaats in te leveren.
Door het separaat inzamelen en recycleren van afvalproducten helpt u mee bij het zuinig omgaan met de natuurlijke hulpbron-
nen en zorgt u ervoor dat het product op een gezondheids- en milieuvriendelijke manier afgevoerd wordt.

43
DISPOSICIÓN / PROTECCIÓN DEL MEDIO AMBIENTE
SMALTIMENTO / TUTELA DELL’AMBIENTE
Nuestros aparatos se fabrican con un alto nivel de calidad por un largo período de uso. El mantenimiento regular y las repa-
raciones de tipo técnico a través de nuestro servicio al cliente pueden prolongar la duración del aparato. Cuando un aparato
está defectuoso y ya no puede repararse, por favor considere en la disposición final los siguientes puntos:
Este producto no puede ser eliminado junto a la basura domiciliaria. Usted debe entregar este producto a un lugar oficial para
el reciclaje de aparatos eléctricos o electrónicos.
Mediante la clasificación por separado y el reciclaje de productos residuales, Usted contribuye a proteger los recursos natu-
rales y asegura que el producto sea eliminado de forma salubre y acorde con el medio ambiente.
I nostri apparecchi vengono prodotti rispettando un elevato standard qualitativo per una lunga durata di utilizzo. Una corretta
manutenzione e riparazioni adeguate a cura dal nostro servizio clienti possono prolungare la durata di utilizzo del prodotto. Se
un apparecchio è difettoso e non più riparabile, per il suo smaltimento si presti attenzione ai punti che seguono.
Questo prodotto non deve essere smaltito unitamente ai comuni rifiuti domestici. Consegnare il prodotto a un centro di rac-
colta per il riciclaggio dei rifiuti elettrici o elettronici.
Con la raccolta differenziata dei rifiuti e dei prodotti riciclabili è possibile contribuire alla tutela delle risorse naturali e far
smaltire il prodotto nel rispetto dell’ambiente e della salute.
Naše vyrobené přístroje mají vysoce kvalitní standard pro zajišt’ění jejich dlouhé životnosti. Pravidelné údržby i opravy odborně
provedeny naším prodejním servisem mohou mít vliv na prodloužení provozní životnosti přístroje. Když je přístroj vadný a už
ho nelze opravit, neopomeňte prosím:
Toto zařízení nepatří do běžného domovního odpadku, ale musí být předáno do autorizované sběrny pro recyklování elektrických
nebo elektronických zařízení.
Separátní sběr a recyklování odpadních produktů umožňuje šetření přírodních zdrojů a zajišt’uje, aby byly odpady likvidovány
způsobem, který je pro zdraví a kologii přijatelný.

Aus dem Hause
-
 1
1
-
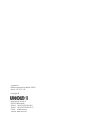 2
2
-
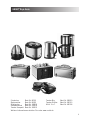 3
3
-
 4
4
-
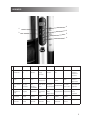 5
5
-
 6
6
-
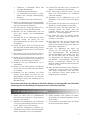 7
7
-
 8
8
-
 9
9
-
 10
10
-
 11
11
-
 12
12
-
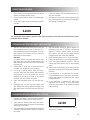 13
13
-
 14
14
-
 15
15
-
 16
16
-
 17
17
-
 18
18
-
 19
19
-
 20
20
-
 21
21
-
 22
22
-
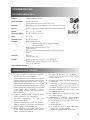 23
23
-
 24
24
-
 25
25
-
 26
26
-
 27
27
-
 28
28
-
 29
29
-
 30
30
-
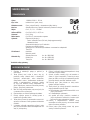 31
31
-
 32
32
-
 33
33
-
 34
34
-
 35
35
-
 36
36
-
 37
37
-
 38
38
-
 39
39
-
 40
40
-
 41
41
-
 42
42
-
 43
43
-
 44
44


Unold 28016 El manual del propietario
- Categoría
- Cafeteras
- Tipo
- El manual del propietario
- Este manual también es adecuado para
en otros idiomas
- français: Unold 28016 Le manuel du propriétaire
- italiano: Unold 28016 Manuale del proprietario
- English: Unold 28016 Owner's manual
- Deutsch: Unold 28016 Bedienungsanleitung
- Nederlands: Unold 28016 de handleiding
- polski: Unold 28016 Instrukcja obsługi
- čeština: Unold 28016 Návod k obsluze
Artículos relacionados
-
Unold 28016 El manual del propietario
-
Unold 28465 Ficha de datos
-
-
Unold 28736 Instrucciones de operación
-
-
Unold 28125 El manual del propietario
-
-
-
-