White 1300DE Manual de usuario
- Categoría
- Máquinas de coser
- Tipo
- Manual de usuario
La página se está cargando...

—
_J
_L,
IjLJ
IMPORTANT
SAFETY
INSTRUCTIONS”
en
using
an
electrical
appliance,
basic
safety
precautiona
shou
d
always
be
followed,
including
‘OiiOWifl.
Id
all
nstructions
before
using
this
sewing
machine:
)AJJ
G
ER—
To
reduce
the
risk
of
electric
shock:’
his
sewing
machine
should
never
be
left
snattenoed
when
plugged
ri.
Always
unplug
this
ewing
machine
from
trw
electric
outlet
immedstely
after
using
and
before
cieanirig
,lways
unp
og
before
reo
acing
ght
bulb.
Replace
buib
with
same
type
rated
15
watts
VAR
I4
IJ
G
—To
reouce
the
risk
of
burns
ftc.
electr
c
shock
or
irrlurv
to
persons’
Do
not
al
ow
to
be
used
as
a
toy,
Close
attention
is
necessary
wnen
th
a
sewing
machine
is
.sed
by
or
near
chilorer,.’
Joe
this
seneng
machine
oniy
for
its
ntended
use
an
descr
bed
in
this
manual
Use
orvy
tttacftments
recommended
by
the
manufacturer
as
contained
in
trim
manua.’
Ofever
operate
this
sew
ng
machine
fit
has
a
damaged
cord
or
piug,
it
it
is
not
working
roperly.
if
it
has
been
dropped
or
damaged,
or
dropped
into
water.
Return
the
sewing
riachine
to
the
nearest
authorized
dealer
or
service
center
for
esamirration.
repair
elect
ricai
or
nechanicai
adjustment”
ttever
Operate
the
new
ng
macnine
wit’i
any
air
openings
bloceed
Keep
ven’,iatiOn
openings
if
the
sewing
machine
and
foot
control
free
from
the
accumulation
of
lint,
dust,
and
loose
‘10th.
‘feeer
drop
or
insert
any
oblect
into
any
opening.
Jo
not
use
outdoors
Jo
not
operate
where
serono
.sprayl
products
are
be’ng
used
or
where
oxygen
is
being
ibminiotered.”
o
disconnecf.
turn
switch
to
the
off
(“0
)
position,
then
remove
plug
from
outlet.”
Jo
not
unplug
by
pulling
on
cord.
To
unplug,
grasp
the
plug,
not
the
cord.”
(eep
hngers
away
from
all
moe
ng
parts
Speciai
care
is
required
around
the
sewing
machine
ieedle.”
iways
use
the
proper
needle
plate.
The
wrong
plate
can
cause
the
needles
to
breac.”
Jo
not
use
bent
needles
)o
not
pull
or
push
fabric
while
nttching.
It
may
deflect
the
needle
cane
ng
it
to
break
lwitch
the
sewing
machine
off
i”0”I
when
making
any
adjustments
in
the
needle
area,
such
o
threading
needle,
changing
needle,
tnreao
ng
loopers
or
changing
presser
foot.
etc.’
ways
unplug
sewing
machine
from
the
electrical
outlet
when
removing
covers.
Lubricating.
when
making
any
other
user
servicing
adlustments
mentioned
in
the
instruction
manual
A
UTI
0
JnrJ
—
Moving
parts—To
reduce
risk
of
injury,
switch
off
before
servicing.
Close
cover
before
operating
machine.
“SAVE
THESE
INSTRUCTIONS”
“This
product
is
for
household
use,
or
equivalent,”
IMPORTANTES
INSTRUCCIONES
DE
SEGURIDAD
Cuanbo
se
usa
un
aoarato
electruco.
debe
seguirne
unas
prccaucioncs
basicas
y
poe
vienen
incividas
a
contrnuacieh.
Leer
ias
instrucc
ones
antes
cc
usar
Ia
maquina
dvi
cotter.
PELIGRO
—
Pars
teducit
ci
riesgo
de
uris
descarga
electruca.
La
maquins
no
debe
deiarse
nunca
desatendida
mientras
eate
conectada
Desconectsr
lvi
maquina
he
Is
red
elcctncs
inmediatamenle
despues
de
su
use
y
antes
he
umpiarla.
2.
Desconecrar
Is
maouina
cc
ia
rec
sores
Ce
camoiar
is
oombills
Coiocar
ur’,a
bombilla
ad
mmmc
hoc
cot’
una
potencia
cc
r
5
Watios
C
UIDADO
—
Pars
rehvcir
el
riesgo
dv
quemaduras
fuego
descargas
electricas
a
csusar
danos
a
oersonas
I
No
ussr
Is
maouins
corno
un
luguete
Presrar
snencion
Si
h.iese
nccevario
cuando
is
maps
ha
esra
siendo
Jsaoa
par
nir’ros
0
cerca
On
ellen.
2.
Ussr
Is
maqumna
Ce
coser
solamente
come
Se
oenctibe
en
cure
marruvu.
Usar
vnicamente
los
accevoruos
recomenbados
pot
ci
fabricante
y
que
vienen
especif
csdos
en
cafe
manual.
2.
No
frabaisr
nurica
con
Is
macu
la
en
caso
de
cue
tengu
el
cable
a
el
enohufe
cii
malab
coroiciones.
vi
no
cone
correctannerrte
er
case
cc
que
se
hays
caio
haya
sioo
danada
0
Sc
trava
maiado
4
No
usar
Is
maqumna
con
los
orihcmas
be
vent
lacibn
b
oquesdos.
Mantener
on
onficios
be
ventilacion
he
Iv
rnsqumna
de
coser
ye
pedal
sin
acumulacion
he
p01cc.
sucierlab
y
resfos
de
tef’do
5.
No
introbucir
no
inserrur
cb)etos
en
los
orificios
de
ventilacuon
6
No
user
al
sire
imbre.
7.
No
ussr
rriienrras
se
esten
utilizsndo
proouctos
aerOsoies
spray)
a
en
lugares
donbe
he
este
administrando
ocigenc.
5.
Pars
desconectar
girar
ci
unferniptor
heats
Ia
posic
on
Off
(“0”).
luego
desconectar
c
enchufe
de
Is
red.
S
No
ocscor’ectar
el
enchufe
tiranco
dcl
cable
Pare
desconcctar,
tirar
Ce
is
devils.
no
del
cable.
0.
Martener
los
decos
alemados
be
todso
las
panes
nov
Plea
dciv
mdo,ina.
Tener
an
cumasds
especial
con
is
agua.
1
Ussr
niempre
is
place
de
agulas
apropiaba.
Una
placs
he
5itUl55
umoropia
puede
prcducir
Is
rotura
he
Is
agula.
12.
No
ussr
sgulas
oesourrradas
‘3.
No
presionsr
01
tirar
del
taco
mientras
hd
ems
005icrroo
Estc
podria
dobmar
Is
agua
y
rornperia
t4
Situar
ci
interrupter
principal
he
Ia
maquina
en
posicihn
Off
(
0”)
cuanbo
se
realice
algun
a
1
ustc
en
e
ares
he
Is
agua
come
enheorar
Is
sgula.
csmbiar
lv
agus,
hilsr
ancolas
cambiar
el
pie
prensatelas
y
similares
r5
Desconectar
siemore
is
maouins
belated
eiectrics
cusndo
Se
retiree
ias
tapes,
pare
lubricar
c
cusndc
be
malice
aigun
Otto
tipo
cc
afuste
mecanido
mencionado
en
ci
manual
oa
insfrucciones.
CONSERVE
ESTE
MANUAL
DE
INSTRUCCIONES
Esta
máquina
de
coser
es
para
usa
doméstico.

TABLE
OF
CONTENTS
I.
KNOW
YOUR
MACHINE
Identification
chart
Accenaonen
Setting
up
your
macnineS
Preparation
for
threading
Changing
preaaer
feet.
Cf
Needle
thread
and
fabric
2.
STARTING
TO
SEW
Threading
yuui
8-6
-machine
10-12
t-ieiprai
nints
13
Teat
ntdch
oneriach
atitchen
14
Sernngchart
in-Id
Three-thread
cuerlanir
with
one
needle
r
7
Narrow
and
rolled
new,
picat
stdca
18-
19
Ad
1
ushng
threaa
tenaiann
20
-
21
Adjusting
stitch
length.
Aduating
oneredge
caning
wid
22
Stitch
finger
181
(Narrow)
22
Differential
teed
23
24
Font
pressure
regaiam
Sewing
with
eetre
aeanyweght
fabric
or
multiple
layers
of
fabric
24
Basic
tenhnipuea
Turning
outside
corners
without
cuffing
threedu,
Turning
corned
edgen
25
Remaning
stitches
from
newn
fabric
25
Corded
one
rionli
26
Denaratine
effects
27
Differential
feeo
applications
“—“
28
3.
CARING
FOR
YOUR
MACNINE
Replacing
moning
cutter,
Disengaging
wourng
caine
29
Rewaning
lace
cone
39
Cleaning
and
oiling
3D
4.
CHECKING
PERFORMANCE
PROBLEMS
31
5.
OPTIONAL
ACCESSORIES
32
-
3ó
INDICE
DE
CONTENIDOS
1.
FRINCIPALES
PARTE,S
GE
LA
MAQUINA
7
Cambia
del
pie
prensetelas,
Mactar
8
Materials,
hilan
y
aguen
2,
5-6
EMPEZAR
A
COSER
Enhebrer
so
wanarna
Suoerencias
de
anode
1D-
12
13
Cawprabar
Ins
uonrehiladoa
Id
Table
De
filacian
18
-
16
Soarenf
eons
de
cnn
hilns
non
one
agaa”’
17
Dabledilledan
enrolladon.
estrenhas
yoe
farm
18-19
Ajaster
las
tensianes
de
Ins
hilan
3D
-
21
Ajaster
la
longitad
oe
panraoa.
Ajaster
Ia
enchura
ae
le
casrare
22
Dnda
de
pantede
(8)
22
Trensparfe
aiferennial
23
Regiador
de
prenion
do
pie
34
Caser
can
materiel
de
genera
graesa
n
capes
waltipea
de
materiel
24
Tinnines
bbsices
Direr
ei
materiel
sin
carter
Ian
hilas,
Direr
Ian
borden
narvedan
28
Eliminer
las
sabrehiledan
del
material
casida
28
Pespante
esnardaneao
26
Planrns
decarerinns
27
29
Aplicaciones
del
Irenapane
difernnniel
3.
CUIOAOOS
PARA
SU
MAOUINA
Cemnier
le
nannilla
macu
39
Desengrener
la
nanhille
macil,
Gaiter
Ia
cabienafrantel
39
Limpieze
p
engrane
3D
4.
VERIFICANDO
LOS
PROBLEMAS
08
EJECUCION
31
5,
ACCESORIOS
OPCIONALES
32-
3-6
SPECIFICATION
OF
MACHINE
Laawner
at
tnreads
3
ore
tnreads
[pyfffpdnp,ytirns
wiggtjm
lien
needle)
end3.8wp(jpn(eedle
jppgie
HA1-SP,
HA
I
li30l705H)’
Catch
lepggt,,,,,,
1-
bmw
—
________
Stitching
speed
Up
In
t3an
stitches
nar
rninnre
Dimensions
33n
mm(w)
7280
mwiD)
.‘.
280
nrw)H
rwaignr
BRan
(176
lad
ESPECIFICACION
DE
LA
MAQUINA
Peale
3a4irilsn
i
dwmla
aain
cmi
do
3.8wipjaqpjauernrn,,,,
HAl-SF.
HA
1
Il3ai7OnHl

1.
t.NVW
YUUH
MALHIN
IDENTIFICATION
CHART
1.
PRINCIPALES
PARTES
DE
LA
MAQUINA
NOMENCLATURA
DE
IDENTIFICACION
1
Foot
pressure
regulator
2
Sewing
ght
3.
Presser
foot
lever
4
Needle
pate
5.
Presser
foot
6
Overedge
cutting
width
dial
7.
Work
rtg
tab
e
8.
Thread
guide
pole
9
Left
needle
thread
tension
control
ID.
Right
rreeaie
tnead
tension
contro
It
Lower
l000er
thread
tensioi
control
t2
Upper
looper
thread tension
contrOi
3
Need
e
thread
gu
des
14
Theadirio
coed
15
Foot
control
16.
Release
lever
17.
Foot
release
lever
18.
Spooldsc
19
Stitch
length
dial
20.
Differential
feed control
lever
21
Hand
wheel
22.
Plug
contractor
socket
23.
Light
and
power
nwitcn
24
Front
cover
25.
Moving
oilIer
26
Upper
iooper
27
LOwer
iccoer
28.
Core
guioe
1
Regolador
de
presion
de
pie
2.
Luz
3.
Palarica
e
evadora
del
prenaatelan
4
Place
de
a
agula
5
Prennatelas
6
Dial
da
anchura
de
costura
7.
Mesa
dv
trabalo
8
Barra
dv porte
carretes
9.
Control
dv
Ia
tension
del
1-i
o
on
ia
agula
zquieea
ID
Control
de
Ia
tension
del
5
10
de
In
agufa
derecfla
it.
Coritrc
dv
Ia
tension
del
hilo
eel
ancora
infeno
12.
Centre
de
Ia
tension
del
hilo
eel
ancora
vupenor
13
Guia
del
Silo
be
Ia
aguia
14.
lristrucciones
de
enhebrado
15.
Reoatato
16.
Pa
anca
de
noftar
Ia
tapa
t
7.
Palarica
de
desprend
miento
prennaf
elan
t8.
Placa
pare
oroiongacion
19.
Dial
de
longitud
pantada
20.
Palarica
de
control
del
avance
diferericial
21
Volarite
manual
22.
Cavva
eel
enchufe
23
ltrerrcoto
de
energia
ft
uz
24
aDa
frontal
25.
Cuchilla
cortadora
rnovil
26
Anccra
suoerior
27.
Ancora
inferior
28
Gum
del
cordbn
15
•[cjIc
WORKING
TABLE
OPENED.
•*1L[é14
TAPA
FRONTAL
ABIERTA
2

ACCESSORIES
Ad
parts
isted
may
be
obtained
from
your
nearest
dealer
Stitch
finger
(B)
(See
page
22)
2
Needle
set
3.
Bryan
4.
Screw
aneer
(large)
5
Screw
Sr
ver
(smal)
6
Machine
cover
7
Oiler
S
Moving
cutter
9
Soanre
10
Spoolnet
it.
Tweezers
12.
Spool
disc
13
Spool
holder
Accessory
oag
ACCESORIOS
Todas
as
piezas
istadss
se
puede
obtener
en
su
diatriburdor
maa
proeimo.
1.
Oedo
oe
puntada
iB
iVer
pagira
22)
2.
Agu
as
3
Cepi
Ia
4
Destorrsllsdor
(grands)
5
Destorodador
)pequeno)
6.
Coierta
Sea
maquina
7
Aceiteas
8
Cichilia
cortadora
movil
9
Lace
10.
Mallas
do
carrete
11
Pinzas
12
Plca
de
prolongacior
3.
PotacoflOs
4
Bosa
de
accesorio
5
4-’
‘-I
12)
H
14)
3

.-pp
SETTING
UP
YOUR
MACHINE
1.
Wipe
off
excess
oit
in
the
needte
plate
and
bed
areas.
2.
FOOT
CONTROL
Push
foot
control
plug
into
connector
socket.
and
connect
the
power
line
ptug
into
power
supply
outlet.
3.
POWER
/
LIGHT
SWITCH
Your
machine
will
not
operate
unless
the
power/tignt
switch
a
turned
on.
This
same
switch
controls
both
machine
power
and
sewing
light.
When
leaning
the
machine
unattended,
or
servicing
the
machine,
remove
the
power
line
plug
from
supply
outlet
4.
OPENING
FRONT
COVER
To
open
front
coeer,
pull
it
to
the
right
and
down
towards
you.
POLARIZED
PLUGS
CAUTION
(USA
only)
This
product
is
equipped
with
a
polarized
alternating
current
line
plug
(a
plug
having
one
blaoe
wider
than
the
other).
This
plug
witl
fit
into
the
power
outlet
only
one
way.
This
is
a
safety
feature.
tf
you
are
unable
to
insert
the
plug
futly
info
the
outlet,
try
reversing
the
plug.
If
the
plug
should
stit
fall
to
lit,
contact
an
electrician
to
replace
the
obsolete
outlet.
Do
not
eYe
feat
the
safety
purpose
of
fhe
polarized
plug.
Use
Yarnamoto
Electnc,
Model
VC-482E
with
this
sewing
machine.
5.
OPENING
WORKING
TABLE
To
open
working
table,
pull
the
release
lever
towards
you
with
your
right
hand,
and
swing
the
table
to
the
left.
Iltustration
•
I
Connector
socKet
*
It
.
Power/light
switch
*
III:
Release
lever
*
tV
Working
fable
*
V
Front
covet
MONTAJE
DE
SU
MAQIJINA
1.
Asegurese
be
I
mpiar
Ia
zona
be
Ia
placa
dv
Ia
agua
y
Ia
placa
base
astas
dv
coser
Sn
nestido.
2.
CONTROL
DEL
REOSTATO
Enchufar
Ia
clavi
1
a
de
control
del
reostato
en
01
conector
situado
at
tondo
en
et
lado
derecho
dv
Ia
maquina
3.
INTERRUPTOR
GE
ENERGIAILUZ
Sn
maquina
no
luncionara
a
menos
que
el
riiterruotor
de
energia/Iuz
vale
convclado.
Este
mismo
interruntorcontrola
taste
Ia
tens
an
he
a
naquina
come
Ia
lus
dv
que
esta
cosiendo.
Cuando
byte
be
coser,
a
maauina
debe
estar
desconectada
completametv
Cuando
veto
utilizando
Ia
maquina
dv
cover
para
quitar
ian
cubierlas
0
cambiar
Ia
lampara.
a
maquina
DEBE
estar
desconectada
dv
Ia
ted
electsca
sacando
Ia
ciavita
del
enchute.
4.
APERTURA
GE
LA
TAPA
FRONTAL
Para
abrir
Ia
tape
frontal.
tue
dv
ella
a
Ia
derectta
y
hacia
usted.
5.
ABRIR
V
CERRAR
LA
MESA
DE
TRABAJO
Para
direr
Ia
mesa
Ge
traoa
1o
brat
Ia
oalanca
dv
soltar
nacia
usted
con
su
mano
derecha
lenantando
a
pane
frontal
del
pie
pronsatelas
con
an
mano
izquivrda.
ltusfracion
*
I
Convctor
sduado
tt
irtterruptorerivrgialluz
*
S
Patanca
dv
soltat
Mesita
dv
trabajo
*
V
Tapa
frontal
HL
\/
4

pp
LIiW
PREPARATION
FOR
THREADING
THREAD
GUIDE
POLE
Pull
up
thread
guide
nole
to
the
nighest
point
untf
you
hear
it
click.
Place
thread
soools
on
pins
and
draw
thread
through
thread
guides
on
the
pole
from
rear
to
front.
Thread
guide
of
pole
can
hold
thread
spools
on
the
spool
stand
by
pulling
down
the
pole
as
illustrated.
Illustration
I
Thread
guide
*
ft
Thread
guide
pole
PREPARACION
PARA
EL
ENHEBRADO
BARRA
DEL
PORTA
CARRETES
Extender
Ia
barra
gula
del
hilo
a
su
punto
mas
alto
trauma
gue
escuche
un
click.
Colocar
los
hilos
sobre
os
pasadores
as
las
guias
desde
atras
51
frente.
La
barra
del
porta
oarrefes
puede
mantener
los
kilos
sobre
los
pasadores
de
los
carretes
tan
soio
baiando
a
barra
hacia
abaio
coma
ilustrado.
llustracidn
*
I
Ojo-guia
del
hilo
*
II
Barra-giiix
del
hilo
5

4ItL’1
ai
.
SPOOL
CAPS
FOR
DOMESTIC
TYPE
SPOOLS
Place
spool
cap
on top
of
spool
so thread
doesnt
get
caught
on
edge
of
spooL
SPOOL
DISC
AND
SPOOL
HOLDERS FOR
CONE
SPOOLS
For
lame
cone
spoors
use
the
rubber
spool
holders
witn
toe
wde
end
at
toe
too,
usc
for
small
ones.
use
the
same
rubber
soool holders
out
with
toe
narrow
end
at
the
top.
SPOOL
NETS
Polyeste
or
buky
cylon
threads become
loose
while
unwinding.
To
keep
consistent
feeding
of Ouch
threads,
utilize
spoo
net
sleeving
over
the
spool.
I
ustration
*
I
Spoo
cap
*
II
Domestic
cotton
reel
*
fit.
Cone
type
thread
*
tV
Spool
holder
*
V.
Spool
disc
*
VI:
Thread
comes
off
the
top
*\Itt:
Net
*ifl
Tom
up
*
tX:
Spool
PLACAS
DE
PROLONGACION
Y
PORTA
CARRETES
PARA
CONO
DE
HILO
INDUSTRIAL
Sara
carretes
conicos
grarces
user
os
oorta-car’etes
be
goma
con
el
oorde
ancho
err
Ia
pace
suoerror
y
oars
los
pepuenos
usar
los
rnismos
por-ta-carretes
Oe
goma
parc
con
e
borne
estrecho
en
Ia
pace
superior
MALLAS
DE
CARRETES
Los
carretes
de
hilo
de
poliester
(hlatresfo,
0
hi’o
be
ny
on
trabafan
mayormente
fuera
del
pssador
del
carrefe
durante
el
cosido,
provocando
enredos
o
on
avance
irregu
ar
de
hilo.
Pars
presenir
esto,
usar
Ia
ma
Ia
del
carrete
suminmstrada
pars
mnantenem
el
carrete
en
so
ugar
como
se
seen
Ia
ilustracidn.
fustracion
*
t
Tapa
del
carrete
*
II
Currete
de
hilo
dornestico
*
ifi
Cono
de
hilo
industrial
*
IV:
Porta-carrefe
*
V
:
Placa
VI
El
kilo
provoca enreclos
o
on
advance
itregular
pal
kilo
*
VI
Malla
*
flit:
Colocacidn
oe
Ia
rnalla
IX
Carrete
TAPAS
PARA
CARRETES
DE
HILO
DOMESTICO
I
1
‘I,
*iv
*
V
*.
.
*Vll
6

CHANGING
PRESSER
FEET
Be
sure
needle
is
in
the
as
pos:tlon
Raise
presser
foot
lever.
1.
Push
toot
re
ease
lever
to
remove
the
foot
2.
Place
tne
oesireo
toot
on
the
needle
plate
aligning
neesie
holes.
3
Lower
the
presser
foot
lever
and
pusn
foot
release
ever
so
tnat
the
foot
holder
snaps
on
the
foot
CAMBIO
DEL
PIE
PRENSATELAS
Aseourarse
de
Due
Ia
aguia
este
en
a
Dosicton
superior.
Alzar
Ia
palanca
del
Die
prensatelas.
I
Ercsuar
a
palanca
oc
oesprendirniento
sensateias
sara
sacst
el
prensatelas
2
Co
scar
el
prensatelas
deseado
sobre
Ia
placa
Ce
aguas
alinesndo
los
agiJleros
e
Ia
agula.
3
Baar
Ia
palsnca
del
pie
prensatelas,
y
emouiar
Ia
Ca
anna
dv
despreridimienfo
prensatelas
de
manera
guy
el
sutetador
srensatelas
so
metre
de
golpe
en
vi
prensatelas.
4
CHANGING
NEEDLES
Raise
needle
bar
to
its
highest
point
by
turning
hand
wheel
towards
you.
but
leave
oresser
foot
down
Loosen
needle
clamp
screw
to
remove
the
needle,
and
place
new
needle
with
Flat
Side
Away
Fmm
You,
into
the
needle
bares
tar
an
it
will
go.
ace
tighten
scmw.
Needle
screee
are
labeled
for
left
and
for
right
need
e
II
ustration
*
I
Foot
release
lever
*
ft
Needle
clamp
screw
*
Ill
Flats
de
away
from
you.
MONTAR
LA(S)
AGUJA(S)
Levantar
Ia
barra
de
as
agujas
haste
so
punto
roan
alto
girando
vI
volente
manual
hacia
usted,
pero
dele
vi
pie
orensatelas
abajo
Destomillar
el
tornillo
do
Ia
aguja
con
el
destornillador
oeooeco
pare
guitar
Ian
agujan
vielas
Colocar
as
riuesas
agulas
con
el
LADO
PLANO.
LADO
POSTERIOR
en
Ia
ranuta
de
a
bana
subiendoia
a
tooo
io
quo
puede.
Acretar
I
rmerrrenre
e
torniiio
clv
nuiecion
oe
Ia
agufa.
I
untraclon
*
Direr
haste
srriba
*
Ii
Tornillo
do
filacion
de
Ia
aguls
*
Ii
El
lads
piano,
ado
Dosterior.
*11
*ffl
7

NEEDLE,
THREAD
AND
FABRIC
CHART
MATERIALS,
HILOS
Y
AGUJAS
Use
HA>
tSP,
HA’<
1l130/705H(
Needles.
FABRIC
THREAD
NEEDLE
Light
weight:
Organdy,
Lawn,
Cotton
No,
tOO
COTtON
Gingham
LINEN
Heavyweight:
—
Polyester
Oatotd,
Dernm,
Cotton
No.
60
-
50
Gabetdine
Cotton
No,
60
Polyester
Light
weight
No
80
Tropical,
Wool,
Poplin
Gortari
No
60
Polyester
Serge,
Gabardine.
WOOL
Flannel
No.80
-60
90(14)
Cotton
No.
60
tsr
general
sewing
Heavyweight’
Polyester
Veloars,
Cantelhair
NO.60
50
Astrvkhan
Cotton
No.90
75
lit)
Or
llgnt
UgOt
weight.
Polyester
weight
Georgette
Crepe.
Voile,
No.
tOO
-80
tabeCs
SYNTHETIC
Satio
GoOse
No.120-80
FIBRE
Heavy
weight.
Polyester
Taffeta.
Twillo,
Denim
No,
60
Cotton
No.
60
Polyester
Tricot
No.
80-
60
Cotton
No.
80-60
Polyester
KNIT
Jersey
No.
60
-
50
Cotton
No.
60
Polyester
Wool
No.60-50
Bulk
Nylon
*
Synthetic
threads
are
recommended
for
ordirtary
overlooking.
Polyester
thread,
for
esampie,
is
sery
usef
vi
for
different
types
of
fabric.
NOTE:
seep
itt
mind
that
the
lower
and
upper
loopers
will
use
about
twice
the
amount
of
thread
as
the
rreedieo.
When
purchasing
threso
for
oewrng,
especially
if
it
is
an
unusual
color,
you
should
buy
sufficient
for
your
requirements.
Ussr
opus
HA>:
iSP
(poets
bola(
0
130/7OSH
S.
MATERIAL
HILO
AGUJA
Geners
Irgero
Alg000rr
50
100
Organdiea,
Lion.
MEDID
Carraoian
UNO
*Géyero
toette
Poliester
NO
60
5
Ootord,
Macon.
Algodde
50
60
Gabardrea
de
aigodOrr
Genero
ligarO
Poliester
N°
80
Tropical.
Lana,
Algnddn
5°
60
Popslin
90
(t4)
Gabardina,
sarga
do
Poliester
NO
80
-60
para
cosido
soda.
Algooórr
N°
60
general
LANA
Flanela
75
(It)
GGnero
fverre
Foliester
50
60-
50
para
Panas,
Astracdn,
Algoddo
NO
60
rnaterialu
Pelo
do
cateello
do
genero
ligero
Gdeero
ligero
Poliester
N°
100
-80
Greopon
georgette,
Algoddn
5°
120
-80
Satdn
nelo
FIBRE
Gdnero
tuerte
Polienler
50
60
Tateta,
Mason,
Aigodon
50
60
Sargas
-
Poliester
NO
80-
60
Trisot
Algodde
NO
80-
60
Poliestor
5°
60-SO
PUNTO
Jersey
Algodon
NO
60
Poliester
NO
60-
50
Lana
Nylon
graces
*
Los
hilos
sinldti005
ne
recotrrierrdan
pars
pespuntes
corrientes.
El
Silo
Ge
polienter,
por
eyemplo,
es
muy
dtil
para
diterentes
tipos
de
materialo.
Nota
I
Se
terrdrG
en
cuents
qua
las
ancoras
supenor
e
inferior
unar8n
el
doble
de
cantid
ad
Ge
Silo
poe
el
hilo
do
Ia
ogula
Cuando
compre
Silo
para
cooer,
si
es
Ge
iJrr
Color
OC0
usual,
debe
comprar
suficiente
para
sus
necesidades.
8
La página se está cargando...

Wrong
threading
may
cause
skied
stitches.
breaking
threads,
or
other
problems.
Try
to
master
the
correct
threading
before
moving
on
to
test
sewing
Threading
must
be
carried
out
in
the
sequence
of
Upper
Looper
—
Lower
Looper
—
Needles.
Open
the
front
cover
and
the
woreing
table.
Raise
needles
to
fs
tiighest
po
0
by
turning
trana
Wheel
towsras
you,
and
raise
the
presser
foot
Before
re-threading
lower
looper,
remove
thread
from
needle
eye
hmt
then
re-thread
the
lower
looper.
This
wi
I
orevent
tang
ing.
NOTE.
Thread
tension
is
released
when
trw
oresser
foot
is
iifteo
up.
We
always
teach
to
thread
upper,
ower,
Right
needle,
Left
needle
and
that
is
how
we
did
the
video
also.
To
switch
the
order
will
be
confusing.
THREADING
UPPER
LOOPER
1
Feed
the
thread
through
ti-ic
thread
guide
as
illustrated.
2.
Poll
the
upper
thread
through
the
slot.
Holding
the
thread
with
your
aft
hand,
pull
down
with
right
hand
f
rmly
3
Draw
the
thread
through
the
thread
guide
as
illustrated.
When
tnreadinig
accord
ng
to
the
instruction,
upper
looper
thread
pass
the
n’nesd
guide
IA)
automatically
after
rotating
nano
wheel.
4.
Psss
the
thread
through
wire
thread
guide
and looper
eye,
leasing
an
escess
ength
of
sbout4”
(10cm).
Un
inst
enhebrade
ecede
originar
puntos
sueltes,
rotura
del
hue
y
Otros
prod
emas.
Trate
de
dominar
ci
enftebrado
correcto
antes
de
meeerse
en
las
pruebss
as
cosudo.
El
enhebrsdo
cc
debe
realuzar
en
Ia
secuencis
dec10
guia
inferior-cue
guis
super
or
sguja.
Pars
re-errhebrar
ci
oo
inferior.
Abnur
Ia
taps
frontal
y
Ia
mesa
be
traoaio
oe
anremsno.
Levanrar
a
barrs
Os
aguja
hasta
su
panic
man
site
gurarido
ei
vciarute
con
a
mane
baste
usted,
y
uevanrar
a
pie
prensateiss.
Quutar
el
bib
del
oto
be
Is
aguja
prurriero
y
lasgo
re-ennebrar
ci
ofc
nferor.
Esto
prevendra
ci
enredo.
NOTA:
us
rensuon
del
kilo
se
saeha
cuando
levanra
ci
pie
prensateias.
ENHEBRAR
EL
ANCORA
SUPERIOR
I.
Avsnzsr
ci
hi
0
a
rravhs
be
Ia
guis
del
hue
come
se
ilustrs.
2.
Conoucur
ci
bile
a
trases
be
is
ranurs,
asegursr’dose
cc
que
ci
kilo
pass
entre
los
dscos
cc
tension
retemendo
ei
hue
con
su
mans
zqauerda
y
ruranoclo
furmemente
hacia
sba
1o
con
su
mane
derecha.
3.
Tirar
ci
kilo
a
tu’aves
de
Ia
gaie
del
hue
come
ilustrado.
Cuando
enhebre
is
mequina
de
50051db
con
las
unstrucc.ories.
Ia
ancom
superior
pass
nor
a
guia
del
kilo
(A)
sutemaricamenre,
despaes
cc
retar
ci
eoiante
manual.
4
Pasar
ci
kilo
a
ti-seen
de
Ia
gus
dci
hulo
y
a
ejo
be
Ia
encore
superior
oelsndo
uns
longutud
be
mss
be
unos
loom
2.
STARTING
TO
SEW
THREADING
YOUR
MACHINE
ENHEBRAR
SU
MAQUINA
2.
EMPEZAR
A
COSER
Nh-
u0:\
10

THREADING
LOWER
LOOPER
Feed
the
thread
through
the
thread
guide
as
illustrated
2
Puil
tie
ower
triread
through
tens.on
siot.
Ho
ding
the
thread
with
your
left
hand.
puit
down
with
right
hand
hrrniy
3.
Draw
the
thread
through
thread
guide
as
iHustrated.
4
Pass
the
threao
through
lower
looper
eye
and
hook
It
around
part
Ads
indicated
by
he
arrow
Leave
abou:
4
(tdcm
eetrs
thread.
b
Lower
looper
thread
always
lays
on
ton
of
upper
looper
ENHEBRAR
EL
ANCORA
INFERIOR
t
Avanzar
a
hilo
a
traves
de
Ia
gus
del
hilo
corno
se
ue
en
Ia
I
gura.
2.
Conducir
SI
hilo
a
trabes
de
Ia
ranura,
asegurandose
de
qua
el
hilo
pane
entre
on
discos
de
tension,
retersendo
el
hi
o
con
nit
mano
zquierda
y
I
rando
o
haa
abalo
con
so
mano
derecha
firmemente.
3.
Trar
el
hilo
a
traaes
de
Ia
gua
del
hi
0
como
ilustrado.
4
Panar
el
hilo
a
traces
del
010
del
encore
infehor
y
engancharlo
alrededor
de
a
pieza
A
como
se
indioa
con
a
fiecha,
Deiar
urros
10cm
oe
bib
estra
.
.
-
11

THREADING
NEEDLES
1
Feed
the
thread
through
the
thread
guide
as
itustrated.
2.
Draw
the
needle
threads
through
right
needle
or
left
needle
tension.
3.
Draw
the
thread
through
the
thread
guide
as
i
ustrated.
4
Thread
the
needles
fron
front
to
back
through
needle
eye
and
pull
the
threads
towards
the
back
passing
along
the
right
side
of
presser
foot
easing
ai
extra
length
ofsbout4
(10
cm).
NOTE
Thread
tension
is
released
when
you
pull
the
tension
control
knob
NEEDLE
THREADER
(OPTION)
Needle
is
fhreadeo
easily
by
needle
threader.
(See
page
36.)
Illustration
*
I
When
using
normal
or
thin
thread.
*
II
When
using
thick
thread.
ENHEBRAR
AGUJAS
I
Avanzar
xl
hi
o
a
traces
oe
Is
guia
del
kilo
come
se
ilustra
2.
Conducir
los
hilos
asegurandose
de
que
xl
hue
pase
entre
los
discos
dx
tensiOn.
3.
Tirar
el
kilo
a
traces
do
Ia
gura
eel
kilo
come
save
en
figura.
4
Enhebrar
las
agulss
desde
ei
frente
a
Ia
parte
posterior
a
traces
del
OfO
dx
Is
agufa.
y
tirar
los
kilos
hacia
atrbs
pasando
a
In
large
del
lade
derecho
del
pie
prensatelas
defando
una
longitud
extra
de
unss
10cm.
Nota:
La
tension
del
his
se
suelta
cuanclo
nrc
xl
control
de
tension.
ENHEBRADOR
DE
AGUJA
(OPCIONAL)
La
agu
a
cx
enhebra
facilmente
oor
el
enhebrador
de
agu
1
a
IVer
pagins
36.(
Ilustracion
I
.
Al
usar
xi
hOc
normal
o
fino.
*
II
.
Al
user
xi
kilo
grueso
12

HELPFUL
HINTS
REPLACING
THREAD
SPOOLS
When
replacing
thread
spoof
a.
the
following
steps
may
be
helpful
for
quick changeover.
1.
Cut
off
existing
threads
near
the
spools.
Tie
the
cut
thread
ends
from
new
spool
s
as
illustrated
(seaman
S
knot).
2
base
presser
foot.
3.
Lower
needle
bar
to
its
lowest
posit
on
by
turning
hand
wheel
AWAY
FROM
YOU
CarefuIy
Pu
the
enistng
threads
unr,
the
conneocng
knots
pass
through
needle
eye
and
looper
eyes.
CUT11NG
NEEDLE
THREAD
Frayed
thread
may
make
needle
threading
difficult.
Draw
the
thread
passing
under
the
mov
ng
cutter
and
turn
hand
when
towards
you
to
obtain
clear
cur
end
as
illustrated.
SUGERENCIAS
DE
AVUDA
REEMPLAZAR
LOS
CARRETES
DE
HILO
Cuando
se
reemplacen
los
carretes
dx
kilo,
pare
un
cambio
rapido.
I
Os
niguientes
pesos
pueden
ner
utiles.
1.
Coder
los
hilos
eaisterttes
cerca
de
Ion
carretos.
Ate
ox
borden
cortados
al
bile
de
los
nuexoa
carreres
corrro
lustrado.
(Nudo
de
marineros)
2
Levantar
ei
me
prensatelas.
3.
Ba
1
ar
is
barra
do
agula
ala
oosiciorr
mas
eaja
oiranoo
e
volante
marualmente
er
sentido
de
a
costura.
Tira
cuidadosamente
de
los
hilos
esistentes
Santa
que
los
hudoS
de
coneaion
pasen
a
traves
be
oj
0
de
Ia
agua
y
a
ancors.
CORTAR
EL
HILO
DE
LA
AGUJA
Un
h,lo
deahilachaxo
puede
hacer
dificil
e
onhebrado
be
a
sgufa.
Tire
del
kilo
hasta
que
posicione
debaio
be
Ia
cuchilla
movil
y
gire
0’
solante
manualr’iente
en
sentido
do
Ia
cOstura
para
obtener
us
code
Iimpio
como
I
ustrado.
*1J
13

TEST
STITCH
OVER
LOCK
STITCHES
After
threading
is
complete
use
a
scrap
of
fabric
that
you
plan
to
sew
and
test
to
sew
in
the
following
order
Gently
pulling
all
the
threads
so
the
left,
lower
the
presser
foot
Rotate
the
hand
wheel
towards
you
a
few
tinies
to
see
if
the
lock
stitches
are
oroperly
formed,
2
Start
the
machine
at
low
soeed
and
feed
in
test
tabric
usder
the
presser
foot
by
slightly
pushing
is
forward.
(This
can
be
done
with
the
presser
foot
down
on
most
fabrics
except
butrv
materials.(
Guide
the
fabric
gently
as
machine
automatically
feeds
the
materiai.
3.
Check
thread
tenssns
by
test
sewing
on
spare
fabric
(See
page
20-
21.)
4
At
fabric
end.
contirue
running
running
machine
at
low
speed.
gently
pulling
the
fabrc
towards
the
back,
until
about
5
to
6
cm
or
extra
lock
stitches
are
produced
without
fabric.
Cut
thread
with
Scissors.
COMPROBAR
LOS
SOBREHILADOS
Desoses
de
que
ci
exhebrado
se
complete,
user
ax
material
similar
que
piense
coser
y
verifique
las
puntactas
en
el
siguiense
ordex:
1
Tiraxdo
suaaernente
de
sodas
los
rubs
a
Ia
izquierda
bajar
el
pie
prensasalas.
Girar
el
volante
manual
hacia
usted
uses
pocus
veces
pare
aer
Si
el
sobrehulado
estd
tormadc
adecuadamente
Fig.
1
2.
Arrascar
Ia
mactuina
a
bula
velocidad
p
avaxzar
ci
material
oe
prueba
debaf
a
del
pie
prensatelas
tirando
ligeramesse
hacia
adelante.
Guiar
el
materual
suavemexte
rnientras
Ia
rnequma
evanze
automaticamente
el
material
3.
Cornprobar
las
tentiones
del
hilo
mirando
el
cosido
en
el
material
de
prueba.
(Var
pagina
20-
21)
4
Al
final
del
cosido
del
material.
continuar
con
Ia
mdauisa
furcionando
a
data
velocidad
tirando
suavemente
ci
material
hacia
a
parte
oe
utras.
haste
conseguir
anos
5
a
6
cms.
de
sobrehulado.
Carte
el
bib
con
tilerau.
Fig.
2
Fug.3
14
La página se está cargando...

TABLA
DE
FIJACION
r
Numero
de
hilo
I
4
3
Dial
tie
anchura
de
costura
-
6
-
6
4
-
-
5
-
4
4
-
6
H
Aguja
que
Se
usa
derecha
)zquierda
y
lzquierda
Derecha
lzquierda
Derecha
Derecha
Dedodepuntada
a
oaguja
izquierda
-
4
-
-
4
-
-
0
-
-
-
-
-
Control
Hilo
aguja
derecha
-
-
-
-
4
-
-
0
-
-
4
-
-
4
-
-
de
tension
Nib
ancora
superior
-4
-
-4
-
-
4-
-
4-
-
4
-
-
4
-
-
4-
-
4
Hibo
ancora
inferior
4
-
-
4
-
-
4
-
-
8
-
-
8
-
-
3
-
-
4
-
-
4
Controide
bongitud
tie
2.5
-
3.5
2.5
-
3.5
3
-
5
2
-
2.5
-
R
-
-
P
-
Nr,
tie
ref.
2
©
I
Oobbaduiio
Dobbadibbo
Dobladubbo
Costura
piano
estrecho
enroilado
i
de
forro
Página
de
referencia
21
27
18
-
19
Note:
Los
nurneros
tie
arruba
tie
tensitin
v
tiuai
tie
anchura
tie
costurs
4.
Fi
1
acion
tie
tensiOn
uncorrecta
cause
puntadas
urregulares.
son
nara
an
sobreh4ado
general.
On
penueho
guro
meiorara
sus
A)i.istarla.
pespurutes
en
muchos
casos.
La
InformaciOru
suguente
as
serd
5.
Fijacion
tie
tensiOn
tentird
probiema
cuando
fujacuon
de
muy
util
agala
es
uncorrecta
Girar
dual
tie
anchura
tie
cottura
(Var
odgina
22).
2
Ajuistar
tens
ones
tie
aguja
cuantio
nose
materiel
grueso
0
fino.
Comprobar
las
puntatias
con
un
trozo
tie
material
3.
Roducur
los
tensiones
cuando
nose
con
el
hub
grueto.
undependuente
a
que
vaya
a
user
p
consiga
las
meiores
resultactos.
16

THREE-THRD
OVERLOCI(
WITH
ONE
NEEDLE
By
threading
the
LEFT
needle
only
a
width
of
8
mm
will
be
produced
and
by
threading
the
RIGHT
needle
only
a
width
of
3.8
mm
will
be
produced.
Please
<sep
the
unused
needle
on
the
needle
pad
aa
illuatrated.
SOBREHILADOS
DE
TRES
KILOS
CON
UNA
AGUJA
Enhebrando
aolo
a
aguja
IZQUIERDA
se
producira
una
anchors
be
8
mm.
y
enhebrando
Is
aguja
DERECHA
solo
se
prodricira
Uris
anchura
do
3.8 mm.
Guardar
Ia
agua
quo
no
usa
en
Ia
almohadilla.
17
La página se está cargando...

DOBLADILLADOS
ENROLLADOS,
ESTRECHOS
Y
DE
FORRO
Son
ideales
para
usarios
en
msteriales
delgados
tales
comm
crespon
goorgette.
crespOn
de
chino.
soda
etc.
Adomds
so
puedo
roalizar
us
pliegue
de
forro,
particularmonto
cuando
so
coca
sobro
matenales
‘doshilachables’
finos
como
so
rnuestra
en
Ia
Fig.
3.
La
roalizaciOn
do
esos
pliegues
no
puodo
realizarse
on
mstoriales
‘duros’
0
‘posados’.
1
Levantar
Si
pie
prensatelas.
2.
Abrir
a
tapa
frontal
y
Ia
mesa
Se
trabajo.
3,
Quitar
of
dedo
do
puntads
do
Is
glees
do
agula
usando
el
dostarnillador
y
guardarla
05
01
borso
its
accosorio,
4
Filer
a
mdouins
do
acuordo
can
Is
pdgrna
15
-
IS.
NOTA:
1.
Ussr
ol
Silo
rocomendado
para
obtener
Sn
dobladillo
idoal,
2.
Dospuos
do
terminar.
colocar
01
dedo
do
puntads
en
su
lugar.
Asegurarso
do
msertarlo
profundamerite come
illustrodo
on
Fig
1
HILO
RECOMENDADO
Ditbiadillo
do
pespunto
estrocho
Dobladillo
enrollados
,]
Con
Ties
Nibs
Con
Ties
‘fibs
Nib
pars
Ia
agubs
Polioster.
nylOn,
seas
No
50-100
NylOn
No
100
Ancora
Superior
Poirestol,
nylOn.
soda
No
50-100
-
-“-.“.“--‘-“.-—-----—-
Nylon
grusso
Imonos
ostirable)
Ancora
inferior
Nylon
glueSo
(monos
ostirable)
blustracion
I
Dodo
do
puntada
(A)
*
lb
Dobladiblo
ostrocho
Si;
Doblaoibo
onrollado
*
v
Dobbadiblo
do
forro
19
La página se está cargando...

AJUSTAR
LAS
TENSIONES
DE
LOS
HILOS
Girando
01
dial
do
tensiOn
hacia
amba
da
ona
tensiOn
del
silo
mayor.
Girando
01
SiOl
do
Ia
tension
Sacia
aba
1o
nos
do
una
tensiOn
menor.
El
nOmero
mds
alto.
a
mayor
tensiOn,
Comprobar
cada
tensiOn
do
hilo
sobre
us
trozo
do
material
independionto
y
similar
al
material
quo
planee
usar.
Aumentar
a
tonsiOn
(4)
Disminuir
Ia
tensiOn
EMPLEO
DE
CUATRO
HILDS
Cosido
corrects
El
hUe
de
Ia
ancora
superior
tirade
al
lace
do
abalo
Lotto
do
abafo
I
Lade
do
adam
inferior
superior
Hrlode
Ia
_______
La
pe
L.adodoaroba
Fig
1
dodoarriba
II
El
Silo
do
Ia
agafe
icqalerda
El
Silo
do
Ia
agaja
de
10
derenha
suelto
y
visible
sobre
el
lade
do
suelte
y
visible
500ro
el
lado
de
000100
inferior
del
material.
abajo
o
ietenor
gal
material.
Incrementar
Ia
tensiOn
del
Silo
do
Ia
agala
izqaierda
Vie
diSminalr
Ia
de
una
0
las
dos
ancoras
Lads
aoaba
1
ISle
de
Ia
ayrga
echa
La0000arriba
ii
Fig.
S
El
Silo
do
a
ancvra
inferior
Orado
al
lade
do
arriba.
Lado
so
abao
Lado
on
abao
[Ladodearriba
i
Fig
3
Ladodearrtha
II
Fig.
2
Incremeotar
Ia
tensiOn
del
Silo
lncremevtar
Ia
tensiOn
del
Vile
de
Ia
anGora
superior
yie
do
Ia
avcora
Infenor
yb
disminuir
Ia
tensiOn
do
Ia
disreivuir
Ia
tension
del
avcora
inferior
s050rior
Fig.
4
Incrementar
Ia
tensiOn
del
Silo
da
Ia
aguja
dorecna.
21

Turn
the
stitch
length
dial
to
the
requ
red
ienatri
The
nigher
the
number,
tie
longer
the st.tch
This
dial
can adiust
the
stitch
length
from
1
to
5mm.
ADJUSTING
OVEREDGE
CUlliNG
WIDTH
Overedge
cutting
width
can
be
ad
1
usted
from
4
to
7
mm
by
simply
turning
overedge
cutting
width
dial
according
to
the
bind
of
fabric.
It
is
set at
standard
width
of
6
mm
when
delivered
from
the
lactory
Turn
it
towards
P5”
if
fabric
edge
curls
while
sewing.
(Fig.
1(
Turn
it
towards
“7”
if
loops
hang
off
the
edge.
(Fig
2(
Scar
e:
dial
be
long
tud
oe
puntada
haste
obtenm
a
ountada
deseada.
Mayor
el
numero. mayor longitud
be
ountada
Este
dial
pueda
a:ustur
ia
ongitud
desde
1
riasta
5
mm
AJUSTAR
LA
ANCHURA
DE
LA
COSTURA
La
ancrura
tie
ia
contura
Se
puede
a
1
sstar
solo
girurido
ei
dial
de
anchsra
de
costura
segun
Is
dane
be
material.
La
anchura
normal
cc
fija
a
6
mm
oesde
Is
tubrica.
S
rarlo
hasta
el’S’
ni
01
horde
de
material
se
rae
cuando
cone
(Fig.
Girarlo
hasta
el
“7’
s
Ia
forms
be
ado
esta
demasiada
flola.
(Fig.
2(
j
Stitch
finger
(B)
(Narrow>
Loops
may
hang
off
the
edge,
when you
sew
with
lightweight
fabric
using
3
threads
(right
needle
only(,
and
setting cutting
width dial
at
4-5
(Fig.
3(.
In
such
a
case
change
the
stitch
finger
(A)
to
(B)
to
get
neat
stitching
(Fig.
4(
I
astral
On
*
.
Stitch
length
dial
*
ft
Ovetedge
cutting
width dia
*
5
Stitch
finger
(B(
DEDO
DE
PUNTADA
(B>
La
forma
be
lszo
euta
demasiads
flota
cuando
cose
con e
material
be
genero
Inqero
usando
3
hilos
(solo
Ia
sgu(a
izquierda(,
fi
1
ando
hI
d
al
be
ancnura
do
couture
en
4
-
5
Fig.
3(.
En
enton
cuson,
cambiar
el
dodd
do
punitada
(A(
a
(B)
paru
dbtener
unu
me
1
or
puntadu
(Fig.
4(.
ADJUSTING
STITCH
LENGTH
AJUSTAR
LA
LONGITUD
DE
PUNTADA
I
jI
J
Li
I
L
F(g.
3
F(g.
4
1
F(g.
2
*
Jfl
Stitch
finger
(B)
Dedo
de
puntada
(8)
Illustration
*
(
.
Dial
de
a
Ongitud
de
puntada
*
S
Control
do
anchurs
do
contura
*
IS
I
Dodo
do
puntadu
(B)
Stitch finger
(A)
Dedo
de
puetada)
22

DIFFERENTIAL
FEED
The
differential
feed
has
two
independent
sets
of
feed
teeth
one
front
(A)
and
one rear
(B).
Set
of
feed
teeth
has
an
ndividual
feed
mechanism
wh
cri
enables
the
feeding
of
material
ate
different
ratio.
POSITIVE DIFFERENTIAL
FEED
WHEN
SET
FOR POSITIVE
DIFFERENTIAL
FEED,
the
front
feed
teeth
(A)
wakes
a longer
stroke
then
the
rear
feed teeth
(B).
This
has
fhe
effect
of
gathering mater
al
under the
presser
foot
to
offset the
wavering
on
the
fabric.
NEGATIVE
DIFFERENTIAL
FEED
WHEN
SET
FOR NEGATIVE
DIFFERENTIAL
FEED,
the
front
feed teeth
(A)
makes
a
shorter
stroke
than
the
rear
feed
teeth
(B).
This
has
the
effect
of
stretch
ng
material
under
the
presser
toot
to
ofteet the
pucivesng on
the
fabric.
Illustration
I
:
Differential
teed
dogs
S
Positive differential
teed
*
th
Negabve
d
fferentisl
feed
TRANSPORTE
DIFERENCIAL
El
transporte
diferencial
tiene
2
transportadores
de
avance
independierrtes,
frontal
(A)
y
posterior
(B)
Cuba
transportador
tierie
us
mecanismo
de
avance
individual
qua
facilits
01
transporte
del
materials
long
tubes
be
puntada
diferentes.
TRANSPORTE
DIFERENCIAL POSITIVO
CUANDD
EL
TRANSPORTADOR
SE
FIJA
PAPA
AVANCE
DIFERENCIAL
POSITIVD,
el
rransporte
fronta
(A),
realize
usa
csrrers
mayor
qua
e
posterior
(B).
Esto
tene
el
efecto
do
vcumular
material
balo
el
pie
prensatelas
pars conseguir
frunc
u
osdular
0
matensl.
TRANSPORTE
DIFERENCIAL
NEGATIVO
CUANDO
EL
TRANSPORTADOR
SE
FtJA
PAPA
AVANCE
DIFERENCIAL
NEGATIVO,
el
transportador
frontal
(A)
realize
una
carrera
was
coos
quo
01
posterior
(B(.
Esto
tiene
01
ofocto
do
estirar
el
material
ba)o
01
i0
prensarelas
pars
compensar
01
srrugaoo
del
material.
I
ustraciOn
*
I
Transportador
do
avance
diterencial.
II
Transpose
diferencial
positivo.
*
lIt:
Transpose
diferencial
negativo.
*flJ
*fl
23

ENGLISH
EFFECT
AND
APPUCATIO
TYPE
OF
FEEDING
SETtING
‘
Waver-free
seams,
Positive
1-2
Gathennh
differential
teed
No
differential
teed
Neutral
teed
I
-
Pucker-free
seams
cbfferenrtlal
teed
0.7-1
[‘
--
—-
FOOT
PRESSURE
REGULATOR
Presser
foot
pressure
has
been
correctly
set
at
the
factory,
so
you
do
not
need
to
aojust
it
for
moat
ordinary
sewing.
S
adjastment
is
necessary.
tarn
the
toot
pressure
regulator
to
a
higher
number
to
increase
or
to
a
lower
number
to
decrease
pressure.
SEWING
WITH
EXTRA
HEAVYWEIGHT
FABRIC
OR
MULTIPLE
LAYERS
OF
FABRIC
A
wide
range
of
fabric
can
be
overlocked
on
this
macnine.
out
it
is
recommended
to
hohten
screw
as
illustrated,
when
sewing
with
extra
heavyweight
fabrics
or
mulitiple
layers
of
fabric.
Ooen
working
table
for
sdlastmeflt.
Loosen
the
screw
when
sewing
with
light
to
normal
weight
fabric
or
turning
overedge
cutting
width
dial,
to
cut
fabric
optimally.
The
macrune
is
set
for
normal
weight
faonca
from
the
factory.
Illustration
*
Differential
feed
control
lover
*
Ii
Increase
*
itt
Decrease
*
IV
Tighten
FIJAR
ELTRANSPORTE
DIFERENCIAL
Fi
1
ar
el
control
Del
avance
Olferencial
simplemente
moviendo
Is
oslanca
a
ia
direccidn
deseaoa.
Referirse
a
la
grafica
de
abajo.
El
control
so
puede
hacer
entre
0.7
(efecto
negativo)
y
2
(efecto
posrtivof.
Esos
valores
fijados
oan
El
melbr
indice
do
transporte.
Pare
un
cosido
normal,
Ia
palanca
debe
son
fijada
en
elf.
La
paianca
puede
ser
ustada
adn
cuando
cute
cosiorrdo.
Control
Del
1
d’
y
aplicaciOv
Tipo
do
avance
2
ruvcrds
a
rxcLt4
T
a
,snsne
2
I
dci
material
diterencial
nosirivo
Tra
xn
,,osi
o
norma
dc
tnsnnvv
rerstvs
Arrugas
y
francidou
diterertcralriegarivo
0.7-1
—----“--‘j
REGULADOR
DE
PRESION
DE
PIE
La
presrdrt
de
pie
prensstelas
ha
sido
fijado
correctarnenlo
en
a
fabrics.
por
Ic
cual
no
en
necesario
be
alustarla
pare
Ia
mayor
paGe
de
cosido
normal.
Si
Sb
005esita
aluste
girar
01
roguladcr
do
presion
de
pie
al
nbrnero
mas
grsnde
para
aumentar
Ia
presiort
o
al
ndmero
mds
pequeho
pare
disminuirla.
COSER
CON
MATERIAL
DE
GENERO
GRUESO
0
CAPAS
MULTIPES
DE
MATERIAL
La
eatonsidn
ancha
del
material
Se
puede
pespunfoar
sobre
Ia
maqurna.
Aprerar
ci
tornillo
como
se
ye
en
a
grafica,
cuando
esta
cosieSS”SSn
material
do
ghnero
grueso
o
capes
multipes
se
material
Abrir
a
mess
do
traoalo
pare
ajusto.
Afloiar
el
tornillo
cuando
estd
cosrendo
con
material
de
genoro
delgado
a
normal
o
girar
el
dial
do
control
de
anchura
do
costura,
p
do
otra
matters.
el
material
no
so
puode
porter
bien.
La
mitquina
osta
alustada
para
ci
material
normal
dec00
ía
fabrics.
llustraciOn
•
Palanca
do
control
del
avanco
diforencial
*
[
Aumentar
*
Ill
Disminuir
*
V
AfIoar
IV
Aprotar
*\f:
Tomillo
SETTING
DIFFERENTIAL
FEED
Set
by
simply
moving
the
differential
feed
control
lover
in
the
direction
desired
referring
to
the
chart
below.
The
adjustment
can
be
made
between
0.7
(nogatlve
effect)
and
2
(Positive
effect).
These
settings
give
the
best
raIlS
of
feeding,
For
normal
sewing,
the
lover
nhould
be
set
at
1.
The
lover
can
be
reset
oven
while
hewing.
*
V
Loosen
Vt
Screw
24

BASIC
TECHNIQUES
TURNING
OUTSIDE
CORNERS
WITHOUT
CUlliNG
THREADS
1.
When
you
reach
the
fabric
edge.
stop
stitching
with
the
needle
above
the
fabric.
2.
hase
the
presser
foot
and
gently
pull
err
the
thread
chain
lust
enough
to
clear
the
stitch
finger.
3.
Turn
the
fabric,
lower
the
presser
foot
and
begin
stitching
in
the
new
drrection.
Fig
NOTE
When
overlocking
and
trimming
at
the
same
time.
cut
the
fabric
along
the
new
stitching
line
fo
about
3
cm,
before
turning
the
fabric.
Fg
2.
TURNING
CURVED
EDGES
For
inside
cumes
guide
fabric
gently
with
tnmmng
line
ot
the
fabric
under
the
right
tront
of
the
presser
foot
(Or
a
little
to
the
left),
applying
pressure
at
ooirtt
A
in
the
direction
of
the
arrow
with
your
left
hand,
and
at
the
same
tme
applying
a
We
ottposite
pressure
at
point
E
with
your
right
hand.
Fig.
3.
For
outside
cumes
place
under
the
presser
toot
in
a
similar
manner
out
aooiying
the
pressure
in
the
ooposite
directions.
F
3
.
4
REMOVING
STITCHES
FROM
SEWN
FABRIC
To
remove
stitches
vireaay
sewn,
snip
off
needle
threadla)
at
intervals
and
pull
out
looper
thread(s).
illustrariot’r
*
t
Cut
i
TECNICAS
BASICAS
Girar
el
material
sin
cortar
los
hilos
Cuando
alcarioe
el
borde
dv
material,
pure
el
pespunte
con
Ia
aguta
sobre
el
material.
2.
Levante
vi
pie
prensatetas
y
suavemente
tire
do
Ia
cadena
dvi
hilo
desde
Ia
placa
dv
Ia
agu(a
y
del
pie
prenoatolas
3
Gire
vi
te)sdo.
bate
ei
pie
prensatelas
y
continue
cosiendo
en
Ia
nueva
direccion
Fig.
r.
Nota:
Cuando
sobrehile
cone
ei
mate-iai
a
In
largo
de
Ia
nueva
linea
Se
puntada
unos
3cm.
antes
dv
girarlo
Fig.
2.
Girar
los
bordes
curvados
Para
curves
intenores,
girar
ei
material
suavemente
por
Ia
lines
de
soorehilado
del
material
bef
o
el
oie
prensatelas
aplicando
usa
presion
en
01
punto
A
en
Ia
direccion
Se
Ia
tlecha
con
su
metro
izquieroa,
y
al
misrrro
tiembo
aolicando
usa
pequeha
presiort
opuesta
o
contrapresion
en
el
punto
con
su
mano
derecha.
Vet
Fig.
3.
Para
curvas
extoriores,
colocar
01
material
bato
vi
pie
prensatelas
dv
manera
similar
pero
aplicando
las
presiones
en
Ia
drrecciones
opuestas.
Fig.
4
Eliminar
los
sobrehilados
del
material
cosido
Pars
eliminar
los
sobrehilados
usa
vez
cosido,
recortar
el
hilo(s)
dv
Is
agula
a
intervalos
y
tirar
hacia
fuera
del
tub(s)
dv
las
ancoras.
ilustracion
I
i
Cartar
I
*1
Fig.
1
Fig.
2
fiH
xi,
Fig.
3
Fig.
4
25

CORDED
OVERLOCK
Corded
overlock
can
be
used
to
utrengthen
shoulder,
sleeve
or
side
seams
when
loining
c’
making
up
knitted
gsttrents.
As
a
decorative
feature
you
can
use
knitting
yarn
of
Contrast
ng
coiors
to
tartner
enhance
your
garrtlent.
Your
machine
is
equipped
with
a
presser
toot
which
has
been
designed
to
feed
your
cord
or
yarn
to
the
left
of
the
safety
sttch
otto
the
right.
Follow
instruct:ons
as
follows:
I
Place
a
‘flller
coro,
such
as
a
crooner
cotton.
gimp
wool
Knitting
yarn
or
skirting
elast
c
at
the
rear
of
The
macfllne
spool
pin
Pass
the
cord
through
the
cord
guides
(1)
and
(2)
nOd
then
through
the
left
needle
thread
gide
(3).
See
Fg.
1,
2.
Insert
the
cord
through
either
the
front
or
rear
bole
iuccoroing
to
the
operation,
see
diagrams
Figures
2
and
31,
in
the
creaser
foot
and
cast
1
under
ano
to
the
rear
of
the
foot,
3.
Place
the
material
to
be
sewn
as
normal
Start
at
slow
speed
obsersing
it
curd
is
feeding
correctly
and
increase
speed
as
fleeced.
FOR
JOINING
SHOULDERS
OR
SLEEVES
pass
the
cord
through
the
front
hole,
ensuring
tnat
it
is
fixed
between
the
left
and
rignt
needle
threads
as
it
in
guided
through
the
front
hole.
(Fig.
2).
FOR
JOINING
SIDE
SEAMS,
pass
the
core
through
the
rear
hole,
ensuring
it
is
ocsitioned
to
the
right
rwedle
ihead.
lFig.
3).
FOR
DECORATIVE
EFFECTS,
you
may
pass
contrasting
colors
either
through
the
front
or
rear
hole
or
it
you
desire,
pass
cord
or
yarn
through
eacn
hole.
FOR
MAKING
WAVED
HEM
WITH
finhllne
Fig.
4(,
pass
Inn
tishline
through
the
rear
hole
ano
start
ROLL
HEMMING
(See
page
18-19).
This
in
used
for
the
hem
of
shirt
etc.
where
more
body
is
desired.
PESPUNTE
ENCORDONADO
El
pexpunte
encordonado
se
puede
unar
para
forta
acer
Ian
hombreran.
rrangas
o
costuras
laterales
ciando
so
conan
vestidos
de
punto.
Comas
an
olemento
decorativo
Vd
puede
ussr
bib
de
tricotar
con
contraste
oe
colores
Su
maquina
entd
oquipada
con
un
pie
prensatelas
qua
ha
sido
disehsoo
pars
alimentar
su
cordon
o
bib
a
Is
izquierda
o
a
Ia
derecha
del
conido
be
segundad.
Soguir
Ian
innrrucc
orles
5
gulenten
I
Colocar
un
cordon
rellenaoor
como
algodon
be
ganchillo.
guimpe.
situ,
hilo
be
punto
0
hibo
arrugado
eIkstco
en
Ia
parte
posterior
del
carrete
do
Is
maqu
na.
Pasa
01
cordon
a
traves
do
as
guius
dei
cordon
(1)
y
12)
y
luogo
a
traves
de
a
guia
del
hue
do
Is
agua
izquierda
13)
Vet
Fg
1
2.
Insertar
el
Cordon
a
trauen
del
agu
1
ero
frontal
o
posterior:
ide
acuerdo
con
Ia
operacuon
nor
los
duagramas
liguras
2
y
31
en
€1
010
pronsatelas
y
pasarlo
por
clebalo
y
hacia
atran
del
pie
3.
Coiocar
01
waters
qua
so
ha
oe
coser
normuimento.
Comencar
a
balu
ye
ocidao
obseicoldc
Si
e
Cordon
oats
aoanzando
correctamento
0
incremental
Ia
volocidad
cuando
sea
necesario.
PAPA
UNIR
HOMBRERAS
0
MANGAS
pasar
el
ccrdcn
a
traves
del
agu
1
ero
anterior
asoguranooso
oe
quo
ants
bIson
entre
Ion
hilos
do
Ian
uguian
derecha
e
uzouieroa
cusndo
es
guisdo
a
traves
oel
aguero
frontal
(Fig.
21,
PARA
UNIR
COSTURAS
LATERALES
pasar
01
Cordon
h
traVen
del
aguloro
postorror
unegurandone
do
quo
osta
orenionado
into
al
bib
bela
aguja
oorecha
IFig.
3(
PAPA
EFECTO5
DECORATIVOS
01
cordon
re’ensdor
oueoe
usarse
contrastsndo
diforenten
coboren
y
panando
a
trases
do
Os
agujoros
anteror
o
posterior
del
prennafelax
PAPA
HACER
DOBLADILLO
ONDULADO
CON
LA
CUERDA
IFig
i
pasar
Ia
cueroa
a
travon
do
aguero
pontorior
y
ornpezsr
dobladillo
enrollado.
Var
pagina
18-19)
So
usa
pars
dobladilbo
00
tslda,
etc.
Fig.
2
Fig.3
g4
26

.q
L1
ESPA1OL
DECORATIVE
EFFECTS
In
addition
to
normai
overlooking
wnrch
is
fully
descnbed
in
tIns
instruction
book,
your
mactrifle
can
also
be
used
for
a
number
ot
decorative
applications
such
as
oecorative
tob-stitcrvng.
butted
seams
pin-tucking
or
making
lengths
of
decorative
braid
See
below
t3ecorative
top-stitching
—
using
three
threads
(flat
seam)
Foid
fabric
along
the
line
to
be
top-stitched
and
sew
ove
the
folded
edge.
making
sure
not
to
cut
into
the
fold.
Fig.
A
Unfold
the
fabric
pu
the
eons
or
toe
threass
to
toe
underside
and
press
flat.
The
final
appearance
can
be
enhanced
by
using
buttonhole
twist
or
embroidery
tnread
on
the
lower
t000er.
Butted
seams
—
using
three
threads
(flat
seam)
Place
two
pieces
of
fabric
wrong
sides
together
and
overoch
along
the
edge.
Unfold
and
press.
By
using
different
coloured
taoricn
and
tnread.
a
pleasing
oatchwork
effect
cart
be
achieved.
Pin-tucking
—
using
three
threads
Fold
fabric
song
a
line
to
be
oin-rucoed
and
overiock
along
the
folded
edge,
making
sure
not
to
cut
info
the
folded
edge
of
the
fabric.
ISee
page
29).
Pull
ends
o
threads
to
the
underside
and
press.
Making
decorative
braid
—
using
three
threads
Overlook
over
a
cord
or
braid,
holding
it
carefully
with
both
nandv.
making
sure
not
to
cut
the
edge
ISee
page
29).
NOTE.
“If
you
use
blind
hem
foot
(option,
see
page
32),
decoratrve
stitch
is
made
easily,
without
cutting.
““Reduce
the
,rpper
looper
tension
when
you
one
thick
thread.
EFECTOS
DECORATIVOS
Ademas
del
500rehilsoo
normal
guy
esta
totairriente
descrito
en
este
libro
dv
iristruccrones.
su
maquins
tambien
puede
var
utilizada
pars
aplrcaciones
decorativas
tales
como
costuras
dv
vivov
0
trenzas
Puntada
superior
decorativa
—
usando
tres
hllos
(costura
plans)
Plegar
el
material
a
In
largo
be
a
Itnea
donde
se
desea
realizar
decnrado
superior
y
sonar
n
to
lsrgo
del
borde
plegado.
asegurandose
dv
no
cortar
el
borde
Fig.
A.
Oesplegar
el
tegido,
tirar
los
estremos
do
kilos
al
lado
de
aba)o
y
errpujar
pIano.
La
apsnencia
final
ouedo
ser
nre)orads
pot
ussda
el
kilo
dv
ojai
o
de
bordado
pars
urrcora
superior.
Dobladitto
topeteado
—
Usando
tres
bibs
(costura
piano)
Coiocsr
dos
piezas
dv
material
untanoo
los
adds
be
aba
1o
y
pespantear
a
10
lsrgo
dv
onus.
Desplegar
y
prensar.
Usanoo
hilos
y
materials
be
diferente
color
voted
reslizara
Is
Obrv
be
rvmrendn’
Costuras
de
vivos
—
usando
3
bibs
Plegur
vi
material
a
In
tango
dv
uns
litres
donde se
denea
reaiizar
el
viao
y
coser
a
10
largo
del
borde
plegado
asegurhndose
dv
no
oortsr
vi
borde.
)Ver
osgina
29).
Pars
vaita”
vi
cone
acompane
vi
material
con
ambas
manna.
Hacer
trencas
decorativas
—
uaando
3
hibos
Coser
us
pespunte
sobre
an
cordon
o
trenza
rrratenrffnidolo
cuidaaosamente
con
ambsa
marros
asegurandove
dv
no
cortsrel
borde.
)Ver
psgins
291.
NOTA:
*Si
usa
vi
pie
dv
plegado
0
puntada
invisible
i000ionsl.
var
pagina
321.
payne
obtener
uns
puntads
decorates
facilmente.
**ReduCir
Ia
tensiOn
de
Is
anccrs
superior
cuando
use
hub
gruvso.
I
iZ
Fig.
A
Fg.
B
27

ENGLISH
ESPANOL
DIFFERENTIAL
FEED
APPLICATIONS
P
ease
refer
to
pages
23
-24
DIFFERENTIAL
FEED.
Different
a
feed
is
desigrieo
to
minimize
puokenng
and
waver
ng.
It
is
also
very
effective
for
gathering.
1.
Puckering
Puckering
tends
to
occur
on
woven
or
sheer
fabrics.
To
obtain
pucker-free
seams.
set
rhe
differential
feed
confrol
ever
at
less
than
1
2.
Wavering
Wavenng
lends
to
occur
on
knitted
or
stretchable
fabrics.
To
obtain
waver-free
seams, set
the
differential
teed
control
ever
at
rn-ore
than
1
3.
Gatheting
Dfemn:mi
feed
makes
gathering
easier
on
lghtweight
raorio.
Use
it
on
waistlines,
sleeve
heads,
sleeve
bottoms
and
rff
las.
etc.
Set
c’ie
mfferentiat
feeo
control
ever
between
1.5
and
2
to
obtain
rhe
cast
gathering
effect
for
your
use.
You
may
wish
to
engtren
stitcn
length
also
APLICACIONES
DEL
TRANSPORTE
DIFERENCIAL
Reierir
Ia
pagina
23
-24
TRANSPORTE
DIFERENCtAL.
El
avance
diferencial
esta
disenedo
peru
minimizar los
pliegues
y
las
ondulaciones.
Es
tambien
muy
efectivo
para
los
fruncidos.
1.
Pliegues.
Los
pliegues
tienden
a ocurr
r
en
materials
p
anos
0
transparentes
Pars
obtener cosfuras
sin
pliegues,
fitar
ei
conrrol
Ce
vvanoe
diferencial
alustando
a
palanca
en
menov
de
1
2.
Onduiaciones.
Tiende
a
ocurrir
en
materials
cue
Se
estirari
0
de
ounto
de
malla.
Para
obtener costuras
si’
or’O,jlac.Ones.
fia
ei
contro.
del
avance
diferenciai
atustanDo
Ia
oaanca
en
mas
oe
1.
3.
Fruncido.
El
avance
dderencial
hace
e!
fru’tcidc
man
facil.
Utilizanoo
en
los
relIes.
en
los
punos,
en
los
‘onoos
de las
manges.
etc.
Fijar
el
control
del
avance
diferenoa
austando
Ia
balanca
ant
re
1.5
y 2,
care obterer
SI
meor
efecto
de
fruncido
requerido.
*ffl
IMPORTANT
The
asact
adlustment
depends
on
the
thickness ano
elasticity
of
fabric.
Even
the
stitch
ength
can
influence
the
setting.
The
longer the stitches,
the
more
the
feonc
is
contracted.
Always
do
a
test
run
with a
oiece
of
actual
fabrics
you
use
and
find
the
cast
settings.
I
lustrar-on
-
Pucker
or
waver-free
seams
2
-
Puckering
3
Wavenng
-
Gatnering
IMPORTANTE
El
a
uste
esacro
dapencte
de
grosor
it
de
Ia
eiesticidud
del
material.
Incluso
Ia
lorigitud
ce
a
puntada
pueda
influenciar
Ia
flacion.
Cuanto
mas
large
as
Ia
puntade.
mus
Se
contrae
el
materiel.
Hacer
siempre
erie
oruebu
con
on
trozo
del
materia
qua
veya
a
utilizar
y
encontrer
los
metorea
resultedos.
Ilustracion
*
Coefura
sIn
fruricioos
om’duaciones
*
It
Cosfiira
plegace
III
Costura
onou,aoe
tV.
Fruncido
/
/
*
TV
28

3.
CARING
FOR
YOUR
MACHINE
REPLACING
MOVING
CUTTER
Replace
a
moaing
cutter
if
it
becomes
blunt
as
follows
A
spare
cutter
will
be
found
in
your
accessories.
NOTE:
You
should
not
need
to
reolace
fxeb
cutter,
wE
ch
is
made
of
a
special
hard
alloy
rnatenal.
FIRST
REMOVE
THE
POWER
PLUG
FROM
THE
SUPPLY
SOCKET-OUTLET
I
Loosen
screw
and
take
out
mosing
cutter.
2.
gthe
workin
tabtav
Lower
cutter
driving
arm
to
Its
lowest
position
by
turnino
the
hana
wneel
towards
you
by
hand.
In
this
ttositiun
set
reolacemenf
cutter
in
position
and
secure
it
with
screw.
ENSURING
THAT
THE
EDGE
OF
THE
MOVING
CUTTER
IS
APPROXIMATELY
05
MM
BELOW
THE
SURFACE
OF
THE
FIXED
CUTTER.
DISENGAGING
MOVING
CUTTER
If
you
want
to
sew
without
cutting,
open
the
working
table
and
disengage
the
moving
cutter
by
pushing
the
cutter
reiease
knott
to
the
left
and
turning
It
towards
you
as
illustrated
Ensure
that
fabric
edge
is
not
wider
than
overedge
width
seiecteo
or
upper
looper
and
needle
can
be
damaged.
Be
sure
and
put
cutter
back
to
upright
ooaition
for
regular
overlooking.
REMOVING
FACE
COVER
Disconnect
from
newer
supply
before
removing
face
cover
Remove
the
screw
and
take
off
the
face
covet.
Illustration
*
I
:
Screw
*
ff
.
Moving
cutte
*
UI
:
Cutter
release
knob
*
tV:
Face
cover
3.
CUIDADOS
PARA
SU
MAQUINA
CAMBIAR
LA
CUCHILLA
MOVIL
Reemplazar
Ia
cuchilla
movil
cuando
lIens
a
ester
gastada
o
deapuntada.
Encontrara
una
be
repuesto
en
sus
accesorios.
Nota.
Vd
no
neceaitara
reemplazar
Ia
cuchilla
fia,
gun
esta
hecha
be
un
material
aleado
duro
especial.
DESCONECTAR
LA
MAOUINA
DEL
SUMINISTRO
DE
TENSION
DESENCHUFANDO
Ltt
CLAVIJA.
I.
AEoar
los
tornillos
y
guitar
Is
cuchilla
mdvil.
2.
Cerrar
Ia
mesa
cv
trabaio.
Bajar
ei
brazo
be
conctuccion
be
a
cuchilla
a
Ia
pesicion
mas
bale
girando
el
volarite
manual
hacia
uSed,
En
esta
posicion,
colocar
Ia
cuctrilla
dv
reeniolazo
en
posicidn
y
asegurarlo
con
el
tOrnillo,
ASEGURANDD
OUE
EL
BORDE
DE
CUCHtLLA
MOVIL
ESTA
APROXIMADAMENTE
0.5
MM
OEBAJO
DE
LA
SUPERFICIE
DE
LA
CUCHILLA
FIJA.
DESENGRANAR
LA
CUCHILLA
MÔVIL
Si
quiera
coaer
sin
cortadora,
abrir
Ia
mesa
be
trabalo
y
deuengranar
a
cortadora
movil
en’tpulanbo
el
tornillo
a
Is
izquierda
y
girandolo
riacia
sated
come
ilustrado.
QUTAR
LA
CUBIERTA
FRONTAL
Desenchufar
Ia
corriente
anten
be
guitar
Ia
cubierts
frontal.
Guitar
el
torniilo
y
despuen
Ia
cubierta
frontal.
IlustraciOn
*
I
:
Tornillo
It:
Cuchilla
cortadora
tr’ovil
*
UI:
Tornillo
pars
desengranar
IV:
Cubierta
frontal

CLEANING
AND
OILING
To
seep
the
machine
running
smoothly,
keep
clean
and
Iubrcatea
at
all
times.
FIRST
DISCONNECT
MACHINE
FROM
POWER
SUPPLY
BY
REMOVING
PLUG
FROM
SOCKETOUTLET.
1
Open
the
front
cover
and
working
table.
Uslncl
the
brash
provided,
remove
dust
and
lint
that have
accumulated.
2.
Apply
a
few
mops
of
oil
to
toe
points
indicated
ha
arrows.
AL
WAYS
USE
A
GOOD
QUALITit
SEWING
MACHINE
OIL
3.
Remove
cccv
top
cover
witn
screw
driver
and
remove
cast
aria
lint
of
ins
oe
with
the
brush.
I
ustratlon
*
I
Screw
*
II
Top
cover
*
S
Brushing
*
IV:
Oil
LIMPIEZA
V
ENGRASE
Pars
conservar
Ia
maqulna
tuncronando
suaaemente.
manrenenls
limpia
y
lubncada.
PRIMERO
DESCONECTAR
LA
MAQUINA
DEL
SUMINISTRD
DE
TENSION
DESENCHUFANDO
LA
CLAVIJA
1
Abnr
Ia
taps
frontal
y
Ia
mesa
de
trabIo.
Usando
e
cepillo
sumin
atnado
qultar
eI
polvo
y
las
partculss
pus
se
han
acumulado.
2.
Poner
arias
novas
gotas
de
cyclic
en
los
Duntos
inoicaoos
vo
las
tlechas.
JTILIZAR
SIEMPRE
UN
ACEITE
CE
BUENA
CALIDAD
PAPA
MAOUINAS
DE
COSER
3.
Guitar
codas
las
cubienta
de
arribs
con
ci
destornillador
y
qailar
csalquier
suciedad
o
particula
usando
el
ceplilo.
llustraciOn
I
:
Tomillo
*
It
Cubierta
be
aruba
*
III
:
CeCiII0
Aceire
30

—
LL11i
4.
CHECKiNG
PERFORMANCE
PROBLEMS
ESPAOL
4.
VERIFICANDO
LOS
PROBLEMAS
DE
EJECUCION
PROBLEM
PROBABLE
CAUSE
CORRECTION
Incorrect
Thread
Tension(s).
Reset
Thread
Tension(s)
Incorrect
size
Needle.
Choose
correct
size
Needle
for
Irregijiar
I
I
Threact
and
Fabric.
Stitches
Improper
Threadrng.
Re-thread
Machine.
Pulling
Fabric.
Do
trot
pull
Fabric:
guide
it
gently
Loose
Presser
Foot.
Reset
Presser
Foot
Pulling
fabric.
Do
riot
pull
Fabric,
guide
it
gently.
Incorrect
size
Needle
Choose
correct
size
Needle
for
B-caking
.
Thread
and
Fabric.
Needle
Incorrect
setting
of
Needie.
Reset
Needle
Loose
Presser
Foot.
Reset
Presser
Foot
Incorrect
Thread
Tension(s).
Reset
Thread
Tension(u.
Bent
or
blunt
Needle
Insert
new
Needle.
Pucker
ng
Differential
feed
is
set
incorrectly.
Set
tat
less
than
1.
Differential
feed
is
set
incorrectly.
Set
it
at
1
or
at
more
than
1
Wavering
I
for
knitted
or
bias
fabrics
Improper
Threading.
Re-thread
Machine.
Incorrect
size
Needle.
Choose
correct
size
Needle
for
Skipping
Stitches
Thread
and
Fabric.
Bent
or
blunt
Needle.
I
Insert
new
Needle.
Incorrect
setting
of
Needle
Reset
Needle.
Improper
Threading.
Re-thread
Machine.
Bent
needle.
Insert
new
Needle
Breaking
Thread
Tension(s)
too
tight.
Reset
Thread
Tensmn(s).
Threads
Incorrect
setting
of
Needle
Reset
Needle.
Thread
Spool
tangled.
Reset
Spool
oroperly
Thread
Guide
Pole
not
estended.
Problema
Cauaa
probable
Corrección
Tensionlesl
cc
hilo
Incorrecta.
VoIcer
a
k(ar
Is(s)
tensionles(
del
kilo.
Tamaho
de
Ia
agus
incorrecta.
Elegir
el
tsmsno
correcto
de
Ia
agu(a
I
pare
el
kilo
y
el
material
r
B
Entiebrado
inadecuado
Volver
a
enhebrar
Is
maquina
g
Malenal
tirante
No
estirar
vi
material.
guiarlo
suavemente.
Pie
prensateas
suelto
Voluer
a
li(ar
el
Die
prensatelas.
Material
tirante
No
estirar
ci
material:
gu
arlo
suavemente.
Rotura
he
Tamano
he
Ia
aguia
incorrecro
Eleg:r
el
tamano
correcto
ne
Ia
agula
aguia
pare
el
kilo
y
ci
material.
Fi
1
acidn
incorrecra
he
Is
aguia.
Volver
a
titar
Ia
agula.
Pie
orenuatelas
suelto
VoIcer
a
fitar
el
pie
prensatelsu.
Tension(es(
del
kilo
incorrecto.
I
Volver
a
fiar
Ia
tensionles)
del
kilo.
PIle
UBS
Aguta
gastada
0
torcida.
Poner
ann
nueva
aguls.
El
avarice
diferencial
fi)soo
Filarlo
en
manes
he
I
ncorrectamente
-
Ordulacion
Avance
biferencial
filado
Fi)srlo
en
1
0
en
mas
be
I
pars
incorrectarnente.
materials
he
punts.
Enhebrado
inaoecuado.
Volver
a
enhebrar
Ia
mdquina.
Cosido
o
Grosor
los
agus
incorrecto.
.
Elegir
el
tamako
correcto
be
Ia
agua
puntadas
psra
el
hilo
y
ci
material.
intermitenteu
Agua
gastada
0
torcids.
Potter
una
agu(a
nueva.
Fifacion
incorrecta
he
Ia
agu(a.
VoIcer
a
Ear
Is
agua.
Enhebrabo
inadecuabo.
I
VoIcer
a
enhebrar
Ia
maquina.
Agu)a
torcids.
Poner
una
nueva
agula.
Rotura
TensIonies(
del
kilo
oemasiabo
Volver
a
fi
1
ar
Is
tension(es)
del
kilo.
he
kilos
I
tirante.
F
lacion
oe
Ia
aoua
incorrecta.
Volver
a
colocar
Is
agua.
Carrete
be
kilo
enrehabo.
Colocarlo
adecuabamente
I
La
barra
he
guia
eel
kilo
no
esta
Extender
Is
barra
de
gum
totalmente.
extendids.

—
5.
OPTIONAL
ACCESSORIES
BLIND
HEM
FOOT
Blind
hem
feet
are
obtainable
as
notional
feet
aria
are
available
or
two
szes
0.5
for
tine-nieGium
fabrics
andl.0
for
medium
heavy
fabrics.
Snap
on
the
appropriate
foot
Set
the
stitch
length
4
5
Proceed
as
fol
ows:
t.
Turn
up
the
hem
to
the
required
depth
and
press.
Fold
the
hem
ovcr<
against
the
rig”T
side
of
the
garment.
creanng
a
soft
foid
on
the
wrong’
vine
ot
the
fabric
—
see
Fig.
2
Place
fabric
unoer
the
presser
foot
with
the
‘wrong’
srde
uo
Feed
gre
folded
edge
through
the
guide
in
tne
front
of
the
foot
and
lower
the
presser
foot
lever
Try
a
snch
or
several
stitchesl
on
a
spare
piece
of
the
actual
fabric
and
adlust
the
guide
so
that
the
needle
ust
catches
the
fold.
Adlust
the
gu
dv
by
means
of
the
small
screw
on
the
top
of
the
foot
—
see
Fig.
2.
3
When
correctly
vet,
sew
the
hem.
The
outside
edge
will
be
cut
away
by
the
machine
see
also
Fig
2.
After
completion.
open
Out
and
press
again.
The
stitches
should
be
almost
invisi4e
on
the
right
of
the
fabric-see
Fig.
3
NOTE.
Tighten
upoer
loooer
tension
to
hwy
hem
ray
flat.
Illustration
*
l
.
Final
hem
enqth
*
II
.
Screw
*
Itt
Guide
fli
gI
•
L2
5.
ACCESORIOS
OPCIONALES
PIE
DE
PLEGADO
0
PUNTADA
INVISIBLE
Los
pliegues
0
doblados
de
oantada
invisib’e
dan
sn
acabaoo
ovradero
e
invisible
y
atrorra
hares
dv
teoroso
cosido
a
mann
Hay
dos
tipsy de
pies
dinponibles,
uno
para
materiala
delgados
p
otro
pare
materials
graesos.
Acoplar
el
pie
be
pliegue
dv
puntada
invisible
aproprado
p
fiiar
lx
longitud
be
puntada
en4
5.
Hacer una
pruoba
usando
algds
material
similar
aIde
Ia
prencta
a
cover.
Colocando
el
reverso
del
material
hacia
arriba,
el
primer
doble
o.jede
realizarse
adS
*rw.
como
maaimo.
Con
el
reverso
del
n’.ater
al
hacia
arriba
nacer
cuidadosarrente
ei
primer
pliegue
trayendo
ei
resto
del
materia
de
ix
izquierda
para hacer
un
segundo
pliegae
0
dobiado
en
Ia
parte
superior
cerca
del
bortw
Gel
material
(Ver
Fig.
Con
el
material
asi,
co
ocarlo
debajo
del
pie
prensatelas
de
puntada
invisible,
avanzar
vi
borde
plegado
a
raves
de
lx
gura
enfrente
del
pie
y
baler
lv
palanca
elevadora
del
pie
prensatelas.
Ahora
cover on
par
de
puntadas.
El
hilo
be
lv
agula
lzqurerda
ha de
coger
Ia
eaquina
del
pliegiJe.
Si
es
necesario
alustar
Ia
guia
mediante
e
tornillo
mostrado
en
lx
Fig
2.
Cuando
esth correctarnente
fijado.
coser
ci
oliegue.
e
barGe
exterior
sera
cortado
por
Ia
maqu
na
leer
tambien
Ia
F’g.
El.
Oespves
clv
coserlo.
abrirlo,
las
puntadas
serian
practican’iente
‘nvisibles
en
el
lado
cderecho
a
anversoc
Gel
matenal
IFig.
3
Ilustracion
*
.
Longtud
y
pliegue
maximo
*
tI
Tornillo
*
III:
Guia
*1
*111
Fig.2
*1
Fig,
1
32

ESPAIJOL
ELASTIC
FOOT
An
elastic
foot
is
available
as
an
optional
foot.
This
foot
will
guide
your
elastic
and
at
the
same
time
apply
pressure
to
the
elastic
with
our
specially
desianed
tension
controlled
roller
allowing
you
to
control
the
elasticity
while
sewing,
Replace
regular
foot
with
elastic
toot
2.
Set
stitch
length
at
about
4.
3.
Slightly
raise
the
roller
portion
of
the
foot
and
insert
elastic
tape
between
the
roller
and
the
lower
support
bar
as
illustrated,
until
the
edge
of
elastic
reaches
the
feed
teeth
4
Sew
the
elastic
for
about
one
inch
(3
cm)
m
more
to
conhrm
if
the
tape
is
properly
sewn.
5
Invert
the
fabric
ander
the
foot
and
sew
together
with
the
elastic.
8.
Check
the
otitchea
to
niabe
sure
they
are
correct
and
ad(ust
tension
(tighter)
if
necessary
7
Adlust
the
tension
control
of
fhe
roller
so
that
the
desired
finish
can
be
obtained.
a
Tighter
tension
of
the
rollet
gives
more
elasticity
of
the
fabric
after
it
is
sewn.
P.
Weaker
tension
of
the
roller
gives
less
elasticity
of
the
fabric.
8
When
the
right
Side
of
elasnc
is
not
even
with
rignt
side
of
iabric
remove
the
stitch
finger
(A)
or
change
it
to
sntch
finger
(B).
Decrease
the
number
of
overedge
cutting
width
dial.
Three
threads
overtoch
with
right
needle
or
left
needle
is
recommendable
in
accordance
with
the
size
of
elastic
NOTE.
A
longer
stitch
length
will
allow
more
elasticity
if
desired.
PIE
ELASTICO
El
pie
elhstico
en
dispcnible
corns
un
sapiemento
opdional.
Este
pie
gsiara
su
elastico
y
tambien
atilicara
Ia
presion
al
elastico
con
el
control
de
is
tension
del
rodillo
especialmente
disenado,
permitiendo
de
controlar
Ia
elasticidad
cuarido
ese
cosiendc
Reemolazar
vi
pie
normal
con
vi
pm
elastico.
2.
Fi
1
ar
Ia
longituri
be
Ia
puntada
en
unos
4.
3.
evantar
Ia
porcioii
oe
rodillo
del
pie
y
vise’tar
a
cinta
destiny
entre
Cl
rodillo
y
ba
1
ar
a
carra
soportada
como
se
ye
en
Ia
grafica
hasty
que
e
1
borde
be
elastico
Ilegue
los
oientes
sal
transpoi’te.
4
Coser
a
cwta
elasnca
unos
3
cm
ci
mas
para
confirmar
Si
Ia
cinta
eats
propiamente
cosido.
5.
Inseitar
vi
material
debalo
del
pie
y
coser
luntos
con
Ia
Cinta
elastica
6
Comprobar
las
puntadas
pars
asegurar
San
estan
coriecras
y
ausiar
a
tension
(may
apretadol
Si
es
necesarlo.
7
Aastar
el
control
de
is
tension
del
rodlllo
para
poe
el
acabado
deseado
Se
pueda
obtener
a.
TensiOn
was
aprefada
del
rodillo
da
mas
elasticidad
al
marenal
despues
be
coser.
hr.
Tension
was
ligers
eel
rodillo
da
menos
elastcidad
al
material.
8
Cuanbo
el
lado
derecho
be
elastico
no
estb
igual
que
el
lado
derecho
de
material.
quitar
ci
dedo
de
pantada
(A)
c
carrbiario
a
IS).
Disrninuir
Ia
anchura
de
costura.
La
Overlock
be
tres
BIos
con
Ia
agua
derecha
0
izouierda
vs
recornendado
be
acuerdo
al
tamano
be
elastics.
—7--
A!mvL
HZ
*1
Illustration
*
Tension
control
of
roller
Ilustracion
*
t
Control
de
tension
del
rodillo

PIPING
FOOT
Prepare
a
piece
of
ready-made
piping
(corded
bras
fold
tape(.
Piace
folded
pip
ng
between
seam
edges
with
fold
extending
beyond
seam
hoe
toward
garment
Pin
or
baste
and
stitch
the
seam.
Braid
or
sbbon
may
also
be
used,
either
flat
or
lot
ded
brad
can
be
used
ri
straight
seams
Use
for
decorating
edges
of
001
era, cuffs,
pockets,
etc.
PEARL
FOOT
1.
PEARLS
ALONG
AN
EDGE:
Set
for
left
needle
remove
right
needle(
3-thread
aser
ock
Set
tensions
as
follows:
Left
needle’
4
Upper
looper:
1
-2
Lower
ooper:
7
-8
SEW:
•
Remove
regular
foot:
replace
with
pearl
foot.
•
Remove
stitch
finger
as
you
did
tar
a
rolled
edge
•
Swing
cutter away
to
lowest
position,
close
front
covers
Raise
the
needle
to
it’s
highest
position.
•
Place
pearls
n
the
channel
on
the
right
aide
of
the
foot
with
2
of
pearls
extending
behind
foot,
Take
one
stitch
with
the
hand
wheel
to
secure
the pearls
•
Follow
edge
of
fabric
along
fabric
guide.
•
Sew pearls
on
edge
of
fabric,
•
Return
cutter
to
original
position
when finished,
2.
PEARLS
SEWN
WITH
A
FLAT
LOCI(
STITCH:
FABRIC:
Med
um
weight
woeen
2
or
4mm
oearls
Set
for
a
3-thread
flat
lock,
left
needle
only.
SEW:
Remove regu
sr
foot:
replace
w th
pear
foot,
•
Insert
small
stitch finger
•
Swing
cutter away
to
lowest
posit
on.
-
Raise
needle
to
its
highest
aosition.
•
Place
pearls
n
channe
on
right
side
of
the
toot
with
2
of
pearls
estending
behind
toot.
•
Take
one
attch
with
the hand
wheel
to
secure
the
pearls.
•
Sew
pearls
an
with
the
left
needle
lust
catching
the
fold
of
the
fabric.
•
Pull
flat lock
open
PIE
PRENSATELAS
PARA
TRENZAS
DECORATIVAS
Preparar
uris
p
eza
de
trencilla
(crete
plegada
sesgads
con
0
an
cordon
intenor(.
Calacar
ía
trencilla
plegade
en
at
horde
do
Ion
materials
a
coser.
Suletar
0
hilvanar
y
coser
Is
costura.
Se
pueden
ussr trenzas planes
o
plegadas
ac
ntas
hechea.
Usado
pare hordes
decoretisos
dv
cuellos,
punas,
bolsi
on,
etc.
El
pie
pars
trenza
cusi
viva
este
disponible
como
an
extra
opciona.
PRENSATELAS
PARA
PERLAS
1.
PERLAS
A
LO
LARGO
DEL
BORDE
Pars
filer
Ia
aguía
izquierda
(quitar
Is
agu
a
derechal
a
3
hilos
de
overlook
PIe
lea
tensiones como
so
luatra:
Agus
izquierde:
4
Ancors
superior:
I
2
Ancors
interior:
7-8
COSA:
•
Quite
el
pa
prensate
as
noimal;
reemp
acela
con
e
pie
prensatelaa
pars
perlas.
Quite
xl
dedo
de
puntads
como usted
hizo
pars
el
dobleditla
de
enrollsdo.
•
Fi(e
Is
cuchills
moral
a
su posicion
max
bela
y
cierre
Ia
taps
frontal.
•
Lessnte
Is
egue
a
su
pasician
man
sIts.
•
Colaque
lea
panes
en
Ia
ranura
en
el
lado
izquierdo
del
pie
prensateles
con
4
cm
de
panes
entendiendolas
atras
del
pie
pransateiss.
Case
uns
puntads
con
e
valante
pars
suletar
las
panes.
•
Siga
xl
horde
del
material
a
10
Isrgo
us
Is
guis
del material.
Cosa
las
panes
en
el
horde
dv
matenal.
Regnese
Is
cuchilla
asu
posician
ong
nel
cuando
termine.
2
PERLAS
COSIDA
CON
PUNTADA
DE
COSTURA
PLFNA
MATERIAL:
To(ido
de
peso
media
204mm
pares
Pars
tIer
Is
costura
Plans
a
3
hilos,
salemante
use
Is
agula
izquisrds,
COSA;
•
Outs
01
pie
pronsatelas
norms: pangs
ei
pie
prensatelss
pare
perle.
•
Inserts
el
dedo
de
puntada
pequeno.
Fi
1
e
Is
cuchills
movil
a
su posicion
reds
bras
Lesente
Is
sgus
5
5U
posiclan
men
sits,
•
Co
aqua
Ian
perlss
en
Is
renurs
del
lada
derecha
del
pie
pronnetelas
con 4
cm
dv per
las
eetendiendolas
atras
del
pie
prennateles.
•
Cons
Uris
puntads
canal
solante
pars
suleter
Ian
pares.
•
Coas
Ian
perlsa
con
Is
agua
izquierda
sgsrrando
el
duklado
del
material.
34

—
.q
L
iir—j
—
I]
GATHERING/SHIRRING
FOOT
Tension
settings
for
gathering
-
Left
neeOle
4
Differential
feed
2 0
Right
neeale
4
Stitch
length
4
UnDer
i000er
4
Lower
looper
4
2
Reolace
regula’
presser
foot
with
gathering
toot.
3.
Clip
both
fabric
layers
approximately
5r8
I’
.h
cm.)
inside
and
1
1
2’
4
cm
I
down
Lih
front
of
presse’
foot
to
place
taDric.
4.
Place
fabric
to
ox
gathered
unoerrreath
the
presser
foot
Place
fabric
whicri
wilt
remain
straight
between
presser
foot
arid
,ower
metal
niece
Push
clipped
portion
through
slot
in
foot
Lower
presser
foot.
5
Turn
nanawheel
to
make
4-
5
stitches
in
the
fabric,
making
sure
to
catch
both
upper
and
lower
layers.
6
Serge.
Use
both
hands
to
guide
fabric
one
on
the
under
layer
of
fabric.
Keep
in
mind
that the
lower
piece
of
fabric
will
mone tooter
as
It
is
gathering
than
the
top
piece.
I
lastrunon
-
Fabric
to be
straight
Fabric
to
be
gathered
PIE
DE
FRUNCIDO
1.
Fquo;on
de
tension
para
frurtcir:
Aguia
izqu
erda
4
Transporte
diferencui
2,0
Agula
derecna
4
Loigitud
ax
puntada
4
Ancorasuperor
4
Anoora
inferior
4
2
Came-are
pa
Dreruatelas
regular
con
el
pie
oe
fruncido
3
ocer
ameos
materials
uproeimadamente
5
8
1.5
cml
a
2
4
cml
abalo
Levantar
a
carte
trontal del
pie
pensate.an
cure
colocar
el
material
4
Colocar
a
material
qua
Se
france
debu
1o
del
pie
prensutelas
Colocur
el
material
que
aueda
reoto
entre
el
pie
prenuatelau
y
piece
on
metal
be
abate
Empular
porcion
cortadu
a
traaes
be
a
abertara
dx
pie
Bejar
el
pie
orensate
as.
5
Direr
at
volante
pare
coser
4
-
5
puntedas
sobre
xl
material.
6.
Sobrehiler.
User
embos
macos
pare
gular
el
material.
uno
sobre
e
material
be
ebato.
Cuidarse
qua
el
material
de
aba
o
ox
movera
mas
rapido
que
ei
otro.
ustrec
on
I
Material
qua
ne
mantiene
recta
2
Material
que
xx
france
35

—
NEEDLE
THREADER
I
Thread
Tie
cuide
of
n000le
barhO
as
illustrated.
Raise
the
oresser
toot.
Raise
the
needle
bar
to
highest
position,
ass
pull
the
thread
teasing
about
4
tO
cm)
clear.
2.
Lower
tne
presser
foot.
Set
the
seed
tsroader
ensuring
the
hooking
tork
enters
into
toe
flees
e
iiole
3
Hotd
the
thread
with
the
needte
threader
with
your
hard.
4
Guide
the
thread
into
hooking
tork
and
pull
the
thread
wth
your
other
sand.
S.
Move
the
needle
threader
backwards
ulightly
Then
release
the
sand
which
is
pui
ing
the
thread.
6.
Take
the
needle
threader
off
the
neede
ciamo
7
Pull
the
thread
away
from
you.
ESPAOL
ENHEBRADOR
DE
LA
AGUJA
Auanzar
el
hoe
traves
do
a
gum
del
Silo
do
graoa
de
agua
detanso
uses
10
cws
extra.
Loeantar
el
pie
orensateias.
Lovantar
Ia
earra
be
aguja
a
a
posicion
was
alta
y
titer
el
Silo.
2.
Ba
ar
et
pie
prensate
us
Colocar
e
enhebrador
de
Ia
aguta
asegurandose
sue
a
horouilla
de
enganche
entra
en
ei
ole
do
Ia
agu
1
a.
3
Guarder
el
Silo
con
e
eshebrador
de
Ia
aguia
Con
as
mane.
4
Guiar
ei
Silo
en
a
horquilta
do
engancne
firer
e
hue
Con
50
otra
mono
5.
Mover
el
enhebrador
do
a
agula
hucis
atras
lugeramento.
Entonces
soltar
su
macb
que
osta
tiranoo
el
Silo.
6
Guitar
01
eshebrador
do
lx
agu)a
do
Ia
graoa
do
agua.
7
Tirar
01
Silo
hacia
atrks.
(For
right
needle)
(Para
Ia
aguja
derecha)
>
(For
left
needle)
(Para
Ia
aguja
izquierda)
36
Transcripción de documentos
— _J _L, IjLJ IMPORTANT SAFETY INSTRUCTIONS” en using an electrical appliance, basic safety precautiona shou d always be followed, including ‘OiiOWifl. Id all nstructions before using this sewing machine: )AJJ G ER— To reduce the risk of electric shock:’ his sewing machine should never be left snattenoed when plugged ri. Always unplug this ewing machine from trw electric outlet immedstely after using and before cieanirig ,lways unp og before reo acing ght bulb. Replace buib with same type rated 15 watts VAR I4 IJ G —To reouce the risk of burns ftc. electr c shock or irrlurv to persons’ Do not al ow to be used as a toy, Close attention is necessary wnen th a sewing machine is .sed by or near chilorer,.’ Joe this seneng machine oniy for its ntended use an descr bed in this manual Use orvy tttacftments recommended by the manufacturer as contained in trim manua.’ Ofever operate this sew ng machine fit has a damaged cord or piug, it it is not working roperly. if it has been dropped or damaged, or dropped into water. Return the sewing riachine to the nearest authorized dealer or service center for esamirration. repair elect ricai or nechanicai adjustment” ttever Operate the new ng macnine wit’i any air openings bloceed Keep ven’,iatiOn openings if the sewing machine and foot control free from the accumulation of lint, dust, and loose ‘10th. ‘feeer drop or insert any oblect into any opening. Jo not use outdoors Jo not operate where serono .sprayl products are be’ng used or where oxygen is being ibminiotered.” o disconnecf. turn switch to the off (“0 ) position, then remove plug from outlet.” Jo not unplug by pulling on cord. To unplug, grasp the plug, not the cord.” (eep hngers away from all moe ng parts Speciai care is required around the sewing machine ieedle.” iways use the proper needle plate. The wrong plate can cause the needles to breac.” Jo not use bent needles )o not pull or push fabric while nttching. It may deflect the needle cane ng it to break lwitch the sewing machine off i”0”I when making any adjustments in the needle area, such o threading needle, changing needle, tnreao ng loopers or changing presser foot. etc.’ ways unplug sewing machine from the electrical outlet when removing covers. Lubricating. when making any other user servicing adlustments mentioned in the instruction manual A UTI 0 JnrJ — Moving parts—To reduce risk of injury, switch off before servicing. Close cover before operating machine. “SAVE THESE INSTRUCTIONS” “This product is for household use, or equivalent,” IMPORTANTES INSTRUCCIONES DE SEGURIDAD Cuanbo se usa un aoarato electruco. debe seguirne unas prccaucioncs basicas y poe vienen incividas a contrnuacieh. Leer ias instrucc ones antes cc usar Ia maquina dvi cotter. PELIGRO Pars teducit ci riesgo de uris descarga electruca. La maquins no debe deiarse nunca desatendida mientras eate conectada Desconectsr lvi maquina he Is red elcctncs inmediatamenle despues de su use y antes he umpiarla. — 2. Desconecrar Is maouina cc ia rec sores Ce camoiar is oombills Coiocar ur’,a bombilla ad mmmc hoc cot’ una potencia cc r 5 Watios C UIDADO Pars rehvcir el riesgo dv quemaduras fuego descargas electricas a csusar danos a oersonas No ussr Is maouins corno un luguete Presrar snencion Si h.iese nccevario cuando is maps ha esra siendo Jsaoa par nir’ros 0 cerca On ellen. 2. Ussr Is maqumna Ce coser solamente come Se oenctibe en cure marruvu. Usar vnicamente los accevoruos recomenbados pot ci fabricante y que vienen especif csdos en — I cafe manual. 2. No frabaisr nurica con Is macu la en caso de cue tengu el cable a el enohufe cii malab coroiciones. vi no cone correctannerrte er case cc que se hays caio haya sioo danada 0 Sc trava maiado 4 No usar Is maqumna con los orihcmas be vent lacibn b oquesdos. Mantener on onficios be ventilacion he Iv rnsqumna de coser ye pedal sin acumulacion he p01cc. sucierlab y resfos de tef’do 5. No introbucir no inserrur cb)etos en los orificios de ventilacuon 6 No user al sire imbre. 7. No ussr rriienrras se esten utilizsndo proouctos aerOsoies spray) a en lugares donbe he este administrando ocigenc. 5. Pars desconectar girar ci unferniptor heats Ia posic on Off (“0”). luego desconectar c enchufe de Is red. S No ocscor’ectar el enchufe tiranco dcl cable Pare desconcctar, tirar Ce is devils. no del cable. 0. Martener los decos alemados be todso las panes nov Plea dciv mdo,ina. Tener an cumasds especial con is agua. 1 Ussr niempre is place de agulas apropiaba. Una placs he 5itUl55 umoropia puede prcducir Is rotura he Is agula. 12. No ussr sgulas oesourrradas ‘3. No presionsr 01 tirar del taco mientras hd ems 005icrroo Estc podria dobmar Is agua y rornperia t4 Situar ci interrupter principal he Ia maquina en posicihn Off ( 0”) cuanbo se realice algun a ustc 1 en e ares he Is agua come enheorar Is sgula. csmbiar lv agus, hilsr ancolas cambiar el pie prensatelas y similares r5 Desconectar siemore is maouins belated eiectrics cusndo Se retiree ias tapes, pare lubricar c cusndc be malice aigun Otto tipo cc afuste mecanido mencionado en ci manual oa insfrucciones. CONSERVE ESTE MANUAL DE INSTRUCCIONES Esta máquina de coser es para usa doméstico. TABLE OF CONTENTS INDICE DE CONTENIDOS I. KNOW YOUR MACHINE Identification chart Accenaonen Setting up your macnineS Preparation for threading Changing preaaer feet. Cf Needle thread and fabric 1. FRINCIPALES PARTE,S GE LA MAQUINA 8-6 7 8 2. STARTING TO SEW Threading yuui-machine t-ieiprai nints Teat ntdch oneriach atitchen Sernngchart Three-thread cuerlanir with one needle Narrow and rolled new, picat stdca ushng threaa tenaiann 1 Ad Adjusting stitch length. Aduating oneredge caning wid Stitch finger 181 (Narrow) Differential teed Font pressure regaiam Sewing with eetre aeanyweght fabric or multiple layers of fabric Basic tenhnipuea Turning outside corners without cuffing threedu, Turning corned edgen Remaning stitches from newn fabric Corded one rionli Denaratine effects Differential feeo applications 10-12 13 14 in-Id r7 18- 19 20 21 22 22 23 24 24 - 25 25 26 27 28 “—“ 3. CARING FOR YOUR MACNINE Replacing moning cutter, Disengaging wourng caine Rewaning lace cone Cleaning and oiling 29 39 3D 4. CHECKING PERFORMANCE PROBLEMS 5. OPTIONAL ACCESSORIES 31 32 SPECIFICATION OF MACHINE Laawner at tnreads 3 ore tnreads [pyfffpdnp,ytirns wiggtjm lien needle) end3.8wp(jpn(eedle jppgie HA1-SP, HA I li30l705H)’ Catch lepggt,,,,,, 1- bmw Stitching speed Up In t3an stitches nar rninnre Dimensions 33n mm(w) 7280 mwiD) 280 nrw)H rwaignr BRan (176 lad — .‘. - 3ó Cambia del pie prensetelas, Mactar Materials, hilan y aguen 2, EMPEZAR A COSER Enhebrer so wanarna Suoerencias de anode Cawprabar Ins uonrehiladoa Table De filacian Soarenf eons de cnn hilns non one agaa”’ Dabledilledan enrolladon. estrenhas yoe farm Ajaster las tensianes de Ins hilan Ajaster la longitad oe panraoa. Ajaster Ia enchura ae le casrare Dnda de pantede (8) Trensparfe aiferennial Regiador de prenion do pie Caser can materiel de genera graesa n capes waltipea de materiel Tinnines bbsices Direr ei materiel sin carter Ian hilas, Direr Ian borden narvedan Eliminer las sabrehiledan del material casida Pespante esnardaneao Planrns decarerinns Aplicaciones del Irenapane difernnniel 3. CUIOAOOS PARA SU MAOUINA Cemnier le nannilla macu Desengrener la nanhille macil, Gaiter Ia cabienafrantel Limpieze p engrane 4. VERIFICANDO LOS PROBLEMAS 08 EJECUCION 5, ACCESORIOS OPCIONALES ESPECIFICACION DE LA MAQUINA i Peale 3a4irilsn dwmla aain cmido 3.8wipjaqpjauernrn,,,, HAl-SF. HA 1 Il3ai7OnHl 5-6 1D- 12 13 Id 18 16 17 18-19 3D 21 22 22 23 34 24 - - 28 28 26 27 29 39 39 3D 31 32- 3-6 1. t.NVW YUUH MALHIN IDENTIFICATION CHART 1. PRINCIPALES PARTES DE LA MAQUINA NOMENCLATURA DE IDENTIFICACION 15 •[cjIc WORKING TABLE OPENED. •*1L[é14 TAPA FRONTAL ABIERTA 1 2 3. 4 5. 6 7. 8. 9 ID. It t2 3 14 Foot pressure regulator Sewing ght Presser foot lever Needle pate Presser foot Overedge cutting width dial Work rtg tab e Thread guide pole Left needle thread tension control Right rreeaie tnead tension contro Lower l000er thread tensioi control Upper looper thread tension contrOi Need e thread gu des Theadirio coed 15 16. 17. 18. 19 20. 21 22. 23. 24 25. 26 27 28. Foot control Release lever Foot release lever Spooldsc Stitch length dial Differential feed control lever Hand wheel Plug contractor socket Light and power nwitcn Front cover Moving oilIer Upper iooper LOwer iccoer Core guioe 1 2. 3. 4 5 6 7. 8 9. ID it. 12. 13 14. 2 Regolador de presion de pie Luz Palarica e evadora del prenaatelan Place de a agula Prennatelas Dial da anchura de costura Mesa dv trabalo Barra dv porte carretes Control dv Ia tension del 1-i o zquieea Control de Ia tension del 5 10 derecfla Coritrc dv Ia tension del hilo infeno Centre de Ia tension del hilo vupenor Guia del Silo be Ia aguia lristrucciones de enhebrado on ia agula de In agufa eel ancora eel ancora 15. Reoatato 16. Pa anca de noftar Ia tapa t 7. Palarica de desprend miento prennafelan t8. Placa pare oroiongacion 19. Dial de longitud pantada 20. Palarica de control del avance diferericial 21 Volarite manual 22. Cavva eel enchufe 23 ltrerrcoto de energia ft uz 24 aDa frontal 25. Cuchilla cortadora rnovil 26 Anccra suoerior 27. Ancora inferior 28 Gum del cordbn ACCESSORIES ACCESORIOS Ad parts isted may be obtained from your nearest dealer Todas as piezas istadss se puede obtener en su diatriburdor maa proeimo. Stitch finger (B) (See page 22) Needle set Bryan Screw aneer (large) Screw Sr ver (smal) Machine cover 7 Oiler S Moving cutter 9 Soanre 10 Spoolnet it. Tweezers 12. Spool disc 13 Spool holder Accessory oag 2 3. 4. 5 6 1. Oedo oe puntada iB iVer pagira 22) Agu as Cepi Ia Destorrsllsdor (grands) Destorodador )pequeno) Coierta Sea maquina Aceiteas Cichilia cortadora movil Lace Mallas do carrete Pinzas Plca de prolongacior PotacoflOs Bosa de accesorio 2. 3 4 5 6. 7 8 9 10. 11 12 3. 4 4-’ 5 ‘-I H 12) 14) 3 .-pp SETTING UP YOUR MACHINE 1. Wipe off excess oit in the needte plate and bed areas. 2. FOOT CONTROL Push foot control plug into connector socket . and connect the power line ptug into power supply outlet. 3. POWER / LIGHT SWITCH Your machine will not operate unless the power/ tignt switch a turned on. This same switch controls both machine power and sewing light. When leaning the machine unatten ded, or servicing the machine, remove the power line plug from supply outlet 4. OPENING FRONT COVER To open front coeer, pull it to the right and down towards you. POLARIZED PLUGS CAUTION (USA only) This product is equipped with a polariz ed alternating current line plug (a plug having one blaoe wider than the other). This plug witl fit into the power outlet only one way. This is a safety feature. tf you are unable to insert the plug futly info the outlet, try reversing the plug. If the plug should stit fall to lit, contact an electrician to replace the obsolete outlet. Do not eYe feat the safety purpose of fhe polarized plug. Use Yarnamoto Electnc, Model VC-482E with this sewing machine. MONTAJE DE SU MAQIJINA 1. Asegurese be I mpiar Ia zona be Ia placa dv Ia agua y Ia placa base astas dv coser Sn nestido. 2. CONTROL DEL REOSTATO Enchufar Ia clavi a de control del reostato en 01 conect 1 or situado at tondo en et lado derecho dv Ia maquina 3. INTERRUPTOR GE ENERGIAILUZ Sn maquina no luncionara a menos que el riiterruotor de energia/Iuz vale convclado. Este mismo interruntorcontrola taste Ia tens an he a naquina come Ia lus dv que esta cosiendo. Cuando byte be coser, a maauina debe estar desconectada completametv Cuando veto utilizando Ia maquina dv cover para quitar ian cubierlas 0 cambiar Ia lampara. a maqui na DEBE estar desconectada dv Ia ted electsca sacand o Ia ciavita del enchute. 4. APERTURA GE LA TAPA FRONTAL Para abrir Ia tape frontal. tue dv ella Ia a derectta y hacia usted. 5. ABRIR V CERRAR LA MESA DE TRAB AJO Para direr Ia mesa Ge traoa o brat Ia oalanca dv soltar nacia 1 usted con su mano derecha lenantando a pane frontal del pie pronsatelas con an mano izquivrda. ltusfracion 5. OPENING WORKING TABLE To open working table, pull the release lever towards you with your right hand, and swing the table to the left. Iltustration • * I It III: tV V . * * * 4 Connector socKet Power/light switch Release lever Working fable Front covet HL * * * I tt S V Convctor sduado irtterruptorerivrgialluz Patanca dv soltat Mesita dv trabajo Tapa frontal \/ pp LIiW PREPARATION FOR THREADING PREPARACION PARA EL ENHEBRADO THREAD GUIDE POLE BARRA DEL PORTA CARRETES Pull up thread guide nole to the nighest point untf you hear it click. Place thread soools on pins and draw thread through thread guides on the pole from rear to front. Thread guide of pole can hold thread spools on the spool stand by pulling down the pole as illustrated. Illustration * I ft Thread guide Thread guide pole Extender Ia barra gula del hilo a su punto mas alto trauma gue escuche un click. Colocar los hilos sobre os pasadores as las guias desde atras 51 frente. La barra del porta oarrefes puede mantener los kilos sobre los pasadores de los carretes tan soio baiando a barra hacia abaio coma ilustrado. llustracidn * * I II Ojo-guia del hilo Barra-giiix del hilo 5 4ItL’1 ai . SPOOL CAPS FOR DOMESTIC TYPE SPOOLS TAPAS PARA CARRETES DE HILO DOMESTICO I Place spool cap on top of spool so thread doesnt get caught on edge of spooL SPOOL DISC AND SPOOL HOLDERS FOR CONE SPOOLS For lame cone spoors use the rubber spool holders witn toe wde end at toe too, usc for small ones. use the same rubber soool holders out with toe narrow end at the top. PLACAS DE PROLONGACION Y PORTA CARRETES PARA CONO DE HILO INDUSTRIAL Sara carretes conicos grarces user os oorta-car’etes be goma con el oorde ancho err Ia pace suoerror y oars los pepuenos usar los rnismos por-ta-carretes Oe goma parc con e borne estrecho en Ia pace superior ‘I, * SPOOL NETS MALLAS DE CARRETES Polyeste or buky cylon threads become loose while unwinding. To keep consistent feeding of Ouch threads, utilize spoo net sleeving over the spool. Los carretes de hilo de poliester (hlatresfo, 0 hi’o be ny on trabafan mayormente fuera del pssador del carrefe durante el cosido, provocando enredos o on avance irregu ar de hilo. Pars presenir esto, usar Ia ma Ia del carrete suminmstrada pars mnantenem el carrete en so ugar como se seen Ia ilustracidn. I ustration Spoo cap Domestic cotton reel Cone type thread * Spool holder * Spool disc * Thread comes off the top *\Itt: Net *ifl Tom up * tX: Spool * * * I II fit. tV V. VI: fustracion * * * * * * * 6 Tapa del carrete Currete de hilo dornestico Cono de hilo industrial Porta-carrefe Placa El kilo provoca enreclos o on advance itregular pal kilo VI Malla flit: Colocacidn oe Ia rnalla IX Carrete t II ifi IV: V : VI *iv V *. . *Vll 1 CHANGING PRESSER FEET CAMBIO DEL PIE PRENSATELAS Be sure needle is in the as pos:tlon Aseourarse de Due Ia aguia este en a Dosicton superior. Alzar Ia palanca del Die prensatelas. Raise presser foot lever. 1. Push toot re ease lever to remove the foot 2. Place tne oesireo toot on the needle plate aligning neesie 3 Lower the presser foot lever and pusn foot release ever so holes. tnat the foot holder snaps on the foot I Ercsuar a palanca oc oesprendirniento sensateias sara sacst el prensatelas 2 Co scar el prensatelas deseado sobre Ia placa Ce aguas alinesndo los agiJleros e Ia agula. 3 Baar Ia palsnca del pie prensatelas, y emouiar Ia Ca anna dv despreridimienfo prensatelas de manera guy el sutetador srensatelas so metre de golpe en vi prensatelas. 4 CHANGING NEEDLES MONTAR LA(S) AGUJA(S) Raise needle bar to its highest point by turning hand wheel towards you. but leave oresser foot down Loosen needle clamp screw to remove the needle, and place new needle with Flat Side Away Fmm You, into the needle bares tar an it will go. ace tighten scmw. Levantar Ia barra de as agujas haste so punto roan alto girando vI volente manual hacia usted, pero dele vi pie orensatelas abajo Destomillar el tornillo do Ia aguja con el destornillador oeooeco pare guitar Ian agujan vielas Colocar as riuesas agulas con el LADO PLANO. LADO POSTERIOR en Ia ranuta de a bana subiendoia a tooo io quo puede. Acretar I rmerrrenre e torniiio clv nuiecion oe Ia agufa. Needle screee are labeled II ustration * * * I ft Ill for left and Foot release lever Needle clamp screw Flats de away from you. for right need e I untraclon * * * Ii Ii Direr haste srriba Tornillo do filacion de Ia aguls El lads piano, ado Dosterior. *11 *ffl 7 NEEDLE, THREAD AND FABRIC CHAR T MATERIALS, HILOS Y AGUJAS Use HA> tSP, HA’< 1l130/705H( Needle s. FABRIC COTtON LINEN THREAD Light weight: Organdy, Lawn, Gingham Heavyweight: Oatotd, Dernm, Cotton Gabetdine Light weight Tropical, Wool, Poplin SYNTHETIC FIBRE KNIT NEEDLE MATERIAL Cotton No, tOO — WOOL Ussr opus HA>: iSP (poets bola( Serge, Gabardine. Flannel MEDID UNO Polyester No. 60 50 Cotton No, 60 - Polyester No 80 Gortari No 60 Polyester No.80 -60 Cotton No. 60 Heavyweight’ Veloars, Cantelhair Astrvkhan Polyester NO.60 50 Cotton No.90 UgOt weight. Georgette Crepe. Voile, Satio Polyester No. tOO -80 GoOse No.120-80 Heavy weight. Taffeta. Twillo, Denim Polyester No, 60 Cotton No. 60 Tricot Polyester No. 80- 60 Cotton No. 80-60 Jersey Polyester No. 60 50 Cotton No. 60 90(14) tsr general sewing LANA 75 lit) Or llgnt weight tabeCs FIBRE 0 130/7OSH S. HILO Geners Irgero Organdiea, Lion. Carraoian AGUJA Alg000rr 50 100 *Géyero toette Poliester NO 60 5 Ootord, Macon. Algodde 50 60 Gabardrea de aigodOrr Genero ligarO Tropical. Lana, Popslin Poliester N° 80 Algnddn 5° 60 Gabardina, sarga do soda. Flanela Poliester NO 80 -60 Algooórr N° 60 GGnero fverre Panas, Astracdn, Pelo do cateello Foliester 50 60- 50 Algoddo NO 60 Gdeero ligero Greopon georgette, Satdn nelo Poliester N° 100 -80 Algoddn 5° 120 -80 Gdnero tuerte Tateta, Mason, Sargas 90 (t4) para cosido general 75 (It) para rnaterialu do genero ligero Polienler 50 60 Aigodon 50 60 - Trisot Poliester NO 80- 60 Algodde NO 80- 60 Jersey Poliestor 5° 60-SO Algodon NO 60 Lana Poliester NO 60- 50 Nylon graces - Wool * Synthetic threads are recommended for ordirtary overlooking. Polyes ter thread, for esampie, is sery usef vi for different types of fabric. NOTE: seep itt mind that the lower and upper loopers will use about twice the amount of thread as the rreedieo. When purchasing threso for oewrng, especia lly if it is an unusual color, you should buy sufficient for your requirements. 8 PUNTO Polyester No.60-50 Bulk Nylon * Los hilos sinldti005 ne recotrr ierrdan pars pespuntes corrientes. El Silo Ge polienter, por eyemplo, es muy dtil para diterentes tipos de materialo. Nota I Se terrdrG en cuents qua las ancoras supenor e inferior unar8n el doble de cantid ad Ge Silo poe el hilo do Ia ogula Cuando compre Silo para cooer, si es Ge iJrr Color OC0 usual, debe comprar suficiente para sus necesidades. 2. STARTING TO SEW 2. EMPEZAR A COSER THREADING YOUR MACHINE ENHEBRAR SU MAQUINA Wrong threading may cause skied stitches. breaking threads, or other problems. Un inst enhebrade ecede originar puntos sueltes, rotura del hue y Otros prod emas. Trate de dominar ci enftebrado correcto antes de meeerse en las pruebss as cosudo. Try to master the correct threading before moving on to test sewing Threading must be carried out in the sequence of Upper Looper Lower Looper Needles. — — Open the front cover and the woreing table. Raise needles to fs tiighest po 0 by turning trana Wheel towsras you, and raise the presser foot Before re-threading lower looper, remove thread from needle eye hmt then re-thread the lower looper. This wi I orevent tang ing. NOTE. Thread tension is released when trw oresser foot is iifteo up. We always teach to thread upper, ower, Right needle, Left needle and that is how we did the video also. To switch the order will be confusing. THREADING UPPER LOOPER 1 Feed the thread through ti-ic thread guide as illustrated. 2. Poll the upper thread through the slot. Holding the thread with your aft hand, pull down with right hand f rmly 3 Draw the thread through the thread guide as illustrated. When tnreadinig accord ng to the instruction, upper looper thread pass the n’nesd guide IA) automatically after rotating nano wheel. El enhebrsdo cc debe realuzar en Ia secuencis dec10 guia inferior-cue guis super or sguja. Pars re-errhebrar ci oo inferior. Abnur Ia taps frontal y Ia mesa be traoaio oe anremsno. Levanrar a barrs Os aguja hasta su panic man site gurarido ei vciarute con a mane baste usted, y uevanrar a pie prensateiss. Quutar el bib del oto be Is aguja prurriero y lasgo re-ennebrar ci ofc nferor. Esto prevendra ci enredo. NOTA: ENHEBRAR EL ANCORA SUPERIOR Nh- I. Avsnzsr ci hi 0 a rravhs be Ia guis del hue come se ilustrs. 2. Conoucur ci bile a trases be is ranurs, asegursr’dose cc que ci kilo pass entre los dscos cc tension retemendo ei hue con su mans zqauerda y ruranoclo furmemente hacia sba o con su mane 1 derecha. 3. Tirar ci kilo a tu’aves de Ia gaie del hue come ilustrado. Cuando enhebre is mequina de 50051db con las unstrucc.ories. Ia ancom superior pass nor a guia del kilo (A) sutemaricamenre, despaes cc retar ci eoiante manual. 4 4. Psss the thread through wire thread guide and looper eye, leasing an escess ength of sbout4” (10cm). 10 us rensuon del kilo se saeha cuando levanra ci pie prensateias. Pasar ci kilo a ti-seen de Ia gus dci hulo y a ejo be Ia encore superior oelsndo uns longutud be mss be unos loom u0:\ THREADING LOWER LOOPER Feed the thread through the thread guide as illustrated 2 Puil tie ower triread through tens.on siot. Ho ding the thread with your left hand. puit down with right hand hrrniy 3. Draw the thread through thread guide as iHustrated. 4 b Pass the threao through lower looper eye and hook It around part Ads indicated by he arrow Leave abou: 4 (tdcm eetrs thread. Lower looper thread always lays on ton of upper looper ENHEBRAR EL ANCORA INFERIOR t Avanzar a hilo a traves de Ia gus del hilo corno se ue en Ia I gura. 2. Conducir SI hilo a trabes de Ia ranura, asegurandose de qua el hilo pane entre on discos de tension, retersendo el hi o con nit mano zquierda y I rando o haa abalo con so mano derecha firmemente. 3. Trar el hilo a traaes de Ia gua del hi como ilustrado. 4 . 0 Panar el hilo a traces del 010 del encore infehor y engancharlo alrededor de a pieza A como se indioa con a fiecha, Deiar urros 10cm oe bib estra . - 11 THREADING NEEDLES 1 2. Draw the needle threads through right needle or left needle tension . 3. Draw the thread through the thread guide as i ustrated. 4 Thread the needles fron front to back through needle eye and pull the threads towards the back passing along the right side of presser foot easing ai extra length ofsbout4 (10 cm). NOTE Thread tension is released when you pull the tension control knob NEEDLE THREADER (OPTION) Needle is fhreadeo easily by needle threader. (See page 36.) Illustration 12 ENHEBRAR AGUJAS Feed the thread through the thread guide as itustrated. * I * II When using normal or thin thread. When using thick thread. I Avanzar xl hi o a traces oe Is guia del kilo come se ilustra 2. Conducir los hilos aseg urandose de que xl hue pase entre los disco s dx tensiOn. 3. Tirar el kilo a traces do Ia gura eel kilo come save en figura. 4 Enhebrar las agulss desde ei frente a Ia parte posterior a traces del OfO dx Is agufa. y tirar los kilos hacia atrbs pasando a In large del lade derecho del pie prensatelas defando una longitud extra de unss 10cm. Nota: La tension del his se suelta cuanclo nrc xl control de tension. ENHEBRADOR DE AGUJA (OPCIONAL) La agu a cx enhebra facilm ente enhebrador de 1 agu IVer pagins 36.( a Ilustracion * I II . . oor el Al usar xi hOc normal o fino. Al user xi kilo grueso HELPFUL HINTS SUGERENCIAS DE AVUDA REPLACING THREAD SPOOLS REEMPLAZAR LOS CARRETES DE HILO When replacing thread spoof a. the following steps may be helpful for quick changeover. Cuando se reemplacen los carretes dx kilo, pare un cambio rapido. I Os niguientes pesos pueden ner utiles. 1. Cut off existing threads near the spools. Tie the cut thread ends from new spool s as illustrated (seaman S knot). 1. Coder los hilos eaisterttes cerca de Ion carretos. Ate ox borden cortados al bile de los nuexoa carreres corrro lustrado. (Nudo de marineros) 2 base presser foot. 2 3. Lower needle bar to its lowest posit on by turning hand wheel AWAY FROM YOU CarefuIy Pu the enistng threads unr, the conneocng knots pass through needle eye and looper eyes. Levantar ei me prensatelas. Ba a r is barra do agula ala oosiciorr mas eaja oiranoo e 3. 1 volante marualmente er sentido de a costura. Tira cuidadosamente de los hilos esistentes Santa que los hudoS de coneaion pasen a traves be oj 0 de Ia agua y a ancors. CUT11NG NEEDLE THREAD CORTAR EL HILO DE LA AGUJA Frayed thread may make needle threading difficult. Draw the thread passing under the mov ng cutter and turn hand when towards you to obtain clear cur end as illustrated. Un h,lo deahilachaxo puede hacer dificil e onhebrado be a sgufa. Tire del kilo hasta que posicione debaio be Ia cuchilla movil y gire 0’ solante manualr’iente en sentido do Ia cOstura para obtener us code Iimpio como I ustrado. *1J 13 TEST STITCH OVER LOCK STITCHES COMPROBAR LOS SOBREHILADOS After threading is complete use a scrap of fabric that you plan to sew and test to sew in the following order Desoses de que ci exhebrado se complete, user ax material similar que piense coser y verifiq ue las puntactas en el siguiense ordex: Gently pulling all the threads so the left, lower the presser foot Rotate the hand wheel towards you few a tinies to see if the lock stitches are oroperly formed, 1 Tiraxdo suaaernente de sodas los rubs a Ia izquierda bajar el pie prensasalas. Girar el volante manua l hacia usted uses pocus veces pare aer Si el sobrehulado estd tormadc adecuadamente Fig. 1 2 Start the machine at low soeed and feed in test tabric usder the presser foot by slightly pushing is forwar d. (This can be done with the presser foot down on most fabrics except butrv materials.( Guide the fabric gently as machine autom atically feeds the materiai. 2. Arrascar Ia mactuina a bula velocidad p avaxzar ci material oe prueba debaf a del pie prensatelas tirando ligeramesse hacia adelante. Guiar el materual suavemexte rnientr as Ia rnequma evanze automaticamente el material 3. Check thread tenssns by test sewing on spare fabric (See page 20- 21.) 3. Cornprobar las tentiones del hilo mirand o el cosido en el material de prueba. (Var pagina 20- 21) 4 4 At fabric end. contirue running runnin g machine at low speed. gently pulling the fabrc toward s the back, until about 5 to 6 cm or extra lock stitches are produc ed without fabric. Cut thread with Scissors. Al final del cosido del material. continuar con Ia mdauisa furcionando a data velocidad tirando suavemente ci material hacia a parte oe utras. haste conseg uir anos 5 a 6 cms. de sobrehulado. Fig. 2 Carte el bib con tilerau. Fug.3 14 TABLA DE FIJACION r Numero de hilo I 4 Dial tie anchura de costura 3 6 - 6 - 4 Dedodepuntada 5 - Hilo aguja derecha Nib ancora superior Hibo ancora inferior Controide bongitud tie 4 - - - - - -4 4 - - 2.5 3.5 - Nr, tie ref. 4 - - -4 - 4 - - - - 2.5 0 - - - 4 - 44 3.5 - - 0 - - - 4- 8 4 - - - 3 - 8 - 21 - - - - 3 - 2 4 4 - - 5 2 Note: Los nurneros tie arruba tie tensitin tiuai tie v anchura tie costurs son nara an sobreh4ado general. On penueh guro o meiorara sus pespurutes en muchos casos. La InformaciOru suguente as serd muy util Girar dual tie anchura tie cottura (Var odgina 22). 2 Ajuistar tens ones tie aguja cuantio nose materiel grueso 0 fino. 3. Roducur los tensiones cuando nose con el hub grueto. 16 4 6 Derecha - - - - 27 4 - - 4 - 2.5 - - R - H - 4- - - - - - - - 4 4 P - I © Costura piano Página de referencia 4 - a oaguja izquierda Control de tension - )zquierda y derecha lzquierda Derecha lzquierda Derecha Aguja que Se usa Oobbaduiio estrecho Dobbadibbo Dobladubbo enroilado 18 - i de forro 19 4. Fi acion tie tensiOn uncorrecta cause puntad 1 as urregulares. A)i.istarla. 5. Fijacion tie tensiOn tentird probiema cuando fujacuon de agala es uncorrecta Comprobar las puntatias con un trozo tie material undependuente a que vaya a user p consig las a meiores resultactos. THREE-THRD OVERLOCI( WITH ONE NEEDLE SOBREHILADOS DE TRES KILOS CON UNA AGUJA By threading the LEFT needle only a width of 8 mm will be produced and by threading the RIGHT needle only a width of 3.8 mm will be produced. Please <sep the unused needle on the needle pad aa illuatrated. Enhebrando aolo a aguja IZQUIERDA se producira una anchors be 8 mm. y enhebrando Is aguja DERECHA solo se prodricira Uris anchura do 3.8 mm. Guardar Ia agua quo no usa en Ia almohadilla. 17 DOBLADILLADOS ENROLLADOS, ESTRE CHOS Y DE FORRO Son ideales para usarios en msteriales delgad os tales comm crespon goorgette. crespOn de chino. soda etc. Adomds so puedo roalizar us pliegue de forro, particularmonto cuando so coca sobro matenales ‘doshilachables’ finos como so rnuestra en Ia Fig. 3. La roalizaciOn do esos pliegues no puodo realiza rse on mstoriales ‘duros’ 0 ‘posados’. 1 Levantar Si pie prensatelas. 2. Abrir a tapa frontal y Ia mesa Se trabajo . 3, Quitar of dedo do puntads do Is glees do agula usando el dostarnillador y guardarla 05 01 borso its accosorio, 4 Filer a mdouins do acuordo can Is pdgrna 15 IS. - NOTA: 1. Ussr ol Silo rocomendado para obtene r Sn dobladillo idoal, 2. Dospuos do terminar. colocar 01 dedo do puntads en su lugar. Asegurarso do msertarlo profundamerite come illustro do on Fig 1 HILO RECOMENDADO Nib pars Ia agubs Ancora Superior -“-.“.“-‘-“.-— -----— - Ancora inferior blustracion * * ,] Ditbiadillo do pespunto estrocho Dobladillo enrollados Con Ties Nibs Con Ties ‘fibs Polioster. nylOn, seas No 50-100 NylOn No 100 Poirestol, nylOn. soda No 50-100 Nylon glueSo (monos ostirable) - Nylon grusso Imonos ostirable) I Dodo do puntada (A) lb Dobladiblo ostrocho Si; Doblaoibo onrollado v Dobbadiblo do forro 19 _______ AJUSTAR LAS TENSIONES DE LOS HILOS Girando 01 dial do tensiOn hacia amba da ona tensiOn del silo o nos do una 1 mayor. Girando 01 SiOl do Ia tension Sacia aba tensiOn menor. El nOmero mds alto. a mayor tensiOn, Comprobar cada tensiOn do hilo sobre us trozo do material independionto y similar al material quo planee usar. Aumentar a tonsiOn (4) Disminuir Ia tensiOn EMPLEO DE CUATRO HILDS El hUe de Ia ancora superior tirade al lace do abalo Cosido corrects I Lade do adam Lotto do abafo El Silo do a ancvra inferior Orado al lade do arriba. El Silo do Ia agafe icqalerda suelto y visible sobre el lade do 000100 inferior del material. Lado so abao Lado on abao 1 Lads aoaba ISle de Ia ayrga echa inferior superior El Silo do Ia agaja de 10 derenha suelte y visible 500ro el lado de abajo o ietenor gal material. Hrlode Ia pe L.adodoaroba Fig 1 Fig 3 Fig. 2 [Ladodearriba i La dodoarriba II Incremeotar Ia tensiOn del Silo lncremevtar Ia tensiOn del Vile do Ia avcora Infenor yb de Ia anGora superior yie del disreivuir tension Ia disminuir Ia tensiOn do Ia avcora inferior s050rior Ladodearrtha II Fig. 4 Incrementar Ia tensiOn del Silo do Ia agala izqaierda Vie diSminalr Ia de una ancoras 0 ii Fig. S La0000arriba Incrementar Ia tensiOn del Silo da Ia aguja dorecna. las dos 21 ADJUSTING STITCH LENGTH AJUSTAR LA LONGITUD DE PUNTADA length dial to the requ red Turn the stitch ienatri The nigher the number, tie longer the st.tch This dial can adiust the stitch length from 1 to 5mm. ADJUSTING OVEREDGE CUlliNG WIDTH usted from 1 Overedge cutting width can be ad 4 to 7 mm by simply turning overedge cutting width dial according to the bind of fabric. It is set at standard width of 6 mm when delivered from the lactory Turn it towards sewing. (Fig. 1( P5” if fabric edge curls while Turn it towards “7” if loops hang off the edge. (Fig 2( Scar e: dial be long tud oe puntada haste obtenm a ountada deseada. Mayor el numero. mayor longitud be ountada Este dial pueda a:ustur ia ongitud desde 1 riasta 5 mm AJUSTAR LA ANCHURA DE LA COSTURA sstar 1 La ancrura tie ia contura Se puede a solo girurido ei dial de anchsra de costura segun Is dane be material. La anchura normal cc fija a 6 mm oesde Is tubrica. S rarlo hasta el’S’ ni 01 horde de material se rae cuando cone (Fig. Girarlo hasta el “7’ s Ia forms be ado demasiada flola. (Fig. 2( esta DEDO DE PUNTADA (B> Loops may hang off the edge, when you sew with lightweight fabric using 3 threads (right needle only(, and setting cutting width dial at 4-5 (Fig. 3(. In such a case change the stitch finger (A) to (B) to get neat stitching (Fig. 4( La forma be lszo euta demasiads flota cuando cose con e material be genero Inqero usando 3 hilos (solo Ia sgu(a izquierda(, ando hI d al be ancnura do couture en 4 5 1 fi Fig. 3(. En enton cuson, cambiar el dodd do or 1 punitada (A( a (B) paru dbtener unu me puntadu (Fig. 4(. * * * 22 . ft 5 Stitch length dial Ovetedge cutting width dia Stitch finger (B( * - Illustration * ( * S * IS . I Dial de a Ongitud de puntada Control do anchurs do contura Dodo do puntadu (B) F(g. 2 1 Stitch finger (B) (Narrow> I astral On Ij J jI Li L F(g. 3 F(g. 4 I Jfl Stitch finger (B) Dedo de puntada (8) Stitch finger (A) Dedo de puetada) DIFFERENTIAL FEED TRANSPORTE DIFERENCIAL The differential feed has two independent sets of feed teeth one front (A) and one rear (B). El transporte diferencial tiene 2 transportadores de avance independierrtes, frontal (A) y posterior (B) Cuba transportador tierie us mecanismo de avance individual qua facilits 01 transporte del materials long tubes be puntada diferentes. Set of feed teeth has an ndividual feed mechanism wh cri enables the feeding of material ate different ratio. POSITIVE DIFFERENTIAL FEED TRANSPORTE DIFERENCIAL POSITIVO WHEN SET FOR POSITIVE DIFFERENTIAL FEED, the front feed teeth (A) wakes a longer stroke then the rear feed teeth (B). This has fhe effect of gathering mater al under the presser foot to offset the wavering on the fabric. CUANDD EL TRANSPORTADOR SE FIJA PAPA AVANCE DIFERENCIAL POSITIVD, el rransporte fronta (A), realize usa csrrers mayor qua e posterior (B). Esto tene el efecto do vcumular material balo el pie prensatelas pars conseguir frunc u osdular 0 matensl. *fl NEGATIVE DIFFERENTIAL FEED TRANSPORTE DIFERENCIAL NEGATIVO WHEN SET FOR NEGATIVE DIFFERENTIAL FEED, the front feed teeth (A) makes a shorter stroke than the rear feed teeth (B). This has the effect of stretch ng material under the presser toot to ofteet the pucivesng on the fabric. CUANDO EL TRANSPORTADOR SE FtJA PAPA AVANCE DIFERENCIAL NEGATIVO, el transportador frontal (A) realize una carrera was coos quo 01 posterior (B(. Esto tiene 01 ofocto do estirar el material ba)o 01 i0 prensarelas pars compensar 01 srrugaoo del material. Illustration I ustraciOn * I : Differential teed dogs S Positive differential teed th Negabve d fferentisl feed * * I Transportador do avance diterencial. II Transpose diferencial positivo. lIt: Transpose diferencial negativo. *flJ 23 ENGLISH FIJAR ELTRANSPORTE DIFERENCIAL SETTING DIFFERENTIAL FEED Set by simply moving the differential feed control lover in the direction desired referring to the chart below. The adjustment can be made between 0.7 (nogatlve effect) and 2 (Positive effect). These settings give the best raIlS of feeding, For normal sewing, the lover nhould be set at 1. The lover can be reset oven while hewing. r el control Del avance Olferencial simplemente moviendo Is Fi a 1 oslanca a ia direccidn deseaoa. Referirse a la grafica de abajo. El control so puede hacer entre 0.7 (efecto negativo) y 2 (efecto posrtivof. Esos valores fijados oan El melbr indice do transporte. Pare un cosido normal, Ia palanca debe son fijada en elf. La paianca puede ser ustada adn cuando cute cosiorrdo. y aplicaciOv TYPE OF FEEDING SETtING Waver-free seams, Gathennh No differential teed Positive differential teed 1-2 Pucker-free seams cbfferenrtlal teed EFFECT AND APPUCATIO Neutral teed ‘ I 0.7-1 - [‘ -- —- Tipo do avance ruvcrds a rxcLt4 T a ,snsne diterencial nosirivo dci material Tra xn ,,osi o norma dc tnsnnvv rerstvs Arrugas y francidou diterertcralriegarivo Del d’ Control 1 2 2 0.7-1 I —----“--‘j FOOT PRESSURE REGULATOR REGULADOR DE PRESION DE PIE Presser foot pressure has been correctly set at the factory, so you do not need to aojust it for moat ordinary sewing. S adjastment is necessary. tarn the toot pressure regulator to a higher number to increase or to a lower number to decrease pressure. La presrdrt de pie prensstelas ha sido fijado correctarnenlo en a fabrics. por Ic cual no en necesario be alustarla pare Ia mayor paGe de cosido normal. Si Sb 005esita aluste girar 01 roguladcr do presion de pie al nbrnero mas grsnde para aumentar Ia presiort o al ndmero mds pequeho pare disminuirla. SEWING WITH EXTRA HEAVYWEIGHT FABRIC OR MULTIPLE LAYERS OF FABRIC COSER CON MATERIAL DE GENERO GRUESO 0 CAPAS MULTIPES DE MATERIAL A wide range of fabric can be overlocked on this macnine. out it is recommended to hohten screw as illustrated, when sewing with extra heavyweight fabrics or mulitiple layers of fabric. Ooen working table for sdlastmeflt. Loosen the screw when sewing with light to normal weight fabric or turning overedge cutting width dial, to cut fabric optimally. The macrune is set for normal weight faonca from the factory. La eatonsidn ancha del material Se puede pespunfoar sobre Ia maqurna. Aprerar ci tornillo como se ye en a grafica, cuando esta cosieSS”SSn material do ghnero grueso o capes multipes se material Abrir a mess do traoalo pare ajusto. Afloiar el tornillo cuando estd cosrendo con material de genoro delgado a normal o girar el dial do control de anchura do costura, p do otra matters. el material no so puode porter bien. La mitquina osta alustada para ci material normal dec00 ía fabrics. llustraciOn Illustration * * * * 24 Ii itt IV Differential feed control lover Increase Decrease Tighten • * * * V Vt Loosen Screw [ Ill IV Palanca do control del avanco diforencial Aumentar * V AfIoar Disminuir *\f: Tomillo Aprotar BASIC TECHNIQUES TURNING OUTSIDE CORNERS WITH OUT CUlliNG THREADS TECNICAS BASICAS Girar el material sin cortar los hilos When you reach the fabric edge. stop stitching with the needle above the fabric. Cuando alcarioe el borde dv materi al, pure el pespunte con Ia aguta sobre el material. 2. hase the presser foot and gently pull err the thread chain lust enough to clear the stitch finger. 2. Levante vi pie prensatetas y suavemente tire do Ia cadena dvi hilo desde Ia placa dv Ia agu(a y del pie prenoatolas 3 Gire vi te)sdo. bate ei pie prensatelas y continue cosiendo en Ia nueva direccion Fig. r. 1. 3. Turn the fabric, lower the presser foot and begin stitching in the new drrection. Fig NOTE When overlocking and trimming at the same time. cut the fabric along the new stitching line fo about 3 cm, before turning the fabric. Fg 2. Nota: Cuando sobrehile cone ei mate-iai a In largo de Ia nueva linea Se puntada unos 3cm. antes dv girarlo Fig. 2. Fig. 1 *1 Fig. 2 TURNING CURVED EDGES For inside cumes guide fabric gently with tnmmng line ot the fabric under the right tront of the presser foot (Or a little to the left), applying pressure at ooirtt A in the direction of the arrow with your left hand, and at the same tme applying a We ottposite pressure at point E with your right hand. Fig. 3. For outside cumes place under the presser toot in a similar manner out aooiying the pressure in the ooposite directions. . 4 3 F Girar los bordes curvados fiH xi, Para curves intenores, girar ei material suavemente por Ia lines de soorehilado del material bef o el oie prensatelas aplicando usa presion en 01 punto A en Ia direccion Se Ia tlecha con su metro izquieroa, y al misrrro tiembo aolicando usa pequeha presiort opuesta o contrapresion en el punto con su mano derecha. Vet Fig. 3. Para curvas extoriores, coloca r 01 material bato vi pie prensatelas dv manera similar pero aplicando las presiones en Ia drrecciones opuestas. Fig. 4 Fig. 3 REMOVING STITCHES FROM SEWN FABRIC To remove stitches vireaay sewn, snip off needle threadla) at intervals and pull out looper thread( s). illustrariot’r * t Cut i Fig. 4 Eliminar los sobrehilados del material cosido Pars eliminar los sobrehilados usa vez cosido, recortar el hilo(s) dv Is agula a interva los y tirar hacia fuera del tub(s) dv las ancoras. ilustracion I i Cartar I 25 CORDED OVERLOCK PESPUNTE ENCORDONADO Corded overlock can be used to utrengthen shoulder, sleeve or side seams when loining c’ making up knitted gsttrents. As a decorative feature you can use knitting yarn of Contrast ng coiors to tartner enhance your garrtlent. Your machine is equipped with a presser toot which has been designed to feed your cord or yarn to the left of the safety sttch otto the right. Follow instruct:ons as follows: El pexpunte encordonado se puede unar para forta acer Ian hombreran. rrangas o costuras laterales ciando so conan vestidos de punto. Comas an olemento decorativo Vd puede ussr bib de tricotar con contraste oe colores Su maquina entd oquipada con un pie prensatelas qua ha sido disehsoo pars alimentar su cordon o bib a Is izquierda o a Ia derecha del conido be segundad. Soguir Ian innrrucc orles 5 gulenten I I Place a ‘flller coro, such as a crooner cotton. gimp wool Knitting yarn or skirting elast c at the rear of The macfllne spool pin Pass the cord through the cord guides (1) and (2) nOd then through the left needle thread gide (3). See Fg. 1, 2. Insert the cord through either the front or rear bole iuccoroing to the operation, see diagrams Figures 2 and 31, in the creaser foot and cast 1 under ano to the rear of the foot, 3. Place the material to be sewn as normal Start at slow speed obsersing it curd is feeding correctly and increase speed as fleeced. FOR JOINING SHOULDERS OR SLEEVES pass the cord through the front hole, ensuring tnat it is fixed between the left and rignt needle threads as it in guided through the front hole. (Fig. 2). Colocar un cordon rellenaoor como algodon be ganchillo. guimpe. situ, hilo be punto 0 hibo arrugado eIkstco en Ia parte posterior del carrete do Is maqu na. Pasa 01 cordon a traves do as guius dei cordon (1) y 12) y luogo a traves de a guia del hue do Is agua izquierda 13) Vet Fg 1 2. Insertar el Cordon a trauen del agu ero frontal o posterior: 1 ide acuerdo con Ia operacuon nor los duagramas liguras 2 y 31 en €1 010 pronsatelas y pasarlo por clebalo y hacia atran del pie 3. Coiocar 01 waters qua so ha oe coser normuimento. Comencar a balu ye ocidao obseicoldc Si e Cordon oats aoanzando correctamento 0 incremental Ia volocidad cuando sea necesario. FOR JOINING SIDE SEAMS, pass the core through the rear hole, ensuring it is ocsitioned to the right rwedle ihead. lFig. 3). PAPA UNIR HOMBRERAS 0 MANGAS pasar el ccrdcn a traves del agu ero anterior asoguranooso oe quo ants bIson entre Ion 1 hilos do Ian uguian derecha e uzouieroa cusndo es guisdo a traves oel aguero frontal (Fig. 21, FOR DECORATIVE EFFECTS, you may pass contrasting colors either through the front or rear hole or it you desire, pass cord or yarn through eacn hole. PARA UNIR COSTURAS LATERALES pasar 01 Cordon h traVen del aguloro postorror unegurandone do quo osta orenionado into al bib bela aguja oorecha IFig. 3( FOR MAKING WAVED HEM WITH finhllne Fig. 4(, pass Inn tishline through the rear hole ano start ROLL HEMMING (See page 18-19). This in used for the hem of shirt etc. where more body is PAPA EFECTO5 DECORATIVOS 01 cordon re’ensdor oueoe usarse contrastsndo diforenten coboren y panando a trases do Os agujoros anteror o posterior del prennafelax desired. Fig. 2 Fig.3 PAPA HACER DOBLADILLO ONDULADO CON LA CUERDA IFig i pasar Ia cueroa a travon do aguero pontorior y ornpezsr dobladillo enrollado. Var pagina 18-19) So usa pars dobladilbo 00 tslda, etc. g4 26 .q L1 DECORATIVE EFFECTS ESPA1OL EFECTOS DECORATIVOS In addition to normai overlooking wnrch is fully descnbed in tIns instruction book, your mactrifle can also be used for a number ot decorative applications such as oecorative tob-stitcrvng. butted seams pin-tucking or makin g lengths of decorative braid See below Ademas del 500rehilsoo norma l guy esta totairriente descrito en este libro dv iristruccrones. su maquins tambien puede var utilizada pars aplrcaciones decora tivas tales como costuras dv vivov 0 trenzas t3ecorative top-stitching Puntada superior decorativa plans) — using three threads (flat seam) Foid fabric along the line to be top-sti tched and sew ove the folded edge. making sure not to cut into the fold. Fig. A Unfold the fabric pu the eons or toe threass to toe underside and press flat. The final appearance can be enhanc ed by using buttonhole twist or embroidery tnread on the lower t000er. Butted seams using three threads (flat seam) Place two pieces of fabric wrong sides together and overoch along the edge. Unfold and press. — By using different coloured taoricn and tnread. a pleasing oatchwork effect cart be achieved. Pin-tucking — using three threads Fold fabric song a line to be oin-rucoed and overiock along the folded edge, making sure not to cut info the folded edge of the fabric. ISee page 29). Pull ends o threads to the underside and press. — usando tres hllos (costura Plegar el material a In largo be a Itnea donde se desea realizar decnrado superior y sonar n to lsrgo del borde plegado. asegurandose dv no cortar el borde Fig. A. Oesplegar el tegido, tirar los estrem os do kilos al lado de aba)o y errpujar pIano. La apsnencia final ouedo ser nre)ora ds pot ussda el kilo dv ojai o de bordado pars urrcora superio r. Dobladitto topeteado Usando tres bibs (costura piano) Coiocsr dos piezas dv material untanoo los adds be aba o y 1 pespantear a 10 lsrgo dv onus. Desplegar y prensar. Usanoo hilos y materials be diferen te color voted reslizara Is Obrv be rvmrendn’ I iZ Fig. A Fg. B — Costuras de vivos usando 3 bibs Plegur vi material a In tango dv uns litres donde se denea reaiizar el viao y coser a 10 largo del borde plegado asegurhndose dv no oortsr vi borde. )Ver osgina 29). Pars vaita” vi cone acompane vi materi al con ambas manna. — Hacer trencas decorativas uaando 3 hibos Coser us pespunte sobre an cordon o trenza rrratenrffnido lo cuidaaosamente con ambsa marros asegurandove dv no cortsrel borde. )Ver psgins 291. — Making decorative braid — using three threads Overlook over a cord or braid, holdin g it carefully with both nandv. making sure not to cut the edge ISee page 29). NOTE. “If you use blind hem foot (option , see page 32), decoratrve stitch is made easily, withou t cutting. ““Reduce the ,rpper looper tension when you one thick thread. NOTA: *Si usa vi pie dv plegado 0 puntada invisible i000ionsl. var pagina 321. payne obtener uns puntads decorates facilmente. **ReduCir Ia tensiOn de Is anccrs superior cuando use hub gruvso. 27 ESPANOL ENGLISH DIFFERENTIAL FEED APPLICATIONS APLICACIONES DEL TRANSPORTE DIFERENCIAL P ease refer to pages 23 -24 DIFFERENTIAL FEED. Different a feed is desigrieo to minimize puokenng and waver ng. It is also very effective for gathering. 1. Puckering Reierir Ia pagina 23 -24 TRANSPORTE DIFERENCtAL. El avance diferencial esta disenedo peru minimizar los pliegues y las ondulaciones. Es tambien muy efectivo para los fruncidos. 1. Pliegues. Puckering tends to occur on woven or sheer fabrics. To obtain pucker-free seams. set rhe differential feed confrol ever at less than 1 2. Wavering Wavenng lends to occur on knitted or stretchable fabrics. To obtain waver-free seams, set the differential teed control ever at rn-ore than 1 3. Gatheting Dfemn:mi feed makes gathering easier on lghtweight raorio. Use it on waistlines, sleeve heads, sleeve bottoms and rff las. etc. Set c’ie mfferentiat feeo control ever between 1.5 and 2 to obtain rhe cast gathering effect for your use. You may wish to engtren stitcn length also Los pliegues tienden a ocurr r en materials p anos transparentes 0 Pars obtener cosfuras sin pliegues, fitar ei conrrol Ce vvanoe diferencial alustando a palanca en menov de 1 2. Onduiaciones. Tiende a ocurrir en materials cue Se estirari malla. 0 de ounto de Para obtener costuras si’ or’O,jlac.Ones. fia ei contro. del avance diferenciai atustanDo Ia oaanca en mas oe 1. 3. Fruncido. El avance dderencial hace e! fru’tcidc man facil. Utilizanoo en los relIes. en los punos, en los ‘onoos de las manges. etc. Fijar el control del avance diferenoa austando Ia balanca ant re 1.5 y 2, care obterer SI meor efecto de fruncido requerido. IMPORTANTE IMPORTANT The asact adlustment depends on the thickness ano elasticity of fabric. Even the stitch ength can influence the setting. The longer the stitches, the more the feonc is contracted. Always do a test run with a oiece of actual fabrics you use and find the cast settings. El a uste esacro dapencte de grosor it de Ia eiesticidud del material. Incluso Ia lorigitud ce a puntada pueda influenciar Ia flacion. Cuanto mas large as Ia puntade. mus Se contrae el materiel. Hacer siempre erie oruebu con on trozo del materia qua veya a utilizar y encontrer los metorea resultedos. - 2 3 - - 28 Pucker or waver-free seams Puckering Wavenng Gatnering / * Ilustracion I lustrar-on *ffl * * Coefura sIn fruricioos It Cosfiira plegace III Costura onou,aoe tV. Fruncido om’duaciones / TV 3. CARING FOR YOUR MA CHINE REPLACING MOVING CUTTER Replace a moaing cutte r if it becomes blunt as follo ws A spare cutter will be found in your accessories. NOTE: You should not need to reolace fxeb cutte r, wE ch is made of a special hard alloy rnatenal. FIRST REMOVE THE POWER PLUG FROM THE SUPPLY SOCKET-OUTLET I Loosen screw and take out mosing cutter. 2. gthe workin tabtav Lower cutter driving arm to Its lowest position by turni no the hana wneel towa rds you by hand. In this ttositiun set reola cemenf cutter in position and secure it with screw. ENS URING THAT THE EDG E OF THE MOVING CUTTER IS APPR OXIMATELY 05 MM BEL OW THE SURFACE OF THE FIXED CUTTER. DISENGAGING MOVING CUTTER If you want to sew without cutting, open the working table and disengage the moving cutte r by pushing the cutte r reiease knott to the left and turning It towards you as illus trated Ensure that fabric edge is not wider than over edge width seiecteo or upper looper and needle can be damaged . Be sure and put cutter back to upright ooaition for regular overlooking. REMOVING FACE COV ER Disconnect from newe r supply before removing face cover Remove the screw and take off the face covet. Illustration * * I : ff UI : tV: . * * Screw Moving cutte Cutter release knob Face cover 3. CUIDADOS PARA SU MAQUINA CAMBIAR LA CUCHILLA MOVIL Reemplazar Ia cuchilla mov il cuando lIens a ester gastada o deapuntada. Encontrara una be repuesto en sus accesorio s. Nota. Vd no neceaitar a reemplazar Ia cuch illa fia, gun esta hecha be un material alead o duro especial. DESCONECTAR LA MAOUINA DEL SUM INISTRO DE TENSION DESENCHUF ANDO Ltt CLAVIJA. I. AEoar los tornillos y guitar Is cuchilla mdvil. 2. Cerrar Ia mesa cv traba io. Bajar ei brazo be conc tuccion be a cuchilla a Ia pesicion mas bale girando el vola rite manual hacia uSed, En esta posicion, colocar Ia cuctrilla dv reeniolazo en posicidn y asegurarlo con el tOrnill o, ASEGURANDD OUE EL BORDE DE CUCHtLLA MOVIL ESTA APROXIMADAMENTE 0.5 MM OEBAJO DE SUPERFICIE DE LA CUCH LA ILLA FIJA. DESENGRANAR LA CU CHILLA MÔVIL Si quiera coaer sin corta dora, abrir Ia mesa be trabalo y deuengranar a corta dora movil en’tp ulanbo el tornillo a Is izquierda y girandolo riaci a sated come ilustrado . QUTAR LA CUBIERTA FRONTAL Desenchufar Ia corriente anten be guitar Ia cubierts frontal. Guitar el torniilo y despuen Ia cubierta frontal. IlustraciOn * * I : It: UI: IV: Tornillo Cuchilla cortadora tr’ovil Tornillo pars desengra nar Cubierta frontal CLEANING AND OILING LIMPIEZA V ENGRASE To seep the machine running smoothly, keep clean and Iubrcatea at all times. Pars conservar Ia maqulna tuncronando suaaemente. manrenenls limpia y lubncada. FIRST DISCONNECT MACHINE FROM POWER SUPPLY BY REMOVING PLUG FROM SOCKETOUTLET. PRIMERO DESCONECTAR LA MAQUINA DEL SUMINISTRD DE TENSION DESENCHUFANDO LA CLAVIJA 1 Open the front cover and working table. Uslncl the brash provided, remove dust and lint that have accumulated. 2. Apply a few mops of oil to toe points indicated ha arrows. ALWAYS USE A GOOD QUALITit SEWING MACHINE OIL 3. Remove cccv top cover witn screw driver and remove cast aria lint of ins oe with the brush. I ustratlon * * * * Screw Top cover Brushing IV: Oil I II S 1 Abnr Ia taps frontal y Ia mesa de trabIo. Usando e cepillo sumin atnado qultar eI polvo y las partculss pus se han acumulado. 2. Poner arias novas gotas de cyclic en los Duntos inoicaoos vo las tlechas. JTILIZAR SIEMPRE UN ACEITE CE BUENA CALIDAD PAPA MAOUINAS DE COSER 3. Guitar codas las cubienta de arribs con ci destornillador y qailar csalquier suciedad o particula usando el ceplilo. llustraciOn * * 30 I : Tomillo It Cubierta be aruba III : CeCiII0 Aceire — LL11i 4. CHECKiNG PERFORM ANCE PROBLEMS PROBLEM Irregijiar Stitches B-caking Needle PROBABLE CAUSE I CORRECTION Incorrect Thread Tension(s). Incorrect size Needle. Improper Threadrng. Pulling Fabric. Loose Presser Foot. I Pulling fabric. Incorrect size Needle Incorrect setting of Needie. Loose Presser Foot. Pucker ng Incorrect Thread Tension(s). Bent or blunt Needle Differential feed is set incorre ctly. Wavering Differential feed is set incorre ctly. . Reset Thread Tension(s) Choose correct size Needle for Threact and Fabric. Re-thread Machine. Do trot pull Fabric: guide it gently Reset Presser Foot Do riot pull Fabric, guide gently it . Choose correct size Needle for Thread and Fabric. Reset Needle Reset Presser Foot ESPAOL 4. VERIFICANDO LOS PRO BLEMAS DE EJECUCION Problema rg Skipping Stitches Breaking Threads Bent or blunt Needle. Incorrect setting of Needle Improper Threading. Bent needle. Thread Tension(s) too tight. Incorrect setting of Needle Thread Spool tangled. Thread Guide Pole not esten ded. I B Entiebrado inadecuado Malenal tirante Rotura he aguia Tamano he Ia aguia incorrecro 1 F a cidn i incorrecra he Is aguia. Pie orenuatelas suelto Reset Thread Tension(u. Insert new Needle. Set tat less than 1. Set it at 1 or at more than 1 I for knitted or bias fabrics Re-thread Machine. Choose correct size Needle for Thread and Fabric. I Insert new Needle. Reset Needle. Re-thread Machine. Insert new Needle Reset Thread Tensmn(s). Reset Needle. Reset Spool oroperly Corrección VoIcer a k(ar Is(s) tensionles( del kilo. Elegir el tsmsno correcto de Ia agu(a pare el kilo y el material Volver a enhebrar Is maquina No estirar vi material. guiarlo suavemente. Voluer a li(ar el Die prensatel as. No estirar ci material: gu arlo suavemente. Eleg:r el tamano correcto ne Ia agula pare el kilo y ci material. Volver a titar Ia agula. VoIcer a fitar el pie prensatelsu. I Volver a fiar Ia tensionles) del kilo. Poner ann nueva aguls. Filarlo en manes he I Pie prensateas suelto Material tirante PIle Improper Threading. Incorrect size Needle. Cauaa probable Tensionlesl cc hilo Incorrecta. Tamaho de Ia agus incorrecta. Tension(es( del kilo incorrecto. Aguta gastada 0 torcida. El avarice diferencial fi)soo ncorrectamente Avance biferencial filado incorrectarnente. Enhebrado inaoecuado. Grosor los agus incorrecto. UBS Ordulacion Cosido o puntadas intermitenteu Rotura he kilos Agua gastada 0 torcids. Fifacion incorrecta he Ia agu(a. Enhebrabo inadecuabo. Agu)a torcids. TensIonies( del kilo oemasiab o tirante. F lacion oe Ia aoua incorrecta. Carrete be kilo enrehabo. I La barra he guia eel kilo no esta extendids. I - Fi)srlo en 1 0 en mas be I pars materials he punts. Volver a enhebrar Ia mdquina. Elegir el tamako correcto be Ia agua psra el hilo y ci material. Potter una agu(a nueva. VoIcer a Ear Is agua. I VoIcer a enhebrar Ia maquina. Poner una nueva agula. Volver a fi ar Is tension(es) del kilo. 1 . Volver a colocar Is agua. Colocarlo adecuabamente Extender Is barra de gum totalm ente. — fli gI • L2 5. OPTIONAL ACCESSORIES 5. ACCESORIOS OPCIONALES BLIND HEM FOOT PIE DE PLEGADO 0 PUNTADA INVISIBLE Blind hem feet are obtainable as notional feet aria are available or two szes 0.5 for tine-nieGium fabrics andl.0 for medium heavy fabrics. Los pliegues 0 doblados de oantada invisib’e dan sn acabaoo ovradero e invisible y atrorra hares dv teoroso cosido a mann Snap on the appropriate foot Proceed as fol ows: t. Turn up the hem to the required depth and press. Fold the hem ovcr< against the rig”T side of the garment. creanng a soft foid on the wrong’ vine ot the fabric see Fig. — Place fabric unoer the presser foot with the ‘wrong’ srde uo Feed gre folded edge through the guide in tne front of the foot and lower the presser foot lever Try a snch or several stitchesl on a spare piece of the actual fabric and adlust the guide so that the needle ust catches the fold. Adlust the gu dv by means of the small screw on the top of the foot see Fig. 2. — 3 When correctly vet, sew the hem. The outside edge will be cut away by the machine see also Fig 2. After completion. open Out and press again. The stitches should be almost invisi4e on the right of the fabric-see Fig. 3 NOTE. Tighten upoer loooer tension to hwy hem ray flat. Illustration * * * l II Itt . . Final hem enqth Screw Guide Colocando el reverso del material hacia arriba, el primer doble o.jede realizarse adS *rw. como maaimo. *1 Fig, 1 Con el reverso del n’.ater al hacia arriba nacer cuidadosarrente ei primer pliegue trayendo ei resto del materia de ix izquierda para hacer un segundo pliegae 0 dobiado en Ia parte superior cerca del bortw Gel material (Ver Fig. Con el material asi, co ocarlo debajo del pie prensatelas de puntada invisible, avanzar vi borde plegado a raves de lx gura enfrente del pie y baler lv palanca elevadora del pie prensatelas. Ahora cover on par de puntadas. El hilo be lv agula lzqurerda ha de coger Ia eaquina del pliegiJe. Si es necesario alustar Ia guia mediante e tornillo mostrado en lx Fig 2. Cuando esth correctarnente fijado. coser ci oliegue. e barGe exterior sera cortado por Ia maqu na leer tambien Ia F’g. El. Oespves clv coserlo. abrirlo, las puntadas serian practican’iente ‘nvisibles en el lado cderecho a anversoc Gel matenal IFig. 3 Ilustracion * * * 32 para materiala Acoplar el pie be pliegue dv puntada invisible aproprado p fiiar lx longitud be puntada en4 5. Hacer una pruoba usando algds material similar aIde Ia prencta a cover. Set the stitch length 4 5 2 Hay dos tipsy de pies dinponibles, uno delgados p otro pare materials graesos. Longtud y pliegue maximo tI Tornillo III: Guia . *1 *111 Fig.2 ESPAIJOL ELASTIC FOOT PIE ELASTICO An elastic foot is available as an optional foot. This foot will guide your elastic and at the same time apply pressure to the elastic with our specially desian ed tension controlled roller allowing you to control the elastic ity while sewing, El pie elhstico en dispcnible corns un sapiemento opdional. Este pie gsiara su elastico y tambien atilicara Ia presion al elastico con el control de is tension del rodillo especialmente disenado, permitiendo de contro lar Ia elasticidad cuarido ese cosiendc Replace regular foot with elastic toot 2. Set stitch length at about 4. 3. Slightly raise the roller portion of the foot and insert elastic tape between the roller and the lower support bar as illustrated, until the edge of elastic reaches the feed teeth 4 Sew the elastic for about one inch (3 cm) m more to conhrm if the tape is properly sewn. Reemolazar vi pie normal con vi pm elastico. 2. 1 Fi a r Ia longituri be Ia puntada en unos 4. 3. evantar Ia porcioii oe rodillo del pie y vise’tar a cinta destiny entre Cl rodillo y ba ar a carra soportada como 1 se ye en Ia grafica hasty que 1 borde be elastico Ilegue los e oientes sal transpoi’te. 5 4 Invert the fabric ander the foot and sew together with the elastic. 8. Check the otitchea to niabe sure they are correct and ad(ust tension (tighter) if necessary 7 5. Inseitar vi material debalo del pie y coser luntos con Ia Cinta elastica Adlust the tension control of fhe roller so that the desired finish can be obtained. 6 a 7 Tighter tension of the rollet gives more elasticity of the fabric after it is sewn. P. Weaker tension of the roller gives less elasticity of the fabric. 8 When the right Side of elasnc is not even with rignt side of iabric remove the stitch finger (A) or change it to sntch finger (B). Decrease the numbe r of overedge cutting width dial. Three threads overtoch with right needle or left needle is recommendable in accordance with the size of elastic NOTE. A longer stitch length will allow more elasticity if desired. Illustration * Tension control of roller Coser a cwta elasnca unos 3 cm ci mas para confirmar Si Ia cinta eats propiamente cosido . Comprobar las puntadas pars asegurar San estan coriecras y ausiar a tension (may apretad ol Si es necesarlo. Aastar el control de is tension del rodlllo para poe el acabado deseado Se pueda obtener —7-- a. TensiOn was aprefada del rodillo da mas elasticidad al marenal despues be coser. hr. Tension was ligers eel rodillo da menos elastcidad al material. 8 Cuanbo el lado derecho be elastic o no estb igual que el lado derecho de material. quitar ci dedo de pantada (A) c carrbiario a IS). Disrninuir Ia anchura de costura. La Overlock be tres BIos con Ia agua derecha 0 izouierda vs recornendado be acuerdo al tamano be elastics. Ilustracion * t Control de tension del rodillo A!mvL HZ *1 PIPING FOOT PIE PRENSATELAS PARA TRENZAS DECORATIVAS Prepare a piece of ready-made piping (corded bras fold tape(. Piace folded pip ng between seam edges with fold extending beyond seam hoe toward garment Pin or baste and stitch the seam. Preparar uris p eza de trencilla (crete plegada sesgads con 0 an cordon intenor(. Calacar ía trencilla plegade en at horde do Ion materials a coser. Suletar 0 hilvanar y coser Is costura. Se pueden ussr trenzas planes o plegadas ac ntas hechea. Usado pare hordes decoretisos dv cuellos, punas, bolsi on, etc. El pie pars trenza cusi viva este disponible como an extra opciona. Braid or sbbon may also be used, either flat or lot ded brad can be used ri straight seams Use for decorating edges of 001 era, cuffs, pockets, etc. PEARL FOOT PRENSATELAS PARA PERLAS 1. PEARLS ALONG AN EDGE: Set for left needle remove right needle( 3-thread aser ock Set tensions as follows: Left needle’ 4 Upper looper: 1 -2 Lower ooper: 7 -8 SEW: • Remove regular foot: replace with pearl foot. • Remove stitch finger as you did tar a rolled edge • Swing cutter away to lowest position, close front covers Raise the needle to it’s highest position. • Place pearls n the channel on the right aide of the foot with 2 of pearls extending behind foot, Take one stitch with the hand wheel to secure the pearls • Follow edge of fabric along fabric guide. • Sew pearls on edge of fabric, • Return cutter to original position when finished, 1. PERLAS A LO LARGO DEL BORDE Pars filer Ia aguía izquierda (quitar Is agu a derechal a 3 hilos de overlook PIe lea tensiones como so luatra: Agus izquierde: 4 Ancors superior: I 2 Ancors interior: 7-8 COSA: • Quite el pa prensate as noimal; reemp acela con e pie prensatelaa pars perlas. Quite xl dedo de puntads como usted hizo pars el dobleditla de enrollsdo. • Fi(e Is cuchills moral a su posicion max bela y cierre Ia taps frontal. • Lessnte Is egue a su pasician man sIts. • Colaque lea panes en Ia ranura en el lado izquierdo del pie prensateles con 4 cm de panes entendiendolas atras del pie pransateiss. Case uns puntads con e valante pars suletar las panes. • Siga xl horde del material a 10 Isrgo us Is guis del material. Cosa las panes en el horde dv matenal. Regnese Is cuchilla asu posician ong nel cuando termine. 2. PEARLS SEWN WITH A FLAT LOCI( STITCH: FABRIC: Med um weight woeen 2 or 4mm oearls Set for a 3-thread flat lock, left needle only. SEW: Remove regu sr foot: replace w th pear foot, • Insert small stitch finger • Swing cutter away to lowest posit on. Raise needle to its highest aosition. • Place pearls n channe on right side of the toot with 2 of pearls estending behind toot. • Take one attch with the hand wheel to secure the pearls. • Sew pearls an with the left needle lust catching the fold of the fabric. • Pull flat lock open - 34 2 PERLAS COSIDA CON PUNTADA DE COSTURA PLFNA MATERIAL: To(ido de peso media 204mm pares Pars tIer Is costura Plans a 3 hilos, salemante use Is agula izquisrds, COSA; • Outs 01 pie pronsatelas norms: pangs ei pie prensatelss pare perle. • Inserts el dedo de puntada pequeno. e Is cuchills movil a su posicion reds bras 1 Fi Lesente Is sgus 5 5U posiclan men sits, • Co aqua Ian perlss en Is renurs del lada derecha del pie pronnetelas con 4 cm dv per las eetendiendolas atras del pie prennateles. • Cons Uris puntads canal solante pars suleter Ian pares. • Coas Ian perlsa con Is agua izquierda sgsrrando el duklado del material. — .q L iir—j — GATHERING/SHIRRING FOOT Tension settings for gathering Left neeOle Right neeale UnDer i000er Lower looper 2 4 4 4 - I] PIE DE FRUNCIDO 1. Fquo;on de tension para frurtcir: Differential feed 2 0 Stitch length 4 Aguia izqu erda Agula derecna Ancorasuperor Anoora inferior 4 Reolace regula’ presser foot with gathering toot. 4 4 4 4 Transporte diferencui Loigitud ax puntada 2,0 4 2 Came-are pa Dreruatelas regular con 3. Clip both fabric layers approximately 5r8 I’ .h cm.) inside and 1 1 2’ 4 cm I down Lih front of presse’ foot to place taDric. 3 ocer ameos materials uproeimadamente 5 8 1.5 cml a 2 4 cml abalo Levantar a carte trontal del pie 4. Place fabric to ox gathered unoerrreath the presser foot Place fabric whicri wilt remain straight between presser foot arid ,ower metal niece Push clipped portion through slot in foot Lower presser foot. 4 Colocar a material qua Se france debu o del pie 1 prensutelas Colocur el material que aueda reoto entre el pie prenuatelau y piece on metal be abate Empular porcion cortadu a traaes be a abertara dx pie Bejar el pie orensate as. 5 Direr 5 Turn nanawheel to make 4- 5 stitches in the fabric, making sure to catch both upper and lower layers. 6 Serge. Use both hands to guide fabric one on the under layer of fabric. Keep in mind that the lower piece of fabric will mone tooter as It is gathering than the top piece. I lastrunon - Fabric to be straight Fabric to be gathered el pie oe fruncido pensate.an cure colocar el material at volante pare coser 4 - 5 puntedas sobre xl material. 6. Sobrehiler. User embos macos pare gular el material. uno sobre e material be ebato. Cuidarse qua el material de aba o ox movera mas rapido que ei otro. ustrec on I 2 Material qua ne mantiene recta Material que xx france 35 — NEEDLE THREADER Thread Tie cuide of n000le barhO as illustrated. Raise the oresser toot. Raise the needle bar to highest position, ass pull the thread teasing about 4 tO cm) clear. 2. Lower tne presser foot. Set the seed tsroader ensuring the hooking tork enters into toe flees e iiole 3 Hotd the thread with the needte threader with your hard. 4 Guide the thread into hooking tork and pull the thread wth your other sand. S. Move the needle threader backwards ulightly Then release the sand which is pui ing the thread. 6. Take the needle threader off the neede ciamo 7 Pull the thread away from you. I (For right needle) (Para Ia aguja derecha) ESPAOL ENHEBRADOR DE LA AGUJA 2. 3 4 5. 6 7 Auanzar el hoe traves do a gum del Silo do graoa de agua detanso uses 10 cws extra. Loeantar el pie orensateias. Lovantar Ia earra be aguja a a posicion was alta y titer el Silo. Ba ar et pie prensate us Colocar e enhebrador de Ia aguta asegurandose sue a horouilla de enganche entra en ei ole do Ia agu a. 1 Guarder el Silo con e eshebrador de Ia aguia Con as mane. Guiar ei Silo en a horquilta do engancne firer e hue Con 50 otra mono Mover el enhebrador do a agula hucis atras lugeramento. Entonces soltar su macb que osta tiranoo el Silo. Guitar 01 eshebrador do lx agu)a do Ia graoa do agua. Tirar 01 Silo hacia atrks. 36 (For left needle) (Para Ia aguja izquierda) >-
 1
1
-
 2
2
-
 3
3
-
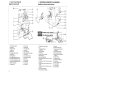 4
4
-
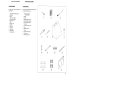 5
5
-
 6
6
-
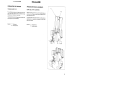 7
7
-
 8
8
-
 9
9
-
 10
10
-
 11
11
-
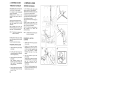 12
12
-
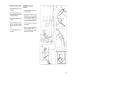 13
13
-
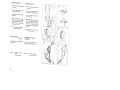 14
14
-
 15
15
-
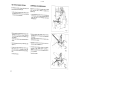 16
16
-
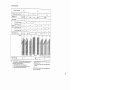 17
17
-
 18
18
-
 19
19
-
 20
20
-
 21
21
-
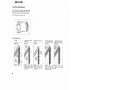 22
22
-
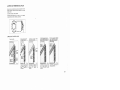 23
23
-
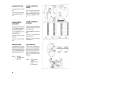 24
24
-
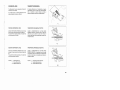 25
25
-
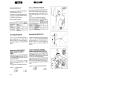 26
26
-
 27
27
-
 28
28
-
 29
29
-
 30
30
-
 31
31
-
 32
32
-
 33
33
-
 34
34
-
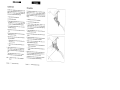 35
35
-
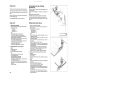 36
36
-
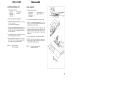 37
37
-
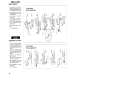 38
38


White 1300DE Manual de usuario
- Categoría
- Máquinas de coser
- Tipo
- Manual de usuario
en otros idiomas
- English: White 1300DE User manual
Artículos relacionados
Otros documentos
-
SINGER 14J334 Manual de usuario
-
SINGER Stylist II El manual del propietario
-
Baby Lock Vibrant Manual de usuario
-
Brother DZ1234 Guía del usuario
-
-
-
Kenmore 385.166551 Manual de usuario
-
JANOME 1100D Professional Manual de usuario
-
ELNA 654 - Manual de usuario
-
Invacare LiNX DLX-REM1 Series Manual de usuario