TEAC LT-1CD Manual de usuario
- Categoría
- Reproductores de CD
- Tipo
- Manual de usuario
Este manual también es adecuado para

9A09896900
LT-1
CD Receiver
OWNER’S MANUAL
MANUEL DU PROPRIÉTAIRE
MANUAL DEL USUARIO
BEDIENUNGSANLEITUNG
MANUALE D’ISTRUZIONI
GEBRUIKSAANWIJZING
Z
?

2
ENGLISH
IMPORTANT(for U.K.Customers)
DO NOT cut off the mains plug from this equipment. If
the plug fitted is not suitable for the power points in
your home or the cable is too short to reach a power
point, then obtain an appropriate safety approved
extension lead or consult your dealer.
If nonetheless the mains plug is cut off, remove the
fuse and dispose of the plug
immediately, to avoid a
possible shock hazard by inadvertent connection to
the mains supply.
If this product is not provided with a mains plug, or
one has to be fitted, then follow the instructions given
below:
IMPORTANT. DO NOT make any connection to the
larger terminal which is marked with the letter E or by
the safety earth symbol |
or coloured GREEN or
GREEN-and-YELLOW.
The wires in the mains lead on this product are
coloured in accordance with the following code:
BLUE : NEUTRAL
BROWN : LIVE
As these colours may not correspond with the
coloured markings identifying the terminals in your
plug proceed as follows:
The wire which is coloured BLUE must be connected
to the terminal which is marked with the letter N or
coloured BLACK.
The wire which is coloured BROWN must be
connected to the terminal which is marked with the
letter L or coloured RED.
When replacing the fuse only a correctly rated
approved type should be used and be sure to re-fit the
fuse cover.
IF IN DOUBT — CONSULT A COMPETENT
ELECTRICIAN.
VARING: APPARATEN INNEHÅLLER LASER KOMPONENT
MED STRÅLNING ÖVERSTIGANDE KLASS 1.
“ADVARSEL: USYNLIG LASERSTRÅLING VED ÅBNING
NAR SIKKERHEDSAFBRYDERE ER UDE AF FUNKTION.
UNDGÅ UDSAETTELSE FOR STRÅLING”
“VAROITUS! SUOJAKOTELOA EI SAA AVATA. LAITE
SISÄLTÄÄ LASERDIODIN. JOKA LÄHETTÄ
(NÄKYMÄTÖNTÄ) SILMILLE VAARALLISTA
LASERSÄTEILYÄ”.
ADVARSEL: USYNLIG LASERBESTRÅLING NÅR DENNE
DELEN ER ÅPEN OG SIKKERHETSSPERREN ER
UTKOBLET UNNGÅ UTSETTELSE FOR STRÅLING.
Contents
Thank you for choosing TEAC. Read this manual
carefully to get the best performance from this unit.
Before Use . . . . . . . . . . . . . . . . . . . . . . . . . . . . . . . . . . . . . 4
RESET Switch . . . . . . . . . . . . . . . . . . . . . . . . . . . . . . . . 6
Compact Disc . . . . . . . . . . . . . . . . . . . . . . . . . . . . . . . . . . . 8
Names of Each Control . . . . . . . . . . . . . . . . . . . . . . . . . . 12
Remote Control Unit . . . . . . . . . . . . . . . . . . . . . . . . . . . . 18
CD
Playing a CD . . . . . . . . . . . . . . . . . . . . . . . . . . . . . . . . . . . 20
Programmed Playback . . . . . . . . . . . . . . . . . . . . . . . . . . 24
Repeat Playback . . . . . . . . . . . . . . . . . . . . . . . . . . . . . . . 28
Shuffle Playback . . . . . . . . . . . . . . . . . . . . . . . . . . . . . . . 30
Sleep Timer . . . . . . . . . . . . . . . . . . . . . . . . . . . . . . . . . . . 30
TUNER
Listening to the Radio . . . . . . . . . . . . . . . . . . . . . . . . . . . 32
How to Preset Stations . . . . . . . . . . . . . . . . . . . . . . . . . . 34
How to select Preset Stations . . . . . . . . . . . . . . . . . . . . 34
Clock Adjustment . . . . . . . . . . . . . . . . . . . . . . . . . . . . . . 36
Timer . . . . . . . . . . . . . . . . . . . . . . . . . . . . . . . . . . . . . . . . . . 38
Troubleshooting . . . . . . . . . . . . . . . . . . . . . . . . . . . . . . . . 42
Specifications . . . . . . . . . . . . . . . . . . . . . . . . . . . . . . . . . 42

3
FRANÇAIS ESPAÑOL
ENGLISH/ FRANÇAIS/ESPAÑOL
Indice
Enhorabuena por la adquisición de un TEAC. Lea
detenidamente este manual a fin de obtener el mejor
rendimiento de esta unidad.
Sommaire
Nous vous remercions pour l’achat d’un appareil
TEAC. Lire ce manuel avec attention pour obtenir les
meilleures performances possibles de cet appareil.
Avant Utilisation . . . . . . . . . . . . . . . . . . . . . . . . . . . . . . . . 5
Commutateur RESET . . . . . . . . . . . . . . . . . . . . . . . . . . 7
Disques Compacts . . . . . . . . . . . . . . . . . . . . . . . . . . . . . . .
9
Nomenclatur . . . . . . . . . . . . . . . . . . . . . . . . . . . . . . . . . . 14
Boîtier de télécommande . . . . . . . . . . . . . . . . . . . . . . . . 19
CD
Lecture de CD . . . . . . . . . . . . . . . . . . . . . . . . . . . . . . . . . 21
Lecture programmée . . . . . . . . . . . . . . . . . . . . . . . . . . . 25
Lecture répétitive . . . . . . . . . . . . . . . . . . . . . . . . . . . . . . 29
Lecture aléatoire . . . . . . . . . . . . . . . . . . . . . . . . . . . . . . . 31
Minuterie sommeil . . . . . . . . . . . . . . . . . . . . . . . . . . . . . 31
TUNER
Ecoute radio . . . . . . . . . . . . . . . . . . . . . . . . . . . . . . . . . . . 33
Comment prérégle une station . . . . . . . . . . . . . . . . . . . 35
Sélection des préréglées . . . . . . . . . . . . . . . . . . . . . . . . .35
Réglage de l’horloge . . . . . . . . . . . . . . . . . . . . . . . . . . . . 37
Minuterie . . . . . . . . . . . . . . . . . . . . . . . . . . . . . . . . . . . . . . 39
Guide de dépannage . . . . . . . . . . . . . . . . . . . . . . . . . . . . 43
Spécifications . . . . . . . . . . . . . . . . . . . . . . . . . . . . . . . . . 43
Previo al empleo . . . . . . . . . . . . . . . . . . . . . . . . . . . . . . . . 5
Interruptor RESET . . . . . . . . . . . . . . . . . . . . . . . . . . . . 7
Discos . . . . . . . . . . . . . . . . . . . . . . . . . . . . . . . . . . . . . . . . . 9
Nombres de cada control . . . . . . . . . . . . . . . . . . . . . . . 16
Unidad de control remoto . . . . . . . . . . . . . . . . . . . . . . . 19
CD
Reproducción de CD . . . . . . . . . . . . . . . . . . . . . . . . . . . . 21
Reproducción programada . . . . . . . . . . . . . . . . . . . . . . 25
Reproducción repetida . . . . . . . . . . . . . . . . . . . . . . . . . . 29
Reproducción aleatoria . . . . . . . . . . . . . . . . . . . . . . . . . 31
Contador de tiempo Sleep (dormir) . . . . . . . . . . . . . . . 31
TUNER
Cómo escuchar la radio . . . . . . . . . . . . . . . . . . . . . . . . . 33
Cómo Preestablecer estaciones . . . . . . . . . . . . . . . . . 35
Cómo seleccionar las estaciones preestablecidas . . 35
Ajuste de reroj . . . . . . . . . . . . . . . . . . . . . . . . . . . . . . . . . 37
Despertador . . . . . . . . . . . . . . . . . . . . . . . . . . . . . . . . . . . 39
Corrección de fallas . . . . . . . . . . . . . . . . . . . . . . . . . . . . 44
Especificaciones . . . . . . . . . . . . . . . . . . . . . . . . . . . . . . . 44

4
ENGLISH
Before Use (1)
Obs! nätströmställaren skiljer ej hela apparaten fran
nätet.
Read this before operation
<
As the unit may become warm during operation,
always leave sufficient space around the unit for
ventilation.
<
The voltage supplied to the unit should match the
voltage as printed on the rear panel. If you are in
any doubt regarding this matter, consult an
electrician.
<
Choose the installation location of your unit
carefully. Avoid placing it in direct sunlight or close
to a source of heat. Also avoid locations subject to
vibrations and excessive dust, heat, cold or
moisture.
<
Do not place the unit on any high heat-producing
units like your amplifier/receiver.
<
Do not use the unit in the hot place (over 85°F/30°C).
<
Do not open the cabinet as this might result in
damage to the circuitry or electrical shock. If a
foreign object should get into the set, contact your
dealer or service agency.
<
When removing the power plug from the wall outlet,
always pull directly on the plug, never yank the
cord.
<
To keep the laser pickup clean, do not touch it, and
do not forget to close the flap lid when not using the
CD player.
<
Do not attempt to clean the unit with chemical
solvents as this might damage the finish. Use a
clean, dry cloth.
<
Keep this manual in a safe place for future
reference.
DO NOT MOVE THE UNIT DURING CD PLAYBACK
During playback, the disc rotates at high speed. Do
NOT lift or move the unit during playback. Doing so
may damage the disc.
WHEN MOVING THIS UNIT
When changing places of installation or packing the
unit for moving, be sure to remove the disc. Then,
press the power switch to turn the power off, and
disconnect the power cord. Moving this unit with the
disc loaded may result in damage to this unit.
CAUTION
The product shall not be exposed to dripping or
splashing and that no object filled with liquids, such
as vases, shall be placed on the product.
Do not install this equipment in a confined space
such as a book case or similar unit.
ATTENTION
Ne pas exposer l’appareil à l’humidité ou aux
projections d’eau; ne pas poser d’objets contenant
de l’eau, tels qu’un vase, ou un liquide quelconque,
sur l’appareil.
Ne pas installer l’appareil dans un endroit clos tel
qu’une bibliothèque ou un meuble fermé.
PRECAUCIÓN
El producto no deberá quedar expuesto a goteos o
salpicaduras, ni servir de base para objetos que
contengan líquido (jarrones, etc.).
No instale este equipo en espacios cerrados tales
como estantes de libros o similares.

5
FRANÇAIS ESPAÑOL
ENGLISH/ FRANÇAIS/ESPAÑOL
Avant Utilisation (1) Previo al empleo (1)
Lire ceci avant de faire fonctionner l’appareil
<
L’appareil pouvant dégager de la chaleur lorsqu’il
fonctionne, laisser un dégagement suffisant au-
dessus de l’appareil afin de permettre une
ventilation naturelle.
<
La tension d’alimentation de l’appareil doit être celle
indiquée à l’arrière de l’appareil. En cas de doute,
contacter un électricien.
<
Choisir avec soin l’endroit où vous placerez votre
appareil. Eviter de le placer directement au soleil ou
près d’une source de chaleur. Eviter aussi les
endroits sujets à des vibrations, à de la poussière
excessive, à la chaleur, au froid ou à l’humidité.
<
Ne pas placer l’unité sur des unités produisant
de fortes chaleurs tels que votre
amplificateur/récepteur.
<
Ne pas utiliser l’unité dans un endroit surchauffé
(plus de 85°F/30°C).
<
Ne pas ouvrir le coffret car ceci risquerait de
provoquer des dommages aux circuits ou des chocs
électriques. Si un objet rentre dans l’appareil,
contacter votre revendeur.
<
Lors du débranchement du cordon d’alimentation de
la prise murale, toujours tirer sur la fiche et non sur
le cordon.
<
Pour garder le capteur laser propre, ne pas y
toucher et ne pas oublier de fermer le tiroir du
disque.
<
Ne pas essayer de nettoyer l’appareil avec des
solvants chimiques car ceci pourrait endommager
le fini de l’appareil. Utiliser un chiffon propre et sec.
<
Garder soigneusement ce manuel d’instructions
pour une référence ultérieure.
NE DEPLACEZ PAS CET APPAREIL PENDANT L’ECOUTE
D’UN DISQUE
Pendant une écoute, le disque tourne à grande
vitesse. Ne soulevez pas cet appareil et ne le
déplacez pas pendant l’écoute d’un disque. En effet,
vous risqueriez d’endommager ce disque.
CONSIGNES DE DEPLACEMENT DE CET APPAREIL
Lorsque vous changez de lieu d’installation ou
lorsque vous emballez cet appareil pour le déplacer,
n’oubliez pas de retirer le disque. Ensuite, appuyez
sur le bouton POWER pour couper la chaîne.
Débranchez le câble électrique. Si vous déplacez cet
appareil alors qu’il contient un disque, vous risquez
d’endommager cet appareil.
Leer antes de la operación
<
Debido a que la unidad puede calentarse durante la
operación, siempre deje espacio suficiente encima
de la unidad para ventilación.
<
El voltaje administrado a la unidad debe coincidir
con el voltaje impreso en el tablero posterior. Si
tiene dudas con respecto a esto, consulte con un
electricista.
<
Elija la ubicación de la instalación para su unidad de
manera cuidadosa. Evite colocarla expuesta
directamente a la luz del sol o cerca de una fuente
de calor. Así mismo, evite ubicaciones sujetas a
vibraciones y a polvo, calor o humedad excesivos.
<
No coloque la unidad en unidades productoras de
calor, como amplificador/receptor.
<
No utilice la unidad en un lugar caluroso (más de
85°F/30°C).
<
No abra el gabinete ya que esto podría dar como
resultado un daño a los circuitos o una descarga
eléctrica. Si un objeto extraño se llegara a
introducir en el aparato, contacte a su distribuidor.
<
Al retirar la conexión de energía de la salida de
pared, siempre jale directamente de la clavija,
nunca tire del cable.
<
Para mantener el sensor óptico láser limpio, no lo
toque y no se olvide de cerrar la charola de discos.
<
No intente limpiar la unidad con solventes químicos
ya que podrían dañar el acabado. Utilice una tela
limpia y seca.
<
Mantenga este manual en un lugar seguro para
referencias futuras.
NO MUEVA LA UNIDAD DURANTE LA REPRODUCCIÓN
Durante la reproducción, el disco gira una velocidad
alta. NO levante o mueva la unidad durante la
reproducción. El hacerlo puede dañar el disco.
AL MOVER ESTA UNIDAD
Al cambiar los lugares de instalación o empaque de
la unidad para moverla, asegúrarse de retirar el
disco. Después, oprima el interruptor de energía
para desactivar la energía y desconecte el cable de
energía. El mover esta unidad con el disco cargado
puede dar como resultado un daño a la unidad.

6
ENGLISH
Before Use (2)
Beware of condensation
When the unit (or a disc) is moved from a cold to a
warm place, or used after a sudden temperature
change, there is a danger of condensation; vapor in
the air could condense on the internal mechanism,
making correct operation impossible. To prevent
this, or if this occurs, leave the unit for one or two
hours with the power turned on. The unit will
stabilize at the temperature of its surroundings.
Maintenance
If the surface of the unit gets dirty, wipe with a soft
cloth or use diluted neutral cleaning liquid. Be sure
to remove any fluid completely. Do not use thinner,
benzine or alcohol as they may damage the surface
of the unit.
RESET Switch
In the following cases, function buttons may not
work properly.
M
When the system is damaged by some electrical
shock.
M
When the power is irregular or has electrical
noise.
In these cases, press the RESET switch once or
twice lightly with a pencil or a ball-point pen when
the unit is on.

7
FRANÇAIS ESPAÑOL
ENGLISH/ FRANÇAIS/ESPAÑOL
Avant Utilisation (2) Previo al empleo (2)
Risque de condensation
En cas de déplacement de l’appareil (ou d’un disque)
d’un endroit froid vers un endroit chaud, ou en cas
d’utilisation après un changement de température
brutale, il y a un risque de condensation. La vapeur
contenue dans l’air peut se condenser sur le
mécanisme interne et affecter le bon
fonctionnement de l’appareil. Pour éviter ceci, ou au
cas où cela venait à se produire, laisser l’appareil
sous tension pendant une heure ou deux. Ceci lui
permettra de se stabiliser à la température
ambiante.
Entretien
Si la surface de l’appareil devient sale, nettoyer
celle-ci à l’aide d’un chiffon doux ou utiliser un
liquide de nettoyage neutre. La nettoyer entièrement.
Ne pas utiliser de diluant, de benzine ou d’alcool car
ils risquent d’endommager la surface de l’appareil.
Cuidado con la condensación
Cuando la unidad (o un disco) se mueve de un lugar
frío a un lugar cálido o cuando está en uso después
de un cambio repentino en la temperatura, existe el
peligro de condensación; el vapor en el aire se
puede condensar en los mecanismos internos,
haciendo que la operación correcta sea imposible.
Para evitar esto, o si esto ocurre, deje la unidad por
una o dos horas con la energía activada. Después la
unidad se estabilizará a la temperatura de su
ambiente.
Mantenimiento
Si se ensucia la superficie de la unidad, frótela con
una tela suave o utilice un líquido limpiador neutral
diluido. Asegúrese de retirar cualquier fluido
completamente. No utilice thinner, bencina o
alcohol, ya que podrían dañar la superficie de la
unidad.
Commutateur RESET
Dans les cas suivants, les boutons de fonctions
peuvent ne pas fonctionner correctement.
1) Quand le système est endommagé par un choc
électrique.
2) Quand l’alimentation est irrégulière ou bruyante.
Dans ces cas, appuyer la touche RESET une ou deux
fois avec un crayon ou un stylo.
Interruptor RESET
En los siguientes casos, los botones de función
podrían no funcionar adecuadamente.
M
Cuando el sistema queda dañado debido a una
descarga eléctrica.
M
Cuando la corriente es irregular o se producen
interferencias en el suministro.
En estos casos, pulse el interruptor RESET una o dos
veces con suavidad con un lápiz o bolígrafo cuando
la unidad esté conectada.

8
ENGLISH
Compact Disc (1)
Discs which can be played on this unit:
• Conventional audio CDs bearing the CD-DA logo
on the label:
?
• Properly finalized CD-R discs
Note:
<
Depending on the quality of the disc and/or the
condition of the recording, some CD-R discs may not
be playable.
<
CD-RW discs cannot be played on this unit.
<
Copy-protected discs and other discs which do not
conform to the CD standard may not play back
correctly in this player.
If you use such discs in this unit, TEAC Corporation
and its subsidiaries cannot be responsible for any
consequences or guarantee the quality of
reproduction. If you experience problems with such
non-standard discs, you should contact the
producers of the disc.
< Always place the disc on the disc tray with the label
side uppermost. (Compact discs can be played or
recorded only on one side.)
<
To remove a disc from its storage case, press down
on the center of the case and lift the disc out,
holding it carefully by the edges.
How to remove the disc
How to hold the disc
<
Should the disc become dirty, wipe the surface
radially with a soft, dry cloth.

9
FRANÇAIS ESPAÑOL
ENGLISH/ FRANÇAIS/ESPAÑOL
Disques Compacts (1)
Disques pouvant être lus avec ce lecteur :
• CD audio classiques, portant le logo CD-DA sur
l’étiquette :
?
• Disques CD-R correctement finalisés
Note :
<
Selon la qualité du disque et/ou la qualité de
l’enregistrement, certains disques CD-R risquent de
ne pas pouvoir être lus.
<
Cet appareil ne permet pas de lire les disques CD-
RW.
<
Les disques protégés contre la reproduction, ainsi
que les disques non-conformes à la norme CD
risquent de ne pas pouvoir être lus correctement
par ce lecteur.
Si vous utilisez de tels disques dans cette unité,
TEAC Corporation et ses filiales ne sont pas tenues
pour responsables de toute conséquence ou de la
garantie de la qualité de la reproduction. En cas de
problèmes avec ce type de disque non standardisé,
contactez le fabricant du disque.
< Placer toujours le disque sur le plateau, la face
imprimée sur le dessus (les disques compacts ne
sont enregistrés que sur une seule face.)
<
Pour sortir un disque de son emballage, appuyer sur
la partie centrale de l’étui et sortir le disque en
veillant à bien le tenir par les bords.
Comment sortir un disque de son emballage
Comment tenir le disque
<
Si la surface du disque est sale, l’essuyer
soigneusement à l’aide d’un chiffon doux et sec.
Discos (1)
Discos que se pueden reproducir en esta unidad:
• CD-Audio convencionales con el logotipo CD-DA
en la etiqueta:
?
• Discos CD-R debidamente grabados (con cierre
de sesión)
Nota:
<
Según la calidad del disco y el estado de la
grabación, algunos CD-R es posible que no se
puedan reproducir.
<
Los discos CD-RW no se pueden reproducir en esta
unidad.
<
Los discos protegidos contra copia y otros discos
que no se ajusten al estándar de los CD es posible
que no se reproduzcan correctamente en esta
unidad.
Si utiliza tales dicos en esta unidad, TEAC
Corporation y sus subsidiarias no pueden hacerse
responsable de ninguna consecuancia, ni garantizar
la calidad de reproducción. Si experimenta
problemas con tales discos no estándar, debe
ponerse en contacto con el fabricante de los discos.
< Coloque siempre el disco en la bandeja con la cara
de la etiqueta hacia arriba.
(Los discos compactos sólo se reproducen y graban
por una cara).
<
Para extraer un disco de su estuche, presione el
centro de la caja y levante con cuidado el disco
sosteniéndolo por los bordes.
Extracción del disco
Así se sostiene el disco
<
Si se ensucia el disco, pase un paño seco y suave
por la superficie, en sentido radial.

10
ENGLISH
Compact Disc (2)
< Never use such chemicals as record sprays,
antistatic sprays or fluid, benzine or thinner to clean
the discs. Such chemicals will do irreparable
damage to the disc’s plastic surface.
<
Discs should be returned to their cases after use to
avoid dust and scratches that could cause the laser
pickup to “skip.”
<
Do not expose discs to direct sunlight or high
humidity and temperature for extended periods.
Long exposure to high temperatures will warp the
disc.
<
CD-R discs are more sensitive to the effects of heat
and ultraviolet rays than ordinary CDs. It is
important that they are not stored in a location
where direct sunlight will fall on them, and which is
away from sources of heat such as radiators or
heat-generating electrical devices.
<
Printable CD-R discs aren’t recommended, as the
label side might be sticky and damage the unit.
<
Do not stick papers or protective sheets on the
discs and do not use any protective coating spray.
<
Use a soft oil-based felt-tipped pen to write the
information on the label side. Never use a ball-point
or hard-tipped pen, as this may cause damage to
the recorded side.
<
Never use a stabilizer. Using commercially available
CD stabilizers with this unit will damage the
mechanisms and cause them to malfunction.
<
Do not use irregular shape CDs (octagonal, heart-
shape, etc.). CDs of this sort can damage the unit.
< If you are in any doubt as to the care and handling
of a CD-R disc, read the precautions supplied with
the disc, or contact the disc manufacturer directly.

11
FRANÇAIS ESPAÑOL
ENGLISH/ FRANÇAIS/ESPAÑOL
Disques Compacts (2)
< Ne jamais utiliser de produits chimiques, tels que
des sprays, des liquides antistatiques, de l’essence
ou des diluants pour nettoyer les disques. Ces
produits chimiques risquent de provoquer des
dégâts irréparables sur la surface en plastique du
disque.
<
Ranger les disques dans leur étui après utilisation
afin d’éviter de les rayer ou que de la poussière ne
se dépose, ceci pouvant compromettre la lecture
par la tête laser.
<
Ne pas exposer les disques à la lumière directe du
soleil, à une température élevée ou à une humidité
excessive pendant une période prolongée. De telles
expositions risquent de provoquer une déformation
du disque.
<
Les disques CD-R sont plus sensibles aux effets de
la chaleur et aux rayons ultraviolets que les disques
compacts ordinaires. Il est donc particulièrement
important de les ranger dans un endroit à l’abri de la
lumière directe du soleil et de toute source de
chaleur, telle que des radiateurs ou des appareils
électriques, susceptibles de dégager de la chaleur.
<
Il est déconseillé d’utiliser des disques CD-R
inscriptibles, la face portant l’étiquette risquant
d’être collante et d’endommager l’appareil.
<
Ne jamais coller d’étiquette ou de feuille de
protection sur le disque; ne pas utiliser de spray
destiné à déposer sur le disque une couche de
protection.
<
Utiliser, pour écrire des informations sur la face
portant l’étiquette, un feutre utilisant une encre à
base d’huile. Ne jamais utiliser de stylo bille ou de
stylo à pointe dure, qui risquerait d’abîmer la
surface enregistrée du disque.
<
Ne jamais utiliser de stabilisateurs. L’utilisation,
avec cet appareil, de stabilisateurs pour CD
disponibles dans le commerce, pourrait
endommager les mécanismes de l’appareil et
provoquer son dysfonctionnement.
<
Ne pas utiliser de CD ayant une forme irrégulière
(octogonale, en forme de coeur, etc.), ceux-ci
risquant d’endommager l’appareil.
< En cas de doute quant à la manipulation des CD-R,
lire les instructions fournies avec le disque ou
contacter directement le fabricant du disque.
Discos (2)
< No utilice nunca productos químicos como los
aerosoles para discos de vinilo o antiestáticos,
bencina o aguarrás para limpiar los discos. Tales
sustancias causarán daños irreparables en la
superficie de plástico del disco.
<
Los discos deberán devolverse a sus estuches
después de usarlos para evitar la acumulación de
polvo y los rayados, que podrían producir “saltos”
en el lector láser.
<
No exponga los discos a la luz solar directa ni a
niveles elevados de temperatura o humedad
durante períodos prolongados. Las altas
temperaturas deforman los discos con el tiempo.
<
Los discos CD-R son más sensibles a los efectos del
calor y los rayos ultravioleta que los CD normales.
No conviene guardarlos en lugares donde puedan
quedar expuestos a la luz solar directa, y deberán
mantenerse alejados de fuentes de calor como los
radiadores o los aparatos eléctricos que
desprendan calor.
<
No se recomiendan los CD-R imprimibles, ya que el
lado de la etiqueta puede tener restos de adhesivo y
dañar la unidad.
<
No adhiera papeles ni láminas de protección a los
discos, ni aplique ningún tipo de aerosol de
revestimiento.
<
Utilice un rotulador de punta blanda para escribir en
el lado de la etiqueta. No emplee nunca bolígrafos
ni lápices de punta dura, ya que podría dañar la
cara grabada del disco.
<
No utilice nunca estabilizadores. Los estabilizadores
de CD existentes en el mercado producirán daños
en los mecanismos y anomalías en su
funcionamiento.
<
No utilice discos de diseño irregular (octogonales,
forma de corazón, etc.), ya que pueden dañar la
unidad.
< Si tiene alguna duda sobre el cuidado y
manipulación de un disco CD-R, lea las
instrucciones facilitadas con el disco o póngase
directamente en contacto con el fabricante.

12
ENGLISH
A
B
V
FEC GD
T S R Q L K J IP MO N
H H
C
K
Q
G
M
D
W
X
U
E
P
TOP
FRONT
REAR
REMOTE CONTROL

ENGLISH/ FRANÇAIS/ESPAÑOL
13
ENGLISH
Names of Each Control
Disc cover
Press the L mark on the disc cover to open it.
SNOOZE button
After the on time is reached, use this button to turn
the unit off for 5 minutes.
POWER switch
Press this switch to turn the unit on and off.
CD, TUNER buttons (FUNCTION button)
Press the CD button to play a disc.
Press the TUNER button to listen to the radio.
Press the FUNCTION button repeatedly when using
the remote control unit.
BAND button
Use this button to select FM or AM.
Display
CD operation buttons
When TUNER is selected, these buttons won’t work.
STOP button (H)
Use this button to stop playback.
PLAY/PAUSE button (y/J)
Use this button to start or pause playback.
SKIP/SEARCH buttons
(.
m
/
,
/)
Press these buttons to skip tracks.
Hold down these buttons to search for a part of a
track.
Speakers (stereo)
Remote sensor
SHUFFLE button
Use this button to select shuffle playback mode.
REPEAT/PRESET button
Use this button to change the repeat mode or select
a preset number and station.
MEMORY/CLOCK ADJ button
Use this button to program tracks or to adjust the
clock.
L
K
J
I
H
G
F
E
D
C
B
A
VOLUME knob
Turn this knob to adjust the volume.
Subwoofer
BASS CONTROL knob
Use this control knob to adjust the subwoofer level.
TUNING knob
Turn this knob to tune in a station.
MUTING button
To cut the sound temporarily, press the MUTING
button. Press the MUTING button again to restore
the sound. If you change the volume during the
muting, the muting will be canceled.
DISPLAY button
Use this button to change the display mode.
TIMER/SLEEP button
Use this button to set the timer or sleep timer.
PHONES
Insert the headphones plug into the PHONES jack,
and adjust the volume.
Both stereo and monaural earphones can be used
with this unit.
SLEEP button
Use this button to set the sleep timer.
Holder for Remote Control Unit
Place the remote control unit when not in use.
You can detach the holder by using a screw driver,
if you don’t need it.
FM feeder antenna
Tune in an FM station and extend the lead to find the
best position for the reception. Then fix it to the wall
with thumb tacks or the like.
AC Power Cord
Plug this AC power cord into an AC wall socket.
X
W
V
U
T
S
R
Q
P
O
N
M
The equipment draws nominal nonoperating
power from the AC outlet with its POWER switch
in the OFF position.

14
FRANÇAIS
A
B
V
FEC GD
T S R Q L K J IP MO N
H H
C
K
Q
G
M
D
W
X
U
E
P
DESSUS
DEVANT
DERRIÈRE
TÉLÉCOMMANDE

ENGLISH/ FRANÇAIS/ESPAÑOL
15
FRANÇAIS
Nomenclature
Couvercle du disque
Appuyez sur la marque L située sur le couvercle du
disque pour l’ouvrir.
Touche SNOOZE
Après que l’appareil s’est allumé, utilisez cette
touche pour l’éteindre pour 5 minutes.
Commutateur POWER
Appuyer sur cette touche pour allumer ou éteindre
l’appareil.
Touches CD, TUNER (Touche FUNCTION)
Appuyer sur la touche CD pour jouer un disque.
Pour l’écoute du radio, appuyer sur la touche AM ou
FM.
Appuyez sur la touche FUNCTION répététivement
quand vous utilisez la télécommande.
Touche BAND
Utilisez cette touche pour choisir le AM ou le FM.
Afficheur
Touches d’opération du CD
Si le TUNER est choisi, ces touches ne fonctionnent
pas.
Touche STOP (H)
Utiliser cette touche pour arrêter la lecture.
Touche PLAY/PAUSE (y/J)
Utiliser cette touche pour débuter ou pausé la
lecture.
Touches SKIP/SEARCH
(.
m
/
,
/)
Appuyer sur ces touches pour sauter des pistes.
Tenir appuyer ces touches pour chercher une
section d’une piste.
Haut-parleurs (stéréo)
Capteur de télécommande
Touche SHUFFLE
Utilisez cette touche pour choisir le mode de lecture
aléatoire.
Touche REPEAT/PRESET
Utilisez cette touche pour changer le répétage ou
choisir un numéro préréglé et une station.
K
J
I
H
G
F
E
D
C
B
A
Touche MEMORY/CLOCK ADJ
Utilisez cette touche pour programmer les pistes ou
régler l’horloge.
Commande VOLUME
Utiliser ce commande pour régler le volume.
Subwoofer
Commande BASS CONTROL
Utilisez ce commande pour régler le niveau du
subwoofer.
Commande TUNING
Utiliser ce commande pour la syntonisation d’un
poste.
Touche MUTING
Pour couper le son provisoirement, appuyer sur la
touche MUTING. Pour rétablir le son, appuyer à
nouveau sur cette même touche. Le fait de modifier
le volume sonore alors que la fonction MUTING est
activée a pour effet d’annuler la fonction MUTING.
Touche d’affichage
Utilisez cette touche pour changer le mode
d’affichage.
Touche TIMER/SLEEP
Utiliser cette touche pour régler le minuteur ou le
minuteur de mise en veille.
ÉCOUTEURS
Insérer la prise des écouteurs dans cette prise et
régler le volume.
Les écouteurs stéréos et monos peuvent être
utiliser avec cet appareil.
Touche SLEEP
Utiliser cette touche pour régler le minuteur de mise
en veille.
Support de la télécommande
Placer la télécommande sur son support lorsqu’elle
n’est pas utilisée. Il est possible de détacher le
support à l’aide d’un tournevis si besoin est.
Antenne FM
Syntoniser un poste FM et étendre l’antenne pour
trouver lameilleure position de réception. Ensuite
tenir en place sur le mur en utilisant des punaises
ou autre.
Cordon d’alimentation
Brancher ce cordon d’alimentation dans une prise
murale CA.
X
W
V
U
T
S
R
Q
P
O
N
M
L
Cet appareil consume du courant même quand il
est éteint.

16
ESPAÑOL
A
B
V
FEC GD
T S R Q L K J IP MO N
H H
C
K
Q
G
M
D
W
X
U
E
P
VISTA SPERIOR
VISTA FRONTAL
VISTA TRASERA
MANDO A DISTANCIA

ENGLISH/ FRANÇAIS/ESPAÑOL
17
ESPAÑOL
Nombres de cada control
Cubierta del disco
Oprima la marca L en la cubierta del disco para
abrirlo.
Botón SNOOZE
Después de que se llega a la hora, utilice este botón
para apagarla durante 5 minutos.
Interruptor POWER
Oprima este interruptor para encender y apagar la
unidad.
Botones CD, TUNER (botón FUNCTION)
Oprima el botón CD para reproducir un disco.
Para escuchar la radio, oprima el botón TUNER.
Oprima el botón FUNCTION de manera repetida
cuando utilice la unidad de control remoto.
Botón BAND
Utilice este botón para seleccionar FM o AM.
Pantalla
Botones de operación de CD
Cuando se selecciona TUNER o AUX, estos botones
no trabajarán.
Botón STOP (H)
Utilice este botón para detener la reproducción.
Botón PLAY/PAUSE (y/J)
Utilice este botón para iniciar o hacer pausa en la
reproducción.
Botones SKIP/SEARCH (.m/ ,/)
Oprima estos botones para saltar las pistas.
Mantenga oprimidos estos botones para buscar una
parte de una pista.
Bocinas (estereo)
Sensor remoto
Botón SHUFFLE
Utilice este botón para seleccionar el modo de
reproducción al azar.
Botón REPEAT/PRESET
Utilice este botón para cambiar el modo de
repetición o seleccione el número preestablecido y
una estación.
K
J
I
H
G
F
E
D
C
B
A
Botón MEMORY/CLOCK ADJ
Utilice este botón para programar las pistas o
ajustar el reloj.
Perilla VOLUME
Gire esta perilla para ajustar el volumen.
Subwoofer
Perilla BASS CONTROL
Utilice esta perilla de control para ajustar el nivel de
subwoofer.
Perilla TUNING
Gire esta perilla para sintonizar una estación.
Botón MUTING
Para cortar el sonido temporalmente, oprima el
botón MUTING. Oprima el botón MUTING otra vez
para restaurar el sonido. Si cambia el volumen
cuando está en estado de MUTING, se cancelará la
condición de silencio.
Botón DISPLAY
Utilice este botón para cambiar el modo de
desplegado.
Botón TIMER/SLEEP
Utilice este botón para ajustar el tiempo de
despertar o dormir.
ÉCOUTEURS
Insérer la prise des écouteurs dans cette prise et
régler le volume.
Les écouteurs stéréos et monos peuvent être
utiliser avec cet appareil.
Botón SLEEP
Utilice este botón para ajustar el tiempo de dormir.
Soporte para la unidad de control remoto
Coloque la unidad de control remoto cuando no se
utilice. Puede separar el soporte usando un
destornillador, si no lo necesita.
Antena alimentadora de FM
Sintonice una estación FM y extienda el conductor
para encontrar la mejor posición para la recepción.
Después fíjela en la pared con tachuelas o algún
objeto similar.
Cable de energía CA
Conecte este cable de energía CA a una conexión
de pared CA.
X
W
V
U
T
S
R
Q
P
O
N
M
L
El equipo toma energía no operacional nominal de
la salida CA con su interruptor POWER en la
posición OFF (APAGADO).

18
ENGLISH
Remote Control Unit
The provided Remote Control Unit allows the unit to be
operated from a distance.
When operating the remote control unit, point it
towards the REMOTE SENSOR on the front panel of the
unit.
<
Even if the remote control unit is operated within the
effective range, remote control operation may be
impossible if there are any obstacles between the
unit and the remote control.
<
If the remote control unit is operated near other
appliances which generate infrared rays, or if other
remote control devices using infrared rays are used
near the unit, it may operate incorrectly. Conversely,
the other appliances may operate incorrectly.
Battery Installation
Remove the battery compartment cover.
Insert two “AAA“ (R03, SUM-4) dry batteries. Make
sure that the batteries are inserted with their
positive “+
“ and negative “_“ poles positioned
correctly.
Close the cover.
Battery Replacement
If the distance required between the remote control
unit and main unit decreases, the batteries are
exhausted. In this case replace the batteries with new
ones.
Precautions concerning batteries
< Be sure to insert the batteries with correct positive
“+
“ and negative “_“ polarities.
<
Use batteries of the same type. Never use different
types of batteries together.
<
Rechargeable and non-rechargeable batteries can
be used. Refer to the precautions on their labels.
<
When the remote control unit is not to be used for a
long time (more than a month), remove the batteries
from the remote control unit to prevent them from
leaking. If they leak, wipe away the liquid inside the
battery compartment and replace the batteries with
new ones.
<
Do not heat or disassemble batteries and never
dispose of old batteries by throwing them in a fire.
3
2
1

19
FRANÇAIS ESPAÑOL
ENGLISH/ FRANÇAIS/ESPAÑOL
Boîtier de télécommande Unidad de control remoto
Le boîtier de télécommande fourni permet la
commande à distance defourni permet la commande à
distance de l’appareil. Pour l’utilisation du boîtier de
télécommande, le diriger vers le détecteusation du
boîtier de télécommande, le diriger vers le détecteur de
télécommande du panneau avant de l’appareil.
<
Même si le boîtier de télécommande est activé dans
la zone de fonctionnement, la commande à distance
peut être impossible s’il y a des obstacles entre le
lecteur et le boîtier de télécommande.
<
Si le boîtier de télécommande fonctionne dans le
voisinage d’autres appareils générant des rayons
infrarouges, ou si d’autres télécommandes utilisant
des rayons infrarouges sont utilisées près du
lecteur, le lecteur peut de ne pas bien fonctionner.
Dans la situation inverse, les autres apaareils
peuvent ne pas bien fonctionner.
Mise en place des piles
Retirer le couvercle du compartiment des piles.
Introduire deux piles “AAA“ (R03, SUM-4). S’assurer
que les piles sont correctement mises en respectant
les polarités plus +
et moins _ .
Fermer le couvercle jusqu’au déclic.
Remplacement des piles
Si vous remarquez que la distance entre le boîtier de
télécommande et le lecteur devient plus courte pour un
fonctionnement correct, ceci indique que les piles sont
usées. Dans ce cas, remplacer les piles par des
nouvelles.
Précautions à observer concernant les
piles
< Bien placer les piles en respectant les polarités plus
+
et moins _ .
<
Utiliser des piles du même type. Ne jamais essayer
d’utiliser des types de pile différents ensemble.
<
Des piles ou des batteries peuvent être utilisées. Se
référer à leurs étiquettes pour les précautions à
respecter.
<
Si le boîtier de télécommande n’est pas utilisé
pendant une longue période (pluss d’un mois),
retirer les piles du boîtier de télécommande pour
éviter des fuites de pile. Si elles coulent, essuyer le
liquide dans le compartiment des piles et remplacer
les piles par des neuves.
<
Ne pas chauffer, démonter les piles ni les mettre au
feu.
3
2
1
La unidad de control remoto suministrada le permite
controlar el aparato a distancia.
Cuando opere con el control remoto, diríjalo hacia el
sensor remoto en el panel frontal del aparato.
<
Aunque se utilice la unidad dentro del margen de
funcionamiento efectivo, es imposible el control a
distancia si hay obstáculos entre el reproductor y el
control remoto.
<
Si se utiliza la unidad cerca de otros aparatos que
generen rayos infrarrojos o si se emplean otros
aparatos de control remoto por rayos infrarrojos
cerca del reproductor, es posible que éste no
funcione correctamente. Del mismo modo, es
posible que los otros aparatos tampoco funcionen
correctamente.
Instalación de las pilas
Abra la tapa del compartimiento de las pilas.
Coloque dos pilas “AAA“ (R03, SUM-4).
Asegúrese de que las pilas queden ubicadas con
sus polos positivo +
y negativo _ correctamente
posicionados.
Cierre la tapa hasta que se trabe.
Cambio de pilas
Si nota que ha disminuido la distancia necesaria para
un control correcto entre el control remoto y el
reproductor, significa que las pilas están gastadas. En
este caso, reemplácelas por nuevas.
Precauciones con las pilas
< Asegúrese de insertar las pilas con sus polaridades
positiva +
y negativa _ correctas.
<
Utilice el mismo tipo de pilas. Nunca utilice
diferentes tipos de pilas juntas.
<
Pueden utilizarse pilas recargables y no
recargables. Refiérase a las precauciones en sus
rótulos.
<
Si no va a utilizar el control remoto por mucho
tiempo (más de un mes), retire las pilas para evitar
pérdidas. Si se produce pérdidas, limpie el líquido
en el interior del compartimiento y cambie las pilas
por nuevas.
<
No caliente ni desarme las pilas y nunca arroje pilas
gastadas al fuego.
3
2
1

20
ENGLISH
Playing a CD (1)
1 52
Press the POWER switch to turn the unit ON.
Press the CD button to select “CD”.
Press the FUNCTION button repeatedly to select
“CD”, when using the remote control unit.
<
When no disc is in the unit, “no dISC” will be
displayed.
Press L to open the disc cover.
Place a disc with the printed label face up, and
close the cover by hand.
<
CD’s must be pressed securely onto the Spindle,
until a “CLICK” is heard.
<
Never place more than one disc in the CD player.
<
When closing, press L on the cover.
<
The total number of the tracks and total play time of
the disc is displayed.
<
It takes a few seconds for the unit to read the
contents of the disc. No button will work during
reading. Wait until the total number of the tracks
and total play time of the disc is displayed.
Press the PLAY/PAUSE button (y /J ) to start
playback.
Playback starts from the first track.
When playback of all the tracks has finished, the
unit stops automatically.
5
4
3
2
1
1
2
4
5
3

21
FRANÇAIS ESPAÑOL
ENGLISH/ FRANÇAIS/ESPAÑOL
Lecture du CD (1) Reproducción de CD (1)
Appuyer sur le commutateur d’alimentation pour
allumer l’appareil.
Appuyer sur la touche CD pour choisir “CD”.
Appuyez sur la touche FUNCTION répététivement
pour choisir “CD”, quand vous utilisez la
télécommande.
<
Si il n’y a pas de disque dans l’appareil “no dISC”.
Appuyez sur L pour ouvrir le couvercle du disque.
Déposer le disque, face imprimée vers le haut et
fermer le tirroir manuellement.
<
Les CD doivent être fermement insérés sur la
broche de centrage, jusqu’à l’émission d’un “CLIC”.
<
Ne jamais déposer plus d’un disque dans l’appareil.
<
Pour fermer, appuyez sur L sur le couvercle.
<
Le nombre total de playes et la durée totale de
lecture du disque s’affichent.
<
L’appareil prend quelque secondes pour lire le
contenu du disque. Aucune touche fonctionne
durant cette lecture. Attendre que le nombre total
de pistes et la durée totale de lecture du disque est
affiché.
Appuyer sur la touche PLAY/PAUSE (y/J) pour
débuter la lecture.
La lecture débute à la première piste. Quand toute
les pistes ont jouées, l’appareil s’arrête
automatiquement.
5
4
3
2
1
Oprima el interruptor POWER para encender la
unidad.
POprima el botón CD para seleccionar “CD”
Oprima el botón FUNCTION de manera repetida
para seleccionar ”CD”, cuando utilice la unidad de
control remoto
<
Cuando no hay ningún disco colocado en la unidad,
se mostrará “no dISC” en la pantalla.
Oprima L para abrir la cubierta del disco.
Coloque un disco con la etiqueta hacia arriba y
cierre la cubierta manualmente.
<
Los CD deben asentarse bien en la unidad, hasta
que se oiga un “CLIC”.
<
Nunca coloque más de un disco en la unidad.
<
Cuando lo cierre, oprima L en la cubierta.
<
Se despliega en pantalla el número total de pistas y
el tiempo total de reproducción del disco.
<
Toma algunos segundos para que la unidad lea el
contenido del disco. Ningún botón funcionará
durante la lectura. Espere hasta que se despliegue
el número total de las pistas y el tiempo total de
reproducción.
Oprima el botón PLAY/PAUSE (y /J ) para
comenzar la reproducción
La reproducción comienza desde la primera pista.
Cuando la reproducción de todas las pistas ha
finalizado, la unidad se detiene automáticamente.
5
4
3
2
1

22
ENGLISH
Playing a CD (2)
BDC A
E
B
A
E
C
D
To stop playback
Press the STOP button (H) to stop playback.
To suspend playback temporarily (pause mode)
Press the PLAY/PAUSE button (y/J). Playback
stops at the current position.
To resume playback, press the PLAY/PAUSE button
(y
/J) again.
To skip to the next or a previous track
During playback, press the SKIP/SEARCH button
(.
m
or
,
/) repeatedly until the desired
track is found. The selected track will be played
from the beginning.
In the stop mode, press the SKIP/SEARCH button
(.
m
or
,
/) repeatedly until the desired
track is found, and press the PLAY/PAUSE button
(y
/J) to start playback from the selected track.
<
When the .
m
button is pressed once during
playback, the track being played will be played from
the beginning. To return to the beginning of the
previous track, press the .
m
button twice.
<
During programmed playback, the next or previous
track in the program is played.
Search for a part of a track
During playback, hold down the SKIP/SEARCH
button (.
m
or
,
/) and release it when
the part you want to listen to is found.
DISPLAY button
During playback, press this button repeatedly to
change the display mode as follows:
<
Clock display and timer mode display appears for 4
seconds and returns to original display.
<
In the stop mode, remaining time of the disc cannot
be selected.
E
D
C
B
A
Playing time of the current track
Remaining time of the disc
Clock display
Timer mode display

23
FRANÇAIS ESPAÑOL
ENGLISH/ FRANÇAIS/ESPAÑOL
Lecture du CD (2)
Pour l’arrêt de la lecture
Appuyer sur la touche STOP (H) pour arrêter la
lecture.
Pour un arrêt momentanné de la lecture (mode
pause)
Appuyer sur la touche PLAY/PAUSE (y/J). La
lecture s’arrête à la position courante. Pour
continuer la lecture appuyer sur la touche
PLAY/PAUSE (y
/J) de nouveau.
Pour sauter vers la piste suivante ou précédente
Durant la lecture, appuyer sur la touche
SKIP/SEARCH (.
m
ou
,
/ )
répététivement jusqu’à temps que la piste désirée
est trouvée. La piste choisie va jouée à partir du
début.
En mode arrêt, appuyer sur la touche SKIP/SEARCH
(.
m
ou
,
/ ) répététivement jusqu’à
temps que la piste désirée est trouvée et appuyer
sur la touche PLAY/PAUSE (y
/J) pour commencer
la lecture de la piste choisie.
<
Quand la touche .
m
est appuyée une fois
durant la lecture, la piste qui joue sera rejouée à
partir du début. Pour retourner au début de la piste
précédente appuyer sur la touche.
m
deux
fois.
<
Durant la lecture programmée, la piste suivante ou
précédente du programme est jouée.
Recherche d’une section de piste
Durant la lecture, tenir appuyer la touche
SKIP/SEARCH (.
m
ou
,
/) et relacher
quand vous avez atteint la section de piste désirée.
Touche DISPLAY
Durant la lecture, appuyez cette touche
répététivement pour changer le mode d’affichage
tel qu’il suit:
<
Affichage de l’horloge et minuterie apparaissent
pour 4 secondes seulement.
<
En mode d’arrêt, le temps qui reste du disque ne
peut pas être choisi.
E
D
C
B
A
Durée de la lecture de la piste courante
Temps qui reste sur le disque
Affichage de l’horloge
Affichage de la minuterie
Reproducción de CD (2)
Para detener la reproducción
Oprima el botón STOP (H ) para detener la
reproducción.
Para suspender temporalmente la reproducción
(modo de pausa)
Oprima el botón PLAY/PAUSE (y /J ). La
reproducción se detiene en la posición actual. Para
continuar la reproducción, oprima el botón
PLAY/PAUSE (y
/J) nuevamente.
Para saltar a la siguiente o a una pista Previa
Durante la reproducción, oprima el botón
SKIP/SEARCH (.m
o ,/)
repetidamente hasta que se encuentre la pista
deseada. La pista seleccionada se reproducirá
desde el comienzo.
En el modo de paro, oprima el botón oprima el botón
SKIP/SEARCH (.m
o ,/) repetidamente
hasta que se encuentre la pista deseada y oprima el
botón PLAY/PAUSE (y
/J ) para comenzar la
reproducción desde la pista seleccionada.
< Cuando se oprime el botón .m una vez
durante la reproducción, la pista que se está
reproduciendo se reproducirá desde el principio.
Para regresar al comienzo de la pista previa, oprima
el botón .m
dos veces.
<
Durante la reproducción programada, se reproduce
la pista siguiente o previa en el programa.
Búsqueda de una parte de una pista
Durante la reproducción, mantenga oprimido el
botón SKIP/SEARCH (.m
o ,/) y
libérelo cuando se ha encontrado la parte que usted
desea escuchar.
Botón DISPLAY (PANTALLA)
Durante la reproducción, oprima este botón de
manera repetida para cambiar el modo de
desplegado de la siguiente forma:
<
El desplegado de reloj y el desplegado de modo de
despertador aparecen durante cuatro segundos y
después regresan al desplegado original.
<
En el modo de paro, no se puede seleccionar el
tiempo restante del disco.
E
D
C
B
A
Tiempo de reproducción de la pista actual
Tiempo restante del disco
Desplegado de reloj
Desplegado de modo de despertador

24
ENGLISH
Programmed Playback (1)
2 4
1 3
Up to 20 tracks can be programmed in the desired
order.
<
Shuffle playback does not work during program
playback.
<
Insert a disc and select “CD” before beginning
programming.
Press the MEMORY/CLOCK ADJ button in the stop
mode.
“MEMORY” indicator blinks, and “P-01” appears on
the display.
Within 10 seconds, press the SKIP/SEARCH button
to select a track.
<
If the SKIP/SEARCH button isn’t pressed within 10
seconds, program mode will be canceled.
While “MEMORY” is blinking on the display, press
the MEMORY/CLOCK ADJ button.
The track is programmed, and “P-02” is displayed.
Repeat step and to program more tracks.
<
You can program up to 20 tracks.
<
To cancel the program mode, press the STOP button
(H
).
When the selection of track numbers has been
finished, press the PLAY/PAUSE button (y
/J) to
start program playback.
If the PLAY/PAUSE button isn’t pressed within 10
seconds, the MEMORY indicator will go off. In that
case, press the MEMORY/CLOCK ADJ button and
then press the PLAY/PAUSE button to start program
playback.
The programmed contents are kept in memory even
after the TUNER button is pressed or the power is
turned off.
4
32
3
2
1
1
2
4
3

25
FRANÇAIS ESPAÑOL
ENGLISH/ FRANÇAIS/ESPAÑOL
Lecture programmée (1)
Jusqu’à 20 pistes peuvent être programmer dans
l’ordre désiré.
<
La lecture aléatoire ne fonctionne pas durant la
lecture programmée.
<
Choisir un disque et “CD” d’avance.
Appuyer sur la touche MEMORY/CLOCK ADJ durant
le mode arrêt.
L’indicateur “MEMORY” clignote et “P-01” est
affiché.
En dedans de 10 secondes, appuyer sur les touches
numériques pour choisir une piste.
<
Si la touche SKIP/SEARCH ne sont pas pressées en
moins de 10 secondes, le mode programmation est
annulé.
Lorsque “MEMORY” clignote à l’affichage, appuyer
sur la touche MEMORY/CLOCK ADJ.
La piste est programmée et “P-02” est affiché.
Répéter l’étape et pour programmer d’autre
pistes.
<
Vous pouvez programmés jusqu’à 20 pistes.
<
Pour annuller la programmation, appuyer sur la
touche STOP (H
).
Quand vous avez terminés avec votre sélection de
pistes, appuyer sur la touche PLAY/PAUSE (y
/J)
pour commencer la lecture programmée.
Si la touche PLAY/PAUSE n’est pas appuyée en
dedans de 10 secondes, l’indicateur MEMORY
s’éteint. Dans ce cas, appuyer sur la touche
MEMORY/CLOCK ADJ et ensuite appuyer sur la
touche PLAY/PAUSE pour commencer la lecture
prorammée.
La programmation est retenue en mémoire même si
la touche TUNER est appuyée ou l’appareil est
éteint.
4
32
3
2
1
Reproducción programada (1)
Se pueden programar hasta 20 pistas en el orden
deseado.
<
La reproducción aleatoria, no funciona durante la
reproducción programada.
<
Coloque un disco y seleccione “CD” previamente.
Oprima el botón MEMORY/CLOCK ADJ en el modo
de paro.
El indicador MEMORY parpadea y aparece “P-01”
en la pantalla,
Dentro de un lapso de 10 segundos, oprima los
botones numéricos para seleccionar una pista.
<
Si no se oprimen el botón SKIP/SEARCH dentro de
los siguientes 10 segundos, se cancelará el modo
de programación.
Mientras parpadea “MEMORY” en la pantalla,
oprima el botón MEMORY/CLOCK ADJ.
La pista se programa y se despliega “P-02”.
Repita los pasos e para programar más
pistas.
<
Usted puede programas hasta 20 pistas.
<
Para cancelar el modo de programa, oprima le
botón STOP (H
).
Cuando se ha finalizado la selección de los número
de pistas, oprima el botón PLAY/PAUSE (y
/J)
para comenzar la reproducción de programa.
Si no se oprime el botón PLAY/PAUSE en un periodo
de 10 segundos, el indicador MEMORY se apagará.
En ese caso, oprima el botón MEMORY/CLOCK ADJ
y después oprima el botón PLAY/PAUSE para
comenzar la reproducción de programa.
Los contenidos programados se mantienen en la
memoria aún después de que se oprime el botón
TUNER o se desactiva la energía.
4
32
3
2
1

26
ENGLISH
Programmed Playback (2)
MEMORY/CLOCK ADJ
STOPSKIP/SEARCH
To add a track to the end of the program
In the stop mode, press the MEMORY/CLOCK ADJ
button repeatedly until “00” appears on the display.
Select a track number by pressing the
SKIP/SEARCH button, and then press the
MEMORY/CLOCK ADJ button.
The track is added to the end of the program.
B
To clear program
In the stop mode, do either of the following to clear
the program:
Press L
on the disc cover and open it.
Press the MEMORY/CLOCK ADJ button and then
the STOP (H
) button.
< If the unit is disconnected from the power supply for
more than 3 minutes, the programmed contents will
be cleared.
E
To cancel the program playback mode
Press the STOP (H) button. “MEMORY” indicator
disappears, but the programmed contents aren’t
lost.
To return to the program mode, press the
MEMORY/CLOCK ADJ button.
D
To check the programmed order
In the stop mode, press the MEMORY/CLOCK ADJ
button repeatedly to show the track numbers that
have been stored in memory.
A
To overwrite the program
In the stop mode, press the MEMORY/CLOCK ADJ
button repeatedly until the track number to be
changed appears on the display.
Select a track number by pressing the
SKIP/SEARCH button, and then press the
MEMORY/CLOCK ADJ button.
C
B
A
E
C
D

27
FRANÇAIS ESPAÑOL
ENGLISH/ FRANÇAIS/ESPAÑOL
Lecture programmée (2)
Pour ajouter une piste à la fin du programme
En mode d’arrêt, appuyez sur la touche
MEMORY/CLOCK ADJ répététivement jusqu’à temps
que “00” est affiché.
Sélectionner un numéro de piste en appuyant sur la
touche SKIP/SEARCH, et appuyer ensuite sur la
touche MEMORY/CLOCK ADJ.
La piste est ajoutée à la fin du programme.
B
Pour vidanger la programmation
En mode d’arrêt, réalisez une des opérations
suivantes pour annuler le programme:
Appuyez sur la touche L
sur la couverture du
compartiment à disque pour l’ouvrir.
Appuyez sur la touche MEMORY/CLOCK ADJ puis
sur la touche STOP (H
).
<
Si l’appareil est débranché pour plus de 3 minutes,
la programmation est vidangée.
E
Pour annuler la lecture programmée
Appuyez sur la touche STOP (H ). le témoin
”MEMORY” s’allume, mais le contenu de la
programmation n’est pas perdu.
Pour retourner en mode programmation, appuyez
sur la touche MEMORY/CLOCK ADJ.
D
Pour vérifier l’ordre de programmation
En mode d’arrêt, appuyez sur la touche
MEMORY/CLOCK ADJ répététivement, pour voir les
numéros de pistes entreposés en mémoire.
A
Pour recouvrir un programme
En mode arrêt, appuyer la touche MEMORY/CLOCK
ADJ répététivement jusqu’ à temps que le numéro de
piste à changer est affiché.
Sélectionner un numéro de piste en appuyant sur la
touche SKIP/SEARCH, et appuyer ensuite sur la
touche MEMORY/CLOCK ADJ.
C
Reproducción programada (2)
Para agregar una pista al final del programa
En el modo de paro, oprima el botón
MEMORY/CLOCK ADJ de manera repetida hasta
que aparezca en pantalla “00” .
Seleccione un número de pista pulsando el botón
SKIP/SEARCH, y luego pulse el botón
MEMORY/CLOCK ADJ.
La pista se agrega al final del programa.
B
Para borrar el programa
En el modo de paro, realice alguna de las siguientes
acciones para borrar el programa:
Oprima L
en la cubierta del disco y ábralo.
Oprima el botón MEMORY/CLOCK ADJ después el
botón STOP (PARO) (H
).
< Si la unidad se desconecta del suministro de
energía por más de 3 minutos, los contenidos de
programa se borrarán.
E
Para cancelar el modo de reproducción
programada
Oprima el botón STOP (H). Desaparece el indicador
“MEMORY”, pero el contenido programado no se
pierde.
Para regresar al modo de programación, oprima el
botón MEMORY/CLOCK ADJ.
D
Para verificar el orden programado
En el modo de paro, oprima el botón
MEMORY/CLOCK ADJ de manera repetida para
mostrar los números de pista que se almacenaron
en memoria.
A
Para sobrescribir el programa
En el modo de paro, oprima el botón
MEMORY/CLOCK ADJ de manera repetida hasta
que aparezca en pantalla el número de pista que se
va a cambiar.
Seleccione un número de pista pulsando el botón
SKIP/SEARCH, y luego pulse el botón
MEMORY/CLOCK ADJ.
C

28
ENGLISH
Repeat Playback
Repeat one track
Press the REPEAT/PRESET button once during
playback. The repeat indicator blinks.
The track being played will be played repeatedly. If
you press the SKIP/ SEARCH button and select
another track, the track you select will be played
repeatedly.
It is also possible to select a track to be repeated in
the stop mode. Press the REPEAT/PRESET button
and then select the track number by pressing the
SKIP/SEARCH button or the numeric buttons. Press
the PLAY/PAUSE button to start playback.
Repeat All the Tracks
All the tracks of the disc will be played repeatedly.
Press the REPEAT/PRESET button twice. The repeat
indicator lights steadily.
<
During program playback, only the programmed
tracks will be played in order repeatedly.
<
If one of the following buttons is pressed or the disc
cover is opened, repeat mode will be canceled:
STOP button (H
)
POWER switch
TUNER button
FUNCTION button
repeat one track
repeat all the tracks
(off)
Every time the REPEAT/PRESET button is pressed, the
REPEAT indicator lights or blinks, and the mode is
changed as follows :

29
FRANÇAIS ESPAÑOL
ENGLISH/ FRANÇAIS/ESPAÑOL
Lecture répétitive
Répétition d’une piste
Appuyer sur la touche REPEAT/PRESET une fois
durant la lecture. L’indicateur de répétition clignote.
La piste courante est rejouée répététivement. Si
vous appuyez sur la touche SKIP/SEARCH ou sur les
touches numériques et choisissez une autre piste,
cette piste sera jouée répététivement
Il est aussi possible de choisir une piste à être
répéter en mode arrêt. Appuyer sur la touche
REPEAT/PRESET et ensuite choisir le numéro de la
piste en appuyant sur la touche SKIP/SEARCH ou
sur les touches numériques. Appuyer sur la touche
PLAY/PAUSE pour commencer la lecture.
Répétition de toute les pistes
Toute les pistes du disque seront répétées
Appuyer sur la touche REPEAT/PRESET deux fois.
L’indicateur repeat s’allume solidement.
<
Durant la lecture programmée, seulement les pistes
programmées seront jouées dans l’ordre
répététivement.
<
Si une des touches suivantes est appuyée ou le
couvercle du disque est ouvert, le répétage est
annulé:
touche STOP (H
)
commutateur POWER(ALIMENTATION)
touche TUNER
touche FUNCTION
répétition d’une piste
répétition de toute les pistes
(off)
Chaque fois que la touche REPEAT/PRESET est
appuyée, l’indicateur REPEAT s’allume ou clignote et le
mode est changé tel qu’il suit :
Reproducción repetida
Repeat one track (Repetir una pista)
Oprima el botón REPEAT/PRESET una vez durante la
reproducción. El indicador de repetición parpadea.
La pista que se está reproduciendo se escuchará de
manera repetida. Si se oprime el botón
SKIP/SEARCH o los botones numéricos y se
selecciona otra pista, la pista que seleccione se
reproducirá de manera repetida.
También es posible seleccionar una pista que se
repita durante el modo de paro. Oprima el botón
REPEAT/PRESET y después seleccione el número
de pista oprimiendo el botón SKIP/SEARCH o los
botones numéricos. Oprima el botón PLAY/PAUSE
para iniciar la reproducción.
Repeat all the tracks (Repetir todas las
pistas)
Se reproducirán repetidamente todas las pistas del
disco.
Oprima dos veces el botón REPEAT/PRESET. El
indicador de repetición se encenderá
uniformemente.
<
Durante la reproducción del programa, únicamente
las pistas programadas se reproducirán en orden
repetidamente.
<
Si se oprime uno de los siguientes botones de la
cubierta del disco abierta, se cancelará el modo de
repetición:
Botón STOP (H
)
Interruptor POWER
Botón TUNER
Botón FUNCTION
Repetir una pista
Repetir todas las pistas
(off)
Cada vez que se oprime el botón REPEAT/PRESET, el
indicador REPEAT se enciende o parpadea y el modo
se cambia de la manera siguiente:

30
ENGLISH
Shuffle Playback
Tracks can be played randomly.
Press the SHUFFLE button in the stop or play mode.
<
If you press the SKIP/SEARCH button (
,
/)
during shuffle playback, next track will be randomly
selected and played.
If you press the SKIP/SEARCH button (.
m
),
the currently played track will be played from the
beginning.
A track cannot be replayed during shuffle playback.
<
To stop shuffle playback, press the STOP button (H).
<
To cancel the shuffle playback mode, press the
SHUFFLE button.
<
If one of the following buttons is pressed or the disc
cover is opened, shuffle mode will be canceled:
STOP button (H
), POWER switch
TUNER button, FUNCTION button
Sleep Timer
The power can be switched off at the specified time.
When the power is on, press the TIMER/SLEEP button
repeatedly until the desired time appears on the
display.
Use the SLEEP button when using the remote control
unit.
The sleep time can be changed at 10-minute intervals.
When the sleep timer is activated, “SLEEP” appears
on the display.
(OFF)
90 80 10
70

31
FRANÇAIS ESPAÑOL
ENGLISH/ FRANÇAIS/ESPAÑOL
Lecture aléatoire
Les pistes peuvent être jouer aléatoirement.
Appuyez sur la touche SHUFFLE mode arrêt (stop) ou
en mode lecture (play).
<
Si vous appuyez su la touche
SKIP/SEARCH(
,
/
) durant la lecture aléatoire,
la piste suivante sera choisir aléatoirement et jouée.
Si vous appuyez sur la touche SKIP/SEARCH
(.
m
), la piste courante sera jouée du début.
Une piste ne peut pas être jouer durant la lecture
aléatoire.
<
Pour arrêter la lecture aléatoire, appuyer sur la
touche STOP (H
).
<
Pour annuler la lecture aléatoire, appuyer sur la
touche SHUFFLE.
<
Si une des touches suivantes est appuyée ou le
couvercle du disque est ouvert, la lecture aléatoire
est annulée:
touche STOP (H
), commutateur POWER,
touche TUNER, touche FUNCTION
Reproducción aleatoria
Las pistas pueden reproducirse aleatoriamente.
Oprima el botón SHUFFLE en el modo de paro o de
reproducción.
<
Si usted oprime el botón SKIP/SEARCH (,/)
durante la reproducción aleatoria, se seleccionará
la siguiente pista y se reproducirá aleatoriamente.
Si usted oprime el botón SKIP/SEARCH (.m
),
la pista que se está reproduciendo actualmente se
reproducirá desde el principio.
Una pista no se puede reproducir durante la
reproducción aleatoria.
<
Para detener la reproducción aleatoria, oprima el
botón STOP (H
).
<
Para cancelar el modo de reproducción aleatoria,
oprima el botón SHUFFLE.
<
Si se oprime uno de los siguientes botones o se abre
la cubierta del disco, se cancelará el modo de
reproducción al azar:
Botón STOP (H
), Interruptor POWER,
Botón TUNER, Botón FUNCTION
Minuterie sommeil
L’appareil peut être éteint à une heure choisie.
Quand l’appareil est allumé, apuyer sur la touche
TIMER/SLEEP répététivement jusqu’à temps que
l’heure désirée est affichée.
Utiliser la touche SLEEP lors de l’utilisation de la
télécommande.
La minuterie sommeil peut être régler à des intervales
de 10 minutes.
Lorsque le minuteur de mise en veille est activé,
“SLEEP” s’affiche.
(OFF)
90 80 10
70
Contador de tiempo Sleep (dormir)
La energía puede desactivarse en el momento
especificado.
Cuando la energía está activada, oprima el botón
TIMER/SLEEP repetidamente hasta que aparezca la
hora deseada en la pantalla.
Utilice el botón SLEEP cuando utilice la unidad de
control remoto.
El tiempo Sleep puede cambiarse en intervalos de 10
minutos.
Cuando el contador de tiempo sleep está activado, la
palabra “SLEEP” aparece en pantalla.
(OFF)
90 80 10
70

32
ENGLISH
Listening to the Radio
1 32
4
Press the POWER switch to turn the unit ON.
Press the TUNER button to select “TUNER”.
Or, press the FUNCTION button repeatedly to select
“TUNER”, when using the remote control unit.
Press the BAND button to select FM or AM.
Select the station you want to listen to (auto
selection).
Turn the TUNING knob to left or right until the
frequency display begins to change.
When a station is tuned in, the tuning process will
stop automatically.
<
Turn the TUNING knob to stop the auto selection.
<
Use the TUNING button, when using the remote
control unit.
Selecting stations which cannot be tuned
automatically (manual selection).
Turn the TUNING knob to left or right and hold to
change the frequency continuously. Release it when
the station you want to listen to is found.
Use the TUNING button, when using the remote
control unit.
If the reception is poor
AM broadcast
Turn around the unit to find the best position for AM
stations.
FM broadcast
For a good reception, turn around the antenna so
that you can get the stations clearly.
4
3
2
1
1
2
4
3

33
FRANÇAIS ESPAÑOL
ENGLISH/ FRANÇAIS/ESPAÑOL
Ecoute radio
Appuyer sur le commutateur POWER pour allumer
l’appareil.
Appuyez sur la touche TUNER pour sélectionner le
“TUNER”.
Ou appuyez sur la touche FUNCTION répététivement
pour choisir “TUNER”, quand vous utilisez la
télécommande.
Appuyez sur la touche BAND pour sélectionner FM
ou AM.
Sélectionnez la station que vous voulez écouter
(auto sélection).
Tourner le bouton TUNING vers la gauche ou la
droite jusqu’à ce que l’affichage de la fréquence
change.
Quand une station est captée, le processus de
réglage s’arrête automatiquement.
<
Tournez le bouton TUNING pour arrêter la sélection
automatique.
<
Utilisez la touche TUNING, quand vous utilisez la
télécommande.
Sélection des stations impossibles à régler
automatiquement (réglage manuel).
Tourner le bouton TUNING vers la gauche ou la
droite et le maintenir pour changer continuellement
de fréquence. Relâcher le bouton une fois que la
station souhaitée est trouvée.
Utilisez la touche TUNING, quand vous utilisez la
télécommande.
Si la récepion est mauvaise
Transmission AM
Tourner l’apparail pour trouver la meilleure position
pour les postes AM.
Transmission FM
Pour améliorer la réception, orientez l’antenne
jusqu’à ce que vous captiez parfaitement les
stations désirées.
4
3
2
1
Cómo escuchar la radio
Oprima el interruptor POWER para ENCENDER la
unidad.
Oprima el botón TUNER para seleccionar “TUNER”
(SINTONIZADOR).
U oprima el botón FUNCTION de manera repetida
para seleccionar “TUNER”, cuando se utilice la
unidad de control remoto
Oprima el botón BAND para seleccionar FM o AM.
Seleccione la estación que quiere escuchar
(selección automática).
Gire la perilla TUNING a la izquierda o derecha
hasta que la pantalla de frecuencia comience a
cambiar.
Cuando se sintoniza una estación, el proceso de
sintonización se detendrá automáticamente.
<
Gire la perilla TUNING para detener la selección
automática.
<
Utilice el botón TUNING cuando se use la unidad de
control remoto.
Selección de estaciones que no se pueden sintonizar
automáticamente (selección manual).
Gire la perilla TUNING a la izquierda o derecha y
mantenga girada la misma para cambiar la
frecuencia continuamente. Suéltela cuando el canal
que desea oír aparezca.
Utilice el botón TUNING, cuando se use la unidad de
control remoto.
Si la recepción es deficiente
Transmisión AM
Gire la unidad para encontrar la mejor posición para
las estaciones AM.
Transmisión FM
Para una buena recepción, gire la antena para que
pueda escuchar las estaciones claramente.
4
3
2
1

34
ENGLISH
In each band, up to 10 stations can be stored in preset
memories.
Press the BAND button to select FM or AM.
Turn the TUNING knob and tune in a station to be
stored as a preset station.
Press the MEMORY/CLOCK ADJ button.
Within 10 seconds, select a preset channel to store
the station using the REPEAT/PRESET button, and
then press the MEMORY/CLOCK ADJ button.
To store more stations, repeat steps to .
41
4
3
2
1
How to Preset Stations
1
1
2 4
2
3
4
1
2
1
2
4
3
Press the BAND button to select FM or AM.
Press the REPEAT/PRESET button repeatedly and
select a preset channel.
2
1
How to select Preset Stations

35
FRANÇAIS ESPAÑOL
ENGLISH/ FRANÇAIS/ESPAÑOL
Pour chaque bande, jusqu’à 10 stations peuvent être
entreposer en mémoire.
Appuyez sur la touche BAND pour sélectionner FM
ou AM.
Tournez le bouton TUNING et syntonisez la station
pour être entreposer comme station préréglée.
Appuyez sur la touche MEMORY/CLOCK ADJ.
Dans les 10 secondes qui suivent, sélectionnez un
canal préréglé pour mémoriser cette station à
l’aide de la touche REPEAT/PRESET; puis appuyez
sur la touche MEMORY/CLOCK ADJ.
Pour mémoriser d’autres stations, répétez les
étapes à .
41
4
3
2
1
Comment préréglé une station
Appuyez sur la touche BAND pour sélectionner FM
ou AM.
Appuyez sur la touche REPEAT/PRESET
répététivement et choisir une station préréglé.
2
1
Sélection des stations préréglées
En cada banda, se pueden almacenar hasta 10
estaciones en memorias preestablecidas.
Oprima el botón BAND para seleccionar FM o AM.
Gire la perilla TUNING y sintonice una estación
que se vaya a almacenar como estación
preestablecida.
Oprima el botón MEMORY/CLOCK ADJ.
Dentro de los 10 segundos siguientes, seleccione
un canal preestablecido para almacenar la
estación utilizando el botón REPEAT/PRESET, y
después oprima el botón MEMORY/CLOCK ADJ.
Para almacenar más estaciones, repita los pasos
a .
4
1
4
3
2
1
Cómo Preestablecer estaciones
Oprima el botón BAND para seleccionar FM o AM.
Oprima el botón REPEAT/PRESET de manera
repetida y seleccione un canal preestablecido.
2
1
Cómo seleccionar las estaciones
preestablecidas

36
ENGLISH
Clock Adjustment
MEMORY/CLOCK ADJDISPLAY
.m,/
Press the DISPLAY button to select clock display.
“:” blinks in the clock display.
<
If the unit is off, press and hold the MEMORY/CLOCK
ADJ button for 2 or more seconds, and continue the
procedure from step .
<
Press the STOP button to cancel the time setting. (In
the TUNER mode, press the DISPLAY button.)
Within 4 seconds, press and hold the
MEMORY/CLOCK ADJ button for 2 or more seconds.
Press the .m
or ,/ button to select
“12H” or “24H”.
If you select “12H”, “AM” or “PM” appears on the
display.
<
In the TUNER mode, use the TUNING knob.
Press the MEMORY/CLOCK ADJ button.
Press the .m
or,/ button to set the
current hour.
<
In the TUNER mode, use the TUNING knob.
Press the MEMORY/CLOCK ADJ button.
Press the .m
or,/ button to set the
current minute.
<
In the TUNER mode, use the TUNING knob.
Press the MEMORY/CLOCK ADJ button to finish the
time setting mode.
The clock starts from 00 second.
<
If the unit is disconnected from the power supply for
more than 3 minutes, the clock and timer setting will
be reset.
<
If the unit is disconnected for less than 3 minutes
the time displayed may not be correct.
8
7
6
5
4
3
2
3
1
1
2
4
3
5
6
8
7

37
FRANÇAIS ESPAÑOL
ENGLISH/ FRANÇAIS/ESPAÑOL
Réglage de l’horloge
Appuyez sur la touche DISPLAY pour choisir
l’affichage de l’horloge
.
“:” clignote dans l’afficheur de l’horloge.
< Si l’appareil est mis hors tension, maintenez pressée la
touche MEMORY/CLOCK ADJ pendant 2 secondes ou
plus et continuez la procédure à partir de l’étape .
<
Appuyez sur la touche STOP pour annuler le réglage
de l’heure. (En mode de TUNER, appuyez sur la
touche DISPLAY.)
En dedans de 4 secondes, appuyez et retenir la
touche MEMORY/CLOCK ADJ pour 2 secondes ou
plus.
Appuyez sur la touche .m
ou ,/ pour
choisir “12H” ou “24H”.
En cas de sélection de “12H”, “AM” ou “PM”
s’affiche.
<
En mode de TUNER, utilisez la commande TUNING.
Appuyez sur la touche MEMORY/CLOCK ADJ.
Appuyez sur la touche .m
ou ,/ pour
régler l’heure.
<
En mode de TUNER, utilisez la commande TUNING.
Appuyez sur la touche MEMORY/CLOCK ADJ.
Appuyez sur la touche .m
ou ,/ pour
régler les minutes.
<
En mode de TUNER, utilisez la commande TUNING.
Appuyez sur la touche MEMORY/CLOCK ADJ pour
finir le réglage de l’horloge.
L’horloge démarre à 00 seconde.
<
Si l’appareil est débranché pour plus de 3 minutes,
l’horloge et la minuterie devront être régler de
nouveau.
<
Si l’appareil est débranché pour moins de 3 minutes,
il est possible que l’heure affichée est inexacte.
8
7
6
5
4
3
2
3
1
Ajuste de reloj
Oprima el botón DISPLAY para seleccionar el
desplegado de reloj.
Empieza a parpadear “:” en el desplegado de reloj.
<
Si la unidad está apagada, oprima y mantenga así el
botón MEMORY/CLOCK ADJ durante dos o más
segundos y continúe el procedimiento desde el
paso .
<
Oprima el botón STOP para cancelar el ajuste de
hora. (En el modo TUNER, oprima el botón DISPLAY.)
Dentro de los siguientes 4 segundos, oprima y
mantenga así el botón MEMORY/CLOCK ADJ
durante 2 ó más segundos.
Oprima el botón .m
o ,/ para
seleccionar “12H” o “24H”.
Si selecciona “12H”, “AM” o “PM” aparezca en la
pantalla.
<
En el modo TUNER, utilice la perilla TUNING.
Oprima el botón MEMORY/CLOCK ADJ.
Oprima el botón .m
o ,/ para ajustar
la hora actual.
<
En el modo TUNER, utilice la perilla TUNING.
Oprima el botón MEMORY/CLOCK ADJ.
Oprima el botón .m
o ,/ para ajustar
el minuto actual.
<
En el modo TUNER, utilice la perilla TUNING.
Oprima el botón MEMORY/CLOCK ADJ para
terminar el modo de ajuste de hora.
El reloj comienza desde 00 segundos.
<
Si la unidad está desconectada del suministro de
energía durante más de 3 minutos, se van a
reestablecer el ajuste de reloj y de despertador.
<
Si la unidad está desconectada durante menos de 3
minutos, el desplegado de hora no será correcto.
8
7
6
5
4
3
2
3
1

38
ENGLISH
MEMORY/CLOCK ADJDISPLAY
.m,/
Timer (1)
Adjust the clock before setting the timer.
Setting the timer
Press the DISPLAY button once or twice to select
the timer mode.
The “TIMER” indicator blinks on the display.
Within 4 seconds, press and hold the
MEMORY/CLOCK ADJ button for 2 or more seconds.
The “TIMER” and hour blinks on the display.
Press the .m or ,/ button to set the
start time (hour).
In the TUNER mode, use the TUNING knob.
Press the MEMORY/CLOCK ADJ button.
The minute blinks on the display.
Press the .m or ,/ button to set the
start time (minute).
In the TUNER mode, use the TUNING knob.
Press the MEMORY/CLOCK ADJ button.
Time setting is finished and blinking of the “TIMER”
indicator will stop.
6
5
4
3
2
1
1
2
4
3
5
6

39
FRANÇAIS ESPAÑOL
ENGLISH/ FRANÇAIS/ESPAÑOL
Minuterie (1)
Régler l’horloge avant de régler la minuterie.
Réglage de la minuterie
Appuyer sur la touche DISPLAY pour changer le
mode de minuterie.
Le témoin “TIMER” clignote.
En dedans de 4 secondes, appuyez et retenez la touche
MEMORY/CLOCK ADJ pour 2 secondes ou plus pour
changer le mode de réglage de la minuterie.
“TIMER” et l’heure clignotent.
Appuyer sur la touche .mou
,
/ pour
régler le temps du démarrage (heure).
En mode de TUNER, utilisez la commande TUNING.
Appuyez sur la touche MEMORY/CLOCK ADJ.
Les minutes clignotent.
Appuyer sur la touche .
m
ou
,
/ pour
régler le temps du démarrage (minute).
En mode de TUNER, utilisez la commande TUNING.
Appuyez sur la touche MEMORY/CLOCK ADJ.
Le réglage de l’heure est terminé et le clignotement
du témoin “TIMER” s’arrête.
6
5
4
3
2
1
Despertador (1)
Ajuste el reloj antes de ajustar el despertador.
Ajuste del despertador
Oprima el botón DISPLAY para cambiar el modo del
despertador.
El indicador “TIMER” empieza a parpadear en la
pantalla.
Dentro de los siguientes 4 segundos, oprima y
mantenga así el botón MEMORY/CLOCK ADJ
durante 2 ó más segundos para cambiar el modo de
ajuste del temporizador.
El indicador “TIMER” y la hora parpadean en la
pantalla.
Oprima el botón .m o ,/ para ajustar
la hora de inicio (hora).
En el modo TUNER, utilice la perilla TUNING.
Oprima el botón MEMORY/CLOCK ADJ.
Los minutos parpadean en la pantalla.
Oprima el botón .m o ,/ para ajustar
la hora de inicio (minutos).
En el modo TUNER, utilice la perilla TUNING.
Oprima el botón MEMORY/CLOCK ADJ.
Cuando se termina el ajuste de hora el indicador
“TIMER” dejará de parpadear.
6
5
4
3
2
1

40
ENGLISH
Activating the timer
Press and hold the TIMER/SLEEP button for 2 or more
seconds, and press the POWER switch to turn the unit
off.
The unit will turn on at the specified time every day,
and will turn off one hour after the start time.
For the timer to start playback of a CD, press the CD
button to select CD, insert a disc and adjust the
volume before turning the unit off.
For the timer to start the radio, tune in a station and
adjust the volume before turning the unit off.
Don’t forget to turn the unit off, or the timer won’t
work.
<
If you want to turn off the unit anytime within 1 hour
from the start time, press the POWER switch to turn
the unit off.
<
If the unit is disconnected from the power supply for
more than 3 minutes, the clock and timer settings
will be reset.
To cancel the timer mode
Press the TIMER/SLEEP button.
The “TIMER” indicator disappears from the display.
How to Use the Snooze function
After the on time is reached, press the SNOOZE
button and the unit will turn off for 5 minutes then
turn on again.
The “SNOOZE” indicator appears on the display
while snooze function is activated.
You can use this function repeatedly.
B
A
Timer (2)
B
A
A
B

41
FRANÇAIS ESPAÑOL
ENGLISH/ FRANÇAIS/ESPAÑOL
Activation de la minuterie
Appuyer et retenir la touche TIMER/SLEEP pour 2
secondes ou plus, et appuyez sur la touche POWER
pour éteindre l’appareil.
L’appareil s’allumera à l’heure spécifiée chaque
jour.
Pour une lecture minutée d’un CD, appuyer sur la
touche CD pour choisir CD, insérer un disque et
régler le volume avant d’éteindre l’appareil.
Pour une lecture minutée de la radio, capter une
station et régler le volume avant d’éteindre
l’appareil.
Ne jamais oublier d’éteindre l’appareil, sinon la
minuterie ne fonctionnera pas.
<
L’heure d’arrêt ne peut pas être régler. Quand la
lecture minutée est terminée, appuyer sur la touche
POWER pour éteindre l’appareil.
<
Si l’appareil est débranché pour plus de 3 minutes,
l’horloge et la minuterie devront être régler de
nouveau.
Pour annulement du mode minuterie
Appuyez sur la touche TIMER/SLEEP.
Le témoin “TIMER” disparait.
Comment utiliser la fonction sommeil
Une fois que l’heure de mise en marche est atteinte,
appuyez sur la touche SNOOZE et l’appareil
s’éteindra pour 5 minutes pour ensuite revenir en
marche.
Le témoin “SNOOZE” s’allume quand la fonction
sommeil est activée. Vous pouvez utiliser cette
fonction plusieurs fois.
B
A
Minuterie (2)
Activación del despertador
Press and hold the TIMER/SLEEP button for 2 or more
seconds, and press the POWER switch to turn the unit
off.
La unidad se encenderá a la hora especificada
todos los días.
Para que el despertador comience la reproducción
de un CD, oprima el botón CD para seleccionar el
CD; inserte un disco y ajuste el volumen antes de
apagar la unidad.
Para que el despertador encienda la radio, sintonice
una estación y ajuste el volumen antes de apagar la
unidad.
No olvide apagar la unidad, o el despertador no
funcionará.
<
La hora de paro no se puede ajustar. Cuando la
reproducción del despertador ya terminó, oprima el
interruptor POWER para apagar la unidad.
<
Si la unidad se desconecta del suministro de
energía durante más de 3 minutos, se
reestablecerán los ajustes de reloj y de
despertador.
Para cancelar el modo de despertador
Oprima el botón TIMER/SLEEP.
El indicador “TIMER” desaparece de la pantalla.
Cómo utilizar la función Snooze (Zumbador)
Después de que se llegue a la hora, oprima el botón
SNOOZE (ZUMBADOR) y la unidad se apagará
durante 5 minutos y después se volverá a encender.
El indicador “SNOOZE” aparece en la pantalla
mientras se activa la función de zumbador. Usted
puede utilizar esta función de manera repetida.
B
A
Despertador (2)

42
ENGLISH
Specifications
TUNER Section
Frequency Range(FM):
87.50 MHz to 108.00 MHz
Frequency Range(AM):
522 kHz to 1,620 kHz
CD PLAYER Section
Frequency Response:
20 Hz to 20 kHz(±1dB)
Wow and Flutter:
Unmeasurable
SPEAKER SYSTEM Section
Type:
65 mm 1-way x 2
80 mm subwoofer x 1
Impedance:
8 ohms (L & R)
8 ohm (subwoofer)
GENERAL
Total Output Power:
15 W
Power Requirements:
230 V, 650 Hz
Power Consumption:
40 W
Dimension ( W x H x D ):
357 x 205 x 247.5 mm
(including the remote holder)
Weight:
5.8 kg
Standard Accessories:
Remote Control Unit (RC-910) x 1
Owner’s Manual x 1
Warranty Card x 1
<
Design and specifications are subject to change
without notice.
<
Illustrations may differ slightly from production
models.
Troubleshooting
If you have problems with your system, look through
this chart and see if you can solve the problem yourself
before calling your dealer or TEAC service center.
General
No power
e
Check the connection to the AC power supply.
No sound.
e
Adjust the volume.
e
If muting is on, press the MUTING button.
The sound is noisy.
e
The unit is too close to a TV set or similar
appliances. Install the unit further from them, or
turn them off.
Tuner
Cannot listen to any station, or signal is too weak.
e
Tune in the station properly.
e
If a TV is near the unit, turn it off.
e
Rotate the unit or antenna wire for the best
reception position.
CD Player
Cannot play.
e
Load a disc with label side up.
e
If the disc is dirty, clean the surface of the disc.
e
Don’t use scratched, damaged or warped discs.
e
Depending on the quality of the disc and/or the
condition of the recording, some CD-R discs may
not be playable.
e
CD-RW discs cannot be played on this unit.
e
Copy-protected discs may not be playable.
Sound skips.
e
Place the unit on a stable place to avoid vibration
and shock.
e
If the disc is dirty, clean the surface of the disc.
e
Don’t use scratched, damaged or warped discs.
Remote Control Unit
Remote control doesn’t work.
e
If the batteries are dead, change the batteries.
e
Use remote control unit within the range (5m/15ft)
and point at the front panel.
e
Clear obstacles between the remote control unit
and the main unit.
e
If a fluorescent light is near the unit, put it off.

ENGLISH/ FRANÇAIS/ESPAÑOL
43
FRANÇAIS
Guide de dépannage
En cas de problème, commencer par chercher dans ce
tableau pour voir si on peut trouver soi-même la
solution avant de contacter le revendeur ou le centre
de service client TEAC.
Généralité
L’appareil ne s’allume pas.
e
Vérifiez que l’appareil est bien branché à la
source d’alimentation CA.
Aucun son ne sort des enceintes.
e
Réglez le volume.
e
Si la fonction “Silence” est active, appuyez sur la
touche MUTING.
Bruits parasites.
e
L’appareil est placé à proximité d’un poste de
télévision ou d’un autre appareil analogue.
Installez l’appareil plus loin de ces derniers, ou
mettez ceux-ci hors tension.
Syntonisateur
Aucune station ne peut être captée, ou niveau sonore
trop faible.
e
Se régler précisément sur la station désirée.
e
Si l’appareil se trouve à proximité d’un poste de
télévision, éteindre ce dernier.
e
Installez de nouveau l’antenne après avoir repéré
la meileure position de réception.
Lecteur de disque compact
Ne fonctionne pas.
e
Placez un disque compact dans la platine, face
imprimée vers le haut.
e
Si le disque est sale, en nettoyer la surface.
e
Evitez d’utiliser des disques rayés, abîmés ou
voilés.
e
Dépendant de la qualité du disque et/ou la
condition de l’enregistrement, certain disques CD-
R ne joueront pas.
e
Les disques CD-RW ne joueront pas.
e
Disques défense de copie ne joueront pas.
Le son n’est pas stable.
e
Placez l’appareil sur un support stable de façon à
éviter les vibrations et les chocs.
e
Si le disque est sale, en nettoyer la surface.
e
Evitez d’utiliser des disques rayés, abîmés ou
voilés.
Télécommande
La télécommande ne fonctionne pas.
e
Si les batteries sont usées, remplacez-les.
e
Sans dépasser la portée (5 m) de la
télécommande, l’orientez vers la face avant de
l’appareil.
e
Enlevez tout objet pouvant faire obstacle entre la
télécommande et l’appareil.
e
Eteignez tout éclairage fluorescent à proximité de
cet appareil.
Spécifications
Section SYNTONISATEUR
Gamme de fréquence(FM):
87,50 MHz à 108,00 MHz
Gamme de fréquence(AM):
522 kHz à 1.620 kHz
Section LECTEUR DISQUE COMPACTE
Réponse de fréquence:
20 Hz à 20 kHz(±1dB)
Pleurage & scintillement:
Non-mesurable
Section Système de HAUT-PARLEUR
Type:
65 mm 1-voies x 2
80 mm subwoofer x 1
Impedance:
8 ohms (L & R)
8 ohm (subwoofer)
GÉNÉRALITÉ
Puissance de sortie totale :
15 W
Alimentation:
230V CA, 50Hz
Consommation:
40 W
Dimension ( L x H x P ):
357 x 205 x 247.5 mm
(télécommande comprise)
Poid:
5,8 kg
Accessoires Standard:
Télécommande (RC-910) x 1
Manuel du propriétaire x 1
Carte de garantie x 1
Nation de origine
Chine
<
Des améliorations peuvent produire des
changements dans les caractéristiques et fonctions
sans préavis.
<
Les illustrations peuvent différer légèrement des
modèles de production.

44
Corrección de fallas
Si tiene problemas con su sistema, observe esta tabla y
vea si puede resolver el problema usted mismo antes
de llamar a su distribuidor o al Centro de servicio TEAC.
Generales
Sin energía.
e
Verifique la conexión al suministro de energía CA.
Sin sonido.
e
Ajuste el sonido.
e
Si está activado el silencio, oprima el botón
MUTING.
El sonido es ruidoso.
e
La unidad está demasiado cerca de un aparato de
televisión o aparatos similares. Instale la unidad
lejos de ellos o apáguelos.
Sintonizador
No puede escuchar ninguna estación, o la señal es
demasiado débil.
e
Sintonice adecuadamente la estación.
e
Si cerca de la unidad se encuentra una TV,
apáguela.
e
Instale la antena nuevamente después de
localizar la posición para la mejor recepción.
Reproductor de CD
No puedo reproducir CD
e
Coloque los discos con la etiqueta hacia arriba.
e
Si el disco está sucio, limpie la superficie del
disco.
e
No utilice discos rayados, dañados o pandeados.
e
Dependiendo de la calidad del disco y/o la
condición del grabado, algunos discos CD-R
pueden no ser reproducibles.
e
Los discos CD-RW no se pueden reproducir en
esta unidad.
e
No se pueden reproducir discos cuya copia esté
prohibida.
Saltos en el sonido.
e
Coloque la unidad en un lugar estable para evitar
vibraciones y golpes.
e
Si el disco está sucio, limpie la superficie del
disco.
e
No utilice discos rayados, dañados o pandeados.
Mando a distancia
El mando a distancia no funciona.
e
Si las pilas están agotadas, cámbielas.
e
Emplee el mando a distancia sin sobrepasar la
distancia indicada (5 m) y apunte al panel frontal.
e
Retire los obstáculos situados entre el mando a
distancia y el equipo.
e
Si hay una luz fluorescente cerca del equipo,
apáguela.
ESPAÑOL
Sección del SINTONIZADOR
Rango de frecuencia (FM):
87,50 MHz a 108,00 MHz
Rango de frecuencia (AM):
522 kHz a 1.620 kHz
Sección del REPRODUCTOR DE CD
Respuesta de frecuencia:
20 Hz a 20 kHz (±1dB)
Ululación y ondulación:
No medibles
Sección del SISTEMA DE BOCINAS
Tipo:
65 mm 1-vía x 2
80 mm Subwoofer x 1
Impedancia:
8 ohmios (L y R)
8 ohmios (Subwoofer)
GENERALES
Energía de salida total:
15 W
Requerimientos de energía:
230 V CA, 50 Hz
Consumo de energía:
40 W
Dimensiones (P x A x P):
357 x 205 x 247.5 mm
(incluyendo el soporte del control remoto)
Peso:
5,8 kg
Standard Accessories:
Mando a distancia (RC-910) x 1
Manual del usuario x 1
Póliza de garantía x 1
<
El diseño y las especificaciones están sujetos a
cambios sin previo aviso.
<
Las ilustraciones pueden diferir ligeramente de los
modelos de producción.
Especificaciones

45
DEUTSCH/ ITALIANO/NEDERLANDS
DEUTSCH ITALIANO
Indice
Grazie per aver acquistato un prodotto TEAC.Leggere
attentamente questo manuale per ottenere le migliori
prestazioni da questo apparecchio.
Inhalt
Vielen Dank für den Kauf dieses TEAC-Geräts. Bitte
lesen Sie diese Anleitung sorgfältig durch, um die
Leistungs-fähigkeit dieses Geräts optimal nutzen zu
können.
Vor Inbetriebnahme
. . . . . . . . . . . . . . . . . . . . . . . . . . . . 46
RESET-Schalter . . . . . . . . . . . . . . . . . . . . . . . . . . . . . 48
Handhabung von Compact Discs . . . . . . . . . . . . . . . . . 50
Bezeichnungen der einzelnen Bedienungselemente 54
Betrieb mit der Fernbedienung . . . . . . . . . . . . . . . . . . . 60
CD
Wiedergabe einer CD . . . . . . . . . . . . . . . . . . . . . . . . . . . 62
Wiedergabe einer programmierten Titelfilge . . . . . . . 66
Wiedergabewiederholung . . . . . . . . . . . . . . . . . . . . . . . 70
Shuffle-Funktion . . . . . . . . . . . . . . . . . . . . . . . . . . . . . . . 72
Einschlaf-Timerfunktion . . . . . . . . . . . . . . . . . . . . . . . . . 72
TUNER
Radiobetrieb . . . . . . . . . . . . . . . . . . . . . . . . . . . . . . . . . . . 74
Speichern von Empfangsfrequenzen in Presets . . . . 76
Umschalten zwischen Sender-Presets . . . . . . . . . . . . 76
Uhr-Einstellungen . . . . . . . . . . . . . . . . . . . . . . . . . . . . . . 78
Timer-Betrieb . . . . . . . . . . . . . . . . . . . . . . . . . . . . . . . . . . 80
Hilfe bei der Fehlerbeseitigung . . . . . . . . . . . . . . . . . . . 84
Technische Daten . . . . . . . . . . . . . . . . . . . . . . . . . . . . . . 84
Prima dell’uso . . . . . . . . . . . . . . . . . . . . . . . . . . . . . . . . . 47
Interruttore RESET . . . . . . . . . . . . . . . . . . . . . . . . . . . 49
Come tenere i CD. . . . . . . . . . . . . . . . . . . . . . . . . . . . . . . 51
Nome dei singoli controlli . . . . . . . . . . . . . . . . . . . . . . . 56
Telecomando . . . . . . . . . . . . . . . . . . . . . . . . . . . . . . . . . . 61
CD
Ascolto di CD . . . . . . . . . . . . . . . . . . . . . . . . . . . . . . . . . . 63
Riproduzione Programmata . . . . . . . . . . . . . . . . . . . . . . 67
Riproduzione Repeat . . . . . . . . . . . . . . . . . . . . . . . . . . . . 71
Riproduzione Shuffle . . . . . . . . . . . . . . . . . . . . . . . . . . . . 73
Temporizzazione della funzione Sleep
(spegnimento ritardato) . . . . . . . . . . . . . . . . . . . . . . 73
TUNER
Ascolto della radio . . . . . . . . . . . . . . . . . . . . . . . . . . . . . 75
Memorizzazione della emittenti preselezionate . . . . . 77
Per richiamare le emittenti preselezionate . . . . . . . . . 77
Regolazione dell’orologio . . . . . . . . . . . . . . . . . . . . . . . . 79
Timer . . . . . . . . . . . . . . . . . . . . . . . . . . . . . . . . . . . . . . . . . . 81
Ricerca dei Guasti . . . . . . . . . . . . . . . . . . . . . . . . . . . . . . 85
Specifiche tecniche . . . . . . . . . . . . . . . . . . . . . . . . . . . . 85
ACHTUNG
Das Gerät darf keinen Tropfen oder Spritzern
ausgesetzt werden – Sie dürfen keine mit
Flüssigkeiten gefüllten Behälter, wie z. B. Vasen, auf
das Gerät stellen.
Platzieren Sie das Gerät nicht an einem beengten Ort
wie in einem Bücherregal oder an ähnlichen Plätzen.
ATTENZIONE
Non esporre quest’apparecchio al rischio di ricevere
spruzzi d’acqua, e non appoggiarvi sopra oggetti
contenenti acqua o liquidi d’altro genere.
Non installare l’apparecchio in uno spazio ristretto,
come il vano di una libreria o un ripiano analogo.

46
DEUTSCH
Vor Inbetriebnahme (1)
Bitte vor Inbetriebnahme lesen
<
Da sich das Gerät während des Betriebs erwärmt,
sollten Sie bei der Aufstellung stets auf genügenden
Platz achten, so daß eine ausreichende
Luftzirkulation gewährleistet ist.
<
Achten Sie stets darauf, daß die Spannung Ihres
Stromnetzes mit dem auf der Geräterückseite
angegebenen Wert übereinstimmt. Sollten Sie dazu
Fragen haben oder im Zweifel sein, wenden Sie sich
bitte an einen Elektrofachmann.
<
Wählen Sie einen geeigneten Standort für den
Receiver. Nicht geeignet sind Standorte, die direkter
Sonneneinstrahlung, Heizquellen, Vibrationen,
Staubeinwirkung, starken
Temperaturschwankungen oder Feuchtigkeit
ausgesetzt sind.
<
Platzieren Sie das Gerät nicht auf stark
wärmeproduzierenden Geräten, wie Verstärkern
oder Receivern.
<
Verwenden Sie das Geräte nicht an Orten mit hoher
Temperatur (über 30 °C).
<
Niemals das Gehäuse öffnen, da hierdurch Schäden
an der Elektronik und/oder elektrische Schläge
verursacht werden können. Falls ein Fremdkörper in
das Geräteinnere gelangen sollte, wenden Sie sich
bitte an Ihren Fachhändler oder eine Service-
Agentur.
<
Bei Abziehen des Netzkabels darauf achten, das
Kabel am Stecker zu halten. Niemals am Kabel
ziehen.
<
Um den Laser-Tonabnehmer sauberzuhalten, diesen
nicht berühren und den CD-Halter stets einfahren,
wenn der CD-Player nicht benutzt wird.
<
Zur Gehäusereinigung niemals Lösungsmittel
verwenden, da hierdurch die Gehäuseoberfläche
beschädigt werden kann. Ein sauberes trockenes
Tuch verwenden.
<
Bewahren Sie diese Bedienungsanleitung auf, um
bei eventuell später auftauchenden Fragen darin
nachschlagen zu können.
DAS GERÄT BEIM ABSPIELEN NICHT BEWEGEN
Beim Abspielen dreht sich die Disc mit
Hochgeschwindigkeit. Das Gerät beim Abspielen
NICHT hochheben oder bewegen. Ansonsten kann
die Disc beschädigt werden.
ZUM BEWEGEN DIESES GERÄTS
Wird der Einbauort des Geräts gewechselt oder das
Gerät für einen Umzug verpackt, sicherstellen, dass
die Disc herausgenommen wurde. Schalten Sie das
Gerät ab. Dann das Netzkabel abziehen. Wird das
Gerät mit einer Disc darin bewegt, kann das Gerät
beschädigt werden.
NEDERLANDS
Inhoud
Hartelijk dank dat u voor een TEAC product heeft
gekozen. Lees deze gebruiksaanwijzing zorgvuldig
door om optimaal te profiteren van de prestaties van
dit apparaat.
Voor gebruik. . . . . . . . . . . . . . . . . . . . . . . . . . . . . . . . . . . 47
RESET-schakelaar . . . . . . . . . . . . . . . . . . . . . . . . . . . 49
Compact Disc . . . . . . . . . . . . . . . . . . . . . . . . . . . . . . . . . . 51
Namen van de bedieningselementen . . . . . . . . . . . . . 58
Afstandsbediening . . . . . . . . . . . . . . . . . . . . . . . . . . . . . 61
CD
Het afspelen van een CD . . . . . . . . . . . . . . . . . . . . . . . . 63
Geprogrammeerde weergave . . . . . . . . . . . . . . . . . . . . 67
Herhaald afspelen . . . . . . . . . . . . . . . . . . . . . . . . . . . . . . 71
Shuffle weergave . . . . . . . . . . . . . . . . . . . . . . . . . . . . . . 73
Sleep Timer . . . . . . . . . . . . . . . . . . . . . . . . . . . . . . . . . . . 73
TUNER
Luisteren naar de radio . . . . . . . . . . . . . . . . . . . . . . . . . 75
Het vooraf-instellen van radio-stations . . . . . . . . . . . . 77
Het selecteren van vooraf-ingestelde stations . . . . . . 77
Deklol instellen . . . . . . . . . . . . . . . . . . . . . . . . . . . . . . . . 79
Timer . . . . . . . . . . . . . . . . . . . . . . . . . . . . . . . . . . . . . . . . . . 81
Problemen oplossen . . . . . . . . . . . . . . . . . . . . . . . . . . . . 86
Technische Specificaties . . . . . . . . . . . . . . . . . . . . . . . 86
Waarschuwing
Stel dit apparaat niet bloot aan water of vocht en zet
nooit vazen of andere zaken die vloeistof bevatten
bovenop het apparaat.
Plaats de apparatuur nooit in een afgesloten kast
zonder adequate ventilatie.

47
ITALIANO
NEDERLANDS
DEUTSCH/ ITALIANO/NEDERLANDS
Leggere questo manuale prima di procedere all’uso
<
Dato che l’apparecchio può diventare caldo durante
il funzionamento, raccomandiamo di garantire
adeguate condizioni di ventilazione, lasciando
sempre spazio intorno ad esso.
<
La tensione d’alimentazione c.a. applicata
all’apparecchio deve corrispondere alla tensione
stampata sul pannello posteriore. In caso di dubbio,
chiedere consiglio a un elettricista.
<
Scegliere con cura il luogo in cui installare
l’apparecchio. Evitare di esporlo alla diretta luce del
sole o ad una sorgente di calore. Evitare inoltre
luoghi soggetti a vibrazioni o ad eccessive
accumulazioni di polvere, calore, freddo od umidità.
<
Non posizionare l’unità su altre unità ad alta
produzione di calore come amplificatori/ricevitori.
<
Non usare l’unità in luoghi caldi (con temp.
superiore a 85°F/30°C).
<
Non aprire la cassa dell’apparecchio. Ciò potrebbe
danneggiarne la circuitazione o causare scariche
elettriche. Se un qualche oggetto estraneo dovesse
essere entrato nell’apparecchio stesso, rivolgetevi
al vostro rivenditore o al servizio di assistenza.
<
Per staccare la spina dalla presa di rete, agire
direttamente sulla spina stessa, evitando di tirare il
cavo.
<
Per mantenere pulito il lettore laser, evitate di
toccarlo ed inoltre ricordate di chiudere sempre il
vano del disco quando non intendete utilizzare il
riproduttore CD.
<
Evitare di pulire l’apparecchio con solventi chimici
poichè ciò potrebbe danneggiare la rifinitura
esterna. Fare semplicemente uso di un panno pulito
ed asciuto.
<
Tenere questo manuale in un luogo di facile
accesso, per ogni eventuale futuro riferimento.
EVITARE LO SPOSTAMENTO DELL’UNITÀ DURANTE
L’USO
Durante la riproduzione, il disco ruota a una velocità
elevata. NON sollevare o spostare l’unità durante la
riproduzione per evitare di danneggiare il disco.
SPOSTAMENTO DELL’UNITÀ
Durante lo spostamento dell’installazione o
l’imballaggio dell’unità per il trasferimento,
assicurarsi che il disco sia stato rimosso dall’unità e
che il ripiano del disco sia rientrato nella posizione
originale all’interno del lettore. Quindi, premere
l’interruttore POWER per disattivare l’apparecchio.
Quindi scollegare il cavo di alimentazione. Lo
spostamento dell’unità quando il disco si trova
ancora all’interno può provocare danni all’unità.
Lees dit voor gebruik
<
Het apparaat kan warm worden tijdens normaal
functioneren. Zorg altijd voor voldoende ventilatie
aan de bovenzijde.
<
De gebruikte netspanning moet overeenkomen met
de netspanning zoals die aan de achterzijde van dit
apparaat staat aangegeven. Raadpleeg bij twijfel
uw dealer.
<
Kies de best mogelijke plaats voor het apparaat. Dus
niet in direct zonlicht of dichtbij een
warmtebron.Zorg dat het apparaat niet bloot komt te
staan aan trillingen, stof, extreme hitte, koude of
vochtigheid.
<
Plaats het apparaat niet op een warmteproducerend
apparaat, bijvoorbeeld uw versterker/ontvanger.
<
Gebruik het apparaat niet in warme ruimten (boven
de 85°F/30°C).
<
Open nooit de behuizing. Dit kan leiden tot schade
aan de elektronica of een elektrische schok
veroorzaken. Wanneer een voorwerp in het
apparaat terecht komt raadpleeg dan uw dealer of
reparateur.
<
Wanneer u de stekker uit het stopcontact verwijdert
trek dan altijd aan de stekker zelf en nooit aan de
kabel.
<
Laat de disc lade nooit open staan wanneer u de
CD-spelar niet gebruikt en raak de laser pick-up niet
aan.
<
Maak het apparaat niet schoon met chemische
middelen, dit kan de laklaag beschadigen. Gebruik
een schone, droge doek.
<
Bewaar deze handleiding zorgvuldig om later te
kunnen raadplegen.
VERPLAATS HET APPARAAT NIET TIJDENS HET
AFSPELEN VAN EEN CD
Gedurende weergave draait de disc op hoge
snelheid. Til het apparaat niet op en verplaats het
apparaat NIET gedurende weergave. Dit kan schade
aan de disc veroorzaken.
VERPLAATSEN
Wanneer u de installatie verplaatst of hem inpakt
voor bijvoorbeeld een verhuizing, moet worden
gecontroleerd dat er geen disc in de lade zit. Druk
vervolgens op de POWER-schakelaar om het
apparaat uit te zetten en trek de stekker uit het
stopcontact. U kunt het apparaat beschadigen als u
het verplaatst met een disc in de lade.
Prima dell’uso (1) Voor gebruik (1)

48
DEUTSCH
Vor Inbetriebnahme (2)
Vermeiden Sie Kondensationsbildung
Wenn der CD-Recorder (oder eine CD) von einer
kalten in eine warme Umgebung transportiert wird
oder nach einer Veränderung der Raumtemperatur
in Betrieb genommen wird, kann es zu Kondensation
kommen. Hierbei schlägt sich Wasserdampf aus der
Luft auf die inneren Laufwerksteile oder die Disc
nieder. Dies kann zu einer Beeinträchtigung der
Funktion führen. Zur Vermeidung – oder falls einmal
Kondensation auftritt – lassen Sie das Gerät bis zum
Erreichen der Raumtemperatur – etwa für ein bis
zwei Stunden – im eingeschalteten Zustand stehen.
Pflege und Wartung
Wenn die Geräteoberfläche verschmutzt sein sollte,
wischen Sie diese mit einem weichen Tuch ab oder
verwenden Sie eine milde Seifenlösung. Trocknen
Sie nach Gebrauch von Flüssigkeit gut ab.
Verwenden Sie keinen Verdünner, Benzin oder
Alkohol, da dies die Geräteoberfläche beschädigen
kann.
RESET-Schalter
In folgenden Fällen kann es vorkommen, daß die
Funktionstasten nicht einwandfrei funktionieren:
M
Wenn das System durch einen Stromschlag (z. B.
durch statische Elektrizität) beschädigt wurde.
M
Bei extremen Spannungsschwankungen des
Stromnetzes sowie bei erhöhtem Aufkommen
elektrischer Interferenzen.
Betätigen Sie in diesen Fällen, unter Zuhilfenahme
eines Bleistifts oder Kugelschreibers, ein- bis
zweimal den RESET-Schalter.

49
ITALIANO NEDERLANDS
DEUTSCH/ ITALIANO/NEDERLANDS
Prima dell’uso (2) Voor gebruik (2)
Pericoli della condensa
Quando l’apparecchio (o un disco) viene spostato da
un ambiente freddo in uno caldo, oppure viene usato
dopo un improvviso sbalzo di temperatura, può
manifestarsi un pericoloso fenomeno di condensa: in
altre parole, il vapore acqueo presente nell’aria si
condensa sulle parti meccaniche interne, rendendo
impossibile il corretto funzionamento. Per evitare
questo pericolo, prima di usare di nuovo
l’apparecchio quando si è formata condensa
bisogna lasciarlo acceso per 1 o 2 ore. L’unità si
stabilizzerà alla temperatura ambiente.
Manutenzione
Se la superficie dell’apparecchio dovesse sporcarsi,
pulirla strofinandola con uno straccio morbido,
oppure usare del sapone liquido delicato.
Assicuratevi di rimuoverne completamente ogni
eccesso. Non usare diluenti, benzina o alcool, in
quanto potrrebbero rovinare la superficie del mobile.
Pas op voor condensvorming
Wanneer het apparaat (of een disc) van een koude
naar een warme ruimte is verplaatst of bij een
plotselinge temperatuurwisseling kan er
condensatie optreden. Vocht in de lucht kan dan als
condens neerslaan op het interne mechanisme en
normaal functioneren van het apparaat onmogelijk
maken. Om dit te voorkomen of wanneer dit gebeurt
kunt u het apparaat het beste een of twee uur in de
betreffende ruimte aan laten staan. Daardoor kan
het apparaat de omgevingstemperatuur aannemen.
Onderhoud
Als het apparaat vuil wordt gebruik dan voor het
schoonmaken een zachte, schone, droge doek of
een milde zeep. Zorg ervoor dat al het vocht wordt
verwijdert. Gebruik nooit chemische
reinigingsmiddelen zoals spuitbussen, antistatische
spray’s of vloeistof, benzine of thinner. De
chemicaliën beschadigen het oppervlak van het
apparaat.
Interruttore RESET
Il comportamento dei tasti funzionali può diventare
improprio nei seguenti casi:
M
Quando il sistema è stato danneggiato da scariche
elettriche.
M
Quando l’alimentazione è discontinua od evidenzia
disturbi elettrici.
In tali casi, premere leggermente l’interruttore
RESET, una o due volte, con una matita o una penna
a sfera.
RESET-schakelaar
In voorkomende gevallen bestaat de mogelijkheid
dat de functietoetsen niet correct werken.
M
Als het systeem beschadigd is door een
electrische schok.
M
Als de stroomtoevoer onregelmatig is of als er
electrische ruis voorkomt.
In zo’n geval drukt u een of twee keer zacht op de
RESET-schakelaar met de punt van een potlood of
ballpoint.

50
DEUTSCH
Handhabung von Compact Discs
(1)
Discs, die mit diesem Gerät abgespielt werden
können:
• konventionelle Audio-CDs, die das CD-DA-Logo
tragen:
?
• korrekt finalisierte (abgeschlossene) CD-Rs
Hinweis:
<
Abhängig von der Qualität der Disc und/oder der
Aufzeichnungsqualität kann es vorkommen, daß
einige CD-Rs nicht wiedergegeben werden können.
<
CD-RW-Discs können nicht mit diesem Gerät
abgespielt werden.
<
Kopiergeschützte Discs und andere Discs, die nicht
mit dem CD-Standard übereinstimmen, können mit
diesem Gerät eventuell nicht richtig wiedergegeben
werden. Falls Sie solche Discs mit diesem Gerät
verwenden, können die TEAC Corporation oder ihre
Niederlassungen weder Haftung für jegliche Folgen
noch eine Garantie für korrekte Wiedergabe
übernehmen. Falls es zu Problemen mit solchen
nicht normgerechten Discs kommen sollte, wenden
Sie sich bitte an den Hersteller der Disc.
< Legen Sie die CD stets mit der Labelseite nach oben in
die CD-Schublade. (Compact Discs können nur auf
einer Seite beschrieben und wiedergegeben werden.)
<
Um eine CD aus der CD-Hülle zu nehmen, drücken
Sie auf den mittleren Haltering und nehmen Sie die
CD vorsichtig aus ihrer Halterung, wobei Sie diese
lediglich am Rand berühren sollten.
Entnehmen einer CD
Anfassen einer CD
<
Sollte eine CD einmal verschmutzt sein, wischen Sie
diese von innen nach außen mit einem weichen,
trockenen Tuch ab.

51
ITALIANO NEDERLANDS
DEUTSCH/ ITALIANO/NEDERLANDS
Come tenere i CD (1)
Questa unità può riprodurre i seguenti tipi di disco:
• CD audio convenzionali riportanti sull’etichetta il
logo CD-DA:
?
• Dischi CD-R opportunamente finalizzati
Nota:
<
Dipendentemente dalla qualità del disco e/o dalle
condizioni di registrazione, potrebbe non essere
possibile riprodurre alcuni dischi CD-R.
<
Questa unità non può riprodurre i dischi CD-RW.
<
Questo lettore potrebbe non essere in grado di
riprodurre correttamente i dischi protetti da copia
ed altri dischi non conformi allo standard CD. In
caso di utilizzo di dischi di questo genere in questa
unità, TEAC Corporation e le sue affiliate non
potranno essere ritenute responsabili di qualsiasi
conseguenza o garanzia della qualità di
riproduzione. Nel caso si verifichino problemi con
tali dischi non standard, si consiglia di contattare il
produttore del disco in questione.
< Appoggiare il disco nell’apposito cassetto sempre
con l’etichetta rivolta verso l’alto. (i CD si possono
leggere o registrare soltanto su un lato).
<
Per estrarre un disco dalla custodia protettiva,
premere al centro dell’astuccio e sollevare il disco
afferrandolo accuratamente solo per i bordi.
Come togliere il disco
Come afferrare il disco
<
Se il disco dovesse comunque sporcarsi, pulirlo con
un panno soffice asciutto, strofinando con
movimento radiale dal centro verso la periferia.
Compact Disc (1)
Discs die op dit apparaat afgespeeld kunnen worden:
• Conventionele audio CD‘s met het CD-DA logo
vermeld op het label:
?
• Correct gefinaliseerde CD-R discs
Opmerking:
<
Afhankelijk van de kwaliteit van de disc en/of de
conditie van de opname kan het voorkomen dat
bepaalde discs niet afgespeeld kunnen worden.
<
CD-RW discs kunnen op dit apparaat niet
afgespeeld worden.
<
Discs met kopieerbeveiliging en andere discs die
niet voldoen aan de CD-norm kunnen mogelijk niet
goed worden afgespeeld door het apparaat. Als u
dergelijke discs probeert af te spelen in dit
apparaat, kunnen TEAC Corporation en haar
dochtermaatschappijen niet verantwoordelijk
worden gehouden voor eventuele gevolgen of de
afspeelkwaliteit. Als u problemen heeft met
dergelijke discs die niet aan de normen voldoen,
dient u contact op te nemen met de fabrikant(en)
van de disc.
< Leg de disc altijd in de lade met het label naar boven
gericht. (Compact discs kunnen maar aan een kant
afgespeeld of opgenomen worden.)
<
Om een disc uit de cd-box te halen maakt u de box
open. U drukt met een vinger op het middelste
gedeelte waar de cd vastgeklemd zit en neemt met
de andere hand de disc eruit. Klem daarbij de rand
van de disc tussen twee vingers.
Voor het uitnemen van de disc
Voor het vasthouden van de disc
<
Mocht de disc vuil worden maak hem dan schoon
met een zachte, schone, droge doek in een
beweging van binnen naar buiten.

52
DEUTSCH
Handhabung von Compact Discs
(2)
< Verwenden Sie zur Reinigung einer CD niemals
chemische Reinigungsmittel, wie Record-Sprays,
Antistatic-Sprays oder Flüssigkeiten wie Benzin oder
Verdünner, da diese Substanzen irreparable Schäden
an einer CD anrichten.
<
Zur Vermeidung von Kratzern und Staub, die den
Laser-Pickup “aus seiner Bahn werfen” könnten,
sollten CDs nach Gebrauch stets in die jeweilige
CD-Hülle zurückgelegt werden.
<
Setzen Sie Ihre CDs nicht über längere Zeit direkter
Sonneneinstrahlung, anderen Wärmequellen sowie
extrem hoher Luftfeuchtigkeit aus, da dies zu
Verformungen führen kann.
<
CD-R Discs sind empfindlicher gegenüber Hitze und
ultravioletter Lichteinstrahlung als vorbespielte CDs.
Daher ist es wichtig, daß sie nicht an einem Ort
aufbewahrt werden, an dem sie direkter
Sonneneinstrahlung, der Einwirkung von Heizkörpern
oder elektrischen Geräten mit erhöhter
Wärmeentwicklung ausgesetzt sind.
< Bedruckbare CD-R Discs sind nicht zu empfehlen, da
deren Labelseite mit einem Film überzogen ist, der
den Recorder beschädigen kann.
<
Kleben Sie keine Papiere oder Schutzfolien auf die CDs,
und verwenden Sie keine Sprays zum Aufbringen einer
Schutzschicht.
< Verwenden Sie einen weichen Filzschreiber, dessen
Tinte auf einer Öl-Emulsion basiert, um die
Labelseite Ihrer CDs zu beschriften. Verwenden Sie
niemals einen Kugelschreiber oder Ball-Penn Stift
(Roller).
<
Verwenden Sie keinen CD-Stabilisator. Die
Verwendung von handelsüblichen CD-Stabilisatoren
in diesem Recorder beschädigt das Laufwerk und
führt daher zu Fehlfunktionen.
<
Ungewöhnlich geformte CDs (achteckig, herzförmig,
usw.) eignen sich nicht zur Verwendung mit diesem
Recorder. Sie können erheblichen Schaden am
Gerät verursachent.
< Falls Sie nicht sicher sind und weitere Fragen
bezüglich Handhabung und Umgang mit CD-R Discs
haben, lesen Sie bitte die Vorsichtsmaßnahmen, die
meist auf der Innenseite der CD-Hülle abgedruckt
sind oder wenden Sie sich an den Hersteller der
entsprechenden CD.

53
ITALIANO NEDERLANDS
DEUTSCH/ ITALIANO/NEDERLANDS
Come tenere i CD (2)
< Per pulire i CD non usare mai prodotti chimici ,come
spray per dischi analogici, fluidi o spray antistatici,
benzina o solventi, che potrebbero tutti danneggiare
irreparabilmente la superficie plastica registrata.
<
Dopo l’uso, conservare sempre i dischi entro le
relative custodie, per evitare che eventuali graffi
costringano il pickup laser a compiere spiacevoli
“salti”.
<
Non conservare i dischi per lunghi periodi esposti alla
luce solare diretta o in condizioni di eccessiva umidità
e temperatura. Il calore troppo elevato può addirittura
incurvare la superficie del disco.
<
Rispetto ai normali CD, i dischi CD-R sono inoltre
molto più sensibili agli effetti del calore e delle
radiazioni ultraviolette. Importante perciò non
conservarli in luoghi esposti alle luce solare diretta
e tenerli lontano da sorgenti di calore, come
radiatori o apparecchiature elettriche in grado di
generare calore.
<
Non sono consigliabili dischi CD-R con etichette
personalizzabili, che possono diventare vischiose e
danneggiare il registratore.
<
Non attaccare pezzi di carta sui dischi e non
spruzzarvi rivestimenti protettivi.
<
Per scrivere informazioni sul lato con l’etichetta
usare solo pennarelli morbidi non a base acquosa,
evitando le penne a sfera che possono danneggiare
i dati registrati.
<
Non usare mai uno stabilizzatore. I normali
stabilizzatori per CD disponibili in commercio
potrebbero danneggiare le parti meccaniche
causando malfunzionamenti dell’apparecchio.
<
Non utilizzare CD di forma irregolare (ottagonale, a
cuore, eccetera) perché possono danneggiare il
registratore.
< In caso di dubbi sul modo di conservare e
maneggiare un disco CD-R, attenersi alle istruzioni
allegate al disco stesso, oppure rivolgersi
direttamente al fabbricante.
Compact Disc (2)
< Gebruik nooit chemische reinigingsmiddelen zoals
spuitbussen, antistatische spray’s of vloeistof,
benzine of thinner. De chemicaliën beschadigen het
plastic oppervlak van de disc zodat deze naderhand
niet meer kan worden gebruikt.
<
Wanneer u de discs na gebruik weer opbergt in het
doosje voorkomt u dat er vuil of krassen op komen
waardoor de laser pick-up kan haperen.
<
Stel discs niet te lang bloot aan direct zonlicht, hoge
luchtvochtigheid of temperatuur omdat dit tot
vervorming van de disc kan leiden.
<
CD-R discs zijn gevoeliger voor hitte en ultraviolette
straling dan normale cd’s. Het is daarom van belang
dat u ze niet opbergt op een plaats waar er direct
zonlicht op valt of in de buurt van een radiator of
elektrisch apparaat dat warmte afgeeft.
<
Gebruik geen bedrukbare CD-R discs omdat het
label kan plakken en schade kan veroorzaken.
<
Plak geen papier of ander materiaal op de schijfjes
en gebruik geen beschermende coating spray.
<
Door middel van een zachte viltstift op oliebasis kan
informatie op de bedrukte zijde van de CD worden
geschreven. Gebruik nooit een ballpoint of andere
pen met een harde punt omdat dit de opnamekant
kan beschadigen.
<
Gebruik nooit een cd-stabilisator. De cd-
stabilisators zoals in de handel verkrijgbaar
beschadigen het loopwerk en leiden tot storingen.
<
Gebruik geen cd’s met afwijkende vormen
(achthoekig, hartvormig, etc.). Ze kunnen het
apparaat beschadigen
< Si tiene alguna duda sobre el cuidado y
manipulación de un disco CD-R, lea las
instrucciones facilitadas con el disco o póngase
directamente en contacto con el fabricante.

54
DEUTSCH
A
B
V
FEC GD
T S R Q L K J IP MO N
H H
C
K
Q
G
M
D
W
X
U
E
P
OBEN
FRONTANSICHT
RÜCKANSICHT
FERNBEDIENUNG

55
DEUTSCH/ ITALIANO/NEDERLANDS
DEUTSCH
Bezeichnungen der einzelnen Bedienungselemente
CD-Fach
Zum Öffnen des CD-Fachs drücken Sie bitte leicht auf
die mit dem Öffnen-Symbol L
bezeichnete Stelle.
SNOOZE-Taste
Wenn die Einschaltzeit erreicht wird, können Sie
das Gerät mit dieser Taste für 5 Minuten abschalten.
Netzschalter (POWER )
Drücken Sie diese Taste, um das Gerät ein- und
auszuschalten.
CD-, TUNER-Tasten (FUNCTION-Taste)
Betätigen Sie zur Wiedergabe einer CD bitte die CD-
Taste.
Für Radiobetrieb betätigen Sie bitte die TUNER-Taste.
Bei Verwendung der Fernbedienung betätigen Sie
bitte wiederholt die darauf befindliche FUNCTION-
Taste.
BAND-Taste
Mit dieser Taste wählen Sie das FM- (UKW) oder
AM- (Mittelwelle) Frequenzband aus.
Display
Tasten zur Steuerung des CD-Laufwerks
Im TUNER-Betrieb besitzen diese Tasten keine
Funktion.
STOP-Taste (H)
Verwenden Sie zum Beenden der Wiedergabe bitte
diese Taste.
PLAY/PAUSE-Taste (y/J)
Mittels dieser Taste können Sie die Wiedergabe
starten oder kurzzeitig unterbrechen.
SKIP/SEARCH
-Tasten
(.
m
/
,
/)
Betätigen Sie eine dieser Tasten, um an den jeweils
nächsten oder vorhergehenden Titelanfang zu
gelangen.
Durch anhaltendes Betätigen der Tasten aktivieren
Sie den schnellen Vor- oder Rücklauf.
Lautsprecher (Stereo)
Fernbedienungssensor
SHUFFLE-Taste
Betätigen Sie diese Taste, um Titel in zufälliger
Reihenfolge wiederzugeben.
REPEAT/PRESET-Taste
Mittels dieser Taste können Sie den
Wiederholungsmodus ändern oder im Radiobetrieb
ein Preset auswählen.
K
J
I
H
G
F
E
D
C
B
A
MEMORY/CLOCK ADJ-Taste
Mittels dieser Taste können Sie Titel für eine
programmierte Titelfolge auswählen sowie
Zeiteinstellungen vornehmen.
VOLUME-Drehregler
Der VOLUME-Drehregler dient zum Einstellen der
gewünschten Wiedergabelautstärke.
Subwoofer
BASS CONTROL-Drehregler
Mittels dieses Drehreglers können Sie die
Lautstärke der Subwoofer-Wiedergabe einstellen.
TUNING-Drehregler
Dieser Drehregler dient zum Einstellen von
Radiosendern.
MUTING-Taste
Betätigen Sie zum kurzzeitigen Stummschalten der
Wiedergabe die MUTING-Taste. Durch
nochmaliges Betätigen der Taste wird die
Wiedergabe mit der zuvor eingestellten Lautstärke
fortgesetzt. Sofern Sie bei aktivierter Muting-
Funktion die Wiedergabelautstärke verändern, wird
die Muting-Funktion automatisch beendet.
DISPLAY-Taste
Mittels dieser Taste können Sie die Display-Anzeige
umschalten.
TIMER/SLEEP-Taste
Diese Taste wird zum Einstellen der Timer-
/Einschlaffunktion benötigt.
PHONES
Schließen Sie bitte Ihren Kopfhörer an der PHONES-
Buchse an, und stellen Sie eine gehörrichtige
Lautstärke ein.
Sie können sowohl Stereo- als auch Mono-Ohrhörer
mit diesem Gerät verwenden.
SLEEP-Taste
Mit dieser Taste stellen Sie den Einschlaf-Timer ein.
Halter für die Fernbedienung
Wenn Sie die Fernbedienung nicht verwenden,
können Sie sie hier aufbewahren. Sie können den
Halter mit Hilfe eines Schraubendrehers entfernen,
falls Sie ihn nicht brauchen.
UKW-Wurfantenne
Stellen Sie einen UKW-Sender ein und richten Sie
die beiden Litzen der Antenne auf beste
Empfangsqualität aus. Befestigen Sie die
Litzenenden der Antenne mittels Reißzwecken an
der Wand, am Fensterrahmen, usw.
Netzkabel
Verbinden Sie das Netzkabel bitte mit einer
Wandsteckdose.
X
W
V
U
T
S
R
Q
P
O
N
M
L
Wenn sich der Netzschalter in der OFF-Position
(Aus) befindet, verbraucht das Gerät nach wie vor
etwas Strom, wenn es an die Steckdose
angeschlossen bleibt.

ITALIANO
56
A
B
V
FEC GD
T S R Q L K J IP MO N
H H
C
K
Q
G
M
D
W
X
U
E
P
PANNELLO SUPERIORE
PANNELLO FRONTALE
PANNELLO POSTERIORE
UNITÀ DI TELECOMANDO

57
ITALIANO
DEUTSCH/ ITALIANO/NEDERLANDS
Nome dei singoli controlli
Coperchio del vano CD
Per aprire il vano CD, premere il contrassegno L sul
coperchio.
Tasto SNOOZE
Quando è arrivata l’ora predisposta per
l’accensione, con questo tasto si può rimandare
l’accensione della radio di 5 minuti.
Interruttore POWER
Permette di accendere e spegnere l’apparecchio.
Tasti CD, TUNER (tasto FUNCTION)
Premere il tasto CD per ascoltare un disco.
Premere il tasto TUNER per ascoltare la radio.
Quando si usa il telecomando, premere
ripetutamente il tasto FUNCTION.
Tasto BAND
Premere questo tasto per selezionare la gamma FM
o AM.
Display
Tasti per ascolto CD
Quando è selezionato il modo TUNER, questi tasti
non sono attivi.
Tasto STOP (H)
Permette di fermare la riproduzione.
Tasto PLAY/PAUSE (y/J)
Avvia la riproduzione o la interrompe
momentaneamente.
Tasti SKIP/SEARCH
(.
m
/
,
/)
Premere questi tasti per saltare al brano successivo
o precedente.
Tenere i tasti premuti per ricercare la parte di un
brano.
Diffusori (stereo)
Sensore per telecomando
Tasto SHUFFLE
Permette di selezionare la riproduzione Shuffle
(lettura dei brani in ordine casuale).
J
I
H
G
F
E
D
C
B
A
Tasto REPEAT/PRESET
Permette di cambiare il modo Repeat o di
sintonizzare una delle emittenti preselezionate.
Tasto MEMORY/CLOCK ADJ
Permette di programmare una sequenza di brani o di
regolare l’orologio.
Controllo VOLUME
Ruotare questa manopola per regolare il livello del
volume.
Subwoofer
Manopola BASS CONTROL
Permette di regolare il livello del subwoofer.
Controllo TUNING
Ruotare questa manopola per sintonizzare
un’emittente.
Tasto MUTING
Per escludere momentaneamente l’audio, premere il
tasto MUTING. Una seconda pressione del tasto
ripristina il normale ascolto. Se il livello del volume
viene modificato mentre è in corso la funzione di
silenziamento, la stessa verrà annullata.
Tasto DISPLAY
Permette di cambiare il tipo d’informazioni
visualizzate.
Tasto TIMER/SLEEP
Permette di predisporre il timer o l’ora di attivazione
della funzione Sleep (spegnimento ritardato).
PHONES
Inserire la spina di una cuffia nella presa PHONES,
e regolare il volume.
La cuffia può essere sia stereo che mono.
Vano porta telecomando
Potete mettere il telecomando in questo vano.
Volendo, con un cacciavite potete togliere le viti e
rimuovere il vano.
Antenna FM a filo
Sintionizzare un’emittente FM e allungare il filo per
trovare la migliore posizione per la recezione. Allora
lo fissare alla pareta con puntine da disegno.
Cavo per alimentazione c.a.
Inserire l’estremità di questo cavo in una presa di
rete.
W
V
U
T
S
R
Q
P
O
N
M
L
K
Questo apparecchio consuma una piccola, non
operante corrente elettrica anche se
l’interruttore POWER si trova rilassato.

NEDERLANDS
58
A
B
V
FEC GD
T S R Q L K J IP MO N
H H
C
K
Q
G
M
D
W
X
U
E
P
Bovenkant
Voorkant
Achterkant
Afstandsbediening

Disc-lader
Druk op het L teken op het klepje van de disc-lader
om het te openen.
SNOOZE-toets
Gebruik deze knop om het apparaat 5 minuten uit te
zetten nadat de ON-tijd is bereikt.
Netstroom (POWER)-schakelaar
Druk op deze toets om het apparaat aan en uit te
zetten.
CD, TUNER-toetsen (FUNCTIE-toets)
Druk op de CD-toets om een disc af te spelen.
Om naar de radio te luisteren drukt u op de TUNER-
toets.
Druk herhaald op de FUNCTIE-toets als u de
afstandsbediening gebruikt.
BAND-toets
Gebruik deze toets om FM of AM te selecteren.
Display
CD-bedieningstoetsen.
Als TUNER geselecteerd is werken deze toetsen
niet.
STOP-toets (H)
Gebruik deze toets om het afspelen te stoppen.
PLAY/PAUSE-toets (y/J)
Gebruik deze toets om het afspelen te stoppen of om
tijdens het afspelen een pauze in te lassen.
SKIP/SEARCH
-toetsen
(.
m
/
,
/)
Druk op deze toetsen om tracks op te zoeken.
Met deze toetsen ingedrukt kunt u naar een
gedeelte van een track zoeken.
Luidsprekers (stereo)
Afstandsbedienings-sensor
SHUFFLE-toets
Gebruik deze toets om de shuffle-afspeelfunctie te
selecteren.
REPEAT/PRESET-toets
Gebruik deze toets om de herhaal-instelling te
veranderen of om een vooraf ingesteld nummer en
station te selecteren.
K
J
I
H
G
F
E
D
C
B
A
59
NEDERLANDS
DEUTSCH/ ITALIANO/NEDERLANDS
Namen van de bedieningselementen
MEMORY/CLOCK ADJ-toets
Gebruik deze toets om tracks te programmeren of
om de klok in te stellen.
VOLUME-knop
Draai aan deze knop om het geluidsniveau te
regelen.
Subwoofer
BASS CONTROLE-knop
Gebruik deze knop om de instelling van de
subwoofer te regelen.
TUNING-knop
Draai aan deze knop om een radio-station te zoeken.
MUTING-toets
Door op de MUTING-toets te drukken kunt u de
geluidsweergave tijdelijk onderbreken. Als u
opnieuw op de MUTING-toets drukt zal het geluid
weer normaal weergegeven worden. Als u tijdens
het gebruik van de MUTING-functie het
geluidsniveau verandert dan zal deze functie
worden opgeheven.
DISPLAY-toets
Gebruik deze toets om de instelling van de display-
mode te veranderen.
TIMER/SLEEP-toets
Met deze toets kunt u de wek-tijd of de tijd dat het
apparaat zichzelf automatisch uitschakelt instellen.
PHONES (Hoofdtelefoon)
Steek de plug van een hoofdtelefoon in de
hoofdtelefoon-aansluiting en regel het
geluidsniveau.
U kunt met dit apparaat zowel stereo- als mono-
koptelefoons gebruiken.
SLEEP-toets
Gebruik deze toets om de sleep timer in te stellen.
Houder voor de afstandsbediening
Plaats de afstandsbediening hierin wanneer u hem
niet gebruikt. U kunt de houder verwijderen met een
schroevendraaier als u hem niet nodig heeft.
FM draad-antenne
Stel een FM-station in en verplaats de draad-
antenne om op deze manier de beste positie voor
een goede ontvangst te vinden. Bevestig hierna de
antenne aan een muur of dergelijke.
AC Netstroomkabel
Steek de stekker van de netstroomkabel in het
stopcontact.
X
W
V
U
T
S
R
Q
P
O
N
M
L
Wanneer de POWER-schakelaar op UIT staat,
verbruikt het apparaat nominale stroom.

60
DEUTSCH
Betrieb mit der Fernbedienung
Die mitgelieferte Fernbedienungseinheit ermöglicht die
Bedienung des Gerät bequem vom Sitzplatz aus.
Die Fernbedienung auf den Fernbedienungs-
Empfangssensor am Gerät richten.
<
Innerhalb des zulässigen Entfernungsbereichs kann
der Signalempfang durch zwischen Fernbedienung
und Empfangssensor befindliche Gegenstände
behindert werden.
<
Bei Fernbedienbetrieb kann der Gerät
Fehlfunktionen zeigen, wenn er in der Nähe eines
Infrarotstrahlen ausstrahlenden Geräts betrieben
wird oder wenn im gleichen Raum Infrarot-
Fernbedienungen anderer Geräte verwendet
werden. Umgekehrt kann die Fernbedienung dieses
Geräts Fehlfunktionen bei anderen mit
Infrarotsignalen zu bedienenden Geräten
verursachen.
Einlegen der Batterien
Die Batteriefach-Abdeckung entfernen.
Zwei Batterien “AAA“ (R03, SUM-4) unter
Beachtung der Polarität (+
/_) einlegen.
Die Abdeckung wieder anbringen.
Batteriewechsel
Sollte es erforderlich werden, den Abstand zwischen
Gerät und Fernbedienung zur Funktionsauslösung zu
verringern, wird ein Batteriewechsel notwendig. Stets
zwei neue Batterien einlegen.
Batterie-Vorsichtsmaßnahmen
< Die Batterien unter Beachtung der korrekten
Polarität (+
und _) einlegen.
<
Stets zwei Batterien des gleichen Typs verwenden,
niemals eine gebrauchte und eine frische Batterie
zusammen verwenden.
<
Sowohl Einweg- als auch wiederaufladbare
Batterien können verwendet werden.
Die Sicherheitshinweise auf den Batterien
beachten.
<
Bei längerem Nichtgebrauch (über einen Monat)
sollten die Batterien entnommen werden, um ein
Auslaufen im Batteriefach zu verhindern.
Ausgelaufene Batterien entnehmen und nach
Säubern des Batteriefachs gegen frische
auswechseln.
<
Batterien nicht erhitzen, zerlegen oder verbrennen.
3
2
1

61
ITALIANO NEDERLANDS
DEUTSCH/ ITALIANO/NEDERLANDS
Telecomando Afstandsbediening
L’unità di telecomando in dotazione pemette di
comandare a distanza l’apparecchio.
Quando si utilizza l’unità di telecomando, puntarla
verso il sensore sul pannello anteriore
dell’apparecchio..
<
Anche se l’unità di telecomando viene utilizzata
entro il campo efficace, il comando a distanza
potrebbe essere impossibile se vi sono degli
ostacoli tra il telecomando ed il lettore.
<
Se l’unità di telecomando viene utilizzata in
prossimità di altri apparecchi che generano raggi
infrarossi oppure se altri dispositivi di comando a
distanza utilizzanti raggi infrarossi vengono utilizzati
in prossimità del lettore, esso potrebbe funzionare in
modo scorretto. Dal punto di vista opposto anche gli
altri apparecchi potrebbero funzionare in modo
scorretto.
Installazione batterie
Rimuovere il coperchio del vano batterie.
Inserire due batterie “AAA“ (R03, SUM-4).
Accertarsi che le batterie siano inserite con I poli
positivo +
e negativo _ nelle posizioni corrette.
Chiudere il coperchio fino a sentire uno scatto.
Sostituzione batterie
Se si notasse che la distanza di funzionamento
diminuisce, ciò indica che le batterie sono scariche. In
tale caso sostituire le batterie con lter di nuove.
Precauzioni riguardanti le batterie
< Accertarsi di inserire le batterie con le polarità + e
_
nella posizione corretta.
<
Usare batterie dello stesso tipo. Non usare mai tipi
diversi di batterie assieme.
<
Possono essere usate sia batterie ricaricabili che
batterie non ricaricabili.
Fare riferimento alle indicazioni sull’etichetta.
<
Quanddo si prevede di non utilizzare il telecomando
per un lungo periodo (più di un mese), rimuovere le
batterie per prevenire perdite. Se si verificassero
delle perdite, pulire il vano batterie e sostituire le
batterie con lter di nuove.
<
Non riscaldare o disassemblare le batterie e non
gettarle nel fuoco.
3
2
1
Met de meegeleverde afstandsbediening kunt u het
apparaat op afstand bedienen. Richt de
afstandsbediening op de Remote Sensor aan de
voorzijde van het apparaat.
<
Als zich obstakels tussen de afstandsbediening en
het apparaat bevinden functioneert de
afstandsbediening mogelijk niet correct, zelfs al
bevindt u zich in het normale werkingsgebied.
<
Als de afstandsbediening wordt gebruikt in de buurt
van andere apparatuur die infrarode straling
produceert of wanneer een andere infrarood
afstandsbediening wordt gebruikt in de buurt van
het apparaat werkt de afstandsbediening mogelijk
niet goed. Hetzelfde geldt omgekeerd wanneer u de
afstandsbediening gebruikt in de buurt van andere
apparatuur die reageert op infrarode straling.
Plaatsen van batterijen
Verwijder het dekseltje van het batterijvak.
Leg er twee AAA (R03, SUM-4) batterijen in en zorg
dat de positieve +
en negatieve _ polen van de
batterijen op de juiste plaats liggen.
Zet het dekseltje weer terug.
Batterijen vervangen
Wanneer u merkt dat u de afstandsbediening steeds
dichter bij het apparaat moet houden om correct te
laten werken dient u de batterijen te vervangen.
Vervang altijd beide batterijen door nieuwe.
Voorzorgsmaatregelen voor batterijen
< Zorg dat u de batterijen met de juiste positieve + en
negatieve _
polariteit in het batterijvakje legt.
<
Gebruik altijd twee nieuwe batterijen van hetzelfde
type.
<
U kunt ook oplaadbare batterijen gebruiken. Volg de
instructies op de batterijen of op het
oplaadapparaat.
<
Wanneer de afstandsbediening erg lang niet
gebruikt wordt (langer dan een maand), verwijder
dan de batterijen om te voorkomen dat ze gaan
lekken. Mochten de batterijen toch gelekt hebben
maak dan het batterijvak schoon en plaats nieuwe
batterijen.
<
Batterijen nooit verhitten of openmaken en nooit in
open vuur gooien.
3
2
1

62
DEUTSCH
Wiedergabe einer CD (1)
1 52
Drücken Sie den Netzschalter (POWER), um das
Gerät einzuschalten.
Wählen Sie bitte durch Betätigen der CD-Taste CD-
Betrieb aus.
Bei Verwendung der Fernbedienung betätigen Sie
zur Auswahl des CD-Betriebs bitte wiederholt die
darauf befindliche FUNCTION-Taste.
<
Sofern sich keine CD im Laufwerk befindet,
erscheint auf dem Display die Meldung “no dISC”.
Drücken Sie zum Öffnen des CD-Fachs bitte leicht
auf die mit dem Öffnen-Symbol L
bezeichnete
Stelle.
Legen Sie eine CD mit deren bedruckten Seite nach
oben ein, und schließen das CD-Fach vorsichtig mit
der Hand.
<
Sie müssen die CDs fest auf die Spindel drücken, bis
ein Klicken zu hören ist.
<
Legen Sie nie mehr als eine CD in das CD-Laufwerk.
<
Drücken Sie zum Schließen der Abdeckung stets
nur leicht auf die mit dem Öffnen-Symbol L
bezeichnete Stelle.
<
Die Gesamttitelanzahl sowie die
Gesamtwiedergabedauer der im Laufwerk
befindlichen CD werden im Display angezeigt.
<
Das Gerät braucht ein paar Sekunden, um den Inhalt
der Disc einzulesen. Während des Lesevorgangs
können Sie keine Tasten betätigen. Warten Sie, bis
die Gesamt-Titelzahl und Gesamtspielzeit der Disc
angezeigt wird.
Betätigen Sie zum Starten der Wiedergabe bitte die
PLAY/PAUSE-Taste (y
/J).
Die Wiedergabe des ersten Titels der CD beginnt.
Sobald alle Titel der CD wiedergegeben wurden,
stoppt die Wiedergabe automatisch.
5
4
3
2
1
1
2
4
5
3

63
ITALIANO NEDERLANDS
DEUTSCH/ ITALIANO/NEDERLANDS
Ascolto di CD (1) Het afspelen van een CD (1)
Premere l’interruttore POWER per accendere
l’apparecchio.
Premere il tasto CD per selezionare il modo “CD”.
Quando si usa il telecomando, premere
ripetutamente il tasto FUNCTION finché compare
“CD”.
<
Se non è stato inserito un disco, verrà visualizzata la
scritta “no dISC”.
Premere L per aprire il coperchio del vano CD.
<
Il CD deve essere ben premuto sull’apposito asse
in modo che si senta un “CLICK”.
<
Non inserire mai più di un disco.
<
Per riaprire, premere ancora L sul coperchio.
<
Sul display sono visibili il numero totale dei brani e il
tempo totale di riproduzione del disco.
<
L’apparecchio impiega qualche secondo a leggere il
contenuto del disco: nel frattempo, tutti i tasti sono
disattivati. Diventano operativi solo dopo che sono
stati visualizzati il numero totale dei brani e il tempo
totale di riproduzione del disco.
Premere il tasto PLAY/PAUSE (y/J) per avviare la
riproduzione.
La riproduzione inizia dal primo brano.
Quando tutti i brani sono stati riprodotti,
l’apparecchio si ferma automaticamente.
5
4
3
2
1
Druk op de POWER-schakelaar om het apparaat
aan te zetten.
Druk op de CD-toets om ”CD” te selecteren.
Druk herhaald op de FUNCTION-toets om ”CD” te
selecteren als u de afstandsbediening gebruikt.
<
Als er geen disc in het apparaat ligt verschijnt ”NO
DISC” in het display.
Druk op L om het klepje van de disc-lader te
openen.
Plaats een disc met het label naar boven en sluit
het klepje met de hand.
<
U moet CD’s stevig op de spindle drukken totdat u
een klik hoort.
<
Leg nooit meer dan een disc in de CD-speler.
<
Druk voor het sluiten op L op het klepje.
<
Het totale aantal tracks en de totale afspeeltijd van
de disc verschijnen in het display.
<
Het duurt enkele minuten voordat het apparaat de
inhoud van disc heeft ingelezen. Tijdens het inlezen
werken de toetsen niet. Wacht totdat het totale
aantal tracks en de totale speeltijd van de disc
worden weergegeven.
Druk op de PLAY/PAUSE-toets (y/J) om met het
afspelen te beginnen.
Het afspelen begint vanaf de eerste track.
Wanneer alle tracks zijn afgespeeld, stopt het
apparaat automatisch.
5
4
3
2
1

64
DEUTSCH
Wiedergabe einer CD (2)
BDC A
E
B
A
E
C
D
Beenden der Wiedergabe
Betätigen Sie die STOP-Taste (H ), um die
Wiedergabe einer CD abzubrechen.
Kurzzeitige Unterbrechung der Wiedergabe (Pause)
Betätigen Sie die PLAY/PAUSE-Taste (y/J). Die
Wiedergabe wird angehalten.
Um die Wiedergabe ab der Position fortzusetzen, an
der Sie zuvor angehalten wurde, betätigen Sie bitte
erneut die PLAY/PAUSE-Taste (y
/J).
Aufsuchen des nächsten oder vorhergehenden
Titelanfangs
Betätigen Sie während der Wiedergabe einer CD die
jeweilige SKIP/SEARCH-Taste (.
m
oder ,
/
)
so oft, bis die gewünschte Titelnummer angezeigt wird.
Die Wiedergabe wird ab dem Titelanfang des
ausgewählten Titels fortgesetzt.
Betätigen Sie wiederholt die jeweilige SKIP/SEARCH-
Taste (.
m
oder ,
/
) im Stoppmodus (keine
Wiedergabe), bis die gewünschte Titelnummer angezeigt
wird. Betätigen Sie nun die PLAY/PAUSE-Taste (y
/J),
um die Wiedergabe des ausgewählten Titels zu starten.
<
Einmaliges Betätigen der .
m
-Taste während der
Wiedergabe bewirkt, daß der momentan wiedergegebene
Titel ab dessen Anfang erneut wiedergegeben wird. Um
an den Titelanfang des vorangegangenen Titels zu
gelangen, müssen Sie die .
m
-Taste zweimal
betätigen.
<
Während der Wiedergabe einer zuvor programmierten
Titelfolge wird der entsprechend nächste oder
vorhergehende Titel der Titelfolge aufgerufen.
Schneller Vor-/Rücklauf
Betätigen Sie während der Wiedergabe die jeweilige
SKIP/SEARCH-Taste (.
m
oder ,
/
). Lassen
Sie die entsprechende Taste los, wenn die gewünschte
Position erreicht ist.
DISPLAY-Taste
Durch wiederholtes Betätigen der DISPLAY-Taste
während der Wiedergabe ändert sich die Anzeige wie
folgt:
<
Die Anzeige der aktuellen Uhrzeit sowie der Timer-
Einstellungen erfolgt jeweils für eine Dauer von vier
Sekunden. Danach kehrt das Display zur Originalanzeige
zurück.
<
Bei stehendem CD-Laufwerk (Stoppmodus) kann die
verbleibende Restwiedergabedauer der im Laufwerk
befindlichen CD nicht angezeigt werden.
E
D
C
B
A
Wiedergabedauer des momentan
wiedergegebenen Titels
Verbleibende Restwiedergabedauer der
im Laufwerk befindlichen CD
Uhrzeitanzeige
Anzeige der aktuellen Timer-Einstellungen

65
ITALIANO NEDERLANDS
DEUTSCH/ ITALIANO/NEDERLANDS
Ascolto di CD (2)
Per fermare la riproduzione
Premere il tasto STOP (H).
Per interrompere momentaneamente la riproduzione
(modo Pause)
Premere il tasto PLAY/PAUSE (y/J). La lettura si
interrompe nel punto raggiunto.
Per riprenderla da quel punto, premere di nuovo il
tasto PLAY/PAUSE (y
/J).
Per saltare al brano successivo o precedente
Mentre è in corso la riproduzione, premere
ripetutamente il tasto SKIP/SEARCH (.
m
o
,
/
) fino a trovare il brano desiderato. Il
brano scelto verrà letto dall’inizio.
Nel modo Stop, premere ripetutamente il tasto
SKIP/SEARCH (.
m
o ,
/
) fino a trovare il
brano desiderato, premere poi il tasto PLAY/PAUSE
(y
/J) per fare iniziare la riproduzione da quel brano.
< Quando si preme una sola volta il tasto .
m
durante la riproduzione, il brano in ascolto verrà letto
dall’inizio. Per tornare all’inizio del brano precedente,
bisogna premere due volte il tasto .
m
.
<
Durante la riproduzione programmata, verrà letto il
brano che occupa il posto successivo o precedente
nella sequenza.
Ricerca di una determinata parte di un brano
Nel corso della riproduzione, mantenere abbassato il
tasto SKIP/SEARCH (.
m
o ,
/
) e
rilasciarlo quando viene raggiunta la parte che si
desidera ascoltare.
Tasto DISPLAY
Durante la riproduzione, premendo ripetutamente
questo tasto vengono visualizzate in sequenza le
seguenti informazioni:
<
Le indicazioni dell’ora e della regolazione del timer
rimangono sullo schermo per 4 secondi, poi il
display riprende l’aspetto originale.
<
Nel modo Stop, non si può selezionare
l’informazione relativa al tempo restante del disco.
E
D
C
B
A
Tempo di riproduzione del brano corrente
Tempo restante del disco
Ora attuale
Regolazione del timer
Het afspelen van een CD (2)
A Het afspelen beëindigen
Druk op de STOP-toets (H) om het afspelen te
beëindigen.
Het afspelen tijdelijk onderbreken (pauzestand)
Druk op de PLAY/PAUSE-toets (y/J). De weergave
zal op dit punt onderbroken worden.
Om het afspelen weer te starten drukt u opnieuw op
de PLAY/PAUSE-toets (y
/J).
Naar de volgende of vorige track gaan
Druk tijdens het afspelen herhaald op de
SKIP/SEARCH-toets (.m
of ,/) totdat
de gewenste track gevonden is. De geselecteerde
track zal vanaf het begin afgespeeld worden.
Druk in de stop-stand herhaald op de SKIP/SEARCH-
toets (.m
of ,/) totdat de gewenste
track gevonden is, druk daarna op de PLAY/PAUSE-
toets (
y/J
) om het afspelen van de geselecteerde
track te starten.
<
Als u tijdens het afspelen van een track een keer op
de .m
-toets drukt dan zal deze track opnieuw
vanaf het begin afgespeeld worden. Om terug te
gaan naar het begin van de vorige track drukt u
twee keer op de .m
-toets.
<
Tijdens geprogrammeerd afspelen zal de volgende
of vorige track in het programma afgespeeld
worden.
Zoeken naar een bepaald gedeelte van een track
Houd tijdens het afspelen de SKIP/SEARCH-toets
(.m
of ,/) ingedrukt totdat u het
gedeelte dat u wilt horen hebt gevonden en laat dan
de toets los.
DISPLAY-toets
Druk tijdens het afspelen herhaald op deze toets om
informatie in het display als volgt weer te geven:
<
De klok en de timer-instellingen worden 4 seconden
weergegeven, daarna schakelt het display terug
naar de originele stand.
<
In de stop-stand is het niet mogelijk de resterende
tijd van de disc te selecteren.
E
D
C
B
A
Afspeeltijd van de huidige track
Resterende afspeeltijd van de disc
Klok
Timer-instellingen

66
DEUTSCH
Wiedergabe einer programmierten Titelfolge (1)
2 4
1 3
Sie können die gewünschte Wiedergabereihenfolge
von bis zu 20 Titeln programmieren.
<
Die Shuffle-Funktion kann nicht zusammen mit der
Wiedergabe einer programmierten Titelfolge
verwendet werden.
<
Legen Sie eine CD in das Laufwerk, und betätigen
Sie bitte die CD-Taste, bevor Sie mit der
Programmierung beginnen.
Betätigen Sie die MEMORY/CLOCK ADJ-Taste
während sich das CD-Laufwerk im Stoppmodus
befindet.
Die “MEMORY”-Anzeige blinkt und die Meldung “P-
01” erscheint auf dem Display.
Um einen Titel auszuwählen, drücken Sie die
SKIP/SEARCH-Taste innerhalb von 10 Sekunden.
<
Falls Sie die SKIP/SEARCH-Taste nicht innerhalb
von 10 Sekunden drücken, wird der Programm-
Modus abgebrochen.
Drücken Sie die MEMORY/CLOCK ADJ-Taste,
während im Display “MEMORY” blinkt.
Der gewählte Titel ist an der ersten Programmstelle
programmiert, und die Meldung “P-02” erscheint im
Display.
Wiederholen Sie, zur Programmierung weiterer Titel, den
Bedienschritt
und .
<
Die Wiedergabereihenfolge von bis zu 20 Titeln kann
programmiert werden.
< Betätigen Sie bitte die STOP-Taste (H), um die
Programmierung einer Titelfolge abzubrechen.
Wenn Sie alle gewünschten Titel programmiert
haben, betätigen Sie bitte die PLAY/PAUSE-Taste
(y /J ), um die Wiedergabe der Titelfolge zu
starten.
Sofern Sie die PLAY/PAUSE-Taste nicht innerhalb
von zehn Sekunden betätigen, erlischt die
„MEMORY“-Anzeige. In diesem Fall betätigen Sie
zum Starten der Wiedergabe die MEMORY/CLOCK
ADJ-Taste gefolgt von der PLAY/PAUSE-Taste.
Die programmierten Inhalte bleiben auch nach
Drücken der TUNER-Taste oder nach dem
Abschalten des Stroms erhalten.
4
32
3
2
1
1
2
4
3

67
ITALIANO NEDERLANDS
DEUTSCH/ ITALIANO/NEDERLANDS
Riproduzione Programmata (1)
Si possono programmare fino a 20 brani nell’ordine
desiderato.
<
La funzione Shuffle non si può usare durante la
riproduzione Program.
<
Prima di cominciare la programmazione, inserire un
disco e selezionare “CD”.
Premere il tasto MEMORY/CLOCK ADJ, partendo
dal modo Stop.
L’indicatore “MEMORY” lampeggia, e compare sul
display l’indicazione “P-01”.
Entro 10 secondi, premere i tasti numerici
corrispondenti al brano da selezionare.
<
Se il tasto SKIP/SEARCH non viene premuto entro 10
secondi, la programmazione verra’ annullata.
Mentre sul display lampeggia “MEMORY”, premere
il tasto MEMORY/CLOCK ADJ.
Il brano viene programmato e sul display compare
l’indicazione “P-02”.
Per programmare altri brani, ripetere i passi e .
<
È possibile programmare un massimo di 20 brani.
<
Per uscire dal modo Program, premere il tasto STOP
(H
).
Dopo aver scelto i numeri di tutti i brani, premere il
tasto PLAY/PAUSE (y
/J ) per avviare la
riproduzione programmata.
Se il tasto PLAY/PAUSE non viene premuto entro 10
secondi, si spegnerà l’indicatore MEMORY.
In tal caso, per avviare la riproduzione programmata
bisogna premere in successione i tasti
MEMORY/CLOCK ADJ e PLAY/PAUSE.
La sequenza di brani programmata viene conservata
in memoria anche dopo aver premuto i tasti TUNER
o dopo aver tolto l’alimentazione.
4
32
3
2
1
Geprogrammeerde weergave (1)
Tot 20 tracks kunnen geprogrammeerd worden in een
door u gewenste volgorde.
<
Shuffle weergave werkt niet tijdens
geprogrammeerde weergave.
<
Plaats een disc en selecteer ”CD” voordat u begint
met programmeren.
Druk in de stopstand op de MEMORY/CLOCK ADJ-
toets.
Het “MEMORY” indicatielampje knippert en “P-01”
verschijnt in het display.
Druk binnen 10 seconden op de SKIP/SEARCH-toets
om een track te selecteren.
<
De programmeerstand wordt geannuleerd als u niet
binnen 10 seconden op de SKIP/SEARCH-toets
drukt.
Druk op de MEMORY/CLOCK ADJ-toets terwijl
“MEMORY” knippert op de display.
De track is geprogrammeerd; het bericht “P-02”
wordt weergegeven.
Herhaal stappen en om meer tracks te
programmeren.
<
U kunt tot 20 tracks programmeren.
<
Om het programmeren te verlaten drukt u op de stop
-toets (H
).
Als de programma-selectie compleet is druk dan op
de PLAY/PAUSE-toets (y
/J ) om met de
geprogrammeerde weergave te beginnen.
Als u de PLAY/PAUSE-toets niet binnen tien
seconden indrukt zal het MEMORY indicatielampje
uit gaan. Druk in dat geval op de MEMORY/CLOCK
ADJ-toets en daarna op de PLAY/PAUSE-toets om
de geprogrammeerde weergave te starten.
De geprogrammeerde inhoud wordt in het geheugen
bewaard, zelfs nadat u op de TUNER-toets drukt of
het apparaat heeft uitgezet.
4
32
3
2
1

68
DEUTSCH
Wiedergabe einer programmierten Titelfolge (2)
MEMORY/CLOCK ADJ
STOPSKIP/SEARCH
Am Ende einer programmierten Titelfolge weitere
Titel hinzufügen
Drücken Sie im Stoppmodus wiederholt auf die
MEMORY/CLOCK ADJ-Taste, bis “00” im Display
erscheint. Wählen Sie eine Titelnummer, indem Sie
die SKIP/SEARCH-Taste gedrückt halten, drücken
Sie dann die MEMORY/CLOCK ADJ-Taste.
Der entsprechende Titel wird am Ende der
bestehenden Titelfolge hinzugefügt.
B
Löschen einer programmierten Titelfolge
Im Stoppmodus führen Sie eine der folgenden
Aktionen durch, um das Programm zu löschen:
Betätigen Sie zum Öffnen der CD-Fachhaube die
L
-Taste.
Betätigen Sie die MEMORY/CLOCK ADJ-Taste und
danach die STOP(H
)-Taste.
< Falls das Gerät länger als 3 Minuten von der
Stromversorgung getrennt wird, so werden die
programmierten Inhalte gelöscht.
E
Beenden der Wiedergabe einer programmierten
Titelfolge
Drücken Sie die STOP-Taste (H). Die “MEMORY”-
Anzeige verschwindet – die programmierten Inhalte
gehen aber nicht verloren.
Durch Betätigen der MEMORY/CLOCK ADJ-Taste
können Sie jederzeit zur Wiedergabe einer
programmierten Titelfolge zurückkehren.
D
Überprüfen der programmierten Reihenfolge
Betätigen Sie bei stillstehendem CD-Laufwerk
(Stoppmodus) wiederholt die MEMORY/CLOCK ADJ-
Taste, um die Titelnummern der gespeicherten
Titelfolge anzuzeigen.
A
Überschreiben einer programmierten Titelfolge
Drücken Sie im Stoppmodus wiederholt auf die
MEMORY/CLOCK ADJ-Taste, bis die zu ändernde
Titelnummer im Display erscheint. Wählen Sie eine
Titelnummer, indem Sie die SKIP/SEARCH-Taste
gedrückt halten, drücken Sie dann die
MEMORY/CLOCK ADJ-Taste.
C
B
A
E
C
D

69
ITALIANO NEDERLANDS
DEUTSCH/ ITALIANO/NEDERLANDS
Riproduzione Programmata (2)
Per aggiungere un brano al termine della sequenza
programmata
Nel modo Stop, premere ripetutamente il tasto
MEMORY/CLOCK ADJ finché viene visualizzato il
numero di brano (00).
Premendo i tasti numerici, selezionare il numero del
brano da aggiungere.
Il brano scelto viene così aggiunto al termine della
sequenza programmata.
B
Per cancellare una sequenza programmata
Una sequenza programmata si può cancellare in
due modi, sempre partendo da Stop:
Premere L
sul coperchio del vano CD e aprirlo.
Premere il tasto MEMORY/CLOCK ADJ e poi STOP
(H).
<
Se l’apparecchio rimane privo di alimentazione per
più di 3 minuti, la sequenza programmata verrà
cancellata.
E
Per annullare il modo di riproduzione Program
Premere il tasto STOP (H). L’indicatore “MEMORY”
scompare, ma la sequenza programmata resta
conservata.
Per ripristinare il modo Program, premere il tasto
MEMORY/CLOCK ADJ.
D
Per verificare l’ordine dei brani programmati
Nel modo Stop, premendo ripetutamente il tasto
MEMORY/CLOCK ADJ verranno visualizzati i numeri
dei brani conservati in memoria.
A
Per cambiare un brano del programma, mediante
sovrascrittura
Nel modo Stop, premere ripetutamente il tasto
MEMORY/CLOCK ADJ finché viene visualizzato il
numero del brano da cambiare.
Premendo i tasti numerici, selezionare il numero del
nuovo brano.
C
Geprogrammeerde weergave (2)
Een track toevoegen aan het einde van het
programma
Druk in de stopstand herhaaldelijk op de
MEMORY/CLOCK ADJ-toets totdat “00” verschijnt
op de display. Selecteer een tracknummer door op
de SKIP/SEARCH-toets te drukken en druk
vervolgens op de MEMORY/CLOCK ADJ-toets.
Deze track zal aan het einde van het programma
worden toegevoegd.
B
Een geprogrammeerde selectie verwijderen
In de stopstand kunt u één van de volgende
procedures gebruiken om het programma te wissen:
Druk op L
op het disc-klepje om het te openen.
Druk nu eerst op de MEMORY/CLOCK ADJ-toets en
daarna op de STOP(H)-toets.
<
Als u de stekker van de netstroomkabel van het
apparaat langer dan 3 minuten uit het stopcontact
haalt zal de geprogrammeerde selectie eveneens
verwijderd worden.
E
Een geprogrammeerde weergave annuleren
Druk op de stop-toets. Het ”MEMORY”
indicatielampje zal uit gaan maar de
geprogrammeerde selectie zal in het geheugen
opgeslagen blijven.
Om terug te gaan naar de programma-functie drukt
u op de MEMORY/CLOCK ADJ-toets.
D
Het controleren van de geprogrammeerde selectie
Druk in de stop-stand herhaald op de
MEMORY/CLOCK ADJ-toets om in het display de
nummers te laten verschijnen die in het geheugen
opgeslagen zijn.
A
Een geprogrammeerde selectie overschrijven
Druk in de stop-stand herhaald op de
MEMORY/CLOCK ADJ-toets totdat het tracknummer
dat u wilt vervangen in het display verschijnt.
Druk op de SKIP/SEARCH-toets om een
tracknummer te selecteren en druk vervolgens op
de MEMORY/CLOCK ADJ-toets.
C

70
DEUTSCH
Wiedergabewiederholung
Wiederholung eines Titels
Nach einmaligem Betätigen der REPEAT/PRESET-
Taste während der Wiedergabe blinkt die REPEAT-
Anzeige.
Der momentan wiedergegebe Titel wird fortan
wiederholt. Wenn Sie mittels SKIP/ SEARCH- oder
Zifferntasten auf der Fernbedienung einen anderen
Titel auswählen, wird dieser fortan wiederholt
wiedergegeben.
Ein Titel kann auch bei stehendem CD-Laufwerk
(Stoppmodus) zur wiederholten Wiedergabe
ausgewählt werden. Betätigen Sie hierzu bitte die
REPEAT/PRESET-Taste , und wählen Sie danach
mittels der jeweiligen SKIP/SEARCH-Taste
(.
m
oder ,
/
)
bzw. Der Zifferntasten auf
der Fernbedienung den gewünschten Titel aus.
Betätigen Sie die PLAY/PAUSE-Taste, um die
wiederholte Wiedergabe des entsprechenden
Titels zu starten.
Wiederholung aller Titel
Alle Titel der momentan im Laufwerk befindlichen
CD werden wiederholt wiedergegeben.
Nach zweimaligem Betätigen der REPEAT/PRESET-
Taste leuchtet die REPEAT-Anzeige kontinuierlich.
<
Bei Wiedergabe einer programmierten Titelfolge
werden lediglich die entsprechenden Titel in ihrer
programmierten Reihenfolge wiederholt
wiedergegeben.
<
Falls Sie eine der folgenden Tasten betätigen oder
das CD-Fach öffnen, wird die
Wiederholungsfunktion automatisch beendet:
STOP-Taste (H
)
Netzschalter (POWER )
TUNER-Taste
FUNCTION-Taste
Wiederholung eines Titels
Wiederholung aller Titel
(aus)
Bei jedem Betätigen der REPEAT/PRESET-Taste
leuchtet oder blinkt die REPEAT-Anzeige entsprechend,
und die Betriebsart wird wie folgt umgeschaltet:

71
ITALIANO NEDERLANDS
DEUTSCH/ ITALIANO/NEDERLANDS
Riproduzione Repeat
Ripetizione di un singolo brano
Durante la riproduzione, premere una sola volta il
tasto REPEAT/PRESET. L’indicatore Repeat
lampeggia.
Il brano in ascolto verrà letto ripetutamente. Se ora,
premendo il tasto SKIP/SEARCH oppure i tasti
numerici, si seleziona un altro brano, verrà letto in
ripetizione il brano scelto.
È anche possibile scegliere un brano da ripetere
partendo dal modo Stop. Premere il tasto
REPEAT/PRESET e poi scegliere il numero del brano
premendo SKIP/SEARCH oppure i tasti numerici.
Premere infine il tasto PLAY/PAUSE per avviare la
riproduzione.
Ripetizione di tutti i brani
Verranno letti in ripetizione tutti i brani del disco.
Premere due volte il tasto REPEAT/PRESET.
L’indicatore Repeat si accende fisso.
<
Durante la riproduzione Program, verranno letti in
ripetizione, nell’ordine stabilito, solo i brani
programmati.
<
Il modo di riproduzione Repeat verrà annullato
quando si apre il coperchio del vano CD, oppure si
preme uno dei seguenti tasti:
STOP (H
)
POWER
TUNER
FUNCTION
Ripetizione di un singolo brano
Ripetizione di tutti i brani
(off)
Ogni volta che si preme il tasto REPEAT/PRESET,
l’indicatore REPEAT si accende fisso o lampeggia, e
commutano fra loro i due modi disponibili:
Herhaald afspelen
Herhalen van een track
Druk tijdens het afspelen op de REPEAT/PRESET-
toets.
Het REPEAT indicatielampje knippert.
De afspelende track zal nu herhaald worden
weergegeven.
Als u op de SKIP/ SEARCH-toets of op de
nummertoetsen drukt en een ander tracknummer
selecteert dan zal dit nieuwe tracknummer herhaald
worden weergegeven.
U kunt in de stopstand ook een track selecteren die
u wilt herhalen. Druk op de REPEAT/PRESET-toets
en selecteer vervolgens het tracknummer door op
de SKIP/SEARCH-toets of de cijfertoetsen te
drukken. Druk op de PLAY/PAUSE-toets om de track
af te spelen.
Herhalen van alle tracks
Alle tracks van een disc zullen herhaald afgespeeld
worden.
Druk twee keer op de REPEAT/PRESET-toets. Het
REPEAT indicatielampje gaat aan.
<
Gedurende geprogrammeerde weergave zullen
alleen de geprogrammeerde tracks in de
geprogrammeerde volgorde herhaald worden
afgespeeld.
<
Als u op een van de volgende toetsen drukt of het
klepje van de disc-lader open maakt zaI de
herhaalde weergave stoppen:
STOP-toets (H
)
POWER-schakelaar
TUNER-toets
FUNCTION-toets
herhalen van een track
herhalen van alle tracks
uit (off)
Elke keer als u op de REPEAT/PRESET-toets drukt zal
het REPEAT indicatielampje branden of knipperen en
de instelling verandert als volgt:

72
DEUTSCH
Shuffle-Funktion
Die Titel einer CD können in zufälliger Reihenfolge
wiedergegeben werden.
Drücken Sie die SHUFFLE-Taste im Stopp- oder
Wiedergabemodus.
<
Bei aktivierter Shuffle-Funktion bewirkt die
Verwendung der SKIP/SEARCH-Taste (
,
/
),
daß der nächste Titel willkürlich ausgewählt und
wiedergegeben wird.
Betätigen Sie die SKIP/SEARCH-Taste (.m
),
um den derzeit wiedergegebenen Titel erneut ab
dessen Anfang wiederzugeben.
Titelwiederholung- und Shuffle-Funktion können
nicht zusammen verwendet werden.
<
Beenden Sie die Shuffle-Funktion durch Betätigen
der STOP-Taste (H
).
<
Die Shuffle-Wiedergabe wird abgebrochen, indem
Sie die SHUFFLE-Taste erneut betätigen.
<
Wenn Sie eine der folgenden Tasten betätigen oder
das CD-Fach öffnen, wird die Shuffle-Funktion
ebenfalls abgebrochen:
STOP-Taste (H
), Netzschalter (POWER),
TUNER-Taste, FUNCTION-Taste
Einschlaf-Timerfunktion
Das Gerät kann sich zu einer bestimmten Zeit
ausschalten.
Betätigen Sie die TIMER/SLEEP-Taste bei
eingeschaltetem Gerät so oft, bis die gewüchte
Ausschaltzeit auf dem Display angezeigt wird.
Wenn Sie die Fernbedienung verwenden, benutzen Sie
die SLEEP-Taste.
Sie können die Ausschaltzeit in 10 Minuten-Schritten
ändern.
Wenn die Einschlaf-Timerfunktion aktiviert ist,
erscheint “SLEEP” im Display.
(OFF)
90 80 10
70

73
ITALIANO NEDERLANDS
DEUTSCH/ ITALIANO/NEDERLANDS
Riproduzione Shuffle
Permette di leggere i brani in ordine casuale.
Premere il tasto SHUFFLE partendo dal modo Stop o
Play.
<
Nel corso della riproduzione Shuffle, premendo il
tasto SKIP/SEARCH (
,
/
) il brano successivo
verrà scelto casualmente e poi riprodotto.
Quando si preme il tasto SKIP/SEARCH (.m
),
il brano in ascolto verrà riletto dall’inizio.
Durante la riproduzione Shuffle, non è possibile
ripetere un brano.
<
Per fermare la riproduzione Shuffle, premere il tasto
STOP (H
).
<
Per uscire dal modo Shuffle, premere il tasto
SHUFFLE.
<
Il modo di riproduzione Shuffle verrà annullato
quando si apre il coperchio del vano CD, oppure si
preme uno dei seguenti tasti:
STOP (H
), POWER
TUNER, FUNCTION
Shuffle weergave
Tracks kunnen in willekeurige volgorde afgespeeld
worden.
Druk in de stop-stand of tijdens weergave op de
SHUFFLE-toets.
<
Als u tijdens SHUFFLE weergave op de
SKIP/SEARCH-toets (,/
) drukt zal een
volgende track willekeurig worden gekozen en
afgespeeld.
Als u op de SKIP/SEARCH-toets (.m
) drukt zal
de huidige track vanaf het begin afgespeeld
worden.
Een track kan niet herhaald worden tijdens SHUFFLE
weergave.
<
Om SHUFFLE weergave te stoppen drukt u op de
STOP-toets (H
).
<
Om SHUFFLE weergave te annuleren drukt u op de
SHUFFLE-toets.
<
Als u een van de volgende toetsen indrukt of het
klepje van de disc-lader open maakt zal SHUFFLE
weergave stoppen:
STOP-toets (H
), POWER-schakelaar
TUNER-toets, FUNCTION-toets
Quando il timer con l’ora dello spegnimento ritardato
e’stato attivato appare “SLEEP” sul display.
Wanneer de sleep timer is geactiveerd, verschijnt het
bericht “SLEEP” op de display.
È possibile specificare l’ora precisa in cui
l’apparecchio dovrà spegnersi.
Mentre la radio è accesa, premere ripetutamente il
tasto TIMER/SLEEP finché viene visualizzata l’ora
desiderata.
Usare il tasto SLEEP per l’utilizzo dell’unità di
telecomando.
La durata del ritardo allo spegnimento può essere
modificata con variazioni di 10 minuti.
(OFF)
90 80 10
70
Sleep Timer
Het apparaat kan op de opgegeven tijd worden
uitgeschakeld.
Druk als het apparaat aan staat herhaald op de
TIMER/SLEEP-toets totdat de gewenste tijd in het
display verschijnt.
Op de afstandsbediening gebruikt u de SLEEP-toets.
De in te stellen tijd kan in stappen van 10 minuten
veranderd worden.
(OFF)
90 80 10
70
Temporizzazione della funzione Sleep
(spegnimento ritardato)

74
DEUTSCH
Radiobetrieb
1 32
4
Drücken Sie den Netzschalter (POWER), um das
Gerät einzuschalten.
Betätigen Sie die TUNER-Taste.
Bei Verwendung der Fernbedienung betätigen Sie
bitte entsprechend oft die FUNCTION-Taste, um
“TUNER” auszuwählen.
Betätigen Sie die BAND-Taste, um zwischen UKW-
und MW-Empfang umzuschalten.
Wählen Sie mittels automatischer
Sendersuchfunktion die Empfangsfrequenz des
Senders aus, den Sie hören möchten.
Drehen Sie den TUNING-Drehregler nach links oder
rechts, bis sich die Frequenzanzeige zu ändern
beginnt.
Sobald ein Sender empfangen wird, stoppt die
Sendersuche automatisch.
<
Durch erneutes Bewegen des TUNING-Drehreglers
können Sie die automatische Sendersuche
abbrechen.
<
Bei Verwendung der Fernbedienung betätigen Sie
bitte die TUNING-Taste.
Einstellen von Empfangsfrequenzen, die nicht mittels
automatischer Sendersuche eingestellt werden
können (manuelle Sendersuche).
Drehen Sie den TUNING-Drehregler nach links oder
rechts und halten Sie ihn fest, um die Frequenz
fortlaufend zu ändern. Lassen Sie ihn los, wenn Sie
die Station gefunden haben, die Sie anhören
möchten.
Bei Verwendung der Fernbedienung betätigen Sie
bitte die TUNING-Taste.
Bei schlechten Empfangsverhältnissen
MW-Empfang
Drehen Sie das Gerät oder verändern Sie seinen
Standort, um die beste Position zum
Mittelwellenempfang (AM) zu finden.
UKW-Empfang
Richten Sie die Litzen der UKW-Wurfantenne neu
aus, bis Sie einen einwandfreien Empfang haben.
4
3
2
1
1
2
4
3

75
ITALIANO NEDERLANDS
DEUTSCH/ ITALIANO/NEDERLANDS
Ascolto della radio
Premere POWER per accendere l’apparecchio.
Premere il tasto TUNER per selezionare il modo
“TUNER”.
Quando si usa il telecomando, per selezionare
“TUNER” premere ripetutamente il tasto FUNCTION.
Premere il tasto BAND oppure il tasto BAND per
scegliere la gamma FM or AM.
Scegliere l’emittente che si desidera ascoltare
(selezione automatica).
Ruotare la manopola TUNING finché il valore della
frequenza visualizzata comincia a cambiare.
Quando un’emittente è stata sintonizzata, la ricerca
si ferma automaticamente.
<
Ruotare la manopola TUNING per fermare la
selezione automatica.
<
Quando si usa il telecomando, premere il tasto
TUNING.
Scelta di emittenti impossibili da sintonizzare
automaticamente (selezione manuale).
Ruotare lentamente avanti e indietro la manopola
TUNING per ottenere piccole variazioni della
frequenza. Rilasciare la manopola quando si sente
l’emittente desiderata.
Quando si usa il telecomando, premere il tasto
TUNING.
Se la ricezione è scarsa
Trasmissioni AM
Spostare l’apparecchio in varie posizioni finché si
trova quella più adatta alla ricezione delle
trasmissioni AM.
Trasmissioni FM
Per ottenere una buona ricezione, cambiare
l’orientamento dell’antenna finché il segnale
dell’emittente risulta chiaro.
4
3
2
1
Luisteren naar de radio
Druk op de POWER-toets om het apparaat aan te
zetten.
Druk op de TUNER -toets om “TUNER” te
selecteren.
Druk herhaald op de FUNCTION-toets om “TUNER”
te selecteren als u de afstandsbediening gebruikt.
Druk op de de BAND-toets om FM of AM te
selecteren.
Selecteer het station waar u naar wilt luisteren
(automatische selectie).
Draai de TUNING-knop naar links of rechts tot de
frequentie op de display verandert.
Als een station gevonden wordt zal de tuning-
functie automatisch stoppen.
<
Draai aan de TUNING-knop om de automatische
selectie te beëindigen.
<
Gebruik de TUNING-toets als u de
afstandsbediening gebruikt.
Het selecteren van stations die niet automatisch
ingesteld kunnen worden (handmatige selectie).
Houd de TUNING-knop naar links of rechts gedraaid
om de frequentie continu te veranderen. Laat de
knop los wanneer u het kanaal dat u wilt horen heeft
gevonden.
Gebruik de TUNING-toets als u de
afstandsbediening gebruikt.
Als de ontvangst matig is
AM-uitzendingen
Draai het apparaat om om de beste positie voor AM-
kanalen te vinden.
FM-uitzendingen
Verplaats de antenne zodanig dat u FM-stations
helder kunt ontvangen
4
3
2
1

76
DEUTSCH
Sie können für den UKW- und den MW-Bereich
jeweils bis zu 10 Empfangsfrequenzen in Presets
speichern.
Betätigen Sie die BAND-Taste, um zwischen UKW-
und MW-Empang umzushalten.
Stellen Sie mittels TUNING-Drehregler, wie bereits
beschrieben, die gewünschte Empfangsfrequenz
eines Senders ein, die Sie in einem Preset
speichern möchten.
Betätigen Sie die MEMORY/CLOCK ADJ-Taste.
Betätigen Sie innerhalb von zehn Sekunden die
REPEAT/PRESET-Taste gefolgt von der
MEMORY/CLOCK ADJ-Taste, um ein Preset
auszuwählen, unter dem Sie die eingestellte
Empfangsfrequenz speichern möchten.
Wiederholen Sie bitte die Bedienschritte bis ,
um weitere Empfangsfrequenzen von Sendern in
Presets zu speichern.
41
4
3
2
1
Speichern von Empfangsfrequenzen in Presets
1
1
2 4
2
3
4
1
2
1
2
4
3
Betätigen Sie die BAND-Taste, um zwischen UKW-
und MW-Empang umzushalten.
Betätigen Sie bitte wiederholt die REPEAT/PRESET-
Taste, um das gewünschte Sender-Preset
auszuwählen.
2
1
Umschalten zwischen Sender-Presets

77
ITALIANO NEDERLANDS
DEUTSCH/ ITALIANO/NEDERLANDS
Per ciascuna gamma, si possono memorizzare in
successione fino a 10 emittenti.
Premere il tasto BAND per scegliere la gamma FM
o AM.
Ruotando la manopola TUNING, sintonizzare
un’emittente da memorizzare come preselezionata.
Premere il tasto MEMORY/CLOCK ADJ.
Entro 10 secondi selezionare, con il tasto
REPEAT/PRESET, la posizione nella quale
memorizzare l’emittente, poi premere il tasto
MEMORY/CLOCK ADJ.
Per memorizzare altre emittenti nel loro rispettivo
ordine, ripetere i passi da a .
41
4
3
2
1
Memorizzazione delle emittenti preselezionate
Premere il tasto BAND per selezionare FM o AM.
Premere ripetutamente il tasto REPEAT/PRESET e
selezionate l’emittente memorizzata.
2
1
Per richiamare le emittenti preselezionate
Voor elke band kunnen maximaal 10 kanalen worden
opgeslagen in het preset-geheugen.
Druk op de BAND-toets om FM of AM te selecteren.
Draai aan de TUNING-knop totdat u een station
gevonden hebt dat u als vooraf-ingesteld station op
wilt slaan.
Druk op de MEMORY/CLOCK ADJ-toets.
Druk binnen 10 seconden op de REPEAT/PRESET-
toets om het vooraf in te stellen station te
selecteren en druk daarna op de MEMORY/CLOCK
ADJ-toets.
Om meer stations op te slaan herhaalt u de stappen
tot .
41
4
3
2
1
Het vooraf-instellen van radio-stations
Druk op de BAND-toets om FM of AM te selecteren.
Druk herhaald op de REPEAT/PRESET-toets en
selecteer een vooraf-ingesteld kanaal.
2
1
Het selecteren van vooraf-ingestelde stations

78
DEUTSCH
Uhr-Einstellungen
MEMORY/CLOCK ADJDISPLAY
.m,/
Drücken Sie die DISPLAY-Taste, um die
Uhrzeitanzeige zu wählen.
“:” blinkt im Display.
<
Wenn das Gerät ausgeschaltet ist, halten Sie die
MEMORY/CLOCK ADJ-Taste mindestens 2 Sekunden
lang gedrückt und fahren bei Schritt fort.
<
Betätigen Sie die STOP-Taste (H ), um die
Zeiteinstellung abzubrechen.(Im TUNER-Betrieb
drücken Sie die DISPLAY-Taste.)
Betätigen Sie innerhalb von vier Sekunden die
MEMORY/CLOCK ADJ-Taste für mindestens zwei
Sekunden.
Betätigen Sie zur Auswahl der Zwölfstunden- (12H)
bzw. Vierundzwanzigstundenanzeige (24H) die
SKIP/SEARCH-Tasten (.m
oder ,/ ).
Wenn Sie “12H”, wählen, erscheint “AM” oder
“PM” im Display.
<
Im TUNER-Betrieb verwenden Sie den TUNING-
Drehregler.
Betätigen Sie die MEMORY/CLOCK ADJ-Taste.
etätigen Sie zum Einstellen der Stundenanzeige die
SKIP/SEARCH-Tasten (.m
oder ,/).
<
Im TUNER-Betrieb verwenden Sie den TUNING-
Drehregler.
Betätigen Sie erneut die MEMORY/CLOCK ADJ-
Taste.
Betätigen Sie zum Einstellen der Minutenanzeige
die SKIP/SEARCH-Tasten (.m
oder
,/
).
<
Im TUNER-Betrieb verwenden Sie den TUNING-
Drehregler.
Betätigen Sie zum Beenden der Uhrzeiteinstellung
bitte nochmals die MEMORY/CLOCK ADJ-Taste.
Die Uhrzeitanzeige beginnt mit einem Sekundenwert
von “00”.
<
Falls das Gerät länger als 3 Minuten von der
Stromversorgung getrennt wird, so werden Uhrzeit-
und Timer-Einstellungen zurückgesetzt.
<
Bei Unterbrechungen der Stromzufuhr, die weniger
als drei Minuten andauern, wird die aktuelle Uhrzeit
danach möglicherweise nicht mehr korrekt
angezeigt.
8
7
6
5
4
3
2
3
1
1
2
4
3
5
6
8
7

79
ITALIANO NEDERLANDS
DEUTSCH/ ITALIANO/NEDERLANDS
Regolazione dell’orologio
Nel modo CD o TUNER, premere il tasto DISPLAY
per selezionare la visualizzazione dell’ora
.
Il segno “:” lampeggia sul display.
<
Se è premuto il tasto AUX oppure l’apparecchio è
spento, tenere premuto per un paio di secondi il
tasto MEMORY/CLOCK ADJ, e continuare la
procedura dal passo .
<
Premere il tasto STOP per cancellare la regolazione
dell’ora. (Nel modo TUNER, premere il tasto
DISPLAY.)
Entro 4 secondi, premere e tenere abbassato per un
paio di secondi il tasto MEMORY/CLOCK ADJ.
Premere il tasto .m
o ,/ per
selezionare “12H” o “24H”.
Scegliendo il formato “12H”, le ore che precedono il
mezzogiorno sono affiancate dall’indicatore “AM” e
quelle dopo mezzogiorno dall’indicatore “PM”.
<
Nel modo TUNER, usare la manopola TUNING.
Premere il tasto MEMORY/CLOCK ADJ.
Premere il tasto .m
o ,/ per regolare
l’ora corrente.
<
Nel modo TUNER, usare la manopola TUNING.
Premere il tasto MEMORY/CLOCK ADJ.
Premere il tasto .m
o ,/ per regolare
i minuti correnti.
<
Nel modo TUNER, usare la manopola TUNING.
Per concludere la regolazione, premere il tasto
MEMORY/CLOCK ADJ.
L’orologio parte da 00 secondi.
<
Se l’apparecchio rimane privo di alimentazione per
più di 3 minuti, le regolazioni dell’orologio e del timer
si azzerano.
<
Se l’apparecchio rimane privo di alimentazione per
meno di 3 minuti, l’ora visualizzata potrebbe non
essere esatta.
8
7
6
5
4
3
2
3
1
De klok instellen
Druk op de DISPLAY-toets om de klokweergave te
selecteren.
“:” knippert in het display.
<
Wanneer het apparaat uitstaat, drukt u gedurende
minimaal 2 seconden op de MEMORY/CLOCK ADJ-
toets. Ga dan verder vanaf stap .
<
Druk op de STOP-toets om het instellen van de tijd
te annuleren. (In de TUNER-stand drukt u op de
DISPLAY-toets)
Druk binnen 4 seconden op de MEMORY/CLOCK
ADJ-toets en houd deze toets minstens 2 seconden
ingedrukt.
Druk op de .m
of ,/ -toets om “12H”
or “24H” te selecteren.
Wanneer u “12H” selecteert, verschijnt “AM” of
“PM” op de display.
<
In de TUNER-stand gebruikt u de TUNING-knop.
Druk op de MEMORY/CLOCK ADJ-toets.
Druk op de .m
of ,/-toets om het uur
in te stellen.
<
In de TUNER-stand gebruikt u de TUNING-knop.
Druk op de MEMORY/CLOCK ADJ-toets.
Druk op de .m
of ,/-toets om de
minuten in te stellen.
<
In de TUNER-stand drukt u op de TUNING-knop.
Druk op de MEMORY/CLOCK ADJ-toets om de klok-
instelfunctie te verlaten.
De klok start vanaf 00 seconde.
<
Wanneer de stekker van het apparaat langer dan
drie minuten uit het stopcontact wordt gehaald,
worden de klok en timer weer op 0 gezet.
<
Bij een onderbreking van de stroomtoevoer van
minder dan 3 minuten kan het voorkomen dat de tijd-
aanduiding niet correct is.
8
7
6
5
4
3
2
3
1

80
DEUTSCH
MEMORY/CLOCK ADJDISPLAY
.m,/
Timer-Betrieb (1)
Stellen Sie bitte die korrekte aktuelle Uhrzeit ein,
bevor Sie mit der Programmierung der Timerfunktion
beginnen.
Einstellen der Timerfunktion
Drücken Sie die DISPLAY-Taste ein- oder zweimal,
um den Timer-Betrieb auszuwählen.
Die “TIMER”-Anzeige blinkt im Display.
Betätigen Sie innerhalb von vier Sekunden die
MEMORY/CLOCK ADJ-Taste für mindestens zwei
Sekunden, um in den Timer-Einstellungsmodus zu
wechseln.
Die Meldung “TIMER” und die Stundenanzeige
blinken im Display.
Betätigen Sie zum Einstellen der Startzeit
(Stundenwert) die SKIP/SEARCH-Tasten (.m
oder ,/).
Im TUNER-Betrieb verwenden Sie den TUNING-
Drehregler.
Betätigen Sie die MEMORY/CLOCK ADJ-Taste.
Der angezeigte Minutenwert blinkt im Display.
Stellen Sie die Startzeit (Minute) mit den .m-
und ,/
-Tasten ein.
Im TUNER-Betrieb verwenden Sie den TUNING-
Drehregler.
Betätigen Sie die MEMORY/CLOCK ADJ-Taste.
Die Programmierung der Einschalt-Timerfunktion ist
hiermit abgeschlossen. Die “TIMER”-Anzeige im
Display blinkt nicht mehr.
6
5
4
3
2
1
1
2
4
3
5
6

81
ITALIANO NEDERLANDS
DEUTSCH/ ITALIANO/NEDERLANDS
Timer (1)
Prima di predisporre il timer, regolare esattamente
l’ora.
Predisposizione del timer
Prememre una o due volte il tasto DISPLAY per
selezionare il modo timer.
L’indicatore “TIMER” lampeggia sul display.
Entro 4 secondi, premere e tenere abbassato per un
paio di secondi il tasto MEMORY/CLOCK ADJ per
cambiare la regolazione del timer.
La scritta “TIMER” e il numero relativo all’ora
lampeggiano sul display.
Premere il tasto .m o ,/ per
predisporre l’ora di attivazione del timer.
Nel modo TUNER, usare la manopola TUNING.
Premere il tasto MEMORY/CLOCK ADJ.
Il numero relativo ai minuti lampeggia sul display.
Premere il tasto .m o ,/ per
predisporre il valore dei minuti.
Nel modo TUNER, usare la manopola TUNING.
Premere il tasto MEMORY/CLOCK ADJ.
La regolazione è conclusa e l’indicatore “TIMER”
smette di lampeggiare.
6
5
4
3
2
1
Timer ( (1)
Controleer de klok en zet deze zonodig gelijk voordat u
timer-instellingen maakt.
Het instellen van de timer
Druk één of twee keer op de DISPLAY-toets om de
timerstand te selecteren.
Het “TIMER” indicatielampje knippert in het display.
Druk binnen 4 seconden op de MEMORY/CLOCK
ADJ-toets en houd deze toets minstens 2 seconden
ingedrukt om de timer-instelling te veranderen.
De aanduiding ”TIMER” en het uur knippert in het
display.
Druk op de .m of ,/-toets om het
instellen van de tijd te starten (uren).
In de TUNER-stand gebruikt u de TUNING-knop.
Druk op de MEMORY/CLOCK ADJ-toets.
De minuten-aanduiding knippert in het display.
Druk op de .m of ,/-toets om het
instellen van de tijd te starten (minuten).
Gebruik in de TUNER-stand de TUNING-knop.
Druk op de MEMORY/CLOCK ADJ-toets.
De TIMER instelling is nu ingevoerd en het “TIMER”
indicatielampje gaat uit.
6
5
4
3
2
1

82
DEUTSCH
Aktivieren der Timerfunktion
Halten Sie die TIMER/SLEEP-Taste mindestens 2
Sekunden lang gedrückt und drücken Sie den
Netzschalter, um das Gerät auszuschalten.
Das Gerät schaltet sich jeden Tag zur angegebenen
Zeit ein und stellt sich eine Stunde nach der
Startzeit wieder aus.
Um eine CD timergesteuert abzuspielen, drücken
Sie die CD-Taste, um CD auszuwählen, legen eine
CD ein und stellen die Lautstärke ein, ehe Sie das
Gerät ausschalten.
Um das Radio timergesteuert einzuschalten, stellen
Sie eine Station ein und passen die Lautstärke an,
ehe Sie das Gerät ausschalten.
Vergessen Sie nicht, das Gerät auszuschalten – der
Timer funktioniert sonst nicht.
<
Falls Sie das Gerät irgendwann innerhalb einer
Stunde nach der Startzeit abstellen möchten,
betätigen Sie den Netzschalter, um das Gerät
auszuschalten.
<
Falls das Gerät länger als 3 Minuten von der
Stromversorgung getrennt wird, so werden Uhrzeit-
und Timer-Einstellungen zurückgesetzt.
Abschalten der Timerfunktion
Betäti
gen Sie die TIMER/SLEEP-Taste.
Die “TIMER”-Anzeige im Display erlischt.
Verwendung der Snooze-Funktion
Nachdem die Einschaltzeit erreicht wurde, drücken
Sie die SNOOZE-Taste – das Gerät schaltet sich für
5 Minuten ab und schaltet sich dann wieder ein.
Bei aktiver Snooze-Funktion erscheint die “SNOOZE”-
Anzeige im Display.
Diese Funktion können Sie mehrmals hintereinander
verwenden.
B
A
Timer-Betrieb (2)
B
A
A
B

83
ITALIANO NEDERLANDS
DEUTSCH/ ITALIANO/NEDERLANDS
Attivazione del timer
Premere e lasciare abbassato il tasto TIMER/SLEEP per
un paio di secondi, poi premere POWER per spegnere
l’apparecchio.
L’ appare cchio si accenderà ogni giorno all’ora
stabilita e si spegnerà da solo un’ora dopo.
Scegliendo l’ascolto di un CD, prima di spegnere
l’apparecchio premere il tasto CD per scegliere il
modo CD, inserire un disco e regolare il volume.
Scegliendo l’ascolto della radio, prima di spegnere
l’apparecchio sintonizzare un’emittente e regolare il
volume.
Non dimenticarsi di spegnere l’apparecchio,
altrimenti il timer non entrerà in funzione.
<
Se desiderate spegnere l’apparecchio entro un’ora
dall’accensione dovete premere il tasto POWER.
<
Se l’apparecchio rimane privo di alimentazione per
più di 3 minuti, le regolazioni dell’orologio e del timer
si azzerano.
Per cancellare la predisposizione del timer
Premere il tasto TIMER/SLEEP.
L’indicatore “TIMER” scompare dal display.
Utilizzo della funzione Snooze
Quando è arrivata l’ora predisposta per
l’accensione, premendo il tasto SNOOZE
l’apparecchio si spegnerà per altri 5 minuti e poi si
accenderà di nuovo.
Mentre questa funzione è attiva, si vede sul display
l’indicatore “SNOOZE”.
La funzione Snooze si può utilizzare più volte.
B
A
Timer (2)
De timer activeren
Houd de TIMER/SLEEP-toets minimaal 2 seconden
ingedrukt en druk op de POWER-toets om het apparaat
uit te zetten.
Het apparaat gaat elke dag op de ingestelde tijd
aan, en wordt één uur na de starttijd weer
uitgeschakeld.
Om bij het inschakelen in de TIMER-functie een CD
af te spelen drukt u op de CD-toets om ”CD” te
selecteren, plaats een disc in de disc-lader en stel
het weergave-volume in voordat u het apparaat uit
zet.
Om in de TIMER-functie een radio-station weer te
geven selecteert u een station, stelt u het
weergave-volume in en daarna zet u het apparaat
uit.
Vergeet het apparaat niet uit te zetten, want anders
werkt de timer niet.
<
De stoptijd kan niet ingesteld worden. Als de timer-
weergave afgelopen is druk dan op de POWER-
schakelaar om het apparaat uit te zetten.
<
Wanneer de stekker van het apparaat langer dan
drie minuten uit het stopcontact wordt gehaald,
worden de klok en timer weer op 0 gezet.
De TIMER-functie uitschakelen
Druk op de TIMER/SLEEP-toets.
Het “TIMER” indicatielampje in het display gaat uit.
Het gebruik van de Snooze-functie
Als het apparaat op de ingestelde tijd aan gaat drukt
u op de SNOOZE-toets. Het afspelen zal 5 minuten
worden onderbroken, daarna begint het afspelen
opnieuw.
Het “SNOOZE” indicatielampje brandt in het display
als de snooze-functie geactiveerd is.
U kunt deze functie meerdere keren achter elkaar
gebruiken.
B
A
Timer ( (2)

84
DEUTSCH
Technische Daten
TUNER-Teil
Frequenzbereich (UKW):
87,50 MHz bis 108,00 MHz
Frequenzbereich (MW):
522 kHz bis 1620 kHz
CD-PLAYER -Teil
Frequenzgang:
20 Hz bis 20 kHz(±1 dB)
Gleichlaufschwankung:
unterhalb der Meßgrenze
LAUTSPRECHER
Typ:
65 mm 1-Weg x 2
80 mm Subwoofer x 1
Impedanz:
8 Ohm (L & R)
8 Ohm (Subwoofer)
ALLGEMEIN
Gesamtausgangsleistung:
15 W
Netzversorgung:
230V, 50Hz
Leistungsaufnahme:
40 W
Abmessungen ( B x H x T ):
357 x 205 x 247.5 mm
(einschließlich
Fernbedienungshalter)
Gewicht:
5,8 kg
Standard-Zubehör:
Fernbedienung (RC-910) x 1
Bedienungsanleitung x 1
Garantiekarte x 1
<
Änderungen der Technischen Daten
sowie des äußeren
Erscheinungsbildes sind ohne
vorherige Ankündigung möglich.
<
Geringfügige Abweichungen der
Illustrationen dieser Anleitung zum
tatsächlichen Serienmodell sind
möglich.
Hilfe bei der Fehlerbeseitigung
Falls Sie Probleme mit Ihrem System haben sollten, gehen Sie diese
Tabelle durch und schauen Sie, ob Sie das Problem selbst beheben
können, ehe Sie sich an Ihren Händler oder an das TEAC-
Servicecenter wenden.
Allgemein
Kein Netz
e
Überprüfen Sie bitte, ob das Netzkabel korrekt angeschlossen ist.
Keine Wiedergabe
e
Stellen Sie mittels VOLUME-Drehregler eine gehörrichtige
Wiedergabelautstärke ein.
e
Falls die Muting-Funktion aktiviert ist, betätigen Sie die MUTING-
Taste.
Die Wiedergabe ist stark verrauscht
e
Das Gerät steht zu nahe an einem Fernseher oder einem
ähnlichen Gerät. Platzieren Sie das Gerät weiter davon entfernt,
oder schalten Sie die anderen Geräte aus.
Tuner
Die Wiedergabe von Radiosendern ist nicht möglich – oder das Signal
ist zu schwach
e
Stellen Sie die Empfangsfrequenz des Senders korrekt ein.
e
Falls sich ein Fernsehgerät in der Nähe befindet, schalten Sie es
aus.
e
Drehen Sie das Gerät oder das Antennenkabel, um die beste
Empfangsposition zu erreichen.
CD-Player
Keine Wiedergabe
e
Legen Sie eine CD mit deren bedruckten Seite nach oben in das
CD-Laufwerk.
e
Falls die CD verschmutzt ist, reinigen Sie deren Oberfläche mit
einem weichen Tuch.
e
Vermeiden Sie die Verwendung zerkratzter, beschädigter oder
verformter CDs.
e
Abhängig von der Qualität des Rohlings und/oder den darauf
aufgenommenen Daten, kann es vorkommen, daß einige CD-Rs
nicht wiedergegeben werden können.
e
CD-RW-Discs können nicht mit diesem Gerät abgespielt werden.
e
Kopiergeschützte CDs können unter Umständen nicht
wiedergegeben werden.
Unterbrechungen während der Wiedergabe
e
Stellen Sie das Gerät auf eine stabile Unterlage, um Vibrationen
und Stöße zu vermeiden.
e
Falls die CD verschmutzt ist, reinigen Sie deren Oberfläche mit
einem weichen Tuch.
e
Vermeiden Sie die Verwendung zerkratzter, beschädigter oder
verformter CDs.
Fernbedienung
Keine Funktion.
e
Falls die Batterien verbraucht sind, ersetzen Sie diese bitte durch
frische.
e
Verwenden Sie die Fernbedienung in einem Funktionsradius von
fünf Metern, und richten Sie sie auf den Sensor an der
Gerätevorderseite aus.
e
Sorgen Sie dafür, dass sich keine Hindernisse zwischen
Fernbedienung und Hauptgerät befinden.
e
Falls sich Leuchtstoffröhren oder ähnliche Beleuchtungskörper
nahe des Gerätes befinden, so schalten Sie diese aus.

85
ITALIANO
DEUTSCH/ ITALIANO/NEDERLANDS
Specifiche tecniche
Sezione SINTONIZZATORE
Campo della Frequenza (FM):
da 87,50 MHz a 108,00 MHz
Campo della Frequenza (AM):
da 522 kHz a1.620 kHz
Sezione LETTORE CD
Risposta in Frequenza:
da 20 Hz a 20.000 Hz (±1 dB)
Wow e flutter:
Non misurabili
Sezione ALTOPARLANTI
Tipo:
2 altoparlanti ad 1 via da 65 mm
1 subwoofer da 80 mm
Impedenza:
8 ohm (L e R)
8 ohm (Subwoofer)
GENERALI
Potenza totale:
15 W
Alimentazione:
230 V CA, 50 Hz
Consumo di Corrente:
40 W
Dimensioni (L x A x P):
357 x 205 x 247,5 mm
(incluso vano porta telecomando)
Peso:
5,8 kg
Accessori Standard:
Telecomando (RC-910) x 1
Manuale di istruzioni x 1
Tagliando di Garanzia x 1
<
Caratteristiche e specifiche possono
variare da quanto contenuto in questo
manuale senza preavviso.
<
Lo stesso vale per le illustrazioni.
Ricerca dei Guasti
In caso di problemi con l’unità si prega di dedicare qualche minuto
alla consultazione di questo grafico e determinare se sia possibile
risolvere il problema prima di chiamare il rivenditore o il centro
assistenza TEAC.
Generale
Manca la corrente
e
Controllare il collegamento all’alimentazione a corrente CA.
Nessun suono dai diffusori.
e
Regolare il volume.
e
Se la funzione di silenziamento è attiva, premere il tasto
MUTING.
Suono disturbato
e
L’unità è posta troppo vicina ad un TV o ad un altro
apparecchio simile. Installarla distante dagli altri apparecchi,
oppure spegnere gli apparecchi in questione.
Sintonizzatore
Non è possibile ascoltare alcuna stazione, oppure il segnale è
troppo debole.
e
Sintonizzare correttamente la stazione.
e
Se vicino all’unità vi è un TV, spegnerlo.
e
Per trovare il punto di ricezione ottimale, cambiare di posizione
l’apparecchio o spostare la posizione del cavo dell’antenna.
Lettore CD
Impossibile fare il playback.
e
Inserire un disco col lato etichettato rivolto vero l’alto.
e
Se il disco è sporco, pulire la superficie del disco.
e
Non usare dischi graffiati, danneggiati o deformati.
e
A seconda della qualità del disco e/o delle condizioni della
registrazione, qualche disco CD-R potrebbe non essere
riproducibile.
e
I dischi CD-RW non si possono leggere con
quest’apparecchio.
e
Dischi di cui è proibita la copia potrebbero non essere
riproducibili.
Il disco salta.
e
Porre l’unità in una posizione stabile, per evitare vibrazioni ed
urti.
e
Se il disco è sporco, pulire la superficie del disco.
e
Non usare dischi graffiati, danneggiati o deformati.
Telecomando
Il telecomando non funziona.
e
Se le batterie sono scariche, sostituirle.
e
Usare il telecomando nel raggio utile (5m) e puntarlo verso il
quadro anteriore dell’unità.
e
Togliere gli ostacoli che intervengono fra il telecomando e
l’unità.
e
Se in prossimità dell’unità vi è una luce al neon, spegnerla.

NEDERLANDS
86
Technische Specificaties
TUNER-gedeelte
Frequentiebereik (FM):
87,50 MHz tot 108,00 MHz
Frequentiebereik (AM):
522 kHz tot 1620 kHz
CD-speler-gedeelte
Frequentierespons:
20 Hz tot 20 kHz(±1dB)
Wow and Flutter:
Niet meetbaar
LUIDSPREKER SYSTEEM
Type:
65 mm 1-weg x 2
80 mm subwoofer x 1
Impedantie:
8 ohm (L & R)
8 ohm (subwoofer)
Algemeen
Totaal Uitgangsvermogen:
15 W
Netstroomaansluiting:
230V, 50Hz
Stroomverbruik:
40 W
Afmetingen (B x H x D):
357 x 205 x 247.5 mm
(inclusief de houder voor de
afstandsbediening)
Gewicht:
5.8 kg
Standaard Accessoires
Afstandsbediening (RC-910) x 1
Gebruiksaanwijzing x 1
Garantie-certificaat x 1
<
Design en specificaties kunnen zonder
voorafgaande kennisgeving veranderd
worden.
<
De tekeningen kunnen licht afwijken in
vergelijking tot de originele uitvoering.
Problemen oplossen
Als u problemen hebt met uw systeem raadpleeg dan eerst
deze lijst om te kijken of u het probleem zelf op kunt lossen
voordat u contact opneemt met uw dealer of met het TEAC
service-centrum.
Algemeen
Geen netstroom
e
Controleer de aansluiting van de netstroomkabel op het
stopcontact.
Geen geluid
e
Regel het volume-niveau.
e
Als de muting-functie aan staat druk dan op de MUTING-
toets.
Het geluid is niet zuiver.
e
Het apparaat staat te dicht bij een televisie of soortgelijk
apparaat.
Zet het apparaat verder weg van deze apparaten of zet
het apparaat uit.
Tuner
Kan geen station vinden of het signaal is te zwak.
e
Stel het radio-station correct in.
e
Als er een TV naast het apparaat staat schakel deze dan
uit.
e
Draai het apparaat of de antenne in de richting met de
best mogelijke ontvangst.
CD-speler
De CD-speler werkt niet
e
Plaats een disc met het label naar boven.
e
Als de disc vuil is maak deze dan schoon.
e
Gebruik geen bekraste, beschadigde of verbogen discs.
e
Afhankelijk van de kwaliteit van een disc en/of de conditie
van de opname kan het voorkomen dat sommige CD-R
discs niet afgespeeld kunnen worden.
e
U kunt op dit apparaat geen CD-RW-discs afspelen.
e
Discs die beschermt zijn met een Copyright kunnen
mogelijk niet afgespeeld worden.
Het geluid springt over.
e
Zet het apparaat op een stabiele plek om trillingen en
schokken te voorkomen.
e
Als de disc vuil is maak deze dan schoon.
e
Gebruik geen bekraste, beschadigde of verbogen discs.
De afstandsbediening
De afstandsbediening werkt niet
e
Als de batterijen zwak zijn vervang deze dan.
e
Gebruik de afstandsbediening binnen 5 meter en richt
deze op de sensor in het voorpaneel.
e
Verwijder obstakels tussen de afstandsbediening en het
apparaat.
eAls er naast het apparaat een fluoriserend licht brandt
doe dit dan uit.


0803
.
MA-0820A
This appliance has a serial number located on the rear panel. Please
record the model number and serial number and retain them for your
records.
Model number Serial number
Z
TEAC CORPORATION
3-7-3, Nakacho, Musashino-shi, Tokyo 180-8550, Japan Phone: (0422) 52-5081
TEAC AMERICA, INC. 7733 Telegraph Road, Montebello, California 90640 Phone: (323) 726-0303
TEAC CANADA LTD. 5939 Wallace Street, Mississauga, Ontario L4Z 1Z8, Canada Phone: (905) 890-8008
TEAC MEXICO, S.A. De C.V Campesinos N°184, Colonia Granjas Esmeralda, Delegacion Iztapalapa, CP 09810 México DF
Phone: (525) 581-5500
TEAC UK LIMITED 5 Marlin House, Croxley Business Park, Watford, Hertfordshire, WD18 8TE, U.K. Phone: 01923-819699
TEAC DEUTSCHLAND GmbH Bahnstrasse 12, 65205 Wiesbaden-Erbenheim, Germany Phone: 0611-71580
TEAC FRANCE S.A. 17, Rue Alexis-de-Tocqueville, CE 005 92182 Antony Cedex, France Phone: (1) 42.37.01.02
TEAC ITALIANA S.p.A. Via C. Cantù 11, 20092 Cinisello Balsamo, Milano, Italy Phone: 02-66010500
TEAC AUSTRALIA PTY., LTD. 280 William Street, Melbourne, Victoria 3000, Australia Phone: (03) 9672-2400
A.B.N. 80 005 408 462
-
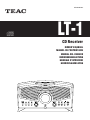 1
1
-
 2
2
-
 3
3
-
 4
4
-
 5
5
-
 6
6
-
 7
7
-
 8
8
-
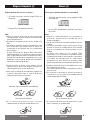 9
9
-
 10
10
-
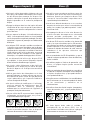 11
11
-
 12
12
-
 13
13
-
 14
14
-
 15
15
-
 16
16
-
 17
17
-
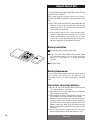 18
18
-
 19
19
-
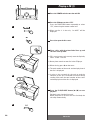 20
20
-
 21
21
-
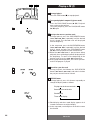 22
22
-
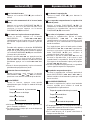 23
23
-
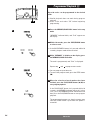 24
24
-
 25
25
-
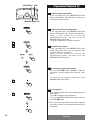 26
26
-
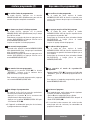 27
27
-
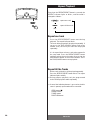 28
28
-
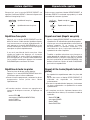 29
29
-
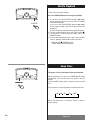 30
30
-
 31
31
-
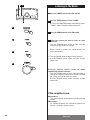 32
32
-
 33
33
-
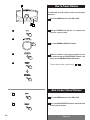 34
34
-
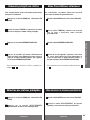 35
35
-
 36
36
-
 37
37
-
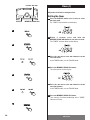 38
38
-
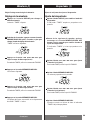 39
39
-
 40
40
-
 41
41
-
 42
42
-
 43
43
-
 44
44
-
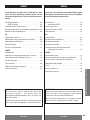 45
45
-
 46
46
-
 47
47
-
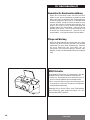 48
48
-
 49
49
-
 50
50
-
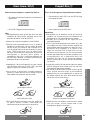 51
51
-
 52
52
-
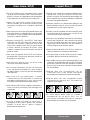 53
53
-
 54
54
-
 55
55
-
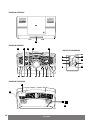 56
56
-
 57
57
-
 58
58
-
 59
59
-
 60
60
-
 61
61
-
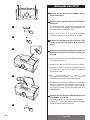 62
62
-
 63
63
-
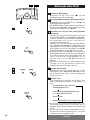 64
64
-
 65
65
-
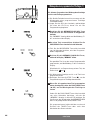 66
66
-
 67
67
-
 68
68
-
 69
69
-
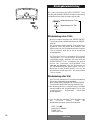 70
70
-
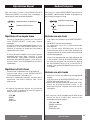 71
71
-
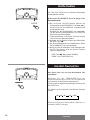 72
72
-
 73
73
-
 74
74
-
 75
75
-
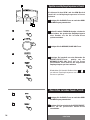 76
76
-
 77
77
-
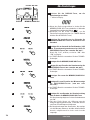 78
78
-
 79
79
-
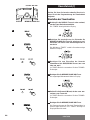 80
80
-
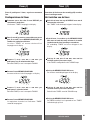 81
81
-
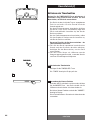 82
82
-
 83
83
-
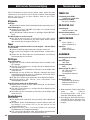 84
84
-
 85
85
-
 86
86
-
 87
87
-
 88
88


TEAC LT-1CD Manual de usuario
- Categoría
- Reproductores de CD
- Tipo
- Manual de usuario
- Este manual también es adecuado para
en otros idiomas
- français: TEAC LT-1CD Manuel utilisateur
- italiano: TEAC LT-1CD Manuale utente
- Deutsch: TEAC LT-1CD Benutzerhandbuch
- Nederlands: TEAC LT-1CD Handleiding
Artículos relacionados
-
TEAC CR-H226 El manual del propietario
-
-
-
-
-
-
-
-
-