GE JVM1490SK El manual del propietario
- Categoría
- Microondas
- Tipo
- El manual del propietario

Spacemaker Oven
GE Profile
3828W5A3662 164D3370P331 49-40402-1 08-03 JR
JVM1490
Owner’s
Manual
www.GEAppliances.com
Write the model and serial numbers here:
Model # __________________________
Serial # __________________________
You can find them on a label when the
door is open.
Safety Instructions . . . . . . . . . . . . .2–6
Operating Instructions
Bake Features . . . . . . . . . . . . 10, 18, 20
Best Method of Cooking Chart . . . .21
Changing Power Level . . . . . . . . . . . 14
Cooking Options . . . . . . . . . . . . . . . .10
Cookware Tips . . . . . . . . . . . . . . . . . .20
Fast Bake Feature . . . . . . . . .10, 19, 20
Features of Your Oven . . . . . . . . . 8, 9
Microwave Terms . . . . . . . . . . . . . . . 25
Other Features . . . . . . . . . . . . . .22–24
Automatic Fan . . . . . . . . . . . . . . . .24
Auto Nite Light . . . . . . . . . . . . . . .23
Beeper Volume . . . . . . . . . . . . . . .23
Child Lock-Out . . . . . . . . . . . . . . .22
CLEAR/OFF . . . . . . . . . . . . . . . . .22
Clock . . . . . . . . . . . . . . . . . . . . . . . .22
Cooking Complete Reminder . . . .22
Display Language . . . . . . . . . . . . . .23
Display ON/OFF . . . . . . . . . . . . . .23
Display Speed . . . . . . . . . . . . . . . . .24
HELP . . . . . . . . . . . . . . . . . . . . . . .22
START/PAUSE . . . . . . . . . . . . . . .22
Surface Light . . . . . . . . . . . . . . . . .24
Timer . . . . . . . . . . . . . . . . . . . . . . .24
Vent Fan . . . . . . . . . . . . . . . . . . . . .24
Sensor Features
. . . . . . . . . . . . . . 15–17
Time and Auto Features . . . . 9, 11–13
Care and Cleaning
Charcoal Filters . . . . . . . . . . . . . . . . . .29
Inside . . . . . . . . . . . . . . . . . . . . . . . . . .26
Outside . . . . . . . . . . . . . . . . . . . . . . .26
Replacing the Light Bulbs . . . . . . . .27
Stainless Steel . . . . . . . . . . . . . . . . . .27
Vent Filters . . . . . . . . . . . . . . . . . .28, 29
Troubleshooting Tips . . . . . . . . 30, 31
Things That Are Normal
With Your Microwave Oven . . . . . . . 32
Consumer Support
Consumer Support . . . . . . Back Cover
Optional Kits . . . . . . . . . . . . . . . . . . . .7
Product Registration . . . . . . . . . 33, 34
Warranty . . . . . . . . . . . . . . . . . . . . . . .
35
Español
For a Spanish version of this
manual, visit our Website at
www.GEAppliances.com.
Para consultar una version en
español de este manual de
instrucciones, visite nuestro sitio de
internet www.GEAppliances.com.

Operating Instructions Safety InstructionsConsumer Support Troubleshooting Tips
IMPORTANT SAFETY INSTRUCTIONS.
READ ALL INSTRUCTIONS BEFORE USING.
IMPORTANT SAFETY INSTRUCTIONS.
When using electrical appliances basic safety precautions should be followed, including the following:
■ Read and follow the specific precautions in the
PRECAUTIONS TO AVOID POSSIBLE EXPOSURE TO
EXCESSIVE MICROWAVE ENERGY section above.
■ This appliance must be grounded. Connect only
to a properly grounded outlet. See the GROUNDING
INSTRUCTIONS section on page 6.
■ Install or locate this appliance only in accordance with
the provided Installation Instructions.
■ This microwave oven is UL listed for installation over
electric and gas ranges.
■ This microwave oven is not approved or tested for
marine use.
■ This over-the-range oven is designed for use over ranges
no wider than 36.″ It may be installed over both gas and
electric cooking equipment.
■ Do not operate this appliance if it has a damaged power
cord or plug, if it is not working properly, or if it has
been damaged or dropped. If the power cord is
damaged, it must be replaced by General Electric
Service or an authorized service agent using a power
cord available from General Electric.
■ Do not cover or block any openings on the appliance.
■ Use this appliance only for its intended use as described
in this manual. Do not use corrosive chemicals or vapors
in this appliance. This microwave oven is specifically
designed to heat, dry or cook food, and is not intended
for laboratory or industrial use.
■ To reduce the risk of fire in the oven cavity:
— Do not overcook food. Carefully attend appliance when
paper, plastic or other combustible materials are placed
inside the oven while cooking.
— Remove wire twist-ties and metal handles from paper or
plastic containers before placing them in the oven.
— Do not use the oven for storage purposes. Do not leave
paper products, cooking utensils or food in the oven
when not in use.
— Do not pop popcorn in your microwave oven unless in
a special microwave popcorn accessory or unless you use
popcorn labeled for use in microwave ovens.
— If materials inside the oven ignite, keep the oven door
closed, turn the oven off and disconnect the power cord,
or shut off power at the fuse or circuit breaker panel.
If the door is opened, the fire may spread.
— Do not use the Sensor Features twice in succession on
the same food portion. If food is undercooked after
the first countdown, use Time Cook for additional
cooking time.
SAVE THESE INSTRUCTIONS
WARNING!
For your safety, the information in this manual must be followed to minimize the risk of fire, explosion, electric shock,
exposure to excessive microwave energy, or to prevent property damage, personal injury, or loss of life.
(a) Do Not Attempt to operate this oven with the door
open since open-door operation can result in harmful
exposure to microwave energy. It is important not to
defeat or tamper with the safety interlocks.
( b) Do Not Place any object between the oven front face
and the door or allow soil or cleaner residue to
accumulate on sealing surfaces.
(c) Do Not Operate the oven if it is damaged. It is
particularly important that the oven door close
properly and that there is no damage to the:
(1) door (bent),
(2) hinges and latches (broken or loosened),
(3) door seals and sealing surfaces.
(d) The Oven Should Not be adjusted or repaired by
anyone except properly qualified service personnel.
PRECAUTIONS TO AVOID POSSIBLE EXPOSURE
TO EXCESSIVE MICROWAVE ENERGY
2

3
www.GEAppliances.com
IMPORTANT SAFETY INSTRUCTIONS.
■ When using the Bake or Fast Bake functions, both
the outside and inside of the oven will become hot.
Always use hot pads to remove containers of food
and accessories such as the oven shelf.
■ Thermometer—Do not use regular cooking or oven
thermometers when cooking by microwave or
combination. The metal and mercury in these
thermometers could cause arcing and possible damage
to the oven. Do not use a thermometer in food you are
microwaving unless the thermometer is designed or
recommended for use in the microwave oven.
■ Do not clean with metal scouring pads. Pieces can burn
off the pad and touch electrical parts involving risk of
electric shock.
■ Do not store any materials, other than our
recommended accessories, in this oven when not in use.
■ Do not store this appliance outdoors. Do not use this
product near water—for example, in a wet basement,
near a swimming pool, near a sink or in similar locations.
■ Keep power cord away from heated surfaces.
■ Do not immerse power cord or plug in water.
■ Do not mount this appliance over a sink.
■ See door surface cleaning instructions in the Care and
cleaning of the microwave oven section of this manual.
■ This appliance must only be serviced by qualified service
personnel. Contact nearest authorized service facility for
examination, repair or adjustment.
■ As with any appliance, close supervision is necessary
when used by children.
■ Do not store anything directly on top of the microwave
oven surface when the microwave oven is in operation.
SAVE THESE INSTRUCTIONS
ARCING
If you see arcing, press the CLEAR/OFF button and correct the problem.
Arcing is the microwave term for sparks in the oven.
Arcing is caused by:
■ The metal shelf not installed correctly so it
touches the microwave wall.
■ Metal or foil touching the side of the oven.
■ Turntable ring support not installed correctly.
■ Foil not molded to food (upturned edges act
like antennas).
■ Metal, such as twist-ties, poultry pins, or gold-
rimmed dishes, in the microwave.
■ Recycled paper towels containing small metal
pieces being used in the microwave.
WARNING!
Consumer SupportTroubleshooting TipsOperating InstructionsSafety Instructions

4
Operating Instructions Safety InstructionsConsumer Support Troubleshooting Tips
IMPORTANT SAFETY INSTRUCTIONS.
READ ALL INSTRUCTIONS BEFORE USING.
FOODS
■ Do not pop popcorn in your microwave oven
unless in a special microwave popcorn accessory
or unless you use popcorn labeled for use in
microwave ovens.
■ Do not boil eggs in a microwave oven. Pressure
will build up inside egg yolk and will cause it to
burst, possibly resulting in injury.
■ Operating the microwave with no food inside for
more than a minute or two may cause damage
to the oven and could start a fire. It increases the
heat around the magnetron and can shorten
the life of the oven.
■ Foods with unbroken outer “skin” such as
potatoes, hot dogs, sausages, tomatoes, apples,
chicken livers and other giblets, and egg yolks
should be pierced to allow steam to escape
during cooking.
■ Some products such as whole eggs and sealed
containers—for example, closed jars—are able
to explode and should not be heated in this
microwave oven. Such use of the microwave
oven could result in injury.
■ SUPERHEATED WATER
Liquids, such as water, coffee, or tea, are able to
be overheated beyond the boiling point without
appearing to be boiling. Visible bubbling or boiling
when the container is removed from the microwave
oven is not always present. THIS COULD RESULT IN
VERY HOT LIQUIDS SUDDENLY BOILING OVER WHEN
THE CONTAINER IS DISTURBED OR A SPOON OR
OTHER UTENSIL IS INSERTED INTO THE LIQUID.
To reduce the risk of injury to persons:
— Do not overheat the liquid.
— Stir the liquid both before and halfway through
heating it.
— Do not use straight-sided containers with narrow
necks.
— After heating, allow the container to stand in the
microwave oven for a short time before removing
the container.
— Use extreme care when inserting a spoon or
other utensil into the container.
■ Foods cooked in liquids (such as pasta) may
tend to boil more rapidly than foods containing
less moisture. Should this occur, refer to the
Care and cleaning of the microwave oven section
for instructions on how to clean the inside of
the oven.
■ Avoid heating baby food in glass jars, even with
the lid off. Make sure all infant food is thoroughly
cooked. Stir food to distribute the heat evenly.
Be careful to prevent scalding when warming
formula. The container may feel cooler than the
formula really is. Always test the formula before
feeding the baby.
■ Don’t defrost frozen beverages in narrow-necked
bottles (especially carbonated beverages). Even if
the container is opened, pressure can build up.
This can cause the container to burst, possibly
resulting in injury.
■ Hot foods and steam can cause burns. Be careful
when opening any containers of hot food,
including popcorn bags, cooking pouches and
boxes. To prevent possible injury, direct steam
away from hands and face.
■ Do not overcook potatoes. They could dehydrate
and catch fire, causing damage to your oven.
■ Cook meat and poultry thoroughly—meat to at
least an INTERNAL temperature of 160°F and
poultry to at least an INTERNAL temperature of
180°F. Cooking to these temperatures usually
protects against foodborne illness.
WARNING!

5
www.GEAppliances.com
MICROWAVE-SAFE COOKWARE
Do not operate the oven without the turntable and the turntable support seated and in place. The turntable
must be unrestricted so it can rotate.
Make sure all cookware used in your microwave oven is suitable for microwaving. Most glass casseroles,
cooking dishes, measuring cups, custard cups, pottery or china dinnerware which does not have metallic
trim or glaze with a metallic sheen can be used. Some cookware is labeled “suitable for microwaving.”
■ If you are not sure if a dish is microwave-safe,
use this test: Place in the oven both the dish you
are testing and a glass measuring cup filled with
1 cup of water—set the measuring cup either in
or next to the dish. Microwave 30–45 seconds at
high. If the dish heats, it should not be used for
microwaving.
If the dish remains cool and only the water in
the cup heats, then the dish is microwave-safe.
■
Oversized food or oversized metal cookware
should not be used in a microwave/convection
oven because they increase the risk of electric
shock and could cause a fire.
■
Sometimes the oven floor, turntable and walls
can become too hot to touch. Be careful touching
the floor, turntable and walls during and after
cooking.
■ If you use a meat thermometer while cooking,
make sure it is safe for use in microwave ovens.
■ Do not use recycled paper products. Recycled
paper towels, napkins and waxed paper can
contain metal flecks which may cause arcing
or ignite. Paper products containing nylon or
nylon filaments should be avoided, as they
may also ignite.
■ Some styrofoam trays (like those that meat
is packaged on) have a thin strip of metal
embedded in the bottom. When microwaved,
the metal can burn the floor of the oven or
ignite a paper towel.
■ Use of the shelf accessory:
— Remove the shelf from the oven when
not in use.
— Use pot holders when handling the shelf and
cookware. They may be hot.
— Be sure that the shelf is positioned properly
inside the oven to prevent product damage.
— Do not cover the shelf or any part of the oven
with metal foil. This will cause overheating of
the microwave/convection oven.
■ Do not use your microwave/convection oven
to dry newspapers.
■
Not all plastic wrap is suitable for use in
microwave ovens. Check the package for
proper use.
■ Paper towels, waxed paper and plastic wrap can
be used to cover dishes in order to retain moisture
and prevent spattering. Be sure to vent plastic
wrap so steam can escape.
■
Do not use paper products when the microwave/
convection oven is operated in the
BAKE
or
FAST BAKE
mode.
■ Cookware may become hot because of heat
transferred from the heated food. Pot holders
may be needed to handle the cookware.
■ “Boilable” cooking pouches and tightly closed
plastic bags should be slit, pierced or vented as
directed by package. If they are not, plastic could
burst during or immediately after cooking,
possibly resulting in injury. Also, plastic storage
containers should be at least partially uncovered
because they form a tight seal. When cooking
with containers tightly covered with plastic wrap,
remove covering carefully and direct steam away
from hands and face.
■ Use foil only as directed in this manual. TV
dinners may be microwaved in foil trays less than
3/4″ high; remove the top foil cover and return
the tray to the box. When using foil in the
microwave oven, keep the foil at least 1″ away
from the sides of the oven.
■ Plastic cookware—Plastic cookware designed for
microwave cooking is very useful, but should be
used carefully. Even microwave-safe plastic may
not be as tolerant of overcooking conditions as
are glass or ceramic materials and may soften or
char if subjected to short periods of overcooking.
In longer exposures to overcooking, the food and
cookware could ignite.
Follow these guidelines:
Use microwave-safe plastics only and use
them in strict compliance with the cookware
manufacturer’s recommendations.
Do not microwave empty containers.
Do not permit children to use plastic
cookware without complete supervision.
3
2
1
Consumer SupportTroubleshooting TipsOperating InstructionsSafety Instructions

6
READ AND FOLLOW THIS SAFETY INFORMATION CAREFULLY.
SAVE THESE INSTRUCTIONS
IMPORTANT SAFETY INFORMATION.
READ ALL INSTRUCTIONS BEFORE USING.
GROUNDING INSTRUCTIONS
This appliance must be grounded. In the event of
an electrical short circuit, grounding reduces the
risk of electric shock by providing an escape wire
for the electric current.
This appliance is equipped with a power cord
having a grounding wire with a grounding plug.
The plug must be plugged into an outlet that is
properly installed and grounded.
Consult a qualified electrician or service technician
if the grounding instructions are not completely
understood, or if doubt exists as to whether the
appliance is properly grounded.
If the outlet is a standard 2-prong wall outlet,
it is your personal responsibility and obligation
to have it replaced with a properly grounded
3-prong wall outlet.
Do not under any circumstances cut or remove the
third (ground) prong from the power cord.
Do not use an adapter plug with this appliance.
Do not use an extension cord with this appliance.
If the power cord is too short, have a qualified
electrician or service technician install an outlet
near the appliance.
For best operation, plug this appliance into its
own electrical outlet to prevent flickering of lights,
blowing of fuse or tripping of circuit breaker.
WARNING!
WARNING: Improper use of the grounding plug can result in a risk of electric shock.
THE VENT FAN
The fan will operate automatically under certain
conditions (see Automatic Fan feature). Take care
to prevent the starting and spreading of accidental
cooking fires while the vent fan is in use.
■ Clean the underside of the microwave often.
Do not allow grease to build up on the microwave
or the fan filters.
■ In the event of a grease fire on the surface units
below the microwave oven, smother a flaming
pan on the surface unit by covering the pan
completely with a lid, a cookie sheet or a flat tray.
■ Use care when cleaning the vent fan filters.
Corrosive cleaning agents, such as lye-based
oven cleaners, may damage the filters.
■ When preparing flaming foods under the
microwave, turn the fan on.
■ Never leave surface units beneath your microwave
oven unattended at high heat settings. Boilovers
cause smoking and greasy spillovers that may
ignite and spread if the microwave vent fan is
operating. To minimize automatic fan operation,
use adequate sized cookware and use high heat
on surface units only when necessary.
Operating Instructions Safety InstructionsConsumer Support Troubleshooting Tips

7
Optional kits www.GEAppliances.com
Filler Panel Kits
■ JX40CT—Bisque
■ JX40WH—White
■ JX41—Black
When replacing a 36″ range hood, filler panel kits
fill in the additional width to provide a custom
built-in appearance.
For installation between cabinets only; not for
end-of-cabinet installation. Each kit contains
two 3″ wide filler panels.
Filter Kits
■ JX81A—Recirculating Charcoal Filter Kit
Filter kits are used when the oven cannot be vented
to the outside.
Available at extra cost from your GE supplier.
Consumer SupportTroubleshooting TipsOperating InstructionsSafety Instructions

8
Operating Instructions Safety InstructionsConsumer Support Troubleshooting Tips
About the features of your oven.
Throughout this manual, features and appearance may vary from your model.
900 Watts
Features of the Oven
Door Latch Release Handle.
Door Latches.
Window with Metal Shield. Screen allows
cooking to be viewed while keeping
microwaves confined in the oven.
Control Panel and Selector Dial.
Removable Turntable. Turntable and support
must be in place when using the oven. The
turntable may be removed for cleaning.
Removable Turntable Support. The turntable
support must be in place when using the oven.
Shelf. Use with Bake or Fast Bake. (Do not use
when microwave cooking.) For best results,
use the shelf in its “low” position, hanging
down from the shelf supports.

9
Consumer SupportTroubleshooting TipsOperating InstructionsSafety Instructions
You can cook by Microwave, Baking or Fast Baking.
About the cooking features of your
microwave/convection oven.
www.GEAppliances.com
Cooking Controls
Microwave Cooking Time and Auto Features
Press Turn and push dial to enter
TIME COOK Amount of cooking time
Press once or twice
MICRO EXPRESS cook/Add 30 sec. Starts immediately!
DEFROST
Press once (Time) Amount of defrosting time
Press twice (Auto) Food weight up to six pounds
Press three times (Fast) Food weight up to one pound
POWER level Power level 1–10
Sensor Features
Press Turn and push dial to enter Option
POPCORN Starts immediately! more/less time
Press once (regular)
Press twice (snack)
REHEAT Starts immediately! more/less time
Press once (plate)
Press twice (
1
⁄2 to 1 cup)
Press three times (1 to 2 cups)
BEVERAGE Starts immediately!
AUTO COOK Food type 1–7 more/less time
Baking
Press Turn and push dial to enter
BAKE Oven temperature and cook time
Fast Baking
Press Turn and push dial to enter
FAST BAKE Oven temperature and cook time
Dial Selector

Operating Instructions Safety InstructionsConsumer Support Troubleshooting Tips
10
Do not use the shelf when
microwave cooking.
Always use the shelf when baking.
Cooking Method
Microwave energy
is distributed evenly
throughout the oven
for thorough, fast
cooking of food.
Heat Source
Microwave energy.
Heat Conduction
Heat produced
within food by
instant energy
penetration.
Benefits
Fast, high efficiency
cooking. Oven and
surroundings do
not get hot.
Easy clean-up.
Cooking Method
Hot air circulates
around food to
produce browned
exteriors and seal
in juices.
Heat Source
Circulating
heated air
(Convection).
Heat Conduction
Heat conducted
from outside of food
to inside.
Benefits
Aids in browning
and seals in flavor.
Cooks some foods
faster than regular
ovens.
Cooking Method
Microwave energy
and convection heat
combine to cook
foods in up to
one-half the time
of regular ovens,
while browning and
sealing in juices.
Heat Source
Microwave energy
and circulating
heated air.
Heat Conduction
Food heats from
instant energy from
penetration and heat
conducted from
outside of food.
Benefits
Shortened
cooking time from
microwave energy,
plus browning and
crisping from
convection heat.
Always use the shelf with Fast Bake.
Available cooking options.
Microwave Cooking
Baking
Fast Baking
Your oven also offers the option of Fast Bake, using microwave energy along with
convection cooking. You cook with speed and accuracy, while browning and crisping
to perfection.
During baking, a heating element is used to raise the temperature of the air inside the
oven. Any oven temperature from 225°F. to 450°F. may be programmed. A fan gently
circulates this heated air throughout the oven, over and around the food, producing golden
brown exteriors and rich moist interiors. This circulation of heated air is called convection.
Because the heated air is kept constantly moving, not permitting a layer of cooler air to
develop around the food, some foods cook faster than in regular oven cooking.
Your oven uses microwave energy to cook by a set time or weight, or automatically
by sensor.
Sensor microwave works by detecting the increasing humidity released during cooking.
The oven automatically adjusts the cooking time to various types and amounts of food.

Consumer SupportTroubleshooting TipsOperating InstructionsSafety Instructions
11
Time Cook
Time Cook I
Allows you to microwave for any time
between 15 seconds and 95 minutes.
Power level 10 (High) is automatically set,
but you may change it for more flexibility.
Press the TIME COOK button.
Turn the dial to set the cook time and
press the dial to enter.
Change power level if you don’t want
full power. (Press POWER. Turn the dial
to select. Press the dial to enter.)
Press the dial or the START/PAUSE
button to start cooking.
You may open the door during Time Cook
to check the food. Close the door and press
the dial or START/PAUSE to resume cooking.
NOTE: You may change the cook time at any
time during cooking by turning the dial. You
may also change the power level by pressing
the POWER button.
Time Cook II
Lets you change power levels automatically
during cooking. Here’s how to do it:
Press the TIME COOK button.
Turn the dial to set the first cook time
and press the dial to enter.
Change the power level if you don’t
want full power. (Press POWER. Turn the
dial to select. Press the dial to enter.)
Press the TIME COOK button again.
Turn the dial to set the second cook
time and press the dial to enter.
Change the power level if you don’t
want full power. (Press POWER. Turn the
dial to select. Press the dial to enter.)
Press the dial or the START/PAUSE
button to start cooking.
At the end of Time Cook I, Time Cook II
counts down.
NOTE: You may change the cook time at any
time during cooking by turning the dial. You
may also change the power level by pressing
the POWER button.
7
6
5
4
3
2
1
4
3
2
1
Micro Express Cook
This is a quick way to set and start cooking
in 30 second blocks each time the MICRO
EXPRESS button is pressed. The cook time
may be changed by turning the dial at any
time during cooking.
The power level will automatically be set
at 10 and the oven will start immediately.
The power level can be changed as time is
counting down. Press the POWER button,
turn the dial and press to enter.
PUSH TO ENTER
TURN TO SELECT
About the time and auto microwave features.
www.GEAppliances.com
PUSH TO ENTER
TURN TO SELECT
Using the Dial
You can make selections on the oven by
turning the dial and pressing it to enter
the selection.
Pressing the dial can also be used in place
of the START/PAUSE button for quicker
programming of the oven.
PUSH TO ENTER
TURN TO SELECT

Operating Instructions Safety InstructionsConsumer Support Troubleshooting Tips
12
Time Defrost
Use Time Defrost to defrost for a selected
length of time.
Press the DEFROST button once.
Turn the dial to select the time you
want. Press the dial to enter.
Press the START/PAUSE button to start
defrosting.
Turn the food over if the oven signals
TURN FOOD OVER.
You may change the defrost time at any
time during defrosting by turning the dial.
Power level is automatically set at 3, but can
be changed. You can defrost small items
quickly by raising the power level after
entering the time. Power level 7 cuts the
total defrosting time in about half; power
level 10 cuts the total time to approximately
1/3. However, food will need more
frequent attention than usual.
A dull thumping noise may be heard
during defrosting. This is normal when
oven is not operating at High power.
Defrosting Tips
■
Foods frozen in paper or plastic can be
defrosted in the package. Closed packages
should be slit, pierced or vented AFTER
food has partially defrosted. Plastic storage
containers should be partially uncovered.
■ Family-size, prepackaged frozen dinners
can be defrosted and microwaved. If the
food is in a foil container, transfer it to
a microwave-safe dish.
■ Foods that spoil easily should not be
allowed to sit out for more than one hour
after defrosting. Room temperature
promotes the growth of harmful bacteria.
■ For more even defrosting of larger foods,
such as roasts, use Auto Defrost. Be sure
large meats are completely defrosted
before cooking.
■ When defrosted, food should be cool
but softened in all areas. If still slightly icy,
return to the microwave very briefly, or
let it stand a few minutes.
4
3
2
1
PUSH TO ENTER
TURN TO SELECT
DEFROST
About the time and auto microwave features.
Auto Defrost
Use Auto Defrost for meat, poultry and fish
weighing up to six pounds.
Use Time Defrost
for most other frozen foods.
Auto Defrost automatically sets the
defrosting times and power levels to give
even defrosting results for meats, poultry
and fish.
■ Remove meat from package and place
on microwave-safe dish.
Press the DEFROST button twice.
Turn the dial to the food weight,
using the Conversion Guide at right.
For example, dial 1.2 for 1.2 pounds
(1 pound, 3 oz.) Press the dial to enter.
Press the START/PAUSE button to start
defrosting.
Turn the food over if the oven signals
TURN FOOD OVER.
■ Remove defrosted meat or shield warm
areas with small pieces of foil.
■ After defrosting, most meats need to
stand 5 minutes to complete defrosting.
Large roasts should stand for about
30 minutes.
Conversion Guide
If the weight of food is stated in pounds and
ounces, the ounces must be converted to tenths
(.1) of a pound.
Weight of Food Enter Food Weight
in Ounces (tenths of a pound)
1–2 .1
3.2
4–5 .3
6–7 .4
8.5
9–10 .6
11 .7
12–13 .8
14–15 .9
4
3
2
1
PUSH TO ENTER
TURN TO SELECT
DEFROST

Consumer SupportTroubleshooting TipsOperating InstructionsSafety Instructions
13
Fast Defrost
Fast Defrost automatically sets the
defrosting times and power levels to give
even defrosting results for meats, poultry
and fish weighing up to one pound.
■ Remove meat from package and place on
microwave-safe dish.
Press the DEFROST button three times.
Turn the dial to the food weight,
using the Conversion Guide at right.
For example, dial .5 for .5 pounds
(8 oz.) Press the dial to enter.
Press the START/PAUSE button to start
defrosting.
Turn the food over if the oven signals
TURN FOOD OVER.
■ Remove defrosted meat or shield warm
areas with small pieces of foil.
■ After defrosting, most meats need to
stand 5 minutes to complete defrosting.
Conversion Guide
If the weight of food is stated in pounds and
ounces, the ounces must be converted to tenths
(.1) of a pound.
Weight of Food Enter Food Weight
in Ounces (tenths of a pound)
1–2 .1
3.2
4–5 .3
6–7 .4
8.5
9–10 .6
11 .7
12–13 .8
14–15 .9
4
3
2
1
PUSH TO ENTER
TURN TO SELECT
DEFROST
www.GEAppliances.com

Operating Instructions Safety InstructionsConsumer Support Troubleshooting Tips
14
About changing the power level.
The power level may be entered or
changed immediately after entering the
time for Time Cook, Time Defrost or Express
Cook. The power level may also be changed
during time countdown.
First, follow directions for Time Cook,
Time Defrost or Express Cook.
Press the POWER button.
Turn the dial clockwise to increase and
counterclockwise to decrease the power
level. Press the dial to enter.
Press the START/PAUSE button to start
cooking.
Variable power levels add flexibility to
microwave cooking. The power levels on
the microwave oven can be compared to
the surface units on a range. Each power
level gives you microwave energy a certain
percent of the time. Power level 7 is
microwave energy 70% of the time. Power
level 3 is energy 30% of the time. Most
cooking will be done on High (power level
10) which gives you 100% power. Power level
10 will cook faster but food may need more
frequent stirring, rotating or turning over.
A lower setting will cook more evenly and
need less stirring or rotating of the food.
Some foods may have better flavor, texture
or appearance if one of the lower settings is
used. Use a lower power level when cooking
foods that have a tendency to boil over,
such as scalloped potatoes.
Rest periods (when the microwave
energy cycles off) give time for the food
to “equalize” or transfer heat to the inside
of the food. An example of this is shown
with power level 3—the defrost cycle. If
microwave energy did not cycle off, the
outside of the food would cook before
the inside was defrosted.
Here are some examples of uses for various
power levels:
High 10: Fish, bacon, vegetables, boiling
liquids.
Med-High 7: Gentle cooking of meat and
poultry; baking casseroles and reheating.
Medium 5: Slow cooking and tenderizing
for stews and less tender cuts of meat.
Low 2 or 3: Defrosting; simmering; delicate
sauces.
Warm 1: Keeping food warm; softening
butter.
4
3
2
1
PUSH TO ENTER
TURN TO SELECT
POWER

15
Consumer SupportTroubleshooting TipsOperating InstructionsSafety Instructions
About the sensor microwave features.
www.GEAppliances.com
Humidity Sensor
What happens when using the Sensor Features:
The Sensor Features detect the increasing humidity released during cooking. The oven
automatically adjusts the cooking time to various types and amounts of food.
Do not use the Sensor Features twice in succession on the same food portion—it may
result in severely overcooked or burnt food. If food is undercooked after the countdown,
use Time Cook for additional cooking time.
■ The proper containers and covers are essential for best sensor cooking.
■ Always use microwave-safe containers and cover them with lids or vented plastic wrap.
Never use tight sealing plastic containers—they can prevent steam from escaping and
cause food to overcook.
■ Be sure the outside of the cooking containers and the inside of the microwave oven are
dry before placing food in the oven. Beads of moisture turning into steam can mislead
the sensor.
Dry off dishes so they don’t mislead
the sensor.
Vented
Covered
Auto Cook
Because most cooking containers must be covered during Auto Cook, this feature is best
with foods that you want to steam or retain moisture.
NOTE: Use of the metal shelf with Auto Cook is not recommended.
Recommended Foods
A wide variety of foods including meats, fish and vegetables can be cooked
using this feature.
Foods not recommended
Foods that must be cooked uncovered, foods that require constant attention, foods that
require addition of ingredients during cooking and foods calling for a dry look or crisp
surface after cooking should not be cooked using this feature. It is best to Time Cook them.

16
Operating Instructions Safety InstructionsConsumer Support Troubleshooting Tips
PUSH TO ENTER
TURN TO SELECT
Sensor Food Type Guide
Food Type Servings Serving Size Comments
Chicken Pieces
1 to 4 2 to 8 Use oblong, square or round dish.
pieces Cover with vented plastic wrap.
Fish 1 to 4 4 to 16 oz. Use oblong, square or round dish.
Cover with vented plastic wrap.
Ground Meat — 8 to 32 oz. Use round casserole dish. Crumble meat
(Beef, Pork, Turkey) into dish. Cover with vented plastic wrap.
Potatoes 1 to 4 8 to 32 oz. Pierce skin with fork. Arrange in a
star pattern in center of turntable.
Canned Vegetables 1 to 4 4 to 16 oz. Use microwave-safe casserole or bowl.
Cover with lid or vented plastic wrap.
Fresh Vegetables 1 to 4 4 to 16 oz. Use microwave-safe casserole or bowl.
Add 2 tablespoons water for each serving.
Cover with lid or vented plastic wrap.
Frozen Vegetables 1 to 4 4 to 16 oz. Use microwave-safe casserole or bowl.
Follow package instructions for adding
water. Cover with lid or vented plastic wrap.
Auto Cook
Place covered food in the oven and
close the door. Press the AUTO COOK
button. SELECT FOOD TYPE appears in
the display.
Turn the dial to the desired food type.
Press to enter.
See the Sensor Food Type Guide below for
specific foods and instructions.
The oven starts immediately.
NOTE: If the door was open while the
control was being set, close the door and
press the START/PAUSE button to begin
cooking.
If food is undercooked after the
countdown, use Time Cook for additional
cooking time.
Do not open the oven door before the countdown
time is displayed—steam escaping from the oven
can affect cooking performance. If the door is
opened, close the door and press START/PAUSE
immediately.
If ground meat was selected, the oven may
signal you to drain and stir the meat. Open
the door, drain the meat and close the door.
Press the START/PAUSE button if necessary
to resume cooking.
Cooking Tips
■ When oven signals and countdown time
is displayed, the door may be opened
for stirring, turning or rotating food.
To resume cooking, close the door and
press START/PAUSE.
■ Match the amount of food to the size of
container. Fill containers at least 1/2 full.
■ Be sure outside of container and inside
of oven are dry.
■ After completion of Cook cycle, if food
needs additional cooking, return food to
oven and use Time Cook to finish cooking.
How to Adjust the Oven’s Automatic
Settings for a Shorter or Longer Cook Time
(Not available for all food types)
To subtract 10% from the automatic
cooking time:
At any time after the countdown begins,
turn the dial counterclockwise and press
to enter.
To add 10% to the automatic cooking time:
At any time after the countdown begins,
turn the dial clockwise and press to enter.
2
1
About the sensor microwave features.
NOTE: Do not use this feature
twice in succession on the
same food portion—it may
result in severely overcooked
or burnt food.

Consumer SupportTroubleshooting TipsOperating InstructionsSafety Instructions
www.GEAppliances.com
Popcorn
To use the Popcorn feature:
Follow package instructions, using
Time Cook if the package is less than
1.5 ounces or larger than 3.5 ounces.
Place the package of popcorn in the
center of the turntable.
Press the POPCORN button once or
twice. The oven starts immediately.
Press once for a regular size (3.0 to 3.5 oz.)
bag of popcorn.
Press twice for a snack size (1.5 to 1.75 oz.)
bag of popcorn.
If you open the door while POPCORN is
displayed, an error message will appear.
Close the door, press CLEAR/OFF and
begin again.
If food is undercooked after the
countdown, use Time Cook for additional
cooking time.
How to Adjust the Automatic Popcorn Setting
to Provide a Shorter or Longer Cook Time
If you find that the brand of popcorn you
use underpops or overpops consistently,
you can add or subtract 20–30 seconds to
the automatic popping time.
To subtract time:
Within the first 30 seconds after the oven
starts, turn the dial counterclockwise for 20
seconds (-) less cooking time. Press to enter.
Turn again to reduce cooking time another
10 seconds (- -) total 30 seconds less time.
Press to enter.
To add time:
Within the first 30 seconds after the oven
starts, turn the dial clockwise for an extra
20 seconds (+) cooking time. Press to enter.
Turn again to add another 10 seconds (++)
total 30 seconds additional time.
Press to enter.
2
1
Use only with prepackaged
microwave popcorn weighing
1.5 to 3.5 ounces.
NOTE: Do not use this feature
twice in succession on the
same food portion—it may
result in severely overcooked
or burnt food.
NOTE: Do not use this feature
twice in succession on the
same food portion—it may
result in severely overcooked
or burnt food.
NOTE: Do not use this feature
twice in succession on the
same food portion—it may
result in severely overcooked
or burnt food.
Reheat
The Reheat feature reheats servings of
previously cooked foods or a plate of
leftovers.
Place the cup of liquid or covered
food in the oven. Press REHEAT once,
twice or three times. The oven starts
immediately.
Press once for a plate of leftovers.
Press twice for 1/2 to 1 full cup.
Press three times for 1 to 2 full cups.
The oven signals when steam is
sensed and the time remaining begins
counting down.
Do not open the oven door until time is
counting down. If the door is opened,
close it and press START immediately.
After removing food from the oven, stir, if possible,
to even out the temperature. Reheated foods may
have wide variations in temperature. Some areas of
food may be extremely hot.
If food is not hot enough after the
countdown use Time Cook for additional
reheating time.
Some Foods Not Recommended for Use
With Reheat
It is best to use Time Cook for these foods:
■ Bread products.
■ Foods that must be reheated uncovered.
■ Foods that need to be stirred or rotated.
■ Foods calling for a dry look or crisp
surface after reheating.
How to Adjust the Oven’s Automatic
Settings for a Shorter or Longer Time
To subtract 10% from the automatic
cooking time:
Within the first 30 seconds after the oven
starts, turn the dial counterclockwise and
press to enter.
To add 10% to the automatic cooking time:
Within the first 30 seconds after the oven
starts, turn the dial clockwise and press
to enter.
2
1
REHEAT
Beverage
Press the BEVERAGE button to heat an
8–10 oz. cup of coffee or other beverage.
The oven starts immediately.
Drinks heated with the Beverage feature may be
very hot. Remove the container with care.
If food is undercooked after the countdown
use Time Cook for additional cooking time.
BEVERAGE
17

18
Operating Instructions Safety InstructionsConsumer Support Troubleshooting Tips
Baking uses a heating element to raise the temperature of the air inside the oven. Any
oven temperature from 225°F to 450°F may be set. A fan gently circulates this heated air
throughout the oven, over and around the food, producing golden brown exteriors and
rich, moist interiors. This circulation of heated air is called convection.
Because the heated air is kept constantly moving, not permitting a layer of cooler air to
develop around the food, some foods cook faster than in regular oven cooking.
See the Cookware Tips section for information on suggested cookware.
For Best Results…
Always use the shelf in its “low” position when baking.
The shelf is required for good air circulation and even browning.
See the Cookware Tips section for information on suggested cookware.
Bake with Preheat
Press the BAKE button.
Turn the dial to set the oven
temperature and press dial to enter.
Do not enter bake time now. (The cook
time will be entered later, after the oven
is preheated.)
Press the dial or the START/PAUSE
button to start preheating.
When the oven is preheated, it will
signal. If you do not open the door
within 1 hour, the oven will turn off
automatically.
Open the oven door and, using
caution, place the food in the oven.
Close the oven door. Turn the dial
to set the cook time and press the dial
or START/PAUSE to start cooking.
When cooking is complete, the oven
will signal and turn off.
NOTE: You may change the cook time at any time
during cooking by turning the dial.
You may change the oven temperature at any
time during cooking by pressing the POWER
button. Turn the dial to set the oven temperature
and press the dial to enter.
To view the cook time and oven temperature
during cooking, press the BAKE button.
Reduce the recipe oven temperature 25°F
for baked goods.
7
6
5
4
2
1
3
PUSH TO ENTER
TURN TO SELECT
Bake without Preheating
If your recipe does not require
preheating, press the BAKE button.
Turn the dial to set the oven
temperature and press to enter.
Turn the dial to set the cook time and
press to enter.
Press the dial or the START/PAUSE
button to start the oven.
NOTE: You may change the cook time at any time
during cooking by turning the dial.
You may change the oven temperature at any
time during cooking by pressing the POWER
button. Turn the dial to set the oven temperature
and press the dial to enter.
To view the cook time and oven temperature
during cooking, press the BAKE button.
Reduce the recipe oven temperature 25°F
for baked goods.
4
3
2
1
PUSH TO ENTER
TURN TO SELECT
About the baking features.
Always use the shelf in its “low”
position when baking.

Fast Bake without Preheat
If your recipe does not require
preheating, press the FAST BAKE
button.
Turn the dial to set the oven
temperature and press to enter.
Turn the dial to set the cook time and
press to enter.
Press the dial or the START/PAUSE
button to start the oven.
NOTE: You may change the cook time at any time
during cooking by turning the dial.
You may change the oven temperature and
microwave power level at any time during
cooking by pressing the POWER button. Turn the
dial to set the oven temperature and press the
dial to enter. Then, turn the dial to set microwave
power level 1 through 4 and press the dial to
enter. The default power level is 4.
To view the cook time and oven temperature
during cooking, press the FAST BAKE button.
NOTE:
■ Some recipes call for preheating.
■ Check the Cookware Tips section for
correct cookware when using Fast Bake.
■ Do not use metal cookware with
Fast Bake.
■ See the Best Method of Cooking section
to determine the which foods are
appropriate to cook using Fast Bake.
■ Reduce the recipe cook time by 25%.
3
2
1
4
PUSH TO ENTER
TURN TO SELECT
19
Consumer SupportTroubleshooting TipsOperating InstructionsSafety Instructions
Fast Bake offers the best features of microwave energy and convection cooking. Microwaves
cook food fast and convection circulation of heated air browns foods beautifully. Any oven
temperature from 225°F to 450°F may be set.
For Best Results…
Always use the shelf in its “low” position with Fast Bake.
The shelf is required for good air circulation and even browning.
See the Cookware Tips section for information on suggested cookware.
See the Best Method of Cooking section to determine the which foods are appropriate to cook
using Fast Bake.
Fast Bake with Preheat
Press the FAST BAKE button.
Turn the dial to set the oven
temperature and press dial to enter.
Do not enter FAST BAKE cook time
now. (The cook time will be entered
later, after the oven is preheated.)
Press the dial or the START/PAUSE
button to start preheating.
When the oven is preheated, it will
signal. If you do not open the door
within 1 hour, the oven will turn off
automatically.
Open the oven door and, using
caution, place the food in the oven.
Close the oven door. Turn the dial to
set the cook time and press to enter.
Press the dial or the START/PAUSE
button to start cooking.
When cooking is complete, the oven
will signal and turn off.
NOTE: You may change the cook time at any time
during cooking by turning the dial.
You may change the oven temperature and
microwave power level at any time during
cooking by pressing the POWER button. Turn the
dial to set the oven temperature and press the
dial to enter. Then, turn the dial to set microwave
power level 1 through 4 and press the dial to
enter. The default power level is 4.
To view the cook time and oven temperature
during cooking, press the FAST BAKE button.
■ Check the Cookware Tips section for
correct cookware when using Fast Bake.
■ Do not use metal cookware with
Fast Bake.
■ Reduce the recipe cook time by 25%.
■ See the Best Method of Cooking section
to determine the which foods are
appropriate to cook using Fast Bake.
7
6
5
4
2
1
3
PUSH TO ENTER
TURN TO SELECT
About the Fast Bake feature. www.GEAppliances.com
Always use the shelf in its “low”
position with Fast Bake.

Operating Instructions Safety InstructionsConsumer Support Troubleshooting Tips
20
Cookware tips.
Bake
Metal Pans are recommended for all types of baked products, but especially where
browning is important.
Dark or dull finish metal pans are best for breads and pies because they absorb heat and
produce crisper crust.
Shiny aluminum pans are better for cakes, cookies or muffins because they reflect heat
and help produce a light tender crust.
Glass or Glass-Ceramic casserole or baking dishes are best suited for egg and cheese
recipes due to the cleanability of glass.
Fast Bake
Glass or Glass-Ceramic baking containers are recommended. Be sure not to use items with
metal trim as it may cause arcing (sparking) with oven wall or oven shelf. This can damage
the cookware, the shelf or the oven.
Heat-Resistant Plastic microwave cookware (safe to 450°F) may be used, but it is not
recommended for foods requiring all-around browning, because the plastic is a poor
conductor of heat.
Cookware Microwave Bake Fast Bake
Heat-Resistant Glass, Glass-Ceramic Yes Yes Yes
(Pyrex
®
, Fire King
®
, Corning Ware
®
, etc.)
Metal No Yes No
Non Heat-Resistant Glass No No No
Microwave-Safe Plastics Yes No Yes*
Plastic Films and Wraps Yes No No
Paper Products Yes No No
Straw, Wicker and Wood Yes No No
* Use only microwave cookware that is safe to 450°F.
■ In Microwave mode, the food should
always be cooked on the glass turntable
tray. Microwave mode should not be used
with the metal shelf in the oven.
■ The metal shelf should always be used
when cooking in Bake or Fast Bake
modes so that heated air will brown
the bottom of the food. The glass
turntable can be left in place in Bake
and Fast Bake modes.
■ For best cooking performance in Bake or
Fast Bake modes, leave at least a one inch
gap between the cooking dish and the
sides of the oven.
■ For best cooking performance in Bake or
Fast Bake modes, always place the shelf
in the “low” position.
■ Placing the shelf in the “high” position
will cause the top of the food to brown/
cook much faster than the interior and
bottom of the food.
Correct shelf position
Cookware and food placement suggestions.
Incorrect shelf position

Consumer SupportTroubleshooting TipsOperating InstructionsSafety Instructions
21
Use the following guide to select the best method of cooking. Recipes can be adapted using the guidelines below to
determine the appropriate cooking mode.
Foods Microwave Bake Fast Bake
Appetizers
Dips and Spreads ✓
Pastry Snacks ✓✓✓
Beverages ✓
Sauces and Toppings ✓
Soups and Stews ✓
Meats
Defrosting ✓
Roasting ✓✓
Poultry
Defrosting ✓
Roasting ✓✓✓
Fish and Seafood
Defrosting ✓
Cooking ✓✓✓
Casseroles ✓✓✓
Eggs and Cheese
Scrambled, Omelets ✓✓
Quiche, Souffle ✓✓
Vegetables, (fresh) ✓
Breads
Muffins, Coffee Cake ✓✓
Quick ✓
Yeast ✓
Desserts
Cakes, Layer and Bundt ✓
Angel Food and Chiffon ✓
Custard and Pudding ✓
Bar Cookies ✓✓
Fruit ✓
Pies and Pastry ✓
Candy ✓
Blanching Vegetables ✓
Frozen Convenience Foods ✓✓✓
Select the best method of cooking. www.GEAppliances.com
Bake
When using the BAKE mode to cook baked goods such as cakes, cookies, pizzas, pies,
breads, etc., reduce the oven temperature 25°F from the recipe to prevent over browning
on the top of baked goods.
Example: A recipe states to bake brownies for 25–30 minutes at 400°F.
400°F - 25°F = 375°F
The new bake temperature in BAKE mode will be 375°F.
Fast Bake
When using the FAST BAKE mode, reduce the recipe cook time by 25%.
Example: A recipe states to cook a roast for 60 minutes at 400°F.
60 minutes x 0.25 = 15 minutes saved.
The new cook time in FAST BAKE mode will be:
60 minutes - 15 minutes = 45 minutes.
Recipe conversions.

Operating Instructions Safety InstructionsConsumer Support Troubleshooting Tips
22
About the other features.
Clock
Press to enter the time of day or to check
the time of day while cooking.
Press the CLOCK button.
Turn the dial to set hours. Press the dial
to enter.
Turn the dial to set minutes. Press the
dial to enter.
Turn the dial to select AM or PM.
Press the dial to enter.
Press the START/PAUSE button to start
the clock.
5
4
3
2
1
PUSH TO ENTER
TURN TO SELECT
CLOCK
AM / PM
Cooking Complete Reminder
To remind you that you have food in the
oven, the oven will display YOUR FOOD IS
READY and beep once a minute until you
either open the oven door or press the
CLEAR/OFF button.
CLEAR / OFF
START / PAUSE
Start/Pause
In addition to starting many functions,
START/PAUSE allows you to stop cooking
without opening the door or clearing the
display.
Clear/Off
Press the CLEAR/OFF button to stop and
cancel cooking at any time.
Child Lock-Out
You may lock the control panel to prevent
the oven from being accidentally started or
used by children.
To lock or unlock the controls, press and
hold the CLEAR/OFF button for about three
seconds. When the control panel is locked,
CONTROL LOCKED will be displayed briefly
anytime a button or dial is pressed.
CLEAR / OFF
Help
The HELP button displays feature
information and helpful hints.
Press HELP, then turn the dial to select
a feature and press the dial to enter.
PUSH TO ENTER
TURN TO SELECT
HELP

23
Consumer SupportTroubleshooting TipsOperating InstructionsSafety Instructions
Display ON/OFF
Use to turn your clock display on or off.
Press the OPTIONS button and turn the
dial to select DISPLAY ON/ OFF. Press the
dial to enter.
Turn the dial to select ON or OFF. Press
the dial to enter.
2
1
PUSH TO ENTER
TURN TO SELECT
OPTIONS
www.GEAppliances.com
Auto Nite Light
The Auto Nite Light can be set to come on
and go off at desired times.
Press the OPTIONS button and turn the
dial to select AUTO NITE LIGHT. Press the
dial to enter.
Turn the dial to select SET TIMES. Press
the dial to enter.
Enter the time of day for the light to
come on by turning the dial to select
the hour, minutes and AM or PM. Press
the dial to enter after each selection.
Enter the time of day for the light to
go off by turning the dial to select the
hour, minutes and AM or PM. Press the
dial to enter after each selection.
NOTE: The NITE indicator will be lit whenever
the nite light is set to operate.
To review the nite light settings, turn the
dial to select REVIEW SETTINGS after
selecting the Auto Nite Light option.
Press the dial to enter.
To clear the nite light settings, turn the dial
to select CLEAR SETTINGS after selecting
the Auto Nite Light option. Press the dial
to enter.
4
3
2
1
PUSH TO ENTER
TURN TO SELECT
OPTIONS
Beeper Volume
The beeper sound level can be adjusted.
Press the OPTIONS button and turn the
dial to select BEEPER VOLUME. Press the
dial to enter.
Turn the dial to select mute to loud.
Press the dial to enter.
NOTE: The MUTE indicator will be lit whenever
the beeper volume is set to mute.
2
1
PUSH TO ENTER
TURN TO SELECT
OPTIONS
Display Language
The language for the scrolling display can
be set to either English or Spanish.
Press the OPTIONS button and turn the
dial to select DISPLAY LANGUAGE. Press
the dial to enter.
Turn the dial to select ENGLISH or
SPANISH. Press the dial to enter.
2
1
PUSH TO ENTER
TURN TO SELECT
OPTIONS

24
Vent Fan
The vent fan removes steam and other
vapors from surface cooking.
Press VENT FAN once for low fan speed,
twice for high fan speed or a third time
to turn the fan off.
NOTE: The FAN indicator will be lit while
the fan is operating.
Automatic Fan
An automatic fan feature protects the
microwave from too much heat rising from
the cooktop below it. It automatically turns
on if it senses too much heat.
If you have turned the fan on you may find
that you cannot turn it off. The fan will
automatically turn off when the internal
parts are cool. It may stay on for 30 minutes
or more after the cooktop and microwave
controls are turned off.
VENT FAN
Surface Light
Press SURFACE LIGHT once for bright light,
twice for the night light or a third time to
turn the light off.
SURFACE
LIGHT
About the other features.
Timer
The Timer operates as a minute timer and
can be used at any time, even when the
oven is operating.
Press the TIMER button.
Turn the dial to select the minutes.
Press the dial to enter.
Turn the dial to select the seconds.
Press the dial to enter
Press the dial or TIMER to start.
To cancel, press the TIMER button.
When time is up, the oven will signal.
To turn off the timer signal, press TIMER.
NOTE: The TIMER indicator will be lit while the
timer is operating.
4
3
2
1
PUSH TO ENTER
TURN TO SELECT
TIMER
Display Speed
The scroll speed of the display can
be changed.
Press the OPTIONS button and turn the
dial to select DISPLAY SPEED. Press the
dial to enter.
Turn the dial to select slowest to fastest.
Press the dial to enter.
2
1
PUSH TO ENTER
TURN TO SELECT
OPTIONS
Operating Instructions Safety InstructionsConsumer Support Troubleshooting Tips

25
Arcing Arcing is the microwave term for sparks in the oven. Arcing is caused by:
■ the metal shelf being installed incorrectly and touching the microwave walls.
■ metal or foil touching the side of the oven.
■ foil that is not molded to food (upturned edges act like antennas).
■ metal such as twist-ties, poultry pins, gold-rimmed dishes.
■ recycled paper towels containing small metal pieces.
■ the turntable ring support being installed incorrectly.
Covering Covers hold in moisture, allow for more even heating and reduce cooking time. Venting plastic wrap or
covering with wax paper allows excess steam to escape.
Shielding In a regular oven, you shield chicken breasts or baked foods to prevent over-browning. When microwaving,
you use small strips of foil to shield thin parts, such as the tips of wings and legs on poultry, which would
cook before larger parts.
Standing Time When you cook with regular ovens, foods such as roasts or cakes are allowed to stand to finish cooking or
to set. Standing time is especially important in microwave cooking. Note that a microwaved cake is not
placed on a cooling rack.
Venting After covering a dish with plastic wrap, you vent the plastic wrap by turning back one corner so excess
steam can escape.
Microwave terms. www.GEAppliances.com
Term Definition
Consumer SupportTroubleshooting TipsOperating InstructionsSafety Instructions

26
Operating Instructions Safety InstructionsConsumer Support Troubleshooting Tips
Care and cleaning of the oven.
Helpful Hints
An occasional thorough wiping with a solution of baking soda
and water keeps the inside fresh.
Be sure the power is off before cleaning any part of this oven.
How to Clean the Inside
Walls, Floor, Inside Window, Metal and Plastic Parts on the Door
Some spatters can be removed with a paper towel; others may require a damp cloth.
Remove greasy spatters with a sudsy cloth, then rinse with a damp cloth. Do not use
abrasive cleaners or sharp utensils on oven walls.
Never use a commercial oven cleaner on any part of your microwave.
Removable Turntable and Turntable Support
To prevent breakage, do not place the turntable into water just after cooking. Wash it
carefully in warm, sudsy water or in the dishwasher. The turntable and support can be
broken if dropped. Remember, do not operate the oven without the turntable and
support in place.
Shelf
Clean with mild soap and water or in the dishwasher.
Do not clean in a self-cleaning oven.
How to Clean the Outside
We recommend against using cleaners with ammonia or alcohol, as they can damage
the appearance of the microwave oven. If you choose to use a common household
cleaner, first apply the cleaner directly to a clean cloth, then wipe the soiled area.
Bottom
Clean off the grease and dust on the bottom often. Use a solution of warm water
and detergent.
Case
Clean the outside of the microwave with a sudsy cloth. Rinse with a damp cloth and then
dry. Wipe the window clean with a damp cloth.
Control Panel and Door
Wipe with a damp cloth. Dry thoroughly. Do not use cleaning sprays, large amounts of
soap and water, abrasives or sharp objects on the panel—they can damage it. Some paper
towels can also scratch the control panel.
Door Surface
It is important to keep the area clean where the door seals against the microwave. Use only
mild, non-abrasive detergents applied with a clean sponge or soft cloth. Rinse well.

27
Consumer SupportTroubleshooting TipsOperating InstructionsSafety Instructions
Stainless Steel
Do not use a steel-wool pad; it will scratch
the surface.
To clean stainless steel surfaces, use a hot,
damp cloth with a mild detergent suitable
for stainless steel surfaces. Use a clean, hot,
damp cloth to remove soap. Dry with a dry,
clean cloth.
If food soil remains, try a general
kitchen cleaner.
For hard-to-clean soil, use a standard
stainless-steel cleaner, such as Bon-Ami
®
or Cameo.
®
Apply cleaner with a damp sponge. Use a
clean, hot, damp cloth to remove cleaner.
Dry with a dry, clean cloth. Always scrub
lightly in the direction of the grain.
After cleaning, use a stainless-steel polish,
such as Stainless Steel Magic,
®
Revere
Copper and Stainless Steel Cleaner,
®
or
Wenol All Purpose Metal Polish.
®
Follow
the product instructions for cleaning the
stainless-steel surface.
www.GEAppliances.com
Replacing the light bulb.
Cooktop Light/Nite Light
Replace with a 120 volt, 20 watt (max.) halogen
bulb. Order WB36X10213 from your GE supplier.
To replace the cooktop light/nite light,
first disconnect the power at the main
fuse or circuit breaker panel, or pull
the plug.
Remove the screw from the side of the
light compartment cover and lower the
cover until it stops.
Be sure the bulb is cool before
removing. Break the adhesive seal
by gently unscrewing the bulb.
Screw in the new bulb, then raise the
light cover and replace the screw.
Connect electrical power to the oven.
4
3
2
1
Remove screw.

28
Operating Instructions Safety InstructionsCustomer Service Troubleshooting Tips
About the exhaust feature.
Vent Fan
The vent fan has two metal reusable
vent filters.
Models that recirculate air back into the
room also use a charcoal filter.
Reusable Vent Filters
The metal filters trap grease released by
foods on the cooktop. They also prevent
flames from foods on the cooktop from
damaging the inside of the oven.
For this reason, the filters must always be
in place when the hood is used. The vent
filters should be cleaned once a month,
or as needed.
Removing and Cleaning the Filters
To remove, slide them to the rear using the
tabs. Pull down and out.
To clean the vent filters, soak them and
then swish around in hot water and
detergent. Don’t use ammonia or ammonia
products because they will darken the
metal. Light brushing can be used to
remove embedded dirt.
Rinse, shake and let dry before replacing.
To replace, slide the filters into the frame
slots on the back of each opening. Press up
and to the front to lock into place.
Reusable vent filters
(on all models).
Charcoal filter (on some models).

29
Consumer SupportTroubleshooting TipsOperating InstructionsSafety Instructions
www.GEAppliances.com
Charcoal Filter
The charcoal filter cannot be cleaned. It must
be replaced. Order Part No. WB2X9883 from
your GE supplier.
If the model is not vented to the outside,
the air will be recirculated through a
disposable charcoal filter that helps
remove smoke and odors.
The charcoal filter should be replaced
when it is noticeably dirty or discolored
(usually after 6 to 12 months, depending on
usage).
To Remove the Charcoal Filter
To remove the charcoal filter, first disconnect
power at the main fuse or circuit breaker,
or pull the plug. Remove the top grille
by removing the two screws that hold it
in place.
You may need to open the cabinet doors to
remove the screws.
Slide the filter toward the front of the oven
and remove it.
To Install the Charcoal Filter
To install a new charcoal filter, remove
plastic and other outer wrapping from the
new filter.
Insert the filter into the top opening of the
oven as shown, maneuvering it behind the
plastic grille until it fits squarely into place.
It will rest at an angle behind the plastic
grille on two side support tabs and in front
of the right rear tab. Replace the grille and
two screws. Reconnect power.
Remove 2 grille screws to remove
the grille.

30
Troubleshooting Tips
Save time and money! Review the charts on the following
pages first and you may not need to call for service.
Operating Instructions Safety InstructionsConsumer Support Troubleshooting Tips
Problem Possible Causes What To Do
Oven will not start A fuse in your home may be • Replace fuse or reset circuit breaker.
blown or the circuit breaker
tripped.
Power surge. • Unplug the microwave oven, then plug it back in.
Plug not fully inserted into wall • Make sure the 3-prong plug on the oven is fully inserted
outlet. into wall outlet.
Door not securely closed. • Open the door and close securely.
Control panel lighted, Door not securely closed. • Open the door and close securely.
yet oven will not start
START button not pressed after • Press START.
entering cooking selection.
Another selection entered • Press CLEAR/OFF.
already in oven and CLEAR/OFF
button not pressed to cancel it.
Cooking time not entered after • Make sure you have entered cooking time after pressing
pressing TIME COOK. TIME COOK.
CLEAR/OFF was pressed • Reset cooking program and press START.
accidentally.
Food weight not entered after • Make sure you have entered food weight after selecting
selecting AUTO DEFROST or AUTO DEFROST or FAST DEFROST.
FAST DEFROST.
Food type not entered after • Make sure you have entered a food type.
pressing AUTO COOK.
CONTROL LOCKED The control has been locked. •Press and hold CLEAR/OFF for about 3 seconds
appears on display to unlock the control.
CAUTION—OVEN HOT The temperature inside the •This is normal.
appears on display oven is greater than 200°F.
One of the sensor cooking •These features will not operate when the oven is hot.
pads was pressed when the
temperature inside the oven
was greater than 200°F.
Floor of the oven is warm The cooktop light is located •This is normal.
even when the oven has below the oven floor. When
not been used light is on, the heat it produces
may make the oven floor get warm.
You hear an unusual You have tried to change •Many of the oven’s features are preset and
low-tone beep the power level when it is cannot be changed.
not allowed.
Oven emits a smoky odor Oils on the stainless steel cavity •This is normal.
and gray smoke after are burning off after using the
using the Bake feature Bake feature the first few times.
Before you call for service…

31
Consumer SupportTroubleshooting TipsOperating InstructionsSafety Instructions
Problem Possible Causes What To Do
Food browns on top much Rack has been placed in the • Always use the rack in its “low” position.
faster than on the bottom “high” position.
Oven temperature The cooking element cycles • This is normal.
fluctuates during cooking on and off to maintain the
oven temperature at the
desired setting.
Vent fan comes on The vent fan automatically turns •This is normal.
automatically on to protect the microwave if it
senses too much heat rising from
the cooktop below.
During Bake or Fast Bake •This is normal.
(after preheating), the vent
fan will automatically come
on to cool the oven components.
www.GEAppliances.com

32
Before you call for service…
Things That Are Normal With Your Microwave Oven
■ Steam or vapor escaping from around
the door.
■ Light reflection around door or outer case.
■ Dimming oven light and change in
the blower sound at power levels other
than high.
■ Dull thumping sound while oven is
operating.
■ TV/radio interference might be noticed
while using the microwave. Similar to
the interference caused by other small
appliances, it does not indicate a
problem with the microwave. Plug the
microwave into a different electrical
circuit, move the radio or TV as far away
from the microwave as possible, or check
the position and signal of the TV/radio
antenna.
Operating Instructions Safety InstructionsConsumer Support Troubleshooting Tips

33
General Electric Company
Warranty Registration Department
P.O. Box 32150
Louisville, KY 40232-2150
GE Service Protection Plus
™
GE, a name recognized worldwide for quality and dependability, offers you
Service Protection Plus
™
—comprehensive protection on all your appliances—
No Matter What Brand!
Benefits Include:
• Backed by GE
• All brands covered
• Unlimited service calls
• All parts and labor costs included
• No out-of-pocket expenses
• No hidden deductibles
• One 800 number to call
You will be completely satisfied with our service protection or you may request your money back
on the remaining value of your contract. No questions asked. It’s that simple.
Protect your refrigerator, dishwasher, washer and dryer, range, TV, VCR and much more—any brand!
Plus there’s no extra charge for emergency service and low monthly financing is available. Even icemaker coverage
and food spoilage protection is offered. You can rest easy, knowing that all your valuable household products are
protected against expensive repairs.
Place your confidence in GE and call us in the U.S. toll-free at 800.626.2224
for more information.
*All brands covered, up to 20 years old, in the continental U.S.
We’ll Cover Any Appliance.
Anywhere. Anytime.*
Please place in envelope and mail to:
✁
Cut here

Consumer Product Ownership Registration
Important
Mail
Today!
GE Consumer Products
General Electric Company
Louisville, Kentucky
www.GEAppliances.com
First
Name
Mr. ■■ Ms. ■■ Mrs. ■■ Miss ■■
Street
Address
City
State
Date Placed
In Use
Month
Day
Year
Zip
Code
Apt. #
Last
Name
Phone
Number
_
_
Consumer Product Ownership Registration
Dear Customer:
Thank you for purchasing our product and thank you for placing your confidence in us.
We are proud to have you as a customer!
Follow these three steps to protect your new appliance investment:
Important: If you did not get a registration card with your
product, detach and return the form below to
ensure that your product is registered, or register
online at www.GEAppliances.com.
1
23
Model Number Serial Number
✁
Cut here
Complete and mail
your Consumer
Product Ownership
Registration today.
Have the peace of
mind of knowing we
can contact you in
the unlikely event of
a
safety modification.
After mailing the
registration below,
store this document
in a safe place. It
contains information
you will need should
you require service.
Our service number is
800.GE.CARES
(800.432.2737).
Read your Owner’s
Manual carefully.
It will help you
operate your new
appliance properly.
Model Number Serial Number
E-mail Address*
* Please provide your e-mail address to receive, via e-mail, discounts, special offers and other important
communications from GE Appliances (GEA).
■■ Check here if you do not want to receive communications from GEA’s carefully selected partners.
FAILURE TO COMPLETE AND RETURN THIS CARD DOES NOT DIMINISH YOUR
WARRANTY RIGHTS.
For more information about GEA’s privacy and data usage policy, go to www.GEAppliances.com
and click on “Privacy Policy” or call 800.626.2224.
34

35
GE Microwave Oven Warranty.
For The Period Of: GE Will Replace:
One Year Any part of the microwave oven which fails due to a defect in materials or workmanship.
From the date of the During this full one-year warranty, GE will also provide, free of charge, all labor and in-home
original purchase service to replace the defective part.
Ten Years The magnetron tube, if the magnetron tube fails due to a defect in materials or workmanship.
From the second through
During this additional nine-year limited warranty, you will be responsible for any labor or in-home
the tenth year from the service costs.
date of original purchase
■ Service trips to your home to teach you how to use
the product.
■ Improper installation, delivery or maintenance.
■ Failure of the product if it is abused, misused, or
used for other than the intended purpose or used
commercially.
■ Replacement of the cooktop light bulbs.
■ Replacement of house fuses or resetting of circuit
breakers.
■ Damage to the product caused by accident, fire, floods
or acts of God.
■ Incidental or consequential damage caused by possible
defects with this appliance.
■ Damage caused after delivery.
What GE Will Not Cover:
This warranty is extended to the original purchaser and any succeeding owner for products purchased for home
use within the USA. In Alaska, the warranty excludes the cost of shipping or service calls to your home.
Some states do not allow the exclusion or limitation of incidental or consequential damages. This warranty gives
you specific legal rights, and you may also have other rights which vary from state to state. To know what your
legal rights are, consult your local or state consumer affairs office or your state’s Attorney General.
Warrantor: General Electric Company. Louisville, KY 40225
All warranty service provided by our Factory Service Centers,
or an authorized Customer Care
®
technician. To schedule service,
on-line, 24 hours a day, visit us at www.GEAppliances.com,
or call 800.GE.CARES (800.432.2737).
Staple your receipt here.
Proof of the original purchase
date is needed to obtain service
under the warranty.
Consumer SupportTroubleshooting TipsOperating InstructionsSafety Instructions

Printed in China
Consumer Support.
GE Appliances Website
www.GEAppliances.com
Have a question or need assistance with your appliance? Try the GE Appliances Website 24 hours a day,
any day of the year! For greater convenience and faster service, you can now download Owner’s Manuals,
order parts, catalogs, or even schedule service on-line. You can also “Ask Our Team of Experts
™
”
your questions, and so much more...
Schedule Service www.GEAppliances.com
Expert GE repair service is only one step away from your door. Get on-line and schedule your service at
your convenience 24 hours any day of the year! Or call 800.GE.CARES (800.432.2737) during normal
business hours.
Real Life Design Studio www.GEAppliances.com
GE supports the Universal Design concept—products, services and environments that can be used by
people of all ages, sizes and capabilities. We recognize the need to design for a wide range of physical and
mental abilities and impairments. For details of GE’s Universal Design applications, including kitchen
design ideas for people with disabilities, check out our Website today. For the hearing impaired, please call
800.TDD.GEAC (800.833.4322).
Extended Warranties www.GEAppliances.com
Purchase a GE extended warranty and learn about special discounts that are available while your warranty
is still in effect. You can purchase it on-line anytime, or call 800.626.2224 during normal business hours.
GE Consumer Home Services will still be there after your warranty expires.
Parts and Accessories www.GEAppliances.com
Individuals qualified to service their own appliances can have parts or accessories sent directly to their
homes (VISA, MasterCard and Discover cards are accepted). Order on-line today, 24 hours every day or
by phone at 800.626.2002 during normal business hours.
Instructions contained in this manual cover procedures to be performed by any user. Other servicing generally
should be referred to qualified service personnel. Caution must be exercised, since improper servicing may cause
unsafe operation.
Contact Us www.GEAppliances.com
If you are not satisfied with the service you receive from GE, contact us on our Website with all the details
including your phone number, or write to: General Manager, Customer Relations
GE Appliances, Appliance Park
Louisville, KY 40225
Register Your Appliance www.GEAppliances.com
Register your new appliance on-line—at your convenience! Timely product registration will allow for
enhanced communication and prompt service under the terms of your warranty, should the need arise.
You may also mail in the pre-printed registration card included in the packing material, or detach and
use the form in this Owner’s Manual.

Horno Spacemaker
GE Profile
3828W5A3662 164D3370P331 49-40402-1 08-03 JR
JVM1490
Manual del
Propietario
www.GEAppliances.com
Instrucciones de seguridad . . 2–6
Instrucciones de Funcionamiento
Cambio de nivel de potencia . . . 14
Consejos de utensilios
de cocina . . . . . . . . . . . . . . . . . .20
Función de cocción
rápida . . . . . . . . . . . . . . .10, 19, 20
Funciones para cocinar . 10, 18, 20
Funciones de sensor
. . . . . . . 15–17
Funciones de su horno . . . . . . 8, 9
Funciones de tiempo
y automático . . . . . . . . . . . 9, 11–13
Opciones de cocción . . . . . . . . .10
Otras funciones . . . . . . . . . . .22–24
Bloqueo para niños . . . . . . . . .22
CLEAR/OFF
(borrar/apagado) . . . . . . . . . .22
Extractor automático . . . . . . . .24
HELP (ayuda) . . . . . . . . . . . . .22
Idioma de pantalla . . . . . . . . .23
Luz nocturna automática . . . .23
Luz de superficie . . . . . . . . . . .24
Pantalla ON/OFF
(encendida/apagada) . . . . . . .23
Reloj . . . . . . . . . . . . . . . . . . . .22
Señal de final de cocción . . . .22
START/PAUSE (inicio/pausa)
. .22
Temporizador . . . . . . . . . . . . .24
Velocidad de pantalla . . . . . . .24
Ventilador extractor . . . . . . . .24
Volumen de señal de aviso . . .23
Tabla con el mejor método
para cocinar . . . . . . . . . . . . . . . .21
Terminología de microondas . . 25
Cuidado y Limpieza
Acero inoxidable . . . . . . . . . . . .27
Exterior . . . . . . . . . . . . . . . . . . .26
Filtros de carbón vegetal . . . . . . .29
Filtros del extractor . . . . . . . . . .28
Interior . . . . . . . . . . . . . . . . . . . . .26
Reemplazo de bombillas . . . . . .27
Resolución de Problemas . . 30, 31
Cosas normales de su horno
microondas . . . . . . . . . . . . . . . . 32
Ayuda al Cliente
Ayuda al Cliente
. . cubierta trasera
Garantía . . . . . . . . . . . . . . . . . . . .
35
Kits opcionales . . . . . . . . . . . . . . .7
Anote aquí los números de modelo
y de serie:
Modelo número ____________________
Número de serie ____________________
Los encontrará en una etiqueta al abrir
la puerta.

Instrucciones de
Funcionamiento
Instrucciones de SeguridadAyuda al Cliente Resolución de Problemas
INSTRUCCIONES IMPORTANTES DE SEGURIDAD.
LEA PRIMERO TODA LAS INSTRUCCIONES.
Por su seguridad, la información contenida en este manual debe seguirse para
minimizar el riesgo de incendio, explosión, descarga eléctrica, exposición a energía
microondas o para evitar daños a la propiedad, lesiones personales o pérdida de vida.
INSTRUCCIONES IMPORTANTES DE SEGURIDAD.
Cuando use electrodomésticos, debe seguir precauciones de seguridad básicas, incluyendo las siguientes:
■ Lea y obedezca las precauciones específicas en la sección de
PRECAUCIONES PARA EVITAR POSIBLE EXPOSICIÓN A UNA
ENERGÍA EXCESIVA DE MICROONDAS de arriba.
■ Este electrodoméstico debe estar conectado a tierra. Conéctelo
sólo a una toma de corriente con toma de tierra. Vea la sección
de INSTRUCCIONES DE TOMA DE TIERRA en la página 6.
■ Instale o coloque este electrodoméstico siguiendo sólo las
Instrucciones de Instalación provistas.
■ Este horno de microondas está listado por UL para ser
instalado sobre estufas electricas y de gas en rangos.
■ Este horno de microondas no ha sido aceptado ni probado
para uso marino.
■ Este horno puede instalarse encima de la cocina y está
diseñado para su uso sobre cocinas encimeras no más anchas
de 36″. Puede instalarse sobre equipos para cocinar de gas o
eléctricos.
■ No usar este electrodoméstico si el cable de corriente o el
enchufe han sufrido algún daño, si no funciona correctamente
o si ha resultado dañado o se ha caído. Si el cable de corriente
ha sido dañado, debe ser reemplazado por el Servicio
Reparaciones de General Electric (GE Service) o un agente
de reparaciones autorizado empleando un cable de corriente
que General Electric tiene a su disposición.
■ No cubra ni bloquee ninguna apertura de este
electrodoméstico.
■ Use este aparato sólo para los fines que se describen en este
manual. No use productos químicos ni vapores corrosivos
en este electrodoméstico. Este horno microondas está
específicamente diseñado para calentar, secar o cocinar
comida y no para su uso industrial o en laboratorio.
■ Para reducir el riesgo de incendio en la apertura del horno:
—No cocine demasiado la comida. Preste atención cuidadosa
al electrodoméstico cuando se coloca papel, plástico u otro
material combustible en el horno mientras se cocina.
—Quite las cintas de cierre con metal y las asas metálicas de
los recipientes de papel o plástico antes de introducirlos en
el horno.
—No almacene cosas en el horno. No deje productos de papel,
utensilios de cocinar ni comida en el horno mientras no lo
esté usando.
—No haga rosetas o palomitas de maíz en el microondas a no ser
que esté usando un accesorio especial para prepararlas o que
esté empleando rosetas o palomitas de maíz que indiquen ser
válidas para el uso de hornos microondas.
—Si se incendiara algún material dentro, mantenga la puerta
del horno cerrada, apague el horno y desconecte el cable de
corriente eléctrica, o apague la corriente en el fusible o panel
del diferencial. Si se abre la puerta el fuego podría expandirse.
—No utilice las características de Sensor dos veces consecutivas en
la misma porción de comida. Si la comida no se ha cocinado
por completo después de la primera cuenta regresiva, use la
función Time Cook para tiempo de cocción adicional.
GUARDE ESTAS INSTRUCCIONES
¡PRECAUCIÓN!
(a) No Intente operar este horno con la puerta abierta ya
que esto podría resultar en una exposición a energía
microondas dañina. Es importante no cancelar ni
manipular de forma indebida los dispositivos de
seguridad.
(b) No Sitúe ningún objeto entre la parte frontal del
horno y la puerta ni permita que se acumule suciedad
o residuos limpios en las gomas de cierre hermético.
(c) No Use el horno si está dañado. Es especialmente
importante que la puerta del horno se cierre
correctamente y que no se dañe:
(1) la puerta (doblada),
(2) bisagras y pasadores (rotos o sueltos),
(3) sellos de la puerta y gomas de cierre hermético.
(d) El horno no debería ajustarse ni repararse por nadie
que no sea personal de servicio adecuadamente
calificado.
PRECAUCIONES PARA EVITAR POSIBLE EXPOSICIÓN
A UNA EXCESIVA ENERGÍA DE MICROONDAS .
2

Ayuda al ClienteResolución de Problemas
Instrucciones de
Funcionamiento
Instrucciones de Seguridad
www.GEAppliances.com
INSTRUCCIONES IMPORTANTES DE SEGURIDAD.
■ Cuando use las funciones de Cocción (Bake) o Cocción
Rápida (Fast Bake), tanto el exterior como el interior del
horno se calentarán. Use siempre manoplas de cocina
para sacar recipientes de comida y accesorios como la
bandeja del horno.
■ Termómetro—No use termómetros de cocina o de horno
convencionales al cocinar con microondas o en modo
combinado. El metal y mercurio en estos termómetros
podría causar la formación de arcos eléctricos y,
posiblemente, dañar el horno. No use un termómetro
en la comida que esté calentando en el horno
microondas a no ser que el termómetro esté diseñado
o recomendado para su uso en un horno microondas.
■ No use estropajos o fregados metálicos para limpiar.
Podrían caer partes del estropajo y tocar elementos
eléctricos que pudieran causar una descarga eléctrica.
■ No almacene ningún material, que no sea uno de los
accesorios que recomendamos, en este horno cuando
no esté usándose.
■ No almacene este electrodoméstico al aire libre.
No use este producto cerca del agua—por ejemplo,
en un sótano mojado, cerca de una alberca, cerca de
un fregadero o en lugares similares.
■ Mantenga el cable de corriente alejado de superficies
calientes.
■ No sumerja el cable de corriente ni el enchufe en agua.
■ No monte este electrodoméstico sobre un fregadero.
■ Revise las instrucciones de limpieza de la superficie
de la puerta en la sección Cuidado y limpieza del horno
microondas de este manual.
■ Las reparaciones de este electrodoméstico deberían
ser realizadas sólo por personal cualificado. Póngase
en contacto con el centro de servicio autorizado más
cercano para su revisión, reparación o ajuste.
■ El uso de cualquier electrodoméstico por parte de niños
debería ser supervisado de cerca por un adulto.
■ No almacene nada directamente encima de la superficie
del microondas cuando esté en operación.
GUARDE ESTAS INSTRUCCIONES
FORMACIÓN DE ARCO ELÉCTRICO
Si ve que se forman arcos eléctricos, presione el botón CLEAR/OFF (borrar/apagado) y resuelva el
problema.
Arco eléctrico es lo que, en la terminología de los
microondas, describe las chispas en el horno.
El arco eléctrico se produce cuando:
■ El estante metálico no está instalado
correctamente y toca la pared del microondas.
■ Hay un metal o papel de aluminio tocando el
lateral del horno.
■ El soporte del aro giratorio no está instalado
correctamente
■ El papel de aluminio no está envolviendo bien la
comida (hay bordes doblados hacia arriba que
actúan como antenas.)
■ Hay algún metal, como cintas de cierre con metal,
pinchos de pollo, o platos con decoración de oro
dentro del microondas.
■ Se está usando papel toalla reciclado que
contienen pequeñas porciones de metal en
el microondas.
¡PRECAUCIÓN!
3

Instrucciones de
Funcionamiento
Instrucciones de SeguridadAyuda al Cliente Resolución de Problemas
INSTRUCCIONES IMPORTANTES DE SEGURIDAD.
LEA PRIMERO TODAS LAS INSTRUCCIONES.
COMIDAS
■ No haga rosetas o palomitas de maíz en el
microondas a no ser que esté usando un accesorio
especial para prepararlas o que esté empleando
rosetas o palomitas de maíz que indiquen ser
válidas para el uso de hornos microondas.
■ No hierva huevos dentro de un horno
microondas. Se generará presión dentro de
la yema del huevo que causará que explote
pudiendo, posiblemente, dañar a alguien.
■ Si se pone en marcha el microondas sin tener
comida en su interior por más de un minuto o
dos podrían causarse daños al horno y podría
empezar un fuego. Esto hace aumentar la
temperatura alrededor del magnetrón y puede
reducir el período de vida útil del horno.
■ Debería cortarse la “piel” externa de aquellos
alimentos que no la tengan rota como las papas,
salchichas, embutidos, tomates, manzanas, hígados
de pollo y demás menudillos de aves y yemas de
huevos, para permitir la salida de vapor mientras
se cocinan.
■ Algunos productos como las yemas de huevo
y recipientes sellados—por ejemplo, jarras
cerradas—podrían explotar y no deben calentarse
en el horno microondas. Si se usa de esa forma el
horno microondas pueden causarse daños
personales.
■ AGUA SOBRECALENTADA
Líquidos, tales como agua, café, o té, se podrían
sobrecalentar más allá del punto de ebullición sin
parecer que estén hirviendo. No siempre habrá
burbujas o evidencia de que el líquido está hirviendo
cuando se extrae el envase con el líquido del
microondas. ESTO PODRÍA RESULTAR EN LÍQUIDOS
MUY CALIENTES DE REPENTE COMENZANDO A
HERVIR Y A REBOSARSE CUANDO EL ENVASE ES
MOVIDO O SI UNA CUCHARA U OTRO UTENSILIO SE
LE INTRODUCE AL LÍQUIDO.
Para reducir el riesgo de lesiones personales:
— No sobrecaliente los líquidos.
— Mueva el líquido tanto antes como a mediados
del tiempo de calentamiento.
— No use envases de lados rectos con cuellos
estrechos.
— Después del calentamiento, permita que el envase
permanezca en el microondas por un tiempo
corto antes de remover el envase.
— Use cuidado extremo cuando inserte una
cuchara u otro utensilio en el envase.
■ Las comidas cocinadas en líquidos (como la pasta)
pueden tener cierta tendencia a hervir más
rápidamente que los alimentos que contengan
menos humedad. Si esto ocurre, revise la sección
de Cuidado y limpieza del horno microondas donde
encontrará instrucciones en cuanto a la limpieza
del interior del microondas.
■ No caliente la comida del bebé en jarras de cristal,
incluso si están destapadas. Asegúrese de que los
alimentos de los niños estén bien cocinados.
Remueva la comida para distribuir el calor de
forma pareja. Tenga cuidado de que el niño
no se queme al calentar la leche de fórmula.
El contenedor puede parecer más frío de lo que
realmente está la fórmula. Pruebe siempre la
fórmula antes de dársela al bebé.
■ No descongele bebidas congeladas en botellas
de cuello estrecho (especialmente bebidas
carbonatadas.) Incluso con el contenedor abierto,
podría generarse un aumento de presión. Esto
puede causar que el contenedor explote, lo cual
podría producir daños personales.
■ Los alimentos calientes y el vapor pueden causar
quemaduras. Tenga cuidado al abrir cualquier
contenedor con comida caliente, incluso bolsas
de rosetas o palomitas de maíz, bolsas o cajas de
cocinar. Para prevenir posibles daños personales,
mantenga el vapor alejado de sus manos y rostro.
■ No cocine demasiado las papas. Podrían
deshidratarse e incendiarse, causando daños
a su horno.
■ Cocine la carne y el pollo por completo—la carne
hasta que alcance una temperatura mínima
INTERIOR de 160°F, y el pollo hasta una
temperatura INTERNA mínima de 180°F.
Cuando se cocinan a estas temperaturas se evita
la contracción de enfermedades por intoxicación.
¡PRECAUCIÓN!
4

■ Si no está seguro de que un plato pueda usarse en el
microondas, haga esta prueba: Coloque el plato que
esté probando y un vaso de medir con 237 ml (1 taza)
de agua en el horno – ponga la taza de medir dentro o
al lado del plato. Ponga el microondas en marcha, a
máxima potencia, durante 30-45 segundos. Si el plato
se calienta no debería usarse en el microondas.
Si el plato se mantiene frío y sólo se calienta la taza,
entonces el plato puede usarse de forma segura en el
microondas.
■ Los alimentos o utensilios de metal demasiado
grandes no deberían usarse en un horno de
microondas/convección ya que aumentan el riesgo
de descarga eléctrica y podrían causar un incendio.
■ A veces el suelo, el plato giratorio o las paredes del
horno pueden estar demasiado calientes para tocarlas.
Tenga cuidado al tocar el suelo, el plato giratorio o las
paredes del horno después de cocinar.
■ Si usa un termómetro de carne al cocinar, asegúrese
que sea uno seguro para usarse en hornos microondas.
■ No use productos de papel reciclado. El papel toalla, las
servilletas y el papel de cera reciclados pueden contener
motas metálicas que podrían causar la formación de
arcos eléctricos o incendiarse. Los productos de papel
que contengan nilón o filamentos de nilón tampoco
deberían usarse ya que se podrían incendiar de igual
modo.
■ Algunas bandejas de plástico (como en las que se
empaqueta la carne) tienen una cinta fina de metal
incrustada en el plato. Al ponerse en el microondas, el
metal puede quemar el suelo del horno o incendiar un
papel toalla.
■ Uso del estante accesorio:
— Quite el estante del horno cuando no lo esté usando.
— Use manoplas cuando esté manipulando el estante y
los utensilios de cocina. Podrían estar calientes.
— Asegúrese que el estante está bien colocado dentro
del horno para que no se produzcan daños.
— No cubra el estante ni ninguna parte del horno con
papel de aluminio. Esto podría causar que el horno
microondas/de convección se sobrecalentara.
■ No use su horno microondas/de convección para
secar periódicos.
■ No todo film plástico puede usarse en hornos
microondas. Revise el uso adecuado del paquete.
■ Pueden usarse papel toalla, papel encerado y film
plástico para los recipientes de forma que retengan la
humedad y para prevenir salpicaduras. Asegúrese de
proveer una forma de ventilación para que el vapor
pueda escapar del film plástico.
■ No deje productos de papel, cuando el horno
microondas/de convección esté funcionando en el
modo de BAKE (hornear) o FAST BAKE (horneo
rápido).
■ Podrían calentarse los utensilios por el calor transferido
por los alimentos calientes. Puede necesitar usar
manoplas ce cocina para manejar los utensilios.
■ Las bolsas de cocinar que puedan hervir y cualquier
bolsa de plástico firmemente cerrada, deberían cortarse,
pincharse o proveer cualquier tipo de ventilación que
indique el paquete. En caso contrario, el plástico
podría explotar mientras se cocina o después, pudiendo
causar daños físicos. Además, los recipientes de plástico
deberían permanecer, al menos, parcialmente
destapados ya que pueden sellarse fuertemente.
Cuando cocine con recipientes firmemente cubiertos
con film plástico, retire la cubierta con cuidado y
mantenga el vapor alejado de sus manos y rostro.
■ Use papel de aluminio sólo de la forma detallada en
este manual. Las comidas rápidas preparadas pueden
meterse en el microondas en bandejas de aluminio de
menos de 3/4″ de altura, quite la cubierta de aluminio
y vuélvalas a poner dentro de la caja. Cuando use
aluminio dentro de un horno microondas, mantenga
el aluminio, al menos, a una pulgada de distancia de los
laterales del horno.
■ Utensilios de plástico—Los utensilios de plástico
diseñados para su uso en microondas son muy
prácticos, pero deben usarse con cuidado. Incluso
aquellos utensilios autorizados para su uso en
microondas podrían no ser tan tolerantes como el
cristal o los materiales de cerámica en condiciones de
sobrecalentamiento y podrían ablandarse o
carbonizarse al someterlos a períodos cortos de
sobrecalentamiento. En exposiciones más largas a
sobrecalentamiento, la comida y los utensilios podrían
incendiarse.
Siga estas normas:
Use solamente plásticos aptos para microondas y
úselos siguiendo estrictamente las recomendaciones
del fabricante de los utensilios.
No introduzca en el microondas recipientes vacíos.
No permita que los niños usen utensilios de plástico
sin completa supervisión.
3
2
1
Ayuda al ClienteResolución de Problemas
Instrucciones de
Funcionamiento
Instrucciones de Seguridad
www.GEAppliances.com
UTENSILIOS DE COCINA PARA MICROONDAS
No ponga en marcha el horno sin que el plato giratorio y el soporte del plato estén encajados en su lugar.
El plato giratorio debe estar suelto para que pueda girar.
Asegúrese de que todos los utensilios de cocina que use en su horno sean aptos para microondas.
Pueden usarse la mayoría de las cazuelas, platos para cocinar, tazas de medir, tazas de flanes y botes de
cristal, o las vajillas de porcelana que no tienen decoraciones metálicas o barnices con brillo metálico.
Algunos utensilios tienen la siguiente inscripción: “puede usarse en microondas.”
5

6
Instrucciones de
Funcionamiento
Instrucciones de SeguridadAyuda al Cliente Resolución de Problemas
FAVOR DE LEER Y SEGUIR CUIDADOSAMENTE ESTA
INFORMACIÓN DE SEGURIDAD.
GUARDE ESTAS INSTRUCCIONES
INFORMACIÓN IMPORTANTE DE SEGURIDAD.
LEA PRIMERO TODA LAS INSTRUCCIONES.
INSTRUCCIONES DE TOMA DE TIERRA
Este electrodoméstico debe estar conectado a tierra.
Si se produjera un cortocircuito, la toma de tierra
reduce el riesgo de descarga eléctrica al proveer un
cable de escape para la corriente eléctrica.
Este electrodoméstico está equipado con un cable
de corriente que dispone de un hilo para toma de
tierra con un enchufe con toma de tierra. El
enchufe debe estar conectado a una toma de
corriente que esté debidamente instalada y con
salida a tierra.
Consulte con un electricista cualificado o un técnico
de reparaciones si no entiende completamente las
instrucciones sobre la toma de tierra, o si tuviese
alguna duda sobre si su aparato está debidamente
conectado a tierra.
Si la toma de corriente es un modelo estándar de
dos clavijas, es su responsabilidad personal y su
obligación el reemplazarla por una toma adecuada
para tres clavijas con conexión a tierra.
Bajo ninguna circunstancia debe cortar o quitar la
tercera clavija (tierra) del cable de corriente.
No use un enchufe adaptador con este
electrodoméstico.
No use un cable extensor de corriente con este
electrodoméstico. Si el cable de corriente es
demasiado corto, haga que un electricista cualificado
o un técnico de reparaciones instalen una toma de
corriente cerca del electrodoméstico.
Para un mejor funcionamiento, enchufe este
electrodoméstico en una toma de corriente exclusiva
para evitar parpadeos de luz, fusibles quemados o
que salte el diferencial.
¡ADVERTENCIA!
ADVERTENCIA: El uso indebido del enchufe de tierra puede resultar en riesgo de descarga
eléctrica.
EL VENTILADOR EXTRACTOR
El ventilador se pondrá en funcionamiento de
forma automática bajo ciertas circunstancias
(ver función de Ventilador Automático). Prevenga
el que empiece algún fuego al cocinar y que se
extienda mientras el ventilador del respiradero
está en marcha.
■ Limpie a menudo la parte inferior del
microondas. No permita que se acumule grasa
en el microondas o en los filtros del ventilador.
■ Si la grasa se incendiara en las unidades de la
cocina (fogones) bajo el horno microondas,
sofoque cualquier sartén en llamas de la unidad
de cocina por completo con una tapa, una
bandeja de galletas o cualquier otra bandeja
plana.
■ Tenga cuidado al limpiar los filtros del
ventilador extractor. Los productos de limpieza
corrosivos, como los limpia-hornos a base de
lejía, pueden dañar los filtros.
■ Ponga en marcha el extractor cuando esté
cocinando comidas con llama bajo el
microondas.
■ Nunca deje las unidades de la cocina (fogones)
bajo su microondas sin atención cuando se esté
trabajando a altas temperaturas. Cuando la
comida entra en ebullición se generan humos y
se derraman grasas que pudieran incendiarse y
propagarse si el ventilador del microondas está
funcionando. Para minimizar el
funcionamiento del extractor automático, use
utensilios de cocina de tamaño adecuado y use
el fuego rápido en las unidades de la cocina
(fogones) sólo cuando sea necesario.

Kits opcionales.
www.GEAppliances.com
7
Kits de panel de relleno
■ JX40CT—Bisqué
■ JX40WH—Blanco
■ JX41—Negro
Al cambiar la tapa de una cocina encimera de
36″ los kits de paneles de relleno ocupan el
espacio adicional proveyendo un aspecto de
montaje a medida.
Sólo para instalarse entre armarios, no pueden
instalarse al final de los armarios. Cada kit
contiene dos paneles de relleno de 3″.
Kits de filtros
■ JX81A—Kit de filtro de carbón vegetal de
recirculación
Los kits de filtros se usan cuando el horno no
puede tener una salida al exterior.
Disponibles en su distribuidor GE por un costo adicional.
Ayuda al ClienteResolución de Problemas
Instrucciones de
Funcionamiento
Instrucciones de Seguridad

Mango de apertura del enganche de la puerta.
Enganches de puerta.
Ventana con escudo metálico. La ventana
permite ver como se cocinan los alimentos y
evita que salgan microondas del horno.
Panel de control y dial selector.
Base giratoria extraíble. El plato giratorio y su
soporte deben estar en su lugar cuando se use
el horno. El plato giratorio puede sacarse para
su limpieza.
Soporte del plato giratorio extraíble. El soporte
del plato giratorio debe estar en su lugar
cuando se use el horno.
Estante. Usar con Bake (cocinar) o Fast Bake
(cocción rápida). (No usar mientras el
microondas esté cocinando.) Para mayor
eficacia, use el estante en su posición “low”
(baja), colgándolo por los soportes del estante.
Las funciones de su horno.
Su modelo puede tener otras características y apariencia que las ilustradas en este manual.
900 Vatios
8
Instrucciones de
Funcionamiento
Instrucciones de SeguridadAyuda al Cliente Resolución de Problemas
Funciones del horno

Ayuda al ClienteResolución de Problemas
Instrucciones de
Funcionamiento
Instrucciones de Seguridad
9
Usted puede cocinar con Microondas, Cocción o Cocción Rápida.
Funciones de cocción de su horno
por microondas / convección. www.GEAppliances.com
Controles de cocción
Dial Selector
Funciones de tiempo de cocción por microondas y automáticas
Presione Gire y apriete el dial para aceptar
TIME COOK (cocción por tiempo) Cantidad de tiempo de cocción
Presione una o dos veces
MICRO EXPRESS cocinar/
Añadir 30 seg. ¡Empieza inmediatamente!
DEFROST (descongelar)
Presione una vez (Tiempo) Cantidad de tiempo de descongelación
Presione dos veces (Automático) Peso de alimentos hasta seis libras
Presione tres veces (Rápido) Peso de alimentos hasta una libra
Nivel de POTENCIA Nivel de potencia 1–10
Funciones de sensor
Presione Gire y apriete el dial para aceptar Opción
POPCORN (rosetas o palomitas de maíz)
¡Empieza inmediatamente! Más/menos tiempo
Presione una vez (regular)
Presione dos veces (merienda)
REHEAT (recalentar) ¡Empieza inmediatamente! Más/menos tiempo
Presione una vez (plato)
Presione dos veces (1/2 a una taza)
Presione tres veces (1 a 2 tazas)
BEVERAGE (bebida) ¡ Empieza inmediatamente!
AUTO COOK (cocinar automáticamente)
Tipo de alimentos 1–7 Más/menos tiempo
Baking (cocción)
Presione Gire y apriete el dial para aceptar
BAKE (cocinar) Temperatura de horno y tiempo de cocción
Fast Baking (cocción rápida)
Presione Gire y apriete el dial para aceptar
FAST BAKE (cocción rápida) Temperatura de horno y tiempo de cocción

10
Instrucciones de
Funcionamiento
Instrucciones de SeguridadAyuda al Cliente Resolución de Problemas
No use el estante cuando cocine
con el microondas.
Use siempre el estante cuando esté
horneando.
Método de
cocción
La energía
microondas se
distribuye de forma
pareja en todo el
horno para que la
comida se cocine
de forma rápida y
completa.
Fuente de calor
Energía microondas.
Conducción del
calor
Calor producido
dentro de la comida
por penetración
instantánea de
energía.
Beneficios
Rápida, alta eficacia
de cocción. El horno
y sus alrededores no
se calientan.
Fácil de limpiar.
Método de
cocción
El aire caliente
circula alrededor de
la comida para
producir exteriores
dorados y mantener
los jugos en el
interior.
Fuente de calor
Aire caliente en
circulación.
(Convección)
Conducción del
calor
El calor se conduce
desde el exterior de
la comida hacia su
interior.
Beneficios
Ayuda a dorar y
sella el sabor en el
interior. Algunos
alimentos se cocinan
más rápidamente
que en hornos
convencionales.
Método de
cocción
La energía
microondas y el
calor de convección
se combinan para
poder cocinar
alimentos en hasta
la mitad del tiempo
de los hornos
convencionales y,
a la vez, dorar por
fuera y mantener
los líquidos.
Fuente de calor
Energía microondas
y aire caliente en
circulación.
Conducción del
calor
La comida se
calienta por energía
instantánea por
penetración y calor
proveniente del
exterior de los
alimentos.
Beneficios
Tiempo de cocción
acortado por la
energía microondas,
además el calor de
convección dora y
produce crujientes
exteriores.
Use siempre el estante con Fast
Bake.
Opciones de cocción disponibles.
Cocción por microondas
Baking (cocción)
Fast Baking (cocción rápida)
Su horno también tiene la opción de cocción rápida (Fast Baking), usando la energía
microondas junto a la cocción por convección. De esta forma cocina con velocidad y
precisión, proporcionando al mismo tiempo alimentos dorados y crujientes.
Cuando se usa el horno, se emplea un elemento calefactor para elevar la temperatura del
aire dentro del horno. Puede programarse cualquier temperatura entre los 225°F y los
450°F. Un ventilador hace circular ligeramente el aire por todo el horno, por encima y
alrededor de la comida, produciendo que se dore por fuera y que los interiores sean ricos
y jugosos. Esta circulación de aire caliente es llamada convección.
Debido a que el aire se mantiene en constante movimiento, al no permitirse la formación
de una capa de aire más frío alrededor de la comida, algunas comidas se cocinan más
rápidamente que en un horno de cocina normal.
Su horno usa energía de microondas para cocinar según un período de tiempo
predeterminado, según el peso o de forma automática por medio de un sensor.
El microondas por sensor funciona detectando el incremento de humedad liberada
durante la cocción. El horno ajusta de forma automática el tiempo de cocción a varios
tipos y cantidades de alimentos.

Ayuda al ClienteResolución de Problemas
Instrucciones de
Funcionamiento
Instrucciones de Seguridad
11
Funciones de microondas por tiempo y automático.
www.GEAppliances.com
Time Cook (cocción por tiempo)
Time Cook I (cocción por tiempo I)
Le permite usar el microondas por un
período de entre 15 segundos y 95 minutos.
El Nivel de potencia 10 (alto) (power level 10
[High]) se selecciona de forma automática
pero puede cambiarlo para mayor
flexibilidad.
Presione el botón TIME COOK (cocción
por tiempo).
Gire el dial para ajustar el tiempo de
cocción y presione el dial para
seleccionar
Cambie el nivel de potencia si no quiere
que cocine a toda potencia. (Presione
POWER. Gire el dial para buscar.
Presione el dial para seleccionar.)
Presione el dial o el botón START/PAUSE
para empezar a cocinar.
Cuando use Time Cook puede abrir la
puerta para revisar la comida. Cierre la
puerta y presione el dial o START/PAUSE
para seguir cocinando.
NOTA: El tiempo de cocción puede cambiarse en
cualquier momento mientras se cocina girando el
dial. Usted puede también cambiar el nivel de
energía presionando el botón de energía POWER.
Time Cook II (cocción por tiempo II)
Le permite cambiar los niveles de potencia
de forma automática mientras cocina.
Se hace de la siguiente forma:
Presione el botón TIME COOK (cocción
por tiempo).
Gire el dial para ajustar el primer
tiempo de cocción y presione el dial
para seleccionar.
Cambie el nivel de potencia si no quiere
que cocine a toda potencia. (Presione
POWER. Gire el dial para seleccionar.
Presione el dial para seleccionar.)
Presione el botón TIME COOK (cocción
por tiempo) de nuevo.
Gire el dial para ajustar el segundo
tiempo de cocción y presione el dial
para seleccionar.
Cambie el nivel de potencia si no quiere
que cocine a toda potencia. (Presione
POWER. Gire el dial para seleccionar.
Presione el dial para seleccionar.)
Presione el el dial o el botón
START/PAUSE para empezar a cocinar.
Cuando acaba Time Cook I, Time Cook II
empieza a funcionar.
NOTA: El tiempo de cocción puede cambiarse en
cualquier momento mientras se cocina girando
el dial. Usted puede también cambiar el nivel de
energía presionando el botón de energía POWER.
7
6
5
4
3
2
1
4
3
2
1
Micro express cook
(cocción micro express)
Esta es la forma rápida de ajustar y empezar
a cocinar en bloques de 30 segundos cada
vez que se aprieta el botón MICRO EXPRESS.
El tiempo de cocción puede cambiarse en
cualquier momento mientras se cocina
girando el dial.
El nivel de potencia estará
automáticamente seleccionado a 10 y el
horno empezará inmediatamente.
El nivel de potencia puede cambiarse
mientras el tiempo se va agotando. Presione
el botón POWER gire el dial y presiónelo
para seleccionar.
PUSH TO ENTER
TURN TO SELECT
PUSH TO ENTER
TURN TO SELECT
Cómo usar el dial
Podrá hacer selecciones en el horno
girando el dial y presionando para ingresar
la selección.
Usted también puede presionar el dial
en vez de botón START/PAUSE para una
programación más rápida del horno.
PUSH TO ENTER
TURN TO SELECT

Instrucciones de
Funcionamiento
Instrucciones de SeguridadAyuda al Cliente Resolución de Problemas
12
Descongelación por tiempo
Use Time Defrost para descongelar por un
período de tiempo seleccionado.
Presione el botón DEFROST
(descongelar) una vez.
Gire el dial para seleccionar el tiempo
que desee. Presione el dial para
seleccionar.
Presione el botón START/PAUSE para
empezar a descongelar.
Dé la vuelta a la comida si aparece el
mensaje TURN FOOD OVER.
Puede variar el tiempo de descongelación
en cualquier momento mientras se
descongela girando el dial.
El nivel de potencia está preseleccionado a
3, pero puede cambiarlo. Puede
descongelar artículos pequeños
rápidamente elevando el nivel de potencia
una vez introducido el tiempo. El nivel de
potencia 7 (power level 7) recorta el tiempo
total de descongelación a la mitad; el nivel
de potencia 10 (power level 10) recorta el
tiempo total en, aproximadamente, una
tercera parte. Sin embargo, la comida
necesitará más atención de lo normal.
Durante la descongelación podría oírse
un ruido de golpes sordo. Esto es normal
cuando el horno no está funcionando
en la potencia High (Alta).
Consejos de descongelación
■
La comida congelada en papel o plástico
puede descongelarse en el paquete. Los
paquetes cerrados deberían cortarse,
pincharse o debería proveerse cualquier
tipo de ventilación, DESPUÉS de haber
descongelado la comida parcialmente.
Los recipientes de plástico deberían
dejarse parcialmente destapados.
■ Las comidas preempaquetadas
congeladas de tamaño familiar pueden
descongelarse y hacerse en el
microondas. Si la comida está en un
contenedor de aluminio, pásela a un
plato seguro para su uso en microondas.
■ Las comidas que se echan a perder
rápidamente no deberían dejarse fuera
por un período de más de una hora tras
su descongelación. La temperatura
ambiente promueve el crecimiento de
bacterias dañinas.
■ Para la descongelación más igualada de
alimentos mayores, como asados, use
Auto Defrost. Asegúrese de que las carnes
grandes estén completamente
descongeladas antes de cocinarlas.
■ Cuando esté descongelada, la comida
debería estar fría pero blanda en todas
sus áreas. Si aún está ligeramente helada,
devuélvala al microondas por muy poco
tiempo, o déjela fuera unos minutos.
4
3
2
1
Funciones de microondas por tiempo y automático.
PUSH TO ENTER
TURN TO SELECT
DEFROST

Ayuda al ClienteResolución de Problemas
Instrucciones de
Funcionamiento
Instrucciones de Seguridad
13
Auto Defrost (descongelación automática)
Use Auto Defrost para carne, aves y pescados
que pesen hasta seis libras.
Use Time Defrost para la mayoría del resto de
comidas congeladas.
Auto Defrost ajusta de forma automática los
tiempos de descongelación y los niveles de
potencia para producir resultados de
descongelación parejos para carnes, aves
y pescado.
■ Saque la carne del paquete y colóquela
en un plato apto para microondas.
Presione el botón DEFROST
(descongelar) dos veces.
Gire el dial hasta alcanzar el peso de la
comida usando la Tabla de Conversión a
la derecha. Por ejemplo, ponga el dial a
1.2 para 1,2 libras (1 libra, 3 onzas.)
Presione el dial para seleccionar.
Presione el botón START/PAUSE para
empezar a descongelar.
De la vuelta a la comida si aparece el
mensaje TURN FOOD OVER.
■ Retire la carne descongelada o cubra las
áreas calientes con pequeños recortes de
papel de aluminio.
■ Una vez descongeladas, la mayoría de las
carnes necesitan 5 minutos en reposo
para que acaben de descongelarse. Los
asados grandes deberían dejarse reposar
por unos 30 minutos.
Tabla de conversión
Si el peso de la comida se calcula en libras y onzas,
las onzas deberán convertirse a décimas (.1) de libra.
Peso de la comida Introduzca el peso de la
en onzas comida (décimas de libra)
1–2 .1
3.2
4–5 .3
6–7 .4
8.5
9–10 .6
11 .7
12–13 .8
14–15 .9
4
3
2
1
Descongelación rápida
Fast Defrost ajusta de forma automática
los tiempos de descongelación y los niveles
de potencia para producir resultados de
descongelación parejos para carnes, aves
y pescado que pesen hasta una libra.
■ Saque la carne del paquete y colóquela
en un plato apto para microondas.
Presione el botón DEFROST
(descongelar) tres veces.
Gire el dial hasta alcanzar el peso de la
comida usando la Tabla de Conversión a
la derecha. Por ejemplo, ponga el dial a
.5 para 0,5 libras (8 onzas) Presione el
dial para seleccionar.
Presione el botón START/PAUSE para
empezar a descongelar.
De la vuelta a la comida si aparece el
mensaje TURN FOOD OVER.
■ Retire la carde descongelada o cubra las
áreas calientes con pequeños recortes de
papel de aluminio.
■ Una vez descongeladas, la mayoría de
carnes necesitan 5 minutos en reposo
para que acaben de descongelarse.
Tabla de conversión
Si el peso de la comida se calcula en libras y onzas,
las onzas deberán convertirse a décimas (.1) de libra.
Peso de la comida Introduzca el peso de la
en onzas comida (décimas de libra)
1–2 .1
3.2
4–5 .3
6–7 .4
8.5
9–10 .6
11 .7
12–13 .8
14–15 .9
4
3
2
1
www.GEAppliances.com
PUSH TO ENTER
TURN TO SELECT
DEFROST
PUSH TO ENTER
TURN TO SELECT
DEFROST

14
Instrucciones de
Funcionamiento
Instrucciones de SeguridadAyuda al Cliente Resolución de Problemas
Cómo cambiar el nivel de potencia.
El nivel de potencia puede introducirse
o cambiarse de forma inmediata tras
introducir el tiempo de cocción (Time
Cook), el tiempo de descongelación
(Time Defrost), o Express Cook. El nivel
de potencia también puede cambiarse
durante la cuenta atrás.
Primero, siga las instrucciones para
el tiempo de cocción (Time Cook),
el tiempo de descongelación (Time
Defrost), o Express Cook.
Presione el botón POWER.
Gire el dial, en el sentido de las agujas
del reloj, para aumentar y en el sentido
contrario para disminuir la potencia.
Presione el dial para seleccionar.
Presione el botón START/PAUSE para
empezar a cocinar.
Los niveles de potencia variables añaden
flexibilidad a la cocina con microondas. Los
niveles de potencia del horno microondas
pueden compararse con las unidades de la
encimera (fogones) en una cocina. Cada
nivel de potencia le proporciona energía
microondas durante cierto porcentaje del
tiempo. Nivel de potencia 7 (power level 7)
es energía microondas al 70% del tiempo.
Nivel de potencia 3 (power level 3) es energía
al 30% del tiempo. Normalmente se
cocinará en Alto (nivel de potencia 10) (High,
power level 10) que proporciona una
potencia del 100%. Power level 10 le
permitirá cocinar más rápido, pero la
comida, posiblemente, necesitará que la
agite, gire o dé la vuelta más a menudo.
Un nivel inferior cocinará la comida de
forma más pareja y no necesitará que la
agite, gire o dé la vuelta tanto. Algunas
comidas pueden tener mejor sabor, textura
o aspecto si se usa un nivel inferior. Use un
nivel de potencia inferior cuando esté
cocinando comidas que tengan tendencia
a hervir, como las papas gratinadas.
Los períodos de descanso (cuando se acaba
el ciclo de la energía microondas) le dan
tiempo a la comida a “igualarse” o transferir
el calor a su interior. Se muestra un ejemplo
de esto con el ciclo de descongelación--
power level 3 Si la energía microondas no
funcionara en ciclos, la parte externa de la
comida se cocinaría antes de que el interior
se descongelara.
Estos son algunos ejemplos de aplicaciones
para diferentes niveles de potencia:
Alta 10: Pescado, tocino o bacón, vegetales,
líquidos que hierven.
Media alta 7: Cocción suave de carne y aves,
sirve para cocinar guisos y para recalentar.
Media 5: Cocina lenta y tierna para
estofados o guisos y para partes menos
tiernas de carne.
Baja 2 o 3: Para descongelar, cocer a “fuego”
lento, para salsas delicadas.
Algo caliente 1: Mantener la comida
caliente, ablandar la mantequilla.
4
3
2
1
PUSH TO ENTER
TURN TO SELECT
POWER

15
Características de microondas por sensor.
www.GEAppliances.com
Sensor de humedad
Qué sucede cuando usa las funciones de sensores:
Las funciones de Sensor detectan la mayor humedad liberada durante la cocción.
El horno ajusta automáticamente el tiempo de cocción a los diferentes tipos y cantidades
de comida.
No utilice las funciones de Sensor dos veces consecutivas en la misma porción de comida.
Puede resultar en que los alimentos se cocinen en exceso o se quemen. Si la comida no se
ha cocinado por completo después de la cuenta regresiva, use la función Time Cook para
tiempo de cocción adicional.
■ Es esencial usar los recipientes y las tapas apropiados para cocinar por sensor de forma
óptima.
■ Use siempre recipientes aptos para microondas y cúbralos con tapas o film de plástico
agujereado. No use nunca recipientes cerrados por completo—pueden hacer que el
vapor no salga y causar que la comida se cocine demasiado.
■ Asegúrese que tanto el exterior de los recipientes como el interior del horno
microondas estén secos antes de poner la comida en el horno. Las acumulaciones
de humedad que se convierten en vapor pueden engañar al sensor.
Seque los platos para que no
engañen al sensor.
Cubierto
Agujereado
Auto Cook (cocinar automáticamente)
Dado que la mayoría de los recipientes deben estar cubiertos durante Auto Cook,
esta función trabaja mejor con comidas que quiera hacer al vapor o en las que quiera
mantener la humedad.
NOTA: No se recomienda el uso del estante de metal con Auto Cook.
Comidas recomendadas
Con esta función se pueden cocinar una gran variedad de comidas incluyendo carnes,
pescado y vegetales.
Comidas no recomendadas
No deberían cocinarse usando esta función aquellas comidas que deban cocinarse
descubiertas, aquellas que requieran atención constante, aquellas que requieran añadir
ingredientes durante su cocción y comidas que deban tener apariencia seca o con una
superficie crujiente. Es mejor cocinar todas estas usando Time Cook.
Ayuda al ClienteResolución de Problemas
Instrucciones de
Funcionamiento
Instrucciones de Seguridad

Instrucciones de
Funcionamiento
Instrucciones de SeguridadAyuda al Cliente Resolución de Problemas
16
PUSH TO ENTER
TURN TO SELECT
Auto Cook (cocinar automáticamente)
Sitúe la comida cubierta en el horno y cierre la
puerta. Presione el botón AUTO COOK (cocción
automática). SELECT FOOD TYPE (seleccione
tipo de comida) aparecerá en la pantalla.
Gire el dial al tipo de comida deseado. Presione
para seleccionar
Ver la Tabla de Tipos de Comidas con Sensor de más
abajo para tipos específicos de comidas e
instrucciones.
El horno empieza a funcionar inmediatamente.
NOTA: Si la puerta se abre mientras se está
seleccionando el control, ciérrela y presione el
botón START/PAUSE para empezar a cocinar.
Si la comida no se ha cocinado por completo
después de la cuenta regresiva, use la función
Time Cook para tiempo de cocción adicional.
No abra la puerta del horno antes de que el tiempo de cuenta
atrás aparezca en la pantalla—el vapor que se escapa del
horno puede afectar la cocción. Si se abre la puerta, ciérrela y
presione START/PAUSE inmediatamente.
Si selecciona carne picada (ground meat), el horno
puede que le indique que le extraiga el líquido y
la remueva. Abra la puerta, seque la carne y cierre
la puerta. Presione el botón START/PAUSE, si fuera
necesario, para seguir con la cocción.
Consejos de cocción
■ Cuando el horno hace una señal y aparece el
tiempo hacia atrás, la puerta puede abrirse para
remover, girar o dar la vuelta a la comida. Cierre
la puerta y presione START/PAUSE para seguir
cocinando.
■ Ajuste la cantidad de comida al tamaño del
recipiente. Llene los recipientes por lo menos
hasta la mitad.
■ Asegúrese de que la parte exterior del recipiente
y el interior del horno estén secos.
■ Una vez completado el ciclo de Cocción, si la
comida necesita cocerse más, vuélvala a poner en
el horno y use Time Cook para acabar de
cocinarla.
Cómo ajustar la configuración automática del horno
para un tiempo de cocción más corto o más largo
(no disponible para todos los tipos de alimentos)
Para restar el 10% del tiempo de cocción
automático:
En cualquier momento después de que el conteo
regresivo inicie, gire el dial en el sentido contrario a
las agujas del reloj y presiónelo para seleccionar.
Para agregar el 10% al tiempo de cocción
automático:
En cualquier momento después de que el conteo
regresivo inicie, gire el dial en el sentido de las
agujas del reloj y presione para seleccionar.
2
1
Características de microondas por sensor.
Tabla de tipos de comidas con sensor
Tipo de comida Raciones Tamaños de las raciones Comentarios
Piezas de pollo 1 a 4 2 a 8 Use un plato ovalado, cuadrado o redondo.
piezas Cubra con envoltura plástica ventilada.
Pescado 1 a 4 4 a 16 oz. Use un plato ovalado, cuadrado o redondo.
Cúbralo con un film plástico agujereado.
Carne picada — 8 a 32 oz. Use plato de guisos redondo. Reparta la carne
(Ternera, Puerco, Pavo) en el plato. Cúbralo con un papel de cera o un
film plástico agujereado.
Papas 1 a 4 8 a 32 oz. Rompa la piel con un tenedor. Arréglelas en un
patrón en forma de estrella al centro del plato
giratorio.
Vegetales enlatados 1 a 4 4 a 16 oz. Use cazuela de guisos para microondas, tazón
o bol. Cúbralo con una tapa o un film plástico
agujereado.
Vegetales frescos 1 a 4 4 a 16 oz. Use cazuela de guisos para microondas, tazón
o bol. Añada dos cucharadas de agua por cada
ración. Cúbralo con una tapa o un film plástico
agujereado.
Vegetales congelados 1 a 4 4 a 16 oz. Use cazuela de guisos para microondas, tazón
o bol. Siga las instrucciones del paquete en
cuanto al agua a añadir. Cúbralo con una tapa o
un film plástico agujereado.
NOTA: No utilice esta función
dos veces consecutivas en la
misma porción de comida.
Puede resultar en que los
alimentos se cocinen en
exceso o se quemen.

Reheat (recalentar)
La función de recalentar (Reheat) vuelve a calentar
raciones de comidas previamente cocinadas o un
plato de sobras.
Sitúe la taza de líquido o la comida cubierta en
el horno. Presione REHEAT una, dos o tres
veces. El horno empieza a funcionar
inmediatamente.
Presione una vez para un plato de sobras.
Presione dos veces para 1/2 o una taza llena.
Presione tres veces para cantidades de 1 a 2
tazas llenas.
El horno da una señal cuando advierte que hay
vapor y empieza a mostrarse hacia atrás el
tiempo que queda.
No abra la puerta del horno hasta que el tiempo
en el horno aparezca en cuenta atrás. Si se abre la
puerta, ciérrela y presione START inmediatamente.
Una vez que haya retirado la comida del horno, remuévala,
si es posible, para igualar la temperatura. Las comidas
recalentadas pueden tener grandes diferencias de
temperatura. Algunas áreas pueden estar
extremadamente calientes.
Si la comida no está suficientemente caliente
después de la cuenta regresiva, use Time Cook
tiempo adicional para recalentar.
No está recomendado el uso de reheat para algunas
comidas
Es mejor usar Time Cook en estos casos:
■ Productos de pan.
■ Comidas que deben recalentarse sin cubrir.
■ Alimentos que necesiten removerse o rotarse.
■ Comidas que necesiten tener un aspecto seco o
una superficie crujiente tras ser recalentados.
Cómo ajustar la configuración automática del horno
para un mayor o menor tiempo de cocción
Para sustraer un 10% del tiempo de cocción
automático:
Antes de que acaben los primeros 30 segundos
desde que el horno se pone en funcionamiento,
gire el dial en el sentido contrario a las agujas del
reloj y presiónelo para seleccionar
Para añadir un 10% del tiempo de cocción
automático:
Antes de que acaben los primeros 30 segundos
desde que el horno se pone en funcionamiento,
gire el dial en el sentido de las agujas del reloj y
presiónelo para seleccionar.
2
1
Beverage (bebida)
Presione el botón BEVERAGE para calentar una
taza de café u otra bebida de 8–10 oz. El horno
empieza a funcionar inmediatamente.
Las bebidas calentadas con la función Beverage pueden
estar muy calientes. Saque el recipiente con cuidado.
Si la comida no se ha cocinado por completo
después de la cuenta regresiva, use la función
Time Cook para tiempo de cocción adicional.
BEVERAGE
REHEAT
Ayuda al ClienteResolución de Problemas
Instrucciones de
Funcionamiento
Instrucciones de Seguridad
17
www.GEAppliances.com
Popcorn (rosetas o palomitas de maíz)
Para usar la función Popcorn:
Siga las indicaciones del paquete, use
Time Cook si el paquete pesa menos de 1,5
onzas o es mayor de 3,5 onzas. Sitúe el paquete
de rosetas en el centro del plato giratorio.
Presione el botón POPCORN una o dos veces.
El horno empieza a funcionar inmediatamente.
Presione una vez para un tamaño de bolsa de
palomitas normal (3,0 a 3,5 oz).
Presione dos veces para un tamaño de bolsa de
palomitas tamaño snack (1,5 a 1,75 oz.).
Si abre la puerta mientras la pantalla dice
POPCORN, aparecerá un mensaje de error. Cierre
la puerta, presione CLEAR/OFF y vuelva a empezar.
Si la comida no se ha cocinado por completo
después de la cuenta regresiva, use la función Time
Cook para tiempo de cocción adicional.
Cómo ajustar la configuración automática para palomitas
de maíz para un mayor o menor tiempo de cocción
Si se da cuenta de que en la bolsa de la marca de
palomitas que usa queda mucho maíz sin reventar o
lo cuece demasiado, puede añadir o substraer
20–30 segundos al tiempo automático de cocción.
Para sustraer tiempo:
Antes de que acaben los primeros 30 segundos
desde que el horno se pone en funcionamiento,
gire el dial en el sentido contrario a las agujas del
reloj para 20 segundos (-) menos de tiempo de
cocción. Presione para seleccionar. Gírelo de nuevo
para reducir el tiempo de cocción otros 10 segundos
(- -) para alcanzar un total de 30 segundos menos.
Presione para seleccionar.
Para añadir tiempo:
Antes de que acaben los primeros 30 segundos
desde que el horno se pone en funcionamiento,
gire el dial en el sentido de las agujas del reloj 20
segundos (+) más al tiempo de cocción. Presione
para seleccionar. Gírelo de nuevo para añadir otros
10 segundos (++) y sumar un total de 30 segundos
adicionales. Presione para seleccionar.
2
1
Use sólo con palomitas o
rosetas preempaquetadas
para microondas que pesen
de 1,5 a 3,5 onzas.
NOTA: No utilice esta función
dos veces consecutivas en la
misma porción de comida.
Puede resultar en que los
alimentos se cocinen en
exceso o se quemen.
NOTA: No utilice esta función
dos veces consecutivas en la
misma porción de comida.
Puede resultar en que los
alimentos se cocinen en
exceso o se quemen.
NOTA: No utilice esta función
dos veces consecutivas en la
misma porción de comida.
Puede resultar en que los
alimentos se cocinen en
exceso o se quemen.

Instrucciones de
Funcionamiento
Instrucciones de SeguridadAyuda al Cliente Resolución de Problemas
18
El horneado usa un elemento calefactor para elevar la temperatura del aire dentro del
horno. Puede programarse cualquier temperatura entre los 225°F y los 450°F. Un ventilador
hace circular ligeramente el aire por todo el horno, por encima y alrededor de la comida,
produciendo que se dore por fuera y que los interiores sean ricos y jugosos. Esta circulación
de aire caliente es llamada convección.
Debido a que el aire se mantiene en constante movimiento, al no permitirse la formación
de una capa de aire más frío alrededor de la comida, algunas comidas se cocinan más
rápidamente que en un horno de cocina normal.
Vea la sección de Consejos de Utensilios de Cocina para información sobre utensilios recomendados.
Para conseguir mejores resultados...
Use siempre el estante en la posición baja cuando esté horneando.
El estante se necesita para la buena circulación del aire y para dorar.
Vea la sección de Consejos de Utensilios de Cocina para información sobre utensilios recomendados.
Hornear con precalentamiento
Presione el botón BAKE (hornear).
Gire el dial para ajustar el tiempo del
horno y presiónelo para seleccionar.
No introduzca el tiempo de horneado
aún. (El tiempo de cocción se
introducirá más adelante, una vez
que el horno se haya recalentado.)
Presione el botón START/PAUSE para
empezar a precalentar.
El horno dará una señal cuando esté
recalentado. Si no abre la puerta en
menos de una hora, el horno se
apagará de forma automática.
Abra la puerta del horno y, con
cuidado, introduzca la comida en
el mismo.
Cierre la puerta del horno. Gire el
dial para ajustar el tiempo de cocción y
presione START/PAUSE para empezar a
cocinar.
Cuando se acabe de cocinar, el horno
dará una señal y se apagará.
NOTA: Podrá cambiar el tiempo de cocción en
cualquier momento durante la cocción girando
el dial.
Podrá cambiar la temperatura del horno
en cualquier momento durante la cocción
presionando el botón POWER. Gire el dial para
fijar la temperatura del horno y presione el dial
para seleccionar.
Para ver el tiempo de cocción y la temperatura
del horno durante el tiempo de cocinado,
presione el botón BAKE (Hornear).
Reduzca la temperatura de la receta del horno
en 25°F para alimentos horneados.
7
6
5
4
2
1
3
PUSH TO ENTER
TURN TO SELECT
Hornear sin precalentamiento
Si su receta no necesita precalentar
el horno, presione el botón BAKE.
Gire el dial para ajustar la temperatura
del horno y presiónelo para
seleccionar.
Gire el dial para ajustar el tiempo de
cocción y presiónelo para seleccionar.
Presione el botón START/PAUSE para
poner el horno en marcha.
NOTA: Podrá cambiar el tiempo de cocción en
cualquier momento durante la cocción girando
el dial.
Podrá cambiar la temperatura del horno
en cualquier momento durante la cocción
presionando el botón POWER. Gire el dial para
fijar la temperatura del horno y presione el dial
para seleccionar.
Para ver el tiempo de cocción y la temperatura
del horno durante el tiempo de cocinado,
presione el botón BAKE (Hornear).
Reduzca la temperatura de la receta del horno
en 25°F para alimentos horneados.
4
3
2
1
PUSH TO ENTER
TURN TO SELECT
Características de horneado.
Use siempre el estante en la posición
baja cuando esté horneando.

Si su receta no necesita precalentar el horno,
presione el botón FAST BAKE.
Gire el dial para ajustar la temperatura del horno
y presiónelo para seleccionar.
Gire el dial para ajustar el tiempo de cocción y
presiónelo para seleccionar.
Presione el dial o el botón START/PAUSE para
poner el horno en marcha.
NOTA: Podrá cambiar el tiempo de cocción en cualquier
momento durante la cocción girando el dial.
Podrá cambiar la temperatura del horno y el nivel de potencia
del microondas en cualquier momento durante la cocción
presionando el botón POWER. Gire el dial para fijar la
temperatura del horno y presione el dial para seleccionar.
Luego, gire el dial para fijar el nivel del microondas, de 1
hasta 4 y presione el dial para seleccionar. El nivel
predeterminado del horno es 4.
Para ver el tiempo de cocción y la temperatura del horno
durante el tiempo de cocción, presione el botón FAST BAKE
(Hornear
rápido
).
NOTA:
■ Algunas recetas requieren el precalentamiento.
■ Revise la sección de Consejos de Utensilios de Cocina
para usar los utensilios correctos al usar Fast Bake.
■ No use utensilios metálicos con Fast Bake.
■ Ver la Sección Mejor Método de Cocción para
determinar cuáles alimentos son apropiados
para cocinar usando Fast Bake.
■ Reduzca el tiempo de cocinado de la receta
en 25%.
3
2
1
Horneo rápido sin precalentamiento
4
PUSH TO ENTER
TURN TO SELECT
Ayuda al ClienteResolución de Problemas
Instrucciones de
Funcionamiento
Instrucciones de Seguridad
19
Fast Bake le ofrece las mejores funciones de la energía de microondas con la cocina
por convección. Las microondas cocinan la comida de forma rápida y la circulación de
convección del aire caliente dora los alimentos de forma maravillosa. Puede programarse
cualquier temperatura entre los 225°F y los 450°F.
Para conseguir mejores resultados...
Use siempre el estante en la posición baja cuando esté horneando rápido.
El estante se necesita para la buena circulación del aire y para dorar.
Vea la sección de Consejos de Utensilios de Cocina para información sobre utensilios
recomendados.
Ver la Sección Mejor Método de Cocción para determinar cuáles alimentos son apropiados para
cocinar usando Fast Bake.
Horneo rápido con precalentamiento
Presione el botón FAST BAKE.
Gire el dial para ajustar el tiempo del
horno y presiónelo para seleccionar.
No introduzca el tiempo de cocción
FAST BAKE aún. (El tiempo de cocción
se introducirá más adelante, una vez que
el horno se haya recalentado.)
Presione el dial o el botón START/PAUSE
para empezar a precalentar.
El horno dará una señal cuando esté
recalentado. Si no abre la puerta en
menos de una hora, el horno se apagará
de forma automática.
Abra la puerta del horno y, con cuidado,
introduzca la comida en el mismo.
Cierre la puerta del horno. Gire el
dial para ajustar el tiempo de cocción y
presiónelo para seleccionar. Presione el
dial o el botón START/PAUSE para
empezar a cocinar.
Cuando se acabe de cocinar, el horno
dará una señal y se apagará.
NOTA: Podrá cambiar el tiempo de cocción en
cualquier momento durante la cocción girando
el dial.
Podrá cambiar la temperatura del horno y el
nivel de potencia del microondas en cualquier
momento durante la cocción presionando el botón
POWER. Gire el dial para fijar la temperatura del
horno y presione el dial para seleccionar. Luego, gire
el dial para fijar el nivel del microondas, de 1 hasta
4 y presione el dial para seleccionar. El nivel
predeterminado del horno es 4.
Para ver el tiempo de cocción y la temperatura del
horno durante el tiempo de cocción, presione el
botón FAST BAKE (Hornear rápido).
■ Revise la sección de Consejos de Utensilios de Cocina
para usar los utensilios correctos al usar Fast Bake.
■ No use utensilios metálicos con Fast Bake.
■ Reduzca el tiempo de cocinado de la receta en
25%.
■ Ver la Sección Mejor Método de Cocción para
determinar cuáles alimentos son apropiados para
cocinar usando Fast Bake.
7
6
5
4
2
1
3
PUSH TO ENTER
TURN TO SELECT
Función de horneo rápido.
www.GEAppliances.com
Use siempre el estante en la posición
baja cuando esté horneando rápido.

Consejos de utensilios de cocina.
Hornear
Se recomienda el uso de bandejas metálicas para todo tipo de productos horneados,
pero especialmente cuando es importante que estén dorados.
Las bandejas con acabados oscuros o mates son mejores para panes y pasteles
rellenos ya que absorben calor y producen un exterior más crujiente.
Las bandejas de aluminio brillantes son mejores para pasteles, galletas o magdalenas
(muffins) ya que las mismas reflejan el calor y ayudan a producir un exterior
suavemente crujiente y tierno.
Las cazuelas o platos de horno de cristal o de cerámica acristalada son mejores para
recetas de huevos y queso ya que el cristal se limpia fácilmente.
Horneado Rápido
Se recomienda usar recipientes de cristal o cerámica acristalada. Asegúrese de que
no usa artículos con decoraciones metálicas ya que podrían causar arcos eléctricos
(chispas) con las paredes o el estante del microondas. Esto puede dañar los
utensilios, el estante o el horno.
Pueden usarse utensilios de microondas de plástico resistente al calor (seguros para
uso en 450°F) pero no se recomienda para comidas que necesiten estar doradas por
completo ya que el plástico es un pobre conductor de calor.
Utensilios Microondas Hornear Horneado rápido
Cristal resistente al calor, cerámica acristalada Sí Sí Sí
(Pyrex
®
, Fire King
®
, Corning Ware
®
, etc.)
Metal No Sí No
Cristal no resistente al calor No No No
Plásticos aptos para microondas Sí No Sí
❆
Films plásticos o envoltorios Sí No No
Productos de papel Sí No No
Paja, mimbre y madera Sí No No
❊
Usar sólo con utensilios para microondas que puedan soportar 450°F de temperatura.
Instrucciones de
Funcionamiento
Instrucciones de SeguridadAyuda al Cliente Resolución de Problemas
20
■ En el modo de Microondas los alimentos
deberían ser siempre cocinados en el
plato giratorio. El modo de Microondas
no debe ser usado con el estante
metálico en el horno.
■ El estante metálico debería ser siempre
usado cuando se cocina en los modos
de Hornear o Fast Bake para que el aire
dore el fondo de los alimentos. El plato
giratorio de vidrio puede ser dejado en
su lugar en los modos de Hornear o
Fast Bake.
■ Para obtener un mejor rendimiento en
la cocción en los modos de Hornear o
Fast Bake, deje por lo menos una
tolerancia de 1 pulgada entre el plato a
cocinar y las paredes del horno.
■ Para obtener un mejor rendimiento en
la cocción en los modos de Hornear o
Fast Bake, siempre coloque el estante en
la posición “inferior”.
■ Colocar el estante en la posición
“superior” causará que la parte superior
de los alimentos se dore demasiado/o
se cocine mucho más rápidamente que
el fondo.
Posición correcta del estante
Batería de cocina y sugerencias para la colocación de alimentos.
Posición incorrecta del estante

Horneado
Cuando se encuentre usando el modo BAKE para cocinar productos horneados como
tortas, galletas, pizzas, pasteles, panes, etc., reduzca la temperatura del horno 25°F de
la temperatura de la receta del horno para evitar que la parte superior de los
productos a hornear se dore demasiado.
Ejemplo: Una receta indica que se cocinan bizcochos de chocolate de 25–30 minutos
a 400° F.
400° F - 25° F = 375° F
La nueva temperatura de horneado en el modo BAKE debe ser 375° F.
Horneado Rápido
Cuando se encuentre en el modo FAST BAKE, reduzca el tiempo de cocción de la
receta del horno un 25%.
Ejemplo: Una receta indica que se cocina un trozo de carne para asar por 60 minutos
a 400° F.
60 minutos x 0,25 = 15 minutos no usados.
El nuevo tiempo de cocción en el modo FAST BAKE debe ser:
60 minutos - 15 minutos = 45 minutos.
Conversiones de Recetas.
21
Ayuda al ClienteResolución de Problemas
Instrucciones de
Funcionamiento
Instrucciones de Seguridad
Use la tabla siguiente para seleccionar el mejor método para cocinar. Las recetas pueden ser adaptadas usando la tabla
a continuación para determinar el modo de cocción apropiado.
Comidas Microondas Horneado Hornear rápido
Aperitivos
Salsas para mojar y untar ✓
Snacks de pastelería ✓✓✓
Bebidas ✓
Salsas y acabados ✓
Sopas y estofados ✓
Carnes
Descongelación ✓
Asados ✓✓
Aves
Descongelación ✓
Asados ✓✓✓
Pescado y mariscos
Descongelación ✓
Cocción ✓✓✓
Guisos ✓✓✓
Huevos y queso
Revueltos, tortillas ✓✓
Quiche, souflé ✓✓
Vegetales, (frescos) ✓
Panes
Masa de levadura ✓
Levadura ✓
Magdalenas, pastel de té ✓✓
Postres
Pasteles, pasteles con capas y bundt
✓
Cabello de angel y pasta fina ✓
Flan y pudín ✓
Galletas alargadas ✓✓
Fruta ✓
Pasteles rellenos y pastelería ✓
Dulces ✓
Vegetales blanqueados ✓
Alimentos preparados congelados ✓✓✓
Seleccione el mejor método de cocción.
www.GEAppliances.com

Las otras funciones.
Reloj
Presione para introducir la hora del día o
para revisar la hora de día mientras cocina.
Presione el botón CLOCK (reloj).
Gire el dial para configurar las horas.
Presione el dial para seleccionar.
Gire el dial para configurar los minutos.
Presione el dial para seleccionar.
Gire el dial para seleccionar AM o PM.
Presione el dial para seleccionar.
Presione el botón START/PAUSE para
poner el reloj en marcha.
5
4
3
2
1
Señal de final de cocción
Para recordarle que tiene comida en el
horno, aparecerá el mensaje YOUR FOOD
IS READY (Su comida está lista) y sonará un
pitido cada minuto hasta que abra la puerta
del horno o presione el botón CLEAR/OFF.
Start/Pause (inicio / pausa)
Además de poner en marcha muchas
funciones, START/PAUSE le permite parar la
cocción sin tener que abrir la puerta o
borrar lo que haya en pantalla.
Clear/Off (borrar/apagado)
Presione el botón CLEAR/OFF para parar y
cancelar la cocción en cualquier momento.
Bloqueo para niños
Puede bloquear el panel de control para
que los niños no pongan en marcha el
horno accidentalmente.
Para bloquear y desbloquear los controles,
apriete y mantenga el botón CLEAR/OFF
durante un período de tres segundos. Con
el panel de control bloqueado aparecerá
brevemente el mensaje CONTROL LOCKED
cada vez que se apriete un botón o el dial.
22
Instrucciones de
Funcionamiento
Instrucciones de SeguridadAyuda al Cliente Resolución de Problemas
Help (ayuda)
El botón HELP le muestra información de
características y consejos prácticos. Presione
HELP, gire el dial para seleccionar una
función y presione el dial para seleccionar.
PUSH TO ENTER
TURN TO SELECT
CLOCK
AM / PM
CLEAR / OFF
START / PAUSE
CLEAR / OFF
PUSH TO ENTER
TURN TO SELECT
HELP

23
Ayuda al ClienteResolución de Problemas
Instrucciones de
Funcionamiento
Instrucciones de Seguridad
Pantalla ON/OFF (encendida/apagada)
Úselo para apagar o encender la pantalla
del reloj.
Presione el botón OPTIONS y gire el
dial para seleccionar DISPLAY ON/ OFF.
Presione el dial para seleccionar.
Gire el dial para seleccionar ON o OFF.
Presione el dial para seleccionar.
2
1
PUSH TO ENTER
TURN TO SELECT
OPTIONS
www.GEAppliances.com
Luz nocturna automática
La luz nocturna automática puede
configurarse para que se encienda y se
apague a horas determinadas.
Presione el botón OPTIONS y gire el
dial para seleccionar AUTO NITE LIGHT.
Presione el dial para seleccionar.
Gire el dial para seleccionar SET TIMES.
Presione el dial para seleccionar.
Introduzca la hora del día para que la
luz se encienda girando el dial para
seleccionar la hora, minutos y AM o PM.
Presione el dial para seleccionar cada
cambio que quiera realizar.
Introduzca la hora del día para que la
luz se apague girando el dial para
seleccionar la hora, minutos y AM o PM.
Presione el dial para seleccionar cada
cambio que quiera realizar.
NOTA: El indicador NITE (noche) se encenderá
cuando la luz de noche se haya fijado para operar.
Para revisar la configuración de la luz
nocturna, gire el dial para seleccionar
REVIEW SETTINGS después de seleccionar la
opción Auto Nite Light. Presione el dial para
seleccionar.
Para borrar la configuración de la luz
nocturna, gire el dial para seleccionar
CLEAR SETTINGS después de seleccionar la
opción Auto Nite Light. Presione el dial para
seleccionar.
4
3
2
1
PUSH TO ENTER
TURN TO SELECT
OPTIONS
Volumen de señal de aviso
El volumen de la señal de aviso puede
ajustarse.
Presione el botón OPTIONS y gire el dial
para seleccionar BEEPER VOLUME.
Presione el dial para seleccionar.
Gire el dial para seleccionar desde
mudo a alto. Presione el dial para
seleccionar.
NOTA: El indicador MUTE (silencioso) se
encenderá cuando el volumen se haya fijado
en silencioso.
2
1
PUSH TO ENTER
TURN TO SELECT
OPTIONS
Idioma de pantalla
El idioma del menú de pantalla puede
configurarse para Inglés y Español.
Presione el botón OPTIONS y gire el dial
para seleccionar DISPLAY LANGUAGE.
Presione el dial para seleccionar.
Gire el dial para seleccionar ENGLISH
o SPANISH. Presione el dial para
seleccionar.
2
1
PUSH TO ENTER
TURN TO SELECT
OPTIONS

24
Instrucciones de
Funcionamiento
Instrucciones de SeguridadAyuda al Cliente Resolución de Problemas
Ventilador extractor
El extractor aspira el vapor de agua y otros
vapores de la encimera de la cocina.
Presione VENT FAN una vez para una
velocidad de ventilador lenta, dos veces
para una velocidad rápida o una tercera
vez para apagar el ventilador.
NOTA: El indicador del extractor estará prendido
mientras el extractor esté operando.
Extractor automático
El extractor automático protege al horno
microondas del calor excesivo que surge
de la estufa debajo de éste. Se enciende
de forma automática si percibe
demasiado calor.
Si ha encendido el extractor, es posible
que sienta que no lo puede apagar.
El extractor se apagará automáticamente
cuando las partes internas se hayan
enfriado. Puede permanecer encendido
hasta por 30 minutos o más después de
que los controles de la estufa y del
microondas se hayan apagado.
VENT FAN
Luz de superficie
Presione SURFACE LIGHT una vez para una
iluminación fuerte, dos veces para la luz
nocturna o una tercera vez para apagarla.
SURFACE
LIGHT
Otras funciones.
Temporizador
El Timer (temporizador) funciona como
temporizador de minutos y se puede usar
en cualquier momento, incluso cuando el
horno está en marcha.
Presione el botón TIMER.
Gire el dial para configurar los minutos.
Presione el dial para seleccionar.
Gire el dial para configurar los
segundos. Presione el dial para
seleccionar.
Presione el dial o TIMER para empezar.
Para cancelar, presione el botón TIMER.
Cuando se acabe el tiempo, el horno dará
una señal. Para apagar la señal del
temporizador, presione TIMER.
NOTA: El indicador del temporizador se encenderá
mientras el temporizador esté en marcha.
4
3
2
1
PUSH TO ENTER
TURN TO SELECT
TIMER
Velocidad de pantalla
La velocidad del menú de pantalla puede
cambiarse.
Presione el botón OPTIONS y gire el
dial para seleccionar DISPLAY SPEED.
Presione el dial para seleccionar.
Gire el dial para seleccionar desde el
más lento al más rápido. Presione el
dial para seleccionar.
2
1
PUSH TO ENTER
TURN TO SELECT
OPTIONS

25
Ayuda al ClienteResolución de Problemas
Instrucciones de
Funcionamiento
Instrucciones de Seguridad
Arco eléctrico El arco eléctrico es lo que, en la terminología de los microondas, describe las chispas en el horno. El arco
eléctrico se produce cuando:
■ el estante de metal se ha instalado de forma incorrecta y está tocando las paredes del microondas.
■ hay un metal o papel de aluminio tocando el lateral del horno.
■ hay papel de aluminio no está envolviendo bien la comida (hay bordes doblados hacia arriba que
actúan como antenas).
■ hay algún metal, como cintas de cierre con metal, pinchos de pollo, o platos con decoración de oro.
■ hay papel toalla reciclado que contiene pequeñas piezas de metal.
■ el soporte del aro del plato giratorio está instalado incorrectamente.
Cubierto Las cubiertas mantienen la humedad dentro, permitiendo un calentamiento más parejo y reduciendo el
tiempo de cocción. Cuando se agujerea el envoltorio de plástico o se cubre con papel de cera se permite la
salida del vapor.
Resguardar En un horno convencional, se tapan o resguardan las pechugas de pollo o las comidas horneadas para
que no se doren demasiado. Al usar el microondas, use pequeñas cintas de papel de aluminio para cubrir
partes finas, como las puntas de las alas en las aves, que podrían cocinarse antes que las partes mayores.
Tiempo de Cuando cocina en hornos regulares, las comidas como los asados o pasteles se dejan reposar para
reposo que acaben de cocinarse o se asienten. El tiempo de reposo es especialmente importante al cocinar con
microondas. Tenga en cuenta que un pastel cocido en horno microondas no se coloca en un estante
de enfriamiento.
Abrir Una vez que haya cubierto un plato con film plástico, deberá abrir un orificio desplegando una
respiraderos esquina para que pueda escapar el vapor.
Terminología de microondas.
www.GEAppliances.com
Término Definición

Instrucciones de
Funcionamiento
Instrucciones de SeguridadAyuda al Cliente Resolución de Problemas
26
Cuidado y limpieza del horno.
Consejos prácticos
Para mantener el interior fresco pásele un paño con una solución de agua y bicarbonato
sódico de cuando en cuando.
Asegúrese de que esté apagado (en off) antes de limpiar cualquier parte de este horno.
Cómo limpiar el interior
Paredes, suelo, ventana interior y piezas de plástico de la puerta
Algunas salpicaduras pueden limpiarse con un papel toalla, otras pueden necesitar un
paño húmedo. Quite las salpicaduras con un paño enjabonado y aclare con un paño
húmedo. No use limpiadores abrasivos ni utensilios afilados en las paredes del horno.
Nunca use un limpiador comercial de horno en ninguna parte del microondas.
Base giratoria extraíble y soporte de base giratoria
Para que no se rompa, no ponga el plato giratorio en agua justo después de cocinar.
Límpielo con cuidado en agua tibia con jabón o en el lavavajillas. El plato giratorio y
el soporte pueden romperse si se caen. Recuerde, no ponga en marcha el horno sin
que el plato giratorio y el soporte estén encajados en su lugar.
Estante
Límpielo con agua y jabón suave o en el lavavajillas.
No la limpie si tiene un horno autolimpiable.
Cómo limpiar el exterior
No recomendamos el uso de limpiadores con amoniaco o alcohol, ya que pueden dañar
el aspecto del horno microondas. Si opta por usar un limpiador casero, primero aplique
el limpiador directamente en un paño limpio, luego limpie el área sucia.
Parte inferior
Limpie la grasa y el polvo de la parte inferior a menudo. Use una solución de agua
templada y detergente.
Caja
Limpie la parte externa del microondas con un paño jabonoso. Aclárelo con un paño
húmedo y séquelo. Pase un trapo húmedo por la ventana para limpiarla.
Panel de control y puerta
Pásele un paño húmedo. Séquelo completamente. No use pulverizadores de limpieza,
mucha cantidad de agua y jabón, abrasivos u objetos afilados en el panel—podrían
dañarlo. Algunas toallas de papel también pueden rayar el panel de control.
Superficie de la puerta
Es importante mantener el área donde la puerta se sella contra el microondas siempre
limpio. Use sólo detergentes suaves, no abrasivos, y aplíquelos con una esponja limpia o
un paño suave. Aclárela bien.

Ayuda al ClienteResolución de Problemas
Instrucciones de
Funcionamiento
Instrucciones de Seguridad
27
Acero inoxidable
No use una esponja metálica, rayará la
superficie.
Para limpiar las superficies de acero
inoxidable, use un paño caliente, mojado
con un detergente suave. Use un paño
limpio, caliente y mojado para quitar el
jabón. Seque con un paño seco y limpio.
Si quedan manchas, intente usar un
limpiador general de cocina.
Para manchas difíciles, use un limpiador
normal de acero inoxidable como
Bon-Ami
®
or Cameo
®
.
Pásele un limpiador con una esponja
mojada. Use un paño limpio, caliente y
mojado para quitar el limpiador. Seque
con un paño seco y limpio. Frote siempre
ligeramente en la dirección del dibujo de
la superficie.
Después de limpiar, use un pulidor de
acero inoxidable como Stainless Steel
Magic
®
, Revere Copper y Stainless Steel
Cleaner
®
, o Wenol All Purpose Metal
Polish
®
. Siga las indicaciones del producto
para la limpieza de superficies de acero
inoxidable.
www.GEAppliances.com
Cambio de bombillas.
Luz de encimera/luz nocturna
Cámbiela por una bombilla halógena de
120 voltios, 20 watt (max). Pida WB36X10213
de su suministrador GE.
Para cambiar la luz de encimera/luz
nocturna, primero desconecte la
corriente del fusible principal o del
panel de diferencial o estire del
enchufe.
Quite el tornillo del lateral de la
cubierta del compartimiento de la
bombilla y baje la cubierta hasta
que pare.
Asegúrese que la bombilla está fría antes
de retirarla. Rompa el sello adhesivo
desenroscando con cuidado la bombilla.
Enrosque la nueva bombilla, luego
levante la cubierta y vuelva a poner el
tornillo. Conecte el horno a la corriente
eléctrica.
4
3
2
1
Quite el tornillo.

La Función de extractor.
Instrucciones de
Funcionamiento
Instrucciones de SeguridadAyuda al Cliente Resolución de Problemas
28
Ventilador extractor
El ventilador extractor tiene dos filtros de
metal reutilizables.
Los modelos que hacen recircular el aire
de nuevo a la habitación usan un filtro de
carbón vegetal
Filtros de extractor reutilizables
Los filtros metálicos atrapan la grasa
liberada por la comida en la cocina
encimera. También evitan que las llamas
de la cocina encimera puedan dañar en
interior del horno.
Por esta razón, los filtros deben estar
siempre en su lugar cuando se esté usando
la campana. Los filtros del extractor deben
limpiarse una vez al mes o según sea
necesario.
Cómo quitar y limpiar los filtros
Para quitarlos, usando las lengüetas,
deslícelos hacia atrás. Estire hacia abajo y
afuera.
Para limpiar los filtros del extractor,
empápelos y páselos de un lado a otro en
agua con detergente. No use amoniaco ni
productos que lo contengan ya que
oscurecerían el metal. Se pueden cepillar
ligeramente para quitar suciedad pegada.
Aclárelos, sacúdalos y déjelos secar antes de
volverlos a poner.
Para volver a colocarlos, deslice los filtros en
los marcos por la parte trasera de cada
apertura. Presione hacia arriba y hacia la
parte frontal para ajustarlos en su lugar.
Filtros de extractor reutilizables
(en todos los modelos).
Filtro de carbón vegetal
(en algunos modelos)

29
www.GEAppliances.com
Filtros de carbón vegetal
El filtro de carbón vegetal no puede limpiarse.
Debe cambiarse por otro. Pida el recambio
No. WB2X9883 de su suministrador GE.
Si el modelo no realiza la extracción al
exterior, el aire recirculará a través de un
filtro de carbón vegetal no reutilizable que
ayuda a quitar olores y humos.
El filtro de carbón vegetal debería
cambiarse cuando está visiblemente sucio
o descolorido (normalmente trás 6 o 12
meses, según el uso).
Cómo quitar el filtro de carbón vegetal
Para quitar el filtro de carbón vegetal, primero
desconecte la corriente del fusible principal
o del panel de diferencial o estire del
enchufe. Retire la parrilla superior
quitando los dos tornillos que lo sujetan.
Puede ser que necesite abrir las puertas del
armario para quitar los tornillos.
Deslice el filtro hacia la parte frontal del
horno y sáquelo.
Ayuda al ClienteResolución de Problemas
Instrucciones de
Funcionamiento
Instrucciones de Seguridad
Retire la parrilla superior quitando
los dos tornillos que lo sujetan.
Cómo instalar el filtro de carbón vegetal
Para instalar un nuevo filtro de carbón vegetal,
retire el plástico y cualquier otro envoltorio
del nuevo filtro.
Inserte el filtro en la apertura superior del
horno como se muestra, maniobrándolo
detrás de la rejilla plástica hasta que se
ajuste correctamente en su lugar.
Descansará en un ángulo detrás de la rejilla
plástica en dos lengüetas laterales de
soporte y en frente de la lengüeta trasera
derecha. Vuelva a colocar la rejilla y los dos
tornillos en su lugar. Conecte la corriente
de nuevo.

Resolución de Problemas
¡Ahorre tiempo y dinero! Revise las tablas en las páginas
siguientes y tal vez no necesite llamar al servicio de reparación.
30
Instrucciones de
Funcionamiento
Instrucciones de SeguridadAyuda al Cliente
Instrucciones de
Funcionamiento
Antes de llamar al servicio de reparaciones…
Problema Posibles causas Qué hacer
El horno no se pone en Puede que se haya fundido • Cambie el fusible o reconecte el diferencial.
marcha un fusible de su casa o que haya
saltado el diferencial.
Apagón de corriente. • Desenchufe el horno microondas de la corriente y
vuélvalo a enchufar.
El enchufe no está completamente • Asegúrese de que el enchufe de 3 clavijas del horno esté
insertado en la toma de corriente completamente insertado en la toma de corriente de la
de la pared. pared.
La puerta no está cerrada del todo. • Abra la puerta y ciérrela por completo.
El panel de control está La puerta no está cerrada del todo. • Abra la puerta y ciérrela por completo.
encendido pero el horno
no se pone en marcha
No se presionó el botón START • Presione START.
tras seleccionar el modo de
cocción.
Ya se ha realizado otra selección • Presione CLEAR/OFF.
en el horno y no se presionó
CLEAR/OFF para cancelarla.
No se introdujo un tiempo • Asegúrese de introducir un tiempo de cocción tras
de cocción tras apretar TIME COOK. presionar TIME COOK.
Se presionó CLEAR/OFF sin querer. • Vuelva a programar la cocción y presione START.
No se introdujo el peso tras • Asegúrese de introducir el peso de la comida tras
seleccionar AUTO DEFROST seleccionar AUTO DEFROST o FAST DEFROST.
o FAST DEFROST.
No se introdujo el tipo de • Asegúrese de entrar un tipo de comida.
comida tras apretar AUTO COOK.
CONTROL BLOQUEADO El control ha sido bloqueado. •Presione y mantenga CLEAR/OFF durante 3 segundos para
(CONTROL LOCKED) desbloquear el control.
aparece en la pantalla
CUIDADO—HORNO La temperatura dentro •Esto es normal.
CALIENTE del horno es mayor de 200°F.
aparece en pantalla
Una de las almohadillas sensoras •Estos dispositivos no funcionan cuando el horno está
de cocción estaba apretada caliente.
cuando la temperatura del
horno era mayor de 200°F.
El suelo del horno está La luz de la encimera está •Esto es normal.
templado incluso cuando situada bajo el suelo del horno.
el horno no se ha usado Cuando la luz está puesta,
el calor que produce puede
calentar el suelo del horno.
Se escucha un pitido Ha intentado cambiar el nivel •Muchas de las funciones del horno están
con un tono inusualmente nivel de potencia cuando no preseleccionadas y no pueden cambiarse.
bajo estaba permitido.

Ayuda al Cliente
Instrucciones de
Funcionamiento
Instrucciones de
Funcionamiento
Instrucciones de Seguridad
31
www.GEAppliances.com
Problema Posibles causas Qué hacer
El horno desprende un olor Se están quemando aceites •Esto es normal.
a humo y sale humo gris en la cavidad de acero inoxidable
después de usar la función después de usar la función de
de horneado Horneado las primeras veces.
La comida se dora mucho La parrilla se fijó en la posición •Siempre use la parrilla en la posición baja.
más rápido en la parte de alta.
arriba que en la parte de
abajo
La temperatura del horno El elemento de cocina pasa de • Esto es normal.
fluctúa durante la cocción encendido a apagado para
mantener la temperatura del
horno en los niveles deseados.
El extractor del horno se El extractor se enciende •Esto es normal.
enciende automáticamente automáticamente para proteger
el microondas si percibe que hay
demasiado calor en la estufa debajo
de éste.
Durante los niveles de Bake •Esto es normal.
(horneado) o Fast Bake
(horneado rápido), después
de precalentado, el extractor
del horno se encenderá para
enfriar los componentes del horno.

Instrucciones de
Funcionamiento
Instrucciones de SeguridadAyuda al Cliente Resolución de Problemas
32
Antes de llamar al servicio de reparaciones…
Cosas normales de su horno microondas
■ Sale vapor de agua de alrededor de la
puerta.
■ Se refleja una luz alrededor de la caja
exterior.
■ A niveles de potencia que no sea el
mayor la luz interior pierde brillo y
cambia el sonido del ventilador.
■ Ruido sordo de golpes mientras el horno
está en funcionamiento.
■ Pueden notarse interferencias en la
TV/radio cuando el microondas está
en marcha. Esto es parecido a las
interferencias causadas por otros
electrodomésticos pequeños, no es
indicativo de ningún problema con el
microondas. Enchufe el microondas a
otro circuito eléctrico, mueva la TV tan
alejada del microondas como sea posible
o revise la posición y la señal de la antena
de la radio o TV.

33
Notas.
www.GEAppliances.com
Ayuda al Cliente
Instrucciones de
Funcionamiento
Instrucciones de
Funcionamiento
Instrucciones de Seguridad

34
Instrucciones de
Funcionamiento
Instrucciones de SeguridadAyuda al Cliente Resolución de Problemas
Notas.

35
Ayuda al Cliente
Resolución de
Problemas
Instrucciones de
Funcionamiento
Instrucciones de
Seguridad
Installation Instructions
Garantía de Horno Microondas GE.
■ Viajes de reparación a su hogar para enseñarle cómo
usar el producto.
■ Instalación o entrega inapropiada, o mantenimiento
impropio.
■ Fallos del producto si hay abuso, mal uso, o uso para
otros propósitos que los propuestos, o si se usa con
fines comerciales.
■ Reemplazo de bombillas de la luz de la estufa.
■ Reemplazo de fusibles de su hogar o reajuste de los
diferenciales.
■ Daño al producto causado por accidente, fuego,
inundaciones, o actos de Dios.
■ Daño incidental o consecuencial a su propiedad causado
por posibles defectos con el aparato.
■ Causar daños después de la entrega.
Lo que GE no cubrirá:
Esta garantía se extiende al comprador original y a cualquier propietario que lo suceda para el caso de productos
comprados para uso doméstico en los Estados Unidos. En Alaska, usted tendrá que pagar el flete del producto o
los costos de viaje del técnico de servicio hasta su hogar.
Algunos estados no permiten la exclusión o limitación de daños incidentales o consecuenciales. Esta garantía le
proporciona derechos legales específicos, y puede tener otros derechos que pueden variar de un estado a otro.
Para conocer los derechos legales de su estado, consulte con su oficina local de asuntos del consumidor o al
procurador general de su estado.
Garantizador: General Electric Company. Louisville, KY 40225
Todos los servicios de garantía los proporcionan nuestros Centros
de Reparación de Fábrica o nuestros técnicos Customer Care
®
autorizados. Pare concertar una cita de reparación, en línea,
24 horas al día, visite www.GEAppliances.com, o llame al
800.GE.CARES (800.432.2737).
Grape aquí su recibo. Se
requiere facilitar prueba de la
fecha de compra original para
obtener un servicio bajo la
garantía.
Durante el período de:
GE reemplazará:
Un año Cualquier recambio del horno microondas que falle debido a un defecto en sus materiales o en
Desde la fecha de la su fabricación. Durante todo este año, GE proporcionará, sin costo adicional, , mano de obra y
compra original servicio en su hogar para reemplazar las partes defectuosas.
Diez años El magnetrón, el tubo magnetrón fallase debido a un defecto en sus materiales o en su
Desde el Segundo hasta
fabricación. Durante estos nueve años adicionales de garantía, usted será responsable de cualquier
el décimo año desde
la
costo de mano de obra o servicio a domicilio.
compra original del
producto

Impreso en China
Ayuda al Cliente.
Página Web de GE Appliances
www.GEAppliances.com
¿Tiene alguna pregunta sobre su electrodoméstico? ¡Pruebe la página Web de GE Appliances 24 horas al
día, cualquier día del año! Para mayor conveniencia y servicio más rápido, ya puede descargar los Manuales
de los Propietarios, pedir piezas o incluso hacer una cita en línea para que vengan a realizar una
reparación. También puede “Ask Our Team of Experts ™ ” (Preguntar a nuestro equipo de expertos)
sobre cualquier cuestión y mucho más…
Solicite una reparación www.GEAppliances.com
El servicio de expertos GE está a tan sólo un paso de su puerta. ¡Entre en línea y solicite su reparación
cuando le venga bien 24 horas al día cualquier día del año! O llame al 800.GE.CARES (800.432.2737)
durante horas normales de oficina.
Real Life Design Studio (Estudio de diseño para la vida real)
www.GEAppliances.com
GE apoya el concepto de Diseño Universal—productos, servicios y ambientes que pueden usar gente de
todas las edades, tamaños y capacidades. Reconocemos la necesidad de diseñar para una gran gama de
habilidades y dificultades físicas y mentales. Para más detalles cobre las aplicaciones de GE Diseño Universal,
incluyendo ideas de diseño para la cocina para personas con discapacidades, mire nuestra página Web hoy
mismo. Para personas con dificultades auditivas, favor de llamar al 800.TDD.GEAC (800.833.4322).
Garantías ampliadas www.GEAppliances.com
Compre una garantía ampliada y obtenga detalles sobre descuentos especiales disponibles mientras su garantía
está aún activa. Puede comprarla en línea en cualquier momento, o llamar al (800.626.2224) durante horas
normales de oficina. GE Consumer Home Services estará aún ahí cuando su garantía termine.
Piezas y accesorios www.GEAppliances.com
Aquellos individuos con la calificación necesaria para reparar sus propios electrodomésticos pueden
pedir que se les manden las piezas o accesorios directamente a sus hogares (aceptamos las tarjetas
VISA, MasterCard y Discover). Haga su pedido en línea hoy, 24 horas cada día o llamar por teléfono
al 800.626.2002 durante horas normales de oficina.
Las instrucciones descritas en este manual cubren los procedimientos a seguir por cualquier usuario. Cualquier
otra reparación debería, por regla general, referirse a personal calificado autorizado. Debe ejercerse precaución
ya que las reparaciones incorrectas pueden causar condiciones de funcionamiento inseguras.
Póngase en contacto con nosotros www.GEAppliances.com
Si no está satisfecho con el servicio que recibe de GE, póngase en contacto con nosotros en nuestra página
Web indicando todos los detalles así como su número de teléfono o escríbanos a: General Manager,
Customer Relations
GE Appliances,
Appliance Park
Louisville, KY 40225
Registre su electrodoméstico www.GEAppliances.com
¡Registre su nuevo electrodoméstico en línea—cuando usted prefiera! El registrar su producto a tiempo le
proporcionará, si surgiera la necesidad, una mejor comunicación y un servicio más rápido bajo los términos
de su garantía. También puede enviar su tarjeta de registro pre-impresa que se incluye en el material de
embalaje o recorte y use el formulario de este Manual del Propietario.
-
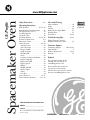 1
1
-
 2
2
-
 3
3
-
 4
4
-
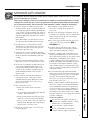 5
5
-
 6
6
-
 7
7
-
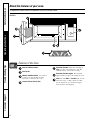 8
8
-
 9
9
-
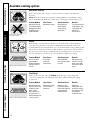 10
10
-
 11
11
-
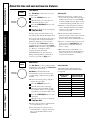 12
12
-
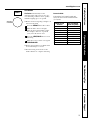 13
13
-
 14
14
-
 15
15
-
 16
16
-
 17
17
-
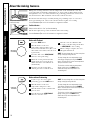 18
18
-
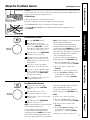 19
19
-
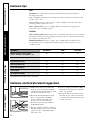 20
20
-
 21
21
-
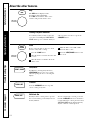 22
22
-
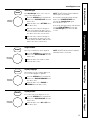 23
23
-
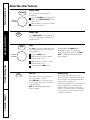 24
24
-
 25
25
-
 26
26
-
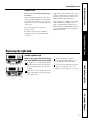 27
27
-
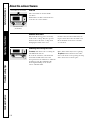 28
28
-
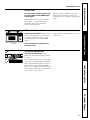 29
29
-
 30
30
-
 31
31
-
 32
32
-
 33
33
-
 34
34
-
 35
35
-
 36
36
-
 37
37
-
 38
38
-
 39
39
-
 40
40
-
 41
41
-
 42
42
-
 43
43
-
 44
44
-
 45
45
-
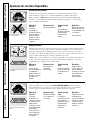 46
46
-
 47
47
-
 48
48
-
 49
49
-
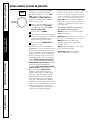 50
50
-
 51
51
-
 52
52
-
 53
53
-
 54
54
-
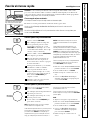 55
55
-
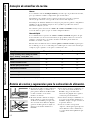 56
56
-
 57
57
-
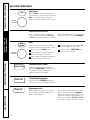 58
58
-
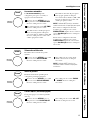 59
59
-
 60
60
-
 61
61
-
 62
62
-
 63
63
-
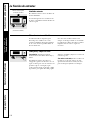 64
64
-
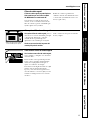 65
65
-
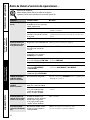 66
66
-
 67
67
-
 68
68
-
 69
69
-
 70
70
-
 71
71
-
 72
72


GE JVM1490SK El manual del propietario
- Categoría
- Microondas
- Tipo
- El manual del propietario
en otros idiomas
- English: GE JVM1490SK Owner's manual
Artículos relacionados
-
GE Cafe Series 1072552 El manual del propietario
-
GE Cafe Series PVM1790DRBB El manual del propietario
-
GE PVM9179 Manual de usuario
-
GE JVM1790WK - Profile 1.7 cu. Ft. Convection Microwave Manual de usuario
-
GE Profile PVM9179DFBB El manual del propietario
-
GE 1067756 El manual del propietario
-
GE PVM9179DKWW Manual de usuario

