Kenmore Elite 36363694301 El manual del propietario
- Categoría
- Microondas
- Tipo
- El manual del propietario
Este manual también es adecuado para

E L I T E
®
A NTIUM
120 TECHNOLOGYTM
Speedcook Oven
Use_,5 _.re Quide
Horno de Speedcook
QuE_ ', ...... e,!Uso ,/Ouidado
Models, Modelos 363.6369:_
= color number, nOmero de color
\
I"
I
X
164D3370P241
(SR40301-3) 143 JR
Printed In Korea Sears, Roebuck and Co,, Hoffrnan Estates, IL 60179 U.S.A. www, sears,com

Safety Instructions
Precautions to Avoid Possible Exposure
to Excessive Microwave Energy ........................ 4
Important Safety Instructions .................... 4-7
Grounding Instructions ................................ 7
Care and Maintenance
Cleaning the Appliance .......................... 36, 37
Light Bulb Replacement ................................ 37
The Vent Fan and Vent Filters ......................... 38
Charcoal Filter ...................................... 39
Operation
What is Speedcook? ...................................... 8
important Parts of Your Speedcook Oven ....... 9, 10
Quick Start ..................................... !1, 12
Speedcooking ................................. 13-20
Convection Baking .......................................... 2l
Warming ............................................... 22
Microwaving ........................................... 23-32
Other Features .................................... 33-35
Troubleshooting Tips
Problems and Solutions ............................ 40, 41
Consumer Services
Model/Serial Number Location ........................ 2
Warranty ................................................... 3
Master Protection Agreements .......................... 3
Consumer Services .................................... 84
Repair Services ........................................ 84
En Espafiol
Instrucciones en espafiol ........... ................ 42
For your convenience and future reference, please write down
your model and serial numbers in the space provided, The
model number and serial number of your Speedcook Oven
can be found on a iabel on the front face of the oven label,
behind the door
MODEL NUMBER:
363.
SERIAL NUMBER:
2

E L I E
SPEEDCOOK OVEN
WARRANTY
F
FULL ONE YEAR WARRANTY ON SPEEDCOOK OVEN
For one year from the date of purchase, if this Kenmore Elite Speedcook Oven fails due to a defect in material or
workmanship, Sears wilt repair it free of charge_
FULL THREE YEAR WARRANTY ON THE HEATING SYSTEM
For three years from the date of purchase, if any heater or lamp in this Kenmore Elite Speedcook Oven fails due
to a defect in material or workmanship, Sears will repair it free of charge
FULL FIVE.YEAR WARRANTY ON THE MAGNETRON
For five years from the date of purchase, if the magnetron in this Kenmore Elite Speedcook Oven should fail due
to a defect in material or workmanship, Sears wiiI repair it free of charge
The above warranty coverage applies only to Speedcook Ovens which are used for private household purposes
WARRANTY SERVICE IS AVAILABLE BY CONTACTING SEARS SERVICE AT 1-800-4-MY-HOME, ®
This warranty applies only while this product is in use in the United States
This warranty gives you specific legal rights, and you may also have other rights which vary from state to state.
Sears Roebuck and Co. Dept 817 WA Hoffman Estates, IL 60179
Master Protection Agreements
Congratulations on making a smart purchase Your new
Kenmore ®product is designed and manufactured for years
of dependable operation. But like all products, it may
require preventive maintenance or repair from time to time_
That's when having a Master Protection Agreement can
save you money and aggravation.
Purchase a Master Protection Agreement now and protect
.yourself from unexpected hassle and expense
The Master Protection Agreement also helps extend
the life of your new product. Here's what's included
in the Agreement:
v' Expert service by our 12,000 professional repair
specialists
v' Unlimited service and no charge for parts and labor
on all covered repairs
v' "No-lemon" guarantee--replacement of your covered
product if four or more product failures occur within
twelve months
v' Product replacement if your covered product can't
be fixed
v' Annual Preventive Maintenance Check at your
request - no extra charge
v' Fast help by phone--phone support from a Sears
technician on products requiring in-home repair, plus
convenient repair scheduling
v' Power surge protection against electrical damage due
to power fluctuations
v' Rental reimbursement if repair of your covered product
takes longer than promised
Once you purchase the Agreement, a simple phone
calf is all that it takes for you to schedule service_
You can call anytime day or night, or schedule a
service appointment online.
Sears has over 12,000 professional repair specialists,
who have access to over 4.5 million quality parts and
accessories. That's the kind of professionalism you can
count on to help prolong the life of your new purchase
for years to comer Purchase your Master Protection
Agreement todayl
Some limitations and exclusions apply.
For prices and additional information, call
1_800-827-6655.
Sears Installation Service
For Sears professional installation of home appliances,
garage door openers, water heaters, and other major
home items, in the UrS Ar cal! 1-800-4-MY=HOME e,

IMPORTANTSAFETY INSTRUCTIONS.
READ ALL INSTRUCTIONS BEFORE USING.
PRECAUTIONS
TOAVOID POSSIBLE
EXPOSURE TO
EXCESSIVE
MICROWAVE ENERGY
AWARNING!
For your safety, the information in this manual must be fotlowed to minimize
the risk of fire, explosion, electric shock, exposure to excessive microwave
energy, or to prevent property damage, personal injury or loss of life.
Do Not Attempt to operate this
oven with the door open since
open-door operation can result in
harmful exposure to microwave
energy, it is important not to defeat
or tamper with the safety interfocks
Do Not Place any object between
the oven front face and the door or
allow soil or cleaner residue to
accumulate on sealing surfaces
Do Not Operate the oven if it is
damaged, it is particularly important
that the oven door close properly
and that there is no damage to the:
1 door (bent),
2 hinges and latches (broken or
loosened),
3 door seals and sealing surfaces.
The Oven Should Not be adjusted
or repaired by anyone except
properly qualified service personnel..
• Read all instructions before using this appliance,
When using electrical appliances, basic safety
precautions should be followed, including the
following:
• Read and follow the specific precautions in the
PRECAUTIONS TO AVOID POSSIBLE EXPOSURE
TO EXCESSIVE MICROWAVE ENERGY section
° Be sure your appliance is properly installed and
grounded by a qualified technician in accordance
with the provided installation instructions.
° Install or locate this appliance only in accordance with
the provided installation instructions.
• Some products such as whole eggs and sealed
containers--for example, closed jars--are able to
explode and should not be heated in this oven_
Such use of the oven could result in injury,
- Do not mount this appliance over a sink,
° This oven is not approved or tested for marine use.
° This oven is UL listed for installation over electric and
gas ranges°
• This oven was designed for use over ranges no wider
than 36 inches, It may be installed over both gas and
electric cooking equipment.
° Do not operate this appliance if it has a damaged
power cord or plug, if it is not working properly, or
if it has been damaged or dropped.
. As with any appliance, close supervision is necessary
when used by children.
• Use this appliance only for its intended use as
described in this guide.
• Do not use corrosive chemicals or vapors in this
appliance,.
. This oven is specifically designed to heat, dry or cook
food, and is not intended for laboratory or industrial use
• This appliance should be serviced only
by qualified service personnel Contact nearest
authorized service facility for examination, repair or
adjustment.
• Do not cover or block any openings on the appliance,.
• Do not store this appliance outdoors. Do not use this
product near water--for example, in a wet basement,
near a swimming pool, near a sink or in similar locations,
• Keep power cord away from heated surfaces
° Do not immerse power cord or plug in water.
° See door surface cleaning instructions in the Care and
Cleaning of the Oven section of this guide.
• To reduce the risk of fire in the oven cavity:
-- Do not overcook food. Carefully attend appliance
when paper, plastic or other combustible materials
are placed inside the oven while cooking,.
-- Remove wire twist-ties and metal handles from
paper or plastic containers before placing them
in the oven,
-- Do not use the oven for storage purposes,, Do not
leave paper products, cooking utensils or food in
the oven when not in use.
If materials inside the oven ignite, keep the oven
door closed, turn the oven off and disconnect
the power cord, or shut off power at the fuse or
circuit breaker panel. If the door is opened, the
fire may spread.,
-- Do not use the Sensor Features twice in succession
on the same food portion° If food is undercoooked
after the first countdown, use COOK TIME for
additional cooking time..
= Do not store anything directly on top of the microwave
oven surface when the microwave oven is in operation.

• Donotoperatetheovenwithouttheturntablesupport
inplace,Theturntablesupportmustbeunrestricted
soitcanturn.
° During and after use, do not touch, or let clothing or
other flammable materials contact any interior area of
the oven; allow sufficient time for cooling firsL
, Potentially hot surfaces include the oven door, floor,
walls and turntable support.
° Cook meat and poultry thoroughly--meat to at least an
INTERNAL temperature of 160_F,and poultry to at least
an INTERNAL temperature of ta0=F. Cooking to these
temperatures usualIy protects against foodborne illness.
° Keep the oven free from grease buildup..
° Don't defrost frozen beverages in narrow-necked bottles
(especially carbonated beverages).. Even if the container
is open, pressure can build up. This can cause the
container to burst, possibly resulting in injury.
-&WARNING!
ARCING
If you see arcing, press the STOP/CLEAR button
and correct the problem.
Arcing is the microwave term for sparks in the oven°
Arcing is caused by:
° Metal or foil touching the side of the oven
° Turntable support not instalIed correctly.
• Metal cookware used during either speedcook or
microwave cooking (except for the pans provided
with the oven).
• Foods cooked in liquids (such as pasta) may tend to
boil more rapidly than foods containing less moisture.
Should this occur, refer to the Care and Cleaning of the
oven section for instructions on how to clean the inside
of the oven.
° Hot foods and steam can cause burns. Be careful when
opening any containers of hot food, including popcorn
bags, cooking pouches and boxes. To prevent possible
injury, direct steam away from hands and face
° Do not overcook potatoes° They could dehydrate and
catch fire, causing damage to your oven.
° Avoid heating baby food in glass jars, even with the lid
off. Make sure all infant food is thoroughly cooked.. Stir
food to distribute the heat evenly. Be careful to prevent
scalding when warming formula The container may
feel cooler than the formula really is Always test the
formula before feeding the baby.
• Do not attempt to deep fry in the oven.
• Foil not molded to food (upturned edges act like
antennas). Use foil only as recommeded in this guide.
° Metal, such as twist4ies, poultry pins or gold-rimmed
dishes, in the microwave.
° Recycled paper towels containing small metal pieces
being used in the microwave
,&WARNING!
FOODS
• When microwaving, place all foods and containers
on the glass microwave turntable..
• Do not pop popcorn in your oven unless in a special
microwave popcorn accessory or unless you use
popcorn labeled for use in microwave ovens..
• Do not boil eggs in this oven. Pressure will build up
inside egg yolk and will cause it to burst, possibly
resulting in injury.
• Do not operate the oven without food inside,
This may cause damage to the oven. tt increases
the heat around the magnetron and can shorten
the life of the oven..
• Foods with unbroken outer "skin" such as potatoes,
hot dogs, sausages, tomatoes, apples, chicken livers
and other giblets, and egg yolks should be pierced
to allow steam to escape during cooking.
SUPERHEATED WATER
Liquids, such as water, coffee or tea are able to be
overheated beyond the boiling point without appearing
to be boiling. Visible bubbling or boiling when the
container is removed from the microwave oven is not
always present. THIS COULD RESULT IN VERY HOT
LIQUIDS SUDDENLY BOILING OVER WHEN THE
CONTAINER IS DISTURBED OR A SPOON OR
OTHER UTENSIL IS INSERTED INTO THE LIQUID.
To reduce the risk of injury to persons:
-- Do not overheat the liquid
-- Stir the liquid both before and halfway through
heating iL
-- Do not use straight-sided containers with narrow
necks..
-- After heating, allow the container to stand in the
microwave oven for a short time before removing
the container.
-- Use extreme care when inserting a spoon or other
utensil into the container,

The turntable support must
always be in place when
using the oven.
The glass microwave
turntable should always be
in place when mtcrowavlng
MICROWAVE-SAFE COOKWARE
• Make sure to use suitable cookware
during microwave cooking. Most glass
casseroles, cooking dishes, measuring
cups, custard cups, pottery or china
dinnerware which does not have metallic
trim or glaze with a metallic sheen can
be used Some cookware is labeled
"suitable for microwaving."
Place food or microwavable container
directly on the glass microwave turntable
to cook your food.
Use of the black metal tray during
microwave cooking will result in inferior
cooking performance.
If you are not sure if a dish is
microwave-safe, use this test: Place in
the oven both the dish you are testing
and a glass measuring cup filled with
1 cup of water--set the measuring cup
either in or next to the dish. Microwave
30-45 seconds at high Ifthe dish heats,
it should not be used for microwaving.
If the dish remains cool and only the
water in the cup heats, then the dish
is microwave-safe..
Cookware may become hot because
of heat transferred from the heated food°
Oven mitts may be needed to handle
the cookware.
Do not use recycled paper products°
Recycled paper towels, napkins and
waxed paper can contain metal flecks
which may cause arcing or ignite. Paper
products containing nylon or nylon
filaments should be avoided, as they
may also ignite.
Use foil only as directed in this guide..
TV dinners may be microwaved in foil
trays less than 3/4" high; remove the
top foil cover and return the tray to the
box. When using foil in the oven, keep
the foil at least 1 inch away from the
sides of the oven.
Do not use the oven to dry newspapers..
If you use a meat thermometer while
cooking, make sure it is safe for use
in microwave ovens.
Some styrofoam trays (like those that
meat is packaged on) have a thin strip
of metal embedded in the bottom. When
microwaved, the metal can burn the floor
of the oven or ignite a paper towel
Paper towels, waxed paper and plastic
wrap can be used to cover dishes in
order to retain moisture and prevent
spattering., Be sure to vent plastic wrap
so steam can escape.
Not all plastic wrap is suitable for use in
microwave ovens. Check the package
for proper use.
"Boilable" cooking pouches and tightly
closed plastic bags should be slit,
pierced or vented as directed by
package. If they are not, plastic could
burst during or immediately after
cooking, possibly resulting in injury.Also,
plastic storage containers should be at
least partially uncovered because they
form a tight seal. When cooking with
containers tightly covered with plastic
wrap, remove covering carefully and
direct steam away from hands and face.
Plastic cookware--Piastic cookware
designed for microwave cooking is very
useful, but should be used carefully.
Even microwave-safe plastic may not
be as tolerant of overcooking conditions
as are glass or ceramic materials and
may soften or char if subjected to
short periods of overcookingr In longer
exposures to overcooking, the food
and cookware could ignite.
Follow these guidelines:
I Use mlcrowave-safe plastics only
and use them in strict compliance
with the cookware manufacturer's
recommendations,
2. Do not microwave empty containers.
3_ Do not permit children to use plastic
cookware without complete supervision°

The turntable support
must always be in p_ace
when using the oven,
Put food or non-metal,
oven-safe cookware dtrectly
on the black metal tray
for speedcooking, baking
or warming
Ensure proper ground
exists before use
OVEN-SAFE COOKWARE FOR
SPEEDCOOK, CONVECTION
BAKE AND WARMING
FEATURES
• The oven and door will get very hot
when speedcooking or using the
convection bake feature.
• Cookware will become hot, Oven mitts
will be needed to handle the cookware,
• Do not use coverings, containers or
cooking/roasting bags made of foil,
plastic, wax or paper when speedcooking
• Do not cover the turntable support, trays
or any part of the oven with metal foil,
This wiil cause arcing in the oven,
GROUNDING INSTRUCTIONS
AWARNING!
Improper use of the grounding plug
can result in a risk of electric shock.
This appliance must be grounded. In the
event of an electrical short circuit,
grounding reduces the risk of electric
shock by providing an escape wire for the
electric current,,
This appliance is equipped with a power
cord having a grounding wire with a
grounding plUg,rThe plug must be plugged
into an outlet that is properly installed
and grounded.
Consult a qualified electrician or service
technician ifthe grounding instructions
are not completely understood, or if doubt
exists as to whether the appliance is
properly grounded.
. Use the black metal flat tray in the same
way you would use a shallow baking
pan or baking tray,
• Place food or oven-safe cookware
directly on the trays when cooking,
• Any oven-safe dish can be used in your
oven_Recipes inthe cookbook included
with your oven were tested in Pyrex_ and
Anchor Hocking_ glass cookware and
Corningware ®ceramic casseroles_
Cook'times and results may vary when
using othertypes of oven-safe dishes.
Place them directly on the black metal tray
• Do not use the oven to dry' newspapers
• Use of the glass microwave turntable
with the speedcook or convection bake
features will result in inferior cooking
performance,
If the outlet is a standard 2-prong wall
outlet, it is your personal responsibility
and obligation to have it replaced with
a properly grounded 3-prong wal! outlet.
Do not under any circumstances cut or
remove the third (ground) prong from
the power cord,
Do not use an adapter plug with this
appliance
Do not use an extension cord with this
appTiance. Ifthe power cord is too short,
have a qualified electrician or service
technician install an outlet near the
appliance.
For best operation, plug this appliance
into its own electrical outlet to prevent
flickering of lights, blowing of fuse or
tripping of circuit breaker
THE VENT FAN
The fan will operate automatically under
certain conditions (see Automatic Fan
feature). Take care to prevent the starting
and spreading of accidental cooking fires
while the vent fan is in use,
• Clean the underside of the oven often.
Do not allow grease to build up on the
microwave or the fan fifters
° In the event of a grease fire on the
surface units below the oven, smother
a flaming pan on the surface unit by
covering the pan completely with a lid,
a cookie sheet or a flat tray,
• Use care when cleaning the vent fan
fi]terso Corrosive cleaning agents, such
as lye-based oven cleaners, may
damage the filters.
° When preparing flaming foods under the
oven, turn the vent fan on,
• Never leave surface units beneath your
oven unattended at high heat settings,
Boilovers cause smoking and greasy
spillovers that may ignite and spread ifthe
oven vent fan is operating, To minimize
automatic fan operation, use adequate
sized cookware and use high heat on
surface units only when necessary.
SAVE THESE INSTRUCTIONS

This Speedcook Oven uses breakthrough Advantium ®120
technology to harness the power of light, The Speedcook
oven cooks the outside of foods much like conventional
radiant heat, while also penetrating the surface so the
inside cooks simultaneously, While radiant heat is the
primary source of power, a "microwave boost" is added
with certain foods° Foods cook eventy and fast, retaining
their natural moisture.
]
]
, nl lUl uul inll,lnl , i i in ulll i,,i nnl I n inllllnul ]
iii,n,lnl I't I I i, IIIII, u IIIIIIIiiii
i nnlnllnl in
i'""""'""" I i nl nnnnl iiii n i,i I ' i i i ii i i1,11 n nuullllnulllll,i u nllHn
I o O O
o©
O
O
II ooO
OO O
O O O
Turntable Support
, The turntable support rotates to ensure even cooking,
Controls
• The oven control contains preset recipes.
° Turn-and-press dial makes menu selection easy.
Speedcooking
• A 500 watt halogen bulb and a 600 watt ceramic heater
cook food from above
• One 375 watt ceramic heater cooks food from below.
• The convection fan ensures even heating.
Convection Bake/Warming
• One 1t00 watt heater cooks food from above,,
o One 375 watt ceramic heater cooks food from below.
° The convection fan ensures even heating.
Microwave
° A microwave "boost" is automatically added with
certain foods.
• The oven can also be used as a 900 watt
microwave oven.

NOTE: Throughout this guide, features and appearance may vary from your model.
O 0 @
o o o
0
Turntable Support
The turntable support must always be in place,
on the oven floor, for arl cooking. Be sure the
turntable support is seated securely over the
hub in the center of the oven.
Black Metal Tray/Baking Sheet
Put food or appropriate cookware directly on the
black metal tray and place on the turntable support
when using the speedcook, convection bake or
warming features.
Glass Microwave Turntable
Center the turntable on the turntable support
when using the microwave features. The turntable
will not lock onto the center hub Place food or
microwave-safe cookware directly on the turntable.
O Upper Heaters
Operate when using the speedcook, convection
bake or warming features,
O indow
Allows food to be viewed while keeping microwaves
confined in the oven.
Door Handle
Pull to open the door_ The door must be securely
latched for the oven to operate_
Door Latches
O Vent Fan
Press the _ button to remove steam and other
vapors from surface cooking.
O ower Ceramic Heater
Operates when using the speedcook, convection
bake or warming features
O urface Light C>,
Press the C_ button to turn the cooktop light on
and off
Control Panel
The buttons used to operate the oven are located
on the contro_ panel
Hub
The hub turns the turntable support. Make sure
the hub is always firmly in place in the bottom of
the oven.

COOKING CONTROLS
With your Speedcook oven, you can cook with
high-intensity halogen lights, ceramic heaters
and/or conventional microwave energy,
SPEEDCOOK
Press this button to access the speedcook menu or
to set your own speedcook program. Press and hold
for 3 seconds to repeat the last cooking selection.
BACK
On certain features, press this button to return to the
previous step.
POWER
Press this button and turn/press the selector dial to
change the speedcook or microwave power levels, or the
convection bake temperature before and during cooking.
CONVECTION
Press this button to bake foods using conventional
oven cooking.
WARM/REHEAT
Press this button to operate the warming and reheating
features. Keep hot, cooked foods at serving temperature,
or reheat servings of previously cooked foods.
MICROWAVE
Press this button to access the microwave menu or
to set your own microwave program°
SELECTOR DIALmTurn to select, Push to enter
First turn then press the dial to make selections. Also
use the dial to increase (turn clockwise) or decrease
(turn counterclockwise) cooking times or temperatures.
OPTIONS
Press this button to set the Clock and access the Beeper
Volume, Clock Display ON/OFF, Display Scroll Speed,
Help, Reminder and Night Light features
START!ENTER
Press this button to start or pause any
cooking function.
STOP/CLEAR
Press this button to cancel ALL oven programs except
the clock, auto night light, timer and reminder.
POPCORN
Press to microwave prepackaged microwave popcorn.
ADD MINUTE
Press for one minute of microwave cooking time.
Each time the button is pressed adds an additional
1 minute to the remaining cooking time The oven
starts immediately..
DEFROST
Press this button to defrost meats by weight or time,
or to defrost bread.
=
SPEEDCOOK
CONVEL-_ION
WARMfREHEAT
MICROWAVE
BACK POWER
© ©
Selector Dial
OPTIONS
STOPICLEAR
START/ENTER
POPCORN
ADD MINUTE
DEFROST
_ K_TCHENT_MER
© © ©
VENT FAN
Press this button to remove steam and other vapors from
surface cooking
SURFACE LIGHT C'_
Press this button to turn the cooktop light on and off,.
KITCHEN TIMER
Press this button to set the minute timer_
10

0
SET THE CLOCK
When you first plug in the oven or
after a power outage:
1 r Turn the selector dial to set the hour,
Press the dial to enter_
2,. Turn the dial to set the minute,
Press the dial to enter
3LTurn the dial to select AM or PM
Press the dial to enter.
To change the time:
1, Press the OPTIONS button,
2r Turn the diat to CLOCK Press the
dial to enter and follow the display
directions to set.
SP_FJ_OUK BEGIN SPEEDCOOKING
Step 1:
Press the SPEEDCOOK button
Step 2:
Turn the dial until the display shows FOOD
MENU Press the dial to enter,
Step 3:
Turn the dial to select the type of food you
want. Press the dial to enter it
Step 4:
Turn the dial to select the specific food.
Press the dial to enter it.
Step 5:
Turn the dial to select the amount, size
and/or doneness (if required, the oven will
prompt you), Press the dial after each
selection,
Step 6:
After the last selection is made, the time
and power levels will be displayed, This is
followed a short time later by a cookware
message and START?,.
Step 7:
Once the display shows START?, place the
food in the oven and press the dial or start
button to start cooking, Speedcooking does
not require preheating
= Press STOP/CLEAR at any time to
stop cooking,
The turntable support
must always be in place
when using the oven
Put food or non-metal,
oven-safe cookware
directly on the black
metal tray to
speedcook.
MICROWAVING WITH THE
ADD MINUTE FEATURE
Press ADD MINUTE for one minute
increments of microwave cooking time.
The oven starts immediately You may
add or subtract time by turning the dial,,
You may also add time in one minute
increments by pressing ADD MINUTE
The turntable support must
always be in place when
using the oven
Theglassmicrowave
turntableshould
alwaysbe inplace
whenmlcrowavtng
11

WAI_M_m£AT
O
USING THE WARMING FEATURE
The Warming feature will keep hot, cooked
foods at serving temperature. Always start
with hot food. Use cookware that can
withstand temperatures up to 230°F.
Step 1:
Press the WARM/REHEAT button..
Step 2:
Turn the dial to select WARMING. Press
the dial to enter°
Step 3:
Turn the dialto selectthe oven
temperature.
LOW ............ 140-160°F
MEDIUM .......160-195°F
HIGH ................195-230°F
Step 4:
Turn the dial to select the CRISP or
MOIST Press the dial to enter..
Ct_tP/£ L_0 N
5T_T/FJ_R_
The turntable support
must always be in place
when using the oven,
Put food or oven-safe
cookware directly on the
black metal tray to bake,
USING THE CONVECTION BAKE
FEATURE
With Preheating
Step 1:
Press the CONVECTION button.
Step 2:
Turn the dial to set the oven temperature
and press dial to start preheating. Do not
place the food in the oven, (You will be
prompted to enter the cook time after the
oven is preheated.)
Step 3:
When the oven is finished preheating,
it will signal If you do not open the door
within t hour, the oven wil! turn off
automatically. Open the oven door and,
using caution, place the food in the oven.
Step 4:
Close the oven door. Turn the dial to set
the cook time and press START/ENTER to
start cooking. When cooking is complete,
the oven will signal and turn off.
Cook times are shown in minutes and
can be a maximum of 179 minutes.
Time can be changed during cooking
by turning the dial.
Without Preheating
Step 1:
If your recipe does not require preheating,
press the CONVECTION button.
Step 2:
Turn the dial to set the oven temperature
and press to enterr
Step 3:
To bypass preheating, press the dial again.
Step 4:
Turn the dia! to set the cook time and
press to enter.
Step 5:
Place the food in the oven, and press the
START/ENTER button to start the oven,
Cook times are shown in minutes and
can be a maximum of 179 minutes.
Time can be changed during cooking
by turning the dial.
12

DISPLAY PROMPTS
After pressing the SPEEDCOOK button,
the oven will prompt you to make several
selections, such as in the example below.
1 Turn the dial untif FOOD MENU
appears. Press the dial to enter
2, Turn the diaf until CHICKEN appears,
Press the dial to enter,
& Turn the dial until BONELESS BRST
(boneless breast) appears, Press the
dial to enter.
,
6,,
7,
Turn the dial to Select SIZE:
Sm (3-4 oz)
Lg (5+ oz)
Press the dial to enter,
Turn the dial to Select amount:
1-2 pieces
3-4 pieces
Press the dial to enter.
Use METAL TRAY is displayed.
Press the START/ENTER button or
the selector dial to start cooking_
NOTE: When
speedcooking, always
use the black tray.
PRE-SET SPEEDCOOK MENU
SELECTIONS
J
O
After a cooking cycle has been
completed, use the Resume feature
to cook for additionar time,
To review settings during cooking.
press the selector dial.
See the Cooking Guide packed with
the oven for a complete list of pre-set
speedcook menu selections
13

USING SPEEDCOOK FEATURES
CAUTION: When using speedcook programs,
remember that the oven, door and dishes will
be very hot!
Prior to the first use of your oven, the clock must be set.
See the Quick Start section..
Before you begin, make sure the turntable support is
in place_
Use the black metal tray at all times when speedcooking
The turntable support must a_ways
be in p_ace when using the oven
Put food or non-metal, oven-safe
cookware directly on the black
metal tray to speedcook°
SPEE3_COOK
TO USE A PRE-SET
SPEEDCOOK MENU
This oven is already pre-set to cook
over 100 popular dishes.
1o Press the speedcook button_
If no selection is made within
15 seconds, the display wilt revert
back to the time of day.
2. Turn the selector dial to FOOD MENU°
Press the dial to enter,
3 Turn the selector dial to select the type
of food category you want. Press the
dial to enter,
1
,
Turn the selector dial to select the
specific food (menu selection). Press
the dia! to enter°
Turn the selector dial to select amount,
size and/or doneness (if required, the
oven will prompt you,) Press the dial
after each selection.
6 Once the display shows START? either
press start or the selector dial to start
cooking°
For certain foods, turn the food over when
the oven signals TURN FOOD OVER.
Press START to resume cooking,
For certain foods, the oven will signal
CHECK for DONENESS Check to see
if the food is done to your liking, The
oven will continue to cook for several
minutes. Take the food out when it is
done to your liking.
To review settings during cooking, press
the selector dial,
If you enter an undesired selection at any
time, simply press the BACK button to
return to the previous step, or press the
STOP/CLEAR button and re-enter the
desired selection.
• Early in a speedcook program, you will
see OPTIMIZING COOK TIME in the
display,, The oven automatically senses
the electrical voltage level in your home
and adjusts the cooking time up or down
for proper cooking.
. If the door is opened during cooking,
the oven will stop and PAUSE will
appear in the display. Close the door
and press the START/ENTER button
to resume cooking.
At anytime during cooking you can turn
the selector dial to change the cooking
time. You can change power levels by
pressing POWER, then turning the
selector dial and pressing to enter.
. To assure consistent cooking results,
the oven may reduce power levels if
the oven is hot at the beginning of
a program
= At the end of cooking, the automatic fan
may continue to run for a short time to
cool internal components,
To cook for additional time after a
cooking cycle has been completed,
use the Resume feature,
14

COOKING TIPS FOR GREAT
TASTING RESULTS
To ensure consistent and even browning when cooking
foods directly on the black metal tray, arrange food as
shown at right. Foods can touch, but should not overlap.
Fresh meat, chicken, fish or seafood that has been
frozen should be thawed before cooking (the
microwave defrost feature can be used). For other
frozen prepackaged foods, follow package direction&
Circular pattern
(Exam#e: biscuits, cookies,
meats)
Spoke pattern
(Example: crescent rolls,
breadsticks)
Single layer
(Example: appetizers)
0
REPEAT LAST
Use this time saving feature for cooking
repetitive items like cookies or appetizers_
NOTE: The last program used is stored for
two hours.
1. Press and hold the SPEEDCOOK
button for about 3 seconds.
24 The last pre-set food will be displayed.
3 Press the START/ENTER button or the
selector dial to start cooking
51^RTfEmE_
RESUME FEATURE
1, If your food needs to cook a bit longer,
you can restart the oven by pressing the
START!ENTER button or selector dial.
2 RESUME COOKING will be displayed
and the oven will restart immediately at
10% of the original time.
The program stays in memory for
5 minutes. After that you will need to
begin the program again. See "TO USE
A PRE-SET SPEEDCOOK MENU".
t5

5P_0o%
0
ST_i_n_n
SPEEDCOOK POWER LEVEL
This oven uses power from a high intensity
halogen light, ceramic heaters and
microwaves simultaneously to cook food
from the top, bottom and interior to sea!
in moisture and flavor..
When using the pre-set speedcook recipes
on the food menu, the power levels are
already selected for you However, these
power levels can be adjusted before or
during cooking. Also, the manual cook
feature allows you to speedcook items not
on the pre-set food menu by selecting your
own cook time and power level settings.
Each power level gives you heater power
and microwave energy for a certain
percentage of the time_
UPPER POWER (U) controls both the
upper heater and microwave power. A
higher UPPER POWER setting will use
more upper heater power, browning food
faster on top. A lower UPPER POWER
setting uses more microwave power,
causing food to cook more evenly
throughout.. Select a higher setting for
foods such as pizza and baked goods.
Select a lower setting for foods such as
casseroles, meat and fish.
LOWER POWER (L) controls the lower
heater, Select a higher setting to brown
foods more on the bottom. Select a lower
setting for less browning on the bottom,
r
.
Press the SPEEDCOOK button and
turn the dial to select FOOD MENU or
MANUAL COOK Press the dial to enter.
Follow instructions from '%0 USE A
PRE-SET SPEEDCOOK MENU" or
"MANUAL COOK'L
To change the power level when
prompted by the display, turn the
dial clockwise to increase or
counterclockwise to decrease the
upper power tevel. Press the dial
to enter.
4. Turn the dial to change the lower power
level Press the dial to enter.
5 Press the START/ENTER button or
the setector dial to start cooking.
ifyou do not want to change one of the
settings, just press the dial to move to
the next selection.
NOTE: Be careful when adjusting power
leveis so that you do not over- or
undercook food.
16

SPEEDCOOK COOKWARE
,, Foliow cookware suggestions on the
oven display or in the Cookbook or
Cooking Guide
• Cookware wilt become hoL Oven mitts
will be needed to handle the cookware+
• Place food or oven-safe cookware
directly on the black tray when cooking,
. Use the black metal tray in the same
way you would use a shallow baking
pan or baking tray.
• In addition to the cookware provided,
you can use non-metal casserole
dishes, pie plates and other heat-safe
cookware_ Place them directly on the
black metal tray.
,, Be sure to select a size that will rotate
easily.,
• Place the black metal tray directly on
the turntable support
• Do not use cookware or coverings made
of paper, plastic or foil when cooking
during a speedcook cycle.
o The black metal tray must be in place
during the speedcook operations,
SP_CI_DK
0
St^_#ENTE_
MANUAL SPEEDCOOK
This oven gives you the flexibility to cook
your favorite dishes,
If you want to cook a food item that is not
among the pre+set selections, use manual
speedcook+
1,, Press the SPEEDCOOK button
If no entries are made within
15 seconds, the display will revert
back to the time of day+
2 Turn the selector dial to MANUAL
COOK_ Press the dial to enterr,
3. Turn the selector dial to select the
cooking time+ Press the dial to enter.
The display will prompt you to select
UPPER POWER and LOWER POWER,
4, Turn the dial clockwise to increase or
counterclockwise to decrease the upper
power level. Press the dial to enter,,
5,,Turn the dial to change the lower power
level+ Press the dial to enter1+
6 Press the START/ENTER button or
press the selector dial to start cooking,,
For power level and cooking time
suggestions, use your cooking guide
or cookbook,,
17

5r_QO_
_oP1C_
0
SPEEDCOOK RECIPE--
TO ENTER AND SAVE
Create up to 30 of your own Speedcook
recipes, or customize an existing
custom recipe to suit your tastes.
Once it's done, your food cooks just
the way you want it every time!
1. Press the SPEEDCOOK button,
,
3.
4,,
Turn the dial until MY RECIPES
appears, Press the dial to enter
Turn the dial until <empty> appears.
Press the dial to enter+
SELECT COOK TIME appears.
Turn the dial to select the cooking
time. Press the dial to enter,.
The display will prompt you to select
UPPER POWER and LOWER POWER.
5. Turn the diat clockwise to increase or
counterclockwise to decrease the upper
power level Press the dial to enter,
6, Turn the dial to change the lower power
level, Press the dial to enter,
7+ Spell out the food name by turning the
selector dial to advance through the
available characters, Press the dial
to enter a character, When you have
entered the entire name, press
START/ENTER. You may change
previously entered characters by
pressing the BACK button,,
8, RECIPE ADDED appears, To begin
cooking, press the START/ENTER
button, To store the recipe without
cooking, press the STOP/CLEAR
button+
For power level and cooking time
suggestions, use your cooking guide
or cookbook.
5PEE_OOK
O
_t/_.Tf_TEn
SPEEDCOOK RECIPE--
TO FIND AND USE
To find and use stored custom
speedcook recipes:
1. Press the SPEEDCOOK button,
2, Turn dial to MY RECIPES and press
to enter
3+Turn dial until the recipe you want is
displayed and press the dial to enter.
4., Press the START/ENTER button or
press the selector dial to start cooking
18

SP_CiK
O
STA_n/_
SToP/C_n
0
SPEEDCOOK RECIPE--
TO ADJUST OR CHANGE
To adjust or change stored custom
speedcook recipes:
1. Press the SPEEDCOOK button.
2, Turn the dial until MY RECIPES
appears Press the dial to enter_
& Turn the dial to the recipe you want
to change Press the dial to enter.
4. Press the OPTIONS button,
5. Turn the dial to select CHANGE
RECIPE, Press the dial to enter.
6. The display will prompt you to SELECT
COOK TIME, then select UPPER
POWER, LOWER POWER and FOOD
NAME. Turn the dial and press to enter
the appropriate settings.
(For more detailed instructions, follow
steps 4 through 7 in the section
"SPEEDCOOK RECIPE-TO ENTER
AND SAVE")
7. RECIPE ADDED appears. To begin
cooking, press the START/PAUSE
button,. To store the recipe without
cooking, press the CLEAR/OFF button.
For power level and cooking time
suggestions, use your cooking guide
or cookbook°
O
S1oP/'OJ_u_
©
SPEEDCOOK RECIPE--
TO DELETE
To delete stored custom speedcook
recipes:
1 Press the SPEEDCOOK button,
2. Turn the dial until MY RECIPES
appears and press the dial to enter,
3 Turn dial to the recipe you want to
delete and press the dial to enter,
4. Press the OPTIONS button.
5, Turn the dial to select DELETE RECIPE,
and press the dial to enter. This deletes
the recipe You may now enter and save
a new recipe or press STOP/CLEAR to
return to the clock display..
19

THINGS THAT ARE NORMAL
DURING SPEEDCOOKING
Cooking Times
• When speedcooking preprogrammed
foods, you may see OPTIMIZING COOK
TIME in the display several seconds
after you press START. The oven
automatically senses the electrical
voltage level in your home and
adjusts the cooking time up or down
for proper cooking_
Fan/Vent
• The fan will come on during cooking°
At the end of cooking, the automatic
fan will continue to run for a short time,
and the display will read Oven is
Cooling. The fan wilt automatically
shut off when the internal parts of
the oven have cooledo
• The exhaust fan may come on
automatically if the cooktop is in use..
• The oven vent will emit warm air while
the oven is on..
Lights
• When the oven is on, light may be
visible around the door or outer case..
• The heaters will dim and cycle on
and off during a speedcook cycle,
sometimes even at full power levels.
This is normal.. The oven senses the
heat level and adjusts automatically.
Heaters
• No preheating is required.. The oven
begins cooking immediately.
• The door and inside of the oven will be
very hot. Use caution when opening the
door and removing food.
• Do not use cookware or coverings made
of paper, plastic or foil when cooking
during a speedcook cycle.
• When cooking for an extended period
of time, the oven may automatically
reduce the power _evels to maintain the
appropriate levet of oven heat_
Sounds
• Clicks and a fan blowing are normal
sounds during cooking,, The relay board
is turning components on and off.
2O

The turntable support
mustalways be in place
when using theoven°
Put food or oven-safe
cookware directly on the
black metal tray to bake,
CONVECTION BAKING
Convection baking allows you to cook
foods the same way as a conventional
oven, using a heating element to raise the
temperature of the air inside the oven. Any
oven temperature from 250°F to 450°F
may be set. A fan gently circulates this
heated air throughout the oven, over and
around the food, producing golden brown
exteriors and rich, moist interiors.
Because the heated air is kept constantly
moving, not permitting a layer of cooler air
to develop around the food, some foods
cook slightly faster than in regular oven
cooking.
Before you begin, make sure the turntable
support is in place. Use the black metal
tray at all times when baking.
CAUTION; When baking, remember
that the oven, door and dishes will be
very hot!
C0 N_"rlON
CONVECTION BAKING
WITH PREHEAT
1. Press the CONVECTION button..
2_
When using the CONVECTION BAKE
mode to cook baked goods such as
cakes, brownies, cookies, pies, rolls,
etc., reduce the oven temperature
25°F-40°F from the recipe to prevent
overbrowning of baked goods..
Turn the dial to set the oven
temperature and press dial to start
preheating. Do not place the food in the
oven. (You will be prompted to enter the
cook time, after the oven is preheated.)
3_
When the oven is finished preheating,
itwill signal. If you do not open the
door within 1 hour, the oven will turn
off automatically. Open the oven door
and, using caution, place the food in
the oven°
4. Close the oven door. Turn the dial
to set the cook time and press
START/ENTER to start cooking
When cooking is complete, the oven
will signal and turn off.
You may change the oven temperature
during preheating by pressing the POWER
button and turning the dial to select the
new temperature.
If the oven door is opened during cooking,
PAUSE wil_appear in the display. Close
the door and press START/ENTER.
Cook times are shown in minutes and
can be a maximum of 179 minutes.
Time can be changed during cooking
by turning the dial.
COt_L_ION CONVECTION BAKING
WITHOUT PREHEAT
t. If your recipe does not require
preheating, press the CONVECTION
buttOnr
2_
When using the CONVECTION BAKE
mode to cook baked goods such as
cakes, brownies, cookies, pies, rolls,
etc., reduce the oven temperature
25°F-40°F from the recipe to prevent
overbrowning of baked goods.
Turn the dial to set the oven
temperature and press to enter.
3r TObypasS preheating, press the dial
again.
4_Turn the dial to set the cook time and
press to enter.
5 Place the food in the oven, and press
the START/ENTER button to start
the oven.
tf the oven door is opened during cooking,
PAUSE wil! appear in the display. Close
the door and press START/ENTER
Cook times are shown in minutes and
can be a maximum of 179 minutes Time
can be changed during cooking by turning
the dial.
21

WARMING
The warming feature will keep hot,
cooked foods at serving temperature_
Always start with hot food, Use cookware
and utensils that can withstand
temperatures up to 230°E
1. Press the WARM/REHEAT button.
2_ Turn the dia! to select WARMING.
Press the dial to enter.
3. Turn the dial to select the oven
temperature°
LOW .......................t 40-160°F
MEDIUM .................160-195°F
H1GH ..................... 195-230°F
4o Turn the dial to CRISP or MOIST.
Press the dial to enter..
If the oven door is opened during warming,
PAUSE will appear in the display Close
the door and press START/ENTER
Tips for Crisp Foods:
• Leave food uncovered.
• Do not use plastic containers or
plastic wrap
• Preheat prior to use according to
recommended times.
Tips for Moist Foods:
• Cover food with lid or aluminum foil
• Do not put water in the warming pan.
= Do not use plastic containers or
pIastic wrap.
• Preheat prior to use according to
recommended times,
To Crisp Stale Items:
• Place food or dishes directly on the
black metal tray°
• Preheat on LOW setting and select
CRISP.
• Check crispness after 45 minutes.
Add time as needed.
Temperature and Moisture Selection Chart
Food Type Control Setting Moisture Setting
Bread, hard rolls MEDIUM CRISP
Bread, soft rolls MEDIUM MOIST
Casseroles MEDIUM MOIST
Fried foods HIGH CRISP
Meats* and fish MEDIUM CRISP
Pancakes, waffles HIGH CRISP
Pizza HIGH CRISP
Potatoes, baked HIGH CRISP
Potatoes, mashed MEDIUM MOIST
Poultry HIGH MOIST
Tortilla Chips LOW CRISP
Vegetables MEDIUM MOIST
*USDA/FSISrecommendsan internaltemperatureof 145°Fas the
minimumdoneness forbeef, Usea portablemeat thermometerto
checkinternaltemperatures_
22

Theturntablesupportmust
always beinplace when
using theoven
USING THE MICROWAVE
FEATURES
Make sure the turntable support and glass
microwave turntable are in place,
P_acefood or microwavable container
directly on the glass microwave turntable
to cook your food
Center the turntable on the turntable
support, The turntable will not lock onto
the center hub,
The glass microwave
turntable should atways be
in place when microwaving
COOKWARE
• Make sure that cookware is suitable for
microwaving.
• Place food or microwavable container
directly on the glass microwave turntable
to cook your food
MICROWAVE PRE-SET FOOD SELECTIONS:
• Bacon • Rice
- Defrost (Auto =Sure Simmer
and Time) • My Recipes
=Frozen Entree
• Soup
• Cook Time
• Vegetables (fresh,
frozen, canned)
23

M_:_0WAV_
0
5_A_t_
_cx
0
moPlCl_._
0
HOW TO USE PRE-SET
MICROWAVE SELECTIONS
1• Press the MICROWAVE button,
If no selection is made within
15 seconds, the display will revert
back to the time of day,
2o Turn the dial to find the pre-set selection
you want, Press the dial to enter_
,
If required, the oven will prompt you
to select amount, weight, size or time+
Turn the dial and press after each
selection.
4. Press the dial or the START/ENTER
button to start cooking.
To review settings during cooking, press
the selector dial,
If you enter an undesired selection at any
time, simply press the BACK button to
return to the previous step, or press the
STOP/CLEAR button and re-enter the
desired selections.
COOKING TIPS
• When cooking bacon, layer strips on
a plate. Cover each layer with a paper
towel.
° When cooking vegetables, use a
microwave-safe casserole or bowl
Cover with a lid or vented plastic wrap
• For frozen vegetables, follow the
package instructions for adding water+
• For fresh vegetables, add two
tablespoons of water for each serving
MIDIOWAV_
0
POW_
O
_r_r/E_rm
COOK TIME
• The power fevel is automatically set at
high, but you can change it for more
flexibility
1+Press the MICROWAVE button.
2 Turn the dial to COOK TIME and press
the dial to enter,
3. Turn the dial to set the time and press
the dial to enter.
4. To change the power level if you don't
want full power, press the POWER
button Turn the ali!! to select° Press
the dial to enter.
5. Press the dial or the START/ENTER
button to start cooking,.
You may open the door during COOK
TIME to check the food+ Close the door
and press START/ENTER to resume
cooking,
ADD MINUTE
Press ADD MINUTE for one minute
increments of microwave cooking time.
Oven starts immediately.
You may add or subtract time by turning
the dial. You may also add time in one
minute increments by pressing ADD
MINUTE again.
24

MI_DWAVE MICROWAVE SENSOR
FEATURES
Some microwave features are sensor
functions that detect the increasing
humidity released during cooking. The
oven automatically adjusts the cooking
time to various types and amounts of food.
When using sensor features, do not
open the oven door until time is counting
down in the display, If the door is opened,
close it and press START/ENTER
immediately°
Do not use the Sensor Features twice
in succession on the same food portion
--it may result in severely overcooked
or burnt food. If food is undercooked
after the countdown, use COOK TiME
in the microwave selector for additional
cooking time°
To subtract time from a sensor program:
Within the first 30 seconds after the oven
starts, turn the dial counterclockwise to
subtract 10% (-) from the automatic time.
Additional turning will subtract 20% (--)
from the automatic time.
To add time to a sensor program:
Within the first 30 seconds after the oven
starts, turn the dial clockwise to add 10%
(+) to the automatic time. Additional turning
will add 20% (+ +) to the automatic time°
= if you have been speedcooking or
baking and the oven is already hot, it
may indicate that it is too hot for sensor
cooking. Of course, you can always
continue with the non-sensor functions.
To shorten or lengthen the cook time,
wait until the time countdown shows in
the display..Then turn the dial to add
or subtract time.
Drinks reheated with the BEVERAGE
feature may be very hot Remove the
container with care.
if you open the door while sensor
cooking, SENSOR ERROR will appear.
Close the door and press START/ENTER
to begin again.
The proper containers and covers
are essential for best sensor
cooking.
o Always use microwave-safe containers
and cover them with lids or vented
plastic wrap Never use tight sealing
plastic containers---they can prevent
steam from escaping and cause food
to overcook.
Be sure the outside of the cooking
containers and the inside of the oven
are dry before placing food in the oven.
Beads of moisture turning into steam
can mislead the sensor.
• Beverages are best heated uncovered
Covered
Vented
Dry off dishes so
they don't mislead
the sensor.
MICROWAVE SENSOR PROGRAMS:
Cooking:
• Frozen Entr_es ° Sure Simmer
• Rice • Popcorn
Reheating:
• Beverage oSauces
• Pasta • Soup
• Plate of Leftovers
25

POP£O_N
0
ST_[E Nf_'l
Use only with
prepackaged popcorn
weighing
.75 to 3 5 ounces
POPCORN
To use the Popcorn feature:
1..Follow package instruction, using
COOK TIME if the package is less than
t .75 ounces or larger than 3.5 ounces.
Place the package of popcorn in the
center of the oven.
2. Press POPCORN
3o Press the dial or press the
START/ENTER button to start cooking.
NOTE: Do not use this feature twice
in succession on the same food portion
it may result in severely overcooked
or burnt food. tf food is undercooked
after the countdown, use COOK TIME
in the microwave selector for additiona!
cooking time..
If you open the door while POPCORN is
displayed, a SENSOR ERROR message
will appear, Close the door and press
START/ENTER immediatety_
M_ROW^W
0
SURE SIMMER
The Sure Simmer feature wilt bring 1-4
quarts of foods such as soups and stews
to a boil, then allow them to simmer for
up to 2 hours.. Cover the dish with a lid.
1. Place covered food in the oven.
2. Press the MICROWAVE button.
3 Turn the dial to SURE SIMMER..
Press the dial to enter..
4. Turn the diat to set the amount of
time you want the food to simmer
after boiting.
5. Press the dial or the START/ENTER
button to start cooking_
The oven signals when the food begins to
boil and the simmer time begins counting
down_ Stir the food if necessary,
Do not open the door until time is counting
down in the display. If the door is opened,
close it and press START/ENTER
immediatelyo
NOTE: Do not use this feature twice
in succession on the same food portion
it may result in severely overcooked
or burnt food. If food is undercooked
after the countdown, use COOK TIME
in the microwave selector for additional
cooking time.
26

0
RICE
The Rice feature will cook 1/2-2 cups of
long-cooking rice. Follow the package
instructions for the amount of water to add
Use an oversized microwaveable dish and
cover the dish with a lid
1. Place covered food in the oven
2. Press the MICROWAVE button.
3. Turn the dial to RICE. Press the dial
to enter.
4. Press the dial or the START/ENTER
button to start cooking.
The oven signats when steam is sensed
and the time remaining begins counting
down_ Stir the food if necessary.
Do not open the door until time is counting
down, If the door is opened, close it and
press START/ENTER immediately,
NOTE: Do not use this feature twice
in succession on the same food portion
-- it may result in severely overcooked
or burnt food. If food is undercooked
after the countdown, use COOK TIME
in the microwave selector for additional
cooking time.
MI_ROWAV_
STNtl_t_F_R
FROZEN ENTREE
The Frozen Entree feature will cook
an 8-22 ounce frozen entr6e
1 Loosen one corner of the plastic cover
on the entr6e and place in the oven
2_ Press the MICROWAVE button°
3. Turn the diaI to FROZEN ENTREE.
Press the dial to enter
4. Press the dial or the START/ENTER
button to start cooking.
The oven signals when steam is sensed
and the time remaining begins counting
down. Stir the food if necessary.
Do not open the door until time is counting
down_ If the door is opened, close it and
press START/ENTER immediately.
NOTE: Do not use this feature twice
in succession on the same food portion
it may result in severely overcooked
or burnt food. If food is undercooked
after the countdown, use COOK TIME
in the microwave selector for additional
cooking time.
27

WA_M_EI_T
ST_f/ENI"_
REHEATING
The REHEAT feature reheats servings
of previously cooked foods or a plate
of leftovers
1 Press the WARM/REHEAT button
2. Turn dial to select REHEATING.
Press the dial to enter,=
3. Turn dial to find the food you want
to reheat_ Press the dial to enter
4 If required, the oven wi!l prompt you
to select the amount. Turn the dial to
select and press to enter_
5. Press the dial or the START/ENTER
button to start reheating.
To review settings during cooking,
press the selector dial
Reheated foods may have wide
variations in temperature. Some
areas may be extremely hot.
NOTE: Do not use this feature twice
in succession on the same food portion
-- it may result in severely overcooked
or burnt food. If food is not hot enough
after the countdown, use COOK TIME
in the microwave selector for additional
reheating time.
it is best to use COOK TIME and not
REHEAT for these foods:
• Bread products
• Foods that must be reheated uncovered
• Foods that need to be stirred of turned
• Foods calling for a dry look or crisp
surface after reheating
REHEAT GUIDE
Food Type
Beverage (8-10 oz.)
Pasta (8-12 ozo)
Pizza Slices (1-4 slices)
Plate of Leftovers
(2-3 foods, 4 oz° each)
Sauces (4-8 oz.)
Soup (8-20 oz.)
Comments
Do not cover_
Cover with wax paper, lid or vented plastic wrap.
Do not cover.
Cover with wax paper or vented plastic wrap
Cover with lid or vented plastic wrap.
Cover with lid or vented plastic wrap.
POWl3t
0
STA_En
MICROWAVE POWER LEVEL
I_ First, follow directions for COOK TIME,
TIME DEFROST or ADD MINUTEr
2_ Press the POWER button..
3. Turn the dial clockwise to increase and
counterclockwise to decrease the power
level. Press the dial to enter.
4. Press the dial or the START/ENtER
button to start cooking..
• You can change the power level before
or during a cooking program.
Here are some examples of uses for
various power levels:
High 10: Fish, bacon, vegetables, boiling
liquids_
Meal-High 7: Gentle cooking of meat and
poultry; baking casseroles and reheating
Medium 5: Slow cooking and tenderizing
for stews and less tender cuts of meat.
Low 2 or 3: Defrosting; simmering;
delicate sauces.
Warm 1: Keeping food warm; softening
butter.
28

MI_DWAV_
0
S_TtErJ_
0
0
MICROWAVE RECIPE m
TO ENTER AND SAVE
Create and store up to 10 of your own
microwave recipes.
1_ Press the MICROWAVE button
2o Turn dial until MY RECIPES appears.
Press the dial to enter.
3_
44
5_
Turn dial until <empty> appears.
Press the dial to enter°
SELECT COOK TIME appears Turn
the dial to select the cooking time you
want. Press the dial to enter.
Turn the dial to change the power level
and press to enter_
6_
,
Spell out the food name by turning the
selector dial to advance through the
available characters. Press the dial
to enter a character. When you have
entered the entire name, press
START/ENTER, You may change
previously entered characters by
pressing the BACK button.
RECIPE ADDED appears. To begin
cooking, press the START/ENTER
button or press the STOP/CLEAR
button to store the recipe without
cooking
M_£I'_0WAVi_
O
_A_/FJat_
MICROWAVE RECIPEm
TO FIND AND USE
To find and use stored custom
microwave recipes:
1. Press the MICROWAVE button.
2, Turn dial to MY RECIPES and press
the dial to enter,
3, FOOD NAME and the recipe names
you entered will appear
4, Turn dial to your recipe and press the
dial to enter.
5 Press the START/ENTER button or
the selector dial to start cooking.
29

MICRDWAVE
ST_/E_ntTn
Q
©
MICROWAVE RECIPE--
TO ADJUST OR CHANGE
To adjust or change stored custom
microwave recipes:
1_Press the MICROWAVE button,
2 Turn dial to MY RECIPES and press
the dial to enter.,
& Turn the dial to the recipe you want
to change, Press the dial to enter,
4 Press the OPTIONS button,
5. Turn the dial to select CHANGE
RECIPE, Press the diaf to enter_
6 Turn the dial to select the cook time
and press the dial to enter,
7_,Turn the dial to select the power level
and press the dial to enter,
8, RECIPE ADDED appears. To begin
cooking, press the START/ENTER
button or press the STOP/CLEAR
button to store the recipe without
cooking,
MI_0WAW
©
MICROWAVE RECIPE--
TO DELETE
To delete stored custom microwave
recipes:
1, Press the MICROWAVE button
2, Turn dial to MY RECIPES and press
the dial to enter.
3o Turn the dial to the recipe you want
to delete. Press the dial to enter,.
4. Press the OPTIONS button,
5. Turn the dial to select DELETE
RECIPE, and press the dial to enter,
This deletes the recipe, You may now
enter and save a new recipe or press
STOP/CLEAR to return to the clock
display
30

D_OST
OE_D_
0
5T_JE_En
DE_:nD_
0
_A_T/Em_
AUTO DEFROST
Auto Defrost automatically sets the
defrosting times and power levels to give
even defrosting results for meats, poultry
and fish weighing up tosix pounds.
1, Remove food from the package and
place it on a microwave-safe dish,,
.
&
,
6_
o
Press the DEFROST button_
Turn the dial to DEFROST-AUTO,
Press the dial to enter,
Turn the dial to the food weight,
using the Conversion Guide at right.
For example, dial 1,,2for 1.2 pounds
(1 pound, 3 oz.,) Press the dial to edter.
Turn the food over when the oven
signals TURN FOOD OVER,.
Remove defrosted meat or shield warm
areas with small pieces of foil for even
defrosting
TIME DEFROST
Use Time Defrost to defrost for a selected
length of time.
1. Press the DEFROST button.
2, Turn the selector dial to DEFROST-TIME
Press the dial to enter.
3. Turn the dial to select the time you
want, Press the dial to enter,
4, Press the dial or START/ENTER button
to start defrosting.
5, Turn the food over when the oven
signals TURN FOOD OVER.
BREAD DEFROST
Bread Defrost automatically sets the
defrosting times and power levels for
defrosting breads,
Remove any wire twist-ties from package
and place bread on a microwave-safe
dish. Small servings of bread should be
removed from the packaging
1 Press the DEFROST button.
2, Turn dial to DEFROST-BREAD_
Press the dial to enter.
3 Turn the dial to enter the food weight,,
Press the dial to enter.
4. Press the dial or the START/ENTER
button to start defrosting.
31
• After defrosting, most meats need to
stand 5 minutes to complete defrosting
Large roasts should stand for about
30 minutes,
Conversion Guide
If the weight of food is stated in pounds
and ounces, the ounces must be
converted to tenths (,1) of a pound,
Weight of Food Enter Food Weight
in Ounces (tenths of a pound)
1-2 .1
3 .2
4-5 .3
6-7 ,4
8 .5
9-10 .6
11 ,7
12-I3 .8
14-15 ,9
Power level is automatically set at 3, but
can be changed. To change the power
ievets, see the Microwave Power Level
section° You can defrost small items
quickly by raising the power level after
entering the time° Power level 7 cuts the
total defrosting time in about half; power
level 10 cuts the total time to about 1/3,
When defrosting at high power levels,
food will need more frequent attention
than usual.
5, Turn the food over when the oven
signals TURN FOOD OVER,
• After defrosting, let bread stand
5 minutes to complete defrosting.
Bread Defrost Chart
BreadType Approximate Weight
'fSmall Bagel 0,2 tb
1 Large Bagel 03 lb
4 Slices of Bread 0,2 lb
1 Leaf of Bread 1.,0Ib
1 Dinner Roll 0.2 fb
1 Hamburger/Hot Dog Bun 02 Ib
1 Small Muffin 0,,2Ib
1 Large Muffir_ 0.3 lb

DEFROSTING TIPS
Use Auto Defrost for meat, poultry and
fish. Use Time Defrost for most other
frozen foods. Use Bread Defrost for
bread products.
, Foods frozen in paper or plastic can be
time defrosted in the package, but foods
should be taken out of the package when
using Auto Defrost. Small servings of
bread should be removed from the
package when using Bread Defrost°
Closed packages should be slit, pierced
or vented after food has partially
defrosted. Plastic storage containers
should be partially uncovered,
• Family-size, prepackaged frozen dinners
can be defrosted and microwaved. If the
food is in a foil container, transfer it to
a microwave-safe dish.
• Foods that spoil easily should not be
allowed to sit out for more than one hour
after defrosting. Room temperature
promotes the growth of harmful bacteria.
= For more even defrosting of larger
foods, such as roasts, use Auto Defrost
Be sure large meats are completely
defrosted before cooking.
When defrosted, food should be cool
but softened in all areas.. If still slightly
icy, return to the microwave very briefly,
or let it stand a few minutes
THINGS THAT ARE NORMAL
Interference
° TV/radio interference might be noticed
while using the microwave. Similar to
the interference caused by other small
appliances, it does not indicate a
problem with the microwave. Move
the radio or TV as far away from the
microwave as possible, or check the
position of the TV/radio antenna_
Oven Heat
° Cookware may become hot because of
heat transferred from the heated food°
Oven mitts may be needed to handle
the cookware..
• Steam or vapor may escape from
around the door,
Sounds
° You may hear a dull thumping sound
while the oven is operating.
32

"FOOD IS READY"
To remind you that you have food in the
oven, the oven will display FOOD IS
READY and beep once a minute until
you either open the oven door or press
the STOP/CLEAR button.
O
REVIEW
Use this feature to review the current
cooking selections you have set.
Press the selector dial at any time during
cooking,
0_0_
O
BEEPER VOLUME
Use this feature to adjust the volume of
the beeper or to turn the beeper off°
1. Press the OPTIONS button,
2, Turn the dial to BEEPER VOLUME and
press the dial to enter°
3, Turn the dial to select the beeper volume,
Press the dial to enter,
OFTIBN$
O
CLOCK
The clock must be set before you can
use your oven for the first time (see the
"Quick Start" section for instructions)_
1oTo change the clock time, press the
OPTIONS button and turn the dial to
CLOCK Press the dial to enter.
2. Turn the dial to set hours., Press the
dial to enter,
3. Turn the diaI to set minutes Press the
dial to enter1
4. Turn the dial to select AM or PM Press
the dial to enter
0
CLOCK DISPLAY ON!OFF
Use this feature to turn your clock
display on or off.
1_ Press the OPTIONS button.
2. Turn the dial to CLOCK DISPLAY, Press
the dial to enter,
3_ Turn the dial to select ON or OFE Press
the dial to enter..
OP/1DNS
O
DISPLAY SPEED
You can change the display scroll
speed if the message scroll is too
slow or too fast.
1. Press the OPTIONS button,
2. Turn the dial to DISPLAY SPEED. Press
the dial to enter.
3. Turn the dial to select the scroll speed°
Press the dial to enter,
33

O
O_ON$
0
AUTO NIGHT LIGHT
Use this feature to program the on/off
time for an automatic night light.
To set the Night Light:
1o Press the OPTIONS button°
2, Turn the dial to NIGHT LIGHT Press
the dial to enter,
3. Turn the dial to SET NITE LIGHT. Press
the dial to enter..
4r Set hours, minutes, and AM/PM for the
on and off times. Press the dial after
each selection_
REMINDER
Use this feature like an alarm clock to
help you keep up with things to do.
To set the Reminder:
t_ Press the OPTIONS button=
2 Turn the dial to REMINDER and press
the dial to enter.
3- Turn the dial to SET. Press the dial
to enter..
4. Set the hours, minutes and AM/PM
for the on and off times. Press the dial
after each selection.
HELP
Use this feature to find out more about
your oven and its features. The display
will show a description for the program
you have chosen.
To check the Night Light setting:
1_ Press the OPTIONS button.
2 Turn the dial to NIGHT LIGHT,, Press
the dial to enter°
3, Turn the dial to CHECK SETTING.
Press the dial to enter,.
To cancel the Night Light setting:
1, Press the OPTIONS button,
2. Turn the dial to NIGHT LIGHT. Press
the dial to enter.
& Turn the dial to CLEAR SETTING,
Press the dial to enter°
To review the Reminder setting:
1 Press the OPTIONS button,,
2. Turn the dial to REMINDER and press
the dial to enter_
3. Turn the dial to REVIEW. Press the dial
to enter.
To clear the Reminder setting:
1, Press the OPTIONS button.
2. Turn the dial to REMINDER and press
the dial to enter,
3. Turn the dial to CLEAR, Press the dial
to enter.
1. Press the OPTIONS button.
2. Turn the dial to HELP.. Press the dial
to enter,
3o Turn the dial to select the feature name
Press the dial to enter.
Features found in the HELP function.
Add Minute Defrost (Auto)
Adjust Defrost (Bread)
Back Defrost (Time)
Bacon Display Speed
Beeper Volume Food Menu
Beverage Frozen Entree
Child Lockout Help
Clear/Off Kitchen Timer
Clock Manual Cook
Clock Display Microwave
Convection My Recipes
Cook Time Night Light
Options Soup
Pasta Speedcook
Pizza Start/Enter
Plate Stop/Clear
Popcorn Sure Simmer
Power Surface Light
Reminder Vegetables (Canned)
Repeat Last Vegetables (Fresh)
Resume Vegetables (Frozen)
Review Vent Fan
Rice Warm/Reheat
Sauce
34

ST^_tI_ CHILD LOCKOUT
You may lock the control panel
to prevent the oven from being
accidentally started or used by
children°
Press and hold START/ENTER for about
3 seconds to lock and unlock.
When the control panel is locked, Control
Panel LOCKED will be displayed briefly
any time a button or the dial is pressed.
C_
O
O
SURFACE LIGHT
Use to light your cooktop.
Press the C_ button, then turn the diaI
if you want to change the brightness.
Press the C_ button again to turn the
light off,
To turn the Night Light on, press and hold
the C_ button for about 3 seconds.
To turn the Night Light off, press the
C_ button..
O
O
VENT FAN
The vent fan removes steam and other
surface vapors from cooking.
Press the _' button, then turn the dial
if you want to change the fan speed.
Press the _ button again to turn the
fan off..
KI'tI:1IEN "JIM,it
O
KITCHEN TIMER
Use this feature anytime you need
a general purpose timer. It can even
be used while cooking in the oven.
1 Press the KITCHEN TIMER button.
2. Turn the dial to select the minutes.
Press the dial to enter°
3. Turn the dial to select the seconds.
Press the dial to enter.
To pause, press KITCHEN TIMER. To
restart, press KITCHEN TIMER again.
To cancel, press and hold the KITCHEN
TIMER button down for about 3 seconds
AUTOMATIC FAN
An automatic fan feature protects the
oven from too much heat rising from
the cooktop below it and from too much
heat inside the oven cavity.
It automatically turns on if it senses
too much heat
If you have turned the fan on, you may
find that you cannot turn it off. The fan will
automatically turn off when the internal
parts are cool. It may stay on for 30
minutes or more after the cooktop and
oven controls are turned off
35

HELPFUL HINTS
An occasional thorough wiping with
a solution of baking soda and water
keeps the inside fresh.
Be sure the power is off before
cleaning any part of this oven.
Walls, floor, inside window,
mefa_ and plastic parts
on the door
HOW TO CLEAN THE INSIDE
Some spatters can be removed with a
paper towel, others may require a damp
soapy cloth. Remove greasy spatters with
a damp sudsy cloth, then rinse with a
damp cioth.
Do not spray or splash liquids directly
into the heater areas,
Do not use abrasive cleaners or sharp
utensils on oven walls.
Never use a commercial oven cleaner
on any part of your oven.
Do not clean the inside of the oven with
metal scouring pads° Pieces can break off
the pad, causing electrical shock.
Some food or liquids may fall into the
heater areas_ The heaters will cook most
of the food away.. Any remaining residue
will not affect cooking
Turntablesupport
DOnotuse the oven without
the turntablesupport In place.,
REMOVABLE TURNTABLE
SUPPORT
The area underneath the turntable support
should be cleaned frequently to avoid
odors and smoking during a cooking cycler
The turntable support can be broken
if dropped. Wash carefully in warm, sudsy
water.. Dry completely and reptace.
To replace the turntable support, place its
center over the hub in the center of the
oven and turn it until it seats into pTace
Black metal tray
TRAY AND TURNTABLE
To prevent breakage, allow the black metal
tray and glass microwave turntable to cool
completely before cleaning. Wash carefully
in warm, sudsy water or in the dishwasher°
A soap-filled scouring pad can also be
used to clean the black metal tray.
Do not use abrasives, as they may
damage the finish.
CC>
Glassmicrowave
turntable
36

HOW TO CLEAN THE OUTSIDE
We recommend against using cleaners
with ammonia or alcohol, as they can
damage the appearance of the oven.
If you choose to use a common
household cleaner, first apply the
cleaner directly to a clean cloth,
then wipe the soiled area°
Case
Clean the outside with a sudsy cloth,
Rinse and then dry. Wipe the window
clean with a damp cloth
Glass Door (on some models)
Wipe with a clean damp sponge. Dry
thoroughly. Do not use cleaning sprays,
large amounts of soap and water, abrasives
or sharp objects on the panel--they can
damage it.
Stainless Steel Control Panel and
Door (on some models)
Do not use a steel wool pad; it will scratch
the surface°
To clean the stainless steel surface, use
a hot, damp cloth with a mild detergent
suitable for stainless steel surfaces. Use
a clean, hot, damp cloth to remove soap.
Dry with a dry, clean cloth
If food soil remains, try a general kitchen
cleaner, such as Fantastik_, Simple Greene
or Formula 409_.
For hard-to-clean soil, use a standard
stainless steel cleaner, such as Bon-AmP
or Cameo _.
Apply cleaner with a damp sponge. Use a
dean, hot, damp cloth to remove cleaner
Dry with a dry, clean cloth. Always scrub
lightly in the direction of the grain.
After cleaning, use a stainless steel
polish, such as Stainless Steel Magic,,
Revere Copper and Stainless Steel
Cleaner _ or Wenol All Purpose Metal
Polish _.Follow the product instructions
for cleaning the stainless steel surface.
Bottom
Clean off the grease and dust on the
bottom often. Use a solution of warm
water and detergent.
Vent Grill
Use warm soapy water and a dishcloth to
wipe offthe grill. If desired, use cotton
swabs to get in between the grill Iouvers
Door Frame
It's important to keep the area clean
where the door seals against the oven..
Use only mild, non-abrasive detergents
applied with a clean sponge or soft cloth.
Rinse well,
Remove screw
I li......
COOKTOP LIGHT/NIGHT LIGHT
1. To replace the cooktop fight/night light,
first disconnect the power at the main
fuse or circuit breaker panel, or pull
the plug.
2. Remove the screw from the side of the
light compartment cover and lower the
cover until it stops..
& Be sure the bulb is cool before removing.
Gently pull the bulb from the receptacle.
Replace the burned-out bulb with a
120 volt, 20 watt (max.) halogen bulb
(WB36X10213), available from your
nearest Sears Parts & Repair Center.
Call 1-800-4-MY-HOME. _ High-intensity
20 watt bulbs, available in most
supermarkets and hardware stores,
may also be used for replacement.
4.. Push the new bulb straight into the
receptacle all the way, then raise the
light cover and replace the screw.
Connect electrical power to the oven.
37

Charcoal filter (on some models)
VENT FAN
The vent fan has two metal reusable
vent filters.
Models that recirculate air back into
the room also use a charcoal filter.
Reusable vent fi{ters
(on a!l models)
REUSABLE VENTFILTERS
The metal filters trap grease released by
foods on the cooktopo They also prevent
flames from foods on the cooktop from
damaging the inside of the oven.
For this reason, the fitters must always be
in place when the hood is used. The vent
filters should be cleaned once a month,
or as needed.
............ I
REMOVING AND CLEANING
THE FILTERS
To remove, slide them to the rear using
the tabs,. Pull down and OUtr
TOclean the vent filters, soak them and
then swish around in hot water and
detergent. Don't use ammonia or ammonia
products because they will darken the
metal Light brushing can be used to
remove embedded dirt.
Rinse, shake and let dry before replacing
To replace, slide the filters into the frame
slots on the back of each opening. Press
up and to the front to lock into place,.
38

CHARCOALFILTER
The charcoal filter cannot be cleaned.
It must be replaced. Order Part No.
WB2X9883 available from your
nearest Sears Parts & Repair Center.
Call t-800-4-MY-HOME. _
If the model is not vented to the outside,
the air will be recirculated through a
disposable charcoal filter that helps
remove smoke and odors.
The charcoal filter should be replaced
when it is noticeably dirty or discolored
(usually after 6 to 12 months, depending
on usage)
Remove 2 grille screws
to remove the grille
TO REMOVE THE
CHARCOAL FILTER
To remove the charcoal filter, first
disconnect power at the main fuse or
circuit breaker, or pull the plug. Remove
the top grille by removing the two screws
that hold it in place,
You may need to open the cabinet
doors to remove the screws.
Slide the filter toward the front of the oven
and remove ito
,/
TO INSTALL THE
CHARCOAL FILTER
To install a new charcoal filter, remove
plastic and other outer wrapping from the
new filter,.
Insert the filter into the top opening of the
oven as shown, maneuvering it behind the
plastic grille until itfits squarely into place,
It will rest at an angle behind the plastic
grille on two side support tabs and in front
of the right rear tab. Replace the grille and
two screws, Reconnect power,
39

PROBLEM POSSIBLE CAUSE SOLUTION
LIGHTS
Light during a This is normal, . This is normal,, The oven senses heat level and
the speedcook cycle Power level has been adjusts automatically,
dims and cycles on automatically reduced
and off, even at full because the oven is hot.
)ower levels
Light visible around This is normal. * When the oven is on, light may be visible around
the door and the door and outer case
outer case while
speedcooking
FAN
Fan continues to run The oven is cooling ° The fan wilt automatically shut off when the internal parts
after cooking stops of the oven have cooled
Oven vent emits warm This is normal.
air while oven is on
Fan comes on This is normal ° If the cooktop gets too hot, the vent fan
automatically when comes on.
oven not in use
Fan comes on This is normal, ° If the microwave is used after speedcook and the oven senses
automatically when that it istoo hot, the vent fan comes on to cool the oven,
using the microwave
COOKING
The oven makes Clicks and fans blowing • These sounds are normal,
unusual sounds are normal° The relay
while cooking board is turning the
components on and off_
Smoke comes out Food is high in fat • Smoke is normal when cooking high-fat foods,
of the oven when content. Aerosol spray Use vegetable oil or olive oil on the meat itself
the door is open used on the pans° instead of coating the entire pane
Food is not fully Programmed times • lncrease or decrease time for aloneness or adjust
cooked or browned may not match the size the upper or lower lamps for browning.
at the end of a or amount of food you
cooking program are cooking.
4O

PROBLEM
!DISPLAY
The display is blank
"Control Panel
LOCKED" appears
in display
Control display is
lighted yet oven
will not start
OTHER PROBLEMS
The door and inside
of the oven feels hot
POSSIBLE CAUSE
Floor of the oven is
warm, even when
the oven has not
been used
The clock display has
been turned off.
The control has
been locked.
Clock is not set
Door not securely closed..
START/ENTER button
not pressed after entering
cooking selection
Another selection already
entered in oven and
STOP/CLEAR button not
pressed to cancel ito
Size, quantity or cooking
time not entered after
selecting VEGETABLES
(FRESH, FROZEN,
CANNED), BACON,
DEFROST-TIME,
COOK TIME or PIZZA.
STOP/CLEAR was
pressed accidentally.,
Food weight not entered
after selecting
DEFROST-AUTO
or DEFROST-BREAD.
The heat lamps
produce intense heat
in a small space.
SOLUTION
• Check the OPTIONS menu for clock display settings.
Turn the display on
• Press and hold START/ENTER for about
3 seconds to unlock the control.
Set the cfock_
Open the door and close securely.
Press START/ENTER
• Press STOP/CLEAR_
• Make sure you have entered cooking
time after selecting.
• Reset cooking program and press
START/ENTER
• Make sure you have entered food weight after
selecting DEFROST-AUTO or DEFROST-BREAD.
,,, ,,,,,,,_,,, .....................
• This is normal.
• Use oven mitts to remove food when ready,
• This is normal.
The cooktop light is
located below the oven
floor° When the light
is on, the heat it produces
may make the oven floor
get warm.
Oven will not start A fuse in your home • Replace fuse or reset circuit breaker.
may be blown or the
circuit breaker tripped,.
Power surge, • Unplug the oven, then plug it back in.
Plug not fully inserted • Make sure the plug on the oven is fully inserted into
into wall outlet., wall outlet,
Glass microwave • This is normal. Center the tray on the
turntable does not turntable support.
lock into center hub
41

Instrucciones de seguridad
Precauciones para evitar posibles exposiciones
a exceso de energ_a det microondas ............... 44
lnstrucciones importantes de seguridad ....... 44-47
lnstrucciones para ta conexi6n a tierra .......... 47
Cuidado y mantenimlento
Limpieza del aparato ............................... 78
Reposici6n de bombiltas .............................. 78
E! ventilador y los _tros de! ventifador ............. 79
Filtro de carb6n ........................................... 80
Operaci6n
&Qu_ es Speedcook o cocciSn r_pida? .............. 48
Partes importantes de su Homo Speedcook .49, 50
tnicio r_.pido ................................... 51, 52
Speedcooking o Cocci6n r_.pida ............... 53-60
Horneado a convecci6n ........................... 6t
FunciSn "Warming" (calentar) ..................... 62
Microondas ................................... 63-72
Otras funciones ................................. 73-76
Consejos para la soluci6n de problemas
Problemas y sofuciones .... .................... 81-83
Servicios al consumidor
UbicaciSn del modeto/numero de serie ........... 42
GarantJ'a ......................................... 43
Contrato de protecciSn maestra .................. 43
Servicios al consumidor .......................... 84
Servicios de reparaciSn .............................. 84
Para su conveniencia y referencia futura, sirvase escribir
los nlJmeros de modelo y de serie en el espacio provisto..
El numero de mode]o y el nt_mero de serie de su Homo
Speedcook se encuentra en una etiqueta al frente de la
etiqueta del homo, detr&s de la puertao
NI_iMERO DE MODELO:
363.
NUMERO DE SERIE:
ill
Z_
o
42

E I E
GARANT(A DEL HORNO
SPEEDCOOK
f
GARANT[A TOTAL DE UN AI_,IOPARA EL HORNO SPEEDCOOK
Per un abe a partir de ia fecha de compra, si este homo Kenmore Elite Speedcook falta debido a un defecto
material o do mane de obra, Sears Io reparar_, sin costa
GARANTfA TOTAL DE TRES AI_IOS PARA EL SISTEMA CALEFACTOR
Per tres aSos a partir de ta fecha de compra, si cualquier cafefactor o bombilla de este homo Kenmore Elite
Speedcook fal}a debido a un defecto material o de mane de obra, Sears Io reparar_ sin costo.
GARANTIA TOTAL DE ClNCO ANOS PARA EL MAGNETRON
Per cinco aSos a partir de la fecha de compra, si el Magnetr6n de este homo Kenmore Elite Speedcook falla debido
a un defecto material o de mane de obra, Sears 1orepararA sin costo
La cobertura de la garantia arriba expuesta aplica Onicamente a hornos Speedcook que se usen con
fines dom_sticos_
EL SERVlClO DE GARANT[A ESTh. DISPON1BLE AL CONTACTAR EL SERVIClO DE SEARS
AL 1-800-SU-HOGAR. ®
Esta garantia apiica l)nicamente mientras este producto se use en los Estados Unidos.
Esta garantfa le otorga derechos legales especfficos. Es posible que tenga otros derechos que pueden variar
entre estados,.
Sears Roebuck and Co. DepL 817 WA Hoffman Estates, IL 60179
Contrato de protecci6n maestra
Felicitaciones per su compra intefigente.. Su nuevo producto
Kenmore®est_ diseSado y fabricado para touches aSos de
operaciSn confiable. Sin embargo, al igual que redes los
productos, puede requerir de mantenimiento o reparaci6n
preventivas en cualquier memento. Es ah! cuando el contrato
do protecci6n maestra fe puede ahorrar dinero
y molestias
Adquiera un Contrato de protecci6n maestra ahora mismo y
prot#jase contra inconvenientes y gastos inesperadoso
El Contrato de protecci6n maestra tambi6n le ayuda a
ampliar la vida de su nuevo producto. Lo siguiente es
lo que se incluye en e! contrato:
v' Servicio experto per parte de nuestros 12,000
especiafistas profesionales de reparaciSn
V Servicio ilimitado sin costo per partes y mane de obra
en todas las reparaciones cubiertas
v' Garantia total--reposiciSn do su producto cubierto
si ocurren cuatro o m&s de cuatro fallas del producto
dentro de doce meses
v' Reposicibn del producte si el producto cubierto no se
puede reparar
v"Revisi6n anuai de mantenimiento preventive a su
soiicitud - sin cargo adicional
v' Ayuda telef6nica r&pida--asistencia telef6nica de parte
de un t_cnico do Sears sobre los productos que requieren
reparaci6n on casa, adem_.sde una conveniente
programaci6n de reparaciones
v' Proteccibn contra descargas el_ctricas para dafios
debido a fluctuaciones el6ctricas
v' Reembolso per alquiler si la reparaciSn del producto
cubierto toma m&s tiempo del prometido
Una vez adquiera el contrato, solo necesita una llamada
telefSnica para programar el servicio. Puede Ilamar a
cualquier hera del d[a o de la noche o programar la cita del
servicio per InterneL
Sears cuenta con m&s de t2.000 especialistas profesionales
de reparaciSn, quienes tienen acceso a m&s de 4,5 miHones
de partes y accesorios de calidad. Este es el tipo de
profesionalismo en el que puede contar para ayudar a
prolongar la vida de su nueva compra para tos ar_os
venideros, iAdquierael Contrato de protecci6n maestra hey
mismo!
Aplican ciertas limitaciones y exctusiones,
Para precios e informaci6n adicional, Ilame
al 1-800-827-6655.
Servicio de instalaci6n de Sears
Para la instalaci6n profesional de Sears
de eiectrodom6sticos, dispositivos para abrir puertas de
garaje, catentadores de agua y otros aparatos impertantes
para el hogar, en los EE.UU llame al 1-888-SU-HOGAR®_
43

INSTRUCCIONES IMPORTANTES DE SEGURIDAD
LEA TODAS LAS INSTRUCCIONES ANTES DE USAR.
PRECAUCIONES
PARAEVITAR
POSIBLES
EXPOSICIONES
A EXCESO DE
ENERGIA DEL
MICROONDAS
,ADVERTENCIA!
Per su seguridad, se debe seguir fa informaci6nde este manual pars reducir el desgo
de incendios, explosiones, cheques el6ctricos, exposiciones a exceso de energia del
microondas o pars evitardafios ala propiedad, daSos personaleso tap_rdida de la vide.
No intente operar este homo con la
puerta abierta ya que esto podrfa resultar
en una exposici6n dafiina ala energ[a
del microondas. Es importante no destruir
o alterar los btoqueos de seguridad
No coloque ning_n objeto entre el frente
del homo y la puerta ni permita que ia
suciedad e residues de limpiadores se
acumulen en las superficies de cierre.
No opere el homo siest& dafiado. Es
particularmente importanteque la puerta
del homo cierre correctamente y que no
haya dafios en la:
1 puerta (torcedura),
2 bisagras y cierres (rotes o suettos),
3 empaques de la puerta y superficies
de cierre herm_tico.
El homo Io debe ajustar o reparar el
personal correctamente calificado para
realizar servicioso
• Lea todas las instrucciones antes de user este aparato,
Cuando use aparatos eldctricos, se deben seguir
precauciones bdsicas de seguridad, incluyendo lss
siguientes:
• Lea y siga las precauciones espectficas en la secci6n
PRECAUCIONES PARA EVlTAR POSIBLES EXPOStCIONES A
EXCESO DE ENERG{A DEL MtCROONDAS
• Cerci6resede queel aparatoest_correctamenteinstaladoy
conectadoa tierraper un t_cnicocalificadode acuerdoconlas
instruccionesde instalaci6nsuministradas.
• lnstaleo coloqueeste aparatounicamentede acuerdocon las
instruccionesde instalaci6nsuministradas.
• Algunosproductostales comehuevosenterosy envases
sellados--por ejemp[o,tarroso borescerrados--podrian
explotar y no debencalentarseen este homo. Talusedel homo
podria resuitaren lesiones.
= No instaleeste aparatoencimadeun ]avaplatos.
• Este homono est_ aprobadoparause o pruebasen el agua.
• Este homocumplecon la listaULpars instalaci6nencimade
estufasel_ctricasy de gas°
• Este homoest&disefiado parauseencimade hornosno
mayoresde 36 pulgadas.Se puedeinstalartanto encimade
equipos de cocinade gas comeet(_ctricos.
, Noopere este aparatositiene un cableo enchufedafiado,
si no est&funcionandocorrectamentey si est,_estrepeado
y seha caido.
• AI igual qua concualquierotroaparato,senecesitade
supervisi6ncercanasi es usadoper nifios.
• Useeste aparato_nicamenteconel prop6sitopara el cualfue
disefiadosegunse describeenesta guia.
• No usequtmicoso vaporescorrosivesen este aparato
o Este aparatoest&especificamentedisefiado pars calentar,secar
o cocinar alimentos.Noest&dlsefiadopara use de laboratorioo
industrial
44
• Este aparato s61odebe set reparado per personal de servicio
calificado. Centacte el centre de servicie autorizado m&s
cercano para revisiones, reparaciones o ajustes.
• No cubra ni bloquee nlnguna abertura en este aparatoo
• No almacene este electrodom_stico al sire libre. No use este
producto cerca de ague--per ejemplo, en un s6tano h_medo,
pr6ximo a piscinas o albercas, cerca de un lavamanos o lugares
similares.
!
Mantenga el cable el_ctrico alejado de las superficies calientes
No sumerja el cable o el enchufe en agua
Consulte las instrucciones para la limpleza de ia superficie de la
puerta en ta secci6n de Cuidado y limpieza de esta guia.
Para reducir el riesgo de incendio en la cavidad del homo:
-- NO cocine excesivamente los alimentoso Atienda el
electrodom_stico cuando materiales de papal, pf&stico
o cualquier otro material combustible es colocado en
et interior del homo mientras cocina.
-- Retire los amarres de alambre o manijas de metal de los
contenedores de papel o pl&stico antes de colocartos en
el homo°
-- No use el homo corno espacio de almacenamiento.
No deje productos de papel, utensilios de cocina o alimentos
en el homo cuando no est_ en use.
-- Si los materiales en el interior del homo se incendian,
mantenga ta puerta de1homo cerrada, apague el homo
y desconecte etsuministro el_ctrico, o desconecte el
suministro et_ctrico hacia ta casa interrumpa el suministro
el6ctrico en el panel de interrupci6n de circuito. Si la puerta
se abre, el incendio se podda esparcir.
-- No utilice las funciones de los sensores dos veces seguidas
en la misma porci6n de comida. Si la comida no est_
completamente cocinada despu_s del primer conteo
regresivo, use COOK TIME para tiempe de cocci6n adicionaL
• No atmaeene nada directamente encima de la superficie
def homo de microondas cuando el microondas est& en
operaci6n.

• No opere el horno sin el soporte giratorio El soporte giratorio
no debe estar restringido para que pueda girar..
• Durante y despu_s del uso, no toque o permita que ta ropa u
otros materiales inflamables entren en contacto con cualquier
_rea interior del homo. Permita tiempo suficiente para que se
enfrie primero
• Las superficies potencialmente calientes incluyen la puerta
dei homo, el piso, tas paredes y el soporte giratorio.
• Cocine las carnes y las aves completamente; la came a una
temperatura INTERNA minima de 160_F y fas ayes a una
temperatura INTERNA minima de 180°F. Cocinar a estas
temperaturas por io general protege contra las enfermedades
causadas por los afimentos.
• Mantenga e! homo libre de acumulaci6n de grasa.
,* No descongele bebidas congetadas en botellas con cuello
angosto (especialmente bebidas carbonadas)° Incfuso si el
contenedor est_ abierto, se puede acumular presi6n+ Esto
puede causar que et contenedor expJote, to que podr[a
resultar en fesiones+
Los alimentos cocinados en Ifquido (como la pasta) tienden
a cocerse mAs r&pidamante que los aiimentos que contienen
menos humedad Si esto ocurriera, consulte la secci6n de
Cuidado y Limpieza de la secci6n del homo para
instrucciones sobre c6mo limpiar el interior del homo+
• Los alimentos calientes yet vapor pueden causar quemaduras.
Tenga cuidado a! abrir cualquier contenedor de alimentos
calientes, incluyendo las bolsas de palomitas de ma[z, bofsas y
cajas para cocina[ Para evitar posibles lesiones, didja e{ vapor
tejos de las manos y el rostror
• No cocine las papas en exceso, se poddan deshidratar y
prenderse, causando daSos a su homo.
,, Evite calentar atimentos para beb6s en frascos de vidrio,
incluso sin la tapa. Cerci6rese de que todos los alimentos
para beb_s est_n completamente cocinados. Revuelva los
alimentos para distribuir el calor uniformemente. Tenga
cuidado de evitar quemarse al calentar leche de f6rmula
para beb_so El contenedor puede estar m#.s fifo que la leche.
Siempre pruebe la leche antes de dar al beb&
,, No intente fre[r en aceite en el homo.
iADVERTENCIA!
ARQUEO
Si observa arqueo, presione el botSn STOP/CLEAR y
corrija el problema,
Arqueo es el t_rmino de microondas para las chispas en el
horno. El arqueo se causa cuando:
• El metal o papel de aluminio toca las paredes del homo.
,, El soporte giratorio no est,. instalado correctamente.
• El recipiente met#Jico usado durante ta cocci6n con
Speedcook o con microondas (excepto tas bandejas
provistas con el homo)°
A iADVERTENCIA!
ALIMENTOS
• AI cocinar en el microondas, coloque todos los atimentos y
contenedores en el plato giratorio de cristal del microondas
• No coloque palomitas de ma[z en eI homo a menos que
est_n en un accesorio de pWomitas para microondas o que
use palomitas marcadas para uso en hornos microondas.
• No hierva huevos en et homo Se acumular_, presi6n al
interior de la yema del huevo y causar& que explore, Io que
podr[a resultar en lesiones.
• No opere el homo sin a_imentos al interio_ Esto podria
causar daSos al homo, aumenta el calor alrededor del
magnetr6n y puede reducir la vida del homo
• Los alimentos con Ia piel exterior sin abrir, como las papas,
perros calientes, satchlchas, tomates, manzanas, yemas de
huevo, htgados de polio y otras menudencias se deben
perforar para permitir que el vapor escape durante !a cocci6n.
• EI aluminio no se dobh5 sobre el afimento (los hordes hacia
arriba act0an como antenas). Use papel de aluminio
_nicamente de la forma como se recomienda en esta guia.
• Los metales como fos alambres para amarrar, las paras para
aves o los ptatos con bordes dorados, en el microondas
,, Las toallas de papel reciclado que contengan piezas
pequeSas de metal que se usen en el microondas
45
AGUA SOBRECALENTADA
Los liquidos tales como agua, caf_ o t{_se pueden
sobrecatentar m&s air& del punto de ebullict6n sin aparentar
que est&n calientes. La evidencia de que los tiquidos est_n
calientes no siempre se presenta a tray, s de las burbujas
visibles o evidencias de que est&n hirviendo cuando los
envases son removidos del homo de microondas ESTO
PODRIA RESULTAR EN LIQUIDOS MUY CALIENTES QUE
COMIENZAN A HERVIR REPENTINAMENTE CUANDO
EL ENVASE ES MOVlDO O SI UNA CUCHARA U OTRO
UTENSlLIO ES INSERTADO EN EL LIQUIDO+
Para reducir el riesgo de lesiones personales:
-- No caliente los liquidos excesivamente.
-- Mueva el Ifquido a antes y la mitad del proceso de
calentamiento+
-- No use envases de lados rectos con cuellos estrechos
-- Despu_s de calentar, permita que el envase permanezca
en el homo de microondas por un corto periodo antes
de removerlo.
-- Use cuidado extremo cuando inserte una cuchara u otto
utensilio en el envase.

La base gtratoria debe
siempre ester an su lugar
cuando se use e! homo-
Et plato giratorlo de cristal
dei microondas slempre
debe ester en su fugar al
user el mlcroondas
REClPIENTES SEGUROS PARA
use EN EL MICROONDAS
Cerci6rese de usar recipientes de cocina
adecuados pare la cocci6n en microondas,
La mayorl'a de las cacerolas de vidfio, plates
para cocinar, razes de medir, tazas de
creme, cer&mica o vaji[las de porcetana que
no tengan borde o ba6o met_Iice con un
briilo met_lico se pueden utilizer.. Afgunos
recipientes est&n marcados con el letrero
"apropiado pare microondas'L
Coloque los alimentos o el contenedor para
microondas directamente en el vidrio
giratorio del microondas para cocina los
alimenteSo
• User la bandeja met_.lica negra durante ta
cocci6n en el microondas resuitar& en un
desempefio inferior de la cocci6no
Si no est6 seguro si un plato es pare use en
el microondas, haga esta prueba: coloque
en el homo e! plato que desea prober y una
taza de medir Ilena de agua, coloque la taza
de medir ya sea dentro o at lade dei plato
Encienda ef microondas per 30-45 segundos
a temperature alta Si el plato se calienta,
no se debe usar en el microondas.
Si el plato permanece file y s61o el ague
se catent6, entonces el plato es apto pare
microendas.
Es posibfe que los recipientes de cocci6n se
calienten debido a Ia transferencia de calor
del alimento calentado Pueden ser
necesarlos guantes de horno pare manipular
el recipiente_
No use productos de papel reciclado. Las
toalfas de papel, servilletas y papel cera
reciclados pueden contener fibres de metal
que pueden causer arqueo o prenderse_
Se deben evitar los productos de papel que
contengan nit6n o filamentos de ni_6nya
que se pueden prender tambi6n.
Use papel aluminio unicamente segOn se
indica en esta gufa Los plates conocidos
come "TV dinners" se pueden cocinar en
el microondas en bandejas de aluminlo
que seen inferiores a 3/4" de alto; retire
la cubierta superior de aluminio y regrese
la bandeja ala cala. AI usar aluminio en
el horno, mantenga el aluminio a una
distancia mfnima do 1 pulgada de los
costados del horna.
• No use ei homo pare secar peri6dicos,
• Si usa un term6metro de metal mientras
cocina, cerci6rese de que sea resistente
al homo de microondas.
Algunas bandejas de espuma de poliestireno
(come en las que se empacan tas carries)
tienen una cinta de metal incrustada al
rondo. AI user el microondas, el metal puede
quemar el fondo det homo o prender un
papel toalla.
Se pueden user papet toatla, papel encerado
y envolturas pt_.sticas pare cubrir los plates
y poder retener la humedad y evitar las
salpicaduras. Cerci6rese de ventitar las
envolturas pl;_sticas pare que el vapor
pueda salir
No todas fes envolturas pl_sticas son
adecuadas pare usar en hornos microondas..
Consulte et empaque para el use correcto_
Las botsas de cocinar pare ebuHici6n y las
bolsas de pl_stico cerradas herm6ticamente
deben rasgarse, romperse o ventilarse segt_n
se indica en ei empaque.. De !o contrafie,
el pl&stico podr_a explotar durante o
inmediatamente despu6s de cocinar,
to que podr[a resultar en lesiones, Tambi6n,
los contenedores pl_sticos pare almacenar
deben ester descubiertos al menos
parcialmente ya que 6stes forman un
selfo herm6tico. Cuando se cocina con
contenedores sellados con envoltura
pl6stica, retire la cubierta cuidadosamente y
dirija el vapor lejos de las manes y el rostro.
Recipientes pl&sticos para cocinar--Los
rec}pientes pl&sticos pare cocinar dise6ados
pare cocci6n en microondas son muy utiles,
pero se deben usar con cuidado. Es posible
que inctuso el pl_stico apto para microondas
no sea tan tolerante en condiciones do
cocci6n e×cesiva come los materiales de
vidrio o cer_mica y puede ablandarse o
quemarse si so somete a codes periodos
de cocci6n excesiva, Durante exposiciones
m&s prolongadas a cocci6n excesiva, el
aiimento y el recipiente se podrfan prender.,
Siga estas pautas:
Use tJntcamente pl&sticos para use seguro
en el micreondas y _selos en estricto
cumplimiento con las recomendaciones
del fabficante del recipienteo
2. No introduzca recipientes vac[os en el
microondas.
3. No permita que los ni6os usen recipientes
pl6sticos sin supervisi6n complete..
46

La base giratoria debs
estar siempre en su luger
al usar el homo
Coloque los alimentos o
reciptente no met_fico,
resfstente el homo,
dlrectamente en la bandeja
met_tica negre para cecci6n
r&ptda, hornear o catentar,
Aseg0rese de que est_
correctamenle conectado
e tierra antes de user
RECIPIENTES PARA
MICROONDAS PARA LAS
FUNClqNES DE SPEEDCOOK O
COCCION R/_PIDA, HORNEAR
A CONVECCION Y CALENTAR
• El homo y la puerta se pondr_n muy
calientes cuando se use la funcl6n
Speedcook o horneado a convecci6n.
• Los recipientes se podr_n calientes Ser#,n
necesados guantes para homo para
manipular eEreclpiente.
• No use cubiertas, contenedores o bolsas
para cocinar/hornear de papet aluminio,
pi_stico o cera al utiHzar la cocci6n r_pida..
• No cubra ta base giratoria, las bandejas
ni ninguna parte del homo con papel de
aluminio. Esto podr[a causar arqueo
en el homo.
INSTRUCCIONES PARA LA
CONEXION A TIERRA
AiADVERTENCIA!
El use incorrecto del enchufe de conexi6n
a tierra podrfa resultar en un riesgo de
cheque el_ctrico.
Este aparato debe conectarse a tierra, En e!
case de un corto circuito ef_ctrico, la conexi6n
a tierra reduce el riesgo de un cheque el_ctrico
ofreciendo un cable de escape para la corriente
el_ctrlca.
Este aparato est,, equipado con un cabfe
el_ctrico que tiene un afambre de conexi6n a
tierra con un enchufe de conexi6n a tierra.. El
enchufe se debe introducir en una tomacorriente
que est_ correctamente instalada y conectada
a tierra
Consuite con un electricista calificado o t_cnico
de servicio si ias instrucciones de conexi6n a
tierra no son completamente claras o si hay
• Use ta bandeja plana negra met&lica al iguat
que usada una bandeja plana de hornear o
una bandeja de hornear.
• Coloque los alimentos en recipientes aptos
para el microondas directamente en las
bandejas al cocinar..
• Cualquier plate apte para use en el
microondas se puede usar en el homo
Las recetas en el libro de cocina incluido
con el homo se ensayaron en recipientes
de cocina marca Pyrex _ y Anchor Hocking e
y cacerolas de cer&mica Corningware _.Los
tiempos de cocci6n y los resultados pueden
variar al usar otros tipos de pSatos aptes para
el homo Col6quelos directamente en la
bandeja met&lica negra,,
• No use el homo para secar peri6dicos
• El use de la base giratoria de cfistal con las
funciones de cocci6n r_pida y horneado a
convecci6n resuttar& en un desempeSo
inferior de la cocci6n
duda en cuando a la conexi6n correcta a tierra
del aparato,
Si la tomacorriente es una de tipo est_.ndar de
dos patas, es su respensabilidad persenat y
obfigaci6n reemplazarta per una tomacorriente
de tres patas correctamente conectada a tierra.
Bajo ninguna circunstancia cortee retire la
tercera pata del cable et_ctrico.
No use un enchufe adaptador con este aparato..
No use un cable de extensi6n con este
aparato.. Si el cable el_ctrico es demasiado
corto, solicite a un eFectricista catificado o
a un t_cnico de servicio que instals una
tomacorriente cerca al aparato.
Para mejor operaci6n, conecte este aparato
en su propia tomacorrlente el_,ctrica para evitar
el parpadeo de fa luz, la quema de fusibles o
el saito del interrupter de circuitos
EL VENTILADOR
El ventilador operar_ autom_ticamente bajo
ciertas condiciones (consulte la funci6n
Automatic Fan [Ventilador autom&tico])Tenga
cuidado de evitar el inicio y ta propagaci6n de
incendios accidentales mientras cocina cuando
el ventilador est,. en use.
• Limpie con frecuencia el costado inferior deb
homo No permita que la grasa se acumule
en el microondas o en el filtro del ventilador.,
• En el evento de un incendio per grasa en las
unidades de la supefficie per debajo del
homo, apague una sart_n en llamas en la
unidad de la superficie cubriendo la sart_n
comptetamente con una tapa, una lata de
galfetas o una bandeja plana.
o
Tenga cuidado al limpiar Ios filtros de
ventiladoro Los agentes corrosives de
limpieza, come los limpiadores de homo
basados en lejia, pueden dafiar los filtros
Cuando prepare alimentos en llamas bajo
el homo, encienda el ventilador
Nunca deje ias unidades de la superficie
debajo del homo sin supervisi6n en
temperaturas altas.. La ebutlici6n en exceso
puede causar humo y derramamientos de
grasa que pueden prenderse y propagarse
si el ventilador est& operando. Para reducir
la operaci6n autom_tica del ventilador, use
recipientes de cocina de tama#,o adecuado
y use calor alto en las unidades de la
superficie _nicamente cuando sea necesario.
GUARDE ESTAS INSTRUCClONES
47

Este homo Speedcook o de cocci6n rApida utiliza
tecno!ogfa de avanzada Advantium e 120 para aprovechar
la potencia de [a luz. El homo Speedcook cocina el
exterior de los alimentos de manera muy similar ai cator
radiante convencional, penetrando la superficie de
manera que el interior se cocine de manera simult=Snea
Mientras el calor radiante es la principal fuente de
energ[a, se agrega un "refuerzo por microondas" con
ciertos alimentos. Los alimentos se cocinan de manera
uniforme y r&pida, reteniendo su humedad natural.
iiiiiinlllllllllnll II I"1 ' Inl Inlll I IIn IIIII [IIIHIIIII
n, "U[I Ilnl UlIIInUl
I IIII '_1_'11_111111 I II II1'1
...................................... nl nllnlnnnll [11 n i nl
ii nun lU ulnnlllllllllll iii nlln
...................... II n'nnlln I 111111 n i ii
,,,,,,,,,, ,,,, ii1,1,,
|
|
o O O
o©
o
o
oO o
0 0 0
Base giratoria
= La base giratoria rota para garantizar una cocci6n
uniforme.
Controles
• El control del homo contiene recetas preestablecidas.
• El bot6n de girar y presionar hace que la selecci6n
del ment3 sea f&ciL
Cocci6n r_pida
° Una bombilla hal6gena de 500 vatios y un calefactor
de cerAmica de 600 vatios cocinan los alimentos
desde arriba
° Un calefactor de cer#.mica de 375 vatios cocina los
alimentos desde abajo
• El ventilador de convecci6n garantiza un calentamiento
uniforme.
Hornear/calentar a convecci6n
o Un calefactor de 1100 vatios calienta los alimentos
desde arribao
o Un calefactor de cer&mica de 375 vatios calienta los
alimentos desde abajo,.
= El ventilador de convecciSn garantiza un calentamiento
uniforme
Microondas
• Se agrega un "refuerzo" de microondas con ciertos
alimentos
° El homo tambi6n se puede utilizar como un homo
de microondas de 900 vatios
48

NOTA:En esta guia, las caracterfsticas y el aspecto pueden variar de su modelo.
0 0 •
|
|
_ 0 0
o o o
@
@
Base giratoria
La base giratoria siempre debe estar en su Iugar,
en el piso del homo, para todas tas coooionesr
Cerci6rese de que la base giratoria est_ firmemente
colocada en el centro del homo°
Lata/bandeja metdlica negra de hornear
Coloque los alimentos o el recipiente correcto en
la bandeja met_lica y co!oque en la gu{a giratoria
cuando use las funciones de cocci6n r_.pida,
hornear a convecci6n o calentaro
Plato giratorio de cristai del microondas
Coloque el plato giratorio en ia base giratoria
cuando utilice las funciones del microondas.
El plato giratorio no encajar_ en el centro.
Coloque alimentos o recipientes adecuados para
microondas directamente en el plato giratorio.
Calefactores superiores
Operan cuando se usan Ias caracteristicas de
cocci6n r&pida, homear a convecci6n y calentar
0
Ventana
Permite que los alimentos se vean mientras que
las ondas dei microondas se mantienen al interior
dethomo.
Manija de la puerta
Hale para abrir la puerta. La puerta se debe cerrar
firmemente para que el homo opere
Cerrojos de la puerta
Ventilador
Presione el botSn _' para retirar el vapor al
cocinar en la estufa de la superficie.
O alefactor de cer_mica inferior
Opera cuando se usan las caracte6sticas de
cocci6n r&pida, hornear a convecci6n y calentar,,
Luz de superficie C_
Presione el botSn C_ para encender y apagar
la luz para ituminar la estufa de ta superficie,
Panel de control
Los botones para operar et homo se encuentran
en el panel de control,
Centro
El centro gira la base giratoria, Cerci6rese de que
el centro est6 siempre firme en su lugar en el fondo
del horno.
49

CONTROLES DE COCClON
Con su homo Speedcook o de cocciSn r_pida, puede cocinar
con luces halSgenas de afta intensidad, calefactores de
cer&mica y/o energfa convencional de microondas.
SPEEDOOOK O COCClON R._,PIDA
Presione este botSn para tener acceso al men0 de cocci6n
r_,pida o para establecer su propio programa de cocci6n r_.pida,.
Presione y sostenga pot 3 segundos para repetir la 01tima
selecci6n de cocci6n
BACK (regresar)
En ciertas funciones, presione este bot6n para ragresar
ai paso anterior
POWER (potencia)
Presione este bot6n y gire/presione el dial de setecci6n
para cambiar los niveles de cocciSn r&pida o potencia del
microondas, o la temperatura del homo a convecciSn antes
y durante la cocci6n.
CONVECTION (¢onvecci6n)
Presione este bot6n para hornear alimentos usando la cocciSn
en el homo a convecci6n.
WARMIREHEAT (calentar/recalentar)
Presione este bot6n para operar las funciones de cafentar y
recalentar. Mantenga los alimentos calientes, cocinados a la
temparatura de servir, o recaliente las porciones de atimentos
anteriormente cocinados
MICROWAVE (microondas)
Presione este bot6n para tener acceso al menu del microondas
o para configurar su propio programa de microondas,
DIAL DE SELEOCI()N---Gire para vet las opciones,
presione para seleccionar.
Primaro gire, luego presione el dial para hacer selecciones
Tambi_n, use el dial para aumentar (en el sentido de las
manecillas de1reloj) o disminuir (en el sentido contrario de las
manciflas del re!oj) los tiempos de cocci6n o Ias temperaturas,
OPTIONS (opciones)
Presione este bot6n para configurar el reloj y tener acceso a
las funciones de volumen de la seSal, encendido y apagado de
Ia pantaila del reloj, velocidad de desptazamiento de la pantaila,
ayuda, recordatorio y luz nocturnao
START/ENTER (iniciar/seleccionar)
Presione este bot6n para iniciar o hacer una pausa en
cuaiquier funciSn de cocci6n
STOP/CLEAR (parar/borrar)
Presione este bot6n para cancetar TODOS los programas
del homo, excepto el refoj, luz nocturna autom&tica, reloj
de cocina y recordatorio.
POPCORN (palomitas de mafz)
Presione para preparar palomitas de ma[z preempacadas
para microondas_
ADD MINUTE (agregar minuto)
Presione para un minuto de tiempo de cocci6n de microondas..
Cada vez que el bot6n se presione, se agrega un minuto
adicional a[ tiempo restante de cocciSn., E! homo inicia de
inmediato.
BA(_¢ POWER
SPEt_DCOOK 0 0
CONW_ON _/Dial
WA_MIREHEAT
MtCBOWAVI_
OPIIDN5
STOPICLF.&R
STABT/ENTE_
de setecci6n
POP'CORN AI_D MINIRE DEFRO_"T
_ Ki'Tr._4:EN TIMER
O O O
DEFROST (descongeiar)
Presione este bot6n para descongefar carnes porpeso
o tiempo, o para descongelar pan,
VENT FAN (ventilador)
Presione este bot6n para retirar los vapores producidos al
cocinar en la superficie,
SURFACE LIGHT (luz de la superficie) C_
Presione este bot6n paraencender y apagar la luzde la estufa
KITCHEN TIMER (reloj de cocina)
Presione este bot6n para configurar el reloj de minutos,,
5O

CONFIGURE EL RELOJ
A1 conectar inicialmente el homo, o
despuds de una interrupci6n en el fluido
el_ctrtco:
1 Gire el dial selector para configurar la hera..
Presione el diat para seleccionar.
2. Gire el dial para configurar los minutes.
Presione et dial para seleccionar.
3. Gire el dial para buscar AM o PM. Presione
el dial para sefeccionar.
Para cambiar la hera:
1_ Presione el bot6n OPTIONS (opciones)
2. Gire el dial hacia CLOCK (reloj)..Presione el
dial para seleccionar y siga las instrucciones
de la pantalla para configurar.
SPEOCI:) D_;
ADO Mlf_uft
O
INICIE LA COCCI6N R,_PIDA
Paso 1:
Presione el bot6n SPEEDCOOK
Paso 2:
Gire el dial hasta que fa pantalla muestre
FOOD MENU (men0 de alimentos). Presione
el dial para ingresar.
Paso 3:
Gire e_dial para buscar el tipo de aiimente que
desea Presione el dia! para seleccionar
Paso 4:
Gire el dial para buscar el alimento especffico..
Presione el dial para seleccionar.
Paso 5:
Gire el dial para seleccionar la cantidad,
tamafio y/o nivel de cocci6n (si se necesario,
et home le indicar&) Presione el dial despu_s
de cada selecci6n
COMe USAR EL MICROONDAS
CON LA FUNCION ADD MINUTE
(agregar minute)
Presione ADD MINUTE para incrementos
de un minuto de tiempo de cocci6n de
microondas.
Paso 6:
Despu_s de realizar la 01tima selecci6n,
aparecen la hera y los niveles de potencia
Esto es seguido un instante despu_s per un
mensaje sobre ef recipiente de cocciSn y
START? (inicio).
Paso 7:
Una vez que la pantalla muestre START?,
coloque Ios alimentos en el homo y presione el
dial o el bet6n START para empezar la cocciSn
La cocci6n r#.pida no requiere precalentaro
, Presione STOPICLEAR en cualquier
memento para interrumpir la cocci6n.
Etsoporte glratorlo debe Coloque los alimentos en
siempre estar en su lugar recipientes no met,'&licos,
cuando use el homo. resistentesal homo en la
bandeja met_llca negra
para coccl6n r_plda
El homo inicia de inmediato.. Puede agregar o
restar t}empo al girar el dial Puede tambi_n
agregar tiempo en incrementos de un minute
al presionar ADD MINUTE
El soporte glratorio debe
siempre estar en su tugar
cuando use el homo
El plato gtratorio de
cristal debe estar
siempre en su lugar
cuando utiltce Ia funci6n
dGl mioroondas.
51

0
0
COMa USAR LA FUNCION
WARMING (calentar)
La funci6n Warming mantendr_ !as aiimentos
cocinados calientes a temperatura de servir..
Siempre empiece con los alimentos calientes..
Use recipientes que puedan soportar
temperaturas basra 230° F
Paso 1:
Presione el bot6n WARM/REHEAT
Paso 2:
Gire el dial para buscar WARMING Presione
e! dial para seieccionar.
Paso 3:
Gire el dial para seleccionar ia temperatura
de1homo
BAJO ..................140-160°F
MEDIa ................160-t 95_F
o
ALTO ................195-230 F
Paso 4:
Girs el dial para buscar la funci6n CRIPSP o
MOIST. Presione el dial para seleccionar.,
CONV_Cl]ON
O
_TART_EI-_
El soporte giratorio debe
siempre estar en su lugar
cuando use el homo,
Coloque los altmentos en
recipientes no met&lfcos,
resistentes al homo en la
bandeJa met_ilica negra
para hornear_
COMa USAR LA FUNCION
CONVECTION BAKE (horno
a convecci6n)
Con Precalentamiento
Paso I:
Presione el bot6n CONVECTION.
Paso 2:
Gire el dial para sefeccionar is temperatura
del homo y presione el dia! para empezar a
precalentar No coloque los atimentos en e!
horno_ (Se le pedir_ que ingress el tiernpo
de cocciSn despu_s de que el homo est_
precalentado )
Paso 3:
Cuando el barrio termine de precalentar,
se le ind]car,_ Si no abre ta puerta dentro de
un iapso de una hora, el homo se apagar_
autom_.ticamente Abra la puerta del homo
y con precauci6n, coioque los alimentos
en el homo.
Paso 4:
Cierre la puerta del homo.. Gire el dial para
configurar el tiempo de cocci6n y presione
START/ENTER para empezar la cocci6n.
Cuando la cocci6n est_ completa, el homo
avisar& y se apagar_..
Los tiempos de cocci6n se muestran
en minutos y pueden ser un mdximo de
179 minutos. El tiempo se puede cambiar
durante la cocci6n at girar el dial.
Sin precalentar
Paso 1:
Si la receta no requiere precalentamiento,
presione el bot6n CONVECTION.
Paso 2:
Gire el dial para configurar la temperatura dsl
homo y presione para selecciona_
Paso 3:
Para ignorar el precatentado, presione el dial
nuevamenteo
Paso 4:
Gire ef dial para configurar el tiempo de cocci6n
y presione para seleccionar
Paso 5:
Coloque el alimento en et homo y presione el
bot6n START/ENTER para encender el homo.
Los tiempos de cocci6n se muestran en
mtnutos y pueden ser un m_iximo de
179 minutos. El tiempo se puede cambiar
durante ta cocciSn al girar el dial.
52

._P_ED_OOK
0
MENSAJES DE LA PANTALLA
Despu#s de presionar el botSn SPEEDCOOK
(cocciSn r&pida), el homo le pedir_, que realice
varias seIecciones, come el siguiente ejempto:
1+.Gire eLdial hasta que FOOD MENU (menu
de alimentos) aparezca. Presione el dial
para seleccionar+
2 Gire et diat hasta que CHICKEN (perle)
aparezca+ Presiene et dial para seleccionar
3 Gire el diai hasta que BONELESS BRST
(pechuga sin hueso) aparezca. Presione
el diai para seleccionar.
4
5,
6.
7.
Gire el dial para seleccionar ei tamaSo
(Select SIZE):
Sm (pequeSo) (3-4 oz)
Lg (grande) (5+ oz)
Presione el dial para seleccionar.
Gire el dial para seleccionar la cantldad
(Select amount):
t-2 piezas
3-4 piezas
Presione el dial para seleccionar+
Aparece Use METAL TRAY (use bandeja
met#.lica)..
Presione el bot6n START/ENTER o ei dial
de selecci6n para empezar la coccl6n.
NOTA: Cuando se
encuentre usando la
cocci6n r&pida, siempre
use la bandeja negra.
SELECCIONES DE COCClON
RAPIDA PRE.SELECCIONADAS
EN EL MENU
• Despu_s de que un cic!o de cocciSn se haya
comptetado, use ia funciSn Resume para
cocinar per tiempo adicional
• Para revisar los ajustes durante la cocciSn,
presione et dial selector..
Vet la Gu[a de Cocci6n empacada con
el homo para una ]ista completa de
las selecciones de cocci6n r&pida
preseleccionadas en el menti.
53

C6MO USAR LAS FUNCIONE.S DE
SPEEDCOOK O COCClON RAPIDA
PRECAUCt6N: Cuando use los programas de coccidn
rdpida, recuerde que el horno, la puerta y los platos
estar_n muy calientes.
Antes de usar el homo por primera vez, debe configurar el reloj.
Consulte la secci6n de tnicio r_pido_
Antes de empezar, cerci6rese de que la base giratoria est_
en su lugar.
Use l_,bandeja met_lica negra en todo momento cuando utilice
la funci6n Speedcook.
La base glratorta debe estar en
su lugar en todo momento cuando
utillce el homo
Cotoque los alimentos oel
recipiente no met_lico para uso
en microondas directamente en
la bandeja met_tlca negra
SF_EIICOOK
PARA USAR UN MEN0
SPEEDCOOK PREESTABLECIDO
Este horno ya estd configurado para
cocinar m_s de 100 recetas populares.
1 Presione e! bot6n Speedcook.
Si no hace una selecci6n dentro de
un plazo de 15 segundos, la pantalla
regresard a la hora del dfa.
2. Gire et dial de selecci6n hasta FOOD
MENU° Presione el dial para seleccionar.
3. Gire el dial de sefecci6n para seleccionar el
tipo de categor[a de alimento qua desea.
Presione el dial para seleccionar.
4 Gire e! dial de selecci6n para seieccionar e!
alimento especffico (sefecci6n de menO).
Presione et dial para seleccionarr
5. Gire el dial de selecci6n para seleccionar la
cantidad, tama5o y nivel de cocci6n (si se
requiere, el homo le indicar&.) Presione et
dial despu_s do cada selecci6n°
6. Una vez que la pantalla muestre START?
Presione START o el dial de selecci6n para
iniciar la cocci6n.
Para ciertos alimentos, voltee el alimento
cuando el homo indique TURN FOOD OVER
(voltee el alimento)o Presione START para
continuar la cocci6n.
Para ciertos alimentos, el homo le indicar&
CHECK for DONENESS (revise el ntvef de
cocci6n). Revise para ver si el alimento est,.
listo en el nivel deseado EI homo continuar_
cocinando por varios minutos.. Saque el
alimento cuando est_ al nivel deseadoo
Para revisar los valores durante la cocci6n,
presione el dial de selecci6n.
Si ingresa una selecci6n no deseada en
cualquier momento, simplemente presione el
bot6n BACK (regresar) para regresar al paso
anterior, o presione e! bot6n STOPtCLEAR y
vuelva a ingresar ta selecci6n deseada.
AI inicio de un programa de cocci6n r_.pida,
ver_ OPTiMiZING COOK TiME (optimizar
tiempo de cocci6n) en la pantatla. El homo
autom_ticamente percibe el nivel de voltaje
el_ctrico en su casa y ajusta el tiempo de
cocci6n hacia arriba o abajo para una
cocci6n correcta.
Si la puerta est& abierta durante ia cocci6n,
eI homo parar& y el mensaje PAUSE (pausa)
aparecer_, on la pantalIa. Cierre la puerta y
presione el bot6n START/ENTER para
continuar la cocci6n.
En cualquier memento durante la cocci6n
puede girar el dial de selecci6n para cambiar
el tiempo de cocci6n Puede cambiar los
ntveles de potencia ai presionar POWER,
fuego gire el dial y presione para seleccionar
Para garantizar resultados consistentes en ta
cocci6n, el homo puede reducir los niveLes
de potencia si el homo est&caliente af inicio
de un programa°
• AI final de la cocci6n, el ventilador autom&tico
puede continuar funcionando per un tiempo
corto para enfriar los componentes internos
• Para cocinar por tiempo adicional despu_s de
que un ciclo de cocci6n se ha completado,
use [a funci6n Resume (continuar)
54

CONSEJOS DE COCINA PARA FABULOSOS
RESULTADOS EN EL SABOR
Para garantlzar una cocci6n consistente y un dorado uniforme
cuando cocina los alimentos directamente en la bandeja
met_lica negra, organice los alimentos como se muestra a la
derecha. Los afimentos se pueden tocar entre sf, aunque no
se deben trastapar.
La came, e! polio, el pescado o la comida de mar que hart
estado congelados se deben descongelar antes de cocinar
(se puede usar [a funciSn de descongelaci6n de1homo
microondas). Para otros alimentos congelados preempacados,
siga las instrucciones del empaque..
PatrSncircular (ejempfo:
biscuits, galletas, carries)
Patr6n de radio (ejempto,
panecillos crecientes, palitos
de pan)
5pL_Ef3_tl_K FUNCION "REPEAT LAST"
(repetir el L_ltimo)
Use esta funci6n para ahorrar tiempo al cocinar
alimentos repetidos como galletas o aperitivos.
NOTA: El ultimo programa utilizado se
almacena por dos horas.
Una sola capa (ejemplo:
aperitivos)
I. Presione y sostenga el botSn SPEEDCOOK
por alrededor de 3 segundos.
2 Aparece el tJltimoalimento preseleccionado
3. Presione el bot6n START/ENTER o el diat
de selecciSn para empezar la cocci6n
SIA_r,/E_rE_
FUNCION "RESUME" (continuar)
1. Si el alimento necesRa cocci6n por un poco
m_s de tiempo, puede volver a iniciar el
homo a! presionar el bot6n START/ENTER
o el dial de selecci6n.
2. Aparece RESUME COOKING (continuar
cocci6n) y ei homo reiniciar_ de inmediato
ai 10% del tiempo original..
El programa permanece en la memoria por
5 minutos. Despu_s de eso, deber_ iniciar
el programa nuevamente. Consulte "PARA
USAR UN MENU PRECONFIGURADO DE
SPEEDCOOK"
55

SPEEDCO0_
0
0
NIVEL DE POTENCIA PARA
SPEEDCOOK O COCCION
RAPIDA
Este homo utiliza potencia de una luz hal6gena
de alta intensidad, calefactores de cer_tmica y
microondas de forma simuit_nea para cocinar
alimentos desde la parte superior, inferior e
interior para encerrar ia humedad y el sabor
AI usar las recetas de cocci6n r&pida
preseteccionadas en el ment_ de alimentos,
los niveles de potencia ya est&n seleccionados
para usted Sin embargo, estos niveles de
potencia se pueden ajustar antes o durante
la cocci6n Igualmente, la funci6n de cocci6n
manual le permite cocinar r__pidoalimentos
que no est&n en el mere3 preseleccionado de
alimentos al seleccionar su propio tiempo de
cocci6n y ntveles de potencia
Cada nivel le da la potencia del calefactor
y la energfa de microondas para cierto
porcentaje del tlempo..
UPPER POWER (potencia superior) (U)
controfa el cafefactor superior y la potencia
del microondas. Un nivel m&s alto de UPPER
POWER usa mf{s potencia del calefactor
superior, Io que dora fos alimentos m_s r_pido
en la parte alta, Un nivel m&s bajo de UPPER
POWER usa m&s potencia de microondas,
Io que cause que los alimentos se cocinen
m_s uniformemente. Seleccione un nivel m_s
alto para alimentos come pizza y alimentos
horneados. Seleccione un nivel m&s bajo para
alimentos como cacerolas, cames y pescado..
LOWER POWER (potencia inferior) (L) controla
ei calefactor inferior Seieccione un nivet m&s
alto para dorar los alimentos m&s en [a parte
de abajo Seleccione un nive] mas bajo para
menos dorado en la parte de abajo
1,
Presione e! bot6n SPEEDCOOK y gire el
dial para seleccionar FOOD MENU o
MANUAL COOK Presione el dia! para
seleccionar..
2 Sigalasinstruccionesdeiasecci6n"PARA
USAR UN MENU PRECONFIGURADO DE
SPEEDCOOK"o"COCCtON MANUAL"
3.
Para cambiar el nivel de potencia cuando
se to indique ]a pantalla, gire el dial en el
sent!do de ias manecillas del re!oj para
aumentar o en el sent!do contrario alas
manecilias del reloj para disminuir el nivel
de potencia superior. Presione el dial para
seteccIonar.
4.. Gire el dial para cambiar el nivei de potencia
inferior Presione el dial para seleccionar
5. Presione ei bot6n START/ENTER o el dial
selector para empezar a cocinar.
Si no desea cambiar uno de tos niveles,
simplemente presione ei dial para pasar
a la siguiente selecci6n.
NOTA: Tenga cuidado al ajustar los niveles
de potencia de manera que no cocine los
aiimentos en exceso ni que queden crudos..
56

RECIPIENTES PARA
SPEEDCOOK O COCCION
R_,PIDA
• Siga Ias sugerencias para recipientes de
cocina en la pantalla del homo o en el libro
de cocina o guia de cocci6n
• El recipiente se pondr_ cafiente. Se necesitan
guantes para el homo para manipufar el
recipiente
, Co!oque los alimentos o el recipiente
resistente al homo directamente en ta
bandeja negra at codnar
• Use la bandeja met_lica negra de fa misma
manera que usafia una bandeja o lata de
hornear,.
o
Adem_s del recipiente provisto, puede usar
plates de cacerola no met&licos, plates para
pasteles y otros recipientes resistentes al
homo Cel6queles directamente en ta
bandeja met<ca negra,
Cercf6rese de seleccionar un tamaSo que
rote f_cilmente,
Coloque la bandeja met_lica negra
directamente en la base giratoria,
No use recipientes o tapas de papel, pl_stico
o alumin{o cuando cocine durante un ciclo de
cocci6n r_pida,
La bandeja met&lica negra debe colocarse
en su tugar durante las operaciones de
cocci6n r_pida,
SPE_OOK
O
sT_tff_m_
SPEEDCOOK O COCCION
R._PIDA MANUAL
Este homo le brinda la flexibilidad de cocinar
sus plates favorites
Si desea cocinar un alimento que no est_ entre
las selecciones preestablecidas, use la funci6n
de cocci6n r&pida manual
1 Presione el bot6n SPEEDCOOK,
Si no ingresa un valor denbro de 15 segundos,
la pantatla regresa a la hera del d[a.
2, Gire el dial de setecci6n hasta MANUAL
COOK, Presiene el dial para sefeccionar,
3 Gire et dial de setecci6n para seleccionar el
tiempo de cocci6n Presione el dial para
seleccionar
La pantafla le indicarA que seleccione
UPPER POWER y LOWER POWER,.
4 Gire et dial en el sentido de las manecillas
del retoj para aumentar o en el sentido
contrario para disminuir et nivel de potencia
superior, Presione el dial para seleccionar.
5 Gire el dial para cambiar el nivef de potencia
inferior. Presione el dial para seleccionar
6 Presione el bot6n START/ENTER o presione
el dial de selecci6n para empezar la
cocci6n,
Para sugerencias sobre el nivel de potencia y
el tiempo de cocci6n, utilice su guta de cocci6n
o libro de cocina
57

_P_DCO0_
©
COMe INGRESAR Y GUARDAR
UNA RE CETA DE SPEEDCOOK O
COCCION RAPIDA
Cree hasta 30 recetas proplas de cocci6n
rdpida o personallce una receta existente
segdn su gusto. Una vez Io haga, sus
alimentos se cocinardn de la forma qua
usted quiera todas las veces.
1 Presione el bot6n SPEEDCOOK.
2. Gire el dial hasta que MY RECIPES
(mis recetas) aparezca
3 Gire el dial hasta que <empty> (vacio)
aparezca. Presione el dlal para seleccionar.
4. SELECT COOK TIME (seleccione tiempo
de cocci6n) aparece. Gire el dial para
seleccionar el tiempo de cocci6n. Presione
el dial para seleccionar..
La pantalla le indica que seleccione UPPER
POWER (potencia superior) y LOWER POWER
(potencia inferior).
5 Gire el dial en el sentldo de las maneciIlas
del retoj para aumentar o en el sentido
contrario para disminuir el nivel de potencia
superior. Presione e! diat para seleccionaro
6 Gire el dial para cambiar el nivelde potencia
inferior,Presione e] dial para seleccionar.,
Marque el nombre del alimento girando el
dial de selecci6n para avanzar a tray,s de
los caracteres disponibles Presione el dial
para marcar un car_cter. Cuando haya
ingresado el nombre complete, presione
START/ENTER Puede cambiar caracteres
marcados anteriormente presionando el
bot6n BACK {regresar).
8 RECIPE ADDED (receta ingresada)
aparece Para empezar a cocinar, presione
el bot6n START/ENTER_ Para almacenar
la receta sin cocinar, preslone e! bot6n
STOP/CLEAR.
Para sugerencias sobre el nivel de potencia y
el tiempe de cocci6n, use la gu[a de cocci6n o
el libro de cocina_
_ED_t3OJ;
PARA ENCONTRAR Y US AR
RE CETAS EN LA COCCION
RAPIDA
Para encontrar y usar recetas almacenadas
en el homo de cocci6n rdpida:
1..Presione el bot6n de SPEEDCOOK
2 Gire el dial a MY RECIPES (mis recetas) y
presione para selecciona_
3. Gire el dial hasta qua la receta que usted
desea sea mostrada y presione el dial para
aceptar..
4 Presione el bot6n de START/ENTER o
presione el dial de selecc[6n para comenzar
la cocci6n.
58

SPL_DCOD_
OP71D_S
St_iEe_
0
COMO AJUSTAR O CAMBIAR
UNA RECETA DE SPEEDCOOK
O COCClON RAPIDA
Para ajustar o cambiar las recetas
almacenadas personalizadas
de Speedcook:
1 Presione el bot6n SPEEDCOOK.
2_
4,,
5.
Gire et dial hasta que MY RECIPES
aparezcao Presione el dial para seleccionar.
Gire el dia! hacia la receta que desea
cambiar.. Presione el dial para seleccionar.
Presione et bot6n OPTIONS.
Gire ei dial para seleccionar CHANGE
RECIPE (cambiar receta). Presione el dlal
para seleccionar.
6.
La pantal[a le indicar& SELECT COOK TIME
(seleccione tiempo de cocci6n), luego
seteccione UPPER POWER, LOWER
POWER y FOOD NAME, Gire el dial y
presione para seleccionar el nivel apropiado..
(Para instrucciones m_s detalladas, siga
los pasos 4 a 7 en Ia secci6n "COMO
INGRESAR Y GUARDAR UNA RECETA
DE SPEEDCOOK O COCCION RAP_DA').
7_
RECIPE ADDED (receta ingresada)
aparece. Para empezar a cocinar, presiene
el bot6n START/PAUSE, Para almacenar
la receta sin cocinar, presione el bot6n
CLEAR/OFF.
Para sugerencias sobre el nivel de potencia y
et tiempo de cocci6n, use su gu[a de cocci6n
o libro de cocina.
5PEEDCOOK
0
©
COMO ELIMINAR UNA RECETA
DE SPEEDCOOK O COCCION
RAPIDA
Para eliminar recetas personalizadas
de Speedcook o cocci6n r_ipida:
I. Presione el bot6n SPEEDCOOK
2.. Gire el dial hasta que MY RECIPES
aparezca y presione el dial para seleccionar,
3 Gire el dial hasta fa receta que desee
etiminar y presione el dial para seleccionar_
4, Presione el bot6n OPTIONS,.
5, Gire el dial para seleccionar DELETE
(eliminar). Esto etimina la receta.
Ahora puede ingresar y guardar una
nueva receta o presione STOP/CLEAR
para regresar ta pantalla al reloj.
59

EFECTOS NORMALES DURANTE
SPEEDCOOKING 0 COCClON
R_,PIDA
Tiempos de cocci6n
• AI usar Speedcooking o cocci6n r_pida
de alimentos preprogramados, es posibfe
qua observe OPTIMIZING COOK TIME
(optimizaci6n del tiempo de cocciSn) en Ia
pantaila per varies segundes despues de
presionar START El homo autom&ticamente
percibe el nivei de voltaje el6ctr]co en su
casa y ajusta el tiempo de cocciSn hacTa
arriba o hacia abajo para una cocc]Sn
adecuada
Ventilador
• E1ventilador so encender_ durante la
cocciSn AI final de Ia cocciSn el ventilador
autom&tico continuer& funcionando per un
tiempo corto, y ia pantalla indicar& Oven is
Cooking (homo cocinando) Ef ventitador se
apagar_ autom&ticamente cuando las partes
internas de_homo se hayan enfriado
• Es posible que e! ventilador del escape se
encienda autom6ticamente si la estufa est_
an use
• El ventilador del homo emitir_ aire caliente
mientras el homo est& encendido
Luces
• Cuando el homo est_ encendido es posible
qua se vean las luces alrededor de la puerta
o caja extedor
= Los calefactores se encender_n e iniciar_n
el cicle durante un ciclo de cocciSn r&pida,
algunas veces incluso a los niveles de
potencia total Esto es normal El homo
percibe el nivel de calory so ajusta
automAticamente
Calefactores
• No se requiere precalentamiento El homo
empieza a cocinar de inmediatoo
• La puerta y el interior del homo estar_n muy
calientes Tenga precauciSn al ebrir la puerta
y retirar ios aiimentos
• No use recipientes de cocina o tapes do
pape! pl_stico o atuminio al cocinar durante
un ciclo de cocciSn r&ptda
Cuando cocine per un periodo do tiempo
proiongado es posible qua el homo reduzca
autom&ticamente los niveles de potencla
pare mantener el nivel correcto de calor en
el homo
Sonido
• Los sonidos y el soplido del ventilador son
normales durante Ia cocciSn El tabiero de
ret_s apaga y enciende los componentes
6O

La base giratoria debe estar
en su lugar en todo memento
cuando utilice el homo
Coloque los alimentos o et
recipiente para use en el
homo directamente en _a
bandeja met_llca negrs
COtt_flON
O
<>.
O
O
HORNEADO A CONVECClON
Homear a convecci6n le permite cocinar los
alimentos de la misma forma que un homo
convencional, usando un elemento calefactor
pars aumentar la temperatura del sire al
interior dei homo, Se puede configurar
cualquier temperatura del homo desde 250°F
haste 450°E Un ventilador circula suavemente
este aire caliente dentro def homo, encima y
alrededor del aiimento, produciendo extefiores
dorados e interiores cremosos y h0medosr
COMO HOR NEAR A
CONVECCION CON LA FUNCION
DE PREHEAT (precalentar)
1. Pres}one el botSn CONVECTION.
2,
Cuando se encuentre usando el mode
CONVECTION BAKE para hernear comidas
tales come tetras, galletas, bizcochos,
brownis, pasteles, panecillos, etc, reduzca
la temperature de! homo 25° F-40 _ F de la
receta para evltar que se doren demasiado
los alimentes horneadoso
3
Gire el dial para configurar ]a temperatura
del homo y presiene et dial para empezar a
precalentar. No coloque el alimento en el
homo. (Se le indicar,_ que ingrese el tiempo
de cocci6n, despu_s de que el homo est_
precalentado)
Cuando el homo est_ precalentado, se lo
indicar&. Si no abre la puerta dentro de
un t_rmino de 1 hera, el homo se apagar_
autom&ticamente Abra la puerta del homo,
y con precauci6n, coloque el alimento
en el homo°
COMO HOR NEAR A
CONVECCION SIN
PRECALENTAR
2
3,,
Si la receta no requiere precalentar el homo,
presione el botbn CONVECTION..
Cuando se encuentre usando el mode
CONVECTION BAKE para hornear comidas
tales come tortes, gaftetas, bizcechos,
brownis, pasteles, panecillos, etc, reduzca
la temperature deI homo 25° F-40 ° F de la
receta pars evttar que se doren demasiado
los alimentos horneados.
Gire el dial para configurar la temperatura
del homo y presione pars seleccionan
Pars ignorar el precalentamiento, presione
el dial nuevamente_
61
Debido a que el aire caliente se manliene en
movimiento constante, 1oque no permite una
caps de aire m&s frio alrededor def alimento,
algunos alimentos se cocinan ligeramenle m_s
r&pido que at cocinar en un homo normal.
Antes de empezar, cerciSrese de que ta base
giratoda est_ en su fugar. Use la bandeja
met_Iica negra en lode memento cuando
homee,.
PRECAUC1ON: AI hornear_ recuerde que el
homo, la puerta y los platos estar_n muy
ca|ientes.
4 Cierre la puerta del homo., Gire el dial para
configurar el tiempo de cocciSn y presione
START/ENTER para empezar la cocci6n..
Cuando [a cecciSn est_ completa, el homo
to indicar_ y se apagar&
Puede cambiar ta temperatura del homo
mientras se precaliente al presionar el bot6n
POWER y girar el dial para seleccionar la
nueva temperature..
Si ia puerta del homo se abre durante ta
cocct6n, ta pantalta muestra PAUSE (pausa).
Cierre la puerta y presione START/ENTER
Los tiempos de cocci6n se muestran en minutes
y pueden ser un m&ximo de 179 minutes Se
puede cambiar el tiempo durante la cocciSn al
girar el dial
4r Gire el dial para establecer ei tiempo de
cocciSn y presione pars seleccionar.
5. Co!oque el alimento en el homo y presione
el bot6n START/ENTER para encender el
homo.
Si la puerta del homo est& abierta durante la
cocciSn, ta pantalla muestra PAUSE Cierre le
puerta y presione START/ENTERo
Los tiempos de cocci6n aparecen en minutes
y puede ser un m_.ximo de 179 minutes. El
tiempo se puede cambiar durante la cocci6n
a! girar el dial.

WA_MIRBfEA?
0
FUNCION "WARMING" (calentar)
La funci6n Warming mantiene los alimentos
cocinados calientes a temperatura de servir..
Siempre empiece con afimentos catientes Use
recipientes y utensilios que puedan soportar
temperaturas hasta de 230°E
1. Presione el bot6n WARM/REHEAT
2_ Gire efdial para seleccionar WARMING
(calentar), Presione el dial para seieccionaro
3 Gire el dial para seleccionar la temperatura
del homo.
BAJO ..............................140-t 60_F
MEDIO .................................160-195°F
ALTO .................................... t95-230 F
4 Gire el dial hacia CRISP (crujiente) o MOIST
(ligeramente mojado). Presione e! dial para
seleccionar°
Si la puerta del homo est_ abierta mientras
caltenta, la pantaIla muestra PAUSE., Cierre
la puerta y presione START/ENTER
Consejos para alimentos crujientes:
• Deje Eosalimentos destapades.
• No use contenedores pt_,sticos o envolturas
pt_sticas.
• Precaliente antes de usar segt3n los tiempos
recomendados
Consejos para alimentos ligeramente
mejades:
* Cubra el alimento con una tapa o papal de
aluminio..
, No penga agua en la bandeja de calentar.
• No use contenedores pl&sticos o envolturas
pl&sticas.
o Precaliente antes de usar de acuerdo con los
tiempos recomendados.
Para tostar alimentos duros:
• Coioque los afimentos o los ptatos
directamente en la bandeja met#Jicanegra,
, Precaliente en niveTBAJO y seleccione
CRISP (crujiente).
,, Revise el nivel de tostado despu_s de
45 minutes. Adicione m&s tiempe segtJn
sea necesaflo.
Tabla para la selecci6n de temperatura y humedad
Tipo de alimento Nivel de control Nivel de humedad
Pan, panecillos dures MEDIUM CRISP
Pan, paneciHos blandos MEDIUM MOIST
Cacerolas MEDIUM MOIST
Afimentos fritos HIGH CRISP
Carnes* y pescado MEDIUM CRISP
Pancakes, waffles HIGH CRISP
Pizza HIGH CRISP
Papas horneadas HIGH CRISP
Papas, pur_ MEDIUM MO_ST
Aves HIGH MOIST
Hojuelas de tortilla LOW CRISP
Vegetales MEDIUM MOIST
*La USDA/FSIS recomienda una temperatura inlema de 145°Fcomo el nivel
mfnimo de cocciSn para la came de res Use un termSmetro port_til para
revisar las temperaturas intemas
62

La base giratoria debe estar
siempre en su lugar cuando
Se USa el horno_
COMe USAR LAS FUNCIONES
DEL MICROONDAS
Cerd6rese de que la base giratoria y el plato
giratorio de cristal del microondas est_n en
su lugar
Coleque los alimentos oeI centenedor de
microondas directamente en el plato giratorio
de cristal del microondas para cocinar sus
atimentos.
Centre et plato giratorio en Ia base giratoria
El plato giratorio no se ajustar_ en et centre_
El plato giratorio de cristal
del microondas debe estar
siempre en su lugar al
usar elmicroondas
REClPIENTES DE COClNA
• Cerci6rese de que el recipiente de cocina
sea apropiado pars el micreondas,.
• Coloque el afimento o el recipiente apto para
microondas directamente en el plato giratorio
de cristal del micreondas pars cocinar sus
alimentos°
SELECCIONES PREESTABLECIDAS PARA ALIMENTOS EN EL MICROONDAS:
, Bacon (tocineta)
= Defrost (descongelar)
(automdtico y tiempo)
=Frozen Entree
(plato congelado)
• Rice (arroz)
- Sure Simmer
(hervidor)
• My Recipes
(mis recetas)
• Soup (sopa)
• Cook Time
(tiempo de cocci6n)
• Vegetables (vegetales)
(frescos, congelados,
enlatados)
63

MI_'4 _A'_fE
_^_1_
0
©
C6MO UTILIZAR SELECCIONES
PREESTABLECIDAS PARA EL
MICROONDAS
1.. Presione el bot6n MICROWAVE
Sl no hace una selecci6n dentro de un
periodo de 15 segundos, la pantalta regresa
a la hera del dfa.
2. Gire el dial para encontrar _aselecci6n
preestablecida qua desea Presione el dial
para seleccionar.
3 Si es necesario, el homo le pedir& qua
seleccione la cantidad, el peso, el tamaSo
o el tiempo Gire el dlal y presione despu6s
de cada selecci6n_
Presione el diai o el bot6n START/ENTER
para empezar a cocinar..
Para rev]sar los niveles durante ia cocci6n,
presione el dial de selecciSn,.
Si ingresa una selecci6n no deseada en
cualquier memento, simptemente presione el
bot6n BACK para regresar al paso anterior,
o presione STOP/CLEAR y vuelva a ingresar
las setecciones deseadaso
SUGERENCIAS PARA COClNAR
= AI cocinar tocineta o bacon, cotoque las tiras
en un plato y cubra cada capa con papel
toalfao
• AI coclnar vegetaies, use una cacerola para
use en microondas o un tazSn. Cubra con
una tapa o una envoltura pf&stica con
ventilaci6n,
• Para vegetales congelados, siga las
instrucciones de! paquete para agregar agua
• Para vegetales frescos, agregue dos
cucharadas de agua per cada perci6n,.
MI_nt_WAVE
O
P0W_f_
O
ST,_rrf_En
TIEMPO DE COCClON
• El nivel de potencia se configura
autom&ticamente en alto, pare puede
cambiarse para mayor flexibilidado
1 Presione et botOn MICROWAVE.
2 Gire el dial hacia COOK TIME y presione
el dial para ingresar_
3.. Gire el dial para configurar el tiempo y
presione et dial para seleccionar,
4o Para cambiar et nivel de potencia, si no
desea toda fa potencia, presione el bot6n
POWER. Gire el dial para seleccionar
Presione el dial para seleccionar.
5.. Presione el dial o el bot6n START/ENTER
para empezar a cocinar.
Puede abrir la puerta durante el tiempo de
cocci6n para revisar el alimento Cierre la
puerta y presione START/ENTER para
continuar cocinando.
AI_ Mt_llfl'E
FUNCION "ADD MINUTE"
(agregar minute)
Presione ADD MINUTE para incrementos
de un minute de tiempo de cocci6n en el
microondas, EI homo inicia de inmediato,.
Puede agregar o restar tiempo girando el dial.
Tambi6n puede agregar tiempo en incrementos
de un minute presionando ADD MINUTE
nuevamente.
64

MJ_OWA_
FUNCIONES DE SENSOR DEL
MICROONDAS
A[gunas funciones del microondas son funclones
de sensor que detectan ef aumento de la
humedad liberada durante la cocci6n
EI homo autom&ticamente ajusta el tiempo
de cocci6n atos diferentes tipos y cantidades de
alimento&
Cuando se usan las funciones de sensor, no abra
la puerta de! homo hasta que el conteo regresive
empiece en Ia pantalta. Si la puerta se abre,
ei6rrela y presione START/ENTER
de inmediato.
No utilice ias funciones de los sensores dos
veces seguidas en ta misma porci6n de comida
ya que puede resultar en que la comida se cecine
en exeeso e se queme. Si la comida no est_
completamente cocinada despu_s del conteo
regresivo, use COOK TIME en el selector del
microondas para tiempo de cocci6n adicionaL
Para restar tiempo de un programa con
sensor: Dentro de los pfimeros 30 segundos
despu6s de que el homo inicie, gire el dial en el
sentido contrafie de las manecillas de1retoj para
restar t0% (-) de el tiempo aurora&rico. Giros
adicionales restar#,n 20% (--) del tiempo
autom_tico,
Para agregar tiempo a un programa con
sensor: Dentro de los primeros 30 segundcs
despu6s de que el homo se encienda, gire e! dial
en el sentida de las manecillas de] reloj pare
agregar t0% (+) al tiempo automb,tico,, Gires
adicionales agregar&n 20% (+ +) al tiempo
autom_t}co,,
• Si ha usado el homo para cocci6n r&pida o
para hornear y el homo ya est:_caliente, puede
indicar que est& demasiado ca[iente para
cocci6n con sensor, aunque podr& continuar
con tas funciones sin sensor.
• Para reducir o prolongar e] tiempo de cocciSn,
espere basra que la cuenta regresiva aparezca
en Ia pantall& Luego, gire el dial para agregar
o restar tiempo..
• Las bebidas recatentadas con la funci6n
BEVERAGE (bebida) pueden estar muy
calientes. Retire el contenedor con cuidado
• Si abre la puerta dei homo mientras est,.
cocinando con sensor, el mensaje SENSOR
ERROR (error del sensor) aparecer& Cierre [a
puerta y presione START/ENTER para
empezar de nuevo.
Contar con los contenedores y tapas
correctas es esencial para meier
cocci6n con los sensoreso
• Utilicesiemprecontenedoresaplospara
el microondasyct_bra!oscontapaso
envoituraspl_sticasventiladas.Nuncautilice
contenedorespl_sticosseHados,puedenevitar
que el vaporse escape y causarque e]
alimentose cocineen exceso
. Cerci6resede queel exteriorde los
contenedoresde cecinay el interiorde] homo
est_nsecosantesde coIocaralimentesen el
homo, Lasgotasde humedadque se
conviertenen vapor
puedenconfundiral sensor.
• Lasbebidassecalientan meiersin cubfirse.
Cubierto
Ventitado
Seque los plates
de manera que no
confundan al sensor
PROGRAMAS CON SENSOR PARA EL MICROONDAS:
Cocci6n: Recalentar:
• Frozen Entr6es ° Sure Simmer - Beverage (bebida)
(plates (hervidor) ° Pasta
congelados) - Popcorn ° Plate of Leftovers
• Rice (arroz) (patomitas de (plato con
mafz) sobrantes de
comida)
• Sauces
(salsas)
• Soup (sopa)
65

PQPCO_
Use so{amiente con los
paquetos de popcorn entre
1,75 onzas
y 3,5 onzas
FUNCION "POPCORN"
(palomitas de mafz)
Para usar ta funci6n POPCORN:
Siga las instrucciones del paquete, usando
COOK TIME si eI paquete es menos de
1,75 onzas o m&s de 3,5 onzas.. Coloque el
paquete de palomitas de mafz en e! centre
del horno.
2. Presione POPCORN.
3. Presione el dia{ o presione eTbot6n
START/ENTER para empezar a cocinar,
NOTA: No utilice esta funciSn dos veces
seguidas en Ia misma porciSn de comida ya
que puede resultar en que Ia comida se cocine
en excese o se queme. Si la comida no est_
completamente coclnada despu_s del conteo
regresivo, use COOK TIME en el selector del
microondas para tiempo de cocci6n adicional
Si abre la puerta mientras POPCORN aparece
en ta panta[la, aparecer_, un mensaje de
SENSOR ERROR (error de sensor).. Cierre la
puerta y presione START/ENTER do inmediato
MI_IIOWAVI_
FUNCION "SURE SIMMER"
(hervidor)
La funci6n Sure Simmer har_ hervir de I a 4
cuartos de galSn de comida come sopas y
cocidos, luego permita que hiervan hasta par 2
horas. Cubra el plato con una tapao
1. Cofoque la comida cubierta en el homo
2.. Presione el botSn MICROWAVE,
3. Gire el dial hacia SURE SIMMER° Presione
el dial para seleccionar.
4. Gire et dial para establecer la cantidad de
tiempo que desea que el alimento stga
hirviendo lentamente despu_s del hervor
inicia!.
5. Presione el alia1o el botSn START/ENTER
para empezar a cocinar.
El homo le indica cuando el alimento empieza a
hervir y el hervidor empieza la cuenta regresiva.
Revuelva el alimento de ser necesario
No abra la puerta del homo hasta que el
conteo regresivo concluya en la pantalla
Si se abre Ia puerta, ci_rrela y presione
START/ENTER de inmediato.
- NOTA: No utilice esta funck_n dos veces
seguidas en ta misma porciSn de comida ya
que puede resuitar en que la comida se cocine
en exceso o se queme. Si la comida no est&
completamente cocinada despu_s del conteo
regresivo, use COOK TIME en el selector del
microondas para tiempo de cocci6n adicionaL
66

Mf_0WA_
ARROZ
La funci6n Rice (arroz) cocina 1/2-2 tazas de
arroz de cocci6n prolongada Siga las
instrucciones del empaque pare ta cantldad de
agua que debe agregar. Use un plato para
microondas de tamaSo grande y cubra con una
tapa
t • Coloque Ia comida cubierta en el homo..
2. Presione el bot6n MICROWAVE.
3. Gire el deal haste RICE, Presiene el dial
para aceptar..
4.. Presione el deal o el bot6n START/ENTER
para empezar la cocci6n.
El homo indica euando perciba e_vapor y el
tiempo restante empieza una cuenta regresivar
Revuelva la comida si es necesario
No abra la puerta hasta tanto no inicie la
cuenta regresiva Si se abre la puerta, ciSrrela
y presione START/ENTER de inmediato.
NOTA: No utilice esta funci6n dos veces
seguidas en la misma porci6n de comida ya
que puede resultar en que la comida se cocine
en exceso o se queme. Si la comida no est#,
completamente cocinada despu_s del conteo
regresivo, use COOK TIME en el selector del
microendas para tiempo de cecci6n adicional
M$c:_ow,_Vl_
FROZEN ENTR_:E
(plates congelados)
La funci6n Frozen Entree cocina un plato
congelado de 8-22 onzas
1, Afloje una esquina de la tape pt_stica en el
plato y coloque en el homo.
2 Presione el bot6n MICROWAVE.
3 Gire el dial a FROZEN ENTREE Presione
el dial pare aceptar,
4. Presione el dial o el bot6n START/ENTER
para empezar a cocinar.
El home indica cuando perciba el vapor y el
tiempo restante empieza una cuenta regresiva
Revue[va la comida si es necesafio.
No abra la puerta hasta tanto no inicie la cuenta
regresiva. Si se abre la puerta, ci6rrela y
presione START/ENTER de inmediato..
NOTA: No utLlice esta funci6n dos veces
seguidas en la misma porciSn de comida ya que
puede resultar en que ta comida se cocine en
exceso o se queme. Si la comida no est_
completamente cocinada despu6s del conteo
regresivo, use COOK TIME en el selector del
microondas para tiempo de cocci6n adtcional
67

WAnM_B_F_T
S_At_E_E_T_
<>8
FUNCION "REHEAT" (recalentar)
La funci6n "REHEAT" recalienta las porciones
de alimentos cocinados con anterioridad o
un plato de sobrantes.
1 Presione el bot6n WARM/REHEAT
(calentar/recalentar)
2o Gire e_dial para seleccionar REHEATING
(recalentar) Presione el dial para
selecciona_
3 Gire el dial hasta encontrar el alimento que
desea recalenta_ Presione el dial para
sefeccionar
4o Si es necesario, et homo le indtcar& que
selecclene la cantidad_ Gire el dial para
selecc[onar y presione,
5, Presione el dial o el bot6n START/ENTER
para empezar a recaientar,
Para revisar _osniveles durante la cocci6n,
presione el dial de selecci6n,
Los atimentos recalentados pueden
tener ampiias variaciones en la
temperatura. Algunas dreas pueden
estar extremadamente calientes.
NOTA: No utilice esta funci6n dos veces
seguidas en la misma porciSn de comida ya
que puede resultar en que la comida se cocine
en exceso o se queme Si la comida no est&
completamente cocinada despu_s del conteo
regresivo, use COOK TIME en el selector del
microondas para tiempo de catentamiento
adicionaL
Es meier usar la funci6n COOK TIME y
no REHEAT para estes alimentos:
• Productos de pan
• Alimentos que se deben recalentar
descubiertos
• Alimentos que se deben revolver o voltear
= Atimentos que requieren un aspecto seco o
una superficie tostada despu_s de recalentar.
GU[A PARA RECALENTAR
Food Type
Beverage (8-10 oz.)
Pasta (8-12 oz.)
Pica Slices (1-4 slices)
Plate of Leftovers
(2-3 foods, 4 oz. each)
Sauces (4--8 oz.)
Soup (8-20 oz,)
Comments
Do not cover
Cover with wax paper, lid or vented plastic wrap,
Do not cover,
Cover with wax paper or vented plastic wrap.
Cover with lid or vented plastic wrap,
Cover with lid or vented plastic wrap.
POWER
0
NIVEL DE POTENCIA DEL
MICROONDAS
I Primero, s{ga las instrucclenes para COOK
TIME, TIME DEFROST o ADD MINUTE.
2. Presione el bot6n POWER
3 Gire el dial en el sentido de Ias manecillas
del reloj para incrementar y en el sentido
contrario para disminuir el nivel de potenciao
Presione el dial para seleccionar.
4 Preslone el dial o el bot6n START/ENTER
para empezar a cocinar.
• Puede camb}ar el nivel de potencia antes o
durante un programa de cocciSn.
Los siguientes son ejemplos de los uses para
los diferentes niveles de potencia:
Alto t0: Pescado, bacon o tocineta, vegetales,
hervir l{quidos.
Medio-alto 7: Cocci6n tigera de carries y ayes,
hornear cacerotas y recalentar.
Medio 5: Cocci6n lenta y para ablandar
estofados y cortes de came menos suave.
Bajo 2 6 3: Descongelar; hervir lentamente;
salsas delicadas.
Tibio 1: Mantener los arimentos tibios;
ablandar mantequilla.
68

MI_OWAYE
STAR_(/EKT_]I
BACX
0
S'_Or/CL_
0
COMO INGRESAR Y GUARDAR
UNA RECETA PARA
MICROONDAS
Creey almacene hasta t0 recetas propias
de microondas.
1, Presiane el bot6n MICROWAVE.
2. Gire el dial hasta que MY RECIPES
aparezca. Presione el dial para selecdonar
3, Gire el dial hasta qua <empty> (vac[o)
aparezca, Presione el dial para seleccionar.,
4, SELECT COOK TIME aparece. Gire el dial
para seteccionar el tiempo de cocci6n que
desea Presione ei dial para seleccionar
5, Gire el dial para cambiar e! nivel de potencia
y presione para seleccionar,
6,
74
Deletree el nombre del alimento girando el
dial de sefecci6n para avanzar a trav6s de
los caracteres disponibles, Presione el dia!
para marcar un car&cter. Cuando haya
ingresado el nombre compteto, presione
START/ENTER Puede cambiar caracteres
ingresados anteriormente presionando el
bot6n BACK,
RECIPE ADDED (receta ingresada) aparece,
Para empezar a cocinar, presione el bot6n
START/ENTER o presione el bot6n
STOP/CLEAR para almacenar la receta
sin cocinar,,
MIC_OWA_
s_ArrrlEmEn
COMO ENCONTRAR Y
USAR UNA RECETA PARA
MICROONDAS
Para encontrar y usar recetas para
microondas personalizadas almacenadas:
1. Presione el bot6n MICROWAVE
2, Gire e! dial hasta MY RECIPES y presione
el dia! para seleccionar,
3 FOOD NAME y los hombres de ia receta
qua ingres6 aparecen en la pantalla_
4, Gire el dial hasta su receta y presione el dial
para seleccionar,,
5,, Presione el botSn START/ENTER o el dial
de selecci6n para empezar a cocinar
M_i_OWAVI_
SrDd_
©
COMO AJUSTAR O CAMBIAR
UNA RECETA PARA
MICROONDAS
Para ajustar o cambiar las recetas
personatizadas para mtcroondas:
1,, Presione el bot6n MICROWAVE,
2, Gire el dial hacia MY RECIPES y presione
el dial para seleccionar_
3 Gire e! dial hacia la receta que desea
cambiar, Presione el dial para seleccionar.
4. Presione el bot6n OPT1ONS
5, Gire el dial para se;eccionar CHANGE
RECIPE (cambiar receta). Presione el
dial para seleccionar.,
6.
7,
&
Gire el dial para seleccionar el tiempo de
cocci6n y presione el dial para seleccionar
Gire el dial para seleccionar el nivel de
potencia y presione el dial para seteccionar,
La pantalla muestra RECIPE ADDED
(receta ingresada), Para empezar a cocinar,
presione el bot6n START/ENTER o presione
el bot6n STOP/CLEAR para guardar la
receta sin cocinar,,
69

MI_DW^V_
0
0
SToHC_n
0
COMe ELIMINAR UNA RECETA
PARA M!CROONDAS
Para eliminar una receta para mtcroondas
personatizada almacenada:
1, Presione el bot6n MICROWAVE,
2 Gire el deal hacia MY RECIPES y presione
ei dial para seleccionar,
3, Gire el dial hacia la receta que desea
eliminar Presione e! diat para seteccionan,
4_ Presione el bot6n OPTIONS°
5, Gire el dial para seleccionar DELETE
RECIPE (efiminar receta), y presione el dial
para seleccionar., Esto elimina ta receta,
En este memento ser& posible seleccionar
y guardar una receta nueva o presione
STOP/CLEAR para regresar a la pantalla
del refoj
o_o_
Q
TIEMPO DE DESCONGELADO
Use el Time Defrost para descongetar per un
tiempo seleccionado,
1. Presione el bot6n DEFROST
2 Gire el selector a DEFROST-TIME Presione
el dial para aceptar,
3,, Gire e! dial para seleccionar el tiempo que
usted desea Presione el dial para acepta[
4. Presione el dial o el bot6n START/ENTER
para comenzar a descongelar
5 Voltee la comida cuando el homo haga la
seSal de TURN FOOD OVER.
El nivel de potencia se establece
autom_.ticamente en 3, pero se puede
cambiar. Para cambiar los niveles de potencia,
consulte la secci6n Nivel de potencia del
microondas, Puede descongetar porciones
pequeSas r&pidamente aumentando el nivel
de potencia despu_s de marcar el tiempoo
Et nivel de potencia 7 reduce el tiempo total
de descongelaci6n en casi la mitad; el nivel
de potencia 10 reduce el tiempo total en 1/3,,
AI descongeiar a altos niveles de potencia,
los alimentos necesitar&n m#.s atenci6n
frecuente que la normal.
70

0
STAt'ZT/EtllE_
FUNCION "AUTO DEFROST"
(descongelaci6n autom_tica)
La funci6n Auto Defrost establece
autom_ticamente los tiempos de descongelaci6n
y los niveles de potencia para ofrecer resultados
uniformes de descongelaci6n para carnes, ayes
y pescado que pesen haste seis fibres
1, Retire el alimento del empaque y col6quelo
en un plato de usa seguro para microondas.
2. Presione el bot6n DEFROST.
3. Gire el dial hacia DEFROST-AUTO.
Presione el diai para seleccionar
4_
Gire el dial hacia el peso deI atimento,
usando ia gu[a de conversi6n a la derecha
Per ejemplo, gire et dial hacia 1,2 pare
1,2 libras (1 libra, 3 onzas) Presione el dia]
pare seleccionar.
6 Voltee el alimento cuando el homo indique
TURN FOOD OVER (voltear efimente).
• Retire la came descongelada o proteja las
#.reas tibias con pedazos pequeSos de papel
aluminio pare una descongetaci6n uniforme
* Despu6s de descongelar, la meyofia de los
a_imentos deben reposar per 5 minutes pare
completer ta descongelaci6n. Las carries
grandes pare hornear se deben dejar per
30 minutes.
Gufa de conversi6n
Si el peso de[ alimento se establece en libres y
onzas, las onzas se deben convertir a d6cimas
(1) de una tibra.
Peso del atimento Marque el peso
en onzas del alimento
(d6ctmas de una libra)
1-2 0,t
3 0,2
4-5 0,3
6-7 0,4
8 0,5
9-t0 0,6
11 0,7
12-13 0,8
14-15 0,9
DEF_O51r
0
ST_iZT/DZT_
FUNCION "BREAD DEFROST"
(descongelar pan)
La fund6n Bread Defrost establece
autom_ticamente los tiempos de descongelaci6n
y los niveles de potencia para descongelar pan
Retire cuelquier alambre de emarre del
paquete y coloque el pan en un plato apte
pare microondas.r Las porciones peque5es
de pan deben refirarse del empaquer
1.. Presione el bet6n DEFROST_
2, Gire el dial hacia DEFROST BREAD,
Presione el dial pare sefeccionar,
3. Gire el diaf para marcar el peso del
alimento. Presione el dial pare seleccionar
4,, Presione el dial o el bot6n START/ENTER
pare empezar a descongelar
5 Voltee el alimente cuando et homo indique
TURN FOOD OVER (voltear alimento),,
• Despu6s de descongetar, deje que el pan
repose per 5 minutes pare completar la
descongelaci6n.
i Tabla para descongelar pan
Tipo de pan Peso aproximedo
1 bagel pequeSo 0,2 Ib
1 bagel grande 0,3 ib
4 rodajas de pan 0,2 Ib
1 molde de pan 1,0 Ib
1 panecillo 0,2 Ib
1 pan de hamburguesa 0,2 Ib
o hot dog
t muffin pequefio 0,2 Ib
1 muffin grande 0,3 ib
71

SUGERENCIAS PARA
DESCONGELAR
Use ta funci6n Auto Defrost para carnes, aves
y pescado Use Time Defrost (descongelaci6n
con tiempo) para la mayorra de tos dem&s
alimentos congelados Use Bread Defrost para
los productos de pan.
• Los alimentos congelados envueltos en
papel o pl#,stico se pueden descongelar en
el empaque, sin embargo, se deben sacar
del empaque cuando se usa Auto Defrost.
Las porciones pequeSas de pan se deben
sacar del paquete at usar Bread Defrost..
Los paquetes cerrados se debe perforar
o ventilar despu_s de que el alimento se
haya descongelado parcialmente_ Los
contenedores pl&sticos se deben abrir
parcialmente
, Los platos congetados preempacados
tamafio famifiar se pueden descongelar
y calentar en microondas. Si el atimento est&
en un contenedor de papel de aluminio,
traslade a un pfato apto para microondas
Los alimentos que se echan a perder
f&cilmente no se deben dejar reposar mAs
de una hora despu_s de descongelarse_
La temperatura delcuarto promueve la
propagaci6n de bacterias da5inas,
Para descongelaci6n adicional en el homo
o alimentos m_s grandes, como las cames
para homear, utilice Auto Defrost. CerciSrese
de que las carnes grandes se descongeten
completamente antes de cocinar
Cuando est_n descongelados, los alimentos
deben estar frfos y suaves en todas las
&teas.. Si todavfa tienen un poco de hielo,
regrese el alimento al microondas por un
corto tiempo, o permita reposar por unos
pocos minutos.
EFECTOS NORMALES
lnterferencia
• Es posible que observe que un radio/
televisor interfiere mientras se usa el
microondas. AI igual que la interferencia
causada por otros aparatos pequeSos,
no indica que haya un probtema con el
microondas Mueva el radio o el televisor
tan iejos del homo microondas como sea
posible, o revise la posiciOn de la antena
del radioltelevisor.
Calor del homo
• Los recipientes se pueden calentar debido
al calor trasladado del alimento calentado
Es posible que necesite guantes para homo
para manipular tos recipientes..
• Es posible que el vapor se escape afrededor
de la puerta,
Sonidos
, Es posible escuchar un sonido sordo de
golpes mientras el homo opera.
72

FUNCION "FOOD IS READY"
(la comida estd lista)
Para recordarle que tiene comida en el homo,
el homo muestra FOOD IS READY en la
pantalla y producir_ un sonido una vez per
minuto hasta que se abra la puerta de] homo
o se presione el botSn STOP/CLEAR.
O
FUNCION "REVIEW" (revisar)
Utilice esta funct6n para revisar las
selecclones actuales de coccidn que
ha estabtecidor
Presione el dlal de selecciSn en cuaIquier
memento durante la cocciSno
OF]_Ot_
O
FUNCION "BEEPER VOLUME"
(volumen del beeper)
Utilice esta funci6n pare ajustar el volumen
del beeper opara apagar el beeper.
1, Presione et botSn OPTIONS.,
2. Gire el dial hacia BEEPER VOLUME y
presione el dial pare sefeccionar
3 Gire el dial para seleccionar el volumen del
beeper, Preeione el dial para selecciona_
o_e_
O
FUNCION "CLOCK" (reloj)
El reloj debe configurarse antes de poder
usar el horno por primera vez (consulte la
secci6n Inicto rfipido para instrucciones).
I. Pare cambiar lahora de! reloj, presione el
botSn OPTIONS y gire el dial hasta CLOCK.
Preeione el dial para seteccionar,,
2, Gire el dial pare configurar la hera,. Presione
el dial para seleccionar,
3 Gire el dlal pare configurar los minutos
Presione el dial para seleccionar
4, Gire el dial para seleccionar AM o PM.
Presione el dial pare se[eccionar,,
0fqltJtlS
O
FUNCION "CLOCK DISPLAY
ON/OFF" (encender/apagar
el reloj)
Utilice esta funciSn para apagar o encender
el reloj.
1, Presione el botSn OPTIONS,
2o Gire el dial haste CLOCK DISPLAY,,
Presione el dial para seleccionar
3 Gire el dia! pare sefeccionar ON o OFF
Presione el dial para seleccionar,,
OFJr]Ofl5
O
O
FUNCION "DISPLAY SPEED"
(velocidad de la pantalla)
Puede cambiar la vetoctdad del
desplazamiento de la pantalla st el
desplazamiento del mensaje es
demasiado lento o demasiado rfipido.
1, Presione el bot6n OPTIONS.
2, Gire el dial hasta DISPLAY SPEED_
Presione el dial pare seteccionar.
3, Gire el dial pare seleccionar la veloeidad
del desplazamiento Presione el dial pare
seleccionar.
73

FUNCION "AUTO NIGHT LIGHT"
(luz nocturna automdtica)
Use esta funci6n para programar el
encendido y apagado de la luz nocturna
automdticm
Para configurar ta luz nocturna:
1, Presione el bot6n OPTIONS°
2 Gire el dial hasta NIGHT LIGHT, Presione
el dial para seleccionar,
3 Gire el dial hasta SET NIGHT LIGHT
(configurar Iuz nocturna),, Presione et dial
para selecciona[,
4., Configure la hera, los minutes, y AM o PM
para la hera de encendido y apagado.
Presione el dial despu_s de cada selecci6n,
Para revtsar la configuraci6n de la luz
nocturna:
1. Presione el bot6n OPTIONS,
2 Gire el dial hasta NIGHT LIGHT., Presione
el dial para seleccionar.
3.. Gire el dial hasta CHECK SETTING
(revisar configuraci6n)., Presione el dial
para seleccionar
Para cancelar la configuraci6n de la |uz
nocturna:
1o Presione el bot6n OPTIONS.
2. Gire el dial hasta NIGHT LIGHT, Presione
el dial para seleccionar.
3 Gire el dial hasta CLEAR SETTING
(borrar configuraci6n).. Presione el dial
para seleccionar.
OPllOlIS
FUNCION "REMINDER"
(recordatorio)
Utilice esta funci6n come una alarma para
ayudarle a recordar to que debe hacer.
Para configurar el recordatorio:
1 Presione el bot6n OPTIONS°
2. Gire el dial hasta REMINDER y presione e!
diaf para sefeccionar..
3.. Gire el dial basra SET (configurar) Presiene
el dial para sefeccionar.,
4. Configure la hera, los minutes y AM/PM
para las horas de encendide y apagado_
Presione el dial despu6s de cada selecciSn.
Para revisar la configuraci6n del
recordatorto:
1. Presione el bot6n OPTIONS.
2o Gire el dial hasta REMINDER y presione
el dial para seleccionar
3. Gire el dial hasta REVIEW (revisar).
Presione el dial para seleccionar..
Para borrar la configuraci6n del
recordatorto:
1 Presione el bot6n OPTIONS,
2. Gire el dial hasta REMINDER y presione
el dial para sefeccionar.
3. Gire el dial hasta CLEAR (borrar). Presione
el dial para seieccionar.
74

FUNCION "HELP" (ayuda)
Utilice esta funci6n para averiguar m_s
sobre el horno y sus funciones. La pantalla
muestra una descripct6n del programa
seleccionado.
1, Presione el bot6n OPTIONS,
2. Gire el dial hasta HELP Presione el dial
para seleccionar.,
3, Gire el dial para seleccionar el hombre de la
funci6n, Presione et dial para seleccionar,,
Funciones que se encuentran en la funci6n HELP.
Add Minute (agregar minuto)
Adjust (ajustar)
Back (regresar)
Bacon (tocineta)
Beeper Volume
(volumen del beeper)
Beverage (bebida)
Child Lockout
(bloqueo para ni_os)
Clear!Off (borrariapagar)
Clock (reloj)
Clock Display
(pantalla de reloj)
Convection (convecciSn)
Cook Time
(tiempo de cocci6n)
Defrost (Auto)
(descongelar-autom_.tico)
Defrost (Bread)
(descongelar-pan)
Defrost (Time)
(descongelar-tiempo)
Display Speed
(velocidad de la pantalla)
Food Menu
(men_ de alimentos)
Frozen Entr6e
(plato congelado)
Help (ayuda)
Kitchen Timer
(reloj de cocina)
Manual Cook
(cocci6n manual)
Microwave (microondas)
My Recipes (mis recetas)
Night Light (luz nocturna)
Options (opciones)
Pasta
Pizza
Plate (plato)
Popcorn (palomitas de mafz)
Power (potencia)
Reminder (recordatorio)
Repeat Last (repetir Ottimo)
Resume (continuar)
Review (revisar)
Rice (arroz)
Sauce (satsa)
Soup (sopa)
Speedcook (cocciSn r_pida)
Start/Enter
(iniciar/seleccionar)
Stop/Clear (parar/borrar)
Sure Simmer (hervidor)
Surface Light
(luz de superficie)
Vegetables (Canned)
(vegetales-eniatados)
Vegetables (Fresh)
(vegetales-frescos)
Vegetables (Frozen)
(vegetales-congelados)
Vent Fan (ventilador)
Warm/Reheat
(calentar/recalentar)
75

FUNCION "CHILD LOCKOUT"
(bloqueo para nifios)
Puede bloquear el panel de control
para evitar que los nifios operen o
usen accidentalmente el hornet
Presione y mantenga presionado
START/ENTER per unos 3 segundos
pare cerrar o pare cancelar.
Cuando el panel de control est& cerrado,
se mostrarA en la pantalia Control Panel
LOCKED per unos segundos cada vez que
un bot6n o un dial sea presionadoo
C_
O
FUNCION "SURFACE LIGHT"
(iuz de superficie)
Use para ilumlnar la estufa.
Presione el bot6n C := , ]tJegogire el dial
si desea cambiar el brillo.
Presione el bot6n O_ nuevamente para
apagar la luz.
Para encender la luz nocturne, presione y
sostenga el bot6n O=, per aproximadamente
3 segundos.
Pare apagar la luz nocturna, presione el
bot6n C_ Ir
O
FUNCl6N "VENT FAN"
(ventilador)
Et ventilador retira los vapores de la
superficte que se producen al cocinar,
Presione el bot6n _, luego gtre el dial si
desea cambiar la velocidad del ventilader..
Presione el bot6n _ nuevamente para
apagar el ventilador.
Ktt_t ER TIMf;_
O
FUNCION "KITCHEN TIMER"
(reloj de cocina)
Use esta funcl6n en cualquter memento que
necesite un reloj pare prop6sttos generales.
Puede utilizarto incluso mientras coctna
en el homo,
1 Preslone el bot6n KITCHEN TIMER.
2_ Gire el dial para seleccionar los minutes.
Presione el dial para seleccionar.
3 Gire el dial pare seleccfonar los segundos.
Presione el dial para seleccionar..
Para hacer una pausa, presione KITCHEN
TIMER. Para volver a iniciar, presione
KITCHEN TIMER de nuevo..
Para cancelar, presione y sostenga el bot6n
KITCHEN TIMER per aproximadamente
3 segundos.
FUNCI6N "AUTOMATIC FAN"
(ventilador autom_tico)
La funci6n venttlador autom_.tico protege al
homo del calor excesivo que se produzca en
la estufa abajo y del calor excesivo el interior
de la cavidad del hornor
Se enciende autom#.ticamentecuando percibe
demasiado calo[
Si ha encendido el ventilador,quiz_,sfeocurra
que no puede apagarfo.El ventilador se apagar&
autom&ticamentecuando las partes intemas se
enfr[en,,Es posibleque permanezcan encendido
per 30 minuteso m_.sdespu_s de que la estufa
y los controles del homo est6n apagados
76

CONSEJOS UTILES
Una limpieza ocasional profunda con una
soluci6n de bicarbonate de soda y agua
mantiene fresco el interior
Cerci6rese de que el homo est_ apagado
antes de ltmplar cualquier parte del mismo_
Las paredes, piso, ventana
interior, partes met,_ricas y
pl_stlcas en fa puerta
COMe LIMPIAR EL INTERIOR
Ciertas salpicaduras se pueden limplar con un
papel toaila, otras pueden necesitar un paso
h_medo con jab6n Retire las salpicaduras
grasosas con un paso ht_medo con jab6n,
_uego enjuague con un pare ht_medo..
No rocfe o vierta tiquidos directamente
en las dreas det calefactor.
No utilice timpiadores abrasives o utensilios
filesos en las paredes def homo..
Nunca uffiice un limpiador comercial de
homes en ninguna parte de! horno.
No limpie el interior dei homo con esponjiilas
met&ricas.r Se pueden soltar porciones de ia
esponjilla y causar un cheque ei_ctrico_
Es posibie que ciertos alimentos caigan en las
_.reas del calefactor. Los caiefactores cocinar&n
fa mayor parte del afimento. Cualquier residue
restante no afectar_ la cocci6n.
Base glratoria
No utifice elhomo sin ta base
giratoria en su Iugar
BASE GIRATORIA REMOVIBLE
Ei _.rea debajo de ia base giratoria se debe
limpiar con frecuencia para evitar olores y que
se produzca humo durante un cicio de cocci6n
La base giratoria se puede quebrar si se
cayera. Se debe lavar cuidadosamente en
agua tibiajabonosa Seque per complete y
vuelva a instalar
Para reemplazar la base giratoda, coloque el
centre de la misma en el centre del homo y
g[rela hasta que se acomode en su lugaro
Bandeja metdllca negra
Plato giratoria de crtsta!
para mlcroondas
BANDEJA Y PLATO GIRATORIO
Para evitar la rotura, permita que la bandeja
met&lica negra y el plato giratorio de vidrio para
microondas se enfrfen per complete antes de
limpiarse. Lave cuidadosamente en agua tibia
jabonesa o en el lavaplatos.
Tambi_n puede usar una esponjilla para limpiar
la bandeja met#,lica negra
No use abrasives, podrtan dafar el acabado
77

C6MO LIMPIAR EL EXTERIOR
No recomendamos el use de limpiadores
con amoniaco o alcohol, ya que pueden
daSar el aspecto del homo. Si selecciona un
|impiador casero comt_n, prtmero aplique el
limptador directamente en un pa_o limpio,
luego limpie el drea sucia.
Caja
Limpie el exterior con un pa_o jabonoso_
Enjuague y luego seque,,Limpiela ventana
con un paF_ohSmedo.
Puerta de vidrio (en algunos modelos)
Limpie con una esponja h_meda limpia_
Seque completamente No use atomizadores
de limpieza, grandes cantidades de jab6n y
agua, objetivos abrasives o filosos en el panel,
ya que podHan daSarloo
Panel de control y puerta de acero
inoxidable (en algunos modelos)
No use una almohaditEade lana de acero,
ya que rayar_ la supeflicie
Para iimpiar la supefficie de acerco inoxidable,
utilice un patio caliente, humedo con un
detergente suave apropiado para superficies
de acede inoxidab[e. Utilice un paso limpio,
caliente, humedo para retirar et jab6n. Seque
con un paso seco y _impio.
Si permanecen restos de comida, intente
con un limpiador general de cocina, come
Fantastik_, Simple Green _ o Formula 409_,
Para manchas dif[cifes, utilice un fimpiador de
acero inoxidable est,_ndar come Ben AmP o
Cameo _,
Aplique el limpiador con una esponja ht_meda..
Utilice un patio timpio, caliente, h(_medo para
retirar el limpiador. Seque con un paso seco y
limpio. Siempre restriegue suavemente en la
direcci6n de ta veta..
Despu_s de ]impiar, utilice un acabado de
acero inoxidable, come Stainless Steel Magic,,
Revere Copper and Stainless Steel Cleaner e
o Wenol All Purpose Metat Polish_. Sigas las
instrucciones del producto para fa limpieza
de la superficie de acero inoxidable.
Parte inferior
Limpie a menudo la grasa y el polvo de la parte
inferior..Utilice una sofuciSn de agua tibia y
detergente.
Rejilla del ventilador
Utiiice agua jabonosa y un paso para plates
para timpiar la rejilia, si to desea, utilice copitos
de algodbn para timpiar entre los listones de
la rejilla..
Marco de la puerta
Es importante mantener el &lea fimpia donde
la puerta se seIla contra ei homo. Utitice
unicamente detergentes suaves, no abrasives,
aplicados con una esponja limpia o paso
suave. Enjuague bien.
Quite el tornil_o
LUZ DE ENCIMERA!
LUZ NOCTURNA
Para cambiar la luz de encimera/luz
nocturna, pdmero desconecte la corriente
del fusible principal o del panel de
diferencial, o estire del enchufe.
Quite el tornillo del lateral de la cubierta
dei compartimiento de la bombiIla y baje
la cubierta hasta que pare.
Aseg0rese que la bembiila est,_fria antes
de retirarta, Rompael sello adhesive
desenroscando con cuidado Iabombillao
Reempiace la bombilla fundida con una
bombilla haJ6gena (WB36X10176) de
20 vatios (mdximo) disponible en su centre
de repuestos y reparaciones Sears m,_s
cercano. Llame al 1-888-SU-HOGAR s"
(1-888-784-6427).
4,, Enrosque la nueva bombi[la, luego levante
ta cubierta y vuelva a poner el tomilto.
Conecte el homo a la corr_ente el_ctficao
78

Filtro de carbSn vegetal
(en algunos modelos)
F[Itrosde extractor reutiltzabIes
(enredes los modelos)
VENTILADOR EXTRACTOR
El ventilador extractor tiene dos filtros de metal
reutilizables
Los modelos que hacen recircular el aire de
nuevo ala habitaci6n usan un filtro de carb6n
vegetal
FILTROS DE EXTRACTOR
REUTILIZABLES
Los filtros met_licos atrapan la grasa iiberada
per fa comida en la cecina encimera,. Tambi_n
evitan que las llamas de la cocina encimera
puedan da_ar el interiorder horno.
Per esta raz6n, los fiitros deben estar siempre
en su lugar cuando se est_ usando la campana
Los filtres del extractor deben fimpiarse una
vez al mes o segun sea necesar_o..
COMe QUITAR Y LIMPIAR
LOS FILTROS
Para quitarlos, usando las lenguetas, desllcelos
hacia atr&s. Estire hacia abajo y afuera
Pare limpiar los filtros del extractor, emp_.pelos
y p_,se]os de un lade a otro en ague con
detergente No use amoniaco ni productos
que io contengan ya que oscureceflan el metal,
Se pueden cepillar ligeramente pare quitar
suciedad pegada
AcL_relos, sacuda_os y d_jelos secar antes de
volverlos a poner.,
Para velvet a colocarlos, deslice los filtros
en los marcos per la parte trasera de cada
apertura. Presione hacia arriba y hacia la parte
frontal pare ajustados en su fugar_,
79

FILTROS DE CARBON VEGETAL
El filtro de carb6n vegetal no puede
limpiarse. Debe cambiarse per otro, Ordene
la parte No. WB2X9883 disponible en su
centre de repuestos y reparactones Sears
m_s cercanoo Llame al 1-888-SU-HOGAR s"
(1-ass-784-6427),
Si el modelo no realiza la extraccibn al exterior,
el aire recircular_, a tray,s de un filtro de
carb6n vegetal no reutitizable que ayuda a
quitar olores y humos_
El fittro de carb6n vegetal deberfa cambiarse
cuando est,_ visiblemente sucio o descolorido
(normalmente tr_s 6 o 12 meses, segOn el uso)o
L
Retire la parrilla superior
quitando los dos tornillos
que Io sujetan
COMe QUITAR EL FILTRO
DE CARBON VEGETAL
Para quitar el flltro de carb6n vegetal,
primero desconecte la corriente de! fusible
principal o del panel de diferencia} o estire dei
enchufe. Retire la parrilla superior quitando los
des tornitlos que Io sujetan.
Puede ser que necesite abrir las puertas
del armario para quitar los torniltos.
Desiice el fiitro hacia la parte frontal del homo
y s_quelo.
J
COMOINSTALAR ELFILTRO
DE CARBON VEGETAL
Para instalar un nuevo ftltro de carb6n
vegetal, retire el pl_stico y cuatquier otro
envoltorio del nuevo fittroo
Inserte el filtro en la apertura superior del
horno come so muestra, maniobr,-_ndoto
detr_s de la rejilla pl&stica hasta que se
ajuste correctamente en su lugar.. Descansar&
en un _.ngulo detr&s de ta rejilla pl&stica en
dos lengOetas laterales de soporte yen frente
de la teng0eta trasera derecha. Vuelva a
colocar la rejilla y los dos tornillos en su lugar
Conecte la corriente de nuevo.
8O

PROBLEMA POSIBLE CAUSA SOLUCION
LUCES
La luz se opaca
durante el ciclo de
cocci6n rdpida y
se enciende y se
apaga, incluso con
el nivel mdximo de
_otencia
La luz es visible
alrededor de |a
puerta y caja
exterior mientras se
utiliza la cocci6n
rdpida
VENTILADOR
El ventilador contimJa
operando despu_s de
terminar la cocci6n
El ventilador del
horno ernite aire
caliente cuando el
homo estd encendido
El ventilador se
enciende
automdticamente
cuando el horno
no estd en uso
E! ventilador se
enciende
automdticamente
cuando utiliza el
microondas
COCClON
El horno produce
ruidos extraSos
mientras opera
Sale humo del horno
cuando se abre
la puerta
El alimento no estd
completamente
cocinado o dorado
at final del programa
de cocci6n
Esto es normal
El hive! de potencia
se ha reducido
autom_.ticamente
debido a que el
homo est_ caliente.
Esto es normal..
El homo se est&
enfriando.
Esto es normal,
Esto es normal
Esto es normal
Los sonidos del ventiiador
funcionando son normaleso
El tablero de rel_s est_
encendiendo y apagando
los componentes,.
Los alimentos tienen
alto contenido de grasa.
Se us6 aerosol en
los recipiente&
Es posible que los
tiempos programados no
concuerden con el tamaSo
o la cantidad de alimentos
que est_ cocinando.
• Esto es normal. El homo percibe el nivel de calor
y se ajusta autom_.ticamente..
• Cuando el homo est,. encendido, es posible qua la luz
sea visible akededor de la puerta yen ia caja exterior.
• Et ventilador se apaga autom&ticamente cuando las partes
internas del homo se han enfriado,
° Si la estufa se calienta mucho, el ventilador se enciende
. Si el microondas se utiliza despu_s de utilizar la cocci6n r_pida
y el homo percibe que est_ demasiado caliente, el ventilador
se enciende para enfriar eI homo°
• Estos sonidos son normales.
• El humo es normal mientras se cocinan alimentos altos
en gras& Utilice aceite vegetal o de olivas en la came en vez
de cubrir el sart_n completo
• Aumente o disminuya el tiempo para el nivel de cocci6n
correcto o ajuste las I_.mparas superior e inferior para dorar
tos alimentos,
81

PROBLEMA POSIBLE CAUSA SOLUCION
PANTALLA
La pantalla est_
en blanco
La pantalla muestra
"Control Panel
LOCKED" (panel de
control bloqueado)
La pantalla de control
estd iluminada cuando
el horno adn no ha
iniciado
La pantaila del reloj • Revise e! meng OPTIONS para la configuraci6n de fa pantalta
se ha apagado_ der reloj Encienda la pantatlar
Se ha bloqueado el ° Presione y sostenga el bot6n START/ENTER por
control aproximadamente 3 segundos para desbloquear el control
El reloj no est& , Configure el reloj.
configurado.
La puerta no est& cerrada • Abra la puerta y ci6rrela firmemente,
firmemente.
EI bot6n START/ENTER • Presione el bot6n START/ENTER.
no se presion6 despu_s
de ingresar la selecci6n
de cocci6n_
Ya se ingres6 otra • Presione STOP/CLEAR
selecci6n en el horno y el
bot6n STOP/CLEAR no
se ha presionado para
cancelar.
E_tamafio, la cantidad o ° Cerc]6rese de que ingres6 el tiempo de cocci6n despu_s
el tiempo de cocci6n no de hacer la selecci6n
se seteccion6 despu_s
de seleccionar
VEGETABLES (FRESH,
FROZEN, CANNED),
BACON, DEFROST-TIME
COOK TIME o PIZZA
Se presion6 STOP/CLEAR , Vuetva a establecer et programa de cocci6n y presione
accidentalmente.. START/ENTER.
No se ingress et peso del • CerciSrese de que ingres6 el peso del aiimento despu_s
alimento despu_s de de seleccionar DEFROST-AUTO o DEFROST-BREAD.
seleccionar DEFROST-
AUTO o DEFROST-
BREAD.
82

PROBLEMA POSIBLE CAUSA SOLUCI(_N
OTROS
PROBLEMAS
La puerta y el interior Las t_mparas calefactoras • Esto es normal,
del homo est_n producen calor intenso • Utilice guantes para el homo para retirar los alimentos
callentes en un espacio pequeSo, cuando est6n listos_
• Esto es normal,
El piso del homo
estd caliente, incluso
cuando el homo
no se ha usado
La luz de la estufa estA
loca)izada debajo del piso
del horno. Cuando la Fuz
est_ encendida, el calor
que produce puede hacer
que el homo se caliente
El horno no enciende Es posible que se haya ° Reemprace el fusible o vuelva a iniciarei interruptorde circuitos
quemado un fusible o
que el interruptor de
circuitos se haya saltado..
Subida de tensi6n • Desconecte el homo, luego conecte nuevamente_
El enchufe no est& = Cerci6rese de que el enchufe del homo est,. completamente
completamente insertado insertado en et tomacorfiente.
en el tomacorriente.
El plato giratorio ° Esto es normal. Centre 4abandeja en la base giratodao
de cristal para
microondas no
encaja en el centro
83

!: =i!;_ii!:!_¸¸,
i_!;:iil_?jz:
i!": !:_ii_!_:_
Your Home
For repair-in your home-of all major brand appliances,
lawn and garden equipment, or heating and cooling systems,
no matter who made it, no matter who sold it!
For the replacement parts, accessories and
owner's manuals that you need to do-it-yourself.
For Sears professional installation of home appliances
and items like garage door openers and water heaters.
1-800-4-MY-HOME ® (1-800-469-4663)
Call anytime, day or night (U.S.A_ and Canada)
! ii'i__!::!i
!!!! IL;:I
www.searsocom www.sears.ca
:_!i!i
Our Home
For repair of carry-in items like vacuums, lawn equipment, : :,
and electronics, call or go on-line for the location of your nearest
Sears Parts & Repair Center.
1-800-488-1222
Call anytime, day or night (U.SoA. only)
i ¸,
www.sears.com
i!:i i!!iii!
To purchase a protection agreement (UoSoA.) ::
or maintenance agreement (Canada) on a product serviced by Sears:
1-800-827-6655 (U.S_A,)
1 800 361 6665 (Canada)
Para pedir servicio de reparaci6n
a domicilio, y para ordenar piezas:
1-888-SU-HOGAR sM
(t-888_784-6427)
Au Canada pour service en frangais:
1 800 LE FOYER Mc
(1-800_533-6937) =
www,sears ca
_M flu
® Registered Trademark / Trademark / Service Mark of Sears, Roebuck and Co
r _ TM
® Ma ca Regtst ado / Marco de F&brica I s_ Marca de Servicie de Sears, Roebuck and Co
_c Marque de commerce / _ Marque d_pos_e de Sears, Roebuck and Co © Sears, Roebuck and Co,
-
 1
1
-
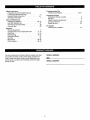 2
2
-
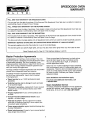 3
3
-
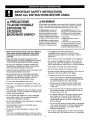 4
4
-
 5
5
-
 6
6
-
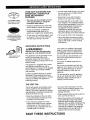 7
7
-
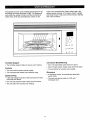 8
8
-
 9
9
-
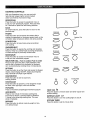 10
10
-
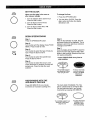 11
11
-
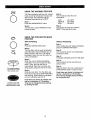 12
12
-
 13
13
-
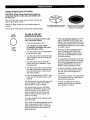 14
14
-
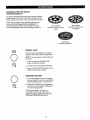 15
15
-
 16
16
-
 17
17
-
 18
18
-
 19
19
-
 20
20
-
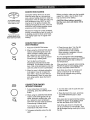 21
21
-
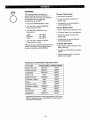 22
22
-
 23
23
-
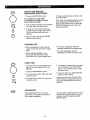 24
24
-
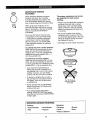 25
25
-
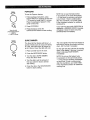 26
26
-
 27
27
-
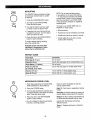 28
28
-
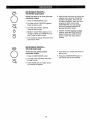 29
29
-
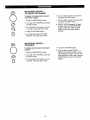 30
30
-
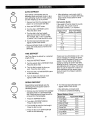 31
31
-
 32
32
-
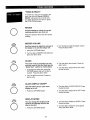 33
33
-
 34
34
-
 35
35
-
 36
36
-
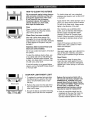 37
37
-
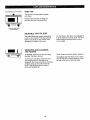 38
38
-
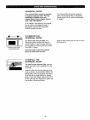 39
39
-
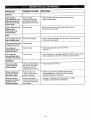 40
40
-
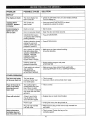 41
41
-
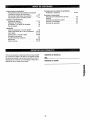 42
42
-
 43
43
-
 44
44
-
 45
45
-
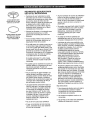 46
46
-
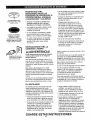 47
47
-
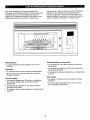 48
48
-
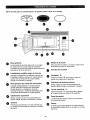 49
49
-
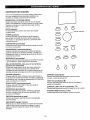 50
50
-
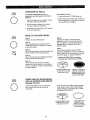 51
51
-
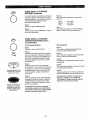 52
52
-
 53
53
-
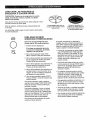 54
54
-
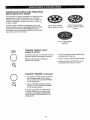 55
55
-
 56
56
-
 57
57
-
 58
58
-
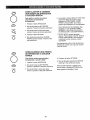 59
59
-
 60
60
-
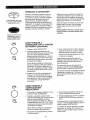 61
61
-
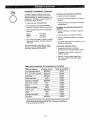 62
62
-
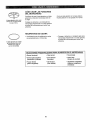 63
63
-
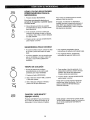 64
64
-
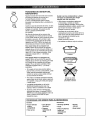 65
65
-
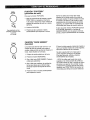 66
66
-
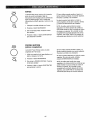 67
67
-
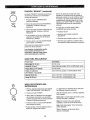 68
68
-
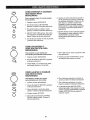 69
69
-
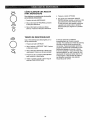 70
70
-
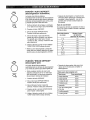 71
71
-
 72
72
-
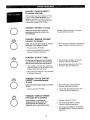 73
73
-
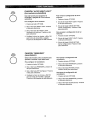 74
74
-
 75
75
-
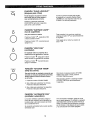 76
76
-
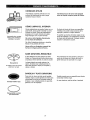 77
77
-
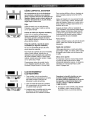 78
78
-
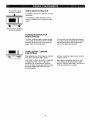 79
79
-
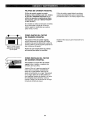 80
80
-
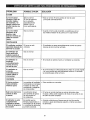 81
81
-
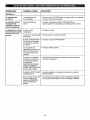 82
82
-
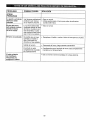 83
83
-
 84
84


Kenmore Elite 36363694301 El manual del propietario
- Categoría
- Microondas
- Tipo
- El manual del propietario
- Este manual también es adecuado para
en otros idiomas
Artículos relacionados
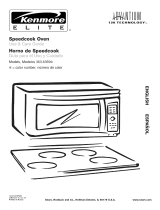
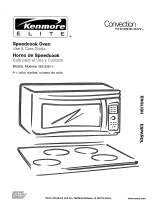
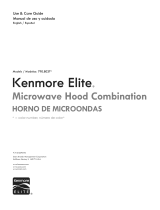

Otros documentos
-
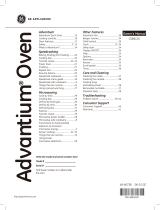 Cafe CSB9120SJSS El manual del propietario
-
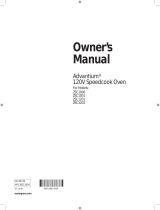 Advantium ZSC1201 El manual del propietario
-
GE CSA1201RSS Guía del usuario
-
-
-
Monogram ZSA1201JSS El manual del propietario
-
GE PSA9120SFSS El manual del propietario
-
GE PSA9240SFSS El manual del propietario
-
Whirlpool FT 439 SL Guía del usuario
-
Whirlpool KMCM 3800 Guía del usuario

