

2
Notice
The information contained in this document is subject to change
without notice. Hewlett-Packard makes no warranty of any kind with
regard to this material, including, but not limited to, the implied
warranties of merchantability and fitness for a particular purpose.
Hewlett-Packard shall not be liable for errors contained herein or for
incidental or consequential damages in connection with the furnishing,
performance, or use of this material. Hewlett-Packard assumes no
responsibility for the use or reliability of its hardware or software on
equipment that is not furnished by Hewlett-Packard or equipment for
which it is not intended. This document contains proprietary
information that is protected by copyright. All rights are reserved. No
part of this document may be photocopied, reproduced, or translated
to another language without the prior written consent of Hewlett-
Packard Company.
Logitech, the Logitech logo, and the Logitech products referred to
herein are either the trademarks or the registered trademarks of
Logitech. Microsoft, Windows and Windows NT are either registered
trademarks or trademarks of Microsoft Corporation in the United
States and/or other countries. All other trademarks are property of
their respective owners.
HP France, 38053 Grenoble, Cedex 9 France
© 2001 Hewlett-Packard Company
All rights reserved
Document No.: 622864-1600

3

4
Regulatory Information
Notice for the USA: FCC Statement
Federal Communications Commission (FCC) Radio Frequency
Interference Statement Warning:
This equipment has been tested and found to comply with the limits
for a Class B digital device, pursuant to Part 15 of the FCC Rules.
These limits are designed to provide reasonable protection against
harmful interference in a residential installation.
This equipment generates, uses, and can radiate radio frequency
energy and, if not installed and used in accordance with the
instructions, may cause harmful interference to radio communications.
However, there is no guarantee that interference will not occur in a
particular installation. If this equipment does cause harmful
interference to radio or television reception, which can be determined
by turning the equipment off and on, the user is encouraged to correct
the interference by one or more of the following measures:
· Reorient or relocate the receiving antenna
· Increase the separation between the equipment and the
receiver
· Connect the equipment into an outlet on a circuit different
from that to which the receiver is connected
· Consult the dealer or an experienced radio/TV technician for
help.
Hewlett-Packard's FCC Compliance Tests were conducted with HP-
supported peripheral devices and HP shielded cables, such as those
you receive with your system. Changes or modifications not expressly
approved by Hewlett-Packard could void the user's authority to
operate the equipment.

Notice for Canada
This Class B digital apparatus complies with the Canadian ICES-003.
Cet appareil numérique de la Class B est conforme à la norme, NMB-
003 du Canada.
Notice for the Netherlands
Bij dit apparaat zijn batterijen geleverd. Wanneer deze leeg zijn, moet
U ze niet weggooien maar inleveren als KCA.
Hardware Warranty
This HP accessory is covered by a limited hardware warranty for a
period of one year from the date of purchase by the original end-user.
The type of service provided is return to an HP or repair-authorized
reseller service-center.
At Hewlett-Packard's discretion, a defective accessory will be repaired
or replaced by a new unit, either of the same type or of an equivalent
model.
If this accessory is purchased and used together with an HP PC, it will
be covered by the warranty of this computer or workstation, under
the same conditions of service and duration.
5

6
Please, refer to the warranty statement provided with your HP PC for
warranty limitations, customer responsibilities and other terms and
conditions.
FOR CONSUMER TRANSACTIONS IN AUSTRALIA AND NEW
ZEALAND: THE WARRANTY TERMS CONTAINED IN THIS
STATEMENT, EXCEPT TO THE EXTENT LAWFULLY PERMITTED,
DO NOT EXCLUDE, RESTRICT OR MODIFY AND ARE IN
ADDITION TO THE MANDATORY STATUTORY RIGHTS
APPLICABLE TO THE SALE OF THIS PRODUCT TO YOU.
HP Software Warranty
THIS WARRANTY STATEMENT TAKES PRECEDENCE OVER ANY
OTHER SOFTWARE WARRANTY STATEMENT INCLUDED WITH
THIS PRODUCT
Ninety-Day Limited Software Warranty
HP warrants for a period of NINETY (90) DAYS from the date of the
purchase that the software product will execute its programming
instructions when all files are properly installed. HP does not warrant
that the software will be uninterrupted or error free. HP does not
warrant to the performance of usefulness of any software provided
with your computer product. Unless otherwise expressly provided by
HP, it is your own responsibility to obtain the latest version of any
software and support directly from the software owner or authorized
distributor. In the event that this software product fails to execute its
programming instructions during the warranty period, Customer’s
remedy shall be a refund or repair. Should HP be unable to replace the
media within a reasonable amount of time, Customer’s alternate
remedy shall be a refund of the purchase price upon return of the
product and all copies
Removable Media (If supplied)

7
HP warrants the removable media, if supplied, upon which this
product is recorded to be free from defects in materials and
workmanship under normal use for a period of NINETY (90) DAYS
from the date of purchase. In the event the media proves to be
defective during the warranty period, Customer’s remedy shall be to
return the media to HP for replacement. Should HP be unable to
replace the media within a reasonable amount of time, Customer’s
alternate remedy shall be a refund of the purchase price upon return
of the product and destruction of all other nonremovable media
copies of the software product.
Notice of Warranty Claims
Customer must notify HP in writing of any warranty claim not later
than thirty (30) days after the expiration of the warranty period.
The above warranty shall not apply to defects resulting from: misuse;
unauthorized modification; operation or storage outside the
environmental specifications for the product; in-transit damage;
improper maintenance; or defects resulting from use of non-HP
software, accessories, media, supplies, consumables, or such items not
designed for use with the product.
HP MAKES NO OTHER EXPRESS WARRANTY, WHETHER
WRITTEN OR ORAL WITH RESPECT TO THIS PRODUCT. ANY
IMPLIED WARRANTY OF MERCHANTABILITY OR FITNESS FOR A
PARTICULAR PURPOSE IS LIMITED TO THE DURATION OF THE
EXPRESS WARRANTY SET FORTH ABOVE. SOME STATES OR
PROVINCES DO NOT ALLOW LIMITATIONS ON HOW LONG
AN IMPLIED WARRANTY LASTS, SO THE ABOVE LIMITATIONS
OR EXCLUSION MAY NOT APPLY TO YOU.
Limitation of Liability and Remedies
THE REMEDIES PROVIDED ABOVE ARE CUSTOMER’S SOLE AND
EXCLUSIVE REMEDIES. IN NO EVENT SHALL HP BE LIABLE FOR
ANY DIRECT, INDIRECT, SPECIAL, INCIDENTAL OR
CONSEQUENTIAL DAMAGES (INCLUDING LOST PROFIT)
WHETHER BASED ON WARRANTY, CONTRACT, TORT OR
ANY OTHER LEGAL THEORY. Some states or provinces do not

8
allow the exclusion or limitation of incidental or consequential
damages, so the above limitation or exclusion may not apply to you.
FOR CONSUMER TRANSACTIONS IN AUSTRALIA AND NEW
ZEALAND: THE WARRANTY TERMS CONTAINED IN THIS
STATEMENT, EXCEPT TO THE EXTENT LAWFULLY PERMITTED,
DO NOT EXCLUDE, RESTRICT OR MODIFY AND ARE IN
ADDITION TO THE MANDATORY STATUTORY RIGHTS
APPLICABLE TO THE SALE OF THIS PRODUCT TO YOU.
HP Software License Agreement
CAREFULLY READ THIS LICENSE AGREEMENT BEFORE
PROCEEDING TO OPERATE THE HP ACCESSORY. RIGHTS IN
THE SOFTWARE ARE OFFERED ONLY ON THE CONDITION
THAT THE CUSTOMER AGREES TO ALL TERMS AND
CONDITIONS OF THIS LICENSE AGREEMENT. PROCEEDING TO
INSTALLING AND USING THE ACCESSORY INDICATES YOUR
ACCEPTANCE OF THESE TERMS AND CONDITIONS. IF YOU DO
NOT AGREE TO THE LICENSE AGREEMENT, YOU MUST NOW
DESTROY ANY MASTER DISKETTES OR CD-ROMS, OR RETURN
THE COMPLETE ACCESSORY AND SOFTWARE FOR A FULL
REFUND.
UNLESS OTHERWISE STATED BELOW, THIS HP SOFTWARE
PRODUCT LICENSE AGREEMENT SHALL GOVERN THE USE OF
ALL SOFTWARE THAT IS PROVIDED TO YOU, THE CUSTOMER,
AS PART OF THE HP ACCESSORY. IT SHALL SUPERSEDE ANY
NON-HP SOFTWARE LICENSE TERMS THAT MAY BE FOUND
ON-LINE, OR IN ANY DOCUMENTATION OR OTHER
MATERIALS CONTAINED IN THE ACCESSORY PRODUCT
PACKAGING.
Note: Operating System Software by Microsoft is licensed to you
under the Microsoft End User License Agreement (EULA) contained in
the Microsoft documentation.
The following License Terms govern the use of the software:

9
USE. Customer may use the software on any one computer.
Customer may not network the software or otherwise use it on more
than one computer. Customer may not reverse assemble or
decompile the software unless authorized by law.
COPIES AND ADAPTATIONS. Customer may make copies or
adaptations of the software (a) for archival purposes or (b) when
copying or adaptation is an essential step in the use of the software
with a computer so long as the copies and adaptations are used in no
other manner.
OWNERSHIP. Customer agrees that he/she does not have any title or
ownership of the software, other than ownership of the physical
media. Customer acknowledges and agrees that the software is
copyrighted and protected under the copyright laws. Customer
acknowledges and agrees that the software may have been developed
by a third party software supplier named in the copyright notices
included with the software, who shall be authorized to hold the
Customer responsible for any copyright infringement or violation of
this Agreement.
TRANSFER OF RIGHTS IN SOFTWARE. Customer may transfer
rights in the software to a third party only as part of the transfer of all
rights and only if Customer obtains the prior agreement of the third
party to be bound by the terms of this License Agreement. Upon such
a transfer, Customer agrees that his/her rights in the software are
terminated and that he/she will either destroy his/her copies and
adaptations or deliver them to the third party.
SUBLICENSING AND DISTRIBUTION. Customer may not lease,
sublicense the software or distribute copies or adaptations of the
software to anyone in physical media or by telecommunication
without the prior written consent of Hewlett-Packard.
TERMINATION. Hewlett-Packard may terminate this software license
for failure to comply with any of these terms provided Hewlett-
Packard has requested Customer to cure the failure and Customer
has failed to do so within thirty (30) days of such notice.

10
UPDATES AND UPGRADES. Customer agrees that the software
does not include updates and upgrades which may be available from
Hewlett-Packard under a separate support agreement.
EXPORT CLAUSE. Customer agrees not to export or re-export the
software or any copy or adaptation in violation of the U.S. Export
Administration regulations or other applicable regulation.
U.S. GOVERNMENT RESTRICTED RIGHTS. Use, duplication, or
disclosure by the U.S. Government is subject to restrictions as set
forth in subparagraph (c)(1)(ii) of the Rights in Technical Data and
Computer Software clause in DFARS 252.227-7013. Hewlett-Packard
Company. 3000 Hanover Street, Palo Alto, CA 94304 U.S.A. Rights
for non-DOD U.S. Government Departments and Agencies are as set
forth in FAR 52.227-19(c)(1,2).
Use, duplication or disclosure is subject to HP standard commercial
license terms and for non-DOD Departments and Agencies of the U.S.
Government, the restrictions set forth in FAR 52.227-19(c)(1-2)(June
1987)
Hewlett-Packard Company
3000 Hanover Street
Palo Alto, CA 94303 U.S.A.
copyright (c) 2001 Hewlett-Packard Company. All Rights Reserved
Customer further agrees that Software is delivered and licensed as
"Commercial computer software" as defined in DFARS 252-227-7014
(June 1995) or as a "commercial item" as defined in FAR 2.101(a), or
as "Restricted computer software" as defined in FAR 52.227-19 (or
any equivalent agency regulation or contract clause), whichever is
applicable. The Customer agrees that it has only those rights provided
for such Software by the applicable FAR or DFARS clause or the HP
standard software agreement for the product involved. (9 Nov 1998)

EC-Declaration of Conformity
to the Essential Requirements of the
applicable Directive 1999/5/EEC
We, Authorised Repesentative Logitech Ireland Services Limited,
Ballincollig Cork Ireland, declare under our sole responsibility that the
Radio-communication product
Brand Name: LOGITECH
Model Name: Cordless Wheel Mouse
Type Number: M-RK45
Or Type Number: M-RN68
And Type Number: C-RC3-MSE
is fully in conformity with the essential requirements of the Council
Directive 1999/5/EEC (R&TTE). This declaration is based on the full
compliance of the product with the following European standards:
For RF: EN 300220-1 v1.2.1 (November 1997)
For EMC: ETS 300683 (June 1997)
For Electrical Safety: EN 60950
For Information: On the basis of this declaration, this product and the
packaging will bear following marking:
HP_MOUSE_USER'S_GUIDE 11/9/01 10:24 am Page 1

Manual del usuario del ratón
Este manual describe la instalación,uso y limpieza del ratón.También hace
referencia a la utilización del botón rueda y la selección de las opciones
del ratón en ratones ópticos y ratones con botón rueda mejorados.Tenga
en cuenta que el ratón funciona en Microsoft® Windows® 9x,Windows®
2000,Windows® XP y Windows NT®.
1. Conexión del ratón
Ratón con botón rueda mejorado y ratón óptico
1. Si el ratón se conecta al puerto PS/2,apague el ordenador.
Si se conecta a un puerto USB,vaya al paso 2.
2. Conecte el ratón (o el receptor del ratón si tiene uno inalámbrico) al
puerto PS/2 o al puerto USB.Haga coincidir el extremo del cable del
ratón (o receptor) con el puerto al que se conecta.Los conectores
de cables PS/2 y USB son diferentes.
3. Encienda el ordenador (conexión PS/2) e instale el software
MouseWare®.A continuación,tendrá a su disposición todas
las prestaciones del ratón.
2. Instalación del software
(ratones con botón rueda mejorados y ratones ópticos)
Con Windows 2000 y Windows XP (cuando esté disponible),
utilice el controlador de ratón incluido para el ratón con botón rueda
mejorado y para el ratón óptico.
Para el ratón con botón rueda mejorado con Windows 9x
oWindows NT 4,en caso de que sea necesario un controlador
de ratón,utilice el CD-ROM incluido en la caja.
Espana
HP_MOUSE_USER'S_GUIDE 11/9/01 10:19 am Page 46

Para el ratón óptico en Windows 98,seleccione el botón Siguiente
en el asistente para la instalación del controlador y los tres botones
Siguiente que aparezcan a continuación. Por último,seleccione
el botón Finalizar.Su nuevo ratón óptico está instalado.
(Este ratón óptico no es compatible con Windows NT 4 y Windows 95).
3. Cómo trabajar con el software
(ratones con botón rueda mejorados y ratones ópticos)
El software MouseWare presenta distintas fichas que permiten
asignar las funciones deseadas a los botones del ratón,controlar
los movimientos del puntero y configurar el ratón en Windows 9x,
Windows 2000 o Windows NT.
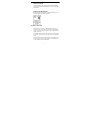
Ficha Configuración rápida :muestra una imagen del ratón
con las funciones asignadas a cada uno de los botones y permite
configurar el ratón mediante el asistente de configuración.
Ficha Punteros :permite cambiar el aspecto del puntero en pantalla.
Ficha Botones :muestra una imagen del ratón con las funciones
asignadas a cada botón,permite asignar las funciones deseadas
a la rueda y los botones del ratón y permite especificar la distancia
de desplazamiento de la rueda del ratón.
Ficha Movimiento :permite ajustar la velocidad y la aceleración
del puntero y activar las opciones Estela del puntero
(sólo en Windows 9x y Windows 2000) y Puntero inteligente
(sólo en Windows NT).
Ficha Dispositivos :ofrece información sobre la versión y el ratón.
HP_MOUSE_USER'S_GUIDE 11/9/01 10:19 am Page 47

Acceso al software
Para acceder al software MouseWare correspondiente a Windows 9x,
Windows 2000 o Windows NT,haga doble clic en el icono Mouse
en el panel de control de Windows.A continuación,se abrirá el cuadro de
diálogo Propiedades de Mouse.
Asignación de funciones a los botones
La ficha Botones del cuadro de diálogo Propiedades de Mouse permite
asignar a los botones del ratón las funciones más utilizadas.Entre estas
funciones se incluyen:Hacer clic/Seleccionar, Menú contextual/alternativo,
Doble clic, Explorar Mi PC,Ayuda de Windows,Botón central,
Menú Inicio y Universal Scroll.
Para asignar funciones a los botones:
1. Abra el cuadro de diálogo Propiedades de Mouse.Para más
información,consulte la sección "Acceso al software MouseWare".
2. Haga clic en la ficha Botones.Aparecerán las asignaciones actuales de
los botones.Una lista desplegable muestra las funciones disponibles
de cada botón.Estas funciones pueden asignarse a la rueda o a un
botón del ratón.La rueda también puede utilizarse como un botón
tradicional con sólo pulsarla.
3. Haga clic en una flecha descendente para ver la lista de funciones.
Utilice la barra de desplazamiento para ver otras funciones
no visibles.Elija una función haciendo clic en ella.Una vez
seleccionada la función, aparecerá resaltada.
4. Haga clic en el botón Opciones para configurar las funciones
AutoScroll y Universal Scroll.Sólo será posible configurarlas si
se han asignado previamente a los botones del ratón.
5. Tras asignar las funciones deseadas y configurar las opciones,
haga clic en el botón Aceptar para guardar la configuración.
HP_MOUSE_USER'S_GUIDE 11/9/01 10:19 am Page 48

4. Uso de la rueda del ratón
(ratones con botón rueda mejorados y ratones ópticos)
El ratón y el software MouseWare permiten desplazarse en Windows 9x,
Windows 2000 y Windows NT.
Desplazamiento
Empuje la rueda con suavidad hacia adelante para desplazarse hacia arriba
y hacia atrás para desplazarse hacia abajo.Para utilizarla como un botón
tradicional,haga clic con ella (púlsela).
Si desea aumentar la suavidad de los desplazamientos en aplicaciones
compatibles con Microsoft Office 97 y Office 2000,active la casilla Sólo
desplazamiento compatible con Office 97Office 2000 situada
en la ficha Botones del cuadro de diálogo Propiedades de Mouse.
Especifique, en la ficha Botones del cuadro de diálogo Propiedades
de Mouse,la distancia de desplazamiento que se recorrerá al utilizar
la rueda del ratón.Para configurar el desplazamiento:
1. Abra el cuadro de diálogo Propiedades de Mouse.Para más
información,consulte la sección "Acceso al software MouseWare".
Haga clic en la ficha Botones.
2. En caso deseado, asigne la función Universal Scroll o AutoScroll
a la rueda o a un botón del ratón.Tenga en cuenta que la rueda
del ratón sólo permite desplazarse en dirección horizontal o vertical.
3. Si sólo desea utilizar la rueda en aplicaciones compatibles con
Office 97/Office 2000,active la casilla Sólo desplazamiento
compatible con Office 97/Office 2000.
4. En caso deseado, haga clic en el botón Opciones para ver opciones
adicionales de Universal Scroll o AutoScroll.
5. Haga clic en Aceptar para aplicar las opciones seleccionadas.
HP_MOUSE_USER'S_GUIDE 11/9/01 10:19 am Page 49

AutoScroll
AutoScroll permite recorrer un documento de forma automática
sin tener que mover continuamente la rueda del ratón.AutoScroll
funciona en aplicaciones para Windows 9x y Windows 2000
y aplicaciones compatibles con Office 97/Office 2000.Para utilizar
la función AutoScroll:
1. En la ficha Botones,asigne la función AutoScroll a la rueda
o a un botón del ratón.
2. Sitúe el puntero en una aplicación o ventana que admita
la utilización de dicha función.
3. Pulse la rueda o un botón del ratón hasta que el icono en forma de
ancla de AutoScroll aparezca en pantalla.
4. Aleje el ratón del icono de AutoScroll para iniciar el desplazamiento.
El desplazamiento continúa realizándose sin necesidad de seguir
moviendo el ratón.La velocidad de desplazamiento depende de la
distancia entre el puntero y el icono de AutoScroll:cuanto más lejos
del icono esté el puntero, mayor será la velocidad de desplazamiento.
5. Para desactivar la función AutoScroll,pulse cualquier tecla del teclado
o botón del ratón.
Universal Scroll
Universal Scroll permite desplazarse por un documento sin necesidad de
utilizar las barras de desplazamiento ni la rueda del ratón.
Para utilizar Universal Scroll,basta con pulsar el botón al que se
ha asignado dicha opción y mover el ratón en la dirección deseada.
Para desactivar esta función,pulse cualquier botón del ratón.
Para asignar la función Universal Scroll,utilice la ficha Botones
del cuadro de diálogo Propiedades de Mouse. Esta ficha permite,además,
configurar la distancia de desplazamiento.Al activar la casilla Sólo
desplazamiento compatible con Office 97/Office 2000,Universal Scroll
funciona exclusivamente en aplicaciones compatibles con Office 97/Office 2000.
HP_MOUSE_USER'S_GUIDE 11/9/01 10:19 am Page 50

Zoom
Las operaciones de zoom sirven para ampliar o reducir un documento en
pantalla.Además,sólo funcionan con aplicaciones compatibles
con Office 97/Office 2000 que admiten zoom.Para realizar operaciones
de zoom:
1. Sitúe el puntero en una aplicación compatible con
Office 97/Office 2000 o una ventana que admita la realización de
operaciones de zoom.
2. Mantenga pulsada la tecla CTRL mientras realiza una de estas
operaciones:
• Para ampliar el documento,mueva la rueda hacia adelante.
• Para reducirlo, mueva la rueda hacia atrás.
Zoom de datos
La función Zoom de datos permite expandir o contraer datos en hojas
de cálculo o documentos de procesadores de texto.Para utilizar la
función Zoom de datos:
1. Sitúe el puntero en una aplicación compatible con Office 97/Office 2000.
2. Sitúe el puntero sobre los datos a los que va a aplicar el zoom.
3. Mantenga pulsada la tecla MAYÚS mientras realiza una de estas
operaciones:
• Para expandir los datos, mueva la rueda hacia adelante.
• Para contraerlos, mueva la rueda hacia atrás.
Nota :Zoom de datos sólo funciona con aplicaciones compatibles
con Office 97/Office 2000 que admiten dicha función.Para
configurarla,active la casilla Sólo desplazamiento compatible con
Office 97/Office 2000 en la ficha Botones.
HP_MOUSE_USER'S_GUIDE 11/9/01 10:19 am Page 51

5. Modificación del puntero en pantalla
(ratones con botón rueda mejorados y ratones ópticos)
Las fichas del cuadro de diálogo Propiedades de Mouse permiten
modificar las características del puntero en pantalla.
Velocidad del punter o:determina la velocidad a la que se desplaza
el puntero por la pantalla y la distancia recorrida por el mismo al mover
el ratón.
Estela del punter o (sólo en Windows 9x y Windows 2000):
permite que el puntero deje una estela a medida que se desplaza
por la pantalla,lo que facilita su localización en las pantallas de cristal
líquido de los ordenadores portátiles.
Combinaciones de punteros : consiste en un conjunto
de indicadores utilizados como principal mecanismo de selección
y posicionamiento en Windows.Es posible cambiar el aspecto
del puntero seleccionando una combinación diferente en la ficha Punteros
del cuadro de diálogo Propiedades de Mouse.
Ajustar al botón predeterminado (sólo en Windows NT):
permite que,al abrir un cuadro de diálogo estándar de Windows,
el puntero vaya directamente al botón de comando predeterminado.Esta
función evita tener que llevar manualmente el puntero al botón de
comando en cuestión cada vez que se abre un cuadro de diálogo.
6. Configuración del ratón para usuarios zurdos
(ratones con botón rueda mejorados)
Es posible configurar el ratón para usuarios zurdos ejecutando
el asistente de configuración desde la ficha Configuración rápida
o cambiando las funciones asignadas a los botones del ratón
en la ficha Botones.
HP_MOUSE_USER'S_GUIDE 11/9/01 10:19 am Page 52

Para ello:
1. Abra el cuadro de diálogo Propiedades de Mouse.Para más
información,consulte la sección "Acceso al software MouseWare".
2. Haga clic en la ficha Botones.
3. En la lista desplegable correspondiente al botón derecho,seleccione
la función Hacer clic/Seleccionar.En la lista desplegable correspondi
ente al botón izquierdo, seleccione la función Menú
contextual/alternativo.
4. Haga clic en Aceptar para guardar los cambios.
7. Operaciones de mantenimiento
(sólo ratones no ópticos)
Si el puntero presentara un comportamiento o movimiento anómalo,
puede que sea preciso limpiar la bola del ratón.
1. Quite el aro de sujeción para sacar la bola.En la parte inferior
del ratón,presione en la dirección de la flecha Open impresa
en la tapa del aro de sujeción.
2. Limpie la bola con un paño limpio que no suelte pelusa y después
sople en el interior del compartimento de la bola para eliminar toda
formación de polvo y pelusa.
3. Compruebe si están sucios los rodillos de goma del interior del
compartimento de la bola.La suciedad normalmente tiene el aspecto
de una franja que se extiende por el centro del rodillo.
4. Si estuvieran sucios,limpie los rodillos de goma del interior del
compartimento de la bola con un bastoncillo de algodón humedecido
en alcohol.Tras la limpieza,asegúrese de que los rodillos estén
centrados en sus canales.
5 . C e rc i ó rese de que no quedan restos de pelusa del bastoncillo en los ro d i l l o s .
6. Vuelva a colocar la bola y el aro de sujeción.
HP_MOUSE_USER'S_GUIDE 11/9/01 10:19 am Page 53

8. Sólo ratones ópticos
Precaución con el ratón óptico
Para un rendimiento óptimo,utilice el ratón óptico sobre una superficie
mate (no sobre una brillante) y trate de evitar las superficies oscuras.
Normativa internacional y seguridad
Este ratón no incluye piezas que puedan repararse o sustituirse.
En funcionamiento normal,la luz visible por el usuario es de
15 microvatios.Este ratón está clasificado como producto comercial para
ser utilizado entre 0° C y 40° C.
Este producto cumple con la normativa internacional IEC 825-1:1993 que
requiere la siguiente declaración:
PRECAUCIÓN:la utilización de controles,ajustes o realización
de procedimientos no especificados en este documento puede
dar como resultado la exposición a radiaciones peligrosas.
Class 1 LED
Product
HP_MOUSE_USER'S_GUIDE 11/9/01 10:19 am Page 54
-
 1
1
-
 2
2
-
 3
3
-
 4
4
-
 5
5
-
 6
6
-
 7
7
-
 8
8
-
 9
9
-
 10
10
-
 11
11
-
 12
12
-
 13
13
-
 14
14
-
 15
15
-
 16
16
-
 17
17
-
 18
18
-
 19
19
-
 20
20


HP Scrolling Mouse (Mosquito) Guía del usuario
- Tipo
- Guía del usuario
- Este manual también es adecuado para
en otros idiomas
Artículos relacionados
Otros documentos
-
Logitech 930525-0403 - iFeel - Mouse Getting Started Manual
-
Dell Precision M6500 Guía del usuario
-
A4 Tech. 4D Manual de usuario
-
RocketFish RF-TWIST Manual de usuario
-
Sony SMU-C3 Instrucciones de operación
-
-
-
Costway GT3585 Instrucciones de operación