BOMANN EK 6021 El manual del propietario
- Categoría
- Chimeneas
- Tipo
- El manual del propietario
Este manual también es adecuado para

EK6021CB_IM 02.08.18
Bedienungsanleitung / Garantie
Instruction Manual • Mode d’emploi
Manual de instrucciones • Instrukcja obsługi / Gwarancja
ELEKTRISCHER KAMINOFEN
Electric Fireplace • Cheminée électrique
Chimenea eléctrica • Kominek elektryczny
EK 6021 CB
Dieses Produkt ist nur für gut isolierte Räume oder für den gelegentlichen Gebrauch geeignet.
This product is only suitable for well isolated rooms or for occasional use.
Ce produit est seulement adapté à une utilisation dans les pièces correctement isolées, ou pour les utilisations
occasionnelles.
Este producto solo es adecuado para utilizarlo en habitaciones bien aisladas o para un uso ocasional.
Ten produkt nadaje się tylko do dobrze izolowanych pomieszczeń lub do sporadycznego użytku.

2
EK6021CB_IM 02.08.18
Bedienungsanleitung .................................................................................Seite 5
Instruction Manual ......................................................................................Page 16
Mode d’emploi .............................................................................................Page 26
Manual de instrucciones ........................................................................ Página 36
Instrukcja obsługi ....................................................................................Strona 46

Übersicht der Bedienelemente
Overview of the Components • Liste des différents éléments de commande
Indicación de los elementos de manejo • Przegląd elementów obsługi
EK6021CB_IM 02.08.18
3

Montage
Assembly • Assemblage • Montaje • Montaż
EK6021CB_IM 02.08.18
4

EK6021CB_IM 02.08.18
5
Bedienungsanleitung
Vielen Dank, dass Sie sich für unser Produkt entschieden
haben. Wir wünschen Ihnen viel Freude mit dem Gerät.
Symbole in dieser Bedienungsanleitung
Wichtige Hinweise für Ihre Sicherheit sind besonders ge-
kennzeichnet. Beachten Sie diese Hinweise unbedingt, um
Unfälle und Schäden am Gerät zu vermeiden:
WARNUNG:
Warnt vor Gefahren für Ihre Gesundheit und zeigt mög-
liche Verletzungsrisiken auf.
ACHTUNG:
Weist auf mögliche Gefährdungen für das Gerät oder
andere Gegenstände hin.
HINWEIS:
Hebt Tipps und Informationen für Sie hervor.
Inhalt
Übersicht der Bedienelemente ..........................................3
Montage ...............................................................................4
Allgemeine Hinweise .......................................................... 5
Spezielle Sicherheitshinweise für dieses Gerät ..............6
Umgang mit Batterien ........................................................8
Auspacken des Gerätes ..................................................... 8
Lieferumfang .......................................................................8
Übersicht der Bedienelemente ..........................................8
Bedienteil am Gerät ........................................................8
Fernbedienung ................................................................8
Display ............................................................................. 9
Montageanleitung ............................................................... 9
Elektrischer Anschluss ...................................................... 9
Anschlusswert .................................................................9
Anschluss ........................................................................9
Fernbedienung .................................................................. 10
Batterien einlegen ........................................................10
Wirkungskreis der Fernbedienung ................................ 10
Bedienung..........................................................................10
Einschalten des Gerätes ............................................... 10
Grundeinstellung des Gerätes ......................................10
Nahbedienung des Gerätes .......................................... 10
Fernbedienung des Gerätes .........................................10
Aktuellen Wochentag und Uhrzeit einstellen ................ 11
Der Timer ...........................................................................11
Timer-Einstellungen anzeigen ......................................11
Timer programmieren ....................................................11
Timer aktivieren / deaktivieren .......................................12
Betrieb beenden ................................................................12
Überhitzungsschutz .........................................................12
Reinigung ...........................................................................12
Hinweise zur Wartung ......................................................13
Störungsbehebung ........................................................... 13
Technische Daten .............................................................13
Hinweis zur Richtlinienkonformität ................................13
Garantie ..............................................................................13
Garantiebedingungen ....................................................13
Garantieabwicklung .......................................................14
Entsorgung ........................................................................ 14
Bedeutung des Symbols „Mülltonne“ ............................14
Produktdatenblatt .............................................................15
Allgemeine Hinweise
Lesen Sie vor Inbetriebnahme dieses Gerätes die Bedie-
nungsanleitung sehr sorgfältig durch und bewahren Sie diese
inkl. Garantieschein, Kassenbon und nach Möglichkeit den
Karton mit Innenverpackung gut auf. Falls Sie das Gerät an
Dritte weitergeben, geben Sie auch die Bedienungsanleitung
mit.
• Benutzen Sie das Gerät ausschließlich für den privaten
und den dafür vorgesehenen Zweck. Dieses Gerät ist
nicht für den gewerblichen Gebrauch bestimmt.
• Benutzen Sie das Gerät nicht im Freien. Halten Sie es
vor Hitze, direkter Sonneneinstrahlung, Feuchtigkeit
(auf keinen Fall in Flüssigkeiten tauchen) und scharfen
Kanten fern. Benutzen Sie das Gerät nicht mit feuchten
Händen. Bei feucht oder nass gewordenem Gerät sofort
den Netzstecker ziehen.
• Schalten Sie das Gerät aus und ziehen Sie immer den
Stecker aus der Steckdose (ziehen Sie am Stecker,
nicht am Kabel), wenn Sie das Gerät nicht benutzen,
Zubehörteile anbringen, zur Reinigung oder bei Störung.
• Betreiben Sie das Gerät nicht unbeaufsichtigt. Sollten
Sie den Raum verlassen, schalten Sie das Gerät immer
aus. Ziehen Sie den Stecker aus der Steckdose.
• Das Gerät und das Netzkabel müssen regelmäßig auf
Zeichen von Beschädigungen untersucht werden. Wird
eine Beschädigung festgestellt, darf das Gerät nicht
mehr benutzt werden.
• Verwenden Sie nur Original-Zubehör.
• Zur Sicherheit Ihrer Kinder lassen Sie keine Ver-
packungsteile (Plastikbeutel, Karton, Styropor, etc.)
erreichbar liegen.
WARNUNG:
Lassen Sie kleine Kinder nicht mit Folie spielen.
Es besteht Erstickungsgefahr!

EK6021CB_IM 02.08.18
6
Spezielle Sicherheitshinweise für dieses Gerät
Auf dem Produkt nden Sie folgendes Symbol mit Warncharakter:
WARNUNG:
Um eine Überhitzung des Heizgerätes zu vermeiden,
darf das Heizgerät nicht abgedeckt werden.
WARNUNG:
Gefahr vor elektrischem Schlag!
Dieses Heizgerät nicht in unmittelbarer Nähe einer Badewanne,
einer Dusche oder eines Schwimmbeckens installieren.
Explosionsgefahr
Im Inneren des Gerätes benden sich glühend heiße Teile. Benut-
zen Sie das Gerät nicht in der Umgebung von entzündbaren oder
explosiven Flüssigkeiten oder Gasen!
Verbrennungsgefahr
• Einige Teile des Produktes können sehr heiß werden und Ver-
brennungen verursachen. Vermeiden Sie Hautkontakt.
• Besondere Vorsicht ist geboten, wenn Kinder und schutzbedürf-
tige Personen anwesend sind.
• Die austretende Luft an der Oberseite des Gerätes wird über
100 °C heiß! Lassen Sie Kinder nicht unbeaufsichtigt in der
Nähe des Gerätes spielen.
ACHTUNG:
Sicherheitsabstand
• Das Heizgerät darf nicht unmittelbar unterhalb einer Wandsteck-
dose installiert werden.
• Halten Sie 1 m Sicherheitsabstand zu leicht entzündlichen
Gegenständen wie Möbeln, Vorhängen usw. ein.

EK6021CB_IM 02.08.18
7
ACHTUNG:
• Montieren Sie das Gerät so, dass die Luft ungehindert ein- und
ausströmen kann.
Gebrauch
Es handelt sich um ein Zusatzheizgerät. Lassen Sie das Gerät
nicht über Stunden unbeaufsichtigt. Verlassen Sie während des
Betriebes nicht das Haus.
Überhitzungsgefahr
Beheizen Sie keine Räume mit weniger als 4 m³ Rauminhalt.
• Stellen Sie sicher, dass das Netzkabel nicht auf dem Gerät liegt.
• Stecken Sie keine Gegenstände in das Gerät.
• Dieses Gerät kann von Kindern ab 8 Jahren und darüber sowie
von Personen mit verringerten physischen, sensorischen oder
mentalen Fähigkeiten oder Mangel an Erfahrung und Wissen be-
nutzt werden, wenn sie beaufsichtigt werden oder bezüglich des
sicheren Gebrauchs des Gerätes unterwiesen wurden und die
daraus resultierenden Gefahren verstehen.
• Kinder dürfen nicht mit dem Gerät spielen.
• Reinigung und Benutzer-Wartung dürfen nicht von Kindern ohne
Beaufsichtigung durchgeführt werden.
• Kinder jünger als 3 Jahre sind fernzuhalten, es sei denn, sie wer-
den ständig überwacht.
• Kinder ab 3 Jahren und jünger als 8 Jahre dürfen das Gerät nur
ein- und ausschalten, wenn sie beaufsichtigt werden oder bezüg-
lich des sicheren Gebrauchs des Gerätes unterwiesen wurden
und die daraus resultierenden Gefahren verstanden haben, vo-
rausgesetzt, dass das Gerät in seiner normalen Gebrauchslage
platziert oder installiert ist.

EK6021CB_IM 02.08.18
8
• Kinder ab 3 Jahren und jünger als 8 Jahre dürfen nicht den Ste-
cker in die Steckdose stecken, das Gerät nicht regulieren, das Ge-
rät nicht reinigen und / oder nicht die Wartung durch den Benutzer
durchführen.
• Reparieren Sie das Gerät nicht selbst, sondern suchen Sie einen
autorisierten Fachmann auf. Wenn die Netzanschlussleitung die-
ses Gerätes beschädigt wird, muss sie durch den Hersteller oder
seinen Kundendienst oder eine ähnlich qualizierte Person ersetzt
werden, um Gefährdungen zu vermeiden.
Umgang mit Batterien
Polarität (+ / -) beachten!
Batterien nicht auaden!
Batterien nicht öffnen!
Explosionsgefahr! Setzen Sie Batterien
keiner hohen Wärme, wie z. B. Sonnen-
schein, Feuer oder Ähnlichem aus.
Batterien nicht kurzschließen!
Batterien gehören nicht in den Hausmüll!
Entsorgen Sie leere Batterien an einer
vorgesehenen Sammelstelle.
ACHTUNG:
• Ungleiche Batterietypen oder neue und ge-
brauchte Batterien dürfen nicht zusammen
verwendet werden.
• Wird die Fernbedienung längere Zeit nicht be-
nutzt, entnehmen Sie die Batterien, um ein
„Auslaufen“ von Batteriesäure zu vermeiden.
Auspacken des Gerätes
ACHTUNG:
Halten Sie das Gerät nicht an der Glasfront fest. Diese ist
am Gerät nur eingehängt.
1. Nehmen Sie das Gerät aus seiner Verpackung.
2. Entfernen Sie sämtliches Verpackungsmaterial, wie
Folien, Füllmaterial, Kabelhalter und Kartonverpackung.
3. Prüfen Sie den Lieferumfang auf Vollständigkeit.
4. Sollte der Verpackungsinhalt unvollständig oder Be-
schädigungen feststellbar sein, nehmen Sie das Gerät
nicht in Betrieb. Bringen Sie es umgehend zum Händler
zurück.
HINWEIS:
Die Glasfront ist mit einer Folie geschützt. Wir empfehlen,
diese Folie erst nach der Montage des Gerätes zu ent-
fernen.
Lieferumfang
1 Elektrischer Kaminofen mit Glasfront
1 Fernbedienung
Montagematerial:
1 Montageleiste, 480 mm lang
1 Montagewinkel, 50 mm lang
6 Dübel, 8 mm
6 Schrauben, 4 × 40 mm
2 Gewindeschrauben, 10 mm
Übersicht der Bedienelemente
Bedienteil am Gerät
1 Kontrollleuchten für die Heizleistung
2 Kontrollleuchte für Ein- /Ausschalttaste
3 Ein- / Ausschalttaste I / O
4 Taste POWER
(Leistung der Heizung 900 W oder 1800 W)
5 Netzschalter
6 Taste BACKLIGHT (Beleuchtung)
Fernbedienung
7 Taste OK
8 Ein- / Ausschalttaste ON / OFF

EK6021CB_IM 02.08.18
9
9 Taste oder
10 Taste DATE / TIME
11 Taste
12 Taste IC
13 Taste 900 W / 1800 W
14 Taste BACK-LIGHT
15 Taste DIMMER
16 Taste TIMER ON / OFF
17 Taste C
18 Taste
19 Taste TIMER SET
Display
20 Auswahlposition (
)
21 Wochentag
22 Timer aktiv (
)
23 Standby ( )
24 Temperatur in °C oder Timer-Einstellungsnummer
25 Timer Ausschaltzeit (OFF)
26 Timer Startzeit (ON)
27 Uhrzeit ( )
28 Automatische, anpassungsfähige Startsteuerfunktion
der Heizung (AUTO)
29 Intensität der Flammen (
)
30 Heizleistung 900 W (
) oder 1800 W ( )
Montageanleitung
Dieses Gerät ist für die permanente Befestigung an einer
Wand gedacht. Es sollte mindestens 30 cm über dem
Boden angebracht werden.
Beachten Sie auch die Abbildungen auf Seite 4.
Schalten Sie das Gerät erst ein, wenn es ordnungs-
gemäß installiert wurde!
WARNUNG:
Vergewissern Sie sich vorher, dass sich keine Leitungen
in der Wand verbergen, die Sie beschädigen könnten!
ACHTUNG:
• Die Wand sollte eine tragende Wand sein, die hitze-
beständig ist.
• Halten Sie das Gerät nicht an der Glasfront fest.
• Die nachfolgenden Arbeiten erfordern handwerkliches
Geschick. Lassen Sie sich gegebenenfalls von einem
Fachmann helfen.
HINWEIS:
• Es muss sich eine Steckdose in der Nähe benden,
aber nicht über dem Gerät. Der heiße Luftstrom wird
vom Ventilator an der Oberseite des Gerätes aus-
gegeben.
• Das Netzkabel führen Sie rechts hinter dem Gerät
entlang.
HINWEIS:
• Damit Sie einen optimalen Blick auf den Kamin haben,
empfehlen wir Ihnen, den Kamin in einer Höhe von
60 cm anzubringen (siehe Abb. A).
• Für die Bohrungen in die Wand verwenden Sie einen
Bohrer der Größe 8.
• Außerdem benötigen Sie einen Kreuzschlitzdreher
mittlerer Größe.
1. Stellen Sie das Gerät vorsichtig auf den Boden gegen
eine Wand gelehnt.
2. Ziehen Sie die Glasfront mit beiden Händen gleichmäßig
nach oben ab. Stellen Sie die Glasfront zur Seite.
3. Messen Sie, in welcher Höhe Sie das Gerät montieren
wollen. Die empfohlenen Maße nden Sie in der Abb. B.
4. Befestigen Sie die Montageleiste mit 4 Schrauben und
Dübeln horizontal an die Wand.
5. Befestigen Sie den Montagewinkel mit den Gewinde-
schrauben an das Gerät.
6. Hängen Sie das Gerät in die Montageleiste an der Wand
ein.
7. Zeichnen Sie die Positionen der 2 Bohrungen für den
Montagewinkel an.
8. Nehmen Sie das Gerät noch einmal von der Wand ab.
9. Bohren Sie die 2 Löcher für den Montagewinkel. Setzen
Sie die Dübel ein.
10. Hängen Sie das Gerät in die Montageleiste an der Wand
ein.
11. Befestigen Sie den Montagewinkel mit 2 Schrauben an
die Wand.
12. Hängen Sie die Glasfront wieder in das Gerät ein. Be-
trachten Sie dazu die Abb. D.
Elektrischer Anschluss
Anschlusswert
Insgesamt kann das Gerät eine Leistung von 1800 W
aufnehmen. Bei diesem Anschlusswert empehlt sich eine
getrennte Zuleitung mit einer Absicherung über einen 16 A
Haushaltsschutzschalter.
ACHTUNG: Überlastung!
• Wenn Sie Verlängerungsleitungen benutzen, sollten
diese einen Leitungsquerschnitt von mindestens
1,5 mm² haben.
• Verwenden Sie keine Mehrfachsteckdosen, da dieses
Gerät zu leistungsstark ist.
• Schließen Sie nicht noch weitere leistungsstarke
Geräte an den gleichen Stromkreis an.
Anschluss
• Vergewissern Sie sich, dass Gerätespannung und Netz-
spannung übereinstimmen. Das Typenschild bendet
sich an der Unterseite des Gerätes.
• Verbinden Sie den Netzstecker nur mit einer vorschrifts-
mäßig installierten Schutzkontaktsteckdose.

EK6021CB_IM 02.08.18
10
Fernbedienung
Batterien einlegen
(Batterien nicht im Lieferumfang enthalten)
1. Öffnen Sie den Batteriefachdeckel auf der Rückseite der
Fernbedienung.
2. Legen Sie 2 Batterien des Typs „AAA“ • 1,5 V • MICRO
ein. Achten Sie auf die richtige Polarität (siehe Batterie-
fachboden)!
3. Schließen Sie den Batteriefachdeckel.
Wirkungskreis der Fernbedienung
• Die Fernbedienung hat eine Reichweite von ca. 10 Me-
tern. Lässt diese Reichweite nach, müssen die Batterien
ausgetauscht werden.
• Achten Sie auf freie Sicht zwischen Fernbedienung
und dem Sensor am Gerät. Dieser bendet sich in dem
linken oberen Bereich der Glasfront.
Bedienung
ACHTUNG:
Schalten Sie das Gerät erst ein, nachdem Sie es ord-
nungsgemäß installiert haben!
HINWEIS:
• Die Bedienung kann teilweise am Bedienteil des
Gerätes erfolgen.
• Für die Einstellung der Timer-Programmierung benut-
zen Sie die Fernbedienung.
• Jeder Bedienschritt wird durch einen Signalton quittiert.
• Sie hören zwei kurze Signaltöne, wenn Sie eine
falsche Taste gedrückt haben.
• Nach dem Einschalten des Gerätes wird das Display
hinter der Glasfront sichtbar. Für ein besseres Am-
biente schaltet sich das Display ca. 20 Sekunden nach
jeder Bedienung des Gerätes aus. Um das Display
wieder einzublenden, drücken Sie eine beliebige Taste.
Einschalten des Gerätes
Stellen Sie den Netzschalter auf Position I. Das Gerät be-
ndet sich im Standby (Bereitschaftszustand). Im Display
leuchtet das Symbol
.
Grundeinstellung des Gerätes
Nach dem Einschalten des Gerätes mit dem Netzschalter
bendet sich das Gerät in folgender Grundeinstellung:
- Wochentag = SUN (Sonntag)
- Anzeige der aktuellen Raumtemperatur
- Zeit =
- Intensität der Flammen = hoch
- Beleuchtung BACKLIGHT = aus
- Basistemperatur für die Heizung =
- Heizung = aus
- Timer = aus
HINWEIS:
• Auch bei einer Stromunterbrechung wird das Gerät in
diese Grundeinstellung zurückgesetzt.
• Das Gerät startet aus Sicherheitsgründen immer ohne
Heizung.
Nahbedienung des Gerätes
• Sie können das Gerät am Bedienteil des Gerätes ein-
schalten, indem Sie die Taste I / O kurz drücken. Die
Grundeinstellung des Gerätes wird im Display sichtbar.
• Wenn Sie die Intensität der Flammen verändern möch-
ten, drücken Sie die Taste I / O länger als 3 Sekunden.
• Sie können die Beleuchtung hinzuschalten, indem Sie
die Taste BACKLIGHT drücken. Beim wiederholten
Drücken dieser Taste verändern sich die Farben. Es gibt
7 verschiedene Farbvarianten.
• Drücken Sie einmal die Taste POWER, um die Heiz-
leistung für 900 W zu aktivieren. Drücken Sie ein zweites
Mal die Taste POWER, um die Heizleistung für 1800 W
zu aktivieren. Mit dem dritten Tastendruck schalten Sie
die Heizung aus. Die Kontrollleuchten über der Taste
zeigen Ihnen den jeweiligen Zustand an.
HINWEIS:
Die Heizung und der Lüfter werden vom Gerät erst ein-
geschaltet, wenn die Raumtemperatur geringer ist, als
die Basistemperatur für die Heizung (siehe Grundein-
stellung). Die Basistemperatur für die Heizung können
Sie mit der Fernbedienung erhöhen.
Fernbedienung des Gerätes
1. Schalten Sie das Gerät mit der Taste ON / OFF an der
Fernbedienung ein. Die Grundeinstellung des Gerätes
wird im Display sichtbar.
2. Drücken Sie die Taste
oder , um die Basistempera-
tur für die Heizung einzustellen. Möglicher Temperatur-
bereich: Zwischen 15 °C und 30 °C. Beachten Sie, dass
die Basistemperatur höher sein muss als die aktuelle
Raumtemperatur. Sinkt die Raumtemperatur unter die
eingestellte Basistemperatur, schaltet sich die Heizung
automatisch ein.
3. Mit der Taste 900 W / 1800 W wählen Sie die Heiz-
leistung:
Taste Darstellung im Display Heizleistung
1 × drücken
900 W
2 × drücken
1800 W
3 × drücken aus
4. Wenn Sie die adaptive Startsteuerfunktion der Heizung
nutzen möchten, drücken Sie die Taste IC. Im Display
wird „AUTO“ eingeblendet. Basierend auf der Raum-
temperatur und der eingestellten Temperatur passt das
Gerät die Heizleistung automatisch an.
5. Drücken Sie die Taste BACK-LIGHT, um eine von
7 Farbvarianten auszuwählen.
6. Wenn Sie die Intensität der Flammen verändern möch-
ten, drücken Sie die Taste DIMMER.
Aktuellen Wochentag und Uhrzeit einstellen
Die Abkürzungen der Wochentage haben folgende
Bedeutung:
SUN = Sonntag, MON = Montag, TUE = Dienstag,
WED = Mittwoch, THU = Donnerstag, FRI = Freitag,
SAT = Samstag
1. Drücken Sie die Taste DATE / TIME. Der Pfeil und
ein Wochentag blinkt. Wählen Sie mit der Taste oder
den Wochentag aus. Drücken Sie erneut die Taste
DATE / TIME, um den Wochentag zu bestätigen.
2. Die Anzeige der Stunden blinkt. Stellen Sie mit der Taste
oder die aktuelle Stunde ein. Drücken Sie erneut
die Taste DATE / TIME, um die Stunde zu bestätigen.
3. Die Anzeige der Minuten blinkt. Stellen Sie mit der Taste
oder die aktuelle Minute ein.
4. Drücken Sie die Taste OK, um das Menü zu verlassen.
Der Timer
Über den Timer lässt sich das Gerät einschließlich Heizung
zeitgesteuert schalten. Voraussetzung für den korrekten
Betrieb des Timers ist die Einstellung der aktuellen Uhrzeit
und des Wochentages.
• Sie können maximal 23 Stunden und 50 Minuten im
Voraus einstellen.
• Die Zeit-Einstellung erfolgt in 10-Minuten-Schritten.
• Sie können bis zu 10 verschiedene Timer-Einstellungen
programmieren.
• Jede Timer-Einstellung beinhaltet eine eigene Ein-
schalt-Zeit, Ausschalt-Zeit und Temperatureinstellung.
• Eine Einstellung kann für einen beliebigen Wochentag
oder für mehrere Tage programmiert werden.
• Möchten Sie während des Betriebs nur eine Aus-
schalt-Zeit programmieren, übergehen Sie die Eingabe
der Einschalt-Zeit und stellen nur eine Ausschalt-Zeit
ein. Falls die Ausschalt-Zeit am nächsten Tag sein
soll, denken Sie daran, bei der Programmierung den
Wochentag anzupassen.
• Die Timer-Einstellungen bleiben erhalten, auch wenn
das Gerät vom Stromnetz getrennt wird.
Timer-Einstellungen anzeigen
1. Drücken Sie die Taste TIMER SET. Im Display blinkt die
erste Einstellungsnummer und „ON“ leuchtet.
2. Benutzen Sie die Taste oder , um sich die Ein-
schalt-Zeiten der 10 Timer-Einstellungen anzeigen zu
lassen.
3. Um zur Ausschalt-Zeit zu wechseln, drücken Sie die
Taste . Im Display leuchtet „OFF“.
4. Benutzen Sie die Taste oder , um sich die Aus-
schalt-Zeiten anzeigen zu lassen.
5. Um eine angezeigte Einstellung zu löschen, drücken Sie
die Taste C.
Die Erklärung der Wochentage nicht im Englischen
einfügen, nur für die Übersetzungen.

EK6021CB_IM 02.08.18
11
6. Wenn Sie die Intensität der Flammen verändern möch-
ten, drücken Sie die Taste DIMMER.
Aktuellen Wochentag und Uhrzeit einstellen
Die Abkürzungen der Wochentage haben folgende
Bedeutung:
SUN = Sonntag, MON = Montag, TUE = Dienstag,
WED = Mittwoch, THU = Donnerstag, FRI = Freitag,
SAT = Samstag
1. Drücken Sie die Taste DATE / TIME. Der Pfeil
und
ein Wochentag blinkt. Wählen Sie mit der Taste oder
den Wochentag aus. Drücken Sie erneut die Taste
DATE / TIME, um den Wochentag zu bestätigen.
2. Die Anzeige der Stunden blinkt. Stellen Sie mit der Taste
oder die aktuelle Stunde ein. Drücken Sie erneut
die Taste DATE / TIME, um die Stunde zu bestätigen.
3. Die Anzeige der Minuten blinkt. Stellen Sie mit der Taste
oder die aktuelle Minute ein.
4. Drücken Sie die Taste OK, um das Menü zu verlassen.
Der Timer
Über den Timer lässt sich das Gerät einschließlich Heizung
zeitgesteuert schalten. Voraussetzung für den korrekten
Betrieb des Timers ist die Einstellung der aktuellen Uhrzeit
und des Wochentages.
• Sie können maximal 23 Stunden und 50 Minuten im
Voraus einstellen.
• Die Zeit-Einstellung erfolgt in 10-Minuten-Schritten.
• Sie können bis zu 10 verschiedene Timer-Einstellungen
programmieren.
• Jede Timer-Einstellung beinhaltet eine eigene Ein-
schalt-Zeit, Ausschalt-Zeit und Temperatureinstellung.
• Eine Einstellung kann für einen beliebigen Wochentag
oder für mehrere Tage programmiert werden.
• Möchten Sie während des Betriebs nur eine Aus-
schalt-Zeit programmieren, übergehen Sie die Eingabe
der Einschalt-Zeit und stellen nur eine Ausschalt-Zeit
ein. Falls die Ausschalt-Zeit am nächsten Tag sein
soll, denken Sie daran, bei der Programmierung den
Wochentag anzupassen.
• Die Timer-Einstellungen bleiben erhalten, auch wenn
das Gerät vom Stromnetz getrennt wird.
Timer-Einstellungen anzeigen
1. Drücken Sie die Taste TIMER SET. Im Display blinkt die
erste Einstellungsnummer und „ON“ leuchtet.
2. Benutzen Sie die Taste
oder , um sich die Ein-
schalt-Zeiten der 10 Timer-Einstellungen anzeigen zu
lassen.
3. Um zur Ausschalt-Zeit zu wechseln, drücken Sie die
Taste . Im Display leuchtet „OFF“.
4. Benutzen Sie die Taste oder , um sich die Aus-
schalt-Zeiten anzeigen zu lassen.
5. Um eine angezeigte Einstellung zu löschen, drücken Sie
die Taste C.
Timer programmieren
HINWEIS:
Sollten Sie während der Timer-Programmierung verse-
hentlich eine falsche Auswahl getroffen haben, verlassen
Sie mit der Taste OK das Menü und beginnen Sie neu.
1. Einstellungsnummer auswählen
1) Drücken Sie die Taste TIMER SET. Die Anzeige der
Timer-Einstellungsnummer blinkt.
2) Benutzen Sie die Taste
oder , um eine andere
Einstellungsnummer auszuwählen.
3) Drücken Sie erneut die Taste TIMER SET, um die
Auswahl zu bestätigen.
2. Wochentag(e) auswählen
1) Der Pfeil
und ein Wochentag blinkt. Wählen Sie
mit der Taste oder den Wochentag aus.
2) Drücken Sie auf die Taste , um den Wochentag zu
aktivieren. Der Pfeil neben dem Wochentag blinkt.
3) Drücken Sie die Taste TIMER SET, um die Auswahl
zu bestätigen.
4) Möchten Sie einen Wochentag deaktivieren, drücken
Sie auf die Taste , während der Pfeil neben dem
Wochentag blinkt.
3. Startzeit einstellen
(Im Display leuchtet „ON“)
1) Die Anzeige der Stunden blinkt. Benutzen Sie die
Taste
oder , um die Stunde einzustellen.
2) Drücken Sie die Taste TIMER SET, um die Auswahl
zu bestätigen.
3) Die Anzeige der Minuten blinkt. Benutzen Sie die
Taste oder , um die Minute einzustellen.
4) Drücken Sie die Taste TIMER SET, um die Auswahl
zu bestätigen.
4. Ausschaltzeit einstellen
(Im Display leuchtet „OFF“)
1) Die Anzeige der Stunden blinkt. Benutzen Sie die
Taste
oder , um die Stunde einzustellen.
2) Drücken Sie die Taste TIMER SET, um die Auswahl
zu bestätigen.
3) Die Anzeige der Minuten blinkt. Benutzen Sie die
Taste oder , um die Minute einzustellen.
4) Drücken Sie die Taste TIMER SET, um die Auswahl
zu bestätigen.
5. Basistemperatur für die Heizung einstellen
HINWEIS:
Aus technischen Gründen wird in diesem Menüpunkt
wieder der aktuelle Wochentag angezeigt.
1) Die Anzeige der Temperatur blinkt. Benutzen Sie
die Taste
oder , um die Basistemperatur für die
Heizung einzustellen.
2) Drücken Sie die Taste TIMER SET, um die Auswahl
zu bestätigen.
Die Erklärung der Wochentage nicht im Englischen
einfügen, nur für die Übersetzungen.

EK6021CB_IM 02.08.18
12
Timer aktivieren / deaktivieren
WICHTIGER HINWEIS:
• Bei einer Stromunterbrechung bleiben alle Timer-Ein-
stellungen erhalten. Aber das Gerät wird in die Grund-
einstellungen zurückgesetzt.
• Die Heizung ist aus Sicherheitsgründen ausgeschaltet.
WARNUNG: Brandgefahr!
• Bevor Sie den Timer einschalten, überprüfen Sie die
Einstellungen des aktuellen Wochentags, der aktuellen
Uhrzeit und die Timer-Einstellungen.
• Stellen Sie die Startzeit immer so ein, dass das Gerät
während des Betriebes unter geeigneter Aufsicht steht.
1. Stellen Sie mit der Taste 900 W / 1800 W die gewünschte
Heizleistung ein. Alternativ können Sie auch mit der
Taste IC die adaptive Startsteuerfunktion der Heizung
wählen.
2. Stellen Sie mit der Taste DIMMER die Intensität der
Flammen ein, die Sie zur Startzeit wünschen.
3. Möchten Sie, dass sich die Beleuchtung zur Startzeit zu-
sätzlich einschaltet, wählen Sie diese jetzt mit der Taste
BACK-LIGHT aus.
4. Mit der Taste TIMER ON / OFF schalten Sie den Timer
ein oder aus.
HINWEIS:
• Ist der Timer aktiviert, wird im Display das Symbol
eingeblendet.
• Zusätzlich sehen Sie im Display die Symbole für die
Intensität der Flammen und für die Heizung, sofern sie
eingeschaltet wurde.
Betrieb beenden
• Haben Sie den Timer aktiviert oder möchten Sie das
Gerät nur vorübergehend in den Standby schalten?
- Benutzen Sie dafür die Taste ON / OFF an der Fern-
bedienung oder die Taste I / O (3) am Gerät.
• Möchten Sie das Gerät vom Stromnetz trennen?
- Stellen Sie den Netzschalter (5) auf Position O. Zie-
hen Sie den Netzstecker aus der Steckdose.
HINWEIS:
Auch wenn Sie den Timer aktiviert haben, wird sich
das Gerät nach der Trennung vom Stromnetz nicht
einschalten. Das Gerät wird in die Grundeinstellun-
gen zurückgesetzt.
Überhitzungsschutz
Das Gerät ist mit einem Überhitzungsschutz ausgestattet,
der bei Überhitzung das Gerät automatisch ausschaltet. Sie
hören ein Warnsignal. Alle Segmente im Display blinken.
Das Gerät schaltet sich aus Sicherheitsgründen nicht von
selbst wieder ein.
Das Gerät ist erst wieder betriebsbereit, wenn Sie Folgen-
des beachten:
• Stellen Sie den Netzschalter auf Position O. Ziehen Sie
den Netzstecker aus der Steckdose. Lassen Sie das
Gerät ca. 15 Minuten abkühlen, bevor Sie es erneut
verwenden.
• Überprüfen Sie, ob die Zu- oder die Abluft zur Heizung
blockiert ist. Beseitigen Sie ggf. die Blockade.
Sollte der Überhitzungsschutz das Gerät nach kurzer Zeit
wieder abschalten, liegt vermutlich ein Defekt vor.
• Schalten Sie das Gerät wieder aus und trennen Sie es
vom Netz.
• Lassen Sie das Gerät von Ihrem Händler oder unserem
Service überprüfen.
Reinigung
WARNUNG:
• Ziehen Sie vor der Reinigung immer den Netzstecker und warten
Sie, bis das Gerät abgekühlt ist.
• Achten Sie darauf, dass bei der Reinigung kein Wasser in die
Öffnungen des Gerätes eindringt. Es könnte zu einem elektri-
schen Schlag oder Brand führen.

EK6021CB_IM 02.08.18
13
ACHTUNG:
• Benutzen Sie keine Drahtbürste oder andere scheu-
ernde Gegenstände.
• Benutzen Sie keine scharfen oder scheuernden
Reinigungsmittel.
• Reinigen Sie die Oberäche des Gerätes mit einem
weichen trockenen Tuch.
• Die Glasfront können Sie bei Bedarf feucht abwischen.
Trocknen Sie mit einem weichen Tuch nach.
Hinweise zur Wartung
• Das Gerät ist mit einem elektronisch gesteuerten
LED-System ausgestattet, welches den Flammeneffekt
projiziert. Dieses System darf nicht vom Benutzer ge-
wartet werden.
• Die LED‘s der Beleuchtung können nicht gewechselt
werden.
Störungsbehebung
Störung Mögliche Ursache Abhilfe
Das Gerät ist ohne
Funktion.
Das Gerät hat keine Stromversorgung. Überprüfen Sie die Steckdose mit einem anderen Gerät.
Setzen Sie den Netzstecker richtig ein.
Kontrollieren Sie die Haussicherung.
Das Gerät ist defekt. Wenden Sie sich an unseren Service oder an einen
Fachmann.
Die Heizung und
der Lüfter
funktionieren nicht.
Die Raumtemperatur ist höher als die
Basistemperatur für die Heizung.
Überprüfen Sie die Einstellung für die Basistemperatur.
Das Gerät schaltet
sich nicht zur
programmierten
Startzeit ein.
Das Gerät wurde vom Stromnetz ge-
trennt (eventuell durch Stromausfall).
Das Gerät wurde in die
Grundeinstellungen zurückgesetzt.
Überprüfen Sie die Einstellungen des aktuellen Wochen-
tags, der aktuellen Uhrzeit und die Timer-Einstellungen.
Der Flammeneffekt
funktioniert nicht.
Ein Bauteil ist defekt. Wenden Sie sich an unseren Service oder an einen
Fachmann.
Sie hören ein
Warnsignal. Alle
Segmente im
Display blinken.
Der Überhitzungsschutz ist aktiviert. 1. Schalten Sie das Gerät mit dem Netzschalter aus.
2. Lassen Sie das Gerät für mindestens 15 Minuten
abkühlen, bevor Sie neu starten.
Technische Daten
Modell: ................................................................. EK 6021 CB
Spannungsversorgung: ............................ 220 - 240 V~, 50 Hz
Leistungsaufnahme:............................................900 / 1800 W
Schutzklasse: .........................................................................
Nettogewicht: .........................................................ca. 12,8 kg
Technische und gestalterische Änderungen im Zuge stetiger
Produktentwicklungen vorbehalten.
Hinweis zur Richtlinienkonformität
Hiermit erklärt der Hersteller, dass sich das Gerät
EK 6021 CB in Übereinstimmung mit den folgenden
Anforderungen bendet:
• Europäische Niederspannungsrichtlinie 2014 / 35 / EU
• EU-Richtlinie für elektromagnetische Verträglichkeit
2014 / 30 / EU
• Ökodesign Richtlinie 2009 / 125 / EG
• RoHS-Richtlinie 2011 / 65 / EU
Garantie
Garantiebedingungen
1. Gegenüber Verbrauchern gewähren wir bei privater
Nutzung des Geräts eine Garantie von 24 Monaten ab
Kaufdatum.
Ist das Gerät zur gewerblichen Nutzung geeignet, ge-
währen wir beim Kauf durch Unternehmer für das Gerät
eine Garantie von 12 Monaten.
Die Garantiezeit für Verbraucher reduziert sich auf
12 Monate, sofern sie ein zur gewerblichen Nutzung ge-
eignetes Gerät – auch teilweise – gewerblich nutzen.
2. Voraussetzung für unsere Garantieleistungen sind der
Kauf des Geräts in Deutschland bei einem unserer
Vertragshändler sowie die Übersendung einer Kopie des
Kaufbelegs und dieses Garantie scheins an uns.
Bendet sich das Gerät zum Zeitpunkt des Garantiefalls
im Ausland, muss es auf Kosten des Käufers uns zur
Erbringung der Garantieleistungen zur Verfügung ge-
stellt werden.

EK6021CB_IM 02.08.18
14
3. Mängel müssen innerhalb von 14 Tagen nach Erkenn-
barkeit uns gegenüber schriftlich angezeigt werden. Be-
steht der Garantieanspruch zu Recht, entscheiden wir,
auf welche Art der Schaden / Mangel behoben werden
soll, ob durch Reparatur oder durch Austausch eines
gleichwertigen Gerätes.
4. Garantieleistungen werden nicht für Mängel erbracht,
die auf der Nichtbeachtung der Gebrauchsanweisung,
unsachgemäßer Behandlung oder normaler Abnutzung
des Geräts beruhen. Garantieansprüche sind ferner
ausgeschlossen für leicht zerbrechliche Teile, wie zum
Beispiel Glas oder Kunststoff. Schließlich sind Garantie-
ansprüche ausgeschlossen, wenn nicht von uns autori-
sierte Stellen Arbeiten an dem Gerät vornehmen.
5. Durch Garantieleistungen wird die Garantiezeit nicht
verlängert. Es besteht auch kein Anspruch auf neue
Garantieleistungen. Diese Garantieerklärung ist eine
freiwillige Leistung von uns als Hersteller des Geräts.
Die gesetzlichen Gewährleistungsrechte (Nacherfüllung,
Rücktritt, Schadensersatz und Minderung) werden durch
diese Garantie nicht berührt.
Stand 06 2012
Garantieabwicklung
24 Stunden am Tag, 7 Tage in der Woche
Sollte Ihr Gerät innerhalb der Garantiezeit einen Mangel
aufweisen, steht Ihnen die schnellste und komfortabelste
Möglichkeit der Reklamationsanmeldung über unser SLI –
Internet-Serviceportal zur Verfügung.
www.sli24.de
Bitte melden Sie direkt den Servicevorgang auf unserem
Online Serviceportal www.sli24.de an. Sie erhalten wenige
Sekunden nach Abschluss der Anmeldung ein kostenloses
Versandticket per E-Mail übermittelt. Zusätzlich erhalten Sie
weitere Informationen zur Abwicklung Ihrer Reklamation.
Mit Ihren persönlichen Zugangsdaten, die direkt nach Ihrer
Anmeldung per E-Mail an Sie übermittelt werden, können
Sie den Status Ihres Vorgangs auf unserem Serviceportal
www.sli24.de online verfolgen.
Sie brauchen das kostenlose Versandticket nur noch auf die
Verpackung Ihres gut verpackten Gerätes zu kleben und
das Paket bei der nächsten Annahmestelle der Deutschen
Post / DHL abzugeben. Der Versand erfolgt für Sie kostenlos
an unser Servicecenter bzw. Servicepartner.
So einfach kann Service sein!
1. Anmelden
2. Einpacken
3. Ab zur Post damit
Fertig, so einfach geht es!
Bitte vergessen Sie nicht, dem Gerät eine Kopie Ihres
Kaufbeleges (Kassenbon, Rechnung, Lieferschein) als Ga-
rantienachweis beizulegen, da wir sonst keine kostenlosen
Garantieleistungen erbringen können.
Unser Serviceportal www.sli24.de bietet Ihnen weitere
Leistungen an:
• Downloadbereich für Bedienungsanleitungen
• Downloadbereich für Firmwareupdates
• FAQ’s, die Ihnen Problemlösungen anbieten
• Kontaktformular
• Zugang zu unseren Zubehör- und Ersatzteile-Web-
shops
Auch nach der Garantie sind wir für Sie da! – Kosten-
günstige Reparaturen zum Festpreis!
Bitte nehmen Sie in keinem Fall eine unfreie Einsendung
Ihres Gerätes vor. Unfreie Lieferungen werden von uns
nicht angenommen. Es entstehen Ihnen damit erhebliche
Kosten.
Stand 06 2012
Entsorgung
Bedeutung des Symbols „Mülltonne“
Schonen Sie unsere Umwelt, Elektrogeräte ge-
hören nicht in den Hausmüll.
Nutzen Sie die für die Entsorgung von Elektro-
geräten vorgesehenen Sammelstellen und
geben dort Ihre Elektrogeräte ab die Sie nicht
mehr benutzen werden.
Sie helfen damit die potenziellen Auswirkungen, durch
falsche Entsorgung, auf die Umwelt und die menschliche
Gesundheit zu vermeiden.
Sie leisten damit Ihren Beitrag zur Wiederverwertung, zum
Recycling und zu anderen Formen der Verwertung von
Elektro- und Elektronik-Altgeräten.
Informationen, wo die Geräte zu entsorgen sind, erhalten
Sie über Ihre Kommunen oder die Gemeindeverwaltungen.

EK6021CB_IM 02.08.18
15
Produktdatenblatt
Modellkennung(en): EK 6021 CB
Angabe Symbol Wert Einheit Angabe Einheit
Wärmeleistung Nur bei elektrischen Speicher-Einzelraumheizgeräten:
Art der Regelung der Wärmezufuhr
Nennwärmeleistung P
nom
1,8 kW manuelle Regelung der Wärmezufuhr mit integriertem
Thermostat
k.A.
Mindestwärmeleistung
(Richtwert)
P
min
0,9 kW manuelle Regelung der Wärmezufuhr mit
Rückmeldung der Raum- und / oder Außentemperatur
k.A.
Maximale kontinuierliche
Wärmeleistung
P
max,c
1,8 kW elektronische Regelung der Wärmezufuhr mit
Rückmeldung der Raum- und / oder Außentemperatur
k.A.
Hilfsstromverbrauch Wärmeabgabe mit Gebläseunterstützung k.A.
Bei Nennwärmeleistung
(Ventilator-Motor)
el
max
0,014 kW Art der Wärmeleistung / Raumtemperaturkontrolle
Bei Mindestwärmeleistung
(Ventilator-Motor)
el
min
0,014 kW einstuge Wärmeleistung,
keine Raumtemperaturkontrolle
nein
Im Bereitschaftszustand el
SB
0,48 W zwei oder mehr manuell einstellbare Stufen,
keine Raumtemperaturkontrolle
nein
Raumtemperaturkontrolle mit mechanischem
Thermostat
nein
mit elektronischer Raumtemperaturkontrolle nein
elektronische Raumtemperaturkontrolle und
Tageszeitregelung
nein
elektronische Raumtemperaturkontrolle und
Wochentagsregelung
ja
Sonstige Regelungsoptionen
Raumtemperaturkontrolle mit Präsenzerkennung nein
Raumtemperaturkontrolle mit Erkennung offener
Fenster
nein
mit Fernbedienungsoption nein
mit adaptiver Regelung des Heizbeginns ja
mit Betriebszeitbegrenzung nein
mit Schwarzkugelsensor nein
Kontaktangaben C. Bomann GmbH, Heinrich-Horten-Str. 17, 47906 Kempen / Germany

EK6021CB_IM 02.08.18
16
Instruction Manual
Thank you for choosing our product. We hope you will enjoy
using the appliance.
Symbols in these Instruction Manual
Important information for your safety is specially marked.
It is essential to comply with these instructions in order to
avoid accidents and prevent damage to the appliance:
WARNING:
This warns you of dangers to your health and indicates
possible injury risks.
CAUTION:
This refers to possible hazards to the appliance or other
objects.
NOTE: This highlights tips and information.
Contents
Overview of the Components ............................................3
Assembly .............................................................................4
General Notes ....................................................................16
Special Safety Instructions for this Appliance .............. 17
Handling Batteries ............................................................19
Unpacking the Appliance .................................................19
Scope of Delivery ..............................................................19
Overview of the Components ..........................................19
Control Panel on the Appliance .....................................19
Remote Control .............................................................19
Display ........................................................................... 20
Assembly Instructions .....................................................20
Electrical Connection ....................................................... 20
Power Requirements .....................................................20
Connection ....................................................................20
Remote Control ................................................................. 20
Inserting the Batteries (Batteries not included) ............. 20
Remote Control Range .................................................20
Operation ...........................................................................21
Switching on the Appliance ...........................................21
Basic Setting of the Appliance ......................................21
Close Operation of the Appliance .................................21
Operate of the Appliance from the Distance ................. 21
Setting the Current Day of the Week and the Time ......21
The Timer ...........................................................................22
Display Timer Settings ..................................................22
Programming the Timer ................................................22
Activating / Deactivating the Timer ................................22
End of Operation ...............................................................23
Overheating Protection .................................................... 23
Cleaning ............................................................................. 23
Maintenance Instructions ................................................23
Troubleshooting ................................................................ 23
Technical Data ................................................................... 24
Disposal .............................................................................24
Meaning of the “Dustbin” Symbol..................................24
Product Data Sheet ...........................................................25
General Notes
Read the operating instructions carefully before putting the
appliance into operation and keep the instructions including
the warranty, the receipt and, if possible, the box with the
internal packing. If you give this appliance to other people,
please also pass on the operating instructions.
• The appliance is designed exclusively for private use
and for the envisaged purpose. This appliance is not t
for commercial use.
• Do not use it outdoors. Keep it away from sources of
heat, direct sunlight, humidity (never dip it into any
liquid) and sharp edges. Do not use the appliance with
wet hands. If the appliance is humid or wet, unplug it
immediately.
• When cleaning or putting it away, switch off the appli-
ance and always pull out the plug from the socket (pull
the plug itself, not the lead) if the appliance is not being
used and remove the attached accessories.
• Do not operate the appliance without supervision. If you
leave the room you should always turn the appliance off.
Remove the plug from the socket.
• The appliance and the mains lead have to be checked
regularly for signs of damage. If damage is found the
appliance must not be used.
• Use only original spare parts.
• In order to ensure your children’s safety, please keep all
packaging (plastic bags, boxes, polystyrene etc.) out of
their reach.
WARNING:
Do not allow small children to play with the foil.
There is a danger of suffocation!

EK6021CB_IM 02.08.18
17
Special Safety Instructions for this Appliance
You will nd the following symbol with warning character on the
appliance:
WARNING: Do not Cover!
To prevent overheating of the heating appliance, the
heating appliance may not be covered.
WARNING:
Risk of Electrical Shock!
Do not install this heating appliance in close proximity to a bathtub,
a shower, or a swimming pool.
Risk of Explosion
The inside of the appliance contains glowing hot components. Do
not use the appliance around ammable or explosive liquids or
gases!
Risk of Burning
• Some parts of the product can become very hot and cause
burns. Avoid contact with the skin.
• You must be particularly careful when children and vulnerable
persons are present.
• The escaping air at the top of the appliance reaches tempera-
tures of more than 100 °C! Do not allow children to play unat-
tended in proximity to the appliance.
CAUTION:
Safety Distance
• The heating appliance must not be installed directly below a wall
outlet.
• Maintain a 1 m safety distance to readily ammable objects such
as furniture, curtains, etc.

EK6021CB_IM 02.08.18
18
CAUTION:
• Mount the appliance in a way that the air can ow freely in and
out.
Use
This is an auxiliary heating appliance. Do not leave the appliance
unattended for several hours. Do not leave the house while it is
in use.
Risk of Overheating
Do not heat any rooms with a volume of less than 4 m³.
• Make sure that the power cable is not lying on the appliance.
• Do not insert any objects into the appliance.
• This appliance can be used by children aged from 8 years and
above and persons with reduced physical, sensory or mental
capabilities or lack of experience and knowledge if they have been
given supervision or instruction concerning use of the appliance in
a safe way and understand the hazards involved.
• Children shall not play with the appliance.
• Cleaning and user maintenance shall not be made by children
without supervision.
• Children younger than 3 years of age should be kept away from
the appliance, unless they are supervised at all times.
• Children from the age of 3 and younger than 8 years of age may
only turn the appliance on and off if they are supervised, or have
been instructed with regard to the safe use of the appliance, and if
they have understood the risks resulting from it, provided that the
appliance has been placed and installed in its normal position of
use.
• Children from the age of 3 and younger than 8 years of age may
not insert the plug into the socket, may not adjust the appliance,

EK6021CB_IM 02.08.18
19
may not clean the appliance and / or may not perform the mainte-
nance by the user.
• Do not repair the appliance by yourself. Always contact an author-
ized technician. If the supply cord is damaged, it must be replaced
by the manufacturer, its service agent or similarly qualied per-
sons in order to avoid a hazard.
Handling Batteries
Insert correctly!
Do not charge!
Do not disassemble!
Danger of explosion! Do not expose
batteries to intense heat, such as sunlight,
re or similar.
Do not short circuit!
Batteries should not be disposed in the
domestic waste! Dispose empty batteries
at a special collection point.
CAUTION:
• Different battery types or new and used batteries
must not be used together.
• When not using the remote control for a long
period of time, remove the batteries in order to
prevent “leakage” of battery acid.
Unpacking the Appliance
CAUTION:
Do not hold the appliance using the glass front. It is only
hanging loose at on the appliance.
1. Remove the appliance from its packaging.
2. Remove all packaging material such as plastic lms,
ller material, cable ties and cardboard packaging.
3. Check the content for any missing parts.
4. In the event that the packaging content should be
incomplete or if damages are noticeable, do not operate
the appliance. Return it to the dealer immediately.
NOTE:
The glass front is protected by a foil. We recommend
not to remove this foil until after the appliance has been
installed.
Scope of Delivery
1 Electric replace with glass front
1 Remote control
Installation material:
1 Mounting strip, 480 mm long
1 Mounting bracket, 50 mm long
6 Dowels, 8 mm long
6 Screws, 4 × 40 mm
2 Threaded screws, 10 mm
Overview of the Components
Control Panel on the Appliance
1 Control lamps for heating power
2 Control lamp for On / Off button
3 On / Off button I / O
4 Button POWER
(heating power of 900 W or 1800 W)
5 Power switch
6 Button BACKLIGHT (lighting)
Remote Control
7 Button OK
8 On / Off button ON / OFF
9 Button
or
10 Button DATE / TIME
11 Button
12 Button IC
13 Button 900 W / 1800 W
14 Button BACK-LIGHT
15 Button DIMMER
16 Button TIMER ON / OFF
17 Button C
18 Button
19 Button TIMER SET

EK6021CB_IM 02.08.18
20
Display
20 Selection position (
)
21 Weekday
22 Timer active ( )
23 Standby ( )
24 Temperature in °C or timer setting number
25 Timer turn-off time (OFF)
26 Timer start time (ON)
27 Time ( )
28 Automatic, adaptive start control function of the heater
(AUTO)
29 Intensity of the flames ( )
30 Heating power of 900 W ( ) or 1800 W ( )
Assembly Instructions
This appliance is intended for permanent attachment to a
wall. It should be placed at least 30 cm above the ground.
Please refer to the gures on page 4.
Do not switch on the appliance until it has been prop-
erly installed!
WARNING:
Make sure beforehand whether there are cables inside
the wall which could be damaged!
CAUTION:
• The wall should be a load bearing and heat resistant
wall.
• Do not hold the appliance using the glass front.
• The subsequent work requires manual skills. If neces-
sary, get help from a specialist
NOTE:
• There must be a power outlet nearby, but not above
the appliance. The hot air ow is emitted by the fan at
the top of the appliance.
• Route the power cord right behind the appliance.
• In order to have an optimal view at the replace, we
recommend installing it onto a height of 60 cm (see
Fig. A).
• Use a size 8 drill bit to drill holes into the wall.
• You will also need a medium sized Phillips screwdriver.
1. Gently place the appliance on the oor leaning against
a wall.
2. Use both hands to pull out the glass front evenly up-
wards. Set the glass front aside.
3. Measure the height at which you want to mount the
appliance. The recommended dimensions can be found
in Fig. B.
4. Use 4 screws and dowels to attach the mounting strip
horizontally to the wall.
5. Attach the mounting bracket with the threaded screws to
the appliance.
6. Hang the appliance into the mounting strip on the wall.
7. Mark the positions of the 2 boreholes for the mounting
bracket.
8. Remove the appliance from the wall once again.
9. Drill the 2 holes for the mounting bracket. Insert the
dowels.
10. Hang the appliance into the mounting strip on the wall.
11. Use 2 screws to attach the mounting bracket to the wall.
12. Hang the glass front back into the appliance. To do this,
see Fig. D.
Electrical Connection
Power Requirements
The appliance can consume a total of 1800 W. With this
connected load a separate supply line protected by a 16 A
household circuit breaker is recommended.
CAUTION: Overload!
• If you use extension leads, these should have a cable
cross-section of at least 1.5 mm².
• Do not use any multiple sockets, as this appliance is
too powerful.
• Do not connect any other powerful appliances to the
same electric circuit.
Connection
• Make sure that the iron voltage and the line voltage
match. The nameplate is located at the bottom of the
appliance.
• The mains plug should only be inserted into a correctly
installed socket with earthing contact.
Remote Control
Inserting the Batteries (Batteries not included)
1. Open the battery compartment cover on the back of the
remote control.
2. Insert 2 batteries of type “AAA” • 1.5 V • MICRO, ob-
serving the correct polarity (see markings on the bottom
of the compartment)!
3. Close the battery compartment cover.
Remote Control Range
• The remote control has a range of approx. 10 meters. If
the range decreases you should change the batteries.
• Make sure there are no obstacles between the remote
control and the sensor of the appliance. It is located in
the upper left area of the glass front.

EK6021CB_IM 02.08.18
21
Operation
CAUTION:
Do not switch on the appliance until it has been properly
installed!
NOTE:
• The operation can partly be done via the control panel
of the appliance.
• To set the timer programming, use the remote control.
• Each operating step will be acknowledged by a signal
tone.
• When pressing a wrong button, you will hear two short
beeps.
• After switching on the appliance, the display behind the
glass front becomes visible. For a better ambience, the
display will switch off approx. 20 seconds after each
operation. Press any button to reveal the display again.
Switching on the Appliance
Set the power switch to position I. The appliance is in
Standby. The
symbol lights up in the display.
Basic Setting of the Appliance
After switching on the appliance via the power switch, it will
be in the following basic setting:
- Weekday = SUN (Sunday)
- Display of the current room temperature
- Time =
- Intensity of the ames = high
- Lighting BACKLIGHT = off
- Base temperature for heating =
- Heating = off
- Timer = off
NOTE:
• Even in the event of a power failure, the appliance is
reset to this basic setting.
• For safety reasons, the appliance will always start
without heating.
Close Operation of the Appliance
• You can switch on the appliance on the control panel by
briey pressing the I / O button. The basic setting of the
appliance will become visible in the display.
• If you want to change the intensity of the ames, press
the I / O button for more than 3 seconds.
• You may turn on the lighting by pressing the BACKLIGHT
button. Pressing this button repeatedly, will change the
colours. There are 7 different colour variants.
• Press the POWER button once to activate the heating
power for 900 W. Press the POWER button a second
time to activate the heating power for 1800 W. Pressing
the button a third time will switch off the heating.
The control lamps above the button are displaying the
corresponding status.
NOTE:
The heater and the fan will not be switched on by the
appliance until the room temperature is lower than the
base temperature for the heater (see basic setting).
You can increase the base temperature for the heating
via the remote control.
Operate of the Appliance from the Distance
1. Switch the appliance on by pressing the ON / OFF button
on the remote control. The basic setting of the appliance
will become visible in the display.
2. Press the or button to set the base temperature for
the heater. Possible temperature range: Between 15 °C
and 30 °C. Note that the base temperature must be
higher than the current room temperature. If the room
temperature falls below the set base temperature, the
heating will switch on automatically.
3. Use the button 900 W / 1800 W to select the heating
power:
Button
Appearance
in the display
Heating power
Press 1 ×
900 W
Press 2 ×
1800 W
Press 3 × off
4. If you want to use the heater’s adaptive start control
function, press the IC button. “AUTO” will appear on the
display. Based on the room temperature and the set
temperature the appliance will automatically adjust the
heating power.
5. Press the BACK-LIGHT button to select one of 7 colour
variants.
6. Press the DIMMER button if you want to change the
intensity of the ames.
Setting the Current Day of the Week and the Time
1. Press the DATE / TIME button. The arrow
and a
weekday will be ashing. Use the or button to
select a weekday. Press the DATE / TIME button again
to conrm the weekday.
2. The hour display starts ashing. Use the
or button
to set the current hour. Press the DATE / TIME button
again to conrm the hour.
3. The minute display starts ashing. Use the or
button to set the current minute.
4. Press the OK button to exit the menu.

EK6021CB_IM 02.08.18
22
The Timer
The appliance including heating can be time-controlled via
the timer. Prerequisite for the correct operation of the timer
is the setting of the current time and day of the week.
• You can set a maximum of 23 hours and 50 minutes in
advance.
• The time setting is done in 10-minute increments.
• You may program up to 10 different timer settings.
• Each timer setting includes its own switch-on time,
switch-off time and temperature setting.
• A setting can be programmed for any day of the week or
for several days.
• If you want, you may only program a switch-off time dur-
ing operation and ignore the entry of the switch-on time.
If the switch-off time is meant to be the next day, remem-
ber to adjust the day of the week when programming.
• Even if the appliance is disconnected from the mains,
the timer settings will be preserved.
Display Timer Settings
1. Press the TIMER SET button. The number for the rst
setting ashes in the display and “ON” lights up.
2. Press the
or button to display the switch-on times of
the 10 timer settings.
3. Press the button in order to switch to the switch-off
time. “OFF” will appear on the display.
4. Use the or button to display the switch-off times.
5. To clear a displayed setting, press the C button.
Programming the Timer
NOTE:
If you have accidentally made a wrong selection during
timer programming, exit the menu by pressing the OK
button and start again.
1. Select setting number
1) Press the TIMER SET button. The display of the
timer setting number starts ashing.
2) Use the
or button to select another setting
number.
3) Press the TIMER SET button again to conrm the
selection.
2. Weekday(s) selection
1) The arrow
and a weekday will be ashing. Use the
or button to select a weekday.
2) Press the button to activate the weekday. The
arrow beside the weekday is ashing.
3) Press the TIMER SET button to conrm the selection.
4) If you want to deactivate a weekday, press the
button, while the arrow beside the weekday is
ashing.
3. Setting the start time
(“ON” will light up in the display)
1) The hour display starts ashing.
Use the
or button to set the hour.
2) Press the TIMER SET button to conrm the selection.
3) The minute display starts ashing.
Use the or button to set the minute.
4) Press the TIMER SET button to conrm the selection.
4. Setting the switch-off time
(“OFF” will light up in the display)
1) The hour display starts ashing.
Use the
or button to set the hour.
2) Press the TIMER SET button to conrm the selection.
3) The minute display starts ashing.
Use the or button to set the minute.
4) Press the TIMER SET button to conrm the selection.
5. Setting the base temperature for the heating
NOTE:
For technical reasons, the current weekday is dis-
played again in this menu item.
1) The temperature display starts ashing. Use the
or
button to set the base temperature for the heater.
2) Press the TIMER SET button to conrm the selection.
Activating / Deactivating the Timer
IMPORTANT NOTE:
• In the event of a power failure, all timer settings will be
preserved. However, the appliance will be reset to the
basic settings.
• For safety reasons, the heating will be switched off.
WARNING: Fire hazard!
• Before switching on the timer, check the settings of
the current weekday, the current time and the timer
settings.
• Always set the start time in such a way that the appli-
ance is under proper supervision during operation.
1. Use the 900 W / 1800 W button to set the desired heating
power. Alternatively, you may also use the IC button to
select the adaptive start control function of the heater.
2. Use the DIMMER button to set the intensity of the
ames you wish to have at the start time.
3. If you want the lighting to additionally switch on at the
start time, select it now with the BACK-LIGHT button.
4. By using the TIMER ON / OFF button you switch the
timer on or off.
NOTE:
• If the timer is activated, the
symbol will appear in
the display.
• In addition, the display will show the symbols for the
intensity of the ames and for the heating, provided
this it has been switched on.

EK6021CB_IM 02.08.18
23
End of Operation
• Did you activate the timer, or do you only want to tempo-
rarily switch the appliance to standby?
- To do this, use the ON / OFF button on the remote
control or the I / O button (3) on the appliance.
• Do you want to disconnect the appliance from the
mains?
- Set the power switch (5) to position O. Disconnect the
power supply from the socket.
NOTE:
The appliance will not turn on after disconnecting it
from the mains, even if you have activated the timer.
The appliance will be reset to the basic settings.
Overheating Protection
The appliance is tted with an overheating protection,
which will automatically turn off the appliance in case of
overheating. You will hear a warning signal. All segments in
the display start ashing. For safety reasons, the appliance
will not turn itself on again.
In order for the appliance to be operated again, proceed as
follows:
• Set the power switch to position O. Disconnect the
power supply from the socket. Let the appliance cool
down for approximately 15 minutes before you use it
again.
• Check whether the air intake or vent on the heater is
blocked. If necessary, clear the blockage.
In the event that the overheating protection turns off the ap-
pliance after a brief period, then there is probably a defect.
• Turn the appliance off again and unplug it from the
mains.
• Have the appliance checked by the dealer or by our
service.
Cleaning
WARNING:
• Before cleaning, always remove the mains plug and wait until
the appliance has cooled down.
• Make sure no water enters the openings of the appliance during
cleaning. Otherwise this might result in an electric shock or re.
CAUTION:
• Do not use a wire brush or any abrasive items.
• Do not use any acidic or abrasive detergents.
• Clean the surface of the appliance with a soft dry cloth.
• The glass front may be wiped wet, if necessary. Then
dry it with a soft cloth.
Maintenance Instructions
• The appliance is equipped with an electronically con-
trolled LED system that projects the ame effect. This
system must not be serviced by the user.
• The LEDs of the lighting can not be replaced.
Troubleshooting
Problem Possible Cause Solution
The appliance does not work. The appliance is not connected to mains
power.
Check the wall outlet with a different appliance.
Insert the plug properly in the wall outlet.
Check the fuse.
The appliance is defective. Contact our service or a repair centre.
The heater and the fan are
not working.
The room temperature is higher than the
base temperature for the heating.
Check the setting for the base temperature.

EK6021CB_IM 02.08.18
24
Problem Possible Cause Solution
The appliance is not turning
on at the programmed start
time.
The appliance has been disconnected
from the mains (possibly due to power
failure).
The appliance has been reset to the basic
settings
Check the settings of the current weekday, the
current time and the timer settings.
The ame effect does not
work.
A component is defective. Contact our service or a repair centre.
You will hear a warning
signal. All segments in the
display start ashing.
The overheating protection has been
activated.
1. Switch off the appliance by using the power
switch.
2. Let the appliance cool down for at least
15 minutes before switching it on again.
Technical Data
Model:..................................................................EK 6021 CB
Power supply:........................................... 220 - 240 V~, 50 Hz
Power consumption: ...........................................900 / 1800 W
Protection class: .....................................................................
Net weight: ..................................................... approx. 12.8 kg
The right to make technical and design modications in
the course of continuous product development remains
reserved.
This appliance has been tested according to all relevant
current CE guidelines, such as electromagnetic compatibil-
ity and low voltage directives, and has been constructed in
accordance with the latest safety regulations.
Disposal
Meaning of the “Dustbin” Symbol
Protect our environment: do not dispose of
electrical equipment in the domestic waste.
Please return any electrical equipment that
you will no longer use to the collection points
provided for their disposal.
This helps avoid the potential effects of incorrect disposal
on the environment and human health.
This will contribute to the recycling and other forms of re-uti-
lisation of electrical and electronic equipment.
Information concerning where the equipment can be dis-
posed of can be obtained from your local authority.

EK6021CB_IM 02.08.18
25
Product Data Sheet
Model identier(s): EK 6021 CB
Item Symbol Value Unit Item Unit
Heat output Type of heat input, for electric storage local space
heaters only
Nominal heat output P
nom
1.8 kW manual heat charge control, with integrated
thermostat
N / A
Minimum heat output
(indicative)
P
min
0.9 kW manual heat charge control with room and / or
outdoor temperature feedback
N / A
Maximum continuous
heat output
P
max,c
1.8 kW electronic heat charge control with room and / or
outdoor temperature feedback
N / A
Auxiliary electricity
consumption
fan assisted heat output
N / A
At nominal heat output
(fan motor)
el
max
0.014 kW Type of heat output / room temperature control
At minimum heat output
(fan motor)
el
min
0.014 kW single stage heat output and no room temperature
control
no
In standby mode el
SB
0.48 W Two or more manual stages, no room temperature
control
no
with mechanic thermostat room temperature control no
with electronic room temperature control no
electronic room temperature control plus day timer no
electronic room temperature control plus week timer yes
Other control options
room temperature control, with presence detection no
room temperature control, with open window
detection
no
with distance control option no
with adaptive start control yes
with working time limitation no
with black bulb sensor no
Contact details C. Bomann GmbH, Heinrich-Horten-Str. 17, 47906 Kempen / Germany

EK6021CB_IM 02.08.18
26
Mode d’emploi
Merci d’avoir choisi notre produit. Nous espérons que vous
saurez proter votre appareil.
Symboles de ce mode d’emploi
Les informations importantes pour votre sécurité sont
particulièrement indiquées. Veillez à bien respecter ces
indications an d’éviter tout risque d’accident ou d’endom-
magement de l’appareil :
AVERTISSEMENT :
Prévient des risques pour votre santé et des risques
éventuels de blessure.
ATTENTION :
Indique les risques pour l’appareil ou tout autre appareil.
NOTE :
Attire votre attention sur des conseils et informations.
Sommaire
Liste des différent éléments de commande ....................3
Assemblage ......................................................................... 4
Notes générales ................................................................26
Conseils de sécurité spéciques à cet appareil ...........27
Manipulation des piles .....................................................29
Déballer l’appareil ............................................................. 29
Contenu de la livraison ....................................................29
Liste des différent éléments de commande ..................29
Panneau de contrôle sur l’appareil ...............................29
Télécommande .............................................................29
Écran .............................................................................29
Instructions d’assemblage ..............................................30
Raccordement électrique .................................................30
Conguration électrique ................................................30
Branchement ................................................................. 30
Télécommande ..................................................................30
Installez les piles (Piles non incluses) ..........................30
Portée de la télécommande .......................................... 30
Fonctionnement ................................................................ 31
Allumer l’appareil ........................................................... 31
Réglages de base de l’appareil .....................................31
Réglages détaillés de l’appareil ....................................31
Contrôler l’appareil à distance.......................................31
Régler la date et l’heure ................................................31
Programmation .................................................................32
Afcher les paramètres de programmation ..................32
Programmer les programmations .................................32
Activer ou désactiver la programmation .......................32
Éteindre .............................................................................. 33
Protection contre la surchauffe ......................................33
Nettoyage ...........................................................................33
Instructions de maintenance ........................................... 34
Dépannage .........................................................................34
Données techniques .........................................................34
Élimination .........................................................................34
Signication du symbole « Poubelle » .......................... 34
Fiche de données techniques du produit ...................... 35
Notes générales
Lisez attentivement ce mode d’emploi avant de mettre l’ap-
pareil en marche pour la première fois. Conservez le mode
d’emploi ainsi que le bon de garantie, votre ticket de caisse
et si possible, le carton avec l’emballage se trouvant à
l’intérieur. Si vous remettez l’appareil à des tiers, veuillez-le
remettre avec son mode d’emploi.
• N’utilisez cet appareil que pour un usage privé et pour
les taches auxquelles il est destiné. Cet appareil n’est
pas prévu pour une utilisation professionnelle.
• Ne l’utilisez pas en plein air. Protégez-le de la chaleur,
des rayons directs du soleil, de l’humidité (ne le plongez
en aucun cas dans l’eau) et des objets tranchants.
N’utilisez pas cet appareil avec des mains humides. S’il
arrive que de l’humidité ou de l’eau atteignent l’appareil,
débranchez aussitôt le câble d’alimentation.
• Arrêtez l’appareil et débranchez toujours le câble d’ali-
mentation de la prise de courant (en tirant sur la che et
non pas sur le câble) si vous n’utilisez pas l’appareil, si
vous installez les accessoires, pour le nettoyage ou en
cas de panne.
• Ne laissez jamais fonctionner l’appareil sans surveil-
lance. Lorsque vous quittez la pièce, toujours arrêter
l’appareil. Débranchez la che de la prise.
• Il y a lieu d’inspecter l’appareil et le bloc d’alimentation
régulièrement en vue d’éventuels signes d’endom-
magements. Lorsqu’un endommagement est détecté,
l’appareil ne doit plus être utilisé.
• N’utilisez que les accessoires d’origine.
• Par mesure de sécurité vis-à-vis des enfants, ne
laissez pas les emballages (sac en plastique, carton,
polystyrène) à leur portée.
AVERTISSEMENT :
Ne pas laisser les jeunes enfants jouer avec le lm.
Il y a risque d’étouffement !

EK6021CB_IM 02.08.18
27
Conseils de sécurité spéciques à cet appareil
Vous trouverez le symbole suivant accompagné d’un avertissement
sur le produit :
AVERTISSEMENT :
Pour éviter toute surchauffe de l’appareil de chauffage,
ne le recouvrez pas.
AVERTISSEMENT :
Risque de choc électrique !
Ne pas installer ce chauffage à proximité d’une baignoire, d’une
douche ou d’une piscine.
Risque d’explosion
L’intérieur de l’appareil contient des composants chauds et
rougeoyants. N’utilisez pas l’appareil près de liquides ou de gaz
inammables ou explosifs !
Risque de brûlure
• Certaines pièces du produit peuvent être très chaudes et causer
des brûlures. Évitez tout contact avec la peau.
• Soyez particulièrement attentif lorsque des enfants ou des
personnes vulnérables sont présents.
• L’air qui s’échappe du haut de l’appareil atteint des températures
dépassant 100 °C ! N’autorisez pas les enfants à jouer sans sur-
veillance près de l’appareil.
ATTENTION :
Distance de sécurité
• Le chauffage ne doit pas être installé directement sous une prise
murale.
• Gardez une distance de sécurité d’1 m par rapport aux objets
facilement inammables tels qu’un meuble, des rideaux, etc.

EK6021CB_IM 02.08.18
28
ATTENTION :
• Installez l’appareil de manière à ce que l’air puisse y pénétrer et
en sortir librement.
Utilisation
Ceci est un appareil de chauffage auxiliaire. Ne laissez pas l’appa-
reil sans surveillance pendant plusieurs heures. Ne quittez pas la
maison lorsque vous utilisez l’appareil.
Risque de surchauffe
Ne chauffez pas une pièce dont le volume est inférieur à 4 m³.
• Assurez-vous que le câble électrique ne repose pas sur l’appareil.
• N’introduisez aucun objet dans l’appareil.
• Cet appareil peut être utilisé par les enfants d’âge supérieur
à 8 ans et par les personnes aux capacités sensorielles, phy-
siques ou mentales réduites, ainsi que par les personnes sans
expérience ou connaissances, tant qu’elles sont supervisées et
instruites à l’utilisation de l’appareil en sécurité et tant qu’elles en
comprennent les risques.
• Les enfants ne doivent pas jouer avec l’appareil.
• Le nettoyage et l’entretien utilisateur ne doivent pas être effectués
par les enfants sans supervision.
• Les enfants de moins de 3 ans doivent se tenir éloignés de l’appa-
reil, sauf s’ils sont surveillés à tout instant.
• Les enfants de 3 à 8 ans peuvent uniquement allumer et éteindre
l’appareil s’ils sont surveillés, ou s’ils ont reçu des instructions sur
la bonne utilisation de l’appareil, et s’ils ont compris les risques qui
en résultent, à condition que l’appareil soit placé et installé dans
sa position normale d’utilisation.
• Les enfants de 3 ans et moins de 8 ans n’ont pas l’autorisation
d’insérer la prise dans la prise murale, d’ajuster l’appareil, de net-
toyer l’appareil et / ou d’effectuer l’entretien par l’utilisateur.

EK6021CB_IM 02.08.18
29
• Ne réparez pas vous-même l’appareil. Contactez toujours un
technicien agrée. Si le cordon d’alimentation est endommagé, il
doit être remplacé par le fabricant, son agent de service ou des
personnes ayant qualité semblable an d’éviter un risque.
Manipulation des piles
Insérez correctement !
Ne pas recharger !
Ne pas démonter !
Danger d’explosion ! N’exposez pas les
piles à la chaleur, comme la lumière du
soleil, le feu ou similaire.
Ne pas court-circuiter !
Les piles ne peuvent pas être jetées avec
les ordures ménagères ! Ramenez les
piles usagées dans les centres de collectes
appropriés ou chez le revendeur.
ATTENTION :
• Ne mélangez pas des piles de types différents
ou des nouvelles piles avec des piles usagées.
• Lorsque vous n’utilisez pas la télécommande
pendant une longue période, retirez les piles
pour éviter que l’acide contenu dans la pile ne
fuie.
Déballer l’appareil
ATTENTION :
Ne pas tenir l’appareil en le tenant par le panneau de
verre avant. Il n’est pas xé sur l’appareil.
1. Retirez l’appareil de son emballage.
2. Retirez tout le matériel d’emballage tel que les lms
plastiques, le matériel de remplissage, les colliers de
serrage et le carton.
3. Vériez la présence de toutes les pièces.
4. En cas de contenu d’emballage incomplet et de dom-
mages apparents, n’utilisez pas l’appareil. Renvoyez-le
immédiatement au détaillant.
NOTE :
Le panneau de verre avant est protégé par un lm protec-
teur. Nous vous recommandons de ne pas le retirer tant
que l’appareil n’est pas installé.
Contenu de la livraison
1 Cheminée électrique avec panneau de verre
1 Télécommande
Matériel d’installation :
1 Bande de monture, d’une longueur de 480 mm
1 Support de monture, d’une longueur de 50 mm
6 Chevilles, d’une longueur de 8 mm
6 4 vis, de 40 mm
2 Vis, de 10 mm
Liste des différent éléments de commande
Panneau de contrôle sur l’appareil
1 Voyants indicateurs pour la puissance de chauffage
2 Voyant indicateur du bouton marche / arrêt
3 Bouton marche / arrêt I / O
4 Bouton POWER
(puissance de chauffage de 900 W ou 1800 W)
5 Bouton d’alimentation
6 Bouton BACKLIGHT (éclairage)
Télécommande
7 Bouton OK
8 Bouton marche / arrêt ON / OFF
9 Bouton
ou
10 Bouton DATE / TIME
11 Bouton
12 Bouton IC
13 Bouton 900 W / 1800 W
14 Bouton BACK-LIGHT
15 Bouton DIMMER
16 Bouton TIMER ON / OFF
17 Bouton C
18 Bouton
19 Bouton TIMER SET
Écran
20 Sélection de position (
)
21 Jour de la semaine
22 Programmation active ( )
23 Veille ( )

EK6021CB_IM 02.08.18
30
24 Température en °C pour chiffres pour la programmation
25 Programmation de mise hors-tension (OFF)
26 Programmation d’allumage (ON)
27 Heure ( )
28 Fonction d’allumage automatique adaptative
du chauffage (AUTO)
29 Intensité des flammes ( )
30 Puissance de chauffage de 900 W ( )
ou de 1800 W ( )
Instructions d’assemblage
Cet appareil est prévu pour être xé au mur de manière
permanente. Il doit être installé à au moins 30 centimètres
du sol.
Veuillez vous référer aux illustrations de la page 4.
Ne pas allumer l’appareil tant qu’il n’a pas été correcte-
ment installé !
AVERTISSEMENT :
Vériez au préalable que le mur ne contient pas de câbles
qui pourraient être endommagés !
ATTENTION :
• Le mur doit être de type porteur, et résistant à la
chaleur.
• Ne pas tenir l’appareil en le tenant par le panneau de
verre avant.
• Les étapes qui suivent nécessitent des capacités de
travail manuel. Si nécessaire, faites-vous aider d’un
spécialiste.
NOTE :
• Le site d’installation doit se trouver proche d’une
prise murale, mais cette prise murale ne doit pas se
trouver au-dessus de l’appareil. Le ux d’air chaud est
expulsé par le haut de l’appareil.
• Faites passer le cordon d’alimentation derrière l’appareil.
• Pour garantir d’avoir une vue optimale dans la chemi-
née, nous recommandons de l’installer à une hauteur
de 60 cm (voir Illus. A).
• Utilisez une mèche de 8 pour percer les trous dans
le mur.
• Vous aurez également besoin d’un tournevis cruci-
forme de taille moyenne.
1. Posez l’appareil avec précautions en l’appuyant sur un
mur.
2. Des deux mains retirez le panneau de verre vers le
haut, de manière régulière. Posez le panneau de verre
avant sur le côté.
3. Mesurez la hauteur à laquelle vous souhaitez monter
l’appareil. Les dimensions recommandées sont indi-
quées dans l’Illus. B.
4. Utilisez les 4 chevilles et vis pour xer la bande de
monture horizontalement sur le mur.
5. Fixez le support de monture avec les vis letées sur
l’appareil.
6. Suspendez l’appareil sur la bande de monture sur le mur.
7. Marquez les positions de deux trous à percer pour le
support de monture.
8. Retirez l’appareil du mur de nouveau.
9. Percez les trous pour le support de monture. Insérez les
chevilles.
10. Suspendez l’appareil sur la bande de monture sur le mur.
11. Utilisez les 2 vis pour xer le support de monture sur
le mur.
12. Remettez le panneau de verre avant sur l’appareil. Pour
faire cela, voyez l’Illus. D.
Raccordement électrique
Conguration électrique
L’appareil peut consommer un total de 1800 W. Il est
conseillé, pour une telle puissance électrique, d’avoir
recours à une canalisation électrique séparée et une protec-
tion par fusibles par disjoncteur de 16 A.
ATTENTION : Surcharge !
• Lorsque vous utilisez des câbles de rallonge, celles
ci doivent avoir une section de câble de 1,5 mm² au
minimum.
• N’utilisez pas de prises multiples étant donné que le
présent appareil est trop puissant.
• Ne branchez pas d’autres appareils puissants au
même circuit électrique.
Branchement
• Vériez que la tension de l’appareil corresponde à la
tension du secteur. La plaque du nom du produit se
trouve sur le bas de l’appareil.
• Branchez la che du secteur uniquement dans une
prise électrique á contact protégé de installée selon les
règles.
Télécommande
Installez les piles (Piles non incluses)
1. Ouvrez le couvercle du compartiment à piles situé à
l’arrière de la télécommande.
2. Insérez 2 piles de type « AAA » • 1,5 V • MICRO en
respectant la bonne polarité (voir les marques au fond
du compartiment) !
3. Fermez le couvercle du compartiment à piles.
Portée de la télécommande
• La télécommande a une portée d’environ 10 mètres. Si
la portée de la télécommande diminue, les piles doivent
être changées.
• Assurez-vous qu’aucun obstacle ne se situe entre la
télécommande et le capteur sur l’appareil. Il se trouve
dans le coin supérieur gauche du panneau avant.

EK6021CB_IM 02.08.18
31
Fonctionnement
ATTENTION :
Ne pas allumer l’appareil tant qu’il n’a pas été correcte-
ment installé !
NOTE :
• Vous pouvez contrôler partiellement l’appareil avec le
panneau de contrôle de l’appareil.
• Pour régler la programmation, utilisez la télécommande.
• Chaque opération est conrmée par une tonalité.
• Si vous appuyez sur un bouton invalide, alors vous
entendrez deux bips courts.
• Après allumage de l’appareil, l’écran derrière le pan-
neau de verre avant devient visible. Pour une meilleure
ambiance, l’écran s’éteint environ 20 secondes après
chaque opération. Appuyez sur n’importe quel bouton
pour allumer l’écran de nouveau.
Allumer l’appareil
Faites basculer le bouton d’alimentation sur la position I.
L’appareil est alors en Standby. Le symbole
s’afche
sur l’écran.
Réglages de base de l’appareil
Après allumage de l’appareil au niveau du bouton d’alimen-
tation, il afchera les réglages par défaut :
- Jour de la semaine = SUN (Dimanche)
- Afchage de la température de la pièce
- Heure =
- Intensité des ammes = haute
- Éclairage BACKLIGHT = désactivé
- Température de chauffage par défaut =
- Chauffage = désactivé
- Programmation = désactivé
NOTE :
• Après une coupure de courant, l’appareil revient à ces
réglages par défaut.
• Pour des raisons de sécurité, l’appareil s’allume tou-
jours sans commencer le chauffage.
Réglages détaillés de l’appareil
• Vous pouvez allumer l’appareil depuis le panneau de
contrôle en appuyant brièvement sur le bouton I / O. Les
réglages de base de l’appareil s’affichent sur l’écran.
• Pour modier l’intensité des ammes, appuyez sur le
bouton I / O pendant plus de 3 secondes.
• Vous pouvez activer l’éclairage en appuyant sur le bou-
ton BACKLIGHT. Appuyez sur ce bouton de manière
répétée pour changer la couleur. L’appareil dispose de
7 variantes de couleurs.
• Appuyez sur le bouton POWER une fois pour activer la
puissance de chauffage de 900 W. Appuyez sur le bou-
ton POWER pour activer la puissance de chauffage de
1800 W. Appuyez une troisième fois pour désactiver le
chauffage. Les voyants indicateurs au-dessus le bouton
vous indiquent leur état.
NOTE :
Le chauffage et le ventilateur ne seront pas activés par
l’appareil tant que la température de la pièce ne des-
cend pas en-dessous de la température de base pour
le chauffage (voir paramètres de base). Vous pouvez
augmenter la température de base pour le chauffage à
l’aide de la télécommande.
Contrôler l’appareil à distance
1. Allumez l’appareil en appuyant sur le bouton ON / OFF
sur la télécommande. Les réglages de base de l’appareil
s’afchent sur l’écran.
2. Appuyez sur le bouton
ou pour régler la tempé-
rature de base du chauffage. Plage de température
ajustable : Entre 15 °C et 30 °C. Notez que la tempé-
rature de base doit être supérieure à celle de la pièce.
Lorsque la température de la pièce descend en-dessous
de la température de base, alors le chauffage s’allume
automatiquement.
3. Appuyez sur le bouton 900 W / 1800 W pour sélectionner
la puissance de chauffage :
Bouton Afchage sur l’écran
Puissance
de chauffage
Appuyez 1 ×
900 W
Appuyez 2 ×
1800 W
Appuyez 3 × Désactivé
4. Si vous souhaitez utilisez la fonction d’allumage adap-
tatif du chauffage, appuyez sur le bouton IC. « AUTO »
apparaît sur l’écran. Selon la température de la pièce et
la température dénie, l’appareil ajustera automatique-
ment la puissance de chauffage.
5. Appuyez sur le bouton BACK-LIGHT pour sélectionner
l’une des 7 variantes de couleur.
6. Appuyez sur le bouton DIMMER si vous souhaitez
changer l’intensité des ammes.
Régler la date et l’heure
Les abréviations des jours de la semaine sont :
SUN = dimanche, MON = lundi, TUE = mardi, WED = mer-
credi, THU = jeudi, FRI = vendredi, SAT = samedi
1. Appuyez sur le bouton DATE / TIME. La èche
et un
jour de la semaine clignoteront. Appuyez sur le bouton
ou sur pour sélectionner un jour de la semaine.
Appuyez sur le bouton DATE / TIME de nouveau pour
confirmer le jour de semaine.
2. Le chiffre des heures commence à clignoter. Appuyez
sur le bouton ou pour dénir l’heure. Appuyez sur le
bouton DATE / TIME de nouveau pour conrmer l’heure.
3. Le chiffre des minutes commence à clignoter. Appuyez
sur le bouton ou pour dénir les minutes.
4. Appuyez sur le bouton OK pour quitter le menu.

EK6021CB_IM 02.08.18
32
Programmation
L’appareil, la fonction de chauffage incluse, peut être
contrôlée dans le temps avec la fonction de programmation.
Avant d’utiliser la programmation, il est nécessaire d’avoir
réglé l’heure et le jour de la semaine.
• Vous pouvez programmer un maximum de 23 heures et
50 minutes en avance.
• La programmation du temps se fait par incréments de
10 minutes.
• Vous pouvez programmer jusqu’à 10 différents réglages
de temps.
• Chaque programmation se compose de sa propre heure
d’allumage, de mise hors-tension et de température.
• Vous pouvez effectuer une programmation pour n’im-
porte quel jour unique de la semaine, ou plusieurs jours
à la fois.
• Si vous le souhaitez, vous pouvez dénir l’heure de
mise hors-tension seulement, et ignorer le réglage de
l’heure d’allumage. Si l’heure de mise hors-tension est
le jour qui suit, souvenez-vous d’ajuster le jour le cas
échéant.
• Même si l’appareil est déconnecté de l’alimentation
secteur, les paramètres de programmation seront
mémorisés.
Afcher les paramètres de programmation
1. Appuyez sur le bouton TIMER SET. Le chiffre pour le
premier réglage clignote et « ON » s’illumine.
2. Appuyez sur le bouton
ou pour afcher les heures
d’allumage des 10 réglages de programmation.
3. Appuyez sur le bouton pour passer à l’heure de mise
hors-tension. « OFF » apparaît sur l’écran.
4. Appuyez sur le bouton ou pour dénir les heures de
mise hors-tension.
5. Pour effacer les réglages afchés, appuyez sur le
bouton C.
Programmer les programmations
NOTE :
Si vous avez fait une sélection incorrecte pendant la pro-
grammation, quittez le menu en appuyant sur le bouton
OK puis recommencez.
1. Sélectionnez le numéro de programmation
1) Appuyez sur le bouton TIMER SET. L’afchage du
numéro de programmation commence à clignoter.
2) Appuyez sur le bouton
ou pour sélectionner un
autre numéro de programmation.
3) Appuyez sur le bouton TIMER SET de nouveau pour
conrmer la sélection.
2. Sélection de jour(s) de la semaine
1) La èche
et le jour de la semaine clignotent.
Appuyez sur le bouton ou pour sélectionner le
jour de la semaine.
2) Appuyez sur le bouton
pour activer le jour de la
semaine. Le èche à côté du jour de la semaine
clignote.
3) Appuyez sur le bouton TIMER SET de nouveau pour
conrmer la sélection.
4) Si vous souhaitez désactiver un jour de la semaine,
appuyez sur le bouton lorsque la èche à côté
du jour de la semaine clignote.
3. Dénir l’heure d’allumage
(« ON » s’illumine sur l’écran)
1) Le chiffre des heures commence à clignoter. Appuyez
sur le bouton
ou pour régler les heures.
2) Appuyez sur le bouton TIMER SET de nouveau pour
conrmer la sélection.
3) Le chiffre des minutes commence à clignoter. Ap-
puyez sur le bouton ou pour régler les minutes.
4) Appuyez sur le bouton TIMER SET de nouveau pour
conrmer la sélection.
4. Dénir l’heure de mise hors-tension
(« OFF » s’illumine sur l’écran)
1) Le chiffre des heures commence à clignoter. Appuyez
sur le bouton
ou pour régler les heures.
2) Appuyez sur le bouton TIMER SET de nouveau pour
conrmer la sélection.
3) Le chiffre des minutes commence à clignoter. Ap-
puyez sur le bouton ou pour régler les minutes.
4) Appuyez sur le bouton TIMER SET de nouveau pour
conrmer la sélection.
5. Régler la température de base pour le chauffage.
NOTE :
Pour des raisons techniques, le jour de la semaine est
afché de nouveau dans cet élément du menu.
1) L’afchage de la température commence à clignoter.
Appuyez sur le bouton
ou pour régler la tempé-
rature de base du chauffage.
2) Appuyez sur le bouton TIMER SET de nouveau pour
conrmer la sélection.
Activer ou désactiver la programmation
NOTE IMPORTANTE :
• Les paramètres sont conservés, même après une
coupure de courant. Cependant, les réglages de base
seront rétablis.
• Pour votre sécurité, le chauffage sera désactivé.
AVERTISSEMENT : Risque d’incendie !
• Avant d’activer la programmation, vériez le réglage du
jour de la semaine, de l’heure et du programme.
• Réglez toujours l’heure d’allumage de manière à ce
que la programmation active l’appareil en présence de
personnes.

EK6021CB_IM 02.08.18
33
1. Appuyez sur le bouton 900 W / 1800 W pour sélectionner
la puissance de chauffage. Vous pouvez également
appuyer sur le bouton IC pour sélectionner la fonction
de démarrage adaptative du chauffage.
2. Appuyez sur le bouton DIMMER pour dénir l’intensité
des ammes que vous souhaitez voir à l’allumage.
3. Si vous souhaitez que l’éclairage s’allume à l’heure
d’allumage, sélectionnez-le maintenant avec le bouton
BACK-LIGHT.
4. Appuyez sur le bouton TIMER ON / OFF pour activer ou
désactiver la programmation.
NOTE :
• Lorsque la programmation est activée, le symbole
s’afche sur l’écran.
• De plus, l’écran afche les symboles d’intensité des
ammes et pour le chauffage, si ce dernière fonction
ont été activée.
Éteindre
• Avez-vous activé la programmation, ou souhaitez-vous
seulement mettre l’appareil temporairement en veille ?
- Pour faire cela, appuyez sur le bouton ON / OFF sur la
télécommande ou sur le bouton I / O (3) sur l’appareil.
• Vous souhaitez couper complètement l’appareil de
l’alimentation ?
- Faites basculer le bouton d’alimentation (5) sur la
position O. Débranchez l’appareil de la prise.
NOTE :
L’appareil ne s’allumera pas après coupure de l’ali-
mentation, même si vous avez créé une program-
mation. Les réglages de base seront rétablis.
Protection contre la surchauffe
L’appareil est équipé d’une protection contre la surchauffe
qui éteint automatiquement l’appareil en cas de surchauffe.
Vous entendrez un signal d’alarme. Toutes les sections de
l’écran clignoteront. Pour votre sécurité, l’appareil ne s’allu-
mera pas automatiquement de nouveau.
Pour pouvoir utiliser à nouveau l’appareil, procédez comme
suit :
• Faites basculer le bouton d’alimentation sur la po-
sition O. Débranchez l’appareil de la prise. Laissez
l’appareil refroidir pendant environ 15 minutes avant de
l’utiliser à nouveau.
• Vériez si la prise d’air ou l’orice d’aération du radiateur
est bloqué. Si besoin est, dégagez l’obstruction.
Si la protection contre la surchauffe éteint l’appareil après
un court instant, il y a alors probablement un défaut.
• Éteignez à nouveau le radiateur et débranchez-le.
• Contactez le revendeur ou notre centre de service pour
vérier l’appareil.
Nettoyage
AVERTISSEMENT :
• Avant tout nettoyage, toujours débrancher l’appareil et patienter
jusqu’à ce que l’appareil ait refroidi.
• Assurez-vous que l’eau n’entre pas dans les ouvertures de l’ap-
pareil pendant le nettoyage. Vous risqueriez de provoquer une
électrocution ou un incendie.
ATTENTION :
• Ne pas utiliser de brosse en l de fer ou autres objets
abrasifs.
• Ne pas utiliser de détergents agressifs ou abrasifs.
• Nettoyez la surface de l’appareil avec un chiffon sec et
doux.
• La surface de verre peut être essuyée avec un chiffon
humide, si nécessaire. Puis, séchez avec un chiffon sec.

EK6021CB_IM 02.08.18
34
Instructions de maintenance
• L’appareil est équipé d’un système LED contrôlé électro-
niquement qui projette l’effet de amme. Le système ne
peut pas être réparé par l’utilisateur.
• Les LED de l’éclairage ne peuvent pas être changées.
Dépannage
Problème Raison possible Solution
L’appareil ne fonc-
tionne pas.
L’appareil n’est pas branché à l’ali-
mentation.
Vériez la sortie murale avec un autre appareil.
Insérez correctement la che dans la prise murale.
Vériez le fusible.
L’appareil est défectueux. Contactez notre service ou un centre d’entretien.
Le chauffage et
le ventilateur ne
fonctionnent pas.
La température de la pièce est
supérieure à la température de base
pour le chauffage.
Vériez le réglage de la température de base.
L’appareil ne
s’active pas à
l’heure d’allumage
programmée.
L’appareil a été déconnecté de
l’alimentation secteur (possiblement à
cause d’une coupure de courant).
Les réglages de base ont été rétablis.
Vériez le réglage du jour de la semaine, de l’heure et du
programme.
L’effet de amme
ne fonctionne pas.
Un composant est défectueux. Contactez notre service ou un centre d’entretien.
Vous entendrez un
signal d’alarme.
Toutes les sections
de l’écran
clignoteront.
La protection anti surchauffe s’est
déclenchée.
1. Éteignez l’appareil à l’aide du bouton d’alimentation.
2. Laissez l’appareil refroidir pendant au moins 15 minutes
avant de le rallumer.
Données techniques
Modèle : ..............................................................EK 6021 CB
Alimentation : ........................................... 220 - 240 V~, 50 Hz
Consommation : ..................................................900 / 1800 W
Classe de protection : ............................................................
Poids net : ............................................................env. 12,8 kg
Nous nous réservons le droit d’apporter des modications
techniques ainsi que des modications de conception dans
le cadre du développement continu de nos produits.
Cet appareil a été contrôlé d’après toutes les directives
européennes actuelles applicables, comme par exemple
concernant la compatibilité électromagnétique et la basse
tension. Cet appareil a été fabriqué en respect des régle-
mentations techniques de sécurité les plus récentes.
Élimination
Signication du symbole « Poubelle »
Protégez votre environnement, ne jetez pas
vos appareils électriques avec les ordures mé-
nagères.
Utilisez, pour l’élimination de vos appareils
électriques, les bornes de collecte prévues à
cet effet où vous pouvez vous débarrasser des
appareils que vous n’utilisez plus.
Vous contribuez ainsi à éviter les impacts potentiels dans
l’environnement et sur la santé de chacun, causés par une
mauvaise élimination de ces déchets.
Vous contribuez aussi au recyclage sous toutes ses for-mes
des appareils électriques et électroniques usagés.
Vous trouverez toutes les informations sur les bornes
d’élimination des appareils auprès de votre commune ou de
l’administration de votre communauté.

EK6021CB_IM 02.08.18
35
Fiche de données techniques du produit
Identiant(s)
du(des) modèle(s) :
EK 6021 CB
Élément Symbole Valeur Unités Élément Unités
Puissance de chauffage Type d’émission de chaleur de chauffage,
pour les chauffages électriques d’appoint seulement
Puissance de chauffage
nominale
P
nom
1,8 kW
contrôle de charge de chauffage, avec thermos-
tat intégré
N / A
Puissance de chauffage
minimum (indicative)
P
min
0,9 kW
contrôle de charge de chauffage manuel et / ou
indication de température extérieure
N / A
Puissance de chauffage
continue maximum
P
max,c
1,8 kW contrôle de charge de température électronique
avec indication de température de la pièce et / ou
extérieure
N / A
Consommation élec-
trique auxiliaire
chauffage assisté par ventilateur
N / A
À puissance de chauffage
nominale
(moteur de ventilateur)
el
max
0,014 kW Type d’émission de chaleur / de contrôle de la tempéra-
ture de la pièce
À puissance de chauffage
minimum
(moteur de ventilateur)
el
min
0,014 kW
émission de chaleur à intensité unique et aucun
contrôle de la température de la pièce
non
En veille el
SB
0,48 W
deux intensités ou plus contrôlées manuellement,
aucun contrôle de la température de la pièce
non
avec contrôle de la température de la pièce par
thermostat mécanique
non
avec contrôle de la température de la pièce par
thermostat électronique
non
contrôle de la température de la pièce plus
programmation jour
non
contrôle de la température de la pièce plus
programmation semaine
oui
Autres options de contrôle
contrôle de la température de la pièce, avec
détection de mouvement
non
contrôle de la température de la pièce, avec
détection de fenêtre ouverte
non
avec option de contrôle à distance non
avec contrôle de démarrage automatique
adaptatif
oui
avec durée de fonctionnement contrôlée non
avec capteur d’ampoule noire non
Détails de contact C. Bomann GmbH, Heinrich-Horten-Str. 17, 47906 Kempen / Germany

EK6021CB_IM 02.08.18
36
Manual de instrucciones
Le agradecemos la conanza depositada en este producto
y esperamos que disfrute de su uso.
Símbolos en este manual de instrucciones
Advertencias importantes para su seguridad están seña-
ladas en especial. Siga estas advertencias incondicional-
mente, para evitar accidentes y daños en el aparato:
AVISO:
Advierte ante los peligros para su salud y demuestra
posibles riesgos de herida.
ATENCIÓN:
Indica los posibles riesgos para el aparato u otros objetos.
NOTA:
Pone en relieve consejos e informaciones para usted.
Índice
Indicación de los elementos de manejo ..........................3
Montaje .................................................................................4
Notas generales ................................................................36
Indicaciones especiales de seguridad
para este aparato ..............................................................37
Manipulación de las pilas ................................................39
Desembalaje del aparato..................................................39
Contenido en la entrega ...................................................39
Indicación de los elementos de manejo ........................39
Panel de control del aparato .........................................39
Mando a distancia .........................................................39
Display ........................................................................... 40
Instrucciones de montaje ................................................40
Conexión eléctrica ............................................................ 40
Requisitos de potencia .................................................. 40
Conexión .......................................................................40
Mando a distancia .............................................................40
Introducir baterías (Baterías no incluidas) .................40
Alcance del mando a distancia .....................................40
Utilización ..........................................................................41
Encendido del aparato ..................................................41
Conguración básica del aparato .................................41
Regulación del aparato .................................................41
Uso del mando a distancia ............................................41
Conguración de la fecha y la hora ..............................41
El temporizador ................................................................. 42
Visualización de las
conguraciones del temporizador ................................. 42
Programación del temporizador ....................................42
Activar y desactivar el temporizador ............................. 42
Apagado .............................................................................43
Protección contra el sobrecalentamiento ......................43
Limpieza ............................................................................. 43
Instrucciones de mantenimiento ....................................44
Resolución de problemas ................................................ 44
Datos técnicos ..................................................................44
Eliminación ........................................................................ 44
Signicado del símbolo “Cubo de basura” ....................44
Ficha del producto ............................................................45
Notas generales
Antes de la puesta en servicio de este aparato lea deteni-
damente el manual de instrucciones y guarde éste bien in-
cluido la garantía, el recibo de pago y si es posible también
el cartón de embalaje con el embalaje interior. En caso de
dejar el aparato a terceros, también entregue el manual de
instrucciones.
• Solamente utilice el aparato para el uso privado y para
el n previsto. Este aparato no está destinado para el
uso profesional.
• No lo utilice al aire libre. No lo exponga al calor, a la
entrada directa de rayos de sol, a la humedad (en
ningún caso sumerja el aparato en agua) y a los cantos
agudos. No utilice el aparato con las manos húmedas.
En caso de que el aparato esté húmedo o mojado retire
de momento la clavija de la caja de enchufe.
• Desconecte el aparato y siempre retire la clavija de la
caja de enchufe (por favor tire de la clavija y no del ca-
ble), cuando no quiera utilizar el aparato, montar piezas
o en caso de limpieza o defectos.
• No utilice el aparato sin vigilancia. En caso de salir de
la habitación, desconecte siempre el aparato. Retire la
clavija de la caja de enchufe.
• El aparato y el cable de alimentación de red se deben
controlar regularmente para garantizar que no estén
dañados.
• Solamente utilice accesorios originales.
• Para la seguridad de sus niños no deje material de
embalaje (Bolsas de plástico, cartón, poliestireno etc.)
a su alcance.
AVISO:
No deje jugar a los niños con la lámina.
¡Existe peligro de asxia!

EK6021CB_IM 02.08.18
37
Indicaciones especiales de seguridad para este aparato
En el producto encontrará el siguiente símbolo con carácter de
aviso:
AVISO:
Para evitar el sobrecalentamiento del aparato calefac-
tor, no lo cubra.
AVISO:
¡Peligro de descarga eléctrica!
No instale este aparato de calefacción cerca de una bañera, du-
cha o piscina.
Peligro de explosión
El interior de este aparato contiene componentes incandescentes.
¡No utilice el aparato cerca de líquidos o gases inamables o
explosivos!
Peligro de quemaduras
• Algunas partes del producto se pueden poner muy calientes y
causar quemaduras. Evite el contacto con la piel.
• Deberá tener especial cuidado cuando haya niños y personas
vulnerables presentes.
• ¡El aire que sale por la parte superior del aparato alcanza tem-
peraturas de más de 100 °C! No permita que los niños jueguen
solos cerca del aparato.
ATENCIÓN:
Distancia de seguridad
• El aparato de calefacción no debe instalarse directamente de-
bajo de un enchufe de pared.

EK6021CB_IM 02.08.18
38
ATENCIÓN:
• Mantenga una distancia de seguridad de un metro con cualquier
objeto fácilmente inamable, como por ejemplo muebles, corti-
nas, etc.
• Monte el aparato de manera que el aire pueda entrar y salir
libremente.
Uso
Este es un aparato de calefacción auxiliar. No lo deje desatendido
durante mucho tiempo. No lo deje encendido cuando salga de
casa.
Peligro de sobrecalentamiento
No caliente ninguna habitación con un volumen inferior a 4 m³.
• Asegúrese de que el cable de alimentación no se apoya ni pasa
sobre el aparato.
• No introduzca ningún objeto en el aparato.
• Pueden utilizar este aparato niños mayores de 8 años y personas
con minusvalías físicas, sensoriales o mentales, o sin experiencia
ni conocimientos, siempre que se les someta a supervisión o se
les instruya respecto a su uso de forma segura y de manera que
entiendan los peligros existentes.
• Los niños no deben jugar con el aparato.
• La limpieza y el mantenimiento no deben realizarlo niños sin su-
pervisión.
• Los niños menores de 3 años debe mantenerse alejados del apa-
rato, a menos que estén vigilados en todo momento.
• Los niños de 3 a 8 años solo podrán encender y apagar el apa-
rato cuando estén vigilados o hayan sido instruidos en el uso
seguro del aparato y comprendan los riesgos que implica, siem-
pre y cuando el aparato esté colocado e instalado en su posición
normal de uso.

EK6021CB_IM 02.08.18
39
• Los niños de 3 a 8 años no pueden enchufar el aparato, con-
gurarlo, ni limpiar el aparato y no pueden realizar las tareas de
mantenimiento del usuario.
• No repare usted mismo el aparato. Póngase en contacto con
un técnico autorizado. Si el cable de alimentación está dañado,
corresponde al fabricante, a su representante o persona de cuali-
cación similar su reemplazo para evitar peligros.
Manipulación de las pilas
¡Introdúzcalas correctamente!
¡No las cargue!
¡No las desmonte!
¡Riesgo de explosión! No exponga las
baterías a calor intenso, como la luz solar,
fuego o similares.
¡No las cortocircuite!
Las pilas no se pueden desechar como
basura doméstica. Devuelva las pilas usa-
das a los puntos de recogida designados o
al proveedor.
ATENCIÓN:
• No mezcle las pilas de diferentes tipos ni las
pilas nuevas con viejas.
• Cuando no utilice el mando a distancia durante
un periodo largo de tiempo, retire las pilas para
evitar la “fuga” del ácido.
Desembalaje del aparato
ATENCIÓN:
No sujete el aparato por la pantalla de cristal, esta solo
está colgada del aparato.
1. Retire el embalaje del aparato.
2. Retire todo el material de embalaje tal como películas
de plástico, material de relleno, abrazaderas de cables y
embalaje de cartón.
3. Compruebe el contenido para ver si faltan piezas.
4. En el caso de que el contenido del paquete esté
incompleto o si se aprecian daños, no ponga el aparato
en funcionamiento. Devuélvalo inmediatamente al
comerciante.
NOTA:
La pantalla de cristal está protegida por una lámina. Le
recomendamos que no quite esta lámina hasta que haya
instalado el aparato.
Contenido en la entrega
1 chimenea eléctrica con pantalla de cristal
1 mando a distancia
Material de instalación:
1 regleta de montaje, 480 mm de largo
1 soporte de montaje, 50 mm de largo
6 anclajes, 8 mm de largo
6 tornillos, 4 × 40 mm
2 tornillos de rosca, 10 mm
Indicación de los elementos de manejo
Panel de control del aparato
1 Luz piloto del poder calorífico
2 Luz piloto del botón de encendido / apagado I / O
3 Botón de encendido / apagado
4 Botón POWER
(poder caloríco de 900 W o 1800 W)
5 Interruptor de encendido
6 Botón BACKLIGHT (iluminación)
Mando a distancia
7 Botón OK
8 Botón de encendido / apagado ON / OFF
9 Botón
o
10 Botón DATE / TIME
11 Botón
12 Botón IC
13 Botón 900 W / 1800 W
14 Botón BACK-LIGHT
15 Botón DIMMER

EK6021CB_IM 02.08.18
40
16 Botón TIMER ON / OFF
17 Botón C
18 Botón
19 Botón TIMER SET
Display
20 Posición de selección (
)
21 Día de la semana
22 Temporizador activo (
)
23 En espera (
)
24 Indicador de temperatura en °C o
número de ajuste del temporizadorr
25 Tiempo de apagado del temporizador (OFF)
26 Hora de inicio del temporizador (ON)
27 Hora ( )
28 Función de puesta en marcha adaptable automático del
calefactor (AUTO)
29 Intensidad de las llamas ( )
30 Poder calorífico de 900 W (
) o 1800 W ( )
Instrucciones de montaje
Este aparato está diseñado para jarlo a una pared de
forma permanente. Debería colocarse como mínimo a
30 cm por encima del suelo.
Consulte las imágenes de la página 4.
¡No encienda el aparato hasta que no se haya instalado
correctamente!
AVISO:
¡Antes de comenzar la instalación, cerciórese de que no
haya ningún cable en la pared para evitar dañarlos!
ATENCIÓN:
• La pared debe ser un muro de carga y resistir el calor.
• No sujete el aparato por la pantalla de cristal.
• Las tareas posteriores requieren habilidades manua-
les. Si es necesario, pida ayuda a un especialista.
NOTA:
• Debe haber una toma de corriente cerca, pero no en-
cima del aparato. El ventilador expulsa el aire caliente
por la parte superior del aparato.
• Pase el cable de alimentación justo por detrás del
aparato.
• Para tener una visión óptima de la chimenea, le
recomendamos que la instale a una altura de 60 cm
(ver Fig. A).
• Use una broca de 8 mm para hacer los agujeros en
la pared.
• Necesitará también un destornillador de estrella de
tamaño mediano.
1. Coloque con cuidado el aparato en el suelo apoyado
contra una pared.
2. Use las dos manos para extraer la pantalla de cristal
hacia arriba. Deje la pantalla de cristal a un lado.
3. Mida la altura a la que desea montar el aparato. Puede
consultar las dimensiones recomendadas en la Fig. B.
4. Use 4 tornillos y clavijas para unir la regleta de montaje
horizontalmente a la pared.
5. Fije el soporte de montaje al aparato con los tornillos
de rosca.
6. Cuelgue el aparato en la regleta de montaje en la pared.
7. Marque la posición de los dos agujeros para el soporte
de montaje.
8. Retire el aparato de la pared una vez más.
9. Perfore los dos oricios para el soporte de montaje.
Inserte las clavijas.
10. Cuelgue el aparato en la regleta de montaje en la pared.
11. Use dos tornillos para unir el soporte de montaje a la
pared.
12. Cuelgue la pantalla de cristal en el aparato. Para ello,
consulte la Fig. D.
Conexión eléctrica
Requisitos de potencia
El aparato puede consumir un total de 1800 W. Con este
consumo nominal es recomendable utilizar un cable de
alimentación separado con una protección por medio de un
conmutador 16 A.
ATENCIÓN: ¡Sobrecarga!
• Si utiliza cables alargadores, deberían tener un diáme-
tro de al menos 1,5 mm².
• No utilice enchufes múltiples, como este equipo es
demasiado potente.
• No conecte ningún otro aparato potente al mismo
circuito eléctrico.
Conexión
• Asegúrese que la tensión del aparato coincida con la
tensión de red. La placa de características se encuentra
en la parte inferior del aparato.
• Sólo conecte el enchufe con un receptáculo aislado de
tierra de debidamente instalado.
Mando a distancia
Introducir baterías (Baterías no incluidas)
1. Abra la tapa del compartimento de la batería en la parte
posterior del mando a distancia.
2. Inserte 2 pilas del tipo “AAA” • 1,5 V • MICRO, teniendo
en cuenta la polaridad correcta (véase las marcas en la
parte inferior del compartimento).
3. Cierre la tapa del compartimento de la batería.
Alcance del mando a distancia
• El mando a distancia tiene un alcance de 10 metros. Si
disminuye el alcance, debería cambiar las pilas.
• Compruebe si hay obstáculos entre el mando a distan-
cia y el sensor del aparato que está situado en el parte
superior izquierda de la pantalla de cristal.

EK6021CB_IM 02.08.18
41
Utilización
ATENCIÓN:
¡No encienda el aparato hasta que no se haya instalado
correctamente!
NOTA:
• La puesta en marcha se puede hacer, en parte, en el
panel de control del aparato.
• Utilice el mando a distancia para programar el tem-
porizador.
• Cada vez que realice un cambio sonará un pitido.
• Al pulsar un botón incorrecto, escuchará dos pitidos
cortos.
• Una vez que encienda el aparato, la pantalla que hay
detrás del cristal se hace visible. Para crear un am-
biente más agradable, la pantalla se apagará después
de unos 20 segundos de inactividad. Pulse cualquier
botón para volver a activar la pantalla
Encendido del aparato
Ponga el interruptor de encendido en posición I. El aparato
está en Standby (en espera). El símbolo
se ilumina en
la pantalla.
Conguración básica del aparato
Cuando encienda el aparato con el interruptor de encen-
dido, tendrá la siguiente conguración básica:
- Día de la semana = SUN (domingo)
- Visualización de la temperatura interior actual
- Tiempo =
- Intensidad de las llamas = alta
- Iluminación BACKLIGHT = apagada
- Temperatura base para la calefacción =
- Calefacción = apagada
- Temporizador = apagada
NOTA:
• En el caso de sufrir una avería eléctrica, el aparato se
reinicia con esta conguración básica.
• Por razones de seguridad, el aparato siempre arran-
cará sin calefacción.
Regulación del aparato
• Puede encender el aparato en el panel de control
pulsando brevemente el botón I / O. La configuración
básica del aparato se hará visible en la pantalla.
• Si desea cambiar la intensidad de las llamas, pulse el
botón I / O durante más de tres segundos.
• Puede encender la iluminación pulsando el botón
BACKLIGHT. Si pulsa este botón repetidamente, cam-
biará los colores. Puede elegir entre siete colores.
• Pulse una vez el botón POWER para activar el poder
caloríco de 900 W. Pulse otra vez el botón POWER
para activar el poder caloríco de 1800 W. Si pulsa el
botón por tercera vez se apagará la calefacción. Las
luces piloto sobre el botón muestran el estado corres-
pondiente.
NOTA:
Ni el calefactor ni el ventilador del aparato se pondrán
en marcha hasta que la temperatura interior sea infe-
rior a la temperatura base del calefactor (consulte la
conguración básica). Puede aumentar la temperatura
base para la calefacción con el mando a distancia.
Uso del mando a distancia
1. Pulse el botón ON / OFF en el mando a distancia para
encender el aparato. La conguración básica del apa-
rato se hará visible en la pantalla.
2. Pulse los botones o , para ajustar la temperatura
base para la calefacción. Rangos de temperatura
posibles: entre 15 °C y 30 °C. Tenga en cuenta que la
temperatura base debe ser mayor que la temperatura
interior actual. Si la temperatura interior cae por debajo
de la temperatura base establecida, la calefacción se
encenderá automáticamente.
3. Use el botón 900 W / 1800 W para seleccionar el poder
caloríco:
Botón
Visualización
en pantalla
Poder caloríco
1 × pulsación
900 W
2 × pulsaciones
1800 W
3 × pulsaciones apagado
4. Pulse el botón IC si quiere usar la función de puesta en
marcha adaptable. “AUTO” aparecerá en pantalla. El
aparato ajusta automáticamente el poder caloríco ba-
sándose en la temperatura interior y en la temperatura
congurada.
5. Pulse el botón BACK-LIGHT para elegir uno de los
siete colores disponibles.
6. Pulse el botón DIMMER si quiere cambiar la intensidad
de las llamas.
Conguración de la fecha y la hora
Las abreviaturas de los días de la semana tienen el
siguiente signicado:
SUN = domingo, MON = lunes, TUE = martes, WED = miér-
coles, THU = jueves, FRI = viernes, SAT = sábado
1. Pulse el botón DATE / TIME. La echa
y el día
de la semana parpadearán. Use los botones
o
para seleccionar un día de la semana. Pulse el botón
DATE / TIME de nuevo para conrmar el día de la
semana.
2. La indicación de horas comenzará a parpadear. Use los
botones o para establecer la hora actual. Pulse el
botón DATE / TIME de nuevo para conrmar la hora.

EK6021CB_IM 02.08.18
42
3. La indicación de los minutos comenzará a parpadear.
Use los botones o para establecer los minutos
actuales.
4. Pulse el botón OK para salir del menú.
El temporizador
El aparato, incluida la calefacción, se puede controlar
con el temporizador. Para que el temporizador funcione
correctamente es imprescindible que previamente se hayan
ajustado la hora y el día actuales.
• La hora máxima que puede congurar con antelación es
de 23 horas y 50 minutos.
• El ajuste del tiempo se realiza en incrementos de
10 minutos.
• Hay 10 tipos de conguraciones de temporizador
disponibles.
• Cada ajuste del temporizador incluye su propio tiempo
de encendido, de desconexión y ajuste de temperatura.
• Se puede programar la conguración para un día en
concreto o para varios días.
• Si lo desea, puede programar solo la hora de apagado
e ignorar la entrada de la hora de encendido. Si la hora
de apagado está prevista para el día siguiente, recuerde
ajustar el día de la semana al programar el aparato.
• Incluso aunque el aparato esté desconectado de la
red eléctrica, se conservarán las conguraciones del
temporizador.
Visualización de las conguraciones del temporizador
1. Pulse el botón TIMER SET. El número del primer ajuste
parpadea en la pantalla y se ilumina “ON”.
2. Pulse los botones
o para pasar de una hora de ini-
cio a otra entre las 10 conguraciones del temporizador
disponibles.
3. Pulse el botón para visualizar la hora de finalización.
“OFF” aparecerá en pantalla.
4. Use los botones o para pasar de una hora de
nalización a otra.
5. Para eliminar la conguración mostrada, pulse el
botón C.
Programación del temporizador
NOTA:
Si accidentalmente selecciona un valor erróneo durante el
ajuste del temporizador, pulse el botón OK para salir del
menú y vuelva a empezar.
1. Elección del número de ajuste
1) Pulse el botón TIMER SET. El número de ajuste del
temporizador parpadeará en la pantalla.
2) Use los botones
o para elegir otro número de
ajuste.
3) Pulse el botón TIMER SET de nuevo para conrmar
la elección
2. Elección del día de la semana
1) La echa
y el día de la semana parpadearán.
Use los botones o para seleccionar el día de la
semana.
2) Pulse el botón para activar el día de la semana.
La echa que hay junto al día de la semana
parpadea.
3) Pulse el botón TIMER SET para conrmar la elección.
4) Si desea desactivar un día de la semana, pulse el
botón mientras parpadea la echa que hay junto
al día de la semana.
3. Conguración de la hora de inicio
(“ON” se iluminará en la pantalla)
1) La indicación de horas comenzará a parpadear. Use
los botones
o para establecer la hora.
2) Pulse el botón TIMER SET para conrmar la elec-
ción.
3) La indicación de los minutos comenzará a parpadear.
Use los botones o para establecer los minutos.
4) Pulse el botón TIMER SET para conrmar la elec-
ción.
4. Conguración de la hora de nalización
(“OFF” se iluminará en la pantalla)
1) La indicación de horas comenzará a parpadear. Use
los botones
o para establecer la hora.
2) Pulse el botón TIMER SET para conrmar la elec-
ción.
3) La indicación de los minutos comenzará a parpadear.
Use los botones o para establecer los minutos.
4) Pulse el botón TIMER SET para conrmar la elec-
ción.
5. Ajuste de la temperatura base para la calefacción
NOTA:
Por razones técnicas, el día de la semana actual se
muestra de nuevo en este elemento del menú.
1) La indicación de la temperatura comenzará a
parpadear. Use los botones
o para ajustar la
temperatura base para la calefacción.
2) Pulse el botón TIMER SET para conrmar la elec-
ción.
Activar y desactivar el temporizador
NOTA IMPORTANTE:
• En el caso de sufrir una avería eléctrica, se conserva-
rán todos los ajustes del temporizador. Sin embargo, el
aparato se reiniciará con la conguración básica.
• Por razones de seguridad, la calefacción se desco-
nectará.

EK6021CB_IM 02.08.18
43
AVISO: ¡Riesgo de fuego!
• Antes de encender el temporizador, compruebe los
ajustes actuales del día de la semana, la hora y el
temporizador.
• Congure siempre la hora de inicio de forma que el
aparato esté bajo supervisión mientras esté funcio-
nando.
1. Use el botón 900 W / 1800 W para seleccionar el poder
caloríco que desee. Como alternativa, también puede
usar el botón IC para seleccionar la función de puesta
en marcha adaptable del calefactor.
2. Use el botón DIMMER para congurar la intensidad de
las llamas que desea tener en la hora de inicio.
3. Si quiere que la iluminación también se encienda
a la hora de inicio, selecciónela ahora con el botón
BACK-LIGHT.
4. Use el botón TIMER ON / OFF para encender o apagar
el temporizador.
NOTA:
• Si el temporizador está activado, el símbolo
apare-
cerá en la pantalla.
• Además, la pantalla mostrará los símbolos de la inten-
sidad de las llamas y de la calefacción, siempre que
ha sido encendido.
Apagado
• ¿Ha activado el temporizador o solo desea cambiar
temporalmente el aparato al modo de espera?
- Para ello, use el botón ON / OFF en el mando a
distancia o el botón I / O (3) en el aparato.
• ¿Desea desenchufar el aparato de la red eléctrica?
- Ponga el interruptor de encendido (5) en posición O.
Desconecte el suministro de alimentación del
enchufe.
NOTA:
El aparato no se encenderá una vez que lo des-
enchufe de la red eléctrica, incluso aunque haya
activado el temporizador. El aparato se reiniciará
con la conguración básica.
Protección contra el sobrecalentamiento
El aparato está equipado con una protección contra el
sobrecalentamiento, que lo apagará automáticamente en
caso de producirse este efecto. Escuchará una señal de
advertencia. Todas las secciones de la pantalla comienzan
a parpadear. Por razones de seguridad, el aparato no se
encenderá solo de nuevo.
Para volver a usar el dispositivo, proceda del modo
siguiente:
• Ponga el interruptor de encendido en posición O.
Desconecte el suministro de alimentación del enchufe.
Deje que el aparato se enfríe durante aproximadamente
15 minuto antes de utilizarlo de nuevo.
• Compruebe si la entrada de aire o los canales de
ventilación están bloqueados. Si es necesario, elimine
los bloqueos.
Si la protección contra sobrecalentamiento apaga el apa-
rato tras un breve periodo, es posible que exista una avería.
• Apague el aparato de nuevo y desenchufar de la toma
de corriente.
• Pida a nuestro servicio o a un distribuidor que com-
pruebe el aparato.
Limpieza
AVISO:
• Antes de cada limpieza retire siempre la clavija de red de la caja
de enchufe y espere hasta que se haya enfriado el aparato.
• Asegúrese de que no entra agua por las aberturas de la unidad
durante la limpieza. Podría causar un electrochoque o un incen-
dio.
ATENCIÓN:
• No utilice un cepillo de alambre u objetos abrasivos.
• No utilice detergentes agresivos o abrasivos.
• Limpie la supercie del aparato con un paño suave y
seco.
• Si es necesario, puede limpiar la pantalla de cristal con
agua. Séquela con una gamuza suave.

EK6021CB_IM 02.08.18
44
Instrucciones de mantenimiento
• El aparato está equipado con un sistema LED contro-
lado de manera electrónica que proyecta el efecto de la
llama. Este sistema no debe repararlo el usuario.
• Los LED de la iluminación no se pueden cambiar.
Resolución de problemas
Problema Posible causa Solución
El aparato no
funciona.
El aparato no está conectado al
suministro eléctrico.
Compruebe la toma eléctrica con otro aparato.
Inserte el enchufe correctamente en la toma de pared.
Compruebe el fusible.
El aparato está defectuoso. Póngase en contacto con nuestro centro de reparación o
servicio.
El calefactor y
el ventilador no
funcionan.
La temperatura interior es más alta
que la temperatura base para la
calefacción.
Compruebe la conguración de la temperatura base.
El aparato no se
enciende a la hora
de inicio
programada.
El aparato se ha desconectado de
la toma de corriente (posiblemente
debido a una avería eléctrica).
El aparato se ha reiniciado con la
conguración básica.
Compruebe los ajustes actuales del día de la semana, la
hora y el temporizador.
El efecto de llamas
no funciona.
Un componente es defectuoso. Póngase en contacto con nuestro centro de reparación o
servicio.
Escuchará una
señal de
advertencia. Todas
las secciones de la
pantalla comienzan
a parpadear.
Se ha activado la protección contra
sobrecalentamiento.
1. Apague el aparato con el interruptor de encendido.
2. Para evitar el sobrecalentamiento, espere al menos
15 minutos antes de encender de nuevo la unidad.
Datos técnicos
Modelo: ...............................................................EK 6021 CB
Suministro de tensión: ............................. 220 - 240 V~, 50 Hz
Consumo de energía: .........................................900 / 1800 W
Clase de protección: ..............................................................
Peso neto: ........................................................ aprox. 12,8 kg
El derecho de realizar modicaciones técnicas y de diseño
en el curso del desarrollo continuo del producto esta
reservado.
Este aparato se ha examinado según las normativas
actuales y vigentes de la Comunidad Europea, como p. ej.
compatibilidad electromagnética y directiva de baja tensión
y se ha construido según las más nuevas especicaciones
en razón de la seguridad.
Eliminación
Signicado del símbolo “Cubo de basura”
Proteja nuestro medio ambiente, aparatos eléc-
tricos no forman parte de la basura doméstica.
Haga uso de los centros de recogida previstos
para la eliminación de aparatos eléctricos y
entregue allí sus aparatos eléctricos que no
vaya a utilizar más.
Ayudará en evitar las potenciales consecuencias, a causa
de una errónea eliminación de desechos, para el medio
ambiente y la salud humana.
Con ello, contribuirá a la recuperación, al reciclado y a otras
formas de reutilización de los aparatos viejos eléctricos y
electrónicos.
La información cómo se debe eliminar los aparatos, se
obtiene en su ayuntamiento o su administración municipal.

EK6021CB_IM 02.08.18
45
Ficha del producto
Identicador(es) del
modelo
EK 6021 CB
Partida
Sím-
bolo
Valor
Uni-
dad
Partida
Uni-
dad
Potencia caloríca Tipo de regulación del aporte térmico, solo con disposi-
tivos de acumulación de calor eléctricos para abasteci-
miento local
Potencia caloríca
nominal
P
nom
1,8 kW control manual de la carga de calor con termostato
integrado
N / A.
Potencia caloríca mínima
(indicativa)
P
min
0,9 kW control manual de la carga de calor con respuesta a
la temperatura interior o exterior
N / A.
Potencia caloríca
continua máxima
P
max,c
1,8 kW control electrónico de la carga de calor con respuesta
a la temperatura interior o exterior
N / A.
Consumo auxiliar de
electricidad
potencia caloríca asistida por ventilador
N / A.
A potencia caloríca nomi-
nal (motor del ventilador)
el
max
0,014 kW Tipo de potencia caloríca/control de temperatura interior
A potencia caloríca
mínima
(motor del ventilador)
el
min
0,014 kW
potencia caloríca de un solo nivel, sin control de
temperatura interior
no
En modo de espera el
SB
0,48 W dos o más niveles manuales, sin control de tempe-
ratura interior
no
con control de temperatura interior mediante termos-
tato mecánico
no
con control electrónico de temperatura interior no
con control electrónico de temperatura interior y
temporizador diario
no
con control electrónico de temperatura interior y
temporizador semanal
si
Otras opciones de control
control de temperatura interior con detección de
presencia
no
control de temperatura interior con detección de
ventanas abiertas
no
con opción de mando a distancia no
con control de puesta en marcha adaptable si
con limitación de tiempo de funcionamiento no
con sensor de lámpara negra no
Información de contacto C. Bomann GmbH, Heinrich-Horten-Str. 17, 47906 Kempen / Germany

EK6021CB_IM 02.08.18
46
Instrukcja obsługi
Dziękujemy za wybór naszego produktu. Mamy nadzieję, że
korzystanie z urządzenia sprawi Państwu radość.
Symbole użyte w tej instrukcji obsługi
Ważne informacje dotyczące bezpieczeństwa użytkownika
są specjalnie wyróżnione. Koniecznie stosuj się do tych
wskazówek, aby uniknąć wypadków i uszkodzenia urzą-
dzenia:
OSTRZEŻENIE:
Ostrzega przed zagrożeniami dla zdrowia i wskazuje na
potencjalne ryzyka obrażeń.
UWAGA:
Wskazuje na potencjalne zagrożenia dla urządzenia lub
innych przedmiotów.
WSKAZÓWKA:
Wyróżnia porady i informacje ważne dla użytkownika.
Spis treści
Przegląd elementów obsługi .............................................3
Montaż .................................................................................. 4
Ogólne uwagi ....................................................................46
Specjalne wskazówki
bezpieczeństwa dla urządzenia ......................................47
Obchodzenie się z bateriami ...........................................49
Rozpakowanie urządzenia ............................................... 49
Zakres dostawy ................................................................. 49
Przegląd elementów obsługi ...........................................49
Panel kontrolny urządzenia ...........................................49
Pilot ................................................................................ 49
Wyświetlacz ...................................................................50
Instrukcja montażu ...........................................................50
Połączenie elektryczne .....................................................50
Wymagania dotyczące zasilania ...................................50
Podłączenie ................................................................... 50
Pilot .....................................................................................51
Założenie baterii (Baterie poza kompletem) ................51
Zasięg pilota ..................................................................51
Obsługa .............................................................................. 51
Wyłączanie urządzenia .................................................51
Podstawowe ustawienia urządzenia .............................51
Obsługa urządzenia z bliska .........................................51
Obsługa urządzenia na odległość .................................51
Ustawianie aktualnego dnia tygodnia i godziny ............ 52
Programator czasowy ......................................................52
Wyświetl ustawienia programatora ...............................52
Ustawianie programatora .............................................. 52
Włączanie / wyłączanie programatora czasowego........52
Wyłączanie ......................................................................... 53
Ochrona przed przegrzaniem .......................................... 53
Czyszczenie ....................................................................... 53
Instrukcje dotyczące konserwacji ..................................54
Usterki i sposoby ich usuwania ...................................... 54
Dane techniczne ................................................................54
Warunki gwarancji ............................................................54
Usuwanie ...........................................................................55
Znaczenie symbolu „Pojemnik na śmieci” ....................55
Karta produktu ..................................................................56
Ogólne uwagi
Przed uruchomieniem urządzenia proszę bardzo dokładnie
przeczytać instrukcję obsługi. Proszę zachować ją wraz
z kartą gwarancyjną, paragonem i w miarę możliwości rów-
nież kartonem z opakowaniem wewnętrznym. Przekazując
urządzenie innej osobie, oddaj jej także instrukcję obsługi.
• Proszę wykorzystywać urządzenie jedynie dla prywat-
nego celu, jaki został przewidziany dla urządzenia.
Urządzenie to nie zostało przewidziane do użytku
w ramach działalności gospodarczej.
• Proszę nie korzystać z urządzenia na zewnątrz. Proszę
trzymać urządzenie z daleka od ciepła, bezpośredniego
promieniowania słonecznego, wilgoci (w żadnym
wypadku nie zanurzać w substancjach płynnych) oraz
ostrych krawędzi. Proszę nie obsługiwać urządzenia
wilgotnymi dłońmi. Jeżeli urządzenie jest wilgotne lub
mokre, proszę natychmiast wyciągnąć wtyczkę.
• Jeżeli nie korzystacie Państwo z urządzenia, jeżeli
chcecie Państwo zamontować jakieś akcesoria, w celu
wyczyszczenia lub w przypadku jakichkolwiek zakłóceń,
proszę zawsze wyłączyć urządzenie i wyjąć wtyczkę
z gniazdka (należy ciągnąć za wtyczkę, nie za przewód).
• Pracującego urządzenia nie należy pozostawiać bez
nadzoru. Przed opuszczeniem pomieszczenia urzą-
dzenie należy zawsze wyłączać i wyciągać wtyczkę
sieciową z gniazda.
• Należy regularnie sprawdzać, czy urządzenie i kabel
sieciowy nie są uszkodzone. W razie uszkodzenia
należy przestać korzystać z urządzenia.
• Proszę stosować tylko oryginalne akcesoria.
• Dla bezpieczeństwa dzieci proszę nie zostawiać
swobodnie dostępnych części opakowania (torby plasti-
kowe, kartony, styropian itp.).
OSTRZEŻENIE:
Nie pozwalaj dzieciom bawić się folią.
Niebezpieczeństwo uduszenia!

EK6021CB_IM 02.08.18
47
Specjalne wskazówki bezpieczeństwa dla urządzenia
Na produkcie znajdują się poniższe symbol ostrzegawcze:
OSTRZEŻENIE:
Aby zapobiec przegrzaniu grzejnika, nie należy go ni-
czym zakrywać.
OSTRZEŻENIE:
Ryzyko porażenia prądem!
Nie instaluj tego urządzenia grzewczego w pobliżu wanny, prysz-
nica lub basenu.
Ryzyko wybuchu
Wewnątrz urządzenia znajdują się rozżarzone elementy. Z urzą-
dzenia nie należy korzystać w pobliżu łatwopalnych lub wybucho-
wych płynów albo gazów!
Ryzyko oparzeń
• Niektóre elementy produktu mogą bardzo się nagrzać i powo-
dują powstanie oparzeń. Nie dopuszczać do kontaktu ze skórą.
• Należy zachować szczególną ostrożność w obecności dzieci
i osób chorych.
• Powietrze ulatniające się z górnej części urządzenia osiąga
temperaturę ponad 100 °C! Nie należy pozwalać dzieciom na
zabawę w pobliżu urządzenia, gdy nikt nie sprawuje nad nimi
nadzoru.
UWAGA:
Bezpieczna odległość
• Urządzenia grzewczego nie wolno instalować bezpośrednio pod
gniazdkiem ściennym.
• Należy zachować bezpieczną odległość wynoszącą 1 m od ła-
twopalnych przedmiotów, takich jak meble, zasłony itp.

EK6021CB_IM 02.08.18
48
UWAGA:
• Zamontuj urządzenie w taki sposób, aby powietrze mogło swo-
bodnie przepływać.
Użycie
Niniejszy produkt jest dodatkowym urządzeniem grzejnym. Włą-
czonego urządzenia nie należy zostawiać bez nadzoru na kilka
godzin. Gdy urządzenie jest włączone, nie należy wychodzić
z domu.
Ryzyko przegrzania
Nie należy ogrzewać pomieszczeń o objętości mniejszej niż 4 m³.
• Należy upewnić się, że kabel zasilający nie leży na urządzeniu.
• Do urządzenia nie należy wkładać żadnych przedmiotów.
• Urządzenie to może być używane przez dzieci w wieku lat 8 lub
starsze, osoby z obniżoną sprawnością zyczną, zmysłową lub
umysłową, osoby z brakiem doświadczenia i wiedzy, jeśli są one
nadzorowane lub gdy je poinstruowano jak korzystać z tego urzą-
dzenia w bezpieczny sposób, i gdy zdają sobie sprawę z istnieją-
cych niebezpieczeństw.
• Dzieci nie powinny bawić się tym urządzeniem.
• Czyszczenie i konserwacja nie powinny być wykonywane przez
dzieci bez nadzoru.
• Dzieci poniżej 3 lat należy trzymać z dala od urządzenia, chyba że
znajdują się pod opieką przez cały czas.
• Dzieci między 3 a 8 rokiem życia mogą jedynie włączać i wyłą-
czać urządzenie, tylko, gdy znajdują się pod opieką lub zostały
poinstruowane pod kątem bezpiecznego użytkowania urządzenia
i jeśli rozumieją ryzyko, jakie niesie, pod warunkiem, że urządze-
nie ustawiono i zainstalowano w normalnej pozycji użytkowania.

EK6021CB_IM 02.08.18
49
• Dzieci w wieku od 3 lat i poniżej 8 lat nie mogą wkładać wtyczki
do gniazdka, nie mogą regulować urządzenia, nie mogą czyścić
urządzenia i / lub nie mogą wykonywać czynności konserwacyj-
nych.
• Nie naprawiać urządzenia samodzielnie. Skontaktować się z pra-
cownikiem autoryzowanego serwisu. Jeśli przewód zasilania jest
uszkodzony, należy go wymienić u producenta, przedstawiciela
serwisu lub podobnie wykwalikowanej osoby, aby uniknąć zagro-
żenia.
Obchodzenie się z bateriami
Włóż poprawnie!
Nie doładowuj!
Nie demontuj!
Zagrożenie wybuchem! Nie wystawiaj
baterii na działanie intensywnego ciepła,
jak bezpośrednie światło słoneczne, ogień
czy podobne.
Nie zwierać!
Baterie nie mogą być wyrzucane wraz
z odpadkami komunalnymi.
Zwróć baterie do wyznaczonego punktu
skupu lub sprzedawcy.
UWAGA:
• Nie mieszać baterii różnego rodzaju ani nowych
baterii ze starymi.
• Kiedy przez dłuższy okres czasu nie korzystamy
z pilota, wyjąć baterie, aby zapobiegać „wycie-
kowi“ kwasu z baterii.
Rozpakowanie urządzenia
UWAGA:
Nie trzymaj urządzenia za szklany front. On jest tylko
luźno zawieszony na urządzeniu.
1. Wyjmij urządzenie z opakowania.
2. Usuń wszystkie materiały opakowaniowe takie, jak folie
z tworzyw sztucznych, materiał wypełniający, opaski
zaciskowe i opakowania kartonowe.
3. Sprawdź zawartość pod kątem brakujących części.
4. W razie, gdy zawartość opakowania jest niepełna lub
jest zauważalnie uszkodzona nie wolno korzystać
z urządzenia. Należy zwrócić je bezzwłocznie do
sprzedawcy.
WSKAZÓWKA:
Szklany front jest chroniony folią. Zalecamy, aby nie usu-
wać folii przed zainstalowaniem urządzenia.
Zakres dostawy
1 elektryczny kominek ze szklanym frontem
1 pilot
Materiały instalacyjne:
1 listwa montażowa o długości 480 mm
1 wspornik montażowy, długość 50 mm
6 kołków rozporowych, długość 8 mm
6 wkrętów, 4 × 40 mm
2 śruby gwintowane, 10 mm
Przegląd elementów obsługi
Panel kontrolny urządzenia
1 Lampki kontrolna mocy grzewczej
2 Lampka kontrolna dla przyciska
3 Przycisk (włącz / wyłącz) I / O
4 Przycisk POWER
(moc grzewcza 900 W lub 1800 W)
5 Przełącznik zasilania
6 Przycisk BACKLIGHT (podświetlenie)
Pilot
7 Przycisk OK
8 Przycisk (włącz / wyłącz) ON / OFF

EK6021CB_IM 02.08.18
50
9 Przycisk lub
10 Przycisk DATE / TIME (data / godzina)
11 Przycisk
12 Przycisk IC
13 Przycisk 900 W / 1800 W
14 Przycisk BACK-LIGHT (podświetlenie)
15 Przycisk DIMMER (ściemnianie)
16 Przycisk TIMER ON / OFF
(wł. / wył. programatora czasowego)
17 Przycisk C
18 Przycisk
19 Przycisk TIMER SET
(ustawienie programatora czasowego)
Wyświetlacz
20 Pozycja wyboru (
)
21 Dzień tygodnia
22 Programator czasowy aktywny ( )
23 Tryb gotowości (
)
24 Temperatura w °C lub numer ustawienia programatora
czasowego
25 Czas wyłączenia programatora czasowego (OFF)
26 Czas włączenia programatora czasowego (ON)
27 Godzina ( )
28 Automatyczna, adaptacyjna funkcja sterowania
uruchamianiem nagrzewnicy (AUTO)
29 Automatyczna, adaptacyjna funkcja sterowania
uruchamianiem nagrzewnicy (AUTO)
29 Intensywność płomieni (
)
30 Moc grzewcza 900 W ( ) lub 1800 W ( )
Instrukcja montażu
Urządzenie jest przeznaczone do stałego mocowania do
ściany. Zalecamy je umieścić na wysokości co najmniej
30 cm ponad podłogą.
Patrz: rysunki na stronie 4.
Nie włączaj urządzenia, dopóki nie zostanie prawidłowo
zainstalowane!
OSTRZEŻENIE:
Przed przystąpieniem do montażu należy upewnić się, że
w danym miejscu w ścianie nie ma kabli, które mogłyby
zostać uszkodzone!
UWAGA:
• Ściana powinna być ścianą nośną i żaroodporną.
• Nie trzymaj urządzenia za szklany front.
• Czynności montażowe wymagają umiejętności
manualnych. W razie potrzeby skorzystaj z pomocy
specjalisty.
WSKAZÓWKA:
• W pobliżu musi znajdować się gniazdko elektryczne,
ale nie nad urządzeniem. Gorące powietrze jest
wywiewane nad urządzenie.
WSKAZÓWKA:
• Poprowadź przewód zasilający bezpośrednio za
urządzeniem.
• Aby uzyskać optymalny widok na wnętrze kominka,
zalecamy zainstalowanie go na wysokości 60cm
(patrz: rys. A).
• Do wiercenia otworów w ścianie użyj wiertła
o rozmiarze 8.
• Będziesz także potrzebować średniej wielkości
śrubokręta Phillipsa.
1. Delikatnie umieść urządzenie na podłodze i oprzyj go
o ścianę.
2. Obiema rękami wyciągnij szklany front równomiernie
w górę. Odłóż szklany front na bok.
3. Zmierz wysokość, na której chcesz zamontować urzą-
dzenie. Zalecane wymiary można znaleźć na rys. B.
4. Użyj 4 wkrętów i kołków rozporowych, aby przymoco-
wać listwę montażową poziomo do ściany.
5. Przymocuj wspornik montażowy za pomocą gwintowa-
nych śrub do urządzenia.
6. Zawieś urządzenie na listwie montażowej na ścianie.
7. Zaznacz położenie 2 otworów dla wspornika montażo-
wego.
8. Zdejmij urządzenie ze ściany jeszcze raz.
9. Wywierć 2 otwory na wspornik montażowy. Włóż kołki
rozporowe.
10. Zawieś urządzenie na listwie montażowej na ścianie.
11. Użyj 2 wkrętów i kołków rozporowych, aby przymoco-
wać wspornik montażowy do ściany.
12. Zawieś szklany front z powrotem na urządzeniu. Aby to
zrobić, patrz: rys. D.
Połączenie elektryczne
Wymagania dotyczące zasilania
Urządzenie może pobierać prąd o mocy 1800 W. W związku
z tym wskazane jest podłączenie osobnym przewodem
i zabezpieczenie obwodu bezpiecznikiem domowym 16 A.
UWAGA: Przeciążenie!
• Używane przedłużacze powinny mieć przewody
o przekroju nie mniejszym niż 1,5 mm².
• Nie używaj rozgałęziaczy ze względu na dużą moc
urządzenia.
• Nie podłączać żadnego innego dużej mocy urządzenia
do tego samego obwodu elektrycznego.
Podłączenie
• Proszę upewnić się, że napięcie urządzenia zgadza się
z napięciem w sieci. Tabliczka znamionowa znajduje się
na dole urządzenia.
• Wtyczkę sieciową podłączaj tylko do prawidłowo zain-
stalowanego gniazda z zestykiem ochronnym.

EK6021CB_IM 02.08.18
51
Pilot
Założenie baterii (Baterie poza kompletem)
1. Otworzyć pokrywkę przedziału baterii w tylnej części
pilota.
2. Włożyć 2 baterie typu „AAA“ • 1,5 V • MICRO,
z uwzględnieniem prawidłowego ułożenia biegunów
(patrz oznaczenia na dolnej części przedziału)!
3. Zamknąć pokrywkę przedziału baterii.
Zasięg pilota
• Pilot posiada zasięg ok. 10 metrów. Jeśli zasięg maleje,
należy zmienić baterie.
• Upewnij się, że pomiędzy pilotem i czujnikiem urządze-
nia nie ma żadnych przeszkód. Znajduje się on w górnej
lewej części szklanego frontu.
Obsługa
UWAGA:
Nie włączaj urządzenia, dopóki nie zostanie prawidłowo
zainstalowane!
WSKAZÓWKA:
• Czynność można częściowo wykonać za pomocą
panelu sterowania urządzenia.
• Aby ustawić programator czasowy, użyj pilota.
• Każda czynność zostanie potwierdzona sygnałem
dźwiękowym.
• Po naciśnięciu niewłaściwego przycisku usłyszysz dwa
krótkie sygnały dźwiękowe.
• Po włączeniu urządzenia, wyświetlacz za szklanym
frontem staje się widoczny. Aby uzyskać lepszą atmos-
ferę, wyświetlacz wyłączy się po ok. 20 sekundach
po każdej operacji. Naciśnij dowolny przycisk, aby
ponownie uaktywnić wyświetlacz.
Wyłączanie urządzenia
Ustaw przełącznik zasilania w pozycji I. Urządzenie znaj-
duje się w Standby (trybie gotowości). Symbol
zaświeci
się na wyświetlaczu.
Podstawowe ustawienia urządzenia
Po włączeniu urządzenia za pomocą wyłącznika zasilania,
będzie ono znajdować się w następującym ustawieniu
podstawowym:
- Dzień tygodnia = SUN (niedziela)
- Wyświetlanie aktualnej temperatury w pomieszczeniu
- Godzina =
- Intensywność płomieni = wysoki
- Podświetlenie BACKLIGHT = wyłączone
- Podstawowa temperatura ogrzewania =
- Ogrzewanie = wyłączone
- Programator czasowy = wyłączone
WSKAZÓWKA:
• Nawet w przypadku awarii zasilania, urządzenie zo-
staje zresetowane do tego podstawowego ustawienia.
• Ze względów bezpieczeństwa urządzenie zawsze
będzie uruchamiane bez ogrzewania.
Obsługa urządzenia z bliska
• Możesz włączyć urządzenie na panelu kontrolnym przez
krótkie naciśnięcie przycisku I / O. Podstawowe ustawie-
nie urządzenia pojawi się na wyświetlaczu.
• Jeśli chcesz zmienić intensywność płomienia, naciśnij
przycisk I / O przez ponad 3 sekundy.
• Możesz włączyć podświetlenie, naciskając przycisk
BACKLIGHT. Wielokrotne naciśnięcie tego przycisku
spowoduje zmianę kolorów. Istnieje 7 różnych wariantów
kolorów.
• Naciśnij raz przycisk POWER (zasilania), aby włączyć
moc grzewczą na 900 W. Naciśnij ponownie przycisk
POWER (zasilania), aby włączyć moc grzewczą na
1800 W. Naciśnięcie przycisku po raz trzeci wyłączy
ogrzewanie. Lampki kontrolne nad przycisku wyświetlają
odpowiedni status.
WSKAZÓWKA:
Grzałka i wentylator nie zostaną włączone przez
urządzenie, dopóki temperatura w pomieszczeniu
nie będzie niższa niż temperatura podstawowa
nagrzewnicy (patrz: ustawienie podstawowe). Możesz
podnieść temperaturę podstawową ogrzewania za
pomocą pilota.
Obsługa urządzenia na odległość
1. Włącz urządzenie, naciskając przycisk ON / OFF na
pilocie. Podstawowe ustawienie urządzenia pojawi się
na wyświetlaczu.
2. Naciśnij przycisk
lub , aby ustawić temperaturę
podstawową nagrzewnicy. Możliwy zakres temperatur:
Od 15 °C do 30 °C. Należy pamiętać, że temperatura
podstawowa musi być wyższa niż aktualna temperatura
pokojowa. Jeśli temperatura w pomieszczeniu spadnie
poniżej ustawionej temperatury podstawowej, ogrzewa-
nie włączy się automatycznie.
3. Użyj przycisku 900 W / 1800 W, aby wybrać moc
grzewczą:
Przycisk
Wygląd na
wyświetlaczu
Moc grzewcza
Naciśnij raz
900 W
Naciśnij dwa razy
1800 W
Naciśnij trzy razy Wył.
4. Jeśli chcesz użyć funkcji adaptacyjnego sterowania
włączania nagrzewnicy, naciśnij przycisk IC. Na wyświe-
tlaczu pojawi się „AUTO”. Na podstawie temperatury
pomieszczenia i ustawionej temperatury, urządzenie
automatycznie dostosuje moc grzewczą.

EK6021CB_IM 02.08.18
52
5. Naciśnij przycisk podświetlenia BACK-LIGHT, aby
wybrać jeden z 7 wariantów kolorów.
6. Naciśnij przycisk ściemniania DIMMER, jeśli chcesz
zmienić intensywność płomieni.
Ustawianie aktualnego dnia tygodnia i godziny
Skróty dni tygodnia mają następujące znaczenie:
SUN = niedziela, MON = poniedziałek, TUE = wtorek,
WED = środa, THU = czwartek, FRI = piątek, SAT = sobota
1. Naciśnij przycisk DATE / TIME. Strzałka
i dzień tygo-
dnia będą migać. Użyj przycisku lub , aby wybrać
dzień tygodnia. Naciśnij przycisk DATE / TIME, aby
potwierdzić dzień tygodnia.
2. Zacznie migać wskazanie godziny. Użyj przycisku
lub , aby ustawić aktualną godzinę. Naciśnij przycisk
DATE / TIME ponownie, aby potwierdzić godzinę.
3. Minuty zaczną migać. Użyj przycisku lub , aby
ustawić aktualną minutę.
4. Naciśnij przycisk OK, aby wyjść z menu.
Programator czasowy
Urządzenie, oraz ogrzewanie może być sterowane czasowo
za pomocą programatora. Warunkiem prawidłowego dzia-
łania programatora jest ustawienie bieżącej godziny i dnia
tygodnia.
• Możesz ustawić urządzenie z maksymalnym wyprze-
dzeniem 23 godzin i 50 minut.
• Ustawienie czasu odbywa się w krokach 10-minuto-
wych.
• Możesz wprowadzić do 10 różnych ustawień progra-
matora.
• Każde ustawienie programatora obejmuje własny czas
włączania, czas wyłączenia i ustawienie temperatury.
• Ustawienie można zaprogramować na dowolny dzień
tygodnia lub kilka dni.
• Jeśli chcesz, możesz zaprogramować tylko czas
wyłączenia podczas pracy urządzenia i zignorować czas
włączenia. Jeśli czas wyłączenia ma być następnego
dnia, pamiętaj o ustawieniu dnia tygodnia podczas
programowania.
• Nawet jeśli urządzenie zostanie odłączone od zasilania,
ustawienia programatora zostaną zachowane.
Wyświetl ustawienia programatora
1. Naciśnij przycisk TIMER SET. Numer pierwszego usta-
wienia miga na wyświetlaczu i świeci wskaźnik „ON”.
2. Naciśnij przycisk
lub , aby wyświetlić czasy włącze-
nia 10 ustawień programatora.
3. Naciśnij przycisk w celu przełączenia na czas wyłą-
czenia. Na wyświetlaczu pojawi się „OFF”.
4. Użyj przycisku lub , aby wyświetlić czasy wyłącze-
nia.
5. Aby wyczyścić wyświetlone ustawienie, naciśnij przy-
cisk C.
Ustawianie programatora
WSKAZÓWKA:
Jeśli przypadkowo dokonano błędnego wyboru podczas
programowania, wyjdź z menu, naciskając przycisk OK
i rozpocznij od nowa.
1. Wybierz numer ustawienia
1) Naciśnij przycisk TIMER SET. Wyświetlony numeru
ustawienia programatora zacznie migać.
2) Użyj przycisku
lub , aby wybrać inny numer
ustawienia.
3) Naciśnij przycisk TIMER SET ponownie, aby potwier-
dzić wybór.
2. Wybór dni(a) tygodnia
1) Strzałka
i dzień tygodnia zaczną migać. Użyj przy-
cisku lub , aby wybrać dzień tygodnia.
2) Naciśnij przycisk , aby ustawić dzień tygodnia.
Strzałka obok dnia tygodnia zacznie migać.
3) Naciśnij przycisk TIMER SET, aby potwierdzić wybór.
4) Jeśli chcesz anulować wybór dnia tygodnia, naciśnij
przycisk , gdy strzałka obok dnia tygodnia miga.
3. Ustawianie czasu włączenia
(Na wyświetlaczu pojawi się „ON”.)
1) Zaczną migać cyfry ustawienia godziny. Użyj przyci-
sku
lub , aby ustawić godzinę.
2) Naciśnij przycisk TIMER SET, aby potwierdzić wybór.
3) Zaczną migać cyfry ustawienia minut. Użyj przycisku
e lub , aby ustawić minuty.
4) Naciśnij przycisk TIMER SET, aby potwierdzić wybór.
4. Ustawianie czasu wyłączenia
(Na wyświetlaczu pojawi się „OFF”.)
1) Zaczną migać cyfry ustawienia godziny. Użyj przyci-
sku
lub , aby ustawić godzinę.
2) Naciśnij przycisk TIMER SET, aby potwierdzić wybór.
3) Zaczną migać cyfry ustawienia minut. Użyj przycisku
lub , aby ustawić minuty.
4) Naciśnij przycisk TIMER SET, aby potwierdzić wybór.
5. Ustawianie podstawowej temperatury ogrzewania
WSKAZÓWKA:
Z przyczyn technicznych aktualny dzień tygodnia
zostanie ponownie wyświetlony w tym punkcie menu.
1) Zaczną migać cyfry ustawienia temperatury. Naciśnij
przycisk
lub , aby ustawić temperaturę podsta-
wową nagrzewnicy.
2) Naciśnij przycisk TIMER SET, aby potwierdzić wybór.
Włączanie / wyłączanie programatora czasowego
WAŻNA INFORMACJA:
• W przypadku awarii zasilania wszystkie ustawienia
programatora zostaną zachowane. Niemniej jednak
urządzenie przywróci ustawienia podstawowe.

EK6021CB_IM 02.08.18
53
WAŻNA INFORMACJA:
• Ze względów bezpieczeństwa ogrzewanie zostanie
wyłączone.
OSTRZEŻENIE: Ryzyko pożaru!
• Przed włączeniem programatora sprawdź ustawienia
aktualnego dnia tygodnia, godziny i programatora.
• Zawsze ustaw czas rozpoczęcia w taki sposób, aby
urządzenie było pod właściwym nadzorem podczas
pracy.
1. Użyj przycisku 900 W / 1800 W, aby ustawić żądaną
moc grzewczą. Można również użyć przycisku IC, aby
wybrać funkcję sterowania adaptacyjnego włączenia
nagrzewnicy.
2. Użyj przycisku DIMMER, aby ustawić intensywność
płomieni w momencie włączenia.
3. Jeśli chcesz, aby podświetlenie włączało się dodatkowo
w momencie rozpoczęcia, wybierz je teraz za pomocą
przycisku BACK-LIGHT.
4. Za pomocą przycisku TIMER ON / OFF należy włączyć
lub wyłączyć programator.
WSKAZÓWKA:
• Jeśli programator jest włączony, symbol
pojawi się
na wyświetlaczu.
• Ponadto wyświetlacz pokaże symbole intensywności
płomienia i ogrzewania, o ile został włączony.
Wyłączanie
• Czy włączono programator, czy chcesz tylko tymcza-
sowo przełączyć urządzenie w tryb gotowości?
- W tym celu użyj przycisku ON / OFF na pilocie lub
przycisku I / O (3) na urządzeniu.
• Czy chcesz odłączyć urządzenie od zasilania?
- Ustaw przełącznik (5) zasilania do pozycji O. Odłącz
kabel zasilający od gniazda elektrycznego.
WSKAZÓWKA:
Urządzenie nie włącza się po odłączeniu go od
sieci, nawet jeśli włączono programator. Urządzenie
będzie zresetowane do ustawień podstawowych.
Ochrona przed przegrzaniem
Urządzenie to jest wyposażone w ochronę przed prze-
grzaniem, dzięki której w przypadku przegrzania zostanie
automatycznie wyłączone. Usłyszysz sygnał ostrzegawczy.
Wszystkie elementy na wyświetlaczu zaczną migać. Ze
względów bezpieczeństwa urządzenie nie włączy się
ponownie.
Aby ponownie uruchomić urządzenie, należy wykonać
następujące czynności:
• Ustaw przełącznik zasilania do pozycji O. Odłącz kabel
zasilający od gniazda elektrycznego. Odstaw urządzenie
do ostygnięcia na około 15 minut przed jego ponownym
użyciem.
• Sprawdź, czy wlot powietrza lub otwory wentylacyjne
grzejnika nie są zablokowane. W razie konieczności
usuń niedrożność.
Jeśli ochrona przed przegrzaniem wyłącza urządzenie po
krótkim czasie jego działania, może to oznaczać uszkodze-
nie urządzenia.
• Wyłącz ponownie urządzenie i odłącz je od źródła
zasilania.
• Oddaj urządzenie sprzedawcy lub do naszego serwisu
w celu sprawdzenia.
Czyszczenie
OSTRZEŻENIE:
• Przed każdym czyszczeniem wyciągnąć wtyczkę z sieci i odcze-
kać, aż urządzenie ostygnie.
• Sprawdzić, aby woda nie przedostała się do otworów urządze-
nia podczas czyszczenia. Może to doprowadzić do porażenia
elektrycznego lub pożaru.
UWAGA:
• Nie używaj szczotki drucianej ani innych podobnych
przedmiotów.
• Nie używaj ostrych lub ściernych środków czyszczą-
cych.
• Obudowę urządzenia czyść suchą, miękką szmatką.
• Szklany front można wytrzeć na mokro w razie potrzeby.
Następnie wytrzyj do sucha miękką ściereczką.

EK6021CB_IM 02.08.18
54
Instrukcje dotyczące konserwacji
• Urządzenie jest wyposażone w elektronicznie sterowany
system LED, który wyświetla efekt płomienia. Ten sys-
tem nie może być serwisowany przez użytkownika.
• Diody LED oświetlenia nie mogą być wymienione.
Usterki i sposoby ich usuwania
Problem Możliwa przyczyna Rozwiązanie
Urządzenie nie
działa.
Urządzenie nie zostało podłączone do
zasilania.
Sprawdź działanie gniazdka ściennego przy użyciu innego
urządzenia.
Włóż prawidłowo wtyczkę do gniazdka ściennego.
Sprawdź bezpieczniki.
Urządzenie jest wadliwe. Skontaktuj się z centrum serwisowym lub naprawczym.
Nagrzewnica
i wentylator nie
działają.
Temperatura w pomieszczeniu jest
wyższa niż temperatura podstawowa
ogrzewania.
Sprawdź ustawienie temperatury podstawowej.
Urządzenie nie
włącza się w za-
programowanym
czasie rozpoczę-
cia.
Urządzenie zostało odłączone od sieci
(prawdopodobnie z powodu awarii
zasilania).
Urządzenie zostało zresetowane do
ustawień podstawowych.
Sprawdź ustawienia aktualnego dnia tygodnia, godziny
i programatora.
Efekt płomienia nie
działa.
Element jest wadliwy. Skontaktuj się z centrum serwisowym lub naprawczym.
Usłyszysz sygnał
ostrzegawczy.
Wszystkie
elementy na wy-
świetlaczu zaczną
migać.
Uruchomiona została ochrona przed
przegrzaniem.
1. Wyłącz urządzenie za pomocą przełącznika zasilania.
2. Przed ponownym włączeniem odstaw urządzenie do
ostygnięcia na co najmniej 15 minut.
Dane techniczne
Model:..................................................................EK 6021 CB
Napięcie zasilające: ................................. 220 - 240 V~, 50 Hz
Pobór mocy: ........................................................900 / 1800 W
Stopień ochrony: ....................................................................
Masa netto: ............................................................ok. 12,8 kg
Zastrzegamy sobie prawo wprowadzania zmian technicz-
nych i projektowych w trakcie ciągłego rozwoju produktu.
Niniejsze urządzenie odpowiada wymaganiom normy
bezpieczeństwa użytkowania oraz spełnia wymagania
dyrektywy niskonapięciowej i kompatybilności elektroma-
gnetycznej.
Warunki gwarancji
Przyznajemy 24 miesiące gwarancji na produkt licząc od
daty zakupu.
W tym okresie będziemy bezpłatnie usuwać w terminie
14 dni od daty dostarczenia wadliwego sprzętu z kartą
gwarancyjną do miejsca zakupu wszystkie uszkodzenia
powstałe w tym urządzeniu na skutek wady materiałów
lub wadliwego wykonania, naprawiając oraz wymieniając
wadliwe części lub (jeśli uznamy za stosowne) wymieniając
całe urządzenie na nowe.
Sprzęt do naprawy powinien być dostarczony w komplecie
wraz z dowodem zakupu oraz z ważną kartą gwarancyjną
do sprzedawcy w miarę możliwości w oryginalnym opako-
waniu lub innym odpowiednim dla zabezpieczenia przed
uszkodzeniem. W razie braku kompletnego opakowania fa-
brycznego, ryzyko uszkodzenia sprzętu podczas transportu
do i z miejsca zakupu ponosi reklamujący.
Naprawa gwarancyjna nie dotyczy czynności przewidzia-
nych w instrukcji obsługi, do wykonania których zobowią-
zany jest użytkownik we własnym zakresie i na własny
koszt.

EK6021CB_IM 02.08.18
55
Gwarancja nie obejmuje:
• mechanicznych, termicznych, chemicznych uszkodzeń
sprzętu i wywołanych nimi wad,
• uszkodzeń powstałych w wyniku działania sił zewnętrz-
nych takich jak wyładowania atmosferyczne, zmiana
napięcia zasilania i innych zdarzeń losowych,
• nieprawidłowego ustawienia wartości napięcia elektrycz-
nego, zasilanie z nieodpowiedniego gniazda zasilania,
• sznurów połączeniowych, sieciowych, żarówek, baterii,
akumulatorów,
• uszkodzeń wyrobu powstałych w wyniku niewłaściwego
lub niezgodnego z instrukcją jego użytkowania, przecho-
wywania, konserwacji, samowolnego zrywania plomb
oraz wszelkich przeróbek i zmian konstrukcyjnych doko-
nanych przez użytkownika lub osoby niepowołane,
• roszczeń z tytułu parametrów technicznych wyrobu, o ile
są one zgodne z podanymi przez producenta,
• prawidłowego zużycia i uszkodzeń, które mają nieistotny
wpływ na wartość lub działanie tego urządzenia.
Karta gwarancyjna bez pieczątki sklepu, daty sprzedaży,
nie wypełniona, źle wypełniona, ze śladami poprawek,
nieczytelna wskutek zniszczenia, bez możliwości ustalenia
miejsca sprzedaży oraz dołączonego dowodu zakupu jest
nieważna.
Korzystanie z usług gwarancyjnych nie jest możliwe po
upływie daty ważności gwarancji. Gwarancja na części lub
całe urządzenie, które są wymieniane kończy się, wraz
z końcem gwarancji na to urządzenie.
Wszystkie inne roszczenia, wliczając w to odszkodowania
są wykluczone chyba, że prawo przewiduje inaczej. Rosz-
czenia wykraczające poza tą umowę nie są uwzględniane
przez tą gwarancję.
Gwarancja na sprzedany towar konsumpcyjny nie wyłącza,
nie ogranicza ani nie zawiesza uprawnień kupującego
wynikających z niezgodności towaru z umową.
Gwarancja oraz zawarte w niej warunki obowiązują na
terenie Rzeczpospolitej Polskiej.
Dystrybutor:
CTC Clatronic Sp. z o.o
Ul. Brzeska 1
45-960 Opole
Usuwanie
Znaczenie symbolu „Pojemnik na śmieci”
Proszę oszczędzać nasze środowisko, sprzęt
elektryczny nie należy do śmieci domowych.
Proszę korzystać z punktów zbiorczych,
przewidzianych do zdawania sprzętu elektrycz-
nego, i tam proszę oddawać sprzęt elektryczny,
którego już nie będą Państwo używać.
Tym sposobem pomagają Państwo unikać potencjalnych
następstw niewłaściwego usuwania odpadów, mających
wpływ na środowisko i zdrowie ludzi.
Tą drogą przyczyniają się Państwo do ponownego użycia,
do recyklingu i do innych form wykorzystania starego
sprzętu elektrycznego i elektronicznego.
Informacje, gdzie można zdać sprzęt, otrzymają Państwo
w swoich urzędach komunalnych lub w administracji gminy.

EK6021CB_IM 02.08.18
56
Karta produktu
Identykator(y) modelu: EK 6021 CB
Element Symbol
War-
tość
Jed-
nostka
Element
Jed-
nostka
Moc grzewcza Typ dostarczanego ciepła, tylko do elektrycznych
miejscowych ogrzewaczy pomieszczeń
Nominalna moc grzewcza P
nom
1,8 kW ręczna regulacja grzania, z wbudowanym termosta-
tem
Nie
dot.
Minimalna moc grzewcza
(wskazywana)
P
min
0,9 kW ręczna regulacja grzania z informacją zwrotną o tem-
peraturze w pomieszczeniu i / lub na zewnątrz
Nie
dot.
Maksymalna ciągła
moc grzewcza
P
max,c
1,8 kW elektroniczna regulacja grzania z informacją zwrotną
o temperaturze w pomieszczeniu i / lub na zewnątrz
Nie
dot.
Dodatkowe zużycie
energii elektrycznej
nagrzewanie wspomagane wentylatorem
Nie
dot.
Przy nominalnej mocy
grzewczej
(silnik wentylatora)
el
max
0,014 kW Rodzaj mocy grzewczej/kontrola temperatury
w pomieszczeniu
Przy minimalnej mocy
grzewczej
(silnik wentylatora)
el
min
0,014 kW
jednostopniowe wytwarzanie ciepła i brak kontroli
temperatury w pomieszczeniu
nie
W trybie gotowości el
SB
0,48 W dwa lub więcej stopni manualnych, brak kontroli
temperatury w pomieszczeniu
nie
z mechanicznym termostatem do regulacji tempera-
tury pomieszczenia
nie
z elektroniczną regulacją temperatury w pomiesz-
czeniu
nie
elektroniczna regulacja temperatury w pomieszczeniu
plus programator dzienny
nie
elektroniczna regulacja temperatury w pomieszczeniu
plus programator tygodniowy
tak
Inne opcje sterowania
kontrola temperatury w pomieszczeniu, z wykrywa-
niem obecności
nie
kontrola temperatury w pomieszczeniu, z wykrywa-
niem otwartego okna
nie
z opcją kontroli odległości nie
z adaptacyjną kontrolą startu tak
z ograniczeniem czasu pracy nie
z czujnikiem ultraoletowym nie
Dane kontaktowe C. Bomann GmbH, Heinrich-Horten-Str. 17, 47906 Kempen / Germany


EK6021CB_IM 02.08.18
Stand 07 / 2018
C. Bomann GmbH
Internet: www.bomann-germany.de
Made in P.R.C.
EK 6021 CB
-
 1
1
-
 2
2
-
 3
3
-
 4
4
-
 5
5
-
 6
6
-
 7
7
-
 8
8
-
 9
9
-
 10
10
-
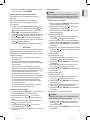 11
11
-
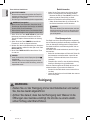 12
12
-
 13
13
-
 14
14
-
 15
15
-
 16
16
-
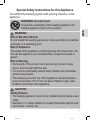 17
17
-
 18
18
-
 19
19
-
 20
20
-
 21
21
-
 22
22
-
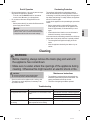 23
23
-
 24
24
-
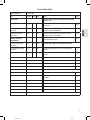 25
25
-
 26
26
-
 27
27
-
 28
28
-
 29
29
-
 30
30
-
 31
31
-
 32
32
-
 33
33
-
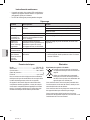 34
34
-
 35
35
-
 36
36
-
 37
37
-
 38
38
-
 39
39
-
 40
40
-
 41
41
-
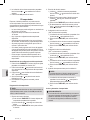 42
42
-
 43
43
-
 44
44
-
 45
45
-
 46
46
-
 47
47
-
 48
48
-
 49
49
-
 50
50
-
 51
51
-
 52
52
-
 53
53
-
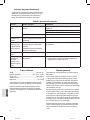 54
54
-
 55
55
-
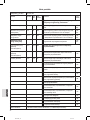 56
56
-
 57
57
-
 58
58


BOMANN EK 6021 El manual del propietario
- Categoría
- Chimeneas
- Tipo
- El manual del propietario
- Este manual también es adecuado para
en otros idiomas
- français: BOMANN EK 6021 Le manuel du propriétaire
- English: BOMANN EK 6021 Owner's manual
- Deutsch: BOMANN EK 6021 Bedienungsanleitung
- polski: BOMANN EK 6021 Instrukcja obsługi
Artículos relacionados
Otros documentos
-
Clatronic HL 3800 Instrucciones de operación
-
ProfiCare PC-GKH 3118 Manual de usuario
-
Klarstein 10032809 Wonderwall 72 Infrared Heater Manual de usuario
-
Klarstein 10032942 HOT SPOT CRYSTAL IR Infrared Heater Manual de usuario
-
Klarstein Hot Spot Crystal IR Infrared Heater Manual de usuario
-
Klarstein 10034234 El manual del propietario
-
ProfiCare PC-HL 3116 Instrucciones de operación
-
-
Stovax Radiance Inset Edge User Instructions
-