LG Gpad LGV500 blanco Manual de usuario
- Categoría
- Smartphones
- Tipo
- Manual de usuario


Manual de usuario
ESPAÑOL
• Laspantallasylasilustracionespuedenser
distintasalasqueveaenlatabletareal.
• Partedelcontenidodeestaguíapuede
noseraplicablealtableta,dependedel
softwareydelproveedordeservicios.Toda
lainformacióndeestedocumentopuede
cambiarsinprevioaviso.
• Estedispositivonoesadecuadopara
personasciegas,yaquecuentaconun
tecladodepantallatáctil.
• Copyright©2014LGElectronics,Inc.
Reservadostodoslosderechos.LGyel
logotipodeLGsonmarcascomerciales
registradasdeLGGroupylasentidades
relacionadas.Lasdemásmarcas
comercialessonpropiedaddesus
respectivospropietarios.
• Google™,GoogleMaps™,Gmail™,
YouTube™,Hangouts™yPlayStore™son
marcascomercialesdeGoogle,Inc.

2
Acerca de este manual de usuario .... 5
Acerca de este manual de usuario ...... 5
Marcas comerciales ............................... 6
DivX HD .................................................. 6
Dolby Digital Plus .................................. 7
Directrices para un uso seguro y
eficaz ....................................................8
Aviso importante ............................... 18
Familiarizarse con el dispositivo ......23
Descripción de la tableta ....................23
Cómo cargar su tableta ......................25
Optimización de la duración de la
batería ...................................................26
Para aumentar la duración de su
batería.................................................................27
Para ver el nivel de carga de la
batería.................................................................27
Para supervisar y controlar qué está
haciendo uso de la batería ........................27
Inserción de la tarjeta microSD .........28
Extracción de la tarjeta microSD .......29
Formateo de la tarjeta microSD .........29
Bloqueo y desbloqueo de la
pantalla .................................................30
Pantalla de inicio ............................... 31
Sugerencias sobre la pantalla táctil ...31
Pulsar o tocar ...................................................31
Mantener pulsado ..........................................31
Arrastrar ..............................................................31
Deslizamiento o desplazamiento ........... 32
Doble pulsación ............................................. 32
Juntar y separar los dedos para
ajustar el tamaño de la imagen .............. 32
Girar la pantalla .............................................. 32
KnockON .......................................................... 32
Pantalla de inicio .................................33
Personalización de la pantalla de
inicio ................................................................... 35
Cómo volver a aplicaciones
utilizadas recientemente ..................... 35
Notificaciones ......................................36
Deslice el dedo hacia abajo para
recibir notificaciones y modificar los
ajustes. .............................................................. 36
Ajustes rápidos en el panel de
notificaciones ....................................... 37
Para reorganizar los elementos de
Ajustes rápidos en el panel de
notificaciones ..................................................37
Aplicaciones QSlide en el panel de
notificaciones ................................................. 38
Uso de las aplicaciones QSlide .............. 38
Iconos indicadores de la barra de
estado ................................................................ 38
Varios usuarios .....................................40
Deslice hacia lateral .............................42
Plug & Pop ...........................................42
Cómo realizar una captura de
pantalla .................................................43
Utilización de QuickMemo para
realizar una captura de pantalla ............. 43
Utilización de Capture plus para
realizar una captura de pantalla ............. 43
Teclado en pantalla ..............................44
Contenido

3
Introducción de letras acentuadas ........ 44
Configuración de la cuenta de
Google ................................................45
Conexión a redes y dispositivos.......46
Wi-Fi .....................................................46
Conexión a redes Wi-Fi .............................. 46
Activación de la conexión Wi-Fi y
conexión a una red Wi-Fi .......................... 46
Bluetooth ..............................................47
Activación del Bluetooth y asociación
de la tableta con un dispositivo
Bluetooth ........................................................... 47
Envío de datos mediante la
funcionalidad inalámbrica Bluetooth .... 48
Recepción de datos mediante la
funcionalidad inalámbrica Bluetooth .... 49
SmartShare ..........................................49
Reproducir contenido a través de
varios dispositivos ......................................... 49
Reproducción/Envío .................................... 49
Reproducir contenido de
dispositivos cercanos ..........................50
Conexión de dispositivos ........................... 50
Búsqueda de otros dispositivos .............. 50
Uso del contenido de la nube ............50
Uso de la nube ................................................51
Conexión a un USB con un cable
para PC ..................................................51
Transferencia de música, fotos y
vídeos mediante el modo
Almacenamiento USB masivo ..................51
Sincronización con el Reproductor
de Windows Media....................................... 52
Contactos ...........................................53
Buscar un contacto .............................53
Agregar un contacto nuevo ................53
Contactos favoritos .............................53
Crear un grupo .....................................54
E-mail .................................................55
Administración de una cuenta
de E-mail ..............................................55
Trabajo con las carpetas de cuenta ... 56
Redacción y envío de correos
electrónicos ..........................................56
Recepción de correos electrónicos ...57
Cámara ...............................................58
Conocer el visor ...................................58
Utilizar la configuración avanzada ....59
Cómo tomar una foto rápida .............61
Después de realizar una fotografía ....61
Ver las fotos guardadas ......................62
Videocámara ......................................63
Conocer el visor ...................................63
Utilizar la configuración avanzada ....64
Cómo grabar un vídeo rápido ............65
Después de grabar un vídeo ..............65
Ver los vídeos guardados ....................65
Ajustar el volumen durante la
visualización de un vídeo ....................66
Multimedia .........................................67
Galería ................................................... 67
Visualización de imágenes ........................67
Acercar y alejar mediante el zoom .......68
Reproducción de vídeos ............................ 68
Eliminación de imágenes y vídeos ........ 68
Establecer como fondo de pantalla ...... 69

4
Modo presentación .............................. 69
Vídeos ...................................................69
Reproducción de un vídeo ....................... 69
Música .................................................... 71
Reproducir una canción ..............................71
Herramientas .....................................73
QPair .....................................................73
QSlide ................................................... 74
QuickMemo .......................................... 76
QuickRemote .......................................78
QuickTranslator ....................................80
Voice Mate ............................................. 81
Alarma ...................................................82
Calculadora ..........................................83
Calendario ............................................83
Tareas ....................................................84
Gestor archivos ....................................85
Grabadora .............................................85
Administrador de tareas .....................86
POLARIS Office 5 ..............................86
Google+.................................................87
Búsqueda por voz ................................88
Descargas .............................................88
Box.........................................................88
La web.................................................89
Internet..................................................89
Apertura de una página ............................90
Búsqueda por voz en la web....................90
Favoritos ............................................................ 90
Historial .............................................................90
Utilización de QSlide ...................................90
Chrome ..................................................91
Visualización de páginas web ....................91
Apertura de una página ..............................91
Búsqueda por voz en la web......................91
Sincronización con otros dispositivos .....91
Agregar marcadores y acceder
a ellos ................................................................. 92
Menú Opciones de Chrome ................... 92
Ajustes ................................................93
Acceso al menú Ajustes .....................93
REDES INALÁMBRICAS ...................93
DISPOSITIVO ......................................96
PERSONAL ........................................ 100
SISTEMA ............................................ 103
LG Backup ........................................ 107
Acerca de la copia de seguridad y
restauración de los datos del
dispositivo ........................................... 107
LG Copia de seguridad de los
datos de su tableta ............................ 108
Planificación de copias de
seguridad automáticas......................108
Restaurar los datos de la tableta ..... 109
Actualización de software de la
tableta ...............................................110
Actualización de software de la
tableta ..................................................110
Actualización inalámbrica del
software de dispositivos LG .............. 110
Accesorios ......................................... 112
Resolución de problemas ................113

5
Acerca de este manual de usuario
•Antesdeutilizarsudispositivo,leadetenidamenteestemanual.Deesta
forma,seasegurarádeutilizareldispositivocorrectamenteydeforma
segura.
•Algunasdelasimágenesycapturasdepantallaindicadasenestaguía
puedendiferirconrespectoasutableta.
•Sucontenidopuedediferirdelproductofinalodelsoftwareproporcionado
porsusoperadoresdetelefoníaoproveedoresdeservicios.Estecontenido
estásujetoacambiossinprevioaviso.Paraaccederalaúltimaversiónde
estemanual,visiteelsitiowebdeLGenwww.lg.com.
•Lasaplicacionesyfuncionesdesudispositivopuedenvariarenfunción
desupaís,suregiónosusespecificacionesdehardware.LGnosehace
responsabledeningúnproblemaderendimientoresultantedelusode
aplicacionesdesarrolladasporproveedoresdistintosdeLG.
•LGnosehaceresponsabledeningúnproblemaderendimientoo
incompatibilidadresultantedelaedicióndelosajustesdelregistroode
lamodificacióndelsoftwaredelsistemaoperativo.Cualquierintentode
modificacióndelsistemaoperativopuedeproducirunfuncionamiento
inesperadodeldispositivoodesusaplicaciones.
•Lalicenciadelsoftware,audio,fondodepantalla,imágenesydemás
mediossuministradosconsudispositivoesdeusolimitado.Siextrae
yutilizaestosmaterialesparausocomercialodecualquierotrotipo,
esposiblequeestéincurriendoenunainfraccióndelosderechosdel
copyright.Comousuario,eselúnicoresponsabledelusoilícitodelmaterial
multimedia.
Acerca de este manual de usuario

6
•Esposiblequeseapliquencargosadicionalesporlosserviciosdedatos,
comomensajería,cargaydescarga,sincronizaciónautomáticaolos
serviciosdeubicación.Paraevitarelcobrodedichoscargos,seleccioneun
plandedatosadecuadoasusnecesidades.Póngaseencontactoconsu
proveedordeserviciosparaobtenermásinformación.
Marcas comerciales
•LGyellogotipodeLGsonmarcascomercialesregistradasdeLG
Electronics.
•Lasdemásmarcascomercialesycopyrightsonpropiedaddesus
respectivospropietarios.
DivX HD
ACERCA DE DIVX VIDEO:DivX®esunformatodevídeodigitalcreadopor
DivX,LLC,unaempresasubsidiariadeRoviCorporation.Estedispositivo
cuentaconlacertificaciónoficialDivXCertified®,queobtienensoloaquellos
dispositivosquesuperanlasrigurosaspruebasdereproduccióndevídeo
DivX.Visitedivx.comparaobtenermásinformaciónyherramientasde
softwareparaconvertirsusarchivosavídeoDivX.
ACERCA DE DIVX VIDEO-ON-DEMAND:estedispositivoDivXCertified®
deberáregistrarseparapoderreproducirpelículasDivXVideo-on-Demand
(VOD)quehayacomprado.Paraobtenerelcódigoderegistro,localicela
secciónDivXVODenelmenúdeconfiguracióndeldispositivo.Visitevod.
divx.comparaobtenermásinformaciónsobrecómocompletarelregistro.

7
Con DivX Certified® puede reproducir vídeo DivX® hasta HD 720p, incluido
el contenido premium.
DivX®, DivX Certified® y los logotipos asociados son marcas comerciales de
Rovi Corporation o sus empresas subsidiarias y se utilizan con licencia.
Aviso: software de código fuente abierto
ParaobtenerelcódigofuentecorrespondienteaGPL,LGPL,MPLyotras
licenciasdecódigofuenteabierto,visitehttp://opensource.lge.com/
Todoslostérminosdelicencia,avisosyavisosdeexenciónde
responsabilidadestándisponiblesparasudescargaconelcódigofuente.
Dolby Digital Plus
FabricadobajolicenciadeDolbyLaboratories.Dolby,DolbyDigitalPlusyel
símbolodeladobleDsonmarcascomercialesdeDolbyLaboratories.

8
Leaestassencillasinstrucciones.Sudesconocimientopuedeserpeligroso
oilegal.
Enelcasodequeseprodujeraalgúnfallo,sudispositivointegrauna
herramientadesoftwarequerecopilaelregistrodefallos.Estaherramienta
recopilaúnicamentedatosespecíficosdelfallo,comosonlaintensidaddela
señalylasaplicacionescargadas.Elregistrosoloseutilizaparadeterminar
lacausadelfallo.Estosregistrosestánencriptadosysolouncentrode
reparacionesdeLGautorizadopuedeaccederaellos.Deberáenviarsu
dispositivoareparar.
Exposición a energía de radiofrecuencia
InformaciónsobreexposiciónaondasderadioySAR(SpecificAbsorption
Rate,Tasaespecíficadeabsorción).
EldiseñodelatabletaLG-V500cumplelanormativadeseguridadvigente
enmateriadeexposiciónalasondasderadio.Estanormativasebasaen
directricescientíficasqueincluyenmárgenesdeseguridaddiseñadospara
garantizarlaseguridaddetodotipodepersonas,independientementedesu
edadyestadodesalud.
•Lasdirectricesdeexposiciónaondasderadioutilizanunaunidadde
mediciónconocidacomoTasaespecíficadeabsorción(SAR).Laspruebas
deSARsellevanacaboutilizandométodosestandarizadosconlatableta
mediantelatransmisiónalnivelmásaltodepotenciacertificadoentodas
lasbandasdefrecuenciautilizadas.
Directrices para un uso seguro y eficaz

9
•AunquepuedehaberdiferenciasentrelosnivelesdeSARdelosdiferentes
modelosdedispositivosLG,todoshansidodiseñadosparaajustarsealas
directricesrelevantesdeexposiciónaondasderadio.
•EllímitedeSARrecomendadoporlaICNIRP(InternationalCommission
onNon-IonizingRadiationProtection,Comisióninternacionaldeprotección
contraradiacionesnoionizantes)esde2W/kgmedidosobrediez(10)
gramosdetejido.
•ElvalordeSARmásaltodeestedispositivocuandosetransportajuntoal
cuerpo,talycomosedescribeenestaguíadeusuario,esde0,720W/kg.
•Estedispositivocumplelasdirectricesdeexposiciónaradiofrecuencia
cuandoseutilizaenposiciónnormaljuntoaloídoocuandosesitúaauna
distanciadealmenos0,00cmdelcuerpo.Cuandoseutilizaunafunda
detransporte,unclipdecinturónounsoporteparaelcuerpo,estosno
puedencontenerpartesmetálicasydebencolocarseaunadistanciadeal
menos0,00cmdelcuerpo.
Parapodertransmitirarchivosdedatosomensajes,estedispositivo
requiereunaconexiónadecuadaalared.Enalgunoscasos,puedeque
latransmisióndearchivosdedatosomensajessufraretrasoshastaque
dichaconexiónestédisponible.Compruebequesiguelasinstrucciones
dedistanciadeseparaciónmencionadasanteriormentehastaquesehaya
completadolatransmisión.

10
Cuidado y mantenimiento del producto
ADVERTENCIA
Aviso de sustitución de la batería
• Porsuseguridad,noextraigalabateríaincorporadaenelproducto.
Sinecesitasustituirlabatería,lleveeldispositivoalproveedoropuntode
servicioautorizadomáscercanodeLGElectronicsparaobtenerasistencia.
• Labateríadeionesdelitioesuncomponentepeligrosoquepodría
provocardaños.
• Sipersonalnocualificadosustituyelabatería,eldispositivopodríaresultar
dañado.
ADVERTENCIA
Utilicesolobaterías,cargadoresyaccesoriosaprobadosparasuutilización
conestemodelodetabletaconcreto.Delocontrario,puedequedar
anuladacualquieraprobaciónogarantíaparalatableta,ypuederesultar
peligroso.
•Nodesmonteestaunidad.Siesnecesariorepararla,llévelaauntécnicode
serviciocualificado.
•Lasreparacionesqueserealicenbajogarantía,alaenteradiscreción
deLG,puedenincluirpiezasoplacasderepuestonuevasoreparadas,
siemprequemantenganlafuncionalidaddelaspiezassustituidas.
•Manténgalaalejadadeaparatoseléctricoscomotelevisores,radiosy
ordenadorespersonales.
•Launidaddebealejarsedefuentesdecalorcomoradiadoresuhornos.
•Noladejecaer.
•Noexpongaestaunidadavibracionesmecánicasogolpes.

11
•Apagueeldispositivoencualquierzonaenlaqueasíloexijannormativas
especiales.Porejemplo,noloutiliceenhospitales,yaquepodríanverse
afectadosequiposmédicosdelicados.
•Nomanipuleeldispositivoconlasmanosmojadasmientrasseestá
cargando.Podríasufrirunadescargaeléctricaydañargravementeel
dispositivo.
•Nocarguelatabletacercadematerialinflamable,yaquepodríacalentarse
yprovocarunincendio.
•Utiliceunpañosecoparalimpiarelexteriordelaunidad(noutilice
disolventescomobenceno,diluyentesoalcohol).
•Nocarguelatabletasobresuperficiesacolchadas.
•Latabletasedebecargarenunazonaconlaventilaciónadecuada.
•Noexpongaestaunidadahumoopolvoexcesivo.
•Nocoloqueeldispositivocercadetarjetasdecréditoobilletesde
transporte,podríaafectaralainformacióndelasbandasmagnéticas.
•Nogolpeelapantallaconunobjetopunzante,yaquepuedeestropearla
tableta.
•Noexpongaeldispositivoalíquidosnihumedad.
•Utiliceconcuidadolosaccesorios(porejemplo,losauriculares).Notoque
laantenasinoesnecesario.
•Noutilice,toqueniintenteretirarnirepararelcristalagrietadosiestá
astilladoopresentaesquirlas.Lagarantíanocubrelosdañosenlapantalla
causadosporelusoincorrectodeldispositivo.
•Latabletaesundispositivoelectrónicoquegeneracalorenmodonormal
defuncionamiento.Sisehautilizadodeformaprolongada,elcontacto
directoconlapielsinlaventilaciónadecuadapuedesermolestoo
provocarquemaduras.Tengacuidadocuandomanipulelatabletadurante
sufuncionamientoodespuésdeeste.

12
•Silatabletasemoja,desenchúfeloinmediatamenteydéjelosecarpor
completo.Nointenteacelerarelprocesodesecadoconunafuentede
calorexterna,comounhorno,unmicroondasounsecadordepelo.
•Almojarseeldispositivo,ellíquidoprovocaráquecambieelcolordela
etiquetadelproductodelinteriordeldispositivo.Lagarantíanocubrelos
dañosproducidosensudispositivocomoconsecuenciadelaexposición
alíquidos.
•Utilicelatabletaatemperaturasentre0ºCy40ºC,siesposible.Exponer
latabletaatemperaturasextremadamentebajasoaltaspodríaproducir
daños,unfuncionamientoincorrectooinclusounaexplosión.
Funcionamiento eficaz del dispositivo
Dispositivos electrónicos
Todoslostabletaspuedenrecibirinterferenciasquepuedenafectaral
rendimiento.
•Noutilicesutabletascercadeaparatosmédicossinsolicitarpermiso.
Evitecolocarlatabletasobremarcapasos(esdecir,noselocoloqueenel
bolsillodelacamisa).
•Algunosaudífonospuedenverseafectadosporlostabletas.
•Tambiénpuedengenerarpequeñasinterferenciasentelevisores,radios,
ordenadores,etc.
Seguridad vial
Compruebelasleyesynormativaslocalessobreelusodetabletasdurante
laconducción.
•Noutilicedispositivosportátilesmientrasconduzca.
•Dediquetodasuatenciónalaconducción.

13
•Laenergíaderadiofrecuenciapuedeafectaraalgunossistemas
electrónicosdesuvehículo,comolaradiodelcocheoelequipode
seguridad.
•Sisuvehículodisponedeunairbag,noloobstruyaconequipos
inalámbricosportátilesofijos.Podríanprovocarunfallodelairbagy
ocasionarlegravesheridasdebidoaunfuncionamientoindebido.
•Siescuchamúsicamientrasestáenlacalle,asegúresedequeelvolumen
tengaunaintensidadrazonabledeformaquepuedaserconscientedelo
quesucedeensuentorno.Estoesimportantesobretodocercadelasvías
detráfico.
Lesiones auditivas
NOTA:Unnivelexcesivodesonidoenlosauricularespuedeprovocar
pérdidadeaudición.
Paraevitarlasposibleslesionesauditivas,noseexpongaaaltos
nivelesdevolumendurantelargosperíodosdetiempo.
•Esposiblequeeloídosufradañoscuandoseveexpuestoasonidosde
altovolumendurantelargosperíodos.Porlotanto,lerecomendamosque
noenciendaniapaguelatabletacercadelosoídos.Lerecomendamos
igualmentequeelvolumendelamúsicaseestablezcaenunnivel
razonable.
•Siutilizaauriculares,bajeelvolumensinopuedeescucharalaspersonas
quelehablandecercaosilapersonasentadaasuladopuedeescuchar
loqueustedestáescuchando.

14
Piezas de cristal
Algunaspiezasdesutabletaestánfabricadasconcristal.Estecristalpuede
rompersesieldispositivocaesobreunasuperficieduraorecibeunimpacto
fuerte.Sielcristalserompe,nolotoqueniintenteretirarlo.Noutilicesu
dispositivohastaqueunproveedordeservicioautorizadosustituyaelcristal.
Derribos
Noutilicelatabletamientrasserealizanderribos.Respetelasrestriccionesy
sigalasnormativas.
Entornos potencialmente explosivos
•Noutilicesutabletaengasolineras.
•Noloutilicecercadeproductosquímicosocombustibles.
•Notransporteoalmaceneexplosivos,líquidosogasesinflamablesenel
compartimentodesuvehículodondetengalatabletaolosaccesorios.
En aviones
Losdispositivosinalámbricospuedenprovocarinterferenciasenlosaviones.
•Apaguelatabletaantesdeembarcar.
•Noloutiliceentierrasinelpermisodelatripulación.
Niños
Dejeeldispositivoenunlugarsegurofueradelalcancedeniñospequeños.
Incluyepiezaspequeñasque,sisetragan,puedencausarasfixia.Este
dispositivotambiéncontieneunabateríainternaquepuedeserpeligrosasi
eldispositivonoseutilizaomantienecorrectamente.

15
Información y mantenimiento de la batería
•Noesnecesariodescargarporcompletolabateríaantesdevolvera
cargarla.Adiferenciadeotrossistemasdebaterías,noexisteningún
efectodememoriaquepuedaafectaralrendimientodelabatería.
•UtilicesololasbateríasycargadoresdeLG.LoscargadoresdeLGhan
sidodiseñadosparamaximizarlavidadelabatería.
•Nodesmonteniprovoquecortocircuitosenlabatería.
•Recarguelabateríasinosehautilizadodurantemuchotiempopara
maximizarsufuncionalidad.
•Noexpongaelcargadordelabateríaalaluzdirectadelsolynoloutilice
enentornosmuyhúmedos,comoenelcuartodebaño.
Nodejelabateríaenlugaresfríosocalientes,yaquesepodríadeteriorar
surendimiento.
•Existeriesgodeexplosiónsilabateríasesustituyeporotradeuntipo
incorrecto.
•Deshágasedelasbateríassegúnlasinstruccionesdelfabricante.Porfavor,
recíclelassiemprequeseaposible.Nolastirealabasuradoméstica.
•Sinecesitasustituirlabatería,llévelaalproveedoropuntodeservicio
autorizadomáscercanodeLGElectronicsparaobtenerasistencia.
•Desenchufesiempreelcargadordelatomadecorrienteunavezquela
tabletahayaterminadodecargarse,paraevitarasíunconsumodeenergía
innecesariodelcargador.
•Laduraciónrealdelabateríadependerádelaconfiguracióndered,
losajustesdelproducto,lospatronesdeuso,eltipodebateríaylas
condicionesambientales.
•Asegúresedequeningúnelementoconbordesafilados,comodienteso
uñasdeanimales,tocalabatería.Podríaprovocarunincendio.

16
Cómo actualizar su tableta
Accedaaloslanzamientosdefirmwaremásrecientes,anuevasfunciones
desoftware,asícomoamejoras.
•Actualice su tableta sin un PC. Seleccione Actualizar SW
>
Actualización de SW.
•Actualice su tableta conectándolo a un PC.
Paraobtenermásinformaciónsobreelusodeestafunción,visite
http://www.lg.com/common/index.jspyseleccioneelpaísyelidioma.
DECLARACIÓN DE CONFORMIDAD
Porlapresente,LG ElectronicsdeclaraqueelproductoLG-V500cumple
losrequisitosimprescindiblesycualquierotradisposiciónrelevantede
ladirectiva1999/5/EC.PuedeconsultarunacopiadelaDeclaraciónde
conformidadenhttp://www.lg.com/global/declaration
Información de contacto de la oficina para el cumplimiento de este
producto
LGElectronicsInc.
EURepresentative,Krijgsman1,
1186DMAmstelveen,TheNetherlands
NOTA: De acuerdo con la EN 60950-1 (§ 1.7.2)
Paraprevenirunconsumoinnecesariodeenergia,desconecteel
dispositivounavezestétotalmentecargado.Utilizesiempreunabasede
tomadecorrientecercadelequipoyfácilmenteaccesible.

17
Cómo desechar aparatos eléctricos y electrónicos obsoletos
1 Todoslosaparatoseléctricosoelectrónicossedebendesechar
apartedelserviciomunicipalderecogidadebasuras,através
delospuntosderecogidadesignadosporelgobiernoolas
autoridadeslocales.
2 Lacorrectarecogidaytratamientodelosdispositivosinservibles
contribuyeaevitarriesgospotencialesparaelmedioambienteyla
saludpública.
3 Paraobtenermásinformaciónsobrecómodesecharlosaparatos
obsoletos,póngaseencontactoconsuayuntamiento,elservicio
derecogidadebasuraoelestablecimientodondeadquirióel
producto.
Cómo desechar las baterías y los acumuladores gastados
1 Silabateríacontienemásdel0,0005%demercurio(Hg);
0,002%decadmio(Cd)o0,004%deplomo(Pb),estesímbolo
puedeaparecerjuntoalossímbolosquímicosdelmercurio,
cadmiooplomo.
2 Todaslasbaterías/acumuladoressedebendesecharapartedel
serviciomunicipalderecogidadebasuras,atravésdelospuntos
derecogidadesignadosporelgobiernoolasautoridadeslocales.
3 Laeliminacióncorrectadebateríasyacumuladorescontribuyea
evitarposiblesriesgosparaelmedioambiente,losanimalesyla
saludpública.
4 Paraobtenermásinformaciónsobrecómodesecharlas
bateríasyacumuladoresinservibles,póngaseencontacto
conelayuntamiento,elservicioderecogidadebasuraoel
establecimientodondehayaadquiridoelproducto.

18
Lea esta información antes de comenzar a usar su
tableta.
Antesdellamaralserviciodeatenciónalclienteollevarlatabletaalservicio
técnico,compruebesilosproblemasdesudispositivosedescribenenesta
sección.
1. Memoria de la tableta
Esnecesariocomprobarlamemoriadelatabletayeliminaralgunosdatos,
comoaplicaciones,paradisponerdemásespacioenlamemoria.
Para desinstalar aplicaciones:
1 Pulselaficha > >Aplicaciones>Ajustes >Aplicaciones.
2 Cuandosemuestrentodaslasaplicaciones,despláceseyseleccionela
aplicaciónquedeseadesinstalar.
3 PulseDesinstalar.
2. Antes de instalar una aplicación o un sistema
operativo de código abierto
ADVERTENCIA
Siinstalayutilizaunsistemaoperativodiferentealproporcionadopor
elfabricante,latabletapodríanofuncionarcorrectamente.Además,la
garantíadesutabletaseanulará.
Aviso importante

19
ADVERTENCIA
Paraprotegerlatabletaysusdatospersonales,descargueúnicamente
aplicacionesqueprocedandefuentesseguras,comoPlayStore™.Sise
haninstaladoaplicacionesdeformaincorrectaensutableta,esposible
queestenofuncionenormalmenteoqueseproduzcaunerrorgrave.
Debedesinstalardelatabletadichasaplicacionesytodossusdatosy
ajustes.
3. Uso de un patrón de desbloqueo
Permiteestablecerunpatróndedesbloqueoparaprotegerlatableta.Pulse
laficha > >Aplicaciones>Ajustes >Pantalla>Bloqueo de
pantalla>Tipo de bloqueo>Patrón.Abreunapantallaqueleguiaráen
lacreacióndeunpatróndedesbloqueodepantalla.Comomedidade
seguridadporsiolvidasupatróndedesbloqueo,creeunPINdeseguridad.
Precaución:antesdeestablecerunpatróndedesbloqueo,debecrearuna
cuentadeGoogle.NoolvideelPINdeseguridadqueestablecióalcrearel
patróndebloqueo.
ADVERTENCIA
Precauciones al utilizar el patrón de bloqueo.
Esmuyimportantequerecuerdeelpatróndedesbloqueoqueha
establecido.Nopodráaccederaltabletasiutilizaunpatrónincorrecto5
veces.Tiene5oportunidadesparaintroducirelpatróndedesbloqueo,el
PINolacontraseña.Sihaagotadolascincooportunidades,puedevolver
aintentarlotras30segundos.

20
Si no puede recordar el patrón de desbloqueo, el PIN o la contraseña:
< Si ha olvidado el patrón >
SihainiciadosesiónensucuentadeGoogledesdelatabletaperoha
cometidocincoerroresalintroducirelpatrón,pulseelbotón¿Has olvidado
el patrón?delaparteinferiordelapantalla.Acontinuación,selesolicitará
queiniciesesiónensucuentadeGoogleoqueescribaelPINdeseguridad
queintrodujoalcrearelpatróndebloqueo.
SinohacreadounacuentadeGoogleenlatabletaohaolvidadoelPINde
seguridad,necesitarárealizarunrestablecimientocompleto.
< Si ha olvidado el PIN o la contraseña >
SiolvidasuPINocontraseña,deberáhacerunrestablecimientocompleto.
Precaución: sihaceunrestablecimientocompleto,seeliminarántodaslas
aplicacionesylosdatosdeusuario.
NOTA:sinohainiciadosesiónensucuentadeGoogleyhaolvidadoel
patróndedesbloqueo,deberáintroducirsuPINdeseguridad.
4. Uso del restablecimiento completo
(restablecimiento a los ajustes de fábrica)
Silatabletanovuelveasusajustesoriginales,realiceunrestablecimiento
completo(restablecimientoalosajustesdefábrica)parainicializarlo.
1 Apagueeltablet.
2 Mantengapulsadalatecla de encendido/bloqueo+latecla para bajar el
volumendellateralderechodeltablet.

21
3 Sueltelatecla de encendido/bloqueoúnicamentecuandosemuestreel
logotipodeLGymantengapulsadalatecla para bajar el volumen.
4 Acontinuación,mantengapulsadainmediatamentelatecla de
encendido/bloqueo + la tecla para subir el volumenalmismotiempo
mientrasmantienepulsadalatecla para bajar el volumen.
5 SueltetodaslasteclascuandosemuestrelapantallaRestablecimiento
completoalosajustesdefábrica.
6 Pulselatecla de encendido/bloqueoparacontinuarobienpulselasteclas
de volumenparacancelar.
7 Pulselatecla de encendido/bloqueounavezmásparaconfirmarobien
lasteclas de volumenparacancelar.
8 Eldispositivorealizaráunrestablecimientocompleto.
ADVERTENCIA
Sirealizaunrestablecimientocompleto,seeliminarántodaslas
aplicacionesylosdatosdelusuario,asícomolalicenciaDRM.Recuerde
realizarunacopiadeseguridaddetodoslosdatosimportantesantesde
realizarunrestablecimientocompleto.
5. Apertura y cambio de aplicaciones
RealizarvariastareasresultasencilloconAndroidporqueesposibleejecutar
másdeunaaplicaciónalavez.Nohaynecesidaddesalirdeunaaplicación
paraabrirotra.
Puedeutilizarvariasaplicacionesabiertasycambiardeunaaotra.Android
gestionacadaaplicación,deteniéndolaeiniciándolasegúnseanecesario,
paragarantizarquelasaplicacionesinactivasnoconsumenrecursos
innecesariamente.

22
1 Mantengapulsadalatecla de inicio .Apareceráunalistadelas
aplicacionesutilizadasrecientemente.
2 Pulselaaplicaciónalaquedeseeacceder.Estonodetienelaejecución
ensegundoplanodelaaplicaciónanteriorenlatableta.Asegúrese
depulsarlatecla Atrás parasalirdeunaaplicacióndespuésde
utilizarla.
•Paradetenerlasaplicaciones,pulseAdministrador de tareasenlalistade
aplicacionesrecientesy,acontinuación,pulsePararoDetener todo.
•Paraeliminarunaaplicacióndelalistadeaplicacionesrecientes,deslice
lavistapreviadelaaplicaciónhacialaizquierdaohacialaderecha.Para
borrartodaslasaplicaciones,pulseLimpiar todo.
6. Cuando la pantalla se bloquea
Si la pantalla se bloquea o la tableta no responde al intentar utilizarlo:
Mantengapulsadalatecla de encendido/bloqueodurante8segundospara
reiniciarlatableta.Sisiguesinfuncionar,póngaseencontactoconelcentro
deservicio.

23
Familiarizarse con el dispositivo
Descripción de la tableta
Pantalla táctil
Sensor de luz ambiental
Teclas de volumen
Lente de la cámara
Altavoz
Lente de la cámara delantera
Tecla de encendido/bloqueo
Conector de auriculares
Ranura para tarjeta microSD
Puerto de carga/USB
Micrófono
LED de infrarrojos
NOTA:durantelagrabacióndeunvídeoodeunclipdeaudio,asegúrese
dequeelmicrófononoseencuentrebloqueado.

24
Lente de
la cámara
delantera
Utilícelaparatomarimágenesygrabarvídeosde
ustedmismo.Tambiénpuedeutilizarlaparamantener
chatsdevídeo.Manténgalalimpiaparaconseguirun
rendimientoóptimo.
Ranura para
tarjeta microSD
InserteunatarjetamicroSDparaalmacenararchivos
como,porejemplo,demúsica,vídeosyfotografías.
Conector de
auriculares
Lepermiteconectarunkitmanoslibresopcionalpara
mantenerconversacionesenelprácticomodode
manoslibres.Tambiénpuedeconectarunosauriculares
paraescucharmúsica.
Sensor de luz
ambiental
Elsensordeluzambientalempleaunsensorambiental
quemidelaluzdelentornoyajustaelbrillodelLCD
paraquelapantallapresenteunbrillovivo.
Tecla de
encendido/
bloqueo
Púlselaparabloquear/desbloquearlapantalla.
Manténgalapulsadaparaencenderyapagarlatableta,
reiniciarlo,activarydesactivarelmodoaviónycambiar
laconfiguracióndesonido.
Teclas de
volumen
Lepermitenajustarelvolumendelcontenido
multimedia.
Puerto de
carga/USB
LepermiteconectarlatabletayelcableUSBpara
utilizarloconeladaptadordelcargadoroconotros
accesorioscompatibles.
Lente de la
cámara
Utilícelaparatomarfotografíasygrabarvídeos.
Manténgalalimpiaparaconseguirunrendimiento
óptimo.

25
Altavoz
Seusaparaescucharelaudiodelafunción
seleccionada(p.ej.,música,vídeos,clipsdesonido,
etc.).
Micrófono
Grabasuvozyseutilizaparafuncionesconactivación
porvoz.
LED de
infrarrojos
FuncionacomosensordeQuickRemote.
ADVERTENCIA
Sicolocaunobjetopesadosobrelatabletaosesientasobreél,puede
dañarlapantallaLCDylasfuncionesdelapantallatáctil.Nocubrael
sensordeproximidaddelapantallaLCDconpelículadeprotección.Esto
podríahacerqueelsensornofuncionaracorrectamente.
SUGERENCIA:
•Pulselatecla Menú
siemprequeabraunaaplicaciónpara
comprobarlasopcionesdisponibles.
•Sieldispositivoestábloqueadoynoresponde,mantengapulsadala
tecla de encendido/bloqueo
durante8segundosparaapagarlo.
Cómo cargar su tableta
Latabletautilizaunabateríarecargabledeionesdelitio.Paracargarla,se
usaunadaptadorUSBincluidoconlatableta.Antesdeusarlatabletapor
primeravez,asegúresedequelabateríaestácompletamentecargada.
NOTA:eldispositivotieneunabateríainternarecargable.Porsu
seguridad,noextraigalabateríaincorporadaenelproducto.

26
Aviso:Silapantallatáctilnofuncionamientraslatabletaestáenproceso
decarga,puededeberseaunsuministroeléctricoinestable.Porlotanto,
desconecteelcableUSBdeldispositivoodesconecteeladaptadorUSB
delatomadecorriente.
1 ConecteeladaptadorUSByelcableUSB.
2 ConecteelcableUSB(talycomosemuestraacontinuación)enelPuerto
decarga/USBdelatableta.
NOTA:deberealizarseunaprimeracargacompletaparamejorarlavida
útildelabatería.
Optimización de la duración de la batería
Puedeaumentarladuracióndelabateríaentrecargasmediantela
desactivacióndeaquellasfuncionesquenonecesitaejecutardeforma
constanteensegundoplano.Tambiénpuedesupervisarcómolas
aplicacionesyrecursosdelsistemaconsumenlaenergíadelabatería.

27
Para aumentar la duración de su batería
•Desactivelascomunicacionesporradioquenoestéutilizando,como
Wi-Fi,BluetoothoGPS.
•Reduzcaelbrillodelapantallayestablezcauntiempodeesperade
pantallamásbreve.
•DesactivelasincronizaciónautomáticadeGmail™,Calendario,Contactosy
otrasaplicaciones.
•Algunasaplicacionesdescargadaspuedenprovocarlareduccióndela
cargadelabatería.
•Compruebeelniveldecargadelabateríamientrasutilizaaplicaciones
descargadas.
Para ver el nivel de carga de la batería
1 Desdelapantalladeinicio,pulseAplicaciones >Ajustes >Acerca
de la tableta>Batería.
2 Elestado(encargaoendescarga)yelniveldelabateríasemuestranen
elmenúsuperiordelapantalla.
Para supervisar y controlar qué está haciendo uso de la batería
1 Desdelapantalladeinicio,pulseAplicaciones >Ajustes >Acerca
de la tableta>Batería>Uso de batería.
2 Laparteinferiordelapantallamuestraeltiempodeusodelabateríay
tambiénindicalasaplicacionesoserviciosqueusanenergíadelabatería
demayoramenorconsumo.

28
Inserción de la tarjeta microSD
EldispositivoescompatibleconelusodelastarjetasdememoriamicroSD
concapacidaddehasta64GB.Elcontenidomultimediasepuedeguardar
enlatarjetamicroSD.
1 ApaguelatabletaantesdeinsertaroquitarlatarjetamicroSD.
2 ColoquelauñaenlamuescaytiredelabandejadelatarjetamicroSD
paraextraerla.InsertelatarjetamicroSDenlaranuraconloscontactos
orientadoshaciaabajo.Empujesuavementelabandejaendirecciónhacia
eldispositivo.

29
Extracción de la tarjeta microSD
ParaquitarconseguridadlatarjetamicroSDdelatableta,primerodebe
desactivarla.
1 Desdelapantalladeinicio,pulseAplicaciones >Ajustes >
Almacenamiento>Desactivar tarjeta SD.
2 TiresuavementedelatarjetamicroSDparaextraerladelaranura.
Aviso:NoquitelatarjetamicroSDsinantesdesactivarla.Delocontrario,
podríadañarselatarjetamicroSDasícomolatableta,ademásdedañarse
losdatosalmacenadosenlatarjetamicroSD.
Formateo de la tarjeta microSD
Aviso:AlformatearlatarjetamicroSD,seborrantodoslosarchivosque
estacontenga.
1 Desdelapantalladeinicio,pulseAplicaciones >Ajustes >
Almacenamiento.
2 PulseBorrar tarjeta SD(dosveces).
3 Sihaestablecidounpatróndedesbloqueo,introdúzcaloypulseBorrar
todo.Latarjetaseformatearáyestarálistaparasuuso.
NOTA: siyahaycontenidoenlatarjetamicroSD,laestructuradecarpetas
puedeserdistintadespuésdelformateo,yaquetodoslosarchivosse
habráneliminado.

30
Bloqueo y desbloqueo de la pantalla
Sinoutilizalatabletaduranteuntiempo,lapantallaseapagaysebloquea
automáticamente.Estocontribuyeaevitarpulsacionesaccidentalesyahorra
energíadelabatería.Sinoestáutilizandolatableta,pulselatecla de
encendido/bloqueo parabloquearlo.
Sihayalgúnprogramaejecutándosecuandosebloquealapantalla,es
posiblequesigaejecutándoseenelmododebloqueo.Serecomiendasalir
detodoslosprogramasantesdeentrarenelmododebloqueo,paraevitar
cargasinnecesarias(p.ej.,accesoawebs,comunicacionesdedatos).
Paraactivardenuevolatableta,pulselatecla de encendido/bloqueo
.Aparecerálapantalladebloqueo.Pulselapantalladebloqueoydeslice
eldedoencualquierdirecciónparadesbloquearlapantalladeinicio.
Aparecerálaúltimapantallaqueteníaabierta.

31
Sugerencias sobre la pantalla táctil
Acontinuación,lepresentamosalgunassugerenciassobrecómonavegar
porlatableta.
NOTA:
•Paraseleccionarunelemento,pulselapartecentraldelicono.
•Noejerzaunapresiónexcesiva.Lapantallatáctileslosuficientemente
sensiblecomoparadetectarunapulsaciónligeraperofirme.
•Utilicelapuntadeldedoparatocarlaopciónquedesee.Intenteno
tocarningunaotratecla.
Pulsar o tocar
Pulsesoloconundedoparaseleccionarelementos,enlaces,accesos
directosyletraseneltecladoenpantalla.
Mantener pulsado
Mantengaunelementopulsadoenlapantallasinlevantareldedohastaque
seproduzcaunaacción.Porejemplo,paraabrirlasopcionesdisponiblesde
uncontacto,mantengapulsadoelcontactoenlalistaContactoshastaque
seabraelmenúcontextual.
Arrastrar
Paraarrastrarunelemento,manténgalopulsadounmomentoy,a
continuación,muevaeldedoporlapantallasinlevantarlohastaquellegue
alaposicióndedestino.Puedearrastrarelementosenlapantalladeinicio
pararecolocarlos.
Pantalla de inicio

32
Deslizamiento o desplazamiento
Paradeslizarodesplazarse,muevarápidamenteeldedosobrelasuperficie
delapantallasindetenersedesdeelmomentoenquehatocadolapantalla
(paranoarrastrarelelemento).Porejemplo,puededeslizareldedosobrela
pantallahaciaarribaohaciaabajoparadesplazarseporunalista,onavegar
porlasdiferentespantallasdeiniciodeslizandoeldedodeizquierdaa
derecha(yviceversa).
Doble pulsación
Realiceunadoblepulsaciónparaampliarunapáginawebounmapa.
Porejemplo,pulsedosvecesrápidamenteunazonadelapáginaweb
paraajustarlaalanchodelapantalla.Tambiénpuedepulsardosveces
paraampliaryreducirdespuésdehacerunafotografía(conlacámara)y
deutilizarMapas.Pulsedosvecesunapalabrapararesaltarla.Ladoble
pulsacióntambiénpuedeactivarlafunciónKnockON,paraencendero
apagarlapantallatáctil.
Juntar y separar los dedos para ajustar el tamaño de la imagen
Utilicelosdedosíndiceypulgarjuntándolosyseparándolosparaacercaro
alejarlaimagencuandoutiliceelnavegador,Mapasoexaminefotografías.
Girar la pantalla
Enmuchasaplicacionesymenús,laorientacióndelapantallaseajustaala
orientaciónfísicadeldispositivo.
KnockON
LafunciónKnockONpermiterealizarundobletoquesobrelapantallapara
encenderlaoapagarlafácilmente.

33
•Realiceundobletoquerápidoenelcentro
delapantallaparaencenderla.
•Realiceundobletoquerápidoenlabarra
deestado,enunáreavacíaenlapantalla
deiniciooenlapantalladebloqueopara
apagarlapantalla.
NOTA:
•PodrádeshabilitarestafunciónenlaconfiguracióndePantalla.
EnlapantallaInicio,toqueAplicaciones
>Ajustes >Pantalla>
KnockON>toquelacasilladeverificaciónKnockON.
Pantalla de inicio
Desliceeldedohacialaizquierdaoladerechaparaverlospaneles.Puede
personalizarcadapanelconaplicaciones,descargas,widgetsyfondosde
pantalla.
NOTA:algunasimágenesdelapantallapodríanserdiferentesenfunción
desuregión.

34
Enlaparteinferiordelapantalladeinicioseencuentranlosiconos
delmenú.Losiconosdelmenúpermitenaccederalasfuncionesmás
habitualesfácilmente,conunasolapulsación.
Barra de estado: muestrainformaciónsobreel
estadodeldispositivo,incluidoslahora,potencia
delaseñal,estadodelabateríaeiconosde
notificación.
Tecla Atrás: vuelvealapantallaanterior.También
cierraelementosemergentes,comoporejemplo
menús,cuadrosdediálogoyeltecladoenpantalla.
Iconos de aplicaciones: pulseunicono(aplicación,
widget,carpeta,etc.)paraabrirloyutilizarlo.
Teclas rápidas: permitenaccederfácilmentealas
funcionesmáshabitualesconunasolapulsación.
Tecla inicio: vuelvealapantalladeinicio(oal
lienzodesupantallaIniciopredeterminadasi
seencuentraencualquieradeloslienzosde
ampliacióndelapantalladeInicio).Manténgala
pulsadaparamostrarlasaplicaciones
recientementeutilizadas,conaccesoalaaplicación
Administradordetareas.
Tecla Menú: abreunmenúdeopciones,con
opcionesqueafectanalapantallaoalaaplicación
actual.Soloaparececuandoestádisponible,en
funcióndelapantallaolaaplicación.

35
Personalización de la pantalla de inicio
Puedeeditarlapantalladeiniciomediantelaincorporacióndeaplicaciones,
descargas,widgetsofondosdepantalla.Parautilizarlatabletadeunaforma
máscómoda,añadasusaplicacionesywidgetsfavoritosalapantallade
inicio.
Para añadir elementos a la pantalla de inicio:
1 Mantengapulsadalapartevacíadelapantalladeinicio.
2 ToquelafichaAplicacionesoWidgets.
3 Arrastreelelementoquedeseealaubicaciónelegidaylevanteeldedo.
Para eliminar un elemento de la pantalla de inicio:
Mantengapulsadoeliconoquedeseeeliminar,arrástreloa ylevanteel
dedo.
SUGERENCIA: Paraañadireliconodeunaaplicaciónalapantallade
iniciodesdelapantalladeAplicaciones,mantengapulsadalaaplicación
quedeseeañadiryarrástrelaalaubicacióndeseada.
SUGERENCIA: Puedeañadirvariosiconosdeaplicacionesaunacarpeta.
Coloqueeliconodeunaaplicaciónencimadeotroenlapantalladeinicio
paracrearunacarpeta.
Cómo volver a aplicaciones utilizadas recientemente
1 Mantengapulsadalatecla de inicio .Apareceráunaventana
emergenteconlosiconosdelasaplicacionesutilizadasrecientemente.
2 Pulseuniconoparaabrirsuaplicación.Tambiénpuedepulsarlatecla
Atrás paravolveralapantallaanterior.

36
Notificaciones
Lasnotificacionesleavisandelallegadadenuevosmensajes,eventosde
calendariooalarmas,asícomodeeventosqueseesténrealizandoenese
momentocomo,porejemplo,descargasdevídeo.
Enelpaneldenotificacionespuedeverelestadoactualdelatabletaylas
notificacionespendientes.
Cuandoserecibeunanotificación,semuestraeliconocorrespondienteen
lapartesuperiordelapantalla.Losiconosdenotificacionespendientesse
muestranalaizquierda,mientrasquelosiconosdelsistema,quemuestran
aspectostalescomolaintensidaddelabateríaodelaredWi-Fi,se
muestranaladerecha.
NOTA: lasopcionesdisponiblespuedenvariarenfuncióndelaregiónoel
proveedordeservicios.
Notificaciones
pendientes
Iconos del sistema como Bluetooth,
Wi-Fi y estado de la batería
Deslice el dedo hacia abajo para recibir notificaciones y
modificar los ajustes.
Deslicehaciaabajolabarradeestadoparaabrirelpaneldenotificaciones.
Paracerrarelpaneldenotificaciones,deslicehaciaarribalabarraquese
encuentraenlaparteinferiordelapantalla.

37
NOTA: mantengapulsadocualquieradelosiconosdeAjustesrápidos
paraverelmenúdeajustesdelafunción.
Barra Ajustes rápidos:deslice
rápidamentehacialaderechaohaciala
izquierdaparadesplazarseporlalista.
Barra de Aplicaciones QSlide::púlsela
paraactivarunafunciónQSlide.
Deslicehaciaizquierdayderechapara
ajustarelBrillodelapantallaoel
Volumen.
Ajustes rápidos en el panel de notificaciones
UtiliceAjustesrápidosparaactivarydesactivarfácilmentelaconfiguración
defuncionescomo,porejemplo,laconexiónWi-Fi.Ajustesrápidosse
encuentraenlapartesuperiordelpaneldenotificaciones.
NOTA: mantengapulsadouniconodelabarradeajustesrápidosparaver
elmenúdeconfiguracióndelafunción.
Para reorganizar los elementos de Ajustes rápidos en el panel de
notificaciones
Abraelpaneldenotificacionesypulse .Acontinuaciónpodrávery
reorganizarloselementosdeseadosenelmenúdeAjustesrápidos.

38
Aplicaciones QSlide en el panel de notificaciones
LasaplicacionesQSlidesemuestranenunabarradelpanelde
notificaciones,bajolabarraAjustesrápidos.Estosiconosofrecenunaforma
rápidayprácticaderealizarvariastareasenlamismapantalla(deunaforma
similarlafuncióndeimagendentrodeimagendeuntelevisor).QSlide
muestraunapequeñaventanadeaplicaciónenlapantalla,quepuede
moverse,modificarsutamañooconvertirentransparente.
Uso de las aplicaciones QSlide
PulsecualquieradelasaplicacionesQSlidedelabarraparaactivarla.
Cuandoseactiva,lafunciónQSlideabrelaaplicaciónenunaventanaen
primerplano,permitiéndoleaccederaotrasaplicacionesquepermanecen
ensegundoplano.PodráabrirhastadosventanasdeQSlidealavez.
Iconos indicadores de la barra de estado
Losiconosindicadoressemuestranenlabarradeestadodelaparte
superiordelapantalla,einformanacercadeeventosdecalendarioy
estadosdeldispositivo,entreotros.
Losiconosquesemuestranenlapartesuperiordelapantallaproporcionan
informaciónacercadelestadodeldispositivo.Enlatablasiguientese
muestranalgunosdelosiconosmáshabituales.
Icono Descripción
Modoavión
ConectadoaunaredWi-Fi
Auricularesconcable

39
Bluetoothestáactivado
Advertenciadelsistema
Mododevibraciónactivado
Modosilenciosoactivado
Bateríacargadaporcompleto
Bateríaencarga
DLNAactivado
Descargandodatos
Cargandodatos
Alarmaactivada
ReproduciendomúsicaSmartShare
GPSactivado
Losdatosseestánsincronizando
NuevoGmail
NuevomensajedeHangouts
Seestáreproduciendounacanción

40
LatabletaestáconectadoalPCatravésdeuncableUSBoestá
activalafunciónMódemUSB
ModoAhorrodeenergíaactivado
QuickSlideactivado
Varios usuarios
Solopuedecrearseunidentificadordepropietariodetableta,peroes
posibleañadirvariosidentificadoresdeusuarioparaqueotraspersonas
puedaniniciarsesiónyusarlatabletadeformaindependiente.Cadausuario
puedeconfigurarsuspropiosajustesdelatableta,utilizarsupropioespacio
dealmacenamientoydisponerdesuspropiosprivilegiosdeactualizaciónde
aplicaciones.
Privilegios del propietario de la tableta
•Soloelidentificadordelpropietariodelatabletapuedeañadirun
identificadordeiniciodesesiónnuevoyeliminaridentificadoresdeusuario.
•Soloelidentificadordelpropietariodelatabletapuedeaccederalatarjeta
microSDyutilizarla.
•Elpropietariodelatabletapuededesinstalarlasaplicacionesdelusuario.
Limitaciones en el caso de varios usuarios de la tableta
•Todoslosusuarioscompartenlamismabatería,memoriainternaydatos
deusoconelrestodeusuarios.
•Laconfiguracióndeidiomadefinidaporunusuarioseaplicaalrestode
usuarios.

41
•Cadausuariosolopuedeconfiguraryusarsupropiocontenidoydatos
(porejemplo,ajustesdelapantalladeinicio,ajustesdesonido,etc.).
•Cualquierusuariopuedeaceptarpermisosdeaplicacionesactualizadosen
nombredelrestodeusuarios.
•Lasalarmassonaránalahoraestablecida,seacualseaelusuarioquelas
activara.
•Losmensajesyloseventosdecalendarioprogramadosseenviaránpara
informarúnicamentealidentificadordeusuarioespecificado.
•EncuantounusuariocomienceaimprimirundocumentoconImpresión
móvil,eltrabajodeimpresióncontinuaráinclusosisecambiade
identificadordeusuario.
•Lastransferenciasdedatos,lasdescargas,lareproducciónmultimediay
losserviciosdecomunicaciónsedetendránsisemodificaelidentificador
deusuario.
Para añadir un nuevo usuario en la tableta
1 Enlapantalladeinicio,toqueAplicaciones>Ajustes>Usuario>Añadir
usuario.
2 Seabriráelasistentedeconfiguraciónparaayudarle.Inicieelasistentede
configuración.
• Deberíautilizarelasistentedeconfiguraciónlaprimeravezqueinicie
sesiónenlatabletacomonuevousuario.
3 Aliniciarsesiónenlatabletapuedeescogerunnombredeusuario.

42
Deslice hacia lateral
Utiliceundeslizamientoconlostresdedosparaguardarlasaplicaciones
queseencuentrenenejecuciónenlaizquierda,ohacerquesemuestrende
nuevoenlapantalla.Alahoraderecuperarlas,algunasaplicacionespodrían
reiniciarse.Podráguardarhastatresaplicaciones.
1 Mientrasseencuentreabiertauna
aplicación,coloquetresdedosenla
pantallaydeslicehacialaizquierda.La
pantallaactualseguardayaparecela
pantalladeinicio.
2 Sideseavolveraabrirlasaplicaciones
guardadas,coloquetresdedossobrela
pantallaydeslicehacialaderecha.Toque
laaplicaciónquedeseeabrir.
Sugerencia:LafunciónDeslice hacia lateralnoreconocemenosdedos,
másdedosnilapalmadelamano.
Plug & Pop
Plug&Poplepermiteseleccionarrápidamentelasaplicacionesqueusaráal
conectarunosauricularesoundispositivoOTG(On-the-Go),comounratón
ounteclado.

43
1 ConectelosauricularesoeldispositivoOTG(On-the-Go)(porejemplo,
ratón,teclado,etc.).
2 Semostraráelpaneldeaplicacionesypodráseleccionarlaaplicaciónque
deseaejecutar.
NOTA: puedeeditarlasaplicacionesquedeseaquesemuestrenen
elpanel,asícomoconfigurarelpaneldeaplicacionesparaquenose
muestre.
Pulse > >Ajustes >Accesorios.
Cómo realizar una captura de pantalla
MantengapulsadaslasteclasVolumenAbajoyEncendido/Bloqueo durante
unosdossegundospararealizarunacapturadepantalla.
Paraverlaimagencapturada,diríjaseaAplicaciones >Galería >
carpetaScreenshots.
SUGERENCIA:Noesposiblerealizarunacapturadeunapantallade
cámaraodevídeo.
Utilización de QuickMemo para realizar una captura de pantalla
Enlapantallaquedeseecapturar,arrastrelabarradeestadohaciaabajoy
seleccioneQuickMemo .
O
Mantengaspulsadaslasteclassubir volumen/abajosimultáneamente.
Utilización de Capture plus para realizar una captura de pantalla
Estafunciónlepermitecapturarunapartedelapantallaenelnavegadorde
Internetpredeterminado.

44
1 MientrasestáconectadoaInternet,pulse y,acontinuación,Capture
plus.
2 Ajusteelrecuadroazulaltamañoquedeseey,acontinuación,pulse
Aceptar.EláreaseleccionadaquedaráguardadaenlaGalería.
Teclado en pantalla
Puedeescribirtextoutilizandoeltecladoenpantalla.Eltecladoenpantalla
apareceautomáticamenteenlapantallacuandonecesitaintroducirtexto.
Paramostrarmanualmenteelteclado,solotienequepulsarelcampode
textoenelquedeseaintroducirtexto.
Uso del teclado e introducción de texto
Pulseesteiconounavezparaescribirenmayúsculaslapróxima
letraqueseintroduzca.Pulsedosvecesparaescribirsiempreen
mayúscula.
Pulseesteiconoparapasaraltecladonuméricoydesímbolos.
Toqueestaopciónparausarlafuncióndeescrituraamano.
Pulseesteiconoparaintroducirunespacio.
Pulseesteiconoparacrearunanuevalíneaenelcampodemensaje.
Pulseesteiconoparaeliminarelcarácteranterior.
Introducción de letras acentuadas
Eltecladoenpantallapermiteintroducircaracteresespeciales(p.ej.,"á").
Mantengapulsadalatecladeseada(porejemplo,latecla"a").Despuésde
queaparezcaelcarácterdeseado,desliceeldedoporencimaylevántelo
paraintroducirlo.

45
Alencenderlatabletaporprimeravez,podráactivarlared,accederasu
cuentadeGoogleyconfigurarlamaneraenquedeseautilizaralgunos
serviciosdeGoogle.
Cómo configurar la cuenta de Google
•IniciesesiónenunacuentadeGoogledesdelapantalladeconfiguración
queaparece.
O
•Desdelapantalladeinicio,pulseAplicaciones >fichaAplicaciones>
Ajustes >Cuentas y sincronización>Añadir cuenta>Google.
SitieneunacuentadeGoogle,pulseUsar cuenta,introduzcasudirección
deE-mailycontraseñay,acontinuación,pulse .Tambiénpuedepulsar
Crear cuentaeintroducirlainformaciónnecesariaparacrearunanueva
cuentadeGoogle.
UnavezquehaconfiguradosucuentadeGoogleenlatableta,estese
sincronizaráautomáticamenteconsucuentadeGoogledelaweb.
Suscontactos,mensajesdeGmail,eventosdecalendarioyotrainformación
deestasaplicacionesyserviciosdelawebsesincronizanconsutableta
(estodependerádesusajustesdesincronización).
Traseliniciodesesión,puedeutilizarGmail™ylosserviciosdeGoogle
incluidosenlatableta.
Configuración de la cuenta de Google

46
Wi-Fi
ConlaconexiónWi-FipuedeutilizarelaccesoaInternetdealtavelocidad
dentrodelacoberturadelpuntodeaccesoinalámbrico.DisfrutedeInternet
sincablesutilizandounaredWi-Fi,sincargosadicionales.
Conexión a redes Wi-Fi
ParautilizarlaconexiónWi-Fidelatabletasedebeaccederaunpunto
deaccesoinalámbricoo"zonaWi-Fi".Algunospuntosdeaccesoestán
abiertosybastaconconectarseaellos.Otrosestánocultosoutilizan
funcionesdeseguridad,porloqueesnecesarioconfigurarlatabletapara
poderconectarseaellos.DesconectelaconexiónWi-Ficuandonolaesté
utilizandoparaaumentarladuracióndelabatería.
Activación de la conexión Wi-Fi y conexión a una red Wi-Fi
1 Enlapantalladeinicio,pulseAplicaciones >fichaAplicaciones>
Ajustes >Wi-Fi.
2 Pulse paraactivarestafunciónycomenzarabuscarredesWi-Fi
disponibles.
3 PulseBuscarparaverunalistadelasredesWi-Fiactivasquese
encuentrandentrodelradiodealcance.
• Lasredessegurassemuestranconuniconodecandado.
4 Toqueunaredparaconectarsealamisma.
• Silaredestáprotegida,selesolicitaráqueintroduzcalacontraseñau
otrascredenciales(solicitealadministradordelaredlosdetalles).
5 LabarradeestadomuestraiconosqueindicanelestadodeWi-Fi.
Conexión a redes y dispositivos

47
Bluetooth
PuedeutilizarlatecnologíaBluetoothparaenviardatosejecutandola
aplicacióncorrespondiente,peronodesdeelmenúBluetooth,comoenla
mayoríadelosdemásteléfonosmóviles.
NOTA:
• LGnosehaceresponsabledelapérdida,interceptaciónousoindebido
delosdatosenviadosorecibidosatravésdelafuncionalidadinalámbrica
Bluetooth.
• Asegúresesiempredequelosdispositivosconlosquecomparte
información,odelosquerecibedatos,seanfiablesyseguros.Sihay
obstáculosentrelosdispositivos,ladistanciadefuncionamientopuede
reducirse.
• Algunosdispositivos,especialmentelosquenocuentanconlacertificación
deBluetoothSIG,puedenserincompatiblesconsudispositivo.
Activación del Bluetooth y asociación de la tableta con un
dispositivo Bluetooth
Debevincularlosdispositivosparapoderconectarse.
1 Enlapantalladeinicio,pulseAplicaciones >fichaAplicaciones>
Ajustes >Bluetooth.
2 ToqueelselectorBluetooth paraactivarestafunción.
3 Toquelacasilladeverificaciónqueaparecejuntoalnombredesutableta
paraqueotrosdispositivosBluetoothpuedandetectarsutableta.
4 Semostraráunalistadelosdispositivosdisponibles.Toqueenlalistael
dispositivoconelquedeseaasociarse.

48
NOTE:Dependiendodeltipodedispositivo,puedequetengaque
introducirloscódigosdejuego,confirmarloscódigoscoinciden,olos
dispositivospuedenasociarseautomáticamente.
Cuandosecompletelaasociación,suteléfonoseconectaráaldispositivo.
NOTA:sutabletanoescompatibleconelPerfilmanoslibres.Porello,el
usodefuncionesdellamadaconalgunosaccesorios,comoporejemplo
kitsmanoslibresBluetoothodispositivosconBluetooth,podríanoestar
disponibleenestedispositivo.
Envío de datos mediante la funcionalidad inalámbrica Bluetooth
1 Abraelelementoypulse .
O
MantengapulsadoelelementoyseleccioneCompartir.
O
Abraelelementoypulselatecla Menú >Compartir.
2 PulseBluetoothparacompartirvíaBluetooth.
NOTA: elmétodoparaseleccionarunaopcióndependerádeltipode
dato.
3 BuscaryvincularseaundispositivoBluetooth.

49
Recepción de datos mediante la funcionalidad inalámbrica
Bluetooth
1 Enlapantalladeinicio,pulseAplicaciones >fichaAplicaciones>
Ajustes >Bluetooth.
2 Pulse paraactivarlaconexiónBluetoothymarquelacasillade
verificacióndelapartesuperiordelapantallaparaquelopuedanver
otrosdispositivos.
NOTA:paraseleccionareltiempoduranteelqueestarávisibleel
dispositivo,pulselatecla Menú
>Tiempo visible.
3 VinculelosdispositivosypulseAceptarcuandorecibaunaSolicitudde
autorizaciónBluetoothparaaceptarlosarchivos.
SmartShare
PuedeusarlafunciónSmartShareconfacilidadenlasaplicacionesGalería,
Música,Videos,etc.
Reproducir contenido a través de varios dispositivos
Puedecompartirelcontenidodesutabletacondiversosdispositivos
Presione paracompartirelcontenidodeGalería,Música,Vídeosy
POLARIS Viewer 5.
Reproducción/Envío
Play–puedereproducirelcontenidoenunaTV,altavocesBluetooth,etc.
Beam–puedeenviarelcontenidoaldispositivoBluetoothySmartShare
Beamcompatible.

50
•SmartShare Beam–Estopermitetransferirelcontenidorápidamentea
travésdeWi-FiDirect.
< Play > < Beam >
Reproducir contenido de dispositivos cercanos
Puededisfrutardelcontenidodedispositivoscercanos(PC,NAS,móvil)en
lasaplicacionesGalería,Música,Vídeosapp.
Conexión de dispositivos
ConecteeldispositivoyotrosdispositivoscompatiblesconDLNAenla
mismaredWi-Fi.
Búsqueda de otros dispositivos
PresioneDispositivoscercanosypodráverlosdispositivoscompatiblescon
DLNA.
Conéctesealdispositivoparaverelcontenido.
Uso del contenido de la nube
Puedeusarcontenidodelanube(porejemplo,Dropbox)enlasaplicaciones
Galería,Música,Vídeos,etc.

51
Uso de la nube
NOTA:lasfuncionescompatiblespuedenvariarenfuncióndelservicioen
lanube.Larecuperacióndedatospuedetardaralgúntiempo,enfunción
delservicioenlanube.
1 SeleccioneNubeenlaaplicaciónGalería,Música,Vídeos,etc.
2 Seleccioneelservicioenlanubequedeseautilizareiniciesesión.
3 Podráusarelcontenidodelanubedespuésdeiniciarsesión.
4 EstablezcalosajustesdeNubeparaqueseleccionenlaaplicaciónque
usaráelservicioenlanube.
Conexión a un USB con un cable para PC
AprendaaconectarsuteléfonoaunPCmedianteuncablededatosUSB
enlosmodosdeconexiónUSB.
Transferencia de música, fotos y vídeos mediante el modo
Almacenamiento USB masivo
1 ConectelatabletaalPCpormediodeuncableUSB.
2 SinohainstaladoelcontroladordelaplataformaAndroiddeLGenel
PC,tendráquecambiarlosajustesmanualmente.SeleccioneAjustes del
sistema>fichaConexión a PC>Seleccionar método de conexión USBy,
acontinuación,seleccioneSincronizar medios (MTP).
3 AhorapuedeverelcontenidodealmacenamientomasivoenelPCy
transferirlosarchivos.

52
Sincronización con el Reproductor de Windows Media
AsegúresedequeelReproductordeWindowsMediaestéinstaladoensu
PC.
1 UtiliceelcableUSBparaconectarlatabletaaunPCquetengainstalado
elReproductordeWindowsMedia.
2 SeleccionelaopciónSincronizar medios (MTP).Unavezconectado,
apareceráunaventanaemergenteenelPC.
3 AbraelReproductordeWindowsMediaparasincronizarlosarchivosde
música.
4 Editeointroduzcaelnombredeldispositivoenlaventanaemergente(si
fueranecesario).
5 Seleccioneyarrastrelosarchivosdemúsicaquedeseealalistade
sincronización.
6 Comiencelasincronización.
•ParalasincronizaciónconelReproductordeWindowsMediadeben
cumplirselossiguientesrequisitos.
Elementos Requisito
SO
MicrosoftWindowsXPSP2,Vistaosuperior
VersióndelReproductorde
WindowsMedia
ReproductordeWindowsMedia10o
superior
•SilaversióninstaladadelReproductordeWindowsMediaesinferiorala
10,instalelaversión10osuperior.

53
Puedeañadircontactosaltabletaysincronizarlosconloscontactos
delacuentadeGoogleuotrascuentasqueseancompatiblesconla
sincronizacióndecontactos.
Buscar un contacto
1 Enlapantalladeinicio,toqueContactos paraabrirlalistade
contactos.
2 ToqueelcuadroBuscar contactosyescribaelnombredelcontacto.
Tambiénpuedetocarunaletraenellateralizquierdodelapantallapara
accederalosnombresquecomiencenporlaletraelegida.
Agregar un contacto nuevo
1 Enlapantalladeinicio,pulseContactos .
2 Pulse .Seleccionelacuentaquedesee(siprocede).
3 Sideseaagregarunaimagenalnuevocontacto,pulse .Elijaentre
Hacer una fotoparacapturarunaimagenconlacámaraoSeleccionar de
galería.Acontinuaciónbusqueunaimagenyselecciónela.
4 Pulse paraintroducirinformaciónmásespecíficadelnombre.
5 Introduzcalosdetallessobreelcontacto.
6 PulseGuardar.
Contactos favoritos
Puedeclasificarloscontactosalosquellamaconfrecuenciacomofavoritos.
Contactos

54
Para añadir un contacto a la lista de favoritos
1 Enlapantalladeinicio,pulseContactos paraaccederaloscontactos.
2 Pulseuncontactoparaverlosdetalles.
3 Pulselaestrella situadaaladerechadelnombredelcontacto.La
estrellasevuelvedoradayelcontactoseañadealosfavoritos.
Para eliminar un contacto de la lista de favoritos
1 Enlapantalladeinicio,pulseContactos paraaccederaloscontactos.
2 PulselafichaFavoritosparaversuscontactosfavoritos.
3 Pulseuncontactoparaverlosdetalles.
4 Pulselaestrelladoradasituadaaladerechadelnombredelcontacto.La
estrellasevuelvegrisyelcontactoseeliminadelosfavoritos.
Crear un grupo
1 Enlapantalladeinicio,pulseContactos paraaccederaloscontactos.
2 PulselafichaGruposy ,acontinuación, .
3 Introduzcaunnombreparaelnuevogrupo.
•ToqueAñadir miembrosparaañadirentradasdecontactoalnuevo
grupo.
•ToqueelcampoCUENTAparacambiarlascuentasenlasquedesea
guardarelnuevogrupo.
4 PulseGuardarparaguardarelgrupo.
NOTA:sieliminaungrupo,noseborranloscontactosasignadosaese
grupo.Continuaránalmacenadosenlalistadecontactos.

55
PuedeutilizarlaaplicaciónE-mailparaleerloscorreoselectrónicosde
servicioscomoGmail.LaaplicaciónE-mailadmitelossiguientestiposde
cuenta:POP3,IMAPyExchange.
Suproveedordeserviciosoadministradordelsistemapuedeproporcionarle
losajustesdecuentaquenecesite.
Administración de una cuenta de E-mail
ToqueelCorreoelectrónico enlapantalladeinicio.Laprimeravez
queabralaaplicaciónE-mail,seabriráunasistentedeconfiguraciónpara
ayudarleaconfigurarunacuentadeE-mail.
Traslaconfiguracióninicial,E-mailmuestraelcontenidodesubandejade
entrada.Sihaañadidomásdeunacuenta,puedecambiardecuenta.
Para añadir otra cuenta de E-mail:
•AbralaaplicaciónE-mailypulselatecla Menú >Ajustes > .
Para cambiar de cuenta:
Sihaañadidomásdeunacuentapuedecambiardecuentafácilmente.
Desdecualquiercarpetadecorreoelectrónico,toquelacuentaactual(en
lapartesuperiordelapantalla)y,acontinuación,toquelacuentaalaque
deseeacceder.
Para cambiar los ajustes de la cuenta de E-mail:
AbralaaplicaciónE-mailytoquelatecla Menú >Ajustes > Ajustes
generalparaconfigurarlosajustesqueseapliquenatodaslascuentas.
Toqueunacuentaconcretaparaconfigurarúnicamentelosajustesdeesa
cuentaconcreta.
E-mail

56
Para eliminar una cuenta de E-mail:
•AbralaaplicaciónE-mailypulselatecla Menú >Ajustes > pulsela
tecla Menú >Borrar cuenta>pulselacuentaquedeseeeliminar>
Eliminar>Sí.
Trabajo con las carpetas de cuenta
AbralaaplicaciónE-mailypulselatecla Menú yseleccioneCarpetas.
Cadacuentatienelassiguientescarpetas:Recibidos,Enviando,Enviados
yBorradores.Enfuncióndelasfuncionesqueadmitaelproveedorde
serviciosdelacuenta,puedecontarconcarpetasadicionales.
Redacción y envío de correos electrónicos
1 DesdelaaplicaciónE-mail,pulseEscribir .
2 Introduzcaladireccióndeldestinatariodelmensaje.Amedidaque
introduzcaeltexto,apareceránlasdireccionesdesuscontactosque
coincidan.Separelasdistintasdireccionesconpuntoycoma.
3 PulseAdjuntar paraadjuntararchivos,silodesea.
4 Escribirelasuntoyeltextodelmensaje
5 PulseEnviar paraenviarelmensaje.
Sinoestáconectadoaunared,porejemplo,siestátrabajandoenmodo
avión,losmensajesqueenvíeseguardaránenlacarpetadelabandeja
desalidahastaquevuelvaaestarconectadoalared.Sicontienealgún
mensajependiente,lacarpetaSalidasemostraráenlapantallaCuentas.

57
Recepción de correos electrónicos
Cuandorecibaunnuevocorreoelectrónicoensubandejadeentrada,sele
informarádeellomedianteunsonidoounavibración(segúnlosajustesde
sonidoydevibración),yapareceráeliconodenotificacióncorrespondiente
enlabarradeestado.

58
ParaabrirlaaplicaciónCámara,pulseCámara enlapantalladeinicio.
Conocer el visor
Cambiar cámara:cambieentrelalentedelacámaratraseraylalentede
lacámaradelantera.
Modo disparo:definelaformaenlaqueserealizarálacaptura.
Ajustes:pulseesteiconoparaabrirelmenúdeajustes.ConsulteUtilizar
la configuración avanzadaenlapáginasiguiente.
Modo de vídeo:pulse(odeslice)paracambiarentreelmodocámarade
fotosydevídeo.
Hacer una foto
Galería:pulseestaopciónparaverlaúltimafotoquehacapturado.Esto
lepermiteaccederasugaleríayverlasfotosguardadasmientrasestáen
elmododecámara.
Cámara

59
NOTA:antesdetomarunafotografía,asegúresedequelalentedela
cámaraestálimpia.
Utilizar la configuración avanzada
Enelvisor,pulse paraabrirlasopcionesavanzadas.Trasseleccionarla
opcióndeseada,pulselatecla Atrás .
Realizarfotografíasmediantecomandosdevoz.
Defineycontrolalacantidaddeluzsolarquerecibelafoto.
Enfocaunpuntoespecífico.
Seleccionalaresolucióndelafoto.Sieligealtaresolución,
eltamañodelarchivoaumentará,loquesignificaquepodrá
almacenarmenosfotosenlamemoria.
ElvalorISOdeterminalasensibilidaddelsensordeluzdela
cámara.CuantomayorseaelvalorISO,mássensibleserála
cámara.Resultaútilenentornososcurosenlosquenoesposible
utilizarelflash.
Mejoralacalidaddecolorendistintascondicioneslumínicas.
Aplicaefectosartísticosasusimágenes.
Estableceelretrasoqueseaplicadespuésdepulsarelbotónde
captura.Resultamuycómodoparapodersalirunomismoenla
fotografía.

60
Activeestaopciónparautilizarlosserviciosdeubicacióndela
tableta.Realicefotografíasdesdecualquierlugaryetiquételascon
laubicación.Sicargaimágenesetiquetadasenunblogcompatible
coneletiquetadogeográfico,podráverlasimágenespresentadas
enunmapa.
NOTA: estafunciónsoloestádisponiblecuandoelGPSestáactivo.
Ajusteunsonidodeobturador.
Permiteajustarsiseusalatecladevolumenparacapturaropara
elzoom.
Definalaubicacióndealmacenamientodelasimágenes.Elijaentre
lamemoriainternaylatarjetaSD.
Abreunaguíadeayudaenlaqueseexplicanlasfunciones.
Restablecetodoslosajustespredeterminadosdelacámara.
SUGERENCIA:
•cuandosalgadelacámara,algunosajustesvolveránasusvalores
predeterminados,comoelbalancedeblancos,eltonodecolor,el
temporizadoryelmododeescena.Compruébelosantesderealizarla
siguientefotografía.
•Elmenúdeajustessemuestrasuperpuestosobreelvisor,porloque
alcambiarelcolordelafotooloselementosdecalidad,veráunavista
previadelaimagenmodificadadetrásdelmenúAjustes.

61
Cómo tomar una foto rápida
1 AbralaaplicaciónCámara.
2 Apunteconelobjetivoalsujetoquedeseefotografiar.
3 Apareceráuncuadrodeenfoqueenelcentrodelapantalladelvisor.
Tambiénpuedepulsarencualquierpuntodelapantallaparaenfocar
dondedesee.
4 Cuandoelcuadrodeenfoquesevuelvaverde,significaráquelacámara
haenfocadoeltema.
5 Pulse paracapturarlafotografía.
Después de realizar una fotografía
1 Toquelavistapreviadelaimagenenlaesquinainferiorderechadela
pantallaparaverlaúltimafotografíaquehacapturado.
2 ToqueGaleríay,acontinuación,toqueSiempreoSólo una vez.
PulseparacompartirsufotopormediodelafunciónSmartShare.
Pulseesteiconoparahacerotrafotografíainmediatamente.
Pulseparaenviarsufotoaotrosoparacompartirlaatravésde
serviciosderedessociales.
Pulseparaborrarlafotografía.
SUGERENCIA:Sidisponedeunacuentadeunaredsocialylaconfigura
entableta,puedecompartirsusfotosconlacomunidaddedichared
social.

62
PulselateclaMenú paraabrirtodaslasopcionesavanzadas.
Usar imagen como:toqueestaopciónparausarlafotografíacomofotografía
deuncontacto,comofondodepantalladelapantalladeinicio,comofondo
depantalladelapantalladebloqueoocomofondodepantalla.
Mover:pulseparamoverlafotografíaaotrolugar.
Copiar:pulseparacopiarlafotoseleccionadayguardarlaenotroálbum.
Copiar a Clip Tray:pulseestaopciónparacopiarlafotoyguardarlaenClip
Tra y.
Renombrar:pulseestaopciónparaeditarelnombredelafotoseleccionada.
Girar a la izquierda/derecha:pulseparagiraralaizquierdaoladerecha.
Recortar:permiterecortarlafoto.Desplaceeldedoporlapantallapara
seleccionareláreaquedeseerecortar.
Editar:permiteveryeditarlafoto.
Modo presentación:lemuestraautomáticamentelasimágenesdelacarpeta
actualdeformaconsecutiva.
Añadir ubicación:añadeinformacióndeubicación.
Detalles:permiteobtenermásinformaciónsobreelcontenido.
Ver las fotos guardadas
Puedeaccederalasfotosguardadasenelmododecámara.Tansolopulse
lavistapreviadelaimagenenlaparteinferiordelapantallaysemostrará
suGalería.
1 Elijalaaplicaciónquedeseeusarparaveryeditarsusfotografías.Toque
GaleríaoFotos.
2 ToqueSiempreoSólo una vez.
•Paravermásfotos,desplácesehacialaizquierdaohacialaderecha.
•Paraampliaroreducirlaimagen,puedepulsardosveceslapantallacon
dosdedosyjuntarlososepararlos,respectivamente.

63
Paraabrirlacámaradevídeo,toqueCámara enlapantalladeinicioy,a
continuación,toqueeliconodelmodo Vídeo (enelvisor)paracambiaral
mododevídeo.
Conocer el visor
Cambiar cámara:cambieentrelalentedelacámaratraseraylalentede
lacámaradelantera.
MODO:definelaformaenlaqueserealizarálacaptura.
Ajustes:pulseesteiconoparaabrirelmenúdeajustes.ConsulteUtilizar
la configuración avanzadaenlapáginasiguiente.
Modo de cámara:pulseydesliceeliconohaciaarribaparacambiaral
mododecámara.
Grabar:pulseparacomenzaragrabarunvídeo.
Galería:pulseestaopciónparaverelúltimovídeograbado.Lepermite
accederalagaleríayverlosvídeosguardadosenelmododevídeo.
Videocámara

64
SUGERENCIA:Cuandoestégrabandounvídeo,coloquedosdedossobre
lapantallayjúntelosparautilizarlafuncióndezoom.
NOTA:Durantelagrabacióndeunvídeoodeunclipdeaudio,asegúrese
dequeelmicrófononoseencuentrebloqueado.
Utilizar la configuración avanzada
Enelvisor,pulse paraabrirtodaslasopcionesavanzadas.
Pulseparaconfigurareltamaño(enpíxeles)delvídeoquevaa
grabar.
Defineycontrolalacantidaddeluzsolarqueentraenelvídeo.
Eviteagitareldispositivomientrasgrabaelvídeo,paraobtenerun
vídeodecalidad.
Mejoralacalidaddecolorendistintascondicioneslumínicas.
Seleccioneuntonodecolorparautilizarloensunuevavista.
Activeestaopciónparautilizarlosserviciosdeubicacióndela
tableta.
Ajustesilatecladevolumenseutilizarápararealizarlagrabacióno
paraelzoom.
Estaopcióndefinelaubicaciónenlaquedeseaguardarlosvídeos.
ElijaentrelamemoriainternaylatarjetaSD.
Abreunaguíadeayudaenlaqueseexplicanlasfunciones.
Restablecetodoslosajustespredeterminadosdelacámara.

65
Cómo grabar un vídeo rápido
1 AbralaaplicaciónCámaraypulseeliconodelmodo Vídeo .
2 Elvisordelavideocámaraapareceenlapantalla.
3 Mientrassujetalatableta,orientelalentehaciaelobjetoosujetoque
deseegrabarenvídeo.
4 Pulse unavezparainiciarlagrabación.
5 Apareceráuntemporizadorenelquesemostraráladuracióndelvídeo.
6 Pulse enlapantallaparadetenerlagrabación.
Después de grabar un vídeo
Toquelavistapreviadelaimagen,enlaparteinferiordelapantalla,paraver
elúltimovídeograbado.
PulseparacompartirsuvídeopormediodelafunciónSmartShare.
Pulseesteiconoparagrabarotrovídeoinmediatamente.
Pulseparaenviarsuvídeoaotrosoparacompartirloatravésde
serviciosderedessociales.
Pulseparaborrarelvídeo.
Ver los vídeos guardados
Accedaalosvídeosguardadosmientrasseencuentraenelmodocámara
devídeoalpulsarlavistapreviadelaimagenenlaesquinainferiorderecha
delvisor.

66
1 Enelvisor,toquelavistapreviadelaimagenenlaesquinainferior
derechadelapantalla.
2 AparecerálaGaleríaenlapantalla,mostrándoseelúltimovídeograbado.
Desliceeldedohacialaizquierdaparadesplazarsealrestodevídeos.
3 ToqueeliconoReproducir enunvídeoparareproducirlo
automáticamente.
NOTA: TambiénpuedeversusvideosenlaGaleríaoaplicacióndeVideos.
NOTA: noejerzaunapresiónexcesiva.Lapantallaeslosuficientemente
sensiblecomoparadetectarunapulsaciónligeraperofirme.
Ajustar el volumen durante la visualización de un
vídeo
Paraajustarelvolumendeunvídeomientrasseestáreproduciendo,utilice
lasteclasdevolumendelladoderechodelatableta.

67
Galería
Puedealmacenararchivosmultimediaenunamemoriainternaparaacceder
fácilmenteatodossusarchivosmultimedia.Utiliceestaaplicaciónparaver
archivosmultimediacomofotografíasyvídeos.
1 Enlapantalladeinicio,pulseAplicaciones >fichaAplicaciones>
Galería .
DesdeGaleríapodrágestionarycompartirtodossusarchivosdeimagen
ydevídeo.
NOTA:
•Enfuncióndelsoftwarequesehayainstaladoeneldispositivo,algunos
formatosdearchivonosoncompatibles.
•Enfuncióndesucodificación,puedequealgunosarchivosnose
muestrencorrectamente.
•Sieltamañodearchivoessuperioralacapacidaddememoria
disponible,puedeproducirseunerroralabrirlosarchivos.
Visualización de imágenes
AlabrirlaGaleríasemuestrantodaslascarpetasdisponibles.Cuandootra
aplicación,comoE-mail,guardaunaimagen,secreaautomáticamentela
carpetadedescargas,enlaqueseguardarálafotografía.Delmismomodo,
alrealizarseunacapturadepantalla,secrealacarpetaCapturasdepantalla.
Pulselacarpetaquedeseeabrir.
Lasfotossemuestranenlacarpetaordenadasporfechadecreación.
Seleccioneunafotografíaparaverlaenpantallacompleta.Despláceseala
derechaoalaizquierdaparaverlaimagenanteriorosiguiente.
Multimedia

68
Acercar y alejar mediante el zoom
Paraampliarunaimagen,utiliceunodelosmétodossiguientes:
•Pulsedosveceslazonaquedeseaampliar.Pulsedosvecesdenuevopara
regresaralavistadepantallacompleta.
•Coloquedosdedosencualquierpuntodelaimagenysepárelospara
acercarlaimagen.Paraalejarla,únalosotoquelapantalladosveces.
Reproducción de vídeos
AbralaaplicaciónGalería yseleccioneunálbum.EliconoReproducir
semuestraenlosarchivosdevídeo.Toqueunaimagenpara
seleccionarla.Seleccionelaimagenquedeseereproducir(toquela
aplicaciónFotos olaaplicaciónVídeos )y,acontinuación,toque
SiempreoSólo una vezycomenzarálareproduccióndelvídeo.
NOTA:
•Cuandoestéenmododereproduccióndevídeo,deslicelapantalla
haciaarribaohaciaabajoparaajustarelbrillodelapantalla.
•Cuandoestéenmododereproduccióndevídeo,deslicelapantalla
hacialaizquierdaoladerechapararetrocederoavanzar.
Eliminación de imágenes y vídeos
Utiliceunodelosmétodossiguientes:
•Enunacarpeta,pulse yseleccionelasfotografíasylosvídeosque
deseeeliminar.Acontinuación,toqueBorrar.
•Cuandoestéviendounafotoounvídeo,pulse .

69
Establecer como fondo de pantalla
Mientrasvisualizaunafoto,toquelatecla Menú >Usar imagen comoy
seleccioneFoto de contacto,Fondo de pantalla, Fondo de bloqueooFondo
de pantalla.
Modo presentación
Puedeversusfotografíasenunapresentacióndediapositivasporálbumoal
seleccionartodaslasfotografías.Enlapantalladeinicio,toqueGalería .
•Toqueelálbumquecontienelasfotografíasquedeseevery,a
continuación,toquelateclaMenú >Modo presentación>reviselos
ajustesdelapresentacióndediapositivas>Inicio.
•ToquelateclaMenú >Vertodoslosarchivos>teclaMenú >
Modo presentación>reviselosajustesdelapresentacióndediapositivas
>Inicio.
ToquelateclaAtrás paradetenerlareproduccióndelapresentaciónde
diapositivas.
Vídeos
Latabletacuentaconunreproductordevídeointegradoparaquepueda
reproducirsusvídeosfavoritos.
Reproducción de un vídeo
1 Enlapantalladeinicio,pulseAplicaciones >fichaAplicaciones>
Vídeos .
2 Seleccioneelvídeoquedeseareproducir.

70
Pulseparapausarlareproduccióndevídeo.
Pulseparacontinuarconlareproduccióndevídeo.
Mantengapulsadoesteiconoparaavanzar
rápidamenteenincrementosde3segundos.Toque
unavezparaavanzarrápidamente10segundos.
Mantengapulsadoesteiconopararebobinaren
incrementosde3segundos.Toqueunavezpara
rebobinar10segundos.
Pulseparacontrolarelvolumendelvídeo.
Pulseparacambiarelaspectodelapantalladevídeo.
PulseparaaccederaQSlideymostrarelvídeoenuna
ventanapequeña.
Pulseparacompartirsuvídeopormediodelafunción
SmartShare.
Pulseesteiconoparacapturarlaimagendurantela
reproduccióndeunvídeo.
Pulseparabloquear/desbloquearunapantalladevídeo.
Paracambiarelvolumenmientrasestáviendounvídeo,pulselasteclasde
volumenenelladoderechodelatableta.
Mantengapulsadounvídeodelalistaparaaccederalasopciones
siguientes:Compartir,Borrar,RecortaryDetalles.

71
SUGERENCIA:Mientrasvisualizaunvídeo,deslicehaciaarribayhacia
abajoporellateralizquierdodelapantallaparaajustarelbrillodela
pantalla.Deslicehaciaarribayhaciaabajoporellateralderechodela
pantallaparaajustarelvolumen.
Música
Latabletacuentaconunreproductordemúsicaparaquepuedaescuchar
todassuscancionesfavoritas.Paraaccederalreproductordemúsica,enla
pantalladeiniciopulseAplicaciones >fichaAplicaciones>Música .
Reproducir una canción
1 Enlapantalladeinicio,pulseAplicaciones >fichaAplicaciones>
Música .
2 PulselafichaCanciones.
3 Seleccionelacanciónquedeseareproducir.
PulseparaencontrarlosarchivosconYouTube.
Pulseparaverlalistadereproducciónactual.
Pulseparaestablecerlacanciónactualcomofavorita.
PulseparacompartirsumúsicaatravésdelafunciónSmartShare.
Pulseparaajustarelmodoaleatorio.
Pulseparaajustarelmododerepetición.
Pulseparacontrolarelvolumendelamúsica.

72
Pulseparapausarlareproducción.
Pulseparareanudarlareproducción.
Pulseparapasaralasiguientepistadelálbumodelalistade
reproducción.
Pulseparavolveralprincipiodelacanción.Pulsedosvecespara
volveralacanciónanterior.
Pulseparaestablecerelefectodeaudio.
Paracambiarelvolumenmientrasestáescuchandomúsica,pulselasteclas
devolumenenelladoderechodelatableta.
Mantengapulsadacualquiercancióndelalistaparaaccederalassiguientes
opciones:Reproducir,Añadir a lista de reproducción,Compartir,Borrar,
DetallesyBuscar.
NOTA:
•Algunosformatosdearchivonosoncompatiblesenfuncióndel
softwareinstaladoeneldispositivo.
•Sieltamañodearchivoessuperioralacapacidaddememoria
disponible,puedeproducirseunerroralabrirlosarchivos.
•Elcopyrightdelosarchivosdemúsicapuedeestarprotegidopor
tratadosinternacionalesyleyesnacionales.
Portanto,puedequeseanecesarioobtenerpermisoounalicenciapara
reproducirocopiarmúsica.
Enalgunospaíses,lasleyesnacionalesprohíbenlarealizacióndecopias
dematerialprotegidoconcopyright.Antesdedescargarocopiarel
archivo,infórmesesobrelalegislaciónrelativaaestetipodematerialen
elpaíscorrespondiente.

73
QPair
AlconectarsutabletaysuteléfonomóvilmedianteQPairpodrásincronizar
lasllamadasentrantes,losmensajesylasalertasderedessocialesentresu
tabletaysuteléfonomóvil.
1 EjecuteQPair ypulseConfiguración inicial>Inicioensutableta
primero,yacontinuaciónrealicelosmismospasosensuteléfono.
SUGERENCIA:EsposiblequelaaplicaciónQPairnoseencuentre
preinstaladaenlatableta.DiríjasealaGooglePlayStore,busqueQpaire
instálela.
NOTA:QPairfuncionaconteléfonosconAndroid4.1yversiones
posteriores.Enalgunosmodelosdeteléfonociertasfuncionespodrían
estarlimitadas.
2 LaconexiónBluetoothseactivarádeformaautomática.
Herramientas

74
Funciones de QPair
Alarma de llamada–Envíaaltabletaunanotificacióncuandoelteléfono
recibeunallamada.Lanotificaciónmuestraelnúmerodelapersonaquele
llama,ylepermiterechazarlallamada.
Alarma de mensaje–Envíaaltabletunanotificacióncuandoelteléfono
recibeunmensaje.
Notificaciones SNS–Cuandoelteléfonolarecibe,apareceunanotificación
SNSenlabarradeestadodelatableta.
NOTA:Parahabilitarestafunción,primerodeberáactivarAjustes>
Accesibilidad>Notificación QPair SNSenelteléfono.Estaopciónleavisa
enlatabletadelasnotificacionesSNSquerecibeatravésdelteléfono.
Enviar QuickMemo –GuardalaQuickMemoactualenlaGaleríadela
tableta,yacontinuaciónsincronizaestaGaleríaconlaGaleríadesuteléfono.
Conexión a Internet a través del teléfono móvil–Conectaautomáticamente
eltabletaInternetatravésdelteléfonomóvil(comosisetrataradeuna
zonaWi-Fi).Elusodeestafunciónpodríaconllevarcargospordatos.Para
ahorrarelusodedatosdelteléfono,esteseconectaráautomáticamentea
cualquierzonaWi-Fideconfianzaqueseencuentredentrodesualcance.
Pegatina de aplicaciones recientes–Cuandolapantalladeldispositivo
asociadosedesbloquee,unamarcaindicarálaúltimaaplicaciónutilizadaen
elotrodispositivosidichaaplicaciónestáinstaladatantoenlatabletacomo
enelteléfono.
QSlide
LafunciónQSlidecreaunapantallasuperpuestasobrelapantalladela
tableta,parafacilitarleelusodelafunciónmultitarea.Lasventanasde
QSlidepuedenabrirsedesdelabarradeaplicacionesdeQSlidedelpanel

75
denotificaciones,odirectamentedesdeaquellasaplicacionescompatibles
conlafunciónQSlide.
O
PulseparaejecutarQSlide.
PulseparasalirdeQSlideyvolveralmododeventanaa
tamañocompleto.
Pulseparaajustarlatransparencia.
PulseparasalirdeQSlide.
Pulseparaajustareltamaño.
NOTA:lafunciónQSlideadmitehastadosventanasalavez.QSlidesolo
puedeutilizarseconlasaplicacionesVídeo,Internet,Notas,Calendario,
Calculadora,E-mail,Administradordearchivos.
1 Abraelpaneldenotificacionesypulselaaplicaciónquedeseeenla
secciónAplicaciones QSlide.
O
MientrasusaunaaplicacióncompatibleconQSlide,pulse .Lafunción
semostrarádeformacontinuaenunapequeñaventanaenlapantalla.

76
2 Deslice paraajustarelniveldetransparencia.Arrastrelabarrade
títulodeQSlideparamoverlaaotraposicióndelapantalla.
QuickMemo
LafunciónQuickMemolepermitetomarnotasyhacercapturasdepantalla.
Podrácapturarpantallas,dibujarenlasmismasycompartirlasconfamiliares
yamigosconlafunciónQuickMemo.
Creación de una nota rápida
1 AccedaalafunciónQuickMemo,deslice
labarradeestadohaciaabajoypulse
.
O
Pulselasdosteclas de volumenal
mismotiempoduranteunsegundo.
2 Seleccionelaopcióndemenúdeseada
entreTipo Bolígrafo, ColoryBorrador.A
continuación,creeunanota.

77
3 Toque paraguardarlanota.Para
salirdeQuickMemoencualquier
momento,pulselatecla Atrás .
NOTA:
•uselapuntadeldedoparautilizarlafunciónQuickMemo.Noutilicela
uña.
Uso de las opciones de QuickMemo
LassiguientesopcionesestándisponiblesenlabarradeherramientasNota
rápidadelapartesuperiordelapantalla.
Pulseparaconservarlanotaactualenpantallayutilizarlatableta
alavez.
Seleccionesideseautilizarlapantalladefondo.
Lepermitedeshaceryrehaceraccionesanteriores.
Seleccioneeltipodelápizyelcolor.
Borralanotacreada.
Pulseparaenviarsunotaaotrosoparacompartirlaatravésde
losserviciosderedessociales.
GuardalanotaenlaLibreta de notasola Galería.

78
Visualización de las notas rápidas
Desdelapantalladeinicio,pulseAplicaciones >Galería yseleccione
elálbumQuickMemo.
QuickRemote
QuickRemoteconviertesutabletaenunmandouniversalparacontrolarsu
televisor,DVDoBlu-ray.
NOTA: esposiblequeQuickRemotenoestédisponibleparaalgunos
dispositivosyáreas.
Para acceder a la aplicación QuickRemote y configurarla
1 Enlapantalladeinicio,toqueAplicaciones >fichaAplicaciones>
QuickRemote .
TambiénpuederealizarlaconfiguracióninicialdelQuickRemotedesdeel
paneldenotificaciones.Deslicelabarradeestadohaciaabajoytoqueel
iconodeQuickRemote .
2 Pulse paraseleccionaruntipodesalaypulse paraañadir
eldispositivo.

79
3 Seleccioneeltipoylamarcadeldispositivo,acontinuaciónsigalas
instruccionesenpantallaparaconfigurareldispositivo.
NOTA:
QuickRemotefuncionacomounmandoadistancianormalcon
señalasinfrarrojas(IR)desuregiónopaís.Tengacuidadodenocubrirel
sensordeinfrarrojosdelapartesuperiordelatabletacuandouselafunción
QuickRemote.Esposiblequenoseadmitaestafuncióndependiendodel
modelo,elfabricanteylaempresaqueofreceelservicio.
Utilización de QuickRemote
1 Enlapantalladeinicio,pulseAplicaciones >QuickRemote
paraabrirlabarraQuickRemotecontodoslosmandosadistancia
configurados.
2 Seleccioneelmandoadistanciaquedeseepulsandosutipo/nombreen
lapartesuperiordelabarraQuickRemote.
3 Pulselosbotonesdelmandoadistanciamostrado.
NOTA:alañadirunmandoadistanciadetelevisor,QuickRemotepuede
usarelbotónEntradaparaconfigurarelmandoadistanciaadecuado.La
fuentedeentradadeltelevisorsepuedecambiaralconfigurarelbotón
ENTRADA.Pararestablecerlafuentedeentradadesutelevisor,pulseel
botónENTRADAdeQuickRemotevariasveces(enfuncióndelnúmerode
dispositivosconectadosaltelevisor).
Opciones de QuickRemote
ParaaccederalmenúOpcionesdeQuickRemote,pulselatecla Menú
(enlabarraTeclatáctilfrontal)paraseleccionarlaopciónquedesee.

80
NOTA:sipulsaunbotóndelQuickRemotedurantelareproducciónde
músicaensegundoplano,sesilenciaráduranteunsegundo.
QuickTranslator
Apunteconlacámaradesutabletaalafrasequedeseetraducirasu
idioma.Puedeobtenerunatraducciónentiemporealencualquiermomento
ylugar.
EnlaGooglePlayStorepuedecomprarmásdiccionariospararealizar
traduccionescuandoestédesconectado.
Idiomadeorigen.
Idiomadedestino.
CambiaalmodoVoz.Toqueel
botóndeidiomayhable.
Traduccióndeunapalabraescrita.
Traduccióndeunafraseescrita.
Traduccióndeunpárrafo.
Accedealosajustesde
QuickTranslator.Aquípuededefinir
losidiomasdeorigenydedestino.
1 Pulse >fichaAplicaciones>QuickTranslator .
2 PulsePalabra,LíneaoPárrafo.
Toqueelformatodetraducción.Elijaentre ,Palabra,LíneaoPárrafo.
3 ToqueeliconoAjustes ydefinalosidiomasdeorigenydedestino.

81
4 Apuntelatabletaunossegundoshaciaelobjetivoquedeseetraducir.
NOTA:sóloseproporcionaundiccionariodeformagratuita.Sidesea
diccionariosadicionales,deberácomprarlosporseparado.Enlalistasiguiente,
seleccioneeldiccionarioquedeseainstalarcomodiccionariocomplementario.
NOTA:enfuncióndeltamaño,elcolor,elbrilloyelángulodelasletras
deltextoquesedeseetraducirpuedequeexistaalgunadiferenciaenla
tasadereconocimiento.
Voice Mate
PuedesolicitaraVoice Matequerealicefuncionesdetabletamedianteel
usodesuvoz,comoporejemploestableceralarmasorealizarbúsquedas
enlaweb.LaprimeravezqueaccedeaVoiceMatesemuestrainformación
deayudaparaayudarleaaprenderausarestafunción.
Para abrir la aplicación Voice Mate
•Enlapantalladeinicio,pulseAplicaciones >Voice Mate .
Utilización de la aplicación Voice Mate
1 AbralaaplicaciónVoice Mate.
2 PulseeliconoSpeakicon (delaparteinferiordelapantalla)para
activarla.Digaloquedeseaquerealice.
• Sidice“Despiértamealas6delamañana",VoiceMateajustarála
alarmaaesahora.
NOTA:accedaalosajustesdeVoiceMateparaactivarlaopciónOmitir
confirmación,paraquelassolicitudesquecoincidanconunnúmeroo
nombreexactoseejecutensinnecesidaddeconfirmación.

82
Iconos de Voice Mate
EnlaparteinferiordelapantallasemuestranlossiguientesiconosdeVoice
Mate:
• PulseparamostrarlaventanaQSlidedeVoiceMateenlapantallade
inicio.
• Pulseparadecirelcomandodevozquedeseaejecutar.
• Pulseparaescribirelcomandoquedeseaejecutar.
Menú Opciones de Voice Mate
Pulselatecla Menú paraaccederalmenúOpcionesparaseleccionar
AjustesoAyuda.
NOTA:
•SielajustedeidiomadeVoiceMatenoeselmismoqueelajustede
idiomapredeterminadodesutableta,algunoscomandos,comopor
ejemplolosdeiniciodeaplicaciones,nofuncionarán.
•Alintroducirtextosolopuedeusarletrasonúmeros.
•VoiceMatereconocesuvozmejorsihablalentamente.
•Puedeverejemplosdedistintoscomandosdeslizandolapantalla
principaldeVoiceMatehacialaizquierda.
Alarma
Definir una alarma
1 Enlapantalladeinicio,pulseAplicaciones >fichaAplicaciones>
Alarma > .
2 Establezcalahoradelaalarmaquedesee.

83
3 EstablezcaRepetir,Repetición de alarmas,Vibración,Tono de alarma,
Volumen de alarma,Inicio automático de aplic.,Desbloqueo Inteligente y
Nota.
4 PulseGuardar.
NOTA:paracambiarlosajustesdelaalarmaenlapantallaquecontiene
lalistadealarmas,pulselatecla Menú
yseleccioneAjustes.
Calculadora
Uso de la calculadora
1 Enlapantalladeinicio,pulseAplicaciones >fichaAplicaciones>
Calculadora .
2 Pulselasteclasnuméricasparainsertarnúmeros.
3 Pararealizarcálculossimplestoquelafunciónquedesearealizar
( , , o )seguidode .
NOTA:
•Pararealizarcálculosmáscomplejos,toquelatecla Menú
,
seleccionelaCalculadora científicay,acontinuación,elijalafunciónque
desee.
•Paraverelhistorialdecálculos,pulselatecla Menú
>Historial de
cálculo.
Calendario
Adición de eventos al calendario

84
1 Enlapantalladeinicio,pulseAplicaciones >fichaAplicaciones>
Calendario .
2 Pulseelbotónsuperiorizquierdoparacambiarlavistadelcalendario
(Día(s),Semana,Mes,Año,Agenda,LifeSquare).
3 Pulselafechaenlaquedeseaagregaruneventoypulse .
4 PulseNombre del eventoyescribaelnombredelevento.
5 PulseelcampoUbicacióneintroduzcalaubicación.Compruebelafecha
eindiquelahoraalaquedeseaqueempieceyfinaliceelevento.
6 Sideseaañadirunanotaalevento,pulseelcampoDescripciónyescriba
losdetalles.
7 Sidesearepetirlaalarma,seleccioneREPETICIÓNyestablezca
RECORDATORIOSsiesnecesario.
8 PulseGuardarparaguardareleventoenelcalendario.
NOTA:mantengapulsadounpuntodelcalendarioparaguardar
rápidamenteuneventodecalendarioendichafecha.Solotendráque
introducirelnombreylahoradeleventoytocarGuardar.Puedetocar
Detalleseintroducirmásinformación,opuedeactualizareleventocon
detallesadicionalesmásadelante.
Tareas
LaaplicaciónTareaspuedesincronizarseconsucuentadeMSExchange.
Puedecrearygestionarsustareasconsutableta,odesdeMSOutlooko
MSOfficeOutlookWebAccess.
1 Enlapantalladeinicio,toqueAplicaciones>Tareas .
2 ToqueeliconoAñadirtarea (enlaesquinasuperiorderechadela
pantalla).

85
3 IntroduzcaelAsunto,VENCIMIENTO,DESCRIPCIÓN,REPETICIÓNy
AVISO,segúndesee.
4 ToqueGuardar.
Gestor archivos
LaaplicaciónGestor archivoslepermiteadministrararchivosensu
almacenamientointerno/externo.
Para abrir la aplicación Administrador de archivos
•Enlapantalladeinicio,pulseAplicaciones >Gestor archivos .
Grabadora
Utilicelagrabadoradevozparagrabarnotasdevozuotrosarchivosde
audio.
Grabar sonido o voz
1 Enlapantalladeinicio,pulseAplicaciones >fichaAplicaciones>
Grabadora .
2 Pulse paraempezarlagrabación.
3 Pulse parafinalizarlagrabación.
4 Pulse paraescucharlagrabación.
NOTA:pulse paraaccederasulistadegrabaciones.Podrá
escucharlasgrabacionesguardadas.Eltiempodegrabacióndisponible
podríadiferirdeltiempodegrabaciónreal.

86
Enviar la grabación de voz
1 Unavezfinalizadalagrabación,puedeenviarelclipdeaudiopulsando
.
2 Elijaentrecualquieradelosmétodosdisponibledeusocompartido.
Administrador de tareas
PuedeadministrarsusaplicacionespormediodelAdministradordetareas.
Puedecomprobarfácilmenteelnúmerodeaplicacionesqueseestán
ejecutandoactualmenteycerrarlasquedesee.
Opciones del Administrador de tareas
•PulsePararparadetenerlasaplicacionesdeunaenuna.
•PulseDetener todoparadetenertodaslasaplicacionesqueseestán
ejecutandoactualmente.
•Pulselatecla Menú paraaccederaAyuda,OrdenarporyAjustes.
POLARIS Office 5
POLARISOffice5esunasoluciónprofesionaldeMobileOfficeque
permitealosusuariosvisualizarcómodamentevariostiposdedocumentos
deOffice,incluidosarchivosdeWord,ExcelyPowerPoint,encualquier
momentoylugarmediantesudispositivomóvil.
Creación de un nuevo documento
1 Enlapantalladeinicio,pulseAplicaciones >fichaAplicaciones>
POLARIS Office 5 .
2 RegistresudireccióndeE-mailenlapáginaRegistro.
NOTA:podrápulsarOmitirparanointroducirlainformaciónderegistro.

87
3 Pulse paracrearunnuevodocumento.
4 Pulseunodelostiposdedocumentodelalistadesplegable,ya
continuaciónelijaunaplantilla.
5 Introduzcaelcontenidoeneldocumentoconlasherramientasdelaparte
superiordelapantallayconeltecladoenpantalla.
6 Cuandohayaterminadodetrabajareneldocumento,pulse (enla
esquinasuperiorizquierdadelapantalla)y,acontinuación,pulseGuardar
eintroduzcaelnombredeldocumento.
Ver y editar un documento en el dispositivo
Ahorapodrávisualizaryeditarfácilmenteunaampliavariedaddetiposde
archivo,incluyendodocumentosdeMicrosoftOfficeyAdobePDF,desdesu
dispositivo.
PulselafichadeundocumentodeOfficeenlapartesuperiordelapantalla
parabuscardocumentosensutableta.
Pulseeldocumentoquequiereveroeditar.
AlvisualizardocumentosconPOLARISOffice5,losobjetosyeldiseñoson
idénticosalosdeldocumentooriginal.
Paraeditarlos,pulse .
Google+
UtilicelaaplicaciónGoogle+paramantenerelcontactoconlagenteatravés
delservicioderedessocialesdeGoogle.
Enlapantalladeinicio,pulseAplicaciones >fichaAplicaciones>
Google+ .
NOTA:enfuncióndesuregiónydesuproveedordeservicios,esposible
queestaaplicaciónnoestédisponible.

88
Búsqueda por voz
LaaplicaciónBúsquedadevozlepermitebuscarpáginaswebconlavoz,en
lugardetenerqueescribir.
1 Enlapantalladeinicio,pulseAplicaciones >fichaAplicaciones>
Búsqueda por voz .
2 DigaunapalabraounafrasecuandosemuestreHablar ahoraenla
pantalla.Seleccioneunadelaspalabrasclavesugeridasquesemuestran.
NOTA:enfuncióndesuregiónydesuproveedordeservicios,esposible
queestaaplicaciónnoestédisponible.
Descargas
UtilicelaaplicaciónDescargasparaverlosarchivosquehadescargado.
Enlapantalladeinicio,pulseAplicaciones >fichaAplicaciones>
Descargas .
Box
LaaplicaciónBoxlefacilitalatareadeaccederasusarchivosyeditarlos,
compartircontenidoymantenerseconectadoasusarchivos,desde
cualquierlugaryconcualquierdispositivo.
Para abrir la aplicación Box
EnlapantallaInicio,pulseAplicaciones >fichaAplicaciones>Box .

89
Internet
UtiliceestaaplicaciónparanavegarporInternet.Graciasalnavegadorpodrá
accederrápidamentedesdesutabletaaunmundoatodocolordejuegos,
música,noticias,deporte,entretenimientoymuchomás,encualquierlugary
sobrecualquiertema.
Enlapantalladeinicio,pulseAplicaciones >fichaAplicaciones>
Internet .
Pulseesteiconopararetrocederunapágina.
Pulseesteiconoparairalasiguientepáginaalaquesehaya
conectadodespuésdelapáginaactual.Estoeslocontrariodelo
queocurrecuandopulsalatecla Atrás ,queledevuelveala
páginaanterior.
Pulseesteiconoparaaccederalapáginadeinicio.
Pulseesteiconoparaañadirunanuevaficha.
Pulseesteiconoparaaccederalosfavoritos.
PulseparaejecutarQSlide.
Pulseparacerrarlafichaactual.
Pulseparaactualizarodetenerlapáginaactual.
La web

90
Apertura de una página
•Paraabrirunanuevapágina,pulse .
•Parairaotrapáginaweb,pulselapáginaparaverla.
Búsqueda por voz en la web
Pulseelcampodedirecciónweb,pulse ,digaunapalabraclavey
seleccioneunadelasqueselesugieren.
NOTA:enfuncióndesuregiónydesuproveedordeservicios,esposible
queestafunciónnoestédisponible.
Favoritos
Paraabrirunapáginawebquehaañadidoamarcadores,pulse enla
barradeherramientasdelnavegadoryseleccioneunadeellas.
Historial
Pulse enlabarradeherramientasdelnavegadoryseleccionelaficha
Historialparaabrirunapáginawebdelalistadepáginaswebvisitadas
recientemente.Paraborrarelhistorial,pulselatecla Menú >Borrar
historial.
Utilización de QSlide
UtiliceestafunciónparaaccederaInternetsincerrarlaaplicaciónactual.
Mientrasvisualizaelcontenidoenelnavegador,pulse .Acontinuación,
puedebuscarotrainformaciónenlatableta.Paraverelnavegadoren
pantallacompleta,toque .

91
Chrome
UtiliceChromeparabuscarinformaciónynavegarporpáginasweb.
Enlapantalladeinicio,pulseAplicaciones >fichaAplicaciones>
Chrome .
NOTA:enfuncióndesuregiónysuproveedordeservicios,esposible
queestaaplicaciónnoestédisponible.
Visualización de páginas web
Toqueelcampodedirección(enlapartesuperiordelapantalla),escriba
unadirecciónwebocriteriosdebúsqueda,ytoque enelteclado.
Apertura de una página
•Parairaunanuevapágina,pulse .
•Parairaotrapáginaweb,pulselapáginaquedeseeparaseleccionarla.
Búsqueda por voz en la web
Pulseelcampodedirección,pulse ,digaunapalabraclaveyseleccione
unadelasqueselesugieren.
NOTA:estafunciónpuedenoestardisponiblesegúnlazonageográficao
elproveedordeservicios.
Sincronización con otros dispositivos
SincronicelasfichasabiertasylosfavoritosparautilizarlosconChromeen
otrodispositivodespuésdehaberiniciadosesiónenlamismacuentade
Google.

92
Paraverlasfichasabiertasenotrosdispositivos,pulselatecla Menú >
Otros dispositivos.PuedeiniciarsesiónenlamismacuentadeGoogleen
todoslosdispositivos.Seleccionelapáginawebquedeseeabrir.
Agregar marcadores y acceder a ellos
Paraañadirmarcadores,pulse .
Paraabrirunapáginawebañadidaamarcadores,pulselatecla Menú
>Marcadores.
Menú Opciones de Chrome
•Nueva pestaña:toqueestaopciónparacrearunanuevapestañadepágina
web.
•Nueva pestaña incógnito:toqueestaopciónparacrearunanuevapestaña
denavegacióndeincógnito.
•Marcadores:muestralaspáginaswebquesehanañadidoamarcadores.
•Otros dispositivos:muestralaspáginaswebabiertasenotrosdispositivos.
•Historial:muestralosdatosdenavegación(páginaswebquehavisitado).
•Compartir...:permitecompartirlaURL.
•Imprimir...:toqueestaopciónparaimprimirlaimagen.Elijasidesea
buscarautomáticamenteunaimpresoraensured,osideseaintroducir
manualmentelaquedeseausar.
•Buscar en la página...:lepermitebuscartextoenlapáginawebactual.
•Ver como en un orde...: marqueestaopciónparaaccederalsitiowebpara
ordenadoresalverpáginaswebdesdelatableta.
•Ajustes:lepermitemodificarlosajustesespecíficosdelaaplicación
Chrome.
•Ayuda:muestrainformaciónsobreelusodelaaplicaciónChromeenla
tableta.

93
Acceso al menú Ajustes
1 Enlapantalladeinicio,pulseAplicaciones >fichaAplicaciones>
Ajustes .
O
Enlapantalladeinicio,pulselatecla Menú >Ajustes del sistema.
2 Seleccioneunacategoríadeajustesy,acontinuación,unaopción.
REDES INALÁMBRICAS
Wi-Fi
Wi-Fi:conestaopciónseactivalafunciónWi-Fiparaconectarsealasredes
Wi-Fidisponibles.
ListadetodaslasredesWi-Fialasquesehaaccedido.Toqueunadeellas
paraconectarse.
NOTA:toqueBuscar(enlaparteinferiordelapantalla)parabuscarlas
redesWi-Fidisponibles.
ToquelateclaMenú enelmenúWi-FiparaaccederalmenúOpciones
deWi-Fi:
Botón WPS:informaciónparaconectaraunaredWi-Fiprotegidamediante
lapulsacióndeunbotónWPS.
Entrada de Pin de WPS:informaciónparaconectaraunaredWi-Fi
protegidamedianteunPINWPS.
Añadir red:lepermiteintroducirunaredWi-Finuevamanualmente.
Ajustes

94
Wi-Fi Direct:permiteconexióndirectacondispositivosWi-Fisinnecesidad
depuntodeacceso.
Wi-Fi avanzado:accedealossiguientesajustesdeWi-Fiavanzados.
Tutorial interactivo:muestratutorialesútilessobrelafunciónWi-Fi.
SUGERENCIA: Cómo obtener la dirección MAC
Paraconfigurarunaconexiónenalgunasredesinalámbricasconfiltro
MAC,tendráqueintroducirladirecciónMACdelatabletaenelrouter.
PuedeencontrarladirecciónMACenlasiguienteinterfazdeusuario:en
lapantalladeinicioAplicaciones
>Ajustes >Wi-Fi>tecla Menú
>Wi-Fi avanzado>Dirección MAC.
Bluetooth
ActiveydesactivelafuncionalidadinalámbricaBluetooth.Activado:le
permiteasociaryconectarsudispositivoaotrosdispositivosBluetooth.
ToquelateclaMenú enelmenúBluetoothparaaccederalmenú
OpcionesdeBluetooth.
Editar nombre de la tableta:permitecambiarelnombredelatabletapara
facilitarsuidentificaciónalasociarlayconectarla.Escribaelnuevonombre
desutabletay,acontinuación,toqueGuardar.
Tiempo visible:estableceelperiododetiempoduranteelqueotros
dispositivosBluetoothpuedenversutabletaparaasociarseyconectarse.
Elijaentre2minutos,5minutos,1horayNunca agotar el tiempo.
Mostrar archivos recibidos:muestraunalistadelosarchivosqueharecibido
atravésdelaconexiónBluetooth.
Tutorial interactivo:muestratutorialesútilessobrelasfuncionesdela
conexiónBluetooth.

95
Servidor multimedia:permitecompartircontenidomultimediacon
dispositivoscercanosatravésdelatecnologíaDLNA.
Uso de datos
Muestraelusodedatos.
Más opciones
Permitecompartircarpetasconotrosdispositivosatravésdeunaconexión
inalámbrica.
Modo avión:activelacasilladeverificacióndeModo aviónparaactivarlo.
AlactivarelModoavión,sedeshabilitarántodaslasconexionesinalámbricas.
Almacenamiento inalámbrico:permitegestionarlosarchivosdelatabletaen
elordenadorocopiararchivosdelordenadoraltabletasinconexiónUSB.
Asegúresedequelatabletayelordenadorseencuentrenconectadosala
mismared.
Acontinuación,introduzcalasdireccioneswebmostradasenlatabletaenla
barradedireccionesdelnavegadordesuordenador.
Miracast:reproducelapantallayelsonidodesutabletaenuntelevisoro
dispositivodeseguridaddeformainalámbrica.
SmartShare Beam:Activeestaopciónpararecibircontenidomultimediaa
travésdeSmartShareBeamdesdetabletasoteléfonosLG.
Servidor de media:permitecompartircontenidomultimediacondispositivos
cercanosatravésdelatecnologíaDLNA.
VPN:muestralalistaderedesprivadasvirtuales(VPN)quesehan
configuradoanteriormente.PermiteagregardistintostiposdeVPN.
NOTA:debeestablecerunPINdebloqueodepantallaounacontraseña
antesdepoderusarelalmacenamientodecredenciales.

96
DISPOSITIVO
Sonido
Perfil de sonido:puedeseleccionarentreSonido,VibraciónoSilencio.
Controles de Volumen:puedeadministrarelvolumendelsonidode
notificación,delarespuestaapulsaciónysistema,delamúsica,delos
vídeos,delosjuegosydeotrocontenidomultimedia.
Notificaciones:lepermiteajustareltonodenotificaciónpredeterminado.
Sonido al tocar:permiteconfigurarelteléfonoparaquereproduzcaun
sonidocuandopulselosbotones,iconosuotroselementosenpantallaque
reaccionanalapulsación.
Sonido bluqueo pantalla:lepermiteconfigurarlatabletaparaque
reproduzcaunsonidoalbloquearydesbloquearlapantalla.
Vibrar al tocarlo:lepermiteestablecerrespuestadevibraciónalas
pulsacionesdelapantalladelatableta.
Pantalla
Pantalla de inicio
Tema:estableceeltemadelapantalladesudispositivo.
Fondo de pantalla:estableceelfondodepantallaqueseusaráensu
pantalladeinicio.
Efecto de pantalla:estableceelefectocuandodesliceparacambiar
pantallas.
Dseplazar pantalla de inicio circularmente:activeestaopciónpara
establecerlaspantallasdeinicioendesplazamientocontinuosintener
quedesplazarhacialadirecciónopuestacuandolleguealfinal.
Copia de seguridad y restaurar:lepermiterealizarunacopiadeseguridad
yrestaurarlasconfiguracionesytemasdeaplicacionesywidgets.

97
Do you know?:habiliteestaopciónparamostrarlapáginadeayudaDo
you know?enunapantalladeinicioadicional.
Ayuda:muestrainformaciónsobreelfuncionamientodelapantallade
inicio.
Bloqueo de pantalla
Tipo de bloqueo:estableceuntipodebloqueodepantallaparaproteger
latableta.Abreunaseriedepantallasqueleguíaenlacreacióndeun
patróndedesbloqueodepantalla.Sitienehabilitadoeltipodebloqueo
patrón,cuandoenciendalatabletaoactivelapantalla,selesolicitaráque
creedibujeelpatróndedesbloqueoparadesbloquearlapantalla.
Efecto de pantalla:establecelasopcionesdeefectodepantalla.
Animación meteorológica:activeestaopciónparamostrarunaanimación
meteorológicadelaubicaciónactualodelaciudadprincipalestablecida
enTiempobasadaenactualizacionesdedatosautomáticas.
Fondo de pantalla:estableceelfondodepantalladelapantallade
bloqueo.SelecciónelodeGaleríaoGalería de fondos de pantalla.
Accesos directos:lepermitecambiarlosaccesosdirectosenlapantalla
de bloqueo de deslizamiento.
Mensaje personal:activeestaopciónparamostrarelnombredel
propietarioenlapantalladebloqueo.Pulseparaintroducireltextoquese
mostrarácomomensajepersonal.
Sólo vista vertical:activeestaopciónparamostrarsiemprelapantallade
bloqueoenlavistavertical.
Temporizador de bloqueo:estableceeltiempoquetranscurriráhastaque
lapantallasebloqueeautomáticamenteunavezseexcedaeltiempode
espera.
Botón de encendido para bloquear:activeestaopciónparabloquearla
pantallaalinstantecuandosepulselatecladeencendido/bloqueo.Este
ajusteanulaelajusteTemp.bloqueosegur.

98
Brillo: permiteajustarelbrillodelapantalla.
Tiempo espera pantalla: ajusteeltiempodeesperadelapantalla.
KnockON: activeestaopciónparapermitirquelafunciónKnockON
enciendayapaguelapantalla.Pulsedosvecesrápidamenteelcentrodela
pantallaparaencenderla.Pulsedosveceslabarradeestado,unáreavacía
enlapantalladeinicioolapantalladebloqueoparaapagarlapantalla.Para
obtenermejoresresultados,nomuevalatabletamientrasusalafunción
KnockON.
Efecto apagar pantalla: defineelefectodeapagadodelapantalla.
Pantalla giratoria: permiteajustarlaorientaciónautomáticamentealgirarla
tableta.
Protector de pantalla: pulseelbotónDaydreamparaactivarloydesactivarlo.
Activadopermitequeelprotectordepantallaajustadosemuestremientras
latabletaestáenmododesuspensióncuandoestácolocadaeneldocko
cargando.ElijaentreAlarmas,Colores,GoogleFotos,MarcodefotosyTabla
defotos.
NOTA:Lacargapuederalentizarsemientraselsalvapantallasestá
activado.
Tipo de fuente: permitecambiareltipodefuentedelapantalla.
Tamaño de fuente: permitecambiareltamañodefuentedelapantalla.
Pantalla inteligente: mantienelapantallaencendidacuandoeldispositivo
detectaquesusojosestánmirandolapantalla.
Smart video: activeestaopciónparapausarelvídeocuandonodetectesus
ojosmirandoalapantalla.

99
Botones táctiles frontales: establezcalasteclastáctilesfrontalesmostradas
enlaparteinferiordetodaslaspantallas.Establezcalasteclasquese
mostrarán,suposiciónenlabarraysuaspecto.Seleccionelasteclasyel
orden,eltemayelfondo.
Calibración del sensor de movimiento: lepermitemejorarlaprecisióndela
inclinaciónylavelocidaddelsensor.
Almacenamiento
ALMACENAMIENTO INTERNO:muestralacantidadtotaldeespacioenla
memoriadeldispositivoyenumeraquétipodedatosestánusandoespacio.
TARJETA SD:muestralacantidadtotaldeespacioenlamemoriaenla
tarjetamicroSD.
Espacio total
Activar/Desactivar tarjeta SD:activaydesactivalatarjetamicroSDde
sutabletaparaquepuedaaccederalosdatosalmacenadosenella,
formatearlatarjetaoquitarladeformasegura.Esteajusteaparece
atenuadosinohayningunatarjetamicroSDinstalada,siyalaha
desactivadoosihaactivadolatarjetamicroSDensuteléfono.
Borrar tarjeta SD:estaopciónborrapermanentementetodoelcontenido
delatarjetamicroSDylapreparaparausarlaconlatableta.
Batería
INFORMACIÓN SOBRE LA BATERÍA:consultecuántaalimentaciónde
labateríaseusaparalasactividadesdeldispositivo.Elniveldebatería
semuestracomounporcentaje.Tambiénsemuestraeltiempodeuso
restante.
Barra de estado del porcentaje de la bateriá:muestraelporcentajedela
bateríaenlabarradeestado.

100
AHORRO DE ENERGÍA:permitegestionarlabateríacondeterminados
elementosdeahorrodeenergía.Pulseelbotón paraactivaresta
función.PulseAhorro de Energíaparaaccederalassiguientesopciones.
• Sincronización automática:desactivalasincronizaciónautomática.
• Wi-Fi:desactivalaconexiónWi-Fisinoseestánutilizandodatos.
• Bluetooth:desactivaelBluetoothsinoestáconectado.
• Vibrar al tocarlo:permitedesactivarlarespuestaaltacto.
• Brillo:permiteajustarelbrillo.
• Tiempo espera pantalla:ajustaeltiempodeesperadelapantalla.
Ayuda:pulseestaopciónparaconsultarconsejossobreelAhorrode
Energía.
Aplicaciones
Desliceaizquierdayderechaparaseleccionarunadelastresfichasdela
partesuperiordelapantallayverinformacióndetalladadelasaplicaciones
DESCARGADAS,EN EJECUCIÓNyTODAS.
Toqueunaentradaparavermásinformación,toqueForzar detencióny,a
continuación,Aceptarparadetenerla.
Deslice hacia lateral
Podráutilizareldeslizamientoconlostresdedosparaguardarlas
aplicacionesqueseencuentrenenejecuciónenlaizquierda,ohacerquese
muestrendenuevoenlapantalla.
PERSONAL
Cuentas y sincronización
Permitequelasaplicacionessincronicendatosenunsegundoplano,tanto
siestátrabajandoconellascomosino.Sidesactivaestaopción,puede
ahorrarbateríayreducir(aunquenoeliminar)elusodedatos.

101
Nube
ToqueAñadir cuentaparausarlafuncióndenube.
Usuario
Activeestaopciónparamostrarelnombredelpropietarioenlapantallade
bloqueo.Pulse paraintroducireltextoquesemostrarácomomensaje
personal.
Añadir usuario:lepermiteañadirunanuevacuentaaltabletayutilizarla
funciónmultiusuario.
Ubicación
Modo
Alta exactitud:utilizaelGPS,laconexiónWi-Fiylasredesmóvilespara
calcularsuubicación.
Ahorro de batería:utilizalaconexiónWi-Fiylasredesmóvilesparacalcular
suubicación.
Solamente sensores del dispositivo:utilizaelGPSparadetectarsu
ubicación.
SOLICITUD DE UBICACIÓN RECIENTE:muestralasaplicacionesque
recientementehansolicitadoinformaciónsobresuubicación.
SERVICIOS DE UBICACIÓN
Informes de Ubicación de Google:lepermiteverlosajustesdelocalización
deGoogle.
Seguridad
Encriptar tableta:lepermiteencriptarlosdatosdelatabletaaefectosde
seguridad.SelesolicitaráqueintroduzcaunPINocontraseñaparadescifrar
sutabletacadavezqueloencienda.

102
Encriptar almacenamiento de tarjeta SD:lepermiteencriptarlosdatosque
contengalatarjetaMicroSDaefectosdeseguridad.
Escritura de contraseña visible:muestraelúltimocarácterdelacontraseña
ocultaamedidaquelaescribe.
Administradores de dispositivos:permitevisualizarodesactivarlos
administradoresdelatableta.
Orígenes desconocidos:ajustepredeterminadoparainstalaraplicacionesque
noprocedandePlayStore.
Verificar aplicationes:nopermitiroadvertirantesdelainstalacióndeaplic.
quepuedancausardaño.
Tipo de almacenamiento: muestraeltipodealmacenamiento.
Credenciales de confianza:muestracertificadosdeautenticaciónde
confianza.
Instalar desde memoria:permiteinstalarcertificadosencriptados.
Borrar certificados:eliminatodosloscertificados.
Idioma y teclado
UtilicelosajustesdeIdiomaytecladoparaseleccionarelidiomaylaregión
deltextodelatabletayparaconfigurareltecladoenpantalla,incluidaslas
palabrasquehaañadidoaldiccionario.
Copia de seguridad y reinicio
Copia de seguridad de datos:establezcaestevalorparahacerunacopiade
seguridaddesusajustesydatosdeaplicacionesenelservidordeGoogle.
Cuenta copia seguridad:establezcalacuentaenlaquedesearealizarla
copiadeseguridaddelosdatos.
Restauración automática:definaestaopciónpararestaurarsusajustes
ydatosdeaplicación,cuandotengaquereinstalarlasaplicacionesenel
dispositivo.

103
Servicio LG Backup:realizaunacopiadeseguridaddetodalainformación
deldispositivoylarestauraencasodequesepierdanosesustituyanlos
datos.
Restaurar datos de fábrica:restablecelosajustesconlosvaloresdefábrica
yeliminatodossusdatos.Sirestablecelatabletadeestaforma,sele
solicitaráquevuelvaaintroducirlamismainformaciónquelaprimeravez
queinicióAndroid.
SISTEMA
Fecha y hora
UtilicelosajustesdeFecha y horaparaestablecercómosemostraránlas
fechas.Tambiénpuedeutilizarestosajustesparaestablecersupropiahoray
zonahorariaenvezdeobtenerlahoraactualdelaredmóvil.
Accesibilidad
UtilicelosajustesdeAccesibilidadparaconfigurarcualquiercomplemento
deaccesibilidadquehayainstaladoenlatableta.
NOTA: requierecomplementosadicionalesparapoderseleccionarlo.
TalkBack:lepermiteconfigurarlafunciónTalkBack,queayudaalas
personascondeficienciavisualmediantelaproporcióndeinstruccionesde
voz.PulseelbotónTalkBack situadoenlaesquinasuperiorderecha
delapantallaparaactivarla.PulseAjustesenlaparteinferiordelapantalla
paraajustarlaconfiguracióndeTalkBack.

104
Texto grande:marqueestaopciónparaaumentareltamañodeltexto.
Invertir color:marqueestaopciónparainvertirelcolor.
Ajuste de color:lepermitemostrarlapantallaconuncontrastedecolormás
alto.Toqueelselector paraactivarestafunción.
Zoom táctil:lepermitenampliaryreducirlaimagenpulsandolapantalla
contresdedos.
Protectores de pantalla:establezcalapantallaparaquemuestreunasombra
ennegro.
Audio mono: marqueestaopciónparapermitirqueelsonidodelos
auricularesseenrutehacialoscanalesderechoeizquierdo.
Subtítulo:permitepersonalizarlosajustesdesubtítulosparaadaptarlosalas
personascondiscapacidadauditiva.Toqueelselector paraactivaresta
función.
Tiempo de realimentación táctil:permiteajustareltiempoylasrespuestas
altacto.ElijaentreCorto,MedioyLargo.
Universal touch:active paracambiarentreactivadoydesactivado.
Ayudatáctilpuedesustituirtodoslosbotonesfísicos.
Pantalla giratoria:marqueestaopciónparapermitirqueeldispositivogirela
pantallaenfuncióndesuorientación(verticaluhorizontal).
Leer contraseñas:activeestaopciónpararecibirunaconfirmaciónverbalal
introducircontraseñas.
Acceso directo a ajustes de accesibilidad:defineaccesorápidoysencilloa
funcionesseleccionadasaltocartresveceslateclaInicio.
Salida de Texto a voz:ofreceunalecturaaudibledeltexto,porejemplo,el
contenidodemensajesdetexto.

105
Conexión a PC
Seleccionar método de conexión USB:ajusteelmodoquedesee:Cargar
tableta,Sincronizar medios (MTP),Software LGoEnviar imagen (PTP).
Preguntar al conectar:sepreguntaelmododeconexiónUSBalconectarse
aunordenador.
Ayuda:ayudaconlaconexiónUSB.
PC Suite:activeestaopciónparautilizarLGPCSuiteconlaconexiónWi-Fi.
TengaencuentaquelaredWi-Fideberáestarconectadaparapoderusar
LGPCSuiteatravésdeunaconexiónWi-Fi.
Ayuda:ayudaconelsoftwareLG.
Accesorios
Quick Cover:activalaCubiertarápidaparaactivarlaodesactivarla
automáticamente.
Almacenamiento USB Plug & Pop:establecelafunciónPlug&Popparael
almacenamientoUSB.ActiveestaopcióndelaopciónPaneldeaplicaciones
paramostrarautomáticamenteelpaneldeaplicacionesalconectaruncable
USBOTG(On-the-Go).PulseAjustes panel de aplicaciones paracambiarlas
aplicacionesquedeseehabilitar.
Auriculares Plug & Pop:establecelafunciónPlug&Popparaaudífonos.
ActiveestaopcióndelaopciónPaneldeaplicacionesparamostrar
automáticamenteelpaneldeaplicacionesalconectarunaudífono.Pulse
Ajustespaneldeaplicacionesparacambiarlasaplicacionesquedesee
habilitar.
Base Plug & Pop:ajustalasfuncionesdePlug&PopdelDock.Activeesta
opcióndelaopciónPaneldeaplicacionesparamostrarautomáticamente
elpaneldeaplicacionesalconectarundock.PulseAjustes panel de
aplicaciones paracambiarlasaplicacionesquedeseehabilitar.

106
Impresión
Lepermiteimprimirelcontenidodedeterminadaspantallas(comopáginas
webmostradasenChrome)enunaimpresoraconectadaalamismared
Wi-FiquesudispositivoAndroid.
Acerca de la tableta
Estemenúlepermitegestionarsusactualizacionesdesoftwareyverdiversa
informaciónrelacionadaconsutableta.
Nombre de la tableta:permitedefinirelnombredelatableta.
Actualizar SW:lepermitebuscaractualizacionesdeaplicacionesyde
software.
Batería:lepermiteverelestadodelabatería,elniveldebateríae
informacióndeusodelabatería.
Información de hardware:lepermiteverelnúmerodemodelo,ladirección
IP,eltiempodeencendido,elCSN,ladirecciónMACdelaWi-Fiyla
direccióndeBluetooth.
Información de software:lepermiteverlaversióndeAndroid,laversiónde
kernel,elnúmerodecompilaciónylaversióndesoftware.
Información legal: lepermiteverlaslicenciasdecódigoabiertoe
informaciónlegaldeGoogle.

107
Acerca de la copia de seguridad y restauración de los
datos del dispositivo
Serecomiendacrearyguardarregularmenteunarchivodecopiade
seguridadenelmediodealmacenamientointerno,especialmenteantesde
actualizarcualquiersoftware.Elmantenimientodeunarchivodecopiade
seguridadactualizadoenlamemoriadealmacenamientopuedepermitir
recuperarlosdatosdeldispositivosilopierde,selorobanoresultadañado
porunproblemaimprevisto.
LaaplicaciónLGCopiadeseguridadescompatibleentresmartphones
ytabletasdeLG,otrosoftwareoversionesdiferentesdeSO.Porello,al
comprarlosnuevossmartphonesytabletasdeLG,puederestauraruna
copiadeseguridaddelosdatosquetengaensuteléfonoantiguoenel
nuevo.
SitieneprecargadalaaplicaciónCopiadeseguridadensussmartphones
ytabletas,podrárealizarunacopiadeseguridadyrestaurarlamayoría
delosdatosdesusmartphone,incluidaslasaplicacionespreinstaladasy
descargadas,marcadores,entradasdelcalendario,contactos,ajustesdela
pantalladeinicioyajustesdelsistema.Tambiénpuede:
•RealizarunaLGCopiadeseguridadmanualdesudispositivo.
•Programarlascopiasdeseguridadautomáticasdesudispositivo.
•Restaurarlosdatosdeldispositivo.
Aviso: Paraevitarqueseapagueeldispositivodeformainesperada
porfaltadeenergíadurantelasoperacionesdecopiadeseguridado
restauración,asegúresedequelabateríaestécompletamentecargada.
LG Backup

108
LG Copia de seguridad de los datos de su tableta
1 Enlapantalladeinicio,pulseAplicaciones >fichaAplicaciones>LG
Backup >Copia de seguridad.
2 Activelacasilladeverificaciónqueestájuntoalosdatosdelosque
deseerealizarlacopiadeseguridad,y,acontinuación,seleccione
Siguiente.
3 EnlapantallaUbicacióndelacopiadeseguridad,pulseAlmacenamiento
internooTarjeta SDy,acontinuación,pulseInicio.
4 Cuandohayafinalizadolacopiadeseguridaddelosarchivos
seleccionados,semostraráelmensajeCopia de seguridad finalizada.
Planificación de copias de seguridad automáticas
Tambiénpuedeprogramarcopiasdeseguridadautomáticasdelosdatos
delatabletasegúnsusajustesdeplanificación.Parahacerlo,realicelos
siguientespasos:
1 Enlapantalladeinicio,pulseAplicaciones >fichaAplicaciones>LG
Backup >Copia de seguridad programada.
2 PulseCopia. seg. elementosyseleccionelacasilladeverificaciónque
aparecejuntoaloselementosdelosquedesearealizarcopiade
seguridad.
3 PulseUbicación de la copia de seguridad,pulseAlmacenamiento interno
oTarjeta SD.
4 PulseHora de la copia de seguridadparadefinirelintervaloderepetición
entreTodos los días, Semana,Cada dos semanas,MensualmenteyHecho.
5 Pulseelbotón paraactivarestafunción.

109
Restaurar los datos de la tableta
NOTA:todoslosarchivosqueesténalmacenadosenlatabletase
borraránantesdequeserestaureelarchivodecopiadeseguridad.
1 Enlapantalladeinicio,pulseAplicaciones >fichaAplicaciones>LG
Backup >Restauración y gestión de archivo.
2 EnlapantallaRestaurar,seleccioneelarchivodecopiadeseguridadque
contengalosdatosquedesearestaurar.
3 Activelacasilladeverificaciónqueestájuntoalelementoquedesee
restaurary,acontinuación,seleccioneSiguientepararestaurarloenla
tableta.
NOTA:tengaencuentaquelosdatosdelatabletasesobrescribiráncon
elcontenidodelacopiadeseguridad.
4 Sielarchivodecopiadeseguridadestáencriptado,escribalacontraseña
quecreóparaencriptarlo.
5 Cuandohayafinalizadolarestauracióndelosarchivosseleccionados,la
tabletasereiniciaráautomáticamente.
NOTA:puedeestablecerHabilitarencriptaciónparaencriptarlosarchivos
decopiadeseguridadyasídisfrutardeunaprotecciónadicional.

110
Actualización de software de la tableta
Estaopciónlepermiteactualizarcómodamenteelfirmwaredelatabletacon
laúltimaversióndesdeInternetsinnecesidaddevisitarningúncentrode
servicio.Paraobtenermásinformaciónsobrecómousarestafunción,visite:
http://www.lg.com
Elprogramadeactualizacióndelfirmwaredelatabletarequierelaatención
delusuariodurantetodoelprocesodeactualización.Antesderealizar
algunaacción,asegúresedeentendertodaslasinstruccionesynotasde
cadapaso.SiextraeelcableUSBolabateríadurantelaactualizaciónpuede
causardañosenlatableta.
Actualización inalámbrica del software de dispositivos
LG
Estafunciónlepermiteactualizarcómodamenteelsoftwaredelatableta
aunanuevaversióndeformainalámbricasintenerqueconectaruncable
dedatosUSB.EstafunciónsoloestádisponiblecuandoLGponelaversión
másrecientedelfirmwareadisposicióndesudispositivo.Enprimerlugar,
debecomprobarlaversióndelsoftwaredelatableta:
enlapantalladeinicio,pulselatecla Menú >Ajustes del sistema>
Acerca de la tableta>Información de Software.
Pararealizarlaactualizacióndelsoftwaredelatableta,enlapantallainicio,
pulselatecla Menú >Ajustes del sistema>Acerca de la tableta>
Actualizar SW>Actualización de SW>Compruebe si existe nuevo SW.
Actualización de software de la tableta

111
NOTA:LGsereservaelderechodeofreceractualizacionesdefirmware
únicamenteparamodelosseleccionadossegúnloestimeoportuno,yno
garantizaladisponibilidaddeunaversiónactualizadadelfirmwarepara
todoslosmodelosdedispositivo.
NOTA:losdatospersonales,incluidalainformaciónsobrelacuentade
Googleycualquierotracuenta,losdatosyajustesdelsistemaydelas
aplicaciones,cualquieraplicacióndescargadaylalicenciaDRMpodrían
eliminarseenelprocesodeactualizacióndelsoftwaredeldispositivo.
Porello,LGlerecomiendaquerealiceunacopiadeseguridaddesus
datospersonalesantesdeactualizarelsoftwaredelatableta.LGnose
responsabilizadelasposiblespérdidasdedatospersonales.

112
Estosaccesoriosestándisponiblesparausarseconestetableta.(Los
elementos que se describen a continuación pueden ser opcionales).
Adaptador de viaje Cable de datos
Guía de inicio
rápido
NOTA:
•UtilicesiempreaccesoriosLGoriginales.Sinolohace,lagarantíapuede
quedaranulada.
•Losaccesoriospuedenvariarenlasdistintasregiones.
Accesorios

113
Enestecapítulosedescribenalgunosproblemasquesepuedenproducir
cuandouselatableta.Parasolucionaralgunosdeellos,deberállamarasu
proveedordeservicios,aunquelamayoríadeproblemaspodrásolucionarlos
ustedmismo.
Mensaje Causas posibles Soluciones posibles
Nosepueden
establecer
aplicaciones.
Elproveedorde
serviciosnoadmite
lafunciónorequiere
registrarse.
Póngaseencontactoconsu
proveedordeservicios.
Erroralcargar
Labateríanoestá
cargada.
Carguelabatería.
Latemperatura
exterioresdemasiado
altaobaja.
Asegúresedequela
tabletaseestácargandoa
temperaturanormal.
Problemade
contacto
Compruebelaconexióndel
cargadoraltableta.
Nohaytensión
Enchufeelcargadorenuna
tomadistinta.
Cargadordefectuoso Cambieelcargador.
Cargadorerróneo
Utilicesoloaccesoriosde
LGoriginales.
Resolución de problemas

114
Mensaje Causas posibles Soluciones posibles
Nosepueden
recibir/enviar
fotos
Memoriallena
Borrealgunasimágenesde
latableta.
Losarchivosno
seabren
Formatodearchivo
nocompatible
Compruebelosformatosde
archivoadmitidos.
Sinsonido Mododevibración
Compruebeelestadode
configuracióndelmenú
desonidoparaasegurarse
dequenoestáenmodo
silencioodevibración.

User Guide
ENGLISH
• Screendisplaysandillustrationsmaydiffer
fromthoseyouseeonactualdevice.
• Someofthecontentsofthisguidemay
notapplytoyourdevice,dependingon
thesoftwareandyourserviceprovider.All
informationinthisdocumentissubjectto
changewithoutnotice.
• Thisdeviceisnotsuitableforpeoplewho
haveavisualimpairmentduetothetouch
screenkeyboard.
• Copyright©2014LGElectronics,Inc.All
rightsreserved.LGandtheLGlogoare
registeredtrademarksofLGGroupandits
relatedentities.Allothertrademarksare
thepropertyoftheirrespectiveowners.
• Google™,GoogleMaps™,Gmail™,
YouTube™,Hangouts™andPlayStore™are
trademarksofGoogle,Inc.

2
About this user guide ......................... 5
About this user guide ........................... 5
Trademarks ............................................. 5
DivX HD .................................................. 6
Dolby Digital Plus .................................. 6
Guidelines for safe and efficient
use ......................................................... 7
Important notice ................................17
Getting to know your device ............ 21
Tablet Overview ..................................... 21
Charging your tablet ...........................23
Optimizing Battery Life ......................24
To extend the life of your battery ........24
To view the battery charge level ......... 25
To monitor and control what uses
the battery ................................................... 25
Inserting a microSD card ....................25
Removing the microSD card ..............26
Formatting the microSD card ............27
Locking and unlocking the screen.....27
Your Home screen .............................28
Touch Screen tips ................................28
Tap or touch ............................................... 28
Touch and hold ......................................... 28
Drag ............................................................... 28
Swipe or slide ............................................. 29
Double-tap .................................................. 29
Pinch-to-Zoom ......................................... 29
Rotate the screen ..................................... 29
KnockON ..................................................... 30
Home screen ........................................30
Customizing the Home screen .......... 32
Returning to recently-used
applications ..........................................32
Notifications .........................................33
Swipe down for notifications &
settings ......................................................... 33
Quick Settings on Notification
Panel ............................................................. 34
To rearrange Quick Setting items
on the Notification Panel ....................... 34
QSlide apps on the Notifications
panel ............................................................. 34
Using the QSlide apps ........................... 35
Indicator icons on the Status Bar ...... 35
Multiple Users ......................................36
Slide Aside ............................................38
Plug & Pop ...........................................38
Capturing a Screenshot ......................39
Using QuickMemo to capture a
screenshot .................................................. 39
Using Capture plus to capture a
screenshot .................................................. 39
Entering Text.........................................40
Entering accented letters ...................... 40
Google account setup ....................... 41
Connecting to Networks and
Devices .............................................. 42
Table of contents

3
Wi-Fi .....................................................42
Connecting to Wi-Fi networks ............ 42
Turning Wi-Fi on and connecting
to a Wi-Fi network .................................... 42
Bluetooth ..............................................43
Turning on Bluetooth and pairing
up your tablet with a Bluetooth
device ........................................................... 43
Send data using the Bluetooth
wireless feature .......................................... 44
Receive data using the Bluetooth
wireless feature .......................................... 44
SmartShare ..........................................45
Enjoying the content via a variety of
devices ......................................................... 45
Playing/Sending ....................................... 45
Enjoying the content from Nearby
devices ..................................................45
Connecting devices ................................ 45
Searching other devices........................ 46
Using the content from the Cloud ....46
Using the Cloud ....................................... 46
PC connections with a USB cable .....46
Transferring music, photos and
videos using the USB mass
storage mode ............................................ 46
Synchronize with Windows Media
Player .............................................................47
Contacts ............................................ 48
Searching for a contact ......................48
Adding a new contact .........................48
Favorite Contacts .................................48
Creating a group ..................................49
E-mail ................................................ 50
Managing an E-mail account .............50
Working with account folders .............51
Composing and sending E-mail .........51
Receiving emails ...................................51
Camera ...............................................52
Getting to know the viewfinder .......... 52
Using the advanced settings ..............53
Taking a quick photo ..........................54
Once you've taken a photo .................55
Viewing your saved photos .................56
Video camera ..................................... 57
Getting to know the viewfinder ..........57
Using the advanced settings ..............58
Recording a quick video .....................59
After recording a video .......................59
Watching your saved videos ...............60
Adjusting the volume when
viewing a video .....................................60
Multimedia ..........................................61
Gallery ....................................................61
Viewing pictures .........................................61
Zooming in and out ................................ 62
Playing videos ............................................ 62
Deleting images and videos ................ 62
Setting as wallpaper ................................ 62
Slideshow ..............................................63
Videos ...................................................63
Playing a video .......................................... 63
Music .....................................................64
Playing a song ........................................... 64

4
Tools ....................................................67
QPair ..................................................... 67
QSlide ...................................................68
QuickMemo .......................................... 70
QuickRemote ........................................71
QuickTranslator .................................... 73
Voice Mate ............................................75
Alarm ..................................................... 76
Calculator ............................................. 76
Calendar ............................................... 77
Tasks ......................................................78
File Manager ........................................78
Voice Recorder .....................................78
Task Manager ....................................... 79
POLARIS Office 5 ..............................79
Google+.................................................80
Voice Search ..........................................81
Downloads .............................................81
Box..........................................................81
The Web .............................................82
Internet..................................................82
Opening a page ....................................... 82
Searching the web by voice................. 83
Bookmarks .................................................. 83
History ........................................................... 83
Using QSlide .............................................. 83
Chrome .................................................83
Viewing web pages ................................. 84
Opening a page ....................................... 84
Searching the web by voice................. 84
Syncing with other devices ...................84
Adding and Viewing bookmarks .......84
Chrome Options menu ......................... 85
Settings ..............................................86
Access the Settings menu .................86
WIRELESS NETWORKS ....................86
DEVICE .................................................89
PERSONAL .......................................... 93
SYSTEM ................................................ 95
LG Backup ..........................................99
About backing up and restoring
device data ...........................................99
LG Backup your tablet data ..............100
Scheduling automatic backups .......100
Restoring tablet data ........................100
Tablet software update ................... 102
Tablet software update .....................102
LG Tablet Software update via
Over-the-Air (OTA) ............................102
Accessories ......................................104
Troubleshooting ...............................105

5
About this user guide
•Beforeusingyourdevice,pleasecarefullyreadthismanual.Thiswillensure
thatyouuseyourdevicesafelyandcorrectly.
•Someoftheimagesandscreenshotsprovidedinthisguidemayappear
differentlyonyourtablet.
•Yourcontentmaydifferfromthefinalproduct,orfromsoftwaresupplied
byserviceprovidersorcarriers,Thiscontentmaybesubjecttochange
withoutpriornotice.Forthelatestversionofthismanual,pleasevisitthe
LGwebsiteatwww.lg.com.
•Yourdevice'sapplicationsandtheirfunctionsmayvarybycountry,region,
orhardwarespecifications.LGcannotbeheldliableforanyperformance
issuesresultingfromtheuseofapplicationsdevelopedbyprovidersother
thanLG.
•LGcannotbeheldliableforperformanceorincompatibilityissuesresulting
fromeditedregistrysettingsbeingeditedoroperatingsystemsoftware
beingmodified.Anyattempttocustomizeyouroperatingsystemmay
causethedeviceoritsapplicationstonotworkastheyshould.
•Software,audio,wallpaper,images,andothermediasuppliedwithyour
devicearelicensedforlimiteduse.Ifyouextractandusethesematerials
forcommercialorotherpurposesis,youmaybeinfringingcopyrightlaws.
Asauser,youarefullyareentirelyresponsiblefortheillegaluseofmedia.
•Additionalchargesmaybeappliedfordataservices,suchasmessaging,
uploadinganddownloading,auto-syncing,orusinglocationservices.To
avoidadditionalcharges,selectadataplantoissuitableforyourneeds.
Contactyourserviceprovidertoobtainadditionaldetails.
Trademarks
•LGandtheLGlogoareregisteredtrademarksofLGElectronics.
•Allothertrademarksandcopyrightsarethepropertyoftheirrespective
owners.
About this user guide

6
DivX HD
ABOUT DIVX VIDEO:DivX®isadigitalvideoformatcreatedbyDivX,LLC,a
subsidiaryofRoviCorporation.ThisisanofficialDivXCertified®devicethat
haspassedrigoroustestingtoverifythatitplaysDivXvideo.Visitdivx.com
formoreinformationandsoftwaretoolstoconvertyourfilesintoDivXvideos.
ABOUT DIVX VIDEO-ON-DEMAND:ThisDivXCertified®devicemustbe
registeredinordertoplaypurchasedDivXVideo-on-Demand(VOD)movies.
Toobtainyourregistrationcode,locatetheDivXVODsectioninyourdevice
setupmenu.Gotovod.divx.comformoreinformationonhowtocomplete
yourregistration.
DivX Certified® to play DivX® video up to HD 720p, including premium
content.
DivX®, DivX Certified® and associated logos are trademarks of Rovi
Corporation or its subsidiaries and are used under license.
Notice: Open Source Software
ToobtainthecorrespondingsourcecodeunderGPL,LGPL,MPLand
otheropensourcelicences,pleasevisithttp://opensource.lge.com/
Allreferredlicenceterms,disclaimersandnoticesareavailablefor
downloadwiththesourcecode.
Dolby Digital Plus
ManufacturedunderlicensefromDolbyLaboratories.Dolby,DolbyDigital
Plus,andthedouble-DsymbolaretrademarksofDolbyLaboratories.

7
Pleasereadthesesimpleguidelines.Notfollowingtheseguidelinesmaybe
dangerousorillegal.
Shouldafaultoccur,asoftwaretoolisbuiltintoyourdevicethatwillgather
afaultlog.Thistoolgathersonlydataspecifictothefault,suchassignal
strengthandapplicationsloaded.Thelogisusedonlytohelpdeterminethe
causeofthefault.Theselogsareencryptedandcanonlybeaccessedbyan
authorizedLGRepaircentreshouldyouneedtoreturnyourdeviceforrepair.
Exposure to radio frequency energy
RadiowaveexposureandSpecificAbsorptionRate(SAR)information.
ThistabletdevicemodelLG-V500hasbeendesignedtocomplywith
applicablesafetyrequirementsforexposuretoradiowaves.These
requirementsarebasedonscientificguidelinesthatincludesafetymargins
designedtoassurethesafetyofallpersons,regardlessofageandhealth.
•Theradiowaveexposureguidelinesemployaunitofmeasurementknown
astheSpecificAbsorptionRate(SAR).TestsforSARareconductedusing
standardisedmethodswiththedevicetransmittingatitshighestcertified
powerlevelinallusedfrequencybands.
•WhiletheremaybedifferencesbetweentheSARlevelsofvarious
LGdevicemodels,theyarealldesignedtomeettherelevantguidelinesfor
exposuretoradiowaves.
•TheSARlimitrecommendedbytheInternationalCommissiononNon-
IonizingRadiationProtection(ICNIRP)is2W/kgaveragedover10gof
tissue.
Guidelines for safe and efficient use

8
•ThehighestSARvalueforthisdevicewhenwornonthebody,asdescribed
inthisuserguide,is0.720W/kg.
•ThisdevicemeetsRFexposureguidelineswhenusedeitherinthenormal
usepositionagainsttheearorwhenpositionedatleast0.00cmaway
fromthebody.Whenacarrycase,beltcliporholderisusedforbody-worn
operation,itshouldnotcontainmetalandshouldpositiontheproductat
least0.00cmawayfromyourbody.
Inordertotransmitdatafilesormessages,thisdevicerequiresaquality
connectiontothenetwork.Insomecases,transmissionofdatafilesor
messagesmaybedelayeduntilsuchaconnectionisavailable.Ensurethe
aboveseparationdistanceinstructionsarefolloweduntilthetransmissionis
completed.
Product care and maintenance
WARNING
Notice for Battery replacement
•Foryoursafety,donotremovethebatteryincorporatedintheproduct.
Ifyouneedtoreplacethebattery,takeittothenearestauthorized
LGElectronicsservicepointordealerforassistance.
•Li-IonBatteryisahazardouscomponentwhichcancauseinjury.
•Batteryreplacementbynon-qualifiedprofessionalcancausedamageto
yourdevice.
WARNING
Onlyusebatteries,chargersandaccessoriesapprovedforusewiththis
particulardevicemodel.Theuseofanyothertypesmayinvalidateany
approvalorwarrantyapplyingtothedeviceandmaybedangerous.

9
•Donotdisassemblethisunit.Takeittoaqualifiedservicetechnicianwhen
repairworkisrequired.
•Repairsunderwarranty,atLG'sdiscretion,mayincludereplacementparts
orboardsthatareeitherneworreconditioned,providedthattheyhave
functionalityequaltothatofthepartsbeingreplaced.
•KeepawayfromelectricalappliancessuchasTVs,radiosandpersonal
computers.
•Theunitshouldbekeptawayfromheatsourcessuchasradiatorsor
cookers.
•Donotdrop.
•Donotsubjectthisunittomechanicalvibrationorshock.
•Switchoffthedeviceinanyareawhereyouarerequiredtobyspecial
regulations.Forexample,donotuseyourdeviceinhospitalsasitmay
affectsensitivemedicalequipment.
•Donothandlethedevicewithwethandswhileitisbeingcharged.Itmay
causeanelectricshockandcanseriouslydamageyourdevice.
•Donotchargeadevicenearflammablematerialasthedevicecanbecome
hotandcreateafirehazard.
•Useadryclothtocleantheexterioroftheunit(donotusesolventssuch
asbenzene,thinneroralcohol).
•Donotchargethetabletwhenitisonsoftfurnishings.
•Thedeviceshouldbechargedinawellventilatedarea.
•Donotsubjectthisunittoexcessivesmokeordust.

10
•Donotkeepthedevicenexttocreditcardsortransporttickets;itcan
affecttheinformationonthemagneticstrips.
•Donottapthescreenwithasharpobjectasitmaydamagethetablet.
•Donotexposethedevicetoliquidormoisture.
•Useaccessorieslikeearphonescautiously.Donottouchtheantenna
unnecessarily.
•Donotuse,touchorattempttoremoveorfixbroken,chippedorcracked
glass.Damagetotheglassdisplayduetoabuseormisuseisnotcovered
underthewarranty.
•Yourtabletisanelectronicdevicethatgeneratesheatduringnormal
operation.Extremelyprolonged,directskincontactintheabsenceof
adequateventilationmayresultindiscomfortorminorburns.Therefore,
usecarewhenhandlingyourdeviceduringorimmediatelyafteroperation.
•Ifyourdevicegetswet,immediatelyunplugittodryoffcompletely.Donot
attempttoacceleratethedryingprocesswithanexternalheatingsource,
suchasanoven,microwaveorhairdryer.
•Theliquidinyourwetdevice,changesthecoloroftheproductlabelinside
yourdevice.Damagetoyourdeviceasaresultofexposuretoliquidisnot
coveredunderyourwarranty.
•Useyourtabletintemperaturesbetween0ºCand40ºC,ifpossible.
Exposingyourdevicetoextremelyloworhightemperaturesmayresultin
damage,malfunction,orevenexplosion.

11
Efficient device operation
Electronics devices
Alltabletdevicemayreceiveinterference,whichcouldaffectperformance.
•Donotuseyourtabletdevicenearmedicalequipmentwithoutrequesting
permission.Avoidplacingthetabletoverpacemakers,forexample,inyour
breastpocket.
•Somehearingaidsmightbedisturbedbytabletdevice.
•MinorinterferencemayaffectTVs,radios,PCsetc.
Road safety
Checkthelawsandregulationsontheuseoftabletdeviceintheareawhen
youdrive.
•Donotuseahand-helddevicewhiledriving.
•Givefullattentiontodriving.
•RFenergymayaffectsomeelectronicsystemsinyourvehiclesuchascar
stereosandsafetyequipment.
•Whenyourvehicleisequippedwithanairbag,donotobstructwith
installedorportablewirelessequipment.Itcancausetheairbagtofailor
causeseriousinjuryduetoimproperperformance.
•Ifyouarelisteningtomusicwhilstoutandabout,pleaseensurethatthe
volumeisatareasonablelevelsothatyouareawareofyoursurroundings.
Thisisofparticularimportancewhennearroads.

12
Avoid damage to your hearing
NOTE:Excessivesoundpressurefromearphonesandheadphonescan
causehearingloss.
Topreventpossiblehearingdamage,donotlistenathighvolume
levelsforlongperiods
•Damagetoyourhearingcanoccurifyouareexposedtoloudsoundfor
longperiodsoftime.Wethereforerecommendthatyoudonotturnonor
offthetabletclosetoyourear.Wealsorecommendthatmusicvolumes
aresettoareasonablelevel.
•Whenusingheadphones,turnthevolumedownifyoucannothearthe
peoplespeakingnearyou,orifthepersonsittingnexttoyoucanhear
whatyouarelisteningto.
Glass Parts
Somepartsofyourtabletdevicearemadeofglass.Thisglasscouldbreak
ifyourdeviceisdroppedonahardsurfaceorreceivesasubstantialimpact.
Iftheglassbreaks,donottouchorattempttoremoveit.Stopusingyour
deviceuntiltheglassisreplacedbyanauthorisedserviceprovider.
Blasting area
Donotusethetabletwhereblastingisinprogress.Observerestrictionsand
followanyregulationsorrules.

13
Potentially explosive atmospheres
•Donotuseyourtabletatarefuelingpoint.
•Donotusenearfuelorchemicals.
•Donottransportorstoreflammablegas,liquidorexplosivesinthesame
compartmentofyourvehicleasyourtabletdeviceoraccessories.
In aircraft
Wirelessdevicescancauseinterferenceinaircraft.
•Turnyourtabletoffbeforeboardinganyaircraft.
•Donotuseitonthegroundwithoutpermissionfromthecrew.
Children
Keepthedeviceinasafeplaceoutofthereachofsmallchildren.Itincludes
smallpartswhichmaycauseachokinghazardifdetached.Thisdevicealso
containsaninternalbatterythatcanbehazardousifthedeviceisnotused
ormaintainedproperly.
Battery information and care
•Youdonotneedtocompletelydischargethebatterybeforerecharging.
Unlikeotherbatterysystems,thereisnomemoryeffectthatcould
compromisethebattery'sperformance.
•UseonlyLGbatteriesandchargers.LGchargersaredesignedtomaximise
thebatterylife.

14
•Donotdisassembleorshort-circuitthebattery.
•Rechargethebatteryifithasnotbeenusedforalongtimetomaximise
usability.
•Donotexposethebatterychargertodirectsunlightoruseitinhigh
humidity,suchasinthebathroom.
Donotleavethedeviceinhotorcoldplaces,asthismaydeteriorate
batteryperformance.
•Thereisriskofexplosionifthebatteryisreplacedwithanincorrecttype.
•Disposeofusedbatteriesaccordingtothemanufacturer'sinstructions.
Pleaserecyclewhenpossible.Donotdisposeashouseholdwaste.
•Ifyouneedtoreplacethebattery,takeittothenearestauthorisedLG
Electronicsservicepointordealerforassistance.
•Alwaysunplugthechargerfromthewallsocketafterthetabletisfully
chargedtosaveunnecessarypowerconsumptionofthecharger.
•Actualbatterylifewilldependonnetworkconfiguration,productsettings,
usagepatterns,batteryandenvironmentalconditions.
•Makesurethatnosharp-edgeditemssuchasanimal’steethornails,
comeintocontactwiththebattery.Thiscouldcauseafire.

15
How to update your tablet
Accesstolatestfirmwarereleases,newsoftwarefunctionsand
improvements.
•Update your tablet without a PC. Select Update Center
> Software
Update.
•Update your tablet by connecting it to your PC.
Formoreinformationaboutusingthisfunction,pleasevisit
http://www.lg.com/common/index.jspselectcountryandlanguage.
DECLARATION OF CONFORMITY
Hereby,LG ElectronicsdeclaresthatthisLG-V500productisin
compliancewiththeessentialrequirementsandotherrelevantprovisions
ofDirective1999/5/EC.AcopyoftheDeclarationofConformitycanbe
foundathttp://www.lg.com/global/declaration
Contact office for compliance of this product
LGElectronicsInc.
EURepresentative,Krijgsman1,
1186DMAmstelveen,TheNetherlands
NOTE: Pursuant EN 60950-1 (§ 1.7.2)
Inordertopreventunnecessaryenergyconsumption,disconnectthe
devicewhenfullycharged.Alwaysuseaneasilyaccessiblepower-outlet
forchargingyourdevice.

16
Disposal of your old appliance
1 Allelectricalandelectronicproductsshouldbedisposedof
separatelyfromthemunicipalwastestreamviadesignated
collectionfacilitiesappointedbythegovernmentorthelocal
authorities.
2 Thecorrectdisposalofyouroldappliancewillhelpprevent
potentialnegativeconsequencesfortheenvironmentandhuman
health.
3 Formoredetailedinformationaboutdisposalofyouroldappliance,
pleasecontactyourcityoffice,wastedisposalserviceortheshop
whereyoupurchasedtheproduct.
Disposal of waste batteries/accumulators
1 Thissymbolmaybecombinedwithchemicalsymbolsformercury
(Hg),cadmium(Cd)orlead(Pb)ifthebatterycontainsmorethan
0.0005%ofmercury,0.002%ofcadmiumor0.004%oflead.
2 Allbatteries/accumulatorsshouldbedisposedseparatelyfrom
themunicipalwastestreamviadesignatedcollectionfacilities
appointedbythegovernmentorthelocalauthorities.
3 Thecorrectdisposalofyouroldbatteries/accumulatorswillhelp
topreventpotentialnegativeconsequencesfortheenvironment,
animalandhumanhealth.
4 Formoredetailedinformationaboutdisposalofyouroldbatteries/
accumulators,pleasecontactyourcityoffice,wastedisposal
serviceortheshopwhereyoupurchasedtheproduct.

17
Please read this before you start using your tablet!
Pleasechecktoseewhetheranyproblemsyouencounteredwithyourtablet
aredescribedinthissectionbeforetakingthetabletinforserviceorcalling
aservicerepresentative.
1. Tablet Memory
Youneedtocheckyourtabletmemoryanddeletesomedata,suchas
applicationstomakemorememoryavailable.
To uninstall applications:
1 Tap > >Appstab>Settings >Apps.
2 Onceallapplicationsappear,scrolltoandselecttheapplicationyouwant
touninstall.
3 TapUninstall.
2. Before installing an open source application and
OS
WARNING
IfyouinstallanduseanOSotherthantheoneprovidedbythe
manufactureritmaycauseyourtablettomalfunction.Inaddition,your
tabletwillnolongerbecoveredbythewarranty.
Important notice

18
WARNING
Toprotectyourtabletandpersonaldata,onlydownloadapplicationsfrom
trustedsources,suchasPlayStore™.Ifthereareimproperlyinstalled
applicationsonyourtablet,thetabletmaynotworknormallyoraserious
errormayoccur.Youmustuninstallthoseapplicationsandallassociated
dataandsettingsfromthetablet.
3. Using an unlock pattern
Setanunlockpatterntosecureyourtablet.Tap > >Appstab>
Settings >Display>Lock screen>Select screen lock>Pattern.This
opensascreenthatwillguideyouthroughhowtodrawascreenunlock
pattern.YouhavetocreateaBackupPINasasafetymeasureincaseyou
forgetyourunlockpattern.
Caution:CreateaGoogleaccountbeforesettinganunlockpatternand
remembertheBackupPINyoucreatedwhencreatingyourpatternlock.
WARNING
Precautions to take when using pattern lock.
Itisveryimportanttoremembertheunlockpatternyouset.Youwillnot
beabletoaccessyourtabletifyouuseanincorrectpattern5times.You
have5opportunitiestoenteryourunlockpattern,PINorpassword.Ifyou
haveusedall5opportunities,youcantryagainafter30seconds.
When you can’t recall your unlock Pattern, PIN or Password:
< If you have forgotten your pattern >
IfyouloggedintoyourGoogleaccountonthetabletbutfailedtoenterthe
correctpattern5times,taptheForgot pattern?buttonatthebottomofthe

19
screen.YouarethenrequiredtologinwithyourGoogleAccountoryouhave
toentertheBackupPINwhichyouenteredwhencreatingyourPatternLock.
IfyouhavenotcreatedaGoogleaccountonthetabletoryouforgotBackup
PIN,youhavetoperformahardreset.
< If you have forgotten your PIN or Password >
IfyouforgetyourPINorPassword,youwillneedtoperformahardreset.
Caution:Ifyouperformahardreset,alluserapplicationsanduserdatawill
bedeleted.
NOTE:IfyouhavenotloggedintoyourGoogleAccountandhave
forgottenyourUnlockPattern,youwillneedtoenteryourBackupPIN.
4. Using the Hard Reset (Factory Reset)
Ifyourtabletdoesnotrestoretoitsoriginalcondition,useaHardReset
(FactoryReset)toinitializeit.
1 Turnthetabletoff.
2 PressandholdthePower/Lock key + Volume Down keyontherightside
ofthetablet.
3 ReleaseonlythePower/Lock KeywhentheLGlogoisdisplayedandkeep
pressingtheVolume Down Key.
4 ImmediatelypressandholdthePower/Lock Key + Volume Up Keyatthe
sametimewhilemaintainingtheVolume Down Keypressed.
5 ReleaseallkeyswhentheFactoryhardresetscreenisdisplayed.
6 PressthePower/Lock KeytocontinueoreitheroftheVolume Keysto
cancel.
7 PressthePower/Lock KeyoncemoretoconfirmoreitheroftheVolume
Keystocancel.
8 Yourdevicewillperformahardreset.

20
WARNING
IfyouperformaHardReset,alluserapplications,userdataandDRM
licenseswillbedeleted.Pleaseremembertobackupanyimportantdata
beforeperformingaHardReset.
5. Opening and switching applications
Multi-taskingiseasywithAndroid,youcankeepmorethanoneapplication
runningatthesametime.Thereisnoneedtoquitanapplicationbefore
openinganotherone.
Useandswitchbetweenseveralopenapplications.Androidmanageseach
application,stoppingandstartingthemasneededtoensurethatidle
applicationsdon'tconsumeresourcesunnecessarily.
1 TouchandholdtheHome Key .Alistofrecentlyusedapplications
willbedisplayed.
2 Taptheapplicationyouwanttoaccess.Thisdoesnotstoptheprevious
apprunninginthebackgroundonthetablet.MakesuretotapBack Key
toexitanappafterusingit.
•Tostopapplications,tapTask Managerfromtherecentappslist,thentap
StoporStop all.
•Toremoveanappfromtherecentappslist,swipetheapppreviewtothe
leftorright.Toclearallapps,tapClear all.
6. When the screen freezes
If the screen freezes or the tablet does not respond when you try to operate
it:PressandholdthePower/Lock key for8secondstorestartyourtablet.
Ifitstilldoesnotwork,pleasecontacttheservicecenter.

21
Getting to know your device
Tablet Overview
Touch screen
Ambient Light Sensor
Volume keys
Camera lens
Speakers
Front-Facing Camera lens
Power/Lock key
Earphone Jack
microSD Card Slot
Charger/USB port
Microphone
IR LED
NOTE:Ensurethemicrophoneisnotblockedwhenrecordingavideoor
audioclip.

22
Front-Facing
Camera lens
Usetotakepicturesandrecordvideosofyourself.You
canalsousethisforvideochatting.Keepitcleanfor
optimalperformance.
microSD Card
Slot
InsertmicroSDCardforstoringfilessuchasmusic,
videosandphotos.
Earphone Jack
Allowsyoutopluginanoptionalheadsetforconvenient,
hands-freeconversations.Youcanalsoplugin
headphonestolistentomusic.
Ambient Light
Sensor
MeasuresthesurroundinglightandadjuststheLCD
brightnesstoprovideavividscreen.
Power/Lock key
Presstolock/unlockthescreen.Pressandholdtoturn
thetableton/off,restartit,activate/deactivateairplane
mode,andchangethesoundsettings.
Volume keys
Allowyoutoadjustthemediavolumes.Pressandhold
bothkeysatthesametimetoaccesstheQuickMemo
feature.
Charger/USB
port
AllowsyoutoconnectthetabletandtheUSBCable
forusewiththechargeradapter,orothercompatible
accessories.
Camera lens
Usetotakephotosandrecordvideos.Keepitcleanfor
optimalperformance.
Speakers
Usetolistentotheaudiofromtheselectedfunction
(e.g.,music,videos,soundclips,etc.).
Microphone
Recordyourvoiceandisusedforvoice-activated
functions.
IR LED UsedasasensorfortheQuickRemoteapp.

23
WARNING
PlacingaheavyobjectonthetabletorsittingonitcandamagetheLCD
andtouchscreenfunctions.DonotcovertheLCDAmbientLightSensor
withprotectivefilm.Thiscouldcausethesensortomalfunction.
TIP!
•TaptheMenu Key
wheneveryouopenanapplicationtocheckwhat
optionsareavailable.
•Ifthedeviceislockedanddoesnotwork,pressandholdthePower/
Lock Key
for8secondstoturnitoff.
Charging your tablet
ArechargeableLi-ionbatteryisusedtopoweryourtablet.AUSBadapter,
whichisincludedwithyourtablet,isusedtochargethebattery.Beforeusing
yourtabletforthefirsttime,makesurethebatteryisfullycharged.
NOTE:Yourdevicehasaninternalrechargeablebattery.Foryoursafety,do
notremovethebatteryincorporatedintheproduct.
Warning!Ifthetouchscreendoesnotfunctionwhilethetablet’sinthe
processofcharging,thismaybeduetoanunstablepowersupply.As
aresult,disconnecttheUSBcablefromthedeviceorunplugtheUSB
adapterfromthepoweroutlet.

24
1 ConnecttheUSBadapterandUSBcable.
2 PlugtheUSBcable(asshownbelow)intothetablet’sCharger/USBport.
3 Plugthechargerintoanelectricalsocket.
NOTE:Thebatterymustbefullychargedinitiallytoimprovebattery
lifetime.
Optimizing Battery Life
Youcanextendyourbattery’slifebetweenchargesbyturningofffeatures
thatyoudon’tneedtorunconstantlyinthebackground.Youcanalso
monitorhowapplicationsandsystemresourcesconsumebatterypower.
To extend the life of your battery
•Turnoffradiocommunicationsthatyouaren’tusing,suchasWi-Fi,
Bluetooth,orGPS.
•Lowerscreenbrightnessandsetashorterscreentimeout.
•TurnoffautomaticsyncingforGmail™,Calendar,Contacts,andother
applications.

25
•Someapplicationsyouhavedownloadedmaycauseyourbatterypowerto
bereduced.
•Whileusingdownloadedapplications,checkthebatterychargedlevel.
To view the battery charge level
1 FromtheHomescreen,tapApps >Settings >About tablet>
Battery.
2 Thebatterystatus(chargingordischarging)andlevelaredisplayedonthe
topmenuofthescreen.
To monitor and control what uses the battery
1 FromtheHomescreen,tapApps >Settings >About tablet>
Battery>Battery use.
2 Thebottomofthescreendisplaysbatteryusagetimeandalsolists
applicationsorservicesusingbatterypowerfromgreatestamounttoleast.
Inserting a microSD card
YourdevicesupportstheuseofmicroSDmemorycardsofupto64GB
capacity.MultimediacontentscanbesavedinthemicroSDcard.
1 TurnthetabletoffbeforeinsertingorremovingthemicroSDcard.

26
2 PlaceyourfingernailinthecutoutandpullthemicroSDcardtrayout.
InsertthemicroSDcardintotheslotwiththecontactsfacingdown.
Carefullypushthetraygentlyintothedevice.
Removing the microSD card
TosafelyremovethemicroSDcardfromyourtablet,firstyouneedto
unmountit.
1 FromtheHomescreen,tapApps >Settings >Storage>
Unmount SD card.
2 GentlypullthemicroSDcardfromtheslot.
Warning!DonotremovethemicroSDcardwithoutunmountingitfirst.
Otherwise,itmaydamagethemicroSDcardaswellasyourtablet,and
thedatastoredonthemicroSDcardmaybecorrupted.

27
Formatting the microSD card
Warning!AllfilesstoredonyourmicroSDcardaredeletedwhenyou
formatthecard.
1 FromtheHomescreen,tapApps >Settings >Storage.
2 TapErase SD card(twice).
3 Ifyousetanunlockpattern,enteritandtapErase everything.Thecard
willthenbeformattedandreadytouse.
NOTE:IfthereiscontentonyourmicroSDcard,thefolderstructuremay
bedifferentafterformattingsinceallthefileswillhavebeendeleted.
Locking and unlocking the screen
Ifyoudonotusethetabletforawhile,thescreenwillbeautomatically
turnedoffandlocked.Thishelpstopreventaccidentaltouchesandsaves
batterypower.Whenyouarenotusingtheyourtablet,pressthePower/Lock
Key tolockyourtablet.
Ifthereareanyprogramsrunningwhenyoulockyourscreen,theymaybe
stillrunninginLockmode.Itisrecommendedthatyouexitallprograms
beforeenteringLockmodetoavoidunnecessarycharges(e.g.webaccess,
datacommunications).
Towakeupyourtablet,pressthePower/Lock Key .TheLockscreenwill
appear.TouchandslidetheLockscreeninanydirectiontounlockyour
Homescreen.Thelastscreenyouviewedwillopen.

28
Touch Screen tips
Herearesometipsonhowtonavigateonyourtablet.
NOTE:
•Toselectanitem,touchthecenteroftheicon.
•Donotpresstoohard;thetouchscreenissensitiveenoughtopickupa
light,yetfirmtouch.
•Usethetipofyourfingertotouchtheoptionyouwant.Becarefulnotto
touchanyotherkeys.
Tap or touch
Asinglefingertapselectsitems,links,shortcutsandlettersonthe
on-screenkeyboard.
Touch and hold
Touchandholdanitemonthescreenbytouchingitandnotliftingyour
fingeruntilanactionoccurs.Forexample,toopenacontact'savailable
options,touchandholdthecontactintheContactslistuntilthecontext
menuopens.
Drag
Touchandholdanitemforamomentandthen,withoutliftingyourfinger,
moveyourfingeronthescreenuntilyoureachthetargetposition.Youcan
dragitemsontheHomescreentorepositionthem.
Your Home screen

29
Swipe or slide
Toswipeorslide,quicklymoveyourfingeracrossthesurfaceofthescreen,
withoutpausingwhenyoufirsttouchit(soyoudon’tdraganiteminstead).
Forexample,youcanslidethescreenupordowntoscrollthroughalist,or
browsethroughthedifferentHomescreensbyswipingfromlefttoright(and
viceversa).
Double-tap
Double-taptozoomonawebpageoramap.Forexample,quicklydouble-
tapasectionofawebpagetoadjustthatsectiontofitthewidthofthe
screen.Youcanalsodouble-taptozoominandoutaftertakingapicture
(usingtheCamera),andwhenusingMaps.Double-tapawordtohighlightit.
Double-tapcanalsoactivatetheKnockONfeaturetoturnthetouchscreen
onoroff.
Pinch-to-Zoom
Useyourindexfingerandthumbinapinchingorspreadingmotiontozoom
inoroutwhenusingthebrowserorMaps,orwhenbrowsingpictures.
Rotate the screen
Frommanyapplicationsandmenus,theorientationofthescreenadjuststo
thedevice'sphysicalorientation.

30
KnockON
TheKnockONfeatureallowsyoutodouble-tapthescreentoeasilyturnthe
screenonoroff.
•Quicklydouble-tapthecenterofthescreen
toturnthescreenon.
•Quicklydouble-taptheStatusBar,anempty
areaontheHomescreen,ortheLockscreen
toturnthescreenoff.
NOTE:
•YoucandisablethisfeatureintheDisplay settings.
FromtheHomescreen,tapApps
>Settings >Display>
KnockON>taptheKnockONcheckbox.
Home screen
Simplyswipeyourfingertotheleftorrighttoviewthepanels.Youcan
customizeeachpanelwithapps,downloads,widgetsandwallpapers.

31
NOTE:Somescreenimagesmaybedifferentdependingonyourregion.
OnyourHomescreen,youcanviewmenuiconsatthebottomofthescreen.
Menuiconsprovideeasy,one-touchaccesstothefunctionsyouusethe
most.
Status bar –Showsdevicestatusinformation,
includingthetime,signalstrength,batterystatus,
andnotificationicons.
Back key –Returnstothepreviousscreen.Also
closespop-upitemssuchasmenus,dialogboxes,
andtheon-screenkeyboard.
Application icons –Tapanicon(application,widget,
folder,etc.)toopenanduseit.
Quick keys –Provideeasy,one-touchaccesstothe
functionsusedmostoften.
Home key –ReturnstotheHomescreen(orreturns
toyourdefaultHomescreencanvasfromanyofthe
Homescreenextensioncanvases).Touchandhold
ittodisplayrecentlyusedapplicationswithaccess
totheTaskManagerapplication.
Menu key –OpensanOptionsmenuwithoptions
thataffectthecurrentscreenorapplication.This
onlyapplieswhenavailable,dependingonthe
screenorapplication.

32
Customizing the Home screen
YoucancustomizeyourHomescreenbyaddingapps,downloads,widgets
orwallpapers.Formoreconvenienceusingyourtablet,addyourfavoriteapps
andwidgetstotheHomescreen.
To add items on your Home screen:
1 TouchandholdtheemptypartoftheHomescreen.
2 TaptheAppsorWidgets tab.
3 Dragthedesireditemtothedesiredlocationandliftyourfinger.
To remove an item from the Home screen:
Touchandholdtheiconyouwanttoremove,dragitto ,andliftyour
finger.
TIP! ToaddanapplicationicontotheHomescreenfromtheApps
screen,touchandholdtheapplicationyouwanttoaddanddragittothe
desiredlocation.
TIP! Youcanaddseveralappiconsinafolder.Droponeappiconover
anotheroneonaHomescreen,andafolderwillbecreated.
Returning to recently-used applications
1 TouchandholdtheHome Key .Thescreendisplaysapop-up
containingtheiconsofapplicationsyouusedrecently.
2 Touchanicontoopentheapplication.OrtouchtheBack Key to
returntoyourpreviousscreen.

33
Notifications
Notificationsalertyoutothearrivalofnewmessages,calendarevents,and
alarms,aswellastoongoingevents,suchasvideodownloads.
FromtheNotificationsPanel,youcanviewyourtablet’scurrentstatusand
pendingnotifications.
Whenanotificationarrives,itsiconappearsatthetopofthescreen.Icons
forpendingnotificationsappearontheleft,andsystemiconsshowingthings
likeWi-Fiorbatterystrengthontheright.
NOTE:Theavailableoptionsmayvarydependingontheregionorservice
provider.
Pending notifications System icons like Bluetooth, Wi-Fi & battery status
Swipe down for notifications & settings
SwipetheStatusBardowntoopentheNotificationsPanel.Toclosethe
NotificationsPanel,swipethebarthatisatthebottomofthescreen
upwards.
NOTE:TouchandholdaniconfromtheQuickSettingstoviewthe
function'ssettingsmenu.

34
Quick Settings Bar–Flickrightorleft
toscrollthroughthelist.
QSlide Apps Bar–Taptoactivatea
QSlidefeature.
Slidetotheleftandrighttoadjustthe
BrightnessofthescreenorVolume.
Quick Settings on Notification Panel
UseQuickSettingstoeasilytogglefunctionsettingslikeWi-Fi.TheQuick
SettingsarelocatedatthetopoftheNotificationsPanel.
NOTE:TouchandholdaniconintheQuickSettingsBartoviewthe
function'ssettingsmenu.
To rearrange Quick Setting items on the Notification Panel
OpentheNotificationsPanelandtouch .Youcanthenviewand
rearrangethedesireditemsontheQuickSettingsmenu.
QSlide apps on the Notifications panel
QSlideappsaredisplayedinabarontheNotificationspanelbelowthe
Quicksettingsbar.Theseiconsprovideaquick,convenientwaytomultitask
onthesamescreen(similartopicture-in-pictureonaTV).QSlidedisplaysa
smallapplicationwindowonthescreenthatcanbemoved,resized,ormade
transparent.

35
Using the QSlide apps
TapanyoftheQSlideappsinthebartoactivateit.Whenactivated,the
QSlidefeatureopenstheapplicationinawindowintheforeground,allowing
youtoaccessotherapplicationsinthebackground.Youcanopenuptotwo
QSlidewindowsatatime.
Indicator icons on the Status Bar
IndicatoriconsappearontheStatusBaratthetopofthescreentoreport
calendarevents,devicestatusandmore.
Theiconsdisplayedatthetopofthescreenprovideinformationaboutthe
statusofthedevice.Theiconslistedinthetablebelowaresomeofthe
mostcommonones.
Icon Description
Airplanemode
ConnectedtoaWi-Finetwork
Wiredheadset
Bluetoothison
Systemwarning
Vibratemodeison
Silentmodeison
Batteryfullycharged
Batteryischarging

36
DLNAison
Downloadingdata
Uploadingdata
Alarmisset
SmartSharemusicplaying
GPSison
Dataissyncing
NewGmail
NewHangoutsmessage
Songisplaying
TabletisconnectedtoPCviaUSBcableorUSBtetheringisactive
Powersavingmodeison
Slideasideison
Multiple Users
OnlyonetabletownerIDcanbecreated,butmultipleuserIDscanbe
addedsothatotherscanloginandusethetabletindependently.Eachuser
canconfiguretheirowntabletsettings,usetheirownstoragespace,and
havetheirownappupdateprivileges.

37
Tablet owner privileges
•OnlythetabletownerIDcanaddanewuserloginIDandremoveuser
IDs.
•OnlythetabletownerIDcanaccessandusethemicroSDcard.
•TheTabletownercanuninstallanyoftheuser'sapps.
Multiple tablet user limitations
• Alluserssharethesamebattery,internalmemory,anddatausagewithallof
theotherusers.
• Thelanguagesettingssetbyoneuserappliestoalloftheotherusers.
• Eachusercanconfigureanduseonlytheirowncontentanddata(e.g.,Home
screensettings,Soundsettings,etc.).
• Anyusercanacceptupdatedapppermissionsonthebehalfofallofthe
otherusers.
• Alarmswillsoundatthesettimenomatterwhichuseractivatedthealarm(s).
• Messagesandscheduledcalendareventswillbesenttonotifythespecified
userIDonly.
• OnceauserstartsprintingadocumentusingMobilePrint,theprintjobwill
continueeveniftheuserIDischanged.
• Datatransfer,download,multimediaplay,andcommunicationserviceswill
stopiftheuserIDischanged.
To add a new user on your tablet
1 Fromthehomescreen,tapApp>Settings>Users>Add user.
2 Set-upwizardopenstohelpyoutosetup.StartSet-upwizard.
• YoushouldfollowSetupWizardwhenyoufirstlogintoyourtabletasa
newuser.
3 Nowyoucanchooseausernamewhenyouloginyourtablet.

38
Slide Aside
Usethree-fingerswipetosaverunningappstotheleftorbringthemback
tothedisplay.Tobringthembacklater,someappsmayrestart.Youcansave
uptothreeapps.
1 Whileanapplicationisopen,placethree
fingersonthescreenandslidetotheleft.
ThecurrentscreenissavedandtheHome
screenappears.
2 Tore-openthesavedapps,placethree
fingersonthescreenandslidetotheright.
Tapthedesiredappyouwanttoopen.
Tip!TheSlide Asidefeaturedoesnotrecognizefewerfingers,additional
fingers,oryourpalm.
Plug & Pop
Plug&Popallowsyoutoquicklychooseappstousewhenplugginginan
earphoneorOn-the-Godevice,suchasamouseorkeyboard.
1 PluginearphoneorOTG(On-the-Go)device(i.e.,mouse,keyboard,etc.).
2 Theapplicationspanelwilldisplayandyoucanselectanapptorun.

39
NOTE:Youcanedittheapplicationstodisplayonthepanelandsetnotto
showtheapplicationspanel.
Tap > >Settings >Accessory.
Capturing a Screenshot
PressandholdtheVolumeDown keyandPower/Lock Key atthesametime
foraround2secondstocaptureascreenshot.
Toviewthecapturedimage,gotoApps >Gallery >Screenshots
Folder.
TIP!Youcannotcaptureacamera/videoscreen.
Using QuickMemo to capture a screenshot
Onthescreenyouwanttocapture,dragthestatusbardownwardandselect
QuickMemo .
OR
PressandholdtheVolume Up/Down Keyatthesametime.
Using Capture plus to capture a screenshot
Thisfeatureallowsyoutocaptureaportionofthescreeninthedefault
Internetbrowser.
1 WhileconnectedtoInternet,tap ,andthentapCapture plus.
2 Adjusttheblueboxtothedesiredsize,andthentapOK.Theselected
areaissavedtotheGallery.

40
Entering Text
Youcanentertextusingtheon-screenkeyboard.Theon-screenkeyboard
appearsautomaticallyonthescreenwhenyouneedtoentertext.To
manuallydisplaythekeyboard,simplytouchatextfieldwhereyouwantto
entertext.
Using the keypad & entering text
Taponcetocapitalizethenextletteryoutype.Double-tapforallcaps.
Taptoswitchtothenumbersandsymbolskeyboard.
Taptousethehandwritingfunction.
Taptoenteraspace.
Taptocreateanewlineinthemessagefield.
Taptodeletethepreviouscharacter.
Entering accented letters
Theon-screenkeyboardallowsyoutoenterspecialcharacters(e.g."á").
Forexample,touchandholdthedesiredkey(forexample,the"a"key).After
thedesiredcharacterappears,slideyourfingeroveritandliftitofftoenter
it.

41
Whenyoufirstturnonyourtablet,youhavetheopportunitytoactivatethe
network,tosignintoyourGoogleAccountandselecthowyouwanttouse
certainGoogleservices.
To set up your Google account
•SignintoaGoogleAccountfromthepromptedset-upscreen.
OR
•FromtheHomescreen,tapApps >Appstab>Settings >
Accounts & sync>Add account>Google.
IfyouhaveaGoogleaccount,touchExisting,enteryouremailaddressand
password,thentouch .Otherwise,touchNewandenterthenecessary
informationtocreateanewGoogleAccount.
OnceyouhavesetupyourGoogleaccountonyourtablet,yourtablet
automaticallysynchronizeswithyourGoogleaccountontheWeb.
Yourcontacts,Gmailmessages,Calendareventsandotherinformationfrom
theseapplicationsandservicesontheWebaresynchronizedwithyourtablet.
(Thiswilldependonyoursynchronizationsettings.)
Aftersigningin,youcanuseGmail™andtakeadvantageofGoogleservices
onyourtablet.
Google account setup

42
Wi-Fi
WithWi-Fi,youcanusehigh-speedInternetaccesswithinthecoverageof
thewirelessaccesspoint(AP).EnjoywirelessInternetusingWi-Fi,without
extracharges.
Connecting to Wi-Fi networks
TouseWi-Fionyourtablet,youneedtoaccessawirelessaccesspointor
‘hotspot’.Someaccesspointsareopenandyoucansimplyconnecttothem.
Othersarehiddenorusesecurityfeatures;youmustconfigureyourtabletto
beabletoconnecttothem.TurnoffWi-Fiwhenyou'renotusingittoextend
thelifeofyourbattery.
Turning Wi-Fi on and connecting to a Wi-Fi network
1 FromtheHomescreen,tapApps >Appstab>Settings >Wi-Fi.
2 Tap toturnitonandstartscanningforavailableWi-Finetworks.
3 TapSearchtoseealistofactiveandin-rangeWi-Finetworks.
• Securednetworksareindicatedbyalockicon.
4 Touchanetworktoconnecttoit.
• Ifthenetworkissecured,youarepromptedtoenterapasswordor
othercredentials.(Askyournetworkadministratorfordetails)
5 TheStatusBardisplaysiconsthatindicateWi-Fistatus.
Connecting to Networks and Devices

43
Bluetooth
YoucanuseBluetoothtosenddatabyrunningacorrespondingapplication,
butnotfromtheBluetoothmenuasonmostothermobilephones.
NOTE:
•LGisnotresponsiblefortheloss,interceptionormisuseofdatasentor
receivedviatheBluetoothwirelessfeature.
•Alwaysensurethatyoushareandreceivedatawithdevicesthatare
trustedandproperlysecured.Ifthereareobstaclesbetweenthedevices,
theoperatingdistancemaybereduced.
•Somedevices,especiallythosethatarenottestedorapprovedby
BluetoothSIG,maybeincompatiblewithyourdevice.
Turning on Bluetooth and pairing up your tablet with a Bluetooth
device
Youmustpairyourdevicewithanotherdevicebeforeyouconnecttoit.
1 FromtheHomescreen,tapApps >Appstab>Settings >
Bluetooth.
2 TaptheBluetoothswitch toturniton.
3 Tapthecheckboxnexttoyourtablet'snametomakeyourtabletvisibleto
otherBluetoothdevices.
4 Alistofavailabledeviceswillbedisplayed.Tapthedeviceyouwanttopair
withfromthelist.
NOTE:Dependingonthetypeofdevice,youmayhavetoentermatching
codes,confirmmatchingcodes,orthedevicesmayautomaticallypair.
Oncepairingissuccessful,yourtabletwillconnecttotheotherdevice.

44
NOTE:Yourtabletdoesn'tsupportHandsfreeProfile.Therefore,theuse
ofcallfeatureswithsomeofaccessoriessuchasBluetoothheadsetsor
Bluetooth-enableddevicesmaynotbeavailableforthisdevice.
Send data using the Bluetooth wireless feature
1 Opentheitemandtap .
OR
TouchandholdtheitemandselectShare.
OR
OpentheitemandtaptheMenu Key >Share.
2 TapBluetoothtoshareviaBluetooth.
NOTE:Themethodforselectinganoptionmayvarybydatatype.
3 SearchforandpairwithaBluetooth-enableddevice.
Receive data using the Bluetooth wireless feature
1 FromtheHomescreen,tapApps >Appstab>Settings >
Bluetooth.
2 Tap toturnBluetoothonandmarkthecheckboxnexttothetablet
nametomakethetabletvisibleonotherdevices.
NOTE:Toselectthelengthoftimethatyourdevicewillbevisible,tapthe
Menu Key
>Visibility timeout.
3 PairthedevicesandtapAcceptwhenyoureceiveaBluetooth
AuthorizationRequesttoacceptthefile(s).

45
SmartShare
YoucanusetheSmartSharefeatureeasilyintheGallery,Music,Videos,etc.
Enjoying the content via a variety of devices
Youcanshareyourtablet'scontentwithavarietydevices.Tap toshare
thecontentintheGallery,Music,Videos,POLARIS Office 5.
Playing/Sending
Play–YoucanplaythecontentviaaTV,aBluetoothspeakeroretc.
Beam–YoucansendthecontenttothedeviceofBluetoothand
SmartShareBeamsupported.
•SmartShare Beam–Thisallowstotransferthecontentfeaturefastvia
Wi-FiDirect.
< Play > < Beam >
Enjoying the content from Nearby devices
Youcanenjoythecontentfromnearbydevices(i.e.PC,NAS,Mobile)inthe
Gallery,Music,Videosapp.
Connecting devices
ConnectyourdeviceandotherdevicessupportedbyDLNAinthesame
Wi-Finetwork.

46
Searching other devices
TapNearbydevices,thenyoucanseetheDLNA-supporteddevices.
Connecttothedevicetoviewthecontent.
Using the content from the Cloud
Youcanusethecontentfromthecloud(i.e.,Dropbox)intheGallery,Music,
Videos,etc.
Using the Cloud
NOTE:Thesupportedfeaturesmayvarydependingonthecloud.
Retrievingdatamaytakesometimedependingonthecloud.
1 SelectCloudintheGallery,Music,Videos,etc.
2 Selectthecloudwhatyouwanttouseandlogin.
3 Youcanusethecontentofthecloudafterloggingin.
4 Setthecloudsettingstoselecttheapptousethecloud.
PC connections with a USB cable
YoucanconnectyourtablettoyourPCtochargeit,transferitemstothePC
fromthetabletandviceversa.
Transferring music, photos and videos using the USB mass
storage mode
1 ConnectyourtablettoaPCusingaUSBcable.
2 Ifyouhaven'tinstalledtheLGAndroidPlatformDriveronyourPC,you
willneedtomanuallychangethesettings.ChooseSystem settings>PC
connection>Select USB connection method,thenselectMedia sync
(MTP).

47
3 YoucannowviewthemassstoragecontentonyourPCandtransferthe
files.
Synchronize with Windows Media Player
EnsurethatWindowsMediaPlayerisinstalledonyourPC.
1 UsetheUSBcabletoconnectthetablettoaPConwhichWindows
MediaPlayerhasbeeninstalled.
2 SelecttheMedia sync (MTP)option.Whenconnected,apop-upwindow
willappearonthePC.
3 OpenWindowsMediaPlayertosynchronizemusicfiles.
4 Editorenteryourdevice’snameinthepop-upwindow(ifnecessary).
5 Selectanddragthemusicfilesyouwanttothesynclist.
6 Startsynchronization.
•ThefollowingrequirementsmustbesatisfiedtosynchronizewithWindows
MediaPlayer.
Items Requirement
OS
MicrosoftWindowsXPSP2,Vistaor
higher
WindowMediaPlayerversion WindowsMediaPlayer10orhigher
•IftheWindowsMediaPlayerversionislowerthan10,installversion10or
higher.

48
Youcanaddcontactsonyourtabletandsynchronizethemwiththecontacts
inyourGoogleAccountorotheraccountsthatsupportsyncingcontacts.
Searching for a contact
1 FromtheHomescreen,tapContacts toopenyourcontactlist.
2 TaptheSearch contactsboxandenterthecontact'sname.Youcanalso
tapaletteralongtheleftsideofthescreentoaccessnamesstartingwith
thechosenletter.
Adding a new contact
1 FromtheHomescreen,tapContacts .
2 Tapthe .Selectthedesiredaccount(ifapplicable).
3 Ifyouwanttoaddapicturetothenewcontact,tap .Choosefrom
Take photototakeapictureusingthecameraorSelect from Gallery.
Thenbrowseforanimageandselectit.
4 Tap toentermorespecificnameinformation.
5 Enterthedetailsaboutyourcontact.
6 TapSave.
Favorite Contacts
Youcanclassifyfrequentlycalledcontactsasfavorites.
To add a contact to your favorites
1 FromtheHomescreen,tapContacts toopenyourcontacts.
2 Tapacontacttoviewitsdetails.
Contacts

49
3 Tapthestar totherightofthecontact’sname.Thestarturnsgold
andthecontactisaddedtoyourfavorites.
To remove a contact from your favorites list
1 FromtheHomescreen,tapContacts toopenyourcontacts.
2 TaptheFavouritestabtoviewyourfavoritecontacts.
3 Tapacontacttoviewitsdetails.
4 Tapthegoldstartotherightofthecontact’sname.Thestarturnsgrey
andthecontactisremovedfromyourfavorites.
Creating a group
1 FromtheHomescreen,tapContacts toopenyourcontacts.
2 TouchtheGroupstab ,thentouch .
3 Enteranameforthenewgroup.
•TapAdd memberstoaddcontactentriestoyournewgroup.
•TaptheACCOUNTfieldtochangetheaccount(s)youwanttosavethe
newgroupto.
4 TouchSavetosavethegroup.
NOTE:Ifyoudeleteagroup,thecontactsassignedtothatgroupwillnot
belost.Theywillremaininyourcontacts.

50
YoucanusetheE-mailapplicationtoreademailsfromserviceslikeGmail.
TheE-mailapplicationsupportsthefollowingaccounttypes:POP3,IMAP
andExchange.
Yourserviceproviderorsystemadministratorcanprovideyouwiththe
accountsettingsyouneed.
Managing an E-mail account
TaptheEmail ontheHomescreen.ThefirsttimeyouopentheE-mail
application,aset-upwizardopenstohelpyoutosetupanE-mailaccount.
Aftertheinitialsetup,E-maildisplaysthecontentsofyourinbox.Ifyouhave
addedmorethanoneaccount,youcanswitchamongaccounts.
To add another E-mail account:
•OpentheE-mailapplicationandtaptheMenu Key >Settings > .
To switch between accounts:
Ifyou'veaddedmorethanoneaccount,youcaneasilyswitchbetweenthem.
Fromanyemailfolder,tapthecurrentaccount(atthetopofthescreen),
thentaptheaccountyouwanttoaccess.
To change an E-mail account’s settings:
OpentheE-mailapplicationandtaptheMenu Key >Settings >
General settingstoconfiguresettingsthatapplytoallofyouraccounts.Tap
anindividualaccounttoconfiguresettingsonlyforthatparticularaccount.
To delete an E-mail account:
•OpentheE-mailapplicationandtaptheMenu Key >Settings > tap
theMenu Key >Remove account>touchanaccountyouwantto
delete>Remove>Yes.
E-mail

51
Working with account folders
OpentheE-mailapplicationandtaptheMenu Key andselectFolders.
EachaccounthasanInbox,Outbox,SentandDraftsfolder.Dependingon
thefeaturessupportedbyyouraccount’sserviceprovider,youmayhave
additionalfolders.
Composing and sending E-mail
1 WhileintheE-mailapplication,tapWrite .
2 Enteranaddressforthemessage’sintendedrecipient.Asyouenter
text,matchingaddresseswillbeproposedfromyourContacts.Separate
multipleaddressesusingsemicolons.
3 TapAttach toattachfiles,ifrequired.
4 Enterthesubjectandyourmessage.
5 TaptheSend tosendthemessage.
Ifyouaren’tconnectedtoanetwork,forexample,ifyou’reworkingin
airplanemode,themessagesthatyousendwillbestoredinyourOutbox
folderuntilyouconnecttoanetworkagain.Ifitcontainsanypending
messages,theOutboxwillbedisplayedontheAccountsscreen.
Receiving emails
WhenanewemailarrivesinyourInbox,you'llbenotifiedbyasound
orvibration(dependingonyoursoundandvibrationsettings)andits
notificationiconappearsontheStatusBar.

52
ToopentheCameraapplication,tapCamera ontheHomescreen.
Getting to know the viewfinder
Swap camera–Switchbetweenthecameralensandthefront–facing
cameralens.
Record Mode–Allowsyoutochoosearecordmodetodefinehowthe
videowillberecorded.
Settings–Touchthisicontoopenthesettingsmenu.SeeUsing the
advanced settingsonthefollowingpage.
Video mode–Tap(orslide)totogglebetweenCameramodeandVideo
mode.
Capture–Takesapicture.
Gallery–Touchtoviewthelastphotoyoucaptured.Thisenablesyouto
accessyourGalleryandviewsavedphotoswhileincameramode.
NOTE:Pleaseensurethecameralensiscleanbeforetakingpictures.
Camera

53
Using the advanced settings
Intheviewfinder,tap toopentheadvancedoptions.Afterselectingthe
option,taptheBack Key .
Takephotosbyvoicecommand.
Definesandcontrolstheamountofsunlightenteringthephoto.
Focusesonaspecificspot.
Selectsphotoresolution.Ifyouchoosehighresolution,filesizewill
increase,whichmeansyouwillbeabletostorefewerphotosinthe
memory.
TheISOratingdeterminesthesensitivityofthecamera'slight
sensor.ThehighertheISO,themoresensitivethecamera.Thisis
usefulindarkerconditionswhenyoucannotusetheflash.
Improvescolorqualityinvariouslightingconditions.
Appliesartisticeffectstoyourpictures.
Setsadelayafterthecapturebuttonispressed.Thisisidealifyou
wanttobeinthephoto.
Activatethistouseyourtablet'slocation-basedservices.Take
pictureswhereveryouareandtagthemwiththelocation.Ifyou
uploadtaggedpicturestoablogthatsupportsgeotagging,you
canseethepicturesdisplayedonamap.
NOTE:ThisfunctionisonlyavailablewhentheGPSfunctionis
active.

54
Setashuttersound.
SettheVolumeKeywhethertouseforthecaptureorzoom.
Setthestoragelocationforyourpictures.ChoosefromInternal
memoryandSDcard.
Opensthehelpguidetoknowhowafunctionoperates.
Restoresallcameradefaultsettings.
TIP!
•Whenyouexitthecamera,somesettingsreturntotheirdefaults,such
aswhitebalance,coloreffect,timerandscenemode.Checkthese
beforeyoutakeyournextphoto.
•Thesettingmenuissuperimposedovertheviewfinder,sowhenyou
changephotocolororqualityelements,youwillseeapreviewofthe
changedimagebehindtheSettingsmenu.
Taking a quick photo
1 OpentheCameraapplication.
2 Pointthelenstowardsthesubjectyouwanttophotograph.
3 Afocusboxwillappearinthecenteroftheviewfinderscreen.Youcan
alsotapanywhereonthescreentofocusonthatspot.
4 Whenthefocusboxturnsgreen,thecamerahasfocusedonyoursubject.
5 Touch tocapturethephoto.

55
Once you've taken a photo
1 Taptheimagepreviewinthelower-rightcornerofthescreentoviewthe
lastphotoyoucaptured.
2 TapGallery,thentapAlwaysorJust once.
TouchtoshareyourphotousingtheSmartSharefunction.
Touchtotakeanotherphotoimmediately.
Touchtosendyourphototoothersorshareitviasocialnetwork
services.
Touchtodeletethephoto.
TIP!Ifyouhaveasocialnetworkingaccountandsetituponyourtablet,
youcanshareyourphotowithyoursocialnetworkingcommunity.
TouchtheMenuKey toopenalladvancedoptions.
Set image as–TouchtousethephotoasaContact photo,Home screen
wallpaper,Lock screen wallpaperorWallpaper.
Move–Touchtomovethephototoanotherplace.
Copy–Touchtocopytheselectedphotoandsaveittoanotheralbum.
Copy to Clip Tray–TaptocopythephotoandstoreintheClipTray.
Rename–Touchtoeditthenameoftheselectedphoto.
Rotate left/right–Torotateleftorright.
Crop–Cropyourphoto.Moveyourfingeracrossthescreentoselectthe
areatobecropped.
Edit–Viewandeditthephoto.

56
Slideshow–Automaticallyshowsyoutheimagesinthecurrentfolderone
aftertheother.
Add location–Toaddthelocationinformation.
Details–Findoutmoreinformationaboutthecontents.
Viewing your saved photos
Youcanaccessyoursavedphotoswhenincameramode.Justtapthe
imagepreviewinthebottomofthescreenandyourGallerywillbedisplayed.
1 Choosetheapptousetoviewand/oredityourphotos.TapGalleryor
Photos.
2 TapAlwaysorJust once.
•Toviewmorephotos,scrollleftorright.
•Tozoominorout,double-tapthescreenorplacetwofingersand
spreadthemapart(moveyourfingersclosertogethertozoomout).

57
Toopenthevideocamera,tapCamera ontheHomescreen,thentap
theVideo modeicon (ontheviewfinder)toswitchtovideomode.
Getting to know the viewfinder
Swap camera–Switchbetweenthecameralensandthefront–facing
cameralens.
Shot mode–Defineshowtheshotwillbetaken.
Settings–Touchthisicontoopenthesettingsmenu.SeeUsing the
advanced settingsonthefollowingpage.
Camera mode–Touchandslideupthisicontoswitchtocameramode.
Record–Touchtostartrecordingavideo.
Gallery–Touchtoviewthelastvideoyourecorded.Thisenablesyouto
accessyourGalleryandviewyoursavedvideoswhileinvideomode.
Video camera

58
TIP!Whenrecordingavideo,placetwofingersonthescreenandpinch
tousetheZoomfunction.
NOTE:Ensurethemicrophoneisnotblockedwhenrecordingavideoor
audioclip.
Using the advanced settings
Usingtheviewfinder,touch toopenalltheadvancedoptions.
Taptosetthesize(inpixels)ofthevideoyouarerecording.
Definesandcontrolstheamountofsunlightenteringthevideo.
Preventshakingwhilevideorecordingtogethighvideoquality.
Improvescolorqualityinvariouslightingconditions.
Chooseacolortonetouseforyournewview.
Activatethistouseyourtablet'slocation-basedservices.
SettheVolumeKeywhethertousefortherecordorzoom.
Thissetsthelocationwhereyouwanttosaveyourvideos.Choose
fromInternalmemoryandSDcard.
Opensthehelpguidetoknowhowafunctionoperates.
Restoresallcameradefaultsettings.

59
Recording a quick video
1 OpentheCameraapplicationandtouchtheVideo modeicon .
2 Thevideocameraviewfinderappearsonthescreen.
3 Holdingthetablet,pointthelenstowardsthesubjectyouwishtocapture
inyourvideo.
4 Touch oncetostartrecording.
5 Atimershowingthelengthofthevideowillappear.
6 Touch onthescreentostoprecording.
After recording a video
Taptheimagepreviewatthebottomofthescreentoviewthelastvideoyou
recorded.
TouchtoshareyourvideousingtheSmartSharefunction.
Touchtorecordanothervideoimmediately.
Touchtosendyourvideotoothersorshareitviasocialnetwork
services.
Touchtodeletethevideo.

60
Watching your saved videos
Accessyoursavedvideoswheninvideocameramodebytappingtheimage
previewinthelower-rightcorneroftheviewfinder.
1 Intheviewfinder,taptheimagepreviewinthelower-rightcornerofthe
screen.
2 YourGallerywillappearonthescreenwithyourmostrecentrecorded
videodisplayed.Swipetothelefttoscrolltoyourothervideos.
3 TapthePlayicon onavideotoplayitautomatically.
NOTE:YoucanalsoviewyourvideosintheGalleryapportheVideosapp.
NOTE:Donottopresstoohard;thetouchscreenissensitiveenoughto
pickupalight,butfirmtouch.
Adjusting the volume when viewing a video
Toadjustthevolumeofavideowhileitisplaying,usetheVolumeKeyson
therightsideofthetablet.

61
Gallery
Youcanstoremultimediafilesininternalmemoryforeasyaccesstoallyour
multimediafiles.Usethisapplicationtoviewmultimediafileslikepictures
andvideos.
1 FromtheHomescreen,tapApps >Appstab>Gallery .
YoucanmanageandshareallyourimageandvideofileswithGallery.
NOTE:
•Somefileformatsarenotsupported,dependingonthesoftware
installedonthedevice.
•Somefilesmaynotplayproperly,dependingonhowtheyareencoded.
•Ifthefilesizeexceedstheavailablememory,anerrorcanoccurwhen
youopenfiles.
Viewing pictures
LaunchingGallerydisplaysyouravailablefolders.Whenanotherapplication,
suchasE-mail,savesapicture,thedownloadfolderisautomaticallycreated
tocontainthepicture.Likewise,capturingascreenshotautomaticallycreates
theScreenshotsfolder.Tapafoldertoopenit.
Picturesaredisplayedbycreationdateinafolder.Selectapicturetoviewit
fullscreen.Scrollleftorrighttoviewthenextorpreviousimage.
Multimedia

62
Zooming in and out
Useoneofthefollowingmethodstozoominonanimage:
•Double-tapanywheretozoomin.Double-tapagaintoreturntofullscreen
view.
•Placetwofingersanywhereontheimageandspreadthemaparttozoom
in.Tozoombackout,pinchthemtogetherordouble-tapthescreen.
Playing videos
OpentheGalleryapp andselectanalbum.ThePlayicon is
displayedonvideofiles.Tapanimagetoselectit.Selecttheapptoplayit
(tapthePhotosapp ortheVideosapp ),thentapAlwaysorJust
onceandthevideobeginsplayback.
NOTE:
•Wheninvideoplaybackmode,slidethescreenupordowntoadjustthe
screenbrightness.
•Wheninvideoplaybackmode,slidethescreenleftorrighttorewindor
fast-forward.
Deleting images and videos
Useoneofthefollowingmethods:
•Inafolder,tap andselectthephotosandvideosyouwanttodelete,
thentapDelete.
•Whenviewingaphotoorvideo,tap .
Setting as wallpaper
Whenviewingaphoto,touchtheMenu Key >Set image asandselect
Contact photo,Home screen wallpaper,Lock screen wallpaperorWallpaper.

63
Slideshow
Youcanviewyourphotosinaslideshowbyalbumorbyselectingallofyour
photos.FromtheHomescreen,tapGallery .
•Tapthealbumwiththephotosyouwanttoview,thentaptheMenukey
>Slideshow>verifytheslideshowsettings>Start.
•TaptheMenukey >Viewallfiles>Menukey >Slideshow>verify
theslideshowsettings>Start.
TaptheBackkey tostopplayingtheslideshow.
Videos
Yourtablethasavideoplayerthatletsyouplayallofyourfavoritevideos.
Playing a video
1 FromtheHomescreen,tapApps >Appstab>Videos .
2 Selectthevideoyouwanttoplay.
Touchtopausevideoplayback.
Touchtoresumevideoplayback.
Touchandholdtofast-forwardin3secondincrements.
Taponcetofast-forward10seconds.
Touchandholdtorewindin3secondincrements.Tap
oncetorewind10seconds.
Touchtomanagethevideovolume.
Touchtochangetheratioofthevideoscreen.

64
TouchaccessQSlideanddisplaythevideoinsmall
window.
TouchtoshareyourvideoviatheSmartSharefunction.
Touchtocaptureimageduringplayingavideo.
Touchtolock/unlockavideoscreen.
Tochangethevolumewhilewatchingavideo,presstheVolumeKeysonthe
rightsideofthetablet.
Touchandholdavideointhelisttoaccessthefollowingoptions:
Share,Delete,TrimandDetails.
TIP!Whilewatchingavideo,slideupanddownalongtheleftsideofthe
screentoadjustthescreenbrightness.Slideupanddownalongtheright
sideofthescreentoadjustthevolume.
Music
Yourtablethasamusicplayerthatletsyouplayallyourfavoritetracks.To
accessthemusicplayer,fromtheHomescreen,tapApps >Appstab>
Music .
Playing a song
1 FromtheHomescreen,tapApps >Appstab>Music .
2 TouchtheSongstab.
3 Selectthesongyouwanttoplay.

65
TouchtofindthefileswithYouTube.
Touchtoseethecurrentplaylist.
Touchtosetthecurrentsongasafavorite.
TouchtoshareyourmusicviaSmartSharefunction.
Touchtosetshufflemode.
Touchtosetrepeatmode.
Touchtomanagethemusicvolume.
Touchtopauseplayback.
Touchtoresumeplayback.
Touchtoskiptothenexttrackonthealbumorintheplaylist.
Touchtogobacktothebeginningofthesong.Touchtwiceto
returntotheprevioussong.
Touchtosettheaudioeffect.
Tochangethevolumewhilelisteningtomusic,presstheVolumeKeyson
therightsideofthetablet.
Touchandholdanysonginthelisttoaccessthefollowingoptions:
Play,Add to playlist,Share,Delete,DetailsandSearch.

66
NOTE:
•Somefileformatsarenotsupported,dependingonthedevicesoftware.
•Ifthefilesizeexceedstheavailablememory,anerrorcanoccurwhen
youopenfiles.
•Musicfilecopyrightsmaybeprotectedbyinternationaltreatiesand
nationalcopyrightlaws.
Therefore,itmaybenecessarytoobtainpermissionoralicenceto
reproduceorcopymusic.Insomecountries,nationallawsprohibit
privatecopyingofcopyrightedmaterial.Beforedownloadingorcopying
thefile,checkthenationallawsoftherelevantcountryconcerningthe
useofsuchmaterial.

67
QPair
ByconnectingyourtabletandmobilephoneviaQPair,youcansync
incomingcalls,messages,andsocialnetworkingnotificationsbetweenyour
tabletandmobilephone.
1 RunQPair andtapGet started>Startonyourtabletfirstandthenrun
thesamestepsonyourphone.
TIP!QPairmaynotbepre-installedonthephone.GotoGooglePlay
StoreandsearchforQpairandinstall.
NOTE:QPairworkswithphonesrunningAndroid4.1orlater.Some
featuresmaybelimiteddependingonyourphonemodel.
2 Bluetoothconnectionwillbeturnedonautomatically.
Tools

68
QPair features
Call notifications–Sendsthetabletanotificationwhenthephonereceives
acall.Thenotificationdisplaysthecaller'snumberandallowsyoutodecline
thecall.
Message notifications–Sendsthetabletanotificationwhenthephone
receivesamessage.
Social network Notifications–Displayssocialnetworkingnotificationson
yourtablet'sStatusbarwhenitarrivesonyourphone.
NOTE:Toenablethisfeature,turntheQPair social network notifications
optiononyourphone(Settings>Accessibility>QPair social network
notifications).Thisoptionallowsyoutobenotifiedofsocialnetworking
notificationsonyourtablet.
QuickMemo transfer–SavesyourcurrentQuickMemointhetablet'sGallery,
andthensyncsthisGallerywiththeGalleryonyourphone.
Internet via phone–AutomaticallyconnectsyourtablettotheInternet
throughyourmobilephone(asaWi-Fihotspot).Usingthisfeaturemayincur
datacharges.Tosavedatausageonthephone,thephoneautomatically
connectstoanytrustedWi-Fihotspotswithinrange.
Recent app sticker–Whenthepaireddevice'sscreenisunlocked,asticker
willdisplaythelastappusedontheotherdeviceiftheappisinstalledboth
onthetabletandthephone.
QSlide
TheQSlidefunctionenablesanoverlaywindowonyourtablet’sdisplayfor
easymultitasking.QSlidewindowscanbeopenedfromtheQSlideappsbar
ontheNotificationspanel,ordirectlyfromtheapplicationsthatsupportthe
QSlidefunction.

69
OR
TaptorunQSlide.
TaptoexittheQSlideandreturntofullwindow.
Taptoadjusttransparency.
TaptoendtheQSlide.
Taptoadjustthesize.
NOTE:TheQSlidefunctioncansupportuptotwowindowsatthesame
time.QSlideonlysupportsthefollowingapplications:Videos,Internet,
Memo,Calendar,Calculator,Email,FileManager.
1 OpentheNotificationsPanelandtapthedesiredappfromtheQSlide
appssection.
OR
WhileusinganapplicationthatsupportsQSlide,tap .Thefunctionwill
bedisplayedcontinuouslyasasmallwindowonyourscreen.
2 Slide toadjustthetransparencylevel.AnddragtheQSlidetitle
bartomoveittoanotherpositiononthescreen.

70
QuickMemo
TheQuickMemofeatureallowsyoutocreatememosandcapturescreen
shots.Capturescreens,drawonthem,andsharethemwithfamilyand
friendswithQuickMemo.
Creating a QuickMemo
1 AccesstheQuickMemofeature,slide
theStatusBardownwardsandtouch
.
OR
PressbothoftheVolume Keysatthe
sametimeforonesecond.
2 Selectthedesiredmenuoptionfrom
Pen type,Colour,andEraser.Then
createamemo.
3 Tap tosavethememo.Toexit
QuickMemoatanytime,taptheBack
Key .

71
NOTE:
•PleaseuseafingertipwhileusingtheQuickMemo.Donotuseyour
fingernail.
Using the QuickMemo options
ThefollowingoptionsareavailableintheQuickMemotoolbaratthetopof
thescreen.
Touchtokeepthecurrentmemoonthescreenandusethe
tabletsimultaneously.
Selectswhethertousethebackgroundscreenornot.
Allowsyoutoundoandredopreviousactions.
Selectsthepentypeandthecolor.
Erasesthememothatyoucreated.
Touchtosendyourmemotoothersorshareitviasocialnetwork
services.
SavesthememointheNotebookor Gallery.
Viewing the saved QuickMemo
FromtheHomescreen,tapApps >Gallery andselectthe
QuickMemoalbum.
QuickRemote
QuickRemoteturnsyourtabletintoaUniversalRemoteforyourhomeTV,
DVD,orBlu-ray.

72
NOTE:QuickRemotemaynotbeavailableforsomedevicesandareas.
To open the QuickRemote application and set up your
QuickRemote(s)
1 FromtheHomescreen,taptheApps >Apptab>QuickRemote .
YoucanalsoperformtheinitialsetupofyourQuickRemotefromthe
NotificationsPanel.SwipetheStatusBardownward,taptheQuickRemote
icon .
2 Touch toselectaroomtypeandtouch toaddthedevice.
3 Selectthetypeandbrandofdevice,thenfollowtheon-screeninstructions
toconfigurethedevice(s).
NOTE:TheQuickRemoteoperatesthesamewayasanordinaryinfrared
(IR)remotecontrolinyourregionorcountry.Becarefulnottocoverthe
infraredsensoratthetopofthetabletwhenyouusetheQuickRemote
function.Thisfunctionmaynotbesupporteddependingonthemodel,
themanufacturerorservicecompany.

73
Using QuickRemote
1 FromtheHomescreen,taptheApps >QuickRemote toopena
QuickRemotebarwithalloftheremotesyousetup.
2 Selecttheremoteyouwantbytappingitstype/nameatthetopofthe
QuickRemotebar.
3 Tapthebuttonsonthedisplayedremote.
NOTE:WhenaddingremotecontrolofTV,QuickRemotecouldusethe
INPUTbuttontoconfigureappropriateremotecontrol.Whenconfiguring
theINPUTbutton,inputsourceofTVcouldbechanged.Toresetinput
sourceofyourTV,taptheINPUTbuttononQuickRemoteseveraltimes
(dependingonthenumberofdevicesconnectedtotheTV).
QuickRemote options
ToaccesstheQuickRemoteOptionsmenu,taptheMenu Key (inthe
FrontTouchKeysbar)toselectthedesiredoption.
NOTE:Whileplayingmusicinthebackground,pressinganyQuickRemote
buttonwillmutethesoundforasecond.
QuickTranslator
Simplyaimthecameraofyoursmarttabletattheforeignsentenceyouwant
tounderstand.Youcangetthereal-timetranslationanywhereandanytime.
YoucanbuyadditionaldictionariesforofflinetranslationfromtheGoogle
PlayStore.

74
Homelanguage.
Destinationlanguage.
SwitchestoVoicemode.Tapthe
languagebutton,thenspeak.
Translationofawrittenword.
Translationofawrittensentence.
Translationofaparagraph.
AccessestheQuickTranslator
settings.Youcansetthehomeand
destinationlanguageshere.
1 Touch >Appstab>QuickTranslator .
2 Tapthetranslationformat.Choosefrom ,Word,Line,orBlock.
3 TaptheSettingsicon andsetthehomeanddestinationlanguages.
4 Holdthetablettowardthesubjectyouwanttotranslateforafewseconds.
NOTE:Onlyonedictionaryisprovidedfreeofcharge.Additional
dictionariesmustbepurchased.Pleaseselectfromthelistbelowthe
dictionaryyouwouldliketoinstallasyourcomplimentarydictionary.
NOTE:Theremaybeadifferenceintherateofrecognizationdepending
onthesize,font,color,brightnessandangleofthelettersthatneedtobe
translated.

75
Voice Mate
YoucanaskVoice Matetoperformtabletfunctionsusingyourvoice,such
assettingalarms,orsearchingtheweb.WhenyouaccessVoiceMateforthe
firsttime,itdisplayshelpinformationtoassistyouinlearninghowtousethis
function.
To open the Voice Mate application
•FromtheHomescreen,taptheApps >Voice Mate .
Using the Voice Mate application
1 OpentheVoice Mateapplication.
2 TaptheSpeakicon (atthebottomofthescreen)toturniton.Say
whatyouwantittodoforyou.
• Ifyousay“Wakemeupat6AM",VoiceMatewillsetthealarmforthat
time.
NOTE:AccesstheVoiceMatesettingstocheckmarkSkip confirmation
sothatfoundexactname(ornumber)matchrequestswillbeexecuted
withoutconfirmingitfirst.
Voice Mate Icons
ThefollowingVoiceMateiconsaredisplayedatthebottomofthescreen:
• TaptodisplaytheVoiceMateQSlidewindowontheHomescreen.
• Taptosayavoicecommandtoexecute.
• Taptotypeacommandtoexecute.
Voice Mate Options menu
TaptheMenu Key toaccesstheOptionsmenutoselectSettingsor
Help.

76
NOTE:
•WhenthelanguagesettingforVoiceMateisnotthesameasthe
defaultlanguagesettingonyourtablet,somecommandssuchas
launchingappsmaynotwork.
•Whenenteringtext,youcanonlyuselettersornumbers.
•VoiceMaterecognizesyourspeechbetterwhenyouspeakslowly.
•YoucanviewexamplesofvariouscommandsbyswipingtheVoiceMate
mainscreentotheleft.
Alarm
Setting your alarm
1 FromtheHomescreen,tapApps >Appstab>Alarm/Clock > .
2 Setthedesiredalarmtime.
3 SetRepeat,Snooze duration,Vibration,Alarm sound,Alarm volume,Auto
app starter,Puzzle lockandMemo.
4 TouchSave.
NOTE:Tochangealarmsettingsinthealarmlistscreen,touchtheMenu
Key
andselectSettings.
Calculator
Using your calculator
1 FromtheHomescreen,tapApps >Appstab>Calculator .
2 Touchthenumberkeystoenternumbers.

77
3 Forsimplecalculations,touchthefunctionyouwanttoperform
( , , or )followedby .
NOTE:
•Formorecomplexcalculations,touchtheMenu Key
,selectthe
Scientific calculator,thenchoosethedesiredfunction.
•Toviewthecalculationhistory,tapMenu Key
>Calculation history.
Calendar
Adding an event to your calendar
1 FromtheHomescreen,tapApps >Appstab>Calendar .
2 Taptheleft-topbuttontochangethecalendarview(Day,Week,Month,
Year,Agenda).
3 Taponthedateforwhichyouwishtoaddaneventandtap .
4 TouchtheEvent namefieldandentertheeventname.
5 TouchtheLocationfieldandenterthelocation.Checkthedateandenter
thetimeyouwishyoureventtostartandfinish.
6 Ifyouwishtoaddanotetoyourevent,touchtheDescriptionfieldand
enterthedetails.
7 Ifyouwishtorepeatthealarm,setREPEATandsetREMINDERS,if
necessary.
8 TouchSavetosavetheeventinthecalendar.
NOTE:Touchandholdaspotonthecalendartoquicklysaveacalendar
eventonthatdate.Simplyentertheeventnameandtime,thentapSave.
YoucantapDetailsandentermoreinformation,orupdatetheeventwith
additionaldetailslater.

78
Tasks
TheTasksappcanbesynchronizedwithyourMSExchangeaccount.You
cancreateandmanageyourtasksusingyourtabletorfromMSOutlookor
MSOfficeOutlookWebAccess.
1 FromtheHomescreen,tapApps>Tasks .
2 TaptheAddtaskicon (intheupper-rightcornerofthescreen).
3 EntertheSubject,DUE DATE,DESCRIPTION,REPEAT,andREMINDER,
asnecessary.
4 TapSave.
File Manager
TheFile Managerapplicationallowsyoutomanagefilesinyourinternal/
externalstorage.
To open the File Manager application
•FromtheHomescreen,tapApps >File Manager .
Voice Recorder
Usethevoicerecordertorecordvoicememosorotheraudiofiles.
Recording a sound or voice
1 FromtheHomescreen,tapApps >Appstab>Voice Recorder .
2 Touch tobeginrecording.
3 Touch toendtherecording.
4 Touch tolistentotherecording.

79
NOTE:Touch toaccessyourlistofrecordings.Youcanlistentothe
savedrecordings.Theavailablerecordingtimemaydifferfromactual
recordingtime.
Sending the voice recording
1 Onceyouhavefinishedrecording,youcansendtheaudioclipby
touching .
2 Choosefromanyoftheavailablemethodsforsharing.
Task Manager
YoucanmanageyourapplicationsusingTaskManager.Youcaneasilycheck
thenumberofapplicationsthatarecurrentlyrunningandshutdowncertain
applications.
Task Manager Options
•TouchStoptostopindividualapps.
•TapStop alltostopallcurrentlyrunningapps.
•TaptheMenu Key toaccessHelp,Sortby,andSettings.
POLARIS Office 5
POLARISOffice5isaprofessionalmobileofficesolutionthatletsusers
convenientlyviewvarioustypesofofficedocuments,includingWord,Excel
andPowerPointfiles,anywhereoranytime,usingtheirmobiledevices.
To create a New Document
1 FromtheHomescreen,tapApps >Appstab>POLARIS Office 5 .
2 RegisteryouremailaddressontheRegistrationpage.

80
NOTE:YoucantapSkiptoignoretheregistrationinformation.
3 Tap tostartanewdocument.
4 Tapadocumenttypefromthedrop-downlist,thenchooseatemplate.
5 Entercontentsinthedocumentusingthetoolsatthetopofthescreen
andtheon-screenkeyboard.
6 Whenyou'redoneworkingonthedocument,tap (inthetopleftcorner
ofthescreen),thentapSaveandEnterthedocumentname.
To view and edit a document on your device
Youcannoweasilyviewandeditawidevarietyoffiletypes,including
MicrosoftOfficedocumentsandAdobePDF,rightontheirmobiledevices.
Tapanofficedocumenttabatthetopofthescreentosearchfor
documentsonyourtablet.
Tapthedocumentthatyouwanttovieworedit.
WhenviewingdocumentsusingPOLARISOffice5,theobjectsandlayout
remainthesameasintheoriginaldocuments.
Toeditit,tap .
Google+
UsetheGoogle+apptostayconnectedwithpeopleviaGoogle’ssocial
networkservice.
FromtheHomescreen,tapApps >Appstab>Google+ .
NOTE:Thisapplicationmaynotbeavailabledependingontheregionor
serviceprovider.

81
Voice Search
TheVoiceSearchappallowsyoutosearchwebpagesusingyourvoice
insteadoftyping.
1 FromtheHomescreen,tapApps >Appstab>Voice Search .
2 SayakeywordorphrasewhenSpeak nowappearsonthescreen.Select
oneofthesuggestedkeywordsthatappear.
NOTE:Thisapplicationmaynotbeavailabledependingontheregionor
serviceprovider.
Downloads
UsetheDownloadsapptoseewhatfileshavebeendownloaded.
FromtheHomescreen,tapApps >Appstab>Downloads .
Box
TheBoxappmakesyoueasytoaccessandedityourfiles,sharecontentand
stayconnectedwithyourfilesfromanywhereonanydevice.
To open the Box application
•FromtheHomescreen,tapApps >Appstab>Box .

82
Internet
UsethisapplicationtobrowsetheInternet.Browsergivesyouafast,full-color
worldofgames,music,news,sports,entertainmentandmuchmore,righton
yourtabletwhereveryouareandwhateveryouenjoy.
FromtheHomescreen,tapApps >Appstab>Internet .
Taptogobackonepage.
Taptogoforwardonepage,tothepageyouconnectedtoafterthe
currentone.Thisistheoppositeofwhathappenswhenyoutouch
theBack Key ,whichtakesyoutothepreviouspage.
TaptogototheHomepage.
Taptoaddanewtab.
Taptoaccessyourbookmarks.
TaptouchtorunQSlide.
Taptoclosethecurrenttab.
Taptorefreshorstopthecurrentpage.
Opening a page
•Toopenanewpage,tap .
•Togotoanotherwebpage,tapthepagetoviewit.
The Web

83
Searching the web by voice
Tapthewebaddressfield,tap ,speakakeyword,andthenselectoneof
thesuggestedkeywordsthatappear.
NOTE:Thisfeaturemaynotbeavailabledependingontheregionor
serviceprovider.
Bookmarks
Toopenabookmarkedwebpage,tap ontheBrowsertoolbarandselect
one.
History
Tap ontheBrowsertoolbarandselecttheHistorytabtoopenaweb
pagefromthelistofrecently-visitedwebpages.Toclearthehistory,tapthe
Menu Key >Clear all history.
Using QSlide
UsethisfeaturetoaccesstheInternetwithoutclosingthecurrent
application.
WhileviewingcontentontheBrowser,tap .Youcanthenbrowseother
informationonyourtablet.Toviewthebrowserinfullscreen,tap .
Chrome
UseChrometosearchforinformationandbrowsewebpages.
FromtheHomescreen,tapApps >Appstab>Chrome .
NOTE:Thisapplicationmaynotbeavailable,dependingonyourregion
andserviceprovider.

84
Viewing web pages
Taptheaddressfield(atthetopofthescreen),enterawebaddressor
searchcriteria,andtap onthekeyboard.
Opening a page
•Togotoanewpage,tap .
•Togotoanotherwebpage,tapthepageyouwanttoselectit.
Searching the web by voice
Taptheaddressfield,tap ,speakakeywordandselectoneofthe
suggestedkeywordsthatappear.
NOTE:Thisfeaturemaynotbeavailabledependingontheregionor
serviceprovider.
Syncing with other devices
SyncopentabsandbookmarkstousewithChromeonanotherdevicewhen
youareloggedinwiththesameGoogleaccount.
Toviewopentabsonotherdevices,taptheMenu Key >Other devices.
YoumustbesignedintothesameGoogleaccountonalldevices.Selecta
webpagetoopen.
Adding and Viewing bookmarks
Toaddbookmarks,tap .
Toopenabookmarkedwebpage,taptheMenu Key >Bookmarks.

85
Chrome Options menu
•New tab–Taptocreateanewwebpagetab.
•New incognito tab–Taptocreateanewincognitotab.
•Bookmarks–Displaysyourbookmarkedwebpages.
•Other devices–Displaysyouropenwebpagesonotherdevices.
•History–Displaysyourbrowsingdata(webpagesyou'vevisited).
•Share...–AlloswstosharetheURL.
•Print...–Taptoprintthepicture.Choosetoautomaticallyfindaprinteron
yournetwork,ormanuallyenteronetouse.
•Find in page–Allowsyoutosearchfortextonthecurrentwebpage.
•Request desktop site–Checkmarktoaccessthedesktopsitewhenyou
viewwebpagesonyourtablet.
•Settings–AllowsyoutochangethesettingsspecifictotheChromeapp.
•Help–DisplaysinformationaboutusingtheChromeapponyourtablet.

86
Access the Settings menu
1 FromtheHomescreen,tapApps >Appstab>Settings .
OR
FromtheHomescreen,taptheMenu Key >System settings.
2 Selectasettingcategoryandselectanoption.
WIRELESS NETWORKS
Wi-Fi
Wi-Fi–TurnsonWi-FitoconnecttoavailableWi-Finetworks.
ThelistofalloftheWi-Finetworksthathavebeenaccessed.Taponeto
connecttoit.
NOTE:TapSearch(atthebottomofthescreen)toscanforavailable
Wi-Finetworks.
TaptheMenukey intheWi-FimenutoaccesstheWi-FiOptions
menu:
WPS Push Button–AllowsyoutoconnecttoasecuredWi-Finetworkwith
aWPSbutton.
WPS Pin Entry–AllowsyoutoconnecttoasecuredWi-Finetworkwitha
WPSPIN.
Add network–AllowsyoutomanuallyenteranewWi-Finetwork.
Settings

87
Wi-Fi Direct–AllowsdirectconnectionwithWi-Fideviceswithoutany
accesspoint.
Advanced Wi-Fi–AccessesthefollowingadvancedWi-Fisettings.
Interactive tutorial–DisplayssomeusefultutorialsfortheWi-Fifunction.
TIP! How to obtain the MAC address
TosetupaconnectioninsomewirelessnetworkswithMACfilters,you
mayneedtoentertheMACaddressofyourtabletintherouter.
YoucanfindtheMACaddressinthefollowinguserinterface:Fromthe
Homescreen,tapApps
>Settings >Wi-Fi>Menu Key >
Advanced Wi-Fi>MAC address.
Bluetooth
TurntheBluetoothwirelessfeatureonorofftouseBluetooth.ONallowsyou
topairandconnecttootherBluetoothdevices.
TaptheMenukey intheBluetoothmenutoaccesstheBluetooth
Optionsmenu.
Edit tablet name–Changesyourtabletnameforeasyidentificationwhen
pairingandconnecting.Enteryournewtabletname,thentapSave.
Visibility timeout–SetstheamountoftimeotherBluetoothdevicescansee
yourtabletforpairingandconnection.Choosefrom2minutes,5minutes,
1hour,andNever time out.
Show received files–DisplaysalistofyourBluetoothreceivedfiles.
Interactive tutorial–DisplayssomeusefultutorialsaboutBluetoothfeatures.

88
Data usage
Displaysthedatausage.
More...
Allowsyoutosharefolderswithotherdevicesviawirelessconnection.
Airplane mode–CheckmarktheAirplane modetoseton.Activating
Airplanemodedisablesallwirelessconnections.
Wireless storage–Youcanmanagefilesonyourtabletinthecomputeror
copyfilestothetabletfromthecomputerwithoutaUSBconnection.Make
surethatthetabletandcomputerareconnectedtothesamenetwork.
Then,enterthewebaddressesshownonyourtabletintheaddressbarof
thebrowseronyourcomputer.
Miracast–Allowsyoutowirelesslymirroryourtabletscreenandsoundonto
aMiracastdongleorTV.
SmartShare Beam–Allowsyoutoreceivemultimediacontentvia
SmartShareBeamfromLGphonesortablets.
Media server–Allowstosharemediacontentswithnearbydevicesvia
DLNA.
VPN–DisplaysthelistofVirtualPrivateNetworks(VPNs)thatyou've
previouslyconfigured.AllowsyoutoadddifferenttypesofVPNs.
NOTE:YoumustsetalockscreenPINorpasswordbeforeyoucanuse
credentialstorage.

89
DEVICE
Sound
Sound profile–ChoosetheSound,eitherVibrateonlyorSilent.
Volumes–ManagethevolumeofNotificationsound,Touchfeedback&
system,Music,video,gamesandothermedia.
Notification sound–Allowsyoutosetyourdefaultnotificationringtone.
Touch sounds–Allowsyoutosetyourtablettoplayasoundwhenyoutouch
buttons,iconsandotheronscreenitemsthatreacttoyourtouch.
Screen lock sound–Allowsyoutosetyourtablettoplayasoundwhen
lockingandunlockingthescreen.
Vibrate on touch–Allowsyoutosetthevibrationfeedbackwhenthetablet
screenistouched.
Display
Home screen
Theme–Setsthescreenthemeforyourdevice.
Wallpaper–SetsthewallpapertouseonyourHomescreen.
Screen swipe effect–Setstheeffectwhenyouswipetochangescreens.
Allow Home screen looping–CheckmarktosettheHomescreensto
scrollcontinuously,eliminatingtheneedtoscrollbackintheopposite
directionwhenyoureachoneend.
Home backup & restore–Allowsyoutobackupandrestoreappand
widgetconfigurationsandthemes.
Do you know?–EnablethisoptiontodisplaythehelppageDo you know?
ontodisplayanadditionalhomescreen.
Help–DisplaysinformationabouttheoperationoftheHomeScreen.

90
Lock screen
Select screen lock–Setascreenlocktypetosecureyourtablet.Opensa
setofscreensthatguideyouthroughdrawingascreenunlockpattern.If
youhaveenabledaPatternlocktypewhenyouturnonyourtabletorwake
upthescreen,youwillbeaskedtodrawyourunlockpatterntounlockthe
screen.
Screen swipe effect–Setsthescreenswipeeffectoptions.
Weather animation–Checkmarktoshowweatheranimationforcurrent
locationorprimarycitysetinWeatherbasedonautodataupdates.
Wallpaper–SetsyourLockscreenwallpaper.SelectitfromGalleryor
Wallpaper gallery.
Shortcuts–AllowsyoutochangetheshortcutsontheSwipeLockscreen.
Owner info–Checkmarktosetthedeviceowner’snametobedisplayed
ontheLockscreen.TaptoenterthetexttobedisplayedastheOwner
info.
Portrait view only–CheckmarktoalwaysdisplaytheLockscreenin
portraitview.
Lock timer–Setstheamountoftimebeforethescreenautomatically
locksafterthescreenhastimed-out.
Power button instantly locks–Checkmarktoinstantlylockthescreen
whenthePower/LockKeyispressed.ThissettingoverridestheSecurity
locktimersetting.
Brightness–Adjustthescreenbrightness.
Screen timeout–Setthetimeforscreentimeout.
KnockON–CheckmarktoenableKnockONtoturnthescreenonandoff.
Quicklydouble-tapcenterscreentoturniton.Double-taptheStatusBar,
anemptyareaontheHomescreen,ortheLockscreentoturnthescreen
off.Forthebestresults,donotmovethetabletwhileusingtheKnockON
feature.

91
Screen-off effect–Setsthescreen-offeffect.
Auto-rotate screen–Settoswitchorientationautomaticallywhenyourotate
thetablet.
Daydream–TaptheDaydreamswitchtotoggleitOnorOff.Onallowsthe
setscreensavertobedisplayedwhenthetabletissleepingwhiledocked
and/orcharging.ChoosefromClock,Colors,PhotoFrame,andPhotoTable.
NOTE:Chargingmightbeslowwhilethescreensaverison.
Font type–Changethetypeofdisplayfont.
Font size–Changethesizeofthedisplayfont.
Smart screen–Keepscreenonwhendevicedetectsyoureyeslookingat
thescreen.
Smart video–Checkmarktopausethevideowhenitdoesn'tdetectyour
eyeslookingatthescreen.
Front touch buttons–SettheFrontTouchKeysdisplayedatthebottom
ofallofthescreens.Setwhichonesaredisplayed,theirpositiononthe
bar,andwhattheylooklike.Selectthekeysandorder,thetheme,andthe
background.
Motion sensor calibration–Allowsyoutoimprovetheaccuracyofthetilt
andspeedofthesensor.
Storage
INTERNAL STORAGE–Displaysthetotalamountofspaceinthedevice’s
memoryandlistswhattypeofdataisusingupspace.
SD CARD–DisplaysthetotalamountofmemoryspaceonthemicroSD
card.

92
Total space
Mount/Unmount SD card–MountsandunmountsthemicroSDcard
fromyourtabletsothatyoucanaccessthedatastoredinit,formatthe
card,orsafelyremoveit.Thissettingisdimmedifthere’snomicroSD
cardinstalled,ifyou’vealreadyunmountedit,orifyou’vemountedthe
microSDcardonyourcomputer.
Erase SD card–PermanentlyeraseseverythingonthemicroSDcardand
preparesitforusewithyourtablet.
Battery
BATTERY INFORMATION–Seehowmuchbatterypowerisusedfordevice
activities.Thebatteryleveldisplaysinapercentage.Theremainingtimeof
useisalsodisplayed.
Battery percentage on status bar –Displaysthebatterypercentageonthe
StatusBar.
BATTERY SAVER–Managethebatteryforthepowersavingitems.Tap
theswitch toturnthisfeatureon.TapBattery saverforthefollowing
options.
• Auto-sync:TurnsoffAuto-sync.
• Wi-Fi:TurnsoffWi-Fiifdataisnotinuse.
• Bluetooth:TurnsoffBluetoothifnotconnected.
• Vibrate on touch:Turnsofftouchfeedback.
• Brightness:Adjustthebrightness.
• Screen timeout:Adjustthescreentimeout.
Help–TouchtoaccesssometipsforPowersaver.

93
Apps
Displaythelistofapplicationssuchascurrentlyrunningordownloaded.
Swipeleftandrighttoviewoneofthethreetabsacrossthetopofthe
screentoviewdetailedinformationforDOWNLOADED,RUNNING,andALL
applications.
Tapanentrytoviewmoreinformation,tapForce stop,thenOKtostopit
fromrunning.
Slide Aside
Youcanusethree-fingerswipetosaverunningappstotheleftorbring
thembacktothedisplay.
PERSONAL
Accounts & sync
Permitsapplicationstosynchronizedatainthebackground,whetherornot
youareactivelyworkinginthem.Deselectingthissettingcansavebattery
powerandlower(butnoteliminate)datausage.
Cloud
TapAdd accounttousecloudfeature.
Users
Checkmarktosetthedeviceowner’snametobedisplayedontheLock
screen.Tap toenterthetexttobedisplayedastheOwnerinfo.
Add user–AllowsyoutoaddnewaccountfortabletanduseMulti-user
feature.

94
Location
Mode
High accuracy–UseGPSandWi-Finetworkstoestimatelocation.
Battery saving–UseWi-Finetworkstoestimatelocation.
Device sensors only–UseGPStopinpointyourlocation.
RECENT LOCATION REQUEST–Displaysappsthathaverecentlyrequested
yourlocationinformation.
LOCATION SERVICES
Google Location Reporting–AllowsyoutoviewyourGooglelocation
settings.
Security
Encrypt tablet–Allowsyoutoencryptdataonthetabletforsecurity.Youwill
berequiredtoenteraPINorpasswordtodecryptyourtableteachtimeyou
poweriton.
Encrypt SD card storage–AllowsyoutoencryptdataontheMicroSDfor
security.
Password typing visible–Showthelastcharacterofthehiddenpasswordas
youtype.
Tablet administrators–Viewordeactivatetabletadministrators.
Unknown sources–Defaultsettingtoinstallnon-Playstoreapplications.
Verify apps–Disalloworwarnbeforeinstallationofappsthatmaycause
harm.
Storage type–Displaysthestoragetype.

95
Trusted credentials–DisplaytrustedCAcertificates.
Install from storage–Choosetoinstallencryptedcertificates.
Clear credentials–Removeallcertificates.
Language & input
UsetheLanguage&inputsettingstoselectthelanguageforthetexton
yourtabletandtoconfiguretheon-screenkeyboard,includingwordsyou've
addedtoitsdictionary.
Backup & reset
Back up my data–Settobackupyoursettingsandapplicationdatatothe
Googleserver.
Backup account–Settheaccounttowhichyouwanttobackupdatato.
Automatic restore–Settorestoreyoursettingsandapplicationdatawhen
theapplicationsarereinstalledonyourdevice.
LG Backup service–Backsupallinformationonthedeviceandrestoresitin
theeventofdatalossorreplacement.
Factory data reset–Resetyoursettingstothefactorydefaultvaluesand
deleteallyourdata.Ifyouresetthetabletthisway,youarepromptedto
re-enterthesameinformationaswhenyoufirststartedAndroid.
SYSTEM
Date & time
UseDate & timesettingstosethowdateswillbedisplayed.Youcanalso
usethesesettingstosetyourowntimeandtimezoneratherthanobtaining
thecurrenttimefromthemobilenetwork.

96
Accessibility
UsetheAccessibilitysettingstoconfigureaccessibilityplug-insyouhave
installedonyourtablet.
NOTE:Requiresadditionalplug-instobecomeselectable.
TalkBack–AllowsyoutosetuptheTalkBackfunctionwhichassistspeople
withimpairedvisionbyprovidingverbalfeedback.TaptheTalkBackswitch
atthetoprightcornerofthescreentoturniton.TapSettingsatthe
bottomofthescreentoadjusttheTalkBacksettings.
Large text–Checkmarktoincreasethesizeofthetext.
Invert colours–Checkmarktoinvertcolour.
Colour adjustment–Allowstodisplayscreenwithgreatercolourcontrast.
Taptheswitch toturnthisfeatureon.
Touch zoom–Allowsyoutozoominandoutbytriple-tappingthescreen.
Screen shades–Setthescreentobeshadeofblack.
Mono audio–Checkmarktoallowheadsetsoundroutedbothrightandleft
channel.
Captions–Allowstocustomizecaptionsettingsforthosewithhearing
impairments.Taptheswitch toturnthisfeatureon.
Touch feedback time–Setsthetouchandfeedbacktime.Choosefrom
Short,Medium,andLong.
Universal touch–Switch totogglebetweenonandoff.Universal
touchcanreplaceallhardwarebuttons.
Auto-rotate screen–Checkmarktoallowthedevicetorotatethescreen
dependingonthedeviceorientation(portraitorlandscape).

97
Read passwords–Checkmarktohaveverbalconfirmationwheninputting
passwords.
Accessibility settings shortcut–Setsquick,easyaccesstoselectedfeatures
whenyoutriple-tapHome key.
Text-to-speech output–Text-to-speechoutputprovidesaudiblereadoutof
text,forexample,thecontentsoftextmessages.
PC connection
Select USB connection method–Setthedesiredmode:Charge tablet,
Media sync (MTP),LG softwareorSend images (PTP).
Ask upon connecting–AskinUSBconnectionmodewhenconnectingtoa
computer.
Help–HelpforUSBconnection.
PC Suite–CheckthistouseLGPCSuitewithyourWi-Ficonnection.Please
notethatWi-FinetworkshouldbeconnectedtoLGPCSuiteviaaWi-Fi
connection.
Help–HelpforLGsoftware.
Accessory
Quick Cover–ActivatetheQuickCovertoturnonoroffautomatically.
USB storage Plug & Pop–SetsthePlug&PopfeatureforUSBstorage.
Checkmarktheapppaneloptiontoautomaticallydisplaytheapppanel
whenconnectinganOTG(On-the-Go)USBcable.TapEdit app panelto
changetheapplicationsyouwanttomakeavailable.
Earphone Plug & Pop –SetsthePlug&Popfeatureforearphones.
Checkmarktheapppaneloptiontoautomaticallydisplaytheapp
panelwhenconnectinganearphone.TapEditapppaneltochangethe
applicationsyouwanttomakeavailable.

98
Dock Plug & Pop–SetsthePlug&PopfeaturesforDock.Checkmarkthe
apppaneloptiontoautomaticallydisplaytheapppanelwhenconnecting
adock.TapEdit app paneltochangetheapplicationsyouwanttomake
available.
Printing
Allowsyoutoprintthecontentofcertainscreens(suchaswebpages
displayedinChrome)toaprinterconnectedtothesameWi-Finetworkas
yourAndroiddevice.
About tablet
Thismenuallowsyoutomanageyoursoftwareupdatesandviewvarious
informationrelatingtoyourtablet.
Tablet name–Allowsyoutosetyourtabletname.
Update Center–Allowsyoutocheckforappandsoftwareupdates.
Battery–Allowsyoutoviewbatterystatus,batterylevel,andbatteryuse
information.
Hardware information–Allowsyoutoviewthemodelnumber,IPaddress,
uptime,CSN,Wi-FiMACaddressandBluetoothaddress.
Software information–AllowsyoutoviewAndroidversion,kernelversion,
buildnumber,andsoftwareversion.
Legal information–AllowsyoutoviewopensourcelicensesandGoogle
legalinformation.

99
About backing up and restoring device data
Itisrecommendedthatyouregularlycreateandsaveabackupfileonthe
internalstorage,especiallybeforeupdatinganysoftware.Maintaininga
currentbackupfileinstoragememorymayallowyoutorecoverdevicedata
ifyourdeviceislost,stolen,orcorruptedbyanunforeseenissue.
ThisLGBackupapplicationissupportedbetweenLGsmartphonesand
tablets,otherS/WorOSversions.Asaresult,whenyoubuythenewLG
smartphonesandtablets,youcanbackupthecurrentdevicedatatoyour
newdevice.
IfyouhavetheBackupapplicationpreloadedonyoursmartphonesand
tablets,youcanbackupandrestoremostofyourdata,includingdownloaded
andpre-installedapplications,bookmarks,calendarentries,contacts,home
screensettings,andsystemsettings.Youmayalso:
•PerformamanualLGBackupofyourdevice.
•Scheduleautomaticbackupsofyourdevice.
•Restoreyourdevicedata.
Warning! Toprotectagainstunexpectedshutoffduringbackuporrestore
operations,duetoinsufficientbatterypower,youshouldalwayskeepyour
batteryfullycharged.
LG Backup

100
LG Backup your tablet data
1 FromtheHomescreen,tapApps >Appstab>LG Backup >
Backup.
2 SelectthecheckboxyouwanttobackupandselectNext.
3 OntheBackupLocationscreen,touchInternal storageorSD card,then
tapStart.
4 Whenallselectedfileshavebeenbackedup,youwillseethemessage
Backup completed.
Scheduling automatic backups
Youcanalsoprogramautomaticbackupsforthedataonyourtablet
accordingtoyourschedulesetting.Todothis,completethefollowingsteps:
1 FromtheHomescreen,tapApps >Appstab>LG Backup >
Scheduled backup.
2 TapBackup itemsandselectthecheckboxnexttotheitemyouwantto
backup.
3 TapBackup location,touchInternal storageorSD card.
4 TapBackup timetosetrepeatintervalamongEvery day, Weekly,Every to
weeks,MonthlyandtapDone.
5 Taptheswitch toactivateautomaticbackups.
Restoring tablet data
NOTE:Allfilesthatarestoredonyourtabletaredeletedbeforethe
backupfileisrestored.

101
1 FromtheHomescreen,tapApps >Appstab>LG Backup >File
restore & management.
2 OntheRestorescreen,selectabackupfilethatcontainsthedatayou
wishtorestore.
3 SelectthecheckboxnexttotheitemyouwishtorestoreandselectNext
torestoreittoyourtablet.
NOTE:Pleasenotethatyourtabletdatawillbeoverwrittenwiththe
contentofyourbackup.
4 Ifthebackupfileisencrypted,typethepasswordthatyoucreatedto
encryptit.
5 Whenallselectedfileshavebeenrestored,thetabletwillautomaticallybe
restart.
NOTE:YoucansetEnableencryptiontoencryptyourbackupfilesfor
extraprotection.

102
Tablet software update
Thisfeatureallowsyoutoupdatethefirmwareofyourtablettothelatest
versionconvenientlyfromtheinternetwithouttheneedtovisitaservice
center.Formoreinformationonhowtousethisfunction,pleasevisit:
http://www.lg.com
Asthetabletfirmwareupdaterequirestheuser’sfullattentionforthe
durationoftheupdateprocess,pleasemakesuretocheckallinstructions
andnotesthatappearateachstepbeforeproceeding.Pleasenotethat
removingtheUSBcableorbatteryduringtheupgrademayseriously
damageyourtablet.
LG Tablet Software update via Over-the-Air (OTA)
Thisfeatureallowsyoutoupdatethefirmwareofyourtablettothenewer
versionconvenientlyviaOTAwithoutconnectingtheUSBdatacable.This
featureisonlyavailableifandwhenLGmakesthenewerversionofthe
firmwareavailableforyourdevice.First,youcancheckthesoftwareversion
onyourtablet:
FromtheHomescreen,taptheMenu Key >System settings>About
tablet>Software information.
Toperformthetabletsoftwareupdate,fromtheHomescreen,taptheMenu
Key >System settings>About tablet>Update Center>Software
Update>Check now for update.
Tablet software update

103
NOTE:LGreservestherighttomakefirmwareupdatesavailableonly
forselectedmodelsatitsowndiscretionanddoesnotguaranteethe
availabilityofthenewerversionofthefirmwareforalltabletmodels.
NOTE:Yourpersonaldata—includinginformationaboutyourGoogle
accountandanyotheraccounts,yoursystem/applicationdataand
settings,anydownloadedapplicationsandyourDRMlicence—might
belostintheprocessofupdatingyourdevice'ssoftware.Therefore,LG
recommendsthatyoubackupyourpersonaldatabeforeupdatingyour
tablet'ssoftware.LGdoesnottakeresponsibilityforanylossofpersonal
data.

104
Theseaccessoriesareavailableforusewiththeyourtablet.(Items described
below may be optional.)
Travel adaptor Data cable
Quick Start Guide
NOTE:
•AlwaysusegenuineLGaccessories.Failuretodothismayvoidyour
warranty.
•Accessoriesmayvaryindifferentregions.
Accessories

105
Thischapterlistssomeproblemsyoumightencounterwhenusingyour
tablet.Someproblemsrequireyoutocallyourserviceprovider,butmostare
easytofixyourself.
Message Possible causes Possible corrective measures
No
applications
canbeset
Notsupportedby
serviceprovideror
registrationrequired.
Contactyourserviceprovider.
Charging
error
Batteryisnot
charged.
Chargebattery.
Outsidetemperature
istoohotorcold.
Makesuretabletischargingata
normaltemperature.
Contactproblem
Checkthechargerandits
connectiontothetablet.
Novoltage
Plugthechargerintoadifferent
socket.
Chargerdefective Replacethecharger.
Wrongcharger UseonlyoriginalLGaccessories.
Impossible
toreceive
/send
photos
Memoryfull
Deletesomeimagesfromyour
tablet.
Troubleshooting

106
Message Possible causes Possible corrective measures
Filesdonot
open
Unsupportedfile
format
Checkthesupportedfileformats.
Nosound Vibrationmode
Checkthesettingsstatusin
thesoundmenutomakesure
youarenotinvibrationorsilent
mode.

CARTA DE GARANTÍA
TELEFONÍA MÓVIL
1.- Antes de poner en marcha el producto, lea detenidamente el
contenido de esta tarjeta de garantía. Asimismo, no ponga en
funcionamiento el producto antes de leer de manera detallada el
Manual de usuario.
2.- Guarde durante todo el período de garantía esta tarjeta
debidamente cumplimentada y sellada por el establecimiento
comercializador junto con la factura de compra.
3.- Cuando requiera cualquier servicio de reparación deberá mostrar
esta tarjeta de garantía.
4.- Para cualquier información que requiera sobre nuestros productos
o ante cualquier duda o consulta en relación a los mismos, puede
hacerlo a través de nuestra web o por medio de nuestra línea de
atención al cliente.
ESTAMOS A SU DISPOSICIÓN
Ante cualquier necesidad de asistencia,
puede ponerse en contacto con nosotros
mediante nuestra página Web, chat online,
correo electrónico o nuestro centro de
Atención al Cliente.
www.lg.com
www.lg.com/es/posventa
Atención al cliente
96 364 92 70

CERTIFICADO DE GARANTÍA
LG ELECTRONICS ESPAÑA S.A.U. (LGEES)
SE COMPROMETE A RESPETAR Y/O HACER CUMPLIR
LAS CONDICIONES DE COBERTURA DE LA PRESENTE GARANTÍA.
REQUISITOS PARA LA VALIDEZ DE LA GARANTÍA
(1) La presente garantía sólo ampara productos oficiales importados o comercializados por LG
dentro de la Unión Europea y para beneficiarse de la misma deberá:
(1.1) En el periodo pre-venta el establecimiento comercializador deberá reflejar el modelo del
dispositivo y número de IMEI o número de Serie (SN) del mismo.
(1.2) En el periodo de garantía será REQUISITO IMPRESCINDIBLE adjuntar, junto a la presente
garantía debidamente sellada por el establecimiento, el original del ticket o factura de
compra que identifique el dispositivo incluyendo modelo del terminal e IMEI del mismo.
(2) Para que la garantía sea válida es IMPRESCINDIBLE que el cliente final o establecimiento
comercializador cumplimente, en el momento de efectuar la adquisición, los datos de todos los
apartados que en la misma se indican.
(3) Los beneficios de la presente garantía sólo serán validos si se utilizan los Servicios Técnicos
autorizados que LG Electronics España, S.A.U. tiene establecidos en su Red de Asistencia
Técnica.
(4) El dispositivo debe ser utilizado de conformidad con las instrucciones que se detallan en el
manual de usuario.
PERIODO DE LA GARANTÍA
(1) La garantía se aplica a todos los dispositivos de Telefonía Móvil comercializados por LG dentro
de la Unión Europea.
El periodo de garantía es el siguiente:
-Dispositivo móvil (terminal): 2 años.
-Accesorios: 2 años.
- Medios o soporte de software (CD–ROM, tarjetas de memoria, USB, etc): 90 días.
(2) La aplicación de la garantía comienza a partir de la fecha de adquisición (fecha de factura)
y será de conformidad con lo establecido en la legislación que se encuentre vigente en el
momento de la fecha de la adquisición (fecha de factura compra).
(3) LG Electronics España, S.A.U. (LGEES) garantiza cualquier pieza o producto reparado por un
periodo de noventa (90) días a partir de su fecha de entrega, o hasta el final de la garantía,
aplicándose aquella cuya duración sea más larga. Eventualmente, en beneficio del propio cliente,
LGEES, solucionará la incidencia en el dispositivo de telefonía móvil sustituyendo el dispositivo
por otro equipo en perfectas condiciones de uso siendo equivalente en prestaciones y fiabilidad
al original, conservando el cliente todos los derechos y coberturas incluidos en la garantía. Todos
aquellos componentes de hardware sustituidos en garantía pasarán a ser propiedad de LGEES.

COBERTURAS DE LA GARANTÍA
NOTA IMPORTANTE
(1) La presente garantía comercial no afecta a los derechos que dispone el cliente final conforme
a las previsiones contenidas en el RDL 1/2007 de 16 de Noviembre de 2007 (BOE 287 de 30
de Noviembre de 2007), frente a la garantía por falta de conformidad del vendedor, que son
independientes y compatibles con la presente garantía.
(2) De acuerdo con lo previsto en el Título V, del RDL 1/2007, el cliente final tendrá derecho a exigir
al vendedor, y/o al productor en los casos determinados en la Ley, la reparación y sustitución del
producto, e incluso, en su caso, la rebaja en el precio o la resolución del contrato si ello no fuere
desproporcionado.
(3) El titular de la garantía disfrutará de los derechos y coberturas que se contienen en el presente
documento.
(4) Para reclamar los derechos y coberturas que se contienen en el presente documento el cliente
final dispondrá de la vía de comunicación con nuestro número de Atención al Cliente y/o por escrito
dirigiéndose a las Oficinas Centrales (Calle Chile, nº 1 28290 Las Rozas de Madrid) o a la Central de
Asistencia Técnica (Parque tecnológico de Paterna, C/Louis Pasteur, 1 Nave 2 C.P. 46980 Paterna –
Valencia), o bien por la vía de la jurisdicción ordinaria.
(5) Durante el tiempo que dure la reparación, no se abonarán los daños y perjuicios por el tiempo
que el aparato esté fuera de servicio.
(6)
Es responsabilidad del cliente guardar una copia de seguridad de los datos contenidos en el terminal
previo a su envío para reparación, realizar un borrado completo de la información contenida en el
dispositivo e inhabilitar todos los usuarios y contraseñas de acceso a sus cuentas en redes sociales y
demás Sites que contengan información confidencial (entidades financieras, correo electrónico, etc..).
En el transcurso del servicio, el contenido de los soportes de almacenamiento del producto podrá ser
borrado, reemplazado o reformateado. En consecuencia, LG Electronics España S.A.U. no garantiza ni
cubre las pérdidas financieras o de otra índole causadas por la pérdida de datos.
(7) LG Electronics España, S.A.U. no se hace responsable de los daños que un dispositivo pueda
causar a elementos externos.
PROTECCIÓN DE DATOS DE CARÁCTER PERSONAL
(1) De conformidad con la Ley Orgánica 15/1999 de 13 de Diciembre, de Protección de Datos de
Carácter Personal, le informamos que los datos personales solicitados, todos ellos obligatorios
para la prestación del servicio de Garantía, serán incorporados a un fichero/s debidamente
inscrito/s en el RGPD cuyo responsable es LG Electronics España S.A.U. con la finalidad de
prestarle el servicio, así como para mantenerle informado de productos o servicios similares.
Usted podrá ejercer sus derechos de acceso, rectificación, cancelación y oposición dirigiéndose
por escrito a la dirección: Calle Chile nº 1, 28029 Las Rozas de Madrid o bien remitiendo un
correo electrónico a la dirección: [email protected], acompañando su solicitud de una copia
de un documento oficial que acredite su identidad e indicando en la misma el derecho que desea
ejercitar.

EXCLUSIONES DE LA GARANTÍA
La garantía de su producto está sujeta a las siguientes exclusiones y
limitaciones:
(1) Incumplimiento de cualquiera de los requisitos citados anteriormente.
(2) Todo componente o accesorio interior o exterior del dispositivo, que no esté especificado e incluido en este
certificado de garantía o no forme parte del producto original.
(3) Puestas en marcha, configuraciones y demostraciones de funcionamiento al usuario.
(4) Si la avería es producida por incendio, inundación, agentes meteorológicos, humedad excesiva o corrosión, golpeo,
aplastamiento o aplicación de voltaje o energía inadecuada o mal conexionado.
(5) Los daños por el mal trato, incluso los de transportes, que deberán reclamarse en presencia del personal de la
compañía de transporte, por lo que conviene inspeccionar los paquetes antes de conformar los albaranes de
entrega correspondientes.
(6) Las averías producidas por rotura física, tales como carcasas, plásticos, pinturas, esmaltes, cristales,
embellecedores y similares.
(7) Los productos cuya avería se deba al mal uso y/o a no atender las instrucciones de funcionamiento y manejo que se
adjuntan con cada aparato.
(8) Por la utilización de accesorios o componentes electrónicos no adecuados.
(9) El uso inadecuado de elementos punzantes sobre las las pantallas táctiles.
(10) Los dispositivos que no llevan identificado número de IMEI y Nº de Serie o que éstos hayan sido alterados o
borrados o no coincidan con el número expresado en el certificado de garantía o factura de compra.
(11) Los problemas inherentes a la unión de IMEI-Número de Abonado para la activación en la Red.
(12) Si el dispositivo es reparado o manipulado por personal no autorizado por LG Electronics España S.A.U.
(13) Las averías producidas por el desgaste normal debido a su uso (incluido el de baterías, lentes de cámaras,
pantallas, auriculares o manos libres externos).
(14) Cuando la avería la produzca un componente o accesorio interno o externo al dispositivo no incluido o
especificado en este certificado de garantía o no forme parte del producto original.
(15) Los fallos de píxel que no excedan de la normativa vigente o la establecida por el fabricante (LG Electronics
España, S.A.U.).
(16) Cualquier tipo de pérdida de información en discos duros, discos en estado sólido o memorias. El cliente final es
responsable de realizar una copia de seguridad de sus datos previa a la cesión del dispositivo al servicio técnico
de conformidad con lo establecido en el punto (6) del apartado “Coberturas de la Garantía”.
(17) Cualquier tipo de soporte físico de información que estuviera en el equipo a la hora de cederlo al servicio oficial
para su reparación.
(18) Los sistemas operativos y/o programas no originales diferentes a los pre-cargados y/o su funcionamiento.
(19) Las actualizaciones o versiones posteriores de software, no homologadas ni soportadas oficialmente por el
fabricante (LG Electronics España, S.A.U.), cualquiera que sea su procedencia.
(20) Los daños y fallos del dispositivo ocasionados por virus u otro tipo de programas maliciosos.
(21) En los consumibles, como las baterías, pilas, etc, el periodo de garantía dependerá de la vida útil de aquéllos,
determinada por los ciclos de carga / descarga y modo de uso, si bien a modo de referencia será de 1 año
aproximadamente.
(22) LG Electronics España S.A.U puede instalar actualizaciones del software de sistema dentro del servicio de
garantía, lo que impedirá que el terminal vuelva a una versión anterior del software del sistema.

RELLENAR TODOS LOS DATOS DEL
CLIENTE Y DEL PRODUCTO EN EL
MOMENTO DE LA COMPRA
NOMBRE Y APELLIDOS:
MODELO: Nº DE IMEI:
OPERADOR DE TELEFONIA:
FECHA DE COMPRA: SELLO DEL ESTABLECIMIENTO /
OPERADOR:
ESTA TARJETA DE GARANTÍA ES
INTRANSFERIBLE Y APLICABLE SOLO AL
COMPRADOR ORIGINAL.
CUMPLIMENTE LOS DATOS REQUERIDOS
Y GUÁRDELA JUNTO CON LA FACTURA DE
COMPRA EN LUGAR SEGURO.
LG Electronics España- Central Asistencia
Técnica
Parque Tecnólogico de Paterna
C/ Louis Pasteur 1, Nave 2
(46980) Paterna (Valencia)

ThisequipmentmaybeoperatedinallEuropean
countries.
The5150-5350MHzbandisrestrictedtoindoor
useonly.
Wi-Fi (WLAN)
Esteequipopuedeutilizarseentodoslospaíses
europeos.
Labandade5150-5350MHzserestringe
únicamentealusoeninteriores.
Wi-Fi (WLAN)

Información general
<CentrodeinformaciónalclientedeLG>
96 364 92 70
*Asegúresedequeelnúmeroescorrectoantesde
realizarunallamada.
General Inquiries
<LGCustomerInformationCentre>
96 364 92 70
*Makesurethenumberiscorrectbeforemakingacall.
-
 1
1
-
 2
2
-
 3
3
-
 4
4
-
 5
5
-
 6
6
-
 7
7
-
 8
8
-
 9
9
-
 10
10
-
 11
11
-
 12
12
-
 13
13
-
 14
14
-
 15
15
-
 16
16
-
 17
17
-
 18
18
-
 19
19
-
 20
20
-
 21
21
-
 22
22
-
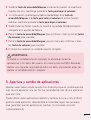 23
23
-
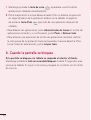 24
24
-
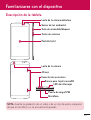 25
25
-
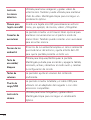 26
26
-
 27
27
-
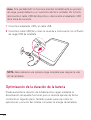 28
28
-
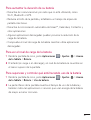 29
29
-
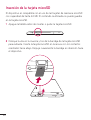 30
30
-
 31
31
-
 32
32
-
 33
33
-
 34
34
-
 35
35
-
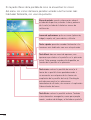 36
36
-
 37
37
-
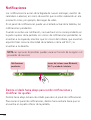 38
38
-
 39
39
-
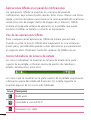 40
40
-
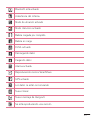 41
41
-
 42
42
-
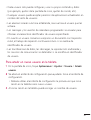 43
43
-
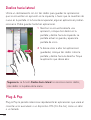 44
44
-
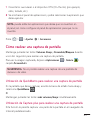 45
45
-
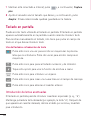 46
46
-
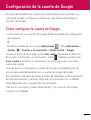 47
47
-
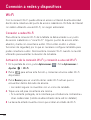 48
48
-
 49
49
-
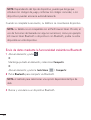 50
50
-
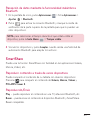 51
51
-
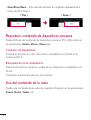 52
52
-
 53
53
-
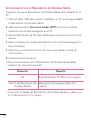 54
54
-
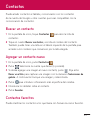 55
55
-
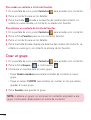 56
56
-
 57
57
-
 58
58
-
 59
59
-
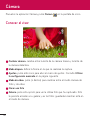 60
60
-
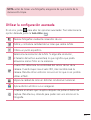 61
61
-
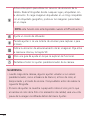 62
62
-
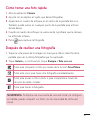 63
63
-
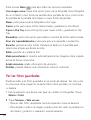 64
64
-
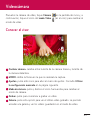 65
65
-
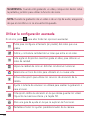 66
66
-
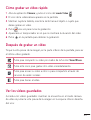 67
67
-
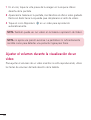 68
68
-
 69
69
-
 70
70
-
 71
71
-
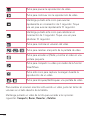 72
72
-
 73
73
-
 74
74
-
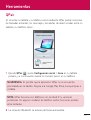 75
75
-
 76
76
-
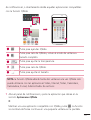 77
77
-
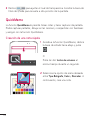 78
78
-
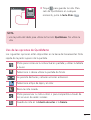 79
79
-
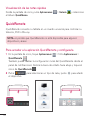 80
80
-
 81
81
-
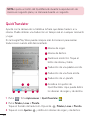 82
82
-
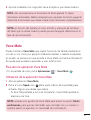 83
83
-
 84
84
-
 85
85
-
 86
86
-
 87
87
-
 88
88
-
 89
89
-
 90
90
-
 91
91
-
 92
92
-
 93
93
-
 94
94
-
 95
95
-
 96
96
-
 97
97
-
 98
98
-
 99
99
-
 100
100
-
 101
101
-
 102
102
-
 103
103
-
 104
104
-
 105
105
-
 106
106
-
 107
107
-
 108
108
-
 109
109
-
 110
110
-
 111
111
-
 112
112
-
 113
113
-
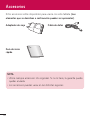 114
114
-
 115
115
-
 116
116
-
 117
117
-
 118
118
-
 119
119
-
 120
120
-
 121
121
-
 122
122
-
 123
123
-
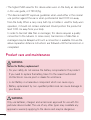 124
124
-
 125
125
-
 126
126
-
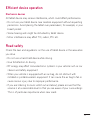 127
127
-
 128
128
-
 129
129
-
 130
130
-
 131
131
-
 132
132
-
 133
133
-
 134
134
-
 135
135
-
 136
136
-
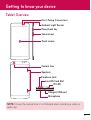 137
137
-
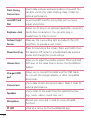 138
138
-
 139
139
-
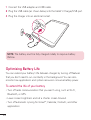 140
140
-
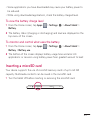 141
141
-
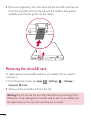 142
142
-
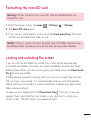 143
143
-
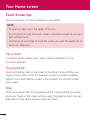 144
144
-
 145
145
-
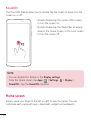 146
146
-
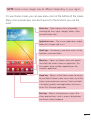 147
147
-
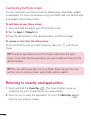 148
148
-
 149
149
-
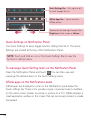 150
150
-
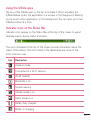 151
151
-
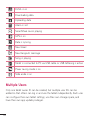 152
152
-
 153
153
-
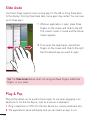 154
154
-
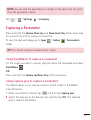 155
155
-
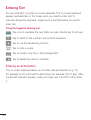 156
156
-
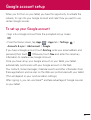 157
157
-
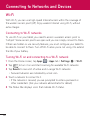 158
158
-
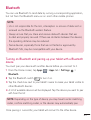 159
159
-
 160
160
-
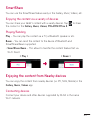 161
161
-
 162
162
-
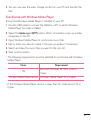 163
163
-
 164
164
-
 165
165
-
 166
166
-
 167
167
-
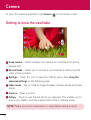 168
168
-
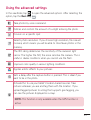 169
169
-
 170
170
-
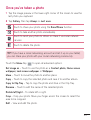 171
171
-
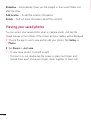 172
172
-
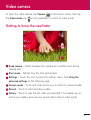 173
173
-
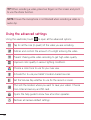 174
174
-
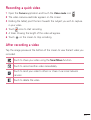 175
175
-
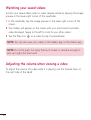 176
176
-
 177
177
-
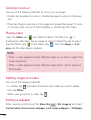 178
178
-
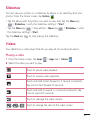 179
179
-
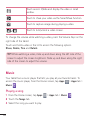 180
180
-
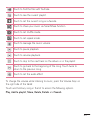 181
181
-
 182
182
-
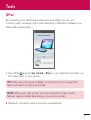 183
183
-
 184
184
-
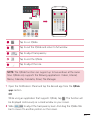 185
185
-
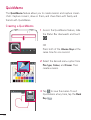 186
186
-
 187
187
-
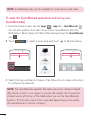 188
188
-
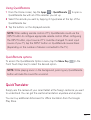 189
189
-
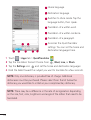 190
190
-
 191
191
-
 192
192
-
 193
193
-
 194
194
-
 195
195
-
 196
196
-
 197
197
-
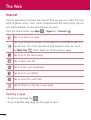 198
198
-
 199
199
-
 200
200
-
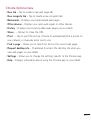 201
201
-
 202
202
-
 203
203
-
 204
204
-
 205
205
-
 206
206
-
 207
207
-
 208
208
-
 209
209
-
 210
210
-
 211
211
-
 212
212
-
 213
213
-
 214
214
-
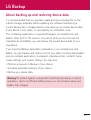 215
215
-
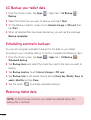 216
216
-
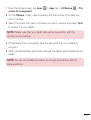 217
217
-
 218
218
-
 219
219
-
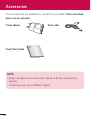 220
220
-
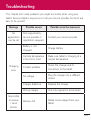 221
221
-
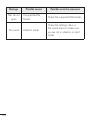 222
222
-
 223
223
-
 224
224
-
 225
225
-
 226
226
-
 227
227
-
 228
228
-
 229
229


LG Gpad LGV500 blanco Manual de usuario
- Categoría
- Smartphones
- Tipo
- Manual de usuario
en otros idiomas
- English: LG Gpad LGV500 blanco User manual
Artículos relacionados
Otros documentos
-
LG G-Pad G-Pad 8.0 4G Orange Guía del usuario
-
 Vidao V7TAB8KB Manual de usuario
-
Lenco TAB-704 Manual de usuario
-
Sky Elite OctaPlus Tablet Manual de usuario
-
Lenco CarTab 920 Manual de usuario
-
Lenco CoolTab 80 Manual de usuario
-
Primux Zonda 3 Manual de usuario
-
-
-
