Sony RDP-XF300IPN Manual de usuario
- Categoría
- Altavoces de acoplamiento
- Tipo
- Manual de usuario
Este manual también es adecuado para

Wireless music streaming compatible models
iPod touch (5th generation)
iPod touch (4th generation)
iPod touch (3rd generation)
iPod touch (2nd generation)
iPod nano (7th generation)
iPhone 5
iPhone 4S
iPhone 4
iPhone 3GS
iPhone 3G
iPad (4th generation)
iPad mini
iPad (3rd generation)
iPad 2
iPad
* The iPod nano (7th generation) cannot be controlled by the
remote when the command of “MENU,” “,” “,” and “ENTER” is
pressed.
Design and specifications are subject to change without
notice.
Troubleshooting
General
The power does not turn on when the AC adaptor is
connected.
Make sure the AC adaptor is connected to the wall outlet
firmly.
The rechargeable battery is depleted.
Connect the AC adaptor to charge the battery.
There is no sound.
Adjust VOLUME +/− (VOL +/− on the remote).
Noise is heard.
Ensure that the unit is not near in-use portable phones,
etc.
The power will not turn on when the AC adaptor is
disconnected.
The Power Off Hold function may be set. In this case,
cancel the Power Off Hold function. (See “Power Off
Hold function.”)
The rechargeable battery may be depleted. In this case,
connect the AC adaptor to charge the battery. (See “To
use the AC adaptor.”)
“ERROR” appears in the display and the unit turns off
automatically.
If this symptom occurs frequently, consult your nearest
Sony dealer.
When using an iPod on the Dock
There is no sound.
Make sure the iPod is connected firmly.
Make sure that the function for iPod is activated.
Operation is not performed.
Make sure the iPod is connected firmly.
Check that the iPod is compatible with this unit. (See
“Dock Connector compatible models.”)
The iPod does not charge.
Make sure the iPod is connected firmly.
Make sure the AC adaptor is connected firmly.
Check that the iPod is compatible with this unit. (See
“Dock Connector compatible models.”)
When using the Bluetooth connection
There is no sound.
Ensure that this unit is not too far from the iPod, or this
unit is not receiving interference from a wireless LAN,
other 2.4 GHz wireless device, or microwave oven.
Check that the Bluetooth connection is made properly
between this unit and the iPod.
Pair this unit and the iPod again.
Keep away from metal objects or surfaces.
Make sure that the Bluetooth function is activated.
Sound skips or the correspondence distance is short.
If a device that generates electromagnetic radiation, such
as a wireless LAN, other Bluetooth device(s), or a
microwave oven is nearby, move away from such sources.
Remove any obstacle between this unit and the iPod or
move away from the obstacle.
Locate this unit and the iPod as close to each other as
possible.
Re-position this unit.
Re-position the iPod.
Connecting cannot be done.
Perform pairing again. (See “To pair with an iPod.”)
Check that the iPod is compatible with this unit. (See
“Wireless music streaming compatible models.”)
Pairing cannot be done.
Bring this unit and the iPod closer together.
Delete the unit from the iPod and perform pairing again.
Check that the iPod is compatible with this unit. (See
“Wireless music streaming compatible models.”)
Radio
Reception is poor.
Extend the antenna to its full length, and orientate for
best FM reception.
The sound is weak or is of poor quality.
If the unit is close to a TV, move it away from the TV.
The TV picture is unstable.
If you are listening to an FM program near a TV with an
indoor antenna, move the unit away from the TV.
Audio-in
There is no sound.
Make sure the audio connecting cable is connected firmly.
Make sure that the connected optional component is in
playback mode.
Make sure that the Audio-in function is activated.
The sound is low.
Check the volume of the connected optional component.
Remote control
The remote does not function.
The unit cannot be turned on with the remote when the
AC adaptor is disconnected. In this case, press on
the unit to turn it on.
Replace the battery in the remote with a new one if it is
weak.
Make sure that you are pointing the remote at the remote
sensor on the unit.
Do not cover or place any objects directly in front of the
(Remote sensor) receiver.
Remove any obstacles in the path of the remote and the
unit.
Make sure the remote sensor is not exposed to strong
light such as direct sunlight or fluorescent lamp light.
If the problem persists, consult your nearest Sony dealer.
Preparations
Power source
Auto power off
After playback of the music (from an iPod on the Dock,
Bluetooth connection, or optional component connected to
the AUDIO IN jack) has finished, and if no operation is
performed for about 20 minutes, the unit will automatically
turn off.
Notes
While the unit is turned on, if no operation is performed
for more than about 30 seconds, the display turns off. In
this case, press SOUND to turn on the display again.
The unit cannot be turned on with the remote when the
AC adaptor is disconnected.
To use the AC adaptor
1 Connect the supplied AC power cord to the AC
adaptor.
2 Connect the AC adaptor to the DC IN 20V jack on
the back of this unit firmly and plug it into a wall
outlet.
RDP-XF300iPN
English
Owner’s Record
The model number and the serial number are located on the bottom.
Record the serial number in the space provided below. Refer to them
whenever you call upon your Sony dealer regarding this product.
Model No. RDP-XF300iPN
Serial No. __________________________________________
For customers in the USA
Please register this product on line at
http://www.sony.com/productregistration
Proper registration will enable us to send you periodic
updates about new products, services and other important
announcements. Registering your product will also allow us
to contact you in the unlikely event that the product needs
adjustment or modification. Thank you.
WARNING
To reduce the risk of fire or electric shock, do
not expose this apparatus to rain or moisture.
To reduce the risk of fire, do not cover the ventilation of the
apparatus with newspapers, tablecloths, curtains, etc. And
do not place lighted candles on the apparatus.
To reduce the risk of fire or electric shock, do not expose
this apparatus to dripping or splashing, and do not place
objects filled with liquids, such as vases, on the apparatus.
Do not install the appliance in a confined space, such as a
bookcase or built-in cabinet.
Do not expose the batteries (battery pack or batteries
installed) to excessive heat such as sunshine, fire or the like
for a long time.
As the main plug is used to disconnect the unit from the
mains, connect the unit to an easily accessible AC outlet.
Should you notice an abnormality in the unit, disconnect
the main plug from the AC outlet immediately.
The unit is not disconnected from the AC power source
(mains) as long as it is connected to the wall outlet, even if
the unit itself has been turned off.
The nameplate and important information concerning
safety are located on the bottom exterior of the main unit
and on the surface of the AC adaptor.
You are cautioned that any changes or modifications not
expressly approved in this manual could void your authority
to operate this equipment.
This equipment must not be co-located or operated in
conjunction with any other antenna or transmitter.
This equipment complies with FCC/IC radiation exposure
limits set forth for an uncontrolled environment and meets
the FCC radio frequency (RF) Exposure Guidelines in
Supplement C to OET65 and RSS-102 of the IC radio
frequency (RF) Exposure rules. This equipment has very
low levels of RF energy that it deemed to comply without
maximum permissive exposure evaluation (MPE). But it is
desirable that it should be installed and operated keeping
the radiator at least 20cm or more away from person’s body
(excluding extremities: hands, wrists, feet and ankles).
Under Industry Canada regulations, this radio transmitter
may only operate using an antenna of a type and maximum
(or lesser) gain approved for the transmitter by Industry
Canada. To reduce potential radio interference to other
users, the antenna type and its gain should be so chosen that
the equivalent isotropically radiated power (e.i.r.p.) is not
more than that necessary for successful communication.
This device complies with Industry Canada license-exempt
RSS standard(s). Operation is subject to the following two
conditions: (1) this device may not cause interference, and
(2) this device must accept any interference, including
interference that may cause undesired operation of the
device.
CAUTION
Danger of explosion if battery is incorrectly replaced.
Replace only with the same type.
NOTE
This equipment has been tested and found to comply with
the limits for a Class B digital device, pursuant to Part 15 of
the FCC Rules. These limits are designed to provide
reasonable protection against harmful interference in a
residential installation. This equipment generates, uses and
can radiate radio frequency energy and, if not installed and
used in accordance with the instructions, may cause
harmful interference to radio communications. However,
there is no guarantee that interference will not occur in a
particular installation. If this equipment does cause harmful
interference to radio or television reception, which can be
determined by turning the equipment off and on, the user is
encouraged to try to correct the interference by one or more
of the following measures:
— Reorient or relocate the receiving antenna.
— Increase the separation between the equipment and receiver.
— Connect the equipment into an outlet on a circuit different
from that to which the receiver is connected.
— Consult the dealer or an experienced radio/TV technician for
help.
WARNING
Replace the battery for the remote control with a Sony
CR2025 lithium battery only. Use of another battery may
present a risk of fire or explosion.
Battery may explode if mistreated. Do not recharge,
disassemble or dispose of in fire.
Dispose of used battery promptly, according to local
environmental laws and guidelines in force. Keep away
from children.
Para clientes de los EE UU y CANADÁ
RECYCLADO DE BATERIAS DE
NÍQUEL-HIDRURO METALICO
Las baterías de níquel-hidruro metalico
son reciclables. Usted podrá ayudar a
conservar el medio ambiente
devolviendo las baterías usadas al
punto de reciclaje mas cercano.
Para más información sobre el
reciclado de baterías, llame al número
gratuito 1-800-822-8837, o visite http://www.rbrc.org/
Precaución: No utilice baterías de níquel-hidruro
metalico dañadas o con fugas.
Tratamiento de los equipos eléctricos y
electrónicos al final de su vida útil
(aplicable en la Unión Europea y en países
europeos con sistemas de recogida
selectiva de residuos)
Sobre derecho de autor y licencias
La marca y los logotipos de la palabra Bluetooth® son
propiedad de Bluetooth SIG, Inc. y el uso de tales marcas
por parte de Sony Corporation se efectúa con licencia. Otras
marcas comerciales y nombres de marca son propiedad de
sus respectivos propietarios.
iPad, iPhone, iPod, iPod nano y el iPod touch son marcas
comerciales de Apple Inc., registradas en EE. UU. y otros
países.
Lightning es una marca comercial de Apple Inc.
“Made for iPod”, “Made for iPhone” y “Made for iPad”
indican que un accesorio electrónico se diseñó para
conectarse específicamente a los dispositivos iPod, iPhone o
iPad, respectivamente, y que el fabricante obtuvo la
certificación necesaria para que cumpla con los estándares
de rendimiento de Apple. Apple no se hace responsable del
funcionamiento de este dispositivo en cumplimiento de los
estándares de seguridad y normativa. Tenga en cuenta que
el uso de este accesorio con los dispositivos iPod, iPhone o
iPad puede afectar el rendimiento inalámbrico.
Precauciones
Para desconectar la unidad de ca del suministro de
alimentación, tómela del enchufe, no del cable.
Debido a que el altavoz utiliza un imán potente, mantenga
las tarjetas de crédito que utilizan codificación magnética
o los relojes de cuerda, televisores de tubos de rayos
catódicos (CRT) o proyectores, etc. alejados de la unidad
para evitar posibles daños causados por el imán.
No coloque la unidad cerca de una fuente de calor, como
un radiador o conducto de aire, o en un lugar que esté
expuesto a la luz solar directa, polvo excesivo, vibración
mecánica o golpes.
Deje que el aire circule adecuadamente para evitar la
acumulación interna de calor. No coloque la unidad sobre
una superficie (tapete, manta, etc.) o cerca de materiales
(cortinas) que puedan obstruir los orificios de
ventilación.
En caso de que un objeto sólido o líquido cayera sobre la
unidad, desenchúfela y haga que la revise personal
calificado antes de proseguir con su uso.
Durante una tormenta eléctrica, no toque la antena
(aérea) ni el enchufe.
No toque la unidad con las manos mojadas.
No coloque la unidad cerca del agua.
NOTAS SOBRE LA BATERÍA DE LITIO
Limpie la batería con un paño seco para garantizar un
contacto adecuado.
Asegúrese de observar la polaridad al instalar la batería.
No sostenga la batería con pinzas metálicas; de lo
contrario, podría producirse un cortocircuito.
Sobre la comunicación Bluetooth
La tecnología inalámbrica Bluetooth funciona en un
rango de aproximadamente 10 metros (acerca de 30 pies).
El rango máximo de comunicación puede variar en
función de los obstáculos (cuerpo humano, metal, pared,
etc.) o ambiente electromagnético.
Gabinete
de acero
Rendimiento limitado
Rendimiento óptimo
La unidad
Las siguientes condiciones pueden afectar la sensibilidad
de la comunicación Bluetooth.
— Hay un obstáculo como una persona, metal o pared
entre esta unidad y el iPod.
— Se está utilizando un dispositivo que usa la frecuencia
2,4 GHz, tal como un dispositivo de LAN inalámbrica,
un teléfono inalámbrico o un horno de microondas
cerca de la unidad.
— La unidad está instalada sobre una estantería de acero.
Dado que los dispositivos Bluetooth y la LAN inalámbrica
(IEEE802.11b/g/n) usan la misma frecuencia,
posiblemente haya interferencias de microondas que
causen deterioro en la velocidad de la comunicación,
ruido o conexión no válida si este unidad se utiliza cerca
de un dispositivo de LAN inalámbrica. En este caso,
realice lo siguiente.
— Utilice esta unidad a una distancia mínima de 10 m
(cerca de 30 pies) de cualquier dispositivo de LAN
inalámbrica.
— Si esta unidad se utiliza a 10 m (cerca de 30 pies) de un
dispositivo de LAN inalámbrica, apague el dispositivo
de LAN inalámbrica.
—
Instale esta unidad y el iPod lo más cerca posible entre sí.
Las microondas que emite un dispositivo Bluetooth
pueden afectar la operación de dispositivos médicos
electrónicos. Apague esta unidad y el iPod en las
siguientes ubicaciones dado que esto puede ocasionar un
accidente.
— cuando haya presencia de gas inflamable, en un
hospital, tren, avión o estación de servicio de
combustible
— cerca de puertas automáticas o una alarma contra
incendios
Esta unidad admite las capacidades de seguridad que
cumplen con el estándar Bluetooth para proporcionar una
conexión segura en el caso de utilizar la tecnología
inalámbrica Bluetooth, pero la seguridad podría no ser
suficiente en función de la configuración. Tenga cuidado
durante la comunicación con la tecnología inalámbrica
Bluetooth.
No asumimos ninguna responsabilidad por las fugas de
información durante la comunicación con Bluetooth.
No se puede garantizar la conexión con todos los
dispositivos Bluetooth.
— Se requiere un dispositivo con la función Bluetooth
para cumplir con el estándar Bluetooth especificado
por Bluetooth SIG, Inc. y para ser autenticado.
— Incluso si el dispositivo conectado cumple con el
estándar Bluetooth mencionado anteriormente, es
posible que algunos dispositivos no puedan conectarse
o no funcionen correctamente según las funciones o
especificaciones del dispositivo.
Es posible que la comunicación tarde en iniciarse en
función del dispositivo que conectará.
Nota
En el Manual de instrucciones, el término “iPod” hace
referencia en general a las funciones de un iPod, iPhone o
iPad a menos que el texto o las ilustraciones especifiquen
lo contrario.
Si tiene alguna pregunta o problema en relación con su
unidad, póngase en contacto con su distribuidor Sony más
cercano.
Información general
Especificaciones
ESPECIFICACIONES DE LA ALIMENTACIÓN DEL
AUDIO
POTENCIA DE SALIDA Y DISTORSIÓN ARMÓNICA
TOTAL:
Con cargas de 6 ohms, ambos canales dirigidos, desde 150 a
10 000 Hz; potencia eficaz RMS mínima de 15 watts
nominales por canal, con un máximo del 10% de distorsión
armónica total en operación de ca.
iPod
cc de salida: 5 V
MÁX: 2,1 A
Radio
Rango de frecuencia
Banda Frecuencia Incremento de
frecuencia
FM 87,5 MHz a 108 MHz 0,1 MHz
Bluetooth
Salida
Especificación de Bluetooth con potencia de salida clase 2
Rango de comunicación máximo
Línea visual aproximada 10 m (30 pies)*
1
Banda de frecuencia
Banda de 2,4 GHz (2,4000 GHz a 2,4835 GHz)
Sistema de comunicación
Versión de especificación para Bluetooth 2.1 + EDR
(Enhanced Data Rate)
Perfiles de Bluetooth compatibles*
2
A2DP (Advanced Audio Distribution Profile)
AVRCP*
3
(Audio/Video Remote Control Profile)
Códec admitido*
4
SBC (Subband Codec)
*
1
El rango real variará en función de factores como obstáculos entre
dispositivos, campos magnéticos en las cercanías de un horno de
microondas, electricidad estática, sensibilidad a la recepción,
rendimiento de la antena, sistema de operación, software de
aplicación, etc.
*
2
Los perfiles estándar de Bluetooth proporcionan las
especificaciones para la comunicación Bluetooth entre los
dispositivos.
*
3
Algunas operaciones posiblemente no están disponibles para
algunos modelos de iPod.
*
4
Códec: formato de compresión y conversión de señales de audio
Generales
Altavoz
Woofer: aproximadamente 76 mm (3 pulgadas) de
diámetro × 2
Tweeter: aproximadamente 25 mm (1 pulgada) de
diámetro × 2
Entrada
Toma AUDIO IN (minitoma estéreo de ø 3,5 mm)
Impedancia: 50 k
Nivel de entrada promedio: 245 mV
Salida de potencia
20 W + 20 W (con distorsión armónica del 1%) (con
adaptador de ca)
7 W + 7 W (con distorsión armónica del 1%) (con batería
recargable)
Fuente de alimentación
Fuente de potencia externa nominal: CC EN 20 V (con
adaptador de ca suministrado (ca 100 V - 240 V,
50 Hz/60 Hz) o paquete de baterías recargable NH-300RDP)
Duración de la batería*:
Aproximadamente 7 horas (reproducción del iPod)
Aproximadamente 7 horas (recepción FM)
Aproximadamente 6,5 horas (reproducción de Bluetooth)
Dimensiones
Aproximadamente 356,0 mm × 168,1 mm × 121,7 mm
(an./al./prf) (14 / pulgadas × 6 / pulgadas ×
4 / pulgadas) (incluye salientes y controles)
Peso
Aproximadamente 2,6 kg (5 libras 12 onzas)
Accesorios suministrados
Control remoto (con una batería de litio) (1)
Adaptador de ca (1)
Cable de alimentación de ca (1)
Manual de instrucciones (este documento) (1)
* Medido conforme a los estándares de Sony. La vida útil real de la
batería puede variar dependiendo de las circunstancias de la
unidad.
Modelos de iPod/iPhone/iPad
compatibles
A continuación, se indican los modelos de iPod/iPhone/
iPad compatibles.
Actualice el software del iPod/iPhone/iPad a la última
versión antes de utilizar esta unidad.
Modelos compatibles de conectores de la
bandeja
iPod touch (5ª generación)
iPod nano (7ª generación)*
iPhone 5
iPad (4ª generación)
iPad mini
Modelos compatibles para la transmisión
inalámbrica de música
iPod touch (5ª generación)
iPod touch (4ª generación)
iPod touch (3ª generación)
iPod touch (2ª generación)
iPod nano (7ª generación)
iPhone 5
iPhone 4S
iPhone 4
iPhone 3GS
iPhone 3G
iPad (4ª generación)
iPad mini
iPad (3ª generación)
iPad 2
iPad
* El iPod nano (7ª generación) no puede controlarse con control
remoto cuando el comando de “MENU”, “”, “”, y "ENTER” está
presionado.
El diseño y las especificaciones están sujetos a cambios sin
previo aviso.
Solución de problemas
Generales
La unidad no se enciende con el adaptador de ca
conectado.
Compruebe que el adaptador de ca esté bien conectado a
la toma de pared.
La batería recargable está agotada.
Conecte al adaptador de ca para cargar la batería.
No hay sonido.
Ajuste VOLUME +/− (VOL +/− en el control remoto).
Se escucha ruido.
Asegúrese de que la unidad no esté cerca de teléfonos
portátiles en uso, etc.
La unidad no se encenderá si el adaptador de ca está
desconectado.
Puede estar establecida la función de retención de
apagado. Si este es el caso, cancele la función de retención
de apagado. (Consulte “Función de retención de
apagado”).
La batería recargable puede estar agotada. Si este es el
caso, conecte al adaptador de ca para cargarla. (Consulte
“Usar el adaptador de ca”).
Aparece “ERROR” en la pantalla y la unidad se apaga
de forma automática.
Si este síntoma se presenta con frecuencia, consulte a su
distribuidor Sony más cercano.
Si utiliza un iPod en la bandeja
No hay sonido.
Asegúrese de que el iPod esté bien conectado.
Asegúrese de que esté activada la función para iPod.
No se puede realizar ninguna operación.
Asegúrese de que el iPod esté bien conectado.
Compruebe que el iPod sea compatible con esta unidad.
(Consulte “Modelos compatibles de conectores de la
bandeja”).
El iPod no se carga.
Asegúrese de que el iPod esté bien conectado.
Asegúrese de que el adaptador de ca esté correctamente
conectado.
Compruebe que el iPod sea compatible con esta unidad.
(Consulte “Modelos compatibles de conectores de la
bandeja”).
Si utiliza la conexión Bluetooth
No hay sonido.
Asegúrese de que esta unidad no esté demasiado alejada
del iPod ni que esté recibiendo interferencias de una LAN
inalámbrica, otro dispositivo inalámbrico de 2,4 GHz u
horno de microondas.
Compruebe que la conexión Bluetooth entre esta unidad
y el iPod sea la correcta.
Empareje esta unidad y el iPod otra vez.
Aléjese de objetos o superficies metálicas.
Asegúrese de que esté activada la función Bluetooth.
El sonido salta o la distancia de correspondencia es
corta.
Si hay cerca un dispositivo que genera radiación
electromagnética, como una LAN inalámbrica, otro
dispositivo Bluetooth o un horno de microondas, aléjelo
de este tipo de fuentes.
Quite los obstáculos entre esta unidad y el iPod, o aléjese
del obstáculo.
Ubique esta unidad y el iPod lo más cerca posible entre sí.
Vuelva a posicionar la unidad.
Vuelva a posicionar el iPod.
No se puede establecer la conexión.
Realice el emparejamiento otra vez. (Consulte “Emparejar
con un iPod”).
Compruebe que el iPod sea compatible con esta unidad.
(Consulte “Modelos compatibles para la transmisión
inalámbrica de música”).
No se puede realizar el emparejamiento.
Acerque la unidad y el iPod.
Elimine la unidad del iPod y realice el emparejamiento
otra vez.
Compruebe que el iPod sea compatible con esta unidad.
(Consulte “Modelos compatibles para la transmisión
inalámbrica de música”).
Radio
Mala recepción.
Extienda la antena por completo y oriéntela para lograr la
mejor recepción de FM.
El sonido es débil o de mala calidad.
Si la unidad está cerca de un televisor, aléjela.
La imagen del televisor no es estable.
Si está escuchando un programa FM cerca de un televisor
con una antena interna, aleje la unidad del televisor.
Entrada de audio
No hay sonido.
Asegúrese de que el cable de conexión de audio esté
correctamente conectado.
Asegúrese de que el componente opcional conectado se
encuentre en modo de reproducción.
Asegúrese de que la función de entrada de audio esté
activada.
El sonido es bajo.
Compruebe el volumen del componente opcional
conectado.
Control remoto
El control remoto no funciona.
No se puede encender la unidad con el control remoto
cuando el adaptador de ca está desconectado. Si este es el
caso, presione en la unidad para encenderla.
Cambie la batería del control remoto por una nueva si no
funciona correctamente.
Apunte siempre con el control remoto al sensor de la
unidad.
No cubra ni coloque ningún objeto directamente en
frente del receptor (sensor remoto).
Aparte cualquier posible obstáculo entre el control
remoto y la unidad.
Asegúrese de que el sensor no esté expuesto a una luz
demasiado fuerte, como la luz solar directa o la de una
lámpara fluorescente.
Si el problema continúa, consulte con su distribuidor Sony.
Preparaciones
Fuente de alimentación
Apagado automático
Una vez terminada la reproducción de música (de un iPod
en la bandeja, conexión Bluetooth o componente opcional
conectado a la toma AUDIO IN) y, en el caso de no
realizarse ninguna operación en los 20 minutos posteriores
(aproximadamente), la unidad se apagará automáticamente.
Notas
Mientras la unidad esté encendida, la pantalla se apagará
si no se realiza ninguna operación durante más
de 30 segundos (aproximadamente). Si este es el caso,
presione SOUND para encender la pantalla otra vez.
No se puede encender la unidad con el control remoto
cuando el adaptador de ca está desconectado.
Usar el adaptador de ca
1 Conecte el cable de alimentación de ca
suministrado al adaptador de ca.
2 Conecte bien el adaptador de ca a la toma DC IN
20V en la parte posterior de esta unidad y
enchúfelo a una toma de corriente.
Nota sobre el adaptador de ca
Utilice solo el adaptador de ca suministrado por Sony. Es
posible que la polaridad de los enchufes de otros
fabricantes sea diferente. Si no utiliza el adaptador de ca
suministrado, la unidad podría averiarse.
3 Confirme que se ha iniciado la carga.
Una vez iniciada la carga, aparecerá el indicador de la
batería. Durante la carga, la animación del indicador de
carga cambia.
Cuando la unidad está apagada
Una vez terminada la carga, el indicador de batería
completa aparece durante un momento y luego desaparece.
Notas
Si conecta el adaptador de ca cuando la batería está
completamente cargada, el indicador de batería completa
aparece durante un momento y luego desaparece.
Si conecta el adaptador de ca cuando la energía de la
batería es baja, la carga se inicia y la animación del
indicador de batería baja y de carga cambian.
Si se muestra el indicador de batería baja, la unidad no
podrá utilizarse sin el adaptador de ca.
Cuando la unidad está encendida
Una vez terminada la carga, aparecerá el indicador de
batería completa.
Nota
La batería se cargará por completo en aproximadamente
6 horas.
Usar la batería recargable
Puede operar la unidad con la batería recargable en lugar de
con el adaptador de ca.
Nota
El volumen máximo de salida será inferior cuando el
adaptador de ca esté desconectado.
Note on the AC adaptor
Use the supplied Sony AC adaptor only. The polarity of
the plugs of other manufacturers may be different. Failure
to use the supplied AC adaptor may cause the unit to
malfunction.
3 Confirm that charging has started.
When charging starts, the battery indicator appears.
While charging, the charging indicator animation loops.
When the unit is turned off
When charging completes, the full battery indicator appears
for a while, and then disappears.
Notes
If you connect the AC adaptor when the battery is fully
charged, the full battery indicator appears for a while, and
then disappears.
If you connect the AC adaptor when the battery power is
low, charging starts and the low battery and charging
indicator animation loops.
The unit cannot be operated without the AC adaptor while
the low battery indicator appears.
When the unit is turned on
When charging completes, the full battery indicator
appears.
Note
It will take approximately 6 hours to fully charge the
battery.
To use the rechargeable battery
You can operate the unit with the rechargeable battery
instead of the AC adaptor.
Note
The maximum output volume will be lower when the AC
adaptor is disconnected.
To check the remaining power of the battery
The remaining power of the battery will be indicated when
the unit is turned on. As the remaining battery power
depletes, the battery indicator decreases.
Level 1 Level 2 Level 3 Level 4
When the battery becomes almost fully depleted, “LOW
BATT” flashes and the unit will turn off. To charge the
battery, connect the AC adaptor. (See “To use the AC
adaptor.”)
Notes
The remaining battery power will not be indicated when
the unit is turned off.
The unit requires at least 30 minutes to charge the battery
if “LOW BATT” appears.
The battery indicator shows approximate remaining
battery power.
Operating conditions will affect the rate of battery
depletion.
When to replace the rechargeable battery
Repeated recharging causes the duration of the battery
power to decrease over time. Replace the battery pack when
its duration becomes half the usual period, even after
charging it fully.
Note
The rechargeable battery pack is not a commercially
available product. To purchase rechargeable battery pack
(NH-300RDP), consult your nearest Sony dealer.
To replace the rechargeable
battery
1 Remove the screw of the battery compartment at
the bottom of the unit, and open the lid.
2 Disconnect the connector of the battery pack and
pull it out.
3 Insert a new battery pack and connect its
connector to the jack.
4 Replace the battery compartment lid and tighten
the screw.
Notes
When replacing the battery pack, place a soft cloth etc.,
under the unit.
Turn off the unit and disconnect the AC adaptor before
removing the old battery pack.
Charge a new battery pack before use. For details, see “To
use the AC adaptor.”
Remote control
Before using the supplied remote for the first time, remove
the insulation film.
Aim the remote at the (Remote sensor) of the unit.
When to replace the battery
With normal use, the battery (CR2025) should last for about
6 months. When the remote can no longer operate the unit,
replace the battery with a new one.
side facing up
Note
If you are not going to use the remote for a long time, remove
the battery to avoid any damage that may be caused by
leakage or corrosion.
Continued on the reverse side
Español
Registro del propietario
El número de modelo y el número de serie se encuentran en la parte
inferior.
Anote el número de serie en el espacio que se proporciona a
continuación. Consúltelos siempre que llame a un distribuidor Sony
en relación con este producto.
N.º de modelo RDP-XF300iPN
N.º de serie ________________________________________
Para clientes de EE. UU.
Registre este producto en línea en la página
http://www.sony.com/productregistration
Un registro adecuado nos permitirá enviarle de manera
periódica correos electrónicos acerca de productos nuevos,
servicios y otras noticias importantes. Además, registrar el
producto nos permitirá ponernos en contacto con usted en
caso de que el producto necesite algún ajuste o modificación.
Gracias.
ADVERTENCIA
Para reducir el riesgo de incendio o descarga
eléctrica, no exponga este aparato a la lluvia ni
a la humedad.
Para reducir el riesgo de incendio, no cubra los agujeros de
ventilación del aparato con periódicos, manteles, cortinas,
etc., y no ponga velas encendidas encima del aparato.
Para reducir el riesgo de incendio o descarga eléctrica, no
exponga nunca el aparato a salpicaduras ni coloque sobre él
objetos que contengan líquido, como jarrones.
No instale el aparato en un espacio cerrado, como una
estantería para libros o un armario empotrado.
No exponga las baterías (el paquete de baterías o las baterías
instaladas) a un calor excesivo como el sol directo, fuego o
similar durante un período prolongado.
Dado que el enchufe principal se utiliza para desconectar la
unidad de la red eléctrica, conecte la unidad a una toma de
corriente de ca fácilmente accesible. Si nota algo anormal en
la unidad, desconecte la clavija principal de la toma de
corriente de ca inmediatamente.
La unidad no estará desconectada de la fuente de
alimentación de ca (toma de corriente) mientras esté
conectada a la toma de pared, aunque esté apagada.
En la parte inferior externa de la unidad principal y en la
superficie del adaptador de ca se encuentran la placa de
identificación e información importante sobre seguridad.
Se le advierte que cualquier cambio o modificación no
autorizada expresamente en este manual podrá anular la
autorización que usted tiene para utilizar este equipo.
Este equipo no debe ubicarse ni operarse junto con
cualquier otra antena o transmisor.
Este equipo cumple con los límites de exposición a
radiación de FCC/IC estipulados para un ambiente no
controlado y cumple con las Directrices de exposición de
radiofrecuencia (RF) de FCC en el Suplemento C para
OET65 y RSS-102 de las reglas de Exposición de
radiofrecuencia (RF) de IC. Este equipo tiene niveles muy
bajos de energía de RF que se consideran que cumplen sin
evaluación de la exposición permitida máxima (MPE). No
obstante, se recomienda que instale y utilice el radiador a
una distancia mínima de 20 cm o más del cuerpo de una
persona (sin incluir las extremidades: manos, muñecas, pies
y tobillos).
Conforme a las reglamentaciones de Industry Canada, este
transmisor de radio solo puede utilizarse con una antena de un
tipo y ganancia máxima (o menor) aprobados para el
transmisor por Industry Canada. Para reducir las posibles
interferencias de radio para otros usuarios, el tipo de antena y
su ganancias también deben seleccionarse de modo que la
energía irradiada isotrópicamente equivalente (e.i.r.p.) no
supere la necesaria para establecer una comunicación correcta.
Este dispositivo cumple con el estándar de RSS exento de la
licencia de Industry Canada. La operación está sujeta a las
siguientes dos condiciones: (1) este dispositivo no puede
causar interferencias y (2) este dispositivo debe aceptar las
interferencias, incluidas aquellas que pueden causar una
operación no deseada del dispositivo.
PRECAUCIÓN
Existe el riesgo de explosión si se cambia incorrectamente la
batería. Cámbiela solo por otra del mismo tipo.
NOTA
Este equipo ha sido probado y se ha encontrado que cumple
con los límites estipulados para un dispositivo digital de
Clase B, en conformidad con el apartado 15 de las normas
de la FCC. Estos límites están designados para ofrecer
protección razonable contra las interferencias nocivas en
una instalación residencial. Este equipo genera, utiliza y
puede radiar energía de radiofrecuencia y, si no se instala y
utiliza de acuerdo con las instrucciones, podrá ocasionar
interferencias nocivas para las comunicaciones de radio. Sin
embargo, no hay garantía de que no vayan a ocurrir
interferencias en una instalación en particular. Si este
equipo ocasiona interferencias de radio nocivas para la
recepción de radio o televisión, lo que podrá determinarse
apagando y encendiendo el equipo, se sugiere que el usuario
intente corregir las interferencias tomando una o más de las
medidas siguientes:
— Reoriente o reubique la antena de recepción.
— Aumente la separación entre el equipo y receptor.
— Conecte el equipo a una toma de corriente de un circuito
diferente al que está conectado el receptor.
— Consulte al distribuidor o a un técnico con experiencia en
radio/TV para que le ayude.
ADVERTENCIA
Cambie la batería del control remoto por una batería de
litio Sony CR2025 únicamente. Si usa cualquier otra
batería, habrá riesgo de incendio o explosión.
La batería puede explotar si se utiliza en forma
inadecuada. No la recargue, desarmar ni la arroje al fuego.
Deseche la batería agotada de inmediato. De acuerdo con
las leyes y directrices ambientales locales vigentes.
Manténgala fuera del alcance de los niños.
Instrucciones de seguridad importantes
1) Lea estas instrucciones.
2) Guarde estas instrucciones.
3) Preste atención a todas las advertencias.
4) Siga todas las instrucciones.
5) No utilice este aparato cerca del agua.
6) Límpielo solamente con un paño seco.
7) No bloquee ninguna abertura de ventilación.
Instale el aparato de acuerdo con las instrucciones del
fabricante.
8) No instale el aparato cerca de fuentes de calor como
radiadores, rejillas de salida de calor, estufas, u otros
aparatos (incluidos amplificadores) que produzcan calor.
9) No anule la función de seguridad de la clavija polarizada
o de tipo con puesta a tierra. Una clavija polarizada tiene
dos cuchillas con una más ancha que la otra. Una clavija
de tipo con puesta a tierra tiene dos cuchillas y una
tercera espiga de puesta a tierra. La cuchilla ancha o la
tercera espiga están provistas para su seguridad. Si la
clavija provista no encaja en su toma de corriente,
consulte con un electricista para que le reemplace la
toma de corriente obsoleta.
10) Proteja el cable de alimentación para impedir que pueda
ser pisado o pinchado, particularmente en los enchufes,
tomas de corriente con extensión eléctrica y puntos
donde salen del aparato.
11) Utilice solamente aditamentos/accesorios especificados
por el fabricante.
12) Utilícelo solamente con el carrito, estante, trípode,
soporte, o mesa especificado por el fabricante, o vendido
con el aparato. Cuando se utilice un carrito, tenga
cuidado al mover la combinación de carrito/aparato
para evitar que se vuelque y le ocasione heridas.
13) Desenchufe este aparato durante las tormentas eléctricas
o cuando no lo vaya a utilizar durante largos periodos de
tiempo.
14) Solicite toda asistencia técnica a personal cualificado. El
servicio de reparación será necesario cuando el aparato
haya sido dañado de cualquier forma, tal como cuando
esté dañado el cable de alimentación o la clavija, se haya
derramado líquido o hayan caído objetos al interior del
aparato, el aparato haya sido expuesto a la lluvia o
humedad, no funcione normalmente, o se haya dejado
caer.
Sólo para el estado de California, EE. UU.
Material de perclorato: puede requerir una manipulación
especial; consulte
www.dtsc.ca.gov/hazardouswaste/perchlorate
Material de perclorato: la batería de litio contiene perclorato
This warranty is valid only in the United States.
Esta garantía es válida únicamente en los Estados Unidos.
Personal Audio
System
4-461-401-12(1)
©2013 Sony Corporation Printed in China
Comprobar la energía restante de la batería
La energía restante de la batería se indicará al encenderse la
unidad. El indicador de batería disminuye a medida que se
agota la energía de la batería restante.
Nivel 1 Nivel 2 Nivel 3 Nivel 4
Cuando la batería se agota casi por completo, “LOW BATT”
parpadea y la unidad se apagará. Para cargar la batería,
conecte el adaptador de ca. (Consulte “Usar el adaptador de
ca”).
Notas
Si la unidad está apagada, no se indicará la energía de la
batería restante.
Se deberá cargar la batería de la unidad durante
30 minutos como mínimo si aparece “LOW BATT”.
El indicador de batería muestra la energía de la batería
restante aproximada.
Las condiciones de operación afectarán la velocidad del
agotamiento de la batería.
Cuándo cambiar la batería recargable
Las constante recargas hacen que la duración de la energía
de la batería disminuya con el tiempo. Cambie el paquete de
baterías cuando su duración disminuya a la mitad de la
duración habitual, incluso después de una carga completa.
Nota
El paquete de baterías recargable no es un producto
disponible en comercios. Para comprar el paquete de
baterías recargable (NH-300RDP), consulte a su
distribuidor Sony más cercano.
Cambiar la batería recargable
1 Retire el tornillo del compartimiento de la batería
en la parte inferior de la unidad y abra la tapa.
2 Desconecte el conector del paquete de baterías y
extráigalo.
3 Inserte un nuevo paquete de baterías y conecte su
conector a la toma.
4 Vuelva a colocar la tapa del compartimiento de la
batería y ajuste el tornillo.
Notas
Al cambiar el paquete de baterías, coloque un paño suave
o similar debajo de la unidad.
Apague la unidad y desconecte el adaptador de ca antes
de quitar el paquete de baterías anterior.
Cargue un nuevo paquete de baterías antes de su uso.
Para obtener detalles, consulte “Usar el adaptador de ca”.
Control remoto
Antes de utilizar el control remoto suministrado por
primera vez, extraiga la película de aislamiento.
Apunte el control remoto al (sensor remoto) de la
unidad.
Cuándo se debe cambiar la batería
En condiciones normales de uso, la batería (CR2025)
debería durar unos 6 meses. Cuando la unidad ya no
funcione con el control remoto, sustituya la batería por una
nueva.
El lado hacia arriba
Nota
Si no va a utilizar el control remoto durante un período de
tiempo prolongado, retire la batería para evitar que se
produzcan daños por fugas o corrosión.
Continúa al dorso
Operating Instructions US
Manual de instrucciones ES
Important Safety Instructions
1) Read these instructions.
2) Keep these instructions.
3) Heed all warnings.
4) Follow all instructions.
5) Do not use this apparatus near water.
6) Clean only with dry cloth.
7) Do not block any ventilation openings.
Install in accordance with the manufacturer’s
instructions.
8) Do not install near any heat sources such as radiators,
heat registers, stoves, or other apparatus (including
amplifiers) that produce heat.
9) Do not defeat the safety purpose of the polarized or
grounding-type plug. A polarized plug has two blades
with one wider than the other. A grounding type plug
has two blades and a third grounding prong. The wide
blade or the third prong are provided for your safety. If
the provided plug does not fit into your outlet, consult
an electrician for replacement of the obsolete outlet.
10) Protect the power cord from being walked on or
pinched particularly at plugs, convenience receptacles,
and the point where they exit from the apparatus.
11) Only use attachments/accessories specified by the
manufacturer.
12) Use only with the cart, stand, tripod, bracket, or table
specified by the manufacturer, or sold with the
apparatus. When a cart is used, use caution when
moving the cart/apparatus combination to avoid injury
from tip-over.
13) Unplug this apparatus during lightning storms or when
unused for long periods of time.
14) Refer all servicing to qualified service personnel.
Servicing is required when the apparatus has been
damaged in any way, such as power-supply cord or plug
is damaged, liquid has been spilled or objects have fallen
into the apparatus, the apparatus has been exposed to
rain or moisture, does not operate normally, or has been
dropped.
For the state of California USA only
Perchlorate Material –special handling may apply, see
www.dtsc.ca.gov/hazardouswaste/perchlorate
Perchlorate Material: Lithium battery contains perchlorate
RECYCLING NICKEL METAL HYDRIDE
BATTERIES
Nickel Metal Hydride batteries are
recyclable. You can help preserve
our environment by returning your
used rechargeable batteries to the
collection and recycling location
nearest you.
For more information regarding recycling of
rechargeable batteries, call toll free 1-800-822-8837 or
visit http://www.rbrc.org/
Caution: Do not handle damaged or leaking Nickel
Metal Hydride batteries.
Disposal of Old Electrical & Electronic
Equipment (Applicable in the European
Union and other European countries with
separate collection systems)
On Copyrights and Licenses
The Bluetooth® word mark and logos are owned by the
Bluetooth SIG, Inc. and any use of such marks by Sony
Corporation is under license. Other trademarks and trade
names are those of their respective owners.
iPad, iPhone, iPod, iPod nano, and iPod touch are
trademarks of Apple Inc., registered in the U.S. and other
countries.
Lightning is a trademark of Apple Inc.
“Made for iPod,” “Made for iPhone,” and “Made for iPad”
mean that an electronic accessory has been designed to
connect specifically to iPod, iPhone, or iPad, respectively,
and has been certified by the developer to meet Apple
performance standards. Apple is not responsible for the
operation of this device or its compliance with safety and
regulatory standards. Please note that the use of this
accessory with iPod, iPhone, or iPad may affect wireless
performance.
Precautions
To disconnect AC power, grasp the plug itself, not the
cord.
Since a strong magnet is used for the speaker, keep credit
cards using magnetic coding or spring-wound watches,
CRT-based TVs, or projectors, etc., away from the unit to
prevent possible damage from the magnet.
Do not leave the unit in a location near a heat source such
as a radiator or airduct, or in a place subject to direct
sunlight, excessive dust, mechanical vibration, or shock.
Allow adequate air circulation to prevent internal heat
build-up. Do not place the unit on a surface (a rug, a
blanket, etc.) or near materials (a curtain) which might
block the ventilation holes.
Should any solid object or liquid fall into the unit, unplug
the unit and have it checked by qualified personnel before
operating it any further.
During a thunderstorm, do not touch the antenna (aerial)
and plug.
Do not touch the unit with wet hands.
Do not place the unit anywhere near water.
NOTES ON LITHIUM BATTERY
Wipe the battery with a dry cloth to assure a good
contact.
Be sure to observe the correct polarity when installing the
battery.
Do not hold the battery with metallic tweezers, otherwise
a short-circuit may occur.
On Bluetooth communication
Bluetooth wireless technology operates within a range of
about 10 meters (about 30 ft).
Maximum communication range may vary depending on
obstacles (human body, metal, wall, etc.) or
electromagnetic environment.
Steel cabinet
Limited performance
Optimal performance
The unit
The following conditions may affect the sensitivity of
Bluetooth communication.
— There is an obstacle such as a person, metal, or wall
between this unit and iPod.
— A device using 2.4 GHz frequency, such as a wireless
LAN device, cordless telephone, or microwave oven, is
in use near the unit.
— The unit is installed on a shelf made of steel.
Because Bluetooth devices and wireless LAN
(IEEE802.11b/g/n) use the same frequency, microwave
interference may occur and resulting in communication
speed deterioration, noise, or invalid connection if this
unit is used near a wireless LAN device. In such a case,
perform the following.
— Use this unit at least 10 m (about 30 ft) away from any
wireless LAN device.
— If this unit is used within 10 m (about 30 ft) of a
wireless LAN device, turn off the wireless LAN device.
— Install this unit and iPod as near to each other as
possible.
Microwaves emitting from a Bluetooth device may affect
the operation of electronic medical devices. Turn off this
unit and iPod in the following locations, as it may cause
an accident.
— where inflammable gas is present, in a hospital, train,
airplane, or a gasoline station
— near automatic doors or a fire alarm
This unit supports security capabilities that comply with
the Bluetooth standard to provide a secure connection
when the Bluetooth wireless technology is used, but
security may be insufficient, depending on the setting. Be
careful when communicating using Bluetooth wireless
technology.
We do not take any responsibility for leakage of
information during Bluetooth communication.
Connection with all Bluetooth devices cannot be
guaranteed.
— A device featuring Bluetooth function is required to
conform to the Bluetooth standard specified by
Bluetooth SIG, Inc. and be authenticated.
— Even if the connected device conforms to the above
mentioned Bluetooth standard, some devices may not
be connected or work correctly, depending on the
features or specifications of the device.
Depending on the device to be connected, it may require
some time to start communication.
Note
In the Operating Instructions, “iPod” is used as a general
reference to functions on an iPod, iPhone or iPad, unless
otherwise specified by the text or illustrations.
If you have any questions or problems concerning your unit,
please consult your nearest Sony dealer.
General information
Specifications
AUDIO POWER SPECIFICATIONS
POWER OUTPUT AND TOTAL HARMONIC
DISTORTION:
With 6 ohm loads both channels driven, from 150 Hz -
10,000 Hz; rated 15 watts per channel minimum RMS
power, with no more than 10% total harmonic distortion in
AC operation.
iPod
DC out: 5 V
MAX: 2.1 A
Radio
Frequency range
Band Frequency Frequency step
FM 87.5 MHz - 108 MHz 0.1 MHz
Bluetooth
Output
Bluetooth Specification Power Class 2
Maximum communication range
Line of sight approx. 10 m (30 ft)*
1
Frequency band
2.4 GHz band (2.4000 GHz – 2.4835 GHz)
Communication System
Bluetooth Specification Version 2.1 + EDR (Enhanced Data
Rate)
Compatible Bluetooth Profiles*
2
A2DP (Advanced Audio Distribution Profile)
AVRCP*
3
(Audio/Video Remote Control Profile)
Supported codec*
4
SBC (Subband Codec)
*
1
The actual range will vary depending on factors such as obstacles
between devices, magnetic fields around a microwave oven, static
electricity, reception sensitivity, antenna performance, operating
system, application software, etc.
*
2
Bluetooth standard profiles provide the specifications for
Bluetooth communication between devices.
*
3
Some operations may not be available for some models of iPod.
*
4
Codec: Audio signal compression and conversion format
General
Speaker
Woofer: Approx. 76 mm (3 inches) dia. × 2
Tweeter: Approx. 25 mm (1 inch) dia. × 2
Input
AUDIO IN jack (ø 3.5 mm stereo minijack)
Impedance: 50 k
Average input level: 245 mV
Power output
20 W + 20 W (at 1% harmonic distortion) (with AC
adaptor)
7 W + 7 W (at 1% harmonic distortion) (with rechargeable
battery)
Power source
Rated external power source: DC IN 20 V (with supplied
AC adaptor (AC 100 V - 240 V, 50 Hz/60 Hz) or
rechargeable battery pack NH-300RDP)
Battery life*:
Approx. 7 hours (playback of iPod)
Approx. 7 hours (FM reception)
Approx. 6.5 hours (Bluetooth playback)
Dimensions
Approx. 356.0 mm × 168.1 mm × 121.7 mm (w/h/d)
(14 / inches × 6 / inches × 4 / inches)
(incl. projecting parts and controls)
Mass
Approx. 2.6 kg (5 lb 12 oz)
Supplied accessories
Remote control (with a lithium battery) (1)
AC adaptor (1)
AC power cord (1)
Operating Instructions (this document) (1)
* Measured by Sony standards. The actual battery life may vary
depending on the circumstance of the unit.
Compatible iPod/iPhone/iPad
models
The compatible iPod/iPhone/iPad models are as follows.
Update the software of the iPod/iPhone/iPad to the latest
version before using it with this unit.
Dock Connector compatible models
iPod touch (5th generation)
iPod nano (7th generation)*
iPhone 5
iPad (4th generation)
iPad mini

English
Operations
How to handle an iPod
To set an iPod
To remove an iPod
Notes
An iPod in a case or cover can be set in this unit.
However, if the case or cover interferes with the
connection, remove the case or cover before setting the
iPod on the Dock Connector.
When placing or removing the iPod, hold it at the same
angle as the Dock Connector on the unit. Do not pull the
iPod forward too far.
When placing or removing the iPod, hold the unit
securely.
Do not twist or bend the iPod, as this may result in
connector damage.
Remove the iPod when transporting it; otherwise, a
malfunction may result.
To turn the unit on/off
Press (On/Standby).
The power indicator lights up when the unit is turned on.
Adjusting the volume
Press VOLUME +/− (VOL +/− on the remote).
Operating an iPod on the
Dock
1 Press the Docking Tray on the front of the unit to
open.
After use, close the Docking Tray by pushing it until
locked.
2 Set the iPod on the Dock Connector.
The Dock Connector can be tilted slightly.
For details, see “How to handle an iPod.”
3 Press .
4 Press iPod to activate the function for iPod.
“iPod” appears in the display.
5 Press .
The iPod begins to play back.
If the iPod does not start playing back, operate directly
on the iPod.
You can operate the connected iPod via this unit or the
iPod itself.
To Press
Pause playback
To resume play, press
again.
Go to the next track
(forward)
Go back to the previous track
(backward)*
Locate a point while listening to
the sound
(forward) or
(backward) while
playing and hold until
you find the desired
point.
Go back to the previous menu
MENU on the remote
Select a menu item or a track
for playback
(up)/ (down) on
the remote
Execute the selected menu item
or begin playback
ENTER on the remote
* During playback, this operation returns you to the beginning of
the current track. To go back to the previous track, press twice.
Notes
If a pop-up message appears on the display of the iPod
touch, iPhone, or iPad, see “About App.”
Some operations may differ or may not be available on
some models of iPod.
If the battery of the iPod is extremely low, charge it for a
while before operation.
Sony cannot accept responsibility in the event that data
recorded to an iPod is lost or damaged when using the
iPod connected to this unit.
For details of environmental conditions for operating an
iPod, check the website of Apple Inc.
To remove the iPod
For details, see “How to handle an iPod.”
To charge an iPod
You can use the unit as a battery charger for an iPod when
the power is supplied by the AC adaptor.
Charging begins when the iPod is connected to the unit.
The charging status appears in the display on the iPod. For
details, refer to the user’s guide of the iPod.
Tips for charging an iPod with the rechargeable
battery
With the function for iPod activated, if the battery
indicator is level 1 or 2, charging will start. If the battery
indicator is level 3 or 4, to start charging, press and hold
iPod. (For details, see “To use the rechargeable battery.”)
Charging will terminate when the unit turns off
automatically. (For details, see “Auto power off.”)
To terminate charging, press and hold iPod. This
operation will terminate playback. To restart charging,
press and hold iPod again.
Operating by wireless music
streaming
By using the Bluetooth connection, you can listen to the
sound from an iPod or other Bluetooth device with the unit
wirelessly.
Pairing
What is pairing?
Bluetooth devices need to be “paired” with each other
beforehand.
Once Bluetooth devices are paired, there is no need for
pairing again, unless pairing information is deleted.
Bluetooth indicator
Status Bluetooth indicator
(blue)
Bluetooth off Off
Bluetooth on but not
connected
Flashes slowly
Pairing mode Flashes quickly
Connected or communicating Lights up
To pair with an iPod
Keep the iPod and the unit within 1 meter (3 ft) of each
other for this operation.
1 Press .
2 Press BLUETOOTH ( on the remote) to turn on
the Bluetooth function when the Bluetooth
indicator is off.
“Bluetooth” appears in the display.
The Bluetooth indicator flashes slowly.
3 Press and hold BLUETOOTH ( on the remote).
When pairing starts, a double-beep sound will be heard
and the Bluetooth indicator will flash quickly.
Pairing mode of the unit is activated.
4 Perform the pairing procedure on the iPod to
detect the unit. Select “Settings
Bluetooth” and
turn on the Bluetooth function.
Example: iPhone 5
A list of detected devices appears on the display.
The unit is displayed as “RDP-XF300iPN.”
If “RDP-XF300iPN” is not displayed, repeat from step 3.
5 Select “RDP-XF300iPN” on the display of the
iPod while the Bluetooth indicator flashes quickly.
When “Connected” appears on the display of the iPod,
pairing and connection are complete.
Example: iPhone 5
Notes
The operation and display may differ depending on the
model of iPod and/or software version. For details, refer
to the user’s guide of the iPod.
Pairing mode is canceled after about 5 minutes. If pairing
mode is canceled halfway, start over from step 3.
If pairing is not complete, start over from step 3.
To pair with another iPod, repeat steps 1 to 5.
In step 3, if a double-beep sound is not heard or the
Bluetooth indicator does not flash quickly, press and hold
BLUETOOTH (
on the remote) again.
If you turn off the unit or the iPod before the Bluetooth
connection is complete, pairing information will not be
memorized, and pairing will not be completed.
Notes on pairing with a Bluetooth device other than
iPod
When pairing with a Bluetooth device other than iPod,
after step 3, pass code input may be required in your
Bluetooth device. In this case, input “0000.”
The operation and display may differ depending on the
Bluetooth device and/or software version. For details,
refer to the user’s guide of the Bluetooth device.
To listen to sound
Keep the iPod and the unit within 10 meters (about 30 ft) of
each other for this operation.
Check the following before operating the unit.
The Bluetooth function of the iPod is on.
Pairing of the unit and the iPod is complete. If pairing is
not completed, perform pairing again. (See “To pair with
an iPod.”)
1 Press .
2 Press BLUETOOTH ( on the remote) to turn on
the Bluetooth function.
The last connected iPod will be reconnected
automatically when the Bluetooth function is turned on.
3 Select your desired music, video, game, etc., to
play on the iPod. For details, refer to the user’s
guide of the iPod.
Tips
If the last connected iPod does not reconnect
automatically, press BLUETOOTH ( on the remote). If it
still does not reconnect, select the model name of this
unit from the iPod. (Perform steps 4 to 5 in “To pair with
an iPod.”)
To connect an alternative iPod, which has previously been
paired with this unit, press BLUETOOTH ( on the
remote) to disconnect the currently connected iPod. Then
select the model name of the unit from the alternative
iPod you want to connect.
While listening to music from an iPod via Bluetooth
connection, you can charge the iPod on the Dock only if
the AC adaptor is connected.
If the volume level is low, adjust the volume of the unit
first. If the volume is still too low, adjust the volume of the
Bluetooth device.
To finish listening
Terminate the Bluetooth connection by any of the following
operations.
Turn off the unit.
Turn off the iPod.
Press BLUETOOTH ( on the remote), iPod, FM or
AUDIO IN.
Operate the iPod to terminate the connection. For details,
refer to the user’s guide of the iPod.
To clear the list of models already-
paired and memorized in the unit
1 Press .
2 Press BLUETOOTH ( on the remote) to turn on
the Bluetooth function.
3 Press and hold BLUETOOTH and VOLUME − at
the same time on the unit.
“CLEAR” appears in the display.
Notes
You can perform step 3 to clear the list even during
Bluetooth connection.
This operation cannot be performed when the unit is
pairing.
To pair with this unit again, delete the model name of this
unit from the iPod and perform pairing again. (See “To
pair with an iPod.”)
Operating the radio
1 Press .
2 Press FM to activate the radio function.
“FM” appears in the display.
Frequency digits appear in the display after a short
period.
3 Press and hold FM until “FREQ. TUNE” appears
in the display.
If “PRESET TUNE” appears, press and hold FM again.
When using the remote to operate the unit, you can skip
this step, and directly operate step 4.
4 Press and hold TUNE + or − until the frequency
digits begin to change in the display.
The unit automatically scans the radio frequencies and
stops when it finds a clear station.
If you cannot tune in a station, press TUNE + or −
repeatedly to change the frequency step-by-step.
When an FM stereo broadcast is received, “STEREO”
appears.
Tips
If you touch or operate an iPod connected to this unit
while listening to the radio, noise may occur. Avoid
touching or operating the iPod in this case.
If you are listening to the radio with an iPhone connected
to the unit, interference with radio reception may occur.
Remove the iPhone in this case.
To improve the reception
Extend the antenna to its full length and adjust the angle for
best reception.
Note
Adjust the direction of the antenna by holding the bottom
of it. The antenna can be damaged if you move the
antenna with excessive force.
To set monaural sound if stereo
reception is poor
The unit automatically switches between stereo and
monaural output, depending on reception conditions.
However, if stereo reception is unstable, you can manually
set for monaural output to improve the sound.
Press FM to show “MONO” in the display. (To resume
stereo reception, press FM again to show “STEREO” in the
display.)
To preset radio stations
You can preset up to 20 radio stations in the unit’s memory.
1 Press FM to activate the radio function.
2 Press and hold until “AUTO PRESET”
appears in the display.
3 Press .
The stations are stored in memory from the lower
frequencies to the higher ones automatically.
Tip
To go back to the previous status, press FM instead of
in step 3.
If a station cannot be preset automatically
You may need to preset a station with a weak signal
manually.
1 Tune in the station you want.
2 Press .
3 Press
or
to select the desired preset
number, and press .
The preset number flashes, then, the frequency digits
show in the display.
The new station replaces the old one.
Tip
To go back to the previous status, press FM instead of
in step 3.
To play preset radio stations
Press
or
to tune in a stored station.
If “FREQ. TUNE” appears, press and hold FM again.
Connecting optional
components
You can enjoy the sound from an optional component, such
as a portable digital music player, through the speakers of
this unit. Be sure to turn off the power of each component
before making any connections.
1 Firmly connect the line output jack of the portable
digital music player (or other component) to the
AUDIO IN jack on the back of the unit, using a
suitable audio connecting cable (not supplied).
2 Press to turn on the unit.
3 Press AUDIO IN to activate the Audio-in function.
“AUDIO IN” appears in the display.
4 Turn the connected component on.
5 Play the connected component.
The sound from the connected component is output
from the speakers of this unit.
Notes
The necessary type of audio connecting cable depends on
the optional component. Be sure to use the correct type of
cable.
If the volume level is low, adjust the volume of the unit
first. If the volume is still too low, adjust the volume of the
connected component.
Other useful functions
Power Off Hold function
You can set the Power Off Hold function to avoid
unintentionally powering on while carrying the unit.
To set the Power Off Hold function
Remove the iPod from the Dock Connector, and then press
and hold on the unit when the AC adaptor is
disconnected.
“HOLD” flashes twice and the display turns off. The unit
cannot be turned on by pressing while the Power Off
Hold function is set.
To cancel the Power Off Hold
function
Press and hold on the unit.
“RELEASE” flashes twice and the Power Off Hold function
is canceled. The unit will turn on automatically.
Tip
The Power Off Hold function will be canceled if you
connect the AC adaptor to the unit or set an iPod on the
Dock Connector.
Selecting audio emphasis
(equalization)
You can adjust the emphasis of the sound.
Press SOUND repeatedly to select the desired audio
emphasis.
About App
A dedicated Dock App for iPod touch/iPhone/iPad available
at Apple App Store.
Search for “D-Sappli” and download the free App to find
out more about the functions.
Features
D-Sappli includes various timer functions: Alarm, Music
Play Timer and Sleep Timer.
You can set up to 10 alarms, using songs in iPod or Preset
Sound in D-Sappli for the alarm sound.
Music Play Timer allows you to play/pause desired music
at a desired time. Sleep Timer allows you to specify a time
at which to stop music playback. Alarm, Music Play
Timer and Sleep Timer work in combination with the
power supply of the unit.
Alarm, Music Play Timer and Sleep Timer are available
only when D-Sappli is activated.
D-Sappli can display a list of Radio Preset Stations
programmed in this unit.
You can rename the Radio Preset Stations, and change
their preset numbers on the D-Sappli. Preset numbers
and order will also be changed accordingly in the unit.
D-Sappli also includes a clock display enlarge feature.
Notes
If the App to link with this unit is not downloaded to the
iPod touch/iPhone/iPad, a pop-up message prompting
you to download D-Sappli may appear repeatedly.
Deactivate the App’s link function to stop the pop-up
message.
To deactivate the App’s link function: Connect the AC
adaptor, and then press / to turn off the unit. Remove
the iPod touch/iPhone/iPad from the Dock Connector.
While holding down , also press and hold / on the
unit for at least 2 seconds. (“App OFF” appears in the
display to show that the App’s link function has been
deactivated.)
To re-activate the App’s link function, repeat the above
steps. (“App ON” appears in the display to show that the
App’s link function has been activated.)
Español
Operaciones
Cómo usar un iPod
Para colocar un iPod
Para extraer un iPod
Notas
En esta unidad, se puede colocar el iPod con su estuche o
funda. Sin embargo, si el estuche o funda interfieren con
la conexión, retírela antes de colocar el iPod en el
conector de la bandeja.
Al colocar o extraer el iPod, sosténgalo en el mismo
ángulo que el conector de la bandeja de la unidad. No jale
mucho el iPod hacia adelante.
Al colocar o extraer el iPod, sujete la unidad con firmeza.
No gire ni incline el iPod ya que se podría dañar el
conector.
Extraiga el iPod al transportarlo; de otra manera se
podrían causar daños.
Para encender/apagar la
unidad
Presione (Encendido/En espera).
El indicador de alimentación se ilumina al encender la
unidad.
Ajuste del volumen
Presione VOLUME +/− (VOL +/−en el control remoto).
Operar un iPod en la
bandeja
1 Presione la bandeja de acoplamiento en el frente
de la unidad para abrirla.
Después de usarla, cierre la bandeja de acoplamiento
empujándola hasta bloquearla.
2 Coloque el iPod en el conector de la bandeja.
El conector de la bandeja puede inclinarse un poco.
Para obtener detalles, consulte “Cómo usar un iPod”.
3 Presione .
4 Presione iPod para activar la función para iPod.
Aparece “iPod” en la pantalla.
5 Presione .
Comienza la reproducción del iPod.
Si el iPod no comienza la reproducción, opere
directamente desde el iPod.
Puede utilizar el iPod conectado mediante los botones
de la unidad o del propio iPod.
Para Presione
Poner en pausa la reproducción
Para reanudar la
reproducción, presione
otra vez.
Ir a la siguiente pista
(avanzar)
Volver a la pista anterior
(retroceder)*
Localizar un punto mientras
escucha sonido
(avanzar) o
(retroceder)
durante la
reproducción y
mantener presionado
hasta encontrar el
punto deseado.
Volver al menú anterior
MENU en el control
remoto
Seleccionar un elemento de
menú o una pista para
reproducir
(arriba)/ (abajo)
en el control remoto
Ejecutar el elemento de menú
seleccionado o comenzar la
reproducción
ENTER en el control
remoto
* Durante la reproducción, esta operación vuelve al principio de la
pista actual. Para volver a la pista anterior, presione dos veces.
Notas
Si aparece un mensaje emergente en la pantalla del iPod
touch, iPhone o iPad, consulte “Acerca de App”.
Algunas operaciones pueden no coincidir o no estar
disponibles según el modelo de iPod.
Si la batería del iPod está casi agotada, cárguela antes de
utilizarlo.
Sony declina toda responsabilidad en el caso de la pérdida
o corrupción de datos grabados en el iPod al utilizarlo
conectado a esta unidad.
Para obtener información detallada sobre las condiciones
ambientales para utilizar el iPod, visite el sitio web de
Apple Inc.
Para extraer el iPod
Para obtener detalles, consulte “Cómo usar un iPod”.
Para cargar un iPod
Puede utilizar la unidad como un cargador de batería del
iPod cuando el adaptador de ca suministre la energía.
La carga comienza cuando el iPod se conecta a la unidad. El
estado de carga aparece en la pantalla del iPod.
Para obtener más información, consulte el manual del
usuario del iPod.
Consejos para cargar un iPod con batería recargable
Con la función para iPod activada, si el indicador de la
batería está en el nivel 1 o 2, la carga se iniciará
automáticamente. Si el indicador de batería está en el
nivel 3 o 4, para iniciar la carga, mantenga presionado
iPod. (Para obtener detalles, consulte “Usar la batería
recargable.”)
La carga finalizará cuando la unidad se apague
automáticamente. (Para más información, consulte
“Apagado automático.”)
Para terminar la carga, mantenga presionado iPod. Esta
operación terminará con la reproducción. Para reiniciar
la carga, mantenga presionado iPod otra vez.
iPod/iPhone/iPad
FM
Startup Guide/Guía de inicio rápido
Power indicator Bluetooth indicator
Supporter
Dock Connector
Docking Tray
Display
Remote sensor
Antenna
VOLUME + (VOL + on the remote control) and buttons have a tactile dot.
Los botones VOLUME + (VOL + en el control remoto) y tienen un punto
táctil.
Indicador de energía Indicador Bluetooth
Pantalla
Sensor remoto
Soporte
Conector de la
bandeja
Bandeja de
acoplamiento
Antena
Operación mediante
reproducción de música
inalámbrica
La conexión Bluetooth le permite escuchar el sonido desde
un iPod u otro dispositivo con Bluetooth con la unidad en
modo inalámbrico.
Emparejamiento
¿Qué es el emparejamiento?
Los dispositivos Bluetooth deben “emparejarse” entre sí con
anticipación.
Una vez emparejados los dispositivos, no es necesario volver
a hacerlo a menos que se haya eliminado la información de
emparejamiento.
Indicador Bluetooth
Estado Indicador Bluetooth
(azul)
Bluetooth desactivado Desactivado
Bluetooth activado, pero no
conectado
Parpadea lento
Modo de emparejamiento Parpadea rápido
Conectado o comunicando Encendido
Emparejar con un iPod
Coloque el iPod y la unidad a 1 metro (3 pies) de distancia
entre sí para realizar esta operación.
1 Presione .
2 Presione BLUETOOTH ( en el control remoto)
para activar la función Bluetooth si el indicador
Bluetooth está apagado.
Aparece “Bluetooth” en la pantalla.
El indicador Bluetooth parpadea lento.
3 Mantenga presionado BLUETOOTH ( en el
control remoto).
Una vez iniciado el emparejamiento, se escuchará un
sonido de dos tonos y el indicador Bluetooth parpadeará
rápido.
Se activa el modo de emparejamiento de la unidad.
4 Realice el procedimiento de emparejamiento en el
iPod para detectar la unidad. Seleccione “Ajustes
Bluetooth” y active la función Bluetooth.
Ejemplo: iPhone 5
Aparece una lista de los dispositivos detectados en la
pantalla.
La unidad se muestra como “RDP-XF300iPN.”
Si no se muestra “RDP-XF300iPN”, repita desde el paso
3.
5 Seleccione “RDP-XF300iPN” en la pantalla del
iPod mientras el indicador Bluetooth parpadea
rápido.
El emparejamiento y la conexión han finalizado cuando
aparece “Conectado” en la pantalla del iPod.
Ejemplo: iPhone 5
Notas
La operación y la pantalla pueden ser diferentes en
función del modelo de iPod y/o la versión de software.
Para obtener más información, consulte el manual del
usuario del iPod.
El modo de emparejamiento se cancela después de
aproximadamente 5 minutos. Si el modo de
emparejamiento se cancela durante el transcurso,
comience otra vez desde el paso 3.
Si el emparejamiento no se ha completado, comience otra
vez desde el paso 3.
Para emparejar con otro iPod, repita los pasos 1 a 5.
En el paso 3, si no se escucha un sonido de dos tonos o el
indicador Bluetooth no parpadea rápido, mantenga
presionado BLUETOOTH (
en el control remoto) otra
vez.
Si apaga la unidad o el iPod antes de completarse la
conexión Bluetooth, la información de emparejamiento
no se memorizará y no se completará el emparejamiento.
Notas sobre el emparejamiento con un dispositivo
Bluetooth diferente de iPod
Si realiza el emparejamiento con un dispositivo Bluetooth
diferente de iPod, después del paso 3, posiblemente se
requiera que ingrese el código de acceso en el dispositivo
Bluetooth. Si este es el caso, ingrese “0000”.
La operación y la pantalla pueden ser diferentes en
función del dispositivo Bluetooth y/o la versión de
software. Para obtener detalles, consulte el manual del
usuario del dispositivo Bluetooth.
Escuchar sonidos
Coloque el iPod y la unidad a 10 metros (cerca de 30 pies)
de distancia entre sí para realizar esta operación.
Compruebe lo siguiente antes de usar la unidad.
La función Bluetooth del iPod está activada.
Se ha completado el emparejamiento de la unidad y el
iPod. De no ser así, realice el emparejamiento otra vez.
(Consulte “Emparejar con un iPod”).
1 Presione .
2 Presione BLUETOOTH ( en el control remoto)
para activar la función Bluetooth.
El último iPod conectado se volverá a conectar
automáticamente cuando se active la función Bluetooth.
3 Seleccione la música, el video, el juego que desee
para reproducirlo en el iPod. Para obtener más
información, consulte el manual del usuario del
iPod.
Sugerencias
Si el último iPod conectado no se vuelve a conectar de
forma automática, presione BLUETOOTH ( en el
control remoto). Si todavía no puede establecerse la
conexión, seleccione el nombre del modelo de esta unidad
en el iPod. (Realice los pasos 4 a 5 en “Emparejar con un
iPod”).
Para conectar un iPod alternativo, emparejado
anteriormente con esta unidad, presione BLUETOOTH
( en el control remoto) para desconectar el iPod
conectado actualmente. A continuación, seleccione el
nombre del modelo de la unidad en el iPod alternativo
que quiera conectar.
Al escuchar música desde un iPod mediante una conexión
Bluetooth, puede cargar el iPod en la bandeja solo si el
adaptador de ca está conectado.
Si el nivel de volumen es bajo, ajuste primero el volumen
de la unidad. Si el volumen sigue siendo muy bajo, ajuste
el volumen del dispositivo Bluetooth.
Finalizar la escucha
Termine la conexión Bluetooth mediante cualquiera de las
siguientes operaciones.
Apague la unidad.
Apague el iPod.
Presione BLUETOOTH ( en el control remoto), iPod,
FM o AUDIO IN.
Utilice el iPod para terminar la conexión. Para obtener
más información, consulte el manual del usuario del iPod.
Borrar la lista de modelos ya
emparejados y memorizados en la
unidad
1 Presione .
2 Presione BLUETOOTH ( en el control remoto)
para activar la función Bluetooth.
3 Mantenga presionado BLUETOOTH y VOLUME −
al mismo tiempo en la unidad.
Aparece “CLEAR” en la pantalla.
Notas
Puede realizar el paso 3 para borrar la lista, incluso
durante la conexión Bluetooth.
Esta operación no puede realizarse cuando se está
emparejando la unidad.
Para emparejar esta unidad otra vez, elimine el nombre de
modelo de esta unidad del iPod y realice el
emparejamiento otra vez. (Consulte “Emparejar con un
iPod”).
Operación de la radio
1 Presione .
2 Presione FM para activar la función de radio.
Aparece “FM” en la pantalla.
Aparecen dígitos de frecuencia en la pantalla después de
un breve período.
3 Mantenga presionado FM hasta que aparezca
“FREQ. TUNE” en la pantalla.
Si aparece “PRESET TUNE”, mantenga presionado FM
otra vez.
Si utiliza el control remoto para operar la unidad, puede
omitir este paso e ir directamente al paso 4.
4 Mantenga presionado TUNE + o − hasta que los
dígitos de frecuencia comiencen a cambiar en la
pantalla.
La unidad explora automáticamente las frecuencias de
radio y se detiene cuando encuentra una estación clara.
Si no puede sintonizar una estación, presione
TUNE + o − repetidamente para cambiar la frecuencia
de a una por vez.
Si se recibe una difusión de estéreo FM, aparecerá
“STEREO”.
Sugerencias
Si toca o utiliza un iPod conectado a esta unidad mientras
escucha la radio, posiblemente escuche ruido. Evite tocar
o usar el iPod en este caso.
Si escucha la radio con un iPhone conectado a la unidad,
posiblemente haya interferencias con la recepción de la
radio. Quite el iPhone en este caso.
Mejorar la recepción
Extienda la antena por completo y ajuste el ángulo para
lograr una mejor recepción.
Nota
Ajuste la dirección de la antena sujetando su parte
inferior. La antena puede dañarse si la mueve con fuerza
excesiva.
Configurar el sonido monoaural si
la recepción estéreo es mala
La unidad cambia automáticamente entre la salida estéreo y
monoaural en función de las condiciones de recepción. No
obstante, si la recepción estéreo no es estable, puede
configurar manualmente la salida monoaural para mejorar
el sonido.
Presione FM para mostrar “MONO” en la pantalla. (Para
reanudar la recepción estéreo, presione FM otra vez para
mostrar “STEREO” en la pantalla).
Preestablecer estaciones de radio
Puede preestablecer hasta 20 estaciones de radio en la
memoria de la unidad.
1 Presione FM para activar la función de radio.
2 Mantenga presionado hasta que aparezca
“AUTO PRESET” en la pantalla.
3 Presione .
Las estaciones se almacenan en la memoria de las
frecuencias más bajas a las más altas de forma
automática.
Sugerencia
Para volver al estado anterior, pulse FM en lugar de
en el paso 3.
Si no se puede preestablecer una estación de
forma automática
Posiblemente necesite preestablecer una estación con una
señal débil de forma manual.
1 Sintonice la estación que desee.
2 Presione .
3 Presione
o
para seleccionar el número
preestablecido que desee y presione .
El número preestablecido parpadea y, a continuación,
los dígitos de frecuencia se muestran en la pantalla.
La nueva estación reemplaza a la anterior.
Sugerencia
Para volver al estado anterior, pulse FM en lugar de
en el paso 3.
Reproducir estaciones de radio preestablecidas
Presione
o
para sintonizar una estación
almacenada.
Si aparece “FREQ. TUNE”, vuelva a mantener presionado FM.
Conexión de componentes
opcionales
Es posible disfrutar del sonido de un componente opcional,
como un reproductor de música digital portátil, a través de
los altavoces de la unidad. Asegúrese de apagar todos los
componentes antes de realizar las conexiones.
1 Conecte con firmeza la toma de salida de línea de
un reproductor de música digital portátil (u otro
componente) a la toma AUDIO IN en la parte
posterior de la unidad con un cable de conexión
de audio adecuado (no suministrado).
2 Pulse para encender la unidad.
3 Presione AUDIO IN para activar la función
Entrada de audio.
Aparece “AUDIO IN” en la pantalla.
4 Encienda el componente conectado.
5 Reproduzca el componente conectado.
El sonido del componente conectado se emite a través
de los altavoces de esta unidad.
Notas
El tipo de cable de conexión de audio requerido depende
del componente opcional. Asegúrese de usar el tipo de
cable correcto.
Si el nivel del volumen es bajo, ajuste primero el volumen
de la unidad. Si el volumen sigue siendo demasiado bajo,
entonces ajuste el volumen del componente conectado.
Otras funciones útiles
Función de retención de
apagado
Puede establecer la función de retención de apagado con el
fin de evitar que la unidad se encienda accidentalmente
mientras la transporta.
Establecer la función de retención
de apagado
Quite el iPod del conector de la bandeja y, a continuación,
mantenga presionado en la unidad cuando el
adaptador de ca está desconectado.
“HOLD” parpadea dos veces y la pantalla se apaga. La
unidad no puede encenderse si presiona mientras está
establecida la función de retención de apagado.
Cancelar la función de retención de
apagado
Mantenga presionado en la unidad.
“RELEASE” parpadea dos veces y se cancela la función. La
unidad se encenderá automáticamente.
Sugerencia
La función de retención de apagado se cancelará si
conecta el adaptador de ca a la unidad o coloca un iPod
en el conector de la bandeja.
Selección del énfasis de
audio (ecualización)
Puede ajustar el énfasis del sonido.
Presione SOUND varias veces para seleccionar el énfasis de
audio deseado.
Acerca de App
Existe una aplicación de bandeja específica disponible para
iPod touch/iPhone/iPad en la tienda Apple App Store.
Busque “D-Sappli” y descargue la aplicación gratuita para
obtener más información sobre las funciones.
Características
D-Sappli incluye varias funciones de temporizador:
Alarm, Music Play Timer y Sleep Timer.
Utilice canciones en el iPod o Sonido preestablecido en
D-Sappli para el sonido de la alarma para configurar 10
alarmas.
Music Play Timer le permite reproducir y poner en pausa
la música que quiere y cuando quiere. Sleep Timer le
permite especificar un horario para detener la
reproducción de música. Alarm, Music Play Timer y
Sleep Timer funcionan en combinación con el suministro
de energía de la unidad.
Alarm, Music Play Timer y Sleep Timer están disponibles
solamente cuando se activa D-Sappli.
D-Sappli puede mostrar una lista de estaciones de radio
preestablecidas programadas en esta unidad.
Puede cambiar el nombre de las estaciones de radio
preestablecidas y cambiar el número preestablecido en
D-Sappli. Los números preestablecidos y el orden
también cambiarán en consecuencia en la unidad.
D-Sappli incluye a su vez una función de ampliación de la
pantalla de reloj.
Notas
Si la App que se enlaza a esta unidad no se descargó al
iPod touch/iPhone/iPad, aparecerá repetidamente un
mensaje emergente instando al usuario a descargar
D-Sappli.
Desactive la función del enlace de Apps para poner fin al
mensaje emergente.
Desactivar la función del enlace de App: Conecte el
adaptador de ca y, a continuación, presione / para
apagar la unidad. Retire el iPod touch/iPhone/iPad del
conector de la bandeja. Mientras mantiene apretado ,
también presione y sujete / de la unidad durante al
menos 2 segundos. (Aparece “App OFF” en la pantalla
para mostrar que la función del enlace de App se ha
desactivado).
Para volver a activar la función del enlace de Apps, repita
los pasos anteriores. (Aparece “App ON” en la pantalla
para mostrar que la función del enlace de App se ha
activado).
Transcripción de documentos
4-461-401-12(1) On Bluetooth communication Bluetooth wireless technology operates within a range of about 10 meters (about 30 ft). Maximum communication range may vary depending on obstacles (human body, metal, wall, etc.) or electromagnetic environment. The unit Personal Audio System Operating Instructions US Steel cabinet Manual de instrucciones ES ©2013 Sony Corporation Printed in China RDP-XF300iPN Important Safety Instructions English Owner’s Record The model number and the serial number are located on the bottom. Record the serial number in the space provided below. Refer to them whenever you call upon your Sony dealer regarding this product. Model No. RDP-XF300iPN Serial No.___________________________________________ For customers in the USA Please register this product on line at http://www.sony.com/productregistration Proper registration will enable us to send you periodic updates about new products, services and other important announcements. Registering your product will also allow us to contact you in the unlikely event that the product needs adjustment or modification. Thank you. WARNING To reduce the risk of fire or electric shock, do not expose this apparatus to rain or moisture. To reduce the risk of fire, do not cover the ventilation of the apparatus with newspapers, tablecloths, curtains, etc. And do not place lighted candles on the apparatus. To reduce the risk of fire or electric shock, do not expose this apparatus to dripping or splashing, and do not place objects filled with liquids, such as vases, on the apparatus. Do not install the appliance in a confined space, such as a bookcase or built-in cabinet. Do not expose the batteries (battery pack or batteries installed) to excessive heat such as sunshine, fire or the like for a long time. As the main plug is used to disconnect the unit from the mains, connect the unit to an easily accessible AC outlet. Should you notice an abnormality in the unit, disconnect the main plug from the AC outlet immediately. The unit is not disconnected from the AC power source (mains) as long as it is connected to the wall outlet, even if the unit itself has been turned off. The nameplate and important information concerning safety are located on the bottom exterior of the main unit and on the surface of the AC adaptor. You are cautioned that any changes or modifications not expressly approved in this manual could void your authority to operate this equipment. This equipment must not be co-located or operated in conjunction with any other antenna or transmitter. This equipment complies with FCC/IC radiation exposure limits set forth for an uncontrolled environment and meets the FCC radio frequency (RF) Exposure Guidelines in Supplement C to OET65 and RSS-102 of the IC radio frequency (RF) Exposure rules. This equipment has very low levels of RF energy that it deemed to comply without maximum permissive exposure evaluation (MPE). But it is desirable that it should be installed and operated keeping the radiator at least 20cm or more away from person’s body (excluding extremities: hands, wrists, feet and ankles). Under Industry Canada regulations, this radio transmitter may only operate using an antenna of a type and maximum (or lesser) gain approved for the transmitter by Industry Canada. To reduce potential radio interference to other users, the antenna type and its gain should be so chosen that the equivalent isotropically radiated power (e.i.r.p.) is not more than that necessary for successful communication. This device complies with Industry Canada license-exempt RSS standard(s). Operation is subject to the following two conditions: (1) this device may not cause interference, and (2) this device must accept any interference, including interference that may cause undesired operation of the device. CAUTION Danger of explosion if battery is incorrectly replaced. Replace only with the same type. NOTE This equipment has been tested and found to comply with the limits for a Class B digital device, pursuant to Part 15 of the FCC Rules. These limits are designed to provide reasonable protection against harmful interference in a residential installation. This equipment generates, uses and can radiate radio frequency energy and, if not installed and used in accordance with the instructions, may cause harmful interference to radio communications. However, there is no guarantee that interference will not occur in a particular installation. If this equipment does cause harmful interference to radio or television reception, which can be determined by turning the equipment off and on, the user is encouraged to try to correct the interference by one or more of the following measures: — Reorient or relocate the receiving antenna. — Increase the separation between the equipment and receiver. — Connect the equipment into an outlet on a circuit different from that to which the receiver is connected. — Consult the dealer or an experienced radio/TV technician for help. WARNING Replace the battery for the remote control with a Sony CR2025 lithium battery only. Use of another battery may present a risk of fire or explosion. Battery may explode if mistreated. Do not recharge, disassemble or dispose of in fire. Dispose of used battery promptly, according to local environmental laws and guidelines in force. Keep away from children. 1) 2) 3) 4) 5) 6) 7) Read these instructions. Keep these instructions. Heed all warnings. Follow all instructions. Do not use this apparatus near water. Clean only with dry cloth. Do not block any ventilation openings. Install in accordance with the manufacturer’s instructions. 8) Do not install near any heat sources such as radiators, heat registers, stoves, or other apparatus (including amplifiers) that produce heat. 9) Do not defeat the safety purpose of the polarized or grounding-type plug. A polarized plug has two blades with one wider than the other. A grounding type plug has two blades and a third grounding prong. The wide blade or the third prong are provided for your safety. If the provided plug does not fit into your outlet, consult an electrician for replacement of the obsolete outlet. 10) Protect the power cord from being walked on or pinched particularly at plugs, convenience receptacles, and the point where they exit from the apparatus. 11) Only use attachments/accessories specified by the manufacturer. 12) Use only with the cart, stand, tripod, bracket, or table specified by the manufacturer, or sold with the apparatus. When a cart is used, use caution when moving the cart/apparatus combination to avoid injury from tip-over. Optimal performance Limited performance The following conditions may affect the sensitivity of Bluetooth communication. — There is an obstacle such as a person, metal, or wall between this unit and iPod. — A device using 2.4 GHz frequency, such as a wireless LAN device, cordless telephone, or microwave oven, is in use near the unit. — The unit is installed on a shelf made of steel. Because Bluetooth devices and wireless LAN (IEEE802.11b/g/n) use the same frequency, microwave interference may occur and resulting in communication speed deterioration, noise, or invalid connection if this unit is used near a wireless LAN device. In such a case, perform the following. — Use this unit at least 10 m (about 30 ft) away from any wireless LAN device. — If this unit is used within 10 m (about 30 ft) of a wireless LAN device, turn off the wireless LAN device. — Install this unit and iPod as near to each other as possible. Microwaves emitting from a Bluetooth device may affect the operation of electronic medical devices. Turn off this unit and iPod in the following locations, as it may cause an accident. — where inflammable gas is present, in a hospital, train, airplane, or a gasoline station — near automatic doors or a fire alarm This unit supports security capabilities that comply with the Bluetooth standard to provide a secure connection when the Bluetooth wireless technology is used, but security may be insufficient, depending on the setting. Be careful when communicating using Bluetooth wireless technology. We do not take any responsibility for leakage of information during Bluetooth communication. Connection with all Bluetooth devices cannot be guaranteed. — A device featuring Bluetooth function is required to conform to the Bluetooth standard specified by Bluetooth SIG, Inc. and be authenticated. — Even if the connected device conforms to the above mentioned Bluetooth standard, some devices may not be connected or work correctly, depending on the features or specifications of the device. Depending on the device to be connected, it may require some time to start communication. Note In the Operating Instructions, “iPod” is used as a general reference to functions on an iPod, iPhone or iPad, unless otherwise specified by the text or illustrations. If you have any questions or problems concerning your unit, please consult your nearest Sony dealer. General information Specifications AUDIO POWER SPECIFICATIONS POWER OUTPUT AND TOTAL HARMONIC DISTORTION: With 6 ohm loads both channels driven, from 150 Hz 10,000 Hz; rated 15 watts per channel minimum RMS power, with no more than 10% total harmonic distortion in AC operation. iPod DC out: 5 V MAX: 2.1 A Radio Frequency range Band FM 13) Unplug this apparatus during lightning storms or when unused for long periods of time. 14) Refer all servicing to qualified service personnel. Servicing is required when the apparatus has been damaged in any way, such as power-supply cord or plug is damaged, liquid has been spilled or objects have fallen into the apparatus, the apparatus has been exposed to rain or moisture, does not operate normally, or has been dropped. For the state of California USA only Perchlorate Material –special handling may apply, see www.dtsc.ca.gov/hazardouswaste/perchlorate Perchlorate Material: Lithium battery contains perchlorate RECYCLING NICKEL METAL HYDRIDE BATTERIES Nickel Metal Hydride batteries are recyclable. You can help preserve our environment by returning your used rechargeable batteries to the collection and recycling location nearest you. For more information regarding recycling of rechargeable batteries, call toll free 1-800-822-8837 or visit http://www.rbrc.org/ Caution: Do not handle damaged or leaking Nickel Metal Hydride batteries. Disposal of Old Electrical & Electronic Equipment (Applicable in the European Union and other European countries with separate collection systems) On Copyrights and Licenses The Bluetooth® word mark and logos are owned by the Bluetooth SIG, Inc. and any use of such marks by Sony Corporation is under license. Other trademarks and trade names are those of their respective owners. iPad, iPhone, iPod, iPod nano, and iPod touch are trademarks of Apple Inc., registered in the U.S. and other countries. Lightning is a trademark of Apple Inc. “Made for iPod,” “Made for iPhone,” and “Made for iPad” mean that an electronic accessory has been designed to connect specifically to iPod, iPhone, or iPad, respectively, and has been certified by the developer to meet Apple performance standards. Apple is not responsible for the operation of this device or its compliance with safety and regulatory standards. Please note that the use of this accessory with iPod, iPhone, or iPad may affect wireless performance. Precautions To disconnect AC power, grasp the plug itself, not the cord. Since a strong magnet is used for the speaker, keep credit cards using magnetic coding or spring-wound watches, CRT-based TVs, or projectors, etc., away from the unit to prevent possible damage from the magnet. Do not leave the unit in a location near a heat source such as a radiator or airduct, or in a place subject to direct sunlight, excessive dust, mechanical vibration, or shock. Allow adequate air circulation to prevent internal heat build-up. Do not place the unit on a surface (a rug, a blanket, etc.) or near materials (a curtain) which might block the ventilation holes. Should any solid object or liquid fall into the unit, unplug the unit and have it checked by qualified personnel before operating it any further. During a thunderstorm, do not touch the antenna (aerial) and plug. Do not touch the unit with wet hands. Do not place the unit anywhere near water. NOTES ON LITHIUM BATTERY Wipe the battery with a dry cloth to assure a good contact. Be sure to observe the correct polarity when installing the battery. Do not hold the battery with metallic tweezers, otherwise a short-circuit may occur. Frequency 87.5 MHz - 108 MHz Frequency step 0.1 MHz Bluetooth Output Bluetooth Specification Power Class 2 Maximum communication range Line of sight approx. 10 m (30 ft)*1 Frequency band 2.4 GHz band (2.4000 GHz – 2.4835 GHz) Communication System Bluetooth Specification Version 2.1 + EDR (Enhanced Data Rate) Compatible Bluetooth Profiles* A2DP (Advanced Audio Distribution Profile) AVRCP*3 (Audio/Video Remote Control Profile) 2 Wireless music streaming compatible models iPod touch (5th generation) iPod touch (4th generation) iPod touch (3rd generation) iPod touch (2nd generation) iPod nano (7th generation) iPhone 5 iPhone 4S iPhone 4 iPhone 3GS iPhone 3G iPad (4th generation) iPad mini iPad (3rd generation) iPad 2 iPad * The iPod nano (7th generation) cannot be controlled by the remote when the command of “MENU,” “,” “,” and “ENTER” is pressed. Design and specifications are subject to change without notice. Troubleshooting General The power does not turn on when the AC adaptor is connected. Make sure the AC adaptor is connected to the wall outlet firmly. The rechargeable battery is depleted. Connect the AC adaptor to charge the battery. There is no sound. Adjust VOLUME +/− (VOL +/− on the remote). Noise is heard. Ensure that the unit is not near in-use portable phones, etc. The power will not turn on when the AC adaptor is disconnected. The Power Off Hold function may be set. In this case, cancel the Power Off Hold function. (See “Power Off Hold function.”) The rechargeable battery may be depleted. In this case, connect the AC adaptor to charge the battery. (See “To use the AC adaptor.”) “ERROR” appears in the display and the unit turns off automatically. If this symptom occurs frequently, consult your nearest Sony dealer. When using an iPod on the Dock There is no sound. Make sure the iPod is connected firmly. Make sure that the function for iPod is activated. Operation is not performed. Make sure the iPod is connected firmly. Check that the iPod is compatible with this unit. (See “Dock Connector compatible models.”) The iPod does not charge. Make sure the iPod is connected firmly. Make sure the AC adaptor is connected firmly. Check that the iPod is compatible with this unit. (See “Dock Connector compatible models.”) Note on the AC adaptor Use the supplied Sony AC adaptor only. The polarity of the plugs of other manufacturers may be different. Failure to use the supplied AC adaptor may cause the unit to malfunction. Registro del propietario 3 Confirm that charging has started. When charging starts, the battery indicator appears. While charging, the charging indicator animation loops. When the unit is turned off Sound skips or the correspondence distance is short. If a device that generates electromagnetic radiation, such as a wireless LAN, other Bluetooth device(s), or a microwave oven is nearby, move away from such sources. Remove any obstacle between this unit and the iPod or move away from the obstacle. Locate this unit and the iPod as close to each other as possible. Re-position this unit. Re-position the iPod. Connecting cannot be done. Perform pairing again. (See “To pair with an iPod.”) Check that the iPod is compatible with this unit. (See “Wireless music streaming compatible models.”) Pairing cannot be done. Bring this unit and the iPod closer together. Delete the unit from the iPod and perform pairing again. Check that the iPod is compatible with this unit. (See “Wireless music streaming compatible models.”) Radio Reception is poor. Extend the antenna to its full length, and orientate for best FM reception. N.º de serie_ ________________________________________ When charging completes, the full battery indicator appears for a while, and then disappears. Notes If you connect the AC adaptor when the battery is fully charged, the full battery indicator appears for a while, and then disappears. If you connect the AC adaptor when the battery power is low, charging starts and the low battery and charging indicator animation loops. The unit cannot be operated without the AC adaptor while the low battery indicator appears. When the unit is turned on When charging completes, the full battery indicator appears. Note It will take approximately 6 hours to fully charge the battery. To use the rechargeable battery You can operate the unit with the rechargeable battery instead of the AC adaptor. Note The maximum output volume will be lower when the AC adaptor is disconnected. To check the remaining power of the battery The remaining power of the battery will be indicated when the unit is turned on. As the remaining battery power depletes, the battery indicator decreases. Level 1 Level 2 Level 3 Level 4 When the battery becomes almost fully depleted, “LOW BATT” flashes and the unit will turn off. To charge the battery, connect the AC adaptor. (See “To use the AC adaptor.”) Notes The remaining battery power will not be indicated when the unit is turned off. The unit requires at least 30 minutes to charge the battery if “LOW BATT” appears. The battery indicator shows approximate remaining battery power. Operating conditions will affect the rate of battery depletion. When to replace the rechargeable battery Repeated recharging causes the duration of the battery power to decrease over time. Replace the battery pack when its duration becomes half the usual period, even after charging it fully. Note The rechargeable battery pack is not a commercially available product. To purchase rechargeable battery pack (NH-300RDP), consult your nearest Sony dealer. To replace the rechargeable battery 1 Remove the screw of the battery compartment at the bottom of the unit, and open the lid. Bluetooth communication between devices. Speaker Woofer: Approx. 76 mm (3 inches) dia. × 2 Tweeter: Approx. 25 mm (1 inch) dia. × 2 Input AUDIO IN jack (ø 3.5 mm stereo minijack) Impedance: 50 kΩ Average input level: 245 mV Power output 20 W + 20 W (at 1% harmonic distortion) (with AC adaptor) 7 W + 7 W (at 1% harmonic distortion) (with rechargeable battery) Power source Rated external power source: DC IN 20 V (with supplied AC adaptor (AC 100 V - 240 V, 50 Hz/60 Hz) or rechargeable battery pack NH-300RDP) Battery life*: Approx. 7 hours (playback of iPod) Approx. 7 hours (FM reception) Approx. 6.5 hours (Bluetooth playback) Dimensions Approx. 356.0 mm × 168.1 mm × 121.7 mm (w/h/d) (14 1/16 inches × 6 5/8 inches × 4 13/16 inches) (incl. projecting parts and controls) Mass Approx. 2.6 kg (5 lb 12 oz) Supplied accessories Remote control (with a lithium battery) (1) AC adaptor (1) AC power cord (1) Operating Instructions (this document) (1) * Measured by Sony standards. The actual battery life may vary depending on the circumstance of the unit. Compatible iPod/iPhone/iPad models The compatible iPod/iPhone/iPad models are as follows. Update the software of the iPod/iPhone/iPad to the latest version before using it with this unit. Dock Connector compatible models iPod touch (5th generation) iPod nano (7th generation)* iPhone 5 iPad (4th generation) iPad mini 2 Disconnect the connector of the battery pack and pull it out. There is no sound. Make sure the audio connecting cable is connected firmly. Make sure that the connected optional component is in playback mode. Make sure that the Audio-in function is activated. 3 Insert a new battery pack and connect its The sound is low. Check the volume of the connected optional component. 4 Replace the battery compartment lid and tighten connector to the jack. the screw. Notes When replacing the battery pack, place a soft cloth etc., under the unit. Turn off the unit and disconnect the AC adaptor before removing the old battery pack. Charge a new battery pack before use. For details, see “To use the AC adaptor.” Remote control Before using the supplied remote for the first time, remove the insulation film. Aim the remote at the (Remote sensor) of the unit. If the problem persists, consult your nearest Sony dealer. Preparations Power source Auto power off After playback of the music (from an iPod on the Dock, Bluetooth connection, or optional component connected to the AUDIO IN jack) has finished, and if no operation is performed for about 20 minutes, the unit will automatically turn off. Notes While the unit is turned on, if no operation is performed for more than about 30 seconds, the display turns off. In this case, press SOUND to turn on the display again. The unit cannot be turned on with the remote when the AC adaptor is disconnected. To use the AC adaptor 1 Connect the supplied AC power cord to the AC When to replace the battery With normal use, the battery (CR2025) should last for about 6 months. When the remote can no longer operate the unit, replace the battery with a new one. Dado que el enchufe principal se utiliza para desconectar la unidad de la red eléctrica, conecte la unidad a una toma de corriente de ca fácilmente accesible. Si nota algo anormal en la unidad, desconecte la clavija principal de la toma de corriente de ca inmediatamente. La unidad no estará desconectada de la fuente de alimentación de ca (toma de corriente) mientras esté conectada a la toma de pared, aunque esté apagada. En la parte inferior externa de la unidad principal y en la superficie del adaptador de ca se encuentran la placa de identificación e información importante sobre seguridad. Se le advierte que cualquier cambio o modificación no autorizada expresamente en este manual podrá anular la autorización que usted tiene para utilizar este equipo. Este equipo no debe ubicarse ni operarse junto con cualquier otra antena o transmisor. Este equipo cumple con los límites de exposición a radiación de FCC/IC estipulados para un ambiente no controlado y cumple con las Directrices de exposición de radiofrecuencia (RF) de FCC en el Suplemento C para OET65 y RSS-102 de las reglas de Exposición de radiofrecuencia (RF) de IC. Este equipo tiene niveles muy bajos de energía de RF que se consideran que cumplen sin evaluación de la exposición permitida máxima (MPE). No obstante, se recomienda que instale y utilice el radiador a una distancia mínima de 20 cm o más del cuerpo de una persona (sin incluir las extremidades: manos, muñecas, pies y tobillos). Conforme a las reglamentaciones de Industry Canada, este transmisor de radio solo puede utilizarse con una antena de un tipo y ganancia máxima (o menor) aprobados para el transmisor por Industry Canada. Para reducir las posibles interferencias de radio para otros usuarios, el tipo de antena y su ganancias también deben seleccionarse de modo que la energía irradiada isotrópicamente equivalente (e.i.r.p.) no supere la necesaria para establecer una comunicación correcta. Para más información sobre el reciclado de baterías, llame al número gratuito 1-800-822-8837, o visite http://www.rbrc.org/ Precaución: No utilice baterías de níquel-hidruro metalico dañadas o con fugas. Tratamiento de los equipos eléctricos y electrónicos al final de su vida útil (aplicable en la Unión Europea y en países europeos con sistemas de recogida selectiva de residuos) Sobre derecho de autor y licencias La marca y los logotipos de la palabra Bluetooth® son propiedad de Bluetooth SIG, Inc. y el uso de tales marcas por parte de Sony Corporation se efectúa con licencia. Otras marcas comerciales y nombres de marca son propiedad de sus respectivos propietarios. iPad, iPhone, iPod, iPod nano y el iPod touch son marcas comerciales de Apple Inc., registradas en EE. UU. y otros países. Lightning es una marca comercial de Apple Inc. “Made for iPod”, “Made for iPhone” y “Made for iPad” indican que un accesorio electrónico se diseñó para conectarse específicamente a los dispositivos iPod, iPhone o iPad, respectivamente, y que el fabricante obtuvo la certificación necesaria para que cumpla con los estándares de rendimiento de Apple. Apple no se hace responsable del funcionamiento de este dispositivo en cumplimiento de los estándares de seguridad y normativa. Tenga en cuenta que el uso de este accesorio con los dispositivos iPod, iPhone o iPad puede afectar el rendimiento inalámbrico. Precauciones Para desconectar la unidad de ca del suministro de alimentación, tómela del enchufe, no del cable. Debido a que el altavoz utiliza un imán potente, mantenga las tarjetas de crédito que utilizan codificación magnética o los relojes de cuerda, televisores de tubos de rayos catódicos (CRT) o proyectores, etc. alejados de la unidad para evitar posibles daños causados por el imán. No coloque la unidad cerca de una fuente de calor, como un radiador o conducto de aire, o en un lugar que esté expuesto a la luz solar directa, polvo excesivo, vibración mecánica o golpes. Deje que el aire circule adecuadamente para evitar la acumulación interna de calor. No coloque la unidad sobre una superficie (tapete, manta, etc.) o cerca de materiales (cortinas) que puedan obstruir los orificios de ventilación. En caso de que un objeto sólido o líquido cayera sobre la unidad, desenchúfela y haga que la revise personal calificado antes de proseguir con su uso. Durante una tormenta eléctrica, no toque la antena (aérea) ni el enchufe. No toque la unidad con las manos mojadas. No coloque la unidad cerca del agua. NOTAS SOBRE LA BATERÍA DE LITIO Limpie la batería con un paño seco para garantizar un contacto adecuado. Asegúrese de observar la polaridad al instalar la batería. No sostenga la batería con pinzas metálicas; de lo contrario, podría producirse un cortocircuito. Sobre la comunicación Bluetooth La tecnología inalámbrica Bluetooth funciona en un rango de aproximadamente 10 metros (acerca de 30 pies). El rango máximo de comunicación puede variar en función de los obstáculos (cuerpo humano, metal, pared, etc.) o ambiente electromagnético. La unidad Este dispositivo cumple con el estándar de RSS exento de la licencia de Industry Canada. La operación está sujeta a las siguientes dos condiciones: (1) este dispositivo no puede causar interferencias y (2) este dispositivo debe aceptar las interferencias, incluidas aquellas que pueden causar una operación no deseada del dispositivo. PRECAUCIÓN Existe el riesgo de explosión si se cambia incorrectamente la batería. Cámbiela solo por otra del mismo tipo. Gabinete de acero NOTA Este equipo ha sido probado y se ha encontrado que cumple con los límites estipulados para un dispositivo digital de Clase B, en conformidad con el apartado 15 de las normas de la FCC. Estos límites están designados para ofrecer protección razonable contra las interferencias nocivas en una instalación residencial. Este equipo genera, utiliza y puede radiar energía de radiofrecuencia y, si no se instala y utiliza de acuerdo con las instrucciones, podrá ocasionar interferencias nocivas para las comunicaciones de radio. Sin embargo, no hay garantía de que no vayan a ocurrir interferencias en una instalación en particular. Si este equipo ocasiona interferencias de radio nocivas para la recepción de radio o televisión, lo que podrá determinarse apagando y encendiendo el equipo, se sugiere que el usuario intente corregir las interferencias tomando una o más de las medidas siguientes: — Reoriente o reubique la antena de recepción. — Aumente la separación entre el equipo y receptor. — Conecte el equipo a una toma de corriente de un circuito diferente al que está conectado el receptor. — Consulte al distribuidor o a un técnico con experiencia en radio/TV para que le ayude. Note If you are not going to use the remote for a long time, remove the battery to avoid any damage that may be caused by leakage or corrosion. adaptor. 1) 2) 3) 4) 5) 6) 7) Lea estas instrucciones. Guarde estas instrucciones. Preste atención a todas las advertencias. Siga todas las instrucciones. No utilice este aparato cerca del agua. Límpielo solamente con un paño seco. No bloquee ninguna abertura de ventilación. Instale el aparato de acuerdo con las instrucciones del fabricante. 8) No instale el aparato cerca de fuentes de calor como radiadores, rejillas de salida de calor, estufas, u otros aparatos (incluidos amplificadores) que produzcan calor. 9) No anule la función de seguridad de la clavija polarizada o de tipo con puesta a tierra. Una clavija polarizada tiene dos cuchillas con una más ancha que la otra. Una clavija de tipo con puesta a tierra tiene dos cuchillas y una tercera espiga de puesta a tierra. La cuchilla ancha o la tercera espiga están provistas para su seguridad. Si la clavija provista no encaja en su toma de corriente, consulte con un electricista para que le reemplace la toma de corriente obsoleta. 10) Proteja el cable de alimentación para impedir que pueda ser pisado o pinchado, particularmente en los enchufes, tomas de corriente con extensión eléctrica y puntos donde salen del aparato. 11) Utilice solamente aditamentos/accesorios especificados por el fabricante. 12) Utilícelo solamente con el carrito, estante, trípode, soporte, o mesa especificado por el fabricante, o vendido con el aparato. Cuando se utilice un carrito, tenga cuidado al mover la combinación de carrito/aparato para evitar que se vuelque y le ocasione heridas. 13) Desenchufe este aparato durante las tormentas eléctricas o cuando no lo vaya a utilizar durante largos periodos de tiempo. 14) Solicite toda asistencia técnica a personal cualificado. El servicio de reparación será necesario cuando el aparato haya sido dañado de cualquier forma, tal como cuando esté dañado el cable de alimentación o la clavija, se haya derramado líquido o hayan caído objetos al interior del aparato, el aparato haya sido expuesto a la lluvia o humedad, no funcione normalmente, o se haya dejado caer. Sólo para el estado de California, EE. UU. Continued on the reverse side Instrucciones de seguridad importantes side facing up 2 Connect the AC adaptor to the DC IN 20V jack on the back of this unit firmly and plug it into a wall outlet. No exponga las baterías (el paquete de baterías o las baterías instaladas) a un calor excesivo como el sol directo, fuego o similar durante un período prolongado. Cambie la batería del control remoto por una batería de litio Sony CR2025 únicamente. Si usa cualquier otra batería, habrá riesgo de incendio o explosión. La batería puede explotar si se utiliza en forma inadecuada. No la recargue, desarmar ni la arroje al fuego. Deseche la batería agotada de inmediato. De acuerdo con las leyes y directrices ambientales locales vigentes. Manténgala fuera del alcance de los niños. Audio-in The remote does not function. The unit cannot be turned on with the remote when the AC adaptor is disconnected. In this case, press on the unit to turn it on. Replace the battery in the remote with a new one if it is weak. Make sure that you are pointing the remote at the remote sensor on the unit. Do not cover or place any objects directly in front of the (Remote sensor) receiver. Remove any obstacles in the path of the remote and the unit. Make sure the remote sensor is not exposed to strong light such as direct sunlight or fluorescent lamp light. Para reducir el riesgo de incendio, no cubra los agujeros de ventilación del aparato con periódicos, manteles, cortinas, etc., y no ponga velas encendidas encima del aparato. Las baterías de níquel-hidruro metalico son reciclables. Usted podrá ayudar a conservar el medio ambiente devolviendo las baterías usadas al punto de reciclaje mas cercano. ADVERTENCIA The TV picture is unstable. If you are listening to an FM program near a TV with an indoor antenna, move the unit away from the TV. Remote control Para reducir el riesgo de incendio o descarga eléctrica, no exponga este aparato a la lluvia ni a la humedad. No instale el aparato en un espacio cerrado, como una estantería para libros o un armario empotrado. *2 Bluetooth standard profiles provide the specifications for General ADVERTENCIA Para reducir el riesgo de incendio o descarga eléctrica, no exponga nunca el aparato a salpicaduras ni coloque sobre él objetos que contengan líquido, como jarrones. between devices, magnetic fields around a microwave oven, static electricity, reception sensitivity, antenna performance, operating system, application software, etc. The sound is weak or is of poor quality. If the unit is close to a TV, move it away from the TV. Para clientes de EE. UU. Registre este producto en línea en la página http://www.sony.com/productregistration Un registro adecuado nos permitirá enviarle de manera periódica correos electrónicos acerca de productos nuevos, servicios y otras noticias importantes. Además, registrar el producto nos permitirá ponernos en contacto con usted en caso de que el producto necesite algún ajuste o modificación. Gracias. Supported codec*4 SBC (Subband Codec) *1 The actual range will vary depending on factors such as obstacles *3 Some operations may not be available for some models of iPod. *4 Codec: Audio signal compression and conversion format El número de modelo y el número de serie se encuentran en la parte inferior. Anote el número de serie en el espacio que se proporciona a continuación. Consúltelos siempre que llame a un distribuidor Sony en relación con este producto. N.º de modelo RDP-XF300iPN When using the Bluetooth connection There is no sound. Ensure that this unit is not too far from the iPod, or this unit is not receiving interference from a wireless LAN, other 2.4 GHz wireless device, or microwave oven. Check that the Bluetooth connection is made properly between this unit and the iPod. Pair this unit and the iPod again. Keep away from metal objects or surfaces. Make sure that the Bluetooth function is activated. Español Para clientes de los EE UU y CANADÁ RECYCLADO DE BATERIAS DE NÍQUEL-HIDRURO METALICO Material de perclorato: puede requerir una manipulación especial; consulte www.dtsc.ca.gov/hazardouswaste/perchlorate Material de perclorato: la batería de litio contiene perclorato Rendimiento óptimo Rendimiento limitado Las siguientes condiciones pueden afectar la sensibilidad de la comunicación Bluetooth. — Hay un obstáculo como una persona, metal o pared entre esta unidad y el iPod. — Se está utilizando un dispositivo que usa la frecuencia 2,4 GHz, tal como un dispositivo de LAN inalámbrica, un teléfono inalámbrico o un horno de microondas cerca de la unidad. — La unidad está instalada sobre una estantería de acero. Dado que los dispositivos Bluetooth y la LAN inalámbrica (IEEE802.11b/g/n) usan la misma frecuencia, posiblemente haya interferencias de microondas que causen deterioro en la velocidad de la comunicación, ruido o conexión no válida si este unidad se utiliza cerca de un dispositivo de LAN inalámbrica. En este caso, realice lo siguiente. — Utilice esta unidad a una distancia mínima de 10 m (cerca de 30 pies) de cualquier dispositivo de LAN inalámbrica. — Si esta unidad se utiliza a 10 m (cerca de 30 pies) de un dispositivo de LAN inalámbrica, apague el dispositivo de LAN inalámbrica. — Instale esta unidad y el iPod lo más cerca posible entre sí. Las microondas que emite un dispositivo Bluetooth pueden afectar la operación de dispositivos médicos electrónicos. Apague esta unidad y el iPod en las siguientes ubicaciones dado que esto puede ocasionar un accidente. — cuando haya presencia de gas inflamable, en un hospital, tren, avión o estación de servicio de combustible — cerca de puertas automáticas o una alarma contra incendios Esta unidad admite las capacidades de seguridad que cumplen con el estándar Bluetooth para proporcionar una conexión segura en el caso de utilizar la tecnología inalámbrica Bluetooth, pero la seguridad podría no ser suficiente en función de la configuración. Tenga cuidado durante la comunicación con la tecnología inalámbrica Bluetooth. No asumimos ninguna responsabilidad por las fugas de información durante la comunicación con Bluetooth. No se puede garantizar la conexión con todos los dispositivos Bluetooth. — Se requiere un dispositivo con la función Bluetooth para cumplir con el estándar Bluetooth especificado por Bluetooth SIG, Inc. y para ser autenticado. — Incluso si el dispositivo conectado cumple con el estándar Bluetooth mencionado anteriormente, es posible que algunos dispositivos no puedan conectarse o no funcionen correctamente según las funciones o especificaciones del dispositivo. Es posible que la comunicación tarde en iniciarse en función del dispositivo que conectará. Nota En el Manual de instrucciones, el término “iPod” hace referencia en general a las funciones de un iPod, iPhone o iPad a menos que el texto o las ilustraciones especifiquen lo contrario. Si tiene alguna pregunta o problema en relación con su unidad, póngase en contacto con su distribuidor Sony más cercano. Información general Especificaciones ESPECIFICACIONES DE LA ALIMENTACIÓN DEL AUDIO POTENCIA DE SALIDA Y DISTORSIÓN ARMÓNICA TOTAL: Con cargas de 6 ohms, ambos canales dirigidos, desde 150 a 10 000 Hz; potencia eficaz RMS mínima de 15 watts nominales por canal, con un máximo del 10% de distorsión armónica total en operación de ca. iPod cc de salida: 5 V MÁX: 2,1 A Radio Rango de frecuencia Banda Frecuencia FM 87,5 MHz a 108 MHz Incremento de frecuencia 0,1 MHz Bluetooth Salida Especificación de Bluetooth con potencia de salida clase 2 Rango de comunicación máximo Línea visual aproximada 10 m (30 pies)*1 Banda de frecuencia Banda de 2,4 GHz (2,4000 GHz a 2,4835 GHz) Sistema de comunicación Versión de especificación para Bluetooth 2.1 + EDR (Enhanced Data Rate) Perfiles de Bluetooth compatibles*2 A2DP (Advanced Audio Distribution Profile) AVRCP*3 (Audio/Video Remote Control Profile) Códec admitido*4 SBC (Subband Codec) *1 El rango real variará en función de factores como obstáculos entre dispositivos, campos magnéticos en las cercanías de un horno de microondas, electricidad estática, sensibilidad a la recepción, rendimiento de la antena, sistema de operación, software de aplicación, etc. *2 Los perfiles estándar de Bluetooth proporcionan las especificaciones para la comunicación Bluetooth entre los dispositivos. El sonido salta o la distancia de correspondencia es corta. Si hay cerca un dispositivo que genera radiación electromagnética, como una LAN inalámbrica, otro dispositivo Bluetooth o un horno de microondas, aléjelo de este tipo de fuentes. Quite los obstáculos entre esta unidad y el iPod, o aléjese del obstáculo. Ubique esta unidad y el iPod lo más cerca posible entre sí. Vuelva a posicionar la unidad. Vuelva a posicionar el iPod. No se puede establecer la conexión. Realice el emparejamiento otra vez. (Consulte “Emparejar con un iPod”). Compruebe que el iPod sea compatible con esta unidad. (Consulte “Modelos compatibles para la transmisión inalámbrica de música”). No se puede realizar el emparejamiento. Acerque la unidad y el iPod. Elimine la unidad del iPod y realice el emparejamiento otra vez. Compruebe que el iPod sea compatible con esta unidad. (Consulte “Modelos compatibles para la transmisión inalámbrica de música”). Radio Mala recepción. Extienda la antena por completo y oriéntela para lograr la mejor recepción de FM. * Algunas operaciones posiblemente no están disponibles para 3 algunos modelos de iPod. *4 Códec: formato de compresión y conversión de señales de audio Entrada Toma AUDIO IN (minitoma estéreo de ø 3,5 mm) Impedancia: 50 kΩ Nivel de entrada promedio: 245 mV Salida de potencia 20 W + 20 W (con distorsión armónica del 1%) (con adaptador de ca) 7 W + 7 W (con distorsión armónica del 1%) (con batería recargable) Fuente de alimentación Fuente de potencia externa nominal: CC EN 20 V (con adaptador de ca suministrado (ca 100 V - 240 V, 50 Hz/60 Hz) o paquete de baterías recargable NH-300RDP) Duración de la batería*: Aproximadamente 7 horas (reproducción del iPod) Aproximadamente 7 horas (recepción FM) Aproximadamente 6,5 horas (reproducción de Bluetooth) Dimensiones Aproximadamente 356,0 mm × 168,1 mm × 121,7 mm (an./al./prf) (14 1/16 pulgadas × 6 5/8 pulgadas × 4 13/16 pulgadas) (incluye salientes y controles) Peso Aproximadamente 2,6 kg (5 libras 12 onzas) Accesorios suministrados Control remoto (con una batería de litio) (1) Adaptador de ca (1) Cable de alimentación de ca (1) Manual de instrucciones (este documento) (1) * Medido conforme a los estándares de Sony. La vida útil real de la batería puede variar dependiendo de las circunstancias de la unidad. Modelos de iPod/iPhone/iPad compatibles A continuación, se indican los modelos de iPod/iPhone/ iPad compatibles. Actualice el software del iPod/iPhone/iPad a la última versión antes de utilizar esta unidad. Modelos compatibles de conectores de la bandeja iPod touch (5ª generación) iPod nano (7ª generación)* iPhone 5 iPad (4ª generación) iPad mini Modelos compatibles para la transmisión inalámbrica de música iPod touch (5ª generación) iPod touch (4ª generación) iPod touch (3ª generación) iPod touch (2ª generación) iPod nano (7ª generación) iPhone 5 iPhone 4S iPhone 4 iPhone 3GS iPhone 3G iPad (4ª generación) iPad mini iPad (3ª generación) iPad 2 iPad * El iPod nano (7ª generación) no puede controlarse con control remoto cuando el comando de “MENU”, “”, “”, y "ENTER” está presionado. El diseño y las especificaciones están sujetos a cambios sin previo aviso. La unidad no se enciende con el adaptador de ca conectado. Compruebe que el adaptador de ca esté bien conectado a la toma de pared. La batería recargable está agotada. Conecte al adaptador de ca para cargar la batería. No hay sonido. Ajuste VOLUME +/− (VOL +/− en el control remoto). Se escucha ruido. Asegúrese de que la unidad no esté cerca de teléfonos portátiles en uso, etc. La unidad no se encenderá si el adaptador de ca está desconectado. Puede estar establecida la función de retención de apagado. Si este es el caso, cancele la función de retención de apagado. (Consulte “Función de retención de apagado”). La batería recargable puede estar agotada. Si este es el caso, conecte al adaptador de ca para cargarla. (Consulte “Usar el adaptador de ca”). Aparece “ERROR” en la pantalla y la unidad se apaga de forma automática. Si este síntoma se presenta con frecuencia, consulte a su distribuidor Sony más cercano. Si utiliza un iPod en la bandeja No hay sonido. Asegúrese de que el iPod esté bien conectado. Asegúrese de que esté activada la función para iPod. No se puede realizar ninguna operación. Asegúrese de que el iPod esté bien conectado. Compruebe que el iPod sea compatible con esta unidad. (Consulte “Modelos compatibles de conectores de la bandeja”). El iPod no se carga. Asegúrese de que el iPod esté bien conectado. Asegúrese de que el adaptador de ca esté correctamente conectado. Compruebe que el iPod sea compatible con esta unidad. (Consulte “Modelos compatibles de conectores de la bandeja”). Si utiliza la conexión Bluetooth No hay sonido. Asegúrese de que esta unidad no esté demasiado alejada del iPod ni que esté recibiendo interferencias de una LAN inalámbrica, otro dispositivo inalámbrico de 2,4 GHz u horno de microondas. Compruebe que la conexión Bluetooth entre esta unidad y el iPod sea la correcta. Empareje esta unidad y el iPod otra vez. Aléjese de objetos o superficies metálicas. Asegúrese de que esté activada la función Bluetooth. Nivel 1 Nivel 2 Nivel 3 Nivel 4 Cuando la batería se agota casi por completo, “LOW BATT” parpadea y la unidad se apagará. Para cargar la batería, conecte el adaptador de ca. (Consulte “Usar el adaptador de ca”). Notas Si la unidad está apagada, no se indicará la energía de la batería restante. Se deberá cargar la batería de la unidad durante 30 minutos como mínimo si aparece “LOW BATT”. El indicador de batería muestra la energía de la batería restante aproximada. Las condiciones de operación afectarán la velocidad del agotamiento de la batería. Cuándo cambiar la batería recargable Las constante recargas hacen que la duración de la energía de la batería disminuya con el tiempo. Cambie el paquete de baterías cuando su duración disminuya a la mitad de la duración habitual, incluso después de una carga completa. Cambiar la batería recargable El sonido es débil o de mala calidad. Si la unidad está cerca de un televisor, aléjela. 1 Retire el tornillo del compartimiento de la batería en la parte inferior de la unidad y abra la tapa. La imagen del televisor no es estable. Si está escuchando un programa FM cerca de un televisor con una antena interna, aleje la unidad del televisor. Entrada de audio No hay sonido. Asegúrese de que el cable de conexión de audio esté correctamente conectado. Asegúrese de que el componente opcional conectado se encuentre en modo de reproducción. Asegúrese de que la función de entrada de audio esté activada. 2 Desconecte el conector del paquete de baterías y extráigalo. El sonido es bajo. Compruebe el volumen del componente opcional conectado. Control remoto El control remoto no funciona. No se puede encender la unidad con el control remoto cuando el adaptador de ca está desconectado. Si este es el caso, presione en la unidad para encenderla. Cambie la batería del control remoto por una nueva si no funciona correctamente. Apunte siempre con el control remoto al sensor de la unidad. No cubra ni coloque ningún objeto directamente en frente del receptor (sensor remoto). Aparte cualquier posible obstáculo entre el control remoto y la unidad. Asegúrese de que el sensor no esté expuesto a una luz demasiado fuerte, como la luz solar directa o la de una lámpara fluorescente. Si el problema continúa, consulte con su distribuidor Sony. Preparaciones Fuente de alimentación Apagado automático 3 Inserte un nuevo paquete de baterías y conecte su conector a la toma. 4 Vuelva a colocar la tapa del compartimiento de la batería y ajuste el tornillo. Notas Al cambiar el paquete de baterías, coloque un paño suave o similar debajo de la unidad. Apague la unidad y desconecte el adaptador de ca antes de quitar el paquete de baterías anterior. Cargue un nuevo paquete de baterías antes de su uso. Para obtener detalles, consulte “Usar el adaptador de ca”. Control remoto Antes de utilizar el control remoto suministrado por primera vez, extraiga la película de aislamiento. Apunte el control remoto al (sensor remoto) de la unidad. Una vez terminada la reproducción de música (de un iPod en la bandeja, conexión Bluetooth o componente opcional conectado a la toma AUDIO IN) y, en el caso de no realizarse ninguna operación en los 20 minutos posteriores (aproximadamente), la unidad se apagará automáticamente. Notas Mientras la unidad esté encendida, la pantalla se apagará si no se realiza ninguna operación durante más de 30 segundos (aproximadamente). Si este es el caso, presione SOUND para encender la pantalla otra vez. No se puede encender la unidad con el control remoto cuando el adaptador de ca está desconectado. Usar el adaptador de ca 1 Conecte el cable de alimentación de ca Cuándo se debe cambiar la batería En condiciones normales de uso, la batería (CR2025) debería durar unos 6 meses. Cuando la unidad ya no funcione con el control remoto, sustituya la batería por una nueva. El lado hacia arriba suministrado al adaptador de ca. 2 Conecte bien el adaptador de ca a la toma DC IN 20V en la parte posterior de esta unidad y enchúfelo a una toma de corriente. Nota sobre el adaptador de ca Utilice solo el adaptador de ca suministrado por Sony. Es posible que la polaridad de los enchufes de otros fabricantes sea diferente. Si no utiliza el adaptador de ca suministrado, la unidad podría averiarse. Solución de problemas Generales La energía restante de la batería se indicará al encenderse la unidad. El indicador de batería disminuye a medida que se agota la energía de la batería restante. Nota El paquete de baterías recargable no es un producto disponible en comercios. Para comprar el paquete de baterías recargable (NH-300RDP), consulte a su distribuidor Sony más cercano. Generales Altavoz Woofer: aproximadamente 76 mm (3 pulgadas) de diámetro × 2 Tweeter: aproximadamente 25 mm (1 pulgada) de diámetro × 2 Comprobar la energía restante de la batería Nota Si no va a utilizar el control remoto durante un período de tiempo prolongado, retire la batería para evitar que se produzcan daños por fugas o corrosión. Continúa al dorso 3 Confirme que se ha iniciado la carga. Una vez iniciada la carga, aparecerá el indicador de la batería. Durante la carga, la animación del indicador de carga cambia. Cuando la unidad está apagada Una vez terminada la carga, el indicador de batería completa aparece durante un momento y luego desaparece. Notas Si conecta el adaptador de ca cuando la batería está completamente cargada, el indicador de batería completa aparece durante un momento y luego desaparece. Si conecta el adaptador de ca cuando la energía de la batería es baja, la carga se inicia y la animación del indicador de batería baja y de carga cambian. Si se muestra el indicador de batería baja, la unidad no podrá utilizarse sin el adaptador de ca. Cuando la unidad está encendida Una vez terminada la carga, aparecerá el indicador de batería completa. Nota La batería se cargará por completo en aproximadamente 6 horas. Usar la batería recargable Puede operar la unidad con la batería recargable en lugar de con el adaptador de ca. Nota El volumen máximo de salida será inferior cuando el adaptador de ca esté desconectado. This warranty is valid only in the United States. Esta garantía es válida únicamente en los Estados Unidos. Startup Guide/Guía de inicio rápido 3 Press and hold BLUETOOTH ( on the remote). When pairing starts, a double-beep sound will be heard and the Bluetooth indicator will flash quickly. Pairing mode of the unit is activated. Power indicator Indicador de energía Bluetooth indicator Indicador Bluetooth Tips If you touch or operate an iPod connected to this unit while listening to the radio, noise may occur. Avoid touching or operating the iPod in this case. If you are listening to the radio with an iPhone connected to the unit, interference with radio reception may occur. Remove the iPhone in this case. To improve the reception Extend the antenna to its full length and adjust the angle for best reception. 4 Perform the pairing procedure on the iPod to detect the unit. Select “Settings Bluetooth” and turn on the Bluetooth function. Example: iPhone 5 Antenna Antena Note Adjust the direction of the antenna by holding the bottom of it. The antenna can be damaged if you move the antenna with excessive force. To set monaural sound if stereo reception is poor iPod/iPhone/iPad The unit automatically switches between stereo and monaural output, depending on reception conditions. However, if stereo reception is unstable, you can manually set for monaural output to improve the sound. Press FM to show “MONO” in the display. (To resume stereo reception, press FM again to show “STEREO” in the display.) Supporter Soporte Dock Connector Conector de la bandeja Remote sensor Sensor remoto Docking Tray Bandeja de acoplamiento Display Pantalla A list of detected devices appears on the display. The unit is displayed as “RDP-XF300iPN.” If “RDP-XF300iPN” is not displayed, repeat from step 3. 5 Select “RDP-XF300iPN” on the display of the iPod while the Bluetooth indicator flashes quickly. When “Connected” appears on the display of the iPod, pairing and connection are complete. Example: iPhone 5 To preset radio stations You can preset up to 20 radio stations in the unit’s memory. 1 Press FM to activate the radio function. 2 Press and hold until “AUTO PRESET” appears in the display. Tip To go back to the previous status, press FM instead of in step 3. If a station cannot be preset automatically You may need to preset a station with a weak signal manually. 1 Tune in the station you want. 2 Press . VOLUME + (VOL + on the remote control) and buttons have a tactile dot. Los botones VOLUME + (VOL + en el control remoto) y tienen un punto táctil. To Pause playback English Operations How to handle an iPod To set an iPod Press To resume play, press again. Go to the next track (forward) Go back to the previous track (backward)* Locate a point while listening to (forward) or the sound (backward) while playing and hold until you find the desired point. Go back to the previous menu MENU on the remote Select a menu item or a track (up)/ (down) on for playback the remote Execute the selected menu item or begin playback ENTER on the remote * During playback, this operation returns you to the beginning of the current track. To go back to the previous track, press twice. To remove an iPod Notes If a pop-up message appears on the display of the iPod touch, iPhone, or iPad, see “About App.” Some operations may differ or may not be available on some models of iPod. If the battery of the iPod is extremely low, charge it for a while before operation. Sony cannot accept responsibility in the event that data recorded to an iPod is lost or damaged when using the iPod connected to this unit. For details of environmental conditions for operating an iPod, check the website of Apple Inc. To remove the iPod For details, see “How to handle an iPod.” To charge an iPod You can use the unit as a battery charger for an iPod when the power is supplied by the AC adaptor. Charging begins when the iPod is connected to the unit. The charging status appears in the display on the iPod. For details, refer to the user’s guide of the iPod. FM Notes An iPod in a case or cover can be set in this unit. However, if the case or cover interferes with the connection, remove the case or cover before setting the iPod on the Dock Connector. When placing or removing the iPod, hold it at the same angle as the Dock Connector on the unit. Do not pull the iPod forward too far. When placing or removing the iPod, hold the unit securely. Do not twist or bend the iPod, as this may result in connector damage. Remove the iPod when transporting it; otherwise, a malfunction may result. To turn the unit on/off Press (On/Standby). The power indicator lights up when the unit is turned on. Tips for charging an iPod with the rechargeable battery With the function for iPod activated, if the battery indicator is level 1 or 2, charging will start. If the battery indicator is level 3 or 4, to start charging, press and hold iPod. (For details, see “To use the rechargeable battery.”) Charging will terminate when the unit turns off automatically. (For details, see “Auto power off.”) To terminate charging, press and hold iPod. This operation will terminate playback. To restart charging, press and hold iPod again. Operating by wireless music streaming By using the Bluetooth connection, you can listen to the sound from an iPod or other Bluetooth device with the unit wirelessly. Press VOLUME +/− (VOL +/− on the remote). open. After use, close the Docking Tray by pushing it until locked. Pairing What is pairing? Bluetooth devices need to be “paired” with each other beforehand. Once Bluetooth devices are paired, there is no need for pairing again, unless pairing information is deleted. Bluetooth indicator Status 2 Set the iPod on the Dock Connector. The Dock Connector can be tilted slightly. For details, see “How to handle an iPod.” 3 Press . 4 Press iPod to activate the function for iPod. “iPod” appears in the display. 5 Press . The iPod begins to play back. If the iPod does not start playing back, operate directly on the iPod. You can operate the connected iPod via this unit or the iPod itself. Notes on pairing with a Bluetooth device other than iPod When pairing with a Bluetooth device other than iPod, after step 3, pass code input may be required in your Bluetooth device. In this case, input “0000.” The operation and display may differ depending on the Bluetooth device and/or software version. For details, refer to the user’s guide of the Bluetooth device. To listen to sound Keep the iPod and the unit within 10 meters (about 30 ft) of each other for this operation. Check the following before operating the unit. The Bluetooth function of the iPod is on. Pairing of the unit and the iPod is complete. If pairing is not completed, perform pairing again. (See “To pair with an iPod.”) 1 Press . 2 Press BLUETOOTH ( on the remote) to turn on the Bluetooth function. The last connected iPod will be reconnected automatically when the Bluetooth function is turned on. 3 Select your desired music, video, game, etc., to play on the iPod. For details, refer to the user’s guide of the iPod. Tips If the last connected iPod does not reconnect automatically, press BLUETOOTH ( on the remote). If it still does not reconnect, select the model name of this unit from the iPod. (Perform steps 4 to 5 in “To pair with an iPod.”) To connect an alternative iPod, which has previously been paired with this unit, press BLUETOOTH ( on the remote) to disconnect the currently connected iPod. Then select the model name of the unit from the alternative iPod you want to connect. While listening to music from an iPod via Bluetooth connection, you can charge the iPod on the Dock only if the AC adaptor is connected. If the volume level is low, adjust the volume of the unit first. If the volume is still too low, adjust the volume of the Bluetooth device. Bluetooth indicator (blue) Bluetooth off Off Bluetooth on but not connected Flashes slowly Pairing mode Flashes quickly Connected or communicating Lights up To pair with an iPod Keep the iPod and the unit within 1 meter (3 ft) of each other for this operation. 1 Press . 2 Press BLUETOOTH ( on the remote) to turn on the Bluetooth function when the Bluetooth indicator is off. “Bluetooth” appears in the display. The Bluetooth indicator flashes slowly. Terminate the Bluetooth connection by any of the following operations. Turn off the unit. Turn off the iPod. Press BLUETOOTH ( on the remote), iPod, FM or AUDIO IN. Operate the iPod to terminate the connection. For details, refer to the user’s guide of the iPod. To clear the list of models alreadypaired and memorized in the unit 1 Press . 2 Press BLUETOOTH ( on the remote) to turn on Notes You can perform step 3 to clear the list even during Bluetooth connection. This operation cannot be performed when the unit is pairing. To pair with this unit again, delete the model name of this unit from the iPod and perform pairing again. (See “To pair with an iPod.”) Operating the radio 1 Press . 2 Press FM to activate the radio function. “FM” appears in the display. number, and press . The preset number flashes, then, the frequency digits show in the display. The new station replaces the old one. Tip To go back to the previous status, press FM instead of in step 3. To play preset radio stations Press or to tune in a stored station. If “FREQ. TUNE” appears, press and hold FM again. Connecting optional components Features D-Sappli includes various timer functions: Alarm, Music Play Timer and Sleep Timer. You can set up to 10 alarms, using songs in iPod or Preset Sound in D-Sappli for the alarm sound. Music Play Timer allows you to play/pause desired music at a desired time. Sleep Timer allows you to specify a time at which to stop music playback. Alarm, Music Play Timer and Sleep Timer work in combination with the power supply of the unit. Alarm, Music Play Timer and Sleep Timer are available only when D-Sappli is activated. D-Sappli can display a list of Radio Preset Stations programmed in this unit. You can rename the Radio Preset Stations, and change their preset numbers on the D-Sappli. Preset numbers and order will also be changed accordingly in the unit. D-Sappli also includes a clock display enlarge feature. Notes If the App to link with this unit is not downloaded to the iPod touch/iPhone/iPad, a pop-up message prompting you to download D-Sappli may appear repeatedly. Deactivate the App’s link function to stop the pop-up message. To deactivate the App’s link function: Connect the AC adaptor, and then press / to turn off the unit. Remove the iPod touch/iPhone/iPad from the Dock Connector. While holding down , also press and hold / on the unit for at least 2 seconds. (“App OFF” appears in the display to show that the App’s link function has been deactivated.) To re-activate the App’s link function, repeat the above steps. (“App ON” appears in the display to show that the App’s link function has been activated.) Español La conexión Bluetooth le permite escuchar el sonido desde un iPod u otro dispositivo con Bluetooth con la unidad en modo inalámbrico. Operaciones Cómo usar un iPod Para colocar un iPod ¿Qué es el emparejamiento? Los dispositivos Bluetooth deben “emparejarse” entre sí con anticipación. Una vez emparejados los dispositivos, no es necesario volver a hacerlo a menos que se haya eliminado la información de emparejamiento. Indicador Bluetooth Para extraer un iPod “AUDIO IN” appears in the display. 4 Turn the connected component on. 5 Play the connected component. The sound from the connected component is output from the speakers of this unit. Notes The necessary type of audio connecting cable depends on the optional component. Be sure to use the correct type of cable. If the volume level is low, adjust the volume of the unit first. If the volume is still too low, adjust the volume of the connected component. Other useful functions Remove the iPod from the Dock Connector, and then press and hold on the unit when the AC adaptor is disconnected. “HOLD” flashes twice and the display turns off. The unit cannot be turned on by pressing while the Power Off Hold function is set. To cancel the Power Off Hold function Press and hold on the unit. “RELEASE” flashes twice and the Power Off Hold function is canceled. The unit will turn on automatically. Tip The Power Off Hold function will be canceled if you connect the AC adaptor to the unit or set an iPod on the Dock Connector. 3 Press and hold FM until “FREQ. TUNE” appears in the display. If “PRESET TUNE” appears, press and hold FM again. When using the remote to operate the unit, you can skip this step, and directly operate step 4. 4 Press and hold TUNE + or − until the frequency digits begin to change in the display. The unit automatically scans the radio frequencies and stops when it finds a clear station. If you cannot tune in a station, press TUNE + or − repeatedly to change the frequency step-by-step. When an FM stereo broadcast is received, “STEREO” appears. Presione (Encendido/En espera). El indicador de alimentación se ilumina al encender la unidad. Ajuste del volumen You can adjust the emphasis of the sound. Press SOUND repeatedly to select the desired audio emphasis. Desactivado Bluetooth activado, pero no conectado Parpadea lento Modo de emparejamiento Parpadea rápido Conectado o comunicando Encendido 1 Presione . 2 Presione BLUETOOTH ( en el control remoto) para activar la función Bluetooth si el indicador Bluetooth está apagado. Aparece “Bluetooth” en la pantalla. El indicador Bluetooth parpadea lento. 3 Mantenga presionado BLUETOOTH ( en el control remoto). Una vez iniciado el emparejamiento, se escuchará un sonido de dos tonos y el indicador Bluetooth parpadeará rápido. Se activa el modo de emparejamiento de la unidad. Finalizar la escucha Termine la conexión Bluetooth mediante cualquiera de las siguientes operaciones. Apague la unidad. Apague el iPod. Presione BLUETOOTH ( en el control remoto), iPod, FM o AUDIO IN. Utilice el iPod para terminar la conexión. Para obtener más información, consulte el manual del usuario del iPod. iPod para detectar la unidad. Seleccione “Ajustes Bluetooth” y active la función Bluetooth. Ejemplo: iPhone 5 al mismo tiempo en la unidad. Aparece “CLEAR” en la pantalla. Notas Puede realizar el paso 3 para borrar la lista, incluso durante la conexión Bluetooth. Esta operación no puede realizarse cuando se está emparejando la unidad. Para emparejar esta unidad otra vez, elimine el nombre de modelo de esta unidad del iPod y realice el emparejamiento otra vez. (Consulte “Emparejar con un iPod”). Operación de la radio 1 Presione . 2 Presione FM para activar la función de radio. Aparece “FM” en la pantalla. Después de usarla, cierre la bandeja de acoplamiento empujándola hasta bloquearla. 3 Presione . 4 Presione iPod para activar la función para iPod. Aparece “iPod” en la pantalla. Si aparece “PRESET TUNE”, mantenga presionado FM otra vez. Si utiliza el control remoto para operar la unidad, puede omitir este paso e ir directamente al paso 4. La unidad explora automáticamente las frecuencias de radio y se detiene cuando encuentra una estación clara. Si no puede sintonizar una estación, presione TUNE + o − repetidamente para cambiar la frecuencia de a una por vez. Si se recibe una difusión de estéreo FM, aparecerá “STEREO”. 5 Presione . Para Poner en pausa la reproducción Presione (avanzar) Volver a la pista anterior (retroceder)* Localizar un punto mientras escucha sonido (avanzar) o (retroceder) durante la reproducción y mantener presionado hasta encontrar el punto deseado. MENU en el control remoto Volver al menú anterior Seleccionar un elemento de menú o una pista para reproducir Ejecutar el elemento de menú seleccionado o comenzar la reproducción (arriba)/ (abajo) en el control remoto ENTER en el control remoto pista actual. Para volver a la pista anterior, presione dos veces. Notas Si aparece un mensaje emergente en la pantalla del iPod touch, iPhone o iPad, consulte “Acerca de App”. Algunas operaciones pueden no coincidir o no estar disponibles según el modelo de iPod. Si la batería del iPod está casi agotada, cárguela antes de utilizarlo. Sony declina toda responsabilidad en el caso de la pérdida o corrupción de datos grabados en el iPod al utilizarlo conectado a esta unidad. Para obtener información detallada sobre las condiciones ambientales para utilizar el iPod, visite el sitio web de Apple Inc. Para extraer el iPod Para obtener detalles, consulte “Cómo usar un iPod”. Para cargar un iPod Puede utilizar la unidad como un cargador de batería del iPod cuando el adaptador de ca suministre la energía. La carga comienza cuando el iPod se conecta a la unidad. El estado de carga aparece en la pantalla del iPod. Para obtener más información, consulte el manual del usuario del iPod. Consejos para cargar un iPod con batería recargable Con la función para iPod activada, si el indicador de la batería está en el nivel 1 o 2, la carga se iniciará automáticamente. Si el indicador de batería está en el nivel 3 o 4, para iniciar la carga, mantenga presionado iPod. (Para obtener detalles, consulte “Usar la batería recargable.”) La carga finalizará cuando la unidad se apague automáticamente. (Para más información, consulte “Apagado automático.”) Para terminar la carga, mantenga presionado iPod. Esta operación terminará con la reproducción. Para reiniciar la carga, mantenga presionado iPod otra vez. Configurar el sonido monoaural si la recepción estéreo es mala Preestablecer estaciones de radio Para reanudar la reproducción, presione otra vez. Ir a la siguiente pista Nota Ajuste la dirección de la antena sujetando su parte inferior. La antena puede dañarse si la mueve con fuerza excesiva. La unidad cambia automáticamente entre la salida estéreo y monoaural en función de las condiciones de recepción. No obstante, si la recepción estéreo no es estable, puede configurar manualmente la salida monoaural para mejorar el sonido. Presione FM para mostrar “MONO” en la pantalla. (Para reanudar la recepción estéreo, presione FM otra vez para mostrar “STEREO” en la pantalla). Comienza la reproducción del iPod. Si el iPod no comienza la reproducción, opere directamente desde el iPod. Puede utilizar el iPod conectado mediante los botones de la unidad o del propio iPod. Puede preestablecer hasta 20 estaciones de radio en la memoria de la unidad. Notas La operación y la pantalla pueden ser diferentes en función del modelo de iPod y/o la versión de software. Para obtener más información, consulte el manual del usuario del iPod. El modo de emparejamiento se cancela después de aproximadamente 5 minutos. Si el modo de emparejamiento se cancela durante el transcurso, comience otra vez desde el paso 3. Si el emparejamiento no se ha completado, comience otra vez desde el paso 3. Para emparejar con otro iPod, repita los pasos 1 a 5. En el paso 3, si no se escucha un sonido de dos tonos o el indicador Bluetooth no parpadea rápido, mantenga presionado BLUETOOTH ( en el control remoto) otra vez. Si apaga la unidad o el iPod antes de completarse la conexión Bluetooth, la información de emparejamiento no se memorizará y no se completará el emparejamiento. Notas sobre el emparejamiento con un dispositivo Bluetooth diferente de iPod Si realiza el emparejamiento con un dispositivo Bluetooth diferente de iPod, después del paso 3, posiblemente se requiera que ingrese el código de acceso en el dispositivo Bluetooth. Si este es el caso, ingrese “0000”. La operación y la pantalla pueden ser diferentes en función del dispositivo Bluetooth y/o la versión de software. Para obtener detalles, consulte el manual del usuario del dispositivo Bluetooth. Escuchar sonidos Coloque el iPod y la unidad a 10 metros (cerca de 30 pies) de distancia entre sí para realizar esta operación. Compruebe lo siguiente antes de usar la unidad. La función Bluetooth del iPod está activada. Se ha completado el emparejamiento de la unidad y el iPod. De no ser así, realice el emparejamiento otra vez. (Consulte “Emparejar con un iPod”). 1 Presione . 2 Presione BLUETOOTH ( en el control remoto) para activar la función Bluetooth. El último iPod conectado se volverá a conectar automáticamente cuando se active la función Bluetooth. 3 Seleccione la música, el video, el juego que desee para reproducirlo en el iPod. Para obtener más información, consulte el manual del usuario del iPod. Sugerencias Si el último iPod conectado no se vuelve a conectar de forma automática, presione BLUETOOTH ( en el control remoto). Si todavía no puede establecerse la conexión, seleccione el nombre del modelo de esta unidad en el iPod. (Realice los pasos 4 a 5 en “Emparejar con un iPod”). Para conectar un iPod alternativo, emparejado anteriormente con esta unidad, presione BLUETOOTH ( en el control remoto) para desconectar el iPod conectado actualmente. A continuación, seleccione el nombre del modelo de la unidad en el iPod alternativo que quiera conectar. Cancelar la función de retención de apagado Mantenga presionado en la unidad. “RELEASE” parpadea dos veces y se cancela la función. La unidad se encenderá automáticamente. Sugerencia La función de retención de apagado se cancelará si conecta el adaptador de ca a la unidad o coloca un iPod en el conector de la bandeja. 1 Presione FM para activar la función de radio. 2 Mantenga presionado hasta que aparezca “AUTO PRESET” en la pantalla. 3 Presione . Las estaciones se almacenan en la memoria de las frecuencias más bajas a las más altas de forma automática. Sugerencia Para volver al estado anterior, pulse FM en lugar de en el paso 3. Si no se puede preestablecer una estación de forma automática Posiblemente necesite preestablecer una estación con una señal débil de forma manual. 1 Sintonice la estación que desee. 2 Presione . 3 Presione o para seleccionar el número preestablecido que desee y presione . El número preestablecido parpadea y, a continuación, los dígitos de frecuencia se muestran en la pantalla. La nueva estación reemplaza a la anterior. Sugerencia Para volver al estado anterior, pulse FM en lugar de en el paso 3. Reproducir estaciones de radio preestablecidas Presione o para sintonizar una estación almacenada. Si aparece “FREQ. TUNE”, vuelva a mantener presionado FM. 5 Seleccione “RDP-XF300iPN” en la pantalla del El emparejamiento y la conexión han finalizado cuando aparece “Conectado” en la pantalla del iPod. Ejemplo: iPhone 5 Quite el iPod del conector de la bandeja y, a continuación, mantenga presionado en la unidad cuando el adaptador de ca está desconectado. “HOLD” parpadea dos veces y la pantalla se apaga. La unidad no puede encenderse si presiona mientras está establecida la función de retención de apagado. Puede ajustar el énfasis del sonido. Presione SOUND varias veces para seleccionar el énfasis de audio deseado. Aparece una lista de los dispositivos detectados en la pantalla. La unidad se muestra como “RDP-XF300iPN.” Si no se muestra “RDP-XF300iPN”, repita desde el paso 3. iPod mientras el indicador Bluetooth parpadea rápido. Establecer la función de retención de apagado “FREQ. TUNE” en la pantalla. 3 Mantenga presionado FM hasta que aparezca Extienda la antena por completo y ajuste el ángulo para lograr una mejor recepción. El conector de la bandeja puede inclinarse un poco. Para obtener detalles, consulte “Cómo usar un iPod”. Otras funciones útiles Selección del énfasis de audio (ecualización) Mejorar la recepción 2 Coloque el iPod en el conector de la bandeja. Notas El tipo de cable de conexión de audio requerido depende del componente opcional. Asegúrese de usar el tipo de cable correcto. Si el nivel del volumen es bajo, ajuste primero el volumen de la unidad. Si el volumen sigue siendo demasiado bajo, entonces ajuste el volumen del componente conectado. Aparecen dígitos de frecuencia en la pantalla después de un breve período. Sugerencias Si toca o utiliza un iPod conectado a esta unidad mientras escucha la radio, posiblemente escuche ruido. Evite tocar o usar el iPod en este caso. Si escucha la radio con un iPhone conectado a la unidad, posiblemente haya interferencias con la recepción de la radio. Quite el iPhone en este caso. de la unidad para abrirla. El sonido del componente conectado se emite a través de los altavoces de esta unidad. Puede establecer la función de retención de apagado con el fin de evitar que la unidad se encienda accidentalmente mientras la transporta. para activar la función Bluetooth. 1 Presione la bandeja de acoplamiento en el frente Aparece “AUDIO IN” en la pantalla. 4 Encienda el componente conectado. 5 Reproduzca el componente conectado. 3 Mantenga presionado BLUETOOTH y VOLUME − Operar un iPod en la bandeja Entrada de audio. Función de retención de apagado dígitos de frecuencia comiencen a cambiar en la pantalla. 4 Realice el procedimiento de emparejamiento en el 3 Presione AUDIO IN para activar la función 1 Presione . 2 Presione BLUETOOTH ( en el control remoto) 4 Mantenga presionado TUNE + o − hasta que los Presione VOLUME +/− (VOL +/−en el control remoto). * Durante la reproducción, esta operación vuelve al principio de la Selecting audio emphasis (equalization) Bluetooth desactivado Para encender/apagar la unidad Power Off Hold function You can set the Power Off Hold function to avoid unintentionally powering on while carrying the unit. Indicador Bluetooth (azul) Coloque el iPod y la unidad a 1 metro (3 pies) de distancia entre sí para realizar esta operación. 1 Firmly connect the line output jack of the portable digital music player (or other component) to the AUDIO IN jack on the back of the unit, using a suitable audio connecting cable (not supplied). 2 Press to turn on the unit. 3 Press AUDIO IN to activate the Audio-in function. Estado Emparejar con un iPod Notas En esta unidad, se puede colocar el iPod con su estuche o funda. Sin embargo, si el estuche o funda interfieren con la conexión, retírela antes de colocar el iPod en el conector de la bandeja. Al colocar o extraer el iPod, sosténgalo en el mismo ángulo que el conector de la bandeja de la unidad. No jale mucho el iPod hacia adelante. Al colocar o extraer el iPod, sujete la unidad con firmeza. No gire ni incline el iPod ya que se podría dañar el conector. Extraiga el iPod al transportarlo; de otra manera se podrían causar daños. Al escuchar música desde un iPod mediante una conexión Bluetooth, puede cargar el iPod en la bandeja solo si el adaptador de ca está conectado. Si el nivel de volumen es bajo, ajuste primero el volumen de la unidad. Si el volumen sigue siendo muy bajo, ajuste el volumen del dispositivo Bluetooth. Borrar la lista de modelos ya emparejados y memorizados en la unidad Emparejamiento You can enjoy the sound from an optional component, such as a portable digital music player, through the speakers of this unit. Be sure to turn off the power of each component before making any connections. Frequency digits appear in the display after a short period. 3 Press or to select the desired preset To set the Power Off Hold function To finish listening “CLEAR” appears in the display. Operating an iPod on the Dock 1 Press the Docking Tray on the front of the unit to Notes The operation and display may differ depending on the model of iPod and/or software version. For details, refer to the user’s guide of the iPod. Pairing mode is canceled after about 5 minutes. If pairing mode is canceled halfway, start over from step 3. If pairing is not complete, start over from step 3. To pair with another iPod, repeat steps 1 to 5. In step 3, if a double-beep sound is not heard or the Bluetooth indicator does not flash quickly, press and hold BLUETOOTH ( on the remote) again. If you turn off the unit or the iPod before the Bluetooth connection is complete, pairing information will not be memorized, and pairing will not be completed. the Bluetooth function. 3 Press and hold BLUETOOTH and VOLUME − at the same time on the unit. Adjusting the volume A dedicated Dock App for iPod touch/iPhone/iPad available at Apple App Store. Search for “D-Sappli” and download the free App to find out more about the functions. 3 Press . The stations are stored in memory from the lower frequencies to the higher ones automatically. Operación mediante reproducción de música inalámbrica About App Conexión de componentes opcionales Es posible disfrutar del sonido de un componente opcional, como un reproductor de música digital portátil, a través de los altavoces de la unidad. Asegúrese de apagar todos los componentes antes de realizar las conexiones. 1 Conecte con firmeza la toma de salida de línea de un reproductor de música digital portátil (u otro componente) a la toma AUDIO IN en la parte posterior de la unidad con un cable de conexión de audio adecuado (no suministrado). 2 Pulse para encender la unidad. Acerca de App Existe una aplicación de bandeja específica disponible para iPod touch/iPhone/iPad en la tienda Apple App Store. Busque “D-Sappli” y descargue la aplicación gratuita para obtener más información sobre las funciones. Características D-Sappli incluye varias funciones de temporizador: Alarm, Music Play Timer y Sleep Timer. Utilice canciones en el iPod o Sonido preestablecido en D-Sappli para el sonido de la alarma para configurar 10 alarmas. Music Play Timer le permite reproducir y poner en pausa la música que quiere y cuando quiere. Sleep Timer le permite especificar un horario para detener la reproducción de música. Alarm, Music Play Timer y Sleep Timer funcionan en combinación con el suministro de energía de la unidad. Alarm, Music Play Timer y Sleep Timer están disponibles solamente cuando se activa D-Sappli. D-Sappli puede mostrar una lista de estaciones de radio preestablecidas programadas en esta unidad. Puede cambiar el nombre de las estaciones de radio preestablecidas y cambiar el número preestablecido en D-Sappli. Los números preestablecidos y el orden también cambiarán en consecuencia en la unidad. D-Sappli incluye a su vez una función de ampliación de la pantalla de reloj. Notas Si la App que se enlaza a esta unidad no se descargó al iPod touch/iPhone/iPad, aparecerá repetidamente un mensaje emergente instando al usuario a descargar D-Sappli. Desactive la función del enlace de Apps para poner fin al mensaje emergente. Desactivar la función del enlace de App: Conecte el adaptador de ca y, a continuación, presione / para apagar la unidad. Retire el iPod touch/iPhone/iPad del conector de la bandeja. Mientras mantiene apretado , también presione y sujete / de la unidad durante al menos 2 segundos. (Aparece “App OFF” en la pantalla para mostrar que la función del enlace de App se ha desactivado). Para volver a activar la función del enlace de Apps, repita los pasos anteriores. (Aparece “App ON” en la pantalla para mostrar que la función del enlace de App se ha activado).-
 1
1
-
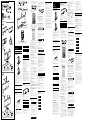 2
2


Sony RDP-XF300IPN Manual de usuario
- Categoría
- Altavoces de acoplamiento
- Tipo
- Manual de usuario
- Este manual también es adecuado para
en otros idiomas
- English: Sony RDP-XF300IPN User manual
Artículos relacionados
-
Sony RDPX200IPN Manual de usuario
-
Sony RDPX200IPN Manual de usuario
-
-
Sony RDP-X200IPN Instrucciones de operación
-
-
Sony RDP-XF300IPN Instrucciones de operación
-
Sony SRS-X7 Guia de referencia
-
Sony RDP-X60iP Instrucciones de operación
-
-
Sony RDPXA700IP Manual de usuario