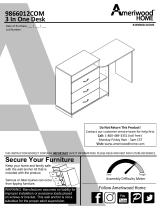
9617348EBL 1
DoorPantry
B349617348EBL1
THISINSTRUCTIONBOOKLETCONTAINS
IMPORTANT
SAFETYINFORMATION.PLEASEREADANDKEEPFORFUTUREREFERENCE.
FollowAmeriwoodHome
Tube
You
DateofPurchase___/___/___
LotNumber:
AssemblyDifficultyMeter
Easy Tough
WARNING:Manufacturerassumesnoliability
forimproperinstallationorexcessiveloads
placedonscrewsorbracket.Thiswallanchor
isnotasubstituteforproperadultsupervision.
SecureYourFurniture
Keepyourhomeandfamilysafe
withthewallanchorkitthatis
includedwiththeproduct.
Seriousorfatalcrushinginjuriescan
occurfromtippingfurniture.
DoNotReturnThisProduct!
Contactourcustomerserviceteamforhelpfirst.
Call:1‐800‐489‐3351(tollfree)
Monday‐Friday9am‐5pmCST
Visit:www.ameriwoodhome.com

ContactUs!
HelpfulHints
2
ameriwoodhome.com
DoNOTreturnthisproduct!
Contactourfriendlycustomerserviceteamfirstforhelp.
Callus!
1‐800‐489‐3351
Monday‐Friday
9am‐5pmCST
Visitameriwoodhome.comtoviewthe
limitedwarrantyvalidintheU.S.andCanada.
AssemblyTips
‐Openyouritemintheareayouplantokeepittoavoidexcessiveheavylifting.
‐Identify,sortandcountthepartsbeforeattemptingassembly.
‐Compressiondowelsarelightlytappedinwithahammer.
‐Slidesarelabeledwitha
R
(right)and
L
(left)forproperplacement.
‐MakesuretoalwaysfacethepointonthetopoftheCamLocktowardsthe
outeredge.
‐Useallthenailsprovidedforthebackpanelandspreadthemoutequally.
‐Backpanelmustbeusedtomakesureyourunitissturdy.
‐DoNOTuseharshchemicalsorabrasivecleanersonthisitem.
‐Neverpush,pull,ordragyourfurniture.
Tube
You
Tube
You
PEOPLENEEDEDFORASSEMBLY:1‐2
ESTIMATEDASSEMBLYTIME:2HOURS

3
ameriwoodhome.com
BeforeYouStart
Quick
Tip
Assembly
CamLockFasteningSystem
ThisCamLockFasteningSystemwillbeusedthroughouttheassemblyprocess.
1
3
2
4
Tube
You
Readthrougheachstepcarefullyandfollowtheproperorder
Separateandcountallyourpartsandhardware
Giveyourselfenoughroomfortheassemblyprocess
Havethefollowingtools:FlatHeadScrewdriver,#2PhillipsHead
ScrewdriverandHammer
Caution:Ifusingapowerdrillorpowerscrewdriverforscrewing,
pleasebeawaretoslowdownandstopwhenscrewistight.
Failuretodosomayresultinstrippingthescrew.

4
ameriwoodhome.com
BoardIdentification
Notactualsize
LeftPanel
39617348010
RightPanel
39617348020
Bottom
39617348041
AdjustableShelf(2
) 39617348060
Top
39617348031
Shelf
39617348050
Valance(2)
39617348071
LeftVerticalMolding
39617348090
RightVerticalMolding
39617348100
CE
F
D
GIJ
A B
K
AssembledDoor
39617348110
L
BackPanel
K961734800
This piece is paperboard construction.
It is not made from wood, but is
required for the assembly of your unit.

5
ameriwoodhome.com
BoardIdentification
Notactualsize
This piece is paperboard
construction. It is not made
from wood, but is required for
the assembly of your unit.
A
B
C
E
D
F
G
I
J
K
L
F
G

6
ameriwoodhome.com
PartList
ActualSize
NotActualSize
(x6)
#A22620
camlock
(x6)
#A22610
cambolt
(x36)
#A12120
#8x7/16"panhead
6
(x6)
#A53510
anglebracket
(x34)
#A21110
nail
(x6)
#A21520
compressiondowel
(x1)
#A17600
8‐32x1‐1/8"truss
(x4)
#A53520
moldingbracket
123
45
7
(x8)
#A80250
shelfsupport
8
9
(x3)
#A60110
hinge
10
(x1)
#A52455
knob
13d
13a
13c
(x1)
#A30030
plasticcatch
(x1)
#A84050
safetybracketkit
11
12a
12b
12 13
13b

7
ameriwoodhome.com
STEP1
6
10
(x6)
#A12120
(x3)
#A60125
I
J
6
10
6
RIGHT HAND
DOOR SETUP
LEFT HAND DOOR
HINGE LOCATIONS

8
ameriwoodhome.com
STEP2
2
1
123
(x2)
#A22620
(x4)
#A22610
(x2)
#A21520
Proper orientation of CAM LOCK
Tip
Assembly
Quick
B
A
3
3
1
2
2
2
Approx.
7/16"
3

9
ameriwoodhome.com
STEP3
46
(x3)
#A53510
(x6)
#A12120
6
6
4
A
I
A
I
A
I
12.00
1/2"
IMPORTANT
This measurement
must be held.
RIGHT HAND DOOR SETUP

10
ameriwoodhome.com
STEP4
46
(x3)
#A53510
(x6)
#A12120
4
6
6
J
B
B
J
12.00
1/2"
IMPORTANT
This measurement
must be held.
J
B
RIGHT HAND DOOR SETUP

11
ameriwoodhome.com
STEP5
C
G
5 6
13a
13b
2
(x2)
#A22610
(x2)
#A53520
(x4)
#A12120
(X1)
#A84050
2
2
13a
13b
Donotfully
tightenscrew.
Equalspacing
onbothends.
5
6
6

12
ameriwoodhome.com
STEP6
Approx.
7/16"
3
13
56
(x2)
#A22620
(x2)
#A21520
(x2)
#A53520 (x4)
#A12120
1
3
1
D
G
5
6
6
3
Proper orientation of CAM LOCK
Tip
Assembly
Quick
Equalspacing
onbothends.

13
ameriwoodhome.com
STEP7
13
Proper orientation of CAM LOCK
Tip
Assembly
Quick
6
(x2)
#A22620
(x2)
#A21520
(x2)
#A12120
(x1)
#A30030
12a
1
3
1
3
66
12a
E
RIGHT HAND DOOR SETUP
LEFT HAND DOOR
CATCH LOCATION

14
ameriwoodhome.com
STEP8
UNLOCKLOCK
B
D
E
J
RIGHT HAND DOOR SETUP

15
ameriwoodhome.com
STEP9
RIGHT HAND DOOR SETUP
UNLOCKLOCK
A
I
E
J
B
D

16
ameriwoodhome.com
STEP10
UNLOCKLOCK
C
G
A
B
RIGHT HAND DOOR SETUP

17
ameriwoodhome.com
STEP11
7
IMPORTANT!
THEBACKPANELISASTRUCTURALPARTOFTHISUNIT
ANDMUSTBEINSTALLEDPROPERLY.
(x34)
#A21110
Withthehelpofanotherperson,turntheunitoveronitsfrontside.Positonbackpanelasshown.
Alignsquarelywithouteredges.Flushbottomedgeofbackpanelwithbottomedgeofthebottom
andnailstraightintobackedgesofleftpanel(A),rightpanel(B),top(C)andbottom(D).
Assurethattheunitissquare.
Distancefromcornertocorner
mustbeequalasshown.
Flushtheedgeofthebackpanel
withthebottomedgeofthe
bottom(D).Alignsquarelyandnail
straightthroughintobackedges.
B
L
D
raw
surface

18
ameriwoodhome.com
STEP12
6
9
11
(x2)
#A12120
(x1)
#A17600
(x1)
#A52455
(x1)
#A30030
12b
69
11
12b
6
K

19
ameriwoodhome.com
STEP13
6
(x6)
#A12120
B
K
RIGHT HAND DOOR SETUP
NOTE: Holes in the hinge (10) are slotted. To make door
adjustments, loosen the screws (6), make adjustments and
then re-tighten.
Also the holes in the catch (12a) are slotted. To make
adjustments to the catch (12a), loosen screws (6), make
adjustments and then re-tighten.
NOTE: If using the left hand door setup,
refer to steps 1 and 7 for locations of the
hinges and catch.
6

20
ameriwoodhome.com
STEP14
8
(x8)
#A80250
8
F
F
finished
edge

21
ameriwoodhome.com
STEP15
13d
13c For Masonry, Concrete, or other
wall materials:
Consult your local hardware store
for appropriate anchors to securely
attach the safety bracket.
IMPORTANT:THISUNITMUSTBESECURETOTHEWALLTOHELPPREVENTTIPOVER.FOLLOW
THESEINSTRUCTIONSTOINSTALLTHEANTI‐TIPPINGSAFETYBRACKETPROVIDEDWITHTHIS
PRODUCT.
WARNING
Seriousorfatalcrushinginjuries
canoccurfromfurnituretipover.
Topreventtipover:
*Installtipoverrestraintprovided
*placeheaviestitemsinthelowest
drawers
*Unlessspecificallydesignedto
accommodate,donotsetTVsor
otherheavyobjectsonthetopof
thisproduct
*Neverallowchildrentoclimbor
hangondrawers,door,orshelves
*Neveropenmorethanone
draweratatime
Useoftipoverrestraintsmayonly
reduce,butnoteliminatetherisk
oftipover
OPTION1:Attachmentintoawallstud(preferredmethod)
Usingastudfinder,locateastudinthewall.Placeyourunitagainstthewall,withthesafetybracketaligned
inthislocation.Tomakedrivingthescreweasier,youcandrilla1/8"diameterpilothole(3mm)throughthe
safetybracketintothestud.Drivethescrewthroughthesafetybracketintothewallstud.Tightenthescrew
thatwasnotfullytightenedinstep5.
OPTION2:Attachmentintodrywall
Locateyourunitwheredesiredagainstawallandmarkthewallthroughthesafetybracket,thenmoveyour
unitaside.Drilla3/16"diameterhole(5mm)intothewallboard.Tapthewallanchorintotheholeuntilitis
flush.Moveyourunitintolocationandfastenthewallbrackettothewallanchorwiththescrew.Tightenthe
screwthatwasnotfullytightenedinstep5.
stud
wallboard
hole
13c
13d

22
ameriwoodhome.com
MaximumLoads
Warning:Riskofinjurytopersons‐donotplaceatelevisiononthisfurniture.Thisfurnitureis
notapprovedforusewithatelevision.
CertificateofConformity
1.ThiscertificateappliestotheDorelHomeFurnishings,Inc.productidentifiedbythisinstructionmanual.
2.ThiscertificateappliestocomplianceofthisproductwiththeCPSCBanonLead‐ContainingPaint(16CFR1303).
3.Thisproductisdistributedby:DorelHomeFurnishings,Inc.
410EastFirstStreetSouth
WrightCity,MO63390
636‐745‐3351
4.SiteofManufacture:CornwallON
5.Seefrontpageofinstructionmanualfordateofmanufacture.
Thisunithasbeendesignedtosupportthemaximumloadsshown.Exceedingtheseloadlimits
couldcausesagging,instability,productcollapse,and/orseriousinjury.
40lbs
18.1kg
0lbs
0kg

23
ameriwoodhome.com
Registeryourproducttoreceivethefollowing:
*Newtrenddetails‐sneakpeekonwhat'snew
*Surveys‐haveavoicewithinourcommunity
*Exclusivedealsanddiscountcodes
*Quickandeasyreplacementpartservice
Toregisteryourproduct,visitameriwoodhome.com
Visityourlocalretailer'swebsite,rateyourpurchased
productandleaveussomefeedback!
Wewouldliketoextendabig"ThankYou"toallof
ourcustomersfortakingthetimetoassemblethis
AmeriwoodHomeproduct,andtogiveusyour
valuablefeedback.

24
ameriwoodhome.com
CubiertaDelantera
Estelibrodeinstruccionescontieneinformación
IMPORTANTE
deseguridad.Porfavorleaymanténgalo
parareferenciaenelfuturo.
NoRegreseesteproducto!
Comuniqueseconnuestroamistosoequipodeservicioalclienteparaobtener
ayuda.
Llamenosal:1‐800‐489‐3351(Gratis)Lunes‐Viernes9am‐5pmCST
Visitar:
www.ameriwoodhome.com
PRECAUCION
Estemueblepuedevolcarseycausargravesheridasy/omuerte.
Anclarelmuebleaunpostedemaderaenlapared(siestoserequiere).
NoPermitaquelosniñosmontenelmueble.
Mantengalosartículosmáspesadosenloscajonesdeabajo.
ConsejosÚtiles(página2)
‐Abrasuartículoeneláreadondeustedplaneautilizarloparaevitarlevantarymoverlomenos
‐Identificar,ordenarycontarlaspiezasantesdeintentarensamblar
‐Lasclavijasdecompresiónsegolpeanconunmartillo
‐LasdiapositivasestánmarcadasconunaR(derecha)yL(izquierda)paralacolocacióncorrecta
‐Asegúresedequesiempreesteelpuntolocaizadoenlapartesuperiordebloqueadordeleva
estevolteadohaciabordeexterior
‐Utilizartodoslosclavosparaelpaneldeatrasydistribuirlosporigual
‐Elpaneldeatrasdebeutilizarseparaasegurarsedequelaunidadquedefijayfirme
‐Nousequimicasfuertesnilimpiadoresabrasivosenestearticulo
‐Nuncaempuje,tireniarrastrelosmuebles
AntesdeQueEmpieces(página3)
‐Leacuidadosamentecadapasoysigaelordencorrecto
‐Separarycontartodassuspiezasyhardware
‐Désesuficienteespacioparaelprocesodeensamble
‐Tengalassiguientesherramientas:destornilladordecabezaplana,#2cabezaPhillips
Destornilladorymartillo
‐Precaución:Siusauntaladroelectrónicooundestornilladoreléctricoparaatornillar,porfavorasegúrese
quedejedeatornillarcuandoeltonillosesteapretado.Fallarhacerestopuedecausarbarrereltornillo.
Sistemadefijarelbloqueodeleva(página3)
Estasistemadefijarelbloqueodelevaserausadoentodoelprocesoensamble.
Español

25
ameriwoodhome.com
Español
Página7
PUERTADELAMANOIZQUIERDAUBICACIÓN
POSICIÓNDELABISAGRADELAPUERTADERECHA
Página11
Espaciamientoigualenambosextremos.
Noaprietecompletamenteeltornillo.
Página12
Espaciamientoigualenambosextremos.
Noaprietecompletamenteeltornillo.
Página17
¡IMPORTANTE!ELPÁNELTRASEROESUNAPIEZAFUNDAMENTALENLAESTRUCTURADEESTA
UNIDADYDEBEQUEDARINSTALADACORRECTAMENTE.
Conlaayudadeotrapersona,girelaunidadensuladodelantero.Paneltraseropositoncomose
muestra.Alineardirectamenteconlosbordesexteriores.Vacíeelbordeinferiordelpanelposterior
conelbordeinferiordelaparteinferiorylauñadirectamenteenlosbordesdelaparteposteriordel
panelizquierdo(A),elpanelderecho(B),lapartesuperior(C)ylaparteinferior(D).
Asegúresedequelaunidadescuadrada.
Ladistanciadelaesquinaalaesquinadebeserigualacomosemuestra.
Vacíeelbordedelpanelposteriorconelbordeinferiordelaparteinferior(D).Alineardirectamentey
clavorectoatravésdelosbordesdeatrás.
Página19
Nota:losorificiosdelabisagra(10)estánranurados.Parahacerajustesdelapuerta,aflojelos
tornillos(6),hagalosajustesyluegovuelvaaapretar.
Tambiénlosagujerosenlacaptura(12a)estánranurados.Pararealizarajustesenlacaptura(12a),
aflojelostornillos(6),realicelosajustesyvuelvaaapretar.
Nota:Siutilizalaconfiguracióndelapuertadelamanoizquierda,consultelospasos1y7paralas
ubicacionesdelasbisagrasylascapturas.

26
ameriwoodhome.com
Español
Página21
Paramampostería,concretouotrotipodeparedes:
Acudeatuferreteríalocalparaobtenerlosanclajesadecuadosparafijardeformaseguraelsoportede
seguridad.
IMPORTANTE:ESTAUNIDADDEBEASEGURARSEAUNAPAREDPARAEVITARQUESEVUELQUE.SIGUE
ESTASINSTRUCCIONESPARAINSTALARELSOPORTEDESEGURIDADANTICAÍDAQUESEPROPORCIONA
JUNTOCONESTEPRODUCTO.
ADVERTENCIA
Unmueblealvolcarsepuedeprovocarheridasporaplastamientoquepuedenresultargraveso
mortales.
Paraprevenirqueunmueblesevuelque:
*Instalaeldispositivocontracaídasqueseproporciona
*Colocalosartículosmáspesadosenloscajonesdemásabajo
*Amenosqueestéespecíficamentediseñadoparatalfin,nocoloquestelevisionesniningúnotro
objetopesadosobreestemueble
*Nuncapermitasquelosniñossesubanocuelguendeloscajones,puertasorepisas.
*Nuncaabrasmásdeuncajónalavez
Elusodelosdispositivoscontracaídaspuedereducir,peronoeliminarporcompletoelriesgodequeel
mueblesevuelque.
OPCIÓN1:acopladoauntravesañodelapared(métodorecomendado)
Ubicauntravesañoenlaparedutilizandounlocalizadordetravesaños.Colocatuunidadcontrala
pared,conelsoportedeseguridadalineadoeneselugar.Parafacilitarlaentradadeltornillo,puedes
perforarunagujeroguíade1/8"(3mm)dediámetroatravésdelsoportedeseguridadhastallegaral
travesaño.Introduceeltornilloeneltravesañodelaparedatravésdelsoportedeseguridad.Aprietael
tornilloquenoapretastecompletamenteenelpaso5.
OPCIÓN2:acopladoaunpaneldepared
Colocatuunidadenellugardeseadocontraunaparedymarcalaparedatravésdelsoportede
seguridad,luegoretiratuunidadhaciaunlado.Perforaunagujerode3/16"dediámetro(5mm)enel
tablerodelapared.Golpeaelanclajedeparedparaintroducirloenelagujerohastaquequedearas.
Vuelveacolocartuunidadensulugarysujetaelsoportedeparedalanclajedeparedconeltornillo.
Aprietaeltornilloquenoapretastecompletamenteenelpaso5.

27
ameriwoodhome.com
Página22
CARGAMAXIMA
Estaunidadhasidodiseñadaparasoportarlacargamáximaanotada.Elexcederestoslímitespuede
causarinestabilidad,colapsarsey/ocausarseriaslesiones.
ADVERTENCIA:Riesgodelesionesalaspersonas‐nocoloqueuntelevisorsobremuebles.Estemueble
noestáaprobadoparasuusoconuntelevisor.
Página23
Registresuproductopararecibirlosiguiente:
*Detallesdenuevastendencias‐Vistazoalonuevo
*Encuestas‐alecsuvozentresucomunidad
*Códigosdeofertasydescuentosexclusivos
*Fácilyrápidoserviciodepartesderemplace
Pararegistrarsuproducto,visiteameriwoodhome.com
Clasificasiónde5estrellas
Visiteelsitiowebdesutiendalocal,califiquesucomprado
ydenossuscomentarios!
Nosgustaríaenviarungran"Agradecimiento"atodosnuestrosclientesportomarseeltiempode
ensamblaresteproductodeAmeriwoodHome,ypordarnossusvaliososcomentarios.
Gracias
Español
-
 1
1
-
 2
2
-
 3
3
-
 4
4
-
 5
5
-
 6
6
-
 7
7
-
 8
8
-
 9
9
-
 10
10
-
 11
11
-
 12
12
-
 13
13
-
 14
14
-
 15
15
-
 16
16
-
 17
17
-
 18
18
-
 19
19
-
 20
20
-
 21
21
-
 22
22
-
 23
23
-
 24
24
-
 25
25
-
 26
26
-
 27
27
Dorel Home 9617341EBL Manual de usuario
- Tipo
- Manual de usuario
- Este manual también es adecuado para
En otros idiomas
- English: Dorel Home 9617341EBL User manual


