Profi Cook PC-ICM 1268 Manual de usuario
- Categoría
- Fabricantes de helados
- Tipo
- Manual de usuario

PC-ICM1268_IM 12.06.23
Bedienungsanleitung
Instruction Manual • Gebruiksaanwijzing • Mode d’emploi • Manual de instrucciones
Istruzioni per l’uso • Instrukcja obsługi / Gwarancja • Használati utasítás
Руководство по эксплуатации •
Eiscreme- / Joghurt-Maker PC-ICM 1268
Ice Cream Maker / Yogurt Maker • IJsmachine / Yoghurtmaker • Glacière / Yaourtière
Heladera / Yogurtera • Gelatiera / Yogurtiera • Maszyna do lodów / Jogurtownica
Fagylaltgép / Joghurtkészítő • Мороженица / Йогуртница •

PC-ICM1268_IM 12.06.23
Bedienungsanleitung ....................................................................................Seite 4
Instruction Manual ........................................................................................ Page 10
Gebruiksaanwijzing ................................................................................... Pagina 16
Mode d’emploi............................................................................................... Page 22
Manual de instrucciones .......................................................................... Página 28
Istruzioni per l’uso .....................................................................................Pagina 34
Instrukcja obsługi .......................................................................................Strona 40
Használati utasítás .......................................................................................Oldal 47
Руководство по эксплуатации .................................................................. стр. 53
63 ....................................................................................................................
2

PC-ICM1268_IM 12.06.23
3
Übersicht der Bedienelemente
Overview of the Components • Overzicht van de bedieningselementen
Liste des différents éléments de commande • Indicación de los elementos de manejo
Elementi di comando • Przegląd elementów obsługi • A kezelőelemek áttekintése
Обзор деталей прибора •

4
PC-ICM1268_IM 12.06.23
WICHTIG:
Lesen Sie unbedingt zuerst die separat beiliegenden Sicherheits-
hinweise.
Bedienungsanleitung
Vielen Dank, dass Sie sich für unser Produkt entschieden
haben. Wir wünschen Ihnen viel Freude mit dem Gerät.
Lesen Sie vor Inbetriebnahme dieses Gerätes die Be-
dienungsanleitung und die separat beiliegenden Sicher-
heitshinweise sehr sorgfältig durch. Bewahren Sie diese
Unterlagen inkl. Garantieschein, Kassenbon und nach
Möglichkeit den Karton mit Innenverpackung gut auf. Falls
Sie das Gerät an Dritte weitergeben, geben Sie auch immer
alle dazugehörigen Unterlagen mit.
Symbole in dieser Bedienungsanleitung
Wichtige Hinweise für Ihre Sicherheit sind besonders ge-
kennzeichnet. Beachten Sie diese Hinweise unbedingt, um
Unfälle und Schäden am Gerät zu vermeiden:
WARNUNG:
Warnt vor Gefahren für Ihre Gesundheit und zeigt mög-
liche Verletzungsrisiken auf.
ACHTUNG:
Weist auf mögliche Gefährdungen für das Gerät oder
andere Gegenstände hin.
Inhalt
Übersicht der Bedienelemente ..........................................3
Auspacken des Gerätes ..................................................... 4
Übersicht der Bedienelemente / Lieferumfang ................4
Warnhinweise für die Benutzung des Gerätes ................ 5
Bei Beschädigung des Kältemittelkreislaufes ..................5
Anwendungshinweise ........................................................ 5
Standort ............................................................................5
Elektrischer Anschluss ..................................................... 5
Anzeigen im Display ........................................................5
Tastenfunktionen ..............................................................5
Zubereitungszeit ...............................................................5
Schutzfunktionen bei der Eiszubereitung ........................6
Vorbereitung für die Eiszubereitung ................................6
Vorbereitung für die Joghurtzubereitung ........................6
Bedienung............................................................................6
Eis entnehmen .................................................................7
Joghurt entnehmen .......................................................... 7
Rezepte für die Eiszubereitung ......................................... 7
Reinigung .............................................................................8
Aufbewahrung .....................................................................8
Störungsbehebung .............................................................9
Technische Daten ...............................................................9
Entsorgung .......................................................................... 9
Bedeutung des Symbols „Mülltonne“ ...............................9
Auspacken des Gerätes
1. Nehmen Sie das Gerät aus seiner Verpackung.
2. Entfernen Sie sämtliches Verpackungsmaterial, wie Fo-
lien, Füllmaterial, Kabelbinder und Kartonverpackung.
3. Prüfen Sie den Lieferumfang auf Vollständigkeit.
4. Sollte der Verpackungsinhalt unvollständig oder Beschä-
digungen feststellbar sein, nehmen Sie das Gerät nicht in
Betrieb. Bringen Sie es umgehend zum Händler zurück.
5. Am Gerät können sich noch Staub oder Produktions-
reste benden. Wir empfehlen Ihnen, das Gerät wie
unter „Reinigung“ beschrieben zu säubern.
Übersicht der Bedienelemente /
Lieferumfang
1 Motorgehäuse für das Rührwerkzeug
2 Entriegelung für das Motorgehäuse
3 Antriebswelle
4 Transparenter Deckel
5 Rührwerkzeug
6 Behälter
7 Kontakte für das Motorgehäuse
8 Mulde des Basisgerätes
9 Basisgerät mit Kompressor
10 Belüftungsöffnungen
11 Drehregler /
12 Taste MENU (Programmwahl)
13 Taste POWER (Gerät ein- / ausschalten)
14 Kontrollleuchte (Joghurtzubereitung)
15 Kontrollleuchte (Eiszubereitung)
16 Display
17 Kontrollleuchte (Rührwerkzeug)
18 Kontrollleuchte (Kühlung)
19 Taste START / PAUSE
(Programm starten / unterbrechen)
Ohne Abbildung
Eisspatel
Messbecher

5
PC-ICM1268_IM 12.06.23
Warnhinweise für die
Benutzung des Gerätes
WARNUNG:
Das Gerät enthält im Kältemittelkreislauf das Kältemittel
Isobutan (R600a), ein Naturgas mit hoher Umweltverträg-
lichkeit, welches brennbar ist. Achten Sie beim Transport
und Aufstellen des Gerätes darauf, dass das Gerät nicht
herunter fällt. Der Kältemittelkreislauf darf nicht beschä-
digt werden.
ACHTUNG:
• Halten Sie unbedingt die Wartezeit von 2 Stunden bei
Erstinbetriebnahme oder nach Transport ein, damit
sich das Kältemittel absenken kann. Andernfalls würde
der Kühlkompressor beschädigt werden.
• Verwenden Sie bei der Entnahme des Speiseeis oder
des Joghurts keinen Löffel aus Metall, um die Be-
schichtung im Behälter nicht zu zerkratzen.
• Verwenden Sie Handschuhe, zum Schutz Ihrer Hände,
bei der Entnahme des Behälters nach der Eisherstellung.
Es besteht Verbrennungsgefahr durch Kälte!
Bei Beschädigung des Kältemittelkreislaufes
• Offenes Feuer und Zündquellen unbedingt vermeiden.
• Den Netzstecker des Gerätes aus der Steckdose ziehen.
• Den Raum, in dem das Gerät steht, durchlüften.
Anwendungshinweise
Standort
• Stellen Sie das Gerät auf eine stabile, waagerechte und
ebene Fläche. Halten Sie einen Abstand von mindestens
15 cm zu Wänden oder Gegenständen.
• Stellen Sie das Gerät nicht auf oder in unmittelbarer
Nähe von Wärmequellen wie z. B. Öfen, Heizkörpern etc.
Elektrischer Anschluss
Bevor Sie den Netzstecker in die Steckdose stecken, prüfen
Sie, ob die Netzspannung, die Sie benutzen wollen, mit der
des Gerätes übereinstimmt. Die Angaben dazu nden Sie
auf dem Typenschild.
Anzeigen im Display
Standby-Modus
(das Symbol blinkt)
Eiszubereitung
(Rührwerkzeug und Kühlung aktiv)
Kühlung aktiv
Rührwerkzeug aktiv
Joghurtzubereitung (Heizung aktiv)
Nachkühlfunktion aktiv
Tastenfunktionen
• Mit der Taste POWER schalten Sie das Gerät ein und
aus.
• Mit der Taste MENU wählen Sie ein Programm aus.
• Mit der Taste START / PAUSE können Sie das ausge-
wählte Programm starten.
• Sie können das aktivierte Programm mit der Taste
START / PAUSE unterbrechen. Bei der Eiszubereitung
kühlt der Kompressor für 1 Minute weiter. Drücken Sie
die Taste erneut, um das Programm fortzusetzen.
• Möchten Sie ein Programm abbrechen, drücken Sie die
Taste POWER. Das Gerät schaltet sich aus.
• Wenn das Programm oder mit der Taste POWER
abgebrochen wurde, warten Sie mindestens 5 Minuten,
bevor Sie das Gerät wieder in Betrieb nehmen. Damit
wird sichergestellt, dass sich der Druck im Kältekreislauf
entspannen kann.
Zubereitungszeit
• Die Zubereitungszeit von Speiseeis oder Joghurt variiert.
Sie hängt von folgenden Faktoren ab:
- der Rezeptur,
- der Temperatur der Mischung,
- der Umgebungstemperatur,
- der gewünschten Konsistenz.
• Lassen Sie das Gerät nicht unbeobachtet während des
Betriebes.
• Eiszubereitung:
• Prüfen Sie bei der Eiszubereitung permanent die
Konsistenz der Masse.
• Die Eismasse darf nicht zu dünnüssig und nicht zu
dicküssig sein.
• Joghurtzubereitung:
• Die Zubereitungszeit hängt von Ihren individuellen
Vorlieben ab.
Kontrollieren Sie nach ein paar Stunden den Joghurt.
Verringern oder erhöhen Sie gegebenenfalls die
voreingestellte Zeit. Drücken Sie hierfür zuerst die
START / PAUSE Taste und verändern dann die Zeit
mit dem Drehregler. Starten Sie das Gerät anschlie-
ßend wieder.
• Die Konsistenz des Joghurts wird fester, wenn er nach
der Zubereitung in den Kühlschrank gestellt wird.

6
PC-ICM1268_IM 12.06.23
Schutzfunktionen bei der Eiszubereitung
• Wenn das Rührwerkzeug während des Betriebs auf-
grund zu fest gewordener Eismasse stehen bleibt,
blockiert der Motor.
1. Schalten Sie das Gerät sofort aus. Ziehen Sie den
Netzstecker aus der Steckdose.
2. Entnehmen Sie das Speiseeis.
• Sie können nach einer Eiszubereitung sofort einen
weiteren Vorgang starten. Zum Schutz schaltet sich der
Kompressor erst nach ca. 3 Minuten ein.
• Bei der Zubereitung von mehreren Portionen Speiseeis
nacheinander kann es sein, dass ein Überhitzungsschutz
aktiviert wird. Der Kompressor schaltet sich nicht ein.
Lassen Sie das Gerät circa 30 Minuten abkühlen, bevor
Sie es erneut in Betrieb nehmen.
Vorbereitung für die Eiszubereitung
1. Vergewissern Sie sich, dass der Behälter vollständig
trocken ist, bevor Sie ihn einsetzen. Stellen Sie den Be-
hälter in die Mulde des Basisgerätes.
2. Füllen Sie die gewünschten Zutaten in den Behälter.
- Füllen Sie nicht mehr als 1000 ml in den Behälter!
- Verwenden Sie Zutaten, die eine Kühlschranktempe-
ratur von 6 – 8 °C haben.
- Die Zutaten dürfen nicht gefroren sein. Dies könnte zu
einer Blockade des Motors führen.
- Wenn Sie Fruchteis zubereiten möchten, verwenden
Sie nur weiche, kernlose Früchte, die Sie vorher zer-
drückt (püriert) haben. Sie können auch Fruchtsäfte
zufügen.
- Wenn Sie das Speiseeis mit festen Fruchtstücken,
Nüssen, Krokant oder Alkohol verfeinern möchten,
fügen Sie diese Zutaten erst zum Ende der Gefrierzeit
zu.
- Alkohol hemmt den Gefrierprozess.
3. Montieren Sie den transparenten Deckel am Motor-
gehäuse. Achten Sie darauf, dass beide Rastnasen vom
Motorgehäuse mit einem „Klick“ am Deckel einrasten.
4. Stecken Sie das Rührwerkzeug auf die Antriebswelle
am Motor. Das Rührwerkzeug muss mit einem „Klick“
einrasten.
5. Setzen Sie das Motorgehäuse mit Deckel und Rührwerk-
zeug so auf, dass der Pfeil am Deckel in Richtung des
Symbols zeigt.
6. Verschließen Sie den Deckel, indem Sie ihn in Richtung
des Symbols drehen.
Vorbereitung für die Joghurtzubereitung
Sie benötigen pasteurisierte Milch (H-Milch) und Natur-
joghurt in einem Mischungsverhältnis von 100 ml : 15 ml.
1. Wählen Sie den Standort so, dass das Gerät während
der Zubereitung des Joghurts nicht bewegt werden muss
und keinen Erschütterungen ausgesetzt ist. Der Joghurt
bleibt sonst üssig.
2. Erwärmen Sie die H-Milch in einem Topf auf circa 45 °C
und mischen Sie den Naturjoghurt oder die Joghurt-Kul-
tur unter. Möchten Sie frische Milch verwenden, kochen
Sie diese vorher ab und lassen Sie sie auf circa 45 °C
abkühlen.
3. Stellen Sie den Behälter in die Mulde des Basisgerätes.
4. Füllen Sie die bereits erwärmte Mischung in den Be-
hälter.
- Füllen Sie nicht mehr als 1400 ml in den Behälter!
- Wenn Sie den Joghurt mit Früchten, Nüssen, Marme-
lade o. ä. verfeinern möchten, fügen Sie diese Zutaten
erst nach der Zubereitung hinzu.
5. Transparenten Deckel vom Motorgehäuse trennen:
Sofern montiert, entfernen Sie zuerst das Rührwerkzeug
von der Antriebswelle. Drücken Sie beide Rastnasen am
Motorgehäuse nach innen, um den Deckel zu entfernen.
6. Setzen Sie den transparenten Deckel ohne Motorge-
häuse auf. So bleibt die Wärme im Gerät.
Bedienung
1. Schließen Sie das Gerät an eine vorschriftsmäßig instal-
lierte Schutzkontaktsteckdose an.
2. Schalten Sie das Gerät mit der Taste POWER ein.
3. Wählen Sie mit der Taste MENU das gewünschte
Programm:
Programm Funktion Voreingestellte
Zeit
Eiszubereitung
(Minuten)
Nur rühren
(Minuten)
Nur kühlen
(Minuten)
Joghurtzubereitung
(Stunden)
Die voreingestellte Zeit können Sie mit dem Drehregler
ändern:
• 5 – 60 Minuten bei den Programmen: / /
• 4 – 24 Stunden beim Programm
4. Bestätigen Sie Ihre Auswahl mit der Taste
START / PAUSE. Das Programm startet.

7
PC-ICM1268_IM 12.06.23
5. Nach Ablauf der Zeit hören Sie 10 Signaltöne.
6. Das Gerät ist mit einer Nachkühlfunktion ausgestattet.
Diese wird nach Ende der Programme und für
1 Stunde aktiviert. Der Kompressor schaltet sich für
10 Minuten aus und läuft dann wieder für 4 Minuten. Im
Display wird angezeigt. Nach Ablauf der 60 Mi-
nuten schaltet das Gerät in den Standby-Modus.
Wir empfehlen, den Inhalt sofort zu entnehmen, damit
das Speiseeis oder der Joghurt nicht am Behälter fest-
friert.
Eis entnehmen
1. Schalten Sie das Gerät mit der Taste POWER aus.
2. Ziehen Sie den Netzstecker aus der Steckdose.
3. Drehen Sie das Motorgehäuse in Richtung des Symbols
. Nehmen Sie das Motorgehäuse samt Deckel und
Rührwerkzeug ab.
4. Entnehmen Sie den Behälter.
WARNUNG: Verbrennungsgefahr durch Kälte!
Schützen Sie Ihre Hände mit Handschuhen, wenn Sie
den Behälter berühren.
5. Entnehmen Sie das Speiseeis mit dem beiliegenden
Eisspatel oder mit einem Löffel aus Silikon oder Holz aus
dem Behälter.
- Benutzen Sie keinen Löffel aus Metall, um die Be-
schichtung im Behälter nicht zu zerkratzen.
6. Füllen Sie das Speiseeis in einen vorgekühlten Behälter
mit Deckel.
- Das Speiseeis schmeckt frisch am besten.
- Sollte das Speiseeis nicht für den direkten Verzehr
gedacht sein, so empfehlen wir, das fertige Speiseeis
in einem Gefrierschrank noch weiter zu kühlen.
- Aufgetautes oder angetautes Speiseeis nicht wieder
einfrieren!
Joghurt entnehmen
1. Schalten Sie das Gerät mit der Taste POWER aus.
2. Ziehen Sie den Netzstecker aus der Steckdose.
3. Drehen Sie den Deckel in Richtung des Symbols .
4. Entnehmen Sie den Behälter.
5. Entnehmen Sie den Joghurt mit dem beiliegenden
Spatel oder mit einem Löffel aus Silikon oder Holz aus
dem Behälter.
- Benutzen Sie keinen Löffel aus Metall, um die Be-
schichtung im Behälter nicht zu zerkratzen.
6. Füllen Sie den Joghurt in einen gründlich gereinigten Be-
hälter mit Deckel und stellen Sie ihn in den Kühlschrank.
- Die Haltbarkeit des Joghurts hängt von der Zu-
bereitung ab. Je sauberer Sie arbeiten, desto länger
dauert es, bis der Joghurt schlecht wird. Länger als
eine Woche sollten Sie den Joghurt dennoch nicht
aufbewahren.
- Fügen Sie Obst und dergleichen erst kurz vor dem
Verzehr hinzu.
- 150 ml des fertigen Joghurts können als Starterkultur
wiederverwendet werden. Verwenden Sie diese
Starterkultur nicht mehr als 20-mal, da die Wirkung mit
der Zeit nachlässt.
Rezepte für die Eiszubereitung
• Bei der Zubereitung der Eismischung beachten Sie
bitte die Hinweise im Kapitel „Vorbereitungen für die
Eiszubereitung“.
• Sie können den im Lieferumfang beiliegenden Mess-
becher zur Hilfe nehmen.
• Die in den Rezepten angegebenen Mengen sind nur
Richtwerte. Probieren Sie Ihre individuelle Mischung aus.
• Möchten Sie die Mengen auf max. 1000 ml erhöhen,
passen Sie die Zutaten im richtigen Verhältnis an. Die
Zubereitungszeit verlängert sich entsprechend.
• Weitere Rezepte nden Sie in Kochbüchern oder im
Internet.
Vanilleeis
(Ergibt ca. 5 Portionen)
Vanille-Extrakt 1– 2 Teelöffel
Vollmilch 600 ml
Sahne 400 ml
Zucker 200 g
• Verrühren Sie alle Zutaten in einer Schüssel mit einem
Handmixer, bis der Zucker aufgelöst ist. Füllen Sie die
gekühlte Eismischung in den Behälter.
• Zubereitungszeit im Eiscreme-Maker: ca. 40 – 45 Minuten
Schokoladeneis
(Ergibt ca. 4 Portionen)
Vanille-Extrakt 1 Teelöffel
Vollmilch 250 ml
Sahne 250 ml
Zucker 125 g
Tafel Schokolade,
bitter oder halbbitter 225 g, in kleinen Stücken
• Vollmilch und Sahne mit Schokolade und Zucker aufko-
chen. Mit einem Mixer verrühren, der für heiße Speisen
verwendet werden kann. Die Eismischung abkühlen
lassen und 24 Stunden im Kühlschrank kalt stellen. Be-
vor Sie die gekühlte Eismischung in den Behälter füllen,
rühren Sie sie noch einmal um.
• Zubereitungszeit im Eiscreme-Maker: ca. 30 – 40 Minuten

8
PC-ICM1268_IM 12.06.23
Erdbeereis
(Ergibt ca. 4 Portionen)
Erdbeeren, frisch, reif,
in Scheiben geschnitten 250 g
Zitronensaft, frisch gepresst 1½ Esslöffel
Vanille-Extrakt 1 Teelöffel
Vollmilch 250 ml
Sahne 250 ml
Zucker 125 g
• Mischen Sie die Erdbeeren mit dem Zitronensaft und ca.
80 g Zucker. Lassen Sie die Mischung 2 Stunden ruhen,
damit sich Saft bildet.
• Rühren Sie den restlichen Zucker unter die Milch mit
einem Handmixer auf kleinster Geschwindigkeitsstufe,
bis der Zucker aufgelöst ist.
• Rühren Sie die Sahne, den Saft der Erdbeeren und den
Vanille-Extrakt in die Milch.
• Füllen Sie die gekühlte Eismischung in den Behälter.
• Zubereitungszeit im Eiscreme-Maker: ca. 30 – 40 Minuten
• Fügen Sie die Erdbeeren in den letzten 10 Minuten des
Gefriervorgangs zu.
Sorbet-Grundrezept
Fruchtsaft / Früchte, püriert 600 – 700 ml
Zucker (je nach Obstsorte) 75 – 100 g
Eiweiß 1– 2 Esslöffel
• Verrühren Sie alle Zutaten in einer Schüssel mit einem
Handmixer, bis der Zucker aufgelöst ist. Füllen Sie die
gekühlte Eismischung in den Behälter.
• Zubereitungszeit im Eiscreme-Maker: ca. 35 – 45 Minuten
• Zum Verfeinern kann am Ende des Gefriervorgangs
1 Esslöffel Likör, Cognac, Himbeergeist oder Ähnliches
zugegeben werden.
• Sorbet sollte relativ zügig verzehrt werden, damit es
nicht wieder üssig wird.
Reinigung
WARNUNG:
• Schalten Sie das Gerät vor der Reinigung immer aus und zie-
hen Sie den Netzstecker aus der Steckdose.
• Tauchen Sie das Gerät nicht in Wasser! Es könnte zu einem
elektrischen Schlag oder Brand führen.
ACHTUNG:
• Benutzen Sie keine Drahtbürste oder andere scheu-
ernde Gegenstände.
• Benutzen Sie keine scharfen oder scheuernden
Reinigungsmittel.
• Verwenden Sie keine Chemikalien, Säuren, Benzin
oder Öl.
• Der Behälter, das Rührwerkzeug und der Deckel sind
nicht zur Reinigung in der Spülmaschine geeignet.
Unter Einwirkung von Hitze und scharfen Reinigern
könnten sie sich verziehen oder verfärben.
• Den Behälter, das Rührwerkzeug und den Deckel
können Sie im warmen Spülwasser unter Zusatz von
etwas Handspülmittel reinigen. Trocknen Sie danach das
Zubehör gut ab.
• Reinigen Sie das Basisgerät und die Mulde mit einem
feuchten Tuch.
Aufbewahrung
• Reinigen Sie das Gerät wie beschrieben und lassen Sie
es vollständig trocknen.
• Wir empfehlen, das Gerät in der Original-Verpackung
aufzubewahren, wenn Sie es über einen längeren Zeit-
raum nicht benutzen möchten.
• Lagern Sie das Gerät immer außerhalb der Reichweite
von Kindern an einem gut belüfteten und trockenen Ort.

9
PC-ICM1268_IM 12.06.23
Störungsbehebung
Problem Mögliche Ursache Abhilfe
Das Gerät ist ohne Funktion. Das Gerät hat keine Stromversorgung. Überprüfen Sie die Steckdose mit einem
anderen Gerät.
Setzen Sie den Netzstecker richtig ein.
Kontrollieren Sie die Haussicherung.
Das Gerät ist defekt. Wenden Sie sich an unseren Service oder
an einen Fachmann.
Der Deckel lässt sich nicht
schließen.
Der Behälter ist nicht richtig in die Mulde
eingesetzt.
Drehen Sie den Behälter beim Einsetzen
ein Stück.
Das Gerät ist im Standby-Betrieb,
obwohl die Eiszubereitung noch
nicht beendet war.
Die Stromversorgung wurde unter-
brochen.
Starten Sie das Programm für die restliche
Zeit erneut.
Der Kompressor macht anormale
Geräusche.
Die Spannung ist zu gering. Schalten Sie das Gerät aus und prüfen
Sie die Netzspannung.
Das Rührwerkzeug stoppt wäh-
rend des Programms.
Das Speiseeis ist zu hart. Blockade des
Motors (Schutzfunktion).
Schalten Sie das Gerät aus und ziehen
Sie den Netzstecker aus der Steckdose.
Entnehmen Sie das Speiseeis.
Im Display wird das Symbol
angezeigt. Der Kompressor
schaltet sich nicht ein.
Der Überhitzungsschutz ist aktiviert. Lassen Sie das Gerät ca. 30 Minuten ab-
kühlen, bevor Sie erneut starten.
Technische Daten
Modell: ............................................................... PC-ICM 1268
Spannungsversorgung: ............................220 – 240 V~, 50 Hz
Leistungsaufnahme
Kühlleistung: ............................................................. 120 W
Heizleistung: ............................................................ 22,8 W
Kältemittel:........................................................... R600a / 24 g
Isolationsblähgas: .......................................................... C5H10
Fassungsvermögen max.: ......................................... 1500 ml
Maximale Füllmenge
Eiszubereitung: ..................................................... 1000 ml
Joghurtzubereitung: .............................................. 1400 ml
Schutzklasse: .........................................................................
Nettogewicht: ..............................................................ca. 9 kg
Technische und gestalterische Änderungen im Zuge stetiger
Produktentwicklungen vorbehalten.
Dieses Gerät wurde nach allen zutreffenden, aktuellen
CE-Richtlinien geprüft und nach den neuesten sicherheits-
technischen Vorschriften gebaut.
Entsorgung
Bedeutung des Symbols „Mülltonne“
Schonen Sie unsere Umwelt, Elektrogeräte ge-
hören nicht in den Hausmüll.
Nutzen Sie die für die Entsorgung von Elektro-
geräten vorgesehenen Sammelstellen und
geben dort Ihre Elektrogeräte ab, die Sie nicht
mehr benutzen werden.
Sie helfen damit die potenziellen Auswirkungen, durch
falsche Entsorgung, auf die Umwelt und die menschliche
Gesundheit zu vermeiden.
Sie leisten damit Ihren Beitrag zur Wiederverwertung, zum
Recycling und zu anderen Formen der Verwertung von
Elektro- und Elektronik-Altgeräten.
Informationen, wo die Geräte zu entsorgen sind, erhalten
Sie über Ihre Kommunen oder die Gemeindeverwaltungen.
Ihr Händler und Vertragspartner ist ebenfalls zur kosten-
freien Rücknahme des Altgerätes verpichtet.

PC-ICM1268_IM 12.06.23
10
IMPORTANT:
Be sure to read the separately enclosed safety instructions rst.
Instruction Manual
Thank you for choosing our product. We hope you will enjoy
using the appliance.
Read the instruction manual and the separately enclosed
safety instructions very carefully before using this appliance.
Keep these documents, including the warranty certicate,
receipt and, if possible, the box with the inner packaging in
a safe place. If you pass the appliance on to a third party,
always include all the relevant documents.
Symbols in this Instruction Manual
Important information for your safety is specially marked.
It is essential to comply with these instructions in order to
avoid accidents and prevent damage to the appliance:
WARNING:
This warns you of dangers to your health and indicates
possible injury risks.
CAUTION:
This refers to possible hazards to the appliance or other
objects.
Content
Overview of the Components ............................................3
Unpacking the Appliance .................................................10
Overview of the Components / Scope of Delivery ......... 10
Warnings for the Use of the Appliance ..........................10
If the Refrigerant Circuit is Damaged............................. 11
Notes for Use .....................................................................11
Location .......................................................................... 11
Electrical Connection ..................................................... 11
Indications on the Display .............................................. 11
Functions of the Buttons ................................................ 11
Preparation Time ............................................................11
Protective Functions During Ice Cream Preparation ..... 11
Preparation for Making Ice Cream .................................. 12
Preparation for Making Yoghurt ......................................12
Operation ...........................................................................12
Removing Ice Cream .....................................................12
Removing Yoghurt ..........................................................13
Recipes for Ice Cream Preparation .................................13
Cleaning ............................................................................. 14
Storage ............................................................................... 14
Troubleshooting ................................................................14
Technical Data ...................................................................15
Disposal .............................................................................15
Meaning of the “Dustbin” Symbol ..................................15
Unpacking the Appliance
1. Remove the appliance from its packaging.
2. Remove all packaging material, such as foils, lling
material, cable ties and cardboard packaging.
3. Check the scope of delivery for completeness.
4. If the contents of the packaging are incomplete or if
damage can be detected, do not operate the appliance.
Return it to the dealer immediately.
5. There may still be dust or production residues on the
appliance. We recommend that you clean the appliance
as described under “Cleaning”.
Overview of the Components /
Scope of Delivery
1 Motor housing for the stirring tool
2 Unlock for the motor housing
3 Drive shaft
4 Transparent cover
5 Stirring tool
6 Container
7 Contacts for the motor housing
8 Trough of the base unit
9 Basic unit with compressor
10 Ventilation openings
11 Rotary control /
12 MENU button (programme selection)
13 POWER button (switch appliance on / off)
14 Control lamp (yoghurt preparation)
15 Control lamp (ice preparation)
16 Display
17 Control lamp (stirring tool)
18 Control lamp (cooling)
19 START / PAUSE button (start / interrupt programme)
Without Illustration
Ice spatula
Measuring cup
Warnings for the Use of the Appliance
WARNING:
The appliance contains the refrigerant isobutane
(R600a) in the refrigerant circuit, a natural gas with high
environmental compatibility, which is ammable. When
transporting and setting up the appliance, make sure that
the appliance does not fall down. The refrigerant circuit
should not be damaged.

PC-ICM1268_IM 12.06.23
11
CAUTION:
• Be sure to observe the waiting time of 2 hours when
using the appliance for the rst time or after transport,
so that the refrigerant can settle. Otherwise, the refrig-
eration compressor would be damaged.
• Do not use a metal spoon when removing the ice
cream or yoghurt so as not to scratch the coating in
the container.
• Use gloves to protect your hands when removing the
container after making ice cream. There is a risk of burns
from the cold!
If the Refrigerant Circuit is Damaged
• Avoid open ames and sources of ignition at all costs.
• Pull the appliance’s mains plug out of the socket.
• Ventilate the room in which the appliance is located.
Notes for Use
Location
• Place the appliance on a stable, horizontal and level
surface. Keep a distance of at least 15 cm from walls or
objects.
• Do not place the appliance on or in the immediate vicinity
of heat sources such as stoves, radiators, etc.
Electrical Connection
Before you plug the mains plug into the socket, check that
the mains voltage you intend to use matches that of the
appliance. You will nd the information on the type plate.
Indications on the Display
Standby mode
(the symbol ashes)
Ice preparation
(stirring tool and cooling active)
Cooling active
Stirring tool active
Yoghurt preparation (heating active)
Post-cooling function active
Functions of the Buttons
• Use the POWER button to switch the appliance on and
off.
• Use the MENU button to select a programme.
• You can start the selected programme with the
START / PAUSE button.
• You can interrupt the activated programme with the
START / PAUSE button. When preparing ice, the com-
pressor continues to cool for 1 minute. Press the button
again to continue the programme.
• If you want to cancel a programme, press the POWER
button. The appliance switches off.
• If the or programme has been cancelled with the
POWER button, maintain at least 5 minutes before
restarting the appliance. This ensures that the pressure
in the refrigerant circuit can relax.
Preparation Time
• The preparation time of ice cream or yoghurt varies. It
depends on the following factors:
- the recipe,
- the temperature of the mixture,
- the ambient temperature,
- the desired consistency.
• Do not leave the appliance unattended during operation.
• Ice Preparation:
• When preparing ice cream, constantly check the
consistency of the mixture.
• The ice cream mixture should not be too thin or too
thick.
• Yoghurt Preparation:
• The preparation time depends on your individual
preferences.
Check the yoghurt after a few hours. If necessary,
reduce or increase the pre-set time. To do this, rst
press the START / PAUSE button and then change the
time with the rotary control. Then restart the appliance.
• The consistency of the yoghurt becomes rmer when
it is placed in the refrigerator after preparation.
Protective Functions During Ice Cream Preparation
• If the stirring tool stops during operation because the ice
cream mass has become too solid, the motor will stall.
1. Switch off the appliance immediately. Pull the mains
plug out of the socket.
2. Remove the ice cream.
• You can start another operation immediately after
preparing ice cream. For protection, the compressor only
switches on after about 3 minutes.
• When preparing several portions of ice cream in suc-
cession, overheating protection may be activated. The
compressor does not switch on. Allow the appliance to
cool down for about 30 minutes before using it again.

PC-ICM1268_IM 12.06.23
12
Preparation for Making Ice Cream
1. Make sure that the container is completely dry before
you insert it. Place the container in the well of the base
unit.
2. Fill the desired ingredients into the container.
- Do not ll more than 1000 ml into the container!
- Use ingredients that have a refrigerator temperature
of 6 – 8 °C.
- The ingredients should not be frozen. This could
cause the motor to block.
- If you want to prepare fruit ice cream, use only soft,
seedless fruit that you have crushed (puréed) before-
hand. You can also add fruit juices.
- If you want to rene the ice cream with solid pieces of
fruit, nuts, brittle or alcohol, only add these ingredients
at the end of the freezing time.
- Alcohol inhibits the freezing process.
3. Fit the transparent lid to the motor housing. Make sure
that both latches of the motor housing engage with a
“click” on the lid.
4. Put the stirring tool onto the drive shaft on the motor. The
stirring tool must engage with a “click”.
5. Place the motor housing with lid and stirring tool so that
the arrow on the cover points in the direction of the
symbol .
6. Close the lid by turning it in the direction of the symbol .
Preparation for Making Yoghurt
You need pasteurised milk (UHT milk) and natural yoghurt
in a mixing ratio of 100 ml : 15 ml.
1. Choose the location so that the appliance does not
have to be moved during yoghurt preparation and is not
exposed to vibrations. The yoghurt will otherwise remain
liquid.
2. Heat the UHT milk in a pot to about 45 °C and mix in the
natural yoghurt or the yoghurt culture. If you want to use
fresh milk, boil it rst and let it cool down to about 45 °C.
3. Place the container in the well of the base unit.
4. Pour the already heated mixture into the container.
- Do not ll more than 1400 ml into the container!
- If you want to rene the yoghurt with fruit, nuts, jam or
similar, add these ingredients only after preparation.
5. Separate the transparent lid from the motor housing:
If tted, rst remove the stirring tool from the drive shaft.
Press both catches on the motor housing inwards to
remove the lid.
6. Put on the transparent lid without the motor housing.
This keeps the heat inside the appliance.
Operation
1. Connect the appliance to a properly installed earthed
socket.
2. Switch on the appliance with the POWER button.
3. Select the desired programme with the MENU button:
Programme Function Preset Time
Ice preparation
(Minutes)
Stir only
(Minutes)
Cooling only
(Minutes)
Yoghurt preparation
(Hours)
You can change the pre-set time with the rotary control:
• 5 – 60 minutes at the programmes: / /
• 4 – 24 hours at the programme:
4. Conrm your selection with the START / PAUSE button.
The programme starts.
5. After the time has elapsed, you will hear 10 beeps.
6. The appliance is equipped with a post-cooling function.
This is activated for 1 hour after the end of the and
programmes. The compressor switches off for 10 minutes
and then runs again for 4 minutes. is displayed.
After 60 minutes, the appliance switches to standby mode.
We recommend removing the contents immediately
so that the ice cream or yoghurt does not freeze to the
container.
Removing Ice Cream
1. Switch off the appliance with the POWER button.
2. Pull the mains plug out of the socket.
3. Turn the motor housing in the direction of the symbol.
Remove the motor housing together with the lid and
stirring tool.
4. Remove the container.
WARNING: Danger of Burns from Cold!
Protect your hands with gloves when touching the
container.
5. Remove the ice cream from the container with the
enclosed ice cream spatula or with a silicone or wooden
spoon.
- Do not use a metal spoon to avoid scratching the
coating in the container.
6. Fill the ice cream into a pre-cooled container with a lid.
- The ice cream tastes best fresh.
- If the ice cream is not intended for direct consumption,
we recommend cooling the nished ice cream further
in a freezer.
- Do not refreeze thawed or defrosted ice cream!

PC-ICM1268_IM 12.06.23
13
Removing Yoghurt
1. Switch off the appliance with the POWER button.
2. Pull the mains plug out of the socket.
3. Turn the lid towards the symbol.
4. Remove the container.
5. Remove the yoghurt from the container with the spatula
provided or with a silicone or wooden spoon.
- Do not use a metal spoon to avoid scratching the
coating in the container.
6. Fill the yoghurt into a thoroughly cleaned container with a
lid and place it in the refrigerator.
- The storage life of the yoghurt depends on how you
prepare it. The cleaner you work, the longer it will take
for the yoghurt to go off. However, you should not
store the yoghurt for longer than a week.
- Add fruit and the like only shortly before eating.
- 150 ml of the nished yoghurt can be reused as a
starter culture. Do not use this starter culture more
than 20 times, as the effect wears off over time.
Recipes for Ice Cream Preparation
• When preparing the ice cream mixture, please refer to the
notes in the chapter “Preparation for Making Ice Cream”.
• You can use the measuring cup included in the scope of
delivery for help.
• The quantities given in the recipes are only guidelines.
Try out your individual mixture.
• If you want to increase the quantities to a maximum of
1000 ml, adjust the ingredients in the correct ratio. The
preparation time will increase accordingly.
• You can nd more recipes in cookbooks or on the
internet.
Vanilla Ice Cream
(Makes approx. 5 servings)
Vanilla extract 1– 2 teaspoons
Whole milk 600 ml
Cream 400 ml
Sugar 200 g
• Mix all the ingredients in a bowl with a hand mixer until
the sugar is dissolved. Pour the chilled ice cream mixture
into the container.
• Preparation time in the ice cream maker: approx.
40 – 45 minutes
Chocolate Ice Cream
(Makes approx. 4 servings)
Vanilla extract 1 teaspoon
Whole milk 250 ml
Cream 250 ml
Sugar 125 g
Chocolate bar,
dark or semi-sweet 225 g, in small pieces
• Bring whole milk and cream to the boil with chocolate
and sugar. Blend with a mixer that can be used for hot
dishes. Allow the ice cream mixture to cool and chill in
the refrigerator for 24 hours. Before pouring the chilled
ice cream mixture into the container, stir it again.
• Preparation time in the ice cream maker: approx.
30 – 40 minutes
Strawberry Ice Cream
(Makes approx. 4 servings)
Strawberries,
fresh, ripe, sliced 250 g
Lemon juice,
freshly squeezed 1½ tablespoons
Vanilla extract 1 teaspoon
Whole milk 250 ml
Cream 250 ml
Sugar 125 g
• Mix the strawberries with the lemon juice and approx.
80 g sugar. Let the mixture rest for 2 hours so that juice
forms.
• Stir the remaining sugar into the milk with a hand mixer
on the lowest speed setting until the sugar is dissolved.
• Stir the cream, the juice of the strawberries and the
vanilla extract into the milk.
• Pour the chilled ice cream mixture into the container.
• Preparation time in the ice cream maker: approx.
30 – 40 minutes.
• Add the strawberries in the last 10 minutes of the freez-
ing process.
Basic Sorbet Recipe
Fruit juice / fruit, puréed 600 – 700 ml
Sugar
(depending on type of fruit)
75 – 100 g
Egg white 1– 2 tablespoon
• Mix all the ingredients in a bowl with a hand mixer until
the sugar is dissolved. Pour the chilled ice cream mixture
into the container.
• Preparation time in the ice cream maker: approx.
35 – 45 minutes.
• To rene, 1 tablespoon of liqueur, cognac, raspberry
brandy or similar can be added at the end of the freezing
process.
• Sorbet should be consumed relatively quickly so that it
does not become liquid again.

PC-ICM1268_IM 12.06.23
14
Cleaning
WARNING:
• Always switch off the appliance and disconnect the mains plug
from the socket before cleaning.
• Do not immerse the appliance in water! It could cause an elec-
tric shock or re.
CAUTION:
• Do not use a wire brush or other abrasive objects.
• Do not use harsh or abrasive cleaners.
• Do not use chemicals, acids, petrol or oil.
• The container, the stirring tool and the lid are not
suitable for cleaning in the dishwasher. Exposure to
heat and harsh cleaners could cause them to warp or
discolour.
• You can clean the container, the stirring tool and the lid
in warm rinsing water with a little hand dishwashing liquid
added. Dry the accessories well afterwards.
• Clean the base unit and the bowl with a damp cloth.
Storage
• Clean the appliance as described and allow it to dry
completely.
• We recommend storing the appliance in its original
packaging if you do not intend to use it for a long period
of time.
• Always store the appliance out of the reach of children in
a well-ventilated and dry place.
Troubleshooting
Problem Possible Cause Remedy
The appliance has no function. The appliance has no power
supply.
Check the power socket with another appli-
ance.
Insert the mains plug correctly.
Check the house fuse.
The appliance is defective. Contact our service or a specialist.
The lid does not close. The container is not inserted
correctly into the tray.
Turn the container a little when inserting it.
The appliance is in standby mode
although ice preparation was not
nished.
The power supply has been
interrupted.
Restart the programme for the remaining time.
The compressor makes abnormal
noises.
The voltage is too low. Switch off the appliance and check the mains
voltage.
The stirring tool stops during the
programme.
The ice cream is too hard.
Blockage of the motor (protective
function).
Switch off the appliance and disconnect the
mains plug from the socket. Remove the ice
cream.
The display shows the symbol .
The compressor does not switch on.
The overheating protection is
activated.
Let the appliance cool down for approx.
30 minutes before starting again.

PC-ICM1268_IM 12.06.23
15
Technical Data
Model:................................................................PC-ICM 1268
Power supply:...........................................220 – 240 V~, 50 Hz
Power consumption
Cooling power: .........................................................120 W
Heating power: ........................................................22.8 W
Refrigerant: ......................................................... R600a / 24 g
Insulation blowing gas:...................................................C5H10
Maximum capacity: .................................................... 1500 ml
Maximum lling capacity
Ice cream preparation: .......................................... 1000 ml
Yoghurt preparation: .............................................. 1400 ml
Protection class: .....................................................................
Net weight: .......................................................... approx. 9 kg
The right to make technical and design modications in
the course of continuous product development remains
reserved.
This appliance has been tested according to all applicable,
current CE directives and built according to the latest safety
regulations.
Disposal
Meaning of the “Dustbin” Symbol
Protect our environment: do not dispose of elec-
trical equipment in the domestic waste.
Please return any electrical equipment that
you will no longer use to the collection points
provided for their disposal.
This helps avoid the potential effects of incorrect disposal
on the environment and human health.
This will contribute to the recycling and other forms of
re-utilisation of electrical and electronic equipment.
Information concerning where the equipment can be
disposed of can be obtained from your local authority. Your
dealer and contractual partner is also obliged to take back
the old appliance free of charge.

PC-ICM1268_IM 12.06.23
16
BELANGRIJK:
Lees eerst de apart bijgevoegde veiligheidsinstructies.
Gebruiksaanwijzing
Dank u voor het kiezen van ons product. Wij hopen dat u
het gebruik van het apparaat zult genieten.
Lees de gebruiksaanwijzing en de apart bijgevoegde
veiligheidsinstructies zorgvuldig door voordat u dit apparaat
in gebruik neemt. Bewaar deze documenten, inclusief het
garantiebewijs, de kassabon en, indien mogelijk, de doos
met de binnenverpakking op een veilige plaats. Als u het
apparaat aan een derde doorgeeft, voeg dan altijd alle
relevante documenten bij.
Symbolen in deze gebruiksaanwijzing
Belangrijke aanwijzingen voor uw veiligheid zijn speciaal
gekenmerkt. Neem deze aanwijzingen strikt in acht om
ongevallen en schade aan het apparaat te vermijden:
WAARSCHUWING:
Waarschuwt voor gevaren voor uw gezondheid en toont
mogelijk letsel risico’s.
LET OP:
Wijst op mogelijke gevaren voor het apparaat of andere
voorwerpen.
Inhoud
Overzicht van de bedieningselementen ...........................3
Het apparaat uitpakken ....................................................16
Overzicht van de bedieningselementen /
Omvang van de levering ..................................................16
Waarschuwingen voor het gebruik van het apparaat...17
Als het koelmiddelcircuit beschadigd is ......................... 17
Opmerkingen voor het gebruik .......................................17
Locatie ............................................................................ 17
Elektrische aansluiting ...................................................17
Indicaties op het display ................................................17
Functies van de toetsen .................................................17
Bereidingstijd ..................................................................17
Beschermende functies tijdens de ijsbereiding .............17
Voorbereiding voor het maken van ijs ...........................18
Voorbereiding voor het maken van yoghurt ..................18
Bediening ...........................................................................18
IJs verwijderen ...............................................................18
Yoghurt verwijderen .......................................................19
Recepten voor ijsbereiding .............................................19
Reiniging ............................................................................ 20
Bewaren .............................................................................20
Problemen oplossen ........................................................20
Technische gegevens .......................................................21
Verwijdering .......................................................................21
Betekenis van het symbool “vuilnisemmer” ...................21
Het apparaat uitpakken
1. Neem het apparaat uit de verpakking.
2. Verwijder al het verpakkingsmateriaal, zoals folies, vul-
materiaal, kabelbinders en kartonnen verpakkingen.
3. Controleer de inhoud van de verpakking op volledigheid.
4. Als de inhoud van de verpakking onvolledig is of als er
beschadigingen kunnen worden vastgesteld, mag u het
apparaat niet in gebruik nemen. Breng het onmiddellijk
terug naar de dealer.
5. Er kunnen zich nog stof- of productieresten op het appa-
raat bevinden. Wij adviseren u het apparaat te reinigen
zoals beschreven onder “Reiniging”.
Overzicht van de bedieningselementen /
Omvang van de levering
1 Motorhuis voor het roerwerktuig
2 Ontgrendeling voor de motorbehuizing
3 Aandrijfas
4 Doorzichtig deksel
5 Roergereedschap
6 Container
7 Contacten voor de motorbehuizing
8 Goot van het basisapparaat
9 Basiseenheid met compressor
10 Ventilatieopeningen
11 Draaiknop /
12 MENU toets (programmakeuze)
13 POWER toets (apparaat aan / uit schakelen)
14 Controlelampje (yoghurtbereiding)
15 Controlelampje (ijsbereiding)
16 Display
17 Controlelampje (roerapparaat)
18 Controlelampje (koeling)
19 START / PAUSE toets (programma starten / onderbre-
ken)
Zonder afbeelding
IJsspatel
Maatbeker

PC-ICM1268_IM 12.06.23
17
Waarschuwingen voor het
gebruik van het apparaat
WAARSCHUWING:
Het apparaat bevat het koelmiddel isobutaan (R600a) in
het koelcircuit, een natuurlijk gas met een hoge milieu-
compatibiliteit, dat brandbaar is. Let er bij het transporte-
ren en opstellen van het apparaat op dat het niet valt. Het
koelcircuit mag niet worden beschadigd.
LET OP:
• Zorg ervoor dat u de wachttijd van 2 uur in acht neemt
wanneer u het apparaat voor het eerst of na transport
gebruikt, zodat het koelmiddel kan bezinken. Anders
zou de koelcompressor beschadigd raken.
• Gebruik geen metalen lepel bij het verwijderen van het
ijs of de yoghurt om de coating in de container niet te
bekrassen.
• Gebruik handschoenen om uw handen te beschermen
wanneer u het bakje na het maken van ijs verwijdert. Er
bestaat gevaar voor brandwonden door de kou!
Als het koelmiddelcircuit beschadigd is
• Vermijd open vuur en ontstekingsbronnen.
• Trek de stekker van het apparaat uit het stopcontact.
• Ventileer de ruimte waarin het apparaat zich bevindt.
Opmerkingen voor het gebruik
Locatie
• Plaats het apparaat op een stabiele, horizontale en
vlakke ondergrond. Houd minstens 15 cm afstand tot
muren of voorwerpen.
• Plaats het apparaat niet op of in de onmiddellijke nabij-
heid van warmtebronnen zoals kachels, radiatoren, enz.
Elektrische aansluiting
Controleer, voordat u de stekker in het stopcontact steekt,
of de netspanning die u wilt gebruiken overeenkomt met die
van het apparaat. U vindt de informatie op het typeplaatje.
Indicaties op het display
Stand-by modus
(het symbool knippert)
IJsbereiding
(roerapparaat en koeling actief)
Koeling actief
Roergereedschap actief
Yoghurtbereiding (verwarmen actief)
Nakoelfunctie actief
Functies van de toetsen
• Gebruik de toets POWER om het apparaat in en uit te
schakelen.
• Gebruik de toets MENU om een programma te selec-
teren.
• Met de toets START/ PAUSE kunt u het gekozen pro-
gramma starten.
• Met de toets START / PAUSE kunt u het geactiveerde
programma onderbreken. Bij het bereiden van ijs blijft de
compressor 1 minuut koelen. Druk nogmaals op de toets
om het programma voort te zetten.
• Als u een programma wilt annuleren, drukt u op de toets
POWER. Het apparaat schakelt uit.
• Als het programma of met de toets POWER is ge-
annuleerd, moet u minstens 5 minuten wachten voordat
u het apparaat opnieuw opstart. Zo kan de druk in het
koelmiddelcircuit tot rust komen.
Bereidingstijd
• De bereidingstijd van ijs of yoghurt varieert. Hij is afhan-
kelijk van de volgende factoren:
- het recept,
- de temperatuur van het mengsel,
- de omgevingstemperatuur,
- de gewenste consistentie.
• Laat het apparaat tijdens de werking niet onbeheerd
achter.
• IJsbereiding:
• Controleer bij het bereiden van ijs voortdurend de
consistentie van het mengsel.
• Het ijsmengsel mag niet te dun of te dik zijn.
• Yoghurtbereiding:
• De bereidingstijd hangt af van uw individuele voor-
keuren.
Controleer de yoghurt na enkele uren. Verminder
of verhoog indien nodig de vooraf ingestelde tijd.
Druk hiervoor eerst op de toets START / PAUSE en
verander vervolgens de tijd met de draaiknop. Start
vervolgens het apparaat opnieuw.
• De consistentie van de yoghurt wordt steviger
wanneer deze na de bereiding in de koelkast wordt
geplaatst.
Beschermende functies tijdens de ijsbereiding
• Als het roerwerk tijdens de werking stopt omdat de
ijsmassa te vast is geworden, zal de motor afslaan.
1. Schakel het apparaat onmiddellijk uit. Trek de stekker
uit het stopcontact.
2. Verwijder het ijs.

PC-ICM1268_IM 12.06.23
18
• U kunt direct na het bereiden van ijs een andere werking
starten. Ter bescherming schakelt de compressor pas na
ongeveer 3 minuten in.
• Wanneer u meerdere porties ijs achter elkaar bereidt,
kan de oververhittingsbeveiliging in werking treden. De
compressor schakelt niet in. Laat het apparaat ongeveer
30 minuten afkoelen voordat u het weer gebruikt.
Voorbereiding voor het maken van ijs
1. Zorg ervoor dat het bakje volledig droog is voordat u
het plaatst. Plaats de container in de uitsparing van het
basisstation.
2. Vul de gewenste ingrediënten in het container.
- Vul de container niet met meer dan 1000 ml!
- Gebruik ingrediënten met een koelkasttemperatuur
van 6 – 8 °C.
- De ingrediënten mogen niet bevroren zijn. Hierdoor
kan de motor blokkeren.
- Als u fruitijs wilt bereiden, gebruik dan alleen zacht,
pitloos fruit dat u vooraf hebt jngemaakt (gepureerd).
U kunt ook vruchtensappen toevoegen.
- Als u het ijs wilt verjnen met vaste stukken fruit, no-
ten, bros of alcohol, voeg deze ingrediënten dan pas
aan het einde van de vriestijd toe.
- Alcohol remt het vriesproces.
3. Plaats het doorzichtige deksel op de motorbehuizing.
Zorg ervoor dat beide grendels van de motorbehuizing
met een “klik” op het deksel vastklikken.
4. Plaats het roerwerk op de aandrijfas van de motor. De
roerstok moet met een “klik” vastklikken.
5. Plaats de motorbehuizing met deksel en roerwerktuig zo
dat de pijl op het deksel in de richting van het symbool
wijst.
6. Sluit het deksel door het in de richting van het symbool
te draaien.
Voorbereiding voor het maken van yoghurt
U heeft gepasteuriseerde melk (UHT-melk) en natuurlijke
yoghurt nodig in een mengverhouding van 100 ml : 15 ml.
1. Kies de locatie zo dat het apparaat tijdens de yoghurt-
bereiding niet verplaatst hoeft te worden en niet aan
trillingen wordt blootgesteld. De yoghurt blijft anders
vloeibaar.
2. Verwarm de UHT-melk in een pan tot ongeveer 45 °C en
meng er de natuurlijke yoghurt of de yoghurtcultuur door.
Als u verse melk wilt gebruiken, kook deze dan eerst en
laat deze afkoelen tot ongeveer 45 °C.
3. Plaats de container in de uitsparing van het basisstation.
4. Giet het reeds verwarmde mengsel in de container.
- Vul de container niet met meer dan 1400 ml!
- Als u de yoghurt wilt verjnen met fruit, noten, jam of
iets dergelijks, voeg deze ingrediënten dan pas na de
bereiding toe.
5. Maak het transparante deksel los van de motorbe-
huizing: Verwijder, indien aanwezig, eerst het roerwerk
van de aandrijfas. Druk beide grendels op de motorbe-
huizing naar binnen om het deksel te verwijderen.
6. Plaats het transparante deksel zonder de motorbehui-
zing. Hierdoor blijft de warmte binnen het apparaat.
Bediening
1. Sluit het apparaat aan op een correct geïnstalleerd
geaard stopcontact.
2. Schakel het apparaat in met de toets POWER.
3. Selecteer het gewenste programma met de toets MENU:
Programma Functie Vooraf inge-
stelde tijd
Ijsbereiding (Minuten)
Alleen roeren
(Minuten)
Alleen koelen
(Minuten)
Yoghurtbereiding
(Uren)
U kunt de vooraf ingestelde tijd wijzigen met de draai-
knop:
• 5 – 60 minuten bij de programma’s: / /
• 4 – 24 uur op het programma:
4. Bevestig uw keuze met de toets START / PAUSE. Het
programma start.
5. Na aoop van de tijd hoort u 10 pieptonen.
6. Het apparaat is uitgerust met een nakoelingsfunctie.
Deze wordt gedurende 1 uur na aoop van de program-
ma’s en geactiveerd. De compressor schakelt gedu-
rende 10 minuten uit en draait dan opnieuw gedurende
4 minuten. wordt weergegeven. Na 60 minuten
schakelt het apparaat over op de stand-by modus.
Wij raden aan de inhoud onmiddellijk te verwijderen, zo-
dat het ijs of de yoghurt niet aan de container vastvriest.
IJs verwijderen
1. Schakel het apparaat uit met de toets POWER.
2. Haal de stekker uit het stopcontact.
3. Draai de motorbehuizing in de richting van het sym-
bool. Verwijder de motorbehuizing samen met het deksel
en het roerwerk.
4. Verwijder de container.
WAARSCHUWING:
Verbrandingsgevaar door koude!
Bescherm uw handen met handschoenen wanneer u
de container aanraakt.

PC-ICM1268_IM 12.06.23
19
5. Haal het ijs uit de container met de bijgeleverde ijsspatel
of met een siliconen of houten lepel.
- Gebruik geen metalen lepel om krassen op de coating
van de container te voorkomen.
6. Vul het ijs in een voorgekoelde container met deksel.
- Het ijs smaakt het beste vers.
- Als het ijs niet bestemd is voor directe consumptie,
raden wij aan het voltooide ijs verder te koelen in een
vriezer.
- Ontdooid of ontdooid ijs niet opnieuw invriezen!
Yoghurt verwijderen
1. Schakel het apparaat uit met de toets POWER.
2. Haal de stekker uit het stopcontact.
3. Draai het deksel naar het symbool.
4. Verwijder de container.
5. Haal de yoghurt uit de container met de bijgeleverde
spatel of met een siliconen of houten lepel.
- Gebruik geen metalen lepel om krassen op de coating
van de container te voorkomen.
6. Giet de yoghurt in een grondig gereinigde container met
deksel en plaats deze in de koelkast.
- De houdbaarheid van de yoghurt hangt af van hoe
je hem bereidt. Hoe schoner u werkt, hoe langer het
duurt voordat de yoghurt bederft. Bewaar de yoghurt
echter niet langer dan een week.
- Voeg fruit en dergelijke pas kort voor het eten toe.
- 150 ml van de afgewerkte yoghurt kan worden herge-
bruikt als startercultuur. Gebruik deze startercultuur
niet meer dan 20 keer, omdat het effect na verloop
van tijd afneemt.
Recepten voor ijsbereiding
• Raadpleeg bij de bereiding van het ijsmengsel de
aanwijzingen in het hoofdstuk “Voorbereiding voor het
maken van ijs”.
• Als hulp kunt u de meegeleverde maatbeker gebruiken.
• De in de recepten aangegeven hoeveelheden zijn
slechts richtlijnen. Probeer uw individuele mengsel uit.
• Als u de hoeveelheden wilt verhogen tot maximaal
1000 ml, pas dan de ingrediënten in de juiste verhouding
aan. De bereidingstijd zal dienovereenkomstig toene-
men.
• Meer recepten vindt u in kookboeken of op internet.
Vanille ijs
(Maakt ong. 5 porties)
Vanille-extract 1– 2 theelepels
Volle melk 600 ml
Room 400 ml
Suiker 200 g
• Meng alle ingrediënten in een kom met een handmixer
tot de suiker is opgelost. Giet het gekoelde ijsmengsel in
de container.
• Bereidingstijd in de ijsmachine: ong. 40 – 45 minuten
Chocolade-ijs
(Maakt ong. 4 porties)
Vanille-extract 1 theelepel
Volle melk 250 ml
Room 250 ml
Suiker 125 g
Chocoladereep,
bitter of halfzoet 225 g, in kleine stukjes
• Breng volle melk en room aan de kook met chocolade en
suiker. Mix met een mixer die gebruikt kan worden voor
warme gerechten. Laat het ijsmengsel afkoelen en zet
het 24 uur in de koelkast. Voordat het gekoelde ijsmeng-
sel in de container wordt gegoten, nogmaals roeren.
• Bereidingstijd in de ijsmachine: ong. 30 – 40 minuten
Aardbeienijs
(Maakt ong. 4 porties)
Aardbeien, vers, rijp,
in plakjes gesneden 250 g
Citroensap, vers geperst 1½ eetlepel
Vanille-extract 1 theelepel
Volle melk 250 ml
Room 250 ml
Suiker 125 g
• Meng de aardbeien met het citroensap en ong. 80 g sui-
ker. Laat het mengsel 2 uur rusten zodat zich sap vormt.
• Roer de resterende suiker met een handmixer op de
laagste snelheid door de melk tot de suiker is opgelost.
• Roer de room, het sap van de aardbeien en het vanil-
le-extract door de melk.
• Giet het gekoelde ijsmengsel in de container.
• Bereidingstijd in de ijsmachine: ong. 30 – 40 minuten
• Voeg de aardbeien toe in de laatste 10 minuten van het
vriesproces.

PC-ICM1268_IM 12.06.23
20
Basissorbet recept
Vruchtensap / fruit, gepureerd 600 – 700 ml
Suiker
(afhankelijk van het soort fruit)
75 – 100 g
Eiwit 1– 2 eetlepels
• Meng alle ingrediënten in een kom met een handmixer
tot de suiker is opgelost. Giet het gekoelde ijsmengsel in
de container.
• Bereidingstijd in de ijsmachine: ong. 35 – 45 minuten
• Om te verjnen kan aan het eind van het vriesproces
1 eetlepel likeur, cognac, frambozenbrandewijn of iets
dergelijks worden toegevoegd.
• De sorbet moet vrij snel worden geconsumeerd, zodat hij
niet opnieuw vloeibaar wordt.
Reiniging
WAARSCHUWING:
• Schakel het apparaat altijd uit en trek de stekker uit het stopcon-
tact voordat u het schoonmaakt.
• Dompel het apparaat niet onder in water! Dit kan een elektri-
sche schok of brand veroorzaken.
LET OP:
• Gebruik geen staalborstel of andere schurende
voorwerpen.
• Gebruik geen agressieve of schurende reinigingsmid-
delen.
• Gebruik geen chemicaliën, zuren, benzine of olie.
• De container, het roerwerk en het deksel zijn niet
geschikt voor reiniging in de vaatwasmachine. Door
blootstelling aan hitte en agressieve schoonmaakmid-
delen kunnen ze kromtrekken of verkleuren.
• U kunt de container, het roerwerk en het deksel schoon-
maken in warm spoelwater met een beetje handafwas-
middel erbij. Droog de accessoires daarna goed af.
• Reinig de basiseenheid en de kom met een vochtige
doek.
Bewaren
• Reinig het apparaat zoals beschreven en laat het volle-
dig drogen.
• Wij raden u aan het apparaat in de originele verpakking
te bewaren als u het langere tijd niet gebruikt.
• Bewaar het apparaat altijd buiten het bereik van kinderen
op een goed geventileerde en droge plaats.
Problemen oplossen
Probleem Mogelijke oorzaak Remedie
Het apparaat werkt niet. Het apparaat heeft geen stroom-
voorziening.
Controleer het stopcontact met een ander
apparaat.
Steek de netstekker er goed in.
Controleer de huiszekering.
Het apparaat is defect. Neem contact op met onze service of een
specialist.
Het deksel sluit niet. De container is niet goed in de lade
geplaatst.
Draai het bakje een beetje bij het plaatsen.

PC-ICM1268_IM 12.06.23
21
Probleem Mogelijke oorzaak Remedie
Het apparaat staat op stand-by,
hoewel de ijsbereiding nog niet
was voltooid.
De stroomtoevoer is onderbroken. Start het programma opnieuw voor de reste-
rende tijd.
De compressor maakt abnor-
male geluiden.
De spanning is te laag. Schakel het apparaat uit en controleer de
netspanning.
Het roerwerk stopt tijdens het
programma.
Het ijs is te hard. Blokkering van de
motor (beveiligingsfunctie).
Schakel het apparaat uit en trek de stekker uit
het stopcontact. Verwijder het ijs.
Op het display verschijnt het
symbool . De compressor
schakelt niet in.
De oververhittingsbeveiliging is
geactiveerd.
Laat het apparaat ong. 30 minuten afkoelen
alvorens opnieuw te beginnen.
Technische gegevens
Model:................................................................PC-ICM 1268
Stroomvoorziening: .................................. 220 – 240 V~, 50 Hz
Stroomverbruik
Koelvermogen: ......................................................... 120 W
Verwarmingsvermogen: ..........................................22,8 W
Koelmiddel: ......................................................... R600a / 24 g
Isolatie blaasgas: ...........................................................C5H10
Maximale inhoud.: ...................................................... 1500 ml
Maximale vulcapaciteit
IJsbereiding: .......................................................... 1000 ml
Yoghurtbereiding: .................................................. 1400 ml
Beschermingsklasse: .............................................................
Nettogewicht: ........................................................... ong. 9 kg
Het recht om technische en ontwerpaanpassingen te ma-
ken in de loop van voortdurende productontwikkeling blijft
voorbehouden.
Dit apparaat is getest volgens alle van toepassing zijnde,
huidige CE-richtlijnen en gebouwd volgens de meest
recente veiligheidsvoorschriften.
Verwijdering
Betekenis van het symbool “vuilnisemmer”
Bescherm ons milieu, elektrische apparaten ho-
ren niet in het huisafval.
Maak voor het afvoeren van elektrische appara-
ten gebruik van de voorgeschreven verzamel-
punten en geef daar de elektrische apparaten af
die u niet meer gebruikt.
Daardoor helpt u de potentiële effecten te voorkomen
die een verkeerde afvoer op het milieu en de menselijke
gezondheid kunnen hebben.
Op deze wijze levert u uw bijdrage aan het hergebruik, de
recycling en andere verwerkingsvormen voor oude elektro-
nische en elektrische apparaten.
Voor informatie over verzamelpunten voor uw apparaten
kunt u contact opnemen met uw gemeente of gemeen-
teadministratie. Uw dealer en contractpartner is bovendien
verplicht het oude apparaat gratis terug te nemen.

PC-ICM1268_IM 12.06.23
22
IMPORTANT :
Veillez à lire d’abord les instructions de sécurité jointes séparé-
ment.
Mode d’emploi
Merci d’avoir choisi notre produit. Nous espérons que vous
saurez proter votre appareil.
Lisez très attentivement le mode d’emploi et les consignes
de sécurité jointes séparément avant d’utiliser cet appareil.
Conservez ces documents, y compris le certicat de garan-
tie, le reçu et, si possible, la boîte avec l’emballage intérieur
dans un endroit sûr. Si vous transmettez l’appareil à un
tiers, joignez toujours tous les documents pertinents.
Symboles de ce mode d’emploi
Les informations importantes pour votre sécurité sont
particulièrement indiquées. Veillez à bien respecter ces
indications an d’éviter tout risque d’accident ou d’endom-
magement de l’appareil :
AVERTISSEMENT :
Prévient des risques pour votre santé et des risques
éventuels de blessure.
ATTENTION :
Indique les risques pour l’appareil ou tout autre appareil.
Sommaire
Liste des différents éléments de commande ..................3
Déballage de l’appareil ..................................................... 22
Liste des différents éléments de commande /
Contenu de la livraison ....................................................22
Avertissements pour l’utilisation de l’appareil..............23
Si le circuit frigorique est endommagé .........................23
Notes d’utilisation ............................................................. 23
Emplacement .................................................................23
Branchement électrique ................................................. 23
Indications sur l’écran ...................................................23
Fonctions des boutons ...................................................23
Temps de préparation ....................................................23
Fonctions de protection pendant la
préparation de la crème glacée .....................................24
Préparation de la crème glacée.......................................24
Préparation de la fabrication du yaourt .........................24
Utilisation ........................................................................... 24
Retrait de la crème glacée ............................................. 25
Retrait du yaourt .............................................................25
Recettes pour la préparation de la crème glacée .........25
Nettoyage ...........................................................................26
Stockage ............................................................................26
Dépannage .........................................................................27
Données techniques .........................................................27
Élimination .........................................................................27
Signication du symbole « Poubelle » ...........................27
Déballage de l’appareil
1. Sortez l’appareil de son emballage.
2. Retirez tous les matériaux d’emballage, tels que les
feuilles, les matériaux de remplissage, les attaches de
câbles et les emballages en carton.
3. Vériez que le contenu de la livraison est complet.
4. Si le contenu de l’emballage est incomplet ou si des dom-
mages peuvent être détectés, n’utilisez pas l’appareil.
Retournez-le immédiatement au revendeur.
5. L’appareil peut encore contenir de la poussière ou
des résidus de production. Nous vous recommandons
de nettoyer l’appareil comme indiqué dans la section
« Nettoyage ».
Liste des différents éléments de
commande / Contenu de la livraison
1 Boîtier du moteur pour l’outil d’agitation
2 Déverrouillage du boîtier du moteur
3 Arbre d’entraînement
4 Couvercle transparent
5 Outil d’agitation
6 Récipient
7 Contacts pour le boîtier du moteur
8 Bac de l’unité de base
9 Appareil de base avec compresseur
10 Ouvertures d’aération
11 Contrôle rotatif /
12 Bouton MENU (sélection du programme)
13 Bouton POWER (allumer / éteindre l’appareil)
14 Témoin de contrôle (préparation du yaourt)
15 Témoin de contrôle (préparation de glace)
16 Afcheur
17 Témoin de contrôle (outil d’agitation)
18 Témoin de contrôle (refroidissement)
19 Bouton START / PAUSE (démarrage / interruption du
programme)
Sans illustration
Spatule à glace
Gobelet de mesure

PC-ICM1268_IM 12.06.23
23
Avertissements pour
l’utilisation de l’appareil
AVERTISSEMENT :
L’appareil contient dans le circuit frigorique de l’iso-
butane (R600a), un gaz naturel à haute compatibilité
environnementale, qui est inammable. Lors du transport
et de l’installation de l’appareil, veillez à ce que l’appareil
ne tombe pas. Le circuit de réfrigération ne doit pas être
endommagé.
ATTENTION :
• Lors de la première utilisation de l’appareil ou après
le transport, veillez à respecter le temps d’attente de
2 heures an que le réfrigérant puisse se stabiliser.
Dans le cas contraire, le compresseur frigorique
serait endommagé.
• N’utilisez pas de cuillère en métal pour retirer la glace
ou le yaourt an de ne pas rayer le revêtement du
récipient.
• Utilisez des gants pour protéger vos mains lorsque
vous retirez le récipient après avoir préparé de la crème
glacée. Il y a un risque de brûlure par le froid !
Si le circuit frigorique est endommagé
• Évitez à tout prix les ammes nues et les sources
d’inammation.
• Débranchez la che secteur de l’appareil.
• Aérez la pièce dans laquelle se trouve l’appareil.
Notes d’utilisation
Emplacement
• Placez l’appareil sur une surface stable, horizontale
et plane. Gardez une distance d’au moins 15 cm par
rapport aux murs ou aux objets.
• Ne pas placer l’appareil sur ou à proximité immédiate de
sources de chaleur telles que poêles, radiateurs, etc.
Branchement électrique
Avant de brancher la che secteur dans la prise, vériez
que la tension secteur que vous souhaitez utiliser corres-
pond à celle de l’appareil. Vous trouverez ces informations
sur la plaque signalétique.
Indications sur l’écran
Mode veille
(le symbole clignote)
Préparation de la glace
(outil de brassage et refroidissement actif)
Refroidissement actif
Agitateur actif
Préparation du yaourt (chauffage actif)
Fonction de post-refroidissement active
Fonctions des boutons
• Utilisez le bouton POWER pour allumer et éteindre
l’appareil.
• Utilisez le bouton MENU pour sélectionner un pro-
gramme.
• Le bouton START / PAUSE permet de démarrer le pro-
gramme sélectionné
• Vous pouvez interrompre le programme activé à l’aide
du bouton START / PAUSE. Lors de la préparation de
glaçons, le compresseur continue à refroidir pendant
1 minute. Appuyez à nouveau sur le bouton pour pour-
suivre le programme.
• Si vous souhaitez interrompre un programme, appuyez
sur le bouton POWER. L’appareil s’éteint.
• Si le programme ou a été annulé à l’aide du bouton
POWER, attendez au moins 5 minutes avant de redé-
marrer l’appareil. Cela permet à la pression du circuit
frigorique de se relâcher.
Temps de préparation
• Le temps de préparation d’une glace ou d’un yaourt est
variable. Il dépend des facteurs suivants :
- la recette,
- la température du mélange,
- la température ambiante,
- la consistance souhaitée.
• Ne laissez pas l’appareil sans surveillance pendant son
fonctionnement.
• Préparation de la glace :
• Lors de la préparation de la glace, vérier constam-
ment la consistance du mélange.
• Le mélange ne doit être ni trop n ni trop épais.
• Préparation du yaourt :
• Le temps de préparation dépend des préférences de
chacun.
Vériez le yaourt après quelques heures. Si
nécessaire, réduisez ou augmentez le temps pré-
réglé. Pour ce faire, appuyez d’abord sur le bouton
START / PAUSE, puis modiez la durée à l’aide du
contrôle rotatif. Redémarrez ensuite l’appareil.
• La consistance du yaourt devient plus ferme lorsqu’il
est placé au réfrigérateur après la préparation.

PC-ICM1268_IM 12.06.23
24
Fonctions de protection pendant la préparation
de la crème glacée
• Si l’agitateur s’arrête en cours de fonctionnement parce
que la masse de crème glacée est devenue trop solide,
le moteur s’arrête.
1. Éteignez immédiatement l’appareil. Retirez la che
d’alimentation de la prise de courant.
2. Retirez la glace.
• Vous pouvez commencer une autre utilisation immé-
diatement après la préparation de la glace. Par mesure
de protection, le compresseur ne se met en marche
qu’après environ 3 minutes.
• Lorsque vous préparez plusieurs portions de glace à la
suite, la protection contre la surchauffe peut être activée.
Le compresseur ne se met pas en marche. Laissez
l’appareil refroidir pendant environ 30 minutes avant de
le réutiliser.
Préparation de la crème glacée
1. Assurez-vous que le récipient est complètement sec
avant de l’insérer. Placez le récipient dans le puits de
l’unité de base.
2. Remplissez le récipient avec les ingrédients souhaités.
- Ne remplissez pas le récipient avec plus de 1000 ml !
- Utilisez des ingrédients dont la température de réfrigé-
ration est comprise entre 6 et 8 °C.
- Les ingrédients ne doivent pas être congelés. Le
moteur pourrait alors se bloquer.
- Si vous souhaitez préparer une glace aux fruits,
n’utilisez que des fruits mous, sans pépins, que vous
aurez préalablement écrasés (réduits en purée). Vous
pouvez également ajouter des jus de fruits.
- Si vous souhaitez afner la glace avec des morceaux
de fruits solides, des noix, du sucre cassé ou de
l’alcool, n’ajoutez ces ingrédients qu’à la n du temps
de congélation.
- L’alcool inhibe le processus de congélation.
3. Placez le couvercle transparent sur le boîtier du moteur.
Assurez-vous que les deux loquets du boîtier du moteur
s’enclenchent avec un « clic » sur le couvercle.
4. Placez l’outil d’agitation sur l’arbre d’entraînement du
moteur. L’outil d’agitation doit s’enclencher avec un
« clic ».
5. Placez le boîtier du moteur avec le couvercle et l’agita-
teur de manière à ce que la èche du couvercle soit
orientée dans la direction du symbole .
6. Fermez le couvercle en le tournant dans le sens du
symbole .
Préparation de la fabrication du yaourt
Vous avez besoin de lait pasteurisé (lait UHT) et de yaourt
naturel dans un rapport de mélange de 100 ml : 15 ml.
1. Choisissez l’emplacement de manière à ce que l’appareil
ne doive pas être déplacé pendant la préparation du
yaourt et qu’il ne soit pas exposé aux vibrations. Sinon,
le yaourt restera liquide.
2. Chauffez le lait UHT dans une casserole à environ
45 °C et mélangez-le au yaourt naturel ou à la culture
de yaourt. Si vous souhaitez utiliser du lait frais, faites-le
d’abord bouillir et laissez-le refroidir à environ 45 °C.
3. Placez le récipient dans le puits de l’unité de base.
4. Versez le mélange déjà chauffé dans le récipient.
- Ne remplissez pas le récipient avec plus de 1400 ml !
- Si vous souhaitez afner le yaourt avec des fruits, des
noix, de la conture ou autres, n’ajoutez ces ingré-
dients qu’après la préparation.
5. Séparez le couvercle transparent du boîtier du
moteur : Si l’appareil en est équipé, retirez d’abord l’outil
d’agitation de l’arbre d’entraînement. Poussez les deux
loquets du boîtier du moteur vers l’intérieur pour retirer
le couvercle.
6. Remettez le couvercle transparent sans le boîtier du
moteur. Cela permet de conserver la chaleur à l’intérieur
de l’appareil.
Utilisation
1. Branchez l’appareil sur une prise de courant correcte-
ment installée et reliée à la terre.
2. Allumez l’appareil à l’aide du bouton POWER.
3. Sélectionnez le programme souhaité à l’aide du bouton
MENU :
Programme Fonction Temps de
présélection
Préparation de la
glace (Minutes)
Remuer seulement
(Minutes)
Refroidissement
uniquement
(Minutes)
Préparation du
yaourt
(Heures)
Vous pouvez modier le temps de présélection à l’aide
du contrôle rotatif :
• 5 – 60 minutes aux programmes : / /
• 4 – 24 heures au programme :
4. Conrmez votre sélection à l’aide du bouton
START / PAUSE. Le programme démarre.
5. Une fois le temps écoulé, vous entendrez 10 bips.
6. L’appareil est équipé d’une fonction de post-refroidis-
sement. Celle-ci est activée pendant 1 heure après la

PC-ICM1268_IM 12.06.23
25
n des programmes et . Le compresseur s’arrête
pendant 10 minutes, puis se remet en marche pendant
4 minutes. Le message s’afche. Après 60 mi-
nutes, l’appareil passe en mode veille.
Il est recommandé de détacher immédiatement le
contenu an que la glace ou le yaourt ne gèle pas sur
le récipient.
Retrait de la crème glacée
1. Éteignez l’appareil à l’aide du bouton POWER.
2. Débranchez la che d’alimentation de la prise de
courant.
3. Tournez le carter du moteur dans le sens du symbole
. Détachez le boîtier du moteur ainsi que le couvercle
et l’agitateur.
4. Retirer le récipient.
AVERTISSEMENT :
Risque de brûlure par le froid !
Protégez vos mains avec des gants lorsque vous
touchez le récipient.
5. Retirez la glace du récipient à l’aide de la spatule à glace
fournie ou d’une cuillère en silicone ou en bois.
- N’utilisez pas de cuillère en métal pour éviter de rayer
le revêtement du récipient.
6. Versez la crème glacée dans un récipient préalablement
refroidi et muni d’un couvercle.
- La crème glacée est meilleure lorsqu’elle est fraîche.
- Si la crème glacée n’est pas destinée à la consom-
mation directe, nous recommandons de la refroidir
davantage dans un congélateur.
- Ne pas recongeler une glace décongelée ou dégelée !
Retrait du yaourt
1. Éteignez l’appareil à l’aide du bouton POWER.
2. Débranchez la che d’alimentation de la prise de
courant.
3. Tournez le couvercle vers le symbole .
4. Retirez le récipient.
5. Retirez le yaourt du récipient à l’aide de la spatule four-
nie ou d’une cuillère en silicone ou en bois.
- N’utilisez pas de cuillère en métal pour éviter de rayer
le revêtement du récipient.
6. Versez le yaourt dans un récipient bien nettoyé muni
d’un couvercle et placez-le au réfrigérateur.
- La durée de stockage du yaourt dépend de la
manière dont vous le préparez. Plus vous travaillez
proprement, plus il faut de temps pour que le yaourt
devienne mauvais. Toutefois, le yaourt ne doit pas être
conservé plus d’une semaine.
- N’ajoutez les fruits et autres ingrédients que peu de
temps avant de le consommer.
- 150 ml du yaourt ni peuvent être réutilisés comme
culture de départ. N’utilisez pas cette culture de départ
plus de 20 fois, car son effet s’estompe avec le temps.
Recettes pour la préparation de
la crème glacée
• Lors de la préparation du mélange de crème glacée,
veuillez vous référer aux notes du chapitre « Préparation
de la crème glacée ».
• Pour vous aider, vous pouvez utiliser le gobelet gradué
fourni avec l’appareil.
• Les quantités indiquées dans les recettes ne sont que
des indications. Essayez votre propre mélange.
• Si vous souhaitez augmenter les quantités jusqu’à un
maximum de 1000 ml, adaptez les ingrédients dans le
bon rapport. Le temps de préparation augmentera en
conséquence.
• Vous trouverez d’autres recettes dans des livres de
cuisine ou sur Internet.
Glace à la vanille
(Environ 5 portions)
Extrait de vanille 1– 2 cuillères à café
Lait entier 600 ml
Crème 400 ml
Sucre 200 g
• Mélanger tous les ingrédients dans un bol à l’aide d’un
batteur à main jusqu’à ce que le sucre soit dissous.
Verser le mélange de crème glacée réfrigérée dans le
récipient.
• Temps de préparation dans la sorbetière : environ 40 à
45 minutes
Glace au chocolat
(Environ 4 portions)
Extrait de vanille 1 cuillère à café
Lait entier 250 ml
Crème 250 ml
Sucre 125 g
Barre de chocolat noir ou mi-sucré
225 g, en petits mor-
ceaux
• Porter à ébullition le lait entier et la crème avec le cho-
colat et le sucre. Mélanger à l’aide d’un mixeur pouvant
être utilisé pour les plats chauds. Laisser refroidir le
mélange de crème glacée et le mettre au réfrigérateur
pendant 24 heures. Avant de verser le mélange de
crème glacée refroidi dans le récipient, le mélanger à
nouveau.
• Temps de préparation dans la sorbetière : environ 30 à
40 minutes

PC-ICM1268_IM 12.06.23
26
Glace à la fraise
(Environ 4 portions)
Fraises fraîches, mûres,
coupées en tranches 250 g
Jus de citron fraîchement pressé 1½ cuillère à soupe
Extrait de vanille 1 cuillère à café
Lait entier 250 ml
Crème 250 ml
Sucre 125 g
• Mélanger les fraises avec le jus de citron et environ 80 g
de sucre. Laisser reposer le mélange pendant 2 heures
pour que le jus se forme.
• Incorporer le reste du sucre dans le lait à l’aide d’un
batteur à main à la vitesse la plus basse jusqu’à ce que
le sucre soit dissous.
• Incorporez la crème, le jus des fraises et l’extrait de
vanille au lait.
• Versez le mélange de crème glacée réfrigérée dans le
récipient.
• Temps de préparation en sorbetière : environ 30 à
40 minutes
• Ajouter les fraises au cours des 10 dernières minutes de
congélation.
Recette de base du sorbet
Jus de fruits / fruits en purée 600 – 700 ml
Sucre (selon le type de fruit) 75 – 100 g
Blanc d’œuf 1– 2 cuillères à soupe
• Mélanger tous les ingrédients dans un bol à l’aide d’un
batteur à main jusqu’à ce que le sucre soit dissous.
Versez le mélange de crème glacée réfrigérée dans le
récipient.
• Temps de préparation en sorbetière : environ 35 à
45 minutes
• Pour afner, une cuillère à soupe de liqueur, de cognac,
d’eau-de-vie de framboise ou autre peut être ajoutée à la
n du processus de congélation.
• Le sorbet doit être consommé assez rapidement an
qu’il ne redevienne pas liquide.
Nettoyage
AVERTISSEMENT :
• Éteignez toujours l’appareil et débranchez la che de la prise de
courant avant de le nettoyer.
• Ne pas immerger l’appareil dans l’eau ! Cela pourrait provoquer
un choc électrique ou un incendie.
ATTENTION :
• N’utilisez pas de brosse métallique ou d’autres objets
abrasifs.
• Ne pas utiliser de nettoyants agressifs ou abrasifs.
• Ne pas utiliser de produits chimiques, d’acides, d’es-
sence ou d’huile.
• Le récipient, l’agitateur et le couvercle ne peuvent pas
être nettoyés au lave-vaisselle. L’exposition à la cha-
leur et à des nettoyants agressifs pourrait les déformer
ou les décolorer.
• Vous pouvez nettoyer le récipient, l’agitateur et le cou-
vercle dans de l’eau de rinçage tiède additionnée d’un
peu de liquide vaisselle. Séchez bien les accessoires
ensuite.
• Nettoyez l’unité de base et le bol avec un chiffon humide.
Stockage
• Nettoyez l’appareil comme indiqué et laissez-le sécher
complètement.
• Nous vous recommandons de ranger l’appareil dans
son emballage d’origine si vous n’avez pas l’intention de
l’utiliser pendant une longue période.
• Rangez toujours l’appareil hors de portée des enfants,
dans un endroit sec et bien ventilé.

PC-ICM1268_IM 12.06.23
27
Dépannage
Problème Cause possible Remède
L’appareil ne fonctionne pas. L’appareil n’est pas alimenté en courant. Vériez la prise de courant avec un autre
appareil.
Insérez la che secteur correctement.
Vériez le fusible de la maison.
L’appareil est défectueux. Contactez notre service ou un spécialiste.
Le couvercle ne se ferme pas. Le récipient n’est pas inséré correctement
dans le bac.
Tournez légèrement le récipient lors de
son insertion.
L’appareil est en mode veille
alors que la préparation des
glaçons n’est pas terminée.
L’alimentation électrique a été interrompue. Redémarrer le programme pour le temps
restant.
Le compresseur émet des
bruits anormaux.
La tension est trop faible. Éteignez l’appareil et vériez la tension
du réseau.
L’outil de brassage s’arrête en
cours de programme.
La glace est trop dure. Blocage du moteur
(fonction de protection).
Éteignez l’appareil et débranchez la che
de la prise de courant. Retirer la glace.
L’écran afche le symbole .
Le compresseur ne se met pas
en marche.
La protection contre la surchauffe est
activée.
Laissez l’appareil refroidir pendant environ
30 minutes avant de le remettre en
marche.
Données techniques
Modèle : ............................................................PC-ICM 1268
Alimentation électrique : ...........................220 – 240 V~, 50 Hz
Puissance absorbée
Puissance de refroidissement : ................................ 120 W
Puissance de chauffage : ........................................22,8 W
Réfrigérant : ........................................................ R600a / 24 g
Gaz de soufage de l’isolation : .....................................C5H10
Capacité maximale : .................................................. 1500 ml
Capacité maximale de remplissage
Préparation de crème glacée : .............................. 1000 ml
Préparation de yaourt : ......................................... 1400 ml
Classe de protection : ............................................................
Poids net : .................................................................env. 9 kg
Nous nous réservons le droit d’apporter des modications
techniques ainsi que des modications de conception dans
le cadre du développement continu de nos produits.
Cet appareil a été testé conformément à toutes les direc-
tives CE applicables et actuelles et a été construit selon les
dernières réglementations en matière de sécurité.
Élimination
Signication du symbole « Poubelle »
Protégez votre environnement, ne jetez pas vos
appareils électriques avec les ordures ména-
gères.
Utilisez, pour l’élimination de vos appareils
électriques, les bornes de collecte prévues à
cet effet où vous pouvez vous débarrasser des
appareils que vous n’utilisez plus.
Vous contribuez ainsi à éviter les impacts potentiels dans
l’environnement et sur la santé de chacun, causés par une
mauvaise élimination de ces déchets.
Vous contribuez aussi au recyclage sous toutes ses formes
des appareils électriques et électroniques usagés.
Vous trouverez toutes les informations sur les bornes
d’élimination des appareils auprès de votre commune ou
de l’administration de votre communauté. Votre revendeur
et partenaire contractuel est également tenu de reprendre
gratuitement l’ancien appareil.

PC-ICM1268_IM 12.06.23
28
IMPORTANTE:
Asegúrese de leer primero las instrucciones de seguridad adjun-
tas por separado.
Manual de instrucciones
Le agradecemos la conanza depositada en este producto
y esperamos que disfrute de su uso.
Lea atentamente el manual de instrucciones y las instruc-
ciones de seguridad adjuntas por separado antes de utilizar
este aparato. Guarde estos documentos, incluyendo el
certicado de garantía, el recibo y, si es posible, la caja
con el embalaje interior en un lugar seguro. Si entrega el
aparato a un tercero, incluya siempre todos los documentos
pertinentes.
Símbolos en este manual de instrucciones
Advertencias importantes para su seguridad están seña-
ladas en especial. Siga estas advertencias incondicional-
mente, para evitar accidentes y daños en el aparato:
AVISO:
Advierte ante los peligros para su salud y demuestra
posibles riesgos de herida.
ATENCIÓN:
Indica los posibles riesgos para el aparato u otros
objetos.
Índice
Indicación de los elementos de manejo ..........................3
Desembalaje del aparato..................................................28
Indicación de los elementos de manejo /
Volumen de entrega ..........................................................28
Advertencias para el uso del aparato .............................29
Si se daña el circuito de refrigerante .............................29
Notas de uso .....................................................................29
Ubicación ........................................................................29
Conexión eléctrica ..........................................................29
Indicaciones en la pantalla .............................................29
Funciones de los botones .............................................. 29
Tiempo de preparación .................................................. 29
Funciones de protección durante la
preparación de helados .................................................30
Preparación para hacer helado ....................................... 30
Preparación para hacer yogur.........................................30
Manejo ................................................................................ 30
Retirar el helado ............................................................. 30
Cómo retirar el yogur .....................................................31
Recetas para la preparación de helados .......................31
Limpieza ............................................................................. 32
Almacenamiento ...............................................................32
Solución de problemas ....................................................32
Datos técnicos ..................................................................33
Eliminación ........................................................................ 33
Signicado del símbolo “Cubo de basura” ....................33
Desembalaje del aparato
1. Saque el aparato de su embalaje.
2. Retire todo el material de embalaje, como las láminas, el
material de relleno, las bridas para cables y el embalaje
de cartón.
3. Compruebe que el volumen de entrega está completo.
4. Si el contenido del embalaje está incompleto o si se
detectan daños, no utilice el aparato. Devuélvalo inme-
diatamente al distribuidor.
5. Es posible que todavía haya polvo o residuos de pro-
ducción en el aparato. Le recomendamos que limpie el
aparato como se describe en el apartado “Limpieza”.
Indicación de los elementos de manejo /
Volumen de entrega
1 Carcasa del motor para el agitador
2 Desbloqueo de la carcasa del motor
3 Eje motriz
4 Tapa transparente
5 Herramienta de agitación
6 Recipiente
7 Contactos de la carcasa del motor
8 Cubeta de la unidad básica
9 Unidad básica con compresor
10 Aberturas de ventilación
11 Mando giratorio /
12 Botón MENU (selección de programa)
13 Botón POWER (encendido / apagado del aparato)
14 Lámpara de control (preparación de yogur)
15 Lámpara de control (preparación de hielo)
16 Pantalla
17 Lámpara de control (herramienta de agitación)
18 Lámpara de control (refrigeración)
19 Botón START / PAUSE (inicio / interrupción del pro-
grama)
Sin ilustración
Espátula para hielo
Vaso medidor

PC-ICM1268_IM 12.06.23
29
Advertencias para el uso del aparato
AVISO:
El aparato contiene en el circuito refrigerante isobutano
(R600a), un gas natural de alta compatibilidad medioam-
biental, que es inamable. Al transportar y montar el
aparato, asegúrese de que no se caiga. El circuito
refrigerante no debe sufrir daños.
ATENCIÓN:
• Asegúrese de respetar el tiempo de espera de
2 horas cuando utilice el aparato por primera vez o
después del transporte, para que el refrigerante pueda
asentarse. De lo contrario, se dañaría el compresor de
refrigeración.
• No utilice una cuchara metálica al sacar el helado o el
yogur para no rayar el revestimiento del recipiente.
• Utiliza guantes para protegerte las manos al retirar el
recipiente después de hacer helado. ¡Existe riesgo de
quemaduras por el frío!
Si se daña el circuito de refrigerante
• Evite a toda costa las llamas abiertas y las fuentes de
ignición.
• Desenchufe el aparato de la toma de corriente.
• Ventile la habitación en la que se encuentra el aparato.
Notas de uso
Ubicación
• Coloque el aparato sobre una supercie estable, hori-
zontal y nivelada. Mantenga una distancia de al menos
15 cm de paredes u objetos.
• No coloque el aparato sobre o cerca de fuentes de calor
como estufas, radiadores, etc.
Conexión eléctrica
Antes de conectar el enchufe a la toma de corriente,
compruebe que la tensión de red que va a utilizar coincide
con la del aparato. Encontrará la información en la placa de
características.
Indicaciones en la pantalla
Modo de espera
(el símbolo parpadea)
Preparación de hielo
(herramienta de agitación y refrigeración
activas)
Enfriamiento activo
Agitador activo
Preparación de yogur
(calentamiento activo)
Función de postenfriamiento activa
Funciones de los botones
• Utilice el botón POWER para encender y apagar el
aparato.
• Utilice el botón MENU para seleccionar un programa.
• Con el botón START/ PAUSE puede iniciar el programa
seleccionado.
• Puede interrumpir el programa activado con el botón
START/ PAUSE. Al preparar hielo, el compresor sigue
enfriando durante 1 minuto. Pulse de nuevo el botón
para continuar con el programa.
• Si desea cancelar un programa, pulse el botón POWER.
El aparato se apaga.
• Si el programa o ha sido cancelado con el botón
POWER, mantenga al menos 5 minutos antes de
volver a poner en marcha el aparato. De esta forma
se garantiza que la presión del circuito de refrigerante
pueda relajarse.
Tiempo de preparación
• El tiempo de preparación del helado o del yogur varía.
Depende de los siguientes factores:
- la receta,
- la temperatura de la mezcla,
- la temperatura ambiente,
- la consistencia deseada.
• No deje el aparato desatendido durante el funciona-
miento.
• Preparación del helado:
• Cuando prepare helado, compruebe constantemente
la consistencia de la mezcla.
• La mezcla de helado no debe ser ni demasiado na ni
demasiado espesa
• Preparación del yogur:
• El tiempo de preparación depende de sus preferen-
cias individuales.
Compruebe el yogur al cabo de unas horas. Si es
necesario, reduzca o aumente el tiempo preajustado.
Para ello, pulse primero el botón START / PAUSE y,
a continuación, modique el tiempo con el mando
giratorio. A continuación, vuelva a poner en marcha
el aparato.
• La consistencia del yogur se vuelve más rme
cuando se introduce en el frigoríco después de la
preparación.

PC-ICM1268_IM 12.06.23
30
Funciones de protección durante
la preparación de helados
• Si el batidor se detiene durante el funcionamiento por-
que la masa de helado se ha solidicado demasiado, el
motor se parará.
1. Desconecte inmediatamente el aparato. Saque el
enchufe de la toma de corriente.
2. Retire el helado.
• Puede iniciar otro funcionamiento inmediatamente
después de preparar el helado. Como medida de
protección, el compresor sólo se enciende transcurridos
unos 3 minutos.
• Al preparar varias porciones de helado seguidas, puede
activarse la protección contra sobrecalentamiento. El
compresor no se enciende. Deje que el aparato se enfríe
durante unos 30 minutos antes de volver a utilizarlo.
Preparación para hacer helado
1. Asegúrese de que el recipiente esté completamente
seco antes de introducirlo. Coloque el recipiente en el
hueco de la unidad base.
2. Rellene el recipiente con los ingredientes deseados.
- ¡No llene más de 1000 ml en el recipiente!
- Utilice ingredientes que tengan una temperatura de
refrigeración de 6 – 8 °C.
- Los ingredientes no deben estar congelados. Esto
podría provocar el bloqueo del motor.
- Si desea preparar helado de fruta, utilice sólo fruta
blanda y sin pepitas que haya triturado (hecho puré)
previamente. También puede añadir zumos de fruta.
- Si desea renar el helado con trozos sólidos de
fruta, frutos secos, frutas quebradizas o alcohol,
añada estos ingredientes sólo al nal del tiempo de
congelación.
- El alcohol inhibe el proceso de congelación.
3. Coloque la tapa transparente en la carcasa del motor.
Asegúrese de que ambos cierres de la carcasa del
motor encajan con un “clic” en la tapa.
4. Coloque el agitador en el eje de accionamiento del mo-
tor. El dispositivo agitador debe encajar con un “clic”.
5. Coloque la carcasa del motor con la tapa y el dispositivo
agitador de forma que la echa de la tapa apunte en
la dirección del símbolo .
6. Cierre la tapa girándola en la dirección del símbolo .
Preparación para hacer yogur
Necesita leche pasteurizada (leche UHT) y yogur natural en
una proporción de mezcla de 100 ml : 15 ml.
1. Elija el lugar de manera que el aparato no tenga que
moverse durante la preparación del yogur y no esté
expuesto a vibraciones. De lo contrario, el yogur perma-
necerá líquido.
2. Caliente la leche UHT en un recipiente a unos 45 °C y
mézclela con el yogur natural o el cultivo de yogur. Si
desea utilizar leche fresca, hiérvala primero y déjela
enfriar a unos 45 °C.
3. Coloque el recipiente en el hueco de la unidad base.
4. Vierta la mezcla ya calentada en el recipiente.
- ¡No llene más de 1400 ml en el recipiente!
- Si desea renar el yogur con fruta, frutos secos,
mermelada o similares, añada estos ingredientes sólo
después de la preparación.
5. Separe la tapa transparente de la carcasa del motor:
Si está instalada, retire primero la herramienta agitadora
del eje de accionamiento. Presione hacia dentro los dos
cierres de la carcasa del motor para retirar la tapa.
6. Coloque la tapa transparente sin la carcasa del motor.
Así se mantiene el calor dentro del aparato.
Manejo
1. Conecte el aparato a una toma de corriente con toma
de tierra.
2. Encienda el aparato con el botón POWER.
3. Seleccione el programa deseado con el botón MENU:
Programa Función Tiempo
preestablecido
Preparación de hielo (Minutos)
Sólo remover
(Minutos)
Sólo enfriar
(Minutos)
Preparación de
yogur
(Horas)
Puedes cambiar el tiempo de preselección con el mando
giratorio:
• 5 – 60 minutos en los programas: / /
• 4 – 24 horas en el programa:
4. Conrme su selección con el botón START / PAUSE. El
programa se inicia.
5. Una vez transcurrido el tiempo, escuchará 10 pitidos.
6. El aparato está equipado con una función de postenfria-
miento. Ésta se activa durante 1 hora tras nalizar los
programas y . El compresor se desconecta durante
10 minutos y vuelve a funcionar durante 4 minutos. Se
visualiza . Transcurridos 60 minutos, el aparato
pasa al modo de espera.
Se recomienda retirar el contenido inmediatamente para
que el helado o el yogur no se congelen en el recipiente.
Retirar el helado
1. Apague el aparato con el botón POWER.
2. Desconecte el enchufe de la toma de corriente.

PC-ICM1268_IM 12.06.23
31
3. Gire la carcasa del motor en la dirección del símbolo .
Retire la carcasa del motor junto con la tapa y el
agitador.
4. Retire el recipiente.
AVISO: ¡Peligro de quemaduras por frío!
Protéjase las manos con guantes al tocar el recipiente.
5. Saque el helado del recipiente con la espátula para hela-
dos incluida o con una cuchara de silicona o de madera.
- No utilice una cuchara metálica para evitar rayar el
revestimiento del recipiente.
6. Vierta el helado en un recipiente previamente enfriado
con tapa.
- El helado sabe mejor fresco.
- Si el helado no se destina al consumo directo, reco-
mendamos enfriar más el helado terminado en un
congelador.
- ¡No vuelva a congelar el helado descongelado!
Cómo retirar el yogur
1. Apague el aparato con el botón POWER.
2. Desconecte el enchufe de la toma de corriente.
3. Gire la tapa hacia el símbolo .
4. Retire el recipiente.
5. Saque el yogur del recipiente con la espátula suminis-
trada o con una cuchara de silicona o de madera.
- No utilice una cuchara metálica para evitar rayar el
revestimiento del recipiente.
6. Vierta el yogur en un recipiente bien limpio con tapa y
colóquelo en el frigoríco.
- La conservación del yogur depende de cómo lo
prepares. Cuanto más limpio esté, más tardará en
estropearse el yogur. Sin embargo, no debes guardar
el yogur más de una semana.
- Añada la fruta y similares sólo poco antes de comerlo.
- 150 ml del yogur terminado pueden reutilizarse como
cultivo iniciador. No utilice este cultivo iniciador más
de 20 veces, ya que su efecto desaparece con el
tiempo.
Recetas para la preparación de helados
• Cuando prepare la mezcla para helado, consulte las
notas del capítulo “Preparación para hacer helado”.
• Puede utilizar como ayuda el vaso medidor incluido en el
volumen de suministro.
• Las cantidades indicadas en las recetas son sólo orien-
tativas. Pruebe su mezcla individual.
• Si desea aumentar las cantidades hasta un máximo
de 1000 ml, ajuste los ingredientes en la proporción
correcta. El tiempo de preparación aumentará en
consecuencia.
• Puede encontrar más recetas en libros de cocina o en
Internet.
Helado de vainilla
(Rinde aprox. 5 porciones)
Extracto de vainilla 1– 2 cucharaditas
Leche entera 600 ml
Nata 400 ml
Azúcar 200 g
• Mezclar todos los ingredientes en un bol con una bati-
dora de mano hasta que se disuelva el azúcar. Vierta la
mezcla de helado enfriada en el recipiente.
• Tiempo de preparación en la heladora: aprox. 40 – 45 mi-
nutos
Helado de chocolate
(Rinde aprox. 4 porciones)
Extracto de vainilla 1 cucharadita
Leche entera 250 ml
Nata 250 ml
Azúcar 125 g
Tableta de chocolate amargo
o semidulce
225 g, en trozos pe-
queños
• Llevar a ebullición la leche entera y la nata con el
chocolate y el azúcar. Batir con una batidora que pueda
utilizarse para platos calientes. Dejar enfriar la mezcla
de helado y enfriarla en el frigoríco durante 24 horas.
Antes de verter la mezcla de helado enfriada en el reci-
piente, remuévala de nuevo.
• Tiempo de preparación en la heladora: aprox. 30 – 40 mi-
nutos
Helado de fresa
(Rinde aprox. 4 porciones)
Fresas frescas, maduras,
cortadas en rodajas 250 g
Zumo de limón, recién exprimido 1½ cucharadas
Extracto de vainilla 1 cucharadita
Leche entera 250 ml
Nata 250 ml
Azúcar 125 g
• Mezclar las fresas con el zumo de limón y aprox. 80 g
de azúcar. Dejar reposar la mezcla durante 2 horas para
que se forme zumo.
• Remover el azúcar restante en la leche con una batidora
de mano a la velocidad más baja hasta que se disuelva
el azúcar.
• Incorpore a la leche la nata, el zumo de las fresas y el
extracto de vainilla.
• Vierta la mezcla de helado fría en el recipiente.
• Tiempo de preparación en la heladora: aprox. 30 – 40 mi-
nutos.
• Añadir las fresas en los últimos 10 minutos del proceso
de congelación.

PC-ICM1268_IM 12.06.23
32
Receta básica de sorbete
Zumo de fruta / fruta en puré 600 – 700 ml
Azúcar (según el tipo de fruta) 75 – 100 g
Clara de huevo 1– 2 cucharadas
• Mezclar todos los ingredientes en un bol con una bati-
dora de mano hasta que se disuelva el azúcar. Verter la
mezcla de helado enfriada en el recipiente.
• Tiempo de preparación en la heladora: aprox. 35 – 45 mi-
nutos
• Para renarlo, se puede añadir 1 cucharada de licor,
coñac, brandy de frambuesa o similar al nal del proceso
de congelación.
• El sorbete debe consumirse con relativa rapidez para
que no vuelva a quedar líquido.
Limpieza
AVISO:
• Apague siempre el aparato y desenchúfelo de la toma de co-
rriente antes de limpiarlo.
• ¡No sumerja el aparato en agua! Podría provocar una descarga
eléctrica o un incendio.
ATENCIÓN:
• No utilice cepillos de alambre ni otros objetos abra-
sivos.
• No utilice limpiadores fuertes o abrasivos.
• No utilice productos químicos, ácidos, gasolina ni
aceite.
• El recipiente, el agitador y la tapa no pueden lavarse
en el lavavajillas. La exposición al calor y a productos
de limpieza agresivos podría deformarlos o decolo-
rarlos.
• Puedes limpiar el recipiente, el agitador y la tapa con
agua tibia y un poco de lavavajillas a mano. A continua-
ción, seque bien los accesorios.
• Limpie la unidad base y el recipiente con un paño
húmedo.
Almacenamiento
• Limpie el aparato como se describe y déjelo secar
completamente.
• Le recomendamos que guarde el aparato en su emba-
laje original si no va a utilizarlo durante un periodo de
tiempo prolongado.
• Guarde siempre el aparato fuera del alcance de los
niños, en un lugar seco y bien ventilado.
Solución de problemas
Problema Posible causa Solución
El aparato no funciona. El aparato no tiene alimentación eléctrica. Compruebe la toma de corriente con otro
aparato.
Inserte el enchufe correctamente.
Compruebe el fusible de la casa.
El aparato está defectuoso. Póngase en contacto con nuestro servicio
técnico o con un especialista.
La tapa no se cierra. El recipiente no está insertado correcta-
mente en la bandeja.
Gire un poco el recipiente al introducirlo.
El aparato está en modo de
espera aunque la preparación
de hielo no haya nalizado.
Se ha interrumpido el suministro eléctrico. Reinicie el programa durante el tiempo
restante.

PC-ICM1268_IM 12.06.23
33
Problema Posible causa Solución
El compresor hace ruidos
anormales.
La tensión es demasiado baja. Apague el aparato y compruebe la tensión
de red.
El batidor se para durante el
programa.
El helado está demasiado duro. Bloqueo
del motor (función de protección).
Apague el aparato y desenchúfelo de la
toma de corriente. Retire el helado.
En la pantalla aparece el
símbolo . El compresor no
se enciende.
La protección contra sobrecalentamiento
está activada.
Deje que el aparato se enfríe durante
aprox. 30 minutos antes de volver a po-
nerlo en marcha.
Datos técnicos
Modelo: .............................................................PC-ICM 1268
Alimentación: ............................................220 – 240 V~, 50 Hz
Consumo de energía
Potencia de refrigeración: ........................................120 W
Potencia caloríca: .................................................. 22,8 W
Refrigerante: ....................................................... R600a / 24 g
Gas de soplado de aislamiento: .................................... C5H10
Capacidad máxima: ................................................... 1500 ml
Capacidad máxima de llenado
Preparación de helado: ......................................... 1000 ml
Preparación de yogur: ........................................... 1400 ml
Clase de protección: ..............................................................
Peso neto: ............................................................. aprox. 9 kg
El derecho de realizar modicaciones técnicas y de diseño
en el curso del desarrollo continuo del producto esta
reservado.
Este aparato ha sido probado de acuerdo con todas las
directivas CE vigentes y construido de acuerdo con las
últimas normas de seguridad.
Eliminación
Signicado del símbolo “Cubo de basura”
Proteja nuestro medio ambiente, aparatos eléc-
tricos no forman parte de la basura doméstica.
Haga uso de los centros de recogida previstos
para la eliminación de aparatos eléctricos y
entregue allí sus aparatos eléctricos que no
vaya a utilizar más.
Ayudará en evitar las potenciales consecuencias, a causa
de una errónea eliminación de desechos, para el medio
ambiente y la salud humana.
Con ello, contribuirá a la recuperación, al reciclado y a otras
formas de reutilización de los aparatos viejos eléctricos y
electrónicos.
La información cómo se debe eliminar los aparatos, se
obtiene en su ayuntamiento o su administración municipal.
Su distribuidor y socio contractual también está obligado a
recuperar el aparato antiguo sin coste alguno.

PC-ICM1268_IM 12.06.23
34
IMPORTANTE:
Assicuratevi di leggere prima le istruzioni di sicurezza allegate
separatamente.
Istruzioni per l’uso
Grazie per aver scelto il nostro prodotto. Vi auguriamo un
buon utilizzo del dispositivo.
Prima di utilizzare l’apparecchio, leggere attentamente
le istruzioni per l’uso e le istruzioni di sicurezza allegate
separatamente. Conservare questi documenti, compreso il
certificato di garanzia, la ricevuta e, se possibile, la scatola
con l’imballaggio interno in un luogo sicuro. Se si cede
l’apparecchio a terzi, includere sempre tutti i documenti
pertinenti.
Simboli per questo manuale di istruzioni per l’uso
Le indicazioni importanti per la propria sicurezza sono
indicati appropriatamente. Osservare assolutamente queste
indicazioni, per evitare incidenti e danni all’apparecchio:
AVVISO:
Previene i rischi della propria salute ed indica possibili
rischi di ferite.
ATTENZIONE:
Indica possibili pericoli per l’apparecchio o altri oggetti.
Indice
Elementi di comando ..........................................................3
Disimballaggio dell’apparecchio ....................................34
Elementi di comando / Nella fornitura .............................34
Avvertenze per l’uso dell’apparecchio ........................... 35
Se il circuito del refrigerante è danneggiato ..................35
Note per l’uso ....................................................................35
Posizione ........................................................................35
Collegamento elettrico ...................................................35
Indicazioni sul display ...................................................35
Funzioni dei tasti ............................................................35
Tempo di preparazione ..................................................35
Funzioni di protezione durante la
preparazione del gelato .................................................36
Preparazione per la preparazione del gelato .................36
Preparazione per la preparazione dello yogurt ............. 36
Utilizzo ................................................................................36
Rimozione del gelato .....................................................37
Rimozione dello yogurt ..................................................37
Ricette per la preparazione del gelato ............................37
Pulizia ................................................................................. 38
Conservazione ..................................................................38
Risoluzione dei problemi .................................................38
Dati tecnici ......................................................................... 39
Smaltimento ......................................................................39
Significato del simbolo “Eliminazione” ...........................39
Disimballaggio dell’apparecchio
1. Togliere l’apparecchio dal suo imballaggio.
2. Rimuovere tutto il materiale d’imballaggio, come pelli-
cole, materiale di riempimento, fascette e imballaggi di
cartone.
3. Controllare la completezza del contenuto dell’imballaggio.
4. Se il contenuto dell’imballaggio è incompleto o se si
rilevano danni, non mettere in funzione l’apparecchio.
Restituirlo immediatamente al rivenditore.
5. Sull’apparecchio potrebbero esserci ancora polvere o
residui di produzione. Si consiglia di pulire l’apparecchio
come descritto al punto “Pulizia”.
Elementi di comando / Nella fornitura
1 Alloggiamento del motore per l’agitatore
2 Sblocco per l’alloggiamento del motore
3 Albero di trasmissione
4 Coperchio trasparente
5 Agitatore
6 Contenitore
7 Contatti per l’alloggiamento del motore
8 Vaschetta dell’unità base
9 Unità base con compressore
10 Aperture di ventilazione
11 Controllo rotativo /
12 Tasto MENU (selezione del programma)
13 Tasto POWER (accensione / spegnimento dell’apparec-
chio)
14 Lampada di controllo (preparazione dello yogurt)
15 Lampada di controllo (preparazione del ghiaccio)
16 Display
17 Lampada di controllo (preparazione del ghiaccio)
18 Lampada di controllo (agitatore)
19 Tasto START / PAUSE (avvio / interruzione del pro-
gramma)
Senza illustrazione
Spatola per il ghiaccio
Bicchiere di misurazione

PC-ICM1268_IM 12.06.23
35
Avvertenze per l’uso dell’apparecchio
AVVISO:
L’apparecchio contiene nel circuito refrigerante l’iso-
butano (R600a), un gas naturale ad alta compatibilità
ambientale, che è infiammabile. Durante il trasporto e
l’installazione dell’apparecchio, assicurarsi che l’apparec-
chio non cada. Il circuito del refrigerante non deve essere
danneggiato.
ATTENZIONE:
• Quando si utilizza l'apparecchio per la prima volta o
dopo il trasporto, rispettare il tempo di attesa di 2 ore
per consentire al refrigerante di stabilizzarsi. In caso
contrario, il compressore frigorifero potrebbe subire
danni.
• Non utilizzare un cucchiaio di metallo quando si
rimuove il gelato o lo yogurt per non graffiare il rivesti-
mento del contenitore.
• Usare guanti per proteggere le mani quando si rimuove il
contenitore dopo aver preparato il gelato. C’è il rischio di
ustioni dovute al freddo!
Se il circuito del refrigerante è danneggiato
• Evitare assolutamente fiamme libere e fonti di accen-
sione.
• Estrarre la spina dell’apparecchio dalla presa di corrente.
• Ventilare il locale in cui si trova l’apparecchio.
Note per l’uso
Posizione
• Collocare l’apparecchio su una superficie stabile,
orizzontale e piana. Mantenere una distanza di almeno
15 cm da pareti o oggetti.
• Non collocare l’apparecchio sopra o nelle immediate
vicinanze di fonti di calore come stufe, radiatori, ecc.
Collegamento elettrico
Prima di inserire la spina nella presa di corrente, verificare
che la tensione di rete che si intende utilizzare corrisponda
a quella dell’apparecchio. Le informazioni sono riportate
sulla targhetta di identificazione.
Indicazioni sul display
Modalità standby
(il simbolo lampeggia)
Preparazione del ghiaccio
(mescolatore e raffreddamento attivo)
Raffreddamento attivo
Agitatore attivo
Preparazione dello yogurt
(riscaldamento attivo)
Funzione post-raffreddamento attiva
Funzioni dei tasti
• Con il tasto POWER si accende e si spegne l’apparec-
chio.
• Con il tasto MENU si seleziona un programma.
• Con il tasto START / PAUSE si avvia il programma
selezionato.
• Con il tasto START / PAUSE è possibile interrompere
il programma attivato. Durante la preparazione del
ghiaccio, il compressore continua a raffreddare per
1 minuto. Premere nuovamente il tasto per continuare il
programma.
• Se si desidera annullare un programma, premere il tasto
POWER. L’apparecchio si spegne.
• Se il programma di o è stato annullato con il tasto
POWER
, mantenere almeno 5 minuti prima di riavviare
l’apparecchio. In questo modo si garantisce che la pres-
sione nel circuito del refrigerante possa rilassarsi.
Tempo di preparazione
• Il tempo di preparazione del gelato o dello yogurt varia.
Dipende dai seguenti fattori:
- la ricetta,
- la temperatura della miscela
- la temperatura ambiente,
- dalla consistenza desiderata.
• Non lasciare l’apparecchio incustodito durante il funzio-
namento.
• Preparazione del ghiaccio:
• Durante la preparazione del gelato, controllare costan-
temente la consistenza della miscela.
• La miscela del gelato non deve essere né troppo
sottile né troppo densa.
• Preparazione dello yogurt:
• Il tempo di preparazione dipende dalle preferenze
individuali.
Controllare lo yogurt dopo qualche ora. Se necessa-
rio, ridurre o aumentare il tempo preimpostato. A tale
scopo, premere prima il tasto START / PAUSE e poi
modificare il tempo con il controllo rotativo. Quindi
riavviare l’apparecchio.
• La consistenza dello yogurt diventa più solida quando
viene riposto in frigorifero dopo la preparazione.

PC-ICM1268_IM 12.06.23
36
Funzioni di protezione durante
la preparazione del gelato
• Se l’agitatore si ferma durante il funzionamento perché
la massa del gelato è diventata troppo solida, il motore
si blocca.
1. Spegnere immediatamente l’apparecchio. Estrarre la
spina dalla presa di corrente.
2. Rimuovere il gelato.
• Dopo aver preparato il gelato, è possibile iniziare un’altra
operazione. Per protezione, il compressore si accende
solo dopo circa 3 minuti.
• Quando si preparano più porzioni di gelato in succes-
sione, è possibile che si attivi la protezione contro il sur-
riscaldamento. Il compressore non si accende. Lasciare
raffreddare l’apparecchio per circa 30 minuti prima di
utilizzarlo nuovamente.
Preparazione per la preparazione del gelato
1. Assicurarsi che il contenitore sia completamente asciutto
prima di inserirlo. Posizionare il contenitore nel pozzetto
dell’unità base.
2. Riempire il contenitore con gli ingredienti desiderati.
- Non riempire il contenitore con più di 1000 ml!
- Utilizzare ingredienti che abbiano una temperatura di
frigorifero di 6 – 8 °C.
- Gli ingredienti non devono essere congelati. Ciò
potrebbe causare il blocco del motore.
- Se si desidera preparare un gelato alla frutta, utiliz-
zare solo frutta morbida e senza semi che sia stata
precedentemente schiacciata (ridotta in purea). È
possibile aggiungere anche succhi di frutta.
- Se si desidera raffinare il gelato con pezzi di frutta
solida, noci, croccanti o alcol, aggiungere questi ingre-
dienti solo alla fine del tempo di congelamento.
- L’alcol inibisce il processo di congelamento.
3. Inserire il coperchio trasparente nell’alloggiamento del
motore. Assicurarsi che entrambe le chiusure dell’allog-
giamento del motore facciano “clic” sul coperchio.
4. Inserire l’agitatore sull’albero di trasmissione del motore.
L’utensile di agitazione deve innestarsi con un “clic”.
5. Posizionare l’alloggiamento del motore con il coperchio
e l’agitatore in modo che la freccia sul coperchio sia
rivolta in direzione del simbolo .
6. Chiudere il coperchio ruotandolo in direzione del sim-
bolo .
Preparazione per la preparazione dello yogurt
Sono necessari latte pastorizzato (latte UHT) e yogurt natu-
rale in un rapporto di miscelazione di 100 ml : 15 ml.
1. Scegliere la posizione in modo che l’apparecchio non
debba essere spostato durante la preparazione dello
yogurt e non sia esposto a vibrazioni. Altrimenti lo yogurt
rimarrà liquido.
2. Riscaldare il latte UHT in una pentola a circa 45 °C e
mescolarvi lo yogurt naturale o la coltura di yogurt. Se
si desidera utilizzare latte fresco, farlo bollire prima e
lasciarlo raffreddare a circa 45 °C.
3. Posizionare il contenitore nel pozzetto dell’unità base.
4. Versare la miscela già riscaldata nel contenitore.
- Non riempire il contenitore con più di 1400 ml!
- Se si desidera perfezionare lo yogurt con frutta, noci,
marmellata o simili, aggiungere questi ingredienti solo
dopo la preparazione.
5. Separare il coperchio trasparente dall’alloggiamento
del motore: Se presente, rimuovere prima l’agitatore
dall’albero motore. Premere verso l’interno i due fermi
dell’alloggiamento del motore per rimuovere il coperchio.
6. Rimettere il coperchio trasparente senza l’alloggiamento
del motore. In questo modo si mantiene il calore all’in-
terno dell’apparecchio.
Utilizzo
1. Collegare l’apparecchio a una presa di corrente corretta-
mente installata con messa a terra.
2. Accendere l’apparecchio con il tasto POWER.
3. Selezionare il programma desiderato con il tasto MENU:
Programma Funzione Tempo
preimpostato
Preparazione del
ghiaccio (Minuti)
Solo agitazione
(Minuti)
Solo raffredda-
mento
(Minuti)
Preparazione dello
yogurt
(Ore)
È possibile modificare il tempo preimpostato con la
manopola:
• 5 – 60 minuti per i programmi: / /
• 4 – 24 ore al programma:
4. Confermare la selezione con il tasto START / PAUSE. Il
programma si avvia.
5. Allo scadere del tempo, si sentono 10 segnali acustici.
6. L’apparecchio è dotato di una funzione di post-raffred-
damento. Questa si attiva per 1 ora dopo la fine dei
programmi e . Il compressore si spegne per 10 minuti
e poi riprende a funzionare per 4 minuti. Viene visualiz-
zato il messaggio . Dopo 60 minuti, l’apparecchio
passa alla modalità standby.
Si consiglia di rimuovere immediatamente il contenuto
per evitare che il gelato o lo yogurt si congelino nel
contenitore.

PC-ICM1268_IM 12.06.23
37
Rimozione del gelato
1. Spegnere l’apparecchio con il tasto POWER.
2. Scollegare la spina dalla presa di corrente.
3. Ruotare il corpo motore in direzione del simbolo .
Rimuovere l’alloggiamento del motore, il coperchio e
l’accessorio per mescolare.
4. Rimuovere il contenitore.
AVVISO: Pericolo di ustioni da freddo!
Proteggere le mani con guanti quando si tocca il
contenitore.
5. Estrarre il gelato dal contenitore con la spatola per gelato
in dotazione o con un cucchiaio di silicone o di legno.
- Non utilizzare un cucchiaio di metallo per evitare di
graffiare il rivestimento del contenitore.
6. Riempire il gelato in un contenitore pre-raffreddato con
coperchio.
- Il gelato è più buono se è fresco.
- Se il gelato non è destinato al consumo diretto, si
consiglia di raffreddare ulteriormente il gelato finito in
un congelatore.
- Non ricongelare il gelato scongelato o scongelabile!
Rimozione dello yogurt
1. Spegnere l’apparecchio con il tasto POWER.
2. Scollegare la spina dalla presa di corrente.
3. Ruotare il coperchio verso il simbolo .
4. Rimuovere il contenitore.
5. Estrarre lo yogurt dal contenitore con la spatola in dota-
zione o con un cucchiaio di silicone o di legno.
- Non utilizzare un cucchiaio di metallo per evitare di
graffiare il rivestimento del contenitore.
6. Versare lo yogurt in un contenitore ben pulito con coper-
chio e riporlo in frigorifero.
- La durata di conservazione dello yogurt dipende da
come lo si prepara. Più si lavora in modo pulito, più
tempo ci vuole perché lo yogurt vada a male. Tuttavia,
non si dovrebbe conservare lo yogurt per più di una
settimana.
- Aggiungere frutta e simili solo poco prima del con-
sumo.
- 150 ml dello yogurt finito possono essere riutilizzati
come coltura starter. Non utilizzare questa coltura
starter per più di 20 volte, poiché l’effetto si esaurisce
con il tempo.
Ricette per la preparazione del gelato
• Per la preparazione della miscela di gelato, fare
riferimento alle note del capitolo “Preparazione per la
preparazione del gelato”.
• Per aiutarsi è possibile utilizzare il misurino in dotazione.
• Le quantità indicate nelle ricette sono solo indicative.
Provate la vostra miscela personalizzata.
• Se si desidera aumentare le quantità fino a un massimo
di 1000 ml, regolare gli ingredienti nel rapporto corretto. Il
tempo di preparazione aumenterà di conseguenza.
• Potete trovare altre ricette nei libri di cucina o su Internet.
Gelato alla vaniglia
(Per circa 5 porzioni)
Estratto di vaniglia 1– 2 cucchiaini
Latte intero 600 ml
Panna 400 ml
Zucchero 200 g
• Mescolare tutti gli ingredienti in una ciotola con un mixer
a mano fino a sciogliere lo zucchero. Versare la miscela
di gelato raffreddata nel contenitore.
• Tempo di preparazione nella gelatiera: circa 40 – 45 minuti
Gelato al cioccolato
(Per circa 4 porzioni)
Estratto di vaniglia 1 cucchiaino
Latte intero 250 ml
Panna 250 ml
Zucchero 125 g
Tavoletta di cioccolato,
amaro o semidolce 225 g, in piccoli pezzi
• Portare a ebollizione il latte intero e la panna con il cioc-
colato e lo zucchero. Frullare con un mixer che possa
essere utilizzato per piatti caldi. Lasciare raffreddare e
raffreddare la miscela di gelato in frigorifero per 24 ore.
Prima di versare la miscela di gelato raffreddata nel
contenitore, mescolare nuovamente.
• Tempo di preparazione nella gelatiera: circa 30 – 40 minuti
Gelato alla fragola
(Per circa 4 porzioni)
Fragole fresche, mature,
tagliate a fette 250 g
Succo di limone, appena
spremuto 1½ cucchiai
Estratto di vaniglia 1 cucchiaino
Latte intero 250 ml
Panna 250 ml
Zucchero 125 g
• Mescolare le fragole con il succo di limone e circa 80 g
di zucchero. Lasciare riposare il composto per 2 ore in
modo che si formi il succo.
• Mescolare lo zucchero rimanente nel latte con un frul-
latore a mano alla velocità più bassa finché lo zucchero
non è sciolto.
• Mescolare la panna, il succo delle fragole e l’estratto di
vaniglia nel latte.
• Versare la miscela di gelato raffreddata nel contenitore.
• Tempo di preparazione nella gelatiera: circa 30 – 40 minuti
• Aggiungere le fragole negli ultimi 10 minuti del processo
di congelamento.

PC-ICM1268_IM 12.06.23
38
Ricetta base del sorbetto
Succo di frutta /
frutta ridotta in purea
600 – 700 ml
Zucchero
(a seconda del tipo di frutta)
75 – 100 g
Albume d’uovo 1– 2 cucchiai
• Mescolare tutti gli ingredienti in una ciotola con un mixer
a mano fino a sciogliere lo zucchero. Versare la miscela
di gelato raffreddata nel contenitore.
• Tempo di preparazione nella gelatiera: circa 35 – 45 minuti
• Per perfezionare, alla fine del processo di congelamento
si può aggiungere 1 cucchiaio di liquore, cognac, brandy
di lamponi o simili.
• Il sorbetto deve essere consumato in tempi relativa-
mente brevi, in modo che non torni liquido.
Pulizia
AVVISO:
• Prima di procedere alla pulizia, spegnere sempre l’apparecchio
e scollegare la spina dalla presa di corrente.
• Non immergere l’apparecchio in acqua! Potrebbe causare
scosse elettriche o incendi.
ATTENZIONE:
• Non utilizzare spazzole metalliche o altri oggetti
abrasivi.
• Non utilizzare detergenti aggressivi o abrasivi.
• Non utilizzare prodotti chimici, acidi, benzina o olio.
• Il contenitore, l’agitatore e il coperchio non possono
essere lavati in lavastoviglie. L’esposizione al calore
e a detergenti aggressivi potrebbe farli deformare o
scolorire.
• È possibile pulire il contenitore, l’agitatore e il coperchio
in acqua tiepida con l’aggiunta di un po’ di detersivo per
piatti. Asciugare poi bene gli accessori.
• Pulire la base e la ciotola con un panno umido.
Conservazione
• Pulire l’apparecchio come descritto e lasciarlo asciugare
completamente.
• Si consiglia di conservare l’apparecchio nella sua confe-
zione originale se non si intende utilizzarlo per un lungo
periodo di tempo.
• Conservare sempre l’apparecchio fuori dalla portata dei
bambini in un luogo ben ventilato e asciutto.
Risoluzione dei problemi
Problema Possibile causa Rimedio
L’apparecchio non funziona. L’apparecchio non ha alimentazione. Controllare la presa di corrente con un altro
apparecchio.
Inserire correttamente la spina di rete.
Controllare il fusibile di casa.
L’apparecchio è difettoso. Contattare il nostro servizio o uno specialista.
Il coperchio non si chiude. Il contenitore non è inserito corretta-
mente nel vassoio.
Ruotare leggermente il contenitore quando lo
si inserisce.
L’apparecchio è in modalità
standby anche se la prepa-
razione del ghiaccio non è
stata completata.
L’alimentazione è stata interrotta. Riavviare il programma per il tempo rimanente.

PC-ICM1268_IM 12.06.23
39
Problema Possibile causa Rimedio
Il compressore emette rumori
anomali.
La tensione è troppo bassa. Spegnere l’apparecchio e controllare la tensione
di rete.
L’agitatore si ferma durante il
programma.
Il gelato è troppo duro. Blocco del
motore (funzione di protezione).
Spegnere l’apparecchio e scollegare la spina
dalla presa di corrente. Togliere il gelato.
Sul display compare il sim-
bolo . Il compressore non
si accende.
La protezione contro il surriscalda-
mento è attivata.
Lasciare raffreddare l’apparecchio per circa
30 minuti prima di riavviarlo.
Dati tecnici
Modello: ............................................................. PC-ICM 1268
Alimentazione:..........................................220 – 240 V~, 50 Hz
Consumo di energia
Potenza di raffreddamento: ......................................120 W
Potenza di riscaldamento:.......................................22,8 W
Refrigerante: ....................................................... R600a / 24 g
Gas isolante: .................................................................. C5H10
Capacità massima: .................................................... 1500 ml
Capacità massima di riempimento
Preparazione del gelato: ....................................... 1000 ml
Preparazione di yogurt: ......................................... 1400 ml
Classe di protezione: .............................................................
Peso netto: ..................................................................ca. 9 kg
Si riserva il diritto di apportare modiche tecniche e di
design nel corso dello sviluppo del prodotto.
Questo apparecchio è stato testato secondo tutte le
direttive CE in vigore e costruito secondo le ultime norme
di sicurezza.
Smaltimento
Significato del simbolo “Eliminazione”
Salvaguardare l’ambiente, gli elettrodomestici
non vanno eliminati come riuti domestici.
Per l’eliminazione degli elettrodomestici, fare
uso dei posti di raccolta previsti per questo tipo
e porre quegli elettrodomestici che non sono
più in uso.
Si contribuisce così ad evitare un effetto potenziale sull’am-
biente e sulla salute, dovuto magari ad una eliminazione
sbagliata.
Questo signica un contributo personale alla riutilizzazione,
al riciclaggio e altre forme di utilizzazione di elettrodomestici
ed apparecchi elettronici usati.
Si possono trovare le corrispondenti informazioni sugli
appositi luoghi di raccolta, nelle amministrazioni dei comuni.
Il vostro rivenditore e partner contrattuale è anche obbligato
a riprendere gratuitamente il vecchio apparecchio.

PC-ICM1268_IM 12.06.23
40
WAŻNE:
Najpierw należy zapoznać się z oddzielnie załączoną instrukcją
bezpieczeństwa.
Instrukcja obsługi
Dziękujemy za wybór naszego produktu. Mamy nadzieję, że
korzystanie z urządzenia sprawi państwu radość.
Przed rozpoczęciem użytkowania urządzenia przeczytaj
uważnie instrukcję obsługi oraz oddzielnie załączone
wskazówki bezpieczeństwa. Przechowuj te dokumenty
wraz z kartą gwarancyjną, paragonem i, jeśli to możliwe,
pudełkiem z opakowaniem wewnętrznym w bezpiecznym
miejscu. Jeżeli przekazujesz urządzenie osobom trzecim,
dołącz zawsze wszystkie istotne dokumenty.
Symbole użyte w tej instrukcji obsługi
Ważne informacje dotyczące bezpieczeństwa użytkownika
są specjalnie wyróżnione. Koniecznie stosuj się do tych
wskazówek, aby uniknąć wypadków i uszkodzenia urzą-
dzenia:
OSTRZEŻENIE:
Ostrzega przed zagrożeniami dla zdrowia i wskazuje na
potencjalne ryzyka obrażeń.
UWAGA:
Wskazuje na potencjalne zagrożenia dla urządzenia lub
innych przedmiotów.
Spis treści
Przegląd elementów obsługi .............................................3
Rozpakowanie urządzenia ............................................... 40
Przegląd elementów obsługi / Zakres dostawy..............40
Ostrzeżenia dotyczące użytkowania urządzenia ..........41
W przypadku uszkodzenia obiegu
czynnika chłodniczego ................................................... 41
Uwagi dotyczące użytkowania ........................................41
Lokalizacja ......................................................................41
Podłączenie elektryczne ................................................41
Wskazania na wyświetlaczu .........................................41
Funkcje przycisków ........................................................ 41
Czas przygotowania .......................................................41
Funkcje ochronne podczas przygotowywania lodów .... 42
Przygotowanie do robienia lodów ..................................42
Przygotowanie do zrobienia jogurtu ..............................42
Obsługa .............................................................................. 42
Wyjmowanie lodów ........................................................42
Usuwanie jogurtu ...........................................................43
Przepisy na przygotowanie lodów ..................................43
Czyszczenie ....................................................................... 44
Przechowywanie ...............................................................44
Rozwiązywanie problemów .............................................44
Dane techniczne ................................................................45
Warunki gwarancji ............................................................45
Usuwanie ...........................................................................46
Znaczenie symbolu „Pojemnik na śmieci” ..................... 46
Rozpakowanie urządzenia
1. Wyjmij urządzenie z opakowania.
2. Usuń wszystkie materiały opakowaniowe, takie jak folie,
materiały wypełniające, opaski kablowe i opakowania
kartonowe.
3. Sprawdź, czy zawartość opakowania jest kompletna.
4. Jeżeli zawartość opakowania jest niekompletna lub
jeżeli widoczne są uszkodzenia, nie używaj urządzenia.
Natychmiast zwróć je do sprzedawcy.
5. Na urządzeniu może nadal znajdować się kurz lub
pozostałości po produkcji. Zalecamy wyczyszczenie
urządzenia zgodnie z opisem w punkcie „Czyszczenie”.
Przegląd elementów obsługi /
Zakres dostawy
1 Obudowa silnika narzędzia do mieszania
2 Odblokowanie obudowy silnika
3 Wałek napędowy
4 Przezroczysta pokrywa
5 Mieszadło
6 Pojemnik
7 Styki obudowy silnika
8 Koryto jednostki podstawowej
9 Jednostka podstawowa z kompresorem
10 Otwory wentylacyjne
11 Regulacja obrotowa /
12 Przycisk MENU (wybór programu)
13 Przycisk POWER (włączanie / wyłączanie urządzenia)
14 Lampka kontrolna (przygotowywanie jogurtu)
15 Lampka kontrolna (przygotowanie lodu)
16 Wyświetlacz
17 Lampka kontrolna (mieszadło)
18 Lampka kontrolna (chłodzenie)
19 Przycisk START / PAUSE (rozpoczęcie / przerwanie
programu)
Bez ilustracji
Łopatka do lodu
Kubek do odmierzania

PC-ICM1268_IM 12.06.23
41
Ostrzeżenia dotyczące
użytkowania urządzenia
OSTRZEŻENIE:
Urządzenie zawiera w obiegu czynnika chłodniczego izo-
butan (R600a), gaz ziemny o wysokiej kompatybilności
środowiskowej, który jest łatwopalny. Podczas transportu
i ustawiania urządzenia należy zwrócić uwagę, aby urzą-
dzenie nie spadło. Nie należy uszkadzać obiegu czynnika
chłodniczego.
UWAGA:
• Należy pamiętać o przestrzeganiu czasu oczekiwania
2 godzin przy pierwszym użyciu urządzenia lub po
transporcie, aby czynnik chłodniczy mógł się osadzić.
W przeciwnym razie dojdzie do uszkodzenia sprężarki
chłodniczej.
• Nie używać metalowej łyżki podczas wyjmowania
lodów lub jogurtu, aby nie porysować powłoki w po-
jemniku.
• Używaj rękawiczek, aby chronić ręce podczas wyjmo-
wania pojemnika po zrobieniu lodów. Istnieje ryzyko
poparzeń z powodu zimna!
W przypadku uszkodzenia
obiegu czynnika chłodniczego
• Za wszelką cenę unikać otwartego ognia i źródeł zapłonu.
• Wyciągnąć wtyczkę sieciową urządzenia z gniazdka.
• Przewietrzyć pomieszczenie, w którym znajduje się
urządzenie.
Uwagi dotyczące użytkowania
Lokalizacja
• Umieścić urządzenie na stabilnej, poziomej i równej
powierzchni. Zachować odległość co najmniej 15 cm od
ścian lub przedmiotów.
• Nie umieszczaj urządzenia na lub w bezpośrednim są-
siedztwie źródeł ciepła, takich jak piece, grzejniki itp.
Podłączenie elektryczne
Przed włożeniem wtyczki do gniazdka sprawdź, czy napię-
cie sieciowe, z którego zamierzasz korzystać, odpowiada
napięciu urządzenia. Informacje na ten temat znajdują się
na tabliczce znamionowej.
Wskazania na wyświetlaczu
Tryb gotowości
(miga symbol )
Przygotowanie lodu
(narzędzie do mieszania i chłodzenie
aktywne)
Chłodzenie aktywne
Mieszadło aktywne
Przygotowanie jogurtu
(podgrzewanie aktywne)
Funkcja chłodzenia aktywna
Funkcje przycisków
• Użyj przycisku POWER, aby włączyć i wyłączyć urzą-
dzenie.
• Użyj przycisku MENU, aby wybrać program.
• Wybrany program można uruchomić przyciskiem
START / PAUSE.
• Przyciskiem START / PAUSE można przerwać włączony
program. Podczas przygotowywania lodu kompresor
kontynuuje chłodzenie przez 1 minutę. Naciśnij ponow-
nie przycisk, aby kontynuować program.
• Jeśli chcesz anulować program, naciśnij przycisk
POWER. Urządzenie wyłączy się.
• Jeśli program lub został anulowany za pomocą
przycisku POWER, przed ponownym uruchomieniem
urządzenia należy zachować co najmniej 5 minut. Dzięki
temu ciśnienie w obiegu czynnika chłodniczego może się
zrelaksować.
Czas przygotowania
• Czas przygotowania lodów lub jogurtu jest różny. Zależy
on od następujących czynników:
- receptury,
- temperatury mieszanki,
- temperatury otoczenia,
- pożądanej konsystencji.
• Nie należy pozostawiać urządzenia bez nadzoru pod-
czas pracy.
• Przygotowanie lodu:
• Podczas przygotowywania lodów należy stale spraw-
dzać konsystencję mieszanki.
• Mieszanka lodowa nie powinna być zbyt rzadka ani
zbyt gęsta.
• Przygotowanie jogurtu:
• Czas przygotowania zależy od indywidualnych
preferencji.
Sprawdź jogurt po kilku godzinach. W razie potrzeby
zmniejsz lub zwiększ ustawiony czas. W tym celu
najpierw naciśnij przycisk START / PAUSE, a następ-
nie zmień czas za pomocą regulatora obrotowego.
Następnie ponownie uruchomić urządzenie.
• Konsystencja jogurtu staje się twardsza, gdy po przy-
gotowaniu zostanie on umieszczony w lodówce.

PC-ICM1268_IM 12.06.23
42
Funkcje ochronne podczas przygotowywania lodów
• Jeśli mieszadło zatrzyma się podczas pracy, ponieważ
masa lodowa stała się zbyt twarda, silnik zgaśnie.
1. Natychmiast wyłączyć urządzenie. Wyciągnąć
wtyczkę sieciową z gniazdka.
2. Wyjąć lody.
• Bezpośrednio po przygotowaniu lodów można rozpocząć
inną czynność. Dla ochrony kompresor włącza się
dopiero po około 3 minutach.
• Podczas przygotowywania kolejno kilku porcji lodów
może włączyć się ochrona przed przegrzaniem. Kom-
presor nie włącza się. Przed ponownym użyciem należy
odczekać około 30 minut, aby urządzenie ostygło.
Przygotowanie do robienia lodów
1. Przed włożeniem pojemnika upewnij się, że jest on cał-
kowicie suchy. Umieść pojemnik w studzience jednostki
bazowej.
2. Wsypać do pojemnika żądane składniki.
- Nie wlewaj do pojemnika więcej niż 1000 ml!
- Używaj składników, których temperatura w lodówce
wynosi 6 – 8 °C.
- Składniki nie powinny być zamrożone. Mogłoby to
spowodować zablokowanie silnika.
- Jeśli chcesz przygotować lody owocowe, używaj
tylko miękkich, pozbawionych pestek owoców, które
wcześniej rozdrobniłeś (przecier). Możesz również
dodać soki owocowe.
- Jeśli chcesz uszlachetnić lody stałymi kawałkami
owoców, orzechami, kruchymi lub alkoholem, dodaj te
składniki dopiero pod koniec czasu zamrażania.
- Alkohol hamuje proces zamrażania.
3. Dopasuj przezroczystą pokrywę do obudowy silnika.
Upewnić się, że oba zatrzaski obudowy silnika zatrza-
skują się z „kliknięciem” na pokrywie.
4. Nałożyć mieszadło na wałek napędowy silnika. Miesza-
dło musi zatrzasnąć się na „kliknięcie”.
5. Założyć obudowę silnika z pokrywą i mieszadłem w taki
sposób, aby strzałka na pokrywie była skierowana
w kierunku symbolu .
Zamknąć pokrywę, przekręcając ją w kierunku sym-
bolu .
Przygotowanie do zrobienia jogurtu
Potrzebne jest mleko pasteryzowane (mleko UHT) i jogurt
naturalny w proporcji mieszania 100 ml : 15 ml.
1. Wybierz miejsce tak, aby urządzenie nie musiało być
przesuwane podczas przygotowywania jogurtu i nie
było narażone na wibracje. W przeciwnym razie jogurt
pozostanie płynny.
2. Podgrzej mleko UHT w garnku do temperatury około
45 °C i wymieszaj z jogurtem naturalnym lub kulturą
jogurtową. Jeśli chcesz użyć świeżego mleka, zagotuj je
najpierw i pozwól mu ostygnąć do około 45 °C.
3. Umieść pojemnik w studzience jednostki bazowej.
4. Wlej podgrzaną już mieszankę do pojemnika.
- Nie wlewaj do pojemnika więcej niż 1400 ml!
- Jeśli chcesz uszlachetnić jogurt owocami, orzechami,
dżemem lub podobnym dodatkiem, dodaj te składniki
dopiero po przygotowaniu.
5. Oddzielić przezroczystą pokrywę od obudowy sil-
nika: Jeśli jest zamontowana, najpierw zdjąć mieszadło
z wałka napędowego. Nacisnąć oba zatrzaski na obudo-
wie silnika do wewnątrz, aby zdjąć pokrywę.
6. Założyć przezroczystą pokrywę bez obudowy silnika.
Dzięki temu ciepło pozostaje wewnątrz urządzenia.
Obsługa
1. Podłączyć urządzenie do prawidłowo zainstalowanego,
uziemionego gniazdka.
2. Włączyć urządzenie za pomocą przycisku POWER.
3. Wybrać żądany program za pomocą przycisku MENU:
Program Funkcja Wstępnie
ustawiony czas
Przygotowanie lodu (Minuty)
Tylko mieszanie
(Minuty)
Tylko chłodzenie
(Minuty)
Przygotowanie
jogurtu
(Godziny)
Za pomocą pokrętła można zmienić zaprogramowany
czas:
• 5 – 60 minut w programach: / /
• 4 – 24 godziny na programie:
4. Potwierdzić wybór przyciskiem START / PAUSE. Pro-
gram rozpoczyna się.
5. Po upływie czasu usłyszysz 10 sygnałów dźwiękowych.
6. Urządzenie jest wyposażone w funkcję chłodzenia po
zakończeniu programu. Jest ona aktywowana na 1 go-
dzinę po zakończeniu programów i . Sprężarka wyłą-
cza się na 10 minut, a następnie ponownie pracuje przez
4 minut. Na wyświetlaczu pojawia się napis . Po
60 minutach urządzenie przechodzi w tryb czuwania.
Zalecamy natychmiastowe wyjęcie zawartości, aby lody
lub jogurt nie przymarzły do pojemnika.
Wyjmowanie lodów
1. Wyłączyć urządzenie przyciskiem POWER.
2. Wyciągnąć wtyczkę sieciową z gniazdka.

PC-ICM1268_IM 12.06.23
43
3. Obrócić obudowę silnika w kierunku symbolu .
Zdjąć obudowę silnika wraz z pokrywą i narzędziem do
mieszania.
4. Wyjąć pojemnik.
OSTRZEŻENIE:
Niebezpieczeństwo poparzenia zimnem!
Przy dotykaniu pojemnika chronić ręce rękawicami.
5. Wyjąć lody z pojemnika za pomocą dołączonej szpatułki
do lodów lub za pomocą silikonowej lub drewnianej łyżki.
- Nie używaj metalowej łyżki, aby nie porysować po-
włoki w pojemniku.
6. Napełnij lody do wcześniej schłodzonego pojemnika
z pokrywką.
- Lody najlepiej smakują na świeżo.
- Jeśli lody nie są przeznaczone do bezpośredniego
spożycia, zalecamy dalsze chłodzenie gotowych
lodów w zamrażarce.
- Nie należy ponownie zamrażać rozmrożonych lub
odmrożonych lodów!
Usuwanie jogurtu
1. Wyłączyć urządzenie przyciskiem POWER.
2. Wyciągnąć wtyczkę sieciową z gniazdka.
3. Obrócić pokrywę w kierunku symbolu .
4. Wyjąć pojemnik.
5. Wyjąć jogurt z pojemnika za pomocą dołączonej szpa-
tułki lub za pomocą silikonowej lub drewnianej łyżki.
- Nie używaj metalowej łyżki, aby nie porysować po-
włoki w pojemniku.
6. Przelej jogurt do dokładnie oczyszczonego pojemnika
z pokrywką i umieść go w lodówce.
- Czas przechowywania jogurtu zależy od tego, jak go
przygotujesz. Im czyściej pracujesz, tym dłużej trwa
proces psucia się jogurtu. Nie należy jednak przecho-
wywać jogurtu dłużej niż tydzień.
- Owoce i tym podobne dodawaj dopiero na krótko
przed jedzeniem.
- 150 ml gotowego jogurtu może być ponownie wyko-
rzystane jako kultura startowa. Nie używaj tej kultury
startowej więcej niż 20 razy, ponieważ jej działanie
z czasem się osłabia.
Przepisy na przygotowanie lodów
• Podczas przygotowywania mieszanki do lodów należy
zapoznać się ze wskazówkami w rozdziale „Przygotowa-
nie do robienia lodów”.
• Do pomocy można użyć miarki wchodzącej w zakres
dostawy.
• Ilości podane w przepisach są jedynie wskazówkami.
Wypróbuj swoją indywidualną mieszankę.
• Jeśli chcesz zwiększyć ilości do maksymalnie 1000 ml,
dopasuj składniki w odpowiedniej proporcji. Czas przygo-
towania odpowiednio się wydłuży.
• Więcej przepisów znajdziesz w książkach kucharskich
lub w internecie.
Lody waniliowe
(Przygotowuje ok. 5 porcje)
Ekstrakt z wanilii 1– 2 łyżeczki
Pełne mleko 600 ml
Śmietana 400 ml
Cukier 200 g
• Wymieszaj wszystkie składniki w misce za pomocą ręcz-
nego miksera, aż do rozpuszczenia cukru. Schłodzoną
masę lodową przelać do pojemnika.
• Czas przygotowania w maszynce do lodów:
ok. 40 – 45 minut
Lody czekoladowe
(Przygotowuje ok. 4 porcje)
Ekstrakt z wanilii 1 łyżeczka
Pełne mleko 250 ml
Śmietana 250 ml
Cukier 125 g
Tabliczka czekolady,
gorzkiej lub półsłodkiej 225 g, w małych kawałkach
• Doprowadzić do wrzenia mleko pełne i śmietankę z cze-
koladą i cukrem. Zmiksować za pomocą miksera, który
może być używany do gorących potraw. Pozostawić
masę lodową do ostygnięcia i schłodzić w lodówce przez
24 godziny. Przed przelaniem schłodzonej masy lodowej
do pojemnika, ponownie wymieszać.
• Czas przygotowania w lodziarce: ok. 30 – 40 minut
Lody truskawkowe
(Przygotowuje ok. 4 porcje)
Truskawki, świeże, dojrzałe,
pokrojone w plasterki 250 g
Sok z cytryny,
świeżo wyciśnięty 1½ łyżka stołowej
Ekstrakt z wanilii 1 łyżeczka
Pełne mleko 250 ml
Śmietana 250 ml
Cukier 125 g
• Zmiksuj truskawki z sokiem z cytryny i około 80 g cukru.
Odstawić na 2 godziny, aby powstał sok.
• Pozostały cukier wymieszać z mlekiem za pomocą
ręcznego miksera na najniższej prędkości, aż cukier się
rozpuści.
• Wymieszać śmietankę, sok z truskawek i ekstrakt wani-
liowy z mlekiem.
• Schłodzoną masę lodową przelać do pojemnika.
• Czas przygotowania w lodziarce: około 30 – 40 minut.
• Truskawki dodać w ostatnich 10 minutach mrożenia.

PC-ICM1268_IM 12.06.23
44
Podstawowy przepis na sorbet
Sok owocowy / owoce, przecier 600 – 700 ml
Cukier (w zależności od rodzaju
owoców)
75 – 100 g
Białko jajka 1– 2 łyżki stołowe
• Wymieszaj wszystkie składniki w misce za pomocą ręcz-
nego miksera, aż cukier się rozpuści. Schłodzoną masę
lodową przelać do pojemnika.
• Czas przygotowania w maszynce do lodów:
ok. 35 – 45 minut
• W celu uszlachetnienia, pod koniec procesu zamrażania
można dodać 1 łyżkę likieru, koniaku, brandy malinowej
lub podobnego.
• Sorbet należy spożywać stosunkowo szybko, aby nie
stał się ponownie płynny.
Czyszczenie
OSTRZEŻENIE:
• Przed czyszczeniem należy zawsze wyłączyć urządzenie i wy-
jąć wtyczkę z gniazdka.
• Nie wolno zanurzać urządzenia w wodzie! Może to spowodo-
wać porażenie prądem lub pożar.
UWAGA:
• Nie używać szczotki drucianej ani innych przedmiotów
ściernych.
• Nie używać ostrych lub ściernych środków czyszczą-
cych.
• Nie używać środków chemicznych, kwasów, benzyny
ani oleju.
• Pojemnik, narzędzie do mieszania i pokrywa nie
nadają się do mycia w zmywarce. Narażenie na
działanie ciepła i ostrych środków czyszczących może
spowodować ich wypaczenie lub odbarwienie.
• Pojemnik, mieszadło i pokrywkę można myć w ciepłej
wodzie do płukania z dodatkiem niewielkiej ilości płynu
do ręcznego mycia naczyń. Następnie należy dobrze
wysuszyć akcesoria.
• Jednostkę podstawową i misę czyścić wilgotną ście-
reczką.
Przechowywanie
• Wyczyść urządzenie zgodnie z opisem i pozostaw do
całkowitego wyschnięcia.
• Zalecamy przechowywanie urządzenia w oryginalnym
opakowaniu, jeśli nie zamierzasz go używać przez
dłuższy czas.
• Zawsze przechowuj urządzenie poza zasięgiem dzieci
w dobrze wentylowanym i suchym miejscu.
Rozwiązywanie problemów
Problem Możliwa przyczyna Środek zaradczy
Urządzenie nie działa. Urządzenie nie jest zasilane. Sprawdzić gniazdo sieciowe za pomocą innego
urządzenia.
Włożyć prawidłowo wtyczkę sieciową.
Sprawdzić bezpiecznik domowy.
Urządzenie jest uszkodzone. Skontaktuj się z naszym serwisem lub specjalistą.
Pokrywa nie zamyka się. Pojemnik nie jest prawidłowo
włożony do tacy.
Obróć nieco pojemnik podczas wkładania.

PC-ICM1268_IM 12.06.23
45
Problem Możliwa przyczyna Środek zaradczy
Urządzenie jest w trybie czu-
wania, mimo że przygotowanie
lodu nie zostało zakończone.
Nastąpiła przerwa w zasilaniu. Uruchom ponownie program na pozostały czas.
Kompresor wydaje nietypowe
dźwięki.
Napięcie jest zbyt niskie. Wyłączyć urządzenie i sprawdzić napięcie w sieci.
Mieszadło zatrzymuje się
podczas programu.
Lody są zbyt twarde. Blokada
silnika (funkcja ochronna).
Wyłączyć urządzenie i wyjąć wtyczkę sieciową
z gniazdka. Wyjąć lody.
Na wyświetlaczu pojawia się
symbol . Kompresor nie
włącza się.
Zabezpieczenie przed przegrza-
niem jest aktywne.
Przed ponownym uruchomieniem pozostawić urzą-
dzenie na ok. 30 minut do ostygnięcia.
Dane techniczne
Model:................................................................PC-ICM 1268
Zasilanie: .................................................. 220 – 240 V~, 50 Hz
Pobór mocy
Moc chłodzenia: .......................................................120 W
Moc grzewcza: ........................................................22,8 W
Czynnik chłodniczy: ............................................ R600a / 24 g
Gaz do wdmuchiwania izolacji: ......................................C5H10
Maksymalna pojemność: ........................................... 1500 ml
Przygotowanie lodów
Przygotowanie lodów: ........................................... 1000 ml
Przygotowanie jogurtu: ......................................... 1400 ml
Stopień ochrony: ....................................................................
Waga netto: .................................................................ok. 9 kg
Zastrzegamy sobie prawo wprowadzania zmian technicz-
nych i projektowych w trakcie ciągłego rozwoju produktu.
To urządzenie zostało przetestowane zgodnie z wszystkimi
obowiązującymi, aktualnymi dyrektywami CE i zbudowane
zgodnie z najnowszymi przepisami bezpieczeństwa.
Warunki gwarancji
Przyznajemy 24 miesiące gwarancji na produkt licząc od
daty zakupu.
W tym okresie będziemy bezpłatnie usuwać w terminie
14 dni od daty dostarczenia wadliwego sprzętu z kartą
gwarancyjną do miejsca zakupu wszystkie uszkodzenia
powstałe w tym urządzeniu na skutek wady materiałów
lub wadliwego wykonania, naprawiając oraz wymieniając
wadliwe części lub (jeśli uznamy za stosowne) wymieniając
całe urządzenie na nowe.
Sprzęt do naprawy powinien być dostarczony w komplecie
wraz z dowodem zakupu oraz z ważną kartą gwarancyjną
do sprzedawcy w miarę możliwości w oryginalnym opako-
waniu lub innym odpowiednim dla zabezpieczenia przed
uszkodzeniem. W razie braku kompletnego opakowania fa-
brycznego, ryzyko uszkodzenia sprzętu podczas transportu
do i z miejsca zakupu ponosi reklamujący.
Naprawa gwarancyjna nie dotyczy czynności przewidzianych
w instrukcji obsługi, do wykonania których zobowiązany jest
użytkownik we własnym zakresie i na własny koszt.
Gwarancja nie obejmuje:
• mechanicznych, termicznych, chemicznych uszkodzeń
sprzętu i wywołanych nimi wad,
• uszkodzeń powstałych w wyniku działania sił zewnętrz-
nych takich jak wyładowania atmosferyczne, zmiana
napięcia zasilania i innych zdarzeń losowych,
• nieprawidłowego ustawienia wartości napięcia elektrycz-
nego, zasilanie z nieodpowiedniego gniazda zasilania,
• sznurów połączeniowych, sieciowych, żarówek, baterii,
akumulatorów,
• uszkodzeń wyrobu powstałych w wyniku niewłaściwego
lub niezgodnego z instrukcją jego użytkowania, przecho-
wywania, konserwacji, samowolnego zrywania plomb
oraz wszelkich przeróbek i zmian konstrukcyjnych doko-
nanych przez użytkownika lub osoby niepowołane,
• roszczeń z tytułu parametrów technicznych wyrobu, o ile
są one zgodne z podanymi przez producenta,
• prawidłowego zużycia i uszkodzeń, które mają nieistotny
wpływ na wartość lub działanie tego urządzenia.
Karta gwarancyjna bez pieczątki sklepu, daty sprzedaży, nie
wypełniona, źle wypełniona, ze śladami poprawek, nieczy-
telna wskutek zniszczenia, bez możliwości ustalenia miejsca
sprzedaży oraz dołączonego dowodu zakupu jest nieważna.
Korzystanie z usług gwarancyjnych nie jest możliwe po
upływie daty ważności gwarancji. Gwarancja na części lub
całe urządzenie, które są wymieniane kończy się, wraz
z końcem gwarancji na to urządzenie.
Wszystkie inne roszczenia, wliczając w to odszkodowania
są wykluczone chyba, że prawo przewiduje inaczej. Rosz-
czenia wykraczające poza tą umowę nie są uwzględniane
przez tą gwarancję.
Gwarancja na sprzedany towar konsumpcyjny nie wyłącza,
nie ogranicza ani nie zawiesza uprawnień kupującego
wynikających z niezgodności towaru z umową.

PC-ICM1268_IM 12.06.23
46
Gwarancja oraz zawarte w niej warunki obowiązują na
terenie Rzeczpospolitej Polskiej.
Dystrybutor:
CTC Clatronic Sp. z o.o
Ul. Brzeska 1
45-960 Opole
Usuwanie
Znaczenie symbolu „Pojemnik na śmieci”
Proszę oszczędzać nasze środowisko, sprzęt
elektryczny nie należy do śmieci domowych.
Proszę korzystać z punktów zbiorczych, prze-
widzianych do zdawania sprzętu elektrycznego,
i tam proszę oddawać sprzęt elektryczny,
którego już nie będą Państwo używać.
Tym sposobem pomagają Państwo unikać potencjalnych
następstw niewłaściwego usuwania odpadów, mających
wpływ na środowisko i zdrowie ludzi.
Tą drogą przyczyniają się Państwo do ponownego użycia,
do recyklingu i do innych form wykorzystania starego
sprzętu elektrycznego i elektronicznego.
Informacje, gdzie można zdać sprzęt, otrzymają Państwo
w swoich urzędach komunalnych lub w administracji gminy.
Twój sprzedawca i partner umowny jest również zobowią-
zany do bezpłatnego odbioru starego urządzenia.

PC-ICM1268_IM 12.06.23
47
FONTOS:
Először feltétlenül olvassa el a külön mellékelt biztonsági utasítá-
sokat.
Használati utasítás
Köszönjük, hogy a termékünket választotta. Reméljük,
elégedetten használja majd a készüléket.
A készülék használata előtt nagyon gyelmesen olvassa
el a használati útmutatót és a külön mellékelt biztonsági
utasításokat. Tartsa ezeket a dokumentumokat, beleértve
a jótállási jegyet, a blokkot és lehetőség szerint a belső
csomagolással ellátott dobozt is, biztonságos helyen. Ha a
készüléket harmadik félnek adja tovább, mindig mellékelje
az összes vonatkozó dokumentumot.
A használati útmutatóban található szimbólumok
Az ön biztonságára vonatkozó utasítások kifejezetten meg
vannak különböztetve. Kérjük, mindenképpen ügyeljen
ezekre annak érdekében, hogy elkerülje a baleseteket és a
készülék károsodását:
FIGYELMEZTETÉS:
Egészségét károsító veszélyforrásokra gyelmeztet és
rámutat a lehetséges sérülési lehetőségekre.
VIGYÁZAT:
Lehetséges veszélyre utal, mely a készülékben vagy más
tárgyakban kárt tehet.
Tartalom
A kezelőelemek áttekintése ...............................................3
A készülék kicsomagolása ..............................................47
A kezelőelemek áttekintése / A csomag tartalma ..........47
A készülék használatára vonatkozó gyelmeztetések
...48
Ha a hűtőközeg-kör megsérült .......................................48
Használati megjegyzések ................................................48
Helyszín ..........................................................................48
Elektromos csatlakozás .................................................48
Jelzések a kijelzőn ........................................................48
A gombok funkciói .......................................................... 48
Előkészítési idő ..............................................................48
Védőfunkciók a fagylaltkészítés során ..........................48
Fagylaltkészítés előkészítése .......................................... 49
Joghurtkészítés előkészítése .......................................... 49
Működés .............................................................................49
A jégkrém eltávolítása .................................................... 49
A joghurt eltávolítása ...................................................... 50
Fagylaltkészítési receptek ...............................................50
Tisztítás .............................................................................. 51
Tárolás ...............................................................................51
Hibaelhárítás......................................................................51
Műszaki adatok .................................................................52
Hulladékkezelés ................................................................52
A „kuka” piktogram jelentése..........................................52
A készülék kicsomagolása
1. Vegye ki a készüléket a csomagolásából.
2. Távolítson el minden csomagolóanyagot, például
fóliákat, töltőanyagot, kábelkötegelőket és kartoncso-
magolást.
3. Ellenőrizze a szállítási terjedelem teljességét.
4. Ha a csomagolás tartalma hiányos, vagy ha sérülések
észlelhetők, ne működtesse a készüléket. Azonnal
juttassa vissza a kereskedőhöz.
5. A készüléken még lehetnek por- vagy gyártási marad-
ványok. Javasoljuk, hogy tisztítsa meg a készüléket a
„Tisztítás” pontban leírtak szerint.
A kezelőelemek áttekintése /
A csomag tartalma
1 Motorház a keverőszerszámhoz
2 A motorház reteszelése
3 Hajtótengely
4 Átlátszó fedél
5 Keverőszerszám
6 Tartály
7 A motorház érintkezői
8 Az alapegység vályúja
9 Alapegység kompresszorral
10 Szellőzőnyílások
11 Forgatós vezérlés /
12 MENU gomb (program kiválasztása)
13 POWER gomb (a készülék be- / kikapcsolása)
14 Vezérlőlámpa (joghurtkészítés)
15 Vezérlőlámpa (jégkészítés)
16 Kijelző
17 Vezérlőlámpa (keverőszerszám)
18 Vezérlőlámpa (hűtés)
19 START / PAUSE gomb (program indítása / megszakí-
tása)
Ábra nélkül
Jégspatula
Mérőpohár

PC-ICM1268_IM 12.06.23
48
A készülék használatára
vonatkozó gyelmeztetések
FIGYELMEZTETÉS:
A készülék a hűtőközegkörben izobután (R600a) hűtőkö-
zeget tartalmaz, amely egy magas környezeti kompatibi-
litású földgáz, amely gyúlékony. A készülék szállításakor
és felállításakor ügyeljen arra, hogy a készülék ne essen
le. A hűtőközegkör nem sérülhet meg.
VIGYÁZAT:
• A készülék első használatakor vagy szállítás után min-
denképpen tartsa be a 2 órás várakozási időt, hogy
a hűtőközeg le tudjon ülepedni. Ellenkező esetben a
hűtőkompresszor megsérülhet.
• Ne használjon fémkanalat a fagylalt vagy joghurt
kivételekor, hogy ne karcolja meg a tartályban lévő
bevonatot.
• Használjon kesztyűt a keze védelmére, amikor a fagylalt-
készítés után eltávolítja a tartályt. A hideg miatt fennáll az
égési sérülések veszélye!
Ha a hűtőközeg-kör megsérült
• Mindenképpen kerülje a nyílt lángot és a gyújtóforrásokat.
• Húzza ki a készülék hálózati dugaszát a konnektorból.
• Szellőztesse ki a helyiséget, amelyben a készülék
található.
Használati megjegyzések
Helyszín
• Helyezze a készüléket stabil, vízszintes és vízszintes
felületre. Tartson legalább 15 cm távolságot a falaktól
vagy tárgyaktól.
• Ne helyezze a készüléket hőforrásokra vagy azok köz-
vetlen közelébe, például kályhára, radiátorra stb.
Elektromos csatlakozás
Mielőtt bedugja a hálózati csatlakozót a konnektorba,
ellenőrizze, hogy a használni kívánt hálózati feszültség
megfelel-e a készülék feszültségének. Az információt a
típustáblán találja.
Jelzések a kijelzőn
Készenléti üzemmód
(a szimbólum villog)
Jégkészítés
(keverőszerszám és hűtés aktív)
Hűtés aktív
Keverőszerszám aktív
Joghurtkészítés (fűtés aktív)
Utóhűtés funkció aktív
A gombok funkciói
• A POWER gombbal a készüléket be- és kikapcsolhatja.
• A MENU gombbal válasszon ki egy programot.
• A kiválasztott programot a START / PAUSE gombbal
indíthatja el.
• A START / PAUSE gombbal megszakíthatja az aktivált
programot. Jégkészítéskor a kompresszor 1 percig to-
vább hűti a készüléket. A program folytatásához nyomja
meg újra a gombot.
• Ha meg akarja szakítani a programot, nyomja meg a
POWER gombot. A készülék kikapcsol.
• Ha a POWER gombbal megszakította a vagy prog-
ramot, a készülék újraindítása előtt legalább 5 percet
tartson ki. Ez biztosítja, hogy a hűtőközegkörben lévő
nyomás le tudjon lazulni.
Előkészítési idő
• A fagylalt vagy joghurt elkészítési ideje változó. A követ-
kező tényezőktől függ:
- a recepttől,
- a keverék hőmérséklete,
- a környezeti hőmérséklet,
- a kívánt állag.
• Ne hagyja a készüléket felügyelet nélkül működés
közben.
• A jég elkészítése:
• Jégkrém készítésekor folyamatosan ellenőrizze a
keverék állagát.
• A fagylaltkeverék nem lehet túl híg vagy túl sűrű.
• Joghurtkészítés:
• Az elkészítési idő az Ön egyéni preferenciáitól függ.
Néhány óra elteltével ellenőrizze a joghurtot. Ha
szükséges, csökkentse vagy növelje a beállított időt.
Ehhez először nyomja meg a START / PAUSE gom-
bot, majd a forgatógombbal módosítsa az időt. Ezután
indítsa újra a készüléket.
• A joghurt állaga szilárdabbá válik, ha a joghurtot az
elkészítés után a hűtőszekrénybe helyezi.
Védőfunkciók a fagylaltkészítés során
• Ha a keverőszerszám működés közben leáll, mert a
fagylaltmassza túlságosan megszilárdult, a motor leáll.
1. Azonnal kapcsolja ki a készüléket. Húzza ki a hálózati
dugót a konnektorból.
2. Vegye ki a jégkrémet.
• A fagylaltkészítés után azonnal újabb műveletet kezdhet.
A védelem érdekében a kompresszor csak körülbelül
3 perc után kapcsol be.

PC-ICM1268_IM 12.06.23
49
• Ha több adag fagylaltot készít egymás után, a túlmele-
gedés elleni védelem aktiválódhat. A kompresszor nem
kapcsol be. Hagyja a készüléket kb. 30 percig hűlni,
mielőtt újra használná.
Fagylaltkészítés előkészítése
1. Győződjön meg róla, hogy a tartály teljesen száraz,
mielőtt behelyezné. Helyezze a tartályt az alapegység
mélyedésébe.
2. Töltse a kívánt összetevőket a tartályba.
- Ne töltsön 1000 ml-nél többet a tartályba!
- Olyan hozzávalókat használjon, amelyeknek a hű-
tőszekrény hőmérséklete 6 – 8 °C.
- Az összetevőket nem szabad lefagyasztani. Ez a
motor blokkolását okozhatja.
- Ha gyümölcsfagylaltot szeretne készíteni, csak olyan
puha, mag nélküli gyümölcsöt használjon, amelyet
előzőleg összetört (pürésített). Gyümölcsleveket is
adhat hozzá.
- Ha a fagylaltot szilárd gyümölcsdarabokkal, dióval,
kekszdarabokkal vagy alkohollal szeretné nomítani,
ezeket az összetevőket csak a fagyasztási idő végén
adja hozzá.
- Az alkohol gátolja a fagyasztási folyamatot.
3. Illessze az átlátszó fedelet a motorházra. Győződjön
meg róla, hogy a motorház mindkét reteszelése „katta-
nással” a fedélen reteszelődik.
4. Helyezze a keverőszerszámot a motor hajtótengelyére.
A keverőszerszámnak „kattanással” kell beakadnia.
5. Helyezze a motorházat a fedéllel és a keverőszerszám-
mal úgy, hogy a fedélen lévő nyíl a szimbólum
irányába mutasson.
6. Zárja le a fedelet a szimbólum irányába történő
elfordítással.
Joghurtkészítés előkészítése
Pasztőrözött tejre (UHT tej) és natúr joghurtra van szüksége
100 ml : 15 ml keverési arányban.
1. A helyét úgy válassza ki, hogy a készüléket a joghurt-
készítés során ne kelljen mozgatni, és ne legyen kitéve
rezgéseknek. A joghurt egyébként folyékony marad.
2. Az UHT tejet egy edényben melegítse fel kb. 45 °C-ra,
és keverje hozzá a natúr joghurtot vagy a joghurtkultúrát.
Ha friss tejet szeretne használni, először forralja fel, és
hagyja kb. 45 °C-ra lehűlni.
3. Helyezze a tartályt az alapegység mélyedésébe.
4. Öntse a már felmelegített keveréket a tartályba.
- Ne töltsön 1400 ml-nél többet a tartályba!
- Ha a joghurtot gyümölccsel, dióval, lekvárral vagy
hasonlóval kívánja nomítani, ezeket a hozzávalókat
csak az elkészítés után adja hozzá.
5. Válassza le az átlátszó fedelet a motorházról:
Ha van, először távolítsa el a keverőszerszámot a
hajtótengelyről. A fedél eltávolításához nyomja befelé a
motorház mindkét reteszét.
6. Tegye fel az átlátszó fedelet a motorház nélkül. Így a hő
a készülék belsejében marad.
Működés
1. Csatlakoztassa a készüléket egy megfelelően beszerelt
földelt aljzathoz.
2. Kapcsolja be a készüléket a POWER gombbal.
3. Válassza ki a kívánt programot a MENU gombbal:
Program Funkció Előre beállított
idő
Jégkészítés (Percek)
Csak keverés
(Percek)
Csak hűtés
(Percek)
Joghurtkészítés
(Órák)
Az előre beállított időt a forgatógombbal módosíthatja:
• 5 – 60 perc a programokon: / /
• 4 – 24 óra a programon:
4. Erősítse meg a választást a START / PAUSE gombbal. A
program elindul.
5. Az idő letelte után 10 hangjelzés hallható.
6. A készülék utóhűtési funkcióval van felszerelve. Ez a
és programok befejezése után 1 órával aktiválódik. A
kompresszor 10 percre kikapcsol, majd 4 percig újrain-
dul. A kijelzőn megjelenik. 60 perc elteltével a
készülék készenléti üzemmódba kapcsol.
Javasoljuk, hogy azonnal vegye ki a tartalmát, hogy a
fagylalt vagy joghurt ne fagyjon a tartályhoz.
A jégkrém eltávolítása
1. Kapcsolja ki a készüléket a POWER gombbal.
2. Húzza ki a hálózati dugót a konnektorból.
3. Fordítsa el a motorházat a szimbólum irányába. Ve-
gye ki a motorházat a fedéllel és a keverőszerszámmal
együtt.
4. Vegye ki az edényt.
FIGYELMEZTETÉS:
A hideg okozta égési sérülések veszélye!
A tartály megérintésekor védje kezét kesztyűvel.
5. Vegye ki a fagylaltot a tartályból a mellékelt fagylaltke-
verő spatulával vagy szilikon- vagy fakanállal.
- Ne használjon fémkanalat, hogy elkerülje a tartályban
lévő bevonat megkarcolását.

PC-ICM1268_IM 12.06.23
50
6. Töltse a fagylaltot egy előre lehűtött, fedeles edénybe.
- A fagylalt frissen a legnomabb.
- Ha a fagylaltot nem közvetlen fogyasztásra szánja,
javasoljuk, hogy a kész fagylaltot fagyasztóban hűtse
tovább.
- Ne fagyassza vissza a felolvasztott vagy kiolvasztott
fagylaltot!
A joghurt eltávolítása
1. Kapcsolja ki a készüléket a POWER gombbal.
2. Húzza ki a hálózati dugót a konnektorból.
3. Fordítsa a fedelet a szimbólum felé.
4. Vegye ki a tartályt.
5. Vegye ki a joghurtot a tartályból a mellékelt spatulával
vagy szilikon- vagy fakanállal.
- Ne használjon fémkanalat, hogy elkerülje a tartályban
lévő bevonat megkarcolását.
6. Öntse a joghurtot egy alaposan megtisztított, fedeles
edénybe, és tegye a hűtőszekrénybe.
- A joghurt eltarthatósága attól függ, hogyan készíti el.
Minél tisztábban dolgozik, annál tovább tart, amíg a
joghurt megromlik. A joghurtot azonban egy hétnél
tovább nem szabad tárolni.
- Gyümölcsöt és hasonlókat csak röviddel fogyasztás
előtt adjon hozzá.
- A kész joghurtból 150 ml újra felhasználható indító kul-
túraként. Ezt az indító kultúrát 20 alkalomnál többször
ne használja fel, mivel hatása idővel elmúlik.
Fagylaltkészítési receptek
• A fagylaltkeverék elkészítésekor kérjük, olvassa el a
„Fagylaltkészítés előkészítése” fejezetben található
megjegyzéseket.
• Segítségül használhatja a szállítási terjedelemben talál-
ható mérőpoharat.
• A receptekben megadott mennyiségek csak iránymuta-
tást jelentenek. Próbálja ki az egyéni keveréket.
• Ha a mennyiségeket maximum 1000 ml-re szeretné
növelni, állítsa be a hozzávalókat a megfelelő arányban.
Az elkészítési idő ennek megfelelően megnő.
• További recepteket talál szakácskönyvekben vagy az
interneten.
Vanília fagylalt
(Kb. 5 adagot készít)
Vanília kivonat 1– 2 teáskanál
Teljes tej 600 ml
Tejszín 400 ml
Cukor 200 g
• Keverjük össze az összes hozzávalót egy tálban kézi
mixerrel, amíg a cukor feloldódik. Öntse a kihűlt fagylalt-
keveréket a tartályba.
• Elkészítési idő a fagylaltkészítő gépben: kb. 40 – 45 perc
Csokoládéfagylalt
(Kb. 4 adagot készít)
Vanília kivonat 1 teáskanál
Teljes tej 250 ml
Tejszín 250 ml
Cukor 125 g
Tábla csokoládé,
keserű vagy félédes 225 g, apró darabokban
• Forraljuk fel a teljes tejet és a tejszínt a csokoládéval
és a cukorral. Forró ételekhez használható mixerrel
turmixoljuk össze. Hagyja kihűlni a fagylaltkeveréket,
és 24 órán át hűtse a hűtőszekrényben. Mielőtt a kihűlt
fagylaltkeveréket a tartályba öntené, keverje össze újra.
• Elkészítési idő a fagylaltkészítő gépben: kb. 30 – 40 perc
Eperfagylalt
(Kb. 4 adagot készít)
Eper, friss, érett, szeletelt eper 250 g
Frissen facsart citromlé 1½ evőkanál
Vanília kivonat 1 teáskanál
Teljes tej 250 ml
Tejszín 250 ml
Cukor 125 g
• Az epret keverje össze a citromlével és kb. 80 g cukorral.
Hagyjuk a keveréket 2 órán át pihenni, hogy levet
képezzen.
• Keverje a maradék cukrot kézi mixerrel a legalacso-
nyabb fokozaton a tejbe, amíg a cukor feloldódik.
• Keverje a tejszínt, az eper levét és a vaníliakivonatot a
tejbe.
• Öntse a kihűlt fagylaltkeveréket a tartályba.
• Elkészítési idő a fagylaltgépben: kb. 30 – 40 perc
• A fagyasztás utolsó 10 percében adjuk hozzá az epret.
Alapvető sorbet recept
Gyümölcslé / gyümölcs, pürésítve 600 – 700 ml
Cukor
(a gyümölcs fajtájától függően)
75 – 100 g
Tojásfehérje 1– 2 evőkanál
• Az összes hozzávalót keverjük össze egy tálban kézi
mixerrel, amíg a cukor feloldódik. Öntse a kihűlt fagylalt-
keveréket a tartályba.
• Elkészítési idő a fagylaltkészítő gépben: kb. 35 – 45 perc
• A nomítás érdekében a fagyasztás végén 1 evőkanál
likőrt, konyakot, málnapálinkát vagy hasonlót adhatunk
hozzá.
• A sorbetet viszonylag gyorsan el kell fogyasztani, hogy
ne váljon újra folyékonnyá.

PC-ICM1268_IM 12.06.23
51
Tisztítás
FIGYELMEZTETÉS:
• Tisztítás előtt mindig kapcsolja ki a készüléket, és húzza ki a
hálózati csatlakozót a konnektorból.
• Ne merítse a készüléket vízbe! Ez áramütést vagy tüzet okozhat.
VIGYÁZAT:
• Ne használjon drótkefét vagy más koptató tárgyakat.
• Ne használjon durva vagy súroló hatású tisztítósze-
reket.
• Ne használjon vegyszereket, savakat, benzint vagy
olajat.
• A tartály, a keverőszerszám és a fedél nem alkalmas
mosogatógépben történő tisztításra. A hőnek és a
durva tisztítószereknek való kitétel elvetemedést vagy
elszíneződést okozhat.
• A tartályt, a keverőszerszámot és a fedelet meleg
öblítővízben, kevés kézi mosogatószer hozzáadásával
tisztíthatja. Utána jól szárítsa meg a tartozékokat.
• Az alapegységet és a tálat nedves ruhával tisztítsa meg.
Tárolás
• Tisztítsa meg a készüléket a leírtak szerint, és hagyja
teljesen megszáradni.
• Javasoljuk, hogy a készüléket az eredeti csomagolásban
tárolja, ha hosszabb ideig nem kívánja használni.
• A készüléket mindig gyermekek elől elzárva, jól szellőző
és száraz helyen tárolja.
Hibaelhárítás
Probléma Lehetséges ok Megoldás
A készülék nem működik. A készüléknek nincs tápellátása. Ellenőrizze a hálózati aljzatot egy másik
készülékkel.
Helyesen dugja be a hálózati dugót.
Ellenőrizze a házi biztosítékot.
A készülék meghibásodott. Forduljon szervizünkhöz vagy szakem-
berhez.
A fedél nem záródik. A tartály nincs megfelelően behelyezve
a tálcába.
Fordítsa meg egy kicsit a tartályt a behe-
lyezéskor.
A készülék készenléti üzemmód-
ban van, bár a jégkészítés nem
fejeződött be.
Az áramellátás megszakadt. Indítsa újra a programot a hátralévő időre.
A kompresszor rendellenes
hangokat ad ki.
A feszültség túl alacsony. Kapcsolja ki a készüléket, és ellenőrizze a
hálózati feszültséget.
A keverőszerszám leáll a prog-
ram közben.
A fagylalt túl kemény. A motor blokkolása
(védőfunkció).
Kapcsolja ki a készüléket, és húzza ki a
hálózati dugót a konnektorból. Vegye ki a
fagylaltot.
A kijelzőn a szimbólum
jelenik meg. A kompresszor nem
kapcsol be.
A túlmelegedés elleni védelem aktivá-
lódik.
Hagyja a készüléket kb. 30 percig lehűlni,
mielőtt újraindítaná.

PC-ICM1268_IM 12.06.23
52
Műszaki adatok
Modell: ............................................................... PC-ICM 1268
Tápegység: ..............................................220 – 240 V~, 50 Hz
Energiafogyasztás
Hűtési teljesítmény: .................................................. 120 W
Fűtési teljesítmény: .................................................22,8 W
Hűtőközeg: .......................................................... R600a / 24 g
Szigetelő fúvógáz: ..........................................................C5H10
Maximális kapacitás: .................................................. 1500 ml
Maximális töltési kapacitás
Fagylaltkészítés: ................................................... 1000 ml
Joghurtkészítmény: ............................................... 1400 ml
Védelmi osztály: .....................................................................
Nettó súly: ...................................................................kb. 9 kg
A műszaki és kivitelezési módosítások jogát a folyamatos
termékfejlesztés miatt fenntartjuk.
Ezt a készüléket az összes vonatkozó, hatályos CE-irány-
elvnek megfelelően tesztelték, és a legújabb biztonsági
előírásoknak megfelelően gyártották.
Hulladékkezelés
A „kuka” piktogram jelentése
Kímélje környezetünket, az elektromos készülé-
kek nem a háztartási szemétbe valók.
Használja az elektromos készülékek ártalmat-
lanítására kijelölt gyűjtőhelyeket, ott adja le
azokat az elektromos készülékeit, amelyeket
többé már nem kíván használni.
Ezzel segítséget nyújt ahhoz, hogy elkerülhetők legyenek
azok a hatások, amelyeket a helytelen „szemétre dobás”
gyakorolhat a környezetre és az emberi egészségre.
Ezzel hozzájárul az újrahasznosításhoz, a recyclinghoz és a
kiöregedett elektromos és elektronikus készülékek értékesí-
tésének egyéb formáihoz.
Az önkormányzatoknál vagy a polgármesteri hivatalokban
tájékoztatást kaphat arról, hogy hova viheti a kiselejtezett
készülékeket. Az Ön kereskedője és szerződéses partnere
köteles a régi készüléket is ingyenesen visszavenni.

PC-ICM1268_IM 12.06.23
53
ВАЖНО:
Обязательно сначала прочитайте отдельно прилагаемые
инструкции по технике безопасности.
Руководство по эксплуатации
Спасибо за выбор нашего продукта. Надеемся, он вам
понравится.
Перед использованием данного прибора внимательно
прочитайте инструкцию по эксплуатации и отдельно при-
лагаемые инструкции по технике безопасности. Храните
эти документы, включая гарантийный талон, чек и, по воз-
можности, коробку с внутренней упаковкой в надежном
месте. Если вы передаете прибор третьему лицу, всегда
прикладывайте к нему все соответствующие документы.
Символы применяемые в
данном руководстве пользователя
Важные рекомендации для обеспечения вашей без-
опасности обозначены по особенному. Обязательно
следуйте этим рекомендациям, чтобы предотвратить
несчастный случай или поломку изделия:
ПРЕДУПРЕЖДЕНИЕ:
Предупреждает об опасности для здоровья и возмож-
ном риске получения травмы.
ВНИМАНИЕ:
Указывает на возможную опасность для изделия и
других окружающих предметов.
Содержание
Обзор деталей прибора ...................................................3
Распаковка прибора ....................................................... 53
Обзор деталей прибора / Комплект поставки ...........53
Предупреждения по использованию прибора.........54
При повреждении контура хладагента ......................54
Примечания по использования ................................... 54
Расположение ..............................................................54
Электрическое подключение ......................................54
Индикация на дисплее .................................................54
Функции кнопок ............................................................. 54
Время приготовления ..................................................54
Защитные функции при
приготовлении мороженого .........................................55
Подготовка к приготовлению мороженого ...............55
Подготовка к приготовлению йогурта .......................55
Использование ................................................................ 55
Извлечение мороженого .............................................56
Удаление йогурта ......................................................... 56
Рецепты приготовления мороженого ........................56
Чистка ................................................................................ 57
Хранение ........................................................................... 57
Устранение неполадок ................................................... 58
Технические данные ......................................................58
Утилизация ....................................................................... 58
Значение символа «корзина» .....................................58
Распаковка прибора
1. Извлеките прибор из упаковки.
2. Удалите все упаковочные материалы, такие как
фольга, наполнитель, кабельные стяжки и картонная
упаковка.
3. Проверьте комплект поставки на комплектность.
4. Если содержимое упаковки неполное или если можно
обнаружить повреждения, не эксплуатируйте прибор.
Немедленно верните его дилеру.
5. На приборе может оставаться пыль или производ-
ственные остатки. Мы рекомендуем очистить прибор,
как описано в разделе «Чистка».
Обзор деталей прибора /
Комплект поставки
1 Корпус двигателя для перемешивающего инстру-
мента
2 Разблокировка корпуса двигателя
3 Приводной вал
4 Прозрачная крышка
5 Инструмент для перемешивания
6 Контейнер
7 Контакты на корпусе двигателя
8 Лоток базового блока
9 Основной блок с компрессором
10 Вентиляционные отверстия
11 Поворотное управление /
12 Кнопка MENU (выбор программы)
13 Кнопка POWER (включение / выключение прибора)
14 Контрольная лампа (приготовление йогурта)
15 Контрольная лампа (приготовление льда)
16 Дисплей
17 Контрольная лампа (инструмент для перемеши-
вания)
18 Контрольная лампа (охлаждение)
19 Кнопка START / PAUSE (запуск / прерывание про-
граммы)
Без рисунка
Лопатка для льда
Мерный стаканчик

PC-ICM1268_IM 12.06.23
54
Предупреждения по
использованию прибора
ПРЕДУПРЕЖДЕНИЕ:
Прибор содержит в контуре хладагента изобутан
(R600a), природный газ с высокой экологической
совместимостью, который является легковоспламе-
няющимся. При транспортировке и установке прибора
следите за тем, чтобы он не упал. Контур хладагента
не должен быть поврежден.
ВНИМАНИЕ:
• Обязательно соблюдайте время ожидания в 2 часа
при первом использовании прибора или после
транспортировки, чтобы хладагент мог осесть. В
противном случае холодильный компрессор будет
поврежден.
• Не пользуйтесь металлической ложкой при
извлечении мороженого или йогурта, чтобы не
поцарапать покрытие контейнера.
• Используйте перчатки для защиты рук при извлече-
нии контейнера после приготовления мороженого.
Существует опасность ожогов от холода!
При повреждении контура хладагента
• Избегайте открытого огня и источников воспламене-
ния любой ценой.
• Выньте сетевую вилку прибора из розетки.
• Проветрите помещение, в котором находится
прибор.
Примечания по использования
Расположение
• Установите прибор на устойчивой, горизонтальной и
ровной поверхности. Расстояние от стен или предме-
тов должно составлять не менее 15 см.
• Не ставьте прибор на источники тепла, такие как
печи, радиаторы и т.д., или в непосредственной
близости от них.
Электрическое подключение
Прежде чем вставить сетевую вилку в розетку, убеди-
тесь, что напряжение в сети, которое вы собираетесь
использовать, соответствует напряжению прибора.
Информация об этом указана на фирменной табличке.
Индикация на дисплее
Режим ожидания
(мигает символ )
Приготовление льда (перемешивающий
инструмент и активное охлаждение)
Охлаждение активно
Активен инструмент для перемешивания
Приготовление йогурта (нагрев активен)
Функция последующего охлаждения
активна
Функции кнопок
• Используйте кнопку POWER для включения и выклю-
чения прибора.
• Используйте кнопку MENU для выбора программы.
• Вы можете запустить выбранную программу с помо-
щью кнопки START / PAUSE.
• Прервать активированную программу можно с
помощью кнопки START / PAUSE. При приготовлении
льда компрессор продолжает охлаждение в течение
1 минуты. Для продолжения программы нажмите
кнопку еще раз.
• Если вы хотите отменить программу, нажмите кнопку
POWER. Прибор выключится.
• Если программа или была отменена кнопкой
POWER, выдержите не менее 5 минут перед по-
вторным запуском прибора. Это позволит снизить
давление в контуре хладагента.
Время приготовления
• Время приготовления мороженого или йогурта может
быть разным. Оно зависит от следующих факторов:
- рецепт,
- температура смеси,
- температура окружающей среды,
- желаемая консистенция.
• Не оставляйте прибор без присмотра во время
работы.
• Приготовление льда:
• При приготовлении мороженого постоянно прове-
ряйте консистенцию смеси.
• Смесь для мороженого не должна быть слишком
тонкой или слишком густой.
• Приготовление йогурта:
• Время приготовления зависит от ваших индивиду-
альных предпочтений.
Проверьте йогурт через несколько часов. При
необходимости уменьшите или увеличьте уста-
новленное время. Для этого сначала нажмите
кнопку START / PAUSE, а затем измените время с
помощью поворотного регулятора. Затем переза-
пустите прибор.
• Консистенция йогурта становится более плотной,
если после приготовления поместить его в холо-
дильник.

PC-ICM1268_IM 12.06.23
55
Защитные функции при приготовлении мороженого
• Если во время работы мешалка остановится из-за
того, что масса мороженого стала слишком твердой,
двигатель заглохнет.
1. Немедленно выключите прибор. Выньте сетевую
вилку из розетки.
2. Удалите мороженое.
• Сразу после приготовления мороженого можно при-
ступать к другой операции. Для защиты компрессор
включается только примерно через 3 минуты.
• При приготовлении нескольких порций мороженого
подряд может сработать защита от перегрева.
Компрессор не включается. Дайте прибору остыть в
течение примерно 30 минут, прежде чем использо-
вать его снова.
Подготовка к приготовлению мороженого
1. Убедитесь, что контейнер полностью сухой, прежде
чем вставлять его. Поместите контейнер в отверстие
базового блока.
2. Засыпьте в контейнер необходимые ингредиенты.
- Не заливайте в емкость более 1000 мл!
- Используйте ингредиенты, температура которых в
холодильнике составляет 6 – 8 °C.
- Ингредиенты не должны быть заморожены. Это
может привести к блокировке двигателя.
- Если вы хотите приготовить фруктовое моро-
женое, используйте только мягкие фрукты без
косточек, которые вы предварительно измельчили
(пюрировали). Можно также добавлять фруктовые
соки.
- Если вы хотите дополнить мороженое твердыми
кусочками фруктов, орехами, хрупкими фруктами
или алкоголем, добавляйте эти ингредиенты
только в конце времени замораживания.
- Алкоголь препятствует процессу замораживания.
3. Установите прозрачную крышку на корпус двигателя.
Убедитесь, что обе защелки корпуса мотора защел-
кнулись на крышке со щелчком.
4. Наденьте инструмент для перемешивания на
приводной вал двигателя. Мешалка должна войти в
зацепление со щелчком.
5. Установите корпус двигателя с крышкой и инстру-
ментом для перемешивания так, чтобы стрелка на
крышке была направлена в сторону символа .
6. Закройте крышку, повернув ее в направлении сим-
вола .
Подготовка к приготовлению йогурта
Вам понадобится пастеризованное молоко (молоко
УВТ) и натуральный йогурт в соотношении для смеши-
вания 100 мл : 15 мл.
1. Выберите место так, чтобы прибор не приходилось
перемещать во время приготовления йогурта и
чтобы он не подвергался вибрации. В противном
случае йогурт останется жидким.
2. Нагрейте УВТ-молоко в кастрюле примерно до 45 °C
и смешайте с натуральным йогуртом или йогуртовой
культурой. Если вы хотите использовать свежее
молоко, сначала вскипятите его и дайте ему остыть
до температуры около 45 °C.
3. Поместите контейнер в отверстие базового блока.
4. Перелейте уже подогретую смесь в контейнер.
- Не заливайте в емкость более 1400 мл!
- Если вы хотите дополнить йогурт фруктами,
орехами, джемом или другими подобными про-
дуктами, добавьте эти ингредиенты только после
приготовления.
5. Отделите прозрачную крышку от корпуса дви-
гателя: Если имеется, сначала снимите мешалку
с приводного вала. Нажмите на обе защелки на
корпусе мотора внутрь, чтобы снять крышку.
6. Наденьте прозрачную крышку без корпуса двигателя.
Это сохранит тепло внутри прибора.
Использование
1. Подключите прибор к правильно установленной
заземленной розетке.
2. Включите прибор кнопкой POWER.
3. Выберите нужную программу с помощью кнопки
MENU:
Программа Функция Время
предустановки
Приготовление
льда (Минуты)
Только переме-
шивание
(Минуты)
Только охлаж-
дение
(Минуты)
Приготовление
йогурта
(Часы)
Время предустановки можно изменить с помощью
поворотного регулятора:
• 5 – 60 минут на программах: / /
• 4 – 24 часа на программе:
4. Подтвердите свой выбор кнопкой START / PAUSE.
Программа запускается.
5. По истечении времени вы услышите 10 звуковых
сигналов.

PC-ICM1268_IM 12.06.23
56
6. Прибор оснащен функцией доохлаждения. Она
активируется на 1 час после окончания программ
и . Компрессор выключается на 10 минут, а затем
снова работает в течение 4 минут. На дисплее ото-
бражается . Через 60 минут прибор переходит
в режим ожидания.
Рекомендуется сразу же извлечь содержимое, чтобы
мороженое или йогурт не примерзли к контейнеру.
Извлечение мороженого
1. Выключите прибор с помощью кнопки POWER.
2. Выньте вилку сетевого шнура из розетки.
3. Поверните корпус двигателя в направлении сим-
вола . Снимите корпус двигателя вместе с крыш-
кой и приспособлением для перемешивания.
4. Извлеките контейнер.
ПРЕДУПРЕЖДЕНИЕ:
Опасность ожогов от холода!
Защищайте руки перчатками, когда прикасаетесь
к контейнеру.
5. Выньте мороженое из контейнера прилагаемой
лопаточкой для мороженого или силиконовой или
деревянной ложкой.
- Не используйте металлическую ложку, чтобы не
поцарапать покрытие контейнера.
6. Перелейте мороженое в предварительно охлажден-
ный контейнер с крышкой.
- Мороженое вкуснее всего в свежем виде.
- Если мороженое не предназначено для непо-
средственного употребления, мы рекомендуем
дополнительно охладить готовое мороженое в
морозильной камере.
- Не замораживайте оттаявшее или размороженное
мороженое!
Удаление йогурта
1. Выключите прибор с помощью кнопки POWER.
2. Выньте вилку сетевого шнура из розетки.
3. Поверните крышку в направлении символа .
4. Извлеките контейнер.
5. Выньте йогурт из контейнера с помощью прилага-
емой лопаточки или силиконовой или деревянной
ложки.
- Не используйте металлическую ложку, чтобы не
поцарапать покрытие контейнера.
6. Перелейте йогурт в тщательно очищенный контей-
нер с крышкой и поставьте его в холодильник.
- Срок хранения йогурта зависит от того, как вы его
приготовите. Чем чище вы работаете, тем дольше
хранится йогурт. Однако не следует хранить
йогурт дольше недели.
- Добавляйте фрукты и т.п. только незадолго до
еды.
- 150 мл готового йогурта можно использовать
повторно в качестве стартовой культуры. Не
используйте эту закваску более 20 раз, так как ее
действие со временем ослабевает.
Рецепты приготовления мороженого
• При приготовлении смеси для мороженого обрати-
тесь к указаниям в главе «Подготовка к приготовле-
нию мороженого».
• Для помощи можно использовать мерный стаканчик,
входящий в комплект поставки.
• Указанные в рецептах количества являются лишь
ориентировочными. Попробуйте приготовить свою
индивидуальную смесь.
• Если вы хотите увеличить объем до 1000 мл, подбе-
рите ингредиенты в правильном соотношении. Время
приготовления соответственно увеличится.
• Другие рецепты вы можете найти в кулинарных
книгах или в Интернете.
Ванильное мороженое
(Делается примерно 5 порции)
Ванильный экстракт 1– 2 чайные ложки
Цельное молоко 600 мл
Сливки 400 мл
Сахар 200 г
• Смешайте все ингредиенты в миске с помощью
ручного миксера до растворения сахара. Перелейте
охлажденную смесь для мороженого в контейнер.
• Время приготовления в мороженице:
прибл. 40 – 45 минут
Шоколадное мороженое
(Делается примерно 4 порции)
Ванильный экстракт 1 чайная ложка
Цельное молоко 250 мл
Сливки 250 мл
Сахар 125 г
Плитка шоколада,
горького или полусладкого
225 г, небольшими кусоч-
ками
• Доведите до кипения цельное молоко и сливки с
шоколадом и сахаром. Взбейте миксером, который
можно использовать для горячих блюд. Дайте смеси
для мороженого остыть и охладите в холодильнике
в течение 24 часов. Перед тем как перелить охлаж-
денную смесь для мороженого в контейнер, еще раз
перемешайте ее.
• Время приготовления в мороженице: прибл.
30 – 40 минут

PC-ICM1268_IM 12.06.23
57
Клубничное мороженое
(Делается примерно 4 порции)
Клубника, свежая, спелая,
нарезанная ломтиками 250 г
Лимонный сок, свежевыжатый 1½ столовые ложки
Ванильный экстракт 1 чайная ложка
Цельное молоко 250 мл
Сливки 250 мл
Сахар 125 г
• Смешайте клубнику с лимонным соком и примерно
80 г сахара. Дайте смеси отдохнуть в течение 2 ча-
сов, чтобы образовался сок.
• Оставшийся сахар размешайте в молоке ручным
миксером на самой низкой скорости до полного
растворения сахара.
• Влейте в молоко сливки, сок клубники и ванильный
экстракт.
• Перелейте охлажденную смесь для мороженого в
контейнер.
• Время приготовления в мороженице:
прибл. 30 – 40 минут
• Добавьте клубнику в последние 10 минут процесса
замораживания.
Базовый рецепт сорбета
Фруктовый сок /
фрукты, пюрированные
600 – 700 мл
Сахар
(в зависимости от вида фруктов)
75 – 100 г
Яичный белок 1– 2 столовые ложки
• Смешайте все ингредиенты в миске с помощью
ручного миксера до растворения сахара. Перелейте
охлажденную смесь для мороженого в контейнер.
• Время приготовления в мороженице:
прибл. 35 – 45 минут
• Для улучшения вкуса в конце процесса заморажи-
вания можно добавить 1 столовую ложку ликера, ко-
ньяка, малинового бренди или аналогичного напитка.
• Сорбет следует употреблять относительно быстро,
чтобы он не успел снова стать жидким.
Чистка
ПРЕДУПРЕЖДЕНИЕ:
• Перед чисткой всегда выключайте прибор и вынимайте
сетевую вилку из розетки.
• Не погружайте прибор в воду! Это может привести к пора-
жению электрическим током или пожару.
ВНИМАНИЕ:
• Не используйте проволочную щетку или другие
абразивные предметы.
• Не используйте жесткие или абразивные чистящие
средства.
• Не используйте химикаты, кислоты, бензин или
масло.
• Контейнер, инструмент для перемешивания и
крышка не подходят для мытья в посудомоечной
машине. Воздействие тепла и агрессивных чистя-
щих средств может привести к их деформации или
обесцвечиванию.
• Контейнер, инструмент для перемешивания и крышку
можно мыть в теплой воде с добавлением неболь-
шого количества жидкости для мытья ручной посуды.
После этого хорошо высушите принадлежности.
• Очищайте базовый блок и чашу влажной тканью.
Хранение
• Очистите прибор, как описано выше, и дайте ему
полностью высохнуть.
• Мы рекомендуем хранить прибор в оригинальной
упаковке, если вы не собираетесь использовать его в
течение длительного периода времени.
• Всегда храните прибор в недоступном для детей,
хорошо проветриваемом и сухом месте.

PC-ICM1268_IM 12.06.23
58
Устранение неполадок
Проблема Возможная причина Устранение
Прибор не работает. Прибор не имеет электропитания. Проверьте розетку с другим прибором.
Правильно вставьте сетевую вилку.
Проверьте предохранитель в доме.
Прибор неисправен. Обратитесь в нашу сервисную службу
или к специалисту.
Крышка не закрывается. Контейнер неправильно вставлен в
лоток.
Немного поверните контейнер, когда
вставляете его.
Прибор находится в режиме
ожидания, хотя приготовление
льда не было завершено.
Подача электроэнергии была прер-
вана.
Перезапустите программу на оставше-
еся время.
Компрессор издает ненормаль-
ные звуки.
Напряжение слишком низкое. Выключите прибор и проверьте напря-
жение в сети.
Мешалка останавливается во
время выполнения программы.
Мороженое слишком твердое. Блоки-
ровка двигателя (защитная функция).
Выключите прибор и отсоедините
сетевую вилку от розетки. Извлеките
мороженое.
На дисплее отображается
символ . Компрессор не
включается.
Активирована защита от перегрева. Дайте прибору остыть в течение
примерно 30 минут перед повторным
запуском.
Технические данные
Модель: ............................................................PC-ICM 1268
Электропитание: .................................... 220 – 240 В~, 50 Гц
Потребляемая мощность
Мощность охлаждения: ........................................ 120 Вт
Мощность нагрева:............................................... 22,8 Вт
Хладагент: ...........................................................R600a / 24 г
Изоляционный дутьевой газ: ......................................C5H10
Максимальная емкость: ...........................................1500 мл
Максимальный объем наполнения
Приготовление мороженого: ..............................1000 мл
Приготовление йогурта:......................................1400 мл
Класс защиты: ......................................................................
Вес нетто: .............................................................прибл. 9 кг
Сохранено право на технические и конструкционные
изменения в рамках продолжающейся разработки
продукта.
Данный прибор был протестирован в соответствии со
всеми применимыми действующими директивами CE
и изготовлен в соответствии с последними правилами
безопасности.
Утилизация
Значение символа «корзина»
Защита окружающей среды: не допускается
утилизация электроприборов вместе с быто-
выми отходами.
Утилизация устаревшей техники и неис-
правных электроприборов производится в
городских приёмных пунктах.
Не допускайте неправильной утилизации отходов. Это
наносит вред окружающей среде и оказывает негатив-
ное воздействие на здоровье людей.
Оказывайте содействие программе утилизации и дру-
гим формам переработки электронной и электрической
техники.
Информацию о пунктах утилизации бытовой техники
можно получить в местных органах власти. Ваш дилер
и партнер по договору также обязан бесплатно принять
старый прибор.

PC-ICM1268_IM 12.06.23
59
.
.
.
.
.
.
./
.
.
.
.
.
.
.
.
.
.
.
.
.( )
.
30
.
.
.
.
PC-ICM 1268 ................................................................................... :
50 ~ 240–220 ................................................. :
120................................................................................:
228..............................................................................:
24 ....................................................................................... :
C5H10 ..................................................................................:
1500.................................................................................:
1000.....................................................................:
1400.............................................................................:
I ...................................................................................................
9 ...................................................................... :
.
.
« »
:
.
.
.
.
.
.

PC-ICM1268_IM 12.06.23
60
•.
• 40–30 :
•. 10
700–600 /
100–75 ( )
2–1
• .
.
• 45–35 :
• 1
.
•.
:
•
.
• !
.
:
•.
•.
•.
• .
.
•
. .
•.
•.
•
.
•
.
• « »
.
•.
•
.
• 1000
. .
•.
( 5 )
2–1
600
400
200
• .
.
• 45–40 :
( 4 )
1
250
250
125
225
• .
.
. 24
.
• 40–30 :
( 4 )
250
1½
1
250
250
125
• 80
.
•
.
•.

PC-ICM1268_IM 12.06.23
61
-
. - .
3 . .
. «»
4 . .
.«»
5 .
.
6 ..
( )
.15:100
1 .
. .
2 . 45
.
45
.
3 ..
4 ..
- ! 1400 -
.
5 .:
.
.
6 . .
.
1 ..
2 ..POWER
3 .:MENU
()
()
()
()
:
• / / : 60 5
• : 24 4
4 .. .START / PAUSE
5 .. 10
6 . 1 .
10 .
. . . 4
. 60
.
1 ..POWER
2 ..
3 . .
.
4 ..
! :
.
5 .
.
- .
6 ..
- . -
. - !
1 ..POWER
2 ..
3 ..
4 ..
5 .
.
- .
6 ..
- .
.
. - . - .
150
20
.

PC-ICM1268_IM 12.06.23
62
• .POWER
.
• POWER
. 5
.
• .
:
- - - - .
•.
•:
•.
•.
•:
•.
.
.
. START / PAUSE
.
•.
•
.
1 . .
.
2 ..
•
. 3 .
•
. .
. 30
1 . .
.
2 ..
- ! 1000 - 6
. 8- . . -
.()
.
:
•
.
•
.
• .
!
•.
•.
•.
• 15 .
.
•
.
.
. .
( )
( )
( )
•. POWER
•. MENU
•.START / PAUSE
• .START / PAUSE
.
.

PC-ICM1268_IM 12.06.23
63
:
.
. .
. .
.
.
.
:
:
.
:
.
3 .......................................................................
63 .......................................................................
63 ............................................... /
63 ...................................................................
62 ....................................................................
62 .....................................................................
62 ......................................................................................
62 ....................................................................................
62 ..................................................................................
62 .....................................................................................
62 ......................................................................................
62 ..................................................
62 .................................................................
61 ........................................................................
61 ............................................................................................
61 ...................................................................................
61 ...................................................................................
60 ........................................................................
60 ............................................................................................
60 .............................................................................................
59 ...............................................................
59 ....................................................................................
59 .............................................................................
59 ..............................................................« »
1 ..
2 .
.
3 ..
4 .
. .
5 . .
.«»
/
1
2
3
4
5
6
7
8
9
10
/ 11
( ) MENU 12
( /) POWER 13
( ) 14
( ) 15
16
( ) 17
() 18
(/ ) START / PAUSE 19
:
(R600a)
.
.

PC-ICM1268_IM 12.06.23

PC-ICM1268_IM 12.06.23

PC-ICM 1268
Internet: www.procook-germany.de
Made in P.R.C.
PC-ICM1268_IM 12.06.23
Stand 05 / 2023
-
 1
1
-
 2
2
-
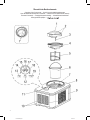 3
3
-
 4
4
-
 5
5
-
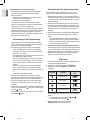 6
6
-
 7
7
-
 8
8
-
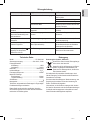 9
9
-
 10
10
-
 11
11
-
 12
12
-
 13
13
-
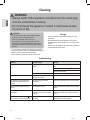 14
14
-
 15
15
-
 16
16
-
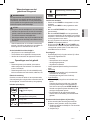 17
17
-
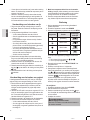 18
18
-
 19
19
-
 20
20
-
 21
21
-
 22
22
-
 23
23
-
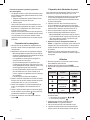 24
24
-
 25
25
-
 26
26
-
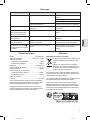 27
27
-
 28
28
-
 29
29
-
 30
30
-
 31
31
-
 32
32
-
 33
33
-
 34
34
-
 35
35
-
 36
36
-
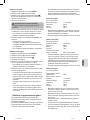 37
37
-
 38
38
-
 39
39
-
 40
40
-
 41
41
-
 42
42
-
 43
43
-
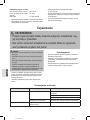 44
44
-
 45
45
-
 46
46
-
 47
47
-
 48
48
-
 49
49
-
 50
50
-
 51
51
-
 52
52
-
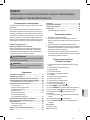 53
53
-
 54
54
-
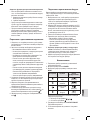 55
55
-
 56
56
-
 57
57
-
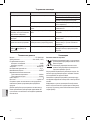 58
58
-
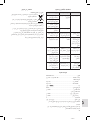 59
59
-
 60
60
-
 61
61
-
 62
62
-
 63
63
-
 64
64
-
 65
65
-
 66
66


Profi Cook PC-ICM 1268 Manual de usuario
- Categoría
- Fabricantes de helados
- Tipo
- Manual de usuario
en otros idiomas
- français: Profi Cook PC-ICM 1268 Manuel utilisateur
- italiano: Profi Cook PC-ICM 1268 Manuale utente
- Deutsch: Profi Cook PC-ICM 1268 Benutzerhandbuch
- Nederlands: Profi Cook PC-ICM 1268 Handleiding
- polski: Profi Cook PC-ICM 1268 Instrukcja obsługi