Blackstar ID:CORE Stereo 100 and 150 El manual del propietario

Categoría
Amplificador de instrumentos musicales
Tipo
El manual del propietario
Blackstar Amplification Ltd, Beckett House, 14 Billing Road, Northampton, NN1 5AW, UK
For the latest information go to: www.blackstaramps.com
Whilst the information contained herein is correct at the time of publication, due to our policy of constant improvement
and development, Blackstar Amplification Ltd reserves the right to alter specifications without prior notice.
Designed and Engineered by
Blackstar Amplification UK
120402M-1 02/16
Owner’s Manual
ID:CORE STEREO 100 & ID:CORE STEREO 150
3
USA / Canada
IMPORTANT SAFETY INSTRUCTIONS
1. Read these instructions.
2. Keep these instructions.
3. Heed all warnings.
4. Follow all instructions.
5. Do not use this apparatus near water.
6. Clean only with dry cloth.
7. Do not block any ventilation openings.
8. Install in accordance with the manufacturer’s instructions.
9. Do not install near any heat sources such as radiators, heat registers, stoves, or
other apparatus (including ampliers) that produce heat.
10. Do not defeat the safety purpose of the polarized or grounding-type plug. A
polarized plug has two blades with one wider than the other. A grounding type
plug has two blades and a third grounding prong. The wide blade or the third
prong are provided for your safety. If the provided plug does not t into your
outlet, consult an electrician for replacement of the obsolete outlet.
11. Protect the power cord from being walked on or pinched particularly at plugs,
convenience receptacles, and the point where they exit from the apparatus.
12. Only use attachments/accessories specied by the manufacturer.
13. Unplug this apparatus during lightning storms or when unused for long periods
of time.
14. Refer all servicing to qualied service personnel. Servicing is required when the
apparatus has been damaged in any way, such as power-supply cord or plug is
damaged, liquid has been spilled or objects have fallen into the apparatus, the
apparatus has been exposed to rain or moisture, does not operate normally, or
has been dropped.
“TO COMPLETELY DISCONNECT THIS APPARATUS FROM THE AC MAINS,
DISCONNECT THE POWER-SUPPLY CORD PLUG FROM THE AC RECEPTACLE.”
“WARNING: TO REDUCE THE RISK OF FIRE OR ELECTRIC SHOCK, DO NOT
EXPOSE THIS APPARATUS TO RAIN OR MOISTURE. THE APPARATUS SHALL
NOT BE EXPOSED TO DRIPPING OR SPLASHING AND THAT OBJECTS FILLED
WITH LIQUIDS, SUCH AS VASES, SHALL NOT BE PLACED ON APPARATUS.”
This symbol is intended to alert the user to the presence of
uninsulated “dangerous voltage” within the product’s enclosure that
may be of sucient magnitude to constitute a risk of electric shock
to persons.
This symbol is intended to alert the user to the presence of important
operation and maintenance (servicing) instructions in the literature
accompanying the appliance.
English
5
English
4
The U.S. Government's Occupational Safety and Health Administration (OSHA) has
specied the following permissible noise level exposures:
Duration Per Day In Hours Sound Level dBA, Slow Response
8 90
6 92
4 95
3 97
2 100
102
1 105
½ 110
¼ or less 115
According to OSHA, any exposure in excess of the above permissible limits could
result in some hearing loss.
Ear plug protectors in the ear canals or over the ears must be worn when operating
this amplication system in order to prevent a permanent hearing loss if exposure is
in excess of the limits as set forth above. To ensure against potentially dangerous
exposure to high sound pressure levels, it is recommended that all persons
exposed to equipment capable of producing high sound pressure levels such as
this amplication system be protected by hearing protectors while this unit is in
operation.
Warning!
Important safety information!
READ THE FOLLOWING INFORMATION CAREFULLY. SAVE ALL
INSTRUCTIONS FOR FUTURE REFERENCE!
Follow all warnings and instructions marked on the product!
Danger! High internal operating voltages.
Do not open the equipment case. There are no user serviceable parts in this
equipment. Refer all servicing to qualied service personnel.
Clean only with a dry cloth.
Condensation can form on the inside of an amplier if it is moved from a cold
environment to a warmer location. Before switching the unit on, it is recommended
that the unit be allowed to reach room temperature.
Unauthorised modication of this equipment is expressly forbidden by Blackstar
Amplication Ltd.
Never push objects of any kind into ventilation slots on the equipment casing.
Do not expose this apparatus to rain, liquids or moisture of any type.
Avoid placing vessels lled with liquid on top of the amplier.
Do not place this product on an unstable trolley, stand or table. The product may
fall, causing serious damage to the product or to persons!
Do not cover or block ventilation slots or openings.
This product should not be placed near a source of heat such as a stove, radiator,
or another heat producing amplier.
Use only the supplied power cord which is compatible with the mains voltage
supply in your area.
Power supply cords should always be handled carefully and should be replaced if
damaged in any way.
Never break o the earth (ground) pin on the power supply cord.
The power supply cord should be unplugged when the unit is to be unused for long
periods of time.
Before the unit is switched on, the loudspeaker should be connected as described
in the handbook using the lead recommended by the manufacturer.
Always replace damaged fuses with the correct rating and type.
Never disconnect the protective mains earth connection.
High loudspeaker levels can cause permanent hearing damage. You should
therefore avoid the direct vicinity of loudspeakers operating at high levels. Wear
hearing protection if continuously exposed to high levels.
If the product does not operate normally when the operating instructions are
followed, then refer the product to a qualied service engineer.
All electrical and electronic products should be disposed of separately
from the municipal waste stream via designated collection facilities
appointed by the government or the local authorities.
Features
Since 2007, Blackstar has led the way in the innovation of guitar amplification.
ID:Core represents the culmination of years of technical Research and Development.
These amps have an intuitive control set like a traditional amp, but have the versatility
of programmability. Designed to be compact and lightweight with high power, the
unique controls allow you, the guitarist, to custom design your own sound.
The Voice control has six different settings Clean Warm, Clean Bright, Crunch,
Super Crunch, OD 1, and OD 2, all of which have been enhanced from the original
ID:Core voices for an articulate live sound. When used together with Blackstar’s
patented ISF control you can get the exact tone you’re thinking of.
The effects section delivers studio quality Super Wide Stereo modulation, delay and
reverb effects simultaneously that you can store with your sound.
Deep editing and storing of patches is simple using the Blackstar ARCHITECT
software. Patches can be shared, uploaded and downloaded via the online
community. The USB connector also allows you to record from your amp directly
to your computer.
The new built-in looper provides both live performance and personal home practice
options for players of all skill levels. Whether playing live as a solo artist or as the
lone guitarist in a power duo (or trio), the simple and intuitive looper helps you to
achieve a stage-filling, multiple track sound at the press of a footswitch (included),
with unlimited overdubs.
An emulated output, MP3/line input and effects loop complete the package.
By using the unique Voice control and the patented ISF, ID:Core amplifiers allow
unparalleled flexibility and ease of use, enabling you to design the sound in your
head and deliver it at home, in the studio and live.
English
7
Introduction
Thank you for purchasing this Blackstar ID:Core amplifier. Like all our products, this
amp is the result of countless hours of painstaking Research and Development by
our world-class design team. Based in Northampton (UK), the Blackstar team are
all experienced musicians themselves and the sole aim of the development process
is to provide guitarists with products which are the ultimate tools for self-expression.
All Blackstar products are subjected to extensive laboratory and road testing to
ensure that they are truly uncompromising in terms of reliability, quality and above
all TONE.
ID:Core represents a truly ground-breaking achievement, combining unique
innovations, an intuitive, traditional control set and the versatility of programmability.
Please read through this handbook carefully to ensure you get the maximum benefit
from your new Blackstar product.
If you like what you hear and want to find out more about the Blackstar range of
products please visit our website at www.blackstaramps.com.
Thanks!
The Blackstar Team
English
6
9
English
9
Factory Reset
The default factory patches and settings can be restored to your amplier at any
time. Simply hold down the MOD, DLY and REV switches simultaneously, whilst
switching on the amplier.
The Voice LEDs will count down to indicate that a factory reset is imminent. If any of
the MOD, DLY and REV switches are released before the Voice LEDs have switched
o, then the operation is cancelled and the amplier will remain unaected.
Finally, switch the amplier power o to complete the process. When powered on,
your amplier will be restored to the factory default settings.
IMPORTANT NOTE:
This process will overwrite any user saved patches and settings.
English
8
Front Panel
1. Input
Plug your guitar in here.
Always use a good quality screened guitar lead.
2. Voice
The enhanced Voice control changes the preamp voicing, ranging from ultra clean
to extremely overdriven.
Clean Warm – Classic clean, dynamic
Clean Bright – ‘Boutique’, will break up when pushed hard
Crunch – Classic medium gain overdrive
Super Crunch – More gain and punch than Crunch
OD 1 – Hot-rodded Master Volume overdrive
OD 2 – Mid boosted overdrive
This setting is saved when you store a patch.
3. Gain
The Gain control adjusts the amount of overdrive or distortion. Low settings (counter
clockwise) will deliver a clean sound on the edge of break-up. As the Gain control is
turned clockwise the sound will become more overdriven, moving through beautiful
crunch tones until, at its maximum position, a full distorted tone is achieved. This
setting is saved when you store a patch.
4. Volume
This controls the preamp volume. High levels of volume will introduce the effect of
valve power amp distortion and compression. This setting is saved when you store
a patch.
5. Bass
The bass control adjusts the amount of low-end frequencies in your tone. This amp
has an advanced tone shaping circuit which allows the tone to be tight and cutting
(counter clockwise) to warm and thumping (clockwise). This setting is saved when
you store a patch.
6. Middle
The middle control adjusts the amount of middle frequencies in your tone. The
middle frequencies are particularly important in setting the amount of ‘body’
your tone has. With the middle control set to its minimum position (fully counter
clockwise) the sound will be aggressive and scooped, a tone ideal for aggressive
rhythm playing. As the middle control is increased (clockwise) the amount of ‘body’
is increased, which is more suitable for sustained lead guitar tones. This setting is
saved when you store a patch.
11
7. Treble
The treble control allows exact adjustment of the treble frequencies within the sound.
At low settings (counter clockwise) the sound will be warm and dark in character.
As the treble control is increased (clockwise) the sound will become brighter. At the
maximum settings the sound will be aggressive and cutting. This setting is saved
when you store a patch.
8. ISF
The patented ISF control allows you to choose the exact
tonal signature you prefer. Fully counter clockwise has
a more American characteristic with a tight bottom-
end and more aggressive middle, and fully clockwise
has a British characteristic which is more ‘woody’ and
less aggressive. This leads to a very familiar, musical
response. This setting is saved when you store a patch.
9. MOD (Modulation)
Press this switch to turn the stereo modulation effect on, off, or focus the effect for
editing. This setting is saved when you store a patch.
10. DLY (Delay)
Press this switch to turn the stereo delay effect on, off, or focus the effect for editing.
This setting is saved when you store a patch.
11. REV (Reverb)
Press this switch to turn the stereo reverb effect on, off, or focus the effect for
editing. This setting is saved when you store a patch.
For all three effect switches/buttons, the LED shows what state the effect is in:
LED Eect State Description
LED not on Eect o Eect not active
LED red Eect on but not ‘focused’ for editing Eect is active, but not aected by the front
panel eect controls
LED green Eect on and ‘focused’ for editing Eect active and aected by the front panel
eect controls
Repeatedly pressing each effect switches on the front panel has the following effect:
Current Eect State Next Eect State
Eect o Turns the eect on and ‘focuses’ the eect. Any previously focused eect
reverts to an ‘on’ state
Eect on but not ‘focused’ Focuses the eect. Any previously focused eect reverts to an ‘on’ state
Eect on and ‘focused’ Turns the eect o. If any other eect(s) are on, the previously ‘focused’ eect
resumes being ‘focused’
NOTE: Only one effect may be ‘focused’ at any time.
English
11
English
10
12. Effect Type
This changes the effect type and edits a parameter of the currently ‘focused’ effect
(modulation, delay, or reverb).
Each segment represents a different effect (four for each type of effect). An
LED shows which effect type is currently active. The distance travelled through
the ‘segment’ modifies an effect parameter. The Effects Table below shows the
modifiable parameters.
This setting is saved when you store a patch.
13. Effect Level
This modifies an effect parameter. For modulation and delay effects, turning the
Level control while holding down the Tap button (14) modifies the rate/time of the
effect.
The Effects Table below shows the modifiable parameters.
This setting is saved when you store a patch.
14. Tap
The Tap switch is used to set the rate/time of the current ‘focused’ effect. The time
between each press of the tap button defines the rate set.
Once set, the Tap LED will flash in time with the set rate of the currently ‘focused’
effect.
The Effects Table below shows the modifiable parameters:
Effects Table
Eect Segment Parameter Level Parameter Tap Parameter
MODULATION
Phaser Mix Depth Speed
Chorus/Flanger Morph Mix Speed
Octaver Octave down/up blend Octaver/original guitar mix -
Tremolo Frequency modulation depth Amplitude modulation depth Speed
DELAY
Linear Feedback Delay level Time
Analogue Feedback Delay level Time
Tape Feedback Delay level Time
Multi Feedback Delay level Time
REVERB
Room Size Reverb level -
Hall Size Reverb level -
Spring Size Reverb level -
Plate Size Reverb level -
This setting is saved when you store a patch.
US
AU
K
13
15. Master Volume
This controls the overall volume of your amplifier. Turning it clockwise increases the
volume. This is a global setting and is not saved when storing a patch. If the master
volume is at zero this allows for silent recording via the Emulated/Headphone Output
or USB. The emulated level is controlled via the preamp volume.
16. USB
Plug a USB cable in here to connect the amplifier to a Windows PC or Mac.
Blackstar’s ARCHITECT software offers a host of features and can be downloaded
from: www.blackstaramps.com/uk/architect
See the USB Audio section on page 15 for more information.
NOTE: The amplifier will appear on a personal computer as an audio capture device
within recording software.
17. Manual
Press this switch to toggle between Manual Mode and the current patch. When the
amplifier is in Manual Mode, the sound will reflect the current physical position of the
knobs. This is applicable to the Voice, Gain, Volume, Bass, Middle, Treble and ISF
controls. Any effects that are active when switching to Manual Mode will be turned
off. While in Manual Mode any of the controls can still be modified by an external
source (Blackstar ARCHITECT software, footcontroller), but this means that the
sound will not represent the positions of the controls on the front panel.
While in Manual Mode any of the controls can still be modified by the Blackstar
ARCHITECT software but this means that the sound will not represent the positions
of the knobs on the front panel.
Tuner Mode
Holding the Manual (17) switch for two seconds will engage the tuner. The Recall
Indicator LED (20) will flash continuously to indicate the amplifier is in Tuner Mode.
The amplifier output will be muted whilst in Tuner Mode.
The Voice LEDs will indicate the closest note to the note being played.
The MOD, DLY and REV LEDs act as indicators to show how close the played note
is to the tuned note.
MOD LED red Note is sharp (above pitch)
DLY LED green Note is in tune
REV LED red Note is at (below pitch)
All other LEDs on the front panel will be off in Tuner Mode.
Pressing any switch will exit Tuner Mode.
English
13
English
12
18. Bank
Press the Bank switch to scroll through the first three banks of patches.
Bank 1 -> Bank 2
Bank 2 -> Bank 3
Bank 3 -> Bank 1
The green LED indicates you’re in Bank 1, the orange LED indicates you’re in Bank
2 and the red LED indicates you’re in Bank 3.
NOTE: The first three banks can be selected from the front panel. When you activate
Bank 4 and higher from an external controller (e.g. Blackstar ARCHITECT software,
footcontroller), the Bank LED will not be lit but the channel LEDs will continue to
show you the patch location. For example:
Patch 9 – Bank LED red, Channel 3 LED lit.
Pressing Bank UP from an external controller will switch you to Patch 12 Bank
LED off, Channel 3 lit.
The channel will be remembered, therefore the corresponding patch within the
current bank will be loaded when scrolling through the banks.
When the amplifier is in Manual Mode, the Bank LED will not be lit.
19. Channels 1-3
Channel 1 activates the first patch within the currently active bank.
Channel 2 activates the second patch within the currently active bank.
Channel 3 activates the third patch within the currently active bank.
20. Recall Indicator
The Recall Indicator shows if there is a mismatch between the current value of a
parameter within the amplifier and the corresponding physical front panel control.
For example, when you change to a different patch the controls on the front panel
may not always reflect the setting you are hearing.
To prevent unexpected level jumps in the control you are adjusting, the front panel
knobs will have no effect on the sound until the knob reaches the current parameter
value. Once reached the Recall Indicator flashes twice and the knob ‘takes control’
of the value and can increase or decrease the value.
The recall indicator will flash each time the physical knob ‘passes through’ the
currently active value that you are hearing.
Recall is active for Gain, Volume, Bass, Middle, Treble and ISF.
When the Tuner is active the Recall Indicator will flash continuously.
When looping, the Recall Indicator will flash once to show when the currently playing
loop has restarted. When a loop or overdub is being recorded, the Recall Indicator
will flash continuously.
15
English
15
Rear Panel
1. Power Switch
This switch is used to turn the amplifier on and off.
2. Mains Input
The supplied detachable mains lead is connected here. Always ensure the Power
Switch is in the OFF position before applying mains power. The lead should only
be connected to a power outlet that is compatible with the voltage, power and
frequency requirements stated on the rear panel. If in doubt get advice from a
qualified technician.
3. Emulated/Headphone Output
This output emulates the tonal characteristics of a guitar speaker cabinet and
provides a natural tone for connection to a recording device or mixing desk. To
make full use of the stereo effects, use a stereo jack to two mono jacks splitter lead
to feed two channels of the recording device or mixer. The output will also function
into a mono guitar type lead. Always use a good quality screened lead. Turning the
Volume knob (4) will control the Emulated Output level. The Master Volume knob
only affects the internal speakers.
NOTE: To ‘silently’ record or practice via headphones, set the Master Volume to
zero.
4. MP3/Line In
Connect the output of your MP3 or CD player here. Adjust the player’s volume to
match that of your guitar to enable you to play along.
5. Footswitch
Connect your included FS-13 footcontroller here, or any other compatible Blackstar
footcontroller (e.g. FS-12 programmable footcontroller). See the Footcontrollers
section on pages 16-17 for more information.
6. Effects Loop
In addition to using the studio quality effects within your amplifier, you can place your
own external effects processors and stomp boxes ‘in the loop’ for the best sonic
performance. Connect the amplifier ‘Send’ to the input of your effects unit, and
connect the output to the ‘Return’. If your effects unit has a stereo output, connect
to both ‘Return’ sockets on your amplifier. If your external effect is mono connect
the output of your effects unit to only the ‘Return L (Mono)’ socket.
Programmability
Storing Patches
To store the current sound as a Patch:
1. Press and hold any of the three Channel switches (19) for one second. All three
Channel LEDs will begin to flash.
English
14
2. Press the Bank switch to scroll through the three banks (green, orange, red) to
choose the store location.
3. Press any of the three Channel switches once to store the patch in the chosen
location.
The LED corresponding to the chosen store location will illuminate and the new
patch will be active.
Green bank = Patches 1-3
Orange bank = Patches 4-6
Red bank = Patches 7-9
The amplifier controls can be used to edit the patch at any stage of the store
process. Press the Manual switch at any stage to cancel the store process and
return the amplifier to the last state.
Storing a patch will overwrite any previous patch in that location. Patches can also
be stored using Blackstar’s ARCHITECT software when connected to the amplifier
via USB.
Recalling Patches
Press any Channel switch to load that patch. Pressing the Bank switch will cycle
through the three banks – green-orange-red. The Channel will be preserved,
therefore the corresponding patch within the current Bank will be loaded when
scrolling through the Banks. Alternatively, patches can be recalled via Blackstar’s
ARCHITECT software or any compatible footcontroller.
USB Audio
Standard device drivers are used to connect the amplifier to a PC or Mac, therefore
no additional device drivers are required. If your computer’s audio latency is found
to be too high a generic ASIO driver can be downloaded and associated with your
amplifier, for example ASIO4ALL – www.asio4all.com. For a guide on low-latency
USB recording visit:
www.blackstaramps.com/usbrecording
NOTE: Always connect the amplifier via a main USB port, often found on the rear
of the computer.
The amplifier will appear as an audio capture device within recording software.
The output of the audio over USB can be changed via the Blackstar ARCHITECT
software, and can be one of the following:
Speaker emulated stereo effected audio channels
2 x mono audio channels
- Left – effected amplifier signal
- Right – unprocessed guitar signal
Reamping Mode
17
Reamping
The amplifier can be switched into Reamping Mode via the Blackstar ARCHITECT
software. This is a non-storable setting and will be switched off either when the USB
cable is removed, or when the amplifier power is switched off.
When activated, Reamping Mode allows the amplifier to accept a pre-recorded, dry
guitar signal via USB and return a fully processed audio signal. This return signal can
then be captured using recording software on the connected PC or Mac.
Footcontrollers
FS-13 2-way footcontroller (supplied)
Connect this footcontroller to the Footswitch socket on the rear of your amplifier
using any standard mono guitar cable or speaker cable (supplied).
By default, your FS-13 footcontroller will be in Looper Mode (see table above) Switch
‘A’ is used to start and finish recording your loops and overdubs, and switch ‘B’ will
stop the loop playback, or cancel the current overdub if still recording. A single press
of both switches ‘A’ and ‘B’ simultaneously will undo the last recorded overdub.
Holding switch ‘B’ will erase the loop memory.
By holding down both the ‘A’ and ‘B’ switches for 3 seconds you can set your
footcontroller to Patch Mode. In this mode, button ‘A’ will toggle between the
patches in Channel 1 and Channel 2 of the currently active Bank. Pressing button
‘B’ will scroll ‘up’ through the first 3 Banks of patches, operating in the same way
as the BANK switch on the amplifier front panel. The operation of Patch Mode can
be changed via the Blackstar ARCHITECT software, as reflected in the table above.
Simply hold down both the ‘A’ and ‘B’ switches again for 3 seconds to change back
to Looper Mode.
The current mode of the FS-13 footcontroller will be stored when you power off
the amplifier, and will be and recalled each time you power on. Upon powering
on the amplifier with the FS-13 footcontroller connected (or connecting the FS-13
footcontroller with the amplifier already powered on) the current mode of the
footcontroller will be indicated by an animation using the MANUAL, BANK, CH1,
CH2 and CH3 LEDs. Looper Mode will be indicated by a ‘looping’ count up of these
LEDs, whereas Patch Mode will be indicated by these LEDs flashing simultaneously
twice before returning to normal operation.
English
16
FS-12 5-way programmable footcontroller (not supplied)
Connect this footcontroller to the Footswitch socket on the rear of your amplifier
using any standard mono guitar cable or speaker cable.
Switches ‘A’-‘C’ correspond to the ‘CH 1’ ‘CH 3’ switches on the front panel
of your amplifier. Pressing any of the ‘A’-‘C’ footcontroller switches will recall the
corresponding patch within the current Bank. Banks can be navigated by a single
press of both switches ‘A’ and ‘B’ simultaneously (Bank down) or a single press
of both switches ‘B’ and ‘C’ simultaneously (Bank up). All 36 amplifier patches (12
banks of 3) can be accessed using the FS-12 footcontroller.
Switches ‘D’ and ‘E’ on the FS-12 footcontroller are programmable and can be
configured to a number of different functions to suit your preference. By default,
Switches ‘D’ and ‘E’ will control the Looper feature of the amplifier, and will behave
as described in the following table.
To change this default setting, connect the amplifier
to your computer via USB and use the free Blackstar
ARCHITECT software to make your personal selection
from various options such as Modulation/Delay/Reverb
On/Off, Modulation/Delay Tap Tempo, Super Wide Stereo
On/Off, amongst others. Please see the Footcontroller
section of the ARCHITECT software for detail of the
programmable functions.
Holding down the ‘D’ and ‘E’ switches will activate Tuner Mode of your amplifier.
With the multifunctional FS-12 footcontroller you gain access to a fully chromatic
tuner with note and cents display information appearing on the footcontroller display
and LEDs. Press any switch to exit Tuner Mode.
FS-12 + FS-13 7-way switching
Connect the FS-12 5-way footcontroller to your amplifier as detailed above, then
connect your supplied FS-13 2-way footcontroller to the ‘EXT.’ socket of your FS-12
footcontroller, using any standard mono guitar cable or speaker cable.
In this configuration you can add two extra, programmable switches which are
configurable via the Blackstar ARCHITECT software. Please see the Footcontroller
section of the ARCHITECT software for detail of the programmable functions.
By default, switch ‘A’ on your FS-13 will toggle the current Modulation effect, and
switch ‘B’ will toggle the current Delay effect. When using this 7-way switching
configuration the two markers at right side of the display of the FS-12 will show the
on/off state of the effect for each switch, as shown below.
English
LOOPER MODE PATCH MODE
Action Toggle Scroll
A (press) Play/Record/Start and
Stop overdub
Patch toggle (CH1 and CH2
of the current BANK) Patch Down (1-12)
B (press) Stop playback/Cancel BANK scroll up Patch Up (1-12)
B (hold) Erase loop memory - -
A + B (press) Undo last overdub - -
A + B (hold) Switch to PATCH mode Switch to LOOPER Mode Switch to LOOPER Mode
ABCDE
AMP EXT.
ABCDE
AMP EXT.
FS-12 FS-13 (supplied)
ABCDE
AMP EXT.
LOOPER MODE
Action
D (press) Play/Record/Start and
Stop overdub
E (press) Stop playback/Cancel
E (hold) Erase loop memory
D + E (press) Undo last overdub
1918
Advanced Features
Your ID:Core amplifier has further advanced features which are aimed at more in-
depth users who enjoy getting the most from their amplifier. These features do
not have independent controls on the front panel of the amplifier, but instead are
accessed by using the Tap switch (14) as a ‘shift key’ and using other controls to
access these features.
Resonance – Tap + Bass
The Resonance control sets the overall bass response. At lower settings the cleans
will be tight and funky and overdrives will be focused in their bass response. At
increased settings the clean sounds will be become full and warm, whilst the crunch
and overdrive tones will be more bass heavy and resonant.
Presence – Tap + Treble
The Presence control sets the overall treble response. Percussive high-end can be
accentuated on clean sounds and the amount of aggressive treble controlled with
crunch and overdrive settings.
USB Recording Level – Tap + Gain
As stated in the USB Audio section (see page 15), the output level of the USB audio
signal from your ID:Core amplifier can be controlled independently of your amplifier’s
speaker volume by holding down the Tap switch (14) whilst turning the Gain control
(3) on the front panel.
Effect Speed/Time – Tap + Effects Level
As stated in the Effect Level section (see page 11), the speed/time of the modulation
and delay effects can be controlled by holding down the Tap switch (14) whilst
turning the Effect Level control (13) on the front panel. This can be very useful for
setting a specific accurate effect tempo instead of using the Tap switch.
Global Emulated Output/Headphones Level – Tap + Volume
This controls the overall output volume of the Emulated Out/Phones connection,
allowing you to tailor the level to best suit the connected device, whether audio
interface, PA system or headphones of various impedance. This control can both
cut and boost the level, with the halfway position of the Volume knob (4) being the
default volume.
English
Firmware Update
Firmware updates are initiated via the Blackstar ARCHITECT software. A new
version of the Blackstar ARCHITECT software will be released whenever an update
is available.
Important note: Always connect the amplifier to a main USB port (usually found on
the on the rear of your PC or Mac) when updating the firmware. Never use a front
mounted USB port, USB hub or a USB extension cable. Doing so may result in a
failed update, which could cause your amplifier to become unresponsive.
When the amplifier is connected (via USB) to a version of the Blackstar ARCHITECT
software containing newer firmware, a message will be displayed prompting you to
install the latest files. Whilst updating, the amplifier controls will be unresponsive.
Front panel voice LEDs will cycle to indicate data activity during the update process.
The amplifier power should not be switched off during a firmware update. If the
amplifier is switched off during an update, the controls may be unresponsive after
the power is reapplied and the amplifier will produce no sound. The voice LEDs will
cycle to indicate that the amplifier contains no valid firmware.
If you are experiencing problems with the firmware update process the amplifier
can be forced to power up in Update Mode. Hold down the Manual (17) & MOD (9)
switches simultaneously, whilst switching on the amplifer to enter this mode with the
voice LEDs cycling to indicate Update Mode. Connect the amplifier to the Blackstar
ARCHITECT software to begin a firmware updae.
The amplifier must be connected to the Blackstar ARCHITECT software to
reinstall valid firmware. The update process will start automatically if the Blackstar
ARCHITECT software detects that the amplifier is in this state.
Technical Specification
ID:CORE STEREO 100
Power: 2 x 50 Watts (Stereo 100 Watts)
Weight (kg): 12.5
Dimensions (mm): 573(W) x 447(H) x 241(D)
Technical Specification
ID:CORE STEREO 150
Power: 2 x 75 Watts (Stereo 150 Watts)
Weight (kg): 14.5
Dimensions (mm): 624(W) x 486(H) x 259(D)
English
2120
Deutsch
Deutsch
WICHTIGE SICHERHEITSHINWEISE
1. Lesen Sie diese Anleitung.
2. Bewahren Sie diese Anleitung auf.
3. Beachten Sie alle Warnungen.
4. Leisten Sie allen Anweisungen Folge.
5. Betreiben Sie dieses Gerät nicht in der Nähe von Wasser.
6. Verwenden Sie zum Reinigen des Geräts ausschließlich ein trockenes Tuch.
7. Die Lüftungsschlitze dürfen nicht verdeckt werden!
8. Beachten Sie bei der Inbetriebnahme die Hinweise des Herstellers.
9. Stellen Sie das Gerät nicht in der Nähe von Heizkörpern, Öfen oder anderen
Wärmequellen auf.
10.
Kleben Sie in keinem Fall den Schutzkontakt des Steckers ab. Ein verpolungssicherer
Stecker besitzt zwei Kontakte, von denen ein Kontakt breiter ist als der andere.
Ein Schukostecker besitzt zwei Kontakte und einen dritten Erdungskontakt. Der
breitere Kontakt des verpolungssicheren Steckers bzw. der Erdungskontakt des
Schukosteckers dient Ihrer Sicherheit. Sollte der Stecker des mitgelieferten Netzkabels
nicht in Ihre Steckdose passen, besorgen Sie sich im Fachhandel ein passendes
Kabel.
11. Treten Sie nicht auf das Netzkabel, knicken Sie es nicht und behandeln Sie
Stecker und Buchsen besonders vorsichtig.
12. Verwenden Sie ausschließlich Zubehör, das vom Hersteller für das Gerät
vorgesehen ist.
13. Ziehen Sie den Netzstecker des Geräts bei Gewitter oder wenn Sie das Gerät
längere Zeit nicht verwenden.
14. Lassen Sie alle Wartungsarbeiten von qualifiziertem Fachpersonal ausführen.
Der Service-Fall tritt ein, wenn z. B. Netzkabel oder -stecker beschädigt sind,
wenn Flüssigkeit oder Fremdkörper in das Gehäuse gelangt sind, das Gerät
Regen oder Feuchtigkeit ausgesetzt war, das Gerät nicht ordnungsgemäß
funktioniert, fallen gelassen oder anderweitig beschädigt wurde.
„UM DAS GERÄT VÖLLIG STROMLOS ZU MACHEN, ZIEHEN SIE DAS
NETZTEILKABEL AUS DER GERÄTEBUCHSE.“
„WARNUNG: UM BRÄNDE ODER STROMSCHLÄGE ZU VERMEIDEN, SETZEN SIE
DAS GERÄT NIEMALS REGEN ODER FEUCHTIGKEIT AUS. SORGEN SIE DAFÜR,
DASS KEINE FLÜSSIGKEIT AUF DAS GERÄT TROPFT BZW. GESPRITZT WIRD
UND STELLEN SIE NIEMALS FLÜSSIGKEITSBEHÄLTER (Z. B. VASEN) DARAUF.“
Dieses Symbol soll den Anwender auf nicht isolierte Leitungen und
Kontakte im Geräteinneren hinweisen, an denen hohe Spannungen
anliegen, die im Fall einer Berührung zu lebensgefährlichen
Stromschlägen führen können.
Dieses Symbol soll den Anwender auf wichtige Bedien- sowie
Service-Hinweise in den zugehörigen Handbüchern aufmerksam
machen.
2322
Hohe Lautsprecherpegel können zu dauerhaften Hörschäden führen. Halten Sie
sich nicht in direkter Nähe von mit hoher Lautstärke betriebenen Lautsprechern
auf. Falls Sie längere Zeit hohen Lautstärken ausgesetzt sind, verwenden Sie einen
Gehörschutz.
Wenn das Gerät offenbar nicht normal arbeitet, obwohl Sie die Inbetriebnahme wie
beschrieben vorgenommen haben, wenden Sie sich an einen qualifizierten Service-
Techniker.
Das amerikanische Amt für Sicherheit und Gesundheitsschutz am Arbeitsplatz
(OSHA) hat folgende Grenzwerte für Lärmbelastung festgelegt:
Dauer pro Tag in Stunden Lärmpegel in dBA, langsame Ansprechzeit
8 90
6 92
4 95
3 97
2 100
102
1 105
½ 110
¼ oder weniger 115
Gemäß der OSHA kann eine anhaltende Beschallung über diese Grenzwerte hinaus
zu Hörverlusten führen.
Für den Betrieb dieses Verstärkersystems empfiehlt es sich, einen Hörschutz im
Gehörkanal oder über den Ohren zu tragen, um einen dauerhaften Hörverlust zu
vermeiden, wenn die genannten Grenzwerte nicht eingehalten werden. Um sich
gegen die potenziellen Gefahren hoher Schalldruckpegel zu schützen sollten sich
alle Personen, die mit Geräten, die zur Ausgabe hoher Schalldruckpegel geeignet
sind (z. B. dieser Verstärker) für die Dauer des Betrieb solcher Geräte einen
Gehörschutz anlegen.
Warnung!
Wichtige Sicherheitshinweise!
LESEN SIE DIE FOLGENDEN INFORMATIONEN SORGFÄLTIG DURCH.
HEBEN SIE DIE ALLE ANLEITUNGEN FÜR REFERENZWECKE AUF!
Beachten Sie alle Warnungen und folgen sie den auf dem Produkt
angebrachten Anweisungen!
Gefahr! Hohe interne Betriebsspannungen.
Öffnen Sie niemals das Gehäuse. Es befinden sich keine vom Anwender
austauschbaren Teile im Gerät. Lassen Sie alle Wartungsarbeiten von qualifiziertem
Fachpersonal ausführen.
Verwenden Sie zum Reinigen des Geräts ausschließlich ein trockenes Tuch.
Im Inneren von Verstärkern kann sich Kondensfeuchtigkeit bilden, wenn der
Verstärker aus einer kalten in eine wärmere Umgebung gebracht wird. Warten Sie
vor dem Einschalten, bis das Gerät Raumtemperatur erreicht hat.
Nicht autorisierte Modifikationen am Gerät sind von Blackstar Amplification Ltd.
ausdrücklich untersagt.
Führen Sie in keinem Fall irgendwelche Gegenstände in die Lüftungsschlitze im
Gehäuse ein.
Setzen Sie das Gerät niemals Regen oder Feuchtigkeit aus.
Stellen Sie keine mit Flüssigkeit gefüllten Gefäße auf dem Verstärker ab.
Platzieren Sie das Gerät nicht auf instabilen Rollwagen, Ständern oder Tischen.
Andernfalls könnte das Gerät herunterfallen und schwere Schäden am Produkt
oder Verletzungen verursachen.
Die Lüftungsschlitze dürfen nicht verdeckt werden.
Dieses Produkt darf nicht in der Nähe von Wärmequellen wie Öfen, Heizkörpern
oder einem anderen Wärme produzierenden Verstärker betrieben werden.
Verwenden Sie ausschließlich das mitgelieferte, mit dem Stromnetz in Ihrer Region
kompatible Netzkabel.
Netzkabel müssen sehr sorgfältig behandelt werden und müssen bei jeglichem
Defekt umgehend ausgetauscht werden.
Entfernen Sie niemals den Erdungskontakt des Netzkabels.
Wenn Sie das Gerät längere Zeit nicht verwenden, ziehen Sie das Netzkabel.
Vor dem Einschalten muss der Lautsprecher wie in diesem Handbuch beschrieben
mit dem vom Hersteller empfohlenen Kabel angeschlossen werden.
Ersetzen Sie beschädigte Sicherungen immer durch Sicherungen gleichen Typs.
Manipulieren Sie niemals den Schutzleiter des Netzsteckers. Elektrische und elektronische Geräte dürfen nicht in den Hausmüll
gegeben, sondern müssen entsprechend den staatlichen bzw.
kommunalen Vorgaben entsorgt werden.
Deutsch
Deutsch
2524
Merkmale
Seit 2007 haben Blackstar sehr viel für die Innovation von Gitarrenverstärkern
getan. ID:Core ist nun das Ergebnis von jahrelanger technischer Forschung und
Entwicklung. Diese Verstärker bieten die gewohnt intuitiven Bedienelemente eines
traditionellen Amps, sind aufgrund ihrer Programmierbarkeit aber deutlich vielseiti-
ger. Dank der einzigartigen Steuerungsmöglichkeiten dieser kompakten, leichten
und leistungsstarken Amps können Sie als Gitarrist Ihren ganz persönlichen Sound
gestalten.
Über den Voice-Regler greifen Sie auf die bereits vom ersten ID:Core bekannten
sechs Einstellungen Clean Warm, Clean Bright, Crunch, Super Crunch, OD 1 und
OD 2 zu, die zugunsten eines noch charakteristischeren Live-Sounds überarbeitet
wurden. In Verbindung mit dem für Blackstar patentierten ISF-Regler erzielen Sie
genau den gewünschten Sound.
Die Effekt-Sektion erzeugt extrem breite Stereo-Modulations-, Delay- und Reverb-
Effekte in Studio-Qualität, die Sie zusammen mit Ihren Sounds abspeichern können.
Mit Hilfe der mitgelieferten Blackstar ARCHITECT Software gestaltet sich die tief
greifende Editierung ebenso wie das Speichern von Patches extrem einfach.
Patches können über die Online Community hochgeladen, heruntergeladen und
ausgetauscht werden. Über den USB-Anschluss können Sie über den Amp direkt
auf den Computer aufnehmen.
Der neue integrierte Looper lässt sich nicht nur auf der Bühne, sondern auch als
Übungshilfe für Gitarristen jedes Niveaus nutzen. Egal ob Sie solo oder als einziger
Gitarrist in einem Power-Duo (oder -Trio) spielen – der einfache und intuitive Looper
verleiht Ihnen auf Knopfdruck (Fußschalter im Lieferumfang) einen bühnenfüllenden
Mehrspur-Sound mit unbegrenzten Overdubs.
Ein emulierter Ausgang, ein MP3/Line-Eingang sowie ein Effekteinschleifweg kom-
plettieren das Angebot.
Dank der beispiellosen Flexibilität und Benutzerfreundlichkeit des einzigartigen Voice-
Reglers und der patentierten ISF-Schaltung lassen Sie mit den ID:Core Verstärkern
Ihren Wunsch-Sound zuhause, im Studio und auf der Bühne Wirklichkeit werden.
Einleitung
Vielen Dank, dass Sie sich für diesen Blackstar ID:Core Verstärker entschieden
haben. Dieser Amp ist wie alle unsere Verstärker das Ergebnis unzähliger Stunden
akribischer Arbeit durch unser erstklassiges Entwickler-Team. Die erfahrenen
Musiker des Blackstar-Teams aus Northampton (UK) verfolgen ein einziges Ziel:
Gitarristen das bestmögliche Equipment zur Verfügung zu stellen, damit diese sich
optimal selbst verwirklichen können.
Alle Blackstar-Produkte wurden sowohl in unseren Labors als auch im Live-Betrieb
auf Herz und Nieren getestet, um sicherzustellen, dass sie in puncto Zuverlässigkeit,
Qualität und KLANG absolut kompromisslose Ergebnisse liefern.
Die ID:Core Serie ist eine wirklich bahnbrechende Neuvorstellung, die einzigar-
tige Innovationen mit intuitiv-traditionellen Bedienelementen und einer vielseitigen
Programmierbarkeit kombiniert.
Bitte lesen Sie dieses Handbuch aufmerksam durch, um Ihr neues Blackstar-
Produkt optimal nutzen zu können.
Wenn Sie mehr über die Blackstar-Produktreihe erfahren möchten, besuchen Sie
unsere Webseite unter www.blackstaramps.com.
Vielen Dank!
Das Blackstar-Team
Deutsch
Deutsch
2726
Factory Reset
Die Werks-Patches und -Einstellungen können im Verstärker zu jeder Zeit
wiederhergestellt werden. Halten Sie die Tasten MOD, DLY und REV gleichzeitig
gedrückt, während Sie den Verstärker einschalten.
Über die Voice-LEDs wird nun angezeigt, dass die Werkseinstellungen
wiederhergestellt werden. Wenn Sie eine der Tasten MOD, DLY und REV loslassen,
bevor die Voice-LEDs alle Farben durchlaufen haben und erloschen sind, wird der
Vorgang abgebrochen und der Verstärker wird nicht zurückgesetzt.
Schalten Sie zum Schluss den Verstärker aus, um den Vorgang abzuschließen. Nach
dem Einschalten ist der Verstärker wieder auf die Werkseinstellungen zurückgesetzt.
WICHTIGER HINWEIS:
Durch diesen Vorgang werden alle vom Anwender gespeicherten Patches und
Einstellungen überschrieben.
Vorderseite
1. Input
Hier schließen Sie Ihre Gitarre an.
Verwenden Sie in jedem Fall hochwertige geschirmte Gitarrenkabel.
2. Voice
Der verbesserte Voice-Regler verändert das Preamp-Voicing im Bereich von extrem
clean bis extrem übersteuert.
Clean Warm – Klassischer, dynamischer Clean-Sound
Clean Bright – ‘Boutique’, übersteuert bei hartem Anschlag
Crunch – Klassischer Overdrive bei mittlerem Gain
Super Crunch – Mehr Gain und Druck als Crunch
OD 1 – Dynamischer, druckvoller Overdrive mit Master Volume
OD 2 – Overdrive-Sound mit Mitten-Boost
Diese Einstellung wird beim Sichern eines Patches gespeichert.
3. Gain
Mit dem Gain-Regler steuern Sie den Grad der Übersteuerung bzw. Verzerrung. Niedrige
Einstellungen (gegen den Uhrzeigersinn) liefern cleane bis angezerrte Sounds. Wenn der
Gain-Regler im Uhrzeigersinn aufgedreht wird, nimmt der Verzerrungsgrad mehr und
mehr zu und wechselt von crunchigen Sounds bis hin zu stark verzerrten Sounds in der
Extremposition. Diese Einstellung wird beim Sichern eines Patches gespeichert.
4. Volume
Dieser Regler steuert den Preamp aus. Bei höherer Lautstärke tritt der Sättigungs-
und Kompressionseffekt einer Röhren-Endstufe auf. Diese Einstellung wird beim
Sichern eines Patches gespeichert.
5. Bass
Der Bass-Regler steuert den Anteil der tiefen Frequenzen im Gesamt-Sound. Dieser
Verstärker bietet eine umfangreiche Klangregelung, mit der Sie den Ton zwischen
knackig und aggressiv (gegen den Uhrzeigersinn) oder warm und druckvoll (im
Uhrzeigersinn) einstellen können. Diese Einstellung wird beim Sichern eines Patches
gespeichert.
6. Middle
Der Middle-Regler steuert den Anteil der Mittenfrequenzen im Gesamt-Sound. Die
Mitten sind insbesondere für den Grundsound entscheidend. In der Minimalposition
(komplett gegen den Uhrzeigersinn) ist der Sound sehr aggressiv und hohl, was sich
speziell für knackige Rhythmus-Parts eignet. Wenn der Mitten-Regler angehoben
wird (im Uhrzeigersinn), nimmt der Grundton-Anteil zu, was sich für singende Lead-
Sounds empfiehlt. Diese Einstellung wird beim Sichern eines Patches gespeichert.
7. Treble
Mit dem Regler Treble können Sie gezielt den Höhenanteil im Gesamt-Sound ein-
stellen. Bei niedrigen Einstellungen (gegen den Uhrzeigersinn) erhält der Sound
einen warmen und dunkleren Charakter. Wenn der Treble-Regler angehoben wird
Deutsch
Deutsch
2928
(im Uhrzeigersinn), wird der Sound immer höhenreicher. In der Maximalposition
klingt der Sound schließlich aggressiv und schneidend. Diese Einstellung wird beim
Sichern eines Patches gespeichert.
8. ISF
Mit dem patentierten ISF-Regler finden Sie genau die Klangfärbung, die Sie suchen.
Bei Einstellungen gegen den Uhrzeigersinn besitzt der Amp einen „amerikanischen“
Sound-Charakter mit einem knackigen Bassfundament
und aggressiveren Mitten. Bei Einstellungen im
Uhrzeigersinn erzeugt der Amp einen „britischen“
Sound, der deutlich ‘erdiger’ und weniger aggressiv
klingt. Das führt letztlich zu einem vertrauten, musika-
lischen Verhalten. Diese Einstellung wird beim Sichern
eines Patches gespeichert.
9. MOD (Modulation)
Mit diesem Schalter (de-)aktivieren Sie den Modulationseffekt oder wählen ihn zur
Editierung aus. Diese Einstellung wird beim Sichern eines Patches gespeichert.
10. DLY (Delay)
Mit diesem Schalter (de-)aktivieren Sie den Delay-Effekt oder wählen ihn zur
Editierung aus. Diese Einstellung wird beim Sichern eines Patches gespeichert.
11. REV (Reverb)
Mit diesem Schalter (de-)aktivieren Sie den Reverb-Effekt oder wählen ihn zur
Editierung aus. Diese Einstellung wird beim Sichern eines Patches gespeichert.
Die Tasten-LEDs der drei Effekt-Schalter geben den Status des jeweiligen Effekts
an:
LED Effekt-Status Beschreibung
LED inaktiv Effekt aus Effekt inaktiv
LED rot Effekt aktiv, aber nicht für die Editierung
ausgewählt
Effekt ist aktiv, wird aber nicht über die Effekt-
Regler auf der Front gesteuert
LED grün Effekt aktiv und für die Editierung
ausgewählt
Effekt ist aktiv und wird über die Effekt-Regler
gesteuert
Ein wiederholtes Drücken der Effekt-Tasten auf der Vorderseite hat den folgenden
Effekt:
Aktueller Effekt-Status Nächster Effekt-Status
Effekt aus Aktiviert den Effekt und setzt den Effekt in den „Fokus“. Der bisherige
„Fokus“-Effekt wird in den Status „On“ geschaltet.
Effekt aktiv, aber nicht im
„Fokus“
Setzt den Effekt in den „Fokus“. Der bisherige „Fokus“-Effekt wird in den
Status „On“ geschaltet.
Effekt aktiv und im „Fokus“ Schaltet den Effekt aus. Wenn weitere Effekte aktiv sind, bleibt der bisher
„fokussierte“-Effekt weiterhin im „Fokus“.
ANMERKUNG: Es kann immer nur ein Effekt im „Fokus“ sein.
12. Effekt-Typ
Hier wählen Sie den Effekt-Typ und editieren einen Parameter des aktuell
„fokussierten“-Effekts (Modulation, Delay oder Reverb).
Jedes Segment steht für einen anderen Effekt (vier für jeden Effekt-Typ). Eine
LED zeigt, welcher Effekt-Typ momentan aktiv ist. Der Regelweg innerhalb des
„Segments“ verändert den jeweiligen Effekt-Parameter. In der Effekt-Tabelle weiter
unten sind alle einstellbaren Parameter aufgelistet:
Diese Einstellung wird beim Sichern eines Patches gespeichert.
13. Effects Level
Dieser Regler verändert einen Effekt-Parameter. Bei Modulations- und Delay-
Effekten können Sie mit dem Level-Regler bei gehaltenem Tap-Taster (14) die Rate/
Time des Effekts verändern.
In der Effekt-Tabelle weiter unten sind alle einstellbaren Parameter aufgelistet:
Diese Einstellung wird beim Sichern eines Patches gespeichert.
14. Tap-Taster
Der Tap-Taster dient zur Eingabe der Rate/Time des Effekts, der sich aktuell im
„Fokus“ befindet. Die Dauer zwischen jedem Drücken des Tap-Tasters bestimmt
die Rate-Einstellung.
Nach der Einstellung blinkt die Tap-LED in der Geschwindigkeit, die für den Effekt
im „Fokus“ eingegeben wurde.
In der folgenden Effekt-Tabelle sind alle einstellbaren Parameter aufgelistet:
Effekt-Tabelle
Effekt Segment-Parameter Level-Parameter Tap-Parameter
MODULATION
Phaser Mix Depth Speed
Chorus/Flanger Morph Mix Speed
Octaver Oktave nach unten/oben Mischung Octaver/Originalsignal -
Tremolo Tiefe der Frequenz-Modulation Tiefe der Amplituden-
Modulation
Speed
DELAY
Linear Feedback Delay-Pegel Time
Analogue Feedback Delay-Pegel Time
Tape Feedback Delay-Pegel Time
Multi Feedback Delay-Pegel Time
REVERB
Room Size Reverb-Pegel -
Hall Size Reverb-Pegel -
Spring Size Reverb-Pegel -
Plate Size Reverb-Pegel -
Diese Einstellung wird beim Sichern eines Patches gespeichert.
US
AU
K
Deutsch
Deutsch
3130
15. Master Volume
Dieser Regler steuert die Gesamtlautstärke Ihres Verstärkers. Im Uhrzeigersinn
heben Sie die Lautstärke an. Hierbei handelt es sich um eine globale Einstellung,
die nicht in den Patches gespeichert wird. Wenn das Master Volume auf 0 herunt-
ergezogen ist, können Sie ohne den Lautsprecher über den Emulated/Headphone
Output oder über USB Aufnahmen machen. Der Pegel der Emulation wird über das
Preamp-Volume ausgesteuert.
16. USB
Hier schließen Sie ein USB-Kabel an, um den Verstärker mit einem Windows PC
oder einem Mac zu verbinden. Die ARCHITECT-Software von Blackstar bietet
zahlreiche Funktionen und kann unter dem Link www.blackstaramps.com/uk/
architect heruntergeladen werden.
Lesen Sie dazu den Abschnitt USB Audio auf Seite 15.
ANMERKUNG: Der Verstärker wird innerhalb der Aufnahme-Software auf dem
Computer als Audio-Interface angezeigt.
17. Manual
Mit diesem Taster schalten Sie zwischen dem Manual-Modus und dem aktuellen
Patch um. Im Manual-Modus entspricht der Sound den aktuellen physikalischen
Positionen der Regler. Das gilt für die Regler Voice, Gain, Volume, Bass, Middle,
Treble und ISF. Alle Effekte, die beim Umschalten in den Manual-Modus aktiv sind,
werden abgeschaltet. Im Manual-Modus können alle Regler weiterhin über ex-
terne Quellen (Blackstar ARCHITECT Software, Fuß-Controller) gesteuert werden.
Das bedeutet aber, dass der Sound nicht den physikalischen Positionen der
Bedienelemente auf der Front entspricht.
Im Manual-Modus können alle Regler auch weiterhin über die Blackstar ARCHITECT
Software gesteuert werden. Das hat aber zur Folge, dass der Sound nicht den
physikalischen Positionen der Regler auf der Front entspricht.
Tuner-Modus
Halten Sie die Manual-Taste (17) zwei Sekunden gedrückt, um den Tuner zu aktivieren.
Die LED der Recall-Anzeige (20) blinkt dauerhaft und zeigt so, dass der Tuner-Modus
aktiv ist. Der Verstärkerausgang wird stummgeschaltet, wenn der Tuner-Modus aktiv
ist.
Über die Voice-LEDs wird die Note angezeigt, die der gespielten Note am nächsten
kommt.
Über die LEDs MOD, DLY und REV wird dargestellt, inwieweit die gespielte Note von
der Referenzstimmung abweicht.
MOD-LED rot Note (Stimmung) ist zu hoch
DLY-LED grün Note ist korrekt gestimmt
REV-LED rot Note (Stimmung) ist zu tief
Alle anderen LEDs auf der Vorderseite sind im Tuner-Modus inaktiv.
Durch Drücken einer beliebigen Taste verlassen Sie den Tuner-Modus.
18. Bank
Drücken Sie die Bank-Taste, um durch die ersten drei Patch-Bänke zu blättern.
Bank 1 -> Bank 2
Bank 2 -> Bank 3
Bank 3 -> Bank 1
Die grüne LED zeigt, dass Sie sich in Bank 1 befinden, die orange LED steht für
Bank 2 und die rote schließlich für Bank 3.
ANMERKUNG: Über die Frontseite können Sie nur auf die ersten drei Bänke zu-
greifen. Wenn Sie Bank 4 oder höher über einen externen Controller (z. B. Blackstar
ARCHITECT Software oder Fuß-Controller) aktivieren, leuchten anstelle der Bank-
LEDs nun die Channel-LEDs und zeigen den Patch-Speicherplatz an. Ein Beispiel:
Patch 9 – Bank-LED rot, LED in Channel 3 leuchtet
Wenn Sie mit einem externen Controller eine Bank nach oben wechseln, wird Patch
12 angewählt – die Bank-LED erlischt, Channel 3 leuchtet
Der Channel wird zwischengespeichert, während das entsprechende Patch innerh-
alb der aktuellen Bank geladen wird, während Sie durch die Bänke blättern.
Wenn der Verstärker im Manual-Modus arbeitet, leuchtet die Bank-LED nicht.
19. Channels 1-3
Channel 1 aktiviert das erste Patch in der aktuellen Bank.
Channel 2 aktiviert das zweite Patch in der aktuellen Bank.
Channel 3 aktiviert das dritte Patch in der aktuellen Bank.
20. Recall-Anzeige
Die Recall-Anzeige zeigt, ob der aktuelle Parameterwert im Verstärker mit der physi-
kalischen Position des zugehörigen Reglers auf der Vorderseite übereinstimmt oder
nicht. Wenn Sie beispielsweise zu einem anderen Patch wechseln, entsprechen die
Regler-Einstellungen auf der Frontseite mit Sicherheit nicht den Einstellungen, die
Sie hören.
Um unerwünschte Pegelsprünge beim Einstellen der Parameter zu verhindern,
haben die Regler auf der Front keine Funktion, bis die physikalische Position den
aktuellen Parameterwert erreicht hat. In diesem Moment blinkt die Recall-Anzeige
zweimal und der Regler „übernimmt“ die Parametersteuerung, sodass Sie den Wert
anheben oder absenken können.
Die Recall-Anzeige blinkt jedes Mal, wenn ein physikalischer Regler über die aktuell
aktive und damit hörbare Einstellung bewegt wird.
Recall erfasst die Parameter Gain, Volume, Bass, Middle, Treble und ISF.
Wenn der Tuner aktiv ist, blinkt die Recall-Anzeige dauerhaft.
Wenn der Looper aktiv ist, blinkt die Recall-Anzeige einmal und zeigt so, dass
der aktuelle Loop neu gestartet wurde. Während der Aufnahme eines Loops oder
Overdubs blinkt die Recall-Anzeige dauerhaft.
Deutsch
Deutsch
3332
Rückseite
1. Power-Schalter
Mit diesem Schalter schalten Sie den Verstärker ein bzw. aus.
2. Netzanschluss
Hier wird das mitgelieferte Kaltgerätenetzkabel angeschlossen. Stellen Sie sicher,
dass sich der Power-Schalter immer in der Stellung OFF befindet, bevor Sie das
Netzteil anschließen. Das Kabel muss an einer Netzsteckdose angeschlossen
werden, die in puncto Spannung, Leistung und Netzfrequenz den auf der Rückseite
vermerkten Spezifikationen entspricht. Im Zweifelsfall wenden Sie sich an einen
qualifizierten Techniker/Elektriker.
3. Emulated/Headphone Output
Dieser Ausgang emuliert den Klangcharakter einer Gitarren-Lautsprecherbox und
sorgt in Kombination mit einem Aufnahmegerät oder Mischpult für einen natürlichen
Klang. Um die Stereo-Effekte nutzen zu können, verwenden Sie ein Y-Kabel, das
einen Stereoklinkenstecker auf zwei Monoklinkenstecker splittet: So können Sie zwei
Kanäle des Aufnahmegeräts oder Mixers ansteuern. Der Ausgang kann aber auch mit
einem Mono-Gitarrenkabel belegt werden. Verwenden Sie in jedem Fall hochwertige
geschirmte Kabel. Mit dem Volume-Regler (4) steuern Sie den Pegel des Emulated
Outputs. Der Master-Volume-Regler wirkt sich nur auf die integrierten Lautsprecher aus.
ANMERKUNG: Für „lautlose“ Aufnahmen drehen Sie das Master Volume auf null.
4. MP3/Line In
An dieser Buchse schließen Sie den Ausgang Ihres MP3- oder CD-Spielers an. Zum
Üben passen Sie die Lautstärke der externen Quelle an den Pegel Ihrer Gitarre an.
5. Footswitch
Schließen Sie hier den beiliegenden Fußschalter FS-13 oder einen anderen kompati-
blen Fußschalter (z. B. den programmierbaren Fußschalter FS-12) von Blackstar an.
Lesen Sie dazu den Abschnitt zum Fuß-Controller auf den Seiten 16-17.
6. Effects Loop
Neben den in Ihrem Verstärker integrierten Effekten in Studioqualität können Sie auch
Ihre eigenen externen Effektgeräte und Bodeneffekte einschleifen und zur Optimierung
Ihres Sounds nutzen. Verbinden Sie dazu die Send-Buchse des Verstärkers mit dem
Eingang Ihres Effektgeräts und den Ausgang mit der Return-Buchse. Zum Anschluss von
Effektgeräten mit Stereo-Ausgang nutzen Sie beide Return-Buchsen Ihres Verstärkers.
Bei Effektgeräten mit nur einem Ausgang verwenden Sie nur die Buchse Return L (Mono).
Programmierung
Speichern von Patches
So speichern Sie den aktuellen Sound als Patch:
1. Drücken und halten Sie einen der vier Channel-Taster (19) für eine Sekunde. Alle
drei Channel-LEDs blinken daraufhin.
2. Drücken Sie die Bank-Taste, um zwischen den drei Bänken (grün, orange, rot)
umzuschalten und den Speicherplatz auszuwählen.
3. Drücken Sie eine der drei Channel-Tasten einmal, um das Patch auf dem
gewählten Speicherplatz abzuspeichern.
Die LED für den gewählten Speicherplatz leuchtet und das neue Patch ist aktiv.
Grüne Bank = Patches 1-3
Orange Bank = Patches 4-6
Rote Bank = Patches 7-9
Mit Hilfe der Regler am Verstärker können Sie das Patch nun zu jedem Zeitpunkt
während dem Speichervorgang editieren. Drücken Sie die Manual-Taste bei Bedarf,
um den Speichervorgang abzubrechen: Der Verstärker wird in den vorherigen
Zustand zurückversetzt.
Das Speichern eines Patches überschreibt ein auf dem Speicherplatz eventuell
vorhandenes Patch. Patches lassen sich auch mit Hilfe der Software Blackstar
ARCHITECT speichern, sofern Ihr Verstärker über USB angeschlossen ist.
Laden von Patches
Drücken Sie eine beliebige Channel-Taste, um das zugehörige Patch zu laden. Durch
Drücken der Bank-Taste blättern Sie durch die drei Bänke grün/orange/rot. Der
Channel bleibt erhalten, während das entsprechende Patch innerhalb der aktuellen Bank
geladen wird, während Sie durch die Bänke blättern. Alternativ können Sie Patches
über die Blackstar ARCHITECT Software oder einen kompatiblen Fuß-Controller laden.
USB Audio
Die Kommunikation des Verstärkers mit einem PC oder Mac erfolgt über Standard-
Gerätetreiber, zusätzliche Gerätetreiber werden nicht benötigt. Sollte die Latenz bei
der Audioübertragung mit Ihrem Computer zu hoch sein, können Sie einen allge-
meinen ASIO-Treiber wie z. B. ASIO4ALL – www.asio4all.com herunterladen und
Ihrem Verstärker zuweisen. Eine kurze Anleitung zur USB-Aufnahme mit minimaler
Latenz finden Sie unter:
www.blackstaramps.com/usbrecording
ANMERKUNG: Schließen Sie den Verstärker immer über einen Haupt-USB-Port
des Computers an (meist auf der Rückseite zu finden).
Der Verstärker erscheint innerhalb der Aufnahme-Software auf dem Computer als
Audio-Interface. Folgende Audioformate für die USB-Ausgabe können über die
Blackstar ARCHITECT Software gewählt werden:
Stereo-Audiokanäle mit Speaker-Emulation und Effekten
2 x Mono-Audiokanäle
- Links – Verstärkersignal mit Effekt
- Rechts – unbearbeitetes Gitarrensignal
Reamping-Modus
Deutsch
Deutsch
3534
Programmierbarer 5-Wege-Fußschalter FS-12 (optional erhältlich)
Schließen Sie diesen Fußschalter mit einem herkömmlichen Mono- oder
Lautsprecherkabel an der Footswitch-Buchse auf der Geräterückseite an.
Die Schalter „A“ „C“ entsprechen den Tasten „CH 1“ – „CH 3“ auf der Vorderseite.
Drücken Sie einen der Fußschalter „A“ bis „C“, um das entsprechende Patch der
aktuellen Bank zu aktivieren. Um zwischen den Bänken umzuschalten, drücken Sie
gleichzeitig die Fußschalter „A“ und „B“ (eine Bank nach unten) bzw. „B“ und „C“
(eine Bank nach oben). Auf diese Weise lassen sich alle 36 Verstärker-Patches (12
Bänke à 3 Patches) über den Fußschalter FS-12 abrufen.
Die Schalter „D“ und „E“ am FS-12 sind programmierbar und können nach Bedarf ver-
schiedenen Funktionen zugewiesen werden. In der Voreinstellung steuern die Schalter
„D“ und „E“, wie in der folgenden Tabelle aufgeführt, die Looper-Funktion des Verstärkers.
Um diese Voreinstellung zu ändern, verbinden Sie
den Verstärker über USB mit Ihrem Computer und
stellen mit der kostenlosen Software ARCHITECT
die Optionen wie z. B. Modulation/Delay/Reverb
On/Off, Modulation/Delay Tap Tempo, Super Wide
Stereo On/Off nach Bedarf ein. Im Footcontroller-
Bereich von ARCHITECT finden Sie Details zu den
programmierbaren Funktionen.
Halten Sie „D“ und „E“ gedrückt, um den Tuner-Modus des Verstärkers zu aktivieren.
Der multifunktionale Fußschalter FS-12 beinhaltet ein chromatisches Stimmgerät mit
Noten- und Cent-Anzeige über das Display und die LEDs des Fußschalters. Durch
Drücken einer beliebigen Taste verlassen Sie den Tuner-Modus.
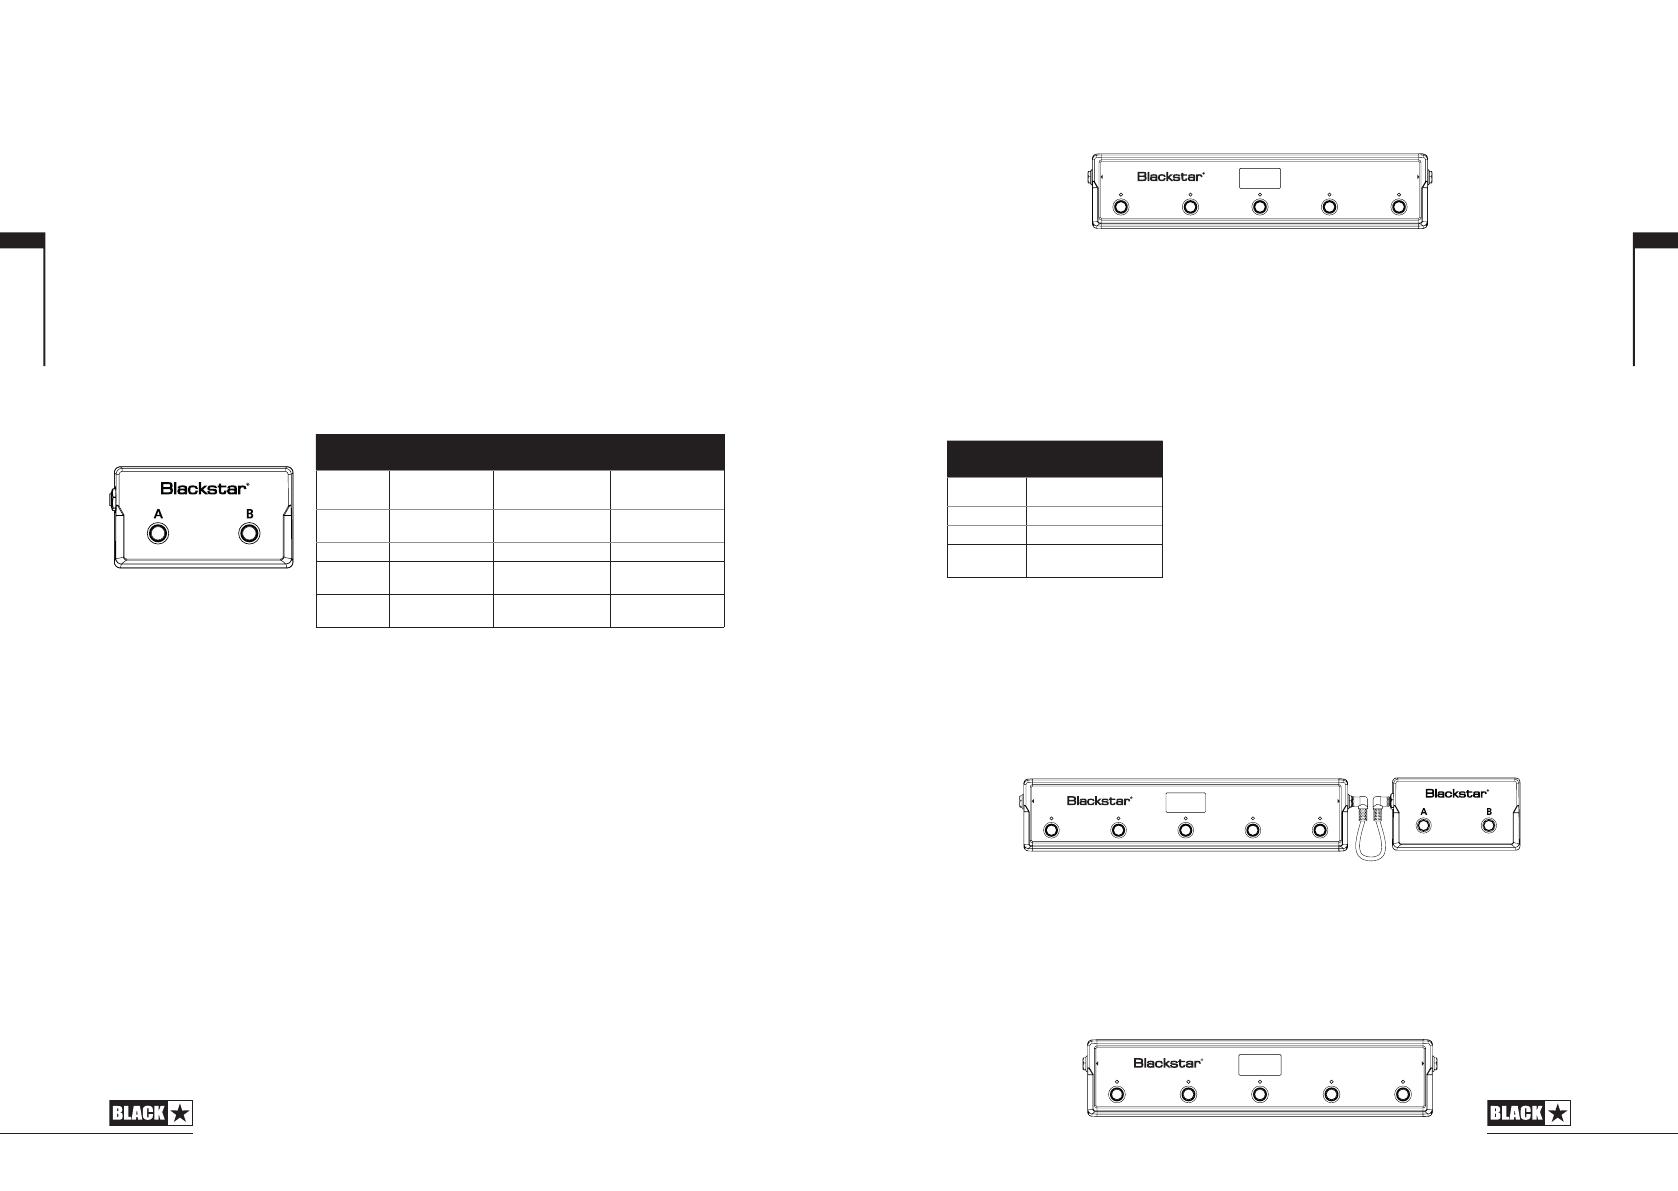
FS-12 + FS-13 – 7-Wege-Umschaltung
Schließen Sie den 5-Wege-Fußschalter FS-12 wie oben beschrieben an Ihren Verstärker
an und verbinden Sie dann den beiliegenden 2-Wege-Fußschalter FS-13 mit einem
herkömmlichen Mono- oder Lautsprecherkabel mit der „EXT“-Buchse Ihres FS-12.
In dieser Konfiguration können Sie zwei zusätzliche programmierbare Schalter nutzen
und über die Software Blackstar ARCHITECT konfigurieren. Im Footcontroller-
Bereich von ARCHITECT finden Sie Details zu den programmierbaren Funktionen.
In der Voreinstellung für den FS-13 schalten Sie mit Schalter „A“ den Modulations-
und mit Schalter „B“ den Delay-Effekt um. In dieser 7-Wege-Konfiguration zeigen
die beiden Symbole rechts im Display des FS-12 (wie unten dargestellt) den An-/
Aus-Status der Effekte für beide Fußschalter an.
LOOPER-MODUS
Aktion
D (drücken) Overdub wiedergeben/
aufnehmen/starten und anhalten
E (drücken) Wiedergabe anhalten/abbrechen
E (halten) Loop-Speicher löschen
D + E (drücken) Letztes Overdub rückgängig
machen
FS-12 FS-13 (im Lieferumfang)
ABCDE
AMP EXT.
ABCDE
AMP EXT.
ABCDE
AMP EXT.
Reamping
Über die ARCHITECT-Software von Blackstar kann der Verstärker in den Reamping-
Modus versetzt werden. Hierbei handelt es sich um eine nicht-programmierbare
Einstellung, die deaktiviert wird, wenn wahlweise das USB-Kabel entfernt oder der
Verstärker ausgeschaltet wird.
Wenn der Reamping-Modus aktiv ist, kann ein bereits aufgenommenes, unbear-
beitetes Gitarrensignal über USB in den Verstärker gespeist und als bearbeitetes
Audiosignal wieder abgegriffen werden. Dieses Return-Signal kann nun über die
Recording-Software im angeschlossenen PC oder Mac aufgenommen werden.
Fußschalter
2-Wege-Fußschalter FS-13 (im Lieferumfang)
Schließen Sie diesen Fußschalter mit einem herkömmlichen Mono- oder
Lautsprecherkabel (im Lieferumfang) an der Footswitch-Buchse auf der
Geräterückseite an.
In der Voreinstellung ist für den Fußschalter FS-13 der Looper-Modus (siehe Tabelle
oben) aktiv. Schalter „A“ startet/beendet dabei die Aufnahme von Loops und
Overdubs und Schalter „B“ stoppt die Loop-Wiedergabe bzw. beendet die aktuelle
Overdub-Aufnahme. Ein einmaliges gleichzeitiges Auslösen der Schalter „A“ und „B“
macht die letzte Overdub-Aufnahme rückgängig. Halten Sie Schalter „B“ gedrückt,
um den Loop-Speicher zu löschen.
Halten Sie die Schalter „A“ und „B“ drei Sekunden lang gedrückt, um den Fußschalter
in den Patch-Modus zu versetzen. In diesem Modus schalten Sie mit Schalter „A“ in
der aktuellen Bank zwischen den Patches von Kanal 1 und 2 um. Mit Schalter „B“
blättern Sie „nach oben“ durch die ersten drei Bänke, so wie Sie es über die BANK-
Taste auf der Vorderseite des Verstärkers tun würden. Den Patch-Modus können
Sie über die Software Blackstar ARCHITECT wie in der Tabelle oben aufgeführt um-
schalten. Halten Sie erneut die Schalter „A“ und „B“ drei Sekunden lang gedrückt,
um zum Looper-Modus zurückzukehren.
Der aktive Modus des Fußschalters FS-13 wird beim Ausschalten des Verstärkers
gespeichert und beim Einschalten wiederhergestellt. Wenn Sie den Fußschalter mit
angeschlossenem Fußschalter FS-13 einschalten (oder den FS-13 an den einge-
schalteten Verstärker anschließen), zeigen die blinkenden LEDS MANUAL, BANK,
CH1, CH2 und CH3 den aktiven Fußschalter-Modus an. Im Looper-Modus blinken
die LEDs der Reihe nach in der Schleife, im Patch-Modus blinken diese LEDs alle
zweimal gleichzeitig und leuchten dann wieder wie zuvor.
LOOPER-MODUS PATCH-MODUS
Aktion Umschalten Blättern
A (drücken)
Overdub wiedergeben/
aufnehmen/starten und
anhalten
Patch umschalten (zwischen
CH1 und CH2 der aktiven
Bank)
Vorheriges Patch laden
(1-12)
B (drücken) Wiedergabe anhalten/
abbrechen Zur nächsten BANK blättern Nächstes Patch laden
(1-12)
B (halten) Loop-Speicher löschen - -
A + B (drü-
cken)
Letztes Overdub
rückgängig machen - -
A + B (halten) PATCH-Modus
aktivieren LOOPER-Modus aktivieren LOOPER-Modus aktivieren
Deutsch
Deutsch
3736
Erweiterte Funktionen
Ihr ID:Core Verstärker bietet zusätzlich erweiterte Funktionen für Anwender, die noch
tiefer einsteigen und ihren Amp maximal ausreizen möchten Für diese Funktionen
stehen keine eigenen Bedienelemente zur Verfügung. Stattdessen werden sie mit
Hilfe der Tap-Taste (14) aufgerufen, die als „Shift“-Taste dient, mit der man auf die
erweiterten Funktionen der regulären Bedienelemente zugreift.
Resonance – Tap + Bass
Der Resonance-Regler steuert global die Ansprache im Bassbereich. Bei niedrigen
Einstellungen klingen cleane Sounds knackig und funky, während bei angezerrten
Sounds die Basswiedergabe angehoben wird. Bei höheren Einstellungen klingen
Clean-Sounds voll und warm, während sich Crunch- und Overdrive-Sounds durch
wuchtige Bässe und Druck auszeichnen.
Presence – Tap + Treble
Der Presence-Regler steuert global die Ansprache im Höhenbereich. Perkussive
Höhen werden bei cleanen Sounds betont, aggressive Höhen lassen sich bei
Crunch- und Overdrive-Sounds gezielt steuern.
USB-Aufnahmepegel – Tap + Gain
Wie im Abschnitt USB-Audio (siehe Seite 15) beschrieben, lässt sich der
Ausgangspegel des USB-Signals unabhängig von der Lautstärke des Lautsprechers
steuern, indem Sie die Tap-Taste (14) gedrückt halten und gleichzeitig den Gain-
Regler (3) auf der Vorderseite bedienen.
Effekt-Geschwindigkeit/Dauer– Tap + Effects Level
Wie im Abschnitt Effects Level (siehe Seite 11) beschrieben ,lässt sich die
Geschwindigkeit/Dauer der Modulations- und Delay-Effekte einstellen, indem Sie
die Tap-Taste (14) gedrückt halten und gleichzeitig den Regler Effects Level (13) auf
der Vorderseite bedienen. Dies kann sehr nützlich sein, wenn Sie das Tempo nicht
mit der Tap-Taste, sondern exakt einstellen möchten.
Globale Einstellung des Emulated Output/Headphones-Pegels – Tap +
Volume
Über diese Funktion steuern Sie die Gesamtlautstärke an der Buchse Emulated Out/
Phones, um den Pegel an das jeweils angeschlossene Gerät wie z. B. ein Audio-
Interface, PA-System oder Kopfhörer mit unterschiedlicher Impedanz anzupassen.
Über diesen Regler können Sie den Pegel absenken und anheben oder für die
Standardeinstellung den Volume-Regler (4) in die Mittelstellung bringen.
Firmware Update
Firmware-Aktualisierungen werden über die Blackstar ARCHITECT Software
ausgeführt. Eine aktuelle Version der Blackstar ARCHITECT Software wird zu jedem
Update veröffentlicht.
Wichtiger Hinweis: Schließen Sie den Verstärker zum Aktualisieren der Firmware
immer an einem Haupt-USB-Port (normalerweise auf der Rückseite Ihres PC oder
Macs) an. Verwenden Sie in keinem Fall integrierte oder externe USB-Hubs oder
USB-Verlängerungen. Andernfalls könnte das Update fehlschlagen, sodass Ihr
Verstärker nicht mehr richtig funktioniert.
Wenn der (über USB) mit der ARCHITECT-Software verbundene Verstärker eine
neuere Firmware erkennt, wird eine Meldung eingeblendet, die eine Installation
dieser aktuellen Daten empfiehlt. Während der Aktualisierung können die Regler am
Verstärker nicht bedient werden. Die Voice-LEDs auf der Vorderseite leuchten für
die Dauer des Aktualisierungsvorgangs.
Der Verstärker darf während der Firmware-Aktualisierung nicht ausgeschaltet
werden. Wenn der Amp während der Aktualisierung ausgeschaltet wird, können
die Regler am Verstärker auch nach dem Einschalten eventuell nicht mehr bedient
werden und der Verstärker gibt keinen Sound aus. Die Voice-LED blinken in der
Schleife und zeigen so, dass im Verstärker keine gültige Firmware installiert ist.
Wenn bei der Aktualisierung der Firmware Probleme auftreten, können Sie den
Verstärker auch gezielt im Update-Modus einschalten. Halten Sie die Tasten Manual
(17) & MOD (9) gleichzeitig gedrückt, während Sie den Verstärker einschalten: Der
Verstärker wird im Update-Modus gestartet, was durch die zyklisch blinkenden
Voice-LEDs angezeigt wird. Verbinden Sie den Verstärker mit der Blackstar
ARCHITECT Software, um mit der Firmware-Aktualisierung zu beginnen.
Der Verstärker muss mit der Blackstar ARCHITECT Software verbunden sein, um
eine gültige Firmware zu installieren. Die Aktualisierung wird automatisch ausgeführt,
wenn die Blackstar ARCHITECT Software erkennt, dass sich der Verstärker im
Update-Modus befindet.
Technische Spezifikationen
ID:CORE STEREO 100
Leistung: 2 x 50 Watt (100 Watt stereo)
Gewicht (kg): 12,5
Abmessungen (mm): 573 (B) x 447 (H) x 241 (T)
Technische Spezifikationen
ID:CORE STEREO 150
Leistung: 2 x 75 Watt (150 Watt stereo)
Gewicht (kg): 14,5
Abmessungen (mm): 624 (B) x 486 (H) x 259 (T)
Deutsch
Deutsch
3938 39
INSTRUCCIONES IMPORTANTES DE SEGURIDAD
1. Lea estas instrucciones.
2. Guarde estas instrucciones.
3. Preste atención a todas las advertencias.
4. Siga todas las instrucciones.
5. No utilice este aparato cerca del agua.
6. Solo limpiar con un trapo seco.
7. No bloquee ninguna salida de ventilación.
8. Haga la instalación acorde con las instrucciones del fabricante.
9. No lo instale cerca de fuentes de calor como radiadores, estufas u otros
aparatos (por ejemplo amplicadores) que producen calor.
10. No anule el propósito de seguridad del enchufe polarizado o con conexión a
tierra. Los enchufes polarizados disponen de dos clavijas, una de mayor tamaño
que la otra. Un enchufe de toma a tierra tiene dos clavijas y una tercera de toma
a tierra. La clavija ancha en el enchufe polarizado o la tercera clavija en el de
toma a tierra se proporcionan para su seguridad. Si el enchufe suministrado no
encaja en la toma, póngase en contacto con un electricista para sustituir la toma
antigua.
11. Proteja el cable de alimentación para no caminar sobre él ni pellizcarlo,
particularmente en los enchufes, los receptáculos de conveniencia y en el punto
donde éstos salen del aparato.
12. Use sólo los acoples/accesorios especicados por el fabricante.
13. Desenchufe el aparato durante tormentas eléctricas o cuando no se utilice por
periodos prolongados.
14. Toda reparación debe ser realizada por personal cualicado. Las reparaciones
deberán realizarse cuando el aparato se estropee de cualquier forma, cuando se
dañe la clavija o el cable de alimentación, se derramen líquidos o caigan objetos
dentro del aparato, cuando éste hay sido expuesto a la lluvia o a la humedad,
cuando no funcione de manera normal o cuando se haya caído.
“PARA DESCNECTAR POR COMPLETO ESTE APARATO DE LA ELECTRICIDAD,
DESENCHUFE EL CABLE DE ALIMENTACIÓN DE LA TOMA PERTINENTE TOMA
DEL PANEL POSTERIOR DEL MISMO”.
“ADVERTENCIA: PARA REDUCIR EL RIESGO DE INCENDIOS Y DESCARGAS
ELÉCTRICAS, NO EXPONGA ESTE APARATO A LLUVIA NI HUMEDAD. EL
APARATO NO DEBERÁ EXPONERSE A GOTEOS NI SALPICADURAS Y NINGÚN
OBJETO CON LÍQUIDO, COMO UN JARRÓN, DEBERÁ COLOCARSE
SOBRE EL APARATO”.
Este símbolo está destinado a alertar al usuario de la presencia de
“tensión peligrosa” sin aislamiento dentro del gabinete del producto,
que puede tener la suciente magnitud para producir descarga
eléctrica.
Éste símbolo tiene la intención de alertar al usuario de que existen
instrucciones de operación y mantenimiento importantes en esta
guía que acompaña al aparato.
Español
414140
La ocina Americana de Protección de la Salud ha especicado los siguientes
niveles admisibles de exposición de ruido:
DURACIÓN POR DÍA Y HORAS NIVEL DE SONIDO DBA BAJA RESPUESTA
8 90
6 92
4 95
3 97
2 100
102
1 105
½ 110
¼ or less 115
Cualquier exposición por encima de los límites mencionados puede provocar
pérdidas auditivas.
Los tapones protectores deben ser utilizados cuando se opere este amplicador
para prevenir una pérdida de oido permanente si la exposición es excesiva o está
por encima de los límites descritos arriba. Para prevenir contra una exposición
peligrosa a altos niveles de sonido se recomienda a todas las personas que puedan
estar expuestas a niveles producidos por un amplicador como éste que protejan
sus oídos mientras la unidad esté en funcionamiento.
¡AVISO!
Importante Información de seguridad
LEA LA SIGUIENTE INFORMACIÓN DETENIDAMENTE Y CONSERVE LAS
INSTRUCCIONES PARA FUTURAS CONSULTAS.
SIGA TODOS LOS AVISOS E INSTRUCCIONES MARCADAS EN LOS
PRODUCTOS.
¡PELIGRO! Alto voltaje interno.
No abra la tapa del equipo. No hay partes utilizables para otros nes en este equipo.
Remita cualquier anomalía al servicio técnico cualicado.
Utilice trapos secos para su limpieza.
Se puede formar condensación dentro del amplicador si este se ha movido de un
lugar frío a otro más cálido. En el caso de que se moviera el amplicador de un sitio
más frío a otro más cálido o a la inversa, deje un rato el amplicador sin encender
para que este alcance la temperatura media del nuevo lugar.
Las modicaciones no autorizadas están expresamente prohibidas por Blackstar
Amplication LTD.
Nunca apoye objetos en ninguno de los agujeros de ventilación localizados en las
tapas del equipo.
No exponga los equipos a la lluvia, líquidos o humedad de cualquier tipo.
No ponga los equipos en carretillas o mesas inestables. El equipo puede caer
dañándose seriamente, así como a otras personas.
No cubra o bloquee los agujeros de ventilación y apertura.
Este producto no debe ser expuesto cerca de una fuente de calor como puede ser
un radiador, estufa o cualquier productor de calor o amplicador.
Use sólo la fuente de alimentación que sea compatible con los voltajes utilizados
en el área donde esté.
La fuente de alimentación debe ser manejada con cuidado y debe ser reemplazada
en caso de cualquier daño.
Nunca rompa la toma de tierra sobre el cable de la corriente.
El cable de la corriente deberá ser desconectado cuando la unidad no vaya a ser
usada durante un tiempo.
Antes de encender un cabezal, la pantalla deberá estar conectada como se
describe en el libro de instrucciones utilizando los conductores recomendados por
el fabricante.
Reemplace siempre los fusibles dañados por otros de características idénticas.
Nunca desconecte el protector de la toma de tierra.
La potencia de sonido de los altavoces cuando los niveles son altos puede causar
daño permanente. Se debe evitar por tanto la exposición directa a loa altavoces
cuando estos estén operando a un alto nivel. Usa siempre protectores auditivos
ante una exposición prolongada.
Si el producto no funcionara una vez seguidas todas las instrucciones, remítalo a
un servicio técnico cualicado.
All electrical and electronic products should be disposed of separately
from the municipal waste stream via designated collection facilities
appointed by the government or the local authorities.
Español
Español
43
Características
Desde 2007, Blackstar ha liderado el camino de la innovación en amplificadores de
guitarra. ID:Core representa la culminación de años de Investigación y Desarrollo.
Este amplificador tiene un intuitivo panel de control, pero con la versatilidad que
ofrece un amplificador programable. Los controles únicos te permiten a ti, el
guitarrista, diseñar tu propio sonido.
El control Voice tiene seis ajustes diferentes: Clean Warm, Clean Bright, Crunch,
Super Crunch, OD 1 y OD 2, los cuales han sido mejorados sobre el original ID:Core
Voces para un claro sonido en vivo. Cuando el control ISF y Blackstar son usados
simultáneamente puedes obtener el tono que estas pensando.
La sesión Effects proporciona efectos con calidad de estudio Super Wide Stereo
para modulación, reverb y delay que puedes almacenar junto con tu sonido.
La edición avanzada de los bancos de sonido, muy sencilla, se realiza usando el
software ARCHITECT de Blackstar. Los bancos se pueden descargar y compartir
con la comunidad de usuarios en línea. El conector USB también te permite grabar
directamente desde tu amplificador al ordenador.
El nuevo looper integrado proporciona opciones de actuaciones tanto en vivo como
en casa para artistas de niveles diferentes. Tanto si tocas en vivo solo o como
guitarrista en un duo o trio, el simple e intuitivo looper te ayuda a conseguir una
sensación de estar en un escenario lleno, sonidos de pistas múltiples al presionar el
pedal (incluido), con overdubs ilimitados.
Una salida emulada, entrada de línea/MP3 completan el paquete.
Usando el único control Voice y el patentado ISF, los amplificadores ID:Core ofrecen
una incomparable flexibilidad y facilidad de uso, permitiéndote diseñar el sonido en
t cabeza y llevarlo a casa, al estudio y al directo.
43
Introducción
Gracias por comprar este amplificador Blackstar ID:Core. Como todos nuestros
productos, este amplificador es el resultado de incontables horas de meticulosa
Investigación y Desarrollo por parte de nuestro prestigioso equipo de diseño.
Con base en Northampton (Reino Unido), el equipo de Blackstar está formado
por músicos experimentados y el único objetivo del proceso de desarrollo es el
de proporcionar a los guitarristas con productos que sean las herramientas de
autoexpresión definitivas.
Todos los productos Blackstar son sometidos a intensivas pruebas de laboratorio y
de rodaje para asegurar que están fuera de compromiso en términos de fiabilidad,
calidad y, sobretodo, TONO.
ID:Core supone un verdadero logro, combina innovaciones únicas, un set de control
tradicional e intuitivo y la versatilidad de un amplificador programable.
Por favor lee este manual detenidamente para asegurarte de que obtienes el
máximo rendimiento de tu producto Blackstar.
Si te gusta lo que oyes y quieres averiguar mas acerca de la línea de productos
Blackstar, por favor visita nuestro sitio web en www.blackstaramps.com.
¡Gracias!
El Equipo Blackstrar
42
Español
Español
4545
Restablecer ajustes de fábrica
Los bancos de sonido por defecto se pueden restablecer en cualquier momento.
Simplemente mantén pulsados simultáneamente los botones MOD, DLY y REV,
mientras enciendes el amplicador.
El indicador LED hará una cuenta atrás para indicar que se va a restablecer los
ajustes de fábrica. Si alguno de los botones MOD, DLY o REV se suelta antes de
que el indicador LED haya nalizado hasta nalmente apagarse, la operación será
cancelada y el amplicador permanecerá como estaba antes de iniciar el proceso.
Finalmente, apague el amplicador para completar el proceso. Cuando se encienda,
su amplicador se habrá restablecido.
NOTA IMPORTANTE:
Este proceso eliminará cualquier contenido guardado por el usuario.
44
Panel Frontal
1. INPUT
Conecta tu guitarra aquí. Usa siempre un cable apantallado de calidad.
2. VOICE
El control Voice cambia el carácter previo, desde limpios cristalinos hasta distorsión
extrema.
Clean Warm - Sonido muy limpio y dinámico.
Clean Bright - ‘Boutique’, romperá cuando se rasguee con fuerza.
Crunch - Distorsión clásica de alta ganancia.
Super Crunch - Versión más distorsionada del canal Crunch.
OD 1 - Potente distorsión con volumen master.
OD 2 - Potente distorsión con énfasis en frecuencias medias.
Este ajuste se almacenará al guardar un banco de sonido.
3. GAIN
El control Gain ajusta la cantidad de overdrive o distorsión. Ajustes bajos (sentido
anti-horario) entregarán un sonido limpio a punto de romper. A medida que el
control de distorsión se incrementa en sentido horario el sonido se volverá más
distorsionado, moviéndose a través de ricos tonos Cruz hasta, en su máxima
posición, alcanzar un sonido totalmente distorsionado. Este ajuste se almacenará
al guardar un banco de sonido.
4. VOLUME
Este control ajusta el volumen previo. Altos niveles de volumen introducirán los
efectos de distorsión y compresión. Este ajuste se almacenará al guarda un banco
de sonido.
5. BASS
El control Bass ajusta la cantidad de frecuencias graves en tu sonido. Este
amplificador tiene un avanzado circuito de formación de tono que permite que el
sonido sea contundente y cortante (sentido anti-horario) o cálido y pesado (sentido
horario). Este ajuste se almacenará al guardar un banco de sonido.
6. MIDDLE
El control Middle ajusta la cantidad de frecuencias medias en tu sonido. Las
frecuencias medias son particularmente importantes al ajustar la cantidad de
cuerpo que tiene tu sonido. Con el control Middle en su posición mínima (sentido
anti-horario) el sonido será agresivo y cortante, un tono ideal para tonos rítmicos.
A medida que el control Middle se incrementa en sentido horario, la cantidad
de cuerpo aumenta, que es más apropiada para tonos solistas. Este ajuste se
almacenará al guardar un banco de sonido.
Español
Español
47
7. TREBLE
El control Treble permite un ajuste exacto de las frecuencias agudas o altas en tu
sonido. A niveles bajos (sentido anti-horario) el sonido será oscuro y caliente en
carácter. A medida que el control Treble se incrementa en sentido horario el sonido
se volverá más brillante. En su ajuste máximo el sonido será agresivo. Este ajuste
queda almacenado al guardar un banco de sonido.
8. ISF
El control ISF te permite elegir la firma tonal exacta
que prefieras. Ajustando de forma anti-horaria se
proporciona una característica más Americana con
bajos apretados y medios agresivos, en cambio al
hacerlo de forma horaria se obtiene un tono Británico,
que es más denso y menos agresivo.
9. MOD (MODULATION)
Pulsa este interruptor para conectar o desconectar el efecto de modulación, o
seleccionar el efecto para editarlo. Este ajuste queda almacenado al guardar un
banco de sonido.
10. DLY (DELAY)
Pulsa este interruptor para conectar o desconectar el efecto delay, o seleccionarlo
para su edición. Este ajuste queda almacenado al guardar un banco de sonido.
11. REV (REVERB)
Pulsa este interruptor para conectar o desconectar el efecto reverb, o seleccionarlo
para su edición. Este ajuste queda almacenado al guardar un banco de sonido.
Para cada uno de los tres efectos el funcionamiento del LED es similar:
LED Estado de efecto Descripción
LED apagado Apagado El efecto no estará activo
LED rojo Encendido (no permite edición) El efecto estará activo, pero no responde a los
controles del panel frontal
LED verde Encendido (permite edición) El efecto estará activo y responderá a los
controles del panel frontal
Al pulsar repetidamente cada uno de los controles de efecto obtendremos la
siguiente secuencia:
Estado actual del efecto Estado del siguiente efecto
Efecto apagado Enciende el efecto y lo selecciona para edición. Cualquier efecto previamente
seleccionado para edición vuelve a su estado normal.
Efecto encendido pero no
seleccionado para edición
Selecciona el efecto para su edición. Cualquier efecto previamente
seleccionado para edición vuelve a su estado normal.
Efecto encendido y seleccionado
para edición
Apaga el efecto, quedando seleccionado para edición el último efecto
seleccionado en caso de que quedase algún efecto encendido.
4746
NOTA: Sólo un efecto puede estar seleccionado para edición cada vez.
12. EFFECT TYPE (TIPO DE EFECTO)
Cambia el tipo de efecto y edita un parámetro del efecto que esté actualmente
seleccionado para edición. (Modulación, delay o reverb)
Cada segmento representa un efecto diferente (hay cuatro para cada tipo de efecto)
Un LED muestra el tipo de efecto que se encuentra activo. La distancia recorrida
por el segmento modifica un parámetro del efecto. La tabla mostrada más adelante
nos indica los parámetros modificables. Este ajuste queda almacenado al guardar
un banco de sonido.
13. EFFECT LEVEL (NIVEL DE EFECTO)
Este control modifica un parámetro de efecto. Para los efectos de modulación y
delay, girar el control de nivel mientras se presiona el interruptor Tap (14) modifica
la frecuencia o el tiempo del efecto.
La tabla mostrada más adelante nos indica los parámetros modificables. Este ajuste
queda almacenado al guardar un banco de sonido.
14. TAP
El interruptor Tap se usa para ajustar la frecuencia o tiempo del efecto seleccionado
para la actual edición. El tiempo entre pulsaciones del interruptor Tap establece la
frecuencia del efecto.
Una vez establecido, el LED parpadeará indicando la frecuencia del efecto
seleccionado.
La tabla mostrada más adelante nos indica los parámetros modificables.
Este efecto queda almacenado al guardar un banco de sonido.
Effects Table
Efecto Segmento Level Parameter Tap Parameter
MODULACIÓN
Phaser Mezcla general Profundidad o ‘Depth’ Velocidad
Chorus/Flanger Morph Mix Velocidad
Octaver Octave down/up blend Profundidad o ‘Depth’ -
Tremolo Profundidad de la modulación
de frecuencia
Profundidad de la modulación
de amplitud
Velocidad
DELAY
Linear Realimentación Nivel de Delay Tiempo
Analógico Realimentación Nivel de Delay Tiempo
Cinta Realimentación Nivel de Delay Tiempo
Multi Realimentación Nivel de Delay Tiempo
REVERB
Room Tamaño Nivel de Reverb -
US
AU
K
Español
Español
49
Efecto Segmento Level Parameter Tap Parameter
Hall Tamaño Nivel de Reverb -
Spring Tamaño Nivel de Reverb -
Plate Tamaño Nivel de Reverb -
Este ajuste se guarda cuando almancena un parche.
15. MASTER VOLUME
Controla el volumen general de tu amplificador. Girándolo en sentido horario se
incrementa el volumen. Este es un ajuste global y no queda almacenado al guardar
un banco de sonido. Si el volumen maestro está a 0, el amplificador se puede utilizar
para grabación silenciosa a través de la salida emulada o el conector USB. El nivel
de la salida emulada es controlado mediante el volumen del preamplificador.
16. USB
Conecta un cable mini USB aquí para enlazar tu amplificador con un sistema
Windows o Mac. El software ARCHITECT de Blackstar se puede descargar desde
nuestro sitio web www.blackstaramps.com/uk/architect
Consulta la sección de Audio USB en la página 15 para más información.
NOTA: el amplificador aparecerá como “Dispositivo de grabación de audio” en el
ordenador.
17. MANUAL
Pulsa este interruptor para cambiar entre modo manual y el banco de sonido actual.
Cuando el amplificador está en modo manual, el sonido reflejará la posición física de
los controles del panel frontal. Esto es aplicable a los controles Voice, Gain, Volume,
Bass, Middle, Treble, ISF. Los efectos que estén activos cuando se cambia el modo
manual se desactivaran.
En modo manual cualquiera de los controles se puede modificar mediante una
fuente externa (Blackstar ARCHITECT, pedal de control) pero esto significa que el
sonido del amplificador no se corresponderá con la posición física de los controles
del panel frontal.
Estando en el modo manual cualquiera de los controles puede ser modificado por
el software Blackstar ARCHITECT pero esto significa que el sonido no representará
la posición de los botones en el panel frontal.
AFINADOR
El mantener pulsado el interruptor manual (17) durante dos segundos se activará
el afinador. El LED Recall (20) parpadeará continuamente para indicar que el
amplificador se encuentra en modo afinador. Por defecto la salida del amplificador
se silenciará en este modo.
Los LEDs sonoros indicarán la nota más próxima a la nota detectada.
4948
Los LEDs MOD, DLY y REV te indicarán la desviación en la afinación para cada nota:
LED MOD (rojo) La nota es más alta que el tono a anar
LED DLY (verde) La nota está anada
LED REV (rojo) La nota es más baja que el tono a anar
Todos los otros LEDs se apagarán durante el modo afinador.
Al pulsar cualquier interruptor volverá al modo normal.
18. BANK (BANCO)
Pulsa el interruptor Bank para moverte por los tres primeros bancos de sonido.
Banco 1 -> Banco 2
Banco 2 -> Banco 3
Banco 3 -> Banco 1
El LED verde indica que estás en el banco 1. El LED naranja indica que estás en el
banco 2. El LED rojo indica que estás en el banco 3.
NOTA: sólo los tres primeros bancos se pueden seleccionar desde el panel frontal.
Al activar el banco 4 y superiores mediante un controlador externo (Software, Pedal,
MIDI…), el LED Bank no se encenderá pero los LEDs de los distintos canales te
indicarán la ubicación del ajuste.
Por ejemplo:
Preajuste 9-LED de banco rojo. LED de canal 3 encendido.
Pulsando el banco hacia arriba con una controladora externa cambiará el preajuste
a 12-LED de banco apagado. LED de canal 3 encendido.
El canal será recordado por el amplificador, por tanto el correspondiente preajuste
del actual banco se cargará al cambiar entre bancos.
Cuando el amplificador se encuentra en modo manual el LED de banco estará
apagado.
19. CANALES 1-3
El canal 1 activa el primer preajuste del banco active actual.
El canal 2 activa el segundo preajuste del banco active actual.
El canal 3 activa el tercer preajuste del banco active actual.
20. INDICADOR RECALL
El indicador Recall muestra si hay alguna discrepancia entre el valor actual del
parámetro del amplificador y la posición de los controles del panel frontal. Por
ejemplo. Cuando cambias de preajuste los controles no siempre reflejarán el sonido
que escuches.
Para prevenir cambios de nivel inesperados en el control que estás ajustando,
los controles del panel frontal no tendrán ningún efecto en el sonido hasta que el
mando alcance el valor del parámetro actual. Una vez alcanzado, el indicador Recall
Español
Español
5151
parpadeará dos veces y el mando tomará el control del parámetro, que se podrá
aumentar o disminuir.
El indicador Recall parpadeará cada vez que el mando físico pasa por el valor
almacenador que escucha actualmente en el preajuste actual.
El indicador Recall se activa para Gain, Volume, Bass, Middle, Treble e ISF.
Cuando el afinador está activo el indicador Recall parpadeará continuadamente.
Durante la secuencia de repetición, el indicador Recall parpadeará una vez para
mostrar cuando la secuencia vuelve a empezar. Cuando una secuencia de repetición
o Overdub se está grabando, el indicador Recall parpadeará continuamente.
Panel Trasero
1.BOTÓN DE ENCENDIDO
Este botón se usa para encender y apagar el amplificador.
2. MAINS INPUT
El cable de alimentación desmontable subministrado se conecta aquí. Asegúrate
siempre que el botón de encendido está en OFF antes de conectar el cable. El cable
solo debe estar conectado a un enchufe que sea compatible con el voltaje, la fuerza
y la frecuencia requerida que se menciona en el panel trasero. En caso de duda pida
consejo a un técnico cualificado.
3. EMULADO/ SALIDA DE AURICULARES
Esta salida emula las características tonales de un altavoz de guitarra y proporciona
un tono natural para la conexión de una tabla de mezclas o una grabadora. Para
un uso completo de los efectos stereo, utilice un stereojack para conectar el cable
de dos mono jacks para alimentar dos canales de la grabadora o tabla de mezclas.
La salida también funcionará para un cable simple de guitarra. Siempre utilice un
cable de alta calidad. El nivel emulado de salida se controlará girando el botón de
volumen (4). El control Master Volume solo afecta a altavoces internos.
NOTA: para grabar “silenciosamente” o practicar con auriculares ponga el control
Master Volume a 0.
4. MP3/LINE IN
Conecta el cable de salida de tu MP3 o reproductor de CD aquí. Ajusta el volumen
para enlazarlo con tu guitarra.
5. INTERRUPTOR DE PIE
Conecta el FS-13 Footcontroller (incluido) aquí, o cualquier otro Blackstar
Footcontroller compatible (ej. FS-12 control de pide programable). Véase la sección
de interruptores de pie en las páginas 16-17 para más información.
6. EFECTOS LOOP
Además de usar los efectos del estudio de tu amplificador puedes colocar tu
propio procesador de efectos externo “In the Loop” para el mejor rendimiento
50
sonoro. Conecta el amplificador “Send” a la entrada de la unidad de efectos,
y conecta el cable de salida al de “Return”. Si tu unidad de efectos tiene un
output stereo, conecta ambos al enchufe “Return” de tu amplificador. Si tus
efectos externos se conectan de manera simple el cable de salida de tu unidad
de efectos se conectará solo al enchufe “Return L (mono)”.
Programmability
ALMACENAMIENTO DE BANCOS DE SONIDO
Para guardar un banco de sonido:
1. Mantén pulsado cualquiera de los tres canales durante un segundo los tres LEDs
de los canales empezarán a parpadear.
2. Pulsa el control Bank para buscar en los tres bancos (Verde, Naranja y Rojo) para
seleccionar donde lo quieres guardar.
3. Pulsa una vez cualquiera de los tres canales para guardar el banco de sonido en
el lugar escogido.
Se iluminará el LED que corresponde al lugar guardado y el nuevo banco de sonido
estará activo.
Green Bank = Patches 1-3
Orange Bank = Patches 4-6
Red Bank = Patches 7-9
Los controles del amplificador pueden ser utilizados para modificar el banco de
sonido en cualquier momento del proceso. Pulsa el control manual en cualquier
momento para cancelar este proceso.
Al guardar un banco de sonido, éste se sobreescribirá cualquier banco de sonido
previo guardado allí. Los bancos de sonido también se pueden guardar utilizando
el software Blackstar ARCHITECT cuando éste se conecte al amplificador vía USB.
RECUPERANDO BANCOS DE SONIDO
Pulsa cualquier canal para cargar ese banco. Pulsando el control Bank éste
buscará en los tres bancos-verde-naranja-rojo. El canal será preservado así pues el
correspondiente banco de sonido dentro del Banco actual será cargado cuando se
esté buscando en los Bancos. Como alternativa, los banco de sonido se pueden
recuperar a través del software Blackstar’s ARCHITECT o cualquier Footcontroller
compatible.
Audio USB
Los controladores de dispositivo estándar se utilizan para conectar el amplificar
a un PC o Mac, así pues ningún dispositivo adicional es necesario. Si la latencia
de audio de tu ordenador es demasiado alta se puede descargar y asociar con tu
amplificador un ASIO genérico por ejemplo, ASIO4ALL — www.asio4all.com. Para
una guía en latencia baja visite:
www.blackstaramps.com/usbrecording
Español
Español
53
NOTA: Siempre conecte el amplificador a través del puerto USB principal,
normalmente se encuentra en la parte trasera del ordenador.
El amplificador aparecerá como un dispositivo de audio.
La salida de audio mediante USB puede ser cambiada a través del software
Blackstar ARCHITECT, y puede ser uno de los siguientes:
Canales de audio estereofónicos anulados por el altavoz
Canales 2 x mono audio
- Izquierda — señal de amplificador
-Derecha — Señal de guitarra sin procesar
Modo de rearmado
Modo Reamping
El amplificador se puede configurar en modo ‘Reamping’ a través del software
Blackstar ARCHITECT. Este es un ajuste no programable y se desactivará al
desconectar el cable USB o al apagar el amplificador. Activar el modo ‘Reamping’
permite al amplificador procesar una señal de guitarra grabada previamente a través
de USB y devolver una señal totalmente procesada. Esta señal se puede capturar
usando un software en el PC o Mac que estemos utilizando.
Foot controllers
Foot controller FS-13 de dos controles (incluido)
Conecta el foot controller al enchufe en el panel trasero del amplificador usando
cualquier cable estándar de guitarra o el cable del altavoz (incluido).
Por defecto, tu FS-13 Foot Controller estará en modo Looper (mirar tabla). El botón
‘A’ se usa para empezar y terminar de grabar una secuencia de audio o un overdub,
y el botón B hace que pare de repetirse la secuencia de audio o cancela el overdub si
aún está grabándose. Al pulsar simultáneamente una vez ambos botones borrará el
último overdub grabado. Al mantener pulsado el botón ‘B’, éste borrará la memoria
del modo de secuencia de repetición o Loop.
Al pulsar ambos botones durante 3 segundos puedes acceder al Modo Patch. En
este modo, el botón ‘A’ cambiará entre el Canal 1 y el 2 del Banco actual. Al pulsar
el botón ‘B’ se desplazará hacia arriba por los 3 primeros Bancos, funcionando igual
que el control Bank del panel frontal. El funcionamiento del Modo Patch se puede
cambiar a través del software Blackstar ARCHITECT, como se refleja en la tabla que
encontramos más arriba. Se vuelve a cambiar al Modo Looper al pulsar de nuevo
durante 3 segundos los botones ‘A’ y ‘B’.
52
El modo actual del Foot controller FS-13 se guardará cuando se apague el
amplificador, y se reanudará un vez se vuelva a encender. AL encender el
amplificador con el Foot Controller conectado (o conectando con el amplificador ya
encendido) el modo del Foot Controller se indicará mediante una animación usando
los LEDs del Manual, Bank, CH1, CH2 y CH3. El modo Looper se indicará por una
suma de LEDs en secuencia, en cambio el Modo Patch se indicará por el doble
parpadeo de los LEDs antes de volver a su funcionamiento normal.
Foot Controller programable FS-12 de 5-controles (no incluido)
Conecta el Foot Controller al enchufe en el panel trasero del amplificador usando
cualquier cable estándar de guitarra o el cable del altavoz.
Los pulsadores ‘A’ - ‘C’ corresponden a los canales 1, 2 y 3 del panel frontal
del amplificador. Al pulsar cualquiera de estos (A-C) se reanudará el Patch
correspondiente a cada Banco. Se puede navegar a través de los Bancos al pulsar
simultáneamente los botones ‘A’ y ‘B’ (hacia abajo) y los
botones ‘B’ y ‘C’ para navegar en el Banco hacia arriba.
Todos los 36 bancos de sonido del amplificador (12
bancos de 3) son accesibles mediante el Foot Controller
FS.12.
Los botones ‘D’ y ‘E’ del FS-12 son programables y se
pueden configurar de forma diferente dependiendo de las
necesidades de cada uno. Por defecto, los botones ‘D’
y ‘E’ controlarán la función Looper del amplificador, y se comportará como sale
descrito en la tabla siguiente.
Para cambiar este ajuste predeterminado, conecta el amplificador al ordenador
a través del cable USB y utiliza el software Blackstar ARCHITECT para escoger
entre varias opciones como Modulation/Delay/Reverb On/Off, Modulation/Delay
Tap Tempo, Super Wide Stereo On/Off, entre otros. Por favor véase la sección de
Foot Controller para más detalles sobre las funciones programables.
Al mantener pulsado los botones ‘D’ y ‘E’ se activará el modo Afinador (Tuner) del
amplificador. Con el FS-12 y su multifunción se gana acceso a una amplia gama de
tonos donde aparecerán mediante la pantalla del Foot Controller y los LEDs. Pulsa
cualquier botón para salir del Modo Afinador.
FS-12 + FS-13 7-controles
Conecte el FS-12 al amplificador como se detalla anteriormente, mas tarde conecte
el FS-13 incluido a la entrada ‘EXT’ del FS-12 usando cualquier cable estándar de
guitarra o el cable del altavoz.
LOOPER MODE PATCH MODE
Action Toggle Scroll
A (press) Play/Record/Start and
Stop overdub
Patch toggle (CH1 and CH2
of the current BANK) Patch Down (1-12)
B (press) Stop playback/Cancel BANK scroll up Patch Up (1-12)
B (hold) Erase loop memory - -
A + B (press) Undo last overdub - -
A + B (hold) Switch to PATCH mode Switch to LOOPER Mode Switch to LOOPER Mode
ABCDE
AMP EXT.
ABCDE
AMP EXT.
FS-12 FS-13 (supplied)
LOOPER MODE
Action
D (press) Play/Record/Start and
Stop overdub
E (press) Stop playback/Cancel
E (hold) Erase loop memory
D + E (press) Undo last overdub
Español
Español
5554
Con esta configuración puede añadir dos botones extras programables que se
pueden configurar a través del software Blackstar ARCHITECT. Por favor véase la
sección de Foot Controller para más detalles sobre las funciones programables.
Por defecto, el botón ‘A’ del FS-13 estará configurado como efecto Modulación y el
‘B’ como efecto Delay. Cuando se use la configuración de 7-controles, dos marcas
a la derecha del panel del FS-12 aparecerán en ON/OFF por cada botón, como se
muestra a continuación.
Características Avanzadas
El amplificador ID:Core tiene varias características avanzadas para una mayor
profundidad de conocimiento y disfrute del usuario y sacar el mayor partido al
amplificador. Estas características no tienen un control propio en el panel frontal
del amplificador, pero se tiene acceso a ellos usando el control Tap (14) como una
tecla ‘shift’ y otro control.
Resonance – Tap + Bass
El control de Resonancia configura la respuesta del bajo. En los ajustes más bajos
los sonidos claros serán más apretados y funkies y los overdrives se enfocarán en la
respuesta de sus graves. Al aumentar los ajustes el sonido será más cálido y lleno,
mientras que el crunch y los tonos overdrive serán mucho más graves y resonantes.
Presence – Tap + Treble
El control Presence ajusta la respuesta del Treble en su totalidad. La gama alta de
percusión se puede acentuar en sonidos claros así como también el control del
Treble más agresivo con ajustes crunch y overdrive.
Nivel de Grabación USB – Tap + Gain
Como mencionamos en la sección de Audio USB (página 15), el nivel de salida de la
señal de audio USB del amplificador ID:Core puede ser ajustado independientemente
al volumen del amplificador al mantener pulsado el control Tap (14) mientras que se
gira el control Gain (3) en el panel frontal.
Efecto Speed/Time – Tap + Effects Level
Como mencionamos en la sección de Nivel de Efecto (página 11), la velocidad/
tiempo de los efectos de modulación y delay serán ajustados al mantener pulsado
el control Tap (14) mientras que se gira el control de Nivel de Efecto (13) del panel
frontal. Esto puede ser muy útil para configurar un efecto tempo especifico en vez
de utilizar el control Tap.
Salida Global Emulada/Nivel de Auriculares – Tap + Volume
Controla la salida global del volumen del Emulated Out/Phones connection,
permitiendo adaptar el nivel que mejor se ajusta al dispositivo conectado, tanto si es
una interfaz de audio, un sistema PA o unos auriculares de varias impudencias. Esto
puede controlar tanto el corte y aumentar el nivel, como volumen predeterminado al
estar el control Volume (4) posicionado a la mitad.
Actualización de Firmware
Las actualizaciones de Software se realizaran mediante el software Blackstar
ARCHITECT. Se lanzará una nueva versión del software siempre que una
actualización esté disponible.
Nota importante: Siempre conecte el amplificador a un puerto USB principal
(normalmente se encuentra detrás del PC o Mac) cuando se actualice el firmware.
Nunca use un puerto USB frontal alternativo o montable, o un cable de extensión
USB. Si fuera ese el caso la actualización puede fallar haciendo que el amplificador
no responda.
Cuando el amplificador se conecta vía USB a una nueva versión del software
conteniendo un nuevo firmware, se mostrará un mensaje preguntando por
la instalación de los últimos ficheros. Mientras se actualiza, los controles del
amplificador no responderán. El LED sonoro del panel frontal indicará la actividad
durante el proceso de actualización.
El amplificador no se debe apagar durante una actualización de firmware. Si el
amplificador se apaga durante el proceso, los controles no responderán tras volver
a encenderlo y el amplificador no producirá ningún sonido. El LED sonoro irá
cambiando para indicar que el amplificador no contiene un firmware válido.
Si experimenta problemas a la hora de actualizar el firmware el amplificador
puede ser forzado a encenderse en Modo Actualización (Update). Mantenga
pulsado simultáneamente el control Manual (17) y el MOD (9) mientras enciende el
amplificador para entrar en ese modo con las LEDs moviendo indicando el modo.
Conecte el amplificador al software Blackstar ARCHITECT para que empiece a
actualizarse.
El amplificador debe estar conectado al Software pa reinstalar un firmware válido.
El proceso de actualización empezará automáticamente si el software Blackstar
ARCHITECT detecta el amplificador.
Especificaciones Técnicas
ID:CORE STEREO 100
Potencia: 2 x 50 Watios (Stereo 100 Watios)
Peso (kg): 12,5
Dimensiones (mm): 573(W) x 447(H) x 241(D)
Especificaciones Técnicas
ID:CORE STEREO 150
Potencia: 2 x 75 Watios (Stereo 150 Watios)
Peso (kg): 14,5
Dimensiones (mm): 624(W) x 486(H) x 259(D)
ABCDE
AMP EXT.
Español
Español
5756
Japanese
Japanese
5958
初めに
このたびはブラックスター ID:Core をお買い上げいただきまして、誠にありがとうご
ざいます。
ID:Core は、世界的にもトップレベルであると自負するブラックスターの設計チーム
により、長期間にわたる徹底した研究、調査を元に設計されています。
英国ノーザンプトンを拠点とするブラックスター社のスタッフは、全員ミュージシャ
ンとしての経験を持っています。我々は、ギタリストのベスト・パフォーマンスを実
現するための「究極のギター・ツール」を提供することを唯一の目的としています。
全てのブラックスター製品は、品質、とりわけサウンド・クォリティーにおいて妥協
せず、多くの検査機関での試験、およびロードテストを行っています。
このID:Core はユニークで革新的で、さらに直観的に操作できる伝統的なコントロー
ル、自由度の高いプログラム機能を統合させたこれまでにない製品です。
ID:Coreの能力を最大限に引き出すために、このハンドブックを一通りお読みになり、
末永くご愛用いただきますようお願い致します。
ブラックスター製品の最新情報は、ホームページでチェックしてください。
URL: www.blackstaramps.com
ブラックスター・チームより
主な特徴
2007年の創立から現在に至るまで、ブラックスターは画期的な商品をリリースするこ
とによって、ギター・アンプ市場を牽引してきました。ID:Core は、今迄の長期的な研
究・調査によって生み出されたブラックスターの新たな一歩となる商品です。これまで
のアンプのように直観的にコントロールができて、自由度の高いプログラム機能を持た
せています。
ユニークなコントロールを活用して、あなたの思い描くサウンドを自由に作ることがで
きるのです。
ボイス・コントロールはCLEAN WARM(クリーン・ウォーム)、CLEAN BRIGHT(クリー
ン・ブライト)、CRUNCH(クランチ)、SUPER CRUNCH(スーパー・クランチ)、OD1
、OD2の6つの異なったセッティングができます。ブラックスターの特許技術であるISF
と合わせて使えば、あなたの思い描いているトーンを正確に表現することが出来ます
Japanese
Japanese
6160
スタジオ・クォリティーのエフェクト・セクションには、新たにオクターバー
機能が追加されたモジュレーション、ディレイ、リバーヴが搭載されており、
それらを同時に使うことで、あなたの思い描いたトーンを再現することができ
ます。
ARCHITECT(インサイダー)を利用することで、パッチをコミュニティにアッ
プロードすることや、アップロードされているパッチをダウンロードして使用
することができます。また、USBコネクターでコンピューターとID:Coreを接続
し、レコーディングをアンプからコンピューターへ直接行うことができます。
初心者の方はもちろんベテランの方まで、個人練習/ライブでお使いいただける
ルーパー機能が新たに搭載されています。
例えば、ソロ・アーティストとして、またはデュオ/トリオのバンドメンバーと
してライブステージに立つ場合でも、付属のフットスイッチを使い直観的に操
作できるルーパーでオーバーダビングを繰り返して創り上げたルーパー・サウ
ンド・トラックを再生すれば、ステージの隙間を埋めることが出来るのです。
エミュレーテッド・アウトとMP3再生用のライン・インも装備しています。
極めて自由度の高い操作性を持つアンプなので、ID Coreのユニークなボイス・
コントロール、特許取得済のISFを活用すれば、家庭や、スタジオ、そしてラ
イブステージであなたの記憶にある音をデザインし簡単に創り出すことが出来
るのです。
ファクトリー・リセット
ID:Coreを工場出荷時の状態にリセットする場合は、MOD(モジュレーション)
、 DLY(ディレイ)、 REV(リヴァーブ)ボタンを同時に長押ししながら、 パ
ワー・スイッチを押して電源を入れてください。
VOICE LED(ヴォイス LED)が6つ全て点灯しリセットが始まります。順番にLED
が消灯すれば完了です。
もしVOICE LEDが消灯する前にMOD、DLY、REVの長押しを解除すると、この操作
はキャンセルされてアンプはリセットされる前の状態に戻ります。
重要:ファクトリー・リセットを行うと内部にセーブしたデータは失われてし
まいますのでご注意ください
フロントパネル
1. INPUT (インプット)
モノラル・シールド・ケーブルでギターを接続します。
2. VOICE (ヴォイス)
ID:Coreのヴォイシングは2つのバンクに分かれています。使用する楽器に合わ
せてプリアンプのヴォイシングを切り替えることが可能です。
Clean Warm:(クリーン・ウォーム) : ダイナミックで上質なクリーン
Clean Bright:(クリーン・ブライト): ハードに弾くと軽く歪むブティッ
ク・トーン
Crunch:(クランチ): 中程度のゲインを持たせたクラッシックなオーバー
ドライヴ
Super Crunch:(スーパー・クランチ): さらにゲインとパンチを効かせた
サウンド
OD1: 中程度のパワーアンプ・ダンピングを伴ったホット・ロッドなオーバ
ードライヴ
OD2: さらにミッドレンジを強化させたホット・ロッドなオーバードライブ
ヴ パッチをストアするとセッティングが保存されます。
3. GAIN (ゲイン)
ゲイン・コントロールを回すと、オーバードライヴとディストーションの量を
調整することができます。
反時計回りに回すに従いエッジの効いたクリーンサウンドに近づいていき、
時計回りに回すに従いドライヴさが増したクランチなトーンに近づいていきま
す。そして、時計回りに回しきったポジションでフルにディストーションの効
いたトーンになります。
パッチをストアするとセッティングが保存されます。
4. VOLUME (ヴォリューム)
プリアンプの音量を調節します。時計回りに回すに従い音量が大きくなりま
す。ポジションを高いレベルにすると真空管特有のパワー、ディストーショ
ン、コンプレッションが現れます。
パッチをストアするとセッティングが保存されます。
Japanese
Japanese
6362
5. Bass (ベース)
低域をコントロールします。反時計回りに回すとタイトな切れ味良いサウンド、時計回
りに回すと暖かみのあるどっしりとしたトーンになります。
パッチをストアするとセッティングが保存されます。
6. Middle (ミドル)
ミドルレンジをコントロールします。ミドルレンジは特に音色を決定する重要なコント
ロールです。コントロールを反時計回りに回すとサウンドはアグレッシヴになり、リズ
ムプレイなどに最適です。
コントロールを時計回りに回すに従いボディ感が強調され、サステインのあるリードギ
ターに最適なトーンになります。
パッチをストアするとセッティングが保存されます。
7. Treble (トレブル)
高域をコントロールします。反時計回りに回すとウォームなサウンドになり、時計回り
に回すに従って明るさが増していきます。時計回りに回しきったセッティングではアグ
レシッブで切れのあるサウンドになります。
パッチをストアするとセッティングが保存されます。
8. ISF
ISFはベース、ミドル、トレブルと連動して働き、好みの
音色が選べます。反時計回りに回すとタイトなボトムエ
ンドとアグレッシヴなミドルのモダンなアメリカンサウ
ンド、時計回りに回すと、より箱鳴り感のあるブリティ
ッシュ・サウンドになります。
パッチをストアするとセッティングが保存されます。
9. MOD (モジュレーション)
ボタンを押してオン/オフ、またはエフェクトの編集を行います。
パッチをストアするとセッティングが保存されます。
10. DLY (ディレイ)
ボタンを押してオン/オフ、またはエフェクトの編集を行います。
パッチをストアするとセッティングが保存されます。
11. REV (リヴァーブ)
ボタンを押してオン/オフ、またはエフェクトの編集を行います。
パッチをストアするとセッティングが保存されます。
3つのEffect スイッチにあるLEDの点灯する色によってEffect の状態を示します。
LED
状態 内容
消灯 エフェクト・オフ エフェクトは作動していま
せん。
赤 エフェクト・オン。
編集は不可。
エフェクトは作動しますが、
フロントパネルのエフェク
ト・コントロールで操作でき
ません。
緑 エフェクト・オン
編集可能(12,13,14参照)
エフェクトは作動し、フロン
トパネルのエフェクト・コン
トロールで操作が行えます。
繰り返しそれぞれのEffectスイッチを押すと以下の順番で状態が順番に変わります。
現在の状態 押した後の状態
エフェクト・オフ エフェクトがオンになります。
エフェクト・オンで編集が不可 引き続きエフェクトがオンで、
エフェクトの編集ができます(12, 13, 14
参照)。
エフェクト・オンで編集が可能 押したスイッチのエフェクトがオフになり
ます。
注意:1度に編集できるのは1つだけで、2つ以上を同時に編集することはできません
12. Effect Type (エフェクト・タイプ)
エフェクトの種類を変更し選択しているエフェクト(MOD、DLY、REV)のパラメーターを
編集します。
それぞれのセグメント内に異なったエフェクトを持たせています(それぞれのエフェ
クトごとに4つ)。作動中のエフェクトにはLEDが点灯します。セグメント内でエフェ
クトのパラメーターを変更することが出来ます。変更出来るパラメーターについては
次のエフェクト表を参照してください。
パッチをストアするとセッティングが保存されます。
US
AUK
Japanese
Japanese
6564
13. Effect Level (エフェクト・レベル)
エフェクトのパラメーターを変更します。
MODとDLYに限ってはTAP スイッチ(14)を押し続けてLevelコントロールを回すことに
よってレート/タイムを変更することもできます。変更出来るパラメーターについては
次のエフェクト表を参照してください。
パッチをストアするとセッティングが保存されます。
14. Tap (タップ)
選択しているエフェクトのレート/タイムを変更します。スイッチをタップして長さを
セットします。セットするとLEDがセットした長さに応じて点滅します。
変更出来るパラメーターについては下記表を参照ください。
Effect Effect Type Effect Level Tap
MODULATION
フェイザー ミックス デプス スピード
コーラス/フランジ
ャー
フィードバック デプス スピード
オクターバー ローオクターブとハ
イオクターブのブ
レンド
ドライとエフェク
トの
ミックス
トレモロ ビブラート・デプス トレモロ・デプス スピード
DELAY
リニア フィードバック ディレイレベル タイム
アナログ フィードバック ディレイレベル タイム
テープ フィードバック ディレイレベル タイム
マルチ フィードバック ディレイレベル タイム
REVERB
ルーム サイズ リバーブ・レベル
ホール サイズ リバーブ・レベル
スプリング サイズ リバーブ・レベル
プレート サイズ リバーブ・レベル
パッチをストアするとセッティングが保存されます。
15. Master Volume (マスター・ヴォリューム)
アンプのスピーカーから出力される全体の音量を調節します。時計回りに回すと音量
が大きくなります。
このセッティングは保存されません。
マスター・ボリュームをゼロにするとエミュレーテッド・アウトやUSBを経由しての静
かなレコーディングができます。 エミュレーテッド・アウトの出力はプリアンプのヴ
ォリューム(4)で調節します。
16. USB
USBケーブルでID:Core とWidows PCやMacを接続する際に使用します。
専用ソフトウェアARCHITECTをウェブサイトからダウンロードでき、多くの機能を楽し
むことが出来ます。
(ARCHITECTのダウンロードは、下記のURL先で行えます。)
www.blackstaramps.com/uk/architect
詳しくは、後述のUSB Audioの項目もご覧ください。
注意 このアンプはレコーディング・ソフト内のオーディオ・キャプチャ
ー・ディバイスとしてパーソナル・コンピューターの画面に現れます。
17. Manual (マニュアル)
このスイッチを押してパッチ・モード(消灯時)とマニュアル・モード(点灯時)の切り
替えを行います。 
マニュアル・モードでのサウンドは、現在のノブの位置が反映されます。
これはVoice, Gain, Volume, BASS, MIDDLE, TREBLE, ISFに適用されます。
あらゆるエフェクトはマニュアル・モードに切り替えるとオフになります。
マニュアル・モードでの全てのコントロールは、専用ソフトウェアARCHITECTでも変更
できますが、この場合は、サウンドがアンプ本体のパネルのノブ位置に左右されない
ようになっています。
Japanese
Japanese
6766
Tuner Mode (チューナー・モード)
Tap(14)スイッチとManual(17) ボタンを長押しするとチューナー・モードが作動しま
す。リコール・インジケーターLED (20)が点滅しアンプがチューナー・モードに入った
ことを知らせます。チューナー・モードでは出力はミュートされます。
VOICEのLEDが最も近い音程を弾くと点灯して知らせます。
Clean Warm E
Clean Bright A
Crunch D
Super Crunch G
OD 1 B
MOD, DLY, REVのLEDが弾いた音程がどれぐらい近いかを点灯して知らせます。
MOD LED 赤 チューニングがシャープ(音程が高い)
DLY LED 緑 チューニングが合っている状態
REV LED 赤 チューニングがフラット(音程が低い)
チューナー・モードではフロントパネルの他のLEDはオフになります。
いずれかのボタンを押すとチューナー・モードから抜け出せます。
18. BANK (バンク)
このボタン使用し、以下の3つのBANK切り替えを行います。
Bank 1 → 2
Bank 2 → 3
Bank 3 → 1
緑のLEDはBANK 1, オレンジのLEDはBANK 2, 赤のLEDはBANK 3を示します。
注意:最初の3つのBANKだけがフロントパネルから選択できます。外部コントローラ(
Blackstar ARCHITECT Software, フットコントローラ)からBANK 4またはそれ以上
のBANKを作動させると、BANK LEDは点灯しませんがCH LEDはパッチの位置を示し続けま
す。
例:パッチ9では BANK LEDは赤く点灯し、CH 3 LEDが点灯します。
外部コントローラーでバンクを上げてパッチ15を選択します。- その場合バンクLEDが
消灯しチャンネル3が点灯します。
チャンネル番号は記憶されますので、BANKをスクロールすると選択したBANK内で相当
するパッチが選択されます。
マニュアル・モードではBANK LEDは点灯しません
19. Channel 1 – 3
CH 1を選択した場合、現在のBANK内にある最初のパッチが作動します。
CH 2を選択した場合、現在のBANK内にある2番目のパッチが 作動します。
CH 3を選択した場合、現在のBANK内にある3番目のパッチが作動します。
20.  Recall Indicator (リコール・インジケーター)
リコール・インジケーターは、現在のパラメーターとフロントパネルのノブ位置との
間に差異があるかどうかを知らせます。例えば、異なったパッチへ変更すると、フロ
ントパネルのコントロールノブは必ずしも実際に聞こえているセッティングを反映し
ません。
調整する際に予想外の位置までレベルを動かしてしまうことを避けるために、フロン
トパネルのノブは現在のパラメーターの位置になるまで効果がかからないようになっ
ています。
その位置にまで到達するとリコール・インジケーターは2回点滅して、ノブのコントロ
ールが有効になり効果を増減させることが出来るようになります。
現在のパッチに保存している値の位置をノブが通過するたびにリコール・インジケー
ターが2回点滅して知らせます。したがって簡単に記憶されている値を確認すること
できます。
リコールはGAIN, VOLUME, BASS, MIDDLE, TREBLE, ISFに働きます。
チューナー・モードの時もリコール・インジケーターは継続して点滅します。
ルーパーを使用する時には、現在録音されたループの再生が開始されると点滅しま
す。
ループやオーバーダブのレコーディング中もリコール・インジケーターは継続して点
滅します。
Japanese
Japanese
6968
Rear Panel (リア・パネル)
1. Power Switch (パワー・スイッチ)
このスイッチの白い丸が付いている方を押し込むと電源がオンになります。
2. Mains Input (電源コード用インプット)
付属の電源コードを接続する端子です。電源コードを差し込む前にパワー・スイッチが
オフになっているかを確認し、リア・パネルに記載されている電圧や周波数が日本国内
で使用する基準に適しているかを確認してください。
不明な場合は、アフターサービスまでお問い合わせください。
3. Emulated/Headphone Output
この端子からは、ギターアンプのスピーカーやキャビネットサウンドをシミュレーショ
ンした回路を通ったサウンドが出力されます。録音機器やミキサーに直接接続する場合
に使用します。
ステレオでご利用になる場合は、ステレオ・ケーブルをお使いください。またミキサ
ーや録音機器の2つのチャンネルに接続するためにステレオY字ケーブルをお使いくだ
さい。この端子はモノラル・ギター用ケーブルにも対応しています。
高品質ケーブルのご使用を推奨します。
VOLUME(4)でEMULATED OUTの出力を調 整します。MASTER VOLUMEは接続されたスピーカ
ー・キャビネットのみに作用します。
注意:静かな状態でレコーディングや練習する場合、MASTER VOLUMEをゼロにセットし
ます。
4. MP3/Line (ライン・イン)
MP3ライン・インを用いれば、オーディオ機器(MP3やCDプレーヤー)を接続し
て、ID:Core からお気に入りの曲を出力することが可能です。オーディオ機器側のヴ
ォリュームを調整すれば、簡単にジャム・セッションをお楽しみいただけます。
5. Footswitch (フットスイッチ)
付属のフットスイッチFS-13をここに接続します。また、別売のフットコントローラー
(FS-12)もここに接続します。
詳しくは後述のフット・コントローラーFS-12,FS-13の項目参照ください
6. Effect Loop (エフェクト・ループ)
アンプ内蔵のエフェクトに追加して、ご自身が所有するラック・エフェクターやエ
フェクト・ボックスを接続し最高のパフォーマンスを得ることができます。アンプ
側の「Send 」とエフェクト側のInputを接続し、エフェクト側のOutputとアンプ側の
Returnを接続します。ステレオ出力仕様のエフェクトの場合は両方のReturnと接続し
ます。モノラル出力のエフェクトの場合はReturn L (Mono)だけに接続します。
Programmability プログラムに関して
Storing Patches (パッチの保存)
現在のサウンドをパッチに保存させる場合、
1. 3つのCHボタンのいずれかを1秒押し続けると、全てのCH LEDが点滅を始めます。
2. BANKボタンを押して3つのBANK (緑、オレンジ、赤)を切り替え、保存先のBANKを選
択します。
3. パッチの保存先を選択するため、保存するCHボタンを選択し押します。
選択したBANKのLEDの色が点灯し、新しいパッチが作動します。
GREEN BANK = パッチ1-3
ORANGE BANK = パッチ 4-6
RED BANK = パッチ7-9
パッチの保存先を完了させる前であれば、編集のためにコントロールを動かすことが
できます
保存させる過程をキャンセルするにはMANUALボタンを押してください。アンプは前の
段階に戻ります。
パッチを保存させると、同じ場所に入っていた情報は上書きされます。
パッチはアンプとUSB経由で接続したPC/Macのブラックスター専用ソフトウェア
(Blackstar ARCHITECT Software)でも保存することが出来ます。
Recalling Patches (パッチの呼び出し)
使用するパッチのCHボタンを押します。
BANKボタンを押して緑 -オレンジ-赤の色を切り替え、BANKを決定します。
CHはそのままで、現在のBANKで呼応するパッチを読み込みます。
パッチはブラックスター専用ソフトウェア(Blackstar ARCHITECT Software)あるいは
接続されたフットスイッチでも呼出すことができます。
Japanese
Japanese
7170
USB Audio
標準的なオーディオ・ドライバーがPCやMacと接続するために使用されます。
特定のドライバーは要求されません。ローレイテンシーUSBレコーディングのガイドに
ついては下記サイトを参照してください。
(www.blackstaramps.com/usbrecording)(英語サイト)
注意:常にPC本体のUSBポートと直接接続してください。
アンプは、レコーディング・ソフト内のひとつのオーディオ・キャプチャーとして現れ
ます。
オーディオ・フォーマットはARCHITECTを通じて変更でき、3つのモードから選べます。
■スピーカー・エミュレイテッド・ステレオエフェクト・オーディオ・チャンネル
■ 2 X モノラル・オーディオ・チャンネル
左チャンネル – エフェクトされたアンプからの信号
右チャンネル – ギターからの未加工信号
■ リアンプ・モード
Reamping (リアンプ)
専用ソフトウェアARCHITECTを経由してリアンプ・モードの選択ができます。これはプ
ログラミングできないセッティングで、USBケーブルを抜くかアンプ本体のスイッチを
オフにした時に、リアンプがオフになります。リアンプ・モードにするとアンプはUSB
を経由してパソコンに録音されたギターのドライ・モノラル信号を受け入れることがで
きます。さらにアンプで加工した信号を送り返すことができます。この戻されたデータ
は接続されたPCやMacで使用しているレコーディング・ソフトでキャプチャーすること
が出来ます。
Footcontrollers
FS-13 2-way Footcontroller (付属のFS-13 2ボタン・フットスイッチ)
このコントローラーをギター・ケーブル又はスピーカー・ケーブルでリアパネルの
Footswitch 端子へ接続します。
初期設定では図のようにLOOPER MODE(ルーパーモード)が設定されており、Aボタンで
ループやオーバーダブの録音の開始と停止を行い、Bボタンでループ演奏の停止または
録音中のオーバーダブのキャンセルを行います。
A,Bボタンを同時に1回押すと最後に録音したオーバーダブの取り消しが行えます。
Bを長押しすると録音されたループの消去が行えます。
A,Bボタンを同時に約3秒長押しするとフットコントローラーをPATCH MODE(パッチモ
ード)に切り替えられます。このモードでは、Aボタンで現在のバンクでのチャンネル
1と2の切り替えができます。Bボタンを押すとフロント・パネルのバンク・スイッチと
同様に最初の3つのバンクのスクロール・アップが行えます。パッチモードの機能はイ
ンサイダーを通じてToggleかScroll(パッチダウン/アップ)の変更ができます。A,B
ボタンを同時に約3秒長押しするとルーパーモードに戻ります。
FS-13の現在使用しているモードはアンプの電源を切っても保存され、電源を入れると
そのモードを呼び出します。
FS-13をアンプに接続し電源を入れると(あるいは既に電源の入ったアンプにFS-13を
接続すると)、フットコントローラーの現在のモードはMANUAL, BANK, CHI, CH2, CH3
のLEDによって表示されます。
ルーパーモードの場合はこれらのLEDがルーピング・カウント・アップして示します。
一方、パッチモードの場合はこれらのLEDが2回点滅して示します。
注意 アンプ本体のパワー・スイッチをオフにするとループメモリーは消去されま
す。
FS-12 5-way Programmable Footcontroller 5ウェイ・プログラマブル・フットコ
ントローラー (別売)
このコントローラーをギター・ケーブル又はスピーカー・ケーブルでリアパネルの
Footswitch 端子へ接続してください。
A-Cボタンがアンプのフロントパネルに表示されているチャンネル1-3スイッチの働き
を行います。
A-Cボタンを押して現在のバンク内でのチャンネル1-3を切り替えます。
A,Bボタンを同時に1回押すとバンクのダウン, B,Cボタンを同時に1回押すとバンクの
アップが行えます。
FS-12でアンプの36パッチ(12バンク × 3パッチ)全てにアクセスすることができま
す。
D, Eボタンは好みに合わせて設定することができます。
LOOPER MODE PATCH MODE
ルーパーモード
パッチモード
Action Toggle
切り替え
Scroll
切り替え
A
(押す) 再生/録音/スタート
パッチの切り替え(現
在のバンクでのCH1/
CH2切り替え)
パッチダウン(1-12)
B
(押す)
演奏停止と
録音中のオーバーダ
ブのキャンセル
バンクのスクロール・
アップ パッチアップ(1-12)
B
(長押し) ループメモリー
の消去
- -
A + B
同時に押す
最後に録音した
オーバーダブの取
り消し
- -
A + B
長押し パッチモードに変更 ルーパーモードに変更 ルーパーモードに
変更
ABCDE
AMP EXT.
Japanese
Japanese
7372
初期設定ではFS-13のルーパーモードと同じ設定でルーパーコントロールができます。
初期設定から変更するにはアンプをフリーソフトであるBLACKSTAR ARCHITECTをインスト
ールしたコンピューターにUSB接続し、ARCHITECTソフトで変更できるようになっていま
す。例えば, モジュレーション/ディレイ/リヴァーブのオン/オフ、モジュレーション/
ディレイのタップテンポのコントロール、スーパーワイド・ステレオのオン/オフ等が
設定できます。詳細はARCHITECTソフトのFoot controllerセクションをご覧ください。
D,Eボタンを長押しするとチューナーモードになりアンプのチューナーが作動し、FS-12
のクロマティック・チューナー機能にもアクセスします。
FS-12のディスプレイとLEDで音階と音程を表示します。
いずれかのボタンを押せばチューナーモードから抜け出せます。
FS12 + FS-13 7-way switching
FS-12をアンプと接続し、付属のFS-13をFS-12のEXT端子と図のように接続ができます。
接続にはギター・ケーブルかスピーカー・ケーブルをご利用ください。
この接続状態でさらに2つの好みの設定がARCHITECTを通じて設定ができます。
詳細はARCHITECTソフトのFootcontrollerセクションをご覧ください。
初期設定ではFS-13のAボタンで現在のモジュレーションのオン/オフ、Bボタンでディ
レイのオン/オフができます。
FS-12とFS-13を接続して使用する場合には、 FS-12のディスプレイにFS-13でのA,Bボ
タンのオン/オフの状態が図のように表示されます。
Advanced Features (先進的な機能)
ID:Core には、より深く音楽を楽しむための先進的な機能が備わっています。これら
の機能は、フロントパネル上に独立してコントロールが付いているわけではありませ
んが、TAPスイッチをPCのShiftキーのように使うことによって、これらの機能を使用
することができます。
注意: 以下のAdvanced Features ( 先進的な機能)を利用する場合は、後述する
Firmware Update (ファームウェアのアップデート) が必要な場合があります
Resonance – Tap + Bass (レゾナンスの調節)
RESONANCEは低音域全体をコントロールします。反時計回りに回すとクリーン・サウ
ンドはタイトでファンキーになりオーバードライヴ・サウンドではベースレスポンス
に効果があります。時計回りに回すとクリーン・サウンドはウォームなサウンドにな
り、クランチやオーバードライヴ・サウンドはよりへヴィで箱鳴り感が増します。
Presence – Tap + Treble (超高域の調節)
PRESENCEは高域全体をコントロールします。クリーン・サウンドはパーカッシブなハ
イエンドを強調し、クランチ/オーバードライヴ・サウンドではアグレッシヴなトレブ
ルをコントロールします。
USB Recording Level Tap + Gain (USBレコーディング・レベルの設定)
ID:Core から出力されるボリュームと独立して、ID:CoreからUSB端子を経由して出力
されるアウトプットのレベルをコントロールすることが可能です。その際は、コント
ロールパネル上のTAPスイッチを押しながらゲイン・コントロールのノブを回してく
ださい。
LOOPER MODE
ルーパーモード
Action
D
(押す) 再生/録音/スタート
オーバーダブ録音の停止
E
(押す) 演奏停止と
録音中のオーバーダブのキャンセル
E
(長押し) ループメモリーの消去
D + E
同時に押す 最後に録音したオーバーダブの取り消し
ABCDE
AMP EXT.
FS-12 FS-13 (supplied)
A
FS-13 Ef
fect switch
toggle states
B
ON
ON
Japanese
Japanese
7574
Effect Speed/Time Tap + Effect Level (モジュレーションとディレイの
タイム/スピードの調節)
ID:Core に搭載されているデジタル・エフェクトのモジュレーションとディレイのスピ
ードおよびタイムは、コントロールパネル上のTAPスイッチを押しながらレベル・コン
トロールのノブを回すことによって調整することも可能です。通常のTAPスイッチの用
途で調整するよりも、より細やかな調整ができます。
Global Emulated Output/Headphones Level Tap + Volume (エミュレーテ
ッド・アウト/ヘッドホン 出力の調節)
エミュレーテッド・アウト/ヘッドフォンアウトに接続するヘッドフォン、PA機器等の
インピーダンスに対して適切な値になるように調節します。
このコントロールはブーストもカットもでき、ヴォリューム・ノブを中央のポジション
にするとデフォルトの値になります。
Firmware Update (ファームウェアのアップデート)
ファームウェアのアップデートはブラックスター専用のソフトウェアARCHITECT (イン
サイダー)を通じて行われます。新ヴァージョンがリリースされると、いつでもアップ
デートが可能になります。
注意: ファームウェアをアップデートする際は、常にアンプのUSB端子とPC/Macのメ
インUSB端子(通常はPC/Mac本体の裏側にあります)とを接続してください。フロント
側のUSB端子、USBハブ、USB延長ケーブルと接続しないで下さい。最悪の場合、アップ
デートに失敗しアンプが反応しなくなることがあります。
アンプをUSB経由でARCHITECTに接続し、アンプが旧ヴァージョンのファームウェアと認
識されると、最新ファイルをインストールするようメッセージが表示されます。アップ
デート中はアンプのコントロールはできません。アップデートの作業中はVOICE LEDが
周回的に点灯します。
アップデートの最中はアンプ本体のパワー・スイッチをオフにしないでください。
アップデートの間にアンプの電源がオフになると、再び電源をオンにしてもコントロー
ルは効かずアンプから音は出ません。VOICE LEDが周回的に点灯した場合はアンプに有
効なファームウェアが搭載されていないことを示します。
もしファームウェア・アップデートの過程で問題が起こると、アンプはアップデート・
モードにするために電源を入れなければなりません。
ファームウェア・アップデートを開始するために、MANUAL(14)とMOD(6)ボタンを長押し
しながらアンプ本体パワー・スイッチをオンにしてください。VOICE LEDが周回的に点
灯すればアンプがアップデート・モードに入ったことを示します。
次にアンプをARCHITECTに接続しファーム・ウェアのアップデートを開始させてくださ
い。
有効なファームウェアを入手するにはアンプをARCHITECTソフトウェアに接続しなけれ
ばなりません。ARCHITECTソフトウェアがアンプの状態を感知すれば自動的にアップデ
ートを開始します。
Technical Speci󲃌cation
ID : CORE STEREO 100
出力 : 2 x 50 Watts (Stereo 100 Watts)
重量 (kg) : 12.5
サイズ (mm) : 573(W) x 447(W) x 241(D)
Technical Speci󲃌cation
ID : CORE STEREO 150
出力 : 2 x 75 Watts (Stereo 150 Watts)
重量 (kg) : 14.5
サイズ (mm) : 624(W) x 486(W) x 259(D)
Japanese
Japanese
7676
ID:CORE STEREO 100 Front Panel
USB
BANK CH1 CH2 CH3
100
ID:CORE STEREO 150 Front Panel
USB
BANK CH1 CH2 CH3
100
Français Japanese
Español
Deutsch
English
FrançaisJapanese Español Deutsch English
7777
ID:CORE STEREO 100 Rear Panel
SEND RETURN
LEFT (MONO) RIGHT
EM. OUT
& PHONES
100V - 240V~50/60Hz 130 WATTS
T1.6AL250V
ID:CORE STEREO 150 Rear Panel
SEND RETURN
LEFT (MONO) RIGHT
EM. OUT
& PHONES
Français Japanese
Español
Deutsch
English
FrançaisJapanese Español Deutsch English
79
Français Japanese
Español
Deutsch
English
78
FrançaisJapanese Español Deutsch English
81
Français Japanese
Español
Deutsch
English
80
FrançaisJapanese Español Deutsch English
Blackstar Amplification Ltd, Beckett House, 14 Billing Road, Northampton, NN1 5AW, UK
For the latest information go to: www.blackstaramps.com
Whilst the information contained herein is correct at the time of publication, due to our policy of constant improvement
and development, Blackstar Amplification Ltd reserves the right to alter specifications without prior notice.
Designed and Engineered by
Blackstar Amplification UK
120402M-2 09/22
Owner’s Manual
ID:CORE STEREO 100 & ID:CORE STEREO 150
  • Page 1 1
  • Page 2 2
  • Page 3 3
  • Page 4 4
  • Page 5 5
  • Page 6 6
  • Page 7 7
  • Page 8 8
  • Page 9 9
  • Page 10 10
  • Page 11 11
  • Page 12 12
  • Page 13 13
  • Page 14 14
  • Page 15 15
  • Page 16 16
  • Page 17 17
  • Page 18 18
  • Page 19 19
  • Page 20 20
  • Page 21 21
  • Page 22 22
  • Page 23 23
  • Page 24 24
  • Page 25 25
  • Page 26 26
  • Page 27 27
  • Page 28 28
  • Page 29 29
  • Page 30 30
  • Page 31 31
  • Page 32 32
  • Page 33 33
  • Page 34 34
  • Page 35 35
  • Page 36 36
  • Page 37 37
  • Page 38 38
  • Page 39 39
  • Page 40 40
  • Page 41 41
  • Page 42 42
  • Page 43 43

Blackstar ID:CORE Stereo 100 and 150 El manual del propietario

Categoría
Amplificador de instrumentos musicales
Tipo
El manual del propietario