Philips SPD5100CC/00 Manual de usuario
- Categoría
- Discos duros internos
- Tipo
- Manual de usuario

How to... for External Hard Disk Drive
Install Guide
Installationsanleitung
Guide d'installation
Guida d'installazione
Installatiegids
Guía de instalación
Kurulum Kıla
vuzu
UK
D
F
I
NL
E
TR
La página se está cargando...

Come usare il pulsante One-Click Backup 25
Come usare il pulsante Safe Shutdown 31
Come eseguire un backup 33
Come ripristinare un backup 39
Come deframmentare 43
Come controllare se sono presenti errori nell'unità disco rigido esterno 47
Garanzia, Ambiente e Sicurezza 57
Specifiche tecniche 58
Inhoud
Hoe moet u deze externe harde schijf op uw systeem aansluiten? (USB-installatie) 5
Hoe moet u deze externe harde schijf op uw systeem aansluiten? (Firewire-installatie) 9
How to install the external harddisk for Windows 98 Second Edition only? 12
How to install the external harddisk for Windows ME? 12
Hoe moet u veilig de externe harde schijf loskoppelen zonder uw systeem uit te schakelen? 13
Hoe moet u snel de externe harde schijf formatteren? 15
Hoe moet u de externe harde schijf formatteren? 19
Hoe moet u de One-Click Backup knop gebruiken? 25
Hoe moet u de Safe Shutdown knop gebruiken? 31
Hoe moet u een backup maken? 33
Hoe moet u een backup terugzetten? 39
Hoe moet u de defragmenteren? 43
Hoe moet u de externe harde schijf op fouten controleren? 47
Garantie, milieu en veiligheid 59
Technische gegevens 60
Contenido
¿Cómo conectar esta disco duro externo en su sistema? (Instalación USB) 5
¿Cómo conectar esta disco duro externo en su sistema? (Instalación Firewire) 9
How to install the external harddisk for Windows 98 Second Edition only? 12
How to install the external harddisk for Windows ME? 12
¿Cómo desconectar de forma segura el equipo disco duro externo sin apagar el sistema? 13
¿Cómo formatear rápidamente el equipo disco duro externo? 15
¿Cómo formatear el equipo disco duro externo? 19
¿Cómo se utiliza el botón de Copia de seguridad con un solo clic? 25
¿Cómo se utiliza el botón de Apagado Seguro? 31
¿Cómo crear un copia de seguridad? 33
¿Cómo restaurar una copia de seguridad? 39
¿Cómo desfragmentar? 43
¿Cómo comprobar los errores del disco duro externo? 47
Garantía, Entorno y Seguridad 61
Especificaciones 62
İçindekiler
Bu harici sabit disk sisteminize takma ?ekli? (USB kurulumu) 5
Bu harici sabit disk sisteminize takma ?ekli? (Firewire/Güvenlik duvarı kurulumu) 9
How to install the external harddisk for Windows 98 Second Edition only? 12
How to install the external harddisk for Windows ME? 12
Sisteminize kapatmadan harici sabit disk’nin güvenli ?ekilde ba?lantısını kesme ?ekli? 13
Harici sabit disk’ı hızlı formatlama ?ekli? 15
harici sabit disk’ı formatlama ?ekli? 19
Tek Tıklatmalı Yedek Kopya düğmesinin kullanım şekli? 25
Güvenli Kapatma düğmesinin kullanım şekli? 31
Bir yedek kopya yaratma şekli? 33
Bir yedek kopyayı geri yükleme şekli? 39
birle?tirme ?ekli? 43
harici sabit disk hatalara kar?ı kontrol etme ?ekli? 47
Garanti, Ortam/Çevre ve Güvenlik 63
Teknik Özellikler 64
NL
E
TR
3
La página se está cargando...

How to connect this external
harddisk on your system?
(USB installation)
Anschließen des externe Festplatte an Ihr System (USB-Installation)
Comment raccorder disque dur externe sur votre système ?
(Installation USB)
Come collegare questa disco rigido esterno al proprio sistema (installazione USB)
Hoe moet u deze externe harde schijf op uw systeem aansluiten? (USB-installatie)
¿Cómo conectar esta disco duro externo en su sistema? (Instalación USB)
Bu harici sabit disk sisteminize takma şekli? (USB kurulumu)
The next pages show how to
use your external HDD with
your (desktop) computer. Since
there are many brands and
types of PC’s available, the next
photographs show only
examples on how your external
HDD could be installed.
Auf den nächsten Seiten wird
Ihnen gezeigt, wie Sie Ihre
externe Festplatte mit Ihrem
PC verwenden.
Da es verschiedene Marken
und Arten von PCs gibt, zeigen
die nächsten Bilder nur
Beispiele, wie die Installation
einer externen Festplatte
vonstatten gehen kann.
Les pages suivantes vous
expliquent comment utiliser
votre disque dur externe avec
votre ordinateur de bureau.
Comme il existe de nombreuses
marques et de nombreux
modèles de PC, les illustrations
suivantes ne sont que des
exemples de la manière dont
votre disque dur externe peut
être installé.
Nelle prossime pagine verranno
date informazioni su come
usare l'unità HDD esterna con
il proprio computer.
Poiché esistono molte marche e
tipi di PC, le prossime foto
mostreranno solo esempi di
come l'unità HDD esterna
possa essere installata.
Op de volgende pagina’s kunt u
lezen hoe u uw externe HDD
met uw desktopcomputer
gebruikt.
Aangezien er vele merken en
soorten pc’s beschikbaar zijn,
laten de onderstaande foto’s
alleen voorbeelden zien van hoe
uw externe HDD zou kunnen
worden geïnstalleerd.
Las páginas a continuación
muestran cómo utilizar su di
sco
duro externo con su ordenador
de sobremesa.
Puesto que hay muchas marcas
y tipos de PC disponibles, las
fotos a continuación muestran
cómo debe instalarse el disco
duro externo.
İzleyen sayfalar, masaüstü
bilgisayarınızla harici HDD’nizi
(sabit disk sürücünüzü)
kullanma şeklini göstermektedir.
Piyasada bir çok marka ve tipte
PC bulunduğundan, izleyen
fotoğraflar; sadece harici
HDD’nizin nasıl kurulabileceğine
dair örnekleri göstermektedir.
UK D F I
NL E TR
5

6
This can be found in the box:
A: Your new external HDD device
B: Vertical Stand
C: Power Adapter
D: Power Cord
E: USB cable
F: Firewire cable
G: How to Manual
H: Nero Software disc
Packungsinhalt:
A: Ihre neue externe Festplatte
B: Vertikaler Ständer
C: Netzteil
D: Netzkabel
E: USB-Kabel
F: Firewire-Kabel
G: Bedienungsanleitung
H: Nero Software-CD
Votre boîte comprend les éléments suivants :
A: votre nouveau disque dur externe B: Support vertical C: Adaptateur de courant
D: Cordon d’alimentation E: Câble USB F: Câble Firewire
G: Manuel H: Logiciel Nero
Contenuto della confezione:
A: La nuova unità HDD esterna B: Il supporto verticale C: Il trasformatore
D: Il cavo di alimentazione E: Il cavo USB F: Il cavo Firewire
G: La guida d'uso H: Il disco del programma Nero
Het volgende zit in de doos:
A: Uw nieuwe externe HDD-apparaat B: Verticaal statief C: Voedingsadapter
D: Stroomsnoer E: USB-kabel F: Firewire-kabel
G: Instructiehandleiding H: Nero software-disc
La caja debe contener:
A: Su disco duro externo B: Soporte vertical C: Adaptador de corriente
D: Cable de alimentación E: Cable USB F: Cable firewire
G: Manual Cómo... H: Disco con el software Nero
Bu, kutu içinde bulunabilir:
A: Yeni harici HDD sürücünüz B: Dikey Sehpa C: Güç Adaptörü
D: Güç Kablosu E: USB kablosu F: Firewire/Güvenlik duvarı kablosu
G: Kullanma Şekli Kılavuzu H: Nero Yazılım diski
TR
E
NL
I
F
D
UK
1
2
Plug the USB cable in the USB port of your new
external HDD.*
Stecken Sie das USB-Kabel in den USB-
Anschluss Ihrer neuen externen Festplatte.*
Insérez le câble USB dans le port USB de votre
nouveau disque dur externe.*
Collegare il cavo USB alla porta USB della nuova
unità HDD esterna.*
Steek de USB-kabel in de USB-poort van uw
nieuwe externe HDD.*
Conecte el cable USB en el puerto USB del
disco duro externo.*
Harici HDD’nizin USB portuna/bağlantı noktasına USB kablosunu takınız.*
*Connect the power cables together and connect them to the external harddisk and a power outlet.
TR
E
NL
I
F
D
UK

7
Connect the other side of the USB cable to an
empty USB port of your computer.
Schließen Sie das andere Ende des USB-Kabels
an einem freien USB-Anschluss an Ihrem PC an.
Branchez l’autre côté du câble USB sur un port
USB vide de votre ordinateur.
Collegare l'altro capo del cavo USB ad una
porta USB libera del computer.
Sluit het andere uiteinde van de USB-kabel aan
op een vrije USB-poort van uw computer.
Conecte el otro extremo del cable USB en un
puerto USB libre de su ordenador.
USB kablosunun diğer tarafını, bilgisayarınızın boş USB portuna/bağlantı noktasına takınız.
TR
E
NL
I
F
D
UK
3
4
A drive icon appears for the external HDD in
Windows Explorer; the name of the drive varies,
depending on your computer system. You can save
and copy data on the drive by moving files and folders
to the drive icon, just as you do when using your
floppy disk or hard disk.
Ein Laufwerksymbol für die externe Festplatte
wird im Windows Explorer angezeigt, wobei der
Name des Laufwerks je nach Ihrem Computersystem
unterschiedlich sein kann. Sie können Daten auf dem
Laufwerk speichern und kopieren, indem Sie Dateien
und Ordner auf das Laufwerksymbol verschieben.
Das funktioniert genauso wie mit einer Diskette oder
wie auf der internen Festplatte.
Une icône de disque apparaît pour le disque dur externe dans l’Explorateur de Windows ; le nom de ce
disque varie en fonction de votre système informatique. Vous pouvez enregistrer et copier des données sur le
lecteur en déplaçant des fichiers ou des dossiers sur l’icône du lecteur, comme vous le faites avec une disquette
ou votre disque dur.
In Windows Explorer appare l'icona dell'unità HDD esterna; il nome dell'unità cambia in base al sistema
operativo in uso nel computer. È possibile salvare e copiare dati sull'unità spostando i file e le cartelle nell'icona
dell'unità, proprio come quando si usa un disco floppy o il disco rigido.
Er verschijnt een pictogram voor de externe HDD in Windows Verkenner; de naam van het station kan
verschillen, naargelang het computersysteem. U kunt gegevens naar het station kopiëren door bestanden en
mappen naar het pictogram van het station te slepen, net zoals bij een floppydisk of een harde schijf.
En el explorador de Windows aparece un icono de la unidad para el disco duro, el nombre de la unidad
varía, dependiendo del sistema del ordenador. Puede guardar y copiar datos a la unidad moviendo los archivos y
carpetas al icono de la unidad, de la misma forma que con un disquete o disco duro.
Windows Explorer’da harici HDD için bir sürücü ikonu/simgesi belirir; sürücün adı; bilgisayar sisteminize
bağlı olarak değişiklik gösterir. Dosyaları ve klasörleri sürücü ikonuna taşıyarak; disket sürücünüzü ya da sabit
diskinizi kullanarak yaptığınız şekilde, sürücü üzerindeki verileri kaydedebilir ya da kopyalayabilirsiniz.
TR
E
NL
I
F
D
UK
La página se está cargando...

How to connect this external
harddisk on your system?
(Firewire installation)
Anschließen des externe Festplatte an Ihr System (Firewire-Installation)
Comment raccorder disque dur externe sur votre système ?
(Installation Firewire)
Come collegare questa disco rigido esterno al proprio sistema (installazione firewire)
Hoe moet u deze externe harde schijf op uw systeem aansluiten?
(Firewire-installatie)
¿Cómo conectar esta disco duro externo en su sistema? (Instalación Firewire)
Bu harici sabit disk sisteminize takma şekli?
(Firewire/Güvenlik duvarı kurulumu)
The next pages show how to
use your external HDD with
your (desktop) computer. Since
there are many brands and
types of PC’s available, the next
photographs show only
examples on how your external
HDD could be installed.
Auf den nächsten Seiten wird
Ihnen gezeigt, wie Sie Ihre
externe Festplatte mit Ihrem
PC verwenden.
Da es verschiedene Marken
und Arten von PCs gibt, zeigen
die nächsten Bilder nur
Beispiele, wie die Installation
einer externen Festplatte
vonstatten gehen kann.
Les pages suivantes vous
expliquent comment utiliser
votre disque dur externe avec
votre ordinateur de bureau.
Comme il existe de nombreuses
marques et de nombreux
modèles de PC, les illustrations
suivantes ne sont que des
exemples de la manière dont
votre disque dur externe peut
être installé.
Nelle prossime pagine verranno
date informazioni su come
usare l'unità HDD esterna con
il proprio computer.
Poiché esistono molte marche e
tipi di PC, le prossime foto
mostreranno solo esempi di
come l'unità HDD esterna
possa essere installata.
Op de volgende pagina’s kunt u
lezen hoe u uw externe HDD
met uw desktopcomputer
gebruikt.
Aangezien er vele merken en
soorten pc’s beschikbaar zijn,
laten de onderstaande foto’s
alleen voorbeelden zien van hoe
uw externe HDD zou kunnen
worden geïnstalleerd.
Las páginas a continuación
muestran cómo utilizar su disco
duro externo con su ordenador
de sobremesa.
Puesto que hay muchas marcas
y tipos de PC disponibles, las
fotos a continuación muestran
cómo debe instalarse el disco
duro externo.
İzleyen sayfalar, masaüstü
bilgisayarınızla harici HDD’nizi
(sabit disk sürücünüzü)
kullanma şeklini göstermektedir.
Piyasada bir çok marka ve tipte
PC bulunduğundan, izleyen
fotoğraflar; sadece harici
HDD’nizin nasıl kurulabileceğine
dair örnekleri göstermektedir.
UK D F I
NL E TR
9
La página se está cargando...
La página se está cargando...
La página se está cargando...

How to safely disconnect the external
harddisk without shutting down your
system?
Sicheres Entfernen der externe Festplatte
ohne Herunterfahren Ihres Systems
Comment débrancher en toute sécurité le disque dur externe sans
éteindre le système ?
Come scollegare in modo sicuro l'unità disco rigido esterno senza spegnere
il sistema
Hoe moet u veilig de externe harde schijf loskoppelen
zonder uw systeem uit te schakelen?
¿Cómo desconectar de forma segura el equipo disco duro externo sin
apagar el sistema?
Sisteminize kapatmadan harici sabit disk’nin
güvenli şekilde bağlantısını kesme şekli?
The next pages show how to
disconnect your new external
HDD to a computer.
The screenshots are
representing the Microsoft
Windows XP™ operating
system. Other operating
systems may show different
popups.
Auf den nächsten Seiten wird
Ihnen gezeigt, wie Sie Ihre
externe Festplatte von Ihrem
PC entfernen. Die abgebildeten
Screenshots zeigen das Betriebs-
system Microsoft Windows XP™.
Bei anderen Betriebssystemen
können andere Popup-Fenster
angezeigt werden.
Les pages suivantes vous
indiquent comment débrancher
votre nouveau disque dur externe
de votre ordinateur. Les écrans
illustrés représentent le système
d’exploitation Microsoft
Windows XP™. Les autres
systèmes d’exploitation peuvent
présenter d’autres illustrations.
Nelle prossime pagine verranno
date informazioni su come
scollegare la nuova unità HDD
esterna dal proprio computer.
Nelle seguenti schermate è
rappresentato il sistema operativo
Microsoft Windows XP™.
Gli altri sistemi operativi possono
mostrare finestre diverse.
Op de volgende pagina’s kunt u
zien u uw nieuwe externe HDD
van een computer loskoppelt.
De schermafbeeldingen zijn
gebaseerd op het
besturingssysteem Microsoft
Windows XP™. Andere
besturingssystemen kunnen
afwijkende popups laten zien.
Las siguientes páginas muestran
cómo desconectar su nuevo
disco duro externo del
ordenador. Las imágenes de
pantalla representan el sistema
operativo Microsoft Windows
XP™. Otros sistemas
operativos podrían mostrar
pantallas distintas.
İzleyen sayfalar, bilgisayara
giden yeni harici HDD’nizin
bağlantısını kesme şeklini
göstermektedir.
Ekran resimleri; Microsoft
Windows XP™ işletim sistemini
temsil etmektedir. Diğer işletim
sistemleri; farklı açılır
menülerini gösterebilir.
UK D F I
NL E TR
13
La página se está cargando...

How to quick format the
external harddisk
?
Schnellformatieren der externe Festplatte
Comment formater rapidement le disque dur externe?
Come formattare rapidamente l'unità disco rigido esterno
Hoe moet u snel de externe harde schijf formatteren?
¿Cómo formatear rápidamente el equipo disco duro externo?
Harici sabit disk’ı hızlı formatlama şekli?
The next pages show how to
quick format your new external
HDD.
The screenshots are representing
the Microsoft Windows XP™
operating system. Other
operating systems may show
different popups.
If you only plan to use Windows
XP or 2000 we advice to
reformat to NTFS.
NTFS is not usable for Windows
98SE, ME, Mac, Linux.
Formatting will erase all the data.
Auf den nächsten Seiten wird
Ihnen gezeigt, wie Sie Ihre neue
externe Festplatte schnell
formatieren.
Die abgebildeten Screenshots
zeigen das Betriebssystem
Microsoft Windows XP™.
Bei anderen Betriebssystemen
können andere Popup-Fenster
angezeigt werden.
Wenn Sie nur Windows XP oder
2000 zu verwenden planen,
empfehlen wir eine
Neuformatierung auf NTFS.
NTFS lässt sich nicht für
Windows 98E, ME, Mac, Linux
einrichten.
Durch Formatierung gehen alle
Daten verloren.
Les pages suivantes montrent
comment formater rapidement
votre nouveau disque dur
externe.
Les écrans illustrés représentent
le système d’exploitation
Microsoft Windows XP™. Les
autres systèmes d’exploitation
peuvent présenter d’autres
illustrations.
Si vous comptez utiliser
exclusivement Windows XP ou
2000, nous recommandons de
reformater le disque en NTFS.
Le format NTFS n’est pas lisible
sous Windows 98SE, ME, Mac
et Linux.
Le formatage entraîne la perte
de toutes les données.
Nelle prossime pagine verranno
date informazioni su come
formattare rapidamente la
nuova unità HDD esterna.
Nelle seguenti schermate è
rappresentato il sistema
operativo Microsoft Windows
XP™.
Gli altri sistemi operativi possono
mostrare finestre diverse.
Se si ha in programma di
utilizzare Windows XP o 2000,
è consigliata la riformattazione
su NTFS.
NTFS non è utilizzabile con
Windows 98SE, ME, Mac, Linux.
La formattazione comporterà la
perdita di tutti i dati.
Op de volgende pagina’s kunt u
zien hoe u uw nieuwe externe
HDD snel moet formatteren.
De schermafbeeldingen zijn
gebaseerd op het besturings-
systeem Microsoft Windows
XP™. Andere besturings-
systemen kunnen afwijkende
popups laten zien.
Als u van plan bent Windows XP
of 2000 te gebruiken, adviseren
wij u te herformatteren naar
NTFS. NTFS is niet geschikt voor
Windows 98SE, ME, Mac, Linux.
Door formatteren zullen alle
gegevens verloren gaan.
Las páginas siguientes muestran
cómo formatear rápidamente su
nuevo disco duro externo.
Las imágenes de pantalla
representan el sistema operativo
Microsoft Windows XP™. Otros
sistemas operativos podrían
mostrar pantallas distintas.
Si sólo piensa utilizar Windows
XP o 2000, le recomendamos
reformatear en NTFS.
NTFS no es recomendable con
Windows 98SE, ME, Mac y
Linux.
El formateo borrará todos los
datos.
İzleyen sayfalar, yeni harici
HDD’nizin hızlı formatlama
şeklini göstermektedir.
Ekran resimleri; Microsoft
Windows XP™ işletim sistemini
temsil etmektedir. Diğer işletim
sistemleri; farklı açılır menülerini
gösterebilir.
Eğer sadece Windows XP yada
2000’i kullanmayı
düşünüyorsanız, NTFS’ye yeniden
formatlamanızı tavsiye ederiz.
NTFS; Windows 98SE, ME, Mac,
Linux için görünür değildir.
Formatlama işlemi ile, tüm veriler
kaybedilecektir.
UK D F I
NL E TR
15
La página se está cargando...
La página se está cargando...
La página se está cargando...

How to format the
external harddisk?
Formatieren der externe Festplatte
Comment formater le disque dur externe ?
Come formattare l'unità disco rigido esterno
Hoe moet u de externe harde schijf formatteren?
¿Cómo formatear el equipo disco duro externo?
harici sabit disk’ı formatlama şekli?
The next pages show how to
format your new external HDD.
The screenshots are representing
the Microsoft Windows XP™
operating system.
Other operating systems may
show different popups.
If you only plan to use Windows
XP or 2000 we advice to
reformat to NTFS.
NTFS is not usable for Windows
98SE, ME, Mac, Linux.
Formatting will erase all the data.
Auf den nächsten Seiten wird
Ihnen gezeigt, wie Sie Ihre neue
externe Festplatte formatieren.
Die abgebildeten Screenshots
zeigen das Betriebssystem
Microsoft Windows XP™.
Bei anderen Betriebssystemen
können andere Popup-Fenster
angezeigt werden.
Wenn Sie nur Windows XP oder
2000 zu verwenden planen,
empfehlen wir eine
Neuformatierung auf NTFS.
NTFS lässt sich nicht für
Windows 98E, ME, Mac, Linux
einrichten.
Durch Formatierung gehen alle
Daten verloren.
Les pages suivantes montrent
comment formater votre
nouveau disque dur externe.
Les écrans illustrés représentent
le système d’exploitation
Microsoft Windows XP™.
Les autres systèmes
d’exploitation peuvent
présenter d’autres illustrations.
Si vous comptez utiliser
exclusivement Windows XP ou
2000, nous recommandons de
reformater le disque en NTFS.
Le format NTFS n’est pas lisible
sous Windows 98SE, ME, Mac
et Linux.
Le formatage entraîne la perte
de toutes les données.
Nelle prossime pagine verranno
date informazioni su come
formattare la nuova unità HDD
esterna.
Nelle seguenti schermate è
rappresentato il sistema operativo
Microsoft Windows XP™.
Gli altri sistemi operativi possono
mostrare finestre diverse.
Se si ha in programma di
utilizzare Windows XP o 2000,
è consigliata la riformattazione
su NTFS.
NTFS non è utilizzabile con
Windows 98SE, ME, Mac, Linux.
La formattazione comporterà la
perdita di tutti i dati.
Op de volgende pagina’s kunt u
zien hoe u uw nieuwe externe
HDD moet formatteren.
De schermafbeeldingen zijn
gebaseerd op het besturings-
systeem Microsoft Windows
XP™. Andere besturings-
systemen kunnen afwijkende
popups laten zien.
Als u van plan bent Windows XP
of 2000 te gebruiken, adviseren
wij u te herformatteren naar
NTFS. NTFS is niet geschikt voor
Windows 98SE, ME, Mac, Linux.
Door formatteren zullen alle
gegevens verloren gaan.
Las páginas siguientes muestran
cómo formatear su nuevo disco
duro externo.
Las imágenes de pantalla
representan el sistema operativo
Microsoft Windows XP™. Otros
sistemas operativos podrían
mostrar pantallas distintas.
Si sólo piensa utilizar Windows
XP o 2000, le recomendamos
reformatear en NTFS.
NTFS no es recomendable con
Windows 98SE, ME, Mac y
Linux.
El formateo borrará todos los
datos.
İzleyen sayfalar, yeni harici
HDD’nizin formatlama şeklini
göstermektedir.
Ekran resimleri; Microsoft
Windows XP™ işletim sistemini
temsil etmektedir. Diğer işletim
sistemleri; farklı açılır menülerini
gösterebilir.
Eğer sadece Windows XP yada
2000’i kullanmayı
düşünüyorsanız, NTFS’ye yeniden
formatlamanızı tavsiye ederiz.
NTFS; Windows 98SE, ME, Mac,
Linux için görünür değildir.
Formatlama işlemi ile, tüm veriler
kaybedilecektir.
UK D F I
NL E TR
19
La página se está cargando...
La página se está cargando...

22
Right click on "Unallocated" hard disk.
Rechtsklicken Sie auf die "Unallocated" (nicht
zugeordnete) Festplatte.
Cliquez avec le bouton droit sur disque dur
"Unallocated" (Non alloué).
Cliccare con il tasto destro del mouse sul disco
rigido "Unallocated" (non allocato).
Klik met de rechtermuisknop op "Unallocated
hard disk" (Niet toegewezen).
Haga clic con el botón derecho en disco duro
"Unallocated" (No asignado).
"Unallocated" (Tahsis edilmemiş) sabit disk üzerine sağ düğmeyle tıklatınız.
TR
E
NL
I
F
D
UK
7
8
9
Choose "New Partition".
Wählen Sie "New Partition" (Neue Partition).
Choisissez "New Partition" (Nouvelle partition).
Scegliere "New Partition" (Nuova partizione).
Kies "New Partition" (Nieuwe partitie).
Elija "New Partition" (Partición nueva).
"New Partition" (Yeni Disk Bölümü)’nü seçiniz.
TR
E
NL
I
F
D
UK
Click "Next".
Klicken Sie auf "Next" (Weiter).
Cliquez sur "Next" (Suivant).
Cliccare su "Next" (Avanti).
Klik op "Next" (Volgende).
Haga clic en "Next" (Siguiente).
"Next" (İleri) üzerine tıklatınız.
TR
E
NL
I
F
D
UK
La página se está cargando...
La página se está cargando...

How to use the One-Click
Backup button ?
So wird die Schaltfläche „Sicherungskopie per Mausklick“ verwendet
Comment utiliser le bouton One-Click Backup ?
Come usare il pulsante One-Click Backup
Hoe moet u de One-Click Backup knop gebruiken?
¿Cómo se utiliza el botón de Copia de seguridad con un solo clic?
Tek Tıklatmalı Yedek Kopya düğmesinin kullanım şekli?
The next pages show how to
use the One-Click Backup to
simplify initiating the automatic
back up.
Auf den nächsten Seiten wird
Ihnen gezeigt, wie Sie
„Sicherung per Mausklick“ zum
Starten einer automatischen
Sicherungskopie verwenden.
Les pages qui suivent
expliquent comment utiliser le
bouton One-Click Backup pour
lancer une sauvegarde
automatique en toute
simplicité.
Nelle prossime pagine verranno
date informazioni su come
usare il pulsante One-Click
Backup per semplificare
l'inizializzazione del backup
automatico.
De volgende pagina’s laten u
zien hoe u One-Click Backup
gebruikt om de start van de
automatische backup te
vereenvoudigen.
Las páginas siguientes muestran
cómo utilizar la función de
Copia de Seguridad con un solo
botón para iniciar la copia de
seguridad automática.
İngiltere Bir sonraki sayfa,
otomatik yedek kopyayı
başlatmayı basitleştirmek için
Tek Tıklatmalı Yedek Kopya’nın
kullanım şeklini göstermektedir.
UK D F I
NL E TR
25
La página se está cargando...

27
First select the files and folders you want to
make a backup of and the hit the Next button.
Markieren Sie erst die Dateien und Ordner, von
denen eine Sicherungskopie erstellt werden soll, und
klicken Sie dann auf die Schaltfläche „Weiter“.
Choisissez les fichiers et les répertoires à
sauvegarder, puis cliquez sur Next (Suivant).
Selezionare dapprima i file e le cartelle di cui si
desidera eseguire il backup, quindi cliccare sul pulsante
Next (Avanti).
Selecteer eerst de bestanden en mappen
waarvan u een reservekopie wilt maken en klik op de
knop Next (volgende).
Lo primero seleccione los archivos y las carpetas que desee copiar y pulse el botón Siguiente.
Önce bir yedek kopyas›n› oluflturmak istedi iniz dosya ve klasörleri seçiniz ve ‹leri dü mesine bas›n›z.
TR
E
NL
I
F
D
UK
4
3
Click the next button in order to make a
backup with files and folders you select.
Klicken Sie auf die Schaltfläche „Weiter“, um
eine Sicherungskopie von den markierten Dateien und
Ordnern zu erstellen.
Cliquez sur le bouton Next (Suivant) pour créer
une copie de sauvegarde des fichiers et des
répertoires sélectionnés.
Cliccare sul pulsante Next (Avanti) per eseguire
il backup dei file e delle cartelle che sono stati
selezionati.
Klik op de knop Next (volgende) om een
backup te maken met bestanden en mappen die u
selecteert.
Haga clic en el botón Siguiente para hacer una copia de seguridad de los archivos y carpetas que haya
seleccionado.
Seçtiğiniz dosya ve klasörler ile bir yedek kopya oluşturmak için ileri düğmesi üzerine tıklatınız.
TR
E
NL
I
F
D
UK

28
6
Check if you have chosen the right target (your
external Philips Harddisk) afterwards click the next
button.
Kontrollieren Sie, ob Sie das richtige
Zielverzeichnis (Ihre externe Philips Festplatte) gewählt
haben, und klicken Sie dann auf die Schaltfläche
„Weiter“.
Vérifiez que le disque cible sélectionné est
correct (le disque dur externe Philips), puis cliquez sur
le bouton Next (Suivant).
Verificare di avere selezionato la destinazione
corretta (il disco rigido esterno Philips), quindi cliccare
sul pulsante Next (Avanti).
Controleer of u de juiste bestemming hebt geselecteerd (de externe harde schijf van Philips) en klik
daarna op de knop Next (volgende).
Compruebe que ha elegido el destino correcto (su disco duro externo Philips), después haga clic en el
botón Siguiente.
Do ru hedef yerini seçip seçmedi inizi kontrol ediniz, (harici Philips Sabit Diskiniz), daha sonra ileri
dü mesi üzerine t›klat›n›z.
TR
E
NL
I
F
D
UK
5
Select the correct target for the backup you
want to make using the dropdown function.
Wählen Sie das Zielverzeichnis für die
Sicherungskopie, die erstellt werden soll, mithilfe der
Dropdown-Funktion.
Dans le menu déroulant Target (Cible),
sélectionnez le disque sur lequel vous souhaitez créer
une copie de sauvegarde.
Nell'elenco a discesa selezionare la destinazione
desiderata per il backup.
Selecteer de juiste bestemming voor de backup
die u wilt maken met het keuzemenu.
Seleccione el destino correcto para la copia de seguridad que desea hacer utilizando la función
desplegable
Aç›l›r liste/kutu ifllevini kullanarak oluflturmak istedi iniz yedek kopya için do ru hedef yeri seçiniz.
TR
E
NL
I
F
D
UK

29
Select the correct target path and backup name
then press the next button.
Wählen Sie den richtigen Zielpfad und Namen
für die Sicherungskopie. Klicken Sie dann auf die
Schaltfläche „Weiter“.
Choisissez l’emplacement et le nom de fichier de
la sauvegarde à créer, puis cliquez sur Next (Suivant).
Selezionare il percorso di destinazione e il nome
di backup corretti, quindi cliccare sul pulsante Next
(Avanti).
Selecteer het juiste bestemmingspad en
backupnaam en druk op de knop Next (volgende).
Seleccione la ruta de destino correcta y el nombre de la copia de seguridad, luego pulse el botón
Siguiente.
Do ru yolu ve yedek kopya ad›n› seçip ileri dü mesine bas›n›z.
TR
E
NL
I
F
D
UK
7
8
This screen gives you an overview of the Job
you have added. Press the finish button.
Mit diesem Bildschirm erhalten Sie einen
Überblick über die Aufgabe, die Sie hinzugefügt haben.
Klicken Sie auf die Schaltfläche „Fertig stellen“.
Cet écran récapitule les données de la
sauvegarde à effectuer. Appuyez sur le bouton Finish
(Terminer).
Questa schermata offre un'anteprima del
processo aggiunto. Selezionare il pulsante Finish (Fine).
Dit scherm geeft u een overzicht van de taak
die u hebt toegevoegd. Druk op de knop Finish
(voltooien)
Esta pantalla le proporciona una descripción del trabajo que ha agregado. Pulse el botón Terminar.
Bu ekran, size ekledi iniz ‹fl’in genel bir görünümünü verir. Bitir dü mesine bas›n›z.
TR
E
NL
I
F
D
UK
La página se está cargando...

How to use the Safe
Shutdown button?
So wird die Schaltfläche „Sicheres Abschalten“ verwendet
Comment utiliser le bouton Safe Shutdown ?
Come usare il pulsante Safe Shutdown
Hoe moet u de Safe Shutdown knop gebruiken?
¿Cómo se utiliza el botón de Apagado Seguro?
Güvenli Kapatma düğmesinin kullanım şekli?
The next pages show how to
use the Safe Shutdown button
of your external HDD.
Auf den nächsten Seiten wird
Ihnen gezeigt, wie Sie die
Schaltfläche „Sicheres
Abschalten“ für Ihre externe
Festplatte verwenden.
Les pages qui suivent
expliquent comment utiliser le
bouton Safe Shutdown (arrêt en
sécurité) de votre disque dur
externe.
Nelle prossime pagine verranno
date informazioni su come
usare il pulsante Safe Shutdown
per l'unità HDD esterna.
De volgende pagina’s laten zien
hoe u de knop Safe Shutdown
moet gebruiken voor uw
externe HDD.
Las páginas siguientes
muestran cómo utilizar el botón
de Apagado Seguro de su disco
duro externo.
İngiltere İzleyen sayfalar, harici
HDD’nizin Güvenli Kapatma
düğmesini kullanma şeklini
göstermektedir.
UK D F I
NL E TR
31
La página se está cargando...

How to create a backup?
Erstellen einer Sicherungskopie
Comment créer une sauvegarde ?
Come eseguire un backup
Hoe moet u een backup maken?
¿Cómo crear un copia de seguridad?
Bir yedek kopya yaratma şekli?
The next pages show how to
create a backup.
The screenshots are
representing the Microsoft
Windows XP™ operating
system. Other operating
systems may show different
popups.
Auf den nächsten Seiten wird
Ihnen gezeigt, wie Sie eine
Sicherungskopie erstellen.
Die abgebildeten Screenshots
zeigen das Betriebssystem
Microsoft Windows XP™.
Bei anderen Betriebssystemen
können andere Popup-Fenster
angezeigt werden.
Les pages suivantes vous
expliquent comment créer une
sauvegarde. Les écrans illustrés
représentent le système
d’exploitation Microsoft
Windows XP™. Les autres
systèmes d’exploitation peuvent
présenter d’autres illustrations.
Nelle prossime pagine verranno
date informazioni su come
eseguire un backup.
Nelle seguenti schermate è
rappresentato il sistema operativo
Microsoft Windows XP™.
Gli altri sistemi operativi possono
mostrare finestre diverse.
Op de volgende pagina’s kunt u
zien hoe u een backup moet
maken.
De schermafbeeldingen zijn
gebaseerd op het besturings-
systeem Microsoft Windows
XP™. Andere besturings-
systemen kunnen afwijkende
popups laten zien.
Las páginas siguientes muestran
como crear una copia de
seguridad.
Las imágenes de pantalla
representan el sistema
operativo Microsoft Windows
XP™. Otros sistemas
operativos podrían mostrar
pantallas distintas.
İzleyen sayfalar, bir yedek
kopya yaratma şeklini
göstermektedir.
Ekran resimleri; Microsoft
Windows XP™ işletim sistemini
temsil etmektedir. Diğer işletim
sistemleri; farklı açılır
menülerini gösterebilir.
UK D F I
NL E TR
33
La página se está cargando...
La página se está cargando...
La página se está cargando...
La página se está cargando...
La página se está cargando...

How to restore a backup?
Wiederherstellen einer Sicherungskopie
Comment restaurer une sauvegarde ?
Come ripristinare un backup
Hoe moet u een backup terugzetten?
¿Cómo restaurar una copia de seguridad?
Bir yedek kopyayı geri yükleme şekli?
The next pages show how to
restore a backup.
The screenshots are
representing the Microsoft
Windows XP™ operating
system. Other operating
systems may show different
popups.
Auf den nächsten Seiten wird
Ihnen gezeigt, wie Sie eine
Sicherungskopie
wiederherstellen.
Die abgebildeten Screenshots
zeigen das Betriebssystem
Microsoft Windows XP™.
Bei anderen Betriebssystemen
können andere Popup-Fenster
angezeigt werden.
Les pages suivantes vous
expliquent comment restaurer
une sauvegarde.
Les écrans illustrés représentent
le système d’exploitation
Microsoft Windows XP™.
Les autres systèmes
d’exploitation peuvent
présenter d’autres illustrations.
Nelle prossime pagine verranno
date informazioni su come
ripristinare un backup.
Nelle seguenti schermate è
rappresentato il sistema
operativo Microsoft Windows
XP™. Gli altri sistemi operativi
possono mostrare finestre
diverse.
Op de volgende pagina’s kunt u
zien hoe u een backup terug
kunt zetten.
De schermafbeeldingen zijn
gebaseerd op het besturings-
systeem Microsoft Windows
XP™. Andere besturings-
systemen kunnen afwijkende
popups laten zien.
Las páginas siguientes
muestran como restaurar una
copia de seguridad.
Las imágenes de pantalla
representan el sistema
operativo Microsoft Windows
XP™. Otros sistemas
operativos podrían mostrar
pantallas distintas.
İzleyen sayfalar, bir yedek
kopyayı geri yükleme şeklini
göstermektedir.
Ekran resimleri; Microsoft
Windows XP™ işletim sistemini
temsil etmektedir. Diğer işletim
sistemleri; farklı açılır
menülerini gösterebilir.
UK D F I
NL E TR
39
La página se está cargando...
La página se está cargando...
La página se está cargando...

How to defragment
Defragmentieren
Comment défragmenter ?
Come deframmentare
Hoe moet u defragmenteren?
¿Cómo desfragmentar?
birleştirme şekli?
The next pages show how to
defragment your new Philips
external HDD.
The screenshots are
representing the Microsoft
Windows XP™ operating
system. Other operating
systems may show different
popups.
Auf den nächsten Seiten wird
Ihnen gezeigt, wie Sie Ihre neue
externe Festplatte von Philips
defragmentieren.
Die abgebildeten Screenshots
zeigen das Betriebssystem
Microsoft Windows XP™.
Bei anderen Betriebssystemen
können andere Popup-Fenster
angezeigt werden.
Les pages suivantes montrent
comment défragmenter votre
nouveau disque dur externe
Philips.
Les écrans illustrés représentent
le système d’exploitation
Microsoft Windows XP™.
Les autres systèmes
d’exploitation peuvent
présenter d’autres illustrations.
Nelle prossime pagine verranno
date informazioni su come
eseguire la deframmentazione
della nuova unità HDD esterna
Philips.
Nelle seguenti schermate è
rappresentato il sistema operativo
Microsoft Windows XP™.
Gli altri sistemi operativi possono
mostrare finestre diverse.
Op de volgende pagina’s kunt u
zien hoe u uw nieuwe Philips
externe HDD moet
defragmenteren.
De schermafbeeldingen zijn
gebaseerd op het besturings-
systeem Microsoft Windows
XP™. Andere besturings-
systemen kunnen afwijkende
popups laten zien.
Las páginas siguientes muestran
cómo desfragmentar su nuevo
disco duro externo Philips.
Las imágenes de pantalla
representan el sistema operativo
Microsoft Windows XP™.
Otros sistemas operativos
podrían mostrar pantallas
distintas.
İzleyen sayfalar, yeni Philips
harici HDD’nizi birleştirme
şeklini göstermektedir.
Ekran resimleri; Microsoft
Windows XP™ işletim sistemini
temsil etmektedir.
Diğer işletim sistemleri; farklı
açılır menülerini gösterebilir.
UK D F I
NL E TR
43
La página se está cargando...
La página se está cargando...
La página se está cargando...

How to check the external
harddisk disk for errors?
Überprüfen der externe Festplatte auf Fehler
Comment vérifier si le disque dur externe comporte des erreurs ?
Come controllare se sono presenti errori nell'unità disco rigido esterno
Hoe moet u de externe harde schijf op fouten controleren?
¿Cómo comprobar los errores del disco duro externo?
harici sabit disk hatalara karşı kontrol etme şekli?
The next pages show how to
check your new Philips external
HDD for errors.
The screenshots are
representing the Microsoft
Windows XP™ operating
system. Other operating
systems may show different
popups.
Auf den nächsten Seiten wird
Ihnen gezeigt, wie Sie Ihre neue
externe Festplatte von Philips
auf Fehler überprüfen.
Die abgebildeten Screenshots
zeigen das Betriebssystem
Microsoft Windows XP™.
Bei anderen Betriebssystemen
können andere Popup-Fenster
angezeigt werden.
Les pages suivantes montrent
comment vérifier si votre
nouveau disque dur externe
Philips comporte des erreurs.
Les écrans illustrés représentent
le système d’exploitation
Microsoft Windows XP™.
Les autres systèmes
d’exploitation peuvent
présenter d’autres illustrations.
Nelle prossime pagine verranno
date informazioni su come
controllare se sono presenti
errori nella nuova unità HDD
esterna Philips.
Nelle seguenti schermate è
rappresentato il sistema operativo
Microsoft Windows XP™.
Gli altri sistemi operativi possono
mostrare finestre diverse.
Op de volgende pagina’s kunt u
zien hoe u uw nieuwe Philips
externe HDD op fouten moet
controleren.
De schermafbeeldingen zijn
gebaseerd op het besturings-
systeem Microsoft Windows
XP™. Andere besturings-
systemen kunnen afwijkende
popups laten zien.
Las páginas siguientes muestran
cómo comprobar los errores de
su nuevo disco duro externo
Philips.
Las imágenes de pantalla
representan el sistema operativo
Microsoft Windows XP™.
Otros sistemas operativos
podrían mostrar pantallas
distintas.
İzleyen sayfalar, yeni Philips
harici HDD’nizi hatalara karşı
kontrol etme şeklini
göstermektedir.
Ekran resimleri; Microsoft
Windows XP™ işletim sistemini
temsil etmektedir. Diğer işletim
sistemleri; farklı açılır
menülerini gösterebilir.
UK D F I
NL E TR
47

48
In Windows Explorer right click on the drive
letter of your Philips external HDD.
Im Windows Explorer rechtsklicken Sie auf dem
Laufwerkbuchstaben Ihrer externen Philips Festplatte.
Dans l’Explorateur de Windows, cliquez avec le
bouton droit sur la lettre du lecteur de votre disque
dur externe Philips.
In Windows Explorer cliccare con il tasto destro
del mouse sulla lettera dell'unità HDD esterna Philips.
Klik in Windows Verkenner met de rechter-
muisknop op de stationletter van uw externe HDD
van Philips.
En el explorador de Windows haga clic con el
botón derecho en la letra de la unidad de su disco duro externo Philips.
Windows Explorer’de Philips harici HDD’nizin sürücü harfi üzerine sağ düğmeyle tıklatınız.
TR
E
NL
I
F
D
UK
1
2
3
Choose “Properties”.
Wählen Sie “Properties” (Eigenschaften).
Choisissez "Properties" (Propriétés).
Scegliere "Properties" (Proprietà).
Kies "Properties" (Eigenschappen).
Elija "Properties" (Propiedades).
"Properties" (Özellikler)’i seçiniz.
TR
E
NL
I
F
D
UK
Choose tab "Tools".
Wählen Sie die Registerkarte "Tools" (Extras...).
Choisissez l’onglet "Tools" (Outils).
Scegliere la scheda "Tools" (Strumenti).
Kies het tabblad "Tools" (Extra).
Elija la ficha "Tools" (Herramientas).
"Tools" (Araçlar) sekmesini seçiniz.
TR
E
NL
I
F
D
UK
La página se está cargando...
La página se está cargando...
La página se está cargando...
La página se está cargando...
La página se está cargando...
La página se está cargando...
La página se está cargando...
La página se está cargando...
La página se está cargando...
La página se está cargando...
La página se está cargando...
La página se está cargando...

¿Cómo encontrar información sobre la garantía?
1
Vuelva a colocar el disco de Nero y haga clic en "salir".
2
Haga clic en el icono "Mi PC" del escritorio o bien haga clic en
"Inicio" y "Mi PC".
3
Haga clic con el botón derecho del ratón en el icono "Nero"
y elija "Explorar".
4
Seleccione la carpeta "Philips Warranty", en la que encontrará
los documentos de la garantía.
Si no dispone de Adobe Acrobat Reader, podrá encontrarlo
en la carpeta "Acrobat Reader" en este disco o descargarlo
gratuitamente por Internet desde http://www.adobe.com
"La realización de copias no autorizadas de materiales protegidos contra copias, incluyendo programas
de ordenador, archivos, emisiones y grabaciones de sonido, puede ser una violación de derechos de
propiedad intelectual y constituir un delito.
Este equipo no debe ser utilizado para dicho propósito."
Indicativo WEEE: "Información al consumidor"
Desecho del producto antiguo
El producto se ha diseñado y fabricado con materiales y componentes de alta calidad, que se pueden
reciclar y volver a utilizar.
Cuando este símbolo de contenedor de ruedas tachado se muestra en un producto indica que éste
cumple la directiva europea 2002/96/EC.
Obtenga información sobre la recogida selectiva local de productos eléctricos y electrónicos.
Cumpla con la normativa local y no deseche los productos antiguos con los desechos domésticos. El
desecho correcto del producto antiguo ayudará a evitar consecuencias negativas para el medioambiente y
la salud humana.
ADVERTENCIA
Las bolsas de plástico pueden ser peligrosas.
Para evitar el peligro de asfixia no dejar este saco al alcance de los niños.
E
Garantía,Entorno y Seguridad
61

62
Especificaciones técnicas:
Soporte de grabación: 3,5
Interfaz: USB 2.0 y FireWire 400
Capacidad: 160 / 250 GB
Velocidad de giro: 7200
Velocidad de transferencia USB (máximo) : 35Mb/s
Velocidad de transferencia FireWire (máximo): 43Mb/s
Dimensiones externas (Ancho x Alto x Fondo): 143 x 220 x 49 mm
Memoria caché: 8 MB
http://www.philips.com/storage
Especificaciones
La página se está cargando...
La página se está cargando...
La página se está cargando...
La página se está cargando...
La página se está cargando...
La página se está cargando...
Transcripción de documentos
How to... for External Hard Disk Drive UK D F I NL E TR Install Guide Installationsanleitung Guide d'installation Guida d'installazione Installatiegids Guía de instalación Kurulum Kılavuzu Come usare il pulsante One-Click Backup Come usare il pulsante Safe Shutdown Come eseguire un backup Come ripristinare un backup Come deframmentare Come controllare se sono presenti errori nell'unità disco rigido esterno Garanzia, Ambiente e Sicurezza Specifiche tecniche NL Inhoud Hoe moet u deze externe harde schijf op uw systeem aansluiten? (USB-installatie) Hoe moet u deze externe harde schijf op uw systeem aansluiten? (Firewire-installatie) How to install the external harddisk for Windows 98 Second Edition only? How to install the external harddisk for Windows ME? Hoe moet u veilig de externe harde schijf loskoppelen zonder uw systeem uit te schakelen? Hoe moet u snel de externe harde schijf formatteren? Hoe moet u de externe harde schijf formatteren? Hoe moet u de One-Click Backup knop gebruiken? Hoe moet u de Safe Shutdown knop gebruiken? Hoe moet u een backup maken? Hoe moet u een backup terugzetten? Hoe moet u de defragmenteren? Hoe moet u de externe harde schijf op fouten controleren? Garantie, milieu en veiligheid Technische gegevens E 5 9 12 12 13 15 19 25 31 33 39 43 47 59 60 Contenido ¿Cómo conectar esta disco duro externo en su sistema? (Instalación USB) ¿Cómo conectar esta disco duro externo en su sistema? (Instalación Firewire) How to install the external harddisk for Windows 98 Second Edition only? How to install the external harddisk for Windows ME? ¿Cómo desconectar de forma segura el equipo disco duro externo sin apagar el sistema? ¿Cómo formatear rápidamente el equipo disco duro externo? ¿Cómo formatear el equipo disco duro externo? ¿Cómo se utiliza el botón de Copia de seguridad con un solo clic? ¿Cómo se utiliza el botón de Apagado Seguro? ¿Cómo crear un copia de seguridad? ¿Cómo restaurar una copia de seguridad? ¿Cómo desfragmentar? ¿Cómo comprobar los errores del disco duro externo? Garantía, Entorno y Seguridad Especificaciones TR 25 31 33 39 43 47 57 58 5 9 12 12 13 15 19 25 31 33 39 43 47 61 62 İçindekiler Bu harici sabit disk sisteminize takma ?ekli? (USB kurulumu) Bu harici sabit disk sisteminize takma ?ekli? (Firewire/Güvenlik duvarı kurulumu) How to install the external harddisk for Windows 98 Second Edition only? How to install the external harddisk for Windows ME? Sisteminize kapatmadan harici sabit disk’nin güvenli ?ekilde ba?lantısını kesme ?ekli? Harici sabit disk’ı hızlı formatlama ?ekli? harici sabit disk’ı formatlama ?ekli? Tek Tıklatmalı Yedek Kopya düğmesinin kullanım şekli? Güvenli Kapatma düğmesinin kullanım şekli? Bir yedek kopya yaratma şekli? Bir yedek kopyayı geri yükleme şekli? birle?tirme ?ekli? harici sabit disk hatalara kar?ı kontrol etme ?ekli? Garanti, Ortam/Çevre ve Güvenlik Teknik Özellikler 5 9 12 12 13 15 19 25 31 33 39 43 47 63 64 3 How to connect this external harddisk on your system? (USB installation) Anschließen des externe Festplatte an Ihr System (USB-Installation) Comment raccorder disque dur externe sur votre système ? (Installation USB) Come collegare questa disco rigido esterno al proprio sistema (installazione USB) Hoe moet u deze externe harde schijf op uw systeem aansluiten? (USB-installatie) ¿Cómo conectar esta disco duro externo en su sistema? (Instalación USB) Bu harici sabit disk sisteminize takma şekli? (USB kurulumu) UK The next pages show how to use your external HDD with your (desktop) computer. Since there are many brands and types of PC’s available, the next photographs show only examples on how your external HDD could be installed. D Auf den nächsten Seiten wird Ihnen gezeigt, wie Sie Ihre externe Festplatte mit Ihrem PC verwenden. Da es verschiedene Marken und Arten von PCs gibt, zeigen die nächsten Bilder nur Beispiele, wie die Installation einer externen Festplatte vonstatten gehen kann. F I Les pages suivantes vous expliquent comment utiliser votre disque dur externe avec votre ordinateur de bureau. Comme il existe de nombreuses marques et de nombreux modèles de PC, les illustrations suivantes ne sont que des exemples de la manière dont votre disque dur externe peut être installé. Nelle prossime pagine verranno date informazioni su come usare l'unità HDD esterna con il proprio computer. Poiché esistono molte marche e tipi di PC, le prossime foto mostreranno solo esempi di come l'unità HDD esterna possa essere installata. NL E TR Op de volgende pagina’s kunt u lezen hoe u uw externe HDD met uw desktopcomputer gebruikt. Aangezien er vele merken en soorten pc’s beschikbaar zijn, laten de onderstaande foto’s alleen voorbeelden zien van hoe uw externe HDD zou kunnen worden geïnstalleerd. Las páginas a continuación muestran cómo utilizar su disco duro externo con su ordenador de sobremesa. Puesto que hay muchas marcas y tipos de PC disponibles, las fotos a continuación muestran cómo debe instalarse el disco duro externo. İzleyen sayfalar, masaüstü bilgisayarınızla harici HDD’nizi (sabit disk sürücünüzü) kullanma şeklini göstermektedir. Piyasada bir çok marka ve tipte PC bulunduğundan, izleyen fotoğraflar; sadece harici HDD’nizin nasıl kurulabileceğine dair örnekleri göstermektedir. 5 This can be found in the box: Your new external HDD device Vertical Stand Power Adapter Power Cord USB cable Firewire cable How to Manual Nero Software disc UK A: B: C: D: E: F: G: H: 1 Packungsinhalt: Ihre neue externe Festplatte Vertikaler Ständer Netzteil Netzkabel USB-Kabel Firewire-Kabel Bedienungsanleitung Nero Software-CD D A: B: C: D: E: F: G: H: F Votre boîte comprend les éléments suivants : A: votre nouveau disque dur externe B: Support vertical D: Cordon d’alimentation E: Câble USB G: Manuel H: Logiciel Nero C: Adaptateur de courant F: Câble Firewire I Contenuto della confezione: A: La nuova unità HDD esterna D: Il cavo di alimentazione G: La guida d'uso B: Il supporto verticale C: Il trasformatore E: Il cavo USB F: Il cavo Firewire H: Il disco del programma Nero NL Het volgende zit in de doos: A: Uw nieuwe externe HDD-apparaat D: Stroomsnoer G: Instructiehandleiding B: Verticaal statief E: USB-kabel H: Nero software-disc E La caja debe contener: A: Su disco duro externo D: Cable de alimentación G: Manual Cómo... B: Soporte vertical C: Adaptador de corriente E: Cable USB F: Cable firewire H: Disco con el software Nero TR Bu, kutu içinde bulunabilir: A: Yeni harici HDD sürücünüz D: Güç Kablosu G: Kullanma Şekli Kılavuzu B: Dikey Sehpa E: USB kablosu H: Nero Yazılım diski C: Voedingsadapter F: Firewire-kabel C: Güç Adaptörü F: Firewire/Güvenlik duvarı kablosu UK Plug the USB cable in the USB port of your new external HDD.* D Stecken Sie das USB-Kabel in den USBAnschluss Ihrer neuen externen Festplatte.* F Insérez le câble USB dans le port USB de votre nouveau disque dur externe.* I Collegare il cavo USB alla porta USB della nuova unità HDD esterna.* NL Steek de USB-kabel in de USB-poort van uw nieuwe externe HDD.* E Conecte el cable USB en el puerto USB del disco duro externo.* TR 6 Harici HDD’nizin USB portuna/bağlantı noktasına USB kablosunu takınız.* *Connect the power cables together and connect them to the external harddisk and a power outlet. 2 3 UK Connect the other side of the USB cable to an empty USB port of your computer. D Schließen Sie das andere Ende des USB-Kabels an einem freien USB-Anschluss an Ihrem PC an. F Branchez l’autre côté du câble USB sur un port USB vide de votre ordinateur. I Collegare l'altro capo del cavo USB ad una porta USB libera del computer. NL Sluit het andere uiteinde van de USB-kabel aan op een vrije USB-poort van uw computer. E Conecte el otro extremo del cable USB en un puerto USB libre de su ordenador. TR 4 USB kablosunun diğer tarafını, bilgisayarınızın boş USB portuna/bağlantı noktasına takınız. UK A drive icon appears for the external HDD in Windows Explorer; the name of the drive varies, depending on your computer system. You can save and copy data on the drive by moving files and folders to the drive icon, just as you do when using your floppy disk or hard disk. D Ein Laufwerksymbol für die externe Festplatte wird im Windows Explorer angezeigt, wobei der Name des Laufwerks je nach Ihrem Computersystem unterschiedlich sein kann. Sie können Daten auf dem Laufwerk speichern und kopieren, indem Sie Dateien und Ordner auf das Laufwerksymbol verschieben. Das funktioniert genauso wie mit einer Diskette oder wie auf der internen Festplatte. F Une icône de disque apparaît pour le disque dur externe dans l’Explorateur de Windows ; le nom de ce disque varie en fonction de votre système informatique. Vous pouvez enregistrer et copier des données sur le lecteur en déplaçant des fichiers ou des dossiers sur l’icône du lecteur, comme vous le faites avec une disquette ou votre disque dur. I In Windows Explorer appare l'icona dell'unità HDD esterna; il nome dell'unità cambia in base al sistema operativo in uso nel computer. È possibile salvare e copiare dati sull'unità spostando i file e le cartelle nell'icona dell'unità, proprio come quando si usa un disco floppy o il disco rigido. NL Er verschijnt een pictogram voor de externe HDD in Windows Verkenner; de naam van het station kan verschillen, naargelang het computersysteem. U kunt gegevens naar het station kopiëren door bestanden en mappen naar het pictogram van het station te slepen, net zoals bij een floppydisk of een harde schijf. E En el explorador de Windows aparece un icono de la unidad para el disco duro, el nombre de la unidad varía, dependiendo del sistema del ordenador. Puede guardar y copiar datos a la unidad moviendo los archivos y carpetas al icono de la unidad, de la misma forma que con un disquete o disco duro. TR Windows Explorer’da harici HDD için bir sürücü ikonu/simgesi belirir; sürücün adı; bilgisayar sisteminize bağlı olarak değişiklik gösterir. Dosyaları ve klasörleri sürücü ikonuna taşıyarak; disket sürücünüzü ya da sabit diskinizi kullanarak yaptığınız şekilde, sürücü üzerindeki verileri kaydedebilir ya da kopyalayabilirsiniz. 7 How to connect this external harddisk on your system? (Firewire installation) Anschließen des externe Festplatte an Ihr System (Firewire-Installation) Comment raccorder disque dur externe sur votre système ? (Installation Firewire) Come collegare questa disco rigido esterno al proprio sistema (installazione firewire) Hoe moet u deze externe harde schijf op uw systeem aansluiten? (Firewire-installatie) ¿Cómo conectar esta disco duro externo en su sistema? (Instalación Firewire) Bu harici sabit disk sisteminize takma şekli? (Firewire/Güvenlik duvarı kurulumu) UK The next pages show how to use your external HDD with your (desktop) computer. Since there are many brands and types of PC’s available, the next photographs show only examples on how your external HDD could be installed. D Auf den nächsten Seiten wird Ihnen gezeigt, wie Sie Ihre externe Festplatte mit Ihrem PC verwenden. Da es verschiedene Marken und Arten von PCs gibt, zeigen die nächsten Bilder nur Beispiele, wie die Installation einer externen Festplatte vonstatten gehen kann. F I Les pages suivantes vous expliquent comment utiliser votre disque dur externe avec votre ordinateur de bureau. Comme il existe de nombreuses marques et de nombreux modèles de PC, les illustrations suivantes ne sont que des exemples de la manière dont votre disque dur externe peut être installé. Nelle prossime pagine verranno date informazioni su come usare l'unità HDD esterna con il proprio computer. Poiché esistono molte marche e tipi di PC, le prossime foto mostreranno solo esempi di come l'unità HDD esterna possa essere installata. NL E TR Op de volgende pagina’s kunt u lezen hoe u uw externe HDD met uw desktopcomputer gebruikt. Aangezien er vele merken en soorten pc’s beschikbaar zijn, laten de onderstaande foto’s alleen voorbeelden zien van hoe uw externe HDD zou kunnen worden geïnstalleerd. Las páginas a continuación muestran cómo utilizar su disco duro externo con su ordenador de sobremesa. Puesto que hay muchas marcas y tipos de PC disponibles, las fotos a continuación muestran cómo debe instalarse el disco duro externo. İzleyen sayfalar, masaüstü bilgisayarınızla harici HDD’nizi (sabit disk sürücünüzü) kullanma şeklini göstermektedir. Piyasada bir çok marka ve tipte PC bulunduğundan, izleyen fotoğraflar; sadece harici HDD’nizin nasıl kurulabileceğine dair örnekleri göstermektedir. 9 How to safely disconnect the external harddisk without shutting down your system? Sicheres Entfernen der externe Festplatte ohne Herunterfahren Ihres Systems Comment débrancher en toute sécurité le disque dur externe sans éteindre le système ? Come scollegare in modo sicuro l'unità disco rigido esterno senza spegnere il sistema Hoe moet u veilig de externe harde schijf loskoppelen zonder uw systeem uit te schakelen? ¿Cómo desconectar de forma segura el equipo disco duro externo sin apagar el sistema? Sisteminize kapatmadan harici sabit disk’nin güvenli şekilde bağlantısını kesme şekli? UK The next pages show how to disconnect your new external HDD to a computer. The screenshots are representing the Microsoft Windows XP™ operating system. Other operating systems may show different popups. D F I Auf den nächsten Seiten wird Ihnen gezeigt, wie Sie Ihre externe Festplatte von Ihrem PC entfernen. Die abgebildeten Screenshots zeigen das Betriebssystem Microsoft Windows XP™. Bei anderen Betriebssystemen können andere Popup-Fenster angezeigt werden. Les pages suivantes vous indiquent comment débrancher votre nouveau disque dur externe de votre ordinateur. Les écrans illustrés représentent le système d’exploitation Microsoft Windows XP™. Les autres systèmes d’exploitation peuvent présenter d’autres illustrations. Nelle prossime pagine verranno date informazioni su come scollegare la nuova unità HDD esterna dal proprio computer. Nelle seguenti schermate è rappresentato il sistema operativo Microsoft Windows XP™. Gli altri sistemi operativi possono mostrare finestre diverse. NL E TR Op de volgende pagina’s kunt u zien u uw nieuwe externe HDD van een computer loskoppelt. De schermafbeeldingen zijn gebaseerd op het besturingssysteem Microsoft Windows XP™. Andere besturingssystemen kunnen afwijkende popups laten zien. Las siguientes páginas muestran cómo desconectar su nuevo disco duro externo del ordenador. Las imágenes de pantalla representan el sistema operativo Microsoft Windows XP™. Otros sistemas operativos podrían mostrar pantallas distintas. İzleyen sayfalar, bilgisayara giden yeni harici HDD’nizin bağlantısını kesme şeklini göstermektedir. Ekran resimleri; Microsoft Windows XP™ işletim sistemini temsil etmektedir. Diğer işletim sistemleri; farklı açılır menülerini gösterebilir. 13 How to quick format the external harddisk? Schnellformatieren der externe Festplatte Comment formater rapidement le disque dur externe? Come formattare rapidamente l'unità disco rigido esterno Hoe moet u snel de externe harde schijf formatteren? ¿Cómo formatear rápidamente el equipo disco duro externo? Harici sabit disk’ı hızlı formatlama şekli? UK D The next pages show how to quick format your new external HDD. The screenshots are representing the Microsoft Windows XP™ operating system. Other operating systems may show different popups. If you only plan to use Windows XP or 2000 we advice to reformat to NTFS. NTFS is not usable for Windows 98SE, ME, Mac, Linux. Formatting will erase all the data. Auf den nächsten Seiten wird Ihnen gezeigt, wie Sie Ihre neue externe Festplatte schnell formatieren. Die abgebildeten Screenshots zeigen das Betriebssystem Microsoft Windows XP™. Bei anderen Betriebssystemen können andere Popup-Fenster angezeigt werden. Wenn Sie nur Windows XP oder 2000 zu verwenden planen, empfehlen wir eine Neuformatierung auf NTFS. NTFS lässt sich nicht für Windows 98E, ME, Mac, Linux einrichten. Durch Formatierung gehen alle Daten verloren. F Les pages suivantes montrent comment formater rapidement votre nouveau disque dur externe. Les écrans illustrés représentent le système d’exploitation Microsoft Windows XP™. Les autres systèmes d’exploitation peuvent présenter d’autres illustrations. Si vous comptez utiliser exclusivement Windows XP ou 2000, nous recommandons de reformater le disque en NTFS. Le format NTFS n’est pas lisible sous Windows 98SE, ME, Mac et Linux. Le formatage entraîne la perte de toutes les données. NL E TR Op de volgende pagina’s kunt u zien hoe u uw nieuwe externe HDD snel moet formatteren. De schermafbeeldingen zijn gebaseerd op het besturingssysteem Microsoft Windows XP™. Andere besturingssystemen kunnen afwijkende popups laten zien. Als u van plan bent Windows XP of 2000 te gebruiken, adviseren wij u te herformatteren naar NTFS. NTFS is niet geschikt voor Windows 98SE, ME, Mac, Linux. Door formatteren zullen alle gegevens verloren gaan. Las páginas siguientes muestran cómo formatear rápidamente su nuevo disco duro externo. Las imágenes de pantalla representan el sistema operativo Microsoft Windows XP™. Otros sistemas operativos podrían mostrar pantallas distintas. Si sólo piensa utilizar Windows XP o 2000, le recomendamos reformatear en NTFS. NTFS no es recomendable con Windows 98SE, ME, Mac y Linux. El formateo borrará todos los datos. İzleyen sayfalar, yeni harici HDD’nizin hızlı formatlama şeklini göstermektedir. Ekran resimleri; Microsoft Windows XP™ işletim sistemini temsil etmektedir. Diğer işletim sistemleri; farklı açılır menülerini gösterebilir. Eğer sadece Windows XP yada 2000’i kullanmayı düşünüyorsanız, NTFS’ye yeniden formatlamanızı tavsiye ederiz. NTFS; Windows 98SE, ME, Mac, Linux için görünür değildir. Formatlama işlemi ile, tüm veriler kaybedilecektir. I Nelle prossime pagine verranno date informazioni su come formattare rapidamente la nuova unità HDD esterna. Nelle seguenti schermate è rappresentato il sistema operativo Microsoft Windows XP™. Gli altri sistemi operativi possono mostrare finestre diverse. Se si ha in programma di utilizzare Windows XP o 2000, è consigliata la riformattazione su NTFS. NTFS non è utilizzabile con Windows 98SE, ME, Mac, Linux. La formattazione comporterà la perdita di tutti i dati. 15 How to format the external harddisk? Formatieren der externe Festplatte Comment formater le disque dur externe ? Come formattare l'unità disco rigido esterno Hoe moet u de externe harde schijf formatteren? ¿Cómo formatear el equipo disco duro externo? harici sabit disk’ı formatlama şekli? UK D F I The next pages show how to format your new external HDD. The screenshots are representing the Microsoft Windows XP™ operating system. Other operating systems may show different popups. If you only plan to use Windows XP or 2000 we advice to reformat to NTFS. NTFS is not usable for Windows 98SE, ME, Mac, Linux. Formatting will erase all the data. Auf den nächsten Seiten wird Ihnen gezeigt, wie Sie Ihre neue externe Festplatte formatieren. Die abgebildeten Screenshots zeigen das Betriebssystem Microsoft Windows XP™. Bei anderen Betriebssystemen können andere Popup-Fenster angezeigt werden. Wenn Sie nur Windows XP oder 2000 zu verwenden planen, empfehlen wir eine Neuformatierung auf NTFS. NTFS lässt sich nicht für Windows 98E, ME, Mac, Linux einrichten. Durch Formatierung gehen alle Daten verloren. Les pages suivantes montrent comment formater votre nouveau disque dur externe. Les écrans illustrés représentent le système d’exploitation Microsoft Windows XP™. Les autres systèmes d’exploitation peuvent présenter d’autres illustrations. Si vous comptez utiliser exclusivement Windows XP ou 2000, nous recommandons de reformater le disque en NTFS. Le format NTFS n’est pas lisible sous Windows 98SE, ME, Mac et Linux. Le formatage entraîne la perte de toutes les données. Nelle prossime pagine verranno date informazioni su come formattare la nuova unità HDD esterna. Nelle seguenti schermate è rappresentato il sistema operativo Microsoft Windows XP™. Gli altri sistemi operativi possono mostrare finestre diverse. Se si ha in programma di utilizzare Windows XP o 2000, è consigliata la riformattazione su NTFS. NTFS non è utilizzabile con Windows 98SE, ME, Mac, Linux. La formattazione comporterà la perdita di tutti i dati. NL E TR Op de volgende pagina’s kunt u zien hoe u uw nieuwe externe HDD moet formatteren. De schermafbeeldingen zijn gebaseerd op het besturingssysteem Microsoft Windows XP™. Andere besturingssystemen kunnen afwijkende popups laten zien. Als u van plan bent Windows XP of 2000 te gebruiken, adviseren wij u te herformatteren naar NTFS. NTFS is niet geschikt voor Windows 98SE, ME, Mac, Linux. Door formatteren zullen alle gegevens verloren gaan. Las páginas siguientes muestran cómo formatear su nuevo disco duro externo. Las imágenes de pantalla representan el sistema operativo Microsoft Windows XP™. Otros sistemas operativos podrían mostrar pantallas distintas. Si sólo piensa utilizar Windows XP o 2000, le recomendamos reformatear en NTFS. NTFS no es recomendable con Windows 98SE, ME, Mac y Linux. El formateo borrará todos los datos. İzleyen sayfalar, yeni harici HDD’nizin formatlama şeklini göstermektedir. Ekran resimleri; Microsoft Windows XP™ işletim sistemini temsil etmektedir. Diğer işletim sistemleri; farklı açılır menülerini gösterebilir. Eğer sadece Windows XP yada 2000’i kullanmayı düşünüyorsanız, NTFS’ye yeniden formatlamanızı tavsiye ederiz. NTFS; Windows 98SE, ME, Mac, Linux için görünür değildir. Formatlama işlemi ile, tüm veriler kaybedilecektir. 19 UK Right click on "Unallocated" hard disk. Rechtsklicken Sie auf die "Unallocated" (nicht zugeordnete) Festplatte. 7 D F Cliquez avec le bouton droit sur disque dur "Unallocated" (Non alloué). I Cliccare con il tasto destro del mouse sul disco rigido "Unallocated" (non allocato). NL Klik met de rechtermuisknop op "Unallocated hard disk" (Niet toegewezen). E Haga clic con el botón derecho en disco duro "Unallocated" (No asignado). TR "Unallocated" (Tahsis edilmemiş) sabit disk üzerine sağ düğmeyle tıklatınız. UK D Wählen Sie "New Partition" (Neue Partition). F Choisissez "New Partition" (Nouvelle partition). I Scegliere "New Partition" (Nuova partizione). NL Kies "New Partition" (Nieuwe partitie). E Elija "New Partition" (Partición nueva). TR "New Partition" (Yeni Disk Bölümü)’nü seçiniz. UK Click "Next". D Klicken Sie auf "Next" (Weiter). F Cliquez sur "Next" (Suivant). I Cliccare su "Next" (Avanti). NL 22 Choose "New Partition". Klik op "Next" (Volgende). E Haga clic en "Next" (Siguiente). TR "Next" (İleri) üzerine tıklatınız. 8 9 How to use the One-Click Backup button ? So wird die Schaltfläche „Sicherungskopie per Mausklick“ verwendet Comment utiliser le bouton One-Click Backup ? Come usare il pulsante One-Click Backup Hoe moet u de One-Click Backup knop gebruiken? ¿Cómo se utiliza el botón de Copia de seguridad con un solo clic? Tek Tıklatmalı Yedek Kopya düğmesinin kullanım şekli? UK D The next pages show how to use the One-Click Backup to simplify initiating the automatic back up. Auf den nächsten Seiten wird Ihnen gezeigt, wie Sie „Sicherung per Mausklick“ zum Starten einer automatischen Sicherungskopie verwenden. NL De volgende pagina’s laten u zien hoe u One-Click Backup gebruikt om de start van de automatische backup te vereenvoudigen. F Les pages qui suivent expliquent comment utiliser le bouton One-Click Backup pour lancer une sauvegarde automatique en toute simplicité. E TR Las páginas siguientes muestran cómo utilizar la función de Copia de Seguridad con un solo botón para iniciar la copia de seguridad automática. İngiltere Bir sonraki sayfa, otomatik yedek kopyayı başlatmayı basitleştirmek için Tek Tıklatmalı Yedek Kopya’nın kullanım şeklini göstermektedir. I Nelle prossime pagine verranno date informazioni su come usare il pulsante One-Click Backup per semplificare l'inizializzazione del backup automatico. 25 3 UK Click the next button in order to make a backup with files and folders you select. D Klicken Sie auf die Schaltfläche „Weiter“, um eine Sicherungskopie von den markierten Dateien und Ordnern zu erstellen. F Cliquez sur le bouton Next (Suivant) pour créer une copie de sauvegarde des fichiers et des répertoires sélectionnés. I Cliccare sul pulsante Next (Avanti) per eseguire il backup dei file e delle cartelle che sono stati selezionati. NL Klik op de knop Next (volgende) om een backup te maken met bestanden en mappen die u selecteert. E Haga clic en el botón Siguiente para hacer una copia de seguridad de los archivos y carpetas que haya seleccionado. TR 4 Seçtiğiniz dosya ve klasörler ile bir yedek kopya oluşturmak için ileri düğmesi üzerine tıklatınız. UK First select the files and folders you want to make a backup of and the hit the Next button. D Markieren Sie erst die Dateien und Ordner, von denen eine Sicherungskopie erstellt werden soll, und klicken Sie dann auf die Schaltfläche „Weiter“. F Choisissez les fichiers et les répertoires à sauvegarder, puis cliquez sur Next (Suivant). I Selezionare dapprima i file e le cartelle di cui si desidera eseguire il backup, quindi cliccare sul pulsante Next (Avanti). NL Selecteer eerst de bestanden en mappen waarvan u een reservekopie wilt maken en klik op de knop Next (volgende). E TR Lo primero seleccione los archivos y las carpetas que desee copiar y pulse el botón Siguiente. Önce bir yedek kopyas›n› oluflturmak istedi iniz dosya ve klasörleri seçiniz ve ‹leri dü mesine bas›n›z. 27 UK Select the correct target for the backup you want to make using the dropdown function. 5 D Wählen Sie das Zielverzeichnis für die Sicherungskopie, die erstellt werden soll, mithilfe der Dropdown-Funktion. F Dans le menu déroulant Target (Cible), sélectionnez le disque sur lequel vous souhaitez créer une copie de sauvegarde. I Nell'elenco a discesa selezionare la destinazione desiderata per il backup. NL Selecteer de juiste bestemming voor de backup die u wilt maken met het keuzemenu. E Seleccione el destino correcto para la copia de seguridad que desea hacer utilizando la función desplegable TR Aç›l›r liste/kutu ifllevini kullanarak oluflturmak istedi iniz yedek kopya için do ru hedef yeri seçiniz. UK Check if you have chosen the right target (your external Philips Harddisk) afterwards click the next button. D Kontrollieren Sie, ob Sie das richtige Zielverzeichnis (Ihre externe Philips Festplatte) gewählt haben, und klicken Sie dann auf die Schaltfläche „Weiter“. F Vérifiez que le disque cible sélectionné est correct (le disque dur externe Philips), puis cliquez sur le bouton Next (Suivant). I Verificare di avere selezionato la destinazione corretta (il disco rigido esterno Philips), quindi cliccare sul pulsante Next (Avanti). NL Controleer of u de juiste bestemming hebt geselecteerd (de externe harde schijf van Philips) en klik daarna op de knop Next (volgende). E Compruebe que ha elegido el destino correcto (su disco duro externo Philips), después haga clic en el botón Siguiente. TR Do ru hedef yerini seçip seçmedi inizi kontrol ediniz, (harici Philips Sabit Diskiniz), daha sonra ileri dü mesi üzerine t›klat›n›z. 28 6 7 UK Select the correct target path and backup name then press the next button. D Wählen Sie den richtigen Zielpfad und Namen für die Sicherungskopie. Klicken Sie dann auf die Schaltfläche „Weiter“. F Choisissez l’emplacement et le nom de fichier de la sauvegarde à créer, puis cliquez sur Next (Suivant). I Selezionare il percorso di destinazione e il nome di backup corretti, quindi cliccare sul pulsante Next (Avanti). NL Selecteer het juiste bestemmingspad en backupnaam en druk op de knop Next (volgende). E Seleccione la ruta de destino correcta y el nombre de la copia de seguridad, luego pulse el botón Siguiente. TR 8 Do ru yolu ve yedek kopya ad›n› seçip ileri dü mesine bas›n›z. UK This screen gives you an overview of the Job you have added. Press the finish button. D Mit diesem Bildschirm erhalten Sie einen Überblick über die Aufgabe, die Sie hinzugefügt haben. Klicken Sie auf die Schaltfläche „Fertig stellen“. F Cet écran récapitule les données de la sauvegarde à effectuer. Appuyez sur le bouton Finish (Terminer). I Questa schermata offre un'anteprima del processo aggiunto. Selezionare il pulsante Finish (Fine). NL Dit scherm geeft u een overzicht van de taak die u hebt toegevoegd. Druk op de knop Finish (voltooien) E TR Esta pantalla le proporciona una descripción del trabajo que ha agregado. Pulse el botón Terminar. Bu ekran, size ekledi iniz ‹fl’in genel bir görünümünü verir. Bitir dü mesine bas›n›z. 29 How to use the Safe Shutdown button? So wird die Schaltfläche „Sicheres Abschalten“ verwendet Comment utiliser le bouton Safe Shutdown ? Come usare il pulsante Safe Shutdown Hoe moet u de Safe Shutdown knop gebruiken? ¿Cómo se utiliza el botón de Apagado Seguro? Güvenli Kapatma düğmesinin kullanım şekli? UK The next pages show how to use the Safe Shutdown button of your external HDD. D Auf den nächsten Seiten wird Ihnen gezeigt, wie Sie die Schaltfläche „Sicheres Abschalten“ für Ihre externe Festplatte verwenden. NL E De volgende pagina’s laten zien hoe u de knop Safe Shutdown moet gebruiken voor uw externe HDD. Las páginas siguientes muestran cómo utilizar el botón de Apagado Seguro de su disco duro externo. F I Les pages qui suivent expliquent comment utiliser le bouton Safe Shutdown (arrêt en sécurité) de votre disque dur externe. Nelle prossime pagine verranno date informazioni su come usare il pulsante Safe Shutdown per l'unità HDD esterna. TR İngiltere İzleyen sayfalar, harici HDD’nizin Güvenli Kapatma düğmesini kullanma şeklini göstermektedir. 31 How to create a backup? Erstellen einer Sicherungskopie Comment créer une sauvegarde ? Come eseguire un backup Hoe moet u een backup maken? ¿Cómo crear un copia de seguridad? Bir yedek kopya yaratma şekli? UK The next pages show how to create a backup. The screenshots are representing the Microsoft Windows XP™ operating system. Other operating systems may show different popups. D Auf den nächsten Seiten wird Ihnen gezeigt, wie Sie eine Sicherungskopie erstellen. Die abgebildeten Screenshots zeigen das Betriebssystem Microsoft Windows XP™. Bei anderen Betriebssystemen können andere Popup-Fenster angezeigt werden. F I Les pages suivantes vous expliquent comment créer une sauvegarde. Les écrans illustrés représentent le système d’exploitation Microsoft Windows XP™. Les autres systèmes d’exploitation peuvent présenter d’autres illustrations. Nelle prossime pagine verranno date informazioni su come eseguire un backup. Nelle seguenti schermate è rappresentato il sistema operativo Microsoft Windows XP™. Gli altri sistemi operativi possono mostrare finestre diverse. NL E TR Op de volgende pagina’s kunt u zien hoe u een backup moet maken. De schermafbeeldingen zijn gebaseerd op het besturingssysteem Microsoft Windows XP™. Andere besturingssystemen kunnen afwijkende popups laten zien. Las páginas siguientes muestran como crear una copia de seguridad. Las imágenes de pantalla representan el sistema operativo Microsoft Windows XP™. Otros sistemas operativos podrían mostrar pantallas distintas. İzleyen sayfalar, bir yedek kopya yaratma şeklini göstermektedir. Ekran resimleri; Microsoft Windows XP™ işletim sistemini temsil etmektedir. Diğer işletim sistemleri; farklı açılır menülerini gösterebilir. 33 How to restore a backup? Wiederherstellen einer Sicherungskopie Comment restaurer une sauvegarde ? Come ripristinare un backup Hoe moet u een backup terugzetten? ¿Cómo restaurar una copia de seguridad? Bir yedek kopyayı geri yükleme şekli? UK The next pages show how to restore a backup. The screenshots are representing the Microsoft Windows XP™ operating system. Other operating systems may show different popups. NL Op de volgende pagina’s kunt u zien hoe u een backup terug kunt zetten. De schermafbeeldingen zijn gebaseerd op het besturingssysteem Microsoft Windows XP™. Andere besturingssystemen kunnen afwijkende popups laten zien. D Auf den nächsten Seiten wird Ihnen gezeigt, wie Sie eine Sicherungskopie wiederherstellen. Die abgebildeten Screenshots zeigen das Betriebssystem Microsoft Windows XP™. Bei anderen Betriebssystemen können andere Popup-Fenster angezeigt werden. E Las páginas siguientes muestran como restaurar una copia de seguridad. Las imágenes de pantalla representan el sistema operativo Microsoft Windows XP™. Otros sistemas operativos podrían mostrar pantallas distintas. F I Les pages suivantes vous expliquent comment restaurer une sauvegarde. Les écrans illustrés représentent le système d’exploitation Microsoft Windows XP™. Les autres systèmes d’exploitation peuvent présenter d’autres illustrations. Nelle prossime pagine verranno date informazioni su come ripristinare un backup. Nelle seguenti schermate è rappresentato il sistema operativo Microsoft Windows XP™. Gli altri sistemi operativi possono mostrare finestre diverse. TR İzleyen sayfalar, bir yedek kopyayı geri yükleme şeklini göstermektedir. Ekran resimleri; Microsoft Windows XP™ işletim sistemini temsil etmektedir. Diğer işletim sistemleri; farklı açılır menülerini gösterebilir. 39 How to defragment Defragmentieren Comment défragmenter ? Come deframmentare Hoe moet u defragmenteren? ¿Cómo desfragmentar? birleştirme şekli? UK The next pages show how to defragment your new Philips external HDD. The screenshots are representing the Microsoft Windows XP™ operating system. Other operating systems may show different popups. D F I Auf den nächsten Seiten wird Ihnen gezeigt, wie Sie Ihre neue externe Festplatte von Philips defragmentieren. Die abgebildeten Screenshots zeigen das Betriebssystem Microsoft Windows XP™. Bei anderen Betriebssystemen können andere Popup-Fenster angezeigt werden. Les pages suivantes montrent comment défragmenter votre nouveau disque dur externe Philips. Les écrans illustrés représentent le système d’exploitation Microsoft Windows XP™. Les autres systèmes d’exploitation peuvent présenter d’autres illustrations. Nelle prossime pagine verranno date informazioni su come eseguire la deframmentazione della nuova unità HDD esterna Philips. Nelle seguenti schermate è rappresentato il sistema operativo Microsoft Windows XP™. Gli altri sistemi operativi possono mostrare finestre diverse. NL E TR Op de volgende pagina’s kunt u zien hoe u uw nieuwe Philips externe HDD moet defragmenteren. De schermafbeeldingen zijn gebaseerd op het besturingssysteem Microsoft Windows XP™. Andere besturingssystemen kunnen afwijkende popups laten zien. Las páginas siguientes muestran cómo desfragmentar su nuevo disco duro externo Philips. Las imágenes de pantalla representan el sistema operativo Microsoft Windows XP™. Otros sistemas operativos podrían mostrar pantallas distintas. İzleyen sayfalar, yeni Philips harici HDD’nizi birleştirme şeklini göstermektedir. Ekran resimleri; Microsoft Windows XP™ işletim sistemini temsil etmektedir. Diğer işletim sistemleri; farklı açılır menülerini gösterebilir. 43 How to check the external harddisk disk for errors? Überprüfen der externe Festplatte auf Fehler Comment vérifier si le disque dur externe comporte des erreurs ? Come controllare se sono presenti errori nell'unità disco rigido esterno Hoe moet u de externe harde schijf op fouten controleren? ¿Cómo comprobar los errores del disco duro externo? harici sabit disk hatalara karşı kontrol etme şekli? UK D F I The next pages show how to check your new Philips external HDD for errors. The screenshots are representing the Microsoft Windows XP™ operating system. Other operating systems may show different popups. Auf den nächsten Seiten wird Ihnen gezeigt, wie Sie Ihre neue externe Festplatte von Philips auf Fehler überprüfen. Die abgebildeten Screenshots zeigen das Betriebssystem Microsoft Windows XP™. Bei anderen Betriebssystemen können andere Popup-Fenster angezeigt werden. Les pages suivantes montrent comment vérifier si votre nouveau disque dur externe Philips comporte des erreurs. Les écrans illustrés représentent le système d’exploitation Microsoft Windows XP™. Les autres systèmes d’exploitation peuvent présenter d’autres illustrations. Nelle prossime pagine verranno date informazioni su come controllare se sono presenti errori nella nuova unità HDD esterna Philips. Nelle seguenti schermate è rappresentato il sistema operativo Microsoft Windows XP™. Gli altri sistemi operativi possono mostrare finestre diverse. NL E TR Op de volgende pagina’s kunt u zien hoe u uw nieuwe Philips externe HDD op fouten moet controleren. De schermafbeeldingen zijn gebaseerd op het besturingssysteem Microsoft Windows XP™. Andere besturingssystemen kunnen afwijkende popups laten zien. Las páginas siguientes muestran cómo comprobar los errores de su nuevo disco duro externo Philips. Las imágenes de pantalla representan el sistema operativo Microsoft Windows XP™. Otros sistemas operativos podrían mostrar pantallas distintas. İzleyen sayfalar, yeni Philips harici HDD’nizi hatalara karşı kontrol etme şeklini göstermektedir. Ekran resimleri; Microsoft Windows XP™ işletim sistemini temsil etmektedir. Diğer işletim sistemleri; farklı açılır menülerini gösterebilir. 47 UK In Windows Explorer right click on the drive letter of your Philips external HDD. 1 D Im Windows Explorer rechtsklicken Sie auf dem Laufwerkbuchstaben Ihrer externen Philips Festplatte. F Dans l’Explorateur de Windows, cliquez avec le bouton droit sur la lettre du lecteur de votre disque dur externe Philips. I In Windows Explorer cliccare con il tasto destro del mouse sulla lettera dell'unità HDD esterna Philips. NL Klik in Windows Verkenner met de rechtermuisknop op de stationletter van uw externe HDD van Philips. E En el explorador de Windows haga clic con el botón derecho en la letra de la unidad de su disco duro externo Philips. TR Windows Explorer’de Philips harici HDD’nizin sürücü harfi üzerine sağ düğmeyle tıklatınız. UK D Wählen Sie “Properties” (Eigenschaften). F Choisissez "Properties" (Propriétés). I Scegliere "Properties" (Proprietà). NL Kies "Properties" (Eigenschappen). E Elija "Properties" (Propiedades). TR "Properties" (Özellikler)’i seçiniz. UK Choose tab "Tools". D Wählen Sie die Registerkarte "Tools" (Extras...). F Choisissez l’onglet "Tools" (Outils). I Scegliere la scheda "Tools" (Strumenti). NL E TR 48 Choose “Properties”. Kies het tabblad "Tools" (Extra). Elija la ficha "Tools" (Herramientas). "Tools" (Araçlar) sekmesini seçiniz. 2 3 Garantía,Entorno y Seguridad E ¿Cómo encontrar información sobre la garantía? 1 2 3 4 Vuelva a colocar el disco de Nero y haga clic en "salir". Haga clic en el icono "Mi PC" del escritorio o bien haga clic en "Inicio" y "Mi PC". Haga clic con el botón derecho del ratón en el icono "Nero" y elija "Explorar". Seleccione la carpeta "Philips Warranty", en la que encontrará los documentos de la garantía. Si no dispone de Adobe Acrobat Reader, podrá encontrarlo en la carpeta "Acrobat Reader" en este disco o descargarlo gratuitamente por Internet desde http://www.adobe.com "La realización de copias no autorizadas de materiales protegidos contra copias, incluyendo programas de ordenador, archivos, emisiones y grabaciones de sonido, puede ser una violación de derechos de propiedad intelectual y constituir un delito. Este equipo no debe ser utilizado para dicho propósito." Indicativo WEEE: "Información al consumidor" Desecho del producto antiguo El producto se ha diseñado y fabricado con materiales y componentes de alta calidad, que se pueden reciclar y volver a utilizar. Cuando este símbolo de contenedor de ruedas tachado se muestra en un producto indica que éste cumple la directiva europea 2002/96/EC. Obtenga información sobre la recogida selectiva local de productos eléctricos y electrónicos. Cumpla con la normativa local y no deseche los productos antiguos con los desechos domésticos. El desecho correcto del producto antiguo ayudará a evitar consecuencias negativas para el medioambiente y la salud humana. ADVERTENCIA Las bolsas de plástico pueden ser peligrosas. Para evitar el peligro de asfixia no dejar este saco al alcance de los niños. 61 Especificaciones Especificaciones técnicas: Soporte de grabación: Interfaz: Capacidad: Velocidad de giro: Velocidad de transferencia USB (máximo) : Velocidad de transferencia FireWire (máximo): Dimensiones externas (Ancho x Alto x Fondo): Memoria caché: http://www.philips.com/storage 62 3,5 USB 2.0 y FireWire 400 160 / 250 GB 7200 35Mb/s 43Mb/s 143 x 220 x 49 mm 8 MB-
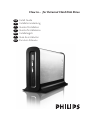 1
1
-
 2
2
-
 3
3
-
 4
4
-
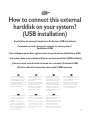 5
5
-
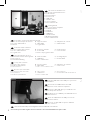 6
6
-
 7
7
-
 8
8
-
 9
9
-
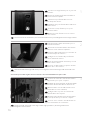 10
10
-
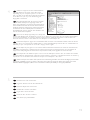 11
11
-
 12
12
-
 13
13
-
 14
14
-
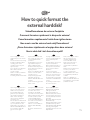 15
15
-
 16
16
-
 17
17
-
 18
18
-
 19
19
-
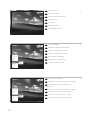 20
20
-
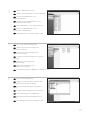 21
21
-
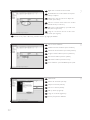 22
22
-
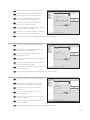 23
23
-
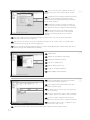 24
24
-
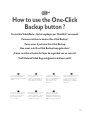 25
25
-
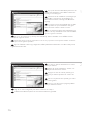 26
26
-
 27
27
-
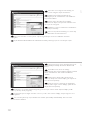 28
28
-
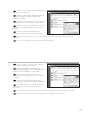 29
29
-
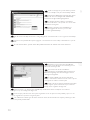 30
30
-
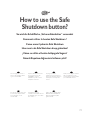 31
31
-
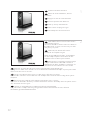 32
32
-
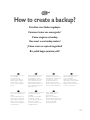 33
33
-
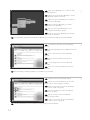 34
34
-
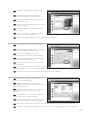 35
35
-
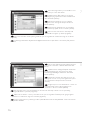 36
36
-
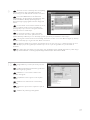 37
37
-
 38
38
-
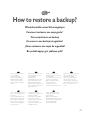 39
39
-
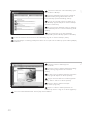 40
40
-
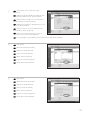 41
41
-
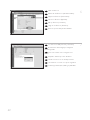 42
42
-
 43
43
-
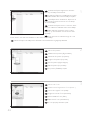 44
44
-
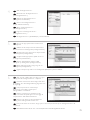 45
45
-
 46
46
-
 47
47
-
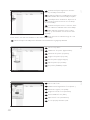 48
48
-
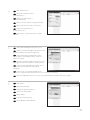 49
49
-
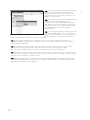 50
50
-
 51
51
-
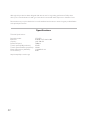 52
52
-
 53
53
-
 54
54
-
 55
55
-
 56
56
-
 57
57
-
 58
58
-
 59
59
-
 60
60
-
 61
61
-
 62
62
-
 63
63
-
 64
64
-
 65
65
-
 66
66
-
 67
67
-
 68
68


Philips SPD5100CC/00 Manual de usuario
- Categoría
- Discos duros internos
- Tipo
- Manual de usuario
en otros idiomas
- français: Philips SPD5100CC/00 Manuel utilisateur
- italiano: Philips SPD5100CC/00 Manuale utente
- English: Philips SPD5100CC/00 User manual
- Deutsch: Philips SPD5100CC/00 Benutzerhandbuch
- Nederlands: Philips SPD5100CC/00 Handleiding
- Türkçe: Philips SPD5100CC/00 Kullanım kılavuzu
Artículos relacionados
-
Philips SPD5210CC/00 Manual de usuario
-
Philips SPE2020 Manual de usuario
-
Philips SPD5240 Manual de usuario
-
Philips SPE3071 Manual de usuario
-
-
Philips SPE3031CC/00 Manual de usuario
-
Philips SPD5121 Manual de usuario
-
-
Philips SPD3500CC/10 Manual de usuario
Otros documentos
-
Nero BackItUp El manual del propietario
-
-
Conceptronic CM3GD1T Manual de usuario
-
Conceptronic Media Giant Plus, 500GB Manual de usuario
-
Approx appDSHDD Manual de usuario
-
Fujitsu AMILO Xi 3650 El manual del propietario
-
Conceptronic CHD2UES200 Guía de instalación
-
Fujitsu AMILO Xi 3670 First-Time Setup
-
Conceptronic 640GB Network (LAN) HDD Guía de instalación
-
Iomega eGo 35527 Guía de inicio rápido